QTestlib Manual
qTest测试管理工具教程说明书

About the T utorialqTest is a test management tool used to track and maintain the records of all STLC phases, right from the Test Plan to Report creation. This tutorial introduces the readers to the basic features and usages of qTest.AudienceThis tutorial is designed for beginners to help them understand how to use the qTest tool. It will guide them on how to utilize the tool in reporting and maintaining the testing activities.PrerequisitesSince qTest is a testing tool, it is beneficial if the readers of this tutorial have a basic understanding of the bug and the testing lifecycle.Copyright & DisclaimerCopyright 2018 by Tutorials Point (I) Pvt. Ltd.All the content and graphics published in this e-book are the property of Tutorials Point (I) Pvt. Ltd. The user of this e-book is prohibited to reuse, retain, copy, distribute or republish any contents or a part of contents of this e-book in any manner without written consent of the publisher.We strive to update the contents of our website and tutorials as timely and as precisely as possible, however, the contents may contain inaccuracies or errors. Tutorials Point (I) Pvt. Ltd. provides no guarantee regarding the accuracy, timeliness or completeness of our website or its contents including this tutorial. If you discover any errors on our website or in thistutorial,******************************************T able of ContentsAbout the Tutorial (i)Audience (i)Prerequisites (i)Copyright & Disclaimer (i)Table of Contents ............................................................................................................................................ i i 1.QTEST – INTRODUCTION (1)Uses of qTest (1)qTest Specifications (2)2.QTEST – FEATURES (3)qTest Core Features (3)3.QTEST – FREE TRIAL ACCESS (5)Set Up for Free Trials (5)4.QTEST – LOGIN (9)On Error (9)On Successful Login (11)5.QTEST ─ DASHBOARD (12)qTest Apps (13)Repository (14)User Profile (15)6.QTEST – INVITE USERS (17)7.QTEST – ADD A PROJECT (20)Create a Project (20)8.QTEST – TEST PLAN & RELEASE MANAGEMENT (24)What is a Test Plan? (24)Create a New Release (24)Edit a Release (28)Move/Copy a Release (30)Delete a Release (31)9.QTEST – TEST PLAN & BUILD MANAGEMENT (34)Create a New Build (34)Edit a Build (37)Move/Copy a Build (38)Delete a Build (39)10.QTEST – MODULES MANAGEMENT (41)Create a Module (41)Edit a Module (45)Move/Copy a Module (46)Delete a Module (47)11.QTEST – REQUIREMENTS (49)Create a New Requirement (49)Edit a Requirement (54)Move/Copy a Requirement (55)Delete a Requirement (56)12.QTEST – CREATE ASSOCIATED TEST CASES (58)13.QTEST – IMPORT REQUIREMENTS (61)Rules for Excel File (61)Import Excel file (62)14.QTEST – EXPORT REQUIREMENTS (67)15.QTEST – EXPORT RTM (72)16.QTEST ─ TEST DESIGN (74)Creating a Test Case (74)Edit a Test Case (79)Move/Copy a Test Case (80)Delete a Test Case (81)17.QTEST – CALLING A TEST CASE (83)18.QTEST – APPROVE A TEST CASE (86)Approve a Single Test Case (86)Approve Multi Test Cases (88)19.QTEST – IMPORT TEST CASES (91)Rules for Excel file (91)Import an Excel File (92)20.QTEST – EXPORT TEST CASES (98)21.QTEST – TEST CYCLE MANAGEMENT (101)Create a New Test Cycle (101)Edit a Test Cycle (104)Move/Copy a Test Cycle (105)Delete a Test Cycle (107)22.QTEST ─ TEST SUITE M ANAGEMENT (108)Create a New Test Suite (108)Edit a Test Suite (111)Move/Copy a Test Suite (112)Delete a Test Suite (113)23.QTEST – ADD TEST RUNS (115)24.QTEST – TEST EXECUTION (118)Default Mode (118)Execute a Single/Multiple Test Run (119)Test Pad Features (121)25.QTEST – QUICK RUN (124)Quick Run a Single Test Run (124)Quick Run of Multiple Test Runs (126)26.QTEST – SUBMIT A DEFECT (128)Submit While Executing a Test (128)Submit Defects After Test Execution Completion (131)27.QTEST – CLONE A DEFECT (132)28.QTEST ─ IMPORT A DEF ECT (135)Rules for Excel File (135)Import an ExcelFile (136)29.QTEST ─ REPORTS (140)Prepare Reports (140)30.QTEST ─ FILTER (144)How to Use Filter? (144)31.QTEST ─ DRAG & DROP (146)32.QTEST – HOTKEYS (148)33.QTEST – RECYCLE BIN (150)Temporary Deletion (150)Permanent Deletion (151)Restore Object (153)34.QTEST – SEARCH (154)Free-text Search (154)Syntax Search (155)35.QTEST – TOGGLE ID (157)36.QTEST – TAGGING ID (160)qTest is a test management tool used for Project Management, Bug Tracking, and Test Management. It follows the centralized test management concept that helps to communicate easily and assists in rapid development of task across QA team and other stakeholders.qTest is a cloud based tool and was developed by QASymphony. It supports all browsers especially Chrome, Firefox, IE, etc. and also supports different windows OS versions –Windows XP, Vista, 7, etc. QTest provides a 14-days trial period for Business email id with access to 4 users. qTest can be integrated with many other tools –JIRA, Bugzilla, FogBugz, Version One, etc.License and Free TrialFollowing points are related to the License and Free Trial of qTest and related services.∙qTest is a commercial tool and available as a trial version for a limited period of 14 days.∙To utilize JIRA services, a license is required.∙qTest provides free license for Business Email ID.∙The basic version (free trials) comes with access for 4-people group.Uses of qT estFollowing are the different uses of qTest:∙Used in tracking all QA activities right from the first phase of the software testing lifecycle.∙Supports Release Management, Build Management, and Module Management.∙Supports all macro level activities performed by QA.∙Useful in performing QA tasks such as writing TestCases, execution, reports, etc.∙Useful in Project Management, Task Tracking, Requirement Management, and Test Management.qTestqT est SpecificationsThe following table lists down the different specifications on qTest along with the description for each.qTest has a wide range of features to attract QAs and other stakeholders for test management. In this chapter, we will discuss the core features of QTest.qT est Core FeaturesFollowing table lists down the core features of qTest.qTestqTest provides 14 days’ free trials to business emails with a few basic features; this can be accessed bya maximum of four users. qTest has a range of plans as well with different advanced features and add-ins. The cost depends on the number of users.By visiting https://, you can view the different plans that are available on trial basis.Set Up for Free T rialsLet us now discuss how to set up for free trials. Follow these steps to understand the setup: Step 1: Visit https:// and click Free Trial tab on the right hand side of the menu bar as shown in the following screenshot.Step 2: Click the “Start Free Trial” button.Step 3: It opens a basic form to create a qTest account. Enter the following details as shown in the following screenshots.∙First Name∙Last Name∙Business Email: Please note, it doesn’t accept gmail, yahoo, and outlook IDs. It should bea business email. The same email can be used as the username to access qTest.∙Industry∙Where are you located∙Number of Employees∙Company Name∙Create your qTest web addess: It should be unique and this URL will be used to access the qTest application∙Password: To authenticate access of this URLStep 4: After entering all details, click CREATE qTest TRIAL button as shown in the above screenshot. It will display a Thank you page for the New User as in the following screenshot. You can see the entered Domain and Username with the Access qTest NOW button.Step 5: Now, click the Access qTEST NOW button. It will display the Dashboard of qTest. It has access to the URL that was entered while creating the free trials.In this chapter, we will discuss how to loginto qTest.Follow these steps to login to qTest.Step 1: Go to your sample website selected while creating the free trial. It will open a login page.Step 2: Enter your registered business email address as Username and Password.Step 3: Click the LOG IN button.The following screenshot shows how to login into qTest using credentials.On ErrorLet us now understand the situation wherein your login attempt is unsuccessful.When a login attempt is unsuccessful, the following error page displays.Error may occur due to wrong combination of email id or password.Following screenshot shows the error message that a user receives, if the credentials are not correct:If you forgot the password, to recover it -o Click on the Forgot Your Password? link below the error message.o Enter the Login Emailo Click SubmitThe following screenshot shows how to recover the password if you forgot.You will get an email with the details of username or link to reset the password.On Successful LoginUpon successful login, the system dashboard will display if the account is associated with any project by admin or if you can create a sample project.The following screenshot displays the welcome page/dashboard of qTest on successful login.End of ebook previewIf you liked what you saw…Buy it from our store @ https://。
qt qlibrary高级用法

qt qlibrary高级用法什么是Qt QLibrary高级用法?Qt QLibrary是Qt Framework中的一个重要类,用于动态链接库(DLL)的加载和管理。
QLibrary提供了一种简单、可靠的方式来使用动态链接库,可以方便地在运行时加载外部库,实现动态扩展和插件机制。
在本篇文章中,我将详细介绍Qt QLibrary高级用法,包括加载库、查找符号、注册自定义类型和解决平台差异等方面。
第一步:加载库QLibrary提供了几种方式来加载库文件。
最常用的方式是使用QLibrary的构造函数,传入库文件的路径,然后调用load()函数完成加载。
例如,下面的代码加载了一个名为"mylibrary.dll"的库文件:QLibrary lib("mylibrary.dll");if (lib.load()) {执行库文件加载成功后的操作} else {加载失败的处理逻辑}除了构造函数,还可以使用setFileName()和setFileNameAndVersion()函数来设置库文件的路径和版本。
在调用load()函数之前,可以调用isLibrary()和isLoaded()函数分别判断库文件是否存在和是否已加载。
第二步:查找符号一旦库文件成功加载,就可以使用QLibrary的resolve()函数来查找库中的符号(函数、变量等)。
resolve()函数接受一个字符串参数,表示要查找的符号名称。
如果找到了对应的符号,将返回符号的地址;否则,返回NULL。
下面的代码演示了如何在已加载的库中查找一个名为"myFunction"的函数:typedef void (*MyFunction)(); 函数指针类型定义MyFunction myFunc =reinterpret_cast<MyFunction>(lib.resolve("myFunction"));if (myFunc) {执行函数调用myFunc();} else {未找到符号的处理逻辑}需要注意的是,为了正确调用库中的函数,需要提前定义函数指针类型。
QTP(Quick Test Professional)自动化测试基础教程说明书

Hands on QTPModule 1 - Automation Basics∙What is Manual testing∙Limitation of manual testing∙What is automation testing∙When to implement automation testing∙Benefit of automation testing∙When not to use automation testingModule 2 - QTP Fundamentals∙Introduction to QTP∙Architecture of QTP∙Environment supported by QTP∙Installation of QTP∙Installing seat or con-current license in QTP∙Installing Add-ins∙Running simple record and runModule 3 - Fundamentals of Vbscript∙Why VB in QTP∙Vbscript variables and constants∙Vbscript arrays∙Writing functions and subroutines∙Writing conditional statements∙Writing loop statements∙Vbscript classes∙Writing and executing simple VBscript in QTP Module 4 - Basics of QTP∙Creating a test∙Expert and keyword view∙Recording and running a test∙Recording modes∙Record and run settings∙Active screen, checkpoints and object description ∙Saving a test∙Opening existing testModule 5 - Objects and object repository∙Objects in QTP∙Types of Objects∙Object spy∙Object repository∙Local and Shared object repository∙Object Identification in QTP∙Adding and removing objects manually in object repository ∙Storing object repository on hard diskModule 6 - Synchronization∙What is synchronization∙Methods to configure synchronization∙Test setting method∙Wait method∙WaitProperty method∙Exist method∙Sync methodModule 7 - Checkpoints∙What is checkpoint∙Standard checkpoint∙Text checkpoint∙Text area checkpoint∙Bitmap checkpoint∙Accessibility checkpointModule 8 - values∙What is output value∙Standard output value∙Text output value∙Text area output valueModule 9 - Datatable/parameterization∙what is data table∙Global data table∙Local data table∙Data driven scenario automation∙Import/export excel into datatableModule 10 - Descriptive programming∙What is descriptive programming∙When to use descriptive programming∙How does QTP extracts objects∙Extracting all the objects and printing properties of objects ∙Extracting all links of page and printing their names∙Extracting links and clicking them one by one∙Extracting specific objects。
自动化测试QTP教程

自动化测试QTP教程目录目录 (1)1 QTP 简介 (2)1.1 自动化测试的好处 (2)1.2 QuickTest工作流程 (2)1.3 QTP程序界面 (3)1.4 Mercury Tours 示范网站 (4)2 录制/执行测试脚本 (5)2.1 录制前的准备 (5)2.2 录制测试脚本 (5)2.2.1 录制测试脚本 (5)2.2.2 分析录制的测试脚本 (8)2.3 执行测试脚本 (9)2.3.1 执行脚本出现错误 (10)2.4 分析测试结果 (10)3 建立检查点 (12)3.1 QuickTest检查点种类 (12)3.2 创建检查点 (13)3.2.1 对象检查 (13)3.2.2 网页检查 (15)3.2.3 文字检查 (17)3.2.4 表格检查 (18)3.3 执行并分析使用检查点的测试脚本 (19)4 参数化 (23)4.1 参数化步骤与检查点中的值 (23)4.1.1 参数化对象与检查点的属性值 (24)4.1.2 参数化操作的值 (24)4.2 参数种类 (25)4.2.1 使用数据表参数 (26)4.2.2 使用环境变量参数 (27)4.2.3 使用随机数字参数 (27)4.3 参数化测试脚本 (28)4.3.1 定义参数 (28)4.3.2 修正受到参数化影响的步骤 (30)4.3.3 执行并分析使用参数的测试脚本 (31)5 输出值 (32)5.1 创建输出值 (33)5.1.1 输出值类型 (33)5.1.2 存储输出值 (34)5.2 输出属性值 (34)5.2.1 定义标准输出值 (34)5.2.2 指定输出类型与与设置 (36)5.3 在脚本中建立输出值 (37)5.3.1 建立输出值 (37)5.3.2 执行并分析使用输出值的测试脚本 (40)1QTP 简介1.1 自动化测试的好处假如你执行过人工测试,你一定熟悉人工测试的缺点,人工测试非常浪费时间而且需要投入大量的人力。
qt测试方案

qt测试方案为了确保软件质量,提高软件的可靠性和稳定性,进行软件测试是必要的。
QT测试方案是一种用于测试QT框架应用程序的方法。
本文将介绍QT测试的基本原理和具体实施步骤。
一、QT测试原理QT测试的基本原理是通过自动化测试工具模拟用户的操作行为,对QT应用程序进行全面的功能测试和性能测试。
1. 功能测试:测试应用程序的各个功能模块是否正常工作,包括界面的显示、按钮的响应、数据的输入与输出等。
2. 性能测试:测试应用程序在不同负载条件下的运行性能,包括响应时间、吞吐量、并发性等指标。
二、QT测试方案的步骤根据QT测试原理,我们可以制定以下步骤来进行QT测试。
1. 确定测试目标和范围:明确测试的目的和测试的范围,确定需要测试的功能模块,以及需要测量的性能指标。
2. 编写测试用例:根据测试目标和范围,编写相应的测试用例。
测试用例应该全面覆盖软件的各个功能模块,并且具有可重复性。
3. 配置测试环境:搭建适合测试的环境,包括操作系统、数据库、网络等。
4. 准备测试数据:根据测试用例的要求,准备相应的测试数据。
测试数据应该具有一定的代表性,覆盖不同的情况。
5. 执行测试用例:按照测试计划,执行测试用例。
测试过程中需要记录测试结果和日志,以便后续分析和问题定位。
6. 分析测试结果:对测试结果进行分析,发现和定位问题。
对于功能测试,可以通过比对预期结果和实际结果来发现问题。
对于性能测试,可以通过性能指标来评估软件的性能。
7. 修复问题和重新测试:根据测试结果,对发现的问题进行修复,并进行重新测试。
重复这个过程,直到所有问题都解决。
8. 编写测试报告:根据测试结果,编写测试报告。
测试报告应该清晰准确地反映测试的结果和发现的问题,以及问题的解决情况。
三、QT测试工具QT测试可以使用多种测试工具来辅助进行。
以下是一些常用的QT 测试工具。
1. QTest:QT自带的测试框架,可以用于编写和执行测试用例,以及生成测试报告。
Qt4迁移至Qt5完全指南
Qt4迁移至Qt5将Qt 4代码迁移到Qt 5还是比较简单的。
实际上,在Qt 5开发过程中就已经注意了与Qt 4代码保持兼容性。
与Qt 3到Qt 4的迁移不同,Qt 5的核心类库并没有做大的API的修改,只有几个新的类取代了旧的(例如,像Qt 4的QList取代了QPtrList和QValueList;itemview取代了Q3ListView;graphicsview取代了Canvas API);同时也没有那些编译通过了,但运行时的行为却与之前的不一致的(例如,QWidget::show现在是非虚函数,绘制应该在paintEvent中进行等等)。
但是,迁移的代价也不会是零。
本文总结了KDE部分代码从Qt 4迁移到Qt 5所需要注意的问题。
KAddressbook迁移到Qt 5和KDE Frameworks 5KDE PIM是最后一个完整迁移到Qt 4和kdelibs 4的部分。
迁移到Qt 5应当更快些。
1.迁移之前迁移策略中应该有这么一条:能够同时使用新版本和旧版本的Qt编译代码,也就是保持Qt 4和Qt 5的兼容性。
这么做的好处是,能够保证你的代码在最小化的库上可以通过编译,让你的代码在Qt 4依然可用;也能够保证在迁移过程中,单元测试代码能够顺利运行;最后,还能够很快地区别出,哪些是本来就有的bug,哪些是由于迁移到Qt 5新引入的bug。
1.1迁移Qt3Support迁移代码,可以从让当前Qt 4代码“现代化”开始。
从代码迁移角度来看,Qt 5的有意义的改变是,移除了Qt3Support模块,移除了所有标记为Qt3Support的API。
在大多数情况下,Qt3Support的代码在Qt 4中有一个更适合的名字。
有的函数直接改名,例如QWidget::setShown改为QWidget::setVisible。
部分KDE代码仍然使用了旧的函数,这种情况也发生在其它古老的第三方代码库中。
从Qt 4迁移到Qt 5,移除代码中的Qt3Support API是必要的、不可避免的。
qscintilla使用手册

qscintilla使用手册QScintilla是一个功能强大的文本编辑器控件,用于在各种应用程序中实现代码编辑、语法高亮、自动完成等功能。
本手册将为您提供有关如何使用QScintilla控件的详细指导。
1. 简介QScintilla是基于Scintilla编辑器组件的Qt框架下的一个扩展控件。
它提供了许多用于文本编辑的功能,包括语法高亮、代码折叠、自动完成、搜索替换等,非常适用于编程编辑器、IDE工具等应用。
2. 安装和配置为了使用QScintilla,您首先需要在您的项目中添加相关的库文件和头文件。
您可以在Qt官方网站上找到QScintilla的安装包,并按照说明进行安装。
安装完成后,在您的项目.pro文件中添加相应的库路径和链接库。
3. 创建QScintilla控件创建QScintilla控件的方法非常简单。
您只需要在您的代码中实例化QScintilla控件,并设置其父级窗口。
例如,以下代码演示了如何创建一个QScintilla编辑器:```cpp#include <Qsci/qsciscintilla.h>// 创建一个QScintilla编辑器控件QsciScintilla *editor = new QsciScintilla(parentWidget);```4. 设置文本和样式您可以使用QScintilla控件的方法来设置文本内容和样式。
例如,以下代码演示了如何设置文本的字体、颜色和背景色:```cpp// 设置字体editor->setFont(QFont("Courier", 10));// 设置前景色editor->setColor(QColor(Qt::black));// 设置背景色editor->setPaper(QColor(Qt::white));```5. 语法高亮QScintilla提供了强大的语法高亮功能,可以根据不同的语言或文件类型来进行代码高亮。
Qt5开发及实例 15章 单元测试框架
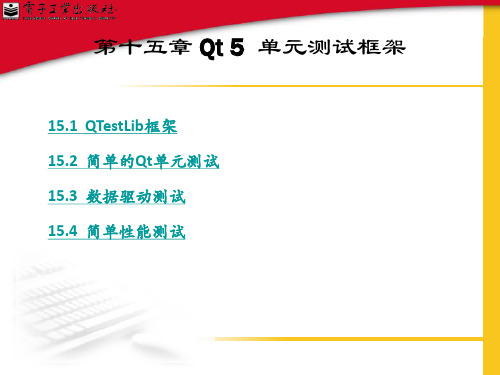
15.2 简单的Qt单元测试
单击“下一步”按钮,在如图15.3所示的对话框中设置将要创建的测试类的 基本信息。
15.2 简单的Qt单元测试
其中,“类名”命名为“TestArea”,“测试槽”(即待测试的函数)命 名为“toAreaTest”,依次单击“下一步”按钮,直至单击“完成”按钮。
ห้องสมุดไป่ตู้
15.2 简单的Qt单元测试
15.3 数据驱动测试
(4)测试结果如图15.7所示。
15.4 简单性能测试
(1)建立单元测试框架(操作方法同前),具体设置如下。 项目名称:TestQString2 测试类名:TestQString2 测试槽:testBenchmark 生成源文件:tst_testqstring2.cpp (2)源文件“tst_testqstring2.cpp”中具体代码。 (3)测试结果如图15.8所示。
15.3 数据驱动测试
例1,测试字符串转换为全小写字符的功能。 (1)建立单元测试框架(操作方法同前),具体设置如下。
项目名称:TestQString
测试类名:TestQString 测试槽:testToLower 生成源文件:tst_testqstring.cpp (2)源文件“tst_testqstring.cpp”的具体代码。
15.3 数据驱动测试
(3)测试结果如图15.6所示。
15.3 数据驱动测试
例2,测试计算圆面积的功能。 (1)建立单元测试框架(操作方法同前),具体设置如下。
项目名称:AreaTest2
测试类名:TestArea 测试槽:toArea 生成源文件:tst_testarea.cpp (2)新建C++头文件“area.h”,其具体代码。 (3)在源文件“tst_testqstring.cpp”中完成测试工作,其具体实现代码。
QT完全手册
成虚拟缓冲帧工具qvfb,并支持4,8,16,32位的显示颜色深度。另外我们也可以在
configure的参数中添加-system-jpeg和gif,使Qt/Embedded平台能支持jpeg、gif
在Linux命令模式下运行以下命令:
tarxfzTMAKEDIR=$PWD/
exportTMAKEPATH=$TMAKEDIR/lib/qws/linux-x86-g++
exportPATH=$TMAKEDIR/bin:$PATH
2.安装Qt/
在Linux命令模式下运行以下命令:
exportQTDIR=$PWD
在Qt的组件中,不仅定义了常用的成员变量和成员函数,还定义了所有与该组件相关的Signal和Slot。
要将组件组合起来,最简单的方法就是使用QtDesigner。首先要启动QtDesigner,在Linux命令模式下,键入以下命令(假设Qt安装在/usr/local下):
cd
然后新建一个QFrame,将自己需要的组件直接拖拉到这个Frame中,相信很多人都有过这样的经历,此处就不再详细描述了。完成之后存盘时,会将这个新的组件保存为一个扩展名为.ui的文件。假设所存的文件名为,用来查看这个文件,发现这是一个用xml语言写的一个文本。下面用这个生成相应的和。同样还是在这个目录下,可以看到一个uic的工具,这个是Qt专门用来将ui文件生成.h和.cpp文件的,在终端模式下键入以下命令:
Qt/Embedded开发环境建立的过程:
(这些软件可以免费从trolltech的WEB或FTP服务器上下载)
◆或更高版本;(生成Qt/Embedded应用工程的Makefile文件)
qtest用法
qtest用法`QTest` 是Qt 框架提供的一个用于单元测试和集成测试的测试框架。
它允许你编写测试用例、测试套件,并提供了一系列断言和辅助函数,以确保你的Qt 应用程序在不同条件下能够正常工作。
以下是`QTest` 的基本用法:1. 编写测试用例使用`QTest` 编写测试用例时,你需要继承`QTest` 类,并使用`Q_TEST_MAIN` 宏定义`main` 函数。
然后,你可以在测试用例中添加测试函数。
```cpp#include <QtTest/QtTest>class MyTest : public QObject {Q_OBJECTprivate slots:// 测试函数示例void testAddition() {QCOMPARE(1 + 1, 2); // 使用QCOMPARE 断言}};QTEST_MAIN(MyTest)#include "mytest.moc"```2. 编写测试套件你可以将多个测试用例组织成一个测试套件,通过创建一个派生自`QTestSuite` 的类,并在其中添加测试用例。
```cpp#include <QtTest/QtTest>class MyTestSuite : public QObject {Q_OBJECTpublic:static MyTestSuite* instance() {static MyTestSuite* s_instance = new MyTestSuite;return s_instance;}private slots:void initTestCase() {// 在整个测试套件开始之前执行的初始化}void cleanupTestCase() {// 在整个测试套件结束之后执行的清理}// 添加测试用例void testCase1() {// 测试用例1}void testCase2() {// 测试用例2}};QTEST_MAIN(MyTestSuite)#include "mytestsuite.moc"```3. 使用断言和辅助函数`QTest` 提供了一系列的断言和辅助函数,用于验证测试条件和执行测试。
testlib 用法
testlib 用法testlib是一个常用的测试库,它提供了许多用于编写测试用例的工具和函数。
在本文档中,我们将介绍testlib的基本用法和常见操作。
一、安装testlib要使用testlib,您需要将其添加到您的项目中。
您可以通过在终端中使用包管理器来安装testlib。
以下是在常见的编程语言中安装testlib的方法:* Python:使用pip安装testlib库。
在终端中运行以下命令:`pip install testlib`* Java:使用Maven或Gradle等构建工具添加testlib依赖项。
* C#:使用NuGet包管理器安装testlib库。
* 其他语言:请参考testlib的官方文档或相关资源。
二、创建测试用例使用testlib编写测试用例非常简单。
您可以使用testlib提供的测试类和测试方法来创建测试用例。
以下是一个简单的示例:```pythonfrom testlib import Testclass MyTest(Test):def test_addition(self):result = self.add(2, 3)self.assertEqual(result, 5)```在这个例子中,我们创建了一个名为MyTest的测试类,继承自Test类。
在test_addition方法中,我们使用add方法对2和3进行加法运算,并将结果存储在result变量中。
最后,我们使用assertEqual方法检查结果是否等于5,如果不相等则测试失败。
三、使用testlib函数和工具testlib提供了许多函数和工具,可以帮助您更轻松地编写测试用例。
以下是一些常用的函数和工具:* assertEqual:用于比较两个值是否相等。
* assertNotEqual:用于检查两个值是否不相等。
* assertTrue:用于检查一个值是否为真。
* assertFalse:用于检查一个值是否为假。
利用googletest与QTest进行GUI测试

利用googletest与QTest进行GUI测试利用google test 与QTest进行GUI 测试分类: Qt 2009-11-10 15:29 926人阅读评论(0) 收藏举报利用google test 与QTest进行GUI 测试Jingwenlai 2009-11-10Google test写测试用例非常方便,而且相对于QTest来说,提供了更多的比较宏,但其并未提供测试GUI的方法,相反,Qt Test lib 虽然仅提供了QCOMPARE等少数的宏,但QtTest提供了诸如keyClick,keyClicks,mouseClicks,mouseClick等模拟UI行为的测试方法。
可以将两者结合起来对QT的GUI程序进行测试,同时,也能够利用Google Test的便利性来写测试程序。
please refer to QtAssitant.exe for more informations about QtTest lib.下面是一个示例程序这个示例完成如下功能,根据用户的输入对显示的值进行增减。
执行了五个测试,其中一个是初始化测试,另外两个是正常情况的测试,还有两种情况是极端情况的测试。
以下是测试代码/**T esting Code;*/#ifndef TEST_PANELITEM_HPP#define TEST_PANELITEM_HPP#include <gtest/gtest.h>#include "PanelItem.h"#include <QtTest/QtTest> //for testing Gui#include <QString>class GPanelItemTest : public ::testing::Test{protected:virtual void SetUp(){panelItem = new GPanelItem();}virtual void TearDown(){delete panelItem;}GPanelItem * panelItem;};TEST_F(GPanelItemTest,testInit){}//GUI testing using QtTestTEST_F(GPanelItemTest,testIncButton){panelItem->reset();QTest::mouseClick(panelItem->getIncreaseButton(),Qt::LeftB utton);QCOMPARE(panelItem->getNumLabel()->text(),QString("1" ));}TEST_F(GPanelItemTest,testDescButton){panelItem->setValue(1);QCOMPARE(panelItem->getNumLabel()->text(),QString("1" ));QTest::mouseClick(panelItem->getDecreaseButton(),Qt::Left Button);QCOMPARE(panelItem->getNumLabel()->text(),QString("0" ));}TEST_F(GPanelItemTest,testIncButtonEdge){panelItem->setValue(9);QTest::mouseClick(panelItem->getIncreaseButton(),Qt::LeftB utton);QCOMPARE(panelItem->getNumLabel()->text(),QString("9" ));}TEST_F(GPanelItemTest,testDescButtonEdge){panelItem->setValue(0);QTest::mouseClick(panelItem->getDecreaseButton(),Qt::Left Button);QCOMPARE(panelItem->getNumLabel()->text(),QString("0" ));}#endif//PenalItem 类:#ifndef PANELITEM_H#define PANELITEM_H#include <QWidget>#include <QHBoxLayout>#include <QVBoxLayout>#include <QPushButton>#include <QLabel>#include <QObject>class GPanelItem : public QWidget{Q_OBJECTpublic:GPanelItem(QWidget * parent = 0) : QWidget(parent){increaseButton = new QPushButton(QString(tr("<")),this);QObject::connect(increaseButton,SIGNAL(clicked()),this,SLO T(increaseNum()));decreaseButton = new QPushButton(QString(tr(">")),this);QObject::connect(decreaseButton,SIGNAL(clicked()),this,SLO T(decreaseNum()));value = 0;numLabel = new QLabel();numLabel->setNum(value);}~GPanelItem(){delete increaseButton;delete decreaseButton;delete numLabel;}public:void reset(){setValue(0);}void setValue(int value){this->value = value;numLabel->setNum(value);}private slots:void increaseNum(){if(value < 9)value++;numLabel->setNum(value);}void decreaseNum(){if(value > 0)value--;numLabel->setNum(value);}public:QPushButton * getIncreaseButton() { return increaseButton; }QPushButton * getDecreaseButton() { return decreaseButton; }QLabel * getNumLabel() { return numLabel; }private:QPushButton* increaseButton;QPushButton* decreaseButton;QLabel * numLabel;private:int value;};#endif//主程序#include <QApplication>#include "PanelItem.hpp"#include <gtest/gtest.h>#include "test.hpp"int main(int argc,char ** argv){QApplication app(argc,argv);::testing::InitGoogleTest(&argc,argv);RUN_ALL_TESTS();GPanelItem * panelItem = new GPanelItem();panelItem->show();return app.exec();}对应的CMakeLists.txt 如下:project(QViewpad)cmake_minimum_required(VERSION 2.6)set(SOURCES main.cpp PanelItem.cpp)set(HEADERS PanelItem.hpp)find_package(Qt4 COMPONENTS QtTest QtGui QtCore REQUIRED)if(QT4_FOUND)include(${QT_USE_FILE})endif()qt4_wrap_cpp(GPanelItem_Moc PanelItem.hpp)add_executable(viewpad ${SOURCES} ${GPanelItem_MOC}) target_link_libraries(viewpad ${QT_LIBRARIES} gtest gtest_main)。
qlibrary用法

qlibrary用法qlibrary是Qt中的一个库加载器,可以动态地加载共享库,在运行时使用其中的函数。
使用qlibrary需要先在代码中包含<qlibrary.h>头文件。
然后创建一个QLibrary对象,并指定要加载的共享库的路径,可以是绝对路径或相对路径。
QLibrary可以通过load()函数加载共享库,返回一个bool值表示是否加载成功。
加载成功后,可以通过resolve()函数来获取共享库中的函数指针,然后使用函数指针来调用共享库中的函数。
使用完毕后,可以通过unload()函数卸载共享库。
示例代码:#include <qlibrary.h>...QLibrary lib('mylib.dll'); //加载共享库if(lib.load()) //加载成功{typedef int (*MyFunc)(int, int); //定义函数指针类型MyFunc myFunc = (MyFunc)lib.resolve('myFunc'); //获取函数指针if(myFunc){int result = myFunc(1, 2); //调用函数...}lib.unload(); //卸载共享库}else //加载失败{...}注意事项:1.加载共享库的路径中不能包含中文字符,否则可能无法成功加载。
2.获取函数指针时需要指定函数的名称,名称的大小写要与共享库中的函数名称一致。
3.如果要加载的共享库依赖其他共享库,则需要先加载依赖的共享库。
4.在调用共享库中的函数时,需要确保传递的参数类型和数量与函数的参数类型和数量一致。
5.使用完毕后,需要正确地卸载共享库,否则可能会导致内存泄漏或其他问题。
QTestlib Manual

QTestlib ManualTrolltech公司提供的QTestlib框架,是一种针对基于QT编写的程序或库的单元测试工具。
QTestLib提供了单元测试框架的基本功能,并提供了针对GUI测试的扩展功能。
目录:∙QtestLib特性∙QTestLib API∙使用 QTestLibo编写一个测试程序o编译一个测试程序o QTestLib 命令行参数▪语法▪选项∙在Windows CE上远程使用QTestLibo使用cetest▪语法▪选项o QtRemoteo约束条件QTestlib特性设计QTestLib的目标是为了简化QT程序或库的单元测试工作。
注意:对于高级的GUI和应用程序测试需求,请参考Trolltech合作伙伴提供的测试产品。
(译者注:如FROGLOGIC提供的Squish工具)QTestLib API所有公有的方法都在QTest命名空间中。
另外,QSignalSpy类为QT的信号和槽提供了简单的内省机制。
使用QTestLib编写一个测试程序编写一个测试程序,需要从QObject类派生一个子类并加入一个或者多个私有槽。
每一个私有槽都是一个测试函数。
QTest::qExec()函数用于执行测试对象中所有的测试函数。
另外,有4种私有槽不能作为测试函数。
他们由测试框架执行,可为整个测试程序或当前测试函数进行初始化和清除操作。
∙initTestCase()会在第一个测试函数执行前调用。
1∙cleanupTestCase()会在最后一个测试函数执行后调用。
∙init()会在每一个测试函数执行前调用。
∙cleanup()会在每一个测试函数执行后调用。
如果initTestCase()函数执行失败,任何测试函数都不会执行。
如果init()函数执行失败,紧随其后的测试函数不会被执行,测试会继续处理下一个测试函数。
例子:c l a s s M y F i r s t T e s t:p u b l i c Q O b j e c t{Q_O B J E C Tp r i v a t e s l o t s:v o i d i n i t T e s t C a s e(){q D e b u g("c a l l e d b e f o r e e v e r y t h i n g e l s e");}v o i d m y F i r s t T e s t(){Q V E R I F Y(1==1);}v o i d m y S e c o n d T e s t(){Q V E R I F Y(1!=2);}v o i d c l e a n u p T e s t C a s e(){q D e b u g("c a l l e d a f t e r m y F i r s t T e s t a n d m y S e c o n d T e s t");}};更多测试例子,请参阅QTestLib Tutorial。
Qt单元测试
Qt单元测试使⽤Qtcreator ⾃带的单元测试⼯具框架QTestlib进⾏测试。
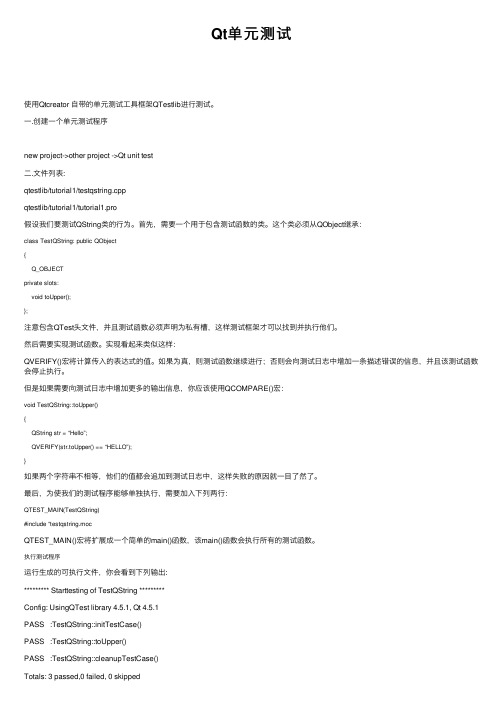
⼀.创建⼀个单元测试程序new project->other project ->Qt unit test⼆.⽂件列表:qtestlib/tutorial1/testqstring.cppqtestlib/tutorial1/tutorial1.pro假设我们要测试QString类的⾏为。
⾸先,需要⼀个⽤于包含测试函数的类。
这个类必须从QObject继承:class TestQString: public QObject{Q_OBJECTprivate slots:void toUpper();};注意包含QTest头⽂件,并且测试函数必须声明为私有槽,这样测试框架才可以找到并执⾏他们。
然后需要实现测试函数。
实现看起来类似这样:QVERIFY()宏将计算传⼊的表达式的值。
如果为真,则测试函数继续进⾏;否则会向测试⽇志中增加⼀条描述错误的信息,并且该测试函数会停⽌执⾏。
但是如果需要向测试⽇志中增加更多的输出信息,你应该使⽤QCOMPARE()宏:void TestQString::toUpper(){QString str = “Hello”;QVERIFY(str.toUpper() == “HELLO”);}如果两个字符串不相等,他们的值都会追加到测试⽇志中,这样失败的原因就⼀⽬了然了。
最后,为使我们的测试程序能够单独执⾏,需要加⼊下列两⾏:QTEST_MAIN(TestQString)#include “testqstring.mocQTEST_MAIN()宏将扩展成⼀个简单的main()函数,该main()函数会执⾏所有的测试函数。
执⾏测试程序运⾏⽣成的可执⾏⽂件,你会看到下列输出:********* Starttesting of TestQString *********Config: UsingQTest library 4.5.1, Qt 4.5.1PASS :TestQString::initTestCase()PASS :TestQString::toUpper()PASS :TestQString::cleanupTestCase()Totals: 3 passed,0 failed, 0 skipped********* Finishedtesting of TestQString *********三.由于使⽤Qtestlib进⾏的测试⽆法⽣成代码覆盖率,我们需要借助linux 下的代码覆盖率⼯具gcov,lcov , genhtml。
qscintilla使用手册

QScintilla 是一个功能强大的文本编辑器组件,它提供了语法高亮、代码折叠、自动补全等功能,常用于编写代码的编辑器中。
以下是 QScintilla 的简要使用手册:
1.安装 QScintilla:首先需要下载并安装 QScintilla 库,将其包含在你的
项目中,并正确配置链接器。
2.集成到项目中:在你的 Qt 项目中,需要将 QScintilla 作为一个 Qt
Widgets 模块添加到你的项目中。
你可以在项目文件(.pro)中添加相应的行来包含 QScintilla。
3.创建 QScintilla 实例:在你的 Qt 应用程序中,需要创建一个
QScintilla 实例,并将其添加到你的用户界面中。
你可以将其作为一个控件添加到 QWidget 中。
4.配置语法高亮:QScintilla 支持语法高亮,你可以使用相关的 API 来设置
语法规则,以便根据不同的语言高亮显示不同的代码元素。
5.实现代码折叠:QScintilla 还支持代码折叠功能,你可以通过编写代码来
折叠和展开代码块。
6.自动补全:QScintilla 提供了自动补全功能,可以根据当前的上下文自动
提供代码补全选项。
7.其他功能:QScintilla 还提供了许多其他功能,如查找和替换、剪切和复
制、粘贴等。
你可以使用相应的 API 来实现这些功能。
总之,QScintilla 是一个功能强大的文本编辑器组件,它可以帮助你创建专业的代码编辑器。
通过正确地使用 QScintilla,你可以提高你的应用程序的易用性和用户体验。
Qt 5开发及实例 第16章 Qt 5单元测试框架

简单的Qt单元测试
(3)测试代码所在的源文件“tst_testarea.cpp”的具体内容如下:
#include <QString> #include <QtTest> #include "area.h" class TestArea : public QObject { Q_OBJECT public: TestArea(); private Q_SLOTS: void toAreaTest(); }; TestArea::TestArea() { } void TestArea::toAreaTest() { Area area(1); QVERIFY(qAbs(area.CountArea()-3.14)<0.0000001); QVERIFY2(true, "Failure"); } QTEST_APPLESS_MAIN(TestArea) #include "tst_testarea.moc“
第16章 Qt 5单元测试框架
——简单的Qt单元测试
简单的Qt单元测试
【例】(简单)(CH1601)首先实现计算圆面积的类,然后编写代码检查该类是否完成了相应的 功能。 (1)建立Qt单元测试框架,步骤如下。 选择“文件”→“新建文件或项目”菜单项,出现如图16.1所示的对话框,选择“其他项 目”→“Qt单元测试”选项,单击“Choose...”按钮。
//(a)
//(b)
//(c)
简单的Qt单元测试
其中, (a) toAreaTest()函数是测试函数,初始化对象的半径为1。 (b)QVERIFY(qAbs(area.CountArea()-3.14)<0.0000001):使用QVERIFY()宏判断半径为1的面积是否为3.14。 由于浮点数不能直接比较,所以取值为给定值和实际值的绝对值,只要这两者之差小于0.0000001,就认为 结果是正确的。 QVERIFY()宏用于检查表达式是否为真,如果表达式为真,则程序继续运行;否则测试失败,程序运行 终止。如果需要在测试失败的时候输出信息,则使用QVERIFY2()宏,用法如下: QVERIFY2(condition,message); QVERIFY2()宏在“condition”条件验证失败时,输出信息“message”。 (c)QTEST_APPLESS_MAIN(TestArea):QTEST_APPLESS_MAIN()宏实现main()函数,并初始化QApplication 对象和测试类,按照测试函数的运行顺序执行所有的测试。 简单Qt单元测试输出结果如图16.5所示。
- 1、下载文档前请自行甄别文档内容的完整性,平台不提供额外的编辑、内容补充、找答案等附加服务。
- 2、"仅部分预览"的文档,不可在线预览部分如存在完整性等问题,可反馈申请退款(可完整预览的文档不适用该条件!)。
- 3、如文档侵犯您的权益,请联系客服反馈,我们会尽快为您处理(人工客服工作时间:9:00-18:30)。
QTestlib ManualTrolltech公司提供的QTestlib框架,是一种针对基于QT编写的程序或库的单元测试工具。
QTestLib提供了单元测试框架的基本功能,并提供了针对GUI测试的扩展功能。
目录:∙QtestLib特性∙QTestLib API∙使用 QTestLibo编写一个测试程序o编译一个测试程序o QTestLib 命令行参数▪语法▪选项∙在Windows CE上远程使用QTestLibo使用cetest▪语法▪选项o QtRemoteo约束条件QTestlib特性设计QTestLib的目标是为了简化QT程序或库的单元测试工作。
注意:对于高级的GUI和应用程序测试需求,请参考Trolltech合作伙伴提供的测试产品。
(译者注:如FROGLOGIC提供的Squish工具)QTestLib API所有公有的方法都在QTest命名空间中。
另外,QSignalSpy类为QT的信号和槽提供了简单的内省机制。
使用QTestLib编写一个测试程序编写一个测试程序,需要从QObject类派生一个子类并加入一个或者多个私有槽。
每一个私有槽都是一个测试函数。
QTest::qExec()函数用于执行测试对象中所有的测试函数。
另外,有4种私有槽不能作为测试函数。
他们由测试框架执行,可为整个测试程序或当前测试函数进行初始化和清除操作。
∙initTestCase()会在第一个测试函数执行前调用。
1∙cleanupTestCase()会在最后一个测试函数执行后调用。
∙init()会在每一个测试函数执行前调用。
∙cleanup()会在每一个测试函数执行后调用。
如果initTestCase()函数执行失败,任何测试函数都不会执行。
如果init()函数执行失败,紧随其后的测试函数不会被执行,测试会继续处理下一个测试函数。
例子:c l a s s M y F i r s t T e s t:p u b l i c Q O b j e c t{Q_O B J E C Tp r i v a t e s l o t s:v o i d i n i t T e s t C a s e(){q D e b u g("c a l l e d b e f o r e e v e r y t h i n g e l s e");}v o i d m y F i r s t T e s t(){Q V E R I F Y(1==1);}v o i d m y S e c o n d T e s t(){Q V E R I F Y(1!=2);}v o i d c l e a n u p T e s t C a s e(){q D e b u g("c a l l e d a f t e r m y F i r s t T e s t a n d m y S e c o n d T e s t");}};更多测试例子,请参阅QTestLib Tutorial。
编译一个测试程序如果使用qmake作为编译工具,只需在project文件中增加移行:Q T+=t e s t l i b(注意,此处有错,应为CONFIG += qtestlib)如果使用其它的编译工具,确保把QTestLib的头文件加入到include路径(通常是Qt 安装路径下的include/QtTest目录)。
如果你要创建Qt程序的发行版本,将测试程序链接到QtTest库。
如果你要创建Qt程序的调试版本,使用QtTest_debug。
参阅:QTestLib Tutorial。
QTestlib命令行参数语法执行自动测试的语法接收下列简单形式:t e s t n a m e[o p t i o n s][t e s t f u n c t i o n s[:t e s t d a t a]]...用你的可执行文件替换testname。
testfunctions包含要执行的测试函数名,如果不指定testfunctions,所有的测试函数都会执行。
如果测试函数名之后加上了测试数据行的名字,则测试函数执行时只会使用该行测试数据。
列如:/m y T e s t D i r e c t o r y$t e s t Q S t r i n g t o U p p e r使用所有的测试数据执行toUpper测试函数。
/m y T e s t D i r e c t o r y$t e s t Q S t r i n g t o U p p e r t o I n t:z e r o使用所有的测试数据执行toUpper测试函数,使用行名为zero的测试数据执行toInt 测试函数(如果对应的测试数据不存在,相关的测试执行时就会失败)。
/m y T e s t D i r e c t o r y$t e s t M y W i d g e t-v s-e v e n t d e l a y500执行testMyWidget测试程序,输出每一个信号发射信息,在每次模拟鼠标/键盘事件之后等待500毫秒。
选项下列命令行参数可以被接受:∙-help输出命令行参数的帮助信息。
∙-functions输出测试中的所有测试函数。
∙-o filename将输出信息写入到执行文件中,而不是打印到标准输出上。
∙-silent沉默地输出,只显示警告、错误和最少的状态信息。
∙-v1详细输出;输出每次进入或离开测试函数的信息。
∙-v2详细输出;也输出每个QCOMPARE()和QVERIFY()信息。
∙-vs输出发出的所有信号。
∙-xml将输出格式化成XML格式,而不是普通文本∙-lightxml输出成XML标签流。
∙-eventdelay ms如果键盘或鼠标模拟(QTest::keyClick(),QTest::mouseClick()等)不指定延迟时间,则使用该参数(以毫秒为单位)作为延迟时间。
∙-keydelay ms与-eventdelay的作用一样,但只影响键盘模拟的延迟时间,不影响鼠标模拟的延迟时间。
∙-mousedelay ms与-eventdelay的作用一样,但只影响鼠标模拟的延迟时间,不影响键盘模拟的延迟时间。
∙-keyevent-verbose详细输出键盘模拟信息。
∙-maxwarnings numberBR设置警告信息的最大数量,0表示不限制,默认值为2000。
在Windows CE上远程使用QTestLibcetest能够帮助用户方便地在Windows CE设备或模拟器上加载应用程序,并且它需要在单元测试被成功编译后才能执行。
加载前,下列文件将拷贝到设备上:∙该工程链接的所有Qt库∙QtRemote.dll∙安装时指定的c运行库∙.pro文件中DEPLOYMENT规则指定的所有文件使用cetest语法执行自动测试的语法接受下列简单形式:c e t e s t[o p t i o n s]...选项cetest不仅提供了与非交叉编译平台相同的选项,参考Command Line Arguments,而且增加了下列选项:∙-debug在调试模式下编译测试程序。
∙-release在发行模式下编译测试程序。
∙-libpath path指明拷贝Qt库的目标路径。
∙-qt-delete执行结束后删除Qt库。
∙-project-delete执行结束后删除工程文件。
∙-delete执行结束后删除工程文件和Qt库。
∙-conf指定一个将被部署到远程路径中的qt.conf文件注意:debug是默认的编译选项。
QtRemoteQtRemote是在QTestLib之后编译的一个小的库。
它允许主机系统创建一个在远程设备上运行的进程,并等待其执行结束。
约束条件cetest使用Microsoft ActiveSync建立主机和设备之间的远程连接,顺利编译cetest 和QtRemote需要与之相关的头文件和库。
在安装Qt之前,需要正确设置INCLUDE和LIB环境变量。
Pocket PC上Windows Mobile 5的默认安装可通过下述方式得到:s e t I N C L U D E=C:\P r o g r a m F i l e s\W i n d o w s C E T o o l s\w c e500\W i n d o w s M o b i l e5.0P o c k e t P C S D K\A c t i v e s y n c\I n c;%I N C L U D E%s e t L I B=C:\P r o g r a m F i l e s\W i n d o w s C E T o o l s\w c e500\W i n d o w s M o b i l e5.0P o c k e t P C S D K\A c t i v e s y n c\L i b;%L I B%注意Qt会记住该路径,因此即使切换到交叉编译环境,你也不需要重新设置它。
