spring配置文件的具体配置 + 注释说明
Spring配置文件

Spring 配置文件命名空间1.xml文档的命名空间XML文档可以创建自定义的元素和属性来描述数据,这样就很容易产生名称相同而含义不同的元素。
XML使用命名空间来加以区分。
命名空间使用统一资源定位符URI来识别。
URI必须是XML文档中唯一的。
1.1 XML文档中加入命名空间为了引用一个命名空间,可以将其以属性的形式加入任何包含了属于该命名空间中元素的节点中。
比如:这决定了命名空间wq指向/ns/furniture1.2 添加默认命名空间/ Copyright©2010吴青版权所有一个XML文档大部分通常属于一个XML词汇。
在这种情况下,可以定义一个默认的命名空间,而不是为每一个元素重复地添加命名空间前缀。
可以使用xmlns关键字来定义默认的命名空间。
这样,就不用为默认的命名空间内的元素指定前缀了。
2.XML的约束模式XML的约束模式定义了XML文档中允许出现的元素名,元素中的属性,内容类型,以及元素之间的嵌套关系和出现顺序。
如果把一个XML文件看做数据库中的一个表,那么XML约束模式就相当于数据库表结构的定义。
约束模式通常都是在一个单独的文件中进行定义,这个文件被称为模式文档。
模式文档采用某种约束模式语言编写,用于描述XML文档的结构。
模式语言应用最广泛的就是XML DTD和XML Schema。
Spring的配置文件中这两种模式浴盐都支持/ Copyright©2010吴青版权所有一个XML文档想说明自己是一个有效的XML文档,除了要严格遵循某个DTD文件定义的规则外,还必须指明其所遵循的是那个DTD文件,以便解析器程序能够对它进行有效性校验。
如何把XML文件和一个DTD文件联系起来?正如上面的代码:XML文档通过使用DOCTYPE声明语句(文档类型定义语句)来指明它所遵循的DTD文件。
DOCTYPE 声明语句紧跟在XML文档声明语句后面,有两种格式:<!DOCTYPE 文档类型名称SYSTEM “DTD文件的URL”><!DOCTYPE 文档类型名称PUBLIC “DTD名称” ”DTD文件的URL”>文档类型名称一般使用XML文件的根元素名称来作为文档类型名称。
spring配置文件详解

spring配置文件详解Spring是一个轻量级的开源Java框架,它提供了一种简化Java应用开发的方式。
在Spring框架中,配置文件起着非常重要的作用,它用于配置应用程序中的各种组件和对象。
Spring配置文件通常使用XML格式,但也可以使用注解或Java代码进行配置。
在配置文件中,我们可以定义Bean(对象)、依赖关系、AOP(面向切面编程)等等。
下面将详细介绍Spring配置文件的各个部分。
1. 命名空间和约束在Spring配置文件的开头,我们需要声明命名空间和约束。
命名空间用于引入Spring的命名空间,以便我们可以使用Spring提供的各种功能。
约束用于验证配置文件的正确性。
2. Bean定义在Spring配置文件中,我们可以定义多个Bean。
每个Bean都有一个唯一的ID和一个类名或接口名。
我们可以使用构造函数或工厂方法来创建Bean,并指定Bean的属性值。
3. 依赖注入依赖注入是Spring框架的核心特性之一。
通过依赖注入,我们可以将一个Bean的依赖关系委托给Spring容器来管理。
在配置文件中,我们可以使用<property>元素来设置Bean的属性值,也可以使用<constructor-arg>元素来设置构造函数的参数。
4. 别名和引用在配置文件中,我们可以为Bean定义别名,以便在其他地方使用更简洁的名称来引用Bean。
我们还可以使用<ref>元素来引用其他Bean。
5. 集合和数组Spring配置文件还支持定义集合和数组类型的属性。
我们可以使用<list>、<set>、<map>和<props>元素来定义不同类型的集合。
6. 自动装配自动装配是Spring框架的另一个重要特性。
通过自动装配,Spring容器可以根据Bean之间的依赖关系自动将它们连接起来。
在配置文件中,我们可以使用autowire属性来指定自动装配的方式。
1.1SpringBoot环境配置和常用注解

1.1SpringBoot环境配置和常⽤注解Spring Boot常⽤注解:@Service: 注解在类上,表⽰这是⼀个业务层bean@Controller:注解在类上,表⽰这是⼀个控制层bean@Repository: 注解在类上,表⽰这是⼀个数据访问层bean@Component:注解在类上,表⽰通⽤bean ,value不写默认就是类名⾸字母⼩写@Autowired:按类型注⼊.默认属性required= true;当不能确定Spring 容器中⼀定拥有某个类的Bean 时,可以在需要⾃动注⼊该类Bean 的地⽅可以使⽤@Autowired(required = false),这等于告诉Spring:在找不到匹配Bean时也不抛出BeanCreationException 异常。
@Autowired 和 @Qualifier 结合使⽤时,⾃动注⼊的策略就从byType 转变byName 了。
@Autowired可以对成员变量、⽅法以及构造函数进⾏注释,⽽@Qualifier 的标注对象是成员变量、⽅法⼊参、构造函数⼊参。
正是由于注释对象的不同,所以 Spring 不将 @Autowired 和 @Qualifier 统⼀成⼀个注释类。
@Resource:按名称装配区别:@Resource默认按照名称⽅式进⾏bean匹配,@Autowired默认按照类型⽅式进⾏bean匹配@Resource(importjavax.annotation.Resource;)是J2EE的注解,@Autowired(importorg.springframework.beans.factory.annotation.Autowired;)是Spring的注解@Configuration:注解在类上,表⽰这是⼀个IOC容器,相当于spring的配置⽂件,java配置的⽅式。
IOC容器的配置类⼀般与@Bean 注解配合使⽤,⽤@Configuration 注解类等价与 XML 中配置 beans,⽤@Bean 注解⽅法等价于 XML 中配置 bean。
Spring常用的一些注解说明

Spring常⽤的⼀些注解说明@Configuration从Spring3.0,@Configuration⽤于定义配置类,可替换xml配置⽂件,被注解的类内部包含有⼀个或多个被@Bean注解的⽅法。
这些⽅法将会被AnnotationConfigApplicationContext或AnnotationConfigWebApplicationContext类进⾏扫描,并⽤于构建bean定义。
@Bean@Bean注解⽤于告诉⽅法,产⽣⼀个Bean对象,然后这个Bean对象交给Spring管理。
产⽣这个Bean对象的⽅法Spring只会调⽤⼀次,随后这个Spring将会将这个Bean对象放在⾃⼰的IOC容器中。
SpringIOC 容器管理⼀个或者多个bean,这些bean都需要在@Configuration注解下进⾏创建,在⼀个⽅法上使⽤@Bean注解就表明这个⽅法需要交给Spring进⾏管理。
@Autowired、@Resource@Resource和@Autowired注解都是⽤来实现依赖注⼊的。
只是@AutoWried按by type⾃动注⼊,⽽@Resource默认按byName⾃动注⼊。
♣ @Autowired@Autowired具有强契约特征,其所标注的属性或参数必须是可装配的。
如果没有Bean可以装配到@Autowired所标注的属性或参数中,⾃动装配就会失败,抛出NoSuchBeanDefinitionException.@Autowired可以对类成员变量、⽅法及构造函数进⾏标注,让 spring 完成 bean ⾃动装配的⼯作。
@Autowired 默认是按照类去匹配,配合 @Qualifier 指定按照名称去装配 bean。
♣ @Resource@Resource是JDK提供的注解,有两个重要属性,分别是name和type。
@Resource依赖注⼊时查找bean的规则既不指定name属性,也不指定type属性,则⾃动按byName⽅式进⾏查找。
SpringBoot注解解析大全(非常全哦!)

SpringBoot注解解析⼤全(⾮常全哦!)使⽤注解的优势:1.采⽤纯java代码,不在需要配置繁杂的xml⽂件2.在配置中也可享受⾯向对象带来的好处3.类型安全对重构可以提供良好的⽀持4.减少复杂配置⽂件的同时亦能享受到springIoC容器提供的功能⼀、注解详解(配备了完善的释义)------(可采⽤ctrl+F 来进⾏搜索哦~~~~也可以收藏⽹页这样以后就不⽤往复查询了哦)@SpringBootApplication:申明让spring boot⾃动给程序进⾏必要的配置,这个配置等同于:@Configuration ,@EnableAutoConfiguration 和 @ComponentScan 三个配置。
@ResponseBody:表⽰该⽅法的返回结果直接写⼊HTTP response body中,⼀般在异步获取数据时使⽤,⽤于构建RESTful的api。
在使⽤@RequestMapping后,返回值通常解析为跳转路径,加上@esponsebody后返回结果不会被解析为跳转路径,⽽是直接写⼊HTTP response body中。
⽐如异步获取json数据,加上@Responsebody后,会直接返回json数据。
该注解⼀般会配合@RequestMapping⼀起使⽤。
@Controller:⽤于定义控制器类,在spring项⽬中由控制器负责将⽤户发来的URL请求转发到对应的服务接⼝(service层),⼀般这个注解在类中,通常⽅法需要配合注解@RequestMapping。
@RestController:⽤于标注控制层组件(如struts中的action),@ResponseBody和@Controller的合集。
@RequestMapping:提供路由信息,负责URL到Controller中的具体函数的映射。
@EnableAutoConfiguration:SpringBoot⾃动配置(auto-configuration):尝试根据你添加的jar依赖⾃动配置你的Spring应⽤。
spring配置
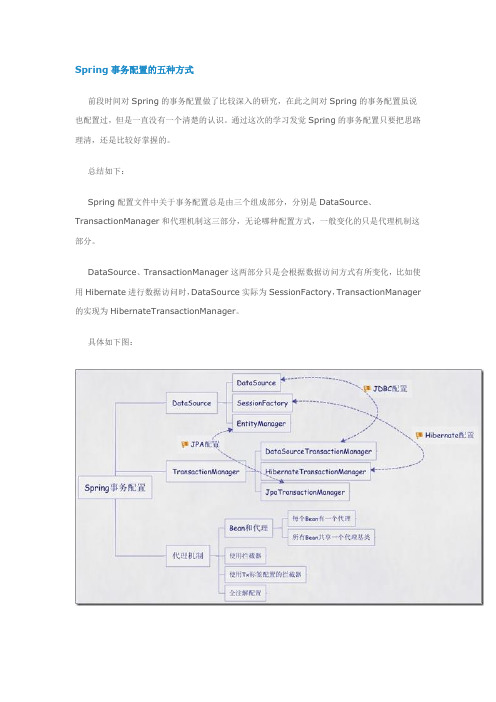
Spring事务配置的五种方式前段时间对Spring的事务配置做了比较深入的研究,在此之间对Spring的事务配置虽说也配置过,但是一直没有一个清楚的认识。
通过这次的学习发觉Spring的事务配置只要把思路理清,还是比较好掌握的。
总结如下:Spring配置文件中关于事务配置总是由三个组成部分,分别是DataSource、TransactionManager和代理机制这三部分,无论哪种配置方式,一般变化的只是代理机制这部分。
DataSource、TransactionManager这两部分只是会根据数据访问方式有所变化,比如使用Hibernate进行数据访问时,DataSource实际为SessionFactory,TransactionManager 的实现为HibernateTransactionManager。
具体如下图:根据代理机制的不同,总结了五种Spring事务的配置方式,配置文件如下:第一种方式:每个Bean都有一个代理<?xml version="1.0" encoding="UTF-8"?><beans xmlns="/schem a/beans"xm lns:xsi="/2001/XMLSchem a-instance"xm lns:context="/schem a/context"xm lns:aop="/schem a/aop"xsi:schem aLocation="/schem a/beans /schem a/beans/spring-beans-2.5.xsd/schem a/context/schem a/context/spring-context-2.5.xsd /schem a/aop/schema/aop/spring-aop-2.5.xsd"><bean id="sessionFactory"class="org.springfram ework.orm.hibernate3.LocalSessionFactoryBean"> <property name="configLocation" value="classpath:hibernate.cfg.xml"/> <property name="configurationClass"value="org.hibernate.cfg.AnnotationConfiguration"/></bean><!-- 定义事务管理器(声明式的事务)--><bean id="t ransactionManager"class="org.springframework.orm.hibernate3.HibernateTransactionManager" ><property name="sessionFactory" ref="sessionFactory"/> </bean><!-- 配置DAO --><bean id="userDaoTarget" class="erDaoImpl"> <property name="sessionFactory" ref="sessionFactory"/> </bean><bean id="userDao"class="org.springframework.transaction.interceptor.TransactionProxyFactor yBean"><!-- 配置事务管理器--><property nam e="t ransactionManager" ref="transactionManager"/><property name="target" ref="userDaoTarget"/><property nam e="proxyInterfaces"value="com.bluesky.spring.dao.GeneratorDao"/><!-- 配置事务属性--><property name="t ransactionAttributes"><props><prop key="*">PROPAGATION_REQUIRED</prop></props></property></bean></beans>第二种方式:所有Bean共享一个代理基类<?xml version="1.0" enc oding="UTF-8"?><beans xmlns="/schem a/beans"xm lns:xsi="/2001/XMLSchem a-instance"xm lns:context="/schem a/context"xm lns:aop="/schem a/aop"xsi:schem aLocation="/schem a/beans/schem a/beans/spring-beans-2.5.xsd/schem a/context/schem a/cont ext/spring-context-2.5.xsd /schem a/aop/schema/aop/spring-aop-2.5.xsd"><bean id="sessionFactory"class="org.springfram ework.orm.hibernate3.LocalSessionFactoryBean"> <property name="configLocation" value="classpath:hibernate.cfg.xml"/> <property name="configurationClass"value="org.hibernate.cfg.AnnotationConfiguration"/></bean><!-- 定义事务管理器(声明式的事务)--><bean id="t ransactionManager"class="org.springframework.orm.hibernate3.HibernateTransactionManager" ><property name="sessionFactory" ref="sessionFactory"/> </bean><bean id="t ransactionBase"class="org.springfram ework.transaction.interceptor.TransactionProxyFact oryBean"lazy-init="true" abstract="t rue"><!-- 配置事务管理器--><property name="t ransactionManager" ref="transactionManager"/><!-- 配置事务属性--><property name="t ransactionAttributes"><props><prop key="*">PROPAGATION_REQUIRED</prop></props></property></bean><!-- 配置DAO --><bean id="userDaoTarget" class="erDaoImpl"> <property name="sessionFactory" ref="sessionFactory"/> </bean><bean id="userDao" parent="transactionBase"><property name="target" ref="userDaoTarget"/></bean></beans>第三种方式:使用拦截器<?xml version="1.0" encoding="UTF-8"?><beans xmlns="/schem a/beans"xm lns:xsi="/2001/XMLSchem a-instance"xm lns:context="/schem a/context"xm lns:aop="/schem a/aop"xsi:schem aLocation="/schem a/beans /schem a/beans/spring-beans-2.5.xsd/schem a/context/schem a/context/spring-context-2.5.xsd /schem a/aop/schema/aop/spring-aop-2.5.xsd"><bean id="sessionFactory"class="org.springfram ework.orm.hibernate3.LocalSessionFactoryBean"><property name="configLocation" value="classpath:hibernate.cfg.xml"/> <property name="configurationClass"value="org.hibernate.cfg.AnnotationConfiguration"/></bean><!-- 定义事务管理器(声明式的事务)--><bean id="t ransactionManager"class="org.springframework.orm.hibernate3.HibernateTransactionManager" ><property name="sessionFactory" ref="sessionFactory"/> </bean><bean id="t ransactionInterceptor"class="org.springframework.transaction.interceptor.TransactionInterceptor" ><property name="t ransactionManager" ref="transactionManager"/><!-- 配置事务属性--><property name="t ransactionAttributes"><props><prop key="*">PROPAGATION_REQUIRED</prop></props></property></bean><beanclass="org.springframework.aop.framework.autoproxy.BeanNameAutoProxyCreat or"><property name="beanNames"><list><value>*Dao</value></list></property><property name="interceptorNames"><list><value>t ransactionInterceptor</value></list></property></bean><!-- 配置DAO --><bean id="userDao" class="erDaoImpl"> <property name="sessionFactory" ref="sessionFactory"/> </bean></beans>第四种方式:使用t x标签配置的拦截器<?xml version="1.0" encoding="UTF-8"?><beans xmlns="/schem a/beans"xm lns:xsi="/2001/XMLSchem a-instance"xm lns:context="/schem a/context"xm lns:aop="/schem a/aop"xm lns:tx="/schema/tx"xsi:schem aLocation="/schem a/beans /schem a/beans/spring-beans-2.5.xsd/schem a/context/schem a/context/spring-context-2.5.xsd /schem a/aop/schema/aop/spring-aop-2.5.xsd/schem a/tx/schema/tx/spring-tx-2.5.xsd"><context:annotation-config /><context:com ponent-scan base-package="com.bluesky"/><bean id="sessionFactory"class="org.springfram ework.orm.hibernate3.LocalSessionFactoryBean"> <property name="configLocation" value="classpath:hibernate.cfg.xml"/> <property name="configurationClass"value="org.hibernate.cfg.AnnotationConfiguration"/></bean><!-- 定义事务管理器(声明式的事务)--><bean id="t ransactionManager"class="org.springframework.orm.hibernate3.HibernateTransactionManager" ><property name="sessionFactory" ref="sessionFactory"/> </bean><tx:advice id="txAdvice" transaction-m anager="transactionManager"> <t x:attributes><tx:method nam e="*" propagation="REQUIRED"/></t x:attributes></tx:advice><aop:config><aop:pointcut id="interceptorPointCuts"expression="execution(* com.bluesky.spring.dao.*.*(..))"/> <aop:advisor advice-ref="t xAdvice"pointcut-ref="interceptorPointCuts"/></aop:config></beans>第五种方式:全注解<?xml version="1.0" encoding="UTF-8"?><beans xmlns="/schem a/beans"xm lns:xsi="/2001/XMLSchem a-instance"xm lns:context="/schem a/context"xm lns:aop="/schem a/aop"xm lns:tx="/schema/tx"xsi:schem aLocation="/schem a/beans /schem a/beans/spring-beans-2.5.xsd/schem a/context/schem a/context/spring-context-2.5.xsd /schem a/aop/schema/aop/spring-aop-2.5.xsd/schem a/tx/schema/tx/spring-tx-2.5.xsd"><context:annotation-config /><context:com ponent-scan base-package="com.bluesky"/><tx:annotation-driven transaction-m anager="transactionManager"/><bean id="sessionFactory"class="org.springfram ework.orm.hibernate3.LocalSessionFactoryBean"> <property name="configLocation" value="classpath:hibernate.cfg.xml"/> <property name="configurationClass"value="org.hibernate.cfg.AnnotationConfiguration"/></bean><!-- 定义事务管理器(声明式的事务)--><bean id="t ransactionManager"class="org.springframework.orm.hibernate3.HibernateTransactionManager" ><property name="sessionFactory" ref="sessionFactory"/> </bean></beans>此时在DAO上需加上@Transactional注解,如下:package com.bluesky.spring.dao;import java.util.List;import org.hibernate.SessionFactory;import org.springframework.beans.factory.annotation.Autowired;import org.springframework.orm.hibernate3.support.HibernateDaoSupport; import ponent;import er;@Transactional@Component("userDao")public class UserDaoImpl extends HibernateDaoSupport implements UserDao {public List<User> listUsers() {return this.getSession().createQuery("from User").list();}}。
springMVC详解以及注解说明

springMVC详解以及注解说明基于注释(Annotation)的配置有越来越流行的趋势,Spring 2.5 顺应这种趋势,提供了完全基于注释配置Bean、装配Bean 的功能,您可以使用基于注释的Spring IoC 替换原来基于XML 的配置。
本文通过实例详细讲述了Spring 2.5 基于注释IoC 功能的使用。
概述注释配置相对于XML 配置具有很多的优势:∙ 它可以充分利用Java 的反射机制获取类结构信息,这些信息可以有效减少配置的工作。
如使用JPA 注释配置ORM 映射时,我们就不需要指定PO 的属性名、类型等信息,如果关系表字段和PO 属性名、类型都一致,您甚至无需编写任务属性映射信息——因为这些信息都可以通过Java 反射机制获取。
∙ 注释和Java 代码位于一个文件中,而XML 配置采用独立的配置文件,大多数配置信息在程序开发完成后都不会调整,如果配置信息和Java 代码放在一起,有助于增强程序的内聚性。
而采用独立的XML 配置文件,程序员在编写一个功能时,往往需要在程序文件和配置文件中不停切换,这种思维上的不连贯会降低开发效率。
因此在很多情况下,注释配置比XML 配置更受欢迎,注释配置有进一步流行的趋势。
Spring 2.5 的一大增强就是引入了很多注释类,现在您已经可以使用注释配置完成大部分XML 配置的功能。
在这篇文章里,我们将向您讲述使用注释进行Bean 定义和依赖注入的内容。
Spring2.5的注释Spring 2.5 提供了AutowiredAnnotationBeanPostProcessor、CommonAnnotationBeanPostProcessor、PersistenceAnnotationBeanPostProcessor 和RequiredAnnotationBeanPostProcessor这四个主要的关于Annotation 的BeanPostProcessor。
Struts2+spring注解配置简介PPT课件

是否必需
value Result[]
是
默认值 描述 无 为action定义一组result映射
示例: @Results({
@Result(name=“input”,value=“/input.jsp”), @Result(name=“success” value=“/success.jsp”) })
NameSpace注解的参数如下表:
参数 value
类型 String
是否必需 默认值
描述
是
无 指定action所属的名称空间
如: @Namespace(value=“/”) 或@NameSpace(“/list”)
Struts2中使用注解配置Action
@Nampspace及@Namespaces
2. 本地的(local)
ame = "error", location = "",type="redirect")}) public String method1() {return "error";}
}
Struts2中使用注解配置Action
与注解有关的参数
Results注解的参数如表所示:
参数 类型
s@truPtasr2e-nctoPnavceknatigoen-plu指gi定n-2继.1承.6的.ja包r, (从strustsru2)t名s2.1 版本开始,包C,o类nvention
P@luNgaimn e作sp为a替ce换替换 指Co定daecbteiohni所nd属P的lu名gin称来空实间现 Struts2包的,零类配置.同时导
NameSpace注解的参数如下表:
参数
Springboot配置文件与配置类的属性映射方式
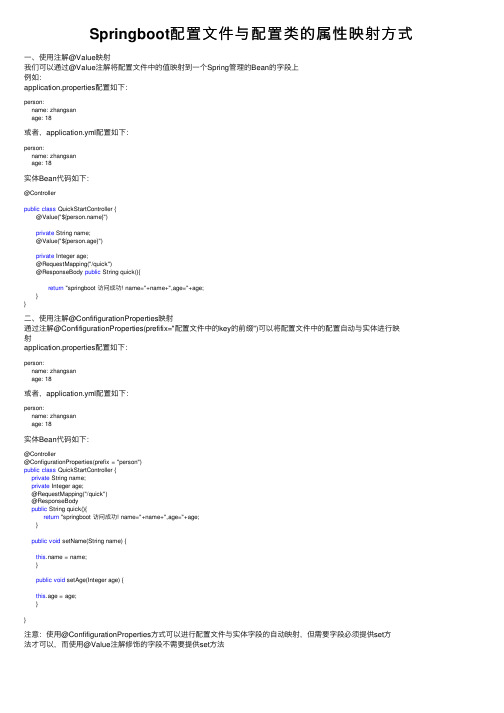
Springboot配置⽂件与配置类的属性映射⽅式⼀、使⽤注解@Value映射我们可以通过@Value注解将配置⽂件中的值映射到⼀个Spring管理的Bean的字段上例如:application.properties配置如下:person:name: zhangsanage: 18或者,application.yml配置如下:person:name: zhangsanage: 18实体Bean代码如下:@Controllerpublic class QuickStartController { @Value("${}") private String name; @Value("${person.age}") private Integer age; @RequestMapping("/quick") @ResponseBody public String quick(){ return "springboot 访问成功! name="+name+",age="+age; }}⼆、使⽤注解@ConfifigurationProperties映射通过注解@ConfifigurationProperties(prefifix="配置⽂件中的key的前缀")可以将配置⽂件中的配置⾃动与实体进⾏映射application.properties配置如下:person:name: zhangsanage: 18或者,application.yml配置如下:person:name: zhangsanage: 18实体Bean代码如下:@Controller@ConfigurationProperties(prefix = "person")public class QuickStartController {private String name;private Integer age;@RequestMapping("/quick")@ResponseBodypublic String quick(){ return "springboot 访问成功! name="+name+",age="+age; }public void setName(String name) { = name; } public void setAge(Integer age) { this.age = age; }}注意:使⽤@ConfifigurationProperties⽅式可以进⾏配置⽂件与实体字段的⾃动映射,但需要字段必须提供set⽅法才可以,⽽使⽤@Value注解修饰的字段不需要提供set⽅法。
spring自定义参数配置
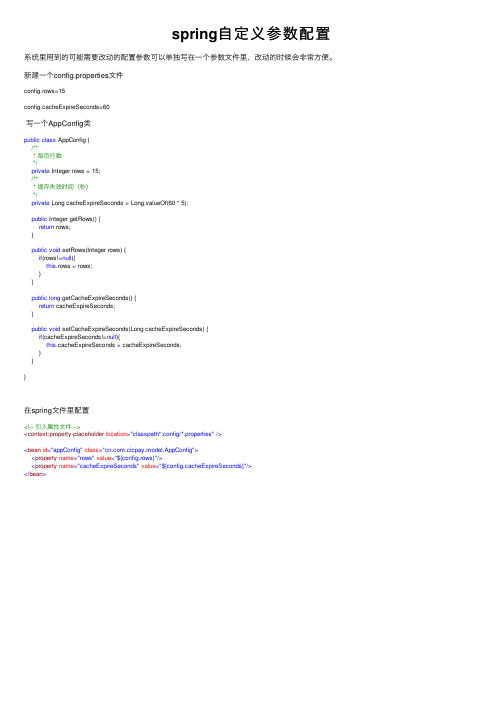
public void setCacheExpireSeconds(Long cacheExpireSeconds) { if(cacheExpireSeconds!=null){ this.cacheExpireSeconds = cacheExpireSeconds; }
}
}
在spring文件里配置
系统里用到的可能需要改动的配置参数可以单独写在一个参数文件里改动的时候会非常方便
spring自 定 义 参 数 配 置
系统里用到的可能需要改动的配置参数可以单独写在一个参数文件里,改动的时候会非常方便。
新建一个config.properties文件
config.rows=15
config.cacheExpireSeconds=60
写一个AppConfig类
public class AppConfig { /** * 每页行数 */ private Integer rows = 15; /** * 缓存失效时间(秒) */ private Long cacheExpireSeconds = Long.valueOf(60 * 5);
<!-- 引入属性文件 --> <context:property-placeholder location="classpath*:config/*.properties" />
<bean id="appConfig" class=".cicpay.model.AppConfig"> <property name="rows" value="${config.rows}"/> <property name="cacheExpireSeconds" value="${config.cacheExpireSeconds}"/>
spring注解注入properties配置文件

spring注解注⼊properties配置⽂件早期,如果需要通过spring读取properties⽂件中的配置信息,都需要在XML⽂件中配置⽂件读取⽅式。
基于XML的读取⽅式:1<bean class="org.springframework.beans.factory.config.PropertyPlaceholderConfigurer">2<property name="locations">3<list>4<value>classpath:properties/thread-pool.properties</value>5</list>6</property>7</bean>当然,这种⽅式可以统⼀管理properties配置⽂件,也能实现代码的松耦合。
但为了⽅便开发,提⾼开发效率,spring官⽅后来提供了基于注解的配置读取⽅式。
两种⽅式各有优势,可以基于对项⽬的考虑选择最合适的⽅式。
接下来就介绍如何通过注解注⼊properties的配置信息。
⾸先,准备配置⽂件:1 core.pool.size=22 max.pool.size=33 keep.alive.time=14 task.queue.size=35 await.termination.time=5定义配置类:1package org.cellphone.config;23import com.google.gson.Gson;4import org.springframework.beans.factory.annotation.Value;5import org.springframework.context.annotation.Bean;6import org.springframework.context.annotation.PropertySource;7import org.springframework.context.support.PropertySourcesPlaceholderConfigurer;8import ponent;910/**11 *12*/13 @Component14 @PropertySource("classpath:properties/thread-pool.properties")15public class ThreadPoolConfig {16/**17 * 核⼼线程个数18*/19 @Value("${core.pool.size}")20private int corePoolSize;21/**22 * 最⼤线程个数23*/24 @Value("${max.pool.size}")25private int maxPoolSize;26/**27 * 保持⼼跳时间28*/29 @Value("${keep.alive.time}")30private int keeAliveTime;31/**32 * 任务队列长度33*/34 @Value("${task.queue.size}")35private int taskQueueSize;36/**37 * 等待任务结束的时间38*/39 @Value("${await.termination.time}")40private int awaitTerminationTime;4142/**43 * 使⽤@value注解注⼊properties中的属性44 * 1. 在类名上⾯使⽤ @PropertySource("classpath:*") 注解,*代表属性⽂件路径,可以指向多个配置⽂件路径45 * 如果是多个配置⽂件,则是 @PropertySource({"classpath:*","classpath:*"....})46 * 2. 在字段上直接使⽤@value注解47 * 3. 注解内使⽤${core.pool.size} core.pool.size 代表属性⽂件⾥⾯的key48 * 5. 需要新增 PropertySourcesPlaceholderConfigurer 的 bean49 * 6. 在 PropertySourcesPlaceholderConfigurer 增加@bean注解,申明返回的是⼀个bean,否则会注⼊失败50 *51*/525355 @Bean56public static PropertySourcesPlaceholderConfigurer propertySourcesPlaceholderConfigurer() {57return new PropertySourcesPlaceholderConfigurer();58 }5960public int getCorePoolSize() {61return corePoolSize;62 }6364public void setCorePoolSize(int corePoolSize) {65this.corePoolSize = corePoolSize;66 }6768public int getMaxPoolSize() {69return maxPoolSize;70 }7172public void setMaxPoolSize(int maxPoolSize) {73this.maxPoolSize = maxPoolSize;74 }7576public int getKeeAliveTime() {77return keeAliveTime;78 }7980public void setKeeAliveTime(int keeAliveTime) {81this.keeAliveTime = keeAliveTime;82 }8384public int getTaskQueueSize() {85return taskQueueSize;86 }8788public void setTaskQueueSize(int taskQueueSize) {89this.taskQueueSize = taskQueueSize;90 }9192public int getAwaitTerminationTime() {93return awaitTerminationTime;94 }9596public void setAwaitTerminationTime(int awaitTerminationTime) {97this.awaitTerminationTime = awaitTerminationTime;98 }99100 @Override101public String toString() {102return new Gson().toJson(this);103 }104 }这⾥注⼊了⼀个 PropertySourcesPlaceholderConfigurer bean,spring是通过 PropertySourcesPlaceholderConfigurer 的 locations 来查找属性⽂件,然后再根据注解将匹配的属性set进去,下⾯通过源码来了解注解可以进⾏⼀些什么操作。
spring配置文件详解
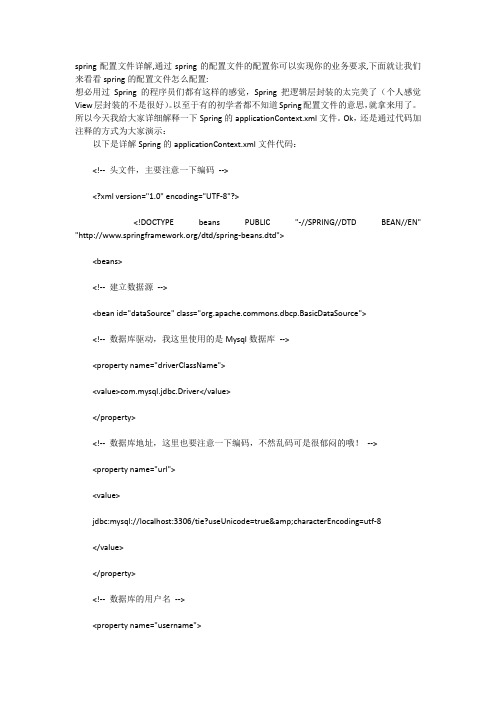
spring配置文件详解,通过spring的配置文件的配置你可以实现你的业务要求,下面就让我们来看看spring的配置文件怎么配置:想必用过Spring的程序员们都有这样的感觉,Spring把逻辑层封装的太完美了(个人感觉View层封装的不是很好)。
以至于有的初学者都不知道Spring配置文件的意思,就拿来用了。
所以今天我给大家详细解释一下Spring的applicationContext.xml文件。
Ok,还是通过代码加注释的方式为大家演示:以下是详解Spring的applicationContext.xml文件代码:<!-- 头文件,主要注意一下编码--><?xml version="1.0" encoding="UTF-8"?><!DOCTYPE beans PUBLIC "-//SPRING//DTD BEAN//EN" "/dtd/spring-beans.dtd"><beans><!-- 建立数据源--><bean id="dataSource" class="mons.dbcp.BasicDataSource"><!-- 数据库驱动,我这里使用的是Mysql数据库--><property name="driverClassName"><value>com.mysql.jdbc.Driver</value></property><!-- 数据库地址,这里也要注意一下编码,不然乱码可是很郁闷的哦!--><property name="url"><value>jdbc:mysql://localhost:3306/tie?useUnicode=true&characterEncoding=utf-8</value></property><!-- 数据库的用户名--><property name="username"><value>root</value></property><!-- 数据库的密码--><property name="password"><value>123</value></property></bean><!-- 把数据源注入给Session工厂--><bean id="sessionFactory"class="org.springframework.orm.hibernate3.LocalSessionFactoryBean"><property name="dataSource"><ref bean="dataSource" /></property><!-- 配置映射文件--><property name="mappingResources"><list><value>com/alonely/vo/User.hbm.xml</value></list></property></bean><!-- 把Session工厂注入给hibernateTemplate --><!-- 解释一下hibernateTemplate:hibernateTemplate提供了很多方便的方法,在执行时自动建立HibernateCallback 对象,例如:load()、get()、save、delete()等方法。
Spring配置解析之Properties

Spring配置解析之Properties 1.简单⽰例:SpringBoot中的的配置简单属性类⽀持ConfigurationProperties⽅式,看⼀个简单的⽰例。
1 @ConfigurationProperties(prefix = "org.dragonfei.demo")2public class DemoProperties {3private String name;4private String password;5private String test;67public String getName() {8return name;9 }1011public void setName(String name) { = name;13 }1415public String getPassword() {16return password;17 }1819public void setPassword(String password) {20this.password = password;21 }2223public String getTest() {24return test;25 }2627public void setTest(String test) {28this.test = test;29 }3031 @Override32public String toString() {33return "DemoProperties{" +34 "name='" + name + '\'' +35 ", password='" + password + '\'' +36 ", test='" + test + '\'' +37 '}';38 }39 }定义Properties类1 =dragonfei2 org.dragonfei.demo.password=password3 org.dragonfei.demo.test=test添加配置1 @Configuration2 @EnableConfigurationProperties({DemoProperties.class})3public class DemoConfiguration {4 }注⼊Properties1 @RunWith(SpringJUnit4ClassRunner.class)2 @SpringApplicationConfiguration(classes = DemoConfiguration.class)3 @EnableAutoConfiguration4public class DemoPropertiesTest {56 @Autowired7private DemoProperties properties;8 @Test9public void testProperties(){10 System.out.println(properties.toString());11 }12 }简单单元测试1 DemoProperties{name='dragonfei', password='password', test='test'}运⾏单元测试结果DemoProperties神奇的注⼊到Spring容器中了。
Springboot--配置文件注解

Springboot--配置⽂件注解使⽤注解11.resouse中新建application.propritiesername=rootjdbc.password=123jdbc.driverClassName=fuckjdbc.url=111111112编写配置类@ConfigurationProperties(prefix = "jdbc")@Datapublic class JdbcProperties {private String url;private String driverClassName;private String username;private String password;// ... 略// getters 和 setters}@ConfigurationProperties表⽰启⽤注解@Data可以省去getter及setter等⽅法3使⽤注解⽅式1第⼀种⽅式@Configuration@EnableConfigurationProperties(JdbcProperties.class)public class JdbcConfig {@Beanpublic DataSource dataSource(JdbcProperties jdbc) {DruidDataSource dataSource = new DruidDataSource();dataSource.setUrl(jdbc.getUrl());dataSource.setDriverClassName(jdbc.getDriverClassName());dataSource.setUsername(jdbc.getUsername());dataSource.setPassword(jdbc.getPassword());return dataSource;}}@Configuration启动容器+@Bean注册Bean,@Bean下管理bean的⽣命周期@EnableConfigurationProperties(JdbcProperties.class)表⽰启⽤注解,直接JdbcProperties jdbc就可以使⽤。
Spring配置文件详解(一)
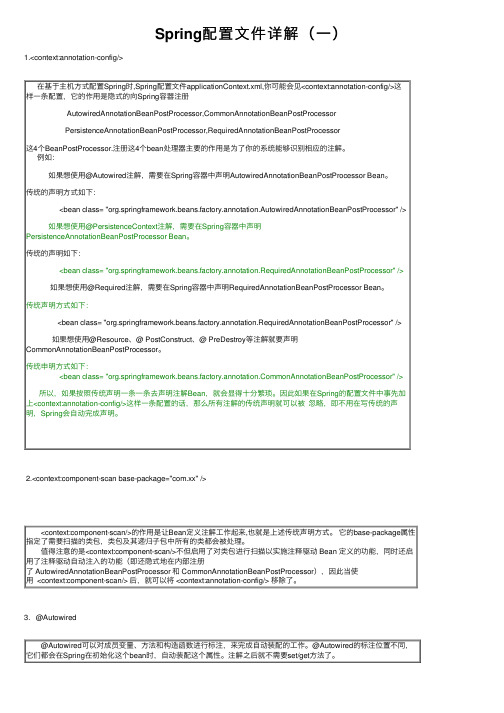
Spring配置⽂件详解(⼀)1.<context:annotation-config/>在基于主机⽅式配置Spring时,Spring配置⽂件applicationContext.xml,你可能会见<context:annotation-config/>这样⼀条配置,它的作⽤是隐式的向Spring容器注册AutowiredAnnotationBeanPostProcessor,CommonAnnotationBeanPostProcessorPersistenceAnnotationBeanPostProcessor,RequiredAnnotationBeanPostProcessor这4个BeanPostProcessor.注册这4个bean处理器主要的作⽤是为了你的系统能够识别相应的注解。
例如:如果想使⽤@Autowired注解,需要在Spring容器中声明AutowiredAnnotationBeanPostProcessor Bean。
传统的声明⽅式如下:<bean class= "org.springframework.beans.factory.annotation.AutowiredAnnotationBeanPostProcessor" />如果想使⽤@PersistenceContext注解,需要在Spring容器中声明PersistenceAnnotationBeanPostProcessor Bean。
传统的声明如下:<bean class= "org.springframework.beans.factory.annotation.RequiredAnnotationBeanPostProcessor" />如果想使⽤@Required注解,需要在Spring容器中声明RequiredAnnotationBeanPostProcessor Bean。
Spring注解@Value及属性加载配置文件方式

Spring注解@Value及属性加载配置⽂件⽅式Spring中使⽤@Value注解给bean加载属性的配置⽂件有两种使⽤⽅式第⼀种:使⽤@Value("#{configProperties['websit.msgname']}")spring中配置属性加载⽂件的配置⽅式<bean id="configProperties" class="org.springframework.beans.factory.config.PropertiesFactoryBean"><property name="locations"><list><value>classpath:/properties/websit.properties</value></list></property></bean>注意1.这⾥使⽤的configProperties必须要和定义的bean名称⼀致。
2.websit⽤来指定msgname来源于那个配置⽂件3.配置的加载属性bean名称为org.springframework.beans.factory.config.PropertiesFactoryBean第⼆种:使⽤@Value("${websit.msgname}");使⽤这种⽅式,⼜可以有两种配置⽅式⽅式⼀<bean id="propertyConfigurer" class="org.springframework.beans.factory.config.PreferencesPlaceholderConfigurer"><property name="properties" ref="configProperties"/></bean><bean id="configProperties" class="org.springframework.beans.factory.config.PropertiesFactoryBean"><property name="locations"><list><value>classpath:/properties/websit.properties</value></list></property></bean>⽅式⼆<bean id="propertyConfigurer" class="org.springframework.beans.factory.config.PropertyPlaceholderConfigurer"><property name="locations"><list><value>classpath:properties/websit.properties</value></list></property></bean>当使⽤@Value注解bean属性时,如果没有在配置⽂件中配置,这时启动spring就会抛出异常。
Spring@Configuration注解及配置方法

Spring@Configuration注解及配置⽅法Spring @Configuration注解Spring3.0开始,@Configuration⽤于定义配置类,定义的配置类可以替换xml⽂件,⼀般和@Bean注解联合使⽤。
@Configuration注解主要标注在某个类上,相当于xml配置⽂件中的<beans>@Bean注解主要标注在某个⽅法上,相当于xml配置⽂件中的<bean>等价于注意:@Configuration注解的配置类有如下要求:@Configuration不可以是final类型;@Configuration不可以是匿名类;嵌套的configuration必须是静态类。
Configuration⾥⾯有⼀个component组件来标识,说明此类也是⼀个bean,可以被调⽤,来看看哪些主要的注解含有component:Annotation 的装配 Spring 中,尽管使⽤ XML 配置⽂件可以实现 Bean 的装配⼯作,但如果应⽤中有很多 Bean 时,会导致 XML 配置⽂件过于靡肿,给后续的维护和升级⼯作带来⼀定的困难为此, Spring 提供了对 Annotation (注解)技术的全⾯⽀持 Spring 中定义了⼀系列的注解,常⽤的注解如下所⽰• @Component: 可以使⽤此注解描述 Spring 中的 Bean ,但它是⼀个泛化的概念,仅仅表⽰⼀个组件 (Bean ,并且可以作⽤在任何层次使⽤时只需将该注解标注在相应类上即可• @Repository: ⽤于将数据访问层( DAO 层)的类标识为 Spring 中的 Bean ,其功能与 @Component 相同• @Service: 通常作⽤在业务层( Service ,⽤于将业务层的类标识为 Spring 中的 Bean 其功能与@Component 相同• @Controller: 通常作⽤在控制层(如 Spring MVC Controller ,⽤于将控制层的类标识 Spring 中的 Bean ,其功能与@Component 相同• @Autowired: ⽤于对 Bean 的属性变量、属性的 setter ⽅法及构造⽅法进⾏标注,配合对应的注解处理器完成 Bean 的⾃动配置⼯作默认按照 Bean 的类型进⾏装配• @Resource: 其作⽤与 Autowired ⼀样其区别在于@Autowired 默认按照 Bean 类型装配,⽽@Resource 默认按照 Bean 实例名称进⾏装配 @Resource 中有两个重要属性: name type Spring name 属性解析为 Bean 实例名称, type 属性解析为 Bean 实例类型如果指定 name 属性,贝IJ 按实例名称进⾏装配;如果指定 type 属性,则按 Bean 类型进⾏装配;如果都不指定,则先按 Bean 实例名称装配,如果不能匹配,再按照 Bean 类型进⾏装⾃⼰;如果都⽆法匹配,则抛出NoSuchBeanDefinitionException 异常• @Qualifier: @Autowired 注解配合使⽤,会将默认的按 Bean 类型装配修改为接 Bean 的实例名称装配, Bean 的实例名称由 @Qualifier 注解的参数指定在上⾯⼏个注解中,虽然@Repository @Service @Controller 功能与@Component 注解的功能相同,但为了使标注类本⾝⽤途更加清晰,建议在实际开发中使⽤@Repository @Service @Controller 分别对实现类进⾏标注下⾯。
Spring注解大全

Spring注解⼤全⼀、Spring bean注解1.1、@SpringBootApplication申明让spring boot⾃动给程序进⾏必要的配置,这个配置等同于:@Configuration ,@EnableAutoConfiguration 和 @ComponentScan 三个配置。
1.2、@Component泛指各种组件,就是说当我们的类不属于各种归类的时候(不属于@Controller、@Services等的时候),我们就可以使⽤@Component来标注这个类,把普通pojo实例化到spring容器中,相当于配置⽂件中的:<bean id="" class=""/>。
所以可以理解为@Component可以细化为@Reposity,@Service,@Controller。
@Component("conversionImpl")//其实默认的spring中的Bean id 为 conversionImpl(⾸字母⼩写)public class ConversionImpl implements Conversion {@Autowiredprivate RedisClient redisClient;}1.3、@ComponentScan@ComponentScan主要就是定义扫描的路径从中找出标识了需要装配的类⾃动装配到spring的bean容器中。
前⾯说到过@Controller注解,@Service,@Repository注解,它们其实都是组件,属于@Component注解,⽽@ComponentScan注解默认会装配标识了@Controller,@Service,@Repository,@Component注解的类到spring容器中。
//扫描com.demo下的组件@ComponentScan(value="com.demo")@Configurationpublic class myConfig {}1.4、@Service⼀般⽤于修饰service层的组件@Service()public class UserService{@Resourceprivate UserDao userDao;public void add(){userDao.add();}}1.5、@EnableAutoConfigurationSpringBoot⾃动配置(auto-configuration):尝试根据你添加的jar依赖⾃动配置你的Spring应⽤。
Spring@Bean注解配置及使用方法解析

Spring@Bean注解配置及使⽤⽅法解析使⽤说明这个注解主要⽤在⽅法上,声明当前⽅法体中包含了最终产⽣ bean 实例的逻辑,⽅法的返回值是⼀个 Bean。
这个 bean 会被 Spring 加⼊到容器中进⾏管理,默认情况下 bean 的命名就是使⽤了 bean 注解的⽅法名。
@Bean ⼀般和 @Component 或者 @Configuration ⼀起使⽤。
@Bean 显式声明了类与 bean 之间的对应关系,并且允许⽤户按照实际需要创建和配置 bean 实例。
该注解相当于:<bean id="useService" class="erServiceImpl"/>普通组件import org.springframework.context.annotation.Bean;import org.springframework.context.annotation.Configuration;@Configurationpublic class MyConfigration {@Beanpublic User user() {return new User;}}import org.springframework.beans.factory.annotation.Autowired;import org.springframework.web.bind.annotation.GetMapping;import org.springframework.web.bind.annotation.RestController;@RestControllerpublic class UserController {@AutowiredUser user;@GetMapping("/test")public User test() {return user.test();}}命名组件bean 的命名为:user,别名为:myUser,两个均可使⽤import org.springframework.context.annotation.Bean;import org.springframework.context.annotation.Configuration;@Configurationpublic class MyConfigration {@Bean(name = "myUser")public User user() {return new User;}}bean 的命名为:user,别名为:myUser / yourUser,三个均可使⽤import org.springframework.context.annotation.Bean;import org.springframework.context.annotation.Configuration;@Configurationpublic class MyConfigration {@Bean(name = {"myUser", "yourUser"})public User user() {return new User;}}Bean 初始化和销毁public class MyBean {public void init() {System.out.println("MyBean初始化...");}public void destroy() {System.out.println("MyBean销毁...");}public String get() {return "MyBean使⽤...";}}@Bean(initMethod="init", destroyMethod="destroy")public MyBean myBean() {return new MyBean();}只能⽤ @Bean 不能使⽤ @Component@Beanpublic OneService getService(status) {case (status) {when 1:return new serviceImpl1();when 2:return new serviceImpl2();when 3:return new serviceImpl3();}}以上就是本⽂的全部内容,希望对⼤家的学习有所帮助,也希望⼤家多多⽀持。
- 1、下载文档前请自行甄别文档内容的完整性,平台不提供额外的编辑、内容补充、找答案等附加服务。
- 2、"仅部分预览"的文档,不可在线预览部分如存在完整性等问题,可反馈申请退款(可完整预览的文档不适用该条件!)。
- 3、如文档侵犯您的权益,请联系客服反馈,我们会尽快为您处理(人工客服工作时间:9:00-18:30)。
<tx:method name="*User" isolation="READ_COMMITTED" propagation="REQUIRED" read-only="true" rollback-for="ng.Exception"/>
<tx:method name="queryUserByID" propagation="SUPPORTS"/>
<property name="initialSize" value="${initSize}"></property>
<property name="maxWait" value="${maxWait}"></property>
</bean>
<!-- 声明工厂Bean -->
<!-- DAO映射文件:mapper -->
<property name="mapperLocations">
<list>
<value></value> <!--在value标签中填写的是要实现的daoImpl的路径 如:classpath:com/spring/dao/*.xml-->
</bean>
<!-- 定制dao 扫描所有的DAO接口,并为其定制实现类,并将实现类纳入工厂中
:DAO实现类在工厂中的id即为对应接口类名的首字母小写:userDAO -->
<bean class="org.mybatis.spring.mapper.MapperScannerConfigurer">
<property name="driverClassName" value="${driverClass}"></property>
<property name="url" value="${url}"></property>
<property name="username" value="${username60}"></property>
</bean>
gt;
<bean id="tx" class="org.springframework.jdbc.datasource.DataSourceTransactionManager">
<property name="dataSource" ref="ds"></property>
<!-- 通过这个类中的属性 dataSource 为其赋值一个DataSource 类型的变量 (要与工厂Bean中使用的DataSource一致) -->
</bean>
<!-- 紧接上面的引头 为添加额外功能的serviceImpl 添加事务 -->
<tx:advice id="txManager" transaction-manager="tx">
<!-- 需要DAO接口文件所在的包路径 -->
<property name="basePackage" value="com.spring.dao"></property>
</bean>
<!-- service id随便写 class如:erServiceImpl-->
<bean id="userAction60" class="erAction" scope="prototype">
<property name="us" ref="uService"></property><!--name为action中的成员变量名 ref对应的是上面的service 的bean id -->
<bean id="" class="">
<property name="udao" ref="userDAO"></property><!--name是serviceImpl中的成员变量名,ref是上面DAO的id 如:userDAO-->
</bean>
<!-- action的声明 scope属性是设置其为单例 -->
/schema/context
/schema/context/spring-context-3.2.xsd">
xmlns:tx="/schema/tx"
xmlns:xsi="/2001/XMLSchema-instance"
xsi:schemaLocation="/schema/beans
/schema/beans/spring-beans-3.2.xsd
/schema/aop
<beans xmlns="/schema/beans"
xmlns:aop="/schema/aop"
xmlns:context="/schema/context"
</list>
</property>
<!-- 实体类别名:可选 value的值为实体的全类名
如此,则,在DAO的映射文件中,需要User的位置只需定义类名即可,包名可以省略 -->
<property name="typeAliasesPackage" value=""></property>
/schema/aop/spring-aop-3.2.xsd
/schema/tx
/schema/tx/spring-tx-3.2.xsd
<!-- 根据工厂bean中生产的SqlSessionFactory 的bean id 自动匹配 sqlsessionfactory -->
<property name="sqlSessionFactoryBeanName" value="sqlSessionFactory"></property>
<bean id="sqlSessionFactory" class="org.mybatis.spring.SqlSessionFactoryBean">
<!-- 连接参数:DataSource=连接池 -->
<property name="dataSource" ref="ds"></property>
<property name="password" value="${password}"></property>
<property name="maxActive" value="${maxSize}"></property>
<property name="minIdle" value="${minSize}"></property>
<!-- 引入外部配置参数 -->
<context:property-placeholder location="classpath:db.properties"/><!--classpath后面填写 properties的路径名称-->
<!-- druid -->
<bean id="ds" class="com.alibaba.druid.pool.DruidDataSource" destroy-method="close" init-method="init"><!--value中填写的是properties中的key-->
</aop:config>
</beans>
<tx:method name="*" propagation="REQUIRED"/>
</tx:attributes>
</tx:advice>
<!-- 编织 -->
<aop:config>
<aop:advisor advice-ref="txManager" pointcut="execution(* erServiceImpl.*(..))"/>
