GB24064ASGBANUA-V02中文资料
各国安规认证大全(带图标)讲解
现在世界各国各种安规标准大约有几十种,但是都大同小异。
我们在日常工作中经常使用的有:IEC——CB、EN——CE(GS)、UL、GB——3C。
所有这些标准,如果从他们的相似性。
大约可以分为2大类:1、由IEC标准延伸出来的EN、GB等。
2、有UL延伸出来的标准。
IEC标准/EN标准:IEC/EN 60335-1 (家用和类似用途电器的通用标准)IEC 60335-2-15(液体加热器标准)IEC 60335-2-13(油炸锅、电煎锅标准)IEC 60335-2-3 (电熨斗标准)IEC 60335-2-85 (蒸汽熨衣器标准)UL标准:UL 1026 (家用电烹饪及食物加工器具)UL1083 (家用电长柄平底锅和煎炸型器具)UL 1082 (家用电咖啡壶及酿造类器具)UL 1005 (家用电熨斗器具)GB标准:GB 4706.1 (家用和类似用途电器的通用标准)GB 4706.2(电熨斗标准)GB 4706.19 (液体加热器标准)GB 4706.56 (油炸锅、电煎锅标准现在世界各国的认证可以分为以下几种:1、CB体系:CB体系是“Certification Bodies‘Scheme”(认证机构体系)的缩写,CB体系是电工产品安全测试报告互认的第一个真正的国际体系。
各个国家的国家认证机构(NCB)之间形成多边协议,制造商可以凭借一个NCB颁发的CB测试证书获得CB体系的其他成员国的国家认证。
CB体系的主要目标是促进国际贸易,其手段是通过推动国家标准与国际标准的统一协调以及产品认证机构的合作,而使制造商更接近于理想的“一次测试,多处适用”的目标。
目前,CB体系开展了十四大类的电工产品的测试,测试结果在43个成员国之间是相互认可的,同时,也被很多未参加CB体系的国家所承认。
IECEE-CB体系目前的成员国是:阿根廷、奥地利、澳大利亚、白俄罗斯、比利时、巴西、加拿大、中国、捷克、德国、丹麦、西班牙、芬兰、法国、英国、希腊、匈牙利、印度、爱尔兰、以色列、意大利、日本、韩国、墨西哥、荷兰、新西兰、挪威、波兰、葡萄牙、俄罗斯、罗马尼亚、新加坡、斯洛伐克、斯洛文尼亚、南非、土耳其、乌克兰、美国、南斯拉夫、瑞士、马来西亚、瑞典、泰国。
0.4kV复合外套避雷器技术规范书
唉¾≡就蜩MkY复合外套邮器技术规范书版本小仃。
21»2广东电网理清公司r2023年4厂目录1总则 (1)2工作范围 (2)2.1 范围和界限 (2)2.2 服务范围 (2)3应遵循的主要标准 (2)4使用霜 (3)4.1 正常使用条件 (3)4.2 特殊使用条件要求 (3)5技术要求 (4)5.1 基本参数 (4)5.2 设计与结构 (4)5.3 外绝缘和耐污要求 (5)5.4 性能要求 (5)5.5 铭牌 (5)6试验要求 (6)6.1 型式试验项目(提供型式试验报告) (6)6.2 出厂试验项目 (6)7产品对环境的影响 (6)8企业VI标识 (6)9技术文臊求 (6)9.1 一般要求 (6)9.2 投标方在投标阶段应提交资料及说明 (6)10监造、包装、运输、安装及质■保证 (7)11设备关键技术参数和性能要求响应表 (7)12主要元器件来源 (8)13投标方需说明的其他问题 (9)1总则1.1 本招标技术文件适用于广东电网有限责任公司电网建设工程项目采购的0.4kV芥合外套避雷器,它提出了该设备本体及附属材料的功能设计、结构、性能、安装和试验等方面的技术要求。
1.2 本物资招标技术文件提出的是最低限度的技术要求。
凡本招标技术文件中未规定,但在相关物资的行业标准、国家标准或IEC标准中有规定的规范条文,投标方应按相应标准的条文进行物资销售、设计、制造、试验和安装。
对国家有关安全、环保等强制性标准,必须满足其要求。
1.3 如果投标方没有以书面形式对本技术规范的条文提出差异,则意味着投标方提供的产品完全符合本技术规范的要求。
如有差异,不管是多么微小,必须逐项在技术差异表中列出。
1.4 本招标技术文件所使用的标准如遇与投标方所执行的标准不一致时,按较高标准执行。
1.5 招标技术文件经买、卖双方确认后作为订货合同的技术附件,与合同正文具有同等的法律效力。
1.6 木招标技术文件未尽事宜,由买、卖双方协商确定。
24kV户外柱上隔离开关技术规范
24kV户外柱上隔离开关技术规范24kV户外柱上隔离开关技术规范(试行)1 范围本技术规范规定了24kV户外柱上隔离开关的使用条件、主要技术参数、功能设计、结构、性能、安装和试验等方面的技术要求。
本技术规范适用于浙江省电力公司20kV系统所需的24kV户外柱上隔离开关。
本技术规范提出的是最低限度的技术要求,并未对一切技术细节作出规定,也未充分引述有关标准和规范的条文,设备生产厂家应提供符合本技术规范、国家标准、电力行业标准以及国际标准的优质产品。
本技术规范所使用的标准如遇与设备生产厂家所执行的标准不一致时,按较高标准执行。
20kV系统中性点接地方式分为二类,Ⅰ类:中性点经低电阻接地系统;Ⅱ类:中性点经消弧线圈接地或不接地系统。
2 规范性引用文件下列文件中的一些条款,通过本规范的引用而成为本规范的条款。
凡是注日期的引用文件,其随后所有的修改单(不包括勘误的内容)或修订版均不适用于本规范,然而,鼓励根据本规范达成协议的各方研究是否可使用这些文件的最新版本。
凡是不注日期的引用文件,其最新版本适用于本规范。
GB 311.1 高压输变电设备的绝缘配合GB 1408.1绝缘材料工频电气强度的试验方法GB 1985高压交流隔离开关和接地开关GB 3309高压开关设备常温下的机械试验GB 4208 外壳防护等级(IP代码)GB 7354 局部放电测量GB/T 156 标准电压GB/T 2900.1 电工名词术语基本术语GB/T 2900.20 电工名词术语高压开关术语GB/T 5273 变压器、高压电器和套管的接线端子GB/T 5582 高压电力设备外绝缘污秽等级GB/T 8287 标称电压高于1000V系统用户内和户外支柱绝缘子GB/T 11022 高压开关设备和控制设备标准的共用技术要求DL/T 486 交流高压隔离开关和接地开关订货技术条件DL/T 593 高压开关设备和控制设备标准的共用技术要求Q/GDW-11-125-2008 浙江电网电气设备交接试验规程Q/GDW-11-120-2007 输变电设备状态检修试验规程浙电生(2008)363号浙江电网污区分布图(2007版)执行规定3 术语和定义本标准采用GB/T 2900.20、GB/T 11022和DL/T 593等标准中有关术语和定义。
GB24064AHGAANUA-V02中文资料
JEWEL HILL ELECTRONIC CO.,LTDJEWEL HILL ELECTRONIC CO.,LTD.SPECIFICATIONS FORLCD MODULEModule No. GB24064AOffice Address: Rm. 518,5/F., 101 Shangbu Industrial District,HuaqiangNorthRoad, Shenzhen, ChinaTEL : (86)-755-83362489 83617492FAX: (86)-755-83286396 83365871E-mail: sales@jhlcd@Website: TABLE OF CONTENTSLCM NUMBER SYSTEM (2)1. GENERAL DESCRIPTION (3)2. FEATURES (3)3. MECHANICAL SPECIFICATION (3)4. MECHANICAL DIMENSION (4)5. MAXIMUM RATINGS (5)6. ELECTRICAL CHARACTERISTICS (5)7. MODULE FUNCTION DESCRIPTION (6)8. ELECTRO-OPTICAL CHARACTERISTICS (15)9. RELIABILITY (19)10. PRECAUTIONS FOR USING LCD MODULES (20)11. USING LCD MODULES (22)12. REVISION HISTORY (24)SAMPLE APPROVED REPORT (25)LCM Number SystemNUMBER OF CHAR. PER LINE F: FSTN; X: OTHER VERSION NUMBER: V00~V99IC TYPE:VIEWING DIRECTION:TEMPERATURE RANGE:BACKLIGHT TYPE:SERIAL NUMBER: A~ZGRAPHIC MODULEs: NUMBER OF COMMONs GRAPHIC MODULEs:NUMBER OF SEGMENTs COB & SMT LCMBACKLIGHT COLOR:CHARACTER MODULEs:CHARACTER MODULEs: NUMBER OF LINE G: REFLECTIVE,NONE BACKLIGHT A: TRANSFLECTIVE, EL BACKLIGHT B: TRANSMISSIVE, EL BACKLIGHT C: TRANSFLECTIVE, LED BACKLIGHT D: TRANSMISSIVE, LED BACKLIGHT E: TRANSFLECTIVE, CCFL BACKLIGHT F: TRANSMISSIVE, CCFL BACKLIGHT A: AMBER; B: BLUE; Y: YELLOW-GREEN R: RED; W: WHITE; O: THER COLOR N: NORMAL TEMPERATURE RANGE U: UPPER(12:00); D: DOWN(6:00)L: LEFT(9:00); R: RIGHT(3:00);A: BONDING IC, WITH CONTROLLER B: BONDING IC, WITHOUT CONTROLLER C: SMT IC, WITH CONTROLLER D: SMT IC, WITHOUT CONTROLLER O: OTHER TYPEW: BLACK-WHITE; O: OTHER G: GRAY; Y: YELLOW-GREEN; B: BLUE; LCD COLOR MODE:N: TN; H: HTN; S: STN LCD TYPE:S: SUPER WIDE TEMPERATURE RANGE W: WIDE TEMPERATURE RANGEM: MIDDLE TEMPERATURE RANGE1. GENERAL DESCRIPTIONThe GB24064A is a 240 x 64 Dots Graphics LCD module. It has a FSTN panel composed of 240 segments and 64 commons. The LCM can be easily accessed by micro-controller via parallel interface.2. FEATURESTransflective and positiveDisplay ModeFSTN moduleDisplay Format Graphic 240 x 64 dotsInput Data Parallel data input from MPUMultiplexing Ratio 1/64 DutyBiasBias 1/9Viewing Direction 6 O’clockBacklight LED3. MECHANICAL SPECIFICATIONItem Specifications Unit Dimensional outline 180.0x 65.0 x 13.8(max) mmResolution 240segs x 64coms dotsActive area 127.16(W) x 33.88(H) mmDots pitch 0.53 (W)×0.53(H) mmDots size 0.49(W)×0.49(H) mm4. MECHANICAL DIMENSION5. MAXIMUM RATINGSItem Symbol Min Max Unit NoteV DD - V ss -0.3 6.0 V Supply voltage V LCD -0.3 24.0 V Input Voltage V IN -0.3 V DD +0.3 VOperating temperature T OPR -10 +60 Storage temperature T STR -20 +70Humidity --- --- 90 %RH6. ELECTRICAL CHARACTERISTICSItem SymbolCondition Min. Typ. Max. UnitSupply Voltage Logic V DD------ 5.0 --- VH level V IH 0.8V DD --- V DDInput VoltageL levelV IL --- V SS --- 0.2V DDVCurrent Consumption(LCD DRIVER)I DD V DD =5.0V; V LCD =15.7V, T amb =25 ;--- --- 25.0 mALCD Driving Voltage V LCDBias=1/9V LCD =V DD -V 0--- 15.7 --- VCurrent Consumption (With LED BackLight)I LEDV DD =5.0V;V LED =4.2V,T amb =25 ;--- --- 500 mA7. MODULE FUNCTION DESCRIPTION7.1. PIN DESCRIPTIONPin No. Symbol Description1 FGGroundPower supply for Ground (0V)2 VSS3 VCCPower supply for positive (5V)4 VOLCD driver voltage regulation pin5 /WRWrite enable signal6 /RDRead enable signal7 /CEChip enable signal8 C/DData/command signed select, ”H”: Command; ”L”: Data9 NCNo signal10 RSTReset signal input pin11 DB012 DB113 DB214 DB38-bit bi-directional data bus15 DB416 DB517 DB618 DB719 FSFont selection; “H”: 6*8; “L”: 8*820 VEENegative voltage for LCD driving21 BL+Backlight power supply voltage for positive22 BL-Backlight power supply voltage for negative7.2 TIMING CHARACTERISTICS7.3 APPLICATION OF LCMCircuit Block Diagram/WR/RD/CEC/DFSRSTFGVDDVSSVEELED+LED-7.4 TABLE OF COMMAND7.5 RAM INTERFACE7.6 FLOWCHART OF COMMUNICATION WITH MPU8. ELECTRO-OPTICAL CHARACTERISTICSItem Symbol Condition Temp Min Typ. Max UnitsNote--- 16.0 ---25 15.2 15.7 16.2 LCD driving voltageV LCD = = 050 --- 15.4 --- V NOTE1Rise Time (Tr) --- --- -- Decay Time (Tf)0 --- ---- --- Rise Time (Tr) --- 225 340Decay Time (Tf) 25 --- 240 360Rise Time (Tr) --- --- -- Response TimeDecay Time (Tf)= = 0 50 --- --- --msec NOTE2Contrast Ratio Cr= = 0 255 10 --- --- NOTE4Viewing AngleRange( = 0°)(6”) = 90°(3”) =180°(12”) =270°(9”)(25 ) CR ≥245 35 25 35DegNOTE3z For panel only․Electro-Optical Characteristics Measuring Equipment(DMS501)SystemIllumination (D65)․Note 1. Definition of Driving Voltage( Vlcd) :․Note 3. Definition of Viewing Angle and :․Note 4. Definition of Contrast ratio( CR) :Brightness of Non-selected Segment (B2)Brightness of Selected Segment (B1)CR =V,maxCR,maxDriving VoltageB r i gh t n e s s (%)Brightness Curve forSelected Segment0%=90 =270Viewing Direction 6 O’clock DirectionNormal :9. RELIABILITY9.1. MTBFThe LCD module shall be designed to meet a minimum MTBF value of 50000 hours with normal. (25°C in the room without sunlight)9.2. TESTSNO. ITEM CONDITION CRITERION1 High Temperature Operating 50 120Hrs2 Low Temperature Operating 0 120Hrs3High Temperature/Humidity Non-Operating60 ,90%RH ,120 Hrs4 High TemperatureNon-Operating70 120Hrs5 Low TemperatureNon-Operating-20 120Hrs6 Temperature CyclingNon-Operating-10 (30Min )↔ 60 (30Min)10 CYCLESNo Defect OfOperational Function InRoom Temperature AreAllowable.IDD of LCM inPre-and post-test shouldfollow specificationNotes: Judgments should be mode after exposure in room temperature for two hours.10. PRECAUTIONS FOR USING LCD MODULES10.1. HANDLING PRECAUTIONS(1) The display panel is made of glass. Do not subject it to a mechanical shock or impact by droppingit.(2) If the display panel is damaged and the liquid crystal substance leaks out, be sure not to get any inyour mouth. If the substance contacts your skin or clothes, wash it off using soap and water.(3) Do not apply excessive force to the display surface or the adjoining areas since this may cause thecolor tone to vary.(4) The polarizer covering the display surface of the LCD module is soft and easily scratched. Handlethis polarizer carefully.(5) If the display surface becomes contaminated, breathe on the surface and gently wipe it with a softdry cloth. If it is heavily contaminated, moisten a cloth with one of the following solvents: - Isopropyl alcohol- Ethyl alcohol(6) Solvents other than those above mentioned may damage the polarizer.Especially, do not use the following:- Water- Ketone- Aromatic solvents(7) Extra care to minimize corrosion of the electrode. Water droplets, moisture condensation or acurrent flow in a high-humidity environment accelerates corrosion of the electrode.(8) Install the LCD Module by using the mounting holes. When mounting the LCD Module, makesure it is free of twisting, warping and distortion. In particular, do not forcibly pull or bend the I/Ocable or the backlight cable.(9) Do not attempt to disassemble or process the LCD Module.(10) NC terminal should be open. Do not connect anything.(11) If the logic circuit power is off, do not apply the input signals.(12) To prevent destruction of the elements by static electricity, be careful to maintain an optimumwork environment.- Be sure to ground the body when handling he LCD Module.- Tools required for assembling, such as soldering irons, must be properly grounded.-To reduce the amount of static electricity generated, do not conduct assembling and other workunder dry conditions.-The LCD Module is coated with a film to protect the display surface. Exercise care when peeling off this protective film since static electricity may be generated.10.2. STORAGE CONDITIONSWhen storing, avoid the LCD module to be exposed to direct sunlight of fluorescent lamps. For stability, to keep it away form high temperature and high humidity environment (The best condition is : 23±5°C, 45±20%RH). ESD protection is necessary for long-term storage also.10.3. OTHERSLiquid crystals solidify under low temperature (below the storage temperature range) leading to defective orientation or the generation of air bubbles (black or white). Air bubbles may also be generated if the module is subject to a low temperature.If the LCD Module have been operating for a long time showing the same display patterns the display patterns may remain on the screen as ghost images and a slight contrast irregularity may also appear.A normal operating status can be recovered by suspending use for some time. It should be noted that this phenomenon does not adversely affect performance reliability.To minimize the performance degradation of the LCD Module resulting from destruction caused by static electricity etc. exercise care to avoid holding the following sections when handling the modules.- Exposed area of the printed circuit board.- Terminal electrode sections.11. Using LCD modules11.1 LIQUID CRYSTAL DISPLAY MODULESLCD is composed of glass and polarizer. Pay attention to the following items when handling.(1) Please keep the temperature within specified range for use and storage. Polarization degradation,bubble generation or polarizer peel-off may occur with high temperature and high humidity.(2) Do not touch, push or rub the exposed polarizers with anything harder than a HB pencil lead (glass,tweezers, etc).(3) N-hexane is recommended for cleaning the adhesives used to attach front/rear polarizers andreflectors made of organic substances, which will be damaged by chemicals such as acetone, toluene, toluene, ethanol and isopropyl alcohol.(4) When the display surface becomes dusty, wipe gently with absorbent cotton or other soft materiallike chamois soaked in petroleum ether. Do not scrub hard to avoid damaging the display surface.(5) Wipe off saliva or water drops immediately, contact with water over a long period of time maycause deformation or color fading.(6) Avoid contacting oil and fats.(7) Condensation on the surface and contact with terminals due to cold will damage, stain orpolarizers. After products are tested at low temperature they must be warmed up in a container before coming is contacting with room temperature air.(8) Do not put or attach anything on the display area to avoid leaving marks on.(9) Do not touch the display with bare hands. This will stain the display area and degrade insulationbetween terminals (some cosmetics are determinate to the polarizers).(10)As glass is fragile, it tends to become or chipped during handling especially on the edges. Pleaseavoid dropping or jarring.11.2 INSTALLING LCD MODULEAttend to the following items when installing the LCM.(1) Cover the surface with a transparent protective plate to protect the polarizer and LC cell.(2) When assembling the LCM into other equipment, the spacer to the bit between the LCM and thefitting plate should have enough height to avoid causing stress to the module surface, refer to the individual specifications for measurements. The measurement tolerance should be ±0.1mm.11.3 ELECTRO-STATIC DISCHARGE CONTROLSince this module uses a CMOS LSI, the same careful attention should be paid for electrostatic discharge as for an ordinary CMOS IC.(1) Make certain that you are grounded when handing LCM.(2) Before removing LCM from its packing case or incorporating it into a set, be sure the module andyour body have the same electric potential.(3) When soldering the terminal of LCM, make certain the AC power source for the soldering irondoes not leak.(4) When using an electric screwdriver to attach LCM, the screwdriver should be of groundpotentiality to minimize as much as possible any transmission of electromagnetic waves produced sparks coming from the commutator of the motor.(5) As far as possible, make the electric potential of your work clothes and that of the workbenches tothe ground potential.(6) To reduce the generation of electro-static discharge, be careful that the air in the work is not toodried. A relative humidity of 50%-60% is recommended.11.4 PRECAUTIONS FOR OPERATION(1) Viewing angle varies with the change of liquid crystal driving voltage (Vo). Adjust Vo to showthe best contrast.(2) Driving the LCD in the voltage above the limit will shorten its lifetime.(3) Response time is greatly delayed at temperature below the operating temperature range. However,this does not mean the LCD will be out of the order. It will recover when it returns to the specified temperature range.(4) If the display area is pushed hard during operation, the display will become abnormal. However, itwill return to normal if it is turned off and then on.(5) Condensation on terminals can cause an electrochemical reaction disrupting the terminal circuit.Therefore, this product must be used and stored within the specified condition of 23±5°C, 45±20%RH.(6) When turning the power on, input each signal after the positive/negative voltage becomes stable.11.5 SAFETY(1) It is recommended to crush damaged or unnecessary LCDs into pieces and wash them off withsolvents such as acetone and ethanol, which should later be burned.(2) If any liquid leaks out of a damaged glass cell and comes in contact with the hands, wash offthoroughly with soap and water.13. REVISION HISTORYrecord Date Version Reviseversion 05-01-011.0 Original2.0 Change specification format 05-11-203.0 Change contact mode 06-08-03SAMPLE APPROVED REPORT。
无障碍洗浴机-最新国标
无障碍洗浴机1范围本文件规定了无障碍洗浴机技术要求、试验方法、检验规则、标志、包装、运输及贮存。
本文件适用于功能障碍者用无障碍洗浴机。
2规范性引用文件下列文件中的内容通过文中的规范性引用而构成本文件必不可少的条款。
其中,注日期的引用文件,仅该日期对应的版本适用于本文件;不注日期的引用文件,其最新版本(包括所有的修改单)适用于本文件。
GB/T191包装储运图示标志GB/T1804一般公差未注公差的线性和角度尺寸的公差GB/T2423.1电工电子产品环境试验第2部分:试验方法试验A:低温GB/T2423.2电工电子产品环境试验第2部分:试验方法试验B:高温GB/T2423.3环境试验第2部分:试验方法试验Cab:恒定湿热试验GB/T2423.5电工电子产品环境试验第二部分:试验方法试验Ea和导则:冲击GB/T2423.10电工电子产品环境试验第2部分:试验方法试验Fc:振动(正弦)GB/T2423.17电工电子产品环境试验第2部分:试验方法试验Ka:盐雾GB/T4208外壳防护等级(IP标志)GB4706.1家用和类似用途电器的安全通用要求GB4706.12家用和类似用途电器的安全储水式热水器的特殊要求GB4706.73家用和类似用途电器的安全涡流浴缸和涡流水疗器具的特殊要求GB/T9174一般货物运输包装通用技术条件GB/T14687工业脚轮和车轮GB/T15560流体输送用塑料管材液压瞬时爆破和耐压试验方法GB/T16886.5医疗器械生物学评价第5部分:体外细胞毒性试验GB/T17626.2电磁兼容试验和测量技术静电放电抗扰度试验GB/T17626.3电磁兼容试验和测量技术射频电磁场辐射抗扰度试验GB19606家用和类似用途电器噪声限值GB/T20289储水式电热水器GB/T20878不锈钢和耐热钢牌号及化学成分GB/T23447卫生洁具淋浴用花洒GB/T26185快热式热水器JC/T779玻璃纤维增强塑料浴缸3术语和定义下列术语和定义适用于本文件。
GB24064ASYBANLB-V02中文资料
JEWEL HILL ELECTRONIC CO.,LTDJEWEL HILL ELECTRONIC CO.,LTD.SPECIFICATIONS FORLCD MODULEModule No. GB24064AOffice Address: Rm. 518,5/F., 101 Shangbu Industrial District,HuaqiangNorthRoad, Shenzhen, ChinaTEL : (86)-755-83362489 83617492FAX: (86)-755-83286396 83365871E-mail: sales@jhlcd@Website: TABLE OF CONTENTSLCM NUMBER SYSTEM (2)1. GENERAL DESCRIPTION (3)2. FEATURES (3)3. MECHANICAL SPECIFICATION (3)4. MECHANICAL DIMENSION (4)5. MAXIMUM RATINGS (5)6. ELECTRICAL CHARACTERISTICS (5)7. MODULE FUNCTION DESCRIPTION (6)8. ELECTRO-OPTICAL CHARACTERISTICS (15)9. RELIABILITY (19)10. PRECAUTIONS FOR USING LCD MODULES (20)11. USING LCD MODULES (22)12. REVISION HISTORY (24)SAMPLE APPROVED REPORT (25)LCM Number SystemNUMBER OF CHAR. PER LINE F: FSTN; X: OTHER VERSION NUMBER: V00~V99IC TYPE:VIEWING DIRECTION:TEMPERATURE RANGE:BACKLIGHT TYPE:SERIAL NUMBER: A~ZGRAPHIC MODULEs: NUMBER OF COMMONs GRAPHIC MODULEs:NUMBER OF SEGMENTs COB & SMT LCMBACKLIGHT COLOR:CHARACTER MODULEs:CHARACTER MODULEs: NUMBER OF LINE G: REFLECTIVE,NONE BACKLIGHT A: TRANSFLECTIVE, EL BACKLIGHT B: TRANSMISSIVE, EL BACKLIGHT C: TRANSFLECTIVE, LED BACKLIGHT D: TRANSMISSIVE, LED BACKLIGHT E: TRANSFLECTIVE, CCFL BACKLIGHT F: TRANSMISSIVE, CCFL BACKLIGHT A: AMBER; B: BLUE; Y: YELLOW-GREEN R: RED; W: WHITE; O: THER COLOR N: NORMAL TEMPERATURE RANGE U: UPPER(12:00); D: DOWN(6:00)L: LEFT(9:00); R: RIGHT(3:00);A: BONDING IC, WITH CONTROLLER B: BONDING IC, WITHOUT CONTROLLER C: SMT IC, WITH CONTROLLER D: SMT IC, WITHOUT CONTROLLER O: OTHER TYPEW: BLACK-WHITE; O: OTHER G: GRAY; Y: YELLOW-GREEN; B: BLUE; LCD COLOR MODE:N: TN; H: HTN; S: STN LCD TYPE:S: SUPER WIDE TEMPERATURE RANGE W: WIDE TEMPERATURE RANGEM: MIDDLE TEMPERATURE RANGE1. GENERAL DESCRIPTIONThe GB24064A is a 240 x 64 Dots Graphics LCD module. It has a FSTN panel composed of 240 segments and 64 commons. The LCM can be easily accessed by micro-controller via parallel interface.2. FEATURESTransflective and positiveDisplay ModeFSTN moduleDisplay Format Graphic 240 x 64 dotsInput Data Parallel data input from MPUMultiplexing Ratio 1/64 DutyBiasBias 1/9Viewing Direction 6 O’clockBacklight LED3. MECHANICAL SPECIFICATIONItem Specifications Unit Dimensional outline 180.0x 65.0 x 13.8(max) mmResolution 240segs x 64coms dotsActive area 127.16(W) x 33.88(H) mmDots pitch 0.53 (W)×0.53(H) mmDots size 0.49(W)×0.49(H) mm4. MECHANICAL DIMENSION5. MAXIMUM RATINGSItem Symbol Min Max Unit NoteV DD - V ss -0.3 6.0 V Supply voltage V LCD -0.3 24.0 V Input Voltage V IN -0.3 V DD +0.3 VOperating temperature T OPR -10 +60 Storage temperature T STR -20 +70Humidity --- --- 90 %RH6. ELECTRICAL CHARACTERISTICSItem SymbolCondition Min. Typ. Max. UnitSupply Voltage Logic V DD------ 5.0 --- VH level V IH 0.8V DD --- V DDInput VoltageL levelV IL --- V SS --- 0.2V DDVCurrent Consumption(LCD DRIVER)I DD V DD =5.0V; V LCD =15.7V, T amb =25 ;--- --- 25.0 mALCD Driving Voltage V LCDBias=1/9V LCD =V DD -V 0--- 15.7 --- VCurrent Consumption (With LED BackLight)I LEDV DD =5.0V;V LED =4.2V,T amb =25 ;--- --- 500 mA7. MODULE FUNCTION DESCRIPTION7.1. PIN DESCRIPTIONPin No. Symbol Description1 FGGroundPower supply for Ground (0V)2 VSS3 VCCPower supply for positive (5V)4 VOLCD driver voltage regulation pin5 /WRWrite enable signal6 /RDRead enable signal7 /CEChip enable signal8 C/DData/command signed select, ”H”: Command; ”L”: Data9 NCNo signal10 RSTReset signal input pin11 DB012 DB113 DB214 DB38-bit bi-directional data bus15 DB416 DB517 DB618 DB719 FSFont selection; “H”: 6*8; “L”: 8*820 VEENegative voltage for LCD driving21 BL+Backlight power supply voltage for positive22 BL-Backlight power supply voltage for negative7.2 TIMING CHARACTERISTICS7.3 APPLICATION OF LCMCircuit Block Diagram/WR/RD/CEC/DFSRSTFGVDDVSSVEELED+LED-7.4 TABLE OF COMMAND7.5 RAM INTERFACE7.6 FLOWCHART OF COMMUNICATION WITH MPU8. ELECTRO-OPTICAL CHARACTERISTICSItem Symbol Condition Temp Min Typ. Max UnitsNote--- 16.0 ---25 15.2 15.7 16.2 LCD driving voltageV LCD = = 050 --- 15.4 --- V NOTE1Rise Time (Tr) --- --- -- Decay Time (Tf)0 --- ---- --- Rise Time (Tr) --- 225 340Decay Time (Tf) 25 --- 240 360Rise Time (Tr) --- --- -- Response TimeDecay Time (Tf)= = 0 50 --- --- --msec NOTE2Contrast Ratio Cr= = 0 255 10 --- --- NOTE4Viewing AngleRange( = 0°)(6”) = 90°(3”) =180°(12”) =270°(9”)(25 ) CR ≥245 35 25 35DegNOTE3z For panel only․Electro-Optical Characteristics Measuring Equipment(DMS501)SystemIllumination (D65)․Note 1. Definition of Driving Voltage( Vlcd) :․Note 3. Definition of Viewing Angle and :․Note 4. Definition of Contrast ratio( CR) :Brightness of Non-selected Segment (B2)Brightness of Selected Segment (B1)CR =V,maxCR,maxDriving VoltageB r i gh t n e s s (%)Brightness Curve forSelected Segment0%=90 =270Viewing Direction 6 O’clock DirectionNormal :9. RELIABILITY9.1. MTBFThe LCD module shall be designed to meet a minimum MTBF value of 50000 hours with normal. (25°C in the room without sunlight)9.2. TESTSNO. ITEM CONDITION CRITERION1 High Temperature Operating 50 120Hrs2 Low Temperature Operating 0 120Hrs3High Temperature/Humidity Non-Operating60 ,90%RH ,120 Hrs4 High TemperatureNon-Operating70 120Hrs5 Low TemperatureNon-Operating-20 120Hrs6 Temperature CyclingNon-Operating-10 (30Min )↔ 60 (30Min)10 CYCLESNo Defect OfOperational Function InRoom Temperature AreAllowable.IDD of LCM inPre-and post-test shouldfollow specificationNotes: Judgments should be mode after exposure in room temperature for two hours.10. PRECAUTIONS FOR USING LCD MODULES10.1. HANDLING PRECAUTIONS(1) The display panel is made of glass. Do not subject it to a mechanical shock or impact by droppingit.(2) If the display panel is damaged and the liquid crystal substance leaks out, be sure not to get any inyour mouth. If the substance contacts your skin or clothes, wash it off using soap and water.(3) Do not apply excessive force to the display surface or the adjoining areas since this may cause thecolor tone to vary.(4) The polarizer covering the display surface of the LCD module is soft and easily scratched. Handlethis polarizer carefully.(5) If the display surface becomes contaminated, breathe on the surface and gently wipe it with a softdry cloth. If it is heavily contaminated, moisten a cloth with one of the following solvents: - Isopropyl alcohol- Ethyl alcohol(6) Solvents other than those above mentioned may damage the polarizer.Especially, do not use the following:- Water- Ketone- Aromatic solvents(7) Extra care to minimize corrosion of the electrode. Water droplets, moisture condensation or acurrent flow in a high-humidity environment accelerates corrosion of the electrode.(8) Install the LCD Module by using the mounting holes. When mounting the LCD Module, makesure it is free of twisting, warping and distortion. In particular, do not forcibly pull or bend the I/Ocable or the backlight cable.(9) Do not attempt to disassemble or process the LCD Module.(10) NC terminal should be open. Do not connect anything.(11) If the logic circuit power is off, do not apply the input signals.(12) To prevent destruction of the elements by static electricity, be careful to maintain an optimumwork environment.- Be sure to ground the body when handling he LCD Module.- Tools required for assembling, such as soldering irons, must be properly grounded.-To reduce the amount of static electricity generated, do not conduct assembling and other workunder dry conditions.-The LCD Module is coated with a film to protect the display surface. Exercise care when peeling off this protective film since static electricity may be generated.10.2. STORAGE CONDITIONSWhen storing, avoid the LCD module to be exposed to direct sunlight of fluorescent lamps. For stability, to keep it away form high temperature and high humidity environment (The best condition is : 23±5°C, 45±20%RH). ESD protection is necessary for long-term storage also.10.3. OTHERSLiquid crystals solidify under low temperature (below the storage temperature range) leading to defective orientation or the generation of air bubbles (black or white). Air bubbles may also be generated if the module is subject to a low temperature.If the LCD Module have been operating for a long time showing the same display patterns the display patterns may remain on the screen as ghost images and a slight contrast irregularity may also appear.A normal operating status can be recovered by suspending use for some time. It should be noted that this phenomenon does not adversely affect performance reliability.To minimize the performance degradation of the LCD Module resulting from destruction caused by static electricity etc. exercise care to avoid holding the following sections when handling the modules.- Exposed area of the printed circuit board.- Terminal electrode sections.11. Using LCD modules11.1 LIQUID CRYSTAL DISPLAY MODULESLCD is composed of glass and polarizer. Pay attention to the following items when handling.(1) Please keep the temperature within specified range for use and storage. Polarization degradation,bubble generation or polarizer peel-off may occur with high temperature and high humidity.(2) Do not touch, push or rub the exposed polarizers with anything harder than a HB pencil lead (glass,tweezers, etc).(3) N-hexane is recommended for cleaning the adhesives used to attach front/rear polarizers andreflectors made of organic substances, which will be damaged by chemicals such as acetone, toluene, toluene, ethanol and isopropyl alcohol.(4) When the display surface becomes dusty, wipe gently with absorbent cotton or other soft materiallike chamois soaked in petroleum ether. Do not scrub hard to avoid damaging the display surface.(5) Wipe off saliva or water drops immediately, contact with water over a long period of time maycause deformation or color fading.(6) Avoid contacting oil and fats.(7) Condensation on the surface and contact with terminals due to cold will damage, stain orpolarizers. After products are tested at low temperature they must be warmed up in a container before coming is contacting with room temperature air.(8) Do not put or attach anything on the display area to avoid leaving marks on.(9) Do not touch the display with bare hands. This will stain the display area and degrade insulationbetween terminals (some cosmetics are determinate to the polarizers).(10)As glass is fragile, it tends to become or chipped during handling especially on the edges. Pleaseavoid dropping or jarring.11.2 INSTALLING LCD MODULEAttend to the following items when installing the LCM.(1) Cover the surface with a transparent protective plate to protect the polarizer and LC cell.(2) When assembling the LCM into other equipment, the spacer to the bit between the LCM and thefitting plate should have enough height to avoid causing stress to the module surface, refer to the individual specifications for measurements. The measurement tolerance should be ±0.1mm.11.3 ELECTRO-STATIC DISCHARGE CONTROLSince this module uses a CMOS LSI, the same careful attention should be paid for electrostatic discharge as for an ordinary CMOS IC.(1) Make certain that you are grounded when handing LCM.(2) Before removing LCM from its packing case or incorporating it into a set, be sure the module andyour body have the same electric potential.(3) When soldering the terminal of LCM, make certain the AC power source for the soldering irondoes not leak.(4) When using an electric screwdriver to attach LCM, the screwdriver should be of groundpotentiality to minimize as much as possible any transmission of electromagnetic waves produced sparks coming from the commutator of the motor.(5) As far as possible, make the electric potential of your work clothes and that of the workbenches tothe ground potential.(6) To reduce the generation of electro-static discharge, be careful that the air in the work is not toodried. A relative humidity of 50%-60% is recommended.11.4 PRECAUTIONS FOR OPERATION(1) Viewing angle varies with the change of liquid crystal driving voltage (Vo). Adjust Vo to showthe best contrast.(2) Driving the LCD in the voltage above the limit will shorten its lifetime.(3) Response time is greatly delayed at temperature below the operating temperature range. However,this does not mean the LCD will be out of the order. It will recover when it returns to the specified temperature range.(4) If the display area is pushed hard during operation, the display will become abnormal. However, itwill return to normal if it is turned off and then on.(5) Condensation on terminals can cause an electrochemical reaction disrupting the terminal circuit.Therefore, this product must be used and stored within the specified condition of 23±5°C, 45±20%RH.(6) When turning the power on, input each signal after the positive/negative voltage becomes stable.11.5 SAFETY(1) It is recommended to crush damaged or unnecessary LCDs into pieces and wash them off withsolvents such as acetone and ethanol, which should later be burned.(2) If any liquid leaks out of a damaged glass cell and comes in contact with the hands, wash offthoroughly with soap and water.13. REVISION HISTORYrecord Date Version Reviseversion 05-01-011.0 Original2.0 Change specification format 05-11-203.0 Change contact mode 06-08-03SAMPLE APPROVED REPORT。
电磁保护设备TeSys GV系列产品参数表说明书
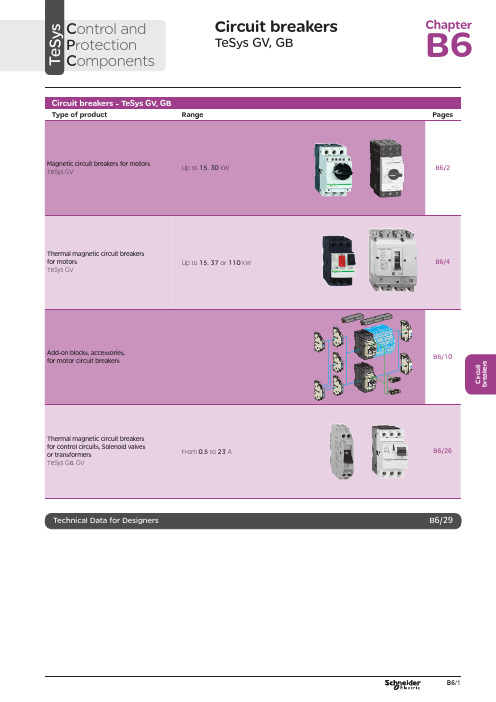
C i r c u i t b r e a k e r sCircuit breakersTeSys GV, GBC ontrol and P rotection C omponentsChapterB60.75g g 1.1g g 1.5375 2.533.5 LR2 K0308GV2LE071.1g g –––––– 2.533.5 LR2 K0308GV2LE071.5g g 1.5g g 3375451 LR2 K0310GV2LE08––– 2.2g g –––451 LR2 K0312GV2LE082.2g g 3501004375 6.378 LR2 K0312GV2LE103g g 410100 5.537510138 LR2 K0314GV2LE144g g 5.510100–––10138 LR2 K0316GV2LE14––––––7.537510138 LRD 14GV2LE14––––––937514170 LRD 16GV2LE165.515507.56751137514170 LR2 K0321GV2LE167.5155096751537518223 LRD 21GV2LE20915401147518.537525327 LRD 22GV2LE2211154015475–––25327 LRD 22GV2LE2215105018.54752237532416LRD 32GV2LE32(1) As % of Icu.g ) > 100 kA.GV2 LE10D F 526144.t i fC i r c u i t b r e a k e r s0.09––––––0.45LRD 03GV2L030.12g g –––0.37g g 0.638LRD 04GV2L040.18g g ––––––0.638LRD 04GV2L04––––––0.55g g 113LRD 05GV2L050.25g g ––––––113LRD 05GV2L05––––––0.75g g 113LRD 06GV2L050.37g g 0.37g g –––113LRD 05GV2L050.55g g 0.55g g 1.1g g 1.622.5LRD 06GV2L06–––0.75g g ––– 1.622.5LRD 06GV2L060.75g g 1.1g g 1.54100 2.533.5LRD 07GV2L07Example: GV3 L32 becomes GV3 L326.(1) As % of Icu. Associated current limiter or fuses, where required. See characteristics page B6/33.g > 100 kA.GV2 L10D F 526145.t i fGV3 L65D F 526146.t i fTeSys GVThermal-magnetic motor circuit breakers GV2 ME0.06gg––––––0.16…0.252.4GV2ME020.09g g––––––0.25…0.405GV2ME030.12 0.18g g g g – –– –– – 0.37 –g–g –0.40…0.638GV2ME040.25gg––– 0.55gg0.63…113GV2ME050.37 0.55 –g g –g g –0.37 0.55 0.75g g g g g g – 0.75 1.1– g g – g g 1…1622.5GV2ME060.75g g1.1gg1.5375 1.6...2.533.5GV2ME071.1 1.5g g g g 1.5 2.2g g g g 2.2 3 3 375 75 2.5 (4)51GV2ME082.2gg350100 43754...6.378GV2ME103 4g g g g 4 5.510 10100 100 5.5 7.5 3 375 756 (10)138GV2ME145.5 –15 –50 –7.5 – 6 –75 – 9 11 3 375 759…14170GV2ME167.5155096751537513…18223GV2ME209154011475 18.537517…23327GV2ME2111154015475 –––20…25327GV2ME22 (3)15105018.54752237524 (32)416GV2ME32Motor circuit breakers from 0.06 to 15 kW / 400 V, with lugsTo order thermal magnetic circuit breakers with connection by lugs, add the digit 6 to the end of reference selected above.Example: GV2 ME08 becomes GV2 ME086.Thermal magnetic circuit breakers GV2 ME with built-in auxiliary contact block With instantaneous auxiliary contact block (composition, see page B6/11):b GV AE1, add suffix AE1TQ to the motor circuit breaker reference selected above. Example: GV2 ME01AE1TQ .b GV AE11, add suffix AE11TQ to the motor circuit breaker reference selected above. Example: GV2 ME01AE11TQ .b GV AN11, add suffix AN11TQ to the motor circuit breaker reference selected above. Example: GV2 ME01AN11TQ .These circuit breakers with built-in contact block are sold in lots of 20 units in a single pack.(1) As % of Icu.(2) The thermal trip setting must be within the range marked on the graduated knob.(3) Maximum rating which can be mounted in enclosures GV2 MC or MP , please consult your Regional Sales Office. g > 100 kA.GV2 ME10D F 526134.t i fC i r c u i t b r e a k e r sTeSys GVTeSys protection componentsThermal-magnetic motor circuit breakers GV2 MEReferences0.06g g ––– 0.16…0.25 2.4GV2ME0230.09g g ––– 0.25…0.405GV2ME0330.120.18g g g g –––0.40…0.638GV2ME0430.250.37g g g g 0.37g g 0.63…113GV2ME0530.370.55g g g g 0.370.550.75g g g g g g 1…1.622.5GV2ME0630.75g g1.1g g 1.6…2.533.5GV2ME0731.11.5g g g g 1.52.2g g g g 2.5…451GV2ME0832.2g g 350100 4…6.378GV2ME10334g g g g 45.510101001006…10138GV2ME1435.515507.5675 9…14170GV2ME1637.515509675 13…18223GV2ME203911151540401147517…23327GV2ME2131115401547520 (25)327GV2ME223Contact blocksDescription Mounting Maximum number Type of contacts Sold in lots of Unitreference Instantaneous auxiliary contactsFront 1N/O + N/C 10GVAE113N/O + N/O 10GVAE203LH side2N/O + N/C 1GVAN113N/O + N/O1GVAN203AccessoryDescriptionApplicationSold in lots of Unitreference Cable end reducerFor connection of conductors from 1 to 1.5 mm 220LA9D99(1) For connection of conductors from 1 to 1.5 mm 2, the use of an LA9 D99 cable end reducer is recommended.(2) Maximum rating which can be mounted in enclosures GV2 MC or MP , please consult your Regional Sales Office (3) The thermal trip setting must be within the range marked on the graduated knob.g > 100 kA.GV2 ME pp 3D F 526135.t i fLA9 D99D F 533898.e p sTeSys GVReferencesTeSys protection componentsThermal-magnetic motor circuit breakersGV2 P, GV3 P and GV3 ME80GV2 P10D F 526137.t i fGV3 P65D F 526139.t i fGV3 P651D F 526140.t i fC i r c u i t b r e a k e r sTeSys GVReferences93610011181001581007.59707010010091150501001001115101010010012…20GV7RS20 2.0109113636100100111518181001001518.58810010015…25GV7RE25 2.0109117070100100111550501001001518.5101010010015…25GV7RS25 2.01018.53610018.522181810010022810025…40GV7RE40 2.01018.57010018.550100221010025…40GV7RS40 2.0102236100301810030810030…50GV7RE50 2.01522701003050100301010030 (50)GV7RS502.01537361004555181810010055810048...80GV7RE80 2.040377010045555050100100551010048...80GV7RS80 2.0404536100–1810075810060...100GV7RE100 2.0404570100–50100751010060...100GV7RS100 2.0405575353510010075903030100100901108810010090 (150)GV7RE1502.020557570701001007590505010010090110101010010090…150GV7RS150 2.02090110353510010011013216030303010010010016020088100100132…220GV7RE220 2.3509011070701001001101321605050501001001001602001010100100132…220GV7RS220 2.350(1) As % of lcu.TeSys protection componentsThermal-magnetic motor circuit breakers GV7 RGV7 RE40D F 526138.t i fGV7 RS220D F 526141.t i f0.12–0.120.180.18–0.370.40…0.6313GV2RT040.090.120.250.370.250.370.370.550.63…122GV2RT050.180.250.370.550.370.550.370.550.750.751.11…1.633GV2RT060.370.750.751.1 1.11.51.6…2.551GV2RT070.550.75 1.11.5 1.51.52.2 2.23 2.5…478GV2RT081.12.22.23344…6.3138GV2RT101.52.234445.5 5.57.56…10200GV2RT142.23 5.55.57.57.59119…14280GV2RT1647.57.5991513…18400GV2RT205.5911111118.517…23400GV2RT21(1) The thermal trip setting must be within the range marked on the graduated knob.GV2 RTD F 526142.t i fC i r c u i t b r e a k e r sblack handle, blue legend plate(1) The thermal trip setting must be within the range marked on the graduated knob.(2) Other accessories such as mounting, cabling and marking accessories are identical to those used for GV2 ME motor circuit breakers, see page B6/13.GV2 RTD F 526142.t i fD F 526340.e p sC i r c u i t b r e a k e r sTeSys GVDescription Mounting Maximum number Type of contacts Sold inlots of Unitreference Instantaneous auxiliary contactsFront (1)1N/O or N/C (2)10GVAE1N/O + N/C 10GVAE11N/O + N/O10GVAE20Side (LH)2N/O + N/C1GVAN11N/O + N/O1GVAN20Fault signalling contact + instantaneous auxiliary contact Side (3) (LH)1N/O (fault)+ N/O1GVAD1010+ N/C1GVAD1001N/C (fault)+ N/O1GVAD0110+ N/C1GVAD0101Short-circuit signalling contactSide (LH)1C/O common point1GVAM11(1 block on RH sideof circuit breaker GV2 ME)50 Hz GVAX11560 Hz GVAX116127 V60 Hz GVAX115220…240 V 50 Hz GVAX22560 Hz GVAX226380…400 V50 Hz GVAX38560 Hz GVAX386415…440 V 50 Hz GVAX415440 V60 Hz GVAX385Add-on contact blocksDescriptionMountingMaximum number Reference Visible isolation block (5)Front (1)1GV2AK00 (6)LimitersAt top(GV2 ME and GV2 P)1GV1L3Independent1LA9LB920(1) Mounting of a GV AE contact block or a GV2 AK00 visible isolation block on GV2 P and GV2 L .(2) Choice of N/C or N/O contact operation, depending on which way round the reversible block is mounted.(3) The GV AD is always mounted next to the circuit breaker.(4) To order an undervoltage trip: replace the dot (p ) in the reference with a U , example: GV AU025. To order a shunt trip: replace the dot (p ) in the reference with an S , example: GV AS025.(5) Visible isolation of the 3 poles upstream of circuit breaker GV2 P and GV2 L .Visible isolation block GV2 AK00 cannot be used with motor circuit breakers GV2 P32 and GV2 L32 (Ith max = 25 A).(6) Ie Max = 32 A.ReferencesTeSys protection componentsThermal-magnetic and magnetic motor circuit breakers GV2 with screw clamp connectionsAdd-on blocks and accessoriesCharacteristics:pages B6/89 and B6/94Dimensions, schemes:pages B6/70 to B6/82LA9LB920D B 126629.e p sC i r c u i t b r e a k e r sTeSys GVTerminal blockfor supply to one or more GV2 G busbar setsConnection from the top1GV1G09Can be fitted with current limiter GV1 L3 (GV2 ME and GV2 P)1GV2G05Cover for terminal block For mounting in modular panels10LA9E07Flexible 3-pole connection for connecting a GV2 to a contactor LC1-D09…D25 Centre distance between mounting rails: 100…120 mm10GV1G02Set of connections upstream/downstream For connecting GV2 ME to a printed circuit board 10GV2GA01“Large Spacing” adapter UL 508 type EFor GV2 P pp H7 (except 32 A)1GV2GH7Clip-in marker holders (supplied with each circuit breaker)For GV2 P , GV2 L, GV2 LE and GV2 RT (8 x 22 mm)100LA9D92ReferencesTeSys protection componentsThermal-magnetic and magnetic motor circuit breakers GV2 with screw clamp connectionsAccessoriesDimensions, schemes:pages B6/70 to B6/82D B 417942.e p sTeSys GVD B 126631.e p sD B 126630.e p sD B 126632.e p s7P B 106297_45.e p sExtended Rotary HandleAllows a circuit breaker or a starter-controller installed in back of an enclosure to be operated from the front of the enclosure.A rotary handle can be black or red/yellow, IP54 or IP65. It includes a function for locking the circuit breaker or the starter in the O (Off) or I (On) position(depending of the type of rotary handle) by means of up to 3 padlocks with a shank diameter of 4 to 8 mm. The extended shaft must be adjusted to use in different size enclosures. The IP54 rotary handle is fixed with a nut (Ø22) to make easierthe assembling. The new Laser Square tool brings the accuracy to align the circuit breaker and the rotary handle.device(padlocks not included)ReferencesTeSys protection componentsThermal-magnetic and magnetic motor circuit breakers GV2 with screw clamp connectionsC i r c u i t b r e a k e r sTeSys GVDescriptionMounting Maximum number Type of contacts Sold inlots of Unitreference Instantaneous auxiliary contactsFront1N/O or N/C (1)10GVAE1N/O + N/C 10GVAE11 (2)N/O + N/O10GVAE20 (2)Side (LH)2N/O + N/C1GVAN11 (2)N/O + N/O1GVAN20 (2)Fault signalling contact + instantaneous auxiliary contactFront 1N/O (fault)+ N/O1GVAED101 (2)N/O (fault)+ N/C1GVAED011 (2)Side (3) (LH)1N/O (fault)+ N/O1GVAD1010+ N/C1GVAD1001N/C (fault)+ N/O1GVAD0110+ N/C1GVAD0101Short-circuit signalling contact Side (LH)1C/O common point 1GVAM11(4)MountingVoltage ReferenceSide(1 block on RH side of circuit breaker)24 V 50 Hz GVA p 02560 Hz GVA p 02648 V 50 Hz GVA p 05560 Hz GVA p 05610050 Hz GVA p 107100…110 V 60 Hz GVA p 107110…115 V 50 Hz GVA p 11560 Hz GVA p 116120…127 V 50 Hz GVA p 125127 V 60 Hz GVA p 115200 V50 Hz GVA p 207200…220 V 60 Hz GVA p 207220…240 V 50 Hz GVA p 22560 Hz GVA p 226380…400 V 50 Hz GVA p 38560 Hz GVA p 386415…440 V 50 Hz GVA p 415415 V 60 Hz GVA p 416440 V 60 Hz GVA p 385480 V 60 Hz GVA p 415500 V 50 Hz GVA p 505600 V60 HzGVA p 505AccessoriesDescription Reference Sets of 3-pole 115 A busbars Pitch: 64 mm2 tap-off GV3 P pp and GV3 L pp GV3G2643 tap-off GV3 P pp and GV3 L pp GV3G364Cover “Large Spacing” UL 508 type E (Only one cover required on supply side)GV3 P ppGV3G66(1) Choice of N/C or N/O contact operation, depending on which way round the reversible block is mounted.(2) Contact blocks available in version with spring terminal connections. Add a figure 3 at the end of the references selected above. Example: GV AED101 becomes GV AED1013.(3) The GV AD pp is always mounted next to the circuit breaker.(4) To order an undervoltage trip: replace the dot (p ) in the reference with a U , example: GV AU025. To order a shunt trip: replace the dot (p ) in the reference with an S , example: GV AS025.Add-on blocks and accessoriesGV3 G66D F 537424.e p sTeSys GVD B 126637.e p sD B 126636.e p sD B 126632.e p s7P B 106297_45.e p sExtended Rotary HandleAllows a circuit breaker or a starter-controller installed in back of an enclosure to be operated from the front of the enclosure.A rotary handle can be black or red/yellow, IP54 or IP65. It includes a function for locking the circuit breaker or the starter in the O (Off) or I (On) position(depending of the type of rotary handle) by means of up to 3 padlocks with a shank diameter of 4 to 8 mm. The extended shaft must be adjusted to use in different size enclosures. The IP54 rotary handle is fixed with a nut (Ø22) to make easierthe assembling. The new Laser Square tool brings the accurency to align the circuit breaker and the rotary handle.For English 10-GVAPSEN For German 10-GVAPSDE For Spanish10-GVAPSES For Chinese 10-GVAPSCN For Portuguese 10-GVAPSPT For Russian 10-GVAPSRU For Italian10-GVAPSITD F 526342.e p sB6/21C i r c u i t b r e a k e r sTeSys GVfor locking the Start button (on open-mounted product)using up to 3 padlocks(padlocks to be ordered separately)External operator for mounting on enclosure door.Red Ø40 knob on yellow plate, padlockable in position O (with up to 3 padlocks). Door locked when knob in position I, and when knob padlocked in position O.GK3AP03(1) 1 voltage trip OR 1 fault signalling contact to be fitted inside the motor circuit breaker.Other versions24 to 690 V, 50 or 60 Hz voltage trips for circuit breakers GV3 ME80.Please consult your Regional Sales Office.ReferencesTeSys protection componentsMotor circuit breakers GV3 ME80 and GK3 EF80Add-on blocks and accessoriesCharacteristics:pages B6/89 and B6/92Dimensions:page B6/47B6/22D F 526344.e p sB6/23C i r c u i t b r e a k e r sTeSys GVThese allow remote indication of the circuit breaker contact states. They can be used for signalling, electrical locking, relaying, etc. They are available in two versions: standard and low level. They include a terminal block and the auxiliary circuits leave the circuit breaker through a hole provided for this purpose.They perform the following functions, depending on where they are located in the circuit breaker:Low levelGV7AB11Fault discrimination devicesThese make it possible to:b either differentiate a thermal fault from a magnetic fault,b or open the contactor only in the event of a thermal fault.VoltageReference a 24...48 and c 24…72 V GV7AD111 (1)z 110…240 VGV7AD112 (1)Electric tripsThese allow the circuit breaker to be tripped via an electrical control signal.b Undervoltage trip GV7 AUv Trips the circuit breaker when the control voltage drops below the tripping threshold, which is between 0.35 and 0.7 times the rated voltage.v Circuit breaker closing is only possible if the voltage exceeds 0.85 times the rated voltage. Circuit breaker tripping by a GV7 AU trip meets the requirements of IEC 60947-2.b Shunt trip GV7 ASTrips the circuit breaker when the control voltage rises above 0.7 times the rated voltage.b Operation (GV7 AU or GV7 AS)v When the circuit breaker has been tripped by a GV7 AU or AS, it must be reset either locally or by remote control. (For remote control, please consult your Regional Sales Office).v Tripping has priority over manual closing: if a tripping instruction is present, manual action does not result in closing, even temporarily, of the contacts.v Durability: 50 % of the mechanical durability of the circuit breaker.TypeVoltageReference Undervoltage trip48 V, 50/60 HzGV7AU055 (1)110…130 V, 50/60 Hz GV7AU107 (1)200…240 V, 50/60 Hz GV7AU207 (1)380…440 V, 50/60 Hz GV7AU387 (1)525 V, 50 HzGV7AU525 (1)Shunt trip48 V, 50/60 HzGV7AS055 (1)110…130 V, 50/60 Hz GV7AS107 (1)200…240 V, 50/60 Hz GV7AS207 (1)380…440 V, 50/60 Hz GV7AS387 (1)525 V, 50 HzGV7AS525 (1)(1) For mounting of a GV7 AD or a GV7 AU or AS.ReferencesTeSys protection componentsThermal-magnetic motor circuit breakers GV7 R with screw clamp connectionsAdd-on blocks and accessoriesCharacteristics:pages B6/51, B6/52 and B6/56Dimensions:pages B6/79 to B6/81Schemes:page B6/83B6/24B6/25C i r c u i t b r e a k e r sTeSys GVDescription ApplicationFor use on contactors Sold in lots of Unitreference Clip-on connectors for GV7 RUp to 150 A, 1.5…95 mm 2–3GV7AC021Up to 220 A, 1.5…185 mm 2–3GV7AC022Spreader 3-pole (1)To increase the pitch to 45 mm–1GV7AC03Terminal shields IP 405 (1)Supplied with sealing accessory–1GV7AC01Phase barriersSafety accessories used when fitting of shields is impossible –2GV7AC04Insulating screens Ensure insulation between the connections and the backplate –2GV7AC05Kits for combination with contactor (2)Allowing link between thecircuit breaker and the contactor. The cover provides protection against direct finger contactLC1 F115…F1851GV7AC06LC1 F225 and F2651GV7AC07LC1 D115 and D1501GV7AC08Replaces the circuit breaker front cover; secured by screws. It includes a device for locking the circuit breaker in the O (Off) position by means of up to 3 padlocks with a shank diameter of 5 to 8 mm (padlocks not included). A conversion accessory allows the direct rotary handle to be mounted on the enclosure door. In this case, the door cannot be opened if the circuit breaker is in the “ON” position. Circuit breaker closing is inhibited if the enclosure door is open.Description TypeDegree of protection Reference Direct rotary handleBlack handle, black legend plate IP 40GV7AP03Red handle, yellow legend plateIP 40GV7AP04Adapter plate (3)Four mounting direct rotary handle on enclosure doorIP 43GV7AP05Allows a circuit breaker installed in the back of an enclosure to be operated from the front of the enclosure. It comprises:b a unit which screws onto the front cover of the circuit breaker,b an assembly (handle and front plate) to be fitted on the enclosure door,b an extension shaft which must be adjusted (distance between the mounting surface and the door: 185 mm minimum, 600 mm maximum). It includes a device for locking the circuit breaker in the O (Off) position by means of up to 3 padlocks with a shank diameter of 5 to 8 mm (padlocks not included). This prevents the enclosure door from being opened.DescriptionTypeDegree of protection Reference Extended rotary handleBlack handle, black legend plate IP 55GV7AP01Red handle, yellow legend plateIP 55GV7AP02Allows circuit breakers not fitted with a rotary handle to be locked in the O (Off) position by means of up to 3 padlocks with a shank diameter of 5 to 8 mm (padlocks not included).Description ApplicationReference Locking deviceFor circuit breaker not fitted with a rotary handleGV7V01(1) Terminal shields cannot be used together with spreaders.(2) The kit comprises links, a protective shield and a depth adjustable metal bracket for the breaker.(3) This conversion accessory makes it impossible to open the door if the device is closed and prevents the device from being closed if the door is open.ReferencesTeSys protection componentsThermal-magnetic motor circuit breakers GV7 R with screw clamp connectionsAccessoriesGV7 AC07D F 537429.e p sGV7 AC08D F 537428.e p sDimensions:pages B6/79 to B6/81B6/260.5 6.63GB2DB051143GB2DB062263GB2DB073403GB2DB084503GB2DB095663GB2DB106833GB2DB1281083GB2DB14101383GB2DB16121653GB2DB20162203GB2DB21202703GB2DB22(1) Conforming to IEC 60947-1.GB2 CBppD F 526243.t i fGB2 CD ppD F 526244.t i fGB2 DBppD F 526245.t i fPresentation, selection :page B6/84Characteristics :pages B6/85 to B6/87Dimensions :page B6/88Schemes :page B6/88B6/27C i r c u i t b r e a k e r s(1) Conforming to IEC 60947-1.Accessories for circuit breakers GB2-CB, DB and CSDescriptionSold in lots of Unitreference Busbar set for supply to 10 GB2 DB or20 GB2 CB or GB2 CS with 2 connectors1GB2G210Supply connector 10GB2G01GB2 CS ppD F 526246.t i fPresentation, selection :page B6/84Characteristics :pages B6/85 to B6/87Dimensions :page B6/88Schemes :page B6/88B6/28B6/29B6/30TeSys GVCharacteristicsTeSys protection componentsMagnetic motor circuit breakers GV2 LE and GV2 LReferences:pages B6/2 and B6/3Dimensions:pages B6/43 to B6/47Schemes:page B6/48add-on contact blocks. Side by side mounting is possible up to 40 °C.(2) When mounting on a vertical rail, fit a stop to prevent any slippage.(1) As % of Icu.Average operating times at 20 °C related to multiples of the setting currentD F 534092.e p s1 3 poles from cold state2 2 poles from cold state3 3 poles from hot stateDynamic stressI peak = f (prospective Isc) at 1.05 Ue = 435 VD F 534093.e p s1 Maximum peak current2 32 A3 25 A4 18 A5 14 A6 10 A7 6.3 A8 4 A9 2.5 A 10 1.6 A11 Limit of rated ultimate breaking capacity on short-circuit of GV2 LE (14, 18, 23 and 25 A ratings).Dynamic stressI peak = f (prospective Isc) at 1.05 Ue = 435 VD F 534094.e p s1 Maximum peak current2 32 A3 25 A4 18 A5 14 A6 10 A7 6.3 A8 4 A9 2.5 A 10 1.6 A11 Limit of rated ultimate breaking capacity on short-circuit of GV2 LE (14, 18, 23 and 25 A ratings).Thermal limit in kA 2s in the magnetic operating zone Sum of I 2dt = f (prospective Isc) at 1.05 Ue = 435 V22Prospective Isc (kA)D F 534095.e p s1 32 A 2 25 A3 18 A4 14 A5 10 A6 6.3 A7 4 A8 2.5 A9 1.6 AThermal limit in kA 2s in the magnetic operating zone Sum of I 2dt = f (prospective Isc) at 1.05 Ue = 435 V22D F 534096.e p s1 25 A and 32 A 2 18 A3 14 A 4 10 A5 6.3 A6 4 A7 2.5 A8 1.6 AThermal limit in kA 2s in the magnetic operating zone Sum of I 2dt = f (prospective Isc) at 1.05 Ue = 435 V22D F 534097.e p s1 32 A (GV2 LE32)2 25 A and 32 A (GV2 L32)3 18 A4 14 A5 10 A6 6.3 A7 4 A8 2.5 A9 1.6 A10 Limit of rated ultimate breaking capacity on short-circuit of GV2 LE (14, 18, 23 and 25 A ratings).Average operating time at 20 °C without prior current flowx the setting current (Ir)D F 534098.e p s1 3 poles from cold state2 2 poles from cold state3 3 poles from hot stateA Thermal overload relay protection zoneB GV3 L protection zoneDynamic stressI peak = f (prospective Isc) at 1.05 Ue = 435 VProspective Isc (kA)D B 418280.e p s1 Maximum peak current2 GV3 L653 GV3 L504 GV3 L405 GV3 L326 GV3 L25Thermal limit in A 2sSum of I 2dt = f (prospective Isc) at 1.05 Ue = 435 V2Prospective Isc (kA)D B 418279.e p s1 GV3 L652 GV3 L503 GV3 L404 GV3 L325 GV3 L25TeSys GVDimensions, mountingD F 537440.e p sD F 537441.e p sD F 537444.e p sTeSys protection componentsMagnetic motor circuit breakers GV2 L and GV2 LETeSys GVDimensions, mounting TeSys protection componentsMagnetic motor circuit breakers GV2 L and GV2 LED B 127415.e p sD B 127414.e p sa b Mini Maxi Mini Maxi GV2 APN pp140250GV2 APN pp + GV APH02151250GV2 APN pp + GV APK11250434--GV2 APN pp + GV APH02 + GV APK11--250445TeSys GVDimensions,mounting Sets of busbars GV2 G445, GV2 G454, GV2 G472, with terminal block GV2 G05D F 537451.e p sGV2 G445224269314359GV2 G454260314368422GV2 G472332404476548D F 537452.e p sD F 537454.e p sGV2 G345 (3 x 45 mm)134GV2 G354 (3 x 54 mm)152TeSys protection componentsMagnetic motor circuit breakers GV2 L and GV2 LED F 537480.e psD F 537435.e p sD F 510637.e p sD F 510638.e p sD B 127416.e p sD B 127417.e p sa b Mini Maxi Mini Maxi GV3 APN pp189300--GV3 APN pp + GV APK12300481GV3 APN pp + GV APH03--200300GV3 APN pp + GV APH03 + GV APK12--300492TeSys GVSchemesTeSys protection componentsMagnetic motor circuit breakers GV2 L, GV2 LE, GV3 LD F 537474.e p sD F 537475.e p sD F 537476.e p sGV2 ME, GV2 P , GV3 ME, GV3 P and GV7 R motor circuit breakers are 3-pole thermal-magnetic circuit breakers specifically designed for the control and protection of motors , conforming to standards IEC 60947-2 and IEC 60947-4-1.Connection GV2GV2 ME and GV2 P circuit breakers are designed for connection by screw clamp terminals.Circuit breaker GV2 ME can be supplied with lugs or spring terminal connections.Spring terminal connections ensure secure, permanent and durable clamping that is resistant to harsh environments, vibration and impact and are even more effective when conductors without cable ends are used. Each connection can take two independent conductors.GV3GV3 circuit breakers feature connection by BTR screws (hexagon socket head), tightened using a n° 4 Allen key.This type of connection uses the Ever Link ® system with creep compensation (1) (Schneider Electric patent).This technique makes it possible to achieve accurate and durable tightening torque, in order to avoid cable creep.GV3 circuit breakers are also available with connection by lugs. This type of connection meets the requirements of certain Asian markets and is suitable for applications subject to strong vibration, such as railway transport.GV7GV7 circuit breakers: with connection by screw clamp terminals (for bars and lugs) and by clip-on connectors.OperationControl is manual and local when the motor circuit breaker is used on its own.Control is automatic and remote when it is associated with a contactor.GV2 ME and GV3 ME80Pushbutton control.Energisation is controlled manually by operating the Start button “I” 1.De-energisation is controlled manually by operating the Stop button “O” 2, or automatically by the thermal-magnetic protection elements or by a voltage trip attachment.GV2 P , GV3 P and GV7 Rb Control by rotary knob: for GV2 P and GV3 P b Control by rocker lever: for GV7 R.Energisation is controlled manually by moving the knob or rocker lever to position “I” 1.De-energisation is controlled manually by moving the knob or rocker lever to position “O” 2.De-energisation due to a fault automatically places the knob or rocker lever in the “Trip” position 3.Re-energisation is possible only after having returned the knob or rocker lever to position “O”.(1) Creep: normal crushing phenomenon of copper conductors, that is accentuated over time.GV2 MEwith screw clamp terminals124D F 526134.t i fGV2 MEwith spring terminals connections124D F 526135.t i fGV3 P1324D F 526136.t ifGV2 P1342D F 526137.t i fGV7 R132D F 526138.t i f。
粉尘沙尘试验箱产品说明书
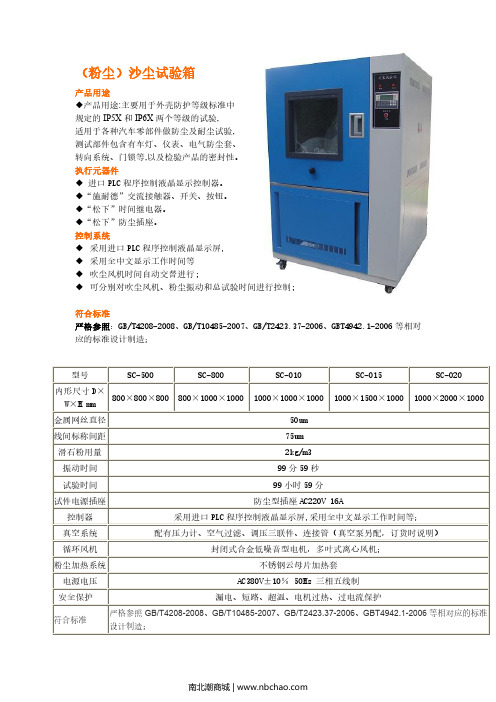
(粉尘)沙尘试验箱产品用途◆产品用途:主要用于外壳防护等级标准中规定的IP5X和IP6X两个等级的试验,适用于各种汽车零部件做防尘及耐尘试验,测试部件包含有车灯、仪表、电气防尘套、转向系统、门锁等,以及检验产品的密封性。
执行元器件◆进口PLC程序控制液晶显示控制器。
◆“施耐德”交流接触器、开关、按钮。
◆“松下”时间继电器。
◆“松下”防尘插座。
控制系统◆采用进口PLC程序控制液晶显示屏,◆采用全中文显示工作时间等◆吹尘风机时间自动交替进行;◆可分别对吹尘风机、粉尘振动和总试验时间进行控制;符合标准严格参照:GB/T4208-2008、GB/T10485-2007、GB/T2423.37-2006、GBT4942.1-2006等相对应的标准设计制造;型号SC-500SC-800SC-010SC-015SC-020内形尺寸D×W×H mm800×800×800800×1000×10001000×1000×10001000×1500×10001000×2000×1000金属网丝直径50um线间标称间距75um滑石粉用量2kg/m3振动时间99分59秒试验时间99小时59分试件电源插座防尘型插座AC220V16A控制器采用进口PLC程序控制液晶显示屏,采用全中文显示工作时间等;真空系统配有压力计、空气过滤、调压三联件、连接管(真空泵另配,订货时说明)循环风机封闭式合金低噪音型电机,多叶式离心风机;粉尘加热系统不锈钢云母片加热套电源电压AC380V±10%50Hz三相五线制安全保护漏电、短路、超温、电机过热、过电流保护符合标准严格参照GB/T4208-2008、GB/T10485-2007、GB/T2423.37-2006、GBT4942.1-2006等相对应的标准设计制造;南北潮商城 | 。
手持式交流平板砂光机-2023最新标准
手持式交流平板砂光机1范围本文件规定了手持式交流平板砂光机的术语和定义、基本参数、技术要求、试验方法、检验规则、标志、包装、运输与贮存。
本文件适用于一般环境条件下,由单相串励电动机驱动偏心机构,使旋转运动变为摆动,并在平板上装有刚玉或其他磨料的砂纸(或砂布)对木材、金属材料等表面进行砂磨的手持式电动摆动式平板砂光机(以下简称砂光机)。
本文件不适用于单相异步鼠笼型电动机驱动的摆动式平板砂光机、电池供电的砂光机。
2规范性引用文件下列文件中的内容通过文中的规范性引用而构成本文件必不可少的条款。
其中,注日期的引用文件,仅该日期对应的版本适用于本文件;不注日期的引用文件,其最新版本(包括所有的修改单)适用于本文件。
GB/T 191包装储运图示标志(ISO 780:1997,MOD)GB/T 1002家用和类似用途单相插头插座型式、基本参数和尺寸GB/T 2099.1家用和类似用途单相插头插座第1部分:通用要求(GB/T 2099.1—2008IEC 60884-1:2006,E3.1MOD)GB/T 2900.28电工名词术语电动工具GB/T 4208-2017外壳防护等级GB/T 3883.1-2014手持式、可移式电动工具和园林工具的安全第1部分:通用要求GB/T 3883.204-2019手持式、可移式电动工具和园林工具的安全第204部分:手持式非盘式砂光机和抛光机的专用要求(IP代码)(IEC 60529:2013,IDT)GB 4343.1家用电器、电动工具和类似器具的电磁兼容要求第1部分:发射GB/T 5013.4-2008额定电压450/750V 及以下橡皮绝缘电缆第4部分:软线和软电缆(IEC 60245-4:2004,IDT)GB/T 5023.5-2008额定电压450/750V及以下聚氯乙烯绝缘电缆第5部分:软电缆(软线)(IEC 60227-5:2003,IDT)GB 17625.1电磁兼容限值谐波电流发射限值(设备每相输入电流≤16A)GB/T 17625.2电磁兼容限值对每相额定电流≤16A且无条件接入的设备在公用低压供电系统中产生的电压变化、电压波动和闪烁的限制SJ/T 11364-2014电子电气产品有害物质限制使用标识要求3术语和定义GB/T 2900.28、GB/T 3883.1-2014界定的以及下列术语和定义适用于本文件。
外壳防护等级(IP代码)

装有无淋浴盆或淋浴器的场所中各区域的0区和1区的范围
有出水器的顶视图 图2 装有无淋浴盆或淋浴器的场所中各区域的0区和1区的范围
返回
1
2
安装在浴室的增压泵
结论: 该浴室内安装的增压泵距地面大于10cm且小于225cm,并且在出水器120cm半径范围内,属于1区,按标准应该安装IPX4防护等级的电气设备。而该增加泵的防护等级为IP22,不符合标准要求。
高压水射流
标准名称:
电击防护装置和设备的通用部分
标 准 号:
GB/T 17045-2008
适用范围:
本标准适用于人和动物对电击的防护,其目的在于给出电气装置、系统和设备所通用的,或它们之前在配合上所需要的基本的原则和要求。
GB/T 17045-2008
0类设备
此类设备采用基本绝缘作为基本防护措施,而没有故障防护措施。 说明: (1)国家标准建议取消该类设备。同时,该类设备一般不再生产,如2008年前可以生产0类灯具,现在已不准生产0类灯具; (2)按照国际电工委员会的触电防护原则,0类设备只能用于不导电场所或电气隔离系统。
Ⅱ类设备
此类设备采用基本绝缘作为基本防护,附加绝缘作为故障防护措施,即采用双重绝缘;或采用防护效果相当于双重绝缘的加强绝缘进行防护。 说明: (1)与Ⅰ类设备设备最大的不同在于该类设备的故障防护措施就设在设备上,即该类设备本身就具有两个“独立的单项防护措施”,而Ⅰ类设备的故障防护措施是在设备之外设置的,设备本身只是设置了利用故障防护措施的连接线。 (2)如果Ⅱ类设备采用双重或加强绝缘后,仍存采用了保护联结, 则此类设备仍归类于Ⅰ类设备。 (3)Ⅱ类设备的标志符号:
IP代码的各要素及含义
第一位特征数字
03
家用和类似用途电器的通用要求 电器安全说明书
ICS13.120CCS Y60中华人民共和国国家标准GB XXXX—20XX家用和类似用途电器的通用要求电器安全Household and similar electrical appliances general requirements–Product safety(征求意见稿)20XX-XX-XX发布20XX-XX-XX实施目次前言 (II)引言 (III)1范围 (1)2规范性引用文件 (1)3术语和定义 (1)4要求 (4)4.1基本要求 (4)4.2产品安全 (5)4.3生命周期 (10)4.4标志和说明 (11)5验证方法 (12)5.1产品安全 (12)5.2生命周期 (12)5.3标志和说明 (13)附录A(规范性)符合性验证标准 (14)前言本文件按照GB/T1.1—2020《标准化工作导则第1部分:标准化文件的结构和起草规则》的规定起草。
请注意本文件的某些内容可能涉及专利。
本文件的发布机构不承担识别这些专利的责任。
本文件由中华人民共和国工业和信息化部提出并归口。
引言电器安全,是指对绝大多数消费人群而言,家用和类似用途电器产品在制造商使用说明规定的条件下,正常使用和可以预见的非正常使用,以及产品在安装、维护、维修等过程中,保障其发生电击、机械伤害、烫伤、起火、爆炸、辐射等危害,或存在这些潜在危害的风险水平在可容许的范围内。
本文件旨在规范家用和类似用途电器的安全质量,最大可能地保护使用者和相关人员的生命和财产安全。
在制定过程中,考虑了我国国情、消费品行业现状,以及未来发张趋势等因素,本文件中所规定的电器安全要求,是为了保护相关人身以及财产安全所应遵循的最基本的要求。
本文件技术内容的制定是以《中华人民共和国产品质量法》、《中华人民共和国消费者权益保护法》和《中华人民共和国标准化法》等法律为依据,并作为这些法律具体实施的技术支撑。
本文件技术内容所涉及的国际标准,包括了由国际电工委员会家用和类似用途电器安全技术委员会(IEC/TC61)及其分技术委员会负责制定的IEC60335《家用和类似用途电器的安全》系列标准和IEC 62115《电玩具的安全》。
变频器包装测试规范V

变频器包装测试规范拟制:______黄国华 ______日期:审核:___________________日期:__________ 批准:___________________日期:__________更改信息登记表规范名称:变频器包装测试规范规范编码:评审会签区:人员签名意见日期目录1. 目的.............................................................................................................................................2.范围.............................................................................................................................................3.定义.............................................................................................................................................4.引用标准.....................................................................................................................................5.测试设备.....................................................................................................................................6.试验环境.....................................................................................................................................7.测试项目.....................................................................................................................................7.1.测试项目清单.............................................................................................................7.2.包装箱抗压试验.........................................................................................................7.3.包装件共振扫描与驻留试验.....................................................................................7.4.包装件随机振动试验.................................................................................................7.5.包装件跌落试验.........................................................................................................7.6.包装件滚动试验.........................................................................................................7.7.包装件倾跌试验.........................................................................................................7.8.包装件斜坡冲击试验.................................................................................................8.数据记录及报告格式.................................................................................................................8.1.包装测试数据记录表.................................................................................................8.2.包装测试报告格式.....................................................................................................变频器包装测试规范1.目的检验变频器产品包装是否满足标准和客户要求;本规范主要集中在验证包装材料和包装容器在流通过程对变频器产品的保护能力。
(塑料橡胶材料)衬氟塑料隔膜阀

(塑料橡胶材料)衬氟塑料隔膜阀衬氟塑料隔膜阀我国规模以上工业企业利润去年以来呈加速增长态势。
去年前两月利润增幅为21.8%,上半年达到28%,全年增长31%。
此前,工业利润从2002年三季度至2004年四季度,连续保持30%至40%的增长。
钢铁行业利润增长处于领先状态。
统计显示,前两月,钢铁行业利润同比增长3.6倍,电力行业增长66.7%,煤炭行业增长57.3%,交通运输设备制造业增长68.4%,有色金属冶炼及压延加工业增长31%。
统计显示,前两月石油加工及炼焦业扭亏为盈,由去年净亏损46亿元转为盈利148亿元,石油和天然气开采业利润同比下降18.6%,电子通信设备制造业下降14.2%。
一、产品[衬氟直流截止阀]的详细资料:产品名称:衬里直流式截止阀产品特点:衬里直流式截止阀,直流式截止阀,衬里截止阀设计与制造按:GB/12239结构长度:GB/12221法兰连接尺寸按:GB4126.3GB4216.4试验检验按:GB/T13927。
二、性能规范:型号公称压力PN(MPa)试验压力PS(MPa)适用介质工作温度(℃)壳体试验密封试验J45J/FS-6 0.6 0.9 0.66 W.非腐蚀性流体J.一般腐蚀性流体FS.强酸碱及各种有机溶剂(溶融碱金属及元素氟除外)≤85≤150J45J/FS-10 1.0 1.5 1.1三、主要零部件材料表:零件名称阀体、阀瓣阀盖阀杆、阀瓣手轮廓材料HT200衬氟塑料、衬橡胶HT200衬氟塑料、衬橡胶35衬氟塑料衬橡胶HT200四、工洲牌衬氟直流截止阀主要连接尺寸及重量:型号公称通径DN(mm)尺寸(mm)质量(kg)L D D1 D H1 b Do n-d25 160 100 75 60 205 16 120 4-11 4.5 32 180 120 90 70 - 16 160 4-13.5 13 40 200 130 100 80 250 16 160 4-13.5 14 50 230 140 110 90 290 16 160 4-13.5 16.5 65 290 160 130 100 310 16 180 4-13.580 310 190 150 125 358 18 200 4-17.5 36 100 350 210 170 145 428 18 200 4-17.5 50 125 400 240 200 175 510 20 280 8-17.5 68 150 480 265 225 200 550 20 280 8-17.5 90 200 600 30 280 255 635 22 400 8-17.5 146250 730 375 335 312 24 12-.17 .5一、产品[衬氟直角截止阀]的详细资料:产品型号:J44J/FS型产品名称:衬里直角阀产品特点:公称通径:DN15~300(mm)主要零部件材料见表A2基本型号:手动J44F43电动J944F3J44F46J944F46法兰连接截止阀(角式)设计与制造符合中国国家标准基本结构形式:角式公称压力:PN1.0~2.5(MPa)法兰连接手动截止阀,角式截止阀,手动截止阀。
开关插座规范技术要求最终版
开关插座规范技术要求最终版开关插座规范及技术要求一、应符合的国家及行业标准:1.开关类产品符合:GB 16915.1-2014/IEC60669-1《家用和类似用途固定式电气装置的开关》第一部份:通用要求;2.插座类产品符合:GB2099.1-2008/IEC884-1《家用和类似用途插头插座》第一部分:通用要求;GB2099.1-2008《家用和类似用途插头插座》第二部分:器具插座的特殊要求;3.电子类产品应符合:GB16915.1-2014/IEC60669-2《家用和类似用途固定式电气装置的开关》第二部分:特殊部分第一节:电子开关;4.各地的地方标准等。
二、产品的技术、品质要求:各系列产品应对应满足以下所列标准要求及规范要求(按照最新规范):名称项目标准GB16915.1-2014GB2099.1-2008技术标准250V 250、440V开关额定电压额定电流10A、16A 6、10、16、开关寿命≥40000次≥40000次(每次开关往复为一次)爬电距离≥3mm ≥3mm电气间隙分隔的带电部件之间≥1.2mm,带电部件与其他部件之间≥3mm分隔的带电部件之间≥1.2mm,带电部件与其他部件之间≥3mm插座额定电压250V 250V 440V额定电流6A、10A、16A 6A、10A、16A 25A(三相插座)插拨次数≥5000次≥5000次≥5000次爬电距离≥3mm ≥3mm ≥3mm电气间隙≥3mm ≥3mm ≥3mm材料品质项目标准二GB16915.1-2014/GB2099.1-2008面板材料PC料或ABS料、必须阻燃——底壳材料PC料或尼龙料(ABS)或尿素树脂必须阻燃——开关触点银合金触点——插座铜片锡磷青铜,表面洁净不能有氧化污垢——三、强制性安全认证(CCC认证):所有产品必须按国家规定要求通过认证并获得证书。
四、其他通用要求:1.大翘板及指甲开关需有红色开关标识,;所有开关表面均不需要金属边框。
电器附件暗装用面板、调整板和安装盒机械产品表面防护层质量分等分级

8.1 绝缘 、复合材料 的面板和安装 盒的外观 绝 缘 、 复合材料的面板安装表面应无气泡 、裂纹、缺料 、肿胀 ;无 明显的擦伤 、毛刺 、变形 、凹陷、
杂 色点等缺陷。 绝 缘 、 复合材料的安装盒表面应无气泡、裂纹、缺料 ,明显的变形 、凹陷等缺点。
注 1 ) 有防进水保护等级的 电器附件 。属非普通型 电器附件 。
此 项 要 求不适用于与带 电部件绝缘的 、将面板固定到安装盒的小螺钉等。 所 有 内 装有电器 附件的安装盒应有至少为 IP20的防 护等级(可用标准测试指来检 查).面板和安装盒 均应按生产厂说明书产品目录中的规定安装好相应的部件之后进行试验。 是 否合 格 ,对绝缘面板和安装盒,可通过观察并向在正确安装之后为易触及的部件上的每一个可能 的位置施 加如下的力来检查。 — 对 7P20 的绝缘面板或安装盒,用 GB 4208规定的无铰链测试指施加 ION的 力; — 对 IP3。的绝 缘面板 或安装盒,用 直径为 2.5 m m 的钢棒施加 3N 的力; — 对 IP40的绝缘面板或 安装盒,用 直径为 lm m的钠棒施加 1N 的力。 遇有 怀 疑 时,用电压为 40-50V 的电指示器显示与有关部分的接触情况。 ,2 专门规定 要带易触及的金属部件,如带用以悬 吊负载的钩等的面板或安装盒 ,应 设计 得能防止 该易 触及金属 部件与带电部件或与在绝缘失效时会变成带电的部件接触 ,但该易触及金属部件本身能可靠地 连接 到接地 电路者除外 。 是 否 合 格,通过观察 检查 。 ,,3 金属的而板及安装盒,应有永久接地的措施。 4- 用 w 定螺 钉或其他的办法是 允许的 . 是 否 合 格 ,通过观察并进行 10.2的试验检查 。
25A 的电流 测出接 地端子与易触及的金属部件之问的电压降 ,并从电流与这一电压降算出电阻值。 无 论 如 何,电阻不得大于 。.05n。 试验 期 问 .应注意 :
减压阀标准汇总
减压阀标准汇总内容来源自网络标准编号标准中文名称标准英文名称JB/T10367-2002液压减压阀GB/T12245-1989减压阀性能试验方法Methodsofperformancetestforpressurereducingvalves GB/T12246-1989标准编号标准中文名称标准英文名称JB/T10367-2002 液压减压阀GB/T12245-1989减压阀性能试验方法Methods of performance test for pressure reducing valvesGB/T12246-1989先导式减压阀Pilot-operated reducing valves GB/T12244-1989减压阀一般要求General specification for pressure reducing valves GB/T1852-1993船用法兰铸钢蒸汽减压阀Marine steel flanged steam pressure reducing valves GB10868-1989电站减温减压阀技术条件Specification of the steam converting valve for fossil power stations JB/T7376-1994(2005复审)气动空气减压阀技术条件JB/T7310-1994(2005复审)装载机用减压阀式先导阀JB/T53361-1994液压减压阀产品质量分等(试行)JB/T53265-1999先导式减压阀产品质量分等JB/T2205-2000减压阀结构长度NF P43-035-2000建筑阀门.供水减压阀和复合供水减压阀.要求和试验(Building valves - Water pressure reducing valves and combination water pressure reducing valves - Requirements and tests.)NF A84-420-1991气焊设备和有关方法.减压阀入品接头.尺寸(Equipment for gas welding and allied processes. Pressure regulators inlet connections. Dimensions.)NF M88-773-1981商用丁烷容器装置.低压固定调节的家用商品丁烷减压阀(INSTALLATIONS BURNING COMMERCIAL BUTANE. PRESSURE REGULATOR TRIP,LOW-PRESSURE FIXED FLOW,FOR COMMERCIAL BUTANE FOR DOMESTIC USE.)NF M88-775-1990装液态碳氢化合物的钢瓶.可移动部分和半移动部分用高压可调减压阀.功能.标记、试验(LIQUEFIED HYDROCARBONS SYSTEMS IN CYLINDERS. FIXED ADJUSTEMENT,HIGH PRESSURE REGULATOR FOR MOBILE AND SEMI-MOBILE PREMISES. CONSTRUCTION. OPERATIONMARKING,TESTS.)NF M88-737-2003可运输可再填充液化石油气瓶用减压阀(Pressure relief valves for transportable refillable cylinders for Liquefied Petroleum Gas (LPG).)NF E48-423-2001液压传动.减压阀、顺序阀、卸载阀、节流阀和止回阀.装配面(Hydraulic fluid power - Pressure-reducing valvessequence valvesunloading valvesthrottle valves and check valves - Mounting surfaces.)ANSI/ASSE 1003-1995家用供水系统用减压阀(Water Pressure Reducing Valves for Domestic Water Supply Systems)ANSI/ASSE 1046-1990热膨胀减压阀(Thermal Expansion Relief Valve)ANSI Z 21.22a-1999减压阀和真空减压阀(Pressure Relief Valves and Vacuum Relief Valves)ANSI Z 21.22b-2001热水供应系统的减压阀(Relief Valves for Hot Water Supply Systems (same as CSA 4.4b)) ANSI/ASTM F 1508-1997用于蒸汽、气体和液体设备的角型减压阀规范(Specification for Angle StylePressure Relief Valves for SteamGasand Liquid Services)ASME A112.4.1-1993热水器减压阀排水管(Water heater relief valve drain tubes)ASME PTC 25.3-1988安全和减压阀(Safety and relief valves)ASTM E 1008-2003地热和其它高温液体设备用减压阀体的安装、检验及维修用标准实施规范(Standard Practice for InstallationInspectionand Maintenance of Valve-body Pressure-relief Methods for Geothermal and Other High-Temperature Liquid Applications)ASTM F 1795-2000空气或氮气系统用减压阀标准规范(Standard Specification for Pressure-Reducing Valves for Air or Nitrogen Systems)ASTM F 1565-2000蒸汽设备用减压阀标准规范(Standard Specification for Pressure-Reducing Valves for Steam Service) ASTM F 1508-1996用于蒸汽、气体和液体设备的角型减压阀标准规范(Standard Specification for Angle StylePressure Relief Valves for SteamGas and Liquid Services)ASTM F 1370-1992船上给水系统用减压阀(Standard Specification for Pressure-Reducing Valves for Water SystemsShipboard)BS EN 1567-2000建筑物阀门.减压阀和组合减压阀.要求和试验(Building valves - Water pressure reducing valves and combination water reducing valves - Requirements and tests)BS ISO 5781-2000液压传动.减压阀、顺序阀、卸荷阀、节流阀和止回阀.安装面(Hydraulic fluid power - Pressure reducing valvessequence valvesunloadingvalvesthrottle valves and check valves - Mounting surfaces)BS ISO 6264-1998液压传动.减压阀.装配面(Hydraulic fluid power - Pressure-relief valves - Mounting surfaces) prEN 14071-2000液化石油气(LPG)罐的减压阀辅助设备Pressure relief valves for LPG tanks - Ancillary equipmentBS 6283-2-1991热水系统中使用的安全和控制装置.压力范围从1bar到10bar温度减压阀规范(Safety and control devices for use in hot water systems - Specifications for temperature relief valves for pressures from 1 bar to 10 bar)BS 6283-4-1991热水系统中使用的安全和控制装置.第4部分:最大供给压力为12bar,标准尺寸包括DN50的微量绷紧减压阀规范(Safety and control devices for use in hot water systems - Specification for drop-tight pressure reducing valves of nominal size up to and including DN 50 for supply pressures up to and including 12 ba)DIN EN 13953-2003液化石油气(LPG)用可运输的可再充式储气瓶的减压阀(Pressure relief valves for transportable refillable cylinders for Liquefied Petroleum Gas (LPG); German version EN 13953:2003)DIN EN 1567-2000建筑阀门.水减压阀和组合水减压阀.要求和试验(Building valves - Water pressure reducing valves and combination water pressure reducing valves - Requirements and tests; German version EN 1567:1999)JIS B8652-2002比例电动液压减压阀及安全阀的试验方法(Test methods for electro-hydraulic proportional pressure relief valves and electro-hydraulic proportional pressure reducing and relieving valves)JIS F0504-1989船上机械装置用减压阀的应用和压力调节(Application and setting pressure of relief valves for ships' machinery) UL 1478-1995消防泵减压阀(Fire pumps relief valves )UL 1468-1995防火设备用直接控制的减压阀和压力控制阀(Direct acting pressure reducing and pressure restricting valves )JIS B8666-2001液压动力.减压阀.安装表面(Hydraulic fluid power -- Pressure-relief valves -- Mounting surfaces)JIS B8372-1994气动装置用减压阀(PRESSURE REDUCING VALVES FOR PNEUMATIC USE)JIS B8664-2001液压动力.压力控制阀(不包括减压阀)、顺序活门、释荷阀、节流阀和止回阀.安装表面(Hydraulic fluid power -- Pressure-control valves (excluding pressure-relief valves)sequence valvesunloading valvesthrottle valves and check valves -- Mounting surfaces)JIS B8410 AMD 1-2003水管用减压阀(修改件1)(Pressure reducing valves for water works (Amendment 1))JIS B8651-2002比例电动液压减压阀试验方法(Test methods for electro-hydraulic proportional pressure relief valves) JIS B8410-1999水管用减压阀(Pressure reducing valves for water works)ISO 15500-12-2001道路车辆.压缩天然气(CNG)燃料系统元部件.第12部分:减压阀(Road vehicles - Compressed natural gas (CNG) fuel system components - Part 12: Pressure relief valve (PRV))ISO 6264-1998液压传动.减压阀.装配面(Hydraulic fluid power - Pressure-relief valves - Mounting surfaces)ISO 5781-2000液压传动.减压阀、顺序阀、卸荷阀、节流阀和止回阀.装配面(Hydraulic fluid power - Pressure-reducing valvessequence valvesunloading valvesthrottle valves and check valves - Mounting surfaces)GB/T10868-2005电站减温减压阀采购前阀门选型的步骤和依据:在流体管道系统中,阀门是控制元件,其主要作用是隔离设备和管道系统、调节流量、防止回流、调节和排泄压力。
球阀详细参数说明

球阀,标准GB/T21465-2008《阀门术语》中定义为:启闭件(球体)由阀杆带动,并绕阀杆的轴线作旋转运动的阀门。
主要用于截断或接通管路中的介质,亦可用于流体的调节与控制,其中硬密封V型球阀其V型球芯与堆焊硬质合金的金属阀座之间具有很强的剪切力,特别适用于含纤维、微小固体颗料等介质。
而多通球阀在管道上不仅可灵活控制介质的合流、分流、及流向的切换,同时也可关闭任一通道而使另外两个通道相连。
本类阀门在管道中一般应当水平安装。
球阀分类:气动球阀,电动球阀,手动球阀。
诞生和应用球阀问世于20世纪50年代,随着科学技术的飞速发展,生产工艺及产品结构的不断改进,在短短的40年时间里,已迅速发展成为一种主要的阀类。
在西方工业发达的国家,球阀的使用正在逐年不断的上升,在我国,球阀被广泛的应用在石油炼制、长输管线、化工、造纸、制药、水利、电力、市政、钢铁等行业,在国民经济中占有举足轻重的地位。
工作原理球阀它具有旋转90度的动作,旋塞体为球体,有圆形通孔或通道通过其轴线。
球阀在管路中主要用来做切断、分配和改变介质的流动方向,它只需要用旋转90度的操作和很小的转动力矩就能关闭严密。
球阀最适宜做开关、切断阀使用,但近来的发展已将球阀设计成使它具有节流和控制流量之用,如V型球阀。
主要特点球阀的主要特点是本身结构紧凑,密封可靠,结构简单,维修方便,密封面与球面常在闭合状态,不易被介质冲蚀,易于操作和维修,适用于水、溶剂、酸和天然气等一般工作介质,而且还适用于工作条件恶劣的介质,如氧气、过氧化氢、甲烷和乙烯等,在各行业得到广泛的应用。
球阀阀体可以是整体的,也可以是组合式的。
球阀不仅结构简单、密封性能好,而且在一定的公称通径范围内体积较小、重量轻、材料耗用少、安装尺寸小,并且驱动力矩小,操作简便、易实现快速启闭,是近十几年来发展最快的阀门品种之一。
球阀是由旋塞阀演变而来的,它的启闭件作为一个球体,利用球体绕阀杆的轴线旋转90°实现开启和关闭的目的。
中国移动2V阀控式铅酸蓄电池产品成分分析测试规范
附件1:中国移动2V阀控式铅酸蓄电池产品成分分析测试规范1.术语定义1.1板栅:参加电池成流反应的活性物质的网状支撑结构,同时传导电流使电流分布均匀。
1.2极板:由板栅和活性物质组成。
1.3极耳:极板边框两侧用于支撑极板和汇流作用的金属条。
1.4工艺耳:熟极板制成后,在蓄电池制成前需要去除的极耳。
1.5熟极板:对生极板进行化成处理,经干燥成为熟极板。
1.6生极板:在板栅上涂上活性物质,然后经过干燥、固化处理成为生极板。
2.抽样要求:抽样基数为20000块极板。
3.投铅量及镉的测试3.1投铅量的组成蓄电池铅分布在以下几部分:正极板栅,负极板栅,正极板(生极板)铅膏,负极板(生极板)铅膏,极柱和汇流排,壳盖中的铅。
3.2取样方案铅膏:采用九点取样法,分别在送样的所有铅板的上中下各取三点,将取下的铅膏充分混合均匀,从中精确称取0.1g作为试样。
板栅:同样采用九点取样法,分别在铅板的上中下各取三点,去掉该部分的表面污染,称取0.1g作为试样。
极柱和汇流排中的铅:在任意3点位置取样,从中精确称取0.1g作为试样。
壳盖中的铅:在任意3点位置取样,从中精确称取0.1g作为试样。
3.3测试方案3.3.1质量测试3.3.1.1测试工具:天平。
对于不同质量的样品,分别采用精确度为1g、0.01g 和0.01 mg的天平进行称量。
游标卡尺:精度为0.02mm。
3.3.1.2测试内容正负极板栅的质量;正负极板质量;正负极板栅的工艺耳的质量;齐根锯掉极板的极柱和汇流排质量;极柱中铜芯的质量;壳盖中铅的质量,其中:正极板铅膏质量=有极耳但无工艺耳的正极板质量-有工艺耳的正极板栅质量+工艺耳的质量负极板铅膏质量=有极耳但无工艺耳的负极板质量-有工艺耳的负极板栅质量+工艺耳的质量说明:正、负极板栅工艺耳的质量直接从带有工艺耳的正、负极板栅中掰去得到。
正极柱和汇流排质量=厂家提供的锯掉极板后的正极极柱和汇流排的质量-焊入内部正极板极耳质量-铜芯的质量×个数(若厂家的极柱内不含铜芯,则不用减去这部分的质量)其中:焊入内部正极板极耳质量的计算方式为:图1锯后极耳长度照片图2齐根锯后极柱和汇流排照片测量焊接前工艺耳的长度H(测量极板上极耳的长度),测量焊接后剩余的工艺耳长度为h(参见图1),测量极耳的宽a,厚b,密度取11.3g/cm3。
- 1、下载文档前请自行甄别文档内容的完整性,平台不提供额外的编辑、内容补充、找答案等附加服务。
- 2、"仅部分预览"的文档,不可在线预览部分如存在完整性等问题,可反馈申请退款(可完整预览的文档不适用该条件!)。
- 3、如文档侵犯您的权益,请联系客服反馈,我们会尽快为您处理(人工客服工作时间:9:00-18:30)。
JEWEL HILL ELECTRONIC CO.,LTDJEWEL HILL ELECTRONIC CO.,LTD.SPECIFICATIONS FORLCD MODULEModule No. GB24064AOffice Address: Rm. 518,5/F., 101 Shangbu Industrial District,HuaqiangNorthRoad, Shenzhen, ChinaTEL : (86)-755-83362489 83617492FAX: (86)-755-83286396 83365871E-mail: sales@jhlcd@Website: TABLE OF CONTENTSLCM NUMBER SYSTEM (2)1. GENERAL DESCRIPTION (3)2. FEATURES (3)3. MECHANICAL SPECIFICATION (3)4. MECHANICAL DIMENSION (4)5. MAXIMUM RATINGS (5)6. ELECTRICAL CHARACTERISTICS (5)7. MODULE FUNCTION DESCRIPTION (6)8. ELECTRO-OPTICAL CHARACTERISTICS (15)9. RELIABILITY (19)10. PRECAUTIONS FOR USING LCD MODULES (20)11. USING LCD MODULES (22)12. REVISION HISTORY (24)SAMPLE APPROVED REPORT (25)LCM Number SystemNUMBER OF CHAR. PER LINE F: FSTN; X: OTHER VERSION NUMBER: V00~V99IC TYPE:VIEWING DIRECTION:TEMPERATURE RANGE:BACKLIGHT TYPE:SERIAL NUMBER: A~ZGRAPHIC MODULEs: NUMBER OF COMMONs GRAPHIC MODULEs:NUMBER OF SEGMENTs COB & SMT LCMBACKLIGHT COLOR:CHARACTER MODULEs:CHARACTER MODULEs: NUMBER OF LINE G: REFLECTIVE,NONE BACKLIGHT A: TRANSFLECTIVE, EL BACKLIGHT B: TRANSMISSIVE, EL BACKLIGHT C: TRANSFLECTIVE, LED BACKLIGHT D: TRANSMISSIVE, LED BACKLIGHT E: TRANSFLECTIVE, CCFL BACKLIGHT F: TRANSMISSIVE, CCFL BACKLIGHT A: AMBER; B: BLUE; Y: YELLOW-GREEN R: RED; W: WHITE; O: THER COLOR N: NORMAL TEMPERATURE RANGE U: UPPER(12:00); D: DOWN(6:00)L: LEFT(9:00); R: RIGHT(3:00);A: BONDING IC, WITH CONTROLLER B: BONDING IC, WITHOUT CONTROLLER C: SMT IC, WITH CONTROLLER D: SMT IC, WITHOUT CONTROLLER O: OTHER TYPEW: BLACK-WHITE; O: OTHER G: GRAY; Y: YELLOW-GREEN; B: BLUE; LCD COLOR MODE:N: TN; H: HTN; S: STN LCD TYPE:S: SUPER WIDE TEMPERATURE RANGE W: WIDE TEMPERATURE RANGEM: MIDDLE TEMPERATURE RANGE1. GENERAL DESCRIPTIONThe GB24064A is a 240 x 64 Dots Graphics LCD module. It has a FSTN panel composed of 240 segments and 64 commons. The LCM can be easily accessed by micro-controller via parallel interface.2. FEATURESTransflective and positiveDisplay ModeFSTN moduleDisplay Format Graphic 240 x 64 dotsInput Data Parallel data input from MPUMultiplexing Ratio 1/64 DutyBiasBias 1/9Viewing Direction 6 O’clockBacklight LED3. MECHANICAL SPECIFICATIONItem Specifications Unit Dimensional outline 180.0x 65.0 x 13.8(max) mmResolution 240segs x 64coms dotsActive area 127.16(W) x 33.88(H) mmDots pitch 0.53 (W)×0.53(H) mmDots size 0.49(W)×0.49(H) mm4. MECHANICAL DIMENSION5. MAXIMUM RATINGSItem Symbol Min Max Unit NoteV DD - V ss -0.3 6.0 V Supply voltage V LCD -0.3 24.0 V Input Voltage V IN -0.3 V DD +0.3 VOperating temperature T OPR -10 +60 Storage temperature T STR -20 +70Humidity --- --- 90 %RH6. ELECTRICAL CHARACTERISTICSItem SymbolCondition Min. Typ. Max. UnitSupply Voltage Logic V DD------ 5.0 --- VH level V IH 0.8V DD --- V DDInput VoltageL levelV IL --- V SS --- 0.2V DDVCurrent Consumption(LCD DRIVER)I DD V DD =5.0V; V LCD =15.7V, T amb =25 ;--- --- 25.0 mALCD Driving Voltage V LCDBias=1/9V LCD =V DD -V 0--- 15.7 --- VCurrent Consumption (With LED BackLight)I LEDV DD =5.0V;V LED =4.2V,T amb =25 ;--- --- 500 mA7. MODULE FUNCTION DESCRIPTION7.1. PIN DESCRIPTIONPin No. Symbol Description1 FGGroundPower supply for Ground (0V)2 VSS3 VCCPower supply for positive (5V)4 VOLCD driver voltage regulation pin5 /WRWrite enable signal6 /RDRead enable signal7 /CEChip enable signal8 C/DData/command signed select, ”H”: Command; ”L”: Data9 NCNo signal10 RSTReset signal input pin11 DB012 DB113 DB214 DB38-bit bi-directional data bus15 DB416 DB517 DB618 DB719 FSFont selection; “H”: 6*8; “L”: 8*820 VEENegative voltage for LCD driving21 BL+Backlight power supply voltage for positive22 BL-Backlight power supply voltage for negative7.2 TIMING CHARACTERISTICS7.3 APPLICATION OF LCMCircuit Block Diagram/WR/RD/CEC/DFSRSTFGVDDVSSVEELED+LED-7.4 TABLE OF COMMAND7.5 RAM INTERFACE7.6 FLOWCHART OF COMMUNICATION WITH MPU8. ELECTRO-OPTICAL CHARACTERISTICSItem Symbol Condition Temp Min Typ. Max UnitsNote--- 16.0 ---25 15.2 15.7 16.2 LCD driving voltageV LCD = = 050 --- 15.4 --- V NOTE1Rise Time (Tr) --- --- -- Decay Time (Tf)0 --- ---- --- Rise Time (Tr) --- 225 340Decay Time (Tf) 25 --- 240 360Rise Time (Tr) --- --- -- Response TimeDecay Time (Tf)= = 0 50 --- --- --msec NOTE2Contrast Ratio Cr= = 0 255 10 --- --- NOTE4Viewing AngleRange( = 0°)(6”) = 90°(3”) =180°(12”) =270°(9”)(25 ) CR ≥245 35 25 35DegNOTE3z For panel only․Electro-Optical Characteristics Measuring Equipment(DMS501)SystemIllumination (D65)․Note 1. Definition of Driving Voltage( Vlcd) :․Note 3. Definition of Viewing Angle and :․Note 4. Definition of Contrast ratio( CR) :Brightness of Non-selected Segment (B2)Brightness of Selected Segment (B1)CR =V,maxCR,maxDriving VoltageB r i gh t n e s s (%)Brightness Curve forSelected Segment0%=90 =270Viewing Direction 6 O’clock DirectionNormal :9. RELIABILITY9.1. MTBFThe LCD module shall be designed to meet a minimum MTBF value of 50000 hours with normal. (25°C in the room without sunlight)9.2. TESTSNO. ITEM CONDITION CRITERION1 High Temperature Operating 50 120Hrs2 Low Temperature Operating 0 120Hrs3High Temperature/Humidity Non-Operating60 ,90%RH ,120 Hrs4 High TemperatureNon-Operating70 120Hrs5 Low TemperatureNon-Operating-20 120Hrs6 Temperature CyclingNon-Operating-10 (30Min )↔ 60 (30Min)10 CYCLESNo Defect OfOperational Function InRoom Temperature AreAllowable.IDD of LCM inPre-and post-test shouldfollow specificationNotes: Judgments should be mode after exposure in room temperature for two hours.10. PRECAUTIONS FOR USING LCD MODULES10.1. HANDLING PRECAUTIONS(1) The display panel is made of glass. Do not subject it to a mechanical shock or impact by droppingit.(2) If the display panel is damaged and the liquid crystal substance leaks out, be sure not to get any inyour mouth. If the substance contacts your skin or clothes, wash it off using soap and water.(3) Do not apply excessive force to the display surface or the adjoining areas since this may cause thecolor tone to vary.(4) The polarizer covering the display surface of the LCD module is soft and easily scratched. Handlethis polarizer carefully.(5) If the display surface becomes contaminated, breathe on the surface and gently wipe it with a softdry cloth. If it is heavily contaminated, moisten a cloth with one of the following solvents: - Isopropyl alcohol- Ethyl alcohol(6) Solvents other than those above mentioned may damage the polarizer.Especially, do not use the following:- Water- Ketone- Aromatic solvents(7) Extra care to minimize corrosion of the electrode. Water droplets, moisture condensation or acurrent flow in a high-humidity environment accelerates corrosion of the electrode.(8) Install the LCD Module by using the mounting holes. When mounting the LCD Module, makesure it is free of twisting, warping and distortion. In particular, do not forcibly pull or bend the I/Ocable or the backlight cable.(9) Do not attempt to disassemble or process the LCD Module.(10) NC terminal should be open. Do not connect anything.(11) If the logic circuit power is off, do not apply the input signals.(12) To prevent destruction of the elements by static electricity, be careful to maintain an optimumwork environment.- Be sure to ground the body when handling he LCD Module.- Tools required for assembling, such as soldering irons, must be properly grounded.-To reduce the amount of static electricity generated, do not conduct assembling and other workunder dry conditions.-The LCD Module is coated with a film to protect the display surface. Exercise care when peeling off this protective film since static electricity may be generated.10.2. STORAGE CONDITIONSWhen storing, avoid the LCD module to be exposed to direct sunlight of fluorescent lamps. For stability, to keep it away form high temperature and high humidity environment (The best condition is : 23±5°C, 45±20%RH). ESD protection is necessary for long-term storage also.10.3. OTHERSLiquid crystals solidify under low temperature (below the storage temperature range) leading to defective orientation or the generation of air bubbles (black or white). Air bubbles may also be generated if the module is subject to a low temperature.If the LCD Module have been operating for a long time showing the same display patterns the display patterns may remain on the screen as ghost images and a slight contrast irregularity may also appear.A normal operating status can be recovered by suspending use for some time. It should be noted that this phenomenon does not adversely affect performance reliability.To minimize the performance degradation of the LCD Module resulting from destruction caused by static electricity etc. exercise care to avoid holding the following sections when handling the modules.- Exposed area of the printed circuit board.- Terminal electrode sections.11. Using LCD modules11.1 LIQUID CRYSTAL DISPLAY MODULESLCD is composed of glass and polarizer. Pay attention to the following items when handling.(1) Please keep the temperature within specified range for use and storage. Polarization degradation,bubble generation or polarizer peel-off may occur with high temperature and high humidity.(2) Do not touch, push or rub the exposed polarizers with anything harder than a HB pencil lead (glass,tweezers, etc).(3) N-hexane is recommended for cleaning the adhesives used to attach front/rear polarizers andreflectors made of organic substances, which will be damaged by chemicals such as acetone, toluene, toluene, ethanol and isopropyl alcohol.(4) When the display surface becomes dusty, wipe gently with absorbent cotton or other soft materiallike chamois soaked in petroleum ether. Do not scrub hard to avoid damaging the display surface.(5) Wipe off saliva or water drops immediately, contact with water over a long period of time maycause deformation or color fading.(6) Avoid contacting oil and fats.(7) Condensation on the surface and contact with terminals due to cold will damage, stain orpolarizers. After products are tested at low temperature they must be warmed up in a container before coming is contacting with room temperature air.(8) Do not put or attach anything on the display area to avoid leaving marks on.(9) Do not touch the display with bare hands. This will stain the display area and degrade insulationbetween terminals (some cosmetics are determinate to the polarizers).(10)As glass is fragile, it tends to become or chipped during handling especially on the edges. Pleaseavoid dropping or jarring.11.2 INSTALLING LCD MODULEAttend to the following items when installing the LCM.(1) Cover the surface with a transparent protective plate to protect the polarizer and LC cell.(2) When assembling the LCM into other equipment, the spacer to the bit between the LCM and thefitting plate should have enough height to avoid causing stress to the module surface, refer to the individual specifications for measurements. The measurement tolerance should be ±0.1mm.11.3 ELECTRO-STATIC DISCHARGE CONTROLSince this module uses a CMOS LSI, the same careful attention should be paid for electrostatic discharge as for an ordinary CMOS IC.(1) Make certain that you are grounded when handing LCM.(2) Before removing LCM from its packing case or incorporating it into a set, be sure the module andyour body have the same electric potential.(3) When soldering the terminal of LCM, make certain the AC power source for the soldering irondoes not leak.(4) When using an electric screwdriver to attach LCM, the screwdriver should be of groundpotentiality to minimize as much as possible any transmission of electromagnetic waves produced sparks coming from the commutator of the motor.(5) As far as possible, make the electric potential of your work clothes and that of the workbenches tothe ground potential.(6) To reduce the generation of electro-static discharge, be careful that the air in the work is not toodried. A relative humidity of 50%-60% is recommended.11.4 PRECAUTIONS FOR OPERATION(1) Viewing angle varies with the change of liquid crystal driving voltage (Vo). Adjust Vo to showthe best contrast.(2) Driving the LCD in the voltage above the limit will shorten its lifetime.(3) Response time is greatly delayed at temperature below the operating temperature range. However,this does not mean the LCD will be out of the order. It will recover when it returns to the specified temperature range.(4) If the display area is pushed hard during operation, the display will become abnormal. However, itwill return to normal if it is turned off and then on.(5) Condensation on terminals can cause an electrochemical reaction disrupting the terminal circuit.Therefore, this product must be used and stored within the specified condition of 23±5°C, 45±20%RH.(6) When turning the power on, input each signal after the positive/negative voltage becomes stable.11.5 SAFETY(1) It is recommended to crush damaged or unnecessary LCDs into pieces and wash them off withsolvents such as acetone and ethanol, which should later be burned.(2) If any liquid leaks out of a damaged glass cell and comes in contact with the hands, wash offthoroughly with soap and water.13. REVISION HISTORYrecord Date Version Reviseversion 05-01-011.0 Original2.0 Change specification format 05-11-203.0 Change contact mode 06-08-03SAMPLE APPROVED REPORT。
