iW1692 7W LED 24.5V 350mA
1692中文

iw1692低功耗离线数字脉宽调制控制器1 特点•初级反馈消除光电隔离器和简化设计•多模操作总体效率最高•内置电缆压降补偿•低启动电流(10μ典型)•非常紧张的输出电压调节•没有外部环路补偿元件•内置恒流控制输出端反馈•内置软启动•顺应中央/环保局:无负载功率消耗平均效率法规•内置短路保护•交流线路下/过压和输出过压保护•40千赫频率脉宽调制开关•内置I SENSE引脚短路保护•PFM运行在轻负载•节省空间的封装2 描述该iw1692是一种高性能的交流/直流电源供应器,控制器采用数字控制技术的建立峰值电流模式反激式电源供应。
该装置提供效率高以及一些关键内置保护功能,同时尽量减少外部元件计数和账单的材料成本。
该iw1692删除需要二次反馈电路,同时实现良好线路和负载调节。
它也不需要循环补偿元件的同时保持稳定所有操作条件。
脉冲的波形分析允许一个循环反应速度远远超过传统的解决方案,从而提高了动态负载响应。
本内置功率限制功能可以优化变压器设计在通用离线应用程序和允许广泛的输入电压范围。
低启动和运行在轻负载金属烤瓷冠使iw1692是理想的应用对象最新的监管标准,备用电源。
3 应用•低功率交流/直流适配器/充电器手机,掌上电脑,数码相机•备用物资的电视机,影碟,机顶盒和其他消费电子产品图2iw1692典型应用电路4 引脚描述5 绝对最大额定值绝对最大额定值的参数值或范围,可造成永久性损伤,如果超过。
为最大安全运行条件,参见电气特性在6节。
6 电气特性电压=12,- 40摄氏°≤局长≤85°,除非另有说明(注1)注释:注1。
调整电压高于阈值设置启动之前在12伏特注2。
这些参数不是100%测试,保证设计和表征。
注3。
频率变化包括±1.2%抖动抑制电磁干扰。
7 典型性能特性8功能块图图8.0.1iw1692功能框图9 操作理论iw1692数字控制器,采用一种新的,专有技术消除初级侧控制二次调节电路和光电隔离反馈需要在传统的设计。
AL1692, AL1697应用指南-180105

AL1692/7 无调光器工作
起动过程
VIN-AC
VCC
VDS
VCOMP
正常工作开关频率fsw=62.5kHz
4) COMP电压调整至适当电压以达到设定电流输出。
AL1692/7 无调光器工作
无调光器工作
VBUS
VCOMP
ILED
ISource
1) 主电感峰值电流和输入电压同步,实现高PFC和低THD; 2) 闭环恒流控制方式实现了很好的输出电流精度和线性负载调整率; 3) 临界工作模式,最大程度减少了MOS管的开关损耗,优化了EMI。
VCC
单级原边控制模式可控硅调光IC驱动器和控制器; 2 RT BCM工作模式,可实现高效率和EMI优化; 6 COMP 3 高PFC,低THD(PF>0.9,THD<30%); 5 GND 4 优异的线性调整率和负载调整率; +/-3% LED输出电流精度; AL1692驱动器 (SOP-7封装) 支持Buck-Boost and Flyback拓扑; 100/120/230Vac交流市电输入; CS 1.6V钳位电压和15us Ton-max 限制; 8 VCC 1 内置3A/400V, 3A/500V, 2A/600V,1A/700V四种Mosfet选择; 7 RT 2 单绕组电感; 6 COMP 3 可实现很好的调光兼容性,大多数调光器可实现5% 到100%的调光范围; 5 GND 4 IC保护功能齐全(UVLO, LED开路/短路, 内置 thermal foldback(TFP),OTP); AL1692控制器 IC驱动器可支持3W~15W应用, IC控制器可支持功率达25W。
AL1692典型应用
RF1 L BD1 L1 T1 C5 R10 R3 R4 D3 LEDD1 D2 LED+ C2 N C1 R2 C3 R1 R9
艾尔文迪电子UHF-5805四通道可重复充电无线麦克风系统说明书
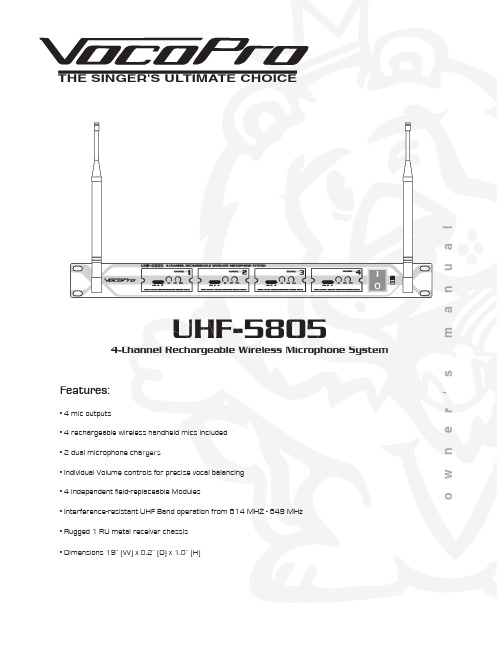
la u n a ms 'r e n w o THE SINGER'S ULTIMATE CHOICEUHF-5805Features:• 4 mic outputs• 4 rechargeable wireless handheld mics included • 2 dual microphone chargers• Individual Volume controls for precise vocal bala • Individual Volume controls for precise vocal balancing • 4 independent field-replaceable Modules• Rugged 1 RU metal receiver chassis • Dimensions 19” (W) x 8.2” (D) x 1.8” (H)4-Channel Rechargeable Wireless Microphone System• Interference-resistant UHF Band operation from 614 MHZ - 649 MHzTable of contentsSafety instructions (2)FCC information (3)Welcome (4)Listening for a lifetime (5)Specifications (6)Microphone basics (7)Before getting started (8)Mounting (9)Getting connected (10)Maintenance procedures (11)Charging the Microphones (12)Front and rear panel descriptions and functions (13)UHF-5805 & stage monitor/P.A. loudspeakers (14)Operations (14)Troubleshooting (15)��������������������CAUTION: To reduce the risk of electric shock, do not remove cover (or back). Nouser-serviceable parts inside. Only refer servicing to qualified service personnel.�������To reduce the risk of fire or electric shock, do not expose this unit to rain or moisture.��������������������������������The lightning flash & arrowheadsymbol, within an equilateral triangle, is intended to alert you to the presence of danger.The exclamation point within anequilateral triangle is intended to alert you to the presence of importantoperating and servicing instructions.�������������������� - All the safety and operating instructions should be read before the appliance is operated.���������������������� - The safety and operating instructions should be retained for future reference.���������������� - All warnings on the appliance and in the operating instructions should be adhered to.���������������������� - All operating and use instructions should be followed.�������������� - Do not use attachments notrecommended by the product manufacturer as they may cause hazards.��������������������� - Do not use this unit near water. For example, near a bathtub or in a wet basement and the like.������������������� - The appliance should be used only with a cart or stand that is recommended by the manufacturer.���� An appliance and cart combination should be moved with care. Quick stops, excessive force, and uneven surfaces may cause an overturn.�������������� - The appliance should be situated so its location does not interfere with its proper ventilation. For example, the appliance should not be situated on a bed, sofa, rug, or similar surface that may block the ventilation slots.������� - The appliance should be situated away from heat sources such as radiators, heat registers, stoves, or other appliances (including amplifiers) that produce heat.����������������� - The appliance should beconnected to a power supply only of the type described in the operating instructions or as marked on the appliance.����������������������������� - Precautions should be taken so that the grounding or polarization means of an appliance is not defeated.������������������������� - Power-supply cordsshould be routed so that they are not likely to be walked on or pinched by items placed upon or against them, paying particular attention to cords at plugs,convenience receptacles, and the point where they exit from the appliance.������������ - Unplug this unit from the wall outlet before cleaning. Do not use liquid cleaners or aerosol cleaners. Use a damp cloth for cleaning.��������������� - An outdoor antenna should be located away from power lines.������������������ - The power cord of the appliance should be unplugged from the outlet when left unused for a long period of time.��������������������������� - Care should be taken so that objects do not fall and liquids are not spilled into the enclosure through openings.���������������������������� - The appliance should be serviced by qualified service personnel when:A. The power supply cord or plug has been damaged; or B. Objects have fallen into the appliance; or C. The appliance has been exposed to rain; orD. The appliance does not appear to operate normally or exhibits a marked change in performance; orE. The appliance has been dropped, or the enclosure damaged.������������� - The user should not attempt to service the appliance beyond that described in the operating instructions. All other servicing should be referred to qualified service personnel.������To CATV system installer's (U.S.A.): This reminder is provided to call the CATV system installer's attention to Article 820-40 of the NEC that provides guidelines for proper grounding and, in particular, specifies that the cable ground shall be connected as close to the point of cable entry as practical.SAFETY INSTRUCTIONS1. IMPORTANT NOTICE: DO NOT MODIFY THIS UNIT!: This product, when installed as indicated in the instructions contained in this manual, meets FCCrequirements. Modifications not expressly approved by Vocopro may void your authority, granted by the FCC, to use this product.2. IMPORTANT: When connecting this product to accessories and/or another product use only high quality shielded cables. Cable(s) supplied with this product MUST be used. Follow all installation instructions. Failure to follow instructions could void your FCC authorization to use this product in the U.S.A.3. NOTE: This product has been tested and found to comply with the requirements listed in FCC Regulations, Part 15 for Class "B" digital devices. Compliance with these requirements provides a reasonable level of assurances that your use of this product in a residential environment will not result in harmful interference with other electronic devices. This equipment generates/uses radio frequencies and, if not installed and used according to the instructions found in the owner's manual, may cause interference harmful to the operation of other electronic devices. Compliance with FCC regulations does not guarantee that interference will not occur in all installations. If this product is found to be the source of interference, which can be determined by turning the unit "Off" and "On", please try to eliminate the problem by using one of the following measures:Relocate either this product or the device that is being affected by the interference.Use power outlets that are on different branch (circuit breaker or fuse) circuits or install AC line filter(s).In the case of radio or TV interference,relocate/reorient the antenna. If the antenna lead-in is 300-ohm ribbon lead, change the lead-in to coaxial type cable.If these corrective measures do not produce satisfactory results, please contact your local retailer authorized to distribute Vocopro products. If you can not locate the appropriate retailer, please contact Vocopro, 1728 Curtiss Court, La Verne, CA 91750.1. To ensure the finest performance, please read this manual carefully. Keep it in a safe place for future reference.2. Install your unit in a cool, dry, clean place - away from windows, heat sources, and too much vibration, dust, moisture or cold. Avoid sources of hum (transformers, v motors). To prevent fire or electrical shock, do not expose to rain and water.3. Do not operate the unit upside-down.4. Never open the cabinet. If a foreign object drops into the set, contact your dealer.5. Place the unit in a location with adequate air circulation. Do not interfere with its proper ventilation; this will cause the internal temperature to rise and may result in a failure.6. Do not use force on switches, knobs or cords. When moving the unit, first turn the unit off. Then gently disconnect the power plug and the cords connecting to other equipment. Never pull the cord itself.7. Do not attempt to clean the unit with chemical solvents: this might damage the finish. Use a clean, dry cloth.8. Be sure to read the "Troubleshooting" section on common operating errors before concluding that your unit is faulty.9. This unit consumes a fair amount of power even when the power switch is turned off. We recommend that you unplug the power cord from the wall outlet if the unit is not going to be used for a long time. This will save electricity and help prevent fire hazards. To disconnect the cord, pull it out by grasping the plug. Never pull the cord itself.10. To prevent lightning damage, pull out the power cord and remove the antenna cable during an electrical storm. 11. The general digital signals may interfere with other equipment such as tuners or receivers. Move the system farther away from such equipment if interference is observed.NOTE:Please check the copyright laws in your country beforerecording from records, compact discs, radio, etc.Recording of copyrighted material may infringecopyright laws.CAUTIONThe apparatus is not disconnected from the AC power source so long as it is connected to the wall outlet, even if the apparatus itself is turned off. To fully insure that the apparatus is indeed fully void if residual power, leave unit disconnected from the AC outlet for at least fifteen seconds. ����������������������������������������������������������������������������������Be sure to position the voltage selector to match the voltage of your local power lines before installing the unit.240V120VFCC INFORMATION (U.S.A.)Welcome...And Thank you for purchasing the UHF-5805from VocoPro, your ultimate choice in Karaoke entertainment! With years of experience in the music entertainment business, VocoPro is a leading manufacturer of Karaoke equipment, and has been providing patrons of bars, churches, schools, clubs and individual consumers the opportunity to sound like a star with full-scale club models, in-home systems and mobile units. All our products offer solid performance and sound reliability, and to reinforce our commitment to customer satisfaction, we have customer service and technical support professionals ready to assist you with your needs. We have provided some contact information for you below.VocoPro1728 Curtiss CourtLa Verne, CA 91750Toll Free: 800-678-5348TEL: 909-593-8893FAX: 909-593-8890VocoPro Company Email DirectoryCustomer Service & General Information****************Tech Support***********************Remember Our WebsiteBe sure to visit the VocoPro website for the latest information on new products, packages and promos. And while you're there don't forget to check out our Club VocoPro for Karaoke news and events, chat rooms, club directories and evena KJ Service directory!We look forward to hearing you sound like a PRO, with VocoPro, your ultimate choice in Karaoke entertainment.FOR YOUR RECORDSPlease record the model number and serial number below, for easy reference, in case of loss or theft. These numbers are located on the rear panel of the unit. Space is also provided for other relevant informationModel NumberSerial NumberDate of PurchasePlace of PurchaseSelecting fine audio equipment such as the unit you’ve just purchased is only the start of your musical enjoyment. Now it’s time to consider how you can maximize the fun and excitement your equipment offers. VocoPro and the Electronic Industries Association’s Consumer Electronics Group want you to get the most out of your equipment by playing it at a safe level. One that lets the sound come through loud and clear without annoying blaring or distortion and, most importantly, without affecting your sensitive hearing.Sound can be deceiving. Over time your hearing “comfort level” adapts to a higher volume of sound. So what sounds “normal” can actually be loud and harmful to your hearing. Guard against this by setting your equipment at a safe level BEFORE your hearing adapts.To establish a safe level:• Start your volume control at a low setting.• Slowly increase the sound until you can hear it comfortably and clearly, and withoutdistortion.Once you have established a comfortable sound level:• Set the dial and leave it there.• Pay attention to the different levels in various recordings.Taking a minute to do this now will help to prevent hearing damage or loss in the future. After all, we want you listening for a lifetime.Used wisely, your new sound equipment will provide a lifetime of fun and enjoyment. Since hearing damage from loud noise is often undetectable until it is too late, this manufacturer and the Electronic Industries Association’s Consumer Electronics Group recommend you avoid prolonged exposure to excessive noise. This list of sound levels is included for your protection.���������������������������Level������������ExampleQuiet library, Soft whispersLiving room, Refrigerator, Bedroom away from traffic Light traffic, Normal ConversationAir Conditioner at 20 ft., Sewing machineVacuum cleaner, Hair dryer, Noisy RestaurantAverage city traffic, Garbage disposals, Alarm clock at 2 ft.��������������������������������������������������������������Level��������������ExampleSubway, Motorcycle, Truck traffic, Lawn MowerGarbage truck, Chainsaw, Pneumatics drillRock band concert in front of speakersGunshot blast, Jet planeRocket launching pad-Information courtesy of the Deafness Research FoundationListening For A LifetimeSpecifi cationsReceiverCarrier Frequency Range: UHF 614~694MHzOscillation Mode: Quartz Controlled Fixed Frequency Stability: 10 PPMSensitivity: 1.6uV @ sinad =12dBMax. Deviation Range: 50HzS/N Ratio:>105dBT.H.D.: <0.5% @ 1kHzImage rejection: 85dB typicalSpurious Rejection: 75dB typicalFrequency Response: 40Hz~16kHzSquelch Control: dual-squelch circuitMax. Output Level: Balance: 0~400mV, Unbalance: 0~200mV Power Supply: External DC Power Supply, 0.7A, 12~15V DC Dimensions: 19”(L) x 8.2”(D) x 1.8”(H)Microphone basicsMicrophone PositionThe UHF-5805 is ideal for close-up vocals and can be held in the hand or mounted on a mic stand. The most common applications and placement techniques are listed below. Keep in mind that microphone technique is largely a matter of personal taste, and there is no one “correct” microphone position.Proximity EffectWhen the sound source is less than ¼ in. from the microphone, the microphone boosts bass frequencies (by 6 to 10 dB at 100 Hz), creating a warmer and richer bass sound than when farther away. This effect, known as proximity effect, happens only in unidirectional dynamic microphones like the UHF-5805.FeedbackFeedback occurs when the amplified sound from any loudspeaker reenters the sound system through any open microphone and is repeatedly amplified. Most commonly, feedback is caused by the following condi-tions: placing loudspeakers too close to microphones, having too many open active microphones, boosting tone controls indiscriminately (mainly treble) and performing in areas with high ratios of room surfaces that have hard and reflective surfaces such as glass, marble and wood. What to do if feedback occurs before the sound system is loud enough?• Request that the talker speak louder into the microphone.• Reduce the distance from the talker to the microphone. Each time this distance ishalved, the sound system output will increase by 6dB.• Reduce the number of open microphones.• Move the loudspeaker farther away from the microphone. Each time this distance isdoubled, the sound system output can be increased by 6dB.• Move the loudspeaker closer to the listener.• Use an equalizer/feedback reducer to cut the frequency bands in which the feedbackoccurs.Microphone Placement & Tone QualityLead & Backup VocalsLips should be less than 3” from or even touching the windscreen on an axis to the microphone. Doing this creates a robust sound, emphasizes bass and provides maximum isolation from other sources.SpeechWhen giving a speech or simply speaking, place the microphone 4” to 10” away from the mouth, just above nose height for a natural sound with reduced bass. You can also place the microphone 8” to 16” away from the mouth, slightly off to one side, for a more “distant” sound with highly reduced bass and minimal “s” sounds.Before getting startedBefore starting any installation procedures, it is recommend to completely unpack all the package contents. The original packaging should be kept in the event that re-shipping is needed. Upon unpacking the UHF-5805, you should have received the following items:•Custom Aluminum Travel Case (1)• UHF-5805 Receiver (1)• Handheld Microphones (4)• 3 ft. male/male ¼” cable (1)• 14V DC Main Unit power adapter (1), 9V DC Charger power adapter (2)• Dual Microphone Charger (2)9V9VUniversal Mic Charger Universal Mic Charger14VTo install the UHF-5805 to a 19” rack case, complete the steps below.1. Attach mounting brackets to the UHF-5805 via the supplied mounting screws.2. Align the UHF-5805 with the desired space in rack and slowly slide in, rear panel first.3. While aligned, use rack case screws (not included) in the order shown below to stabilize the UHF-5805 in its space, using the “X” rotation (numbered below) will ensure even tension and flush alignment.MountingNOTE: Depending on your rack case design, it may be neces-sary to allow for sufficient space for the antennas.NOTE: Do not tighten screws firmly until all screws are in place.����Maintenance proceduresRemoving the Field Replaceable ModulesEach of the 4 microphone modules on the UHF-5805 were designed in a way that allows them to slide out. This is a convenient feature if ever a module needs to be repaired or replaced.1. Remove the two screws that fasten the module to the front panel.2. To remove the module, simply slide the module out of the compartmentNOTE: It might be helpful to use a flat-head screwdriver to nudge the module out of its compartment.3. To re-insert, slide the module into compartment until it is completely secured. Secure the module withthe screws.The UHF-5805 comes with two dual chargers that let you charge all four microphones at the same time.Charging the MicrophonesIf the LED light on the microphone(s) does not light up when the microphone is turned on, this indicates that the microphone needs to be chargedTo charge:1. Place the microphone in the charger slot, the LED on the charger will be lit while the microphone is charging.2. When the LED on the charger turns off, the microphone is charged and can be removed.NOTE: For longest battery life, be sure to turn the microphones off when not in use.Reading the LED IndicatorsThe LEDs on the charger indicate the charging status. There are three states: blinking, on, and off.• Blinking - The power is connected to the charger but there are no microphones being charged • On - The microphone is being charged• Off - The microphone is completely charged and can be removed.Charger and Microphone Descriptions and Functions1. Microphone slots - Insert ne slots the microphones in these slots to charge2. Bodypack charger2. Body - pack charger Insert the optional rechargeable body pack in this slot to charge3. Microphone charge LED charge LED charge LE D in D - Indicate the - I indicators charging status of the microphones4. Bodypack charge LED in 4. Body - Indicates the charging status of the bodypack- I dicator - The color of this LED indicates the microphone’s charge level. Green means 5. Charge Indicator LED the charge is high, Orange means the charge is getting low and should be charged, and Red means the charge is very low and must be charged immediately.- Used to turn the microphone power ON and OFF . The mic power is ON when the 6. Power Switch switch is in the ON position and the power is OFF when the switch is in the OFF position.Charging the MicrophonesUniversal Mic Charger11562334NOTE:Make sure you are using the 9V power adapter for microphone chargersFront and rear panel descriptions and functions1.ANTEN ANTE NNA N - P NAS rovide both RF and AF signals.- Indicates whether the UHF-5805 is ON or OFF . When it is lit, the power is ON.2. POWER (LED) - Lights when RF signals are received from the microphone channels. - L 3. RF (LED) - 4. AF (LED)Lights when AF signals are received from the microphone channels.5. SQUELCH controls SQUELCH - Manual controls for controlling each microphone’s signal strength for bestcontrols performance. Turn clockwise to increase SQUELCH control and turn counter-clockwise to decreaseSQUELCH application.- Adjusts the individual VOLUME of the receiver’s 4 microphone channels.6. VOLUME controls - Contains the SQUELCH and VOLUME controls for each of the 4 wireless 7. MICROPHONE modules - C microphones. Each module can be easily removed individually. - Turns the UHF-5805 ON/OFF .8. POWER button - Main power jack for connection to an AC electrical outlet or power strip/surge 9. AC POWER connection - M protector. NOTE: Make sure you are connecting the 14V power adapter here.- This ¼” unbalanced output jack is for output connection to amplifiers, effects devices 10. MIXED OUTPUT or mixers. Both mic channels are output through this jack for mixed output. - These XLR unbalanced output jacks are for output connections to amplifiers, effects 11. XLR AUDIO OUTS devices or mixers. These are for separate mic channel connections with unmixed mic output.1567910113428UHF-5805 & stage monitor/p.a. loudspeakersIf you will be using the UHF-5805 with stage monitors and/or P.A. system, try the following:• Place the stage monitor directly behind the microphone.• Locate the P.A. loudspeakers so that they point away from the rear of the microphone. (With the speakers located in these positions, the possibility of feedback is greatly reduced).• Always check the stage setup before a performance to ensure optimum placement of microphone and monitors.IMPORTANT: Every wireless microphone installation is a unique situation, and can present a variety of prob-lems. Never attempt a live performance without first conducting a “walkthrough” test of the system in the performing area. If major changes (additional wireless systems or intercoms, relocation of scenery, etc.) have been made since the last walk-through test, check the wireless system again, as close to performance time as possible.P.A. Speakers Facing AwayFrom Rear of MicrophoneMonitor Directly BehindMicrophoneOperations2. Adjust the receiver’s VOLUME controls to approximately 50%.3. Switch the microphone’s POWER BUTTONS to the ON positions.4. Talk or sing into the microphones. During normal operation, the RF/AF signal LED’s will light when amicrophone is being used.5. Adjust the receiver’s VOLUME controls until the output levels are balanced w ith each other and otherpossible source output i.e. CD+G tracks.TroubleshootingProblemsNo sound output, RF/AF LED(s) are not glowingReceived signal is noisy or contains extraneous sounds with the microphone(s) ON.There is noise coming from the receiver with the microphones turned OFF.Momentary loss of sound as microphone(s) are moved throughout the operating range.Solutions• Make sure the microphone and receiver power switches and receiver are set to the ON position.• Check microphone charge to ensure there is sufficient power. Charge mic if necessary• Check receiver’s AC power connection.• Make sure antennas are firmly connected and extended to an optimal position.• If necessary, reduce the distance between the microphones and receiver.• Turn up the receiver’s VOLUME level controls.• Check for proper connection between receiver and external amplifier/mixer.• Talk into the microphone and observe the receiver’s RF/AF signal LED’s. If they glow, the problem is elsewhere in the sound system.• Check microphone(s) charge and recharge if the charge is low.• Remove local sources of UHF interference, such as lighting equipment.• Adjust the squelch controls on the front of the UHF-5805 receiver.• Signal may be too weak. If so, reposition antennas. (If possible, move them closer to the transmitter).• Remove local sources of UHF interference, such as lighting equipment.• Reposition the receiver or antennas.• Reposition the receiver, perform a “walkthrough”, and observe the signal strengths. If audio dropouts persist, mark these “dead spots” in the operating area and avoid them during the performance.UHF-5805 Manual © VocoPro 2011V 1.1Erratic LED blinking on the main receiver modules• Make sure the 14V power adapter is pluggedin to the main unit. Do not use the 9V adapterswith the main receiver unit.• If the power adapter is the 14V and the main unitlights are still blinking, contact VocoPro for areplacement。
LED模组规格书

项目内容 点间距/Pixel Pitch 基色/Trichromatic 模组尺寸/Module Size 模组点数/Module Points 像素密度/Pixel density 水平视角/Level view Angle 扫描方式/Scan Mode 最佳视距/Best View angle 工作电压/Working Voltage 功率消耗/Power consumption 平均无故障时间/MTBF 寿命/Screen Life 盲点率/Blind spot rate PH10mm户外单色 10mm 1R 320mmx160mm 32x16 10000点/平方 ≥110℃ 1/4. 10~150 220V±10% ≤500W(峰值) ≤350W(平均) ≥1000H 100000H ≤0.01% PH12mm户外单色 12mm 2R(OR 1R) 192mmx96mm 16x8 6944点/平方 ≥110℃ 1/4. ≥3500cd 10~150 220V±10% ≤600W(峰值) ≤400W(平均) ≥1000H 100000H ≤0.01% PH16mm户外单色 16mm 2R(OR 1R) 256mmx128mm 16x8 3906点/平方 ≥110℃ 1/4或静态 ≥2800cd 15~150 220V±10% ≤450W(峰值) ≤250W(平均) ≥1000H 100000H ≤0.01%
最高亮度/Maximuum brighjtness ≥7000cd 10~150 最佳视距/Best View angle 工作电压/Working Voltage 功率消耗/Power consumption 平均无故障时间/MTBF 寿命/Screen Life 盲点率/Blind spot rate 220V±10% ≤1500W(峰值) ≤800W(平均) ≥1000H 100000H ≤0.01%
TP-LINK IPTV解决方案

无线共享上网一体机 TD-W89741N 增强型 (经济型)
增强型防雷设计,4000V 雷击测试 支持同时共享上网与 IPTV 连接 11N 技术,150M 无线传输速率 IP 带宽控制,自由分配上网带宽 支持 PVC 自动检测
增强型防雷设计,4000V 雷击测试 支持同时共享上网与 IPTV 连接
无辐射,低功耗,绿色节能
电力线 AP
无线网卡 有线共享上网一体机 无线共享上网一体机
(增强型)
TL-PWA2701
TL-WN723N TL-WN727N TD-89402 增强型
TD-W89841N 增强型
200Mbps 传输速率,150Mbps 无线传输速率 128-bit AES 加密,数据传输安全可靠 同一电表范围内,传输距离可达 300m 支持 QoS 应用优先,保障 IPTV 的畅通
类型型号特点电力线适配器增强型tlpa501500mbps传输速率信号稳定不掉线128bitaes加密数据传输安全可靠同一电表范围内传输距离可达300m支持qos应用优先保障iptv的畅通支持多路iptv电力线适配器经济型tlpa200200mbps传输速率信号稳定128bitaes加密数据传输安全可靠同一电表范围内传输距离可达300m无辐射低功耗绿色节能电力线aptlpwa2701200mbps传输速率150mbps无线传输速率128bitaes加密数据传输安全可靠同一电表范围内传输距离可达300m支持qos应用优先保障iptv的畅通无线网卡tlwn723ntlwn727n11n无线技术150mbps无线传输速率qss快速安全设置无线网络更安全精致小巧方便用于机顶盒有线共享上网一体机td89402增强型ip带宽控制自由分配上网带宽支持pvc自动检测增强型防雷设计4000v雷击测试支持同时共享上网与iptv连接无线共享上网一体机增强型tdw89841n增强型11n技术300m无线传输速率ip带宽控制自由分配上网带宽支持pvc自动检测增强型防雷设计4000v雷击测试支持同时共享上网与iptv连接无线共享上网一体机经济型tdw89741n增强型11n技术150m无线传输速率ip带宽控制自由分配上网带宽支持pvc自动检测增强型防雷设计4000v雷击测试支持同时共享上网与iptv连接2
IC-7112W 安装指南说明书

IC-7112W包裝內容LED 指示燈號說明網路線壁架底座 螺絲安裝指南CD 光碟片電源變壓器IC-7112W硬體安裝請您按照本章節的說明,使用Wi-Fi 無線網路連線,安裝啟動手機App EdiLife 來設定您的IC-7112W ,您也可以使用有線網路連接的方式或使用電腦執行EdiView Finder 的方式來設定(請參閱CD 內附使用手冊)。
您可以在本產品底座標籤貼紙上找到產品獨有的 SSID ,它與"EdiView.Setup ** "一致,而最後兩碼* * 即為您的網路攝影機獨有的 MAC 位址的最後兩碼。
1. 請將電源變壓器連接至產品本體後方的電源連接埠,並將插頭端插入電源插座。
2. 請稍待本產品開機完成。
當產品本體的LED 燈號呈現紅燈閃爍的狀態,代表安裝模式已就緒。
3.請使用您的手機或平板,依您其作業系統至Google Play或Apple App Store搜尋〝EdiLife〞App,然後下載並安裝。
4.iOS用戶請在啟動EdiLife之前,先前往您iPhone的Wi-Fi設定,並連接到您IC-7112W的SSID(EdiView.Setup **),接著請前往步驟75.Android用戶請啟動EdiLife後,點擊視窗畫面右上方的+圖示(如下右圖示)6.Android用戶請自可用無線裝置清單中選擇您的無線網路攝影機後,耐心稍待App建立連線。
若您未看到您想要連線的無線攝影機,請點擊右上角的”重新整理”圖示.7.當您看到如下提示對話框,為了安全考量,請輸入新的裝置名稱和密碼。
接著,請點選Done(確認)以繼續。
8.請從清單中選擇您的Wi-Fi無線網路,然後輸入您的無線網路密碼後,再按OK "確定"。
若您未看到您想要連線的無線網路,請點擊右上角的”重新整理”圖示.9. 請稍候您的IC-7112W 連接到您的無線網路。
當你看到"Setupcomplete(安裝完成)"畫面時,請按下"Live"圖示以繼續,或等待數秒自動繼續。
NETGEAR WAX628 Insight Managed WiFi 6 AX5400 Acces

NETGEAR, Inc.350 East Plumeria Drive San Jose, CA 95134, USA© NETGEAR, Inc., NETGEAR and the NETGEAR Logo are trademarks of NETGEAR, Inc. Anynon‑NETGEAR trademarks are used for reference purposes only.July 2022NETGEAR INTERNATIONAL LTD Floor 1, Building 3,University Technology Centre Curraheen Road, Cork, T12EF21, IrelandInstallation GuideInsight Managed WiFi 6 AX5400 Access PointNOTE: You can power up the WAX628 by connecting it to a PoE+ switch, or you can purchase a power adapter separately.Overview1Power/Cloud LED 2LAN 1 LED 3LAN 2 LED 4 2.4 GHz WLAN LED 55 GHz WLAN LED 6DC power connector 7LAN 1/PoE+ port 8LAN 2 port 9Reset button1. Connect to power and InternetPower up the WAX628 access point (AP) by connecting the LAN 1/PoE+ port to a PoE+ switch that supplies 802.3at power, or to a power adapter.Make sure that the AP has Internet connectivity: •If you connect the AP to a switch, make sure that the switch has Internet connectivity. •If you use a power adapter to provide power, use an Ethernet cable to connect theLAN 1/PoE+ port on the AP to a router or other network device on a network with Internetconnectivity.Metal bracket with T‑bar, lock screw,and 4 short screws 3 tall screws and anchors for wall mountingAfter starting up and during setup, the AP’s LEDs can light in these colors:For more information about the LEDs, see the user manual, which you can download by visiting /support/download.Terms of UseThis device must be professionally installed. It is the installer’s responsibility to follow local country regulations including operations within legal frequency channels, output power and DFS requirements. Vendor or Reseller or Distributor is not responsible for illegal wireless operations. Please see Device’s Terms and Conditions for more details.B. Configure the AP with the NETGEAR Insight app1. Connect your mobile device to the AP’s setup SSID (WiFi network name) using one of thefollowing methods:• Scan the QR code : You can use the QR code on the label to connect to the APs SSID.•Connect manually : The setup SSID is on the AP label on the bottom of the AP and is shown in the format NETGEARxxxxxx‑SETUP , where xxxxxx are the last six digits of the AP’s MAC address. The default WiFi passphrase is sharedsecret .2. Open the NETGEAR Insight app.3. Enter the email address and password for your account and tap LOG IN .4. Add a new network location where you want to add the AP by tapping the Next button , andthen tapping OK . You can also select an existing network location.The device admin password that you entered for the new network location replaces the existing admin password on all devices that you add to the network location.In most situations, Insight detects the AP automatically, which can take several minutes.5. To add the AP to your network location, do one of the following:• If the AP is automatically detected and listed in the Insight Manageable Devices section, tap the icon for the AP , and then tap the ADD DEVICE button.•If the AP is not automatically detected, or you prefer to use another method to add the AP , tap the + icon in the top bar, and do one of the following:-Tap the SCAN BARCODE OR QR CODE button, and then scan the AP’s code. -Tap the Enter Serial Number and MAC Address link, and then manually enter theAP’s serial number and MAC address.A. Configure the AP with the NETGEAR Insight Cloud Portal1. Make sure that the AP is connected to the Internet.2. On a computer or tablet, visit /.3. Enter the email address and password for your NETGEAR account and click the NETGEARSign In button.4. Only if you are an Insight Pro user, select the organization to which you want to add the AP .5. Add a new network location where you want to add the AP , or select an existing networklocation.6. Click the + (Add Device ) button.NOTE: If you are an Insight Pro user, you can either add a single device or you can add multiple Insight managed devices by uploading a device list as a CSV file.7. In the Add New Device pop‑up page, enter the AP’s serial number and MAC address, andthen click Go .8. After Insight verifies that the AP is a valid product, you can optionally change the devicename of the AP , and then click Next .When the AP is successfully added to the portal, a page displays a confirmation that setup is in progress.NOTE: If the AP is online but Insight does not detect the AP , the firewall at the physical location where the AP is located might prevent communication with the Insight cloud. If this happens, add port and DNS entries for outbound access to the firewall. For more information, see /000062467.The AP automatically updates to the latest Insight firmware and Insight location configuration. This might take up to 10 minutes, during which time the AP restarts.The AP is now an Insight managed device that is connected to the Insight cloud‑based management platform. If the Power/Cloud LED was solid green, it lights solid blue.You can use the Insight Cloud portal or Insight app to configure and manage the AP .2. Configure and manage the APInsight remote management offers additional features and add‑on services that are not available in standalone mode. Your new Insight‑manageable device comes with Insight included. You can choose an Insight Premium or Insight Pro account. For more information, visit the following pages:• /business/services/insight/subscription/•/000061848/How‑do‑I‑use‑NETGEAR‑s‑one‑year‑of‑Insight‑included‑subscriptionTo configure and manage the AP , use one of the methods described in the following table.A.Remotely Cloud/remote modeNETGEAR Insight Cloud PortalSee A. Configure the AP with the NETGEAR Insight Cloud Portal B.Remotely Cloud/remote mode NETGEAR Insight appSee B. Configure the AP with the NETGEAR Insight app C.LocallyStandalonemodeWeb browserSee C. Configure the AP as standalone in a web browserIf connected to 2.5 Gbps equipment, the WAX628 LAN 1/PoE+ port supports Ethernet speeds up to 2.5 Gbps within your LAN. The preceding figures show a NETGEAR MS510TXUP switch, which supports speeds of 2.5 Gbps and higher, as well as PoE+. If your Internet connection, modem, router, and switch support a speed of 2.5 Gbps, the AP’s Internet connection also functions at 2.5 Gbps. Otherwise, the Internet connection functions at 1 Gbps, which is a common speed.NOTE: The AP receives an IP address from a DHCP server (or a router that functions as a DHCP server) in your network. If your network does not include a DHCP server, the AP uses its default IP address: 192.168.0.100.Sample connections for a NETGEAR Insight setupSample connections for a standalone setupIf you want to use Insight remote management, your NETGEAR account is also your Insight account. Your NETGEAR account credentials let you log in as an Insight Premium user, or if you upgrade to an Insight Pro account, as an Insight Pro user.If you don’t have an Insight account yet, you can create an account now.For information about creating an Insight Premium account or upgrading to an Insight Pro account, /000044343.Continued on the next page.Visit /support to get your questions answered and access the latest downloads. You can also check out our NETGEAR Community for helpful advice at .Support and CommunitySi ce produit est vendu au Canada, vous pouvez accéder à ce document en français canadien à https:///support/download/.(If this product is sold in Canada, you can access this document in Canadian French at https:///support/download/.)For regulatory compliance information including the EU Declaration of Conformity, visit https:///about/regulatory/.See the regulatory compliance document before connecting the power supply.For NETGEAR’s Privacy Policy, visit https:///about/privacy‑policy.By using this device, you are agreeing to NETGEAR’s Terms and Conditions athttps:///about/terms‑and‑conditions. If you do not agree, return the device to your place of purchase within your return period.Do not use this device outdoors. The PoE source is intended for intra building connection only.For 6 GHz devices: Only use this device indoors. The operation of 6 GHz devices is prohibited on oil platforms, cars, trains, boats, and aircraft, except that operation of this device is permitted in large aircraft while flying above 10,000 feet. Operation of transmitters in the 5.925-7.125 GHz band is prohibited for control of or communications with unmanned aircraft systems.Regulatory and LegalMounting optionsYou can mount the AP to a wall or to a ceiling with a 15/16 in. (24 mm) T‑bar, or you can install the AP freestanding on a flat surface.We recommend that you use a flat Ethernet cable so that the cable fits in the narrow space between the AP and the surface on which it is mounted or placed.Before you mount the AP , first set up and test the AP to verify WiFi network connectivity.Mount the AP on a wallshown in the format NETGEARxxxxxx‑SETUP , where xxxxxx are the last six digits of the AP’s MAC address. The default WiFi passphrase is sharedsecret .2. On your computer, launch a web browser and, in the address bar, enter .Your browser might display a security warning because of the self-signed certificate on the AP , which is expected behavior. You can proceed, or add an exception for the security warning. For more information, see /000062980/.3. Enter the AP user name and default password. The user name is admin . The defaultpassword is password . The user name and password are case‑sensitive.4. Select the Web-browser (Local) radio button.The Day Zero Easy Setup page displays.5. Follow the instructions on the Day Zero Easy Setup page, and then click the Apply button.We recommend that you make a note of the new admin password, SSID (WiFi network name), WiFi passphrase, and IP address to keep in a safe place. A message displays to indicate that your settings are being applied.6. If the WiFi connection of your computer or mobile is terminated, reconnect to the AP usingthe new SSID and WiFi passphrase that you set on the Day Zero Easy Setup page.7. When the login page displays, you can log in to the AP using your new admin password toconfigure the AP .For information about configuring the AP , see the user manual, which you can download by visiting /support/download.We recommend that you register your AP with NETGEAR.8. To register your AP with NETGEAR:a. From a computer or mobile device that is connected to the Internet, visit.b. Log in to your NETGEAR account.If you do not already have a NETGEAR account, you can create an account now.The My Products page displays.c. From the menu on the left, select Register a Product.d. In the Serial Number field, type the serial number of your AP .The serial number is 13 digits long. It is printed on the AP label.e. From the Date of Purchase menu, select the date that you purchased the AP .f.Click the REGISTER button.Your AP is registered to your NETGEAR account.A confirmation email is sent to your NETGEAR account email address.CAUTION: Make sure that the wall is not damaged. 1. Place the mounting plate on the wall.2. Mark the wall where the mounting holes are.3. wall.4. the anchors are flush with the wall.5. wall.NOTE: without anchors.6. Connect any cables.7. Attach the AP to the mounting plate.8. Twist the AP clockwise to lock it onto themounting plate.Next button..。
诺瓦科技LED显示屏联网播放器TB2规格书

萨福铝焊机说明书
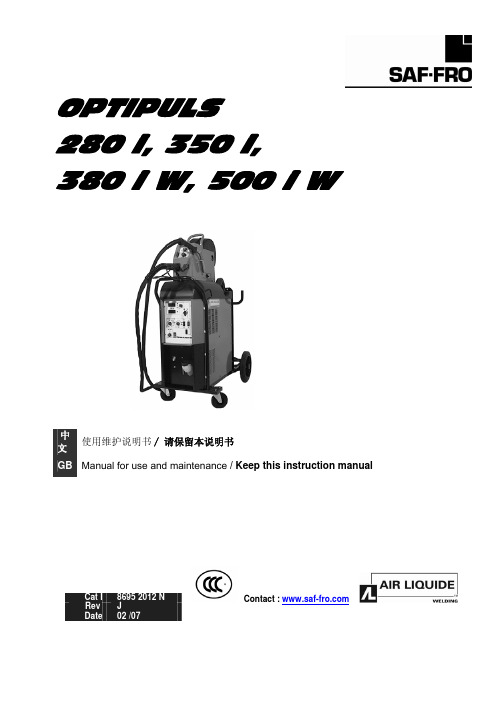
B - 安装调试 ............................................................................................................10 1. 拆除包装 .......................................................................................................10 2. 送丝机连接...................................................................................................10 3. 主电源的电路连接 .....................................................................................10 4. 焊枪的连接...................................................................................................10
中文
目录
安全说明 .....................................................................................................................2
A - 总体介绍 ...............................................................................................................7 1. 装置简介 .........................................................................................................7 2. 焊接设备组成 ................................................................................................7 3. 前面板描述.....................................................................................................8 4. 选配件..............................................................................................................8 5. OPTIPULS i / i W技术规格 .............................................................................8 6. 尺寸和重量.....................................................................................................9 7. 冷却装置的技术规格......................................................................................9
讯飞网维 信号特克 千兆以太网性能测试仪 说明书

SIGNAL TEK™Cable Performance T esterI Gigabit PerformanceQualification – Test toIEEE 802.3 standardsI Selectable PerformanceT esting – qualify performanceof Data, Voice over IP, andIP Video applicationsI Performs Gigabit Ethernetlink establishment test in10 secondsI Data Monitoring to detectintermittent network problemsI Smart Autotest Functiondetects the presence of theSIGNAL TEK remote, activenetwork device or open endedcable and automatically runsthe appropriate test suiteI Intuitive Graphical UserInterface for fast andeasy operationI Internal and USBData Storage –store 20,000 tests internallyor unlimited on USB driveI Prints Easy-to-Read Pass/Fail Qualification ReportsSIGNALTEK™– High-Performance Gigabit Ethernet TestingSIGNALTEK™is the most cost-effective Gigabit Ethernet cableAutotest key to initiate tests from the remote end for one personoperation2.8Љ(7.1cm) 1⁄4VGA Color Display with backlighting for use in low light conditionMulti-color LEDs indicate link status,loopback mode,10/100 and Gigabit device detection,Autotest pass/fail,and battery conditionEasy-to-navigate user interfaceCompact design and soft over-mold sides fit well into any sized handContext sensitive softkeysSingle button cable testingQuick navigation key returns to Job Manager screenSingle button push for active network testing and monitoring Port status function detects 10/100 or Gigabit Ethernet devicesDisplays result for last autotest via red or green LED indicationSIGNAL TEK ™Standard KitCatalog No. 33-974I1 SIGNALTEK ™Near-end and remote-end handset IDEAL INDUSTRIES, INC.03/06Printed in U.S.A.ISO 9001:2000 QMSNo. 33-974SIGNALTEK ™OptionalPower Adapter – 4010-00-0136DESCRIPTION CAT NUMBER SIGNALTEK™ Cable Performance Tester 33-974Replacement cable accessory kit –Contains all original cables in SIGNALTEK™ kit 1219-91-0003RJ45 to 8 head alligator clipK-7920OPTIONALUniversal (120-240V) AC-DC power adapter (1)4010-00-0136。
LED调光智能控制器(蓝牙版)

图(13)
7
软件功能介绍 Software Features
定时功能介绍
(1) 点击主界面上的定时按钮,进入定时界面
(2) 添加一条定时,点击界面上的添加按钮;
(3) 设置定时信息,时间、日期、星期、动作。针对“动作” 说明如下。
点击动作按钮,进入动作界面,点击模式选择按钮,出现 16种可选定时动作如图(17),随便点击一种模式(除关 闭外)界面即马上显示当前模式的相关默认设置如图 (16),并可对所设定时15种模式的亮度、速度进行设 置,设置成功后点击确定按钮。返回上一层界面,再次点 击确定按钮。
LED Bluetooth版 调光智能控制器 使用说明书
广州唯创电子有限公司
Guangzhou Waytronic Electronics Co., Ltd.
目录 Catalogue
1 产品简介 2 控制器参数
2 功能概述及应用 4 安装指引 4 安装指导
5 软件使用说明 6 控制端连接控制器 7 软件功能介绍
3
安全指引 Safety Guidelines
注意!为了保证产品的完好状态和使用安全,请遵守此说明书上的指示和提醒。谨 慎操作!请详细阅读安全注意事项:
1、安装时尽量避免在雷区、强磁场和高压区域。 2、请确保接线正确牢固,以免短路损坏部件和触发火灾事故。 3、请将控制器安装在通风良好的地方,以保证环境温度适宜。 4、请检查控制器输入电压、开关电源(电源要配套恒压开关电源)是否符合 产品要求,电源正负极定义是否和产品一致。 5、禁止带电接线,检查确认接线正确后,检查无短路,再通电! 6、如果发生问题,请勿私自维修。如果有疑问,请联系供应商。
图(14)
图vice
从购买产品时间起,1年时间内按操作说明正常使用出现质量问题,本公司 免费提供维修或更换服务。
一LED显示屏P6全彩显示屏规格参数
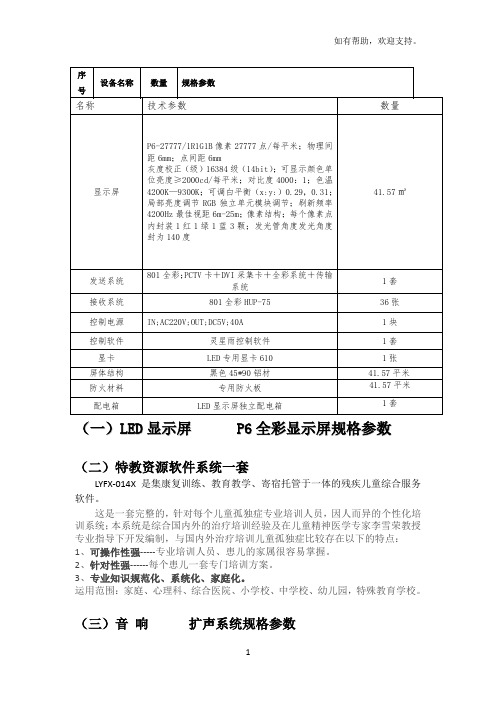
(一)L E D显示屏P6全彩显示屏规格参数(二)特教资源软件系统一套LYFX-014X是集康复训练、教育教学、寄宿托管于一体的残疾儿童综合服务软件。
这是一套完整的,针对每个儿童孤独症专业培训人员,因人而异的个性化培训系统;本系统是综合国内外的治疗培训经验及在儿童精神医学专家李雪荣教授专业指导下开发编制,与国内外治疗培训儿童孤独症比较存在以下的特点:1、可操作性强-----专业培训人员、患儿的家属很容易掌握。
2、针对性强------每个患儿一套专门培训方案。
3、专业知识规范化、系统化、家庭化。
运用范围:家庭、心理科、综合医院、小学校、中学校、幼儿园,特殊教育学校。
(三)音响扩声系统规格参数∙∙∙∙(五)升降机技术参数1.规格型号:SJY0.3-8(剪叉式六层结构)2.载重:300KG 自身重量:750KG3.升高:8m(工作高度9.7m)4.台面尺寸:1800*900mm5.外形尺寸:2200*1200*1350mm6.自身高度:135CM7.护栏材料:25mm方管、高900mm(可拆卸)8.升降速度:3-4m/min9.支杆材料:莱钢Q235高强度矩形管采用100*50*4m10.液压油缸:Ф80×2支11.密封件:采用日本“NOK”进口密封圈图片仅供参考12.功率:(直流220V、380V交流12V、24V可选)/2.2KW 泵站:采用无锡德力优质泵站。
13.控制方式:配电箱按钮控制,上下控制。
14.电器:德力西电器总程台面采用汽车专用防滑地板15.槽钢:设备底上架采用10#槽钢,销轴45#热处理钢材。
16.转动部位采用支杆套加无油耐磨轴承,型号为SF-217.液压油:冬季用HM-32#,夏季用HM-46#,油管采用双层钢网高压油缸,颜色为橘黄色。
18.轮胎:充气橡胶轮4个。
19.移动方式:人工牵引和机械牵引。
20.售后服务:免费保修一年、超期只收成本费,终生服务;承诺,出现质量问题由专业维修人员及时到达现场。
十大触控一体机品牌技术参数
目录一、希沃 (1)70寸技术参数 (1)图片示例 (2)二、TCL (3)70寸技术参数 (3)图片示例 (4)65寸技术参数 (5)三、上海广电光显 (6)技术参数 (6)四、长虹 (7)65寸技术参数 (7)五、鸿合科技 (8)70寸技术参数 (8)六、创维光电 (8)70寸技术参数 (9)图片示例 (10)84寸技术参数 (11)65寸技术参数 (12)七、上海仙视 (12)70寸技术参数 (12)图片示例 (14)84寸技术参数 (15)八、夏普 (16)70寸技术参数 (16)80寸技术参数 (17)图片示例 (19)九、创显光电 (19)70寸技术参数 (20)84寸技术参数 (21)图片示例 (22)十、深圳中银科技 (23)70寸技术参数 (23)一、希沃70寸技术参数图片示例70寸图片165寸图片2二、TCL70寸技术参数图片示例70寸图片365寸图片465寸技术参数三、上海广电光显技术参数四、长虹65寸技术参数五、鸿合科技70寸技术参数产品规格:70英寸型号:HD-I7002E背光类型:LED显示比例:16:9可视角度:178°物理解析度:1920*1080Pixel图像制式/声音制式:PAL/DK,I3D功能:——工作电压:AC 90-265V,50/60Hz触摸表面材质:钢化玻璃感应方式:红外感应触摸技术特性:HID免驱触摸点数:多点触控,多点书写书写方式:手指或书写笔触摸分辨率:32767*32767通讯接口: USB存储温度/湿度:-20℃~60℃,10%~90% 工作温度/湿度:5℃~50℃,10%~90% 安装方式:壁挂或移动整机尺寸:1648.9*975.6*112.9mm重量:70KG六、创维光电70寸技术参数图片示例70寸图片565寸图片6七、上海仙视70寸技术参数图片示例八、夏普 70寸技术参数 电力消耗(W ) 230W 待机消耗功率(W ) 0.50电源要求 交流110-240V ,50Hz 屏幕显示语言 英文/中文(简体)/俄语 扬声器 (150mm×34mm )×2音频输出功率 10W×2(AV 输入,负载4欧姆,失真度为10%时) 电视调谐系统 自动预设99个频道视频彩色制式 PAL/SEAM/NTSC3.58/PAL60图像清晰度* RD 模拟信号:水平>=350,垂直>=400以上 SDTV :水平>=450,垂直>=450以上 背光源 LED 重量kg 57.5KG 外型尺寸(cm )宽×深×高 1.625 ×106 ×993mm液晶显示屏 X-GEN 面板分辨力1920(水平)×1080(垂直)下面-数字(天线输入)UHF/VHF 75q DIN 型插座下面-模拟(天线输UHF/VHF 75q DIN 型插座入)后面ー音频输入 HDMI2/电脑共用(直径3.5mm 插孔)RS-232C 9针D-sub 凸型插头电脑 15针小型D-sub,音频输入(与HDMI2共用)(直径3.5mm 插孔)后面—输入5 视频输入,音频输入后面—输入4色差输入(480I,576I,480P,576P,720P/50Hz,720P/60Hz, 1080I/50Hz,10080I/60Hz ),音频输入 后面-HDMI3HDMI(HDMI 输入)(480I,576I,480P,576P,720P/50Hz, 720P/60Hz,1080I50Hz,1080I/60Hz,1080P/50Hz, 1080P/60Hz,1080P/24Hz )侧面-HDMI2HDMI(HDMI 输入)(480I,576I,480P,576P,720P/50Hz720P/60Hz,1080I/50Hz,1080I/60Hz,1080P/50Hz,1080P/60Hz1080P/24Hz)音频输入(与电脑输入公用)(直径3.5mm 插孔))侧面-HDMI 1(ARC )HDMI(HDMI 输入)(480I,576I,480P,576P,720P/50Hz,720P/60Hz,1080I/50Hz,1080I/60Hz,1080P/50Hz,1080P/60Hz,1080P/24Hz ) 侧面-USB2(HDD ) USB2.0 前面 USB12.0侧面ー音频输出/耳机 直径3.5 插孔(音频输出)接收频道 VHF/UHF C1・C12・C13-C57 CATV SECAM/NTSC3.58/PAL60立体声/双语 丽音(NICAM )B/G ,I ,D/K A2 立体声:B/G 接收频率 模拟ATV 44.25-863.25MHz 数字DTV 55.25-863.25MHz电视制式 PAL :B/G,D/K ,I SECAM :B/G,D/K,K/K1 NTSC :M电源 由USB 提供操作系统 Win XP,Win CE,Vista,Win7,Linux,Mac,Android,Win8检测区域 153.9×86.6cmPC 连接器 USB (兼容1.1)书写方式 手指或非透明触控笔触摸定位精度 ± 2mm响应速度(单点连续) 4ms (典型值)触摸点数 6点检测方法 红外线阻隔检测方法80寸技术参数 基本规格电力消耗(W ) 260 待机消耗功率(W ) 0.50 能效指数(EEILCD ) 1.4分辨力1920(水平)×1080(垂直)外型尺寸(cm )宽×深×高 187.6×11.6×113.3液晶显示屏X超晶面板端子DVI-D 端口 1音频输出端子(HP) 1光纤数字音频输出 1Y,Pb,Pr输入端子 1USB端口 2RS-232C端口 1PC输入 1LAN(网络) 无HDMI端口 3复合视频输入端子 2声音声音输出(w) 10W+10W智能光控(opc) 有立体环绕SRS TruSurround HD图片示例九、创显光电图片示例十、深圳中银科技70寸技术参数。
设备需求技术参数
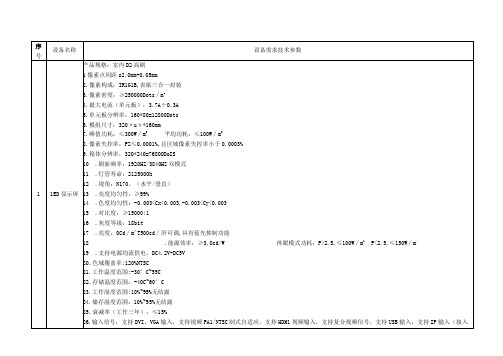
20.色域覆盖率:120%NTSC
21.工作温度范围:-30°C~55C
22.存储温度范围:-40C~60°C
23.工作湿度范围:10%~95%无结露
24.储存湿度范围:10%~95%无结露
25.衰减率(工作三年):≤15%
26.输入信号:支持DVI、VGA输入,支持视频PA1/NTSC制式自适应,支持HDM1视频输入,支持复合视频信号,支持USB输入,支持IP输入(接入IP解码卡,支持主流厂商的IPC设备)
所有图层均支持抠图、透明度调节,呈现ห้องสมุดไป่ตู้佳效果。
不同信号进行切换时支持多种特效,包括淡入淡出、上下左右划幕、斜上斜下划幕、圆形切出切入、菱形切出切入、梳状切换。
支持信号源热备份。
可对输入输出信号进行预监设置。
ED1D配置管理:支持ED1D(ExtendedDisp1ayIdentificationData,扩展显示识别数据)的读取、修改、自定义。
单卡12个标准HUB75E接口,输出24组RGB数据,单卡最大支持128义768像素带载
视频处理器:
单机具有12个网口,单网口带载65万像素,整机最大带载780万像素,宽度可达到12000点,高度可达到4000点。
支持多种数字信号接口,包括1路DPI.1,1路HDMI13和4路DV1-D输入源。
支持3画面显示,画面位置任意布局。
KTDR功能,支持SDR转HDR图像优化技术,可以提升普通SDR视频的对比度、增强图像细节表现,让普通视频具备HDR效果。
控制软件:
用于1ED显示屏控制和播放的专业软件。该软件功能丰富、性能优越,兼具良好的操作界面,易学易用。支持视频、音频、图像、文字、F1ash、Gif等形式的媒体文件播放;支持MiCrOSoftOffiCe的WOrC1、Exce1、PPT显示;支持时钟、计时、天气预报显示;支持外部视频信号(TV、AV、S-Video.复合视频)播放;支持多页面多分区节目编辑;软件提供了丰富灵活的视频切换功能、分区特效,以及三维特效动画,让显示屏的显示效果得到完美展现。
蔚蓝电子产品-菲利普显示器LCD监视器-平滑触摸B线24(23.8英寸 60.5厘米)1920 x

Philips Monitor LCD monitor with SmoothTouchB Line24 (23.8"/60.5 cm diag.)1920 x 1080 (Full HD)242B9TNBrilliant interactive display with SmoothTouchA sturdy water- and dust-resistant touch-screen monitor for flexible use anywhere. Offering simple and intuitive use across applications, greatly boosts productivity.Brilliant interactive display•SmoothTouch display for natural, fluid touch response•Stylus for fluid and accurate performance with more control •Monitor front surface meets IP65 for water and dust resistance •16:9 Full HD display for crisp, detailed images •SmartContrast for rich black details•LowBlue Mode for easy-on-the-eyes productivity •Less eye fatigue with Flicker-Free technology•EasyRead mode for a paper-like reading experience Easy to experience•HDMI ensures universal digital connectivity •USB 3.1 high-speed data transfer•DisplayPort connection for maximum visuals •VESA mount allows for flexibilityHighlightsSmoothTouchThis Philips display uses Projected capacitive 10-point touch technology for fluid response. You can fully utilise the new capabilities of touch-based applications and bring your older applications to life. Touch-type with 10 fingers or play exciting interactive games with your friends. Collaborate with colleaguesinteractively at work or school environment and increase your productivity and efficiency.Water- and dust-resistantFor less-than-perfect environments, you need a monitor that's designed to hold up to the splashes of water and dust that happen in the everyday world. Ingress Protection (IP) ratings defined in international standard IEC/EN 60529, are used to define levels of sealing effectiveness of electrical enclosures against intrusion from foreign bodies and moisture. This Philips display meets the international IP rating for water and dust resistance. It will hold up to the water splashes and dust that happen in the everyday world.16:9 Full HD displayPicture quality matters. Regular displays deliver quality, but you expect more. This display features enhanced Full HD 1920 x 1080resolution. With Full HD for crisp detail paired with high brightness, incredible contrast and realistic colours, expect a true-to-life picture.SmartContrastSmartContrast is a Philips technology that analyses the contents you are displaying,automatically adjusting colours and controlling backlight intensity to dynamically enhance contrast for the best digital images and videos or when playing games where dark hues are displayed. When Economy mode is selected, contrast is adjusted and backlighting fine-tuned for just-right display of everyday office applications and lower power consumption.LowBlue ModeStudies have shown that just as ultra-violet rays can cause eye damage, shortwave-length blue light rays from LED displays can cause eyedamage and affect vision over time. Developed for wellbeing, the Philips LowBlue Mode setting uses a smart software technology to reduce harmful shortwave blue light.Flicker-Free technologyDue to the way brightness is controlled on LED-backlit screens, some users experience flicker on their screen which causes eyefatigue. Philips Flicker-Free technology applies a new solution to regulate brightness and reduce flicker for more comfortable viewing.EasyRead modeEasyRead mode for a paper-like reading experienceHDMI ReadyAn HDMI-ready device has all the required hardware to accept High-DefinitionMultimedia Interface (HDMI) input. An HDMI cable enables high-quality digital video and audio to be transmitted over a single cable from a PC or any number of AV sources (including set-top boxes, DVD players, A/Vreceivers and video cameras).Issue date 2022-06-01 Version: 7.1.212 NC: 8670 001 62148 EAN: 87 12581 76187 5© 2022 Koninklijke Philips N.V.All Rights reserved.Specifications are subject to change without notice. Trademarks are the property of Koninklijke Philips N.V. or their respective owners.SpecificationsPicture/Display•LCD panel type: IPS technology•Backlight type: W-LED system•Panel Size: 23.8 inch/60.5 cm•Effective viewing area: 527 (H) x 296.5 (V)•Aspect ratio: 16:9•Optimum resolution: 1920 x 1080 @ 60 Hz •Pixel Density: 93 PPI•Response time (typical): 5 ms (Grey to Grey)*•Brightness: 250 cd/m²•Contrast ratio (typical): 1000:1•SmartContrast: 50,000,000:1•Pixel pitch: 0.275 x 0.275 mm•Viewing angle: 178º (H)/178º (V), @ C/R > 10•Flicker-free•Picture enhancement: SmartImage•Colour gamut (typical): NTSC 72% (CIE 1931)•Display colours: 16.7 M•Scanning Frequency: 30–85 kHz (H) / 48–75 Hz (V)•sRGB•EasyRead•LowBlue ModeTouch•Touch technology: Projected capacitive •Touch points: 10 points•Touch method: Stylus, Finger, Glove*•Touch interface:USB•Touch glass hardness: 7 H•Touch glass coating: Glare•Touch active area: 527 mm (H) x 296.5 mm (V)•Operating system: Windows 10 / 8.1 / 8 / 7; Android 7.1 / 7.0 / 6.0 / 5.0 / 4.4; certain Linux versions*•Palm rejection area: >= 30 x 30 mm•Ingress protection: IP65 - front only •Sealability: Touchscreen sealed to bezel; Touchscreen sealed to LCDConnectivity•Signal Input: VGA (Analogue), DVI-D (digital, HDCP), DisplayPort 1.2, HDMI 1.4•USB: USB 3.1 x 2 (1 w/fast charging)*•Sync Input: Separate Sync, Sync on Green •Audio (In/Out): PC audio-in, Headphone out Convenience•Built-in Speakers: 2 W x 2•User convenience: SmartImage, Input, Brightness, Menu, Power On/Off •Control software: SmartControl•OSD Languages: Brazil Portuguese, Czech, Dutch,English, Finnish, French, German, Greek,Hungarian, Italian, Japanese, Korean, Polish,Portuguese, Russian, Simplified Chinese, Spanish,Swedish, Traditional Chinese, Turkish, Ukrainian•Other convenience: Kensington lock, VESA mount(100 x 100 mm)•Plug and Play Compatibility: DDC/CI, sRGB,Windows 10 / 8.1 / 8 / 7Power•ECO mode: 11.5 W (typ.)•On mode: 15.68 W (typ.) (EnergyStar testmethod)•Standby mode: < 0.5 W (typ.)•Off mode: < 0.3 W (typ.)•Energy Label Class: E•Power LED indicator: Operation - White, Standbymode - White (flashing)•Power supply: External, 100–240 VAC, 50–60 HzDimensions•Product without stand (mm): 554 x 338 x 50 mm•Packaging in mm (W x H x D): 620 x 433 x 168 mmWeight•Product without stand (kg): 4.86 kg•Product with packaging (kg): 7.77 kgOperating conditions•Temperature range (operation): 0°C to 40°C °C•Temperature range (storage): -20°C to 60°C °C•Relative humidity: 20%-80 %•Altitude: Operation: +12,000 ft (3658 m), Non-operation: +40,000 ft (12,192 m)•MTBF (demonstrated): 70,000 hrs (excludedbacklight)Sustainability•Environmental and energy: EnergyStar 8.0,EPEAT*, TCO Certified, RoHS, WEEE•Recyclable packaging material: 100 %•Specific Substances: PVC/BFR free housing,Mercury freeCompliance and standards•Regulatory Approvals: CB, CE Mark, FCC Class B,SEMKO, UKRAINIAN, ICES-003, TUV/GS, TUVErgo, CU-EAC, EAEU RoHS, cETLusCabinet•Front bezel: Black•Rear cover: Black•Foot:Black•Finish: TextureWhat's in the box?•Monitor•Cables: HDMI cable, USB-A to B cable, Powercable•User Documentation*"IPS" word mark / trademark and related patents on technologiesbelong to their respective owners.*Glove material and thickness: Nitrile (0.15 mm), Cotton (0.31 mm),CPE (0.03 mm), PVC (0.12 mm)*Response time value equal to SmartResponse*Please refer to "SmoothTouch" in the user manual for more detailson operating system support when using the touch function.*Fast charging complies with USB BC 1.2 standard*EPEAT rating is valid only where Philips registers the product. Pleasevisit https:/// for registration status in your country.*The monitor may look different from feature images.。
创维恒流板参数信息表
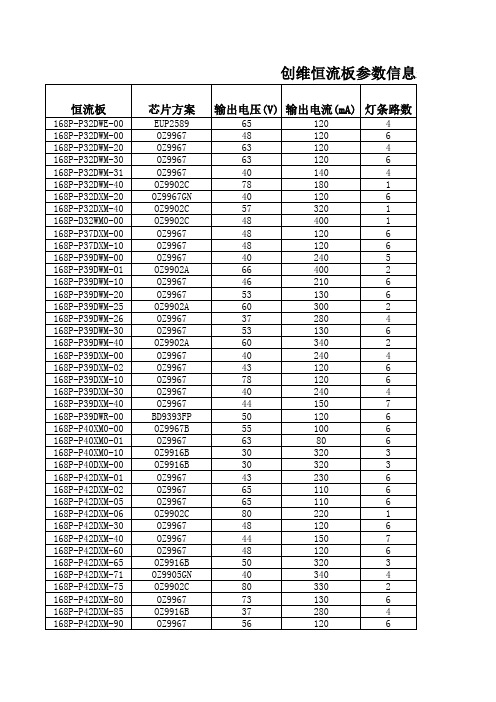
6 6 4 3 4 6 6 110 330 16 4 3 3 3 3 6 6 6 3 3 3 3 3 6 3 3 12 12 12 120 360 16 4 12 6 3 6 3 6 3 3 5 8
备注:恒流板对应的屏体和玻璃可能不只是一种,以上表中信息仅供参考。
参数信息表(2014-08-08)
屏体
SEL315V6-S00A) RDL320HY(LD0-403) RDL320HY(LD0-403) SEL32SDL320HY(CD0-600) REL320LH-D000 RDL320HY(LD0-500) SDL320HY(CD0-601) REL370HY(LDO-000) REL370LH-D000 SDL390S1-S05D SDL390HY(QD0-000) SEL390V7-S02C SEL390V7-S06A SDL390FY(ADF-220) SDL390HY(QD0-001) SEL390V7-S05A RDL390FY(QD0-102) SDL390S1-S00B REL390HY(QD0-000) REL390FY(ADF-103) RDL390FY(QD0-101) RDL390FY(QD0-100) SEL390V7-S04A REL400FY(QD0-100) REL420FY(LD0-201) REL420FY(LD0-201) RDL400FY(QD0-101) RDL420AF-D003 RDL420FY(AD0-00D) RDL420FY(AD0-300) REL420FY(LD0-001) REL420FY(LD0-001) RDL420AF-D00B RDL420FY(AD0-002) SDL420FY(LD0-600) RDL420FY(AD0-003) SDL420FY(LD0-310) SEL470FY(LDF-110) RDL420FY(LD0-101) REL420FY(LDF-502) REL420FY(LDF-300) REL420FY(LD0-200)
LED无影灯的招标参数
LED无影灯的招标参数LED无影灯是一种常用于医疗、工业检测等领域的照明设备,具有照明均匀、无阴影、节能环保等特点。
为了确保招标过程的公平、公正,制定LED无影灯的招标参数是非常重要的。
以下是LED无影灯招标参数的标准格式文本,包含详细的内容和数据。
1. 产品基本信息- 产品名称:LED无影灯- 产品型号:LWD-001- 产品品牌:ABC Lighting- 产品规格:直径300mm,高度150mm- 产品材质:铝合金外壳,钢化玻璃镜面2. 技术参数- 光源类型:LED- 光源功率:100W- 光源寿命:≥50,000小时- 光源颜色温度:4000K(可调节)- 光照强度:≥5000lux(距离1m)- 色温准确度:±200K- 色采指数(CRI):≥80- 照明范围:≥1.5m(直径)3. 功能特点- 无影照明:采用特殊光学设计,能够实现无阴影照明效果,提供清晰的观察环境。
- 调光功能:支持调节光源亮度,满足不同工作环境的需求。
- 色温调节:可根据需要调节光源的色温,提供舒适的照明效果。
- 防水防尘:具备防水、防尘等级,适合于各种复杂环境。
4. 安全性能- 防眩光设计:采用特殊的光学设计,避免眩光对操作人员的影响。
- 电气安全:符合国家相关电气安全标准,具备过流、过压、过温等保护功能。
- 灯体散热:采用优质散热材料和设计,确保灯体散热良好,避免过热引起安全问题。
- 灯体外壳:外壳采用防火材料,具备阻燃性能,确保安全使用。
5. 质量保证- 产品认证:通过ISO9001质量管理体系认证。
- 售后服务:提供一年免费质保期,及时解决客户使用过程中的问题。
- 售后响应时间:在接到故障报修后,24小时内响应并派遣维修人员。
6. 技术支持- 提供产品安装指导书和操作手册,确保用户正确使用产品。
- 提供技术支持热线,及时解答用户疑问。
- 提供产品维修和维护培训,确保用户能够正确维护和保养产品。
以上是LED无影灯的招标参数的详细内容和数据。
Macbook pro 电池使用情况记录表

纪录时间电池电池信息: 型号信息: 序列号: 制造商: 设备名称: Pack Lot Code: PCB Lot Code: 固件版本: 硬件校正: 电池校正: 电量信息: 剩余电量 (mAh): 已充满电: 正在充电: 全负荷容量 (mAh): 效能信息: 循环计数: 状态: 电池已安装: 电流强度 (mA): 电压 (mV):系统电源设置: 交流电源: 系统睡眠定时器(分钟): 磁盘睡眠定时器(分钟):显示器睡眠定时器(分钟):交流电变化时唤醒:翻盖打开时唤醒:局域网唤醒:显示器睡眠时使屏幕暗淡:PrioritizeNetworkReachabilityOverSleep:Standby Delay:Standby Enabled:电池电源:系统睡眠定时器(分钟):磁盘睡眠定时器(分钟):显示器睡眠定时器(分钟):交流电变化时唤醒:翻盖打开时唤醒:当前电源:显示器睡眠时使屏幕暗淡:降低亮度:电池使用情况纪录登记表20121004Standby Delay:Standby Enabled:硬件配置:UPS 已安装:交流充电器信息:已连接:正在充电:电池信息:型号信息:序列号:制造商:设备名称:Pack Lot Code:PCB Lot Code:固件版本:硬件校正:电池校正:电量信息:剩余电量 (mAh):已充满电:正在充电:全负荷容量 (mAh):效能信息:循环计数:状态:电池已安装:电流强度 (mA):电压 (mV):系统电源设置:交流电源:系统睡眠定时器(分钟):磁盘睡眠定时器(分钟):显示器睡眠定时器(分钟):交流电变化时唤醒:翻盖打开时唤醒:局域网唤醒:显示器睡眠时使屏幕暗淡:PrioritizeNetworkReachabilityOverSleep: Standby Delay:Standby Enabled:电池电源:系统睡眠定时器(分钟):磁盘睡眠定时器(分钟):显示器睡眠定时器(分钟):交流电变化时唤醒:翻盖打开时唤醒:当前电源:显示器睡眠时使屏幕暗淡:降低亮度:Standby Delay:Standby Enabled:硬件配置:UPS 已安装:交流充电器信息:已连接:20121006正在充电:20121017电池信息:型号信息:序列号:制造商:设备名称:Pack Lot Code:PCB Lot Code:固件版本:硬件校正:电池校正:电量信息:剩余电量 (mAh):已充满电:正在充电:全负荷容量 (mAh):效能信息:循环计数:状态:电池已安装:电流强度 (mA):电压 (mV):系统电源设置:交流电源:系统睡眠定时器(分钟):磁盘睡眠定时器(分钟):显示器睡眠定时器(分钟):交流电变化时唤醒:翻盖打开时唤醒:局域网唤醒:当前电源:显示器睡眠时使屏幕暗淡:PrioritizeNetworkReachabilityOverSleep:Standby Delay:Standby Enabled:电池电源:系统睡眠定时器(分钟):磁盘睡眠定时器(分钟):显示器睡眠定时器(分钟):交流电变化时唤醒:翻盖打开时唤醒:显示器睡眠时使屏幕暗淡:降低亮度:Standby Delay:Standby Enabled:硬件配置:UPS 已安装:交流充电器信息:已连接:ID:瓦特数 (W):修正版:系列:序列号:正在充电:20121102电池信息:型号信息:序列号:制造商:设备名称:Pack Lot Code:PCB Lot Code:固件版本:硬件校正:电池校正:电量信息:剩余电量 (mAh):已充满电:正在充电:全负荷容量 (mAh):效能信息:循环计数:状态:电池已安装:电流强度 (mA):电压 (mV):系统电源设置:交流电源:系统睡眠定时器(分钟):磁盘睡眠定时器(分钟):显示器睡眠定时器(分钟):交流电变化时唤醒:翻盖打开时唤醒:局域网唤醒:显示器睡眠时使屏幕暗淡:PrioritizeNetworkReachabilityOverSleep:Standby Delay:Standby Enabled:电池电源:系统睡眠定时器(分钟):磁盘睡眠定时器(分钟):显示器睡眠定时器(分钟):交流电变化时唤醒:翻盖打开时唤醒:当前电源:显示器睡眠时使屏幕暗淡:降低亮度:Standby Delay:Standby Enabled:硬件配置:UPS 已安装:交流充电器信息:已连接:正在充电:20121103电池信息:型号信息:序列号:制造商:设备名称:Pack Lot Code:PCB Lot Code:固件版本:硬件校正:电池校正:电量信息:剩余电量 (mAh):已充满电:正在充电:全负荷容量 (mAh):效能信息:循环计数:状态:电池已安装:电流强度 (mA):电压 (mV):系统电源设置:交流电源:系统睡眠定时器(分钟):磁盘睡眠定时器(分钟):显示器睡眠定时器(分钟):交流电变化时唤醒:翻盖打开时唤醒:局域网唤醒:显示器睡眠时使屏幕暗淡:PrioritizeNetworkReachabilityOverSleep: Standby Delay:Standby Enabled:电池电源:系统睡眠定时器(分钟):磁盘睡眠定时器(分钟):显示器睡眠定时器(分钟):交流电变化时唤醒:翻盖打开时唤醒:当前电源:显示器睡眠时使屏幕暗淡:降低亮度:Standby Delay:Standby Enabled:硬件配置:UPS 已安装:交流充电器信息:已连接:正在充电:20121114电池信息:型号信息:序列号:制造商:设备名称:Pack Lot Code:PCB Lot Code:固件版本:硬件校正:电池校正:电量信息:剩余电量 (mAh):已充满电:正在充电:全负荷容量 (mAh):效能信息:循环计数:状态:电池已安装:电流强度 (mA):电压 (mV):系统电源设置:交流电源:系统睡眠定时器(分钟):磁盘睡眠定时器(分钟):显示器睡眠定时器(分钟):交流电变化时唤醒:翻盖打开时唤醒:局域网唤醒:显示器睡眠时使屏幕暗淡:PrioritizeNetworkReachabilityOverSleep:Standby Delay:Standby Enabled:电池电源:系统睡眠定时器(分钟):显示器睡眠定时器(分钟):交流电变化时唤醒:翻盖打开时唤醒:当前电源:显示器睡眠时使屏幕暗淡:降低亮度:Standby Delay:Standby Enabled:硬件配置:UPS 已安装:交流充电器信息:已连接:正在充电:20121121电池信息:型号信息:序列号:制造商:设备名称:Pack Lot Code:PCB Lot Code:固件版本:硬件校正:电池校正:电量信息:剩余电量 (mAh):已充满电:正在充电:全负荷容量 (mAh):效能信息:循环计数:状态:电池已安装:电流强度 (mA):电压 (mV):系统电源设置:交流电源:系统睡眠定时器(分钟):磁盘睡眠定时器(分钟):交流电变化时唤醒:翻盖打开时唤醒:局域网唤醒:当前电源:显示器睡眠时使屏幕暗淡:PrioritizeNetworkReachabilityOverSleep:Standby Delay:Standby Enabled:电池电源:系统睡眠定时器(分钟):磁盘睡眠定时器(分钟):显示器睡眠定时器(分钟):交流电变化时唤醒:翻盖打开时唤醒:显示器睡眠时使屏幕暗淡:降低亮度:Standby Delay:Standby Enabled:硬件配置:UPS 已安装:交流充电器信息:已连接:ID:瓦特数 (W):修正版:系列:序列号:正在充电:20121129电池信息:型号信息:序列号:制造商:设备名称:Pack Lot Code:PCB Lot Code:固件版本:硬件校正:电池校正:电量信息:剩余电量 (mAh):已充满电:正在充电:全负荷容量 (mAh):效能信息:循环计数:状态:电池已安装:电流强度 (mA):电压 (mV):系统电源设置:交流电源:系统睡眠定时器(分钟):磁盘睡眠定时器(分钟):显示器睡眠定时器(分钟):交流电变化时唤醒:翻盖打开时唤醒:局域网唤醒:当前电源:显示器睡眠时使屏幕暗淡:PrioritizeNetworkReachabilityOverSleep: Standby Delay:Standby Enabled:电池电源:系统睡眠定时器(分钟):磁盘睡眠定时器(分钟):显示器睡眠定时器(分钟):交流电变化时唤醒:翻盖打开时唤醒:显示器睡眠时使屏幕暗淡:降低亮度:Standby Delay:Standby Enabled:硬件配置:UPS 已安装:交流充电器信息:已连接:ID:瓦特数 (W):修正版:系列:序列号:正在充电:20121222电池信息:型号信息:序列号:制造商:设备名称:Pack Lot Code:PCB Lot Code:固件版本:硬件校正:电池校正:电量信息:剩余电量 (mAh):已充满电:正在充电:全负荷容量 (mAh):效能信息:循环计数:状态:电池已安装:电流强度 (mA):电压 (mV):系统电源设置:交流电源:系统睡眠定时器(分钟):磁盘睡眠定时器(分钟):显示器睡眠定时器(分钟):交流电变化时唤醒:翻盖打开时唤醒:局域网唤醒:AutoPowerOff Delay:AutoPowerOff Enabled:当前电源:显示器睡眠时使屏幕暗淡:PrioritizeNetworkReachabilityOverSleep:Standby Delay:Standby Enabled:电池电源:系统睡眠定时器(分钟):磁盘睡眠定时器(分钟):显示器睡眠定时器(分钟):交流电变化时唤醒:翻盖打开时唤醒:AutoPowerOff Delay:AutoPowerOff Enabled:显示器睡眠时使屏幕暗淡:降低亮度:Standby Delay:Standby Enabled:硬件配置:UPS 已安装:交流充电器信息:已连接:ID:瓦特数 (W):修正版:系列:序列号:正在充电:20130121电池信息:型号信息:序列号:制造商:设备名称:Pack Lot Code:PCB Lot Code:固件版本:硬件校正:电池校正:电量信息:剩余电量 (mAh):已充满电:正在充电:全负荷容量 (mAh):效能信息:循环计数:状态:电池已安装:电流强度 (mA):电压 (mV):系统电源设置:交流电源:系统睡眠定时器(分钟):磁盘睡眠定时器(分钟):显示器睡眠定时器(分钟):交流电变化时唤醒:翻盖打开时唤醒:局域网唤醒:AutoPowerOff Delay:AutoPowerOff Enabled:当前电源:显示器睡眠时使屏幕暗淡:PrioritizeNetworkReachabilityOverSleep: Standby Delay:Standby Enabled:电池电源:系统睡眠定时器(分钟):磁盘睡眠定时器(分钟):显示器睡眠定时器(分钟):交流电变化时唤醒:翻盖打开时唤醒:AutoPowerOff Delay:AutoPowerOff Enabled:显示器睡眠时使屏幕暗淡:降低亮度:Standby Delay:Standby Enabled:硬件配置:UPS 已安装:交流充电器信息:已连接:ID:瓦特数 (W):修正版:系列:序列号:正在充电:电池信息:型号信息:序列号:制造商:设备名称:Pack Lot Code:PCB Lot Code:固件版本:硬件校正:电池校正:电量信息:剩余电量 (mAh):已充满电:正在充电:全负荷容量 (mAh):效能信息:循环计数:状态:电池已安装:电流强度 (mA):电压 (mV):系统电源设置:交流电源:系统睡眠定时器(分钟):磁盘睡眠定时器(分钟):显示器睡眠定时器(分钟):交流电变化时唤醒:翻盖打开时唤醒:局域网唤醒:AutoPowerOff Delay:AutoPowerOff Enabled:当前电源:显示器睡眠时使屏幕暗淡:PrioritizeNetworkReachabilityOverSleep: Standby Delay:Standby Enabled:电池电源:系统睡眠定时器(分钟):磁盘睡眠定时器(分钟):显示器睡眠定时器(分钟):交流电变化时唤醒:翻盖打开时唤醒:AutoPowerOff Delay:AutoPowerOff Enabled:显示器睡眠时使屏幕暗淡:降低亮度:Standby Delay:Standby Enabled:硬件配置:UPS 已安装:交流充电器信息: 已连接:ID:瓦特数 (W): 修正版:系列:序列号:正在充电:具体信息W0224475UD3LCSMPbq20z451201000a165737否否538811正常是-64911043101010否是是是420010102否是是是是4200否否否W0224475UD3LCSMPbq20z451201 000a1651403否否536813正常是-72711148101010否是是是420010102否是是是是42000否否否W0224475UD3LCSMPbq20z451201 000a1654350否是541818正常是1290122641010否是是是是420010102否是是是42000否是0x010060 0x00000x00ba0x00e6e21d是W0224475UD3LCSMPbq20z451201 000a1654607否否523726正常是-98712007301030否是是是4200201020否是是是是42000否否否W0224475UD3LCSMPbq20z451201 000a1655156是否521527正常是-96512292301030否是是是4200201020否是是是是4200否否否W0224475UD3LCSMPbq20z451201 000a1654562否否541534正常是-100011927101010否是是是4200102否是是是是42000否否否W0224475UD3LCSMPbq20z451201 000a1655336是否542636正常是1245010否是是是是4200101010否是是是42000否是0x010060 0x00000x00ba0x00e6e21d否W0224475UD3LCSMPbq20z451201 000a1655210否521040正常是265125631060否是是是是4200101010否是是是42000否是0x010060 0x00000x00ba0x00e6e21dW0224475UD3LCSMPbq20z451201 000a1655132是否513246正常是124521060否是是144001是是4200101010否是144001是是42000否是0x010060 0x00000x00ba0x00e6e21d否W0224475UD3LCSMPbq20z451201 000a1655129是否515758正常是124721060否是是144001是是4200101010否是144001是是42000否是0x010060 0x00000x00ba0x00e6e21d否W0224475UD3LCSMPbq20z451201 000a1655059否是519276正常是62912555101010否是是144001是是4200101010否是144001是是4200否是0x010060 0x00000x00ba0x00e6e21d是。
酒店高清电视解决方案
酒店IPTV方案设计:磊职位:项目工程师:传真:手机::.日期:2012年目录第一章酒店客房高清流媒体电视及互动服务综述1.1 数字时代酒店客房资讯服务面临的挑战 (3)1.2 K-RHDS高清流媒体及互动服务系统为入住宾客提供精彩的容信息服务 (4)1.3 K-RHDS高清流媒体及互动服务系统为酒店管理者提供完善的应用和支持服务 .. 91.4 K-RHDS高清流媒体及互动服务系统的优势 (14)第二章系统实施与项目管理2.1 K-RHDS系统功能概述 (22)2.2 K-RHDS系统构架及设备 (17)2.3 系统设备 (25)2.4 系统实施环境要求 (26)2.5 项目实施流程 (27)2.6 项目实施计划 (28)第三章 K-RHDS概况及成功案例附录1 终端显示一体化设备规格参数 (34)附录2 前端流媒体设备附录3 PMS系统接口支持第一章酒店客房互动电视服务综述1.1数字时代酒店客房资讯服务面临的挑战中国酒店服务和经营环境已经进入智能数字化时代。
酒店是一个以服务为本的行业,在数字化时代,高端酒店经营者已经开始开辟新的适应客户需求的服务环境和服务方式,酒店行业数字化服务已经成为当今酒店发展的必由之路,无论是商务旅行还是旅游度假,酒店客人都希望在酒店享受宁静休憩的同时,有更多方便快捷的途径,供客人主动选择愉悦身的娱乐和信息服务容。
但现实的情况差强人意,酒店每每陷入期待中:⏹在酒店环境建设提升的同时,如何提升酒店的服务设施、服务方式的差异化竞争优势?⏹这些差异化竞争措施,如何营造、匹配酒店优美的服务环境和客户感官体验?⏹以平板电视为核心的高级视听系统,在差强人意的电视节目及清晰度的约束下,如何扩充高清显示的、精彩的视听休闲娱乐容?⏹客人在差旅途中如何快捷的获取所需要的精准信息?⏹如何运用这种服务平台,实现针对每个客人的个体关怀服务,体现酒店对客人的用心?⏹如何运用这种服务平台,成为酒店品牌、形象的宣传平台,以全新的多媒体方式展示、传递酒店的设施与服务,引导客人留店消费?⏹如何运用这种服务平台开展以丰富的增值服务?在满足客人需求的同时,酒店增收?⏹如何运营这种服务平台,获取客人在房行为数据,作为酒店改善服务的统计分析依据?⏹在数字电视启动的时代,系统能否支持或未来可以扩展具备高清电视的接收?⏹这种服务系统,酒店是否有足够的控制权?酒店集团、酒店是否可以自行制作、更新、发布相关的信息容、背景音乐等?⏹是否具备与其他关联系统的互联互通或者具备开发接口的能力?包括电视机、电视信号接收设备、音响系统、房间设备智能控制系统、酒店PMS系统等。
- 1、下载文档前请自行甄别文档内容的完整性,平台不提供额外的编辑、内容补充、找答案等附加服务。
- 2、"仅部分预览"的文档,不可在线预览部分如存在完整性等问题,可反馈申请退款(可完整预览的文档不适用该条件!)。
- 3、如文档侵犯您的权益,请联系客服反馈,我们会尽快为您处理(人工客服工作时间:9:00-18:30)。
B(S)
1(F)
2UEW 0.19mmx1 38T – Primary
2UEW 0.19mmx1 38T – Primary
3(S) 1(S)
2UEW 0.19mmx1 38T – Primary
Copper Foil 8(W)X30(L)mm – Shield
A(F)
0.25mmx1 17T –Secondary Triple Insulation wire (anti-clockwise)
1. Specification
Description
Input Voltage Frequency Open-load Input Power (264VAC) Output Output Voltage Const Voltage Output Current Output Voltage Const Current Output Current Total Output Power Continuous Output Power Over Current Protection Efficiency Environmental Conducted EMI Safety OperationTemperature
C10 C2 L1 Q1 T1
D1
24.5V/350mA LED Driver
iWatt Confidential – Do Not Copy
24 Sep 2008
Page: 7
7. Efficiency Measurement
85
80
75
70 Eff(%) 65 60 55 50 80 100 120 140 160 180 Vin(Vac) 200 220 240 260 280
Small solder Joint with fine wire
Cuffing Tape {36(L)x16(W)}mm
1
Fold up both side of Tape Finished Assembly
Top
PRI SEC
2UEW 0.14mmx3 16T –Bias
X(F)
0.25mmx1 17T –Secondary Triple Insulation wire (anti-clockwise)
4.Transformer Design
SCHEMATIC 1 Primary 3 17T 5 Bias 6 16T B 6(F) 5(S) 114T 17T X X Secondary A
Clockwise looking at pin 1-5 side
4
Cut Copper Foil (8x30x0.05)mm
X(S)
Bottom
iWatt Confidential – Do Not Copy
24 Sep 2008
Page: 5
5. Bill of Material
Item 1 2 3 4 5 6 7 8 9 10 11 12 13 14 15 16 17 18 19 20 21 22 23 24 25 26 27 28 29 30 31 32 Qty. 1 1 1 1 1 1 1 1 1 1 1 2 1 1 2 1 1 1 1 1 1 1 1 1 2 1 1 1 1 1 1 1 Ref. U1 C1 C2 C3 C4 C5 C6 C7 C8 C10 R1 R2,R3 R5 R6 R7,R10 R8 R9 R11 R12 R13 R14 R15 D1 D5 D2,D6 BR1 FR1 L1 Q1 Z1 CY1 T1 Description iW1692, Off-line digital PWM Controller, SOT-6 4.7uF, 400V, E-CAP, 105'C 10uF, 400V, E-CAP, 105'C 2.2nF, 1KV, Ceramic Capacitor,SMD-1206 68pF, 50V, NPO, SMD-0603 470pF, 50V, NPO, SMD-0805 0.1uF, 50V, NPO, SMD-0603 4.7uF, 50V, E-CAP, Low ESR 150pF, 50V, SMD-0805 100uF, 35V, Low ESR E-CAP, 4.7kΩ ±5﹪, SMD-0805 2.4MΩ,±1﹪, SMD-1206 100kΩ,±5﹪, SMD-1206 100Ω,±5﹪, SMD-0805 27kΩ,±5﹪, SMD-0805 3.9kΩ,±5﹪, SMD-0603 47Ω ±5﹪, SMD-0805 1.1Ω ±1﹪, SMD-0805 1kΩ ±5﹪, SMD-0603 100Ω ±5﹪, SMD-0805 Trim, SMD-0805 27k±5﹪, SMD-0805 HER204, Rectifier Diode, FR107, Rectifier Diode, DO-41 1N4148 0.1A/100V, LL-34 Rectifier Bridge MB8S 10R 1W Fusible resistor 220uH, Filter Inductor,0510 02N6G, TO-251 15V,0.5W 680pF,Y1 EE19 Transformer Total BOM (Based on 100K/M volume) Cost (US Cent) / unit Sub-Total (Cent)
EE19 Vertical
Top side
Primary controller iW1692
Bottom side
Primary-side
Second-side 24.5V/350mA LED Driver iWatt Confidential – Do Not Copy 24 Sep 2008 Page: 4
24.5V/350mA LED Driver
iWatt Confidential – Do Not Copy
24 Sep 2008
Page: 11
11. Conducted EMI
QPScan
230VAC/50Hz,Live
AVScan
QPScan
230VAC/50Hz,Neutral
AVScan
ELECTRICAL SPECIFICATIONS: 1. Primary Inductance (Lp) = 0.9mH @10KHz 2. Primary Leakage Inductance (Lk)≤30uH@10KHz MATERIALS: 1. Core : EE19 (Ferrite Material TDK PC40 or equivalent) 2. Bobbin : EE19 Vertical 3. Magnet Wires : Type 2-UEW 4. Layer Insulation Tape :3M1298 or equivalent. FINISHED : 1. Varnish the complete assembly 2. Core is connected to primary ground (Pin6) 24.5V/350mA LED Driver
* Note: Output voltage measured at PCB end.
24.5V/350mA LED Driver iWatt Confidential – Do Not Copy 24 Sep 2008 Page: 8
8. Output VI Characteristics
* Note: Output voltage measured at PCB end, TAMB=25 ℃
24 Sep 2008
Page: 2
2. Schematic circuit
24.5V/350mA LED Driver
iWatt Confidential – Do Not Copy
24 Sep 2008
Page: 3
3. Circuit Board Photograph
To LED Lamps AC Input (90-265Vac)
24.5V/350mA LED Driver
iWatt Confidential – Do Not Copy
24 Sep 2008
Page: 6
6. Temperature Rise Test
Item Input Inductance(L1) Input Bulk-Cap(C2) Power Transistor(Q1 02N6G) Transformer(T1) Output Diode(D1) Output E-Cap(C10) Ambient Temperature 90Vac T(℃) 96 79 88.8 83.1 79.4 77.3 65 Tr(℃) 28 11 20.8 15.1 11.4 9.3 264Vac T(℃) 61.8 67 79.6 77.2 75 72.5 59 Tr(℃) 2.8 8 20.6 18.2 16 13.5
LED Driver Design with iW1692
Summary and Features : 1. 2. 3. 4. 5. 7W LED driver, 24.5V, CC@0.35A ; Wide AC input range 90Vac-264Vac For Isolated or Non-isolated Applications High Efficiency and Minimum Parts count Meet EMI EN55015B-QP & AV limits Fully protected against AC input UV, OV, O/P Short/Open, meet single point failure test.
VIN=90VAC, TAMB=25℃
