206说明书
konica minolta 206说明书
konica minolta 206说明书
1、首先确定打印机能正常使用,然后将usb数据线联接电脑和打印机。
2、在电脑主界面点击“开始”,然后点击“控制面板”。
3、进入控制面板后,在选项中选择“硬件和声音”,点击进入。
4、然后在弹出的对话框中选择“设备和打印机”点击进入。
5、点击进入设备和打印机设置页面后,点击“添加打印机”。
6、在弹出的界面中选择“添加本地打印机”,然后点击进入。
7、选择打印机的端口类型一般说明书上有,然后点击“下一步”。
8、在选项列表内先选打印机的厂商和打印机型号,然后点击“从磁盘安装”。
9、点击后在弹出的对话框中选择“浏览”。
10、然后从磁盘中找到打印机的驱动选中,然后点击打开。
11、然后会返回之前的界面,在界面中点击“下一步”。
12、然后输入打印机的名称,书好后点击“下一步”。
13、然后在弹出的打印机共享设置中,点击“取消”即可,打印机和电脑就设置连接了。
usr-lg206-l-c-产品使用手册说明书
USR-LG206-L-C 产品使用手册目录一、基本说明 (3)1.1结构框图and 数据流向(服务器主动下发模式)....................................................................................................41.2资料下载.....................................................................................................................................................................41.3测试环境.....................................................................................................................................................................41.4测试步骤 (5)1.4.1硬件连接...........................................................................................................................................................51.4.2指示灯状态.......................................................................................................................................................61.4.3设置参数...........................................................................................................................................................61.4.4数据透传测试................................................................................................................................................121.4.5基本测试常见问题. (14)二、常见用法 (14)2.1LG220网线直连电脑通信 (14)2.2LG220连接透传云通信...........................................................................................................................................142.3LG220花生壳内网穿透说明...................................................................................................................................14三、常见问题排查方法. (14)3.1集中器无法连接到服务器或者无法连接到透传云 (14)3.2LoRa 节点无法入网.................................................................................................................................................153.3通信距离近...............................................................................................................................................................153.4同频干扰...................................................................................................................................................................153.5丢包率高...................................................................................................................................................................16四、更新历史..........................................................................................................................................................................17五、联系方式.. (18)目录Content一、基本说明集中器的有工作模式有三种:集中器轮询唤醒、节点主动上报、服务器主动下发,在介绍如可配置之前先分别对这三种模式做简要概述。
DLM206使用说明书
DLM206处理器使用说明:1.打开电源开关此时屏幕会显示A135 B246F00 Default是指连接控制的模式,设备固有的有9种模式,如果需要选择模式按下按键,此时屏幕会显示Load PresetF00 Default此时的F00在闪烁,可以通过此旋钮旋转来调节需求的模式,常用的模式是F01,F02,F03,F01=A接1,B接2、3、4,D接5、6,F01为2×2分频模式;F02=A接1、2,B接3、4,P接5、6,F02为2×2分频模式;F03=A接1、3、5,B接2、4、6,F03为2×3分频模式。
如果需要自行设定数值请参照以下操作模式:一、按下按钮是调节输出信号的数值1.INA Gain表示A通道的输入增益,范围是-40db—+20db,可以通过此旋钮旋转调节数值。
2.增益调节完毕按下,此时屏幕会显示INA EQ1 Peak bp,同事EQ在闪烁,此时表示A通道的输入均衡器,输入均衡器是8段均衡,此时按下此旋钮按键就会切换到1在闪烁,然后按下按键就会依次切换到Peak bp和下一行的三组数字,Peak表示直通,当Peak在闪烁的时候可以通过旋转切换LOW(低通)和HIGH(高通)两种模式,bp表示bypass,直通,没有效果,当bp后面是×表示有效果,当是√表示直通。
依次下面的三组数字可以根据具体的需求来调节。
3.当第一段均衡调节完毕后按一下就可以退回到EQ1的位置,通过旋转来选择第2、3、4、5、6、7、8段均衡继续调节,调节方式同EQ1相同。
4.当均衡全部调节完毕以后按下就可还原到EQ字母在闪烁的阶段,按下按键一下,屏幕会显示INA Delay,表示A通道输入延时,此时可以根据需要旋转此按钮来调节数值。
5.此时输入信号的调节完毕,直接按下按钮开始调节输出信号的数值。
此时屏幕会显示OP1 MIX INA INB SUM1 SUM2字样,OP1表示第一路输出通道,如果要调节第二通道就按两下键,以此类推,共6个通道,可循环。
海尔冰箱bcd206sad温度调节说明书
海尔冰箱bcd206sad温度调节说明书海尔冰箱bcd206sad温度补偿开关
冰箱温度补偿开关使用方法是根据我国南北地区温差较大的特点而设计的宽气候带电冰箱,在环境温度较低情况下(10℃以下),请你打开温度补偿开关以便正常使用。
当环境温度较低时,如果不打开温度补偿开关使用,压缩机的工作次数会明显减少或者不工作,开机时间短,停机时间长,造成冷冻室温度偏高,冷冻食品不能完全冻结,因此必须打开温度补偿开关使用。
(其原理是当环境温度低于10摄氏度时,需要你打开该开关,为冰箱冷藏室加温,使冰箱被动工作,以便于冷冻室温度保持低温结冰状态。
)打开温度补偿开关并不影响冰箱的使用寿命。
当冬季过去,环境温度升高,环境温度高于15℃时,请你将温度补偿开关关闭,这样,可以避免压缩机频繁启动,节约用电。
温控器
冰箱温控器使用方法冰箱在使用过程中,其工作时间和耗电受环境温度影响很大,因此需要我们在不同的季节要选择不同的档位使用,冰箱温控器夏季应开低挡冬季开高档。
夏季环境温度高时,应打在弱挡2、3档使用,冬季环境温度低时,应打在强挡4、5使用,原因:在夏季,环境温度较高(达30℃),冷冻室内温度若打在强挡(4、5),达-18℃以下,内外温度差大,因此箱内温度每下降1℃都很困难,再则,通过箱体保温层和门封冷气散失也会加
快,这样开机时间很长而停机时间很短,会导致压缩机在高温下长时间运转,既耗电又易损坏压缩机。
若此时改在弱挡(2、3档),就会发冰箱现开机时间明显变短,又减少了压缩机磨损,延长了使用寿命。
所以夏季高温时就将温控调至弱挡。
当冬季环境温度较低时,若仍将温控器调至弱挡,因此时内外温差小,将会出现压缩机不易启动,单制冷系统的冰箱还可能出现冷冻室化冻的现象。
油水分离器油份仪GQS-206使用说明书
外部电磁阀、水泵等) 5) 10--11:清水清洗阀信号输入 6) 12――13:油水分离器的运行状态开关输入 7) 14―15―16:系统故障报警输出(一组带有常开常闭的继电器,当系统故障时该组
继电器动作)。 8) 17―18―19:报警点 1 输出(一组有常开常闭的继电器,用于电磁阀、声光报警控
11/29
查询时的快进、快退按钮。“打印/PRINT”用于打印显示的当前页面。
(1)系统设置(System Set): 按下工具按钮“菜单/MENU”,进入系统设置菜单。如图所示:
GQS-206 使用说明 / User’s manual
6/29
15ppm 舱底水报警装置装有两个独立的循环报警点,根据 MEPC.107(49)决议的要 求,出厂时两个报警点都被默认设定为 15ppm 。也可根据用户的需要设定 1—15ppm 范围内的报警值,报警值的设定在任何情况下不会超过 15ppm。
控制超标污水的排放。
GQS-206 使用说明 / User’s manual
5/29
3、仪器性能指标:
测量范围:0-30ppm 测量精度:15±5ppm 响应时间:≤5 秒 显示方式:大屏幕液晶显示(LCD) 电 源: 110V/220 V AC 50/60 Hz 功 耗: 约 15VA 报警点:1-15ppm(用户可根据情况调节) 继电器带载能力:
二. 仪器主要特点、功能及性能指标
15PPM检测仪 GQS-206使用说明书
GQS-206 油份浓度计GQS-206 Oil Content Meter 中文:第2~15页(EN)page16~page2915ppm舱底水报警装置15 ppm Bilge Alarm使用手册User's Manual厦门星鲨仪器有限公司 Xiamen xingsha instrument co., Ltd 厦门分析仪器厂Xiamen analytical instrument factory第一部分(中文)使用须知1)该装置必须严格按照该手册里的说明进行安装和操作,否则将不提供维护。
2)安装和服务必须由胜任或专业的技术人员来执行。
3)设备必须按照相关的要求接地。
4)如果要维护该装置,请务必确认已切断供电电源。
5)如果在严寒的条件下(即环境温度在+1℃以下),该装置在停用或储存时,必须保证测量室处于无水样状态,以避免玻璃管破裂。
① 安装后停用时将清洁水和水样进口关闭,排干净测量室内的残余水样;② 将流量调节器逆时针旋转至不脱落即可。
目 录一. 简介 (4)二. 仪器主要特点、功能及性能指标 (4)三. 测量原理 (5)四. 结构示意图 (6)五. 安装 (7)六. 试机运行 (9)七. 维护保养 (12)八. 常见故障及排除方法 (14)九. 运输、贮存 (15)十. 仪器成套性 (15)一. 简介15ppm舱底水报警装置(GQS—206油份浓度计)是根据国际海事组织IMO MEPC.107(49)决议的要求,采用红外测量技术原理和先进的微处理技术而设计的专用仪器,一般与油水分离器配套使用。
本仪器经中国船级社型式认可,技术性能符合IMO MEPC.107(49)决议(2003年7月18日通过)《修订的船舶机舱舱底水防污染设备指南和技术条件》中第2部分《15ppm舱底水报警装置型式认可试验和性能技术条件》、第3部分《防污染设备型式认可环境试验技术条件》规定。
仪器设计结构合理、牢固、防护等级达到IP65。
kj206a钳流表说明书
kj206a钳流表说明书kj206a钳流表是一种常用的电子测量仪器,广泛应用于工业自动化、电力、通讯、电子、航空航天等领域。
本文将从kj206a钳流表的基本原理、使用方法、注意事项等方面进行详细介绍。
一、kj206a钳流表的基本原理kj206a钳流表采用了非接触式测量原理,通过利用安培环磁感应定律,测量被测电路中的电流大小。
该仪器具有高精度、高灵敏度、高稳定性等特点,能够准确地测量直流电流和交流电流。
二、kj206a钳流表的使用方法1. 电源接入:将kj206a钳流表的电源线插入电源插座,确保电源稳定。
2. 测量回路连接:将被测电路的导线夹入kj206a钳流表的夹头中,确保夹头与被测导线接触良好。
3. 选择测量模式:根据被测电流的类型选择合适的测量模式,kj206a钳流表支持直流和交流两种模式的测量。
4. 读数记录:在测量过程中,可以通过kj206a钳流表上的液晶显示屏实时观察电流数值,并可通过记录功能将测量结果保存。
三、kj206a钳流表的注意事项1. 测量范围:在使用kj206a钳流表时,应根据被测电流的大小选择合适的测量范围,避免超出测量范围造成误差或损坏仪器。
2. 安全操作:在进行电流测量前,应确保被测电路断开并确认安全,避免发生触电等意外事故。
3. 环境条件:kj206a钳流表适用于室内环境,应避免在高温、潮湿、腐蚀性气体等恶劣环境中使用。
4. 仪器保养:定期清洁kj206a钳流表的外壳和显示屏,避免灰尘积累影响测量精度。
5. 仪器校准:长时间使用后,应定期对kj206a钳流表进行校准,确保测量结果的准确性。
kj206a钳流表作为一种常用的电子测量仪器,在工业领域具有广泛的应用。
通过对其基本原理、使用方法和注意事项的了解,能够更好地使用和维护这一仪器,提高工作效率和测量精度。
在实际操作中,还需根据具体情况结合使用说明书进行操作,以确保安全和准确性。
TP206型SF6气体密度继电器校验器使用说明书
目录一、概述 (1)1.1仪器外形 (1)1.2主要特点 (2)二、技术指标 (4)三、工作原理 (3)四、仪器的安装 (5)4.1配件检查 (6)4.2电池的充电 (6)五、仪器的操作 (7)5.1显示说明 (7)5.2按键说明 (7)5.3功能菜单及设置 (8)1、密度继电器 (8)2、密度表 (12)3、压力表 (15)4、数据查询 (17)5、系统设置 (18)六、测试步骤 (18)七、注意事项 (21)八、注意事项 (21)8.1术语和定义 (22)8.2过渡接头 (24)8.3部分密度继电器连接示意图 (26)一概述SF 6气体密度继电器是用来监测运行中SF 6开关本体中SF 6气体密度变化的重要元件,现场运行的SF 6气体密度继电器因不常动作,经过一段时期后常出现动作不灵活、触点接触不良等现象,有的还会出现密度继电器温度补偿性能变差,当环境温度突变时常导致SF 6密度继电器误动作。
因此DL/T596-1996《电力设备预防性试验规程》规定:各SF 6开关使用单位应定期对SF 6气体密度继电器进行校验。
TP206型SF6密度继电器校验器是依据国家能源局最新发布的《DL/T259-2012:六氟化硫气体密度继电器校验规程》研发。
1.1仪器外形。
1、前面板介绍图1.1.1液晶屏触点测量接口充电指示灯开关(1)触点测量接头:此接口通过仪器配置的连接线连接至待测密度继电器的输出接点;(2)充电指示:当外接充电器对仪器进行充电时,该指示灯将点亮;2、后面板介绍图1.1.2(1)进气:设备测量供气接口,最大进气压力为1MPa;(2)出气:此接口连接待校验的密度继电器、密度表或者压力表;(3)排气:设备测量过程中以及测量结束后的余气排出接口;出气进气USB 接口电源打印机出气(4)USB:可以通过该接口将测量结果导出至U盘;(5)电源:仪器总电源按钮;1.2主要特点•密度继电器校验仪采用高性能单片机进行检测与控制,核心元器件采用进口元件,精度高,重复性好,可靠性高。
Extech CG206 非侵入式膜层厚度测试仪用户指南说明书
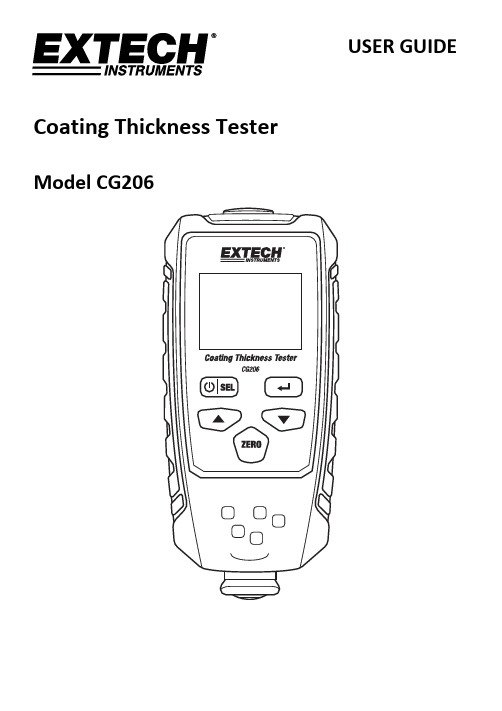
USER GUIDECoating Thickness TesterModel CG206IntroductionThank you for selecting the Extech CG206 Coating Thickness Tester. The CG206 is a portable meter designed for non‐invasive coating thickness measurements with automatic recognition of the substrate material under test.The meter uses two measurement methods: magnetic induction (for ferrous metal substrates) and eddy current (for non‐ferrous metal substrates).The CG206 meter can connect to a PC via USB and transmit recorded data for further analysis and for generating report documentation.Proper use and care of this meter will provide many years of reliable service.Features∙Measured Coatings: Non‐magnetic coatings (e.g. paint, zinc) on steel; Insulated Coatings (e.g.paint, anodized coatings) on non‐ferrous metals∙Intuitive menu‐based programming∙Memory storage of up to 1500 readings in 30 groups (50 readings per group)∙Delete single readings or all groups easily∙Auto Power OFF with disable feature∙Data transfer to PC via USB∙User Zero Calibration abilityApplications∙Corrosion protection∙Paint Shops and Electroplaters∙Chemical, Automobile, Shipbuilding, and Aircraft industries∙Laboratory, Workshop, and Field useProbe DescriptionThe CG206 probe is spring mounted in the sensor sleeve. This ensures safe and stable positioning of the probe and ensures constant contact pressure.A V‐groove in the sleeve of the probe facilitates reliable readings on small cylindrical parts. The hemispherical tip of the probe is made of hard and durable material.Measuring metallic coatingsThis meter can measure non‐magnetic metal coatings (Zinc) on a magnetic (ferrous) substance base, and non‐metal coatings on a metal base (ferrous or non‐ferrous).6745Meter Description1. LCD display2. Power and Select button3. Up arrow4. Zero Key5. Micro USB connector6. Back Key ()7. Down arrow8. SensorNote: Battery compartment on rear of meterDisplay Description1. Data record memory group number2. Record Number in current memory group3. Battery status icon4. Measurement units: µm or mils5. DEL (Delete): Press the back () button to delete the previous reading6. Metal type (FE=ferrous, NFE=non ‐ferrous)7. Automatic (Auto) metal detect modeMeter PowerInstall two ‘AAA’ 1.5 V batteries into the rear battery compartment. Press the power buttonto switch the meter ON. The display will switch ON. If the display does not switch ON, install or replace the batteries. When powering up, please keep the meter at least 10cm (4”) from metal objects. Replace the batteries when the battery status icon appears low, the meter will give inaccurate readings if the battery voltage falls very low.MeasurementsBefore each measurement session please perform a Zero Calibration as described later in this User Guide.Practice with the film and zero reference metal substrates to learn how the meter operates before moving to a professional application. The heavier metal substrate is the ferrous (magnetic) zero substrate (Fe) and the lighter metal substrate (Al) is the non‐ferrous (non‐magnetic) zero substrate. In Auto mode, the meter automatically senses ferrous and non‐ferrous substrates.1.Place a reference film (250µm, for example) on the ferrous substrate (FE).2.Power the meter on by pressing the power button.3.Place the spring‐loaded meter sensor against the reference film.4.The meter will emit an audible tone indicating that the measurement has been taken.5.The LCD will show the reading at the center of the display area.6.For a typical display see the Display description diagram.Automatic Power OFFIn order to conserve battery life, the meter will automatically turn off after approximately 3 minutes. To defeat this feature, use the programming menu detailed in the next section (menu parameter AUTO POWER OFF under SET).Programming MenuThe meter can be configured and calibrated through simple button presses in the programming menu.∙Press the SEL button to access the menu; refer to the menu ‘tree’ below.∙Use the UP/DOWN buttons to scroll the menu∙Use the SEL button to select the highlighted mode∙Use the () button to exit or back out of a mode∙Other button presses are mode specific, follow on‐screen prompts explained below. In the table below the factory default settings are in bold with an asterisk (*).Each parameter is explained in detail in the subsequent sections.Top level Sub level 1 Sub level 2 DescriptionWORKING MODE Group 1…30 Shows Memory Groups and the numberof readings in each group(Group 0 has no memory) MEASURE MODE NFE, FE, Auto* Non‐Ferrous, Ferrous, or Auto(Automatic) Metal selection SET Unit settings µm* Micrometersmil Mils = mm * 2.54 / 100Backlight Increase/decrease backlight using up/down arrowsAuto Power OFF Enable* Allows Auto Power OFFDisable Defeats Auto Power OFF featureIncrease/decrease contrast using up/down arrowsContrastInfo Shows firmware version number and model number MEASURE VIEW View or delete stored data in all groups or selected groupsCALIBRATION CAL Zero of FE Perform FE Zero Calibration (refer to Calibration section)CAL Zero of NFE Perform NFE Zero Calibration (refer to Calibration section)Delete Zero of FE Delete FE Zero Calibration dataDelete Zero of NFE Delete NFE Zero Calibration dataNOTE: Disable the Auto Power OFF feature before lengthy programming to avoid inconvenient automatic power down while programming.WORKING MODE1.Press the LEFT button (SEL) to access the menu.2.Scroll to WORKING MODE (if necessary) using up/down buttons.3.Press the LEFT button (SELECT) to open WORKING MODE.e the UP and DOWN buttons to scroll through the groups and to see the number of savedreadings in each group. Group 0 does not have memory.5.Press the LEFT button (SELECT) to select the group and exit Working mode and return to themain menu or press the RIGHT button () twice to return to the normal operating mode.MEASURE MODE1.Press the LEFT button (SEL) to access the programming menue the UP/DOWN buttons to scroll to the Measure Mode3.Press the LEFT button (SELECT) to select the Measure Modee the UP/DOWN buttons to scroll to Auto, FE, or NFE.Press the LEFT button (SELECT) to make a selection.AUTO mode ‐ the meter automatically recognizes the metal that is being measured.Ferrous (FE) Mode ‐ the Magnetic induction measurement mode is used.Non‐Ferrous (NFE) Mode ‐ the eddy current measurement mode is used.5. Press the RIGHT button () to return to the normal operating mode.SET1.Press the LEFT button (SEL) to access the menu.e the UP/DOWN arrows to scroll to SET.3.Press the LEFT button (SELECT) to open the SET menu.e the UP and DOWN buttons to scroll through the selections.5.Press the Left button (SELECT) to open the selected item.a.Units of measure selectionsSelect µm or mil using the arrow buttons (µm = micrometers; mils). Press the LEFTbutton (SELECT) button to confirm and to return to the SET menu (otherwise press theright button () to abort the edit and return to the SET menu).b.BacklightUse the UP and DOWN arrows to adjust the brightness of the backlight.Press the RIGHT button () to confirm and return to the SET menu.c.Auto Power OFFSelect ENABLE or DISABLE using the arrow buttons. When enabled, the meterautomatically switches OFF after 3 minutes of inactivity. When disabled, the meter willonly switch OFF with a power button press or when the battery power is weak.Press the LEFT button (SELECT) button to confirm and to return to the SET menu(otherwise press the right button () to abort the edit and return to the SET menu).d.ContrastUse the UP and DOWN arrows to adjust the display contrast up or down.Press the LEFT button (OK) button to confirm and to return to the SET menu(otherwise press the right button () to abort the edit and return to the SET menu).The model number and firmware version level are displayed.Press the right button () to exit to the SET menu.MEASURE VIEWThe Measure View menu allows for scrolling through the readings in all of the groups.Readings can be viewed or deleted in this mode.1.Press the LEFT button (SEL) to access the main menu.e the DOWN ARROW button to scroll down to MEASURE VIEW.3.Press LEFT (SELECT) to open the MEASURE VIEW parameter.e the UP/DOWN ARROW buttons to scroll through the groups of stored readings.5.When a group is highlighted that contains stored readings, use the LEFT (SELECT) button toopen the readings list. Now use the UP/DOWN arrows to view the readings. Press the LEFT button (Delete Group) to delete all readings in this Group or press the RIGHT button () to return to the main Group list.6.Highlight ‘Delete All’ and press the LEFT button (SELECT) to delete all of the readings in allgroups. Otherwise press the RIGHT button () to return to the previous menu.CALIBRATIONThe Calibration menu allows the user to perform a Ferrous (Zero FE) or non‐ferrous (Zero NFE) ZERO Calibration. The Calibration menu also allows the user to delete ZERO calibration data for both ferrous (Zero F) and non‐ferrous (Zero N) modes.1.Press the LEFT button (SEL) to access the main menu.e the DOWN button to scroll to CALIBRATION.3.Press LEFT (SELECT) to open the CALIBRATION parameter.4.To perform a ZERO Calibration, refer to Zero Calibration in the next section.5.To delete ZERO Calibration data, scroll to DEL Zero of FE or DEL Zero of NFE and then pressthe LEFT button (SELECT). This executes the Zero delete function and returns the meter to the SET menu.6.Press the RIGHT button () to return to the normal operating mode.Reference Film Accuracy Verification1.The CG206 meter comes with a set of reference films to check the measurementaccuracy of the meter.2.The base materials are Ferrous (Steel) and the Non‐Ferrous (Aluminum).3.Turn on the meter 1 meter away from any material.4.Set the Measure Mode to FE, NFE, or Auto.5.Perform a Zero calibration on the base material of your choice.6.Place a thickness film on the base and make a measurement.7.Refer to the accuracy specifications to validate the accuracy of the meter.ZERO CalibrationThe customer should perform a Zero Calibration before any measurements are taken. Preparing for ZERO Calibration1.Clean the probe tip and the substrate (grease, oil, metal scraps.The slightest impurity will affect measurement and will distort readings.2.Switch the meter ON at a 10 cm (4”) minimum distance from any metal.3.Set the meter to the correct substrate type, FE or NFE.4.The meter is now ready for calibration.Zero CalibrationZERO Calibration from the Programming Mode1.From the normal measurement mode, press the LEFT button (SEL) to access the menu.e the UP/DOWN button to scroll to CALIBRATION mode.3.Press LEFT (SELECT) to open the CALIBRATION parameter.4.Scroll to ‘CAL ZERO OF FE’ or ‘CAL ZERO OF NFE’5.Press the LEFT button (SELECT) and ‘FE CAL’ or ‘NFE CAL’ should be displayed on theLCD’s lower level.6.Press the sensor against the FE or NFE zero reference substrate and wait for the beep.7.Press the LEFT button (OK) to accept the calibration value or press the RIGHT button(CANCEL) to abort the calibration.8.If the meter did not read 0.0 you can try again or “Set” the Zero reference by pressingand holding the ZERO button until the meter beeps.9.When the Zero calibration is complete, the meter is ready to make measurements.Note that the user can delete ZERO Calibration data by selecting ‘Del ZERO of FE’ or ‘DelZERO of NFE’ from the CALIBRATION mode in the Programming menu.ZERO Calibration – Relative Mode1.This mode can be used to set a zero point on reference substrate or on a knownthickness of material.For a relative measurement, any thickness greater or lesser will be referenced to this set value.2.Press the sensor against the FE or NFE zero reference substrate or on a known thicknessvalue of material.3.Press and hold the ZERO button until it beeps to set the relative zero calibration to 0.0.Record Readings in Memory GroupsThe CG206 offers 30 memory storage groups, Group ‘0’ through ‘30’.Group ‘0’ does not allow data to be stored; it is simply a group that can be selected if readings are to be taken without being stored.From the Normal measurement mode, Use the UP/DOWN arrow keys to scroll to a particular group. When a reading is taken it is automatically stored in the selected group.Each Group can store up to 50 readings (for a total of 1500 for the 30 groups).To delete all groups, or an individual group, use the MEASURE VIEW mode as explained in the programming menu section of this User Guide.In GROUP mode, if the storage capacity is exceeded. The meter will display (50) in the upper right corner and will beep twice.SOFTWAREThis meter is capable of storing data and can download that data to a PC through the supplied Windows© compatible software and micro‐USB cable. Refer to the Software Help guide supplied with the software on how to install and operate the software.Check the software download page of the website for the latest version of the PC software and its operating system compatibility.Error MessagesThe following error messages will appear on the meter’s LCD if a problem arises.Err1 Magnetic induction probe (FE) errorErr2 Eddy current probe (NFE) errorErr3 Both probes ‐ Eddy current and Magnetic induction errorsErr4 Magnetic induction probe (FE) faultErr5 Eddy current probe (NFE) faultPlease contact Extech Instruments if a problem exists.MaintenanceCleaning and StoragePeriodically wipe the meter housing with a damp cloth and mild detergent; do not use abrasives or solvents. If the meter is not to be used for 60 days or more, remove the batteries and store them separately.Battery Replacement/Installation instructions1.Open the rear battery door2.Replace/install the two 1.5V ‘AAA’ batteries observing proper polarity3.Secure the battery compartmentNever dispose of used batteries or rechargeable batteries in household waste.As consumers, users are legally required to take used batteries to appropriatecollection sites, the retail store where the batteries were purchased, or whereverbatteries are sold.Disposal: Do not dispose of this instrument in household waste. The user is obligated to take end‐of‐life devices to a designated collection point for the disposal of electrical and electronic equipment.SpecificationsFerrous Non‐Ferrous Measurement principle Magnetic induction Eddy current principleMeasuring range 0~1350μm0~53.1mils 0~1350μm 0~53.1milsAccuracy1 (% of reading) 0~1000μm: ± (2.5% + 2μm)1000μm ~1350μm: (±3.5%)0~39.3mils: ± (2% + 0.08mils)39.3mils ~53.1mils: (±3.5%)0~1000μm: ± (2.5% + 2μm)1000μm ~1350μm: (±3.5%)0~39.3mils: ± (2% + 0.08mils)39.3mils ~53.1mils: (±3.5%)Resolution 0~100μm: (0.1μm)100μm ~1000μm: (1μm)1000μm ~1350μm: (0.01mm)0~10mils: (0.01mils)10mils~53.1mil:s (0.1mils) 0~100μm: (0.1μm)100μm ~1000μm: (1μm) 1000μm ~1350μm: (0.01mm) 0~10mils: (0.01mils)10mils~53.1mils: (0.1mils)Min. curvature radius 59.06mils (1.5mm) 118.1mils (3mm)Diameter of Min. area 275.6mils (7mm) 196.9mils (5mm)Basic critical thickness 19.69mils (0.5mm) 11.81mils (0.3mm)Industrial standards Conforms to GB/T 4956‐1985, GB/T 4957‐1985, JB/T 8393‐1996, JJG889‐95, and JJG 818‐93Operating Temperature 0°C~40°C (32°F~104°F)Operating RelativeHumidity (R.H.)20%~90% Relative HumidityPower 2 x AAA batteries with Auto Power OFF after 3 minutesDimensions 120 x 62 x 32 mm (4.7 x 2.4 x 1.25”)Weight 175g (6.17 oz.)1Accuracy note: Accuracy statement applies to use on a flat surface, with a zero calibrationperformed and with the meter stabilized at ambient temperature. The accuracy of the reference films or any reference standards should be added to measurement results.Copyright © 2016 FLIR Systems, Inc.All rights reserved including the right of reproduction in whole or in part in any form。
爱可美206缝纫机使用说明
爱可美206缝纫机使用说明
1. 在使用爱可美206缝纫机之前,请仔细阅读使用说明书,并确保了解每个部件及其功能。
2. 准备工作
(1) 将缝纫机放在平稳的表面上,调整踏板线缆以便于使用。
(2) 开启机器,检查针眼板和缝纫脚是否安装正确,针是否正常。
(3) 放置线轴,将线轴放置在线架上,插入线轴芯。
(4) 填线,将线穿过缝纫机的线通道,并经过张力调节器,直至到达缝纫针处。
3. 缝纫基本操作
(1) 将布放在缝纫机下方的制作台上,将缝纫脚放在布上,向下按压缝纫脚。
(2) 使用踏板控制缝纫机的速度和缝纫长度。
(3) 主动调整缝纫轨道和速度,在缝纫时通过调节轨道和速度来实现前进和后退。
4. 维护和保养
(1) 经常清洁爱可美206缝纫机,以免灰尘和纤维堆积。
(2) 定期清洗线通道,确保线通道畅通无阻。
(3) 不要使用老化的针头和线。
(4) 缝纫完毕后,请关闭电源并拔掉电源插头。
(5) 请勿将机器置于恶劣的环境下,如潮湿、高温及阳光直射的地方。
5. 安全操作
(1) 使用时应注意自己和周围人的安全。
(2) 不要将手部伸入缝纫区域,以免受伤。
(3) 在插线、更换针头和清洁的时候请拔掉电源插头。
(4) 如果出现卡住或者其他异常情况,请立刻停止使用并检查治疗,避免安全事故的发生。
海尔冰箱bcd206lstcg说明书
海尔冰箱bcd206lstcg说明书
产品特点购买时已经做了充分了解。
用户须知告诉你需要注意放置环境,使用环境以及使用前的一些准备。
安全注意事项就是要安全用电,正确使用冰箱如箱内不放易燃易爆强腐蚀物品,不要重压等。
海尔冰箱bcd206lstcg使用方法
1,检查连接线,接通电源;
2,进行温度设置与调节,一般有1-7个档位,根据环境温度选择合适的档位。
3,将食物放进冰箱(注意在首次使用前先通电,冰箱正常运转且箱内温度已经降低后再放入食物)。
4,根据食物特点分类存放,一些肉类需冷冻,新鲜蔬菜保鲜就好。
5,长期外出不在家时,需将冰箱食物取出,以免食物因停电变质产生不良气味。
冰箱清洁保养与选购
冰箱最好定时清洗,清洗时注意切断电源,拿出食物。
用酒精和柔软抹布轻轻全方位的擦拭,注意一些死角不要遗漏。
选购冰箱时,请仔细考虑各种因素,最后综合选择。
看品牌看价格就不说了。
注意冰箱外观有没有破损,箱门有没有不严盒。
检查箱内照明是否正常,运行有没有噪音等。
另外可咨询售后服务是否到位。
扬子bcd-206说明书
扬子bcd-206说明书
1、产品特点
(1)节能设计,优化发泡层,最新双门封设计,高效压缩机,耗电量率先达到国家一级标准。
(2)宽电压设计,宽电压带技术设计,能够在176到242V电压范围内正常运转。
(3)宽气候带设计,无论一年四季气温如何变化,冰箱均能运行自如,不会出现天热不停机,天冷不启动现象。
(4)全封闭冷冻系统,抽屉储物,即可避免食物串味,又可避免食品与制冷板直接接触、冻结在一起;同时开门时暖空气不进入储物区,保冷节能。
(5)内藏式制冷系统,整洁美观,采用平背式结构,冷凝器、压缩机全部内置,冰箱无论从前面看、侧面看或后面看,均浑然一体,使外观更加整洁美观。
(6)吸顶灯照明,内胆顶部照明系统,更加美观、节省空间。
2、产品使用说明
(1)冷藏室,冷藏室内可存放各种水果、蔬菜和副食品;可短期储藏鸡蛋、饮料、调味汁、各种罐头和瓶装食品等。
(2)冷冻室,冷冻室的温度很低,可以长时间地保持食品的新鲜状态,因此需要长时间保存的食品最好放在冷冻室里贮藏,但应遵守食品包装上注明的贮藏时间。
3、产品改进介绍
BCD206KCM是在母本BCD206TCX基础上,匹配压机,更改冷藏和冷冻蒸发器,能耗由0.45降低到0.39;冷冻最上层抽屉为二星级冷冻部分。
CNB-206门禁一体机使用说明书
CNB-206门禁⼀体机使⽤说明书CNB-206门禁⼀体机使⽤说明书整体特征:本单门门禁机专门为写字楼、办公室、住宅、保安系统、楼宇通道等出⼊的控制⽽设计。
其外表美观⼤⽅、安装时可与墙⾯完美结合。
不须联⽹,同时具备感应卡开门、感应卡加密码开门和单⽤密码开门三种开门⽅式。
艰久耐⽤,所有数据不会因断电⽽丢失。
是门禁系统之理想选择。
产品整体特征卡⽚容量:1000张。
⽤户操作:⽤户编程模式简单容易、同時发出声⾳和灯光作为回应。
开门⽅式:感应卡,密码,卡+密码三种⼯作⽅式。
安裝简单:全部采⽤单机运⾏⽅式、不需联⽹。
读卡或按密码,直接输出接点信号,可⾃动开锁或开⾃动门机,⽅便和电锁以及各种⾃动门机的直接连接。
读卡功率⼤,距离不⼩于10CM。
操作使⽤简洁明了,卡⽚增减灵活,可脱机删除卡⽚。
有防撬报警功能。
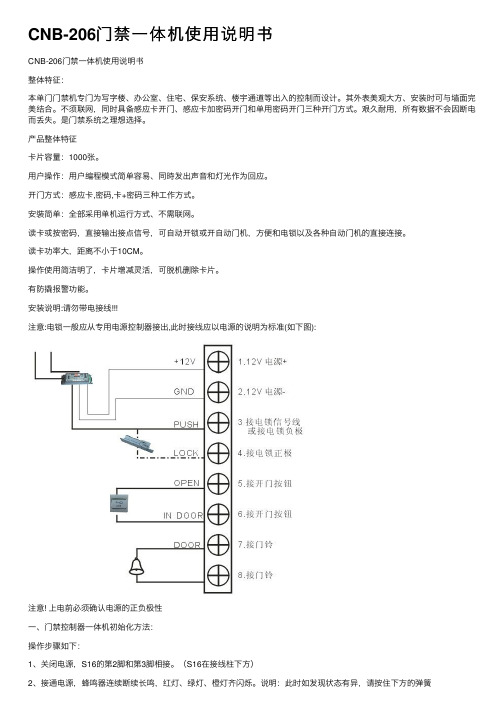
安装说明:请勿带电接线注意:电锁⼀般应从专⽤电源控制器接出,此时接线应以电源的说明为标准(如下图):注意! 上电前必须确认电源的正负极性⼀、门禁控制器⼀体机初始化⽅法:操作步骤如下:1、关闭电源,S16的第2脚和第3脚相接。
(S16在接线柱下⽅)2、接通电源,蜂鸣器连续断续长鸣,红灯、绿灯、橙灯齐闪烁。
说明:此时如发现状态有异,请按住下⽅的弹簧3、断电,再接通电源,红灯、绿灯、橙灯齐闪烁。
S16开关转换。
4、S16的2、3脚断开,1、2脚接通。
5、门禁控制器初始化完成,蜂鸣器鸣响⼀声,门禁控制器进⼊⽤户使⽤状态。
说明:初始化操作仅修改系统密码为缺省密码123456(出⼚默认),其它数据不会被删改。
⼆、继电器输出设置⽅法1、PUSH 1 为继电器⼲触点输出。
三、门禁⼀体机编程⽅法2、J1 的NO脚连接,PUSH 1,GND常开电器动作时,PUSH 1,GND接通。
3、J1的NC脚连接,PUSH 1,GND 常闭(继电器动作时,PUSH 1 、GND断开)。
4、J2为⾼低电平选择端。
1、“#”功能键,进⼊编程模式a、按“#”字键,红灯、绿灯、橙灯、橙灯齐亮。
凯米斯仪器有限公司PHG-206在线PH传感器用户手册说明书

PHG-206Online PH SensorUser ManualYANTAI CHEMINS INSTRUMENT CO.,LTD.Tel:*************************E-mail:***********************************************Website:Address:No.15,Entrepreneurship Base,Development Zone,Zhaoyuan City,Shandong Province●Please read the instruction carefully before using and save it for reference.●Please follow the instructions and precautions.●When receiving the instrument,please open the packaging carefully,inspectequipment’s damage level in case of transportation,if you found spoiled equipment,please immediately notify the manufacturer and distributor,and retain the packaging,in order to send back to processing.●When the instrument is in trouble,please don’t repair it by yourself,pleasedirectly contact the maintenance department of the manufacturer.ContentUser Notes (2)Ⅰ、Application Environment (4)Ⅱ、Technical performance and specifications (4)1.Technical parameters (4)2.Dimensional drawing (5)Ⅲ、Installation and electrical connection (5)1.Installation (5)2.Electrical connection (6)Ⅳ、Maintenance and maintenance (6)e and maintenance (6)2.Calibration (7)Ⅴ、Quality and service (7)1.Quality assurance (7)2.Accessories and spare parts (8)3.After-sales service commitment (7)Appendix data communication (8)Ⅰ、Application EnvironmentUsed for environmental water quality monitoring,acid/alkali/salt solution,chemical reaction process and industrial production process,it can meet the requirements of online pH measurement for most industrial applications.●Signal output:RS-485(Modbus/RTU protocol).●Convenient connection to third-party devices such as PLCs,DCS,industrial control computers,general-purpose controllers,paperless recording instruments or touch screens.●Dual high-impedance differential amplifier with strong anti-interference and fast response.●The patented pH probe,the internal reference solution oozes extremely slowly from themicroporous salt bridge at a pressure of at least100kpa(1Bar),and its forward bleedcontinues for more than20months.Such a reference system is very stable and the electrode life is extended by a factor of two compared to conventional industrial electrodes.●Easy to install:3/4NPT pipe thread for easy submersible installation or installation in pipes andtanks.●IP68protection grade.Ⅱ、Technical performance and specifications1.Technical parameters2.Dimensional drawingⅢ、Installation and electrical connection1.InstallationNote:The sensor should not be installed upside down or horizontally when installed,at least at an angle of15degrees or more.2.Electrical connectiona)Red line-power cord(12~24V)b)Black line-ground(GND)c)Blue line-485Ad)white line-485Be)bare wire-shielded wireAfter wiring is completed,it should be carefully checked to avoid incorrect connections before powering up.Cable specification:Considering that the cable is immersed in water(including sea water)for a long time or exposed to the air,the cable has certain corrosion resistance.The outer diameter of the cable isΦ6mm and all interfaces are waterproof.Ⅳ、Maintenance and maintenancee and maintenanceWhen measuring the pH sensor,it should be cleaned in distilled water(or deionized water),and the filter paper should be used to absorb moisture to prevent impurities from being introduced into the liquid to be tested.1/3of the sensor should be inserted into the solution to be tested.The sensor should be washed when not in use,inserted into a protective sleeve with a3.5mol/L potassium chloride solution,or the sensor inserted into a container with a3.5mol/L potassium chloride solution.Check if the terminal is dry.If it is stained,wipe it with absolute alcohol and dry it.Avoid long-term immersion in distilled water or protein solution and prevent contact with silicone grease.With a longer sensor,its glass film may become translucent or with deposits,which can be washed with dilute hydrochloric acid and rinsed with water.The sensor is used for a long time.When a measurement error occurs,it must be calibrated with the meter for calibration.When the calibration and measurement cannot be performed while the sensor is being maintained and maintained in the above manner,the sensor has failed.Please replace the sensor.Standard buffer pH reference tableTemp(℃) 4.00 4.01 6.867.009.1810.010 4.00 4.00 6.987.129.4610.325 4.00 4.00 6.957.099.3910.2510 4.00 4.00 6.927.069.3310.1815 4.00 4.00 6.907.049.2810.1220 4.00 4.00 6.887.029.2310.0625 4.00 4.01 6.867.009.1810.0130 4.01 4.02 6.85 6.999.149.9735 4.02 4.02 6.84 6.989.179.9340 4.03 4.04 6.84 6.979.079.8945 4.04 4.05 6.83 6.979.049.8650 4.06 4.06 6.83 6.979.029.83The actual reading and standard of the instrument sometimes have an error of±1word.2.CalibrationNote:The sensor has been calibrated before leaving the factory.If the measurement error is not exceeded,it should not be arbitrarily calibrated.a)Zero calibrationUse250mL of distilled water in a measuring cylinder,pour into a beaker,add a packet of calibration powder with pH=6.86,stir evenly with a glass rod until the powder is completely dissolved,configure the solution with pH=6.86,put the sensor into the solution,wait for3~5 minutes,after the value is stable,see if the displayed value is6.86.If not,you need to perform zero calibration.Refer to the appendix for the calibration instructions.b)Slope calibrationFor acidic solution:Take250mL of distilled water in a measuring cylinder,pour into a beaker,add a packet of calibration powder with pH=4.00,stir evenly with a glass rod until the powder is completely dissolved,and configure the solution to pH=4.00;In the solution,wait for3to5minutes. After the value is stable,see if the value is4.00.If not,the slope calibration is required.Refer to the appendix for the calibration instructions.For alkaline solution:Take250mL of distilled water in a measuring cylinder,pour into a beaker, add a packet of calibration powder with pH=9.18,stir evenly with a glass rod until the powder is completely dissolved,and configure the solution to pH=9.18;In the solution,wait for3to5minutes. After the value is stable,check if the display is9.18.If not,the slope calibration is required.Refer to the appendix for the calibration instructions.Ⅴ、Quality and service1.Quality assurance●The quality inspection department has standardized inspection procedures,advanced andperfect testing equipment and means,and strictly in accordance with the regulations,to do 72-hour aging test and stability test on the product,and not to allow one unqualified product to leave the factory.●The receiving party directly returns the product batch with a failure rate of2%,and all the costsincurred are borne by the supplier.The reference standard refers to the product description provided by the supplier.●Guarantee the quantity of goods and the speed of shipment.2.Accessories and spare partsThis product includes:●1sensor●Calibration powder3packs●1copy of the manual●1certificate3.After-sales service commitmentThe company provides local after-sales service within one year from the date of sale,but does not include damage caused by improper use.If repair or adjustment is required,please return it, but the shipping cost must be conceited.Damaged on the way,the company will repair the damage of the instrument for free.Appendix data communication1.Data formatThe default data format for Modbus communication is:9600,n,8,1(baud rate9600bps,1start bit,8data bits,no parity,1stop bit).Parameters such as baud rate can be customized.rmation frame formata)Read data instruction frame0603xx xx xx xx xx xx Address Function code Register address Number of registers CRC check code(low byte first)b)Read data response frame0603xx xx......xx xx xxAddress Function code Bytes Answer data CRC check code(low byte first)c)Write data instruction frame0606xx xx xx xx xx xxAddress Function code Register address Write data CRC check code(low byte first)d)Write data response frame(same data command frame)0606xx xx xx xx xx xxAddress Function code Register address Write data CRC check code(low byte first)3.Register addressRegister address Name InstructionNumber ofregistersAccessmethod40001 (0x0000)Measuredvalue+temperature4double-byte integers,which are DO value,DOvalue decimal digits,temperature value,4(8bytes)Reada)The register address defined here is the register address with the type of the register.(Theactual register address is represented in the bracket).b)When address of the device is changed,the response to the data write instruction wouldcontain the new changed address.c)The data definition of the read response value:xx xx xx xx xx xx xx xx2bytes test value2bytes decimal digits*2bytes temp value2bytes decimal digits The default data type is double-byte integer(high byte first),other data format such as floatingpoint type is optional.mand examplea)Read data instructionsFunction:Obtain the pH and temperature of the measuring probe;the unit of pH is pH;the unit of temperature is °C.Request frame:06030000000445BE;Response frame:06030800620002010100012459Example of reading:pH value:0062means hexadecimal reading pH value,0002means pH value with 2decimal places,converted to decimal value 0.98.Temperature value:0101indicates the hexadecimal reading temperature value,0001indicates that the temperature value has 1decimal place and is converted to a decimal value of 25.7.b)Calibration instructionsZero calibrationFunction:Set the pH zero calibration value of the electrode.The zero value is based on the 6.86pH standard.The examples are as follows;Request frame:0606100000008C BD Response frame:0606100000008C BDSlope calibrationFunction:Set the pH slope calibration value of the electrode;the slope calibration is divided into high point and low point calibration,and the alkaline solution is measured at the high point;the acidic solution is measured at the low point,where the standard solution is high here.Point 9.18pH,standard solution low 4.00pH is the calibration reference,examples are as follows:High point standard solution 9.18pH calibration:Request frame:060610040000CD 7C Response frame:060610040000CD 7C Low standard solution 4.00pH calibration:Request frame:0606100200002D 7D Response frame:0606100200002D 7Dc)Set the device ID address:Role:set the MODBUS device address of the electrode;Change the device address 06to 01.The example is as follows Request frame:060620020001E3BDPh value Temperature value0062000201010001烟台凯米斯仪器有限公司11/11 Response frame:060620020001E3BD5.Error responseIf the sensor does not correctly execute the host command,it will return the following format information:Definition Address Function code Code CRC checkData ADDR COM+80H xx CRC 16Number of bytes 1112a)CODE:01–Function code error03–Data is wrongb)COM:The received function code。
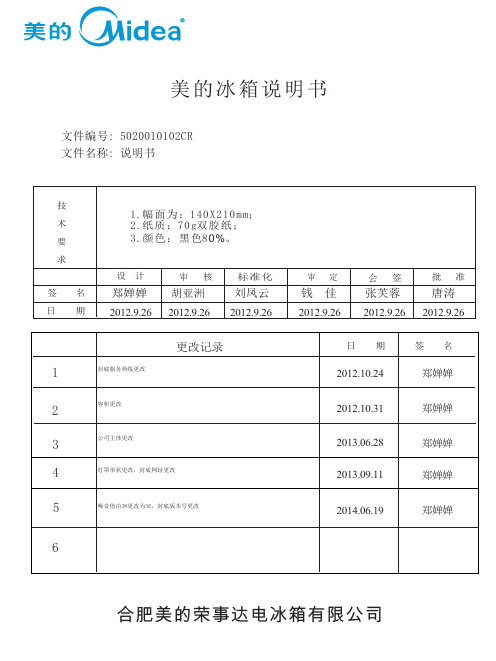
美的 冰箱 BCD-206TM(C) 极光银 使用说明书
I类
星级标志
总有效容积
206L
冷冻室有效容积
53L
保鲜冷冻室有效容积
42L
冷冻能力
3.0kg/24h
电
源
220V~/50Hz
耗电量
0.47kW·h/24h
能效等级
1级
额定电流
0.50A
照明灯输入功率
2W
重
量
51kg
外形尺寸
544x593x1725
制冷剂及装入量
R600a,47g
技发术参泡数说材明:料
停止使用时 停电时:停电时即使在夏季,食品仍然可以保存几个小时;期间应尽量减少开门次数,不 宜再放入新鲜食品。
长时间不使用时:应拔下电源,再对冰箱进行清洁,并保持冰箱门敞开,以防止冰箱产生 不良气味。
移动冰箱时:移动冰箱前取出冰箱内所有物品,用胶带将玻璃隔板、果菜盒、冷冻室抽屉 等固定好、扭紧可调节脚;关紧冰箱门、用胶带固定,以免移动时门打开。搬运时请勿倒 置、横放、震动冰箱,冰搬箱一运旦时启倾用后角,不最可好连大续于使4用5,°。一般情况下不要停用冰箱,以免影响冰箱使用寿命。
异是正常的;
4、因产品改进和技术更新,参数更改后,恕不另行通知,请以冰箱贴的铭牌为准。
第8页
安全警告事项
安全警示符号代表意义
该符号表示禁止的事项,其行为必须禁止。不遵守指示可能会导致产 品损坏或者危及使用者人身安全。 禁止符号
该符号表示必须遵守的事项,其行为必须严格按照要求操作执行。 不遵守指示可能会导致产品损坏或者危及使用者人身安全。 警告符号 该符号表示需注意的事项,其行为需要特别注意。如果不加以防范, 可能导致轻度或者中度的伤害,或造成产品损伤。 注意符号
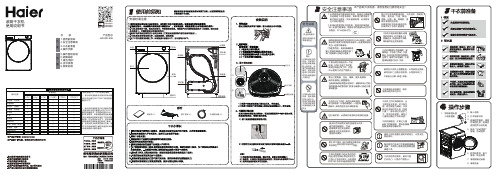
海尔 HG100-206 10公斤热泵干衣机 使用说明书
产品型号HG100-206目 录1.使用前须知2.安全注意事项3.干衣前准备4.操作步骤正面5.操作面板说明6.故障排除7.清洁/维护8.技术参数9.保修说明反面··智能家电操控智慧场景定制智家商城购物家电报装报修滚筒干衣机使用说明书07220V50Hz电源上,电源中一定要有接地线不要与其它电器合用一个接以免干衣机工作时影响其它电器正常工作。
右图所示使用方式应严格禁止。
合格品,3C认证标志为:请勿拆卸电源线不用或清理时,一定把电请勿用湿手去拆卸电源线。
进行维护前,必须断开电源线与电源的连接。
清洗外壳和滚筒时请勿直接用水冲洗。
请勿使用稀释剂、汽油、酒精等挥发性物品擦拭。
潮湿衣物必须经脱水后方以防锈蚀其他危险。
等含橡胶或材料及防水材料的物品。
禁止过度弯曲、拉扯、缠绕、捆扎电源线当电源线或电源插头损坏时,请联系本公司的特约维修点或售后部门的专业维修人员进行维为避免危险,电源线请联系我公司特约维修点或售后部门干衣机仅能烘干经水洗过的纺清洗后,请将线屑过滤器及内过滤网重新安装到位,不要用尖锐的工具清理过滤网,以免破坏网布。
出现以下情况时,有时未必是故障。
委托修理前,请先按照以下列表检查确认。
如果确属故障,请与 本公司售后服务部门联系,请勿自行处理。
检查前,请拔下电源插头。
故障排除机器在运行过程中,由于产品特性,当出现以下声音时,是正常的,请放心使用:压机工作时,偶尔发出的“嗡嗡声”风扇“呼呼”声水泵抽水声机器不启动或中途停止机器不启动显示“e ”原因没有连接电源或电源没电;没有按动电源按键;水盒已满;机门没有关好;衣物已经达到程序设定的烘干程度;滚筒内无负载;烘干时间太长程序设定不正确;过滤网和冷凝器过滤网没有清理;冷凝器或风道堵塞;干衣护理机滚筒内衣物过量;衣物太湿;检查电源连接;倒掉水盒里面的水;正确将机门关上;检查设定程序是否正确;检查滚筒内是否有衣物;确保程序设定正确;清理过滤网;减少滚筒内的衣量;衣物放入滚筒之前要充分脱水;检查风道,去除堵塞;排除方法现象显示屏剩余时间停止或跳变剩余时间根据以下因素不断调整负载温度;负载种类;负载数量;环境温度;对自动烘干程序,烘干时间自动调整为正常现象;按动电源键;代码释义显示代码排除方法请联系维修中心F32NTC2断路或短路重新开机,若故障未消除,请联系维修中心NTC3断路或短路请联系维修中心FC2电脑板与显示板通讯线断开请联系维修中心检查水盒是否已满,未满,请联系维修中心F2排水泵或水位开关故障F33加热异常或制冷剂泄漏F4重新开机,若故障未消除,请联系维修中心总线自身故障FC0取下海绵,用湿毛巾清理线屑6.此代码为正常显示,无需处理即“AUTO”,代表自动运行模式中。
- 1、下载文档前请自行甄别文档内容的完整性,平台不提供额外的编辑、内容补充、找答案等附加服务。
- 2、"仅部分预览"的文档,不可在线预览部分如存在完整性等问题,可反馈申请退款(可完整预览的文档不适用该条件!)。
- 3、如文档侵犯您的权益,请联系客服反馈,我们会尽快为您处理(人工客服工作时间:9:00-18:30)。
1.产品主要技术指标
2.产品出厂缺省值
3.声光显示
3.1.正常工作状态下:
3.1.1.有效指令:嘟短声
3.1.2.无效指令:嘟长声
3.2.编程状态下:
3.2.1.绿灯常亮
3.2.2.有效指令:嘟嘟两声
3.2.3.无效指令:嘟嘟嘟三声
4.撤销未完成的指令:
在键入指令没有全部完成前,按下[*]键,可以撤销该项指令
5.功能及设置
5.1.进入编程:
[*]+[6位编程密码]
缺省:990101,使用时请修改此密码
5.2.修改编程密码:
[0]
+[输入6位新编程密码]
+[重复输入6位新编程密码]
2
5.3.设置有效卡:
[5]
+[输入3位编码]嘟嘟
+[感应卡1]嘟、嘟嘟
+[感应卡2]嘟、嘟嘟
+……
+[感应卡n]嘟、嘟嘟
+[*]嘟嘟,完成加卡
5.3.1.3位编码:是000——500之间不可重
复数字。
该编码是在卡丢失后删除卡
的重要方式,请发卡人员妥善保存卡
编码
5.3.2.连续设置有效卡时,每张卡的编码按
前一张卡的编码+1递增。
例如输入编
码为015,再次读卡时,再次卡的编
码为016……依次类推
5.4.删除有效卡:
5.4.1.编码方式删卡:
[7]
+[输入3位编码1]嘟嘟
+[输入3位编码2]嘟嘟
+……
+[输入3位编码n]嘟嘟
+[*]嘟嘟,完成删卡
3
5.4.2.感应方式删卡:
[7]
+[感应卡1]嘟、嘟嘟
+[感应卡2]嘟、嘟嘟
+……
+[感应卡n]嘟、嘟嘟
+[*]嘟嘟完成删卡
5.4.3.删除所有已设置卡:
请使用恢复出厂设置的方式
5.5.退出编程状态:
[*]嘟嘟
5.6.设置感应卡的开门方式:
5.6.1.卡或通用密码:缺省
5.6.2.卡+个人密码:
5.6.2.1.有效卡缺省个人密码:0000,此时
该卡采用“读卡开门”的通行方式5.6.2.2.当有效卡的个人密码修改为非0000
的4位数字后,该卡只能采用
“卡+个人密码”方式通行
5.6.2.3.修改个人密码:非编程状态下
[#]嘟嘟
+[读感应卡]嘟、嘟嘟
+[输入4位原密码](缺省0000)嘟嘟
+[输入4位新密码]
+[重复输入4位新密码]嘟嘟;
4
5.7.修改通用密码:
[3]+[4位通用密码]
当通用密码为0000时,通用密码失效,此时控制器没有通用密码可以开门
5.8.设置开锁时间:
[2]+[TT]。
TT表示开锁时间,以秒为单位,如开锁时间为3秒,则TT=03;
5.9.设置防拆报警功能:
5.9.1.关闭防拆报警:[4]+[0]
5.9.2.开启防拆报警:[4]+[1]
5.10.设置开锁时检测门磁状态:
5.10.1.关闭开锁时检测门磁状态:[6]+[0]
(有效指令开锁)
5.10.2.开启开锁时检测门磁状态[6]+[1]
(“有效指令+门磁闭合”开锁)
此功能可用于多门互锁。
5.11.设置门磁报警状态:
5.11.1.关闭门磁报警功能:[8]+[0]
5.11.2.开启门磁报警功能:[8]+[1]
开启本功能后,当正常开门后,没有关门,或者门没有通过控制器开启,控制器将发出嘟嘟嘟连续长鸣报警;
5.12.设置报警延时:
[82]+[TT]。
TT表示延时报警时间,以秒为单位,如报警延时时间为3秒,则TT=03
5
报警延时:闭锁TT秒后,门(门磁)还没有闭合,则报警,直到门闭合报警才解除此指令需与开启门磁报警功能同时使用6.恢复出厂设置:
[9]+[86]嘟嘟、嘟嘟嘟,5秒后嘟嘟嘟,控制器恢复为出厂设置状态
7.使用方法:
7.1.卡或通用密码方式:
7.1.1.输入密码的时间间隔应小于2秒
7.1.2.没有完成全部4位密码输入时,按[*]
键,取消本次密码输入
7.2.卡加个人密码的开门方式
7.2.1.【读有效卡】嘟嘟+【个人密码】开门7.2.2.输入个人密码不足4位时,按[*]键
后,直接输入正确密码即可
8.强制恢复出厂编程密码:见接线图注释
6
7。
