6用户操作手册
PRO6快速操作手册

PRO6 Control Centre控制中心Quick Reference Guide快速操作手册200812目录第一章 PRO6简介 (4)PRO6现场数字调音台概况 (4)系统组成(流动版标配,安装版不含航空箱) (4)关于本手册 (5)第二章 PRO6控制中心 (6)PRO6概况 (6)Bay和GUI的布局 (6)PRO6控制界面 (7)GUI (9)前面板连接 (10)后面板连接 (10)第三章 PRO6控制中心的操作 (11)基于GUI的操作 (11)GUI显示屏控制的操作 (12)使用GUI菜单 (13)文本的编辑 (14)第四章导航(Navigation) (15)PRO6的导航功能 (15)关于导航控制 (16)关于导航“select”(选择)项 (17)怎样导航 (17)第五章配接(Patching) (21)介绍 (21)功能按钮 (22)关于配接程序 (22)配置设备 (23)以snake类型配置POR6 (24)设置输入/输出机架设备 (24)如何配接 (26)第六章基本操作 (28)主要的操作 (28)操作模式 (28)提示和技巧 (29)存储你的工作(文件) (29)设置一个话筒功率放大器的输入增益 (30)设置高通和低通滤波器 (31)输入均衡(E区) (33)输入动态处理(D区) (34)使用VCA/POP编组(推子编组) (36)创建混音 (38)建立效果器机架(effects rack) (41)简单路由到主立体声输出 (43)场景和表演管理(automation) (43)设置输入和输出 (47)使用复制和粘贴 (48)演出文件(show)编辑 (49)用户库 (50)环绕声像(surround panning) (50)双人操作 (52)把演出文档存储到USB存储器上 (53)第七章系统设置 (54)初始的设置程序 (54)设备拆箱 (54)拼凑机架 (54)配线指示 (54)给PRO6接上电源 (55)接通/切断PRO6控制中心 (56)设置DL351输入/输出模块单元ID (58)附录A:排除并修理故障 (59)没有音频 (59)诊断(Diagnostics) (59)交换现行的主控控制器 (60)第一章 PRO6简介欢迎进入PRO6 Control Centre (控制中心)。
达氏空气净化器DK6用户手册说明书

Version:1710V2Please read this operating manual,Before start to use it.(请在使用本产品前,阅读本操作手册)瑞典达氏空气净化器Dustie Air CleanerDK6使用前准备工作部品名称及规格空气净化器本体三合一过滤网可水洗初滤网过滤网盖434435电源线1条*注:请将电源线插入机器底部插座CADR 600m 3/h(注1)型 号额定电压输入功率甲醛C A D R *注1:执行标准G B /T 18801-2015之6.6.1*注2:执行标准G B /T 18801-2015之5.6*注3:执行标准G B /T 18801-2015之5.4*注4:执行标准G B /T 18801-2015之5.5.2*注5:根据G B /T 18801-2015相关条款 适用面积等于(0.07-0.12*C A D R )*注6:产品符合G B 4706.1、G B 4706.45—2008颗粒物净化能效甲醛净化能效尺 寸重 量颗粒物C A D R噪声 (声功率级)快速清洁模式空气质量感应有-220V~/ 50Hz 适用面积42-72m²(注5)高效级(注4)累积净化量P4(注3)DK6高效级(注4)355(W)X424(D)X550(H) mm10.2kg61W 80m 3/h 65.7dB(A)(注2)产 品集尘模式Dustie 达氏 空气净化器平行双进风物理过滤操作指导使用说明初次使用前请务必将两侧滤网的塑料包装袋拆除,并请将空气净化器插头插入标准 220V插座 。
插电运转当每次重新插上电源时,空气净化器发出“B”声档位指示灯由快速清洁模式至极速档依次亮灭,空气净化器进入待机状态。
开启电源(待机状态)按一下( )键启动,蓝色电源指示灯亮起,空气净化器发出”B.B”两声于中速档起动,中速档风量指示灯(蓝色)亮起。
关机在空气净化器启动运转中 ,按一下( ) 键可以关机,清淨机发出”B”一长声.并处于待机状态。
Crossover-6切换台操作手册

接地功能。为减少操作人员和维修人员的触电隐患,该接地导线必须接到地面上。
警告
19.警告:本产品配备一个连接局域网 (LAN) 的 “以太网端口”。连接的网络必须在建筑 物内。请勿连接建筑物外的网络。
中卸除电路板前,请先触摸机架以消散静电;在电路板上作业时,请采取适当的接地预防措施。
Ô 保修和维修政策
Ross Video Limited (Ross) 保证其切换台和相关选项在正常使用情况下无缺陷,并且从发货之日起保修一 年。淡变器手柄配件终身保修。如果零件在保修期内出现故障, Ross 公司确定故障存在后,将维修或更 换该零件。 保修期内的维修将在 Ross 公司进行,由 Ross 公司承担往返运费。如果在客户现场维修,将收取合理的零 星费用。 Ross 公司经过自由裁量,可能在维修故障零件的同时,以临时借用方式免费提供插入式电路板 或其他备件。客户承担归还时的包装、运送和特殊受理成本。 切换台可能不时需要根据 Ross Video 的决定升级软件。升级程序发布在 Ross Video 的网站上,供切换台终 身免费升级。 如果产品遭受误用、疏忽、事故、不恰当的安装或应用,或未经授权的更改,则保修将失效。 在任何情况下, Ross Video Limited 均不对直接的、间接的、特殊的、偶然的或附带的损害 (包括利润损 失)承担责任。默示的保证,包括对适销性和适用于特定用途的保证,均明确限于保修期内。 在 Ross 公司发出所有权变更通知后,本保修政策可转让至后续所有者。
可能需要采取完善的举措。
一般操作指导原则 · 请务必采用静电放电预防措施,遵循谨慎操作原则。 · 在卸除印刷电路板 (PCB) 前,请关闭系统电源。
操作手册

操作手册操作手册1. 简介本操作手册旨在为用户提供全面且准确的操作指导,以帮助用户正确、高效地使用特定产品或系统。
请用户在使用前仔细阅读本手册,并按照说明进行操作,以避免不必要的错误或损失。
2. 准备工作在进行任何操作之前,请确保您已经具备以下要求和准备工作:2.1 硬件要求:确保您的设备满足所需的硬件配置要求,例如内存、处理器等。
2.2 软件要求:安装并配置所需的软件,并确保其版本与本操作手册要求的版本一致。
2.3 数据备份:在进行任何操作之前,请务必备份您的重要数据,以防止操作中出现数据丢失或损坏的风险。
2.4 环境准备:确保操作环境安全、稳定,并具备所需的网络、电源等条件。
3. 操作步骤以下是针对特定操作的详细步骤指导,请严格按照顺序操作:3.1 步骤一:在这里描述第一步骤的具体操作流程,可包括文字说明、图示或截图等。
确保清晰明了,便于用户理解和操作。
3.2 步骤二:类似地,描述第二步骤的操作流程及注意事项。
如有必要,可以提供相关的提示或故障排除方法。
3.3 步骤三:依此类推,逐步描述后续步骤的操作流程,直到完成特定操作的全部步骤。
4. 常见问题与解答在使用过程中,用户可能会遇到一些常见问题或疑难情况。
这里列举了一些可能的问题及其解答,供用户参考:4.1 问题一:描述问题的具体情况。
解答:在这里提供相应的解答或解决办法,尽可能详细地解释问题原因和处理方法。
4.2 问题二:描述问题的具体情况。
解答:类似地,提供相应的解答或解决办法。
4.3 问题三:描述问题的具体情况。
解答:以此类推,为更多可能的问题提供解答。
5. 注意事项在操作过程中,请留意以下注意事项,以确保操作的顺利进行:5.1 安全性:遵守安全操作规范,避免对自身或他人造成伤害。
5.2 警示信息:注意并理解操作过程中的警示信息,并按照要求进行操作,避免潜在的风险。
5.3 数据保护:注意数据的保护和隐私,在操作过程中不要泄露敏感信息。
5.4 更新维护:定期检查和更新相关软件或系统,以保持其正常运行和安全性。
苏州友商S6用户手册

《用户手册》友商S6管理系统售后维护手册苏州市友商软件有限公司项目组编制2009-5-18目录1 正版光盘内容 (2)2 如何安装正版软件 (2)3 如何操作友商软件 (4)4 如何维护正版用户CRM资料 (5)5 使用友商软件中的注意事项 (10)友商提示:以下内容中,有一部分带有“《》”的内容,可按住“CTRL”键,鼠标点击该内容,则自动打开该文件内容!1正版光盘内容□正版安装程序(.exe文件)一个;□视频教学(文件夹)一个;□用户手册(word)一个;□软件使用说明书(word)一个;□实施材料(文件夹)一个;□参考材料(文件夹)一个;2如何安装正版软件2.1 第一步:数据库友商软件后台挂接的是SQL2000数据库(数据库由用户提供,友商软件公司不提供数据库及数据库技术支持),操作者必须确认安装友商软件的指定电脑中已安装有SQL2000数据库,并且数据库为“启动”状态。
如果用户未正确安装SQL2000数据库,可参照光盘参考材料中的《SQL SERVER数据库安装》执行。
友商说明:任何原因造成的用户未安装或未正确安装SQL2000数据库,由此产生的友商软件无法正确使用,友商软件公司不负任何责任。
2.2 第二步:安装友商软件点击光盘中,含有标识符的可执行文件,参照光盘实施材料中的《安装手册》执行;2.3 第三步:如何登录友商软件友商软件安装完毕后,会在WINDOWS桌面自动生成二个文件名:使用友商软件时,首先双击,双击后系统自动执行JA V A的TOMCAT服务程式,显示窗口,把此窗口最小化。
再双击,稍待片刻后,会显示一个登录窗口,在你操作的那台电脑第一次登录友商软件时,需要下载并装一个JA V A控件,安装完毕后,重新打开,这时会显示需输入用户名和密码的窗口界面,默认的用户名是admin,密码相同;3如何操作友商软件①可通过光盘目录中中的多媒体教学材料来完成友商软件功能的操作;②详细的软件功能操作,则参照光盘目录中的《软件功能说明书》;③正常的业务流程操作,请参照光盘实施材料中的《常见业务—软件操作方法》;首次使用友商软件的操作步骤:步骤内容达到的目的1 观看《基础数据》视频文档观看《基础数据》视频内容,根据S6软件中‘基础数据’模块各模块从上到下的顺序观看。
kepserverex6使用手册

kepserverex6使用手册摘要:一、前言- 引入KEPServerEX 6 使用手册的主题二、KEPServerEX 6 概述- 介绍KEPServerEX 6 的背景和作用- 说明KEPServerEX 6 的使用场景和目标读者三、KEPServerEX 6 安装与配置- 讲解KEPServerEX 6 的安装流程和注意事项- 说明KEPServerEX 6 的配置步骤和相关设置四、KEPServerEX 6 基本操作- 介绍KEPServerEX 6 的主要功能和操作方法- 说明KEPServerEX 6 的常用技巧和注意事项五、KEPServerEX 6 高级应用- 讲解KEPServerEX 6 的高级功能和应用场景- 说明KEPServerEX 6 的高级操作和配置方法六、KEPServerEX 6 常见问题与解答- 列举KEPServerEX 6 使用过程中常见的问题- 提供KEPServerEX 6 问题的解决方法和技巧七、KEPServerEX 6 的维护与升级- 说明KEPServerEX 6 的维护方法和升级流程- 提醒KEPServerEX 6 用户注意软件版本和更新八、总结- 总结KEPServerEX 6 使用手册的主要内容- 强调KEPServerEX 6 的重要性和优点正文:KEPServerEX 6 使用手册KEPServerEX 6 是一款功能强大的OPC 服务器软件,主要用于工业自动化领域中不同设备之间的数据交换和通信。
本手册旨在帮助用户快速掌握KEPServerEX 6 的使用方法,提高工业自动化过程的效率和质量。
一、前言KEPServerEX 6 使用手册主要介绍了KEPServerEX 6 的安装、配置、基本操作、高级应用、常见问题及解答、维护与升级等方面的内容。
通过本手册的指导,用户可以深入了解KEPServerEX 6 的功能和操作方法,充分发挥KEPServerEX 6 在工业自动化领域的优势。
新支点电信级服务器操作系统 V6 NewStart CGSL V6 系统用户手册说明书

新支点电信级服务器操作系统V6NewStart CGSL V6系统用户手册编写日期2020年4月20日文件版本V1.0文件编排封面1页,目录6页,内容214页,合计224页广东中兴新支点技术有限公司手册说明本手册是新支点电信级服务器操作系统(以下简称NewStart CGSL)V6系列版本全面使用说明书,讨论了进行系统管理所需的基础知识及相关系统管理主题,能够帮助您顺利执行系统管理任务并配置和管理一个高效、安全、稳定的服务器系统。
内容介绍第1章基本命令介绍介绍在CGSL系统中进行Shell操作的基本知识,以及系统基本命令的使用。
第2章系统安装与升级介绍CGSL系统如何安装和升级。
第3章用户和群组管理如何在命令行界面下完成用户账号、工作组的建立和维护。
第4章文件系统管理对CGSL系统的文件系统如何进行管理进行介绍。
第5章软件包管理介绍如何使用Shell命令安装和管理系统中的应用程序和软件包。
第6章使用Vim编辑器介绍如何使用Vim编辑器。
第7章基础系统管理介绍CGSL系统管理基本知识。
第8章系统服务介绍CGSL服务的配置与使用。
第9章系统安全介绍CGSL系统安全管理策略。
第10章网络介绍CGSL网络管理的基本配置。
第11章图形环境介绍CGSL系统图形环境管理的基本配置。
第12章自研工具介绍CGSL自研工具的使用。
第13章版权说明详细介绍GPL版权申明与免责申明。
版本更新说明V1.02020年4月20日更新软件版本CGSL V6系统用户手册本书约定介绍符号的约定、键盘操作约定、鼠标操作约定以及四类标志。
1)符号约定样按钮表示按钮名;带方括号“【属性栏】”表示人机界面、菜单条、数据表和字段名等;多级菜单用“->”隔开,如【文件】->【新建】->【工程】表示【文件】菜单下的【新建】子菜单下的【工程】菜单项;尖括号<路径>表示当前目录中include目录下的.h头文件,如<asm-m68k/io.h>表示/include/asm-m68k/io.h文件。
6-GFM用户手册(中文)

动力未来/ power the future第一章安全说明摘要本章介绍安全标志和安全注意事项。
在进行任何有关本产品的操作之前,需要仔细阅读本章内容,以确保安全。
安全符号安全符号用以提示在进行电池安装、操作和维护时所必须遵守的安全事项。
安全符号如表0-1所示。
表0-1 安全符号及含义安全事项在电池安装、操作和维护中,必须遵守所在地的安全规范和相关操作规程,否则可能会导致人身伤害或设备损坏。
手册中提到的安全注意事项只作为当地安全规范的补充。
双登集团不承担任何因违反通用安全操作要求或违反设计、生产和使用设备安全标准而造成的责任。
1.电池组电压较高,直接接触或通过潮湿物体间接接触导电电缆,存在电击危险。
电池组为储能设备,在操作维护过程中严禁以任何方式短路电池组。
2.操作时严禁佩带手表、手链、手镯、戒指等易导电物体。
3.本设备中存在化学物质,只有经过培训的专业人员才能进行安装、操作和维护。
4.必须使用专用工具。
在进行电缆连接操作时,必须使用专用工具,不得使用非专用工具。
同时,工具使用前需做好绝缘处理(如在金属裸露部分缠绕胶布),以防工具触碰到带电的物件,造成短路或伤害人身安全。
5.使用相同型号的蓄电池。
请使用同型号的蓄电池,随意使用不同型号的蓄电池会损坏设备。
6.火灾危险。
蓄电池安装时,应保证电缆连接牢固和电池输出端子所在面清洁,否则可能引起蓄电池正负端子温度升高而打火,并可能引起火灾。
7.注意操作规范。
进行电池作业之前,必须仔细阅读电池搬运的安全注意事项以及电池的正确连接方法。
电池的不规范操作会造成危险。
操作中必须严防电池短路或壳体破裂。
壳体破裂后电解液的流出会对设备构成潜在的威胁,会腐蚀金属物体及电路板,造成设备损坏及电路板短路。
8.电池使用环境。
电池应远离火源、有机溶剂,避免阳光直晒、同组电池使用环境温度一致。
第二章 概述摘要本章介绍6-GFM 蓄电池的型号、产品选型、产品搬运及使用环境要求、产品规格和主要参数。
6企业安全生产标准化信息管理系统用户操作手册(地方安全监管部门系统管理员端)

企业安全生产标准化信息管理系统(地方安全监管部门系统管理员端)用户操作手册国家安全生产监督管理总局通信信息中心2016年1月目录1.登录系统 (3)2.用户、角色管理 (4)2.1新增本单位业务人员用户 (4)2.1.1操作方法 (4)2.1.2注意事项 (5)2.2新增下一级安全监管部门三员用户 (5)2.2.1操作方法 (6)2.2.2注意事项 (6)2.3新增评审组织单位和评审单位用户 (7)2.3.1操作方法 (7)2.3.2注意事项 (8)3.系统维护 (10)3.1修改用户注册信息 (10)3.1.1操作方法 (10)3.1.2注意事项 (10)3.2修改密码 (11)3.2.1操作方法 (11)3.2.2注意事项 (11)附件1 地方安全监管部门三员用户职责说明 (12)1.登录系统打开非兼容模式的IE8.0及以上版本IE浏览器,输入,进入系统登录页面,输入用户名、密码、验证码,点击“登录”按钮,验证通过后进入系统主页面。
备注:密码连续输入错误6次,用户将被冻结,2个小时后才能重新登录系统。
2.用户、角色管理2.1新增本单位业务人员用户点击“用户、角色管理”菜单、“本单位业务人员用户管理”子菜单,进入本单位业务人员用户信息列表页面,用户信息超过一页时,可以通过上下翻页功能浏览。
2.1.1操作方法点击右上角的“新增”按钮,进入新增本单位业务人员用户信息页面,各项信息填写完成并确认无误后,点击“保存”按钮即可。
不过此新增的用户还没有任何功能、数据权限,应及时通知本单位安全保密管理员进行角色、数据授权。
2.1.2注意事项(1)用户名:必填,30位字符之内,一个用户名只能注册一个用户,不能重复注册。
(2)使用者姓名:必填,最多50位个汉字或字符。
(3)手机号码:必填,11位数字。
(4)电子邮箱:必填,30位字符之内,包含“@”,“@”的两端必须有字符,“@”后面的字符中间必须有“.”。
(5)密码:必填,必须是数字和英文字母的组合,最少6位,最长不能超过20位。
D6 用户手册说明书
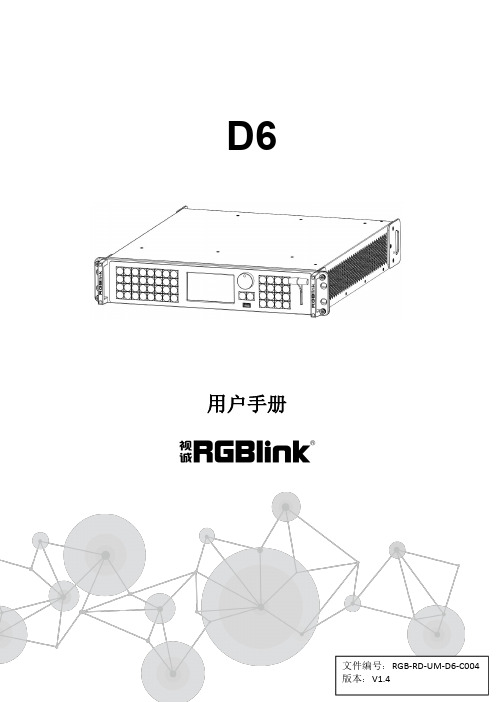
D6用户手册目录目录 (2)声明 (5)声明/担保与赔偿 (5)安全操作概要 (5)安装安全概要 (6)第一章产品简介 (7)1.1随附配件 (7)1.2产品概述 (8)1.2.1前面板 (9)1.2.2后面板 (12)1.2.3外形尺寸图 (13)第2章产品安装 (14)2.1插入信号源 (14)2.2插入电源 (14)2.3设备上电 (14)第3章产品使用 (16)3.1前面板操作 (16)3.1.1语言 (16)3.1.2系统设置 (16)3.1.4输出 (21)3.1.5PVW (23)3.1.6PGM (24)3.1.7PST (25)3.1.8Transition (25)3.1.9DSK (26)3.1.10Logo (26)3.1.11背景图层 (27)3.1.12边缘羽化 (27)3.1.13测试模板 (28)3.1.14保存和调保存 (28)3.1.15技术支持 (29)3.1.16工厂复位 (30)3.2XPOSE控制D6 (31)3.2.1安装XPOSE软件 (31)3.2.2登录XPOSE (35)3.2.3搜索设备 (37)3.2.4输出设置 (39)3.2.5操作模式 (43)3.2.6用户管理 (61)3.2.7系统设置 (63)3.2.9注销 (67)第4章订购编码 (68)4.1产品 (68)4.2选配模块 (68)4.2.1输入模块 (68)4.2.2输出模块 (68)第5章技术支持 (69)5.1联系我们 (69)第6章附录 (70)6.1规格 (70)6.2D6升级 (73)6.3模块安装 (76)6.4设备养护 (77)6.4.1风扇清理 (77)6.5术语和定义 (78)6.6修订记录 (81)首先感谢您选购我们的产品!为了让您迅速掌握如何使用这款视频处理器,我们为您送上了详细的产品使用手册。
您可以在使用视频处理器之前阅读产品介绍以及使用方法,请仔细阅读我们所提供给您的所有信息,以便于您正确地使用我们的产品。
P6 操作手册

2014 P6操作手册P6 操作手册及职责说明作者:汪楠步勇日期:2014/05/15目录一、基本操作 (2)1。
安装软件客户端 (2)2。
用户登录 (2)3。
语言设置 (3)4。
基本设置 (3)5.设置当前用户参数 (4)二、职位权限操作指南 (8)1。
质量、安全、技术经理 (8)2。
商务采购 (10)3.计划经理 (11)4.成本经理 (12)5。
项目负责人 (12)6.项目总工 (12)7.管理层 (12)三、编码说明 (14)1.项目分类码编码说明 (14)2。
作业分类码编码说明 (14)3。
资源分类码编码说明 (14)四、相关名词解释 (15)一、基本操作1.安装软件客户端参见《02-P6客户端安装说明》,沙特分公司由燕军贵负责所有客户端的安装和调试。
2.用户登录--运行“Project Management"程序;--输入用户名:“登录名";参见《P6客户端人员清单》——输入口令:“你的密码”(首次输入密码为空,请务必在基本设置步骤添加口令);—-选择数据库(PMDB或MTPMDB均可);-—点击“确定”按钮登录PM组件。
3. 语言设置“工具"-“语言设置”4. 基本设置选择菜单“显示(V )”->“工具栏(T)”,将“工具条”菜单中所有选项打上钩.菜单栏 导航栏工具栏目录命令5.设置当前用户参数选择菜单“编辑(E)”-〉“用户设置(Z)…”,并按照下图所示设置当前用户的各个参数。
(1)参数“时间单位(U)”的设置如图所示:(2)参数“日期(D)”的设置如下图所示:(3)参数“货币(C)"的设置如下图所示:(4)参数“程序(A)"的设置如下图所示:(5)参数“口令(P)”的设置如下图所示:二、职责及基本操作指南1.质量、安全、技术经理职责:负责质量/安全/技术方面的计划和控制,完善作业计划的相关部分;编辑、删除作业分类码(项目级和EPS)在菜单栏“企业"—“作业分类码”—“修改”增加作业分类码对作业进行控制例如安全控制分配分类码看。
凝思安全操作系统 V6.0.80 用户手册说明书
凝思安全操作系统V6.0.80用户手册北京凝思软件股份有限公司目 录产品概述 (1)关于本书 (6)文档约定 (6)术语简介 (8)如何使用本书 (11)第1章 登录和注销 (12)1.1 登录 (12)1.1.1 从桌面登录 (14)1.1.1.1 桌面的使用 (15)1.1.1.2 控制会话 (16)1.1.1.3 锁定屏幕 (17)1.1.2 从控制台登录 (18)1.2 文档和帮助 (19)1.3 注销 (21)1.3.1 从桌面注销 (21)1.3.2 从控制台注销 (22)第2章 系统基本使用 (23)2.1 Bash 简介 (23)2.1.1 命令 (23)2.1.2 文件和目录 (23)2.1.3 Bash 功能 (26)2.1.4 指定路径 (26)2.1.5 通配符 (26)2.1.6 less和more (27)2.1.7 管道 (27)2.1.8 存档和数据压缩 (28)2.2 用户和访问控制 (30)2.2.1 文件系统权限 (31)2.2.2 修改文件权限 (32)2.2.3 setuid位 (33)2.2.4 setgid位 (34)2.2.5 粘滞位 (34)2.2.6 自主访问控制 (34)2.2.6.1 访问控制列表 (36)2.3 重要的 Linux 命令 (39)2.3.1 文件命令 (39)2.3.2 系统命令 (43)第3章 分区与文件系统 (47)3.1 磁盘分区 (47)3.1.1 命令行分区工具——parted (47)3.1.1.1 parted基本用法 (47)3.1.1.2 创建分区表 (47)3.1.1.3 查看磁盘分区情况 (48)3.1.1.4 添加分区 (48)3.1.1.5 删除分区 (48)3.1.2 图形分区工具——gparted (48)3.1.2.1 启动gparted程序 (49)3.1.2.2 gparted程序首界面 (50)3.1.2.3 创建分区表 (51)3.1.2.4 添加分区 (53)3.1.2.5 删除分区 (57)3.2 文件系统 (59)3.2.1 创建文件系统 (59)3.2.2 修复文件系统 (59)3.3 磁盘阵列RAID (61)3.3.1 创建RAID (61)3.3.2 关闭RAID (62)3.4 逻辑卷管理LVM (63)3.4.1 基本命令介绍 (63)3.4.2 逻辑卷创建 (64)3.4.3 逻辑卷扩容 (65)3.4.4 删除逻辑卷 (65)第4章 中文支持 (66)4.1 多语言环境支持 (66)4.2 字符编码与中文字体 (67)4.3 输入法 (70)第5章 系统管理 (71)5.1 关闭或重新启动系统 (71)5.1.1 关闭系统 (71)5.1.2 重启系统 (71)5.2 初始化设置 (72)5.2.1 设备驱动模块配置 (72)5.2.2 profile文件 (72)5.2.3 issue文件 (74)5.3 系统配置 (75)5.3.1 fstab文件 (75)5.4 挂载和卸载 (77)5.4.1 挂载 (77)5.4.2 卸载 (77)5.5 系统监控 (78)5.6 数据备份与恢复 (80)5.6.1 数据备份的重要性 (80)5.6.2 工具名称 (80)5.6.3 工具安装 (80)5.6.4 备份与恢复策略 (80)5.6.4.1 完全备份 (80)5.6.4.2 增量备份 (81)5.6.4.3 差异备份 (82)5.6.5 工具参数 (83)5.6.6 功能演示 (84)第6章 软件包管理 (86)6.1 软件包管理机制 (86)6.1.1 软件包概述 (86)6.1.2 软件包命名约定 (86)6.1.3 维护脚本 (86)6.1.4 软件包优先级 (87)6.1.5 软件包依赖关系 (88)6.2 软件包管理工具 (89)6.2.1 常用的包管理工具 (89)6.2.2 dpkg (89)6.2.3 apt (89)6.2.3.1 设置软件源 (89)6.2.3.2 apt-get (90)6.2.3.3 apt-cache (90)6.2.4 aptitude (91)6.2.4.1 介绍 (91)6.2.4.2 aptitude安装 (92)6.2.5 安装软件包 (92)第7章 用户管理 (94)7.1 添加用户 (94)7.2 删除用户 (94)7.3 添加用户组 (95)7.4 删除用户组 (95)7.5 将用户添加到用户组 (95)7.6 将用户从用户组中删除 (96)7.7 改变用户当前所在组 (96)7.8 修改用户口令 (96)7.9 修改用户口令时限 (98)7.10 修改用户信息 (100)7.11 修改口令文件 (101)7.12 定义鉴别阈值 (103)第8章 网络管理 (104)8.1 网络参数配置 (104)8.1.1 interfaces文件 (104)8.1.2 resolv.conf文件 (105)8.1.3 hostname文件 (106)8.1.4 services文件 (106)8.1.5 hosts.allow文件 (108)8.1.6 hosts.deny文件 (108)8.1.7 host.conf文件 (109)8.1.8 ifconfig命令 (110)8.2 网络服务 (115)8.2.1 Apache (117)8.2.1.1 简介 (117)8.2.1.2 配置文件 (117)8.2.1.3 配置文件参数 (118)8.2.1.4 日志 (142)8.2.1.5 参考信息 (148)8.2.2 BIND (148)8.2.2.1 简介 (148)8.2.2.2 配置文件 (148)8.2.2.3 配置文件参数 (148)8.2.2.4 参考信息 (152)8.2.2.5 日志 (152)8.2.3 Samba (152)8.2.3.1 简介 (152)8.2.3.2 配置文件 (152)8.2.3.3 配置文件参数 (153)8.2.3.4 日志 (160)8.2.3.5 参考信息 (160)8.2.4 SSH (160)8.2.4.1 简介 (160)8.2.4.2 配置文件 (160)8.2.4.3 配置文件参数 (160)8.3 bonding (166)8.3.1 参数说明 (166)8.3.1.1 参数列表 (166)8.3.2 bonding模式 (168)8.3.3 配置bonding (170)8.3.3.1 操作系统及环境 (170)8.3.3.2 配置文件 (171)第9章 日志与审计 (173)9.1 日志管理 (173)9.1.1 查看系统日志 (173)9.1.2 查看用户信息 (173)9.2 安全审计 (173)9.2.1 审计守护进程 (175)9.2.1.1 环境配置文件 (175)9.2.1.2功能配置文件 (175)9.2.2 审计规则配置程序 (182)9.2.2.1 参数详解 (182)9.2.2.2 用法举例 (186)9.2.2.3 注意事项 (187)9.2.3 审计规则配置文件 (187)9.2.4 审计日志分析工具 (187)9.2.4.1 报表生成工具 (187)9.2.4.2 日志搜索工具 (187)9.2.5 审计分发程序 (188)9.2.6 审计系统附加功能 (188)9.2.7 审计系统设置 (188)第10章 凝思安全机制 (189)10.1 安全模块 (189)10.1.1 安全模块的参数 (189)10.1.2 安全模块的加载与卸载 (191)10.2 强制访问控制(Mandatory Access Control) (192)10.2.1 功能简介 (194)10.2.1.1 安全标签 (194)10.2.1.2 主体标签 (194)10.2.1.3 客体标签 (195)10.2.1.4 规则 (195)10.2.1.5 MAC配置基本流程 (196)10.2.2 规则说明 (196)10.2.3 配置文件 (197)10.2.4 配置工具 (198)10.2.5 功能演示 (199)10.2.6 调试方法 (206)10.3 网络标签 (207)10.3.1 功能简介 (207)10.3.2 配置文件 (208)10.3.3 标签使能 (209)10.3.4 规则说明 (209)10.3.4.1 在网络环境中的主客体定义 (209)10.3.4.2 网络请求接受的条件定义 (209)10.3.4.3 标签网络环境必要条件 (209)10.3.4.4 收/发数据包的细节 (209)10.3.4.5 TCP/UDP连接的区别 (210)10.3.5 功能演示 (210)10.3.6 案例展示 (214)10.3.7 调试方法 (217)10.4 强制行为控制(Mandatory Behavior Control) (220)10.4.1 功能简介 (220)10.4.2 规则说明 (221)10.4.3 配置工具 (223)10.4.4 功能演示 (224)10.4.5 调试方法 (224)10.5 强制能力控制(Mandatory Capability Control) (226)10.5.1 功能简介 (230)10.5.1.1 线程的能力 (230)10.5.1.2 文件的能力 (231)10.5.2 规则说明 (231)10.5.3 配置工具 (232)10.5.4 功能演示 (234)10.5.5 调试方法 (235)10.6 分权管理员 (237)10.6.1 管理员职责 (237)10.6.2 功能演示 (240)10.7 无root系统运行 (241)第11章 开发 (242)11.1 开发环境 (242)11.1.1 java开发环境 (242)11.1.2 C开发环境 (243)11.1.3 C++开发环境 (244)11.1.4 Python开发环境 (245)11.1.5 Perl开发环境 (245)11.1.6 Shell开发环境 (246)11.1.7 Php开发环境 (247)11.1.8 Tcl/tk开发环境 (248)11.2 开发工具 (249)11.2.1 eclipse (249)11.2.2 kdevelop (249)11.2.3 emacs (250)11.2.4 qtcreater (251)第12章 常见问题解答 (253)附录A 文件和目录 (262)A.1 / (263)A.2 /etc (265)A.3 /dev (267)A.4 /usr (267)A.5 /var (268)A.6 /proc (269)产品概述凝思安全操作系统(以下简称为“凝思系统”)是北京凝思软件股份有限公司自主研发、拥有完全自主知识产权、具备等保四级要求、并且达到军B级安全级别的操作系统,是国内首家达到安全服务器保护轮廓EAL3级别的安全产品。
几何g6操作手册
几何g6操作手册摘要:一、几何g6 操作手册简介1.几何g6 操作手册的封面与目录2.几何g6 操作手册的主要内容二、几何g6 操作手册的使用说明1.几何g6 操作手册的使用方法2.几何g6 操作手册的功能介绍3.几何g6 操作手册的注意事项三、几何g6 操作手册的实践应用1.几何g6 操作手册在实际操作中的应用2.几何g6 操作手册在解决实际问题中的应用3.几何g6 操作手册在提高工作效率中的应用四、几何g6 操作手册的评价与建议1.几何g6 操作手册的优点2.几何g6 操作手册的不足3.对几何g6 操作手册的建议与改进正文:几何g6 操作手册是一本关于几何g6 软件使用的指南,它详细介绍了几何g6 软件的功能、使用方法以及注意事项。
几何g6 操作手册的封面简洁大方,目录清晰明了,方便用户快速定位到自己需要的内容。
几何g6 操作手册的使用说明详细而全面,不仅包括了软件的安装与启动,还包括了各种功能模块的使用方法。
此外,几何g6 操作手册还提供了丰富的实例,帮助用户更好地理解和掌握软件的使用。
在使用过程中,用户需要注意几何g6 操作手册中提到的各种事项,以确保软件的稳定运行和数据的准确性。
在实践应用环节,几何g6 操作手册提供了丰富的应用案例,涵盖了各种实际操作场景。
通过这些案例,用户可以学习到如何将几何g6 软件应用到实际问题中,提高工作效率。
同时,几何g6 操作手册也收集了用户在使用过程中遇到的问题和解决方案,为用户提供了宝贵的参考。
总的来说,几何g6 操作手册是一本实用的软件使用指南。
虽然它也存在一些不足,如部分内容的表述不够清晰,但这并不影响它作为几何g6 软件使用者的必备参考书。
广联达云计价平台GCCP6操作流程手册
广联达云计价平台GCCP6操作流程手册介绍广联达云计价平台GCCP6是一个用于计价的云平台,能够帮助用户进行快速且准确的价格计算。
本操作流程手册旨在为用户提供GCCP6的使用说明和操作步骤,帮助用户更好地使用该平台。
登录1. 打开浏览器并输入GCCP6的网址。
2. 在登录页面输入您的用户名和密码,并点击登录按钮。
创建项目1. 登录后,进入主页面。
2. 在主页面上方找到"新建项目"按钮,并点击它。
3. 在弹出的窗口中填写项目相关信息,如项目名称、客户名称、项目类型等。
4. 确认填写无误后,点击"保存"按钮。
添加任务1. 在项目详情页中,找到"添加任务"按钮,并点击它。
2. 在弹出的窗口中填写任务相关信息,如任务名称、任务描述、任务类型等。
3. 确认填写无误后,点击"保存"按钮。
添加材料1. 在任务详情页中,找到"添加材料"按钮,并点击它。
2. 在弹出的窗口中填写材料相关信息,如材料名称、材料数量、材料单价等。
3. 确认填写无误后,点击"保存"按钮。
计算价格1. 在任务详情页中,找到"计算价格"按钮,并点击它。
2. 系统会自动根据任务中的材料数量和单价进行价格计算,并显示计算结果。
查看报告1. 在任务详情页中,找到"查看报告"按钮,并点击它。
2. 在报告页面中,您可以查看计价结果报告的详细信息,包括计算过程和结果汇总。
导出报告1. 在报告页面中,找到"导出报告"按钮,并点击它。
2. 选择导出报告的格式,如PDF或Excel。
3. 确认选择后,点击"导出"按钮。
修改项目或任务信息1. 在项目详情页或任务详情页中,找到"编辑"按钮,并点击它。
2. 修改相应的信息后,点击"保存"按钮。
oh6服务手册
oh6服务手册
OH6服务手册是一个提供关于OH6设备使用和维护信息的文档。
手册通常包含以下内容:
1. 设备概述:简要介绍OH6设备的用途、功能和特点。
2. 安装指南:提供设备安装和固定方面的指导,包括所需的工具和材料。
3. 操作指南:详细说明如何使用OH6设备,包括各个功能和设置的说明。
4. 维护和保养:提供设备日常维护、定期保养和故障排除方面的指导。
5. 常见问题解答:列出在使用OH6设备过程中可能遇到的问题,并提供相应的解决方案。
6. 保修和售后服务:提供关于设备保修期限、保修范围以及售后服务方面的信息。
在使用OH6服务手册时,建议按照手册的目录顺序进行阅读,并根据实际需要查找相关章节获取详细信息。
同时,手册中可能包含一些专业术语和缩写,建议在使用前先了解相关概念和含义。
厨卫电器 Hob PKE6.K17., PKF6..K17. 用户操作手册说明书

HobPKE6.K17., PKF6..K17.[en]Instruction manualen2Table of contents8Intended use. . . . . . . . . . . . . . . . . . . . . . . . . . . . . 3(Important safety information . . . . . . . . . . . . . . . 3]Causes of damage. . . . . . . . . . . . . . . . . . . . . . . . 4Overview . . . . . . . . . . . . . . . . . . . . . . . . . . . . . . . . . . .47Environmental protection . . . . . . . . . . . . . . . . . . 4Energy-saving tips . . . . . . . . . . . . . . . . . . . . . . . . . . . .4Environmentally-friendly disposal . . . . . . . . . . . . . . . . .4*Getting to know your appliance . . . . . . . . . . . . . 5The control panel. . . . . . . . . . . . . . . . . . . . . . . . . . . . .5The hotplates . . . . . . . . . . . . . . . . . . . . . . . . . . . . . . . .5Residual heat indicator. . . . . . . . . . . . . . . . . . . . . . . . .51Operating the appliance . . . . . . . . . . . . . . . . . . . 6Switching the hob on and off . . . . . . . . . . . . . . . . . . . .6Setting a hotplate. . . . . . . . . . . . . . . . . . . . . . . . . . . . .6Table of cooking times. . . . . . . . . . . . . . . . . . . . . . . . .6X Electronic boil start control . . . . . . . . . . . . . . . . 7Setting the electronic boil start control. . . . . . . . . . . . .7Table of cooking times for electronic boil start control.7Tips for the electronic boil start control . . . . . . . . . . . .8A Childproof lock. . . . . . . . . . . . . . . . . . . . . . . . . . . 8Switching the child safety lock on and off. . . . . . . . . .8Automatic childproof lock. . . . . . . . . . . . . . . . . . . . . . .8b Automatic safety cut-out. . . . . . . . . . . . . . . . . . . 8k Wipe protection . . . . . . . . . . . . . . . . . . . . . . . . . . 8Q Basic settings. . . . . . . . . . . . . . . . . . . . . . . . . . . . 9Changing the basic settings. . . . . . . . . . . . . . . . . . . . .9D Cleaning . . . . . . . . . . . . . . . . . . . . . . . . . . . . . . . .9Ceramic . . . . . . . . . . . . . . . . . . . . . . . . . . . . . . . . . . . .9Hob surround . . . . . . . . . . . . . . . . . . . . . . . . . . . . . . .103Trouble shooting . . . . . . . . . . . . . . . . . . . . . . . .10E-report in the displays. . . . . . . . . . . . . . . . . . . . . . . .104Customer service. . . . . . . . . . . . . . . . . . . . . . . .11E number and FD number . . . . . . . . . . . . . . . . . . . . .11E Test dishes . . . . . . . . . . . . . . . . . . . . . . . . . . . . .12Additional information on products, accessories, replacement parts and services can be found at and in the online shop 3.( .3.) .Intended use en38Intended useRead these instructions carefully. Please keep the instruction and installation manual, as well as the appliance certificate, in a safe place for later use or for subsequent owners.Check the appliance for damage afterunpacking it. Do not connect the appliance if it has been damaged in transport.Only a licensed professional may connect appliances without plugs. Damage caused by incorrect connection is not covered under warranty.This appliance is intended for private domestic use and the household environment only. The appliance must only be used for the preparation of food and beverages. Thecooking process must be supervised. A short cooking process must be supervised without interruption. Only use the appliance in enclosed spaces.This appliance is intended for use up to a maximum height of 2000 metres above sea level.Do not use covers. These can causeaccidents, for example due to overheating, catching fire or materials shattering.Only use safety devices or child protection grilles approved by ourselves. Unsuitable safety devices or child protection grilles may result in accidents.This appliance may be used by children over the age of 8 years old and by persons with reduced physical, sensory or mental capabilities or by persons with a lack of experience or knowledge if they aresupervised or are instructed by a person responsible for their safety how to use the appliance safely and have understood the associated hazards.Children must not play with, on, or around the appliance. Children must not clean theappliance or carry out general maintenance unless they are at least 15 years old and are being supervised.Keep children below the age of 8 years old at a safe distance from the appliance and power cable.(Important safety information:Warning – Risk of fire!■Hot oil and fat can ignite very quickly. Never leave hot fat or oil unattended. Never use water to put out burning oil or fat. Switch off the hotplate. Extinguish flames carefully using a lid, fire blanket or something similar. ■The hotplates become very hot. Neverplace combustible items on the hob. Never place objects on the hob.■The appliance gets hot. Do not keep combustible objects or aerosol cans in drawers directly underneath the hob.■The hob switches off automatically and can no longer be operated. It may switch on unintentionally at a later point. Switch off the circuit breaker in the fuse box. Contact the after-sales service.:Warning – Risk of burns!■The hotplates and surrounding area (particularly the hob surround, if fitted) become very hot. Never touch the hot surfaces. Keep children at a safe distance.■The hotplate heats up but the display does not work. Switch off the circuit breaker in the fuse box. Contact the after-sales service.:Warning – Risk of electric shock!■Incorrect repairs are dangerous. Repairs may only be carried out by one of our trained after-sales engineers. If theappliance is faulty, unplug the mains plug or switch off the fuse in the fuse box. Contact the after-sales service.■Do not use any high-pressure cleaners or steam cleaners, which can result in an electric shock.■ A defective appliance may cause electric shock. Never switch on a defectiveappliance. Unplug the appliance from the mains or switch off the circuit breaker in the fuse box. Contact the after-sales service.■Cracks or fractures in the glass ceramic may cause electric shocks. Switch off the circuit breaker in the fuse box. Contact the after-sales service.en Causes of damage4:Warning – Risk of injury!Saucepans may suddenly jump due to liquid between the pan base and the hotplate.Always keep the hotplate and saucepan bases dry.]Causes of damageCaution!■Rough pot and pan bases scratch the ceramic.■Avoid boiling pots dry. This may cause damage.■Never place hot pots or pans on the control panel, the display area or the surround. This may cause damage.■Damage can occur if hard or pointed objects fall on the hob. ■Aluminium foil and plastic containers melt on hot hotplates. Oven protective foil is not suitable for your hob.OverviewYou will find the most frequently caused damage in the following table.7Environmental protectionIn this section, you can find information about saving energy and disposing of the appliance.Energy-saving tips■Always place suitable lids on saucepans. When cooking without a lid, considerably more energy is required. A glass lid means that you can see inside without having to lift the lid.■Use pots and pans with even bases. Uneven bases increase energy consumption.■The diameter of pot and pan bases should be the same size as the hotplate. In particular, small saucepans on the hotplate cause energy losses. Please note: cookware manufacturers often indicate the upper diameter of the saucepan. This is usually bigger than the diameter of the base of the pan.■Use a small saucepan for small quantities. A larger, less full saucepan requires a lot of energy.■Cook with only a little water. This will save energy. Vitamins and minerals in vegetables are preserved.■Always cover as large an area of the hotplate as possible with your saucepan.■Switch to a lower heat setting in good time.■Select a suitable ongoing cooking setting. You will waste energy by using an ongoing cooking setting which is too high.■Use the residual heat of the hob. For longer cooking times, you can switch the hotplate off 5-10 minutes before the end of the cooking time.Environmentally-friendly disposalDispose of packaging in an environmentally-friendly manner.This appliance is labelled in accordance with European Directive 2012/19/EU concerning used electrical and electronic appliances (waste electrical and electronic equipment - WEEE). The guideline determines theframework for the return and recycling of used appliances as applicable throughout the EU.Getting to know your appliance en5*Getting to know your applianceThe instruction manual is the same for various different hobs. You can find the hob dimensions in the overview of models. ~ Page 2The control panelNotes ■When you touch a symbol, the respective function is activated.■Always keep the controls dry. Moisture reduces their effectiveness.■Do not pull pans close to the displays and sensors. The electronics could overheat.The hotplatesNotes ■Any dark areas in the glow pattern of the hotplate are due to technical reasons. The function of the hotplate is not affected.■Hotplate temperature is regulated by the heatswitching on and off. The heat may also switch on and off at the highest setting.■With multi-circuit hotplates the heater elements of the inner filament circuits and the heater element of the activations may switch on and off at different times.Residual heat indicatorThe hob has a two-stage residual heat indicator for each hotplate.If • appears in the display the hob is still hot. It may be used, for example, to keep a small meal warm or to melt cooking chocolate. As the hotplate cools down further, the display changes to œ. The display remains lit until the hotplate has cooled sufficiently.en Operating the appliance61Operating the applianceIn this section, you can find out how to set the hotplates. The table shows heat settings and cooking times for various meals.Switching the hob on and offThe main switch is used to switch the hob on and off.To switch on: touch the # symbol. A signal sounds. The display light above the main switch and the ‹ indicators light up. The hob is ready for use.To switch off: Touch the # symbol until the display light above the main switch and the displays go out. All hotplates are switched off. The residual heat indicator remains on until the hotplates have cooled down sufficiently.Notes ■The hob switches off automatically if all hotplates have been switched off for more than 20 seconds.■The settings remain stored for 4 seconds after the hob has been switched off. If you switch it on again during this time, the hob will operate using the previously stored settings.Setting a hotplateSet the desired heat setting on the control panel.Heat setting 1 = lowest setting Heat setting 9 = highest settingEvery heat setting has an intermediate setting. This is marked in the control panel with the û symbol.Setting the heat settingThe hob must be switched on.1. Touch the $ symbol to select the hotplate.‹ lights up in the heat setting display, ¬ lights upunder the heat setting display.2.Select the required heat setting in the control panel.Changing the heat settingSelect the hotplate and set the desired heat setting in the control panel.Switching off the hotplateUse the $ symbol to select the hotplate. Set the control panel to 0. After about 10 seconds, the residual heat indicator appears.Note: The last selected hotplate remains activated. You can set the hotplate without selecting it again.Table of cooking timesThe following table provides some examples.Cooking times and heat settings may vary depending on the type of food, its weight and quality. Deviations are therefore possible.For bringing liquids to the boil, use heat setting 9.Stir thick liquids occasionally.Food that needs to be seared quickly or food which loses a lot of liquid during initial frying is best seared in several small portions.Tips for energy-saving cooking can be found in the Environmental protection section.~ Page 4Electronic boil start control en7X Electronic boil start controlThe electronic boil start control heats the hotplate using the highest heat setting and then switches down to the simmer setting you have selected.The time taken for the hotplate to heat up depends on the simmer setting selected.Setting the electronic boil start controlThe electronic boil start control can only be activated in the first 30 seconds after you have switched on the hotplate:1.Set the desired ongoing cooking setting for thehotplate.2.Touch the w symbol.The electronic boil start control is activated. ‘and the ongoing cooking setting flash alternately in the display.After the food has been brought to the boil, only the ongoing cooking setting remains lit on the display.Switching offSelect the hotplate and touch the w symbol again.Table of cooking times for electronic boil start controlThe table below shows which dishes electronic boil start control can be used for.The smaller quantities indicated are for the smaller hotplates and the larger quantities are for the larger hotplates. The values given are guidelines.Stir thick liquids occasionally.en Childproof lock 8Tips for the electronic boil start controlElectronic boil start control is designed to conserve food's nutritional value while using little water for cooking.■Add only approximately 3 cups of water to the food for large hotplates and approximately 2 cups of water for small hotplates. ■Place a lid on the saucepan.■Electronic boil start control is not suitable for food that is cooked in a large volume of water (e.g. pasta).A Childproof lockYou can use the childproof lock to prevent children from switching on the hob.Switching the child safety lock on and offThe hob must be switched off.To switch on: Touch the D symbol for approx.4 seconds. The D symbol lights up for 10 seconds. The hob is locked.To switch off: Touch the D symbol for approx. 4 seconds. The lock is released.Automatic childproof lockThis function automatically activates the childproof lock every time you switch the hob off.Switching on and offFind out how to switch the automatic childproof lock on and off in the Basic settings section.~ Page 9b Automatic safety cut-outIf a hotplate has been switched on for a long time without the setting being changed, the automatic time limit is activated.The hotplate stops heating. ”‰ and the •/œ residual heat indicator flash alternately on the hotplate display.The display goes out when you touch any control. You can make new settings.When the time limit is activated depends on the heat setting selected (1 to 10 hours).k Wipe protectionIf you wipe over the control panel while the hob is switched on, settings may be changed.To prevent this from happening, your hob has a wipe protection function. Touch the > symbol. A beep goes off and the display light above the > symbol lights up. The control panel is locked for 30 seconds. You can now wipe over the control panel without changing any settings.Note: The primary switch is not affected by the wipe protection function. You can switch off the hob at any time.Basic settings en9Q Basic settingsYour appliance has various basic settings. You can adjust these settings to meet your own needs.Changing the basic settingsThe hob must be switched off.1.Switch on the hob.2.Within the next 10 seconds, touch the w symbol for4 seconds.™ and ‚ flash alternately in the lower display and ‹lights up in the upper display.3.Touch the w symbol repeatedly until the desireddisplay appears in the lower display.4.Set the desired value on the control panel.5.Touch the w symbol for 4 seconds.The setting is activated.Switching offTo exit the basic setting, switch off the hob with the main switch and make new settings.D CleaningSuitable maintenance and cleaning products can be purchased from the after-sales service or in our e-Shop.CeramicClean the hob after each use. This will prevent spills from burning onto the ceramic.Only clean the hob when it has cooled down e only cleaning agents which are suitable for glass ceramic. Follow the cleaning instructions on the packaging.Never use:■Undiluted washing-up liquid■Detergent intended for dishwashers ■Scouring agents■Harsh cleaning agents such as oven spray or stain remover■Abrasive sponges■High-pressure cleaners or steam jet cleanersGround-in dirt can be best removed with a glass scraper, available from retailers. Please note the manufacturer's instructions.You can also obtain a suitable glass scraper from our after-sales service or from the e-Shop.Using special sponges to clean glass ceramic achieves great cleaning results.en Trouble shooting10Hob surroundTo prevent damage to the hob surround, observe the following instructions:■Use only hot soapy water.■Wash new sponge cloths thoroughly before use.■Do not use any sharp or abrasive agents.■Do not use the glass scraper.3Trouble shootingFaults often have simple explanations. Please read the notes in the table before calling the after-sales service.The electronics of your hob are underneath the control panel. For various reasons, the temperature in this area may rise sharply. In order that the electronics do not overheat, thehotplates are switched off as and when necessary. The ”ƒ, ”…, or ”† display appears alternately with the • or œ residual heat indicator.E-report in the displaysWhen an error message with "E" appears in the display, e.g. E0111, switch the appliance off and on again.If it was a one-off error, the display goes out. If the error message appears again, call the after-sales service and quote the exact error message.Customer service en114Customer serviceOur after-sales service is there for you if your appliance needs to be repaired. We will always find anappropriate solution, also in order to avoid after-sales personnel having to make unnecessary visits.E number and FD numberPlease quote the E-number (product number) and the FD number (production number) of your appliancewhen contacting the after-sales service. The rating plate bearing these numbers can be found on the appliance certificate.Please note that a visit from an after-sales serviceengineer is not free of charge in the event of misuse of the appliance, even during the warranty period.Please find the contact data of all countries in the enclosed customer service list.To book an engineer visit and product advice Rely on the professionalism of the manufacturer. You can therefore be sure that the repair is carried out by trained service technicians who carry original spare parts for your appliances.GB ***********Calls charged at local or mobile rate.IE 01450 26550.03 € per minute at peak. Off peak 0.0088 € per minute.en Test dishes12E Test dishesThis table has been produced for test institutes to facilitate the testing of our appliances.The data in the table refers to our accessory cookware from Schulte Ufer (4-part induction pot set HEZ 390042) with the following dimensions:■Saucepan dia.16 cm, 1.2 litres, for 14.5 cm dia. single-circuit hotplate■Cooking pot dia. 16 cm, 1.7 litres, for 14.5 cm dia. single-circuit hotplate■Cooking pot dia. 22 cm, 4.2 litres, for 18 cm dia. or 17 cm dia. hotplate■Frying pan dia. 24 cm, for 18 cm dia. or 17 cm dia. hotplateTest dishes en13en Test dishes 14If the tests are carried out with an 18 cm dia. hotplate with a power rating of 1500 W, the boiling time is increased by approx. 20% and the ongoing cooking setting by one ongoing cooking setting.63PCFSU #PTDI )BVTHFSÉUF (NC)XXX CPTDI IPNF DPN$BSM 8FSZ 4USB F.ßODIFO (&3."/:*9001271965*9001271965970210。
Enfocus PitStop6操作手册

Enfocus PitStop 6.0操作手册第一章 启动Pitstop1.1启动Enfocus Pitstop ProfessionalEnfocus Pitstop Professional作为Adobe Acrobat的插件,因此需要在Acrobat启动该程序1.1.1启动Adobe Acrobat(如果在启动Acrobat时按住SHIFT键,则Acrobat将不启用任何插件,即无法使用Enfocus Pitstop)1.1.2选择文件>打开1.1.3选择您所要打开的PDF文件1.1.4点击Enfocus Pitstop Professional工具条上的任意按钮,此时将显示Enfocus Pitstop Professional提示窗口几秒钟1.2取得帮助菜单选择帮助>增效工具帮助>Enfocus Pitstop Professional第二章 Enfocus Pitstop Professional 工作界面2.1 在Acrobat中的工作界面2.2 Enfocus Pitstop Professional 工具条按钮2.3 视图按钮工具条显示\隐藏注解显示页面边界及出血范围切换预视模式及草图模式加速图像显示显示导览窗口,显示错误信息2.4 窗口按钮工具条A显示Pitstop Inspector面板B显示Pitstop Global Change面板C显示Pitstop PDF Profile控制面板D显示Pitstop Action List控制面板第三章 PDF文件的基本信息此章节介绍Pitstop对PDF文件的一些基本编辑功能,包括属性的拷贝粘贴、测量文档中的两点间距、添加删除导线、以及撤消及重复功能3.1 拷贝及粘贴物体属性按住CTRL键点击所要拷贝其属性的物体,并选择所需要拷贝的属性内容,即可进行粘贴。
3.2 测量工作区域中的两点间距点击需要测量的两点,即可得到其间距,如图:3.3 使用eyedropper工具检查物体属性通过eyedropper工具可以检查物体的以下属性:z物体类型(Object type)z颜色空间(Color space)z颜色类型(Color settings)z叠印设定(Overprint settings)3.4 在PDF文件中添加或删除导线将导线移除页面范围即可将其删除第四章 为PDF文档进行整体设定(Global Changes)通过使用Enfocus Pitstop Professional,您可以对PDF文件进行物体相关或页面相关的整体设定,您可以对整个PDF文件中的内容进行以下修改:z颜色(color)z字体(font)z叠印设定(Overprint Settings)z物体的最细线值(Minimum line weight of objects)z图像分辨率(Image Resolution)z尺寸、位置或页面朝向(Size,Position or orientation of the page contents)z页面定义框(Page boxes)z删除已选择范围以内或以外的物体(Remove objects inside or outside a selected area)z页面编码(Page numbering)4.1 整体颜色设定选择菜单“编辑”>Show Pitstop Global change1)选择需要更改的物体2)从From中,选择一项作为需要修改的颜色a)自定颜色或特别色b)选取物体的色块或外框颜色c)定义的RGB或CMYK颜色3)在To中选择所要转换为的颜色4)在Apply to中选择所要应用的范围(所选物体、当前页面、整个文档)5)点击Apply即可4.2 进行整体的字体设定选择菜单“编辑”>Show Pitstop Global Change>Object tab>Font tab1)选择需要更改的字体2)在From中选择一项作为需要修改的文字a)自选字体b)已选择的字体c)所有字体3)可以在Limit to point size between中设定文件的大小范围4)在To中选择所要更改的内容5)在Apply to中选择所要应用的范围(所选物体、当前页面、整个文档)6)点击Apply即可4.3 修改彩色背景上的黑色或白色文字的叠印设定选择菜单“编辑”>Show Pitstop Global change>Object tab>Prepress tab1)使用物体选择工具选中彩色背景上的黑色或白色文字2)根据需要选择面板中对于黑色和白色文字的设定3)选择所要应用的范围4)点击Apply即可4.4更改物体最细线的值(minimum line weight of objects)建立PDF文件时通常会包括非常细的线条,例如0.03pt的发丝,当文档以高分辨率输出时,这些细线则可能消失,例如,通常胶印用的胶片通过激光进行成像。
几何g6操作手册

几何g6操作手册(实用版)目录1.几何 g6 操作手册概述2.手册的内容3.手册的使用方法4.注意事项正文几何 g6 操作手册概述几何 g6 操作手册是一本详细讲解如何使用几何 g6 软件的书籍。
几何 g6 是一款专业的数学软件,主要用于解决数学中的几何问题。
这本书旨在帮助用户更好地理解几何 g6 软件的使用方法,从而更有效地解决数学问题。
手册的内容几何 g6 操作手册的内容非常丰富,包括以下几个部分:第一部分:几何 g6 软件的简介和安装这一部分主要介绍了几何 g6 软件的基本信息,包括它的用途、特点以及如何安装和使用它。
第二部分:几何 g6 的基本操作这一部分主要讲解了几何 g6 的基本操作,包括如何创建和编辑图形,如何进行几何变换和计算等。
第三部分:几何 g6 的高级操作这一部分主要讲解了几何 g6 的高级操作,包括如何使用编程语言进行自动化操作,如何使用插件等。
第四部分:几何 g6 的实际应用这一部分主要介绍了几何 g6 在实际中的应用,包括如何解决一些复杂的数学问题,如何进行数据分析等。
手册的使用方法几何 g6 操作手册的使用方法非常简单,用户可以根据自己的需要选择不同的章节进行阅读。
对于初学者,建议先从第一部分开始阅读,然后再逐步深入到其他部分。
对于已经熟悉基本操作的用户,可以直接跳到第四部分,了解几何 g6 的实际应用。
注意事项在使用几何 g6 操作手册时,用户需要注意以下几点:1.手册中的操作方法和步骤都是以几何 g6 软件为基础的,如果使用的是其他数学软件,可能需要进行相应的调整。
2.在操作过程中,一定要注意保存好自己的工作成果,以免意外丢失。
3.如果遇到问题,可以先自行查阅手册,如果还是无法解决,可以向相关人员寻求帮助。
几何 g6 操作手册是一本非常实用的书籍,可以帮助用户更好地理解和使用几何 g6 软件,从而更有效地解决数学问题。
几何g6操作手册

几何g6操作手册【最新版】目录1.几何 g6 操作手册概述2.手册的内容和结构3.手册的使用方法和注意事项4.几何 g6 操作手册的优点和局限性正文几何 g6 操作手册概述几何 g6 操作手册是一本详细讲解如何使用几何 g6 软件的专业指南。
几何 g6 是一款功能强大的几何建模软件,广泛应用于工程、数学、物理等领域,帮助用户进行复杂的几何计算和建模。
手册的内容和结构几何 g6 操作手册的内容涵盖了软件的各个方面,包括基本操作、高级技巧和实用示例。
手册分为以下几个部分:第一部分:基本操作包括文件操作、视图控制、选择与编辑等基础功能,让用户快速掌握软件的基本使用方法。
第二部分:高级技巧涵盖了建模、计算、分析等高级功能,帮助用户深入了解软件的强大能力。
第三部分:实用示例通过具体的实例演示如何使用几何 g6 解决实际问题,帮助用户更好地理解软件的应用场景。
手册的使用方法和注意事项在使用几何 g6 操作手册时,建议用户按照手册的结构逐步学习,从基本操作开始,逐步掌握高级技巧。
在实际操作过程中,应注意以下几点:1.仔细阅读手册中的说明和示例,确保理解每个操作的含义和目的。
2.在操作过程中,注意保存文件,避免数据丢失。
3.在使用高级功能时,务必确保自己对基本操作已经熟练掌握,以免出现错误。
几何 g6 操作手册的优点和局限性几何 g6 操作手册的优点在于其内容详尽、结构清晰,能够帮助用户全面了解软件的使用方法。
此外,手册中的实用示例也能够帮助用户更好地理解软件的应用场景,提高实际操作能力。
然而,几何 g6 操作手册也存在一定的局限性。
由于手册是纸质的,无法实时更新,因此可能无法涵盖软件的最新功能和更新。
此外,手册主要介绍软件的使用方法,对于如何解决实际问题,可能需要用户在实际操作中不断积累经验。
总之,几何 g6 操作手册是一本非常实用的专业指南,能够帮助用户全面了解软件的使用方法。
- 1、下载文档前请自行甄别文档内容的完整性,平台不提供额外的编辑、内容补充、找答案等附加服务。
- 2、"仅部分预览"的文档,不可在线预览部分如存在完整性等问题,可反馈申请退款(可完整预览的文档不适用该条件!)。
- 3、如文档侵犯您的权益,请联系客服反馈,我们会尽快为您处理(人工客服工作时间:9:00-18:30)。
六、用户操作手册
1.引言 (1)
1.1编写目的 (1)
1.2项目背景 (2)
1.3定义 (2)
1.4参考资料 (2)
2.软件概述 (2)
2.1目标 (2)
2.2功能 (2)
2.3性能 (2)
3.运行环境 (2)
3.1硬件 (2)
3.2支持软件 (3)
4.使用说明 (3)
4.1安装和初始化 (3)
4.2输入 (3)
4.3输出 (4)
4.4出错和恢复 (4)
4.5求助查询 (4)
5.运行说明 (4)
5.1运行表 (4)
5.2运行步骤 (4)
6.非常规过程 (5)
7.操作命令一览表 (5)
8.程序文件(或命令文件)和数据文件一览表 (5)
9.用户操作举例 (6)
1.引言
1.1编写目的
【阐明编写手册的目的,指明读者对象。
】
1.2项目背景
【应包括项目的来源、委托单位、开发单位和主管部门。
】
1.3定义
【列出手册中所用到的专门术语的定义和缩写词的原文。
】
1.4参考资料
【列出有关资料的作者、标题、编号、发表日期、出版单位或资料来源,可包括:
a.项目的计划任务书、合同或批文;
b.项目开发计划;
c.需求规格说明书;
d.概要设计说明书;
e.详细设计说明书;
f.测试计划;
g.手册中引用的其他资料、采用的软件工程标准或软件工程规范。
】
2.软件概述
2.1目标
2.2功能
2.3性能
a.数据精确度【包括输入、输出及处理数据的精度。
】
b.时间特性【如响应时间、处理时间、数据传输时间等。
】
c.灵活性【在操作方式、运行环境需做某些变更时软件的适应能力。
】3.运行环境
3.1硬件
【列出软件系统运行时所需的硬件最小配置,如
a.计算机型号、主存容量;
b.外存储器、媒体、记录格式、设备型号及数量;
c.输入、输出设备;
d.数据传输设备及数据转换设备的型号及数量。
】
3.2支持软件
【如:
a.操作系统名称及版本号;
b.语言编译系统或汇编系统的名称及版本号;
c.数据库管理系统的名称及版本号;
d.其他必要的支持软件。
】
4.使用说明
4.1安装和初始化
【给出程序的存储形式、操作命令、反馈信息及其含意、表明安装完成的测试实例以及安装所需的软件工具等。
】
4.2输入
【给出输入数据或参数的要求。
】
4.2.1数据背景
【说明数据来源、存储媒体、出现频度、限制和质量管理等。
】
4.2.2数据格式
【如:
a.长度;
b.格式基准;
c.标号;
d.顺序;
e.分隔符;
f.词汇表;
g.省略和重复;
h.控制。
】
4.2.3输入举例
4.3输出
【给出每项输出数据的说明。
】
4.3.1数据背景
【说明输出数据的去向、使用频度、存放媒体及质量管理等。
】
4.3.2数据格式
【详细阐明每一输出数据的格式,如:首部、主体和尾部的具体形式。
】
4.3.3举例
4.4出错和恢复
【给出:
a.出错信息及其含意;
b.用户应采取的措施,如修改、恢复、再启动。
】
4.5求助查询
【说明如何操作。
】
5.运行说明
5.1运行表
【列出每种可能的运行情况,说明其运行目的。
】
5.2运行步骤
【按顺序说明每种运行的步骤,应包括:】
5.2.1运行控制
5.2.2操作信息
a.运行目的;
b.操作要求;
c.启动方法;
d.预计运行时间;
e.操作命令格式及说明;
f.其他事项。
5.2.3输入/输出文件
【给出建立或更新文件的有关信息,如:】
a.文件的名称及编号;
b.记录媒体;
c.存留的目录;
d.文件的支配【说明确定保留文件或废弃文件的准则,分发文件的对象,占用硬
件的优先级及保密控制等。
】
5.2.4启动或恢复过程
6.非常规过程
【提供应急或非常规操作的必要信息及操作步骤,如出错处理操作、向后备系统切换操作以及维护人员须知的操作和注意事项。
】
7.操作命令一览表
【按字母顺序逐个列出全部操作命令的格式、功能及参数说明。
】
8.程序文件(或命令文件)和数据文件一览表
【按文件名字母顺序或按功能与模块分类顺序逐个列出文件名称、标识符及说明。
】
9.用户操作举例。
