震动雾化器官方说明书[Aeroneb]
超声雾化器使用说明
超声雾化器使用说明超声雾化器是一种常见的医疗设备,常用于治疗呼吸道疾病,如哮喘、慢性阻塞性肺病等。
本文将详细介绍超声雾化器的使用方法,以确保正确操作和发挥最佳治疗效果。
一、雾化器的组成与原理超声雾化器主要由超声振动器、药液杯、气泵和控制面板四个部分组成。
其工作原理是通过超声波的振荡作用将液体药物分散成微小的液体颗粒,形成雾状物质,便于患者吸入。
二、使用前的准备工作1. 首先,确保超声雾化器的所有零部件都完好无损,未受到任何损坏。
2. 在使用之前,清洗超声雾化器的所有可拆卸部件,保持其清洁卫生。
使用温水和中性清洁剂进行清洗,并用干净的毛巾擦干。
切勿使用有腐蚀性的清洁剂,以免损坏设备。
3. 准备好需要使用的药物,并按照医生或药物说明书的建议配制药液。
三、使用步骤1. 将超声振动器连接到控制面板,并确保连接牢固。
2. 打开超声雾化器的电源,将其置于平稳的工作台面上。
3. 打开药液杯的盖子,将配制好的药液倒入药液杯中,并确保液面不超过最高标记线。
4. 将药液杯安装到超声雾化器上,并将其牢固固定。
5. 根据需要,选择合适的治疗时间和震荡频率,并在控制面板上进行设置。
根据医嘱或药物说明,调整雾化器的雾化时间和药液输入速率。
6. 将雾化器的输出管连接到合适的雾化器面罩或嘴嚼,确保连接紧密,防止雾化物泄漏。
7. 开始使用超声雾化器治疗,根据医生的建议进行每次治疗的时间和频率。
四、注意事项1. 使用过程中,患者应尽可能保持正坐姿,并将面罩或嘴嚼正确放置于口鼻部位,以确保雾化物进入呼吸道。
2. 使用时请遵循医生或药物说明书的建议,不要随意更改药液配方或使用量。
3. 使用过程中,尽量避免外界干扰和杂音,以确保雾化器的正常工作。
4. 每次使用后,请及时清洗和消毒雾化器的所有可拆卸部件,并将其储存在干燥通风的地方。
5. 定期检查超声雾化器的性能,如果发现任何故障或异常情况,请立即停止使用并寻求专业维修人员的帮助。
总结:超声雾化器是一种有效治疗呼吸道疾病的设备,正确使用可以帮助患者获得最佳的治疗效果。
雾化器说明书摘要
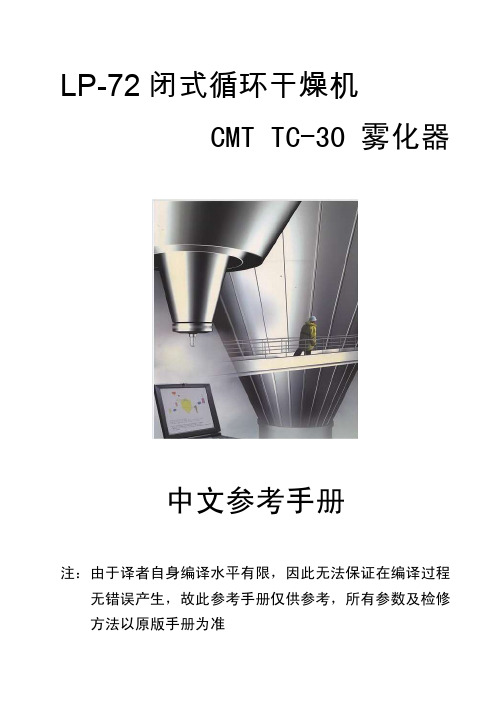
LP-72闭式循环干燥机CMT TC-30 雾化器中文参考手册注:由于译者自身编译水平有限,因此无法保证在编译过程无错误产生,故此参考手册仅供参考,所有参数及检修方法以原版手册为准编译:刘永强雾化器结构示意简图电机电机底座 电机皮带轮 雾化器基板 雾化器保护板 振动传感器 下保护盖板 喷嘴轮下室下轴振箱 温度传感器 雾化器室 下轴承 弹簧 轴承套 料液导流壳 上轴承 上温度传感器 上轴承箱 主轴 保护帽 上贝尔螺母 雾化器皮带主轴皮带轮 转速传感器 进料管衬套 保护帽1) 轴承温度检测轴承温度检测使用PT-100铂电阻作为温度传感器,当轴承温度超过系统预设值时,系统将会发出报警。
注意:当轴承温度在60℃以内时,雾化器运行良好;当轴承温度在80℃以内时,雾化器可以正常运行; 当轴承温度在80-100℃时,应准备停止雾化器; 当轴承温度超过100℃时,必须立即停止雾化器运行。
2) 振动传感器雾化器安装有振动传感器,用于测量由于轴承磨损、雾化器主轴松动及料液旋转喷头不平衡等引起的振动。
二、雾化器处部系统连接下图为雾化器外部系统连接示意图。
为保证雾化器的正常运行,请注意连接的准确无误。
进料管 DN32 DIN11851 氮气出口 DN15 ISO2852 出油口内部冷却 空气出口6针 连接器10针 连接器下轴承 润滑油入口 上轴承 润滑油入口转速传感器 冷却风入口 DN40 ISO2825内部压力检测1/4 GAS氮气入口DN15 ISO2852雾化器内部冷却入口DN50 ISO28253、雾化器润滑系统示意图油壶减压阀真空泵废油口PLC 控制器油泵压缩空气入口润滑油加注口出油口 1/8”F*2供油开关电磁阀机油滤清器4、润滑系统与雾化器连接示意图接压缩空气到雾化器出油口使用时,实际供油量应根据雾化器的工作状态来进行调5、雾化器冷却系统:在雾化器使用过程中,由于调整旋转的传动带及内部的轴承会产生大量的热量,同时物料及进风温度也会导致雾化器温度升高。
Aerogen Pro 雾化器系统说明手册说明书

• Aerogen Pro 需要采取电磁兼容 (EMC) 方面的特殊预防措施,并且必 须根据《使用说明》中提供的 EMC 信息进行安装和使用。
1. Aerogen Pro 雾化器装置
2. 带塞子的 T 型接头(成人)
3. 儿童T型接头及硅胶塞(选配)
4. 新生儿T型接头及硅胶塞(选配)
5. 控制器
6. 控制器电缆
7. AC/DC 适配器 4
8. 固定挂架 Aerogen Pro 雾化器系统说明手册
9. 标准挂架
10. 新生儿接头组合 (包含: 接头1: 15 M 10 mm OD -选配 接头2: 15 F,10 mm OD,7.5 mm ID-选 配)
表格列表
表 1: Aerogen Pro 雾化器系统符号...................................................... 10 表 2: Aerogen Pro 雾化器控制器和指示灯........................................... 13 表 3: Aerogen Pro 雾化器系统故障排除............................................... 34 表 4: Aerogen Pro 雾化器系统部件列表............................................... 37
注意:本设备被归类为 II 类、BF 型连续运行的医疗电子设备并符合指定 的电气绝缘和电流泄漏的安全等级。Aerogen Pro AC/DC 适配器不带接 地连接,因为通过使用双重绝缘已经达到所要求的保护级别。
旋转雾化器说明书资料
旋转雾化器说明书资料INSTRUCTION MANUAL 指导手册900 SERIES ATOMIZER DRIVE 900系列喷雾器OPERATING MANUAL操作手册ATOMIZING SYSTEM喷雾系统FOR供HEFEI WTE PROJECTCHINA中国合肥垃圾焚烧发电项目CLIENT:用户FISIA BABCOCK ENVIRONMENT GmbH德国费塞亚巴高克环境工程公司D0430INSTRUCTION MANUAL 指导手册900 SERIES ATOMIZER DRIVE 900系列喷雾器TABLE OF CONTENTS 目录Section章节1.0. RECEIVING, STORAGE AND INSTALLATION收货、储存和安装1.1. Receiving and Storage收货和储存1.2. Installation安装1.2.0 General Description概述1.2.1 Atomizer System Control (ASC) 喷雾器控制系统(ASC)1.2.2 Atomizer (Motor) 喷雾器(电机)1.2.3. Variable Frequency Drive (VFD) 变频驱动器(VFD)1.2.4 Permanent Installation设备永久固定2.0. SYSTEM DESCRIPTION 系统说明General喷雾器设计理念–概述 2.1. Atomizer Design Concept -2.2. Atomizer (Motor) - Mechanical喷雾器(电机)- 机械方面2.3. Atomizer (Motor) - Electrical 喷雾器(电机)- 电气方面2.4. Variable Frequency Drive (VFD) 变频驱动器(VFD)2.5. Atomizer System Control (ASC) 喷雾器控制系统(ASC)2.5.0 General Description, Procedure and Sequencing概述、流程和顺序: 2.5.1 Oil Lubrication System润滑系统2.5.2 Oil Return System油回流系统2.5.3 Atomizer Cooling System喷雾器冷却系统2.5.4 Purge Air and Wheel & Shaft Cooling/Wash Water吹扫空气和转盘/轴冷却/清洗水INSTRUCTION MANUAL 指导手册900 SERIES ATOMIZER DRIVE 900系列喷雾器2.6. Theory of Operation of the Atomizer System Control (ASC)喷雾器控制系统(ASC)的操作原理2.6.0 References参考2.6.1 VFD Fault 变频驱动器故障2.6.2 Cooling Water Flow Switch 冷却水流量开关INSTRUCTION MANUAL 指导手册900 SERIES ATOMIZER DRIVE 900系列喷雾器TABLE OF CONTENTS (cont?d) 目录(续)Section (cont?d)章节(续)2.6.3 Lube Oil Level Switches润滑油油位开关2.6.4 Lube Oil Mist Pressure Sensor润滑油雾压力传感器2.6.5 Vibration Element / Transmitter振动元件 / 变送器2.6.6 Upper Bearing RTD Element / Temperature Transmitter顶部轴承热电阻元件/温度变送器2.6.7 Alarm Summary报警概述报警跨接 2.6.8 Alarm Bypass2.7. Summary of the Atomizer?s Utility Services喷雾器的公用设施概述2.7.0 General 概述2.7.1 Instrument Air 仪用空气2.7.2 Lubrication 润滑系统2.7.3 Cooling Water 冷却水2.7.4 Wheel & Shaft Cooling/Wash Water转盘和轴冲洗水3.0. START UP AND OPERATION启动和运行3.1. Commissioning the Atomizer System 喷雾系统调试3.1.0 General / Start-up Engineer 概述/启动工程师3.1.1 Priming the Lubrication System 润滑系统加注3.1.2 Atomizer Preparation and Run-In 喷雾器的准备和试车3.2. Normal Start Up 正常启动3.3. Normal Operation 正常运行3.4. Normal Shutdown 正常停止3.5. Emergency Shutdown of the Atomizer喷雾器的紧急停止INSTRUCTION MANUAL 指导手册900 SERIES ATOMIZER DRIVE 900系列喷雾器TABLE OF CONTENTS (cont?d) 目录(续)Section (cont?d) 章节(续)4.0 ROUTINE MAINTENANCE例行维护4.1. Lubrication 润滑系统4.2. Preventative and Periodic Maintenance of the ASC ASC防护保养和定期维护4.3. Preventative and Periodic Maintenance of the Atomizer and Wheel喷雾器和转盘的防护保养和定期维护4.4. Long Term Storage of the Atomizer 长期存储喷雾器4.5. Instrument Calibration仪表校准5.0 ATOMIZER DISASSEMBLY AND ASSEMBLY INSTRUCTIONS喷雾器拆卸和装配指南5.1 General Recommendations一般建议5.2 Disassembly Instructions 拆卸指南5.3 Re-Assembly Instructions 重新装配指南5.4 Atomizer Wheel Balancing Guidelines 喷雾器转盘平衡调校指南6.0 SPARE PARTS LIST备品备件清单6.1 Recommended Spare Parts - Model 900 Atomizer型号900 旋转喷雾器,建议的备品备件6.2 Recommended Spare Parts - Model EI-804 Wheel型号EI-804喷雾器转盘,建议的备品备件INSTRUCTION MANUAL 指导手册900 SERIES ATOMIZER DRIVE 900系列喷雾器6.3 Recommended Spare Parts – ASCASC面板,建议的备品备件6.4 Recommended Spare Parts – VFD型号A1000,Yaskawa(日本安川电气)喷雾器变频驱动器,建议的备品备件7.0 TROUBLE SHOOTING GUIDE 故障排除指南7.1. General 概述7.2. Operating Log 运行日志7.3. Problem Symptoms and Probable Cause Outline故障症状和可能的原因概述7.4. Specific Atomizer Wheel Troubleshooting Guide喷雾器转盘特殊故障排除指南INSTRUCTION MANUAL 指导手册900 SERIES ATOMIZER DRIVE 900系列喷雾器TABLE OF CONTENTS (cont?d) 目录(续)Section (cont?d) 章节(续)7.5. Other General Inspection and Trouble Shooting Issues其它总体检查和故障排除事项7.6. Freezing Weather Precautions寒冷天气应对措施参考图纸 8.0 REFERENCE DRAWINGS(Please see drawing list at start of section)(请参阅章节前述的图纸清单)9.0 VENDOR DATA 供货商数据(Please see catalogue list at start of section)(请参阅章节前述的目录清单)INSTRUCTION MANUAL 指导手册900 SERIES ATOMIZER DRIVE 900系列喷雾器SAFETY SUMMARY: 安全概述The general information in this part of the summary is for both operating and maintenance personnel. Specific cautions and warnings will be found throughout the manual where they apply, but may not appear in this summary.此部分概述包含的总体信息供操作和维护人员所用。
振动器使用说明书

振动器使用说明书1. 产品简介振动器是一种常见的电子设备,通过震动来产生声音或者震动效果。
本产品具有高音质、强震动效果和易操作性等优点,适用于个人娱乐、音乐表演、体育活动等场合。
2. 安全注意事项- 在使用本产品前,请务必仔细阅读本使用说明书,并按照指示正确地操作。
- 请勿将本产品在高温、潮湿、尘土多的环境下使用,以免影响其正常工作和寿命。
- 避免长时间过度使用本产品,以免对身体造成不适。
- 孩子在使用本产品时需在成年人的监护下进行,并请放置在儿童无法触及的地方。
- 如发现本产品存在异常情况,请立即停止使用并咨询专业人士。
3. 使用方法- 准备:将振动器连接到电源适配器,并确保电源正常接通。
同时,检查振动器的电池电量是否足够。
- 开关机:按下振动器上的电源开关,等待片刻,振动器将开始工作。
再次按下电源开关即可将其关闭。
- 音量调节:通过调整振动器上的音量按钮,可实现音量的增加或减小。
请根据实际需求进行调节。
- 模式选择:振动器上可能配备有多种模式,通过按下模式选择键可以切换不同的模式,以实现不同的音效或振动效果。
- 音效调节:一些振动器还具备音效调节功能,可通过相关按钮进行设置和调整。
- 附件使用:某些振动器可能配备附件,如耳机、连接线等,按照附件使用说明进行正确插拔和连接。
4. 维护保养- 定期清洁:为保证振动器的长期使用寿命和良好的工作效果,请定期清洁振动器表面,可使用轻柔湿布进行擦拭。
- 防尘存放:如长时间不使用,请将振动器存放在防尘袋或器皿中,以免灰尘积累影响其正常工作。
- 避免水浸泡:请勿将振动器浸泡在水中或者将其暴露在湿润的环境中,以免造成损坏。
- 避免摔落:小心使用振动器,避免将其摔落或敲击,以免造成内部零部件松动或损坏。
5. 常见问题解决- 问题1:无法正常启动。
解决方法:请确认电源是否接好,电池电量是否充足,然后重新尝试启动。
- 问题2:音量过小。
解决方法:请检查振动器上的音量设置,或者尝试调整外接设备(如耳机、扬声器)的音量。
雾化器使用说明书

雾化器使用说明书
1. 准备工作:
- 确保雾化器器具整洁无尘,并保持干燥。
- 确保雾化器器具中加满清水或医用液体。
- 确保雾化器器具已经连接好电源。
2. 使用方式:
- 将雾化器器具正确安装在电源源头上,并确保连接紧固牢固。
- 按下电源开关,并选择适当的雾化模式。
- 将喷嘴部位放入口腔或鼻孔,然后轻轻吸气,使药物喷雾
进入呼吸道内。
3. 清洁与维护:
- 使用后关闭电源开关,拔出电源插头,等待雾化器器具冷却。
- 将雾化器器具拆解,并用温水和中性洗涤剂进行清洗。
- 使用清水彻底冲洗雾化器器具,并确保去除任何残留物。
- 在放置和存储雾化器器具之前,确保它已经完全干燥。
注意事项:
- 使用前请仔细阅读和理解使用说明书。
- 使用过程中请保持机器稳定,防止意外摔落。
- 使用完毕后请及时清洗和干燥器具,防止细菌滋生。
- 使用药物时请确保按照医生或药剂师的指示使用正确剂量。
- 如果出现任何故障或异常,请立即停止使用并咨询专业人员。
以上为一般雾化器的使用说明书,具体操作步骤可能因不同型号的雾化器而有所差异,请根据实际情况调整。
雾化器使用说明书
本产品广泛应用于国内外各种型号的原子吸收分光光度计。
其特点是工作稳定,雾化效果好,对提高仪器的工作稳定性和测量灵敏度起到重要的作用。
一:主要性能1.工作气体压力:0.20〜0.25 Mpa2.流量计流量:5〜7 L/mi n3.提升量: 4〜 8 ml/min4.雾化率:优于 15%二:安装与调整雾化器是由同轴玻璃喷射器、撞击球帽、不锈钢保护套、进气管接头、进液管接头、限流进液管等组成。
雾化器安装时,要用手拿稳,注意别磕碰撞击球帽,并将撞击球连接杆朝下方,把雾化器直接插入雾化室端头的雾化器插孔内,然后分别接上进气管和限流进液管。
调整撞击球帽的位置,可改变雾化效率。
安装前必须将撞击球帽调整到最佳位置。
调整方法:将雾化器接上进气管,调节压力在 0. 2Mpa 左右,打开气源,吸喷蒸馏水,轻轻|. 地转动撞击球帽,将撞击球抵住喷射口,使喷出的水雾向前散喷或成平面喷出,尽量与轴线对称。
本产品出厂前已调整到最佳位置。
调整限流进液管的长短和内径,可改变提升量。
限流进液管愈短,则提升量愈大;内径愈小,则提升量愈小。
三:故障处理及维护1 .限流进液管堵塞:通常堵在进口处,可将限流进液管拔下,用手指除去,或用压缩空气吹通.2.样品溶液将尽时,管内形成成串气泡,阻力很大使吸入停止:可用手指弹动进液管使气泡吸走,即可正常;也可用注射器吸走气泡。
3.喷射器内管堵塞:常堵在接近喷口处,取下撞击球帽,用压缩空气或水冲掉堵塞物;或用专用不锈钢针穿透堵塞物。
决不可用其它金属丝捅,否则将损坏雾化器。
4.喷射器气流通道堵塞:可取下撞击球帽用反向气流或水冲洗。
5.喷射器内管或气流通道被有机质积累的灰尘或干涸的盐类堵塞:可取下撞击球帽将本产品广泛应用于国内外各种型号的原子吸收分光光度计。
其特点是工作稳定,雾化效果好,对提高仪器的工作稳定性和测量灵敏度起到重要的作用。
一:主要性能5.工作气体压力: 0.20〜0.25 Mpa6.流量计流量: 5〜 7 L/min7.提升量: 4〜 8 ml/min8.雾化率:优于 15%二:安装与调整雾化器是由同轴玻璃喷射器、撞击球帽、不锈钢保护套、进气管接头、进液管接头、限流进液管等组成。
雾化器

雾化器使用说明(医用型)使用前请仔细阅读O警告信息:表示在错误使用情况下,可能导致死亡或严重伤害。
O注意事项:表示在错误使用情况下,可能导致人员伤害或物器损坏。
本产品属于医疗器械,主要用于治疗各种下下呼吸系统疾病,如感冒、发热、咳嗽。
哮喘、咽喉肿痛、咽炎、鼻炎、支气管炎、尘等。
本产品采用高效无油活塞式气泵和长寿命马达,产生一定压力和流量的压缩空气,利用文邱里喷射原理,使液体药物变成雾状微粒,雾状药物能直接到达呼吸道的病理部位,迅速缓急症状。
雾化器产品组成:主机使用电源:AC220V 50HZ;使用电压范围:AC220V±10V产器规格性能:1.主机尺寸:215W*200D*190H2.压缩机种类:无油活塞泵。
3.额定功率:55W。
4.空气压力>0.5bar5.压缩机最大压力>1.5bar6.气体流量>6L/min7.雾化速率:0.25-0.35ml/min(0.9%的NaCL溶液测试)8.工作噪音:60dB/距离1米9.雾化微粒MMAD:MMAD4.0~6.0UM10.储药盒容量:8ml11.使用寿命:长寿命马达10度至40度,15-90%RH 压缩机寿命>4年(每天运行一次,每次20min)雾化器操作:使用前检查所有附件有无缺失。
本产品使用AC电源供电。
使用时按如下步骤操作:1、取出机器、雾化杯、咬嘴等部件;2、将咬嘴与雾化杯相连接;3、将空气导管同雾化杯同雾化杯与主机相连接;4、打开雾化杯上盖;5、加入治疗药物;6、重新盖上雾化杯上盖;7、检查雾化器电源开关是否处于关断位置;插上电源插头;8、插入AC电源插座,插入前请检查AC电源是否与适配器相符。
9、打开雾化器上的电源开关,雾化器开始喷喷出雾化药物提供治疗使用;10、咬嘴与喷雾罩使用:1、咬嘴:雾化杯配接咬嘴使用时,需用手握持雾化杯,将咬嘴轻轻放入嘴中轻轻含住,不可用力咬住,以免咬嘴破裂和造成伤害;身体坐端正保持自然呼吸状态。
雾化器使用说明书

雾化器使用说明书雾化器简介超声波十头雾化器是集加湿器及空气清新器于一体的科技产品,以释放出有益于人体健康的负氧离子,起到疗身健体的功效,若在水中加入一至二滴消毒液或香水,则可消毒杀菌,且令满室香气怡人。
只需将雾头置放在水中就能喷雾,广泛应用于各类工艺品及假山园林的点缀和美化,也适用于宾馆等场所的摆设及工业加湿装置的应用。
产品指标;A:喷雾头参数:1、输入电压:DC 48V2、输入电流:7.5A3、最大蒸发量:3000ML/H4、使用环境温度:±1℃~45℃5、使用水深:40---80MM6、电源引线长度:3M7、喷头外形尺寸:253*90*56MMB:配备变压器参数:1、输入电压: AC220V/50HZ2、输入功率: 300W3、输出电压: AC36V雾化器使用须知1.从包装箱取出产品,将雾化头平稳放置于水深40---80MM的盛水容器内,(雾化片距水面约30-50MM时或距水位检测器1-10MM雾化效果最佳)喷雾头水面上方应留100MM以上的空间.2.将喷雾头的输入插头与配备变压器输出插座连接,然后把变压器电源插入供电网喷雾头指示灯亮,喷雾即产生,(如果有3红灯闪亮,即未够水)3.随着雾化器的工作,容器内的水不断消耗,当水位低于曲线圈(水位感应器)时会产生保护,停止喷雾,待加水高于曲线圈时(水位感应器)后,喷雾继续进行.4.雾化器开始工作初期,雾量可能会小些,待片刻后,会趋于稳定,冷天会影响喷雾量,可加入少许热水,加速雾化量的稳定.5.当长时间不使用雾化器时,应将变压器电源头拔下,以防发生意外.注意事项及保养1.必须使用厂商指定或配备的变压器,使用权用前先检查变压器标注的输入电压是否与当地电源是电压相符,才能插上电源.2.雾化器工作时,会产生一定热量,需要容器内的水散热,故此为了确保雾化器能正常工作,容器内必须有足够的水,通常盛水量应大于10升.雾化器底部离容器底部应不小于100MM高,或不小于5升的水,避免散热条件不足而影响产品寿命.如果水在流动状态下或散热条件好时,水量可相应减少,3.雾化器上面不能被杂物掩盖,上部空间应大于100MM.也不能用密封的容器放置雾化器.4.不能在高水温下工作,也不允许在冰冻条件下工作.5.避免将雾化器放置在电视机等电器设备旁边,以免水雾潮湿损坏电器设备.6.配备的变压器应高喷雾头,避免有水直接溅湿,连接喷雾头的插头不能放在水里.7.为了确保喷雾头在良好的环境下工作,必须每周定期更换清水,并用干净的软布清洗雾化片及曲线圈(水位感应器),但不能用化学剂来清洗,不能用硬物、利器划花雾化片及曲线圈。
雾化器说明书

USER INFORMATION - 使用者需知................................................................................1 About this instruction - 关于本说明书 .............................................................................. 1 Symbols - 符号................................................................................................................. 1 EU Directives and Harmonized Standards - EU 指示和符合标注 ................................... 1 EC declaration of conformity - 符合 EC 的声明 ............................................................... 2 General safety instructions - 总的安全指导 ..................................................................... 2 Markings - 标识................................................................................................................ 2 Packaging, handling and transport - 包装,处置和运输 ................................................. 3 Protection of the atomizer - 雾化器的保护....................................................................... 3 Recycling and disposal - 循环利用和处理 ....................................................................... 4 Disposal of packaging 包装的处理 .................................................................................4 Disposal of the rotary atomizer and accessories - 雾化器和附件的处理 ......................4 2.5 2.6 2.7 2.7.1 2.7.2 2.8 2.9 2.9.1 2.9.2 2.9.3 2.9.4 2.10 2.10.1 2.10.2 2.10.3 2.10.4 2.10.5
雾化器使用说明书

雾化器使用说明书雾化器简介超声波十头雾化器是集加湿器及空气清新器于一体的科技产品,以释放出有益于人体健康的负氧离子,起到疗身健体的功效,若在水中加入一至二滴消毒液或香水,则可消毒杀菌,且令满室香气怡人。
只需将雾头置放在水中就能喷雾,广泛应用于各类工艺品及假山园林的点缀和美化,也适用于宾馆等场所的摆设及工业加湿装置的应用。
产品指标;A:喷雾头参数:1、输入电压:DC 48V2、输入电流:7.5A3、最大蒸发量:3000ML/H4、使用环境温度:±1℃~45℃5、使用水深:40---80MM6、电源引线长度:3M7、喷头外形尺寸:253*90*56MMB:配备变压器参数:1、输入电压: AC220V/50HZ2、输入功率: 300W3、输出电压: AC36V雾化器使用须知1.从包装箱取出产品,将雾化头平稳放置于水深40---80MM的盛水容器内,(雾化片距水面约30-50MM时或距水位检测器1-10MM雾化效果最佳)喷雾头水面上方应留100MM以上的空间.2.将喷雾头的输入插头与配备变压器输出插座连接,然后把变压器电源插入供电网喷雾头指示灯亮,喷雾即产生,(如果有3红灯闪亮,即未够水)3.随着雾化器的工作,容器内的水不断消耗,当水位低于曲线圈(水位感应器)时会产生保护,停止喷雾,待加水高于曲线圈时(水位感应器)后,喷雾继续进行.4.雾化器开始工作初期,雾量可能会小些,待片刻后,会趋于稳定,冷天会影响喷雾量,可加入少许热水,加速雾化量的稳定.5.当长时间不使用雾化器时,应将变压器电源头拔下,以防发生意外.注意事项及保养1.必须使用厂商指定或配备的变压器,使用权用前先检查变压器标注的输入电压是否与当地电源是电压相符,才能插上电源.2.雾化器工作时,会产生一定热量,需要容器内的水散热,故此为了确保雾化器能正常工作,容器内必须有足够的水,通常盛水量应大于10升.雾化器底部离容器底部应不小于100MM高,或不小于5升的水,避免散热条件不足而影响产品寿命.如果水在流动状态下或散热条件好时,水量可相应减少,3.雾化器上面不能被杂物掩盖,上部空间应大于100MM.也不能用密封的容器放置雾化器.4.不能在高水温下工作,也不允许在冰冻条件下工作.5.避免将雾化器放置在电视机等电器设备旁边,以免水雾潮湿损坏电器设备.6.配备的变压器应高喷雾头,避免有水直接溅湿,连接喷雾头的插头不能放在水里.7.为了确保喷雾头在良好的环境下工作,必须每周定期更换清水,并用干净的软布清洗雾化片及曲线圈(水位感应器),但不能用化学剂来清洗,不能用硬物、利器划花雾化片及曲线圈。
雾化器说明书

注意1.如果使用医药消毒清洁剂,必须要遵照使用说明书。
2.雾化杯气管的内部不需要清洗,因为此气管只是流通经过过滤的空气。
清洗或者更换泡沫进口过滤器1.拔掉电源插头。
2.打开过滤器的盖子。
3.取出过滤器,用肥皂和清水清洗,然后晾干。
4.如果过滤器堵塞,撕裂或者外观上有磨损,请更换过滤器。
注意事项1.至少每月清洗一次过滤器,假如过滤器变色。
2.定期清洗过滤器,是为了雾化器能正常的运转。
佛山市凯亚医疗科技有限公司地址:广东省佛山市禅城区华宝南路1号电话:0757-******** 传真:0757-********医疗器械产品注册证号:粤食药监械(准)字2011第2540338号医疗器械注册产品标准号:YZB/粤0847-2010生产许可证号:粤食药管械生产许20071409号凯亚医用气体雾化器使用说明书佛山市凯亚医疗科技有限公司警告为了减少烧伤,触电,火灾,或者人身伤害的发生,请注意以下的事项1.请勿在洗澡时使用。
2.请勿放置或储存本设备在浴缸或者水槽旁边。
3.本设备掉进水里或者液体后,请勿碰触,并立即关掉电源。
4.请勿将本设备放置或者掉落水里或者其他液体里。
5.本设备在使用时,必须有人照看。
6.在本设备使用时,旁边有小孩或者残障人的,必须要严密监督。
7.使用时,请将长发束起来。
8.请勿使用损坏了的电源线或者插头,假如本设备运行不正常,摔落或者损坏,或者掉进水里,请联系专业的维修人员进行检修。
9.请勿将物体掉落或者加入本设备的任何开口。
10.请勿在睡觉时使用本设备。
11.请将本设备的空气开口远离带皮毛之类的物品。
空气开口堵塞可能会导致设备关闭。
如果发生此情况,请立即联系经销商。
12.本压缩机是无油型的,无须使用润滑剂。
13.请勿拆开以防触电,需要维修时请及时通知经销商的有资质的维修人员。
外观功能图插头电源开关雾化杯气管接口可重复使用泡沫的进气过滤器雾化杯挂钩雾化杯雾化杯气管使用方法1.首次使用时需将雾化杯清洗干净。
旋转雾化器说明书..

900 SERIES ATOMIZER DRIVE 900系列喷雾器OPERATING MANUAL操作手册ATOMIZING SYSTEM喷雾系统FOR供HEFEI WTE PROJECTCHINA中国合肥垃圾焚烧发电项目CLIENT:用户FISIA BABCOCK ENVIRONMENT GmbH 德国费塞亚巴高克环境工程公司D0430900 SERIES ATOMIZER DRIVE 900系列喷雾器TABLE OF CONTENTS 目录Section章节1.0. RECEIVING, STORAGE AND INSTALLATION收货、储存和安装1.1. Receiving and Storage收货和储存1.2. Installation安装1.2.0 General Description概述1.2.1 Atomizer System Control (ASC) 喷雾器控制系统(ASC)1.2.2 Atomizer (Motor) 喷雾器(电机)1.2.3. Variable Frequency Drive (VFD) 变频驱动器(VFD)1.2.4 Permanent Installation设备永久固定2.0. SYSTEM DESCRIPTION 系统说明2.1. Atomizer Design Concept - General喷雾器设计理念–概述2.2. Atomizer (Motor) - Mechanical喷雾器(电机)- 机械方面2.3. Atomizer (Motor) - Electrical 喷雾器(电机)- 电气方面2.4. Variable Frequency Drive (VFD) 变频驱动器(VFD)2.5. Atomizer System Control (ASC) 喷雾器控制系统(ASC)2.5.0 General Description, Procedure and Sequencing概述、流程和顺序:2.5.1 Oil Lubrication System润滑系统2.5.2 Oil Return System油回流系统2.5.3 Atomizer Cooling System喷雾器冷却系统900 SERIES ATOMIZER DRIVE 900系列喷雾器2.5.4 Purge Air and Wheel & Shaft Cooling/Wash Water吹扫空气和转盘/轴冷却/清洗水2.6. Theory of Operation of the Atomizer System Control (ASC)喷雾器控制系统(ASC)的操作原理2.6.0 References参考2.6.1 VFD Fault 变频驱动器故障2.6.2 Cooling Water Flow Switch 冷却水流量开关900 SERIES ATOMIZER DRIVE 900系列喷雾器TABLE OF CONTENTS (cont’d)目录(续)Section (cont’d)章节(续)2.6.3 Lube Oil Level Switches润滑油油位开关2.6.4 Lube Oil Mist Pressure Sensor润滑油雾压力传感器2.6.5 Vibration Element / Transmitter振动元件 / 变送器2.6.6 Upper Bearing RTD Element / Temperature Transmitter顶部轴承热电阻元件/温度变送器2.6.7 Alarm Summary报警概述2.6.8 Alarm Bypass 报警跨接2.7. Summary of the Atomizer’s Utility Services喷雾器的公用设施概述2.7.0 General 概述2.7.1 Instrument Air 仪用空气2.7.2 Lubrication 润滑系统2.7.3 Cooling Water 冷却水2.7.4 Wheel & Shaft Cooling/Wash Water转盘和轴冲洗水3.0. START UP AND OPERATION启动和运行3.1. Commissioning the Atomizer System 喷雾系统调试3.1.0 General / Start-up Engineer 概述/启动工程师3.1.1 Priming the Lubrication System 润滑系统加注3.1.2 Atomizer Preparation and Run-In 喷雾器的准备和试车3.2. Normal Start Up 正常启动3.3. Normal Operation 正常运行3.4. Normal Shutdown 正常停止900 SERIES ATOMIZER DRIVE 900系列喷雾器3.5. Emergency Shutdown of the Atomizer喷雾器的紧急停止TABLE OF CONTENTS (cont’d)目录(续)Section (cont’d)章节(续)4.0 ROUTINE MAINTENANCE例行维护4.1. Lubrication 润滑系统4.2. Preventative and Periodic Maintenance of the ASC ASC防护保养和定期维护4.3. Preventative and Periodic Maintenance of the Atomizer and Wheel喷雾器和转盘的防护保养和定期维护4.4. Long Term Storage of the Atomizer 长期存储喷雾器4.5. Instrument Calibration仪表校准5.0 ATOMIZER DISASSEMBLY AND ASSEMBLY INSTRUCTIONS喷雾器拆卸和装配指南5.1 General Recommendations一般建议5.2 Disassembly Instructions 拆卸指南5.3 Re-Assembly Instructions 重新装配指南5.4 Atomizer Wheel Balancing Guidelines 喷雾器转盘平衡调校指南6.0 SPARE PARTS LIST备品备件清单6.1 Recommended Spare Parts - Model 900 Atomizer型号900 旋转喷雾器,建议的备品备件900 SERIES ATOMIZER DRIVE 900系列喷雾器6.2Recommended Spare Parts - Model EI-804 Wheel型号EI-804喷雾器转盘,建议的备品备件6.3Recommended Spare Parts – ASCASC面板,建议的备品备件6.4Recommended Spare Parts – VFD型号A1000,Yaskawa(日本安川电气)喷雾器变频驱动器,建议的备品备件7.0 TROUBLE SHOOTING GUIDE 故障排除指南7.1. General 概述7.2. Operating Log 运行日志7.3. Problem Symptoms and Probable Cause Outline故障症状和可能的原因概述7.4. Specific Atomizer Wheel Troubleshooting Guide喷雾器转盘特殊故障排除指南900 SERIES ATOMIZER DRIVE 900系列喷雾器TABLE OF CONTENTS (cont’d)目录(续)Section (cont’d)章节(续)7.5. Other General Inspection and Trouble Shooting Issues其它总体检查和故障排除事项7.6. Freezing Weather Precautions寒冷天气应对措施8.0 REFERENCE DRAWINGS 参考图纸(Please see drawing list at start of section)(请参阅章节前述的图纸清单)9.0 VENDOR DATA 供货商数据(Please see catalogue list at start of section)(请参阅章节前述的目录清单)900 SERIES ATOMIZER DRIVE 900系列喷雾器SAFETY SUMMARY: 安全概述The general information in this part of the summary is for both operating and maintenance personnel. Specific cautions and warnings will be found throughout the manual where they apply, but may not appear in this summary.此部分概述包含的总体信息供操作和维护人员所用。
震动雾化器官方说明书[Aeroneb go]
![震动雾化器官方说明书[Aeroneb go]](https://img.taocdn.com/s3/m/0514571759eef8c75fbfb386.png)
• Never operate this product if any of the parts are not working properly or have been damaged.
• Do not use the Aeroneb® Go Nebulizer in the presence of a flammable anaesthetic mixture with air, oxygen or nitrous oxide. As with any electrical equipment, take care when using the device in a potentially oxygen enriched environment.
• Do not use the Aeroneb® Go Nebulizer with anaesthetic breathing systems or lung ventilator breathing systems.
• Do not place or drop this product into water or any liquid when it is plugged into a power source.
This page has been intentionally left blank
振动式物理治疗仪的使用

2.2号叩击头:90mm聚氨酯海绵,适用于体弱或对叩击敏感的成人
2号叩击头产生的治疗力较1号小,可用于年老体弱和对叩击叫 敏感的患者,临床可用于体位引流治疗和术后护理,也适用较敏 感部位的治疗
应用技巧:当对一些有伤口或对叩击特别敏感的患者进行治疗 时,可隔着毛巾适用叩击头并徒手引导叩击头,也可以将叩击头 放在医生手背或手指背部,治疗力通过手传递给患者,既可以缓 冲治疗力,又能让医生更好的感觉到治疗时患者的反应
2021/10/10
13
叩击头的选择
叩击头的选择和应用技巧《二》 3.3号叩击头:68mm聚氨酯海绵 3号叩击头产生的治疗力比较轻柔,适用于个别对叩击特别敏感的成人或敏
感部位的治疗 应用技巧:震动排痰机在敏感患者进行治疗时,可经治疗师的手和手指 间接传递,从而进行非常敏捷和轻柔的治疗 注意:使用1.2.3号叩击头时可以同时使用叩击换向器 4.4号叩击头:羊角状,宽度60mm,长度243mm,适用术后患者的护理治疗 叩击头有两个接触点,在患者采用侧卧位时,可在患者肋骨两外侧进行 治疗,另外,肺部上叶感染时,也可叩击头作用于患者肩部进行治疗
使用过程中:如果发现动力头异常声响或振动,应立即停机检 查动力头是否松动,因为这种异常现象绝大多数是螺纹连接松 动造成的,只要将松动处的螺纹旋紧(顺时针),即可正常工 作
2021/10/10
15
六:注意事项(二)
4.每次使用时请用一次性治疗巾套住叩击头,以避免交 叉感染
5.为了延长动力管的使用寿命,防止不正常的折断现象, 请注意下面内容:不要:小曲率半径弯曲 直角打折 打结 随意手拎动力管
叩击部位:从下向上,从外向里,直到整个肺部
时间:每日治疗2~4次,餐前2h或餐后2h进行,治疗 前行20min雾化治疗,治疗后5~10min吸痰。每次 治疗时间5~20min为宜。
XPower F-8 F-16电气雾化器使用说明书
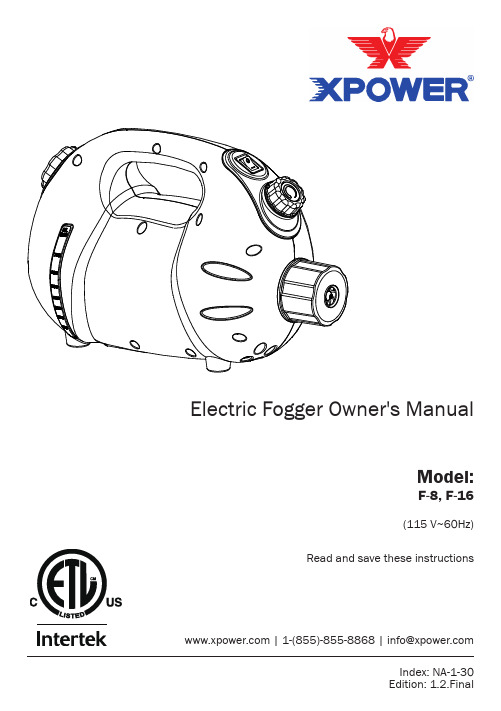
Electric Fogger Owner's ManualModel:F-8, F-16(115 V~60Hz)Read and save these instructions |1-(855)-855-8868|***************WARNING: READ AND SAVE THESE INSTRUCTIONS BEFORE USING THISPRODUCT.When using electrical appliances, especially when children or animals are present, basic safety precautions should always be followed to reduce the risk of fire, electric shock, and personal injury, including, but not limited to the following:• DO NOT attempt to perform any service or maintenance not outlined in instruction manual.• WARNING: To reduce the risk of electric shock – Use indoors only. DO NOT use outdoors.• WARNING: This machine is not intended for use by children. Adult assembly and operation required. To reduce the risk of injury, close supervision is necessary when an appliance is used near children.• DO NOT use as a toy.• DO NOT leave appliance when plugged in. Unplug from outlet when not in use and before servicing.• DO NOT use extension cords with machine.• DO NOT unplug unit by pulling on cord, to unplug, grasp the plug, not the cord.• WARNING: Never use a machine with a damaged cord or plug, or after the machine malfunctions or is dropped, damaged. Return to an authorized service center for service, examination, repair, or electrical or mechanical adjustment.• To disconnect, turn all controls to the off (“O”) position, then remove plug from outlet.• DO NOT pull or carry by cord, use cord as a handle, close a door on cord, or pull cord around sharp edges or corners. DO NOT run appliance over cord. Keep cord away from heated surfaces.• DO NOT handle plug or appliance with wet hands.• Use extra care when cleaning on stairs.• DANGER: DO NOT expose the machine to rain or water.• DO NOT use or store machine where it can fall or be pulled into tub or sink or standing water. If machine falls into water, unplug it, DO NOT reach into the water. Keep units out of baths and DO NOT operate on a wet floor, or wet surface.• WARNING:DO NOT allow any material to clog or block air intakes as this may cause units to overheat and result in a fire or electrical hazard. DO NOT direct the air / fogging outlet to huamn beings or living animals.• WARNING: DO NOT expose this machine to extreme temperature.• (For Model F-16) Connect to a properly grounded outlet only. See Grounding Instructions.• WARNING: Filling these types of solution / liquid into the solution tank, may cause safety hazzards, corrosive damages to the machine or blockage of the fogging system.(1) Strong acids, strong bases or other corrosive liquids(2) Alcohol, or flammable or explosive liquidsThis appliance must be grounded. In the event of malfunction or breakdown, grounding provides a path of least resistance for electric current to reduce the risk of electric shock. This appliance is equipped with a cord having an equipment-grounding conductor and a grounding plug. The plug must be plugged into an appropriate outlet that is properly installed and grounded in accordance with all local codes and ordinances.A qualified electrician should be consulted if there is any doubt as to whether an outlet box is properly grounded.DANGER: Improper connection of the equipment-grounding conductor can result in a risk of electric shock. The conductor with insulation having an outer surface that is green with or without yellow stripes is the equipment-grounding conductor. If repair or replacement of the cord or plug is necessary, do not connect the equipment-grounding conductor to a live terminal. Check with a qualified electrician or serviceman if the grounding instructions are not completely understood, or if in doubt as to whether the appliance is properly grounded. Do not modify the plug provided with the appliance – if it will not fit the outlet, have a proper outlet installed by a qualified electrician.This appliance is for use on a nominal 115V circuit (NEMA 5-15R), and has a grounding plug (NEMA 5-15P) as illustrated below. Make sure that the appliance is connected to an outlet having the same configuration as the plug. No adapter should be used with thisappliance.(3) Oil, or other organic oils(4) Suspensions, such as water with sands (5) Detergents• The Electric Fogger produces ULV fine mist withhigh velocity airflow helping the distributionof different liquids to the indoor space andsurfaces for varies applications.* The fogging outlet might be sold separately. Some of the models may already include extra fogging outlets.Fogging Volume ControlSpeed Switch /Power SwitchFogging OutletAir Outlet Solution Tank CoverSolution Tank Power CordAir Inlet• Turn counterclockwise to uninstall the fogging outlet cover and take out the fogging outlet. Apply the new fogging outlet and reinstall the fogging outlet cover.• The size of the fogging outlet varies and produces different fogging effects. (See Page 11: Technical Specifiations )* The fogging outlet might be sold separately. Some of the models may already include extra fogging outlets.Fill the Solutiong Tank• IMPORTANT: Always turn the fogging volume control to the lowest setting and disconnect the machine from the power source before filling the solution tank.• Turn counterclockwise to open the solution tank cover, and fill designated solution or liquid into the solution tank. Do not exceed the maximum capacity of the solution tank. (See Page 8: Fogging System Maintenance ) Close the solution tank cover.• WARNING: Filling these types of solution / liquid into the solution tank may cause safety hazzards, corrosive damages to the machine or blockage of the fogging system:(1) Strong acids, strong bases or other corrosive liquids (2) Alcohol, or flammable or explosive liquids (3) Oil, or other organic oils(4) Suspensions, such as water with sands (5) Detergents• IMPORTANT: If you intend to fill the solution of the types mentioned above, please contact the manufacturer of the solution for usage reference and proper methods of cleaning. (S ee Page 8: Fogging System Maintenance)Select a Power Source with a Proper Location• Check the throw distance of the machine. (See Page 10: Technical Specifications )• Please find a power source with a proper location where the fogging droplets can reachdesignated objects.Start Fogging• Connect the machine to power source.• IMPORTANT: Make sure the fogging volume control is on the lowest setting before turning the power on.• Turn on the machine and set to designated speed.• Turn the fogging volume control counterclockwise to set designated fogging volume.Turn off the Machine• Turn the fogging volume control clockwise to the lowest setting.• Turn off the machine and disconnect the machine from its power source.• IMPORTANT: Discard or use up the liquids in the solution tank. If you are not able to use up the liquids, transfer the liquids into a safe container, or follow the disposal instructions of the liquids if applicable.User Maintenance and Servicing InstructionsFrequent maintenance is recommended on this appliance. Failure to follow the maintenance instructions may cause failure of the appliance and void the warranty. Always disconnect the machine from the power source before any maintenance or servicing.Fogging System MaintenanceCleaning the Solution Tank• Turn the fogging volume control to the lowest setting.• Fill the solution tank with cold water to half of maximum capacity, close the solution tank and shake the machine a few times. Then open the solution tank and discard the water inside. Repeat the steps above 2 times.• Check if the solution tank is clean. If not, you might repeat the steps above.Cleaning the Liquid Conduit and Fogging Outlet • Turn the fogging volume control to the lowest setting.• Fill the solution tank with cold water to half of maximum capacity and close the solution tank.• Connect to power source.• Turn on the machine and turn the fogging volume control to the highest setting.• Keep the machine working for 3 minutes. Turn the fogging volume control to the lowest setting, turn off the machine and disconnect the power source.• Open the solution tank and discard the water inside. Close the solution tank. Wipe the water on the machine surface and the fooging outlet.• Use proper methods of cleaning for the solution tank. (See Page 8: Fogging System Maintenance)Cleaning the Surface• Use a damp cloth to wipe the surface of the housing. Do not clean the unit with water directly.• Remove dirt or any other objects that could block the air inlet, air outlet or the fogging outlet.Storage• When not in use, make sure no liquids are left in the solution tank.• Store the appliance in a dry and cool indoor place. Make sure it’s out of reach of children.Selection Suggestions of Cleaning Agent• It’s recommended to use COLD WATER ONLY to clean the fogging system.Troubleshooting Guide• You might follow the cleaning and disposal instructions of the liquids used for fogging if applicable.• WARNING: Filling these types of solution / liquid into the solution tank for cleaning, may cause safety hazzards, corrosive damages to the machine or blockage of the fogging system.(1) Strong acids, strong bases or other corrosive liquids (2) Alcohol, or flammable or explosive liquids (3) Oil, or other organic oils(4) Suspensions, such as water with sands (5) DetergentsIf your product(s) is not listed above, please visit for more information.XPOWER Limited Warranty (USA)1 YEAR LIMITED WARRANTYXPOWER-branded products purchased in the U.S. from authorized distributors include a 1-year limited warranty. Contact XPOWER to confirm warranty information about your product(s).This limited warranty covers defects in materials and workmanship in your XPOWER-branded products, purchased in the U.S. ONLY . Local warranty policy (if any) in yourFogging Outlet Specificationcountry will cover products purchased outside the U.S.Before contacting XPOWER, please try one or more of the following:(1) Consult this Owner’s Manual and follow the instructions of troubleshooting guide. (2) Access for more advice and information that could be helpful to address your problems.If you need additional assistance from XPOWER, please: (1) ********************.(2) Call XPOWER U.S. Customer Service Department at 855-855-8868 or other numbers provided on .(3) Visit XPOWER U.S. Head Office at 668 S. 6th Ave., City of Industry, CA 91746 or the most current address provided on .Please also have your original proof of purchase and the serial number(s) of your product(s) ready when you contact XPOWER.(1) Please finish the online warranty registration before usage. Visit /service-support/warranty-registration.(2) This Limited Warranty applies with its own timeliness. Contact XPOWER or visit for more information.If you are instructed to return the unit for service or replacement, please:(1) Request a RMA (Return-Merchandise-Authorization) number.(2) Use the original or an equivalent packaging, prepay shipping charges at your own expense to the address provided by XPOWER, with the RMA number on the shipping label or the packaging.(3) Include all the original parts and components.XPOWER will inspect, assess and advise the repairs needed and applicable cost, if any. For products under warranty, we will pay to ship the repaired or replaced product(s) to you if you use an address within the Contiguous United States. Otherwise, we will ship the product(s) to you at your own expense.(1) Power cord, filters or any other components considered as a “consumable parts” by XPOWER.(2) Normal wear and tear.(3) Problems that result, directly or indirectly, at XPOWER’s sole discretion, from: (3.1) External causes such as accident, abuse, misuse or problems with electrical power supply.(3.2) Disassembling, servicing or modification not authorized by XPOWER.(3.3) Usage that is not accordant with product instructions stated in Owner’s Manual.(3.4) Failure to follow the product instructions or lack of necessary maintenance stated in Owner’s Manual.|1-(855)-855-8868|***************668 S. 6th Ave.,City of Industry, CA 91746 USAXPOWER Manufacture, INC.Read and save these instructions。
烟雾机产品使用说明书
使用烟雾机前,请仔细阅读本说明书6HYH-36WA/6HYH-36WB 背负式烟雾机使用说明书丹阳市万事达机械有限公司承蒙购买烟雾机-谨此致谢尊敬的烟雾机用户,欢迎您使用本厂各型号烟雾机,在使用前请您仔细阅读本《使用说明书》以便正确使用,为了在以后使用过程中参考,请妥善保留此说明书目录一、安全警示及使用注意事项二、烟(热)雾机简介及技术参数和适用范围┈┈┈┈┈┈┈┈三、烟(热)雾机电路原理图┈┈┈┈┈┈┈┈┈┈┈┈┈┈┈四、烟(热)雾机气路、油(药)路图┈┈┈┈┈┈┈┈┈┈┈五、烟(热)雾机主要部件图┈┈┈┈┈┈┈┈┈┈┈┈┈┈┈六、烟(热)雾机的基本操作┈┈┈┈┈┈┈┈┈┈┈┈┈┈┈七、保养及常见故障排除┈┈┈┈┈┈┈┈┈┈┈┈┈┈┈┈┈八、装箱单┈┈┈┈┈┈┈┈┈┈┈┈┈┈┈┈┈┈┈┈┈┈┈九丶三包服务手册┈┈┈┈┈┈┈┈┈┈┈┈┈┈┈┈┈┈┈┈┈附热雾渗透稳定剂┈┈┈┈┈┈┈┈┈┈┈┈┈┈┈┈┈┈┈┈┈一、安全警示及使用注意事项由于本背负式烟(热)雾机在工作时会产生高温和噪音等情况,因此要非常注意安全。
本机在油(药)箱、弯(直)管处均贴(印)有防护标志。
序号图案含义粘贴位置1油箱内装有汽油,药箱内装有柴油。
严禁烟火。
油(药)箱上2防止烫伤,身体任何部位都应远离热源。
喷药管处3警示操作者使用安全防护用具。
(作业人员需穿防护服、戴防毒面具、耳罩和口罩,禁止使用特殊工作液,处理农药时,应按农药厂提供的操作规范和安全指示进行)油(药)箱上万不可大意,确保人身安全,应注意以下。
注意事项:1. 操作本机应以2-3人组成机组,轮流作业,相互交替,避免一人长期处于药雾中,吸不到新鲜空气。
2. 机器运行时,严禁手或衣物接触燃烧室外部的防护罩和喷药管上,以免烫伤3. 机器严禁摔、撞、压或修理中用力敲打机器。
4. 中途需要加汽油时,必须在停机十分钟后方可加汽油,用红色漏斗加汽油时注意不要溢出或加到外面,防止引燃汽油发生火灾。
雾化器库使用说明

雾化器库使用说明本文档为赛元提供的雾化器库的使用说明,雾化器库支持1.7M频率和2.4M频率的雾化片,库提供了函数接口进行设置。
其中1.7M雾化片适用于大功率加湿器(功率在15W以上),2.4M雾化片适用于小功率的香薰机(功率在6-12W)。
雾化器库提供了自动追频、功率设置、雾化工作、触控检水功能。
库共提供了11个函数接口供用户调用,实现雾化器功能。
一、雾化器库介绍:雾化器Atomizer文件夹中包含:SC91F832_C.H MCU头文件Atomizer.h 包含雾化器外部调用接口函数SOC_Atomizer_lib_V0.1.LIB 雾化器库文件实现雾化器工作需要占用一定的系统资源,雾化器库资源占用:ROM:1.8K DATA: 50BYTE XDATA:60BYTE定时器:定时器0PWM:PWM1ADC:两路ADCEEPROM: 4byteTouch Key: 两路二、雾化器的工作流程三、雾化器库函数接口和接口说明雾化器库共提供10个函数接口和3个全局变量:变量:bit TrackFreqFlag; 变量说明:追频完成标志0:未完成;1:完成变量:bit AjustPowerFlag; 变量说明:功率调整完成标志0:未完成;1:完成变量:bit Water_flag; 变量说明:水位检测输出结果0:缺水;1:有水函数:bit SOCAPI_GetTrackFreqStaus(void);函数功能:获取雾化器追频状态,返回1为已追频,0为未追频函数:void SOCAPI_SetFreq(void) ;函数功能:设置雾化器工作频率,当得到已追踪过频率可以调用该函数设置雾化器的频率函数:void SOCAPI_Atomizer_Init(INT8U mode);函数说明:雾化器初始化,设置PWM和定时器0;设置mode为0时雾化器的工作频率设置为1.7M;mode为1时为2.4M函数:void SOCAPI_TrackFreq_Init(void);函数功能:雾化器追频初始化,设置了追频所需的变量,需要在追频前调用函数:void SOCAPI_TrackFreq(void);函数功能:雾化器追频,该函数需要在SOCAPI_TrackFreq_Init之后在主程序中一直调用,直到TrackFreqFlag变量置1,追频完成后进入功率调整函数:void SOCAPI_AtomizerSetPower(INT8U Power);函数功能:设置雾化器工作时最大档功率,1.7M:设置范围15-21W;2.4M:设置范围6-12W函数:void SOCAPI_AdjustPower(void);函数功能:进行功率调整,将最大档功率调制到设定功率,需要在SOCAPI_AtomizerSetPower 之后调用函数:void SOCAPI_AtomizerSetGear(INT8U Gear);函数功能:设置档位,16档可调,0为低档,16为高档位,用户可以在当中选择任意档位作为目标功率函数:void SOCAPI_AtomizerWork(void);函数说明:雾化器雾化工作,该函数需要在主函数中无阻塞调用函数: void SOCAPI_WaterLevelDetectorInit(INT16U Initial_Diff,int ThresholdTmp,INT8U Speed); 函数说明:水位检测初始化,设置水位检测参数函数:void SOCAPI_WaterLevelDetector(void);函数功能:水位检测,检测结果由Water_flag输出四、雾化器库的具体使用雾化器库使用准备:雾化器的检水功能需要使用到Touch Key,赛元提供触控库帮助用户使用赛元的触控功能,具体使用见触控库的使用说明或者联系赛元的工程师,在项目工程中添加触控库;采集TK通道的数据,设置main.h中以下三个参数:#define CH_INITIAL_DIFF 668参数说明:检测通道与参考通道的初始比例,采样通道无水时RAWdata/参考通道RAWdata*1000#define WATERThresholdtmp 1300参数说明:检测通道有无水差值*0.6,如完全覆的差值为2166,则设置为1300。
- 1、下载文档前请自行甄别文档内容的完整性,平台不提供额外的编辑、内容补充、找答案等附加服务。
- 2、"仅部分预览"的文档,不可在线预览部分如存在完整性等问题,可反馈申请退款(可完整预览的文档不适用该条件!)。
- 3、如文档侵犯您的权益,请联系客服反馈,我们会尽快为您处理(人工客服工作时间:9:00-18:30)。
ii
Aeroneb Professional Nebulizer System Instruction Manual
®
ቤተ መጻሕፍቲ ባይዱ
Introduction
The Aeroneb® Professional Nebulizer System is a portable medical device for multiple patient use that is intended to aerosolize physician-prescribed medications for inhalation that are approved for use with a general purpose nebulizer. This device can be used by patients on and off mechanical ventilation or other positive pressure breathing assistance. Aeroneb® Pro is suitable for use by neonate, pediatric to adult patients as described in this manual. It incorporates the Aerogen® OnQTM Aerosol Generator. Aeroneb® Pro is designed to operate in-line with standard ventilator circuits and mechanical ventilators. It operates without changing patient ventilator parameters and can be refilled without interrupting ventilation. The control module operates from the AC/DC adapter and can be operated on its internal rechargeable battery for up to 45 minutes when fully charged. The product operates without compressed gas, making it suitable for portable applications. Indications for Use: The Aeroneb® Professional Nebulizer System is a portable medical device for multiple patient use that is intended to aerosolize physician-prescribed solutions for inhalation to patients on and off ventilation or other positive pressure breathing assistance. The Aeroneb® Professional Nebulizer System is suitable for use in adult, pediatric and neonate patients.
Aeroneb Professional Nebulizer System Instruction Manual
®
i
List of Figures
Figure 1: Aeroneb Pro ............................................................. 2 Figure 2: Aeroneb Pro controls and indicators...................... 10 Figure 3: Connecting nebulizer unit to T-piece ..................... 13 Figure 4: Connecting control module and nebulizer unit ...... 14 Figure 5: Connecting the AC/DC adapter ............................. 15 Figure 6: Connecting to an adult breathing circuit ................ 17 Figure 7: Connecting to a pediatric breathing circuit ............ 17 Figure 8: Connecting to a neonatal breathing circuit ............ 17 Figure 9: Alternative neonatal breathing circuit using neonate T-piece.......................................... 18 Figure 10: Control module and universal mounting bracket (vertical)................................................................ 18 Figure 11: Control module and universal mounting bracket (horizontal) ........................................................... 19 Figure 12: Equipment mount adapter ................................... 19 Figure 13: Connecting to a mask .......................................... 21 Figure 14: Connecting to a mouthpiece ................................ 22 Figure 15: Filling the nebulizer unit with a pre-filled ampoule .............................................. 23 Figure 16: Maximum fill indication point ................................ 24 Figure 17: Starting and stopping nebulization....................... 26
List of Tables
Table 1: Aeroneb Pro symbols ................................................ 8 Table 2: Aeroneb Pro controls and indicators ....................... 11 Table 3: Aeroneb Pro troubleshooting .................................. 33 Table 4: Aeroneb Pro parts list ............................................. 36
Instruction Manual
.
Aeroneb Professional Nebulizer System
®
Instruction Manual
This page has been intentionally left blank
.
Table of contents
Introduction ............................................................................. 1 System description............................................................. 2 Warnings ............................................................................ 4 Warnings ............................................................................ 5 Electromagnetic susceptibility ............................................ 6 Warnings ............................................................................ 7 Symbols ............................................................................. 8 Warranty........................................................................... 12 Life of Product .................................................................. 12 Assembly and Installation ..................................................... 13 Recharging the Battery .................................................... 15 Installation for use with a ventilator.................................. 16 Installation for use with a mask ........................................ 20 Installation for use with a mouthpiece.............................. 22 Adding medication ........................................................... 23 Nebulization .......................................................................... 25 Functional test ....................................................................... 27 Cleaning, disinfection and sterilization .................................. 28 Troubleshooting .................................................................... 33 Order numbers ...................................................................... 36 Specifications ........................................................................ 38 Physical ............................................................................ 38 Environmental .................................................................. 38 Performance .................................................................... 39 Appendix 1 EMC Tables ....................................................... 41
