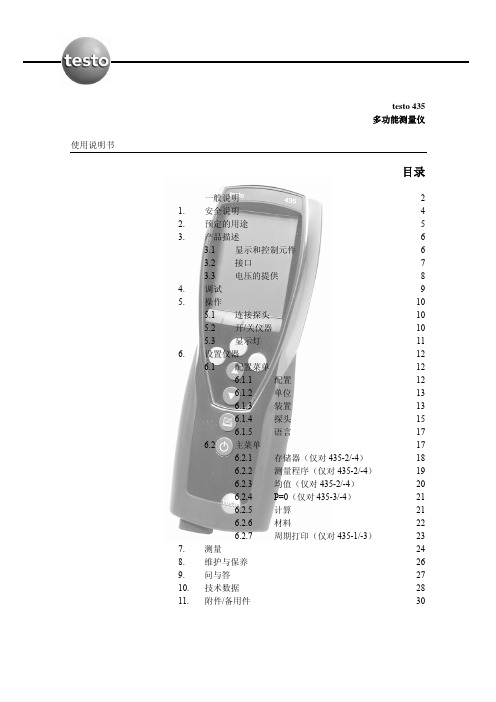
testo_435多功能测量仪
Testo 德图红外热像仪 产品手册

德图红外热像仪产品手册从基础到高端,全面适用于各行各业国德制造2精密型红外热像仪德图 testo 8833德图红外热像仪产品4德图红外热像仪产品一览testo 883320 x 240 640 x 480–可选功能备注:不具备* 如需订购帧频为 33 Hz 或 27 Hz 热像仪,请与德图官方联系。
5什么是红外热像仪?所有温度在绝对零度(约-273 ℃)以上的物体,都会因自身的分子运动而辐射红外线。
红外热像仪可以将这些人眼无法看到的红外线转换成为电信号,将以各种不同颜色表示不同温度的可视图像显示出来。
通过图像,可以迅速便捷地检测整个温度面,并识别高低温度点,从而可以进行温度的定性与定量分析,如有温度异常则预示将有故障发生。
通过对异常温度的检测,寻找出可能存在的问题,并及早采取相关措施,避免损失的发生。
红外热像仪的应用越来越广泛,在工业领域常用在机械设备的预防性维护及检修电气设备的预防性维护及检修生产过程的质量监控高耗能设备的监控产品研发的实验过程红外热像仪在工业领域的应用优势非接触式测量,无需停工,无需接触,安全快速显示整个温度场的分布,可对测量目标进行整体分析,高效检测显示任何细节部位,发现故障隐患,节约维修成本,降低能源损耗扫描式检测方法,反应灵敏,节约测量时间不同测量任务请选择适合的测量设备全新上市,功能全面,经济适用6德图红外热像仪产品testo 红外热像仪工业领域中电气设备维护的应用应用描述: 热像仪提供对电气设备故障部位或缺陷组件早发现,早判定的检测方法,继而采取针对性的维护或维修措施,避免可能会导致生产停工甚至引发火灾而产生的损失。
应用描述: 触网系统目前在铁路及地铁运行中占据非常重要的作用,保障触网运行是运行人员至关重要的工作,热像仪提供非接触快速扫瞄的远距离测量方式,大面积对触网系统进行扫瞄,有效保障运行。
应用描述: 大多数线路是架空设计,红外热像仪提供远距离的测量方法,简单快捷。
德图t435多功能测量仪使用说明书
仅执行文档中描述的维护和修理工作。按照规定的步骤执行维护和修理工作。为了 安全起见,仅使用 Testo 的原装备件。
保证正确处置
> 将损坏的可充电电池/用完的电池送到为其提供的收集点。 > 在本产品使用寿命结束时,将产品寄回 Testo。我们将保证以环境友好的方式处置这
6.1.1 配置
本仪器已经预定义了适应特定应用范围的测量配置。
配置设置在测量方式下影响下面几点:
z 功能按钮的分配 z 预定义功能的号码 z 主菜单的结构
在标准配置下所有功能均可提供。在应用特定的测量配置下,可用到的功能减少,仅留 下那些需要的功能,以保证较快的访问。
¾ 设置一个配置: √ 打开配置菜单,显示 config.(配置)。 1 Profile(配置)→ OK 。 2 用 ▲ / ▼ 选择期望的配置,并用 OK 确认。
使用说明书
testo 435 多功能测量仪
一般说明 1. 安全说明 2. 预定的用途 3. 产品描述
3.1 显示和控制元件 3.2 接口 3.3 电压的提供 4. 调试 5. 操作 5.1 连接探头 5.2 开/关仪器 5.3 显示灯 6. 设置仪器 6.1 配置菜单
6.1.1 配置 6.1.2 单位 6.1.3 装置 6.1.4 探头 6.1.5 语言 6.2 主菜单 6.2.1 存储器(仅对 435-2/-4) 6.2.2 测量程序(仅对 435-2/-4) 6.2.3 均值(仅对 435-2/-4) 6.2.4 P=0(仅对 435-3/-4) 6.2.5 计算 6.2.6 材料 6.2.7 周期打印(仅对 435-1/-3) 7. 测量 8. 维护与保养 9. 问与答 10. 技术数据 11. 附件/备用件
Testo 480 多功能测量仪 操作手册说明书
1testo 480 · 多功能测量仪操作手册2目录2 安全和环境 (5)2.1. 本文介绍 (5)2.2. 保证安全 (6)2.3. 保护环境 (7)3 规格 (8)3.1. 使用 (8)3.2. 技术数据 (8)4 产品说明 (11)4.1. 综述 (11)4.1.1. 便携式仪器 (11)4.1.2. 仪器接口 (12)4.1.3. 操控按键 (13)4.1.4. 显示屏 (14)5 入门知识 (16)5.1. 调试 (16)5.2. 产品 (19)5.2.1. 菜单 (19)5.2.2. 选择功能 (20)5.2.3. 退出菜单 (20)5.2.4. 切换到另外一个标签 (20)5.2.5. 输入数值 (20)5.2.6. 保存数值 (21)6 使用产品 (22)6.1. 设置操作 (22)6.2. 设置测量页面 (23)6.2.1. 计算的测量参数 (24)6.3. 收藏夹标签 (25)6.4. 探头菜单 (25)6.5. 数据管理浏览器菜单 (27)36.6. 测量和测量程序 (30)6.6.1. 保留(“保持”)测量数值 (30)6.6.2. 测量程序 (30)6.6.3. 栅格测量 (32)6.6.4. 紊流度测量 (36)6.6.5. 皮托管测量 (37)6.6.6. 使用风量罩测量 (38)6.6.7. 压力测量 (38)6.6.8. 二氧化碳测量 (39)6.6.9. 保存测量值 (40)6.6.10. 打印测量值 (41)6.6.11. 测量数值导出 (43)7 维护产品 (44)7.1.1. 电池护理 (44)7.1.2. 进行湿度调整 (44)7.1.3. 仪器固件更新 (45)8 提示和帮助 (51)8.1. 问题和解答 (51)8.2. 附件和备件 (52)42 安全和环境2.1. 本文介绍符号和书写标准警告一定要注意带有如下警告符号的信息,并采取规定的预防措施。
testo 迷你红外测温仪 中文说明书
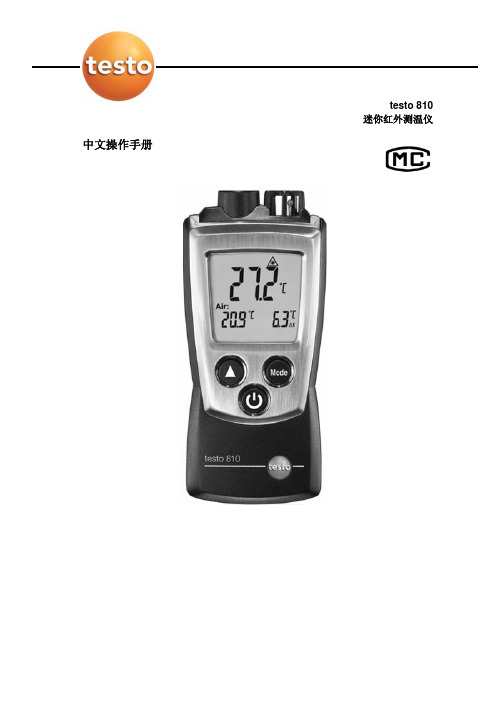
testo 810迷你红外测温仪中文操作手册产品描述①保护帽:安装位置②红外传感器③空气温度传感器④显示屏⑤控制按钮⑥电池盒(在仪器背面)基本设置关机 > 按键2秒 > 按选择键()> 按确认键()温度单位:°C, °F > 温差Δt: OFF(关),On(开)>发射率:ε> 自动关机:OFF(关),On(开)开机按住打开背光灯(按住10秒)在仪器打开的情况下,按住IR(红外)测量持续按键选择显示模式在仪器打开的情况下,用键来选择HOLD:读数被锁定了 > MAX:最大值 > MIN:最小值关闭仪器在仪器开着的情况下,按住2秒安全和环保提示¾请在使用本产品之前,仔细通读该操作手册,并熟悉本产品的操作。
请小心保管本文档,以便你在需要时可以查阅。
请把该操作手册提供给其他用户阅读。
¾请特别注意下列标识的提示信息:重要提示!避免人身伤害或仪器损坏的预防措施¾请在操作手册规定的用途范围,以及限定的技术参数内,正确操作仪器。
不要使用强力。
¾不要将仪器与溶剂、硫酸以及其他腐蚀性溶液存放在一起。
¾请务必按照操作手册中的描述来执行维护和修理工作。
请遵循规定的步骤。
为了确保仪器安全,请务必使用德图的原装备件。
环保回收¾将损坏的充电电池/废电池送到指定的电池回收点。
¾在仪器使用寿命结束时,将其寄回德图。
我们将保证以环境友好的方式处置这些产品。
规格和参数说明Testo 810是一款红外测量仪器,常用于测量表面温度,如散热器和发热器,同时测量周围的空气温度。
技术数据测量数据常规仪器数据·传感器:红外传感器NTC空气温度传感器·参数:°C, °F·量程:红外测温: -30~300°C, -20~575°F, 空气温度: -10~50°C, 14~122°F ·分辨率:0.1°C,0.1°F ·保护等级:IP 40·环境温度:-10~+50, +14℃~+122℉·存放/运输温度:-40~+70,℃-40~+158℉·电源:2节1.5V AAA电池·电池寿命:50小时(背光灯关闭)·尺寸:119×46×25 mm·重量:90g(包括电池和保护帽)·精度:红外测温:±2 °C(-30~+100°C)±3.6 °F(-22~212°F)±2 %测量值(其余量程)空气温度:±0.15°C;±0.9°F 标准和规范·EC标准:89/336/EEC·测量速率0.5 秒·光学分辨率6:1 保修保修期: 1 年保修条款:见保修卡产品描述概述①保护套:安装位置②红外传感器③空气温度传感器④显示屏⑤控制按钮⑥电池盒(在仪器背面)初始步骤¾安装电池1. 向下推动电池盒盖,打开电池盒2. 放入电池(2节1.5V AAA电池)。
测试设备说明手册(TESTO)说明书
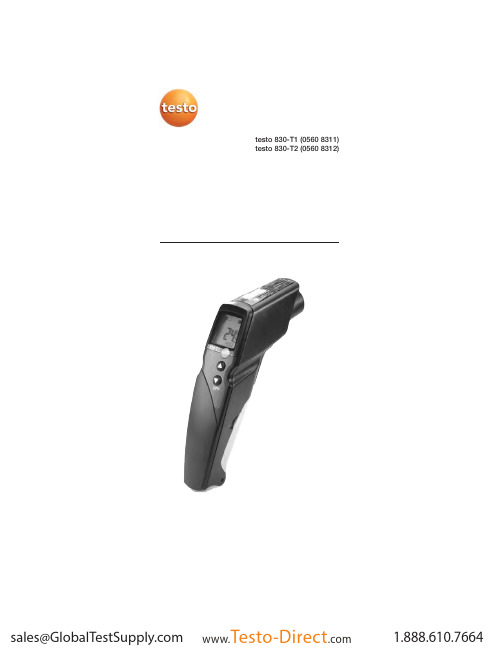
testo 830-T1 (0560 8311) testo 830-T2 (0560 8312)91. General Information Please read this document through carefully and familiarise yourself with the operation of the product before putting it to use.Keep this documentation to hand so that you can refer to it when necessary.2. Product Description3. Safety InformationContact measurement: Do not measure on or near live parts. Infrared measurement: Please adhere to the required safe distance when measuring on live parts.Operate the instrument properly and according to its intended purpose and within the parameters specified. Do not use force.Do not expose to electromagnetic radiation (e.g. microwaves,induction heating systems), static charge, heat or extreme fluctuations in temperature.Do not store together with solvents (e.g. acetone).Open the instrument only when this is expressly described in the documentation for maintenance purposes.Laser radiation! Do not look into laser beam. e n Accessories Name Item no.Water-tight immersion/penetration probe, -60 to +400°C/-76 to +752°F 0602 1293Quick-reaction surface probe, -60 to +300°C/-76 to +572°F 0602 0393Robust air probe, -60 to +400°C/-76 to +752°F 0602 1793Leather protection sleeve 0516 8302Emissivity adhesive tape ε=0.950554 0051Infrared sensor,laser Battery compartment DisplayOn/Off switch Contact measurement Measurement button:infrared measurement Infrared measurementProbe socket (testo 830-T2 only)10Ensure correct disposal:Dispose of defective rechargeable batteries and spentbatteries at the collection points provided.Send the instrument directly to us at the end of its life cycle.We will ensure that it is disposed of in an environmentallyfriendly manner.4. Intended Usetesto 830 is a compact infrared thermometer for the non-contact measurement of surface temperatures. Using testo830-T2, it is possible to carry out additional contact measurements byattaching probes.5. Technical DataFeature testo 830-T1testo 830-T2Parameter°C/°FInfrared measurement range-30 to +400°C/ -22 to +752°FInfrared resolution0.1°C/0.1°FInfrared accuracy±1.5°C/ 2.7°F or 1.5% of reading (+0.1 to +400°C/ +32 to +752°F)1;(at 23°C) +/- 1 digit±2°C/ 3.6°F or 2% of reading (-30 to 0°C/ -22 to +31.9°F)1Emissivity0.1 to 1.0 adjustableInfrared measurement rate0.5sTemp. sensor -Thermocouple Type K (attachable) Measurement range of temp sensor--50 to +500°C/ -58 to +932°F Resolution of temp. sensor-0.1°C/ 0.1°FAccuracy of temp. sensor-±0.5°C/0.9°F+0.5% of reading (±1 digit)at rated temperature 22°C/ 72°F Measuring rate of temp. sensor- 1.75sOptics (90% value)10:1212:12Laser type 1 x laser 2 x laserOperating temperature-20 to +50°C/ -4 to +122°FTransport /S torage temperature-40 to +70°C/ -40 to +158°FPower supply9V block batteryBattery life 20 h 15 hHousing ABSDimensions (LxHxB)190 x 75 x 38mm/ 7.5 x 3.0 x 1.5inCE guideline2004/108/EECWarranty 2 yearsLaserLaser type 1 x laser 2 x laserPower< 1 mWWavelength645 to 660 nmClass2Standard DIN NE 60825-1:2001-111the larger value applies2+ Opening diameter of the sensor (16mm/ 0.6in)6. Initial OperationInsert battery: See 9.1Changing the battery.117. Operation7.1 Connecting probe (testo 830-T2 only)Connect temperature probe to probe socket. Observe +/-!7.2 Switching on/offSwitch on instrument: Press measurement button.-lights up).The display light remains for 10 seconds every time a button is activated.pressed until display darkens.The device switches off automatically after 1 min (IR measure -ment view) or 10 mins (contact measurement view, only testo830-T2) without the button being pressed.7.3 Measuring/ measurement, this is done when the device is switched off orwhen you switch to the IR measurement view.-The instrument is switched on.Infrared measurement1Start measurement: Hold down measurement button.2Locate object to be measured using laser point.testo830-T1: laser marks the centre point of the measurement spot.testo830-T2: Laser marks the upper and lower end of themeasurement spot.-The current reading is shown (2 measurements per second)3End measurement: Release button.-HOLD lights up. The last measured value and min./max. value are saved until the next measurement.Restart measurement: Press measurement button.Contact measurement (testo 830-T2 only)-Temperature probe was connected before the measuring instrument was switched on.1-The instrument changes to the contact measurement mode (lights up). The current reading is shown.en122End the measurement: Press .-HOLD lights up. The last measured value and min./max. value are saved until the next measurement.Switch between min., max. and recorded value: Press .Restart measurement: Press .Back to infrared measurement view: Press measurementbutton.Setting the emissivity-Instrument is in the infrared measurement mode.If no button is pressed for 3 s in the emissivity mode, theinstrument switches to the infrared measurement mode.1Press for 3 s.2Set emissivity: Press or-The instrument switches to the infrared measurement mode.8. Settings-Instrument is switched off.If no button is activated in the setting mode for 3 s, theinstrument changes to the next mode.1Press for 3 s.-The device switches to settings mode.2Set lower alarm value (ALARM): Press or . Hold the button down to go forward quickly.3Set upper alarm value (ALARM): Press or . Hold the button down to go forward quickly.4Set alarm function on/oFF: Press or .5Select parameter (°C/ °F) : Press or .-The device returns to IR measurement view.The alarm function is only available for IR measurement. If theset alarm values are exceeded/not reached, a visual andacoustic alarm is output.9. Service and Maintenance9.1 Changing the batteryInstrument must be switched off!1Open battery compartment:Open up cover.2Remove used battery and insert newone. Observe +/-. The minus should bevisible once the battery is inserted.3Close battery compartment: Closecover.139.2 Clean instrument Do not use abrasive cleaning agents or solutions.Clean the housing with a damp cloth (soap water).Carefully clean the lens with water or cotton buds dipped in water or medical alcohol. 10. Questions and AnswersQueryPossible causes Possible solutionInfrared measurement mode: -Readings outside -- - -lights up.measurement range.Contact measurement mode: -Readings outside -If we have not answered your question, please contact your local distributor or Testo´s Customer Service.11. Information on infrared measurement 11.1 Measurement methodInfrared measurement is an optical measurementKeep lens clean.Do not measure with clouded lens.Keep measurement field (area between instrument and object being measured) free of interferences: no dust and dirtparticles, no moisture (rain, steam) or gases.Infrared measurement is a surface measurementIf there is dirt, dust, frost etc. on the surface, only the top layer will be measured, i.e. the dirt.In the case of shrinkwrapped foodstuffs, do not measure in air pockets.If values are critical, always subsequently measure using a contact thermometer. Particularly in the food sector, the core temperature should be measured with a penetration/immersion thermometer.Adaptation timeIf the ambient temperature changes (change of location, e.g.inside/outside measurement) the instrument needs an adaptation time of 15 minutes for infrared measurement.e n1411.2 EmissivityMaterials have different emissivities, i.e. they emit different levels of electromagnetic radiation. The emissivity of testo 830 is set in the factory to 0.95. This is the ideal value for measuring non-metals (paper, ceramics, plaster, wood, paints and varnishes),plastics and foodBright metals and metal oxides are only suited to a limited extent to infrared measurement on account of their low or nonuniform emissivity.Apply emissivity enhancing layers such as varnish or emission adhesive tape (Item no. 05540051) to the object being measured. If this is not possible, measure with the contact thermometer.Emissivity table of the most important materials(typical values)A specific spot is determined depending on the distance from the measuring instrument to the object being measured. Measurement optics (Ratio Distance : Measurement spot)500 mm1000 mm2000 mm5000 mmØ 516 mmØ 216 mmØ 116 mmØ 66 mmØ 16 mm testo 830-T1laser1512. Information on contactmeasurementObserve minimum penetration depth in immersion/penetration probes: 10 x probe diameterAvoid applications in corrosive acids or bases.Do not use spring-loaded surface probes on sharp edges.e n 500 mm 1000 mm2000 mm 5000 mm Ø 433 mm Ø 183 mmØ 100 mmØ 58 mm Ø 16 mm testo 830-T2laserlaser。
天井在住宅生态设计中的应用——以浙江安吉生态屋为例

eco啪omb地byRenwe幽。魑in蜘ieou矗tyofZbeji嘲
as example,the quantitatiVe analysis ofthe mermal ef强cI of yard in lhis paper could bo reference or enlighfenmenf for eco小uildiIlg desi驴.
天井在住宅生态设计中的应用
——以浙江安吉生态屋为例
马全明’许丽薄2
摘骧/天井式住宅是中国传统居住建筑的形式之一,天
井鼹有良好的通风采光和温度调节作用,能改善建筑内
部的小气候。以浙江省安吉按任噩中所建造的生态凝测
量淹秘,定量建势辑了天筹蕊热王效痊,薅建鬟垒惫凌
诗戳疟发稚话鉴。
关键词/天井热环境生态设计
340mm;内墙为粘土砖墙,厚240mm;二 层部分为木结构承重体系,梁、板、柱均为 杉木;屋面也是木结构,由木梁、木檩条、 木望板组成,屋面瓦为沥青瓦。由于生态房 主要作展示用,室内家具很少,布置简单。
2)测试内容与方法 本次测量的主要内容是生态屋天井温
表l潮试参数及仪器
测试参数 室内外空气温度
外墙内外表面温度一
·季节对比测试 本次测试分为两个阶段,一个是3月 扮,处于冬末蠢窃酶时节,一个怒8胃份, 夏季时节。以体现冬夏黼季的不同效果。 ·天井颈郝开敞与封溺魄对比溯试 天井顶部开敞与否,对于温魔的影响 是十分显著的。测试中,我们使用透光的塑 料薄睽覆盖在天并j耍部将箕封闭(黼3),逡 行对比测试。 ·普逶农宅与垒态黪瓣醢鼹浚+ 肖天井的出态房与没有天井的普通农 宅进行测试对比,以体现天井的存在效果。 普通农宅离生态房大约50m远,粘±砖墙、 钢筋混凝±楼板、瓦屋掰,外墙贴面砖,无 天并,该农宅熬宥一定的代表幢(鬻4),枣 上世纪90年代以来,当地的大多数农房都 是这秘澎式。 测试仪器及参数如裘格l所示,测试布 点位遗如图5嬲示。生态房测试从3月24日 16时35分开始,3月25霞8时至14时由于 停电中断。对比测试从3月25日15时开始, 至3月27鑫下午15时络壤。在溺试室黔空 气温度时,为了防止太阳辐射,采取了遮阳 掊旌。第二除段测试是铁8胃16疆劐18强。 3)测试结果与分析 ·2006年3月份测试结果与分析 生态房与农宅在对比灏试时,室内发 热量憝本相同。图6为3月25日15时30分 至3舅26嚣l毒孵30努戆空气温度冼较,其 中室外空气温度为生态虏室外空气温度和 农宅整穸b空气懑麦的平均煎。强中温度单 位为℃。图7怒3月26日15时Oo分至3月
testo480·多功能测量仪
3 规格 .............................................................. 8
3.1. 使用 ............................................................................. 8 3.2. 技术数据 ...................................................................... 8
5.2.1. 5.2.2. 5.2.3. 5.2.4. 5.2.5. 5.2.6.
菜单 .................................................................................. 19 选择功能 ........................................................................... 20 退出菜单 ........................................................................... 20 切换到另外一个标签 ......................................................... 20 输入数值 ........................................................................... 20 保存数值 ........................................................................... 21
testo 400多功能测量仪 德国德图TESTO
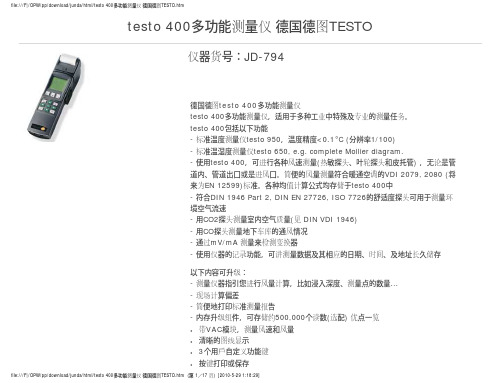
+/-0.1 %rF (0.0 ... 100.0 %rF) +/-0.1 %RH (0.0 ... 100.0 %RH)
Testo
file:///F|/OPW/pp/download/junda/html/testo 400
测
图TESTO.htm
压 (压 )
传
0.0 ... 2000.0 hPa
测
图TESTO.htm
+/-0.1 °C (-200.0 ... 1000.0 °C) +/-1.0 °F (-330.0 ... 239.9 °F) J ( (Fe-CuNi) ) -330.0 ... 1832.0 °F +/-0.4 °F (-240.0 ... 299.9 °F) +/-1.0 °F (300.0 ... 1832.0 °F) +/-0.1 °F (-330.0 ... 1832.0 °F) +/-0.4 °C (-40.0 ... 10.1 °C) +/-0.2 °C (-10.0 ... 50.0 °C) +/-0.4 °C (50.1 ... 150.0 °C) +/-0.1 °C (-40.0 ... 150.0 °C) +/-0.4 °F (-40.0 ... 14.1 °F) +/-0.2 °F (-14.0 ... 122.0 °F) +/-0.4 °F (122.1 ... 300.0 °F) +/-0.1 °F (-40.0 ... 300.0 °F) Testo ( (
file:///F|/OPW/pp/download/junda/html/testo 400 测 图TESTO.htm 3 17 [2010-5-29 1:18:29]
CDC卫生标准管理办法及参考仪器配置
国家职业卫生标准管理办法中华人民共和国卫生部令第20号《国家职业卫生标准管理办法》已于2002年3月15日经卫生部部务会讨论通过,现予发布,自2002年5月1日起施行。
部长张文康二○○二年三月二十八日国家职业卫生标准管理办法第一条为加强国家职业卫生标准的管理,根据《中华人民共和国职业病防治法》(以下简称《职业病防治法》),制定本办法。
第二条对下列需要在全国范围内统一的技术要求,须制定国家职业卫生标准:(一)职业卫生专业基础标准;(二)工作场所作业条件卫生标准;(三)工业毒物、生产性粉尘、物理因素职业接触限值;(四)职业病诊断标准;(五)职业照射放射防护标准;(六)职业防护用品卫生标准;(七)职业危害防护导则;(八)劳动生理卫生、工效学标准;(九)职业性危害因素检测、检验方法。
第三条本办法适用于国家职业卫生标准的立项、起草、审查、公布、复审和解释。
第四条卫生部主管国家职业卫生标准工作;卫生部委托办事机构,承担国家职业卫生标准的日常管理工作;由卫生部聘请有关技术专家组成全国卫生标准技术委员会,负责国家职业卫生标准的技术审查工作。
第五条国家职业卫生标准制定的原则:(一)符合国家有关法律、法规和方针、政策,满足职业卫生管理工作的需要;(二)体现科学性和先进性,注重可操作性;(三)在充分考虑我国国情的基础上,积极采用国际通用标准;(四)逐步实现体系化,保持标准的完整性和有机联系.第六条国家职业卫生标准分为强制性标准和推荐性标准.强制性标准分为全文强制和条文强制两种形式。
强制性标准包括:(一)工作场所作业条件的卫生标准;(二)工业毒物、生产性粉尘、物理因素职业接触限值;(三)职业病诊断标准;(四)职业照射放射防护标准;(五)职业防护用品卫生标准。
其他标准为推荐性标准。
第七条任何单位和个人可向卫生部标准办事机构提出制定国家职业卫生标准立项的建议。
建议内容包括:标准名称、制定标准的目的、主要技术内容和国内外主要情况说明等。
Testo 512差压测量仪操作手册说明书

testo 512 差压测量仪操作手册目录一般说明2.1安全说明3.2预定的用途4.3产品描述51.3显示和控制元件52.3接口63.3电源6.4调试7.5操作81.5连接压力软管,皮托管82.5开/关仪器93.5开/关显示灯94.5设置9.6测量41.7维护与保养61.8问与答71.9技术数据81.01附件/备用件912 一般说明一般说明本节提供使用本文档的重要信息。
本文档包含安全有效地使用本产品必须用到的信息。
请在使用本产品之前,仔细通读本文档,并熟悉本产品的操作。
请将本文档放在手头,以便你在需要时可以查阅。
标识标识意义说明注意提供有用的提示和信息。
¾, 1, 2 目标表示经由描述的步骤所要达到的目标。
步骤编号的地方,你必须始终遵守给出的顺序!√条件在按照描述执行一个动作时必须满足的条件。
>, 1, 2,... 步骤执行步骤。
步骤编号的地方,你必须始终遵守给出的顺序!文本显示文本在仪器显示屏上显示的文本。
功能按钮按下该按钮。
- 结果表示上一步的结果。
交叉参照请参照更广泛或更详细的信息。
安全说明 3 1. 安全说明本节描述安全使用本产品必须服从和遵守的一般规则。
避免人员受伤/设备损坏>不要在有电部件上或其附近使用本测量仪器和探头进行测量。
> 不要将测量仪器/探头与溶剂存放在一起,并且不要使用任何干燥剂。
本产品安全/质保有效性的声明> 仅在技术数据中规定的参数范围内操作测量仪器。
> 始终以正确的方式及其预定的用途使用测量仪器。
不要使用外力。
> 不要将手柄和馈线置于70℃以上的温度环境下,除非它们明确允许用于高温。
探头上给出的温度仅与传感器的测量范围相关。
> 仅当文档中明确表明是为了维护和修理目的时,才可打开仪器。
仅执行文档中描述的维护和修理工作。
按照规定的步骤执行维护和修理工作。
为了安全起见,仅使用Testo的原装备件。
正确处置申明> 将损坏的可充电电池/用完的电池送到为其提供的收集点。
宏村徽州传统民居过渡季节室内环境分析_陈晓扬
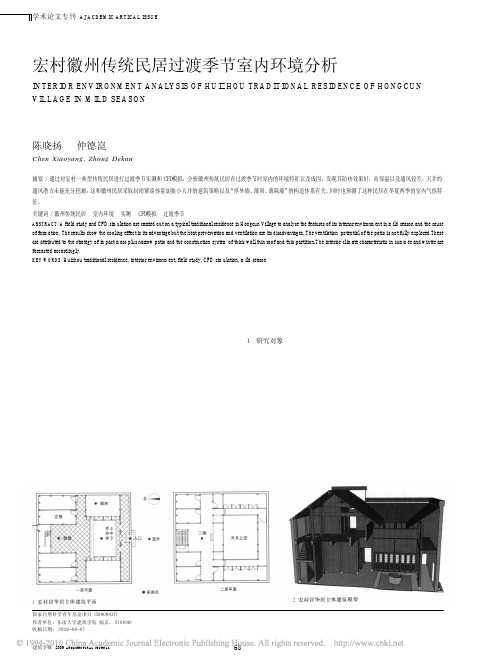
2009 ARCHITECTURAL JOURNAL建筑学报68AJ ACDEMIC ARTICAL ISSUE宏村徽州传统民居过渡季节室内环境分析INTERIOR ENVIRONMENT ANALYSIS OF HUIZHOU TRADITIONAL RESIDENCE OF HONGCUN VILLAGE IN MILD SEASON陈晓扬 仲德崑Chen Xiaoyang, Zhong Dekun摘要/ 通过对宏村一典型传统民居进行过渡季节实测和CFD模拟,分析徽州传统民居在过渡季节时室内的环境特征以及成因,发现其防热效果好,而保温以及通风较差,天井的通风潜力未能充分挖掘,这和徽州民居采取封闭紧凑体量加狭小天井的建筑策略以及“厚外墙、薄顶、薄隔墙”的构造体系有关。
同时也预测了这种民居在冬夏两季的室内气候特征。
关键词/ 徽州传统民居室内环境实测CFD模拟过渡季节ABSTRACT/ A field study and CFD simulation are carried out on a typical traditional residence in Hongcun Village to analyse the features of its interior environment in mild season and the causeof formation. The results show the cooling effect is its advantage but the heat prevervation and ventilation are its disadvantages. The ventilation potential of the patio is not fully explored.These are attributed to the strategy of impact mass plus narrow patio and the construction system of thick wall,thin roof and thin partition.The interior climate characteristic in summer and winter are forcasted accordingly.KEY WORDS/ Huizhou traditional residence, interior environment, field study, CFD simulation, mild season徽州民居在总体布局上通过遵循风水理论充分利用周围山水获得了较好气候环境,在建筑设计中同样也有很多适应当地气候的生态策略,如利用天井、冷巷、水体、遮阳等措施调节室内环境[1]。
试验检测仪器设备一览表汇编

试验检测仪器设备一览表汇编1. 引言本文档旨在提供一个试验检测仪器设备的一览表汇编,以便于管理和查阅。
该汇编表涵盖了各种试验检测仪器设备的详细信息,包括名称、型号、厂家、功能和适用范围等。
本文档的目标读者是试验检测部门的相关人员,以及需要了解试验检测仪器设备的相关人员。
2. 试验检测仪器设备一览表序号仪器设备名称仪器设备型号厂家功能适用范围1 电子天平ETP-100 ABC 测量物体重量实验室常规使用2 示波器SCO-200 XYZ 显示电信号波形电子设备测试3 高温炉HTF-300 DEF 提供高温环境材料热稳定性测试4 恒温槽TCC-400 GHI 维持恒定温度化学反应温度控制5 光谱仪SPC-500 JKL 测量样品光谱化学成分分析6 色差计DCM-600 MNO 测量样品颜色产品质量检测7 硬度计HDM-700 PQR 测量物体硬度材料力学性能测试8 气体检测仪GTD-800 STU 检测空气中气体浓度环境污染监测3. 仪器设备详细信息3.1 电子天平 (ETP-100)•厂家: ABC•功能: 测量物体重量•适用范围: 实验室常规使用3.2 示波器 (SCO-200)•厂家: XYZ•功能: 显示电信号波形•适用范围: 电子设备测试3.3 高温炉 (HTF-300)•厂家: DEF•功能: 提供高温环境•适用范围: 材料热稳定性测试3.4 恒温槽 (TCC-400)•厂家: GHI•功能: 维持恒定温度•适用范围: 化学反应温度控制3.5 光谱仪 (SPC-500)•厂家: JKL•功能: 测量样品光谱•适用范围: 化学成分分析3.6 色差计 (DCM-600)•厂家: MNO•功能: 测量样品颜色•适用范围: 产品质量检测3.7 硬度计 (HDM-700)•厂家: PQR•功能: 测量物体硬度•适用范围: 材料力学性能测试3.8 气体检测仪 (GTD-800)•厂家: STU•功能: 检测空气中气体浓度•适用范围: 环境污染监测4. 结论本文档提供了一个试验检测仪器设备的一览表汇编,涵盖了常用的仪器设备的详细信息。
多功能测试仪
多功能测试仪(TC-V2.12k)Multi-function Tester (TC-V2.12k)浩祺电子科技2015年8月Haoqi Electronic Technology Co., Ltd.August 2015目录1综述 (3)1.1本机说明 (3)1.2功能介绍 (3)2操作指引 (4)2.1按键操作定义 (4)2.2开机 (4)2.3测试晶体管 (5)2.4自动校准 (9)2.5测试稳压二极管 (10)2.6红外解码 (10)2.7关机 (10)2.8内置锂电池电压测量 (11)2.9内置锂电池充电 (11)3性能参数 (12)4常见问题 (13)5装箱单 (13)1Overview (14)1.1Introduction (14)1.2Features (14)2Operating Instructions (15)2.1Key operational definitions (15)2.2Power on (16)2.3Detect transistor (16)2.4Selftest (20)2.5Detect Zener diode (21)2.6IR decoder (21)2.7Power off (22)2.8Built-in Li-ion Battery voltage measurement (22)2.9Charging the Battery (23)3Performance Parameters (23)4FAQ (24)5Packing List (24)多功能测试仪(TC-V2.12k)1综述1.1 本机说明① - 160x128 TFT显示屏② - 多功能按键③ - 晶体管测试区④ - 稳压二极管测试区⑤ - 红外接收窗口⑥ - Micro USB充电接口⑦ - 充电指示灯1.2 功能介绍TC-V2.12k是采用TFT图形显示的多功能测试仪。
●晶体管测试仪-自动测量NPN和PNP晶体管、N沟道和P沟道场效应管、二极管(含双二极管)、电阻(含电位器)、电感、电容、可控硅、电池(0.1-4.5V)等元器件-自动测量稳压二极管(0.01-30V)-自动校准功能●红外解码器-支持日立公司编码-红外波形显示-红外接收指示●其他-测量结果采用TFT图形显示-一键操作-自动关机(关机时长可设置)-内置大容量可充电锂电池-锂电池电压检测-支持中英文双语警告:内置锂电池,严禁将测试仪浸入水中、严禁靠近热高温源!警告:为了您的人身安全,请严格遵守锂电池使用规范和注意事项!2操作指引2.1 按键操作定义多功能按键有两种操作:●短按:按下按键不短于10毫秒且在1.5秒内松开按键●长按:按下按键1.5秒以上2.2 开机关机状态下短按多功能按键,测试仪开机并自动进行测量。
testo480多功能测量仪使用规程
testo 480 多功能检测仪——空调通风系统调试,环境舒适度检测专家产品介绍:testo 480 一机多能,您可以记录温度、湿度、风速、光照度、热辐射、紊流度和二氧化碳等多种参数,正是针对办公楼、住宅和工业建筑中的空调系统及室内环境检测最新的多功能测量仪。
为暖通空调行业的系统优化专家、技术服务提供商和工程师提供了完备的整体方案支持。
testo 480 的智能校准功能让客户的测量及操作更自由、更专业!自动提醒校准时间凭借最新的数字式记忆探头,带存储芯的探头会自动记忆仪器及校准信息,会自动提醒客户“您的仪器和探头该进行校准了”,确保您的仪器始终处于精确可靠!探头自动补偿校准偏差用户通过软件输入所有的校准数据后,这些数据将在探头中永久保存。
当客户使用时,探头会自动补偿校准偏差,实现数据的零误差的显示。
无需主机便可实现探头校准数字式记忆探头让校准过程变得更简单、更方便。
空调工程师如需校准,无需将主机送交校准机构,只需探头就可完成校准工作了,您的仪器即可继续您的其他测量。
同时,系统精度包含了主机和探头,确保了测量结果的可靠性和可重复性。
优点一览:∙数字式记忆探头,无需主机即可校准探头∙自动补偿校准偏差,自动提醒探头校准时间∙内置格栅测量法,轻松实现标准的通风系统测量∙支持SD卡和USB数据传输,专业软件分析∙新型触控键更易操控技术数据探头接口2个K型热电偶接口1个内置差压接口3个数字式探头接口其他连接USB接口、SD卡、电源、用于连接快速打印机的红外接口工作温度0 ~ 40 °C外部电源连接电源可实现长期测量和电池充电电池寿命8小时(主机,不带探头,50%的显示亮度) 显示彩色图形显示内存存储器可存储10,000个测量报告内置测量参数K型热电偶量程: - 200 ~ + 1370 °C精度: ± (0.3 °C + 0.1% 测量值)分辨率: 0.1 °C差压 量程: - 25 ~ 25 hPa精度: ± (0.3 Pa + 1% 测量值)分辨率: 0.1 Pa绝对压力 量程: 700 ~ 1100 hPa精度: ± 3 hPa分辨率: 0.1 hPa外接风速探头量程精度(±1数位)0635 9542 叶轮式风速探头 直径16mm + 0.4 ~ + 50 m/s - 10 °C ~ + 70 °C ±(0.2 m/s + 1%测量值)(0.4~40m/s) ±(0.2 m/s + 2%测量值)(40~50m/s) ± 1.8 °C0635 1543 热敏式风速探头 90度弯曲 0 ~ + 20 m/s - 20 ~ + 70 °C 0 ~ 100 %RH ± (0.03 m/s + 4%测量值)± 0.5 °C± (1.8 %RH + 0.7%测量值)0635 9343 叶轮式风速探头 直径100mm+ 0.10 ~ + 15 m/s 0 ~ + 60 °C ± (0.1 m/s + 1.5%测量值) ± 0.5 °C 外接舒适度探头量程精度(±1数位)0636 9743温湿度探头直径12mm 0 ~ 100 %RH - 20 ~ + 70 °C ± (1.0 % RH + 0.7%测量值) (0 ~ 90 %RH) ± (1.4 % RH + 0.7%测量值) (90 ~ 100 %RH) ± 0.5 °C0632 1543 IAQ 室内空气品质探头 - 20 ~ + 70 °C 0 ~ + 100 % RH 0 ~ 10,000 ppm +700 ~ +1100 hPa ± 0.5 °C± (1.8 %RH + 0,7%测量值)± (50 ppm CO2 + 2%测量值) (0 ~ + 5,000 ppm CO 2 )± (100 ppm CO2 + 3%测量值) (5,001 ~ +10,000 ppm)± 3hPa0628 0143 紊流度探头 0 ~ + 50 °C 0 ~ + 5 m/s ± 0.5 °C± (0.03 m/s + 4%测量值)0602 0743热辐射黑球探头 直径150mm0 ~ + 120 °C 1级精度0635 0543 光照度探头 0 ~ 100,000 Lux 等级 C ,根据DIN 5032 - 7 f1 = 6% (色彩补偿) f2 = 5% cos (余弦补偿)外接温度探头量程精度(±1数位)0602 1793空气探头,K型热电偶- 60 ~ + 400 °C2级精度0602 0393表面探头,K型热电偶快速响应,带有弹簧式表面探头- 60 ~ + 300 °C2级精度0602 1293防水,浸入式/插入式探头K型热电偶- 60 ~ + 400 °C± 0.2 °C(-20 ~ +70 °C )1级精度(其余量程)0614 0073Pt 100 高精度,浸入式/插入式探头3 mm直径- 100 ~ +400 °C± 0.15 °C + 0.2% 测量值 (- 100 ~- 0.01 °C)± 0.15 °C + 0.05% 测量值 (0 ~100 °C)± 0.15 °C + 0.2% 测量值 (100.01~ 350 °C)± 0.5 °C + 0.5% 测量值 (350.01 ~400 °C)指针式绝缘电阻测试仪BK6132数字式绝缘电阻测试仪BK6151线缆追踪测试器BK6183漏电断路器测试仪BK6812电池测试仪BK6470指针式接地电阻测试仪BK6105网络线检测器BK6185数字式接地电阻测试仪BK6120绝缘测试仪BK86M四合一激光测距仪BK4500一氧化碳检测仪BK8370一氧化碳检测仪BK8670德国EPK PoroTest7涂层针孔检测仪德国EPK物理测试仪器PhysiTest 12303德国EPK物理测试仪器PhysiTest 16102(-16105)德国EPK物理测试仪器PhysiTest 12302德国EPK物理测试仪器PhysiTest 14001德国EPK物理测试仪器PhysiTest 16501(-16505)德国EPK物理测试仪器PhysiTest 14003德国EPK物理测试仪器PhysiTest 14002直流耐压绝缘测试仪TH9201直流耐压绝缘测试仪TH9201S直流耐压绝缘测试仪TH9201B交直流耐压绝缘测试仪TH9301直流耐压绝缘测试仪TH9301A交直流耐压绝缘测试仪TH9301B直流耐压绝缘测试仪TH9201C直流耐压绝缘测试仪TH90010直流耐压绝缘测试仪TH5101耐压测试仪CC2671直流耐压绝缘测试仪TH5101B直流耐压绝缘测试仪TH5101D直流耐压绝缘测试仪TH5101C耐压测试仪CC2671DCS2674-100 KH3925ZN3951A EMI TES92 ESLEMI YD2675/76KH3925B TH90010B CS2674-100KH3935KH3922A KH3922 KH3922TDS3TMT EMI KH3928ZKC-B ZN3951AEMI LQHB-HST-J LQHB-HST-J KH3935EMI ZKC-A KH3925YD20000NY-1A HST-J STL200HM-1K TES9 2TES92PWS2326-SC TES-6220WDZ-6A DJZ-1DZ-10A AWA6050YB4810/YB4811/YB4813YB4812 DZ-6ADZ-6A YB1733A YB3200YB1731A/B YB4805YB1730YD9880A YD9882YB1732A/B YD2675YD98 81YD2676DP1308A UTP3702 TES6210UTP3701PWS2185-SC UTP3704J1202UTP3703DPO3PWR U TP3705。
Testo 315-3 CO CO2 测量仪使用手册说明书
testo 315-3 · CO/CO2 measuring instrument Instruction manual21 Contents1Contents1Contents (3)2Safety and the environment (4)2.1.About this document (4)2.2.Ensure safety (4)2.3.Protecting the environment (5)3Specifications (6)e (6)3.2.Technical data (6)3.2.1.Measurement ranges and resolution (6)3.2.2.Accuracy and response time (6)3.2.3.Other instrument data (7)3.2.4.Bluetooth® module (option) (7)4Product description (9)4.1.Overview (9)4.1.1.Control elements and connections (9)4.1.2.Display (12)4.2.Basic properties (13)5First steps (14)6Using the product (15)6.1.Performing settings (15)6.2.Measuring (16)6.3.Printing the measurement results (17)6.4.Bluetooth® and IrDA data transfer (18)7Maintaining the product (18)8Tips and assistance (19)8.1.Questions and answers (19)8.2.Calibration interval (21)8.3.Accessories and spare parts (21)32 Safety and the environment42Safety and the environment2.1.About this documentUse> Please read this documentation through carefully andfamiliarize yourself with the product before putting it to use. Pay particular attention to the safety instructions and warning advice in order to prevent injuries and damage to the products. > Keep this document to hand so that you can refer to it whennecessary.> Hand this documentation on to any subsequent users of theproduct.Symbols and writing standardsRepresen-tationExplanationNote: Basic or further information.1. ...2. ...Action: more steps, the sequence must be followed. > ...Action: a step or an optional step. - ...Result of an action.MenuElements of the instrument, the instrument displays or the program interface.[OK]Control keys of the instrument or buttons of the program interface. ✓ ...Handling prerequisite2.2.Ensure safety> Only operate the product properly, for its intended purpose andwithin the parameters specified in the technical data. Do not use any force. > Dangers may also arise from the systems being measured orthe measuring environment: Note the safety regulations valid in your area when performing the measurements.2 Safety and the environment5> Do not perform contact measurements on non-insulated, liveparts.> Do not store the product together with solvents. Do not use anydesiccants. These substances may impair the operation and reliability of the instrument.> Carry out only the maintenance and repair work on thisinstrument that is described in the documentation. Follow the prescribed steps exactly. Use only original spare parts from Testo.> Temperatures given on probes/sensors relate only to themeasuring range of the sensors. Do not expose handles and feed lines to any temperatures in excess of 70 °C unless they are expressly permitted for higher temperatures.For products with Bluetooth® (optional)Changes or modifications that have been made without the explicit consent of the responsible approval authority, may cause the retraction of the type approval. Data transfer may be disturbed by equipment that uses the same ISM band, e.g. WLAN, microwave ovens, ZigBee.The use of radio communication links is not permitted in aeroplanes and hospitals, among others. For this reason the following points must be ensured before entering:The data transfer function must not be active.2.3.Protecting the environment> Dispose of faulty rechargeable batteries/spent batteries inaccordance with the valid legal specifications. > At the end of its useful life, send the product to the separatecollection for electric and electronic devices (observe local regulations) or return the product to Testo for disposal.3 Specifications63Specifications3.1.UseThe testo 315-3 is a convenient and robust measuring instrument for recording ambient CO/CO 2 values. It is used to avoid risks. Fields of application are, for example- Heating systems with operation dependent on ambient air - Ventilation systems- Storage in the food and drinks industryThe Bluetooth ® option may only be operated in countries in which it is type approved.3.2.Technical data3.2.1.Measurement ranges and resolutionMeasurement parameter Measuring range Resolution CO 0 to 100 ppm 0.5 ppm CO 20 to 10,000 ppm 10 ppm Humidity115 to 95 %RH0.1 %RH Temperature 1 -10 to +60 °C/14 to 140 °F0.1 °C/°F3.2.2. Accuracy and response timeMeasurement parameter Accuracy Response time CO± 3 ppm to 20 ppm ± 5 ppm from 20 ppm< 120 s (t90)1 Only when the humidity/temperature sensor is connected (optional)3 Specifications7Measurement parameter Accuracy Response time CO 2±300 ppm(0 to 4,000 ppm) ±8 % of meas. val. (4,000 to 6,000 ppm) ±500 ppm.(6,000 to 10,000 ppm)< 120 s (t90)Humidity 1±2.5 %RH (5 to 95 %RH)Temperature 1 ±0.5 °C (+ 1 digit)3.2.3. Other instrument dataFeatureValuesStorage/transportation conditions -20 to 60 °C/-4 to 140°F 0 to 95 %RHOperating conditions 0 to 40 °C/32 to 104 °F/0 to 95 %RH Weight incl. holster Approx. 382 g Housing materialABSDimensions (L x W x H)190 x 65 x 40 mm Protection class IP 40 acc. to EN 60529Operating time Min 10 h measuring time (at20 °C/68 °F), mains operation possible DisplaySegment display Supported printer 0554 0549/0554 0547 License acc. to EN 50543WarrantyInstrument: 24 months Battery: 12 months CO sensor: 12 months CO 2 sensor: 12 monthsWarranty conditions: see website /warranty EC Directive2014/30/EC3.2.4. Bluetooth ® module (option)• Bluetooth ® type: BlueNiceCom IV• Bluetooth ® product note: BNC4_HW2x_SW2xx3 Specifications8• Bluetooth® identification: B013784• Bluetooth® company: 10274• Coverage: < 10 mCertificationBelgium (BE), Bulgaria (BG), Denmark (DK), Germany (DE), Estonia (EE), Finland (FI), France (FR), Greece (GR), Ireland (IE), Italy (IT), Latvia (LV), Lithuania (LT), Luxembourg (LU), Malta (MT), Netherlands (NL), Austria (AT), Poland (PL), Portugal (PT), Romania (RO), Sweden (SE), Slovakia (SK), Slovenia (SI), Spain (ES), Czech Republic (CZ), Hungary (HU), United Kingdom (GB), Republic of Cyprus (CY).Iceland (IS), Liechtenstein (LI), Norway (NO) and Switzerland (CH).Turkey (TR), El Salvador (SV), Columbia (CO)4 Product description94Product description4.1.Overview4.1.1.Control elements and connections1 Connection for temperature/humidity module (optional)2 IR interface, record printer 3CO sensor module4CO 2 sensor module (back) 5 Display 6 Keyboard7 Reset button (back) 8USB mains unit socket4 Product description10Temperature/humidity module option9 Temperature/humidity sensor10 Connection for temperature/humidity module to the testo 315-3 Key functionsButton Duration Status FunctionShortReading display • Holds measuringvalues• Displays maximumvalues• Displays minimumvalues• Displays currentvaluesConfigurationmodeConfirms entry, nextsettingLongReading display(current value)Opens configurationmodeReading display(maximumvalue/minimumvalue/hold value)Resets maximumvalue, minimum value,hold valueConfigurationmodeExits configurationmode (changes arestored)ShortInstrument is off Switches instrumentonInstrument is on Switches on displayillumination/switchesoff display illuminationThe displayilluminationswitches offafter 3 minutesif no keys arepressed.Long Instrument is on Switches instrumentoff4 Product descriptionButtonDuration StatusFunctionShort Reading display,only if humiditymodule isconnected• Displays humidityand temperature• Displays dewpoint/temperature• Displays CO/CO2 ConfigurationmodeChangesoption/increases valueLong Reading display Sets zeropoint/deletes zeropoint ConfigurationmodeIncreases valuequicklyShort Reading display Prints data ConfigurationmodeChangesoption/decreasesvalueLong Reading display Switches on datatransfer mode via IrDaor Bluetooth®(optional) / switchesoff data transfer modevia IrDa or Bluetooth®(optional) ConfigurationmodeDecreases valuequickly4 Product description4.1.2. Display1 Status informationIconFunctionBattery capacity: 100% / 66% / 33%, <10%Micro USB mains unit is connected.Alarm off, alarm onFlashes: the alarm threshold is exceededData transferData transfer enabledLights up: information Flashes: error messageDifferential measurement calibration Flashes: adjust CO 2 sensor in fresh air.CO 2 sensor should be adjusted in fresh air after 120 operating hours.2 Measuring functions3 Display of CO measuring value, humidity, dew point, date (dayand month), hours and minutes, measurement parameter 4 Display of CO 2 measuring value, adjustment value, temperature, year, measurement parameter.5 Settings4 Product description4.2.Basic propertiesPower supplyPower is supplied to the testo 315-3 via:• Rech. batt., type: Li-Po rechargeable battery pack, 3.7 V/1,500 mAh (can be replaced via Testo Service)• USB mains unit inc. cable (0554 1105), 5,0 V/1.000 mAhWith an attached mains unit, power is supplied automatically viathe mains unit and the instrument's rechargeable battery ischarged. To avoid destroying the rechargeable battery, only chargeit at an ambient temperature of 0 to 45 °C/32 to 113 °F.5 First steps5First stepsSwitching onConnect the humidity/temperature module (0636 9725)before switching the instrument on (option).1. Switch the instrument on: press [] briefly.- All segments of the display light up for around 1 s.- The warm-up phase then occurs for 30 s. (information indisplay: warm-up).During first commissioning, the configuration menu isopened automatically, see Settings.- The current measurement values are displayed. The instrument is operational.The measurement value of the CO sensor is displayedin the upper line.The measurement value of the CO2 sensor is displayedin the lower line.Switching off2. Switch off the instrument: press and hold down [].6 Using the product6Using the product6.1.Performing settingsOpening the configuration menu✓The instrument is in measurement view.> Open configuration menu: press and hold down [] untilconfiguration mode appears.Selecting, opening and setting functions> To select the next function: press [] / [] briefly.> To enable the selected function: press [] briefly.> To adjust the open function: press [] / [] briefly.> To cancel the function: press [] briefly until the displaychanges.Adjustable functionsEnsure correct settings: all settings are transferredimmediately. There is no Cancel function.Settings and display of temperature and humidity are onlypossible if the humidity module was connected beforeswitching on.Function Setting options/commentsalarm off or onon selected:• Enables/disables acoustic signal• Sets CO limiting value• Sets CO2 limiting valueauto-off off or onon selected:Sets valuedate Sets year, month, daytime off or on selectedSelects 24h or am or pm format, sets hoursand minutesunit CO2: Vol% or ppmtemp./dewpoint: °F, °C/°Ftd, °Ctd6 Using the productFunction Setting options/commentscalibration CO2yes (adjust)or no (do not adjust)yes selected:CO2 value is adjusted to the nominal valueand stored (only possible with a current CO2value < 650 ppm)The calibration/adjustment must becarried out in fresh air that has anormal CO2 concentration ofapprox. 400 ppm.To avoid incorrect calibra-tion/adjustment values, calibrationshould, for example, not be carriedout on busy roads or in closed rooms.Ensure that, before and during thecalibration/adjustment, no exhaled airreaches the instrument.Before completing the adjustment, theinstrument should be left in the freshair for 3-4 minutes.calibrationhumidityyes or noyes selected:Humidity values are aligned to the alignmentpoints 11.3 % RH and 75.3 % RH and saved.To adjust to the alignment points, usethe testo Control and alignment setfor humidity sensors (0554 0660).> Cancel configuration menu: press and hold down [] untilconfiguration mode display switches to the measurementview.6.2.Measuring✓testo 315-3 is on.- Display of the current CO and CO2 measuring values.Switching to humidity, temperature and dew point value isonly possible if a humidity/temperature module isconnected.> Display humidity and temperature value: press [] briefly.6 Using the product> Display dew point: press [] briefly.Delta measurement✓testo 315-3 for CO and CO2 is in the measurement view.> Call up Delta measurement menu: press [] until the display changes.- Delta measurement is carried out ([] lights up). The current measuring values are zeroed as a reference.> To cancel the function: press and hold down [] until thedisplay switches to the measurement view.Hold/Max/Min✓testo 315-3 is in measurement view.The measuring values for Hold/Max/Min can be called up for:• CO and CO2• Temperature and humidity (if temperature and humidity module is connected)• Dew point (if temperature and humidity module is connected)> Call up Hold function: press [] briefly.- The current measuring values are held.> Call up Max function: press [] briefly.- The maximum measuring values are displayed.> Call up Min function: press [] briefly.- The minimum measuring values are displayed.> Set Hold/Max/Min values to the current value: press and hold down [].- Measuring values flash several times and are updated.6.3.Printing the measurement results✓testo 315-3 is on.> Call up Print function: press [] briefly.- The data is transferred to the printer via the IrDA interface.- [] lights up.7 Maintaining the product6.4.Bluetooth® and IrDA data transferData is transferred via Bluetooth® if both instruments havethis interface. Otherwise, data is transferred via the IrDAinterface.Data can currently be transferred to the following testo measuringinstruments:• testo 330 (0632 3306 / 0632 3307) from firmware version V1.11• testo 330 (0632 3304 / 0632 3305) from firmware version V1.63✓testo 315-3 is on and a measurement has been carried out.> Switch on data transfer: press and hold down [].- [] lights up. Data is transferred.Please refer to the operating instructions for the relevanttesto measuring instrument.7Maintaining the productCharging the rechargeable battery1. Connect the mains unit connector to the instrument's microUSB socket.2. Connect the mains plug to the mains socket.The charging process will start automatically. Charging is indicatedby a change in the battery icon segments. lights up when thebattery is fully charged.Cleaning the instrumentDo not use any aggressive cleaning agents or solvents! Mildhousehold cleaning agents and soap suds may be used.8 Tips and assistance8Tips and assistance8.1.Questions and answersQuestionPossible causes/solutionsflashes and E145 lights up The instrument temperature is outside the permissible range:> Let the instrument warm up or cool down.flashes and E161 lights uporflashes and E419 lights uporflashes and E999 lights up A serious error has occurred:> Contact your dealer or the Testo Customer Service.flashes and E290 lights up The current CO2 measuring value is too high for an adjustment: Acknowledge the error message with [Hold/Max/Min] and carry out theadjustment again in fresh air (CO2measuring value < 650 ppm).flashes and E420 lights up Fan is blocked> Please check if any item sticks in the ventilation slot on the back ofthe instrument. After 90 seconds, the fan is started again.> If there is nothing directly visible, please contact your dealer or theTesto Customer Service., calibration and CO2 flash CO2 sensor must be adjusted> Adjust CO2 sensor in fresh air.flashes Battery capacity too low> Connect the mains unit.8 Tips and assistanceQuestion Possible causes/solutionsand flash, E401lights up Rechargeable battery is empty,instrument will soon switch off automatically.> Connect the mains unit (the warning can be deleted with [Hold/Max/Min]).and flash Recharging the battery is impossible:> Contact your dealer or the Testo Customer Service.Can the battery be replaced?The battery cannot be replaced.> Contact your dealer or the Testo Customer Service. Can the battery be charged via the USB port of a laptop or PC?The battery cannot be charged. Can Bluetooth ® be retrofitted?Bluetooth ® functionality cannot be retrofitted. Can humidity, temperature and dew point measurements be carried out?Humidity, temperature and dew point measurements are possible with the temperature/humidity module (accessory). The display is illuminated also after the testo 315 - 3 is switched off The display illumination goes out as soon as the instrument has shut down. While the display is illuminated, the instrument cannot be switched on. The CO 2 measuring value is displayed as 0000The current measuring value is over 10,000 ppm. The CO2 reading is implausible. The gas opening on the back of the instrument might be covered. This means that a correct CO2 measurement is not possible.If we could not answer your question or the solutions given during troubleshooting did not help: please contact your dealer or Testo Customer Service. Contact data see back of this document or website /service-contact .8 Tips and assistance218.2. Calibration intervalTesto recommends that calibration of the measuring instrument is carried out once a year by Testo Customer Service or a service centre authorised by Testo.8.3. Accessories and spare partsDescription Article no. testo 315-3 without Bluetooth ® (incl. micro USB mains unit, cable USB A - USB micro B)0632 3153 testo 315-3 with Bluetooth ® (incl. micro USB mains unit, cable USB A - USB micro B)0632 3154 Temperature/humidity module0636 9725 Topsafe0516 0223 USB mains unit inc. cable0554 1105 Basic printer0554 0549 Spare printer paper (6 rolls) 0554 0568 Control and calibration set for humidity sensors (11.3 %RH and 75.3 %RH)0554 06600970 3153 en 04。
Fluke 435 操作说明书(图文演示)
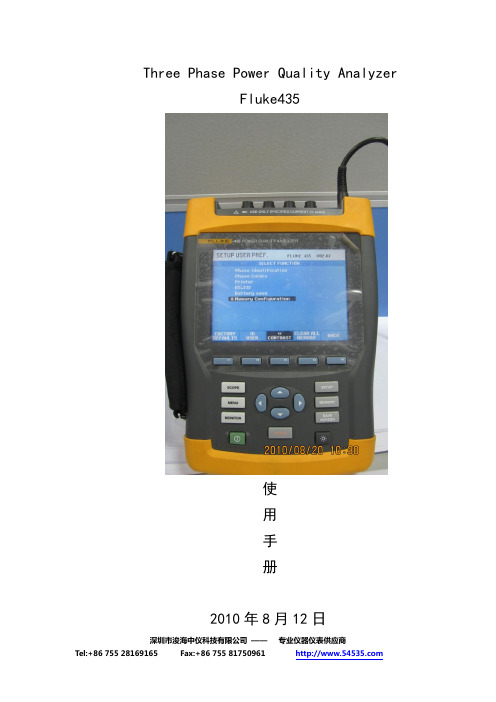
Three Phase Power Quality AnalyzerFluke435使用手册2010年8月12日Fluke整体介绍1测量范围:1.1电压输入:a)最大输入电压:1000Vrmsb)标称电压范围:50至500V,内部分为三个范围:500V、250V、125Vc)最大峰值电压:6KVd)输入阻抗:4MΩ//5PF1.2 电流输入:a)输入范围:用仪表附带的电流夹i5s,1至5Arms;用可选电流夹i430flex-4pk,0.1至3000 Armsb)输入阻抗:50KΩ1.1.2标称频率:40…70Hz1.2菜单功能介绍:Fluke435菜单主要有SETUP、SCOPE、MENU、MONITOR、MEMORY、SAVE SCREEN1.2.1对测试仪进行设置:使用设置(SETUP)功能1.2.2检查电压导线和电流线夹是否正确连接:使用示波器波形(ScopeWaveform)和示波相量(Scope Phasor)功能1.2.3查看电力系统的各项数据:使用菜单(MENU)功能1.2.4对测试仪数据集进行内存管理:使用内存(MEMORY0)功能1.2.5对电力系统电能质量有一个总体了解:使用检测(MONITOR)功能。
1.2.6 制作屏幕画面:使用制作屏幕画面(SAVE SCREEN)功能打开测试仪,会出现一个开机欢迎屏幕:按F1键可查看测试仪设置的系统接线方式2.1设置测试仪:点击SETUP键,进入设置菜单界面我们按照设置菜单界面选项按从上到下的界面进行设置。
2.1.1 User用户参数选择:按F4键进入测用户参数选择菜单。
a)相位标记(Phase Identification):使用下/下箭头键来选择A、B、C 或 L1、L2、L3。
按功能键 F5 –确定(OK)来确认。
b)相位颜色(Phase Colors)使用功能键F1 至F4 来依照在美国、欧盟、英国使用或依照IEC 选择颜色。
数据中心的第三方验证测试
数据中心的第三方验证测试毛向荣陈晓童冯园园 / 上海市计量测试技术研究院【期刊名称】上海计量测试【年(卷),期】2014(000)002【总页数】30 引言数据中心是电子信息技术所需的基础设施,从现有的互联网、电信网、广电网等到即将组建的物联网,电子信息的传输、运算和存储都离不开数据中心的支持。
随着信息技术的不断发展,数据中心机房设施的规划、设计、选型和施工成为一项极其繁杂的系统工程,所以只有理论知识渊博、技术经验丰富的专业数据中心测试人员,借助先进的测试仪器,才能发现潜在的施工瑕疵及机房安全隐患,保证机房符合标准,保障IT设备的高可用性与高可靠性。
第三方验证测试作为审核数据中心运行环境质量的主要手段,其重要性尤为突出。
1 主要内容第三方验证测试作为数据中心验证验收的核心部分,承担着发现系统偏差、系统风险、系统隐患的重要任务。
主要的工作内容包括:第一阶段,测试准备阶段;第二阶段,数据中心单元模块的功能验证测试;第三阶段:数据中心整体的联动验证测试;第四阶段:数据中心环境验证测试。
1.1 数据中心验证测试准备阶段主要是测试方案和计划的初步设计、逐步深化的过程。
准备工作阶段是整个验证测试的前提和基础,直接关系到验证测试方案是否合理、全面,以及后续测试过程是否顺利,测试效果是否理想。
准备阶段工作主要内容包括:现场勘查,了解现场实际施工情况,明确满足测试条件的配套措施;查看设计单位制定的设计文档,为测试方案做技术准备;制定测试与调试说明文件和方案;审核并批准主要设备厂商提供的设备出厂测试资料,核查设备出厂测试数据是否符合测试要求;通过建设单位安排专题会议,与施工团队讨论测试计划、测试范围、协调未来工作安排和问题等方面内容;通过实地勘查现场,逐步细化、完善验证测试方案,落实验证测试的计划。
1.2 数据中心单元模块的功能测试目的是验证单元模块的测试是对各系统基础功能是否实现,并满足设计的标准要求。
单元模块功能测试是后续数据中心整体联合测试的基础,也是整个验证测试成败的关键。
CRH380B高寒型动车组牵引变流器冷却单元功率测试

CRH380B高寒型动车组牵引变流器冷却单元功率测试马昭钰【摘要】根据工业散热器热交换原理特性,建立了冷却系统功率测试平台,基于热量交换公式,设计出一套能够实际测量动车组牵引变流器冷却单元冷却功率的试验平台。
研究冷却系统不同工况下的影响,进而提出了一种准确的冷却功率计算方法。
将此方法应用于某动车组牵引变流器冷却单元实际功率的测量中,结果表明实际测量值能够满足车辆运行的需要,可广泛应用于动车组牵引变流冷却单元散热功率的测量。
%According to the industrial radiator heat exchange principle,a cooling system power testing platform which can actually measure the cooling power of EMU traction converter is established based on the heat exchange formula.A precise method to calculate the cooling power is presented by analyzing the cooling system under different conditions.The method is applied to measuring the actual power of the cooling system of the particular EMU traction converter.The result shows that the actual measured value can meet the requirement of vehicles and the method can be widely used in the cooling power measure-ment of the cooling system of EMU traction converter.【期刊名称】《兰州交通大学学报》【年(卷),期】2014(000)006【总页数】3页(P145-147)【关键词】牵引变流器;冷却单元;散热【作者】马昭钰【作者单位】长春轨道客车股份有限公司铁路客车开发部,吉林长春 130062【正文语种】中文【中图分类】U269近年来随着高铁的发展,车辆的速度变得越来越快,给人们带来了便捷、舒适的旅程.因为随着车辆速度的增加,牵引系统的功率变得越来越大,大功率牵引部件的散热就成为了设计者不得不考虑的问题.随着列车速度的增加,列车表面负压急剧增加,空气流量减少,致使冷却风机工作效率将会下降,严重时会影响牵引变流器的散热.所以必须设计出一套大功率、可靠性强的冷却系统,以满足列车在高速运行时的散热需求.1 冷却单元工作原理CRH380B高寒动车组为4M4T编组形式,在每个动车上设有一个牵引变流器,每个牵引变流器配有一个冷却单元.冷却单元的冷却方式为水循环冷却,冷却液为乙二醇与去离子水的混合液,高寒动车组中牵引变流器冷却液中乙二醇与去离子水比例为56%:44%.冷却单元吊装在车体上紧靠牵引变流器.牵引变流器冷却单元工作原理为冷却介质由水泵泵往主变流器外的热交换器,冷却介质经由热交换器冷却后流回主变流器,流入并行连接的牵引变流器所有的功率模块,与功率模块的散热板进行热量交换;然后由泵泵出,再由水泵泵往热交换器,如此循环往复[1].此外在冷却单元内还有膨胀水箱、压力传感器、温度传感器等保护和检查装置.依据牵引变流器冷却单元的工作原理,整个牵引变流器冷却系统的性能主要取决于热交换器散热的效果.高寒动车组冷却循环系统效果图如图1所示.图1 CRH380B高寒车牵引变流器冷却单元循环散热效果图Fig.1 The circulating cooling effect diagram of cooling unit of CRH380BLTT Traction converters 2 试验研究2.1 试验台搭建冷却单元试验台主要有以下几个部分组成,待测冷却单元,冷却液加热源,体积流量测量设备,上位机,压力传感器,温度传感器等.试验原理是通过冷却单元自身循环带动整个循环散热系统工作,将冷却单元流出的冷却液进行加热,经过一套热源装置使冷却液升温,来模拟牵引变流器所产生的热量,通过冷却单元散热器将热量通过冷却风机散发到空气中去[2].冷却液循环试验如图2所示.试验中所用的各主要测试仪器及设备见表1所示.图2 冷却单元冷却液循环试验Fig.2 Coolant circulating test of cooling unit 冷却单元的散热量是根据牵引变流器在不同工况下能够产生最大热量的多少来最终确定[3].按照CRH380B高寒车牵引变流器在最高时速时产生的热量,以及在实际运行中散热效率和列车运行负压带来的影响等综合分析后,得出此冷却系统的冷却功率在海拔1 500m处工作时应不小于67kW,67kW是冷却系统能否满足实际要求的一个重要依据[4].数据处理系统包括数据采集、信号处理及数据分析系统[5],如图3所示.表1 测量仪器与设备Tab.1 Measuring instruments and equipment设备名称型号测量范围精度数量温度传感器 PT100 0~100℃ ±0.8℃ 8热电偶 K -40~100℃±0.8℃ 18流速计 MAG60 25l/s ±0.5% 1差压计 P903VG 0~10bar ≤1% 2风速计 Testo435 0~20m·s-12% 1图3 数据处理系统Fig.3 Data processing system2.2 冷却单元冷却效率计算CRH380B高寒车牵引变流器冷却单元功率测试的理论依据为单位时间内由冷却液所带走的热量为冷却单元的功率,即:由式(2)可以推导出:由式(2)和式(3)可以得出:其中:Q为冷却液散发热量;P为冷却单元功率;Cl为冷却液的比热;ρl为冷却液密度;Ml为冷却液质量;ΔT为进出口液体温度差;v为冷却液流速.由式(4)可知,要实现冷却单元功率的测量就需要冷却液的比热、密度、流速及进出口温度差值.因此需要在冷却单元的进出口处,设有温度传感器.冷却液密度随温度增高而变小,实际密度将根据通用乙二醇冷却液密度表进行准确选取,以确保试验的准确性.在循环的管路里设有流速计,并将数据及时送入上位机.2.3 散热功率试验试验的理论基础并不是很复杂,然而在实际的操作中,影响到试验的准确性还有其他因素[6].如:冷却液的密度随温度的增高而改变、冷却液的比热随温度增高而改变、空气密度、空气温度.此外列车在实际运行中产生的负压,污染等因素都是影响到冷却单元性能的重要因素[7-8].尤其是列车在高速运行时产生的负压有时严重影响新风的进气量,从而影响冷却效果.鉴于此为了让冷却单元能够更接近真实情况,本试验采用了3种不同工况.工况1:300 Pa外压,无污染;工况2:350Pa外压,10%污染;工况3:700Pa外压,10%污染;模拟污染等级则采用遮挡进风口面积的比例来选取,进风口被遮挡的面积越多则表明污染越严重,在本次试验中采用方法是使用胶条对进风口过滤器进行粘贴遮挡的办法.具体试验结果如表2所示.表2 不同工况下的冷却功率试验结果Tab.2 The test result of cooling power under different conditions试验次数1 2 3进风口温度/℃27.93 23.46 26.3冷却液入口温度/℃ 51.47 46.64 47.63冷却液出口温度/℃ 44.18 39.4841.39平均温度/℃ 47.83 43.06 44.51冷却液体积流量/s-1 3.29 3.28 3.3冷却液密度/(kg·m-3) 1 059 1 062 1 060比热容/(J·(kgK)-1) 3 515 3 500 3 510海拔1 500m下实际功率/kW 76 74 71试验结果表明无论是哪种工况下,冷却单元的冷却功率都高于要求的67kW,故此冷却单元能够满足CRH380B高寒车牵引变流器所需的散热功率.3 结论本文结合CRH380B高寒型动车组牵引传动系统热特性,研制出牵引变流器热冷却单元测试平台,对各种不同运行条件下牵引变流器冷却系统的功率进行了准确的测量.测试结果表明:CRH380B高寒型高速动车组在复杂条件下,牵引变流器的冷却系统能够满足动车组以300km·h-1持续运行的要求.【相关文献】[1]刘建强,郑琼林,郭超勇,等.高速动车组牵引变流器热容量[J].电工技术学报,2011,26(10):205-210.[2]郭晓燕,张波,黄金.城铁列车牵引系统集成设计技术研究[J].铁道机车车辆,2013,33(3):56-62.[3]董焕彬,林范坤,陈乐恒.CRH3型高速动车组牵引变流器冷却系统试验研究[J].电力机车与城轨车辆,2012,35(6):28-30.[4]王业峰,白军,梁雪.牵引变流器中IGBT的水冷实验研究[J].甘肃科技,2011,27(23):51-53.[5]刘俊杰.交流传动八轴9600kW货运机车冷却系统研究[J].内燃机车,2013(6):1-4. [6]董雪婷,黄超.大功率交流传动电力机车牵引特性分析[J].兰州交通大学学报,2010,29(1):90-94.[7]邓学寿,肖石.高速动车组牵引传动跟踪测试系统的研究与应用[J].机车电传动,2011(6):13-16.[8]王晶,孔丽君,刘俊杰,等.高速动车组冷却单元故障模式分析及预防[J].内燃机车,2013(6):22-25.。
- 1、下载文档前请自行甄别文档内容的完整性,平台不提供额外的编辑、内容补充、找答案等附加服务。
- 2、"仅部分预览"的文档,不可在线预览部分如存在完整性等问题,可反馈申请退款(可完整预览的文档不适用该条件!)。
- 3、如文档侵犯您的权益,请联系客服反馈,我们会尽快为您处理(人工客服工作时间:9:00-18:30)。
testo 435-4多功能测量仪,带内置式差 压测量,适用于空调通风系统,可检测 室内空气质量,带有电池和出厂报告, 带有数据存储器、PC软件和USB数据 线。
订货号 0563 4354
435-1/-2/-3/-4
工作温度 -20 ~ +50°C
存放温度 -30 ~ +70°C
0 ~ +500 ppm CO
±5%测量值(+100. 1~ +500 ppm CO) ±5 ppm CO(0 ~ +100ppm CO)
0632 1535 0632 1235
风速探头(435-1/-2/-3/-4)
热敏风速探头,带内置式温 度和湿度测量,Φ12mm, 带伸缩式手柄(max.745mm)
叶轮风速探头,直径16mm, 带伸缩式手柄(max.890mm), 例如测量管道风速
叶轮风速探头,直径100mm, 可配风量罩0563 4170
叶轮风速探头,直径60mm, 带伸缩式手柄(max.910 mm), 例如测量出风口 热线风速探头,测量风速和 湿度,探头尖端直径7.5mm, 带伸缩式手柄(max.820mm)
testo 435-3
·内置差压探头
testo 435-3多功能测量仪,带内置式差 压测量,适用于空调通风系统,可检测 室内空气质量,带有电池和出厂报告。
订货号 0560 4351
订货号 0563 4352
订货号 0560 4353
探头类型 量程
435-1/-2/-3/-4
NTC
-50 ~ +150°C
testo 435 可在现场无线传输数据至德图打印。测量时间和地点可以 和测量数据同时打印。
2
技术参数
testo 435-1
testo 435-1多功能测量仪,适用于空调 通风系统,可检测室内空气质量,带有 电池和出厂报告。
testo 435-2
·带存储,含软件
testo 435-2多功能测量仪,适用于空调 通风系统,可检测室内空气质量,带有 电池和出厂报告,带有数据存储器、 PC软件和USB数据线。
优势所在: 使用多功能测量仪 testo 435,您能方 便的现场测量任何墙体结构的U值。
6. 可靠的测量数据管理
testo 435 具备了强大的测量数据处理功能,可在电脑上运用专业的 测量软件进行管理,或者利用便携式德图打印机来现场打印数据。
测量报告为用户提供了通风管道,日期和紊流度等数据,还可将公 司标识导入报告里。testo 435-2/-4与相应软件配套使用,实现了连 接电脑进行数据处理的功能。
3. testo 435 用于出风口测量
仅需将叶轮式探头 ( 100mm) 连接到风量罩上, testo 435 测量仪就能自动地显示出风口的风量。 这都归功于testo 435 拥有完整的风量罩因数。
通过使用testo 435 进行出风口测量,您能对各 个出风口的风量有效的进行设置。
优势所在: 多功能测量仪 testo 435 能通过所测的 风速直接计算相应的风量。
200 h (以叶轮测量为例)
尺寸
225 x 74 x 46 mm
可连接探头
室内空气品质探头,用于测量CO2、空气温度、空气湿度和绝对压力 热敏式风速探头(温湿度、风速)
testo 435-1
testo 435-2
testo 435-3
叶轮和热线探头
温度探头,刺入式/空气式/表面式
环境一氧化碳CO探头
优势所在: 多功能测量仪能根据您的测量需求 提供给您最便捷的测量途径。
2. testo 435 用于压差测量
楼宇的通风系统是否正常运作?洁净室的压 力环境是否已调节到正确的范围内?
您仅需简单的连接上硅胶软管,就能立即读 取 0 到 25 hPa 范围内的压差。
优势所在: 多功能测量仪 testo 435 拥有功能强大的内 置压差探头,这意味着,您无需再使用其他 的探头或者连接件。
testo 435 多功能测量仪
空调通风系统和室内空气品质全面解决方案
适合各种应用的探头选配
°C
·室内空气品质探头(CO2 , CO)
·热敏式风速探头(温湿度、风速)
%RH
·叶轮风速叶轮探头
·内置式差压探头,连接皮托管可测风速
m/s
友好的用户界面,易于操作
hPa
专业软件分析,可靠的数据管理
ppm CO2
K型(NiCr-Ni) -200 ~ +1,370°C
435-3/-4
内置式差压探头
0 ~ +25hPa
435-2/-4
照度
0 ~ +100,000 Lux
精度
±0.2°C (-25 ~ +74.9°C) ±0.3°C (-60 ~ +60°C) ±0.02 hPa (0 ~ +2 hPa)
±1数位
打印机和选件
德图打印机,带红外接口,一卷热敏打印纸和4节AA 的电池,用于现场打印读数 备用热敏打印纸(6卷),测量数据文件能维持10年的清晰 备用热敏打印纸(6卷) 充电器,包括4块Ni-MH充电电池,带有内置式电源适配器
标定证书
ISO标定证书/温度;连接表面探头的温度仪, 标定点:+60°C; +120°C; +180°C ISO标定证书/湿度;温湿度仪; 标定点:11.3%RH和75.3%RH,在+25°C ISO标定证书/压力,差压,5点标定(全量程分布)
订货号
0516 0035 0516 0435
订货号
0563 4170 0554 0410 0554 0415 0554 0447 0554 0761 0554 0440 0430 9735 0554 0660 0554 0756 0554 0647
订货号
0554 0549 0554 0568 0554 0569 0554 0610
订货号
0520 0071 0520 0006 0520 0005
0520 0024 0520 0004 0520 0034 0520 0010 0520 0033
4
探头一览
*t 99:响应时间
探头种类
图表 量程 精度 t 99 订货号
Lux
多功能性
testo 435 是空调通风系统安装与调试的理想工具。该款多功能测量仪器适用于现场检测空调 通风系统的温湿度、压力、风速等 多项参数,确保系统处于最佳工况,既满足设定要求,又能 达到节约能耗的效果。
可靠的数据管理
通过PC软件,可实现数据的分析管理。testo 435-1 和 testo 435-3 可以用德图打印机周期性地 打印测量数据。
绝压探头(435-1/-2/-3/-4)
绝压探头,2,000 hPa
-20 ~ +70°C 0 ~ +100%RH 0 ~ +20m/s
±0.3°C ±2%RH(+2 ~ +98%RH) ±(0.03m/s+4%测量值)
+0.6 ~ +40m/s
±(0.2m/s+1.5%测量值)
操作温度:0 ~ 60°C
1
4. testo 435 用于舒适度测量
对室内环境进行快速测量,来评估室内的舒适度是 否达到规定的等级,倒如室内CO2浓度、室内湿度、 温度、绝对压力以及光照度:使用 testo 435 就能 完成所有的测量。
您仅需使用一个多功能探头 (CO2, %RH, C,绝对 压力) 以及一个紊流度探头和一个光照度探头就能 完成上述测量。
绝对压力探头
内置差压测量,配皮托管测量风速
舒适度探头,用于测量紊流度,评估室内吹风感舒适度
湿度探头,用于测量空气温度和湿度
光照度探头,用于测Leabharlann 光照度传热系数(U值 )探头
testo 435-4
仪器功能
背光显示 连接testo红外打印机,现场打印数据(选配) 带存储,可储存10,000个测量值 专业软件,用于分析、存档和记录读数
+0.3 ~ +20m/s 0 ~ 50°C
±(0.1m/s+1.5%测量值) ±0.5°C
+0.25 ~ +20 m/s
±(0.1m/s+1.5%测量值)
操作温度: 0 ~ 60°C
0 ~ +20m/s -20 ~ +70°C
±(0.03m/s+5%测量值) ±0.3°C(-20 ~ +70°C)
ISO标定证书风速,热线,叶轮风速仪; 标定点:0.5; 0.8; 1; 1.5 m/s ISO标定证书风速,热线,叶轮风速仪;皮托管; 标定点:1; 2; 5; 10 m/s ISO标定证书风速,热线,叶轮风速仪; 标定点:5; 10; 15; 20 m/s ISO标定证书/照度探头, 标定点:500; 1000; 2000 Lux ISO标定证书/CO2探头, 标定点:0; 1000; 5000 ppm
±0.4°C (-40 ~ -25.1°C) ±0.4°C (+75 ~ +99.9°C)
±(0.2°C + 0.3% 测量值) 1% 测量值(其余量程) (其余量程)
分辨率
±0.5% 测量值 (其余量程)
0.1°C
0.1°C
0.01 hPa
1Lux / 0.1Hz
过载
200 hPa
testo 435-4
60s
0613 1712
探头一览
*t 99:响应时间
探头种类
图表 量程 精度 t 99 订货号
testo 435 多功能测量仪
适用于建筑,空调通风系统中的各种测量应用
