翰宇Hannstar HQ191D液晶彩显图
瀚视奇Hannstar HW191A液晶彩显图纸
R437 R401
R438
3.9K 1/16W
10K 1/16W
3.9K 1/16W
MCU_VCC
2006-12-8 change R437,R401 from 10K to 3.9K
2007-1/18 change X401 to 75 Degree
1
1
2
R311 100R 1/16W DSUB_CONNECT {4}
ZD305 UDZS5.6B
1
1
2 3 VGA_R+
1 2
3 VGA_G+ 1 2
3 VGA_B+ 1
D301 BAV99
D302 BAV99
D303 BAV99
CMVCC
C315 0.1uF/16V
Page No. Revision
MCU_VCC
VCC3
MCU_VCC_S
C405 +
C406
R454 R453
10uF/50V 0.1uF/16V R451 R413 R414
MCU_VCC
R411 4K7 1/16W
R412 4K7 1/16W
IICSDA IICSCL WP RTD_SD3/SDI RTD_SCLK
RTD_SD3/SDI {5} RTD_SCLK {5}
AP1117E33LA
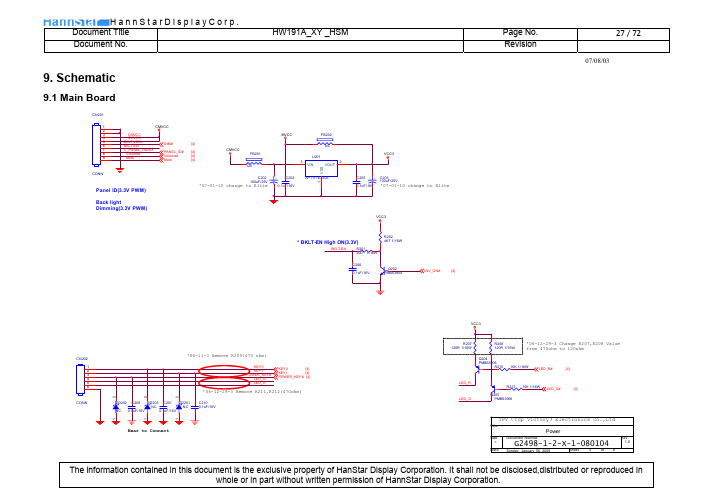
Back light Dimming(3.3V PWM)
VCC3
C205
+ C203 100uF/25V
0.1uF/16V '07-01-10 change to Elite
VCC3
* BKLT-EN High ON(3.3V)
BKLT-EN
HP PageWide Pro MFP 577dw系列用户指南说明书

用户指南版权与许可©2016 版权所有HP Development Company, L.P.保留所有权利。
除非版权法允许,否则在未经HP 预先书面许可的情况下,严禁转载、改编或翻译本手册的内容。
本文档包含的信息如有更改,恕不另行通知。
HP 产品与服务的全部保修条款在此类产品和服务附带的保修声明中均已列明。
此处内容不代表任何额外保修。
HP 对此处任何技术性或编辑性的错误或遗漏概不负责。
Edition 2016 年2 月1 日商标声明Adobe®、Acrobat®和PostScript®是 Adobe Systems Incorporated 的商标。
Intel® Core™ 是Intel Corporation 在美国和其它国家/地区的商标。
Java™ 是Sun Microsystems, Inc. 在美国的商标。
Microsoft®、Windows®、Windows® XP 和Windows Vista® 是Microsoft Corporation 在美国的注册商标。
UNIX®是The Open Group 的注册商标。
能源之星和能源之星标记是美国环保署拥有的注册商标。
目录1产品基本信息 (1)产品功能 (2)环境功能 (2)辅助功能 (3)产品视图 (4)左前视图 (4)右前视图 (5)后视图 (5)墨盒门视图 (6)开机/关机 (7)打开产品电源 (7)管理电源 (7)关闭产品电源 (8)使用控制面板 (9)控制面板按钮 (9)控制面板主屏幕 (10)控制面板仪表板 (10)控制面板的应用程序文件夹 (11)控制面板快捷方式 (11)帮助功能 (12)打印机信息 (12)帮助动画 (13)安静模式 (14)从控制面板打开或关闭安静模式 (14)从EWS 打开或关闭安静模式 (14)2连接产品 (15)将产品接入计算机或网络 (16)使用USB 电缆连接产品 (16)将产品连接到网络 (16)支持的网络协议 (16)ZHCN iii使用有线网络连接产品 (17)使用无线网络(仅限无线型号)连接产品 (17)使用WiFi 设置向导将产品连接到无线网络 (18)使用WPS 将产品连接至无线网络 (18)手动将产品连接至无线网络 (19)使用Wi-Fi Direct 将计算机或设备连接至产品 (20)打开Wi-Fi Direct (20)从具有无线功能的移动设备打印 (20)从具有无线功能的计算机进行打印(Windows) (20)从具有无线功能的计算机进行打印(OS X) (20)为已接入网络的无线产品安装HP 打印机软件 (23)打开打印机软件(Windows) (24)管理网络设置 (25)查看或更改网络设置 (25)设置或更改产品密码 (25)在控制面板中手动配置TCP/IP 参数 (25)链路速度和双工设置 (26)3打印机管理和服务 (27)HP 嵌入式Web 服务器(EWS) (28)关于EWS (28)关于cookie (28)启动EWS (29)功能 (29)主页选项卡 (29)“扫描”选项卡 (30)“传真”选项卡 (31)“Web 服务”选项卡 (31)“网络”选项卡 (31)“工具”选项卡 (31)“设置”选项卡 (32)Web 服务 (33)何为Web 服务? (33)HP ePrint (33)打印应用程序 (33)设置Web 服务 (33)使用Web 服务 (34)HP ePrint (34)打印应用程序 (35)删除Web 服务 (35)iv ZHCNHP Web Jetadmin 软件 (37)产品安全功能 (38)安全声明 (38)防火墙 (38)安全性设置 (39)固件更新 (39)打印机软件(Windows) 中的HP Printer Assistant (40)打开HP Printer Assistant (40)功能 (40)Connected 选项卡。
Hannstar HG171A液晶显示器图纸

Model Name:HG171A Model No:HSG1033 17” Color TFT LCD DisplayCopyrightCopyright © 2006 by HannStar Corporation. All rights reserved. No part of this publication may be reproduced, transmitted, transcribed, stored in a retrieval system, or translated into anylanguage or computer language, in any form or by any means, electronic, mechanical, magnetic, optical, chemical, manual or otherwise, without the prior written permission of HannStar Corporation.DisclaimerHannStar makes no representations or warranties, either expressed or implied, with respect to the contents hereof and specifically disclaims any warranty of merchantability or fitness for any particular purpose. Further, HannStar reserves the right to revise this publication and to make changes from time to time in the contents hereof without obligation of HannStar to notify any person of such revision or changes.TrademarksOpt quest is a registered trademark of HannStar Corporation.HannStar is a registered trademark of HannStar Corporation.All other trademarks used within this document are the property of their respective owners.Revision HistoryRevision SM Editing Date ECR Number Description of Changes TPV Model A00 Sep.-10-08 First Version Release T7RHM5D8AWHZNCA01 Dec.-02-08 Add new BOM in item 16 T7RHM5DBAWZ3NNTABLE OF CONTENTS1. Dimensions 42. Precautions and Safety Notice 63.Monitor Specification 74.LCD Monitor Description 85.Operation Instruction 96. Input/output Specification 147. Mechanical Instructions 188. Block Diagram 219.Schematic 2710.PCB Layout 3541 11.Maintainability12 DDC Instruction 4713. White-Balance, Luminance adjustment 5314.Monitor Exploded View 5515. BOM List 5616.Different Parts List (65)1. Dimensions 1.1 Front View1.2 Back View1.3 Side View1.4 Bottom View2. Precautions and Safety NoticesProper service and repair is important to the safe, reliable operation of all AOC Company Equipment. The service procedures recommended by AOC and described in this service manual are effective methods of performing service operations. Some of these service operations require the use of tools specially designed for the purpose. The special tools should be used when and as recommended.It is important to note that this manual contains various CAUTIONS and NOTICES which should be carefully read in order to minimize the risk of personal injury to service personnel. The possibility exists that improper service methods may damage the equipment. It is also important to understand that these CAUTIONS and NOTICES ARE NOT EXHAUSTIVE. AOC could not possibly know, evaluate and advise the service trade of all conceivable ways in which service might be done or of the possible hazardous consequences of each way. Consequently, AOC has not undertaken any such broad evaluation. Accordingly, a servicer who uses a service procedure or tool which is not recommended by AOC must first satisfy himself thoroughly that neither his safety nor the safe operation of the equipment will be jeopardized by the service method selected.Hereafter throughout this manual, AOC Company will be referred to as AOC.WARNINGUse of substitute replacement parts, which do not have the same, specified safety characteristics may create shock, fire, or other hazards.Under no circumstances should the original design be modified or altered without written permission from AOC. AOC assumes no liability, express or implied, arising out of any unauthorized modification of design.Servicer assumes all liability.FOR PRODUCTS CONTAINING LASER:DANGER-Invisible laser radiation when open AVOID DIRECT EXPOSURE TO BEAM.CAUTION-Use of controls or adjustments or performance of procedures other than those specified herein may result in hazardous radiation exposure.CAUTION -The use of optical instruments with this product will increase eye hazard.TO ENSURE THE CONTINUED RELIABILITY OF THIS PRODUCT, USE ONLY ORIGINAL MANUFACTURER'S REPLACEMENT PARTS, WHICH ARE LISTED WITH THEIR PART NUMBERS IN THE PARTS LIST SECTION OF THIS SERVICE MANUAL.Take care during handling the LCD module with backlight unit.-Must mount the module using mounting holes arranged in four corners.-Do not press on the panel, edge of the frame strongly or electric shock as this will result in damage to the screen.-Do not scratch or press on the panel with any sharp objects, such as pencil or pen as this may result in damage to the panel.-Protect the module from the ESD as it may damage the electronic circuit (C-MOS).-Make certain that treatment person’s body is grounded through wristband.-Do not leave the module in high temperature and in areas of high humidity for a long time.-Avoid contact with water as it may a short circuit within the module.‐If the surface of panel becomes dirty, please wipe it off with a soft material. (Cleaning with a dirty or rough cloth may damage3. Monitor Specifications4. LCD Monitor DescriptionAssembly DescriptionThe LCD MONITOR will contain a main board, a power board, and a key board which house the flat panel control logic, brightness control logic and DDC.The power board will provide AC to DC Inverter voltage to drive the backlight of panel and the main board chips each voltage.5. Operating Instructions5.1 General InstructionsPress the power button to turn the monitor on or off. The control buttons are located in the front of the monitor.By changing these settings, the picture can be adjusted to your personal preferences.-The power cord should be connected.-Connect the video cable from the monitor to the video card.-Press the power button to turn on the monitor, the power indicator will light up.5.2 Control ButtonsFRONT PANEL CONTROL• Power Button:Press this button to switch ON/OFF of monitor’s power.• Power Indicator:Green — Power On mode.Orange — Power Saving mode.• MENU / ENTER:1. Turn the OSD menu on/off or return to the previous menu2. Exit OSD menu when in volume OSD status.• Adjust < >:1. Activates the volume control when the OSD is OFF.2. Navigate through adjustment icons when OSD is ON or adjust a function when function is activated.• A Button:• The OSD menu is used as ¡§confirmation¡¨ function during start-up. 2. Press and hold this button more than 3 seconds will start 「Auto Adjust」function when using VGA input only. (The auto adjustment function is used to optimize the 「horizontal position」, 「vertical position」,「clock」,and 「phase」.)NOTES:• Do not install the monitor in a location near heat sources such as radiators or air dusts, or in a place subject to direct sunlight, or excessive dust or mechanical vibration or shock.• Save the original shipping box and packing materials, as they will come in handy if you ever have to ship your monitor. • For maximum protection, repackage your monitor as it was originally packed at the factory.• To keep the monitor looking new, periodically clean it with a soft cloth. Stubborn stains may be removed with a cloth lightly dampened with a mild detergent solution. Never use strong solvents such as thinner, benzene, or abrasive cleaners, since these will damage the cabinet. As a safety precaution, always unplug the monitor before cleaning it. • Function Key Lock:Press the 「<」, 「>」 and the 「Menu」buttons simultaneously to enable the Function Key Lock. When the Function Key Lock is enabled, only the Power button is active. Press the 「<, 「>」 and the 「Menu」buttons simultaneously again to unlock the function keys.08/09/09 5.3 Adjusting the Picture08/09/0908/09/096. Input/output Specification 6.1 Input Signal Connector6.2 Factory Preset Display Modes6.3 Panel SpecificationHannStar Display model HSD170MGW1-B00 is a color active matrix thin film transistor(TFT) liquid crystal display (LCD) that uses amorphous silicon TFT as a switching device. This model is composed of a TFT LCD panel, a driving circuit and a back light system. This TFT LCD has a 17.0 inch diagonally measured active display area withXGA resolution (900 vertical by 1440 horizontal pixel array) and can display up to 16.2M (6-bit+FRC)colors.6.3.1 Features_ 17.0 WXGA+ for Monitor application_ High Resolution: 1440*900_ 2-ch LVDS interface system_ LCD Timing Controller_ Wide Viewing Angle_ RoHS compliance6.3.2 Display Characteristics6.3.3 Electrical Characteristics1. TFT LCD Module2. Backlight Unit6.3.4 Optical CharacteristicsMeasuring Condition_ Measuring surrounding: dark room_ Lamp current IBL: 7.5±0.1mA, lamp freq. FL=50 KHz, Inverter: TDK TBD315NR-1 _ VDD=5.0V, fV=60Hz_ Ambient temperature: 25±2oC_ 30min. Warm-up time.7. Mechanical Instructions08/09/0908/09/091) MCU initialize.2) Is the EPROM blank?3) Program the EPROM by default values.4) Get the PWM value of brightness from EPROM.5) Is the power key pressed?6) Clear all global flags.7) Are the AUTO and SELECT keys pressed?8) Enter factory mode.9) Save the power key status into EPROM.Turn on the LED and set it to green color.Scalar initializes.10) In standby mode?11) Update the lifetime of back light.12) Check the analog port, are there any signals coming?13) Does the scalar send out an interrupt request?14) Wake up the scalar.15) Are there any signals coming from analog port?16) Display "No connection Check Signal Cable" message. And go into standby mode after the message disappear.17) Program the scalar to be able to show the coming mode.18) Process the OSD display.19) Read the keyboard. Is the power key pressed?8.2 Electrical Block Diagram 8.2.1 Main Board8.2.2 Power/Inverter Board8.3 Mechanical Block Diagram 8.3.1 Assembly Block8.3.1 Disassembly Block08/09/09 9. Schematic9.1 Main BoardTSUM16FWR SCHEMATICXGA/SXGA LVDS OUTPUT08/09/095555555HG171A F B 47Monday , July 21, 2008715G2904-1D <称爹>02.InputG2904-1D-2-X -4-080728OEM MODEL Size Rev DateSheetofTPV MODEL PCB NAME 称爹T P V ( Top Victory Electronics Co . , Ltd. )Key Component絬 隔 瓜 絪 腹5555HG171A F B 77Monday , July 21, 2008715G2904-1D <称爹>05.PowerG2904-1D-2-X -4-080728OEM MODEL Size Rev DateSheetofTPV MODEL PCB NAME 称爹T P V ( Top Victory Electronics Co . , Ltd. )Key Component絬 隔 瓜 絪 腹4, 508/09/095HG171A F A 67Monday , July 21, 2008715G2904-1D <称爹>04.OutputG2904-1D-2-X-4-080728OEM MODEL Size Rev DateSheetofTPV MODEL PCB NAME 称爹T P V ( Top Victory Electronics Co . , Ltd. )Key Component絬 隔 瓜 絪 腹5PPWR_ON#508/09/09 9.2 Power Board08/09/0908/09/0908/09/09 10. PCB Layout10.1 Main Board08/09/0908/09/0908/09/0910.2 Power Board08/09/0908/09/09 10.3 key board11. Maintainability11.1 Equipments and Tools Requirement1. Voltmeter.2. Oscilloscope.3. Pattern Generator.4. DDC Tool with Compatible Computer.5. Alignment Tool.6. LCD Color Analyzer.7. Service Manual.8. User Manual.11.2 Trouble Shooting11.2.1 Main BoardNo powerNo picture (LED orange)08/09/09 White screen08/09/09 11.2.2 Power Board1) No power08/09/09 2.) No Backlight11.2.3 Key Board12. DDC InstructionGeneralDDC Data Re-programmingIn case the main EEPROM with Software DDC which store all factory settings were replaced because a defect, repaired monitor’ the serial numbers have to be re-programmed.It is advised to re- soldered the main EEPROM with Software DDC from the old board onto the new board if circuit board have been replaced, in this case the DDC data does not need to be re-programmed.Additional information about DDC (Display Data Channel) may be obtained from Video Electronics Standards Association (VESA). Extended Display Identification Data (EDID) information may be also obtained from VESA. 1. An i486 (or above) personal computer or compatible. 2. Microsoft operation system Windows 95/98/2000/XP . 3. “ PORT95NT.exe, WinDDC_ setup” program. 4. Software OSD SN Alignment kits The kit contents: a. OSD SN BOARD x1b.Printer cablex1c. VGA cable x1d. Digital cable x1e. 12V DC power source1. Install the “PORT95NT.EXE”, and restart the computer.2. Install the “WinDDC_ setup”3. Connect the DDC board as follow: (Take philips 190B8 for example)Note: Pin5 of the VGA cable which connects to the monitor should be cut off.08/09/09 4. Take analog DDC write for example, as followa. Double-click ,appear as follow Figs:b. Click .c. Key 14 numbers in the Serial Number blank, then click “OK”. Now analog DDC Write completes, as follow.Note: The way of digital DDC write is the same as analog DDC write.HG171A EDID128 bytes EDID Data (Hex):00 01 02 03 04 05 06 07 08 09 10 11 12 13 14 150: 00 FF FF FF FF FF FF 00 22 64 D1 1B sn sn sn sn16: ww yy 01 03 0A 25 17 78 EA B6 90 A6 54 51 91 2532: 17 50 54 BF EF 80 81 80 81 C0 81 40 71 4F 61 4648: 90 4F 95 0F 01 01 9A 29 A0 D0 51 84 22 30 50 9864: 36 00 72 E6 10 00 00 1E 00 00 00 FD 00 sn sn sn80: sn sn sn sn sn sn sn sn sn sn 00 00 00 FF 00 3296: 33 31 31 32 33 31 32 33 31 32 33 33 00 00 00 FC112: 00 48 61 6E 6E 73 2E 47 20 48 47 31 37 31 00 D2。
Hann Star(瀚宇彩晶)液晶面板连接器I液晶屏驱屏线I背光板线【产品 百I度I搜I索 找 →苏州汇成元】

接口脚距 0.5 mm
0.5 mm 0.5 mm
0.5 mm 1.0 mm 0.5 mm 0.5 mm
1.0 mm 1.0 mm 1.0 mm 1.25 mm 1.25 mm 0.5 mm
0.5 mm 1.0 mm 0.5 mm 1.0 mm 1.0 mm 0.5 mm
0.5 mm 0.5 mm 1.0 mm 0.5 mm 0.5 mm 0.5 mm 1.0 mm
20455-040E-12 MSA24046P30B 20455-040E-12 AA01B-P030VA1 196357-30041-3 20455-040E-12 093F30-B0B01A FH12A-40S-05SH HD1S040HA1 805SLS-0502T1R-C1 093F30-B0B01A 093F30-B0B01A 093F30-B0B01A FI-SEB20P-HF10 DF14A-20P-1.25H 20455-040E-12 MSAK24025P400B 20455-040E-12 093F30-B0B01A AF7301-N2G11A FI-XB30SL-HF10 FI-X30SSL-HF 20455-040E-12 MSA24046P30B MSAK24025P40B AA01B-P030VA1 187098-30091 FH12A-40S-0.5SH 20455-040E-12 MSAK24025P40B MSCK240730B 196357-30041-3 MSA24046P30B 20455-040E-12 FI-XB30SL-HF10 FI-XB30SL-HF10 FI-XB30SL-HF10 FI-XB30SSRL-HF16 FI-XB30SL-HF16
FF12-31A-R12BN-D3 MSA24046P30B 20455-040E-12 FH12-40S-0.5SH FI-X30SSL-HF FI-XB30SL-HF10 093F30-B0B01A 20455-040E-12 FI-XB30SL-HF10 FI-XB30SL-HF10 093F30-B0B01A FI-XB30SL-HF10 20455-040E-12 FI-XB30SL-HF10 MDF76URW-30S-1H 20455-040E-12 DF19L-20P-1H MSAK24024P40 FI-XB30SL-HF10 FI-XB30SL-HF10 FI-XB30SL-HF10 20455-040E-12 20455-040E-12 MDF76GW-30W-1H FI-X30SSL-HF10 20455-040E-12 20455-040E-12 FI-X30SSL-HF FI-X30SSL-HF FI-E30S FI-XB30SSRL-HF16 FI-X30SSL-HF DF14-20P-1.25H DF14-20P-1.25H DF14-20P-1.25H MDF76GW-30S-1H FI-XB30SSRL-HF16 FI-XB30SSRL-HF16 FI-XB30SSRL-HF16 FI-XB30SSRLA-HF16 MDF76URW-30S-1H FI-XB30SSRLA-HF16 MDF76URW-30S-1H MDF76URW-30S-1H MDF76URW-30S-1H MDF76URW-30S-1H FI-X30SSL-HF FI-X30SSL-HF
中光学DLP、DID屏幕技术参数表

50寸;分辨率1400×1050;亮度1600lm;Laser光源;光源寿命20000小时;显示比例4:3;复合玻 璃幕;LED屏数字显示;输入接口:VIDEO×2、DVI/VGA×2;输出接口:DVI;控制接口:RS232 (IN)、RS485(IN/OUT);单元尺寸(mm):1016(宽)×762(高)× 762(厚);功率240W;重量
67寸;分辨率1400×1050;亮度1600lm;Laser光源;光源寿命20000小时;显示比例4:3;复合玻 璃幕;LED屏数字显示;输入接口:VIDEO×2、DVI/VGA×2;输出接口:DVI;控制接口:RS232 (IN)、RS485(IN/OUT);单元尺寸(mm):1364(宽)×1023(高)×8 72(厚);功率250W;重量 145kg;后维护; 67寸;分辨率1400×1050;亮度1600lm;Laser光源;光源寿命20000小时;显示比例4:3;复合玻 璃幕;LED灯指示显示;输入接口:DVI×2;控制接口:RS232(IN)、RS485(IN/OUT)、RJ45 (IP、IN/OUT);单元尺寸(mm):1364(宽)×1023(高)×872(厚);功率250W;重量145kg;后 维护;
80寸;分辨率1024×768;亮度2000lm;Laser光源;光源寿命20000小时;显示比例4:3;复合玻 璃幕;LED屏数字显示;输入接口:DVI×2,VGA×2,HDMI×4,RGBHV×2,S-Video×2,CVBS× 2;输出接口:HDMI×2,CVBS×2;控制接口:RS232(IN)、RS485(IN/OUT)、RJ45(IP、 IN/OUT);单元尺寸(mm):1620(宽)×1215(高)×1016(厚);功率250W;重量200kg;后维护;
瀚视奇
1 简介瀚视奇Hanns.G是由瀚宇彩晶股份有限公司自有的品牌。
通过企业资源和商业知识的整合,瀚视奇Hanns.G 致力于品牌名称推广和分销瀚宇彩晶LCD显示器。
凭借来自东芝和日立的技术转让,瀚宇彩晶拥有出色的生产效率和现代化的TFT- LCD制造技术,客户包括全球各大品牌和企业。
目前瀚宇彩晶的第五代液晶面板厂所生产的基板,能切割成15块17英寸宽屏面板,相比之下,以前只能切割成12块17英寸的面板或者16块15英寸的面板,因此17寸宽屏的成本要低于17寸标准屏,加之其在娱乐上的特长,竞争力进一步提升。
而由于采用了自家生产的面板,瀚视奇液晶显示器在成本控制上有先天优势,产品价格也往往卖得比其他品牌低。
瀚视奇(HANNS.G)系出名门—由全球十大液晶面板厂商之一的Hannstar生产制造,瀚视奇所用的Hannstar面板,采用日本面板领导厂商东芝之面板技术制造,完全符合严格之日系列产品检验,苹果、惠普、东芝、戴尔、联想等国际知名品牌的液晶显示器均皆广泛采用Hannstar面板。
2 背景2008年,中国电脑市场对于厂商来说,是忙碌的一年。
由于上游电脑配件产量的大幅提升,计算机技术和设计的不断发展,液晶屏、内存、硬盘、CPU等配件价格大幅下跌,从而使得PC产品更替加速,市场价格调整异常频繁,市场促销活动也接连不断。
从产品替代趋势来看,随着电脑价位的不断下调,2008年笔记本市场销量增速明显。
台式机和笔记本市场销量占比由年初的7:3变为5.5:4.5,预计2009年笔记本市场销量将首次超过台式机。
而随着EeePC在新兴市场的成功开拓,销量迅速攀升,也将给整个市场格局带来新的变化。
预计2009年将有更多的网络终端设备进入已成熟的1-3级市场。
从目前各厂商市场拓展方向以及产品线分布来看,2009年农村市场和中小企业将是厂商关注焦点,而该类细分市场的消费特征决定了台式机市场的主导地位。
未来1-2年内台式机将在增速趋缓的前提下,继续保持其稳步增长趋势。
针打旗舰助您商海领航-爱普生中国

针打旗舰 助您商海领航LQ-1900KIIH 强大的企业级针式打印机高速一档模式打印速度:270汉字/秒*打印头寿命:4亿次/针*平均无故障时间:20000小时*多进纸途径:前部、后部、底部、顶部进纸大容量色带:1600万字符*(草稿模式)标配双接口:USB 口/并口ECS161217AZ图片仅供参考,外观以实物为准。
本说明若有任何细节之更改,恕不另行通知。
爱普生(中国)有限公司在法律许可的范围内对以上内容有解释权。
爱普生(中国)有限公司北京市朝阳区建国路81号华贸中心1号楼4层爱普生官方天猫旗舰店:官方网站: 官方微信/微博:爱普生中国服务导购热线:400-810-9977爱普生官方微博爱普生官方微信爱普生官方网站产品尺寸图EPSON为SEIKO EPSON公司注册商标。
其他所有产品名称和其他公司名称再次作为表示之用,是各自所有者的商标或注册商标。
爱普生对这些商标不拥有任何权利。
*本宣传页中的数据,来源于爱普生实验室数据。
因使用环境和设置的不同,与实际使用数据可能存在差异。
24针/136列EPSON ESC/P是爱普生开发的控制命令,为了提高中文打印机的控制处理功能,爱普生又开发了ESC/P-K,通用于汉字使用区域,属爱普生独自之作。
639mm402mm256mm270汉字/秒*270双拖纸器复写能力1+51+5136列LQ-1900KIIH 强大的企业级针式打印机作为针式打印机的制造商,爱普生公司一直关注用户需求的变化,并以其先进科技,不断推出满足用户需求的新产品。
全新的136列宽行通用针式打印机LQ-1900KIIH 以其优良的性能,全面满足金融、邮政、通信、商业、教育、交通等高端行业用户的打印需求,为其带来稳定、高效、可靠、便捷的使用体验。
优良性能,稳定可靠三年售后服务,使用无忧LQ-1900KIIH 提供高枕无忧的整机三年保修服务。
爱普生拥有完备的售后服务体系,连续13年获得CCID 打印机服务满意度金奖*1。
NEC 19WMGX真彩实色亮眼液晶
华硕 D S E B — D G 板载 的 I n t e l 。
6 32 1 和 In t e l。82 56 3E B D u a l P o r t
G b E , 以及两个In t e l。82 5 7 3 G b E , 不
仅 为该 主板提供 了四个高速千兆 网卡
接 口 , 还 带来 了 “ 组 合 (t e a m i n g )”
用 户完全没有后顾 之忧 。 e
扩展 丰富 华硕 DS EB - DG 双 路服务器 主板
华硕服务器 凭借领先的研发水
平 打造 的 华硕 D S E B — D G 是一 款
支持4 5n m 、 四 核 CP U 的优秀双 路 服务 器主板 , 为服 务器提供 了稳 定可 靠的性能 、 功能及丰富的扩 展性 。
C o n t r o l l e r H u b (M C H )和 I n t e l 。
6 3 2 1 E S B I /O C o n t r o l l e r H u b
(I C H )芯 片组 支持 , 此 服 务 器 具 备 了 支 持 6 6 7 /l 0 6 6 /1 3 3 3 /l 6 0 0 M H z 前 端
对于 N E C 显示器而言 , 一 直以
来 , 最 为标榜 的 即是 , 色彩 显 示 效 果
的 高 度 自然 , 色 彩 同 步 , 没 有 偏 差 。
N E C 显 示器在 2 0 0 8 年推 出一 款颇
具 审美品位 与应用 意趣 的新 品— —
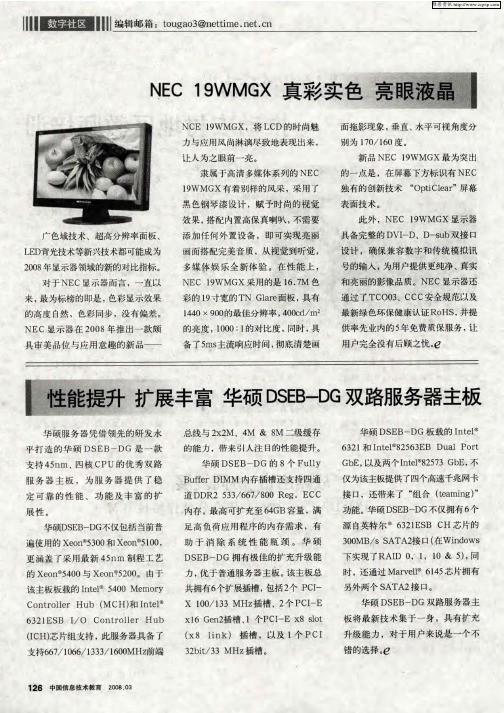
N C E 1 9 W M G X , 将 L C D 的时 尚魅 力 与应 用 风 尚淋 漓 尽 致地 表 现 出来 , 让人 为之 眼前一 亮 。
隶属于高清多媒体 系列的 N E C 19W M G X 有着别样的风采 , 采用 了 黑 色钢 琴 漆 设 计 , 赋 予 时 尚的视 觉 效果 , 搭配 内置 高保真喇 叭 , 不需要 添 加任 何外 置 设 备 , 即可 实现 亮丽 画面搭 配 完美音质 , 从 视觉到听觉 , 多媒体娱 乐全新体验 。 在性能上 , N E C 19 W M G X 采 用 的是 16 . 7M 色 彩 的 19 寸宽的 T N Gla r e 面板 , 具有 1 4 4 0 × 9 0 0 的 最 佳 分 辨 率 , 4 0 0 c d /m 。 的 亮 度 , 10 0 0 :1 的对 比 度 , 同时 , 具 备 了5 m s 主流响应时间 , 彻底清楚画
HANNS G 19寸液晶显示器 说明书
英國: 公司:ARENA Network 聯絡人:Dr. Tillotson Allen 地址:Bank Buildings Treforest Estate, Pontypridd, Rhondda Cynon Taff, Kindom 郵遞區號:
CF37 5UR 電話:01443 844001 傳真:01443 844002 網站:
可能導致設備的損傷。用車子或椅子放置可參考廠商或顯示器供應商的建議。若把顯示器 固定於牆上或架子上,安裝的固定方式需得到廠商承認並嚴格按照程序安裝。 • 在後殼的上部及下部有許多狹長的開孔是通風用的。為保證顯示器持續操作而不過熱,這 些散熱孔不能被堵塞或覆蓋。故顯示器不能置於床、沙發、毛毯或類似的表面上,也不能 靠近於輻射體或熱源之上。除非通風得到保障,否則不能放在書櫃或箱子內。 • 顯示器操作的電源電壓範圍標識於後殼標籤上。若您不能確認所供應的電壓可洽詢經銷商 或當地的電力公司。 • 本監視器配備有三端接地插頭,即有第三端(接地)之插頭。此插頭只能插到具有安全功 能之接地電源插座上。如果您的插座無法插入三端插頭,請讓專業人員幫您安裝正確的插 座,或者使用轉接頭來安全地為設備接地。請勿損壞接地插頭的安全功能。 • 當顯示器長期不使用,請切斷電源。這樣做能防止在雷雨天受到電擊以及異常電源電壓的 損傷。 • 不能讓插座超載,否則會引起火災或電擊。 • 不要把異物放入機內,它能引起短路而導致火災或電擊。 • 不能打開後殼,以免遭受高壓或其他危險。若有故障,請直接與售後服務人員聯繫。
..................................................................................................... 9
HannStar(瀚宇彩晶)4.3英寸HSD043I9W1-A规格书

HSYNC display area Thd 480 DCLK
HSYNC back porch Thbp 36 40 255 DCLK
HSYNC front porch Thfp 4 5 65 DCLK
Document No. Revision 1.2 .
Document No. Revision 1.2
Document No. Revision 1.2
Document No. Revision 1.2
HannStar Display Corp.
Document Title HSD043I9W1-A Formal Specification Page No. 18/22 Document No. Revision 1.2
Document No. Revision 1.2
Document No. Revision 1.2
Document No. Revision 1.2
Document No. Revision 1.2
Document No. Revision 1.2 TFT LCD Module
Pixel Format
DCLK frequency fclk 5 9 12 MHz
VSYNC period time Tv 277 288 400 Th
VSYNC display area Tvd 272 Th
VSYNC back porch Tvbp 3 8 31 Th
VSYNC front porch Tvfp 2 8 93 Th
பைடு நூலகம்HannStar(瀚宇彩晶)4.3英寸HSD043I9W1-A规格书
海尔HT-22109W液晶彩显使用说明书
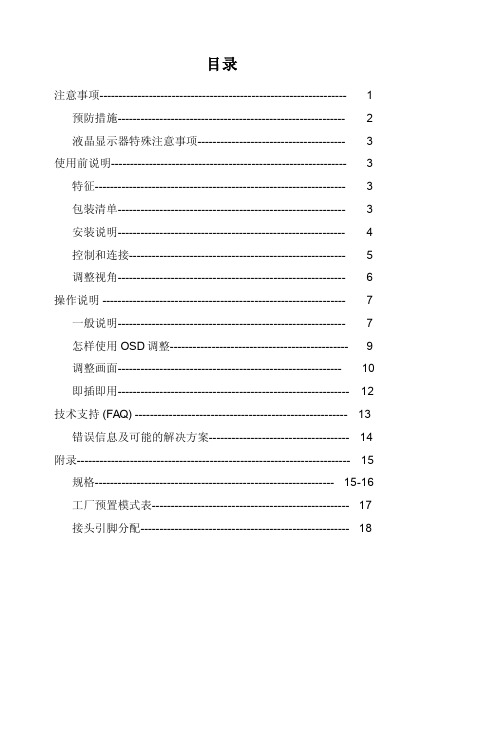
目录注意事项----------------------------------------------------------------- 1 预防措施------------------------------------------------------------ 2 液晶显示器特殊注意事项--------------------------------------- 3 使用前说明-------------------------------------------------------------- 3 特征------------------------------------------------------------------ 3 包装清单------------------------------------------------------------ 3 安装说明------------------------------------------------------------ 4 控制和连接--------------------------------------------------------- 5 调整视角------------------------------------------------------------ 6 操作说明 ---------------------------------------------------------------- 7 一般说明------------------------------------------------------------ 7 怎样使用OSD调整----------------------------------------------- 9 调整画面----------------------------------------------------------- 10 即插即用------------------------------------------------------------- 12 技术支持 (FAQ) -------------------------------------------------------- 13 错误信息及可能的解决方案------------------------------------- 14 附录------------------------------------------------------------------------ 15 规格--------------------------------------------------------------- 15-16 工厂预置模式表---------------------------------------------------- 17 接头引脚分配------------------------------------------------------- 18尊敬的用户,欢迎您使用海尔液晶显示器本手册用于指导您配置及使用海尔液晶显示器,在操作显示器前请全部阅读此说明书,说明书应保留好,便于供将来参考用。
HANNS G HW191 19寸宽屏液晶显示器 说明书

19寸宽屏液晶显示器HW191用戶手册用户说明书在操作显示器前请全部阅读此说明书,说明书应保留好,便于供将来参考用。
FCC B 类射频干扰声明经测试,本设备符合 FCC 规则第 15 部分对“B 类”数字设备的限制规定。
这些限制旨在提供合理的保护措施,以防该设备在住宅区安装时产生有害干扰。
本设备产生、使用并辐射射频能量,如果未遵照说明进行安装和使用,可能会对无线电通信产生干扰。
但也不能保证在特定的安装中不会产生干扰的问题。
如果本设备确实对无线电或电视接收造成干扰(可以通过开关设备来确定),建议用户采取以下一种或多种措施排除干扰:重新调整接收天线的方向或位置。
增大本设备与接收器的间距。
将设备电源连接到不同于接收器所连接到的电路的电源插座上。
咨询经销商或有经验的无线电/电视机技术人员以获取帮助。
本设备符合 FCC 规则第 15 部分的规定。
操作应符合以下两个条件:(1) 本设备不会造成有害干扰,并且(2) 本设备一定能够承受接收到的所有干扰,包括可能会造成意外操作的干扰。
加拿大本 B 类数字设备符合 Canadian Interference-Causing Equipment Regulations(加拿大设备引起干扰法规)的所有要求。
本设备符合电磁兼容性方面的 EMC 法令 89/336/EEC 的规定以及低压法令方面的73/23/EEC 和 93/68/EEC 规定。
电源插座应靠近设备并可以够到。
用户说明书Congratulations!The display you have just purchased carries the TCO’03Displays label. This means that your display is designed,manufactured and tested according to some of the strictestquality and environmental requirements in the world. This makesfor a high performance product, designed with the user in focusthat also minimizes the impact on our natural environment.Some of the features of the TCO’03 Display requirements:Ergonomics• Good visual ergonomics and image quality in order to improve the working environment for the user and to reduce sight and strain problems. Important parameters are luminance, contrast, resolution, reflectance, colour rendition and image stability.Energy• Energy-saving mode after a certain time – beneficial both for the user and the environment• Electrical safetyEmissions• Electromagnetic fields• Noise emissionsEcology• The product must be prepared for recycling and the manufacturer must have a certified environmental management system such as EMAS or ISO 14 001• Restrictions onchlorinated and brominated flame retardants and polymersheavy metals such as cadmium, mercury and lead.The requirements included in this label have been developed by TCO Development in cooperation with scientists, experts, users as well as manufacturers all over the world. Since the end of the 1980s TCO has been involved in influencing the development of IT equipment in a more user-friendly direction. Our labelling system started with displays in 1992 and is now requested by users and IT-manufacturers all over the world.For more information, please visit用户说明书回收信息我们,Hanns.G 极为重视环境保护战略,深信:通过在工业技术设备寿命结束时进行适当的处理和回收可以更好地保护我们的地球这些设备包含有可回收材料,可以将这些材料重新分解处理后用到新的产品中。
IDWC瀚彩寸数字TFT屏
1.1 Introduction
HannStar Display model HSD080IDW1-C01 is a color active matrix thin film transistor (TFT) liquid crystal display (LCD) that uses amorphous silicon TFT as a switching device. This model is composed of a TFT LCD panel, a driving circuit and a back light system. This TFT LCD has a 8.0 (16:9) inch diagonally measured active display area with WVGA (800 horizontal by 480 vertical pixel) resolution.
2.The information contained herein is presented merely to indicate the characteristics and performance of our products. No responsibility is assumed by HannStar for any intellectual property claims or other problems that may result from application based on the module described herein.
Item
Symbol Min.
Max.
Unit
Operating Temperature
Topa
XT070YTC23C_B1 液晶显示模块 用户手册说明书
XT070YTC23C_B1液晶显示模块
用户手册
版本信息
1、功能介绍
XT070YTC23C_B1是欣瑞达电子有限公司开发的DVI-I接口液晶显示模块,该产品基于7英寸真彩液晶屏和五点电容式触摸屏开发,客户端接口包含8bit LVDS数据接口和USB触摸屏控制接口,模块驱动板集成了显示屏所需的各种复杂电源模块,便于客户使用。
2、规格参数
显示性能参数
电性能参数
可靠性参数
3、P1显示屏接口形式
系统控制板LCD信号接口采用29PIN DVI-I插座作为连接器,接口示意图如下1.1
(图1.1)29PIN DVI-I接口引脚定义(P1)
P1接口引脚定义如下表(29pin )
4、机械尺寸
机械尺寸参考如下图所示,未注公差为±0.30mm,单位:mm
Details
您可以通过以下途径获得我们更详细的产品资讯和解决方案支持
1、访问欣瑞达的互联网官方站点
2、产品咨询和申请样品请拨打免费服务热线免费服务热线:400-069-8808
未开通400电话地区请拨打*************3、欣瑞达期待您的光临与联系
地址:深圳市南山区高新园北松坪山路5号嘉达研发大楼A 栋3层邮编:518000。
- 1、下载文档前请自行甄别文档内容的完整性,平台不提供额外的编辑、内容补充、找答案等附加服务。
- 2、"仅部分预览"的文档,不可在线预览部分如存在完整性等问题,可反馈申请退款(可完整预览的文档不适用该条件!)。
- 3、如文档侵犯您的权益,请联系客服反馈,我们会尽快为您处理(人工客服工作时间:9:00-18:30)。
w. wj
EEPROM M24C02 (U404)
ht
tp
://
ww
19
el.
D-Sub Connector (CN405)
ne
DVID Connector (CN406) EEPROM M24C02 (U405)
H sync V sync RGB
RGB DCLK+ DCLK-
t
19" LCD Color Monitor
Sheet 3 of 6
B
Thursday , October 20, 2005
22
19" LCD Color Monitor
17 CN405 DB15 RED+ 1 RED6 GREEN+ 2 GREEN7 BLUE+ 3 BLUE8 4 PC5V PC5V 9 VGA_CON 5 10 16 FB410 FB411 FB412 0 1/16W 0 1/16W 0 1/16W R439 75 1/16W R440 75 1/16W R438 75 1/16W R434 R435 R436 R437 56 1/16W 56 1/16W 56 1/16W 470 1/16W C432 0.047uF C433 0.047uF C434 0.047uF C435 0.047uF RIN GIN BIN SOG 4 4 4 4 11 12 13 14 15
XGA/SXGA
RIN GNDR GIN GNDG SOG BIN GNDB HSY NC VSY NC DDCA_SDA DDCA_SCL DET_VGA DDC_WP R+ RG+ GB+ BCLK+ CLKDDCD_SDA DDCD_SCL DET_DVI
SCHEMATIC
LVDS OUTPUT
SOT-223
1
1 2 3
1 2 3
B BL_ADJ(DC) 0V ~ 3.3V 0V ~ 5V BL_ADJ P W M D C +12V R708 +12V C706 0.1uF C707 + 100uF/25V +5V GND GND +12V GND +5V GND 4 CN701 2 4 6 8 10 12 BL_ON BL_ADJ +12V GND +5V GND 10K 1/16W R710 C711 0.1uF Q703 PMBS3904 C709 0.1uF C710 + 100uF/25V CONN VCC5V NC R711 10K 1/16W R712 4.7K 1/16W on_BACKLIGHT 4 +5V R31 47 4K7 R31 4.7K 4.7K C32 N.C 1uF C51 1UF 1UF R32 0 X R29 X 1K R33 X 4.7K Q4 X MMBT3904 C705 D702 1N4148 + +5V
19" LCD Color Monitor
5.2 Electric Block Diagram
5.2.1 Main Board
HSD HQ191D
Crystal (14.318MHz) (X401)
LCD interface (CN101)
EEPROM 24LC16B (U403)
Scalar TSUM56AK (Include MCU, ADC, OSD) (U401)
PWM control IC
ww
w. wj
Push-pull circuit LC resonant Lamp Feedback circuit 20
On/off control
Start circuit
Dimming control
ht
tp
://
el.
ne
Switching circuit PWM control IC&MOSFET IC901
HSD HQ191D
R441 R442 R443 3 3 D403 BAV99 D404 BAV99 3 D405 BAV99 ESD_5V 2 1 2 1 2 1 C439 0.1uF C440 0.1uF C441 0.1uF +5V
100 1/16W 100 1/16W 100 1/16W
+5V
10 1/16W
Recommond to used "Blue" parts circuit for VCC1.8V if you want to suppoert DDC function when system power off
2
D704 D703 BAT54C
1
SMAL140
TO-263
VCC3.3 VOUT VOUT 2 4 R713 C712 + VCC3.3 4 VIN ADJ
U702 3 1
ww
P.S: The 1N4148 Vf=0.7V~1V can't meet LDO spec. The BAT42, Vf is OK but the If=200mA(forward current) can not meet current spec.
PMBS3904
1uF
3
Q701
C708
D704(SSM12L) Vf=0.38V and If=1A. So when system power on, the system loading is about 400mA (3.3V is about 200mA and 1.8V is about 200mA), So D35 changed from 1N4148(or BAT42) to SSM12L(schottky diode).
5.2.2 Inverter / Power Board
AC inlet Filter Rectifier and filter
Transform
HSD HQ191D
Rectifier and filter D920, D922 12V/5V
er
To main board Start circuit R905 OVP/OCP circuit
ht
:// w
on_BACKLIGHT on_Panel on_PANEL_12V VCTRL Adj_BACKLIGHT
el.
VCC1.8 Vcc3.3 +5V +12V
5.PANEL INTERFACE
VLCD
VLCD_12V
4.SCALER
Title
TOP
Size B Date: Document Number Rev Sheet 2 of 6
ne t
1uF/16V R704 100 1/16W
VCC3.3
el.
3,4
+5V
1 3 5 7 9 11
VCC3.3
4
+5V
PC5V PC5V 3
3,4
+5V
R732
R709 0 1/16W
R701 1K 1/16W R706 NC R705 4.7K 1/16W
.w j
3,4 +5V
4 Adj_BACKLIGHT R707 4.7K 1/16W
Feedback circuit IC902, IC921
t
12V
19" LCD Color Monitor 6. Schematic
6.1 Main Board
HSD HQ191D
TSUM57AK
B3 RIN GNDR GIN GNDG SOG BIN GNDB HSY NC VSY NC DDCA_SDA DDCA_SCL DET_VGA DDC_WP R+ RG+ GB+ BCLK+ CLKDDCD_SDA DDCD_SCL DET_DVI B4 +5V +5V
VLCD 5 +5V R716 R733 NC R734 10K 1/16W NC R717 R714 R715 NC R723 51K 1/16W R725 4.7K 1/16W R735 4 on_Panel 4.7K 1/16W C721 0.1uF Q708 C718 PMBS3904 0.1uF Q706 PMBS3904 C715 0.1uF + Q704 AO3401L 10K 1/16W 10K 1/16W
2.POWER
715G1558-B-FSC.DSN
Thursday , October 20, 2005
B
21
19" LCD Color Monitor
+5V 3 C701 NC U701 VI GND NC/LT1117-18 VO VO
HSD HQ191D
+3V3 +3V3 C703 100uF/25V + C704 NC 9 H1 8 7 6 H2 8 7 6 H3 R702 8 7 6 51 1/16W 5 4 VCC1.8 TP D701 C 1N4148 Q702 E CHT2907 R703 2K 1/16W + C702 4.7uF/16V VCC1.8 4 5 4 TP 9 5 4 TP 9 VCTRL 4 2 4 8 7 6 8 7 6 9 5 4 9 5 4 9 1 2 3 1 2 3 1 2 3 1 2 3 8 7 6 5 4
+12V PC5V +3V3 VCC1.8 +5V VCC5V VCC3.3 B2 on_BACKLIGHT on_Panel on_PANEL_12V
tp
+12V PC5V VCTRL +3V3 VCC1.8 +5V Adj_BACKLIGHT VCC5V VCC3.3 VLCD VLCD_12V
