torque中文教程--闪电
torque中文教程--武器切换
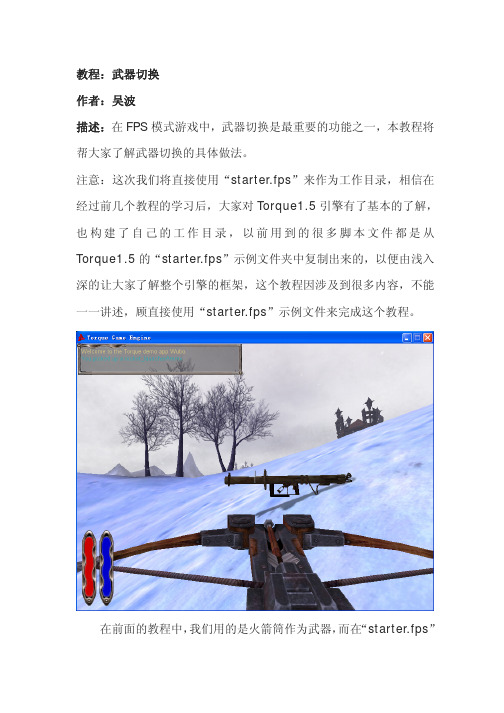
教程:武器切换作者:吴波描述:在FPS模式游戏中,武器切换是最重要的功能之一,本教程将帮大家了解武器切换的具体做法。
注意:这次我们将直接使用“starter.fps”来作为工作目录,相信在经过前几个教程的学习后,大家对Torque1.5引擎有了基本的了解,也构建了自己的工作目录,以前用到的很多脚本文件都是从Torque1.5的“starter.fps”示例文件夹中复制出来的,以便由浅入深的让大家了解整个引擎的框架,这个教程因涉及到很多内容,不能一一讲述,顾直接使用“starter.fps”示例文件来完成这个教程。
在前面的教程中,我们用的是火箭筒作为武器,而在“starter.fps”示例中,游戏者使用的是弩,我们设法将火箭筒配备给“starter.fps”中的游戏角色(兽人),闲话不多说了,现在就开始吧。
1.首先还是备份工作目录“starter.fps”,这一步是很重要的。
2.将素材目录里的“rocket_launcher”文件夹拷贝到“starter.fps\data\shapes”下,将“rocket_launcher_1.cs”文件拷贝到“\starter.fps\server\scripts”文件夹,并改名为“rocket_launcher.cs”(当然也可以不改名,但后面的操作也要做相应的调整)。
3.打开以下目录中的两个文件并填加红色的语句:game\starter.fps\client\config.cs:// Torque Input Map Fileif (isObject(moveMap)) moveMap.delete();new ActionMap(moveMap);moveMap.bindCmd(keyboard, "escape", "", "escapeFromGame();");moveMap.bind(keyboard, "f2", showPlayerList);moveMap.bind(keyboard, "f5", toggleParticleEditor);moveMap.bind(keyboard, "a", moveleft);moveMap.bind(keyboard, "d", moveright);moveMap.bind(keyboard, "w", moveforward);moveMap.bind(keyboard, "s", movebackward);moveMap.bind(keyboard, "space", jump);moveMap.bind(keyboard, "r", setZoomFOV);moveMap.bind(keyboard, "e", toggleZoom);moveMap.bind(keyboard, "z", toggleFreeLook);moveMap.bind(keyboard, "tab", toggleFirstPerson);moveMap.bind(keyboard, "alt c", toggleCamera);moveMap.bindCmd(keyboard, "ctrl w", "commandToServer(\'playCel\',\"wave\");", "");moveMap.bindCmd(keyboard, "ctrl s", "commandToServer(\'playCel\',\"salute\");", ""); moveMap.bindCmd(keyboard, "ctrl k", "commandToServer(\'suicide\');", "");moveMap.bindCmd(keyboard, "h", "commandToServer(\'use\',\"HealthKit\");", "");moveMap.bindCmd(keyboard, "1", "commandToServer(\'use\',\"Crossbow\");", "");moveMap.bindCmd(keyboard, "2", "commandToServer(\'use\',\"Rocket_Launcher\");", ""); moveMap.bind(keyboard, "u", toggleMessageHud);moveMap.bind(keyboard, "pageup", pageMessageHudUp);…game\starter.fps\client\scripts\defaultbind.cs://------------------------------------------------------------------------------// Misc. Player stuff//------------------------------------------------------------------------------moveMap.bindCmd(keyboard, "ctrl w", "commandToServer('playCel',\"wave\");", "");moveMap.bindCmd(keyboard, "ctrl s", "commandToServer('playCel',\"salute\");", ""); moveMap.bindCmd(keyboard, "ctrl k", "commandToServer('suicide');", "");//------------------------------------------------------------------------------// Item manipulation//------------------------------------------------------------------------------moveMap.bindCmd(keyboard, "h", "commandToServer('use',\"HealthKit\");", "");moveMap.bindCmd(keyboard, "1", "commandToServer('use',\"Crossbow\");", "");moveMap.bindCmd(keyboard, "2", "commandToServer(\'use\',\"Rocket_Launcher\");", "");//moveMap.bindCmd(keyboard, "3", "commandToServer(\'use\',\"mp5\");", "");//moveMap.bindCmd(keyboard, "4", "commandToServer(\'use\',\"grenadeLauncher\");", "");//moveMap.bindCmd(keyboard, "5", "commandToServer(\'use\',\"LaserBeam\");", "");//moveMap.bindCmd(keyboard, "6", "commandToServer(\'use\',\"flamer\");", "");//moveMap.bindCmd(keyboard, "7", "commandToServer(\'use\',\"grenadeTimer\");", "");//moveMap.bindCmd(keyboard, "8", "commandToServer(\'use\',\"missileLauncher\");", "");…4.在\game\starter.fps\server\scripts\game.cs脚本文件中填加火箭筒相关语句:// Load up all datablocks, objects etc. This function is called when // a server is constructed.exec("./audioProfiles.cs");exec("./envAudioProfiles.cs");exec("./camera.cs");exec("./markers.cs");exec("./triggers.cs");exec("./inventory.cs");exec("./shapeBase.cs");exec("./item.cs");exec("./environment.cs");exec("./health.cs");exec("./staticShape.cs");exec("./weapon.cs");exec("./radiusDamage.cs");exec("./crossbow.cs");exec("./rocket_launcher.cs");exec("./environment.cs");exec("common/server/lightingSystem.cs");exec("./player.cs");exec("./animy.cs");exec("./chimneyfire.cs");exec("./aiplayer.cs");exec("./sgExamples.cs");5.在“\starter.fps\server\scripts\player.cs”脚本文件中填加以下语句,以保证武器可以被检起来。
1-Torque1.5中文教程
Torque 1.5 – 介绍教程欢迎来到Torque的世界祝贺你买了我们的Torque 游戏引擎。
这个教程会带领你参观大部分Torque的基本功能,也是你开始自己做游戏的一个起点。
做完这个教程时,我们已经做好了一个简单的3D游戏!在我们进入Torque世界以前,有两点值得注意。
在这个教程中,当你看到诸如“Select File > Open Mission”,它意味着点击File菜单中的“Open Mission”选项。
至于文件的位置,我们假定你把Torque安装在了某个硬盘根目录的/Torque/SDK目录。
第2点,这个教程是写给PC平台用户的,如果你使用的是苹果系统,我们强烈建议你使用两个按键的鼠标,同时用Option键代替Ctrl键的操作。
另外,应用程序文件在Mac中被叫做“二进制文件”的,我们在这里叫“可执行文件”。
开始页在Torque/SDK/example目录下,你会发现名为torqueDemo可执行文件。
当你运行torqueDemo的时候,你会发现如下的开始页面:那顶上的一群图标是到TGE工具和文档的快捷方式。
GUIEditor是制作图形用户界面的工具。
World Editor是创造你的游戏世界并添加物体。
Console是提供通过文字界面访问和控制游戏引擎的脚本。
在这个教程中,我们将要探索GUI和World编辑器,并且我们会快速浏览一下Console。
至于TDN,News,Docs,和Forums图标是关于Torque信息的网页的链接。
Tutorial是本教程的链接。
Options让你能设置普通的图形和声音选项,比如屏幕分辨率或音量等。
最后,Exit 就像你想象中的那样,退出这个引擎。
我们在这个教程中不会深入介绍Torque 的Consol (控制台),只是让你知道它能做什么,点击这个图标,在Consol 窗口你可以看到引擎启动后的一些进程记录。
你不仅仅可以用它来得到文字反馈,你也能直接在文字输入框中输入命令,举个例子,输入“quit();”,当然,这个命令退出了TGE 。
torque中文教程--开场画面

StartupGui.done = false; Canvas.setContent( StartupGui ); schedule(100, 0, checkStartupDone ); // If you want a sound or music to play add a new AudioProfile to client\scripts\audioProfiles.cs
6. 进入游戏引擎,在选项里打开声音了?好,我们继续做下去。 8.仍然在“StartupGui.gui”中,将脚本复制一遍,并做相应的改动,改动后内 容如下:
//--- OBJECT WRITE BEGIN --new GuiFadeinBitmapCtrl(StartupGui) {
// start.ogg 可在素材文件夹中复制
5.存盘,听下声音吧。是不是声音小的可怜?的确如此,我们需要打开
"game\client\defaults.cs"文件,可以看到声音的初始值是“0.8”,,将他们都 修改为“1”:
$pref::Audio::masterVolume = 1; $pref::Audio::channelVolume1 = 1; $pref::Audio::channelVolume2 = 1; $pref::Audio::channelVolume3 = 1; $pref::Audio::channelVolume4 = 1; $pref::Audio::channelVolume5 = 1; $pref::Audio::channelVolume6 = 1; $pref::Audio::channelVolume7 = 1; $pref::Audio::channelVolume8 = 1;
脚本级网络游戏编程 课件02 Torque编辑器

背景更换:在右边窗口的树型结构中选择 MainMenuGui,在下面的窗口中找到Misc 项目,下面有个bitmap选项,通过拖动窗 口左边的分界栏可以看到整个文件名。 图标的删除。
添加按钮:单击该按钮,就可以进入游戏世界, 类似所有其他游戏的操作。在New Control中选 择GuiButtonCtrl。 在右下方窗口中找到Misc项目的text选项,输入 “Start”并单击Apply按钮。 为该按钮添加命令脚本,这样单击它才能执行命 令。在Parent项中的command文本框中输入 “loadMyMission();”,单击Apply按钮。注意, loadMyMission()后边的“;”(分号)一定不要忘记 输入。
2、Torque支持的文件类型
资源类型丰富: .cs和.cs.dso文件 .gui和.gui.dso文件 DTS格式文件 DIF格式文件 材质文件 音乐和音效文件
.cs和.cs.dso文件
TorqueScript(Torque脚本)是Torque引擎中最具 革命性的特性,它是一种语法类似C++的面向对 象程序设计语言,提供了对Torque引擎内几乎所 有组件的访问方法。它的功能非常强大,很少需 要对引擎进行源代码级的修改。 可以使用任何文本编辑软件编写TorqueScript代 码。如,使用记事本编写的test.txt文件,改成 test.cs即可。 每次运行Torque游戏时,Torque会自动编译相应 目录下的.cs文件。.cs文件经过编译成为.cs.dso 文件,该文件为二进制文件 。
对象组织
添加了一些Logo对象,使得MissionGroup 列表中的内容有些“臃肿” ,所以,需要 用类似文件夹的方式组织管理游戏对象。 在Torque中,SimGroups命令用于组织管 理游戏对象。
最新thorx6中文操作说明培训资料
最新thorx6中文操作说明培训资料目录1.简介 (3)1.1产品简介 (3)1.2主要特点 (3)1.3 技术参数 (3)2.版面功能介绍 (2)2.1文件操作 (2)2.2 标记工具栏 (2)2.3排版工具栏 (4)2.4刻印工具栏 (4)2.5数据库工具栏 (4)3.创建标记 (5)3.1建立标记对象 (5)3.2位置调整 (6)3.3对针 (6)3.4刻印 (7)4.创建并编辑标记对象 (8)4.1文本类标记对象 (8)4.2扇形文本类标记对象 (8)4.3 DataMatrix二维码 (8)4.4图形类标记对象 (10)4.5符号类标记对象 (11)4.6标尺类标记对象 (12)5排版标记对象 (14)5.1视图控制 (14)5.2标记对齐 (14)5.3对针跟随 (14)6.刻印标记对象 (16)6.1刻印控制 (16)6.2刻印参数 (16)7.日志数据库 (18)8.常见异常现象的解决 (19)8.1打标针只移动不冲击 (19)8.2打标针冲击幅度小 (22)8.3打标针冲击力小,打标深度不够 (23)8.4打标针有时冲击有时不冲击,刻印的字符残缺不全 (23)8.5刻印出的字符笔画有拖尾现象 (24)8.6刻印的字符深浅不一 (24)8.7打标头不能正常移动行走 (25)8.8刻印字符粗糙,模糊,不美观 (25)8.9使用标牌夹具刻印标牌,夹上标牌后不会自动刻印 (26)8.11已打开控制器电源,但按刻印,打标头没反应(27)8.12打标头移动轨迹混乱 (27)9.标牌夹具的安装方法 (28)1.简介1.1产品简介气动打标机的工作原理:将需刻印内容输入计算机,计算机通过打标机控制器控制打标针按一定的轨迹移动,同时打标针在压缩空气作用下高频率冲击工件,从而在工件上形成所需刻印内容。
电脑气动打标机可用于在产品零部件或铭牌上刻印商标、规格型号、生产批号、技术参数等内容,从而对产品的现代化生产进行有效的管理和质量跟踪,也利于在市场上识别自己的产品,树立企业良好的市场形象。
torque使用指南
Tip1:By default, job submission is allowed only on the TORQUE server host (host on which pbs_server is running). Enablement of job submission from other hosts is documented in Configuring Job Submit Hosts.Master node:node3Submit a job:Qsub查询作业状态:qstat/qstat –f查询节点状态:pbsnodes –a第一步:安装Yum install torque*安装之后的路径:/var/torque第二步:配置配置控制节点:1.执行/usr/share/doc/torque-2.5.7/torque.setup,将本节点配置为管理节点。
命令:./torque.setup <username>(指定一个非root用户名)qmgr -c 'p s' //查看配置信息2.具体指定计算节点在目录TORQUE_HOME/server_priv/nodes建立文件nodes,具体指定集群中的计算节点。
简单示例如下:# Nodes 001 and 003-005 are cluster nodes#node001 np=2 cluster01 rackNumber22## node002 will be replaced soonnode002:ts waitingToBeReplaced# node002 will be replaced soon#node003 np=4 cluster01 rackNumber24node004 cluster01 rackNumber25node005 np=2 cluster01 rackNumber26 RAM16GBnode006node007 np=2node008:ts np=4配置计算节点:在计算节点的TORQUE_HOME/mom_priv/config文件中修改$pbsserver headnode # note: hostname running pbs_server $logevent 255 # bitmap of which events to log Pbsserver为你的集群中的管理节点的hostname.3.重启节点计算节点:pbs_mom控制节点:> qterm -t quick> pbs_server注意事项:1.在torque中在执行mpi程序时。
torque中文教程--人工智能2

教程:人工智能入门(2)描述:本教程使用的工作目录为“starter.fps”,需要用到“素材”目录中的“aiGuard”文件夹中的文件。
原文如下:This is my second attempt at making an AI controlled character. The first was an AIPlayer that would follow paths. This character is a guard unit. The guard willwait at it's post (spawn point) until it sees a target. It will then attack thattarget while trying to close with it.If the target is lost the bot will wait at the last place it saw the character andlook around for a little bit, and then it will try to return to it's post.There is a chance the bot will get stuck trying to return, but there is a simpleroutine that has the bot try to move in random directions to try and clear itselfof any obstacles between it and it's post. It's not perfect.The thinking routine is a simple state machine - which can be expanded on to give the bot more responses and actions.As with my first ai character, I am using a simple system that allows the designer to drop markers in the game map that will mark where the bots will start out. When the mission isloaded, the markers are detected and bots are spawned at the marker locations. The markers are then hidden from view. (The markers can be left visible to help in map editing.)The markers for the guards can be given a dynamic variable called respawn. (Assigned to the marker during map editing.) 'Respawn' will determine whether a bot respawns or not upon death.The bots have an attention setting. How often they scan is determined by their attention level. The bots get more sluggish (freeing up processor time) when targets are too far away. Conversely, the bot becomes incrementally more attentive as targets come within range, and further aware as targets come into sight.When a target is found in range and in sight the bot will shoot at the target. The firing sequence is a step of scheduled calls that call for a firing cycle, a trigger down cycle, and a firing delay to control bot rate of fire.When a bot is attacked it will attempt to sideatep and it's field of vision is temporarily increased to a 360deg field of vision - to emulate looking around to see what happened. The bot's attention level is also set to make it think at it's fastest rate when attacked.To use the AIGuard...the following changes need to be made.1. Back up your original game.cs, player.cs, and your current build of Torque. To install AIGuard will require a recompile, since I have created a new class cloned by copying and AIPlayer.h and renaming all references to AIPlayer to AIGuard.(I did this because I wanted to be able to run both my AIPatroller and AIGuards in the same maps and did not want to have any confusion between them.)2. Add the files and AIGuard.h to your Torque project. (In my instance I saved them to my c:\Torque\engine\game directory and then added them into my project.)3. Recompile your project and copy your new executable to the appropriate directory for your app.(这步说着简单,做起来就不那么容易了,为了方便大家使用,笔者把编译好的torquedemo.exe 放到了素材目录中,大家可以直接复制到example下使用)4. Copy the file AIGuard.cs into your server/scripts directory.5. Modify game.cs to add the lineexec("./aiGuard.cs");to the function onServerCreated().6. Also in game.cs: The section for function StartGame needs to modified the following ways: Below the lines that read:// Start the AIManagernew ScriptObject(AIManager) {};MissionCleanup.add(AIManager);AIManager.think();add this:AIGuard::LoadEntities();(If you followed my previous resource you may not have any reference to AImanager. Don't fret... just look for the place in game.cs where you haveAIPlayer::LoadEntitiesand put inAIGuard::LoadEntities();right underneath it.7. In player.cs in the code for Armor::Damage modify the lines// Deal with client callbacks here because we don't have this// information in the onDamage or onDisable methods%client = %obj.client;%sourceClient = %sourceObject ? %sourceObject.client : 0;if (%obj.getState() $= "Dead")%client.onDeath(%sourceObject, %sourceClient, %damageType, %location);to read:// Deal with client callbacks here because we don't have this// information in the onDamage or onDisable methods%client = %obj.client;%sourceClient = %sourceObject ? %sourceObject.client : 0; if (%obj.isbot == true){%obj.attentionlevel=1;%obj.enhancefov(%obj);}if (%obj.getState() $= "Dead"){if (%obj.isbot == true){if (%obj.respawn == true){%obj.delaybeforerespawn(%obj.botname, %obj.markerpos,%obj.marker);%this.player=0;}}else{%client.onDeath(%sourceObject, %sourceClient, %damageType,%location);}}*** If you followed my previous resource there should be no need to change this code.8. Load your map - Stronghold as an example.9. Go into the map editor. (F11) Then go into the Editor Creator (F4)10. Under Shapes there should be a drop down called AIMarker, under that a new item called AIGuard.11. Create a new AIGuard marker.12. Select your marker, position it where you like and hit (F3) to modify the marker.13. If you want to override the default respawn value - create a dynamic variable called respawn and set it's value to true or false.14. Update your item by clicking 'APPLY'- very important and easy to miss step.15. Save your mission and reload it.A bot called Guard1 should appear at the spot of your marker.If you come within range of the guard he should shoot at you and try to hunt you down.If you get away, or when you die, he should return to his post.I hope the resource helps other people get up and running with some AI code in their game.And again, I'd like to thank the other members of this website whose code has been used in several places in the scripting to make this all work.。
Torque_粒子系统中文教程
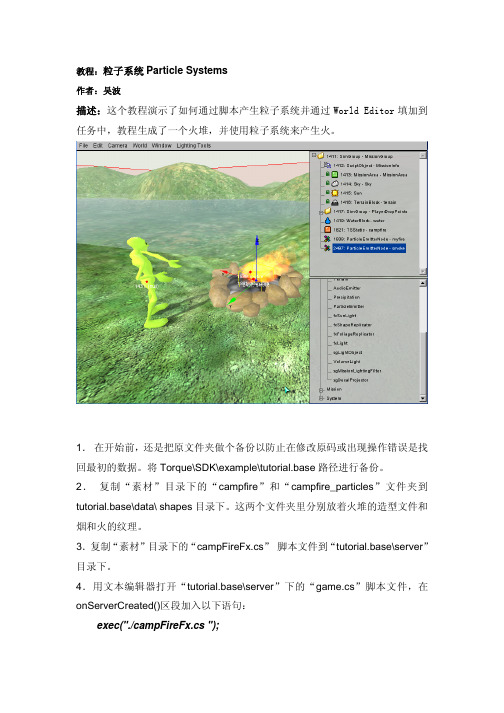
教程:粒子系统Particle Systems作者:吴波描述:这个教程演示了如何通过脚本产生粒子系统并通过World Editor填加到任务中,教程生成了一个火堆,并使用粒子系统来产生火。
1.在开始前,还是把原文件夹做个备份以防止在修改原码或出现操作错误是找回最初的数据。
将Torque\SDK\example\tutorial.base路径进行备份。
2.复制“素材”目录下的“campfire”和“campfire_particles”文件夹到tutorial.base\data\ shapes目录下。
这两个文件夹里分别放着火堆的造型文件和烟和火的纹理。
3.复制“素材”目录下的“campFireFx.cs”脚本文件到“tutorial.base\server”目录下。
4.用文本编辑器打开“tutorial.base\server”下的“game.cs”脚本文件,在onServerCreated()区段加入以下语句:exec("./campFireFx.cs ");你应该看到还有几个其他的exec(…);语句,把你要填加的语句放在最后一行就可以了,这样就可以让游戏服务器在开始运行的时候就读入你的粒子系统脚本。
3.回到“tutorial.base\server”目录,打开“campFireFx.cs”文件,看下里面的描述语句,好多数据是关于粒子的运动规律的,如果你对3DMAX的粒子系统很熟悉的话,应该很容易看懂这些语句,当然你可以修改这些语句,看过后关掉文件。
4.回到example目录双击torquedemo.exe运行引擎,点“start”键进入World Editor,按F11进入编辑状态。
按F4进入Window > World Editor Creator模式。
5.先把火堆调入引擎,在右下脚的窗口找到Mission objects,点击它左侧的“+”号展开路径,再点击Startic shapes旁边的“+”号,按照“Static Shapes->tutorial.base->data->Shapes->campfire”连续展开。
torque中文教程--武器连续切换
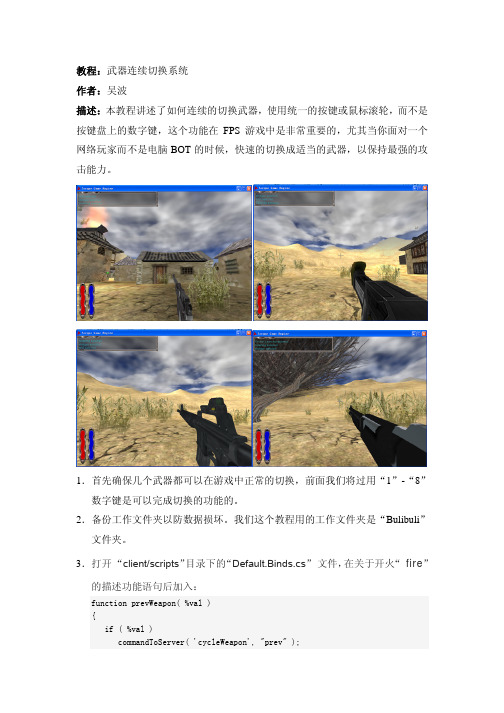
教程:武器连续切换系统作者:吴波描述:本教程讲述了如何连续的切换武器,使用统一的按键或鼠标滚轮,而不是按键盘上的数字键,这个功能在FPS游戏中是非常重要的,尤其当你面对一个网络玩家而不是电脑BOT的时候,快速的切换成适当的武器,以保持最强的攻击能力。
1.首先确保几个武器都可以在游戏中正常的切换,前面我们将过用“1”-“8”数字键是可以完成切换的功能的。
2.备份工作文件夹以防数据损坏。
我们这个教程用的工作文件夹是“Bulibuli”文件夹。
3.打开“client/scripts”目录下的“Default.Binds.cs”文件,在关于开火“ fire”的描述功能语句后加入:function prevWeapon( %val ){if ( %val )commandToServer( 'cycleWeapon', "prev" );}function nextWeapon( %val ){if ( %val )commandToServer( 'cycleWeapon', "next" );}moveMap.bind(keyboard, "ctrl q", prevWeapon);// "ctrl q"前一个武器moveMap.bind(keyboard, "q", nextWeapon);// "q"后一个武器4.打开“client/scripts”目录下的“optionsDLG.cs”文件,在段尾加入:$RemapName[$RemapCount] = "Previous Weapon";$RemapCmd[$RemapCount] = "prevWeapon";$RemapCount++;$RemapName[$RemapCount] = "Next Weapon";$RemapCmd[$RemapCount] = "nextWeapon";$RemapCount++;5.打开“server/scripts”目录下的“inventory.cs”文件,在开头处加入:$weaponInSlot[0] = "Browning";$weaponInSlot[1] = "shotgun";$weaponInSlot[2] = "m16";$weaponInSlot[3] = "PSWrifle";$maxWeaponSlot = 4;注意:标注成红色的武器名要与自己的武器名相同,当然也可以再加更多的武器6.在文件的段尾加入:function ShapeBase::hasInventory(%this, %data){return (%this.inv[%data] > 0);}function serverCmdCycleWeapon( %client, %data ){%client.getControlObject().cycleWeapon( %data );}function ShapeBase::cycleWeapon( %this, %data ){%slot = -1;if ( %this.getMountedImage($WeaponSlot) != 0 ) {%curWeapon = %this.getMountedImage($WeaponSlot).item.getName();if(%curWeapon $= "Browning")%slot = 0;else if(%curWeapon $= "shotgun")%slot = 1;else if(%curWeapon $= "m16")%slot = 2;else if(%curWeapon $= "PSWrifle ")%slot = 3;}if ( %data $= "prev" ) {// Previous weapon...if ( %slot == 0 || %slot == -1 ) {%i = $maxWeaponSlot;%slot = 0;}else%i = %slot - 1;}else {// Next weapon...if ( %slot == $maxWeaponSlot || %slot == -1 ) {%i = 0;%slot = $maxWeaponSlot;}else%i = %slot + 1;}%newSlot = -1;while ( %i != %slot ) {if ( $weaponInSlot[%i] !$= ""&& %this.hasInventory( $weaponInSlot[%i] )) {// player has this weapon and it has ammo or doesn't need ammo %newSlot = %i;break;}if ( %data $= "prev" ) {if ( %i == 0 )%i = $maxWeaponSlot;else%i--;}else {if ( %i == $maxWeaponSlot )%i = 0;else%i++;}}if ( %newSlot != -1 )%e( $weaponInSlot[%newSlot] );}7.打开“client”下的“config.cs”文件,填加下面的语句:moveMap.bind(keyboard, "ctrl q", prevWeapon);// "ctrl q"前一个武器moveMap.bind(keyboard, "q", nextWeapon);// "q"后一个武器8.把所有修改好的文件都存盘,进入游戏看下效果吧。
Torque3D规范及说明书

Torque 3D规范及说明书TORQUE 3D规范及说明书 (1)前言 (2)第1章编著 (2)第2章游戏框架结构 (3)2.1节游戏服务器端 (3)2.2节游戏客户端 (4)2.3节游戏运行调用过程 (5)第3章脚本编辑基本语法 (8)3.1节UI编辑 (8)3.2节世界地图编辑 (8)3.3节游戏脚本编辑 (8)第4章语法与变量 (10)4.1节命令 (10)4.2节语法 (10)4.3节变量 (11)4.4节物体定义OBJECTS (13)4.5节注意: (16)前言第1章编著本人自己在初学习Torque引擎脚本时写过的一部分脚本说明,大家可以做一个小小的参考。
Torque引擎是一款3D游戏引擎,在使用中,它主要分为三部分:UI编辑、世界地图编辑、及游戏内部编辑三部分。
内可能有很多不明或错误之处请谅解,并及时通知本人进行修改,谢谢!!漂の者(619711385)2006年09月30日第2章游戏框架结构如上图所示,游戏框架结构主要分为Server与Client两大部分,以下以游戏启动与执行顺序做以简单说明。
2.1节游戏服务器端如上图所示,游戏服务器端主要分为以上六大模块:1> Net Work Server网络服务模块其主要功能是做为服务器与所有客户机信息连接进行数据传输功能。
可以对客户机游戏版本进行升级等功能。
2> Word Map 世界地图模块主要载入游戏中地图的镜像文件在服务器端摹拟一个像客户端的地图场景,主要用于对游戏场景中的人物等对像进行判断碰撞等运算处理,在这里,可以保证所有客户机与服务器信息保持信息时间的一致。
3> Database Connection数据库连接模块主要应用于游戏内各游戏客户机与数据库信息保持信息一致与及时更新。
4> ServerCommand服务器执行命令主要执行第一个客户机发来的所有可执行命令及操作、动作等,如:人物的攻击移动等。
torque中文教程--手雷

教程:为玩家装备一个手雷作者:吴波描述:本教程演示如何为玩家装备上手雷。
1.首先备份工作路径,这点已经多次强调了,这次我们使用“Bulibuli”工作目录。
2.打开“client/config.cs”,填加以下语句:moveMap.bindCmd(mouse0, "button1", "commandToServer(\'grenadefire\');", ""); 3.打开“server/scripts/commands.cs”,填加:function serverCmdgrenadefire(%client){echo(%client.player.grenade); //echo's the type of grenade we're using%client.player.grenade.onfire(%client.player,$weaponslot); //runs that grenades onfire function}定义手雷开火的功能。
4.从“素材”目录中拷贝手雷的脚本文件“grenade.cs”到“server/scripts/”下,拷贝文件夹“grenade”到“data\shapes”下,“打开“server/scripts/ game.cs”文件,填加:exec("./grenade.cs");5.同时,在“game.cs”的function GameConnection::createPlayer(%this, %spawnPoint)功能区内,找到:// Starting equipment%player.setInventory(browning,1);%player.setInventory(pistolAmmo,pistolAmmo.maxInventory);%player.mountImage(browningImage,0);并在下面填加:%player.setInventory(grenade,4); //gives us 4 grenades%player.grenade = "grenade"; //defines the grenades were using as grenade 6.另外别忘了在“player.cs”中增加玩家的库存。
铁路电动扭矩扳手使用方法

铁路电动扭矩扳手使用方法英文回答:Using an electric torque wrench for railway maintenance is a straightforward process that requires a few simple steps. Here's how I typically use it:1. Preparation: Before using the electric torque wrench,I make sure to wear appropriate safety gear, such as gloves and safety glasses, to protect myself from any potential hazards. I also ensure that the wrench is properlycalibrated and in good working condition.2. Selecting the correct torque setting: Depending on the specific task at hand, I need to set the torque levelon the wrench. This is typically done by adjusting the torque setting dial or digital display on the tool. It is important to refer to the manufacturer's instructions orthe torque specifications provided for the particular application to ensure the correct torque level is selected.3. Attaching the socket: I then attach the appropriate socket to the wrench. The socket size should match the size of the fastener or nut that needs to be tightened or loosened. I make sure the socket is securely attached to the wrench to prevent any accidents or slippage during use.4. Positioning the wrench: I position myself in a comfortable and stable position, ensuring that I have a clear view of the fastener or nut that needs to be worked on. It is important to have a good grip on the wrench and maintain proper body posture to prevent strain or injury.5. Applying torque: Once everything is set up, I engage the wrench and apply torque to the fastener or nut. The wrench will automatically stop applying torque once the set level is reached, preventing over-tightening or under-tightening. This feature is particularly useful in preventing damage to the fastener or nut and ensuring proper tightening.6. Verifying torque: After applying torque, I use atorque verification tool, such as a torque wrench or torque tester, to confirm that the desired torque level has been achieved. This step is crucial for quality control and ensuring the integrity of the fastening process.7. Maintenance and storage: After using the electric torque wrench, I clean it thoroughly and store it in a safe and dry place. Regular maintenance, such as lubrication and calibration checks, should be performed as per the manufacturer's instructions to ensure the longevity and accuracy of the tool.中文回答:使用电动扭矩扳手进行铁路维护是一个简单的过程,需要几个简单的步骤。
铁路电动扭矩扳手使用方法

铁路电动扭矩扳手使用方法英文回答:Railway electric torque wrench is a powerful tool used for tightening and loosening bolts and nuts in railway construction and maintenance. It is designed to provide precise torque control, ensuring that fasteners are tightened to the required specifications.To use a railway electric torque wrench, follow these steps:1. Prepare the tool: Make sure the wrench is fully charged or connected to a power source. Check that the torque settings are appropriate for the task at hand.2. Select the appropriate socket: Choose a socket that matches the size of the bolt or nut you need to tighten or loosen. Attach the socket securely to the wrench.3. Set the torque value: Adjust the torque setting on the wrench to the specified value. This can usually be done using a digital display or a manual dial.4. Position the wrench: Place the socket onto the bolt or nut, ensuring a secure fit. Make sure the wrench is aligned properly and positioned perpendicular to the fastener.5. Activate the wrench: Press the power button or trigger to activate the wrench. The wrench will start applying torque to the fastener.6. Apply torque: Hold the wrench firmly and apply force in a controlled manner. The wrench will automatically stop applying torque once the set value is reached. Some wrenches may also provide visual or audible signals to indicate when the desired torque has been achieved.7. Release the wrench: Once the desired torque is reached, release the power button or trigger to stop the wrench from applying force. Remove the wrench from the boltor nut.It is important to note that using a railway electric torque wrench requires proper training and knowledge of the specific torque requirements for different fasteners. Incorrect use of the tool can lead to over-tightening or under-tightening, which can compromise the integrity of the fasteners and potentially cause safety hazards.中文回答:铁路电动扭矩扳手是一种用于铁路建设和维护中紧固和松动螺栓和螺母的强大工具。
torque中文教程--静态形状
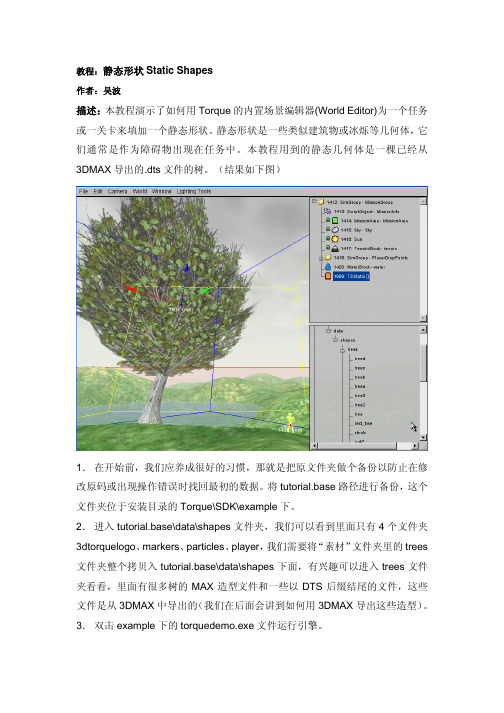
教程:静态形状Static Shapes作者:吴波描述:本教程演示了如何用Torque的内置场景编辑器(World Editor)为一个任务或一关卡来填加一个静态形状。
静态形状是一些类似建筑物或冰烁等几何体,它们通常是作为障碍物出现在任务中。
本教程用到的静态几何体是一棵已经从3DMAX导出的.dts文件的树。
(结果如下图)1.在开始前,我们应养成很好的习惯,那就是把原文件夹做个备份以防止在修改原码或出现操作错误时找回最初的数据。
将tutorial.base路径进行备份,这个文件夹位于安装目录的Torque\SDK\example下。
2.进入tutorial.base\data\shapes文件夹,我们可以看到里面只有4个文件夹3dtorquelogo、markers、particles、player,我们需要将“素材”文件夹里的trees 文件夹整个拷贝入tutorial.base\data\shapes下面,有兴趣可以进入trees文件夹看看,里面有很多树的MAX造型文件和一些以DTS后缀结尾的文件,这些文件是从3DMAX中导出的(我们在后面会讲到如何用3DMAX导出这些造型)。
3.双击example下的torquedemo.exe文件运行引擎。
4.出现主菜单后,点击“start”键,进入任务。
5.任务开始后,按F11打开World Editor,并选Camera > Toggle Camera(快捷键Alt+C),将视角从游戏者转成摄象机,再点一下,回到游戏者视角。
注意:你可以用W、A、S、D键来移动,但要转动的话必须按住右键拖动鼠标。
6.选择成摄影机视角,飞起来一点,在游戏者附近找个适合放置一棵树的位置。
7.切换编辑模式到Window > World Editor Creator模式,快捷键是F4。
这个功能是打开编辑器产生器,用于调用场景中的各种物体。
8.在右侧的窗口中,看到上下两个部分,在下半部的树状结构中找到“Static Shapes”,点它左侧的+号展开,直到找到trees文件夹,具体的结构顺序是"Static Shapes->tutorial.base->data->Shapes->trees",在树的文件夹中有很多树的名称,点击一下就会在屏幕中调出这个树的造型,是不是很简单呢?找到一个你喜欢的树,不喜欢的话直接按DEL键删掉它。
赫拉工具-Click-Torque A 6 Set 1 产品说明说明书
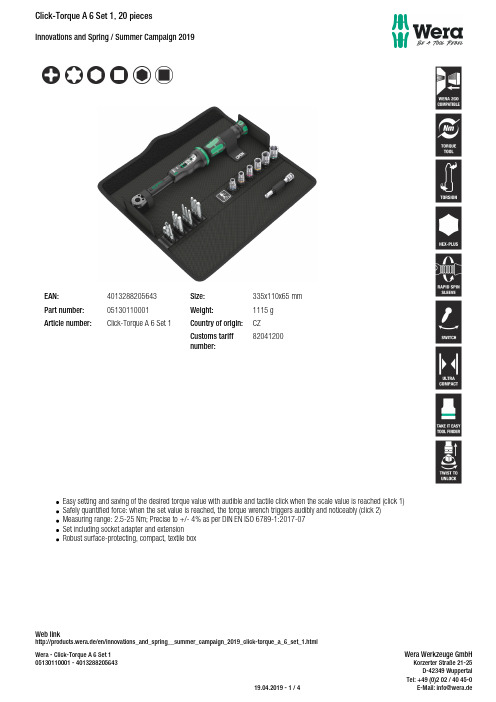
EAN:4013288205643Size:335x110x65 mmPart number:0513*******Weight:1115 g Article number:Click-Torque A 6 Set 1Country of origin:CZ Customs tariff number:82041200Easy setting and saving of the desired torque value with audible and tactile click when the scale value is reached (click 1)Safely quantified force: when the set value is reached, the torque wrench triggers audibly and noticeably (click 2)Measuring range: 2.5-25 Nm; Precise to +/- 4% as per DIN EN ISO 6789-1:2017-07Set including socket adapter and extension Robust surface-protecting, compact, textile boxWeb linkhttp://products.wera.de/en/innovations_and_spring__summer_campaign_2019_click-torque_a_6_set_1.htmlClick torque wrench in the unmistakable Wera design. Very robust design with high accuracy as per DIN EN ISO 6789-1: 2017-07. Easy setting and saving of the default value. The audible and tactile clicks on reaching the scale values facilitate the safe setting of the desired torque value. The robust release mechanism guarantees a clearly audible and tactile release signal when the set torque is reached. Provides clockwise torque-control and 45-tooth ratchet mechanism. The Wera click torque wrench is accompanied with various accessories in a compact set arrangement. Included are: Click-Torque A 6 1/4 … from 2.5 to 25 Nm, 6 sockets with 1/4“ drive, 11 Hex-Plus hexagon bits, Philips head bits and TORX® bits, plus an extension and socket adaptor.Web linkhttp://products.wera.de/en/innovations_and_spring__summer_campaign_2019_click-torque_a_6_set_1.htmlSet contents:Click-Torque A 6***********1 x 1/4" x 2,5-25 N m851/4 TZ PH***********1 x PH2 x 50 mm867/4 Z TORX®05060133001 1 x TX 15 x 50 mm05060134001 1 x TX 20 x 50 mm05060135001 1 x TX 25 x 50 mm05060136001 1 x TX 27 x 50 mm05060137001 1 x TX 30 x 50 mm050601380011 x TX 40 x 50 mm840/4 Z Hex-Plus*********** 1 x 3 x 50 mm*********** 1 x 4 x 50 mm*********** 1 x 5 x 50 mm***********1 x 6 x 50 mm870/1***********1) 1 x 1/4" x 25 mm1) With friction ball; formanual nut spinner sockets8794 SA***********1 x 1/4" x 75 mm8790 HMA*********** 1 x 6 x 23 mm*********** 1 x 7 x 23 mm*********** 1 x 8 x 23 mm*********** 1 x 10 x 23 mm*********** 1 x 12 x 23 mm*********** 1 x 13 x 23 mmK24011990178 1 x 240 x 50 mmClick-Torque Wrench series Click-Torque A 6ExactClick Torque wrench set1/4"withdouble click.We wanted working with torquewrenches to be simple andaccurate which is why wedeveloped the Click-Torquewrenches.With the ability to setand save the default values andwith the unmistakable,robustWera design,these torquewrenches are the ideal tools for allbolting applications that requiretorque-controlled tightening(clockwise torque wrenches)andtightening and loosening(torquewrenches for insert tools).With 1/4" hex drive.Precise to±4%as per DIN EN ISO6789-1:2017-07.Web linkhttp://products.wera.de/en/innovations_and_spring__summer_campaign_2019_click-torque_a_6_set_1.htmlSimple and safeSimple settingRelease mechanismManual and machine socketsEasy setting and saving of the desired torque value;readable on the main and fine scales.With audible and tactile clicks when adjusting the scale values.When the set torque value is reached,an audible and tactile mechanism triggers.The manual and machine sockets can be used both for hand and power tools use (non-impact).Users need just one socket set for all applications.Web linkhttp://products.wera.de/en/innovations_and_spring__summer_campaign_2019_click-torque_a_6_set_1.html。
torque中文教程--瞄准器
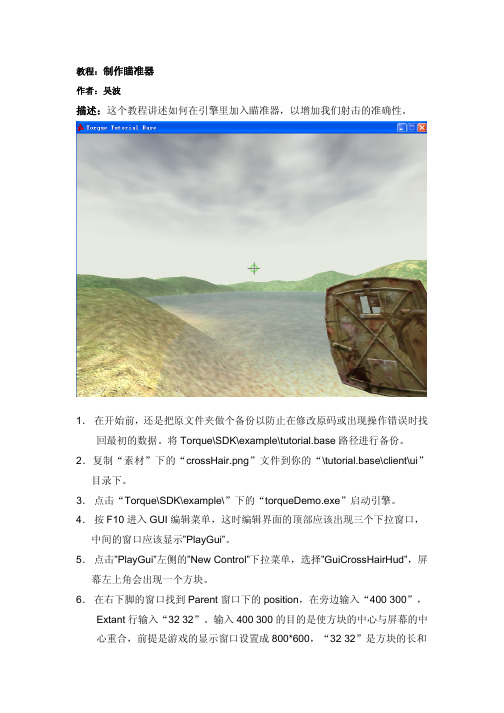
教程:制作瞄准器作者:吴波描述:这个教程讲述如何在引擎里加入瞄准器,以增加我们射击的准确性。
1.在开始前,还是把原文件夹做个备份以防止在修改原码或出现操作错误时找回最初的数据。
将Torque\SDK\example\tutorial.base路径进行备份。
2.复制“素材”下的“crossHair.png”文件到你的“\tutorial.base\client\ui”目录下。
3.点击“Torque\SDK\example\”下的“torqueDemo.exe”启动引擎。
4.按F10进入GUI编辑菜单,这时编辑界面的顶部应该出现三个下拉窗口,中间的窗口应该显示”PlayGui”。
5.点击”PlayGui”左侧的”New Control”下拉菜单,选择”GuiCrossHairHud”,屏幕左上角会出现一个方块。
6.在右下脚的窗口找到Parent窗口下的position,在旁边输入“400 300”,Extant行输入“32 32”。
输入400 300的目的是使方块的中心与屏幕的中心重合,前提是游戏的显示窗口设置成800*600,“32 32”是方块的长和宽,不知道大家注意没有,我们拷贝的“crossHair.png”文件的长宽正是 32*32。
7.拉动窗口的划块,在下面的“Misc”中找到“bitmap”行,点击最右侧的“…”,在“\tutorial.base\client\ui”目录下选择“crossHair.png”文件。
8.点击“Apply”,瞄准器出现了。
按F10进入游戏状态,发射几下看看瞄准器是不是很准确,如果武器的落点有偏差的话,按F10回到编辑状态,记住子弹的落点,把瞄准器的中心与落点重合。
必要忘记点“Apply”来确认。
9.调试好以后,不要忘记存盘,当然是存成Playgui.gui文件。
10.不要忘了!再次启动引擎前,要编辑一下Playgui.gui文件,加入:Nocursor = “1”;以确保进入游戏后,鼠标还能带动视角转动。
Torque脚本简单实例创建一个简单的Al驱动的游戏人物
Torque脚本简单实例创建一个简单的Al驱动的游戏人物李华杰
【期刊名称】《程序员:游戏创造》
【年(卷),期】2008(000)003
【摘要】在前几期的文章中,我们已经对TorqueGameEngine进行了一系列的介绍,相信大家对Torque引擎的强大功能也都有了一些了解。
其实,使用Torque引擎进行游戏开发的另一个突出优点就是它的易用性。
本期,我们就通过一个实例向大家展示一下如何使用Torque在游戏中轻松加入自己想要的内容。
本文所列举的实例是对网上一个实例进行简单修改而得来的,为的是使读者可以在Torque自身的“Tutorial.base”实例上运行它。
【总页数】4页(P52-55)
【作者】李华杰
【作者单位】递归教育
【正文语种】中文
【中图分类】TP316.7
【相关文献】
1.创建一个简单而实用的尿红细胞形态诊断新标准 [J], 刘金祥;丁勇;曹翠云;潘妍
2.用FALSH MX 2004的ActionScript脚本语言开发拼图游戏 [J], 钱海军
3.当已经映射了驱动器Z时如何通过脚本确定下一个可用盘符 [J],
4.能给我一个菜单吗?——使用菜单驱动的脚本存储和应用注册表编辑 [J], Dick; Lewis; 蒋世滨(译者)
5.用SSIS创建一个简单的ETL系统大致了解基本包设计和建设 [J], Joy; Mundy; Warren; Thornthwaite; 徐瑾(译)
因版权原因,仅展示原文概要,查看原文内容请购买。
特拉福克斯撬晃门Process向导-前悬應Tools说明书
JK Shock Removal and Installation
Important Notes:
Prior to beginning this or any installation read these instructions to familiarize yourself with the required steps and evaluate if you are experienced and capable to personally perform these modifications. A factory service manual should be used in conjunction with these installation instructions.
5
Revisiபைடு நூலகம்n A
6
999207
4
Apply penetrating oil. These are captured nuts and a broken bolt here is a real inconvenience. Remove the two upper bolts with a 16mm.
WARNING TO DRIVER: This vehicle has been modified to enhance off road performance and has unique handling characteristics. Use in harsh environments can cause extreme stress on the components. Vehicle should be inspected after being off road to make sure that all the components are in working order and safe to travel on the highway. All fasteners should be checked so that they are at the correct torque specifications as the vibration and stresses from off roading may cause critical fasteners to work loose. Extra care should be taken to inspect the critical components, steering, and brake systems. During each oil change components such as arms, tie rod ends, etc should be greased and checked for excessive wear. Any worn components should be replaced. When returning to the pavement always set or restore tire air pressure to the factory recommendation and connect or engage any disabled sway bar mechanisms. Because of the higher center of gravity and larger tires, this vehicle handles and reacts differently than many passenger cars, both on and off road. You must drive it safely! Extreme care should be taken to prevent vehicle rollover or loss of control, which can result in serious injury or death. Avoid sudden sharp turns or abrupt maneuvers. Generally, braking performance and capabilities are decreased when significantly larger/heavier tires are used, especially when used in combination with transfer case low-range reduction kits. Take this into consideration while driving. Do not add, alter or fabricate any factory or aftermarket parts to increase vehicle height over the intended height of the TeraFlex product purchased. Mixing component brand is not recommended. TeraFlex Inc. will not be responsible for any altered product or any improper installation or use of our products. We will be happy to answer any questions concerning the design, function, and correct use of our products. It is ultimately the buyer’s responsibility to have all bolts/nuts checked for tightness after the first 100 miles and then every 3000 miles. Wheel alignment, steering system, suspension and drive line systems must be inspected by a qualified professional mechanic at least every 3000 miles.
- 1、下载文档前请自行甄别文档内容的完整性,平台不提供额外的编辑、内容补充、找答案等附加服务。
- 2、"仅部分预览"的文档,不可在线预览部分如存在完整性等问题,可反馈申请退款(可完整预览的文档不适用该条件!)。
- 3、如文档侵犯您的权益,请联系客服反馈,我们会尽快为您处理(人工客服工作时间:9:00-18:30)。
教程:闪电 作者:吴波 描述:前面我们曾做过雨的效果,如果再加上闪电,那效果将更加的逼真,这个 教程就使我们锦上添花地为暴风雨加上闪电。
1.首先还是备份我们的工作目录。 2.要做闪电,首先要准备闪电的图片,在“素材”目录中我为大家准备好了六 张闪电的图。如果你是一个美工,那就请自己画几幅闪电的图片,记得背景 一定要作成透明的,并存成 PNG 的文件格式。 3.将六张闪电图拷贝到“工作目录\data\environment”下。 4.打开 UltraEdit-32,新建一个名为“lightning.cs”的文件,在文件中,输入以 下脚本编码: datablock AudioProfile(thunderCrash1) { filename = "~/data/sound/thunder1.ogg";
datablock LightningData(LightningStorm) { strikeTextures [0] ="~/data/environment/lightning.dml"; thunderSounds[0] = thunderCrash1; thunderSounds[1] = thunderCrash2; thunderSounds[2] = thunderCrash3; }; 前面一段是对闪电发生时声音的描述,大家可以根据脚本中语音文件所在的目
description = Audio2D; };
datablock AudioProfile(thunderCrash4) { filename = "~/data/sound/thunder4.ogg";
description = Audio2D; };
// Images and Settingsdescription = A Nhomakorabeadio2D;
};
datablock AudioProfile(thunderCrash2) { filename = "~/data/sound/thunder2.ogg";
description = Audio2D; };
datablock AudioProfile(thunderCrash3) { filename = "~/data/sound/thunder3.ogg";
录,从“素材”里把相应的文件复制过来,这个操作相信对引擎脚本比较熟悉的 你来说不再是问题,在此不再赘述。 5.保存好文件,打开“工作目录\server\scripts”下的“game.cs” ,在适当的地 方加入: exec("./lightning.cs"); 存盘。 6.进入引擎,按 F11+F4,在右下侧窗口中的 “MissionObject->Environment->Lightning” ,在出现的窗口中输入任意的名 字,点 OK。 7.按 F11,静静的观看出现的闪电吧,甚至还能听到隐隐的雷声。当然你还可 以通过按 F3 来编辑它的各种属性。 8.效果怎么样?感觉好的话就存盘吧。
