WebSphere Application Server v7.0运行配置
Websphere7.0搭建集群手册

Websphere V7.0集群搭建用户操作手册目录1引言 (1)1.1编写目的 (1)1.2面向读者 (1)1.3面向读者 (1)2集群搭建准备 (1)3集群搭建 (2)3.1集群管理器安装 (2)3.2节点安装 (9)3.3集群搭建 (16)3.3.1创建集群 (16)3.3.2创建集群成员 (17)3.4JDBC配置 (18)3.4.1创建JDBC提供程序 (18)3.4.2配置数据源 (20)3.5发布应用程序 (27)3.5.1创建虚拟主机 (27)3.5.2安装应用程序 (29)3.5.3配置服务器 (31)4重启服务器后,启动应用程序步骤 (34)4.1.1启动节点 (34)4.1.2启动集群 (34)4.1.3启动应用程序服务器 (35)1 引言1.1 编写目的系统上线安装参考文档1.2 面向读者服务器管理人员,项目管理人员等1.3 面向读者读者需要了解WebSphere Application Server Network Deployment 7.0相关知识2 集群搭建准备一台服务器作为集群管理器;多台服务器作为应用程序服务器,成为集群节点。
集群拓扑图:应用程序应用程序应用程序集群管理器服务器1服务器2服务器33集群搭建3.1集群管理器安装执行launchpad.exe文件,点击右边的“启动WebSphere Application Server Network Deployment安装向导”,点击“下一步”,选择“我既接受IBM条款也接受非IBM条款”,点击“下一步”,点击“下一步”,点击“下一步”,选择安装目录,点击“下一步”选择“管理”环境,点击“下一步”,选择“Deployment Manager”,点击“下一步”,启动管理安全性,输入用户名、密码和确认密码,点击“下一步”,创建存储库,选择安装目录,点击“下一步”,点击“下一步”,安装中…..安装成功,点击“完成”!点击“安装验证”并启动Deployment Manager验证完成,启动Deployment Manager成功!3.2节点安装执行launchpad.exe文件,点击右边的“启动WebSphere Application Server Network Deployment安装向导”,点击“下一步”,选择“我既接受IBM条款也接受非IBM条款”,点击“下一步”,点击“下一步”,点击“下一步”,选择安装目录,点击“下一步”选择“定制”,点击“下一步”,填写Deployment Manager主机名或IP地址、用户名和密码,端口号使用缺省值8879,点击“下一步”,安装中……安装成功,点击“完成”!启动“第一步”,点击“管理控制台”进入管理平台进入“系统管理-节点”,确认集群服务器和应用程序服务器是否关联?已关联,可以建立集群了!3.3集群搭建3.3.1创建集群点击“下一步”,创建一个空的集群,点击“下一步”,点击“完成”!3.3.2创建集群成员点击“集群成员”进入,点击“添加成员”,添加完成!3.4JDBC配置3.4.1创建JDBC提供程序作用域选择“集群=nmwxcs_cluster”,点击“新增”,点击“下一步”,点击“下一步”,点击“完成”,创建成功!新增WebSphere变量,类路径配置完成!3.4.2配置数据源点击列表中的“MySQL JDBC Provider”,进入点击右边“数据源”,点击“新建”,输入数据源名和JNDI名称,点击“下一步”,点击“下一步”,点击“下一步”,点击“完成”,创建成功!定制属性进入数据源列表点击“MySQL DataSource”,进入下一页,点击“定制属性”,进入下一页创建url属性:值:jdbc:mysql://10.219.242.13/nmwxcs?autoReconnect=true&useUnicode=true&character Encoding=UTF-8创建user属性:创建password属性:创建JAAS-J2C认证数据:进入数据源,点击列表中“MySQL DataSource”,进入下一页点击右边“JAAS-J2C认证数据”,进入下一页,点击“新增”按钮,点击“应用”,再点击“确定”,完成!选择数据源,点击“测试连接”,配置完成!3.5发布应用程序3.5.1创建虚拟主机环境->虚拟主机进入,点击“新增”,进入新增页面点击“确定”,新增成功点击虚拟主机nmwxcs_host进入以下页面点击右侧“主机别名”,进入后,再点击“新增”按钮,点击“确定”,完成!3.5.2安装应用程序应用程序-应用程序类型-WebSphere企业应用程序进入,点击“安装”,点击“下一步”,点击“下一步”,点击“下一步”,点击“下一步”,点击“下一步”,点击“完成”,安装成功!点击“保存到主配置”。
WebSphere7.0安装部署卸载手册
WebSphere7.0安装部署卸载手册目录一. 安装WebSphere (3)1.1 安装程序 (3)1.2 安全验证 (8)1.3 访问控制台 (10)二. 启动类 (10)三. JVM参数配置 (12)四. 创建数据源 (15)4.1 新建JDBC提供程序 (16)4.2 新建数据源 (18)4.3 J2C认证 (21)4.4 设置数据源与J2C认证关联 (22)五. 安装应用程序 (25)5.1 部署War包 (25)5.2 启动应用程序 (28)5.3 修改端口号 (29)六. 卸载WebSphere (29)6.1 卸载程序 (29)6.2 删除残余文件 (31)6.3 删除注册表 (32)一.安装WebSphere1.1 安装程序第一步:打开文件夹,双击应用程序第二步:点击【启动WebSphere Application Server Network Deployment安装向导】开始安装第三步:接受条款,点击【下一步】第四步:系统必备软件检查,点击【下一步】第五步:安装可选的功能部件,点击【下一步】第六步:选择产品安装位置,点击【下一步】第七步:选择“应用程序服务器”,点击【下一步】第八步:取消勾选“启用管理安全性”,即登录控制台不需要密码,点击【下一步】第九步:检查安装摘要,点击【下一步】,这里可能需要一些时间,请耐心等待第十步:安装成功,点击【完成】1.2 安全验证在第一步页面,点击【安全验证】安装验证完成,服务器即已启动,关闭验证窗口。
1.3 访问控制台通过以下三种方式进入控制台:1.在“第一步”窗口中点击【管理控制台】2.在开始程序中点击【管理控制台】3.在浏览器中输入http://localhost:9060/ibm/console二.启动类第一步:进入服务器-服务器类型-WebSphere Applcation Server,点击应用程序服务器【server1】第二步:在右侧容器设置中找到容器服务,点击【Startup Bean服务】第三步:勾选“在服务器启动时启动服务”,点击【应用】第四步:保存到主配置三.JVM参数配置第一步:进入服务器-服务器类型-WebSphere Applcation Server,点击应用程序服务器【server1】第二步:找到右侧Java和进程管理,点击【进程定义】第三步:点击右侧【Java虚拟机】第四步:输入初始堆大小:256,最大堆大小:512,通用JVM参数:-Ddefault.client.encoding=GBK -Dfile.encoding=GBK nguage=Zh -Duser.region=CN,这里主要是配置支持中文第五步:保存到主配置四.创建共享库第一步:进入环境-共享库,选择节点,点击【新建】第二步:输入名称、类路径,点击【确定】第三步:保存到主配置五.创建数据源5.1 新建JDBC提供程序第一步:进入资源-JDBC-JDBC提供程序,选择节点,点击【新建】第二步:选择数据库类型、提供程序类型、实现类型,前三项设置好会自动带出名称和描述,图示以DB2为例,点击【下一步】第三步:输入Jar驱动包所在路径,点击【下一步】第四步:点击【完成】第五步:保存到主配置5.2 新建数据源第一步:进入资源-数据源,选择节点,点击【新建】第二步:填写数据源名、JNDI名称,点击【下一步】第三步:选择现有的JDBC提供程序,即上面刚创建的JDBC提供程序,点击【下一步】第四步:输入数据库名、服务器名称和端口号,点击【下一步】第五步:直接点击【下一步】,后面再做J2C认证第六步:检查摘要,点击【完成】第七步:保存到主配置5.3 J2C认证第一步:进入资源-数据源,点击数据源名【HNSTAND】第二步:点击右侧【JAAS - J2C认证数据】第三步:点击【新建】第四步:输入别外、用户标识、密码,点击【应用】第五步:保存到主配置5.4 设置数据源与J2C认证关联第一步:进入资源-数据源,点击数据源名【HNSTAND】第二步:向下拉找到安全性设置,设置组件管理的认证别名和容器管理的认证别名为刚才新建的J2C认证,点击【应用】第三步:保存到主配置第四步:测试数据源是否或用。
Websphere JMS配置
Step2: 修改摘要,点击“完成”
Step3: 点击 “保存到主配置” 使之生效
Step4: 添加总线成员:服务集成——》总线——》进入刚才建立的总线,点击 “拓扑”栏下 的 “总线成员”,添加一个,都走默认配置,保存到主配置 ,使之生效
2. 配置连接工厂:
Step1: 资源——》JMS——》连接工厂——》新建
Step2: 将主题通过 jndi 发布: 资源——》jms——》主题——》新建——》直到 主题属性设置页面 输入名称和 jndi 名称,选择刚才建立的总线,和总线里面的目标主题空间
确定,保存到主配置
6. 配置主题 2
{ Name= testTopic } 步骤同 5 的配置主题 1 的 step1 中所述
7. 重启 WAS 服务。
Step2: 将队列通过 jndi 发布: 资源——》jms——》队列——》新建——》直到 队列属性设置页面 输入名称和 jndi 名称,选择刚才建立的总线,和总线里面的目标队列
确定,保存到主配置。
4. 配置队列 2
{ Name= testQueue2
} 步骤同 3、配置队列 1 的 step1
4. 配置主题:
主题 1: { Name= topicRec JNDIName=jms/ topicRec }
主题 2: { Name= testTopic }
二、配置过程
1. 配置总线
Step1: 服务集成——》总线——》新建——》输入总线名称,点 “下一步” 勾掉 “总线安全性”(如果不需要的话)
5. 配置主题 1
{ Name= topicRec JNDIName=jms/ topicRec } Step1: 创建队列 点击进入刚才建立的总线:bsnRecordBus2——》目标资源——》目标——》新建——》 选“主题空间”,进入 主题空间属性设置页,输入标识,下一步一直到完成,保存到主 配置,使之生效。
Websphere配置手册

Websphere配置手册Websphere配置手册Websphere配置手册 (1)1.启动WebSphere Application Server (1)2.系统启动和关闭的集成 (1)3.启停the deployment manager (5)4.添加应用程序 (6)5.删除应用程序 (13)6.更新应用程序 (14)7.更新WebSphere(silent方式安装) (14)安装升级工具 (14)升级文件 (15)1.启动WebSphere Application Servera) WebSphere Application Server 提供startServer.sh shell 脚本以简化应用服务器的启动过程。
此脚本有一个参数,即要启动的应用服务器的名称。
b) 启动应用服务器的方法是,使用su或sudo -s命令(取决于使用的是UNIX 系统还是Linux 发行版)变成安装WebSphere Application Server 的系统上的特权用户。
在出现提示时,分别输入根密码或您的密码。
c) 接下来,输入以下命令启动WebSphere Application Server:/opt/IBM/WebSphere/AppServer/bin/startServer.sh server1 (在刚安装WebSphere Application Server 的系统上,默认的服务器名称是server1)。
2.系统启动和关闭的集成a)在系统上安装应用服务器之后,通常希望在每次重新启动系统时自动启动它。
在Microsoft Windows 等平台上安装WebSphere Application Server 时,安装过程允许用户把服务器和管理服务器定义为在启动系统时自动启动的Windows 服务。
但是,UNIX 和 Linux 安装程序没有提供相似的启动集成机制。
因此,在 UNIX 和Linux 系统上,必须手工地把 WebSphere Application Server 集成到系统启动过程中。
【VIP专享】websphere7.0中配置oracle数据源及部署
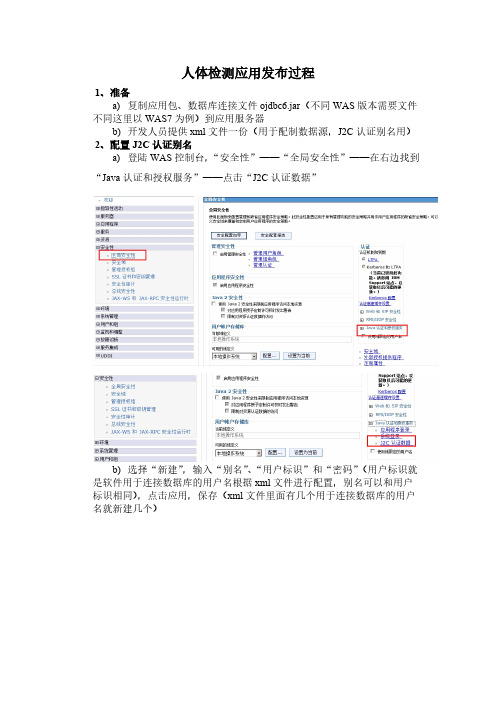
人体检测应用发布过程1、准备a)复制应用包、数据库连接文件ojdbc6.jar(不同WAS版本需要文件不同这里以WAS7为例)到应用服务器b)开发人员提供xml文件一份(用于配制数据源,J2C认证别名用)2、配置J2C认证别名a)登陆WAS控制台,“安全性”——“全局安全性”——在右边找到“Java认证和授权服务”——点击“J2C认证数据”b)选择“新建”,输入“别名”、“用户标识”和“密码”(用户标识就是软件用于连接数据库的用户名根据xml文件进行配置,别名可以和用户标识相同),点击应用,保存(xml文件里面有几个用于连接数据库的用户名就新建几个)3、新建JDBC提供程序a)“资源”——“JDBC”——“JDBC提供程序”,选择作用域并新建b)选择数据库类型和实现类型(数据类型根据使用数据库进行选择,实现类型选择连接池数据源),下一步c)配置数据库类路径(ojdbc6.jar存放位置,根据自己实际位置填写),下一步d)点击完成并保存,JDBC提供程序创建成功4、新建数据源,测试数据源连接a)“资源”——“JDBC”——“数据源”,选择作用域并点击“新建”b)输入数据源名称和JNDI名称(JNDI名称必须根据xml文件填写),下一步c)选择JDBC提供程序,由于前面创建了JDBC提供程序这里就选择现有的JDBC提供程序,下一步d)配置URL,选择数据存储器辅助控件类名(根据提供的xml文件配置URL地址,根据数据库版本选择辅助控件类名),下一步e)设置安全性别名,这里只需要选择组建管理的认证别名就行了(根据xml文件进行选择),下一步f)完成,点击“完成”并“保存”g)测试数据源连接一个数据源创建完成,如果有多个数据源,重复新建“数据源”的步骤要使创建的数据源生效,必须重新启动WAS,在测试数据源连接5、配置websphere变量值a)“环境”——“Websphere变量”,找到“ORACLE JDBC DRIVER PATH”,右键配置(在‘值’的位置输入ojdbc6.jar路径),应用并保存a)“应用程序”——“WebSphere企业应用程序”——“安装”b)选择要发布的应用程序包路径,下一步c)选择“详细”和“生成缺省绑定”,下一步d)点击“继续”e)下一步f)选中“集群和服务器”并勾选模块,点击应用,下一步g)下一步h)下一步i)下一步j)下一步k)下一步l)下一步m)下一步n)点击“完成”o)稍等一会,点击保存p)等待一会点击“确定”,应用发布成功,启动应用7、测试应用发布是否成功a)在IE地址栏输入应用地址(这里没有使用IHS所以加端口9080),回车b)能打开应用,证明发布成功(可以使用测试账号进行登录以检查应用是否正常)。
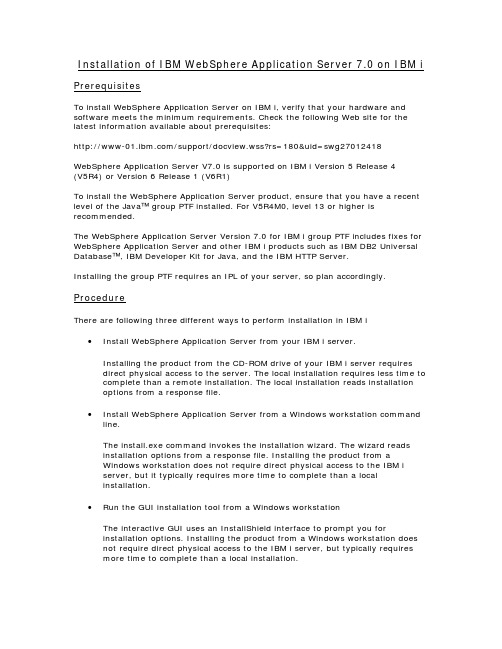
Installation of IBM WebSphere Application Server 7
Installation of IBM WebSphere Application Server 7.0 on IBM iPrerequisitesTo install WebSphere Application Server on IBM i, verify that your hardware and software meets the minimum requirements. Check the following Web site for the latest information available about prerequisites:/support/docview.wss?rs=180&uid=swg27012418WebSphere Application Server V7.0 is supported on IBM i Version 5 Release 4(V5R4) or Version 6 Release 1 (V6R1)To install the WebSphere Application Server product, ensure that you have a recent level of the Java™ group PTF installed. For V5R4M0, level 13 or higher is recommended.The WebSphere Application Server Version 7.0 for IBM i group PTF includes fixes for WebSphere Application Server and other IBM i products such as IBM DB2 Universal Database™, IBM Developer Kit for Java, and the IBM HTTP Server.Installing the group PTF requires an IPL of your server, so plan accordingly. ProcedureThere are following three different ways to perform installation in IBM i ∙Install WebSphere Application Server from your IBM i server.Installing the product from the CD-ROM drive of your IBM i server requiresdirect physical access to the server. The local installation requires less time to complete than a remote installation. The local installation reads installationoptions from a response file.∙Install WebSphere Application Server from a Windows workstation command line.The install.exe command invokes the installation wizard. The wizard readsinstallation options from a response file. Installing the product from aWindows workstation does not require direct physical access to the IBM iserver, but it typically requires more time to complete than a localinstallation.∙Run the GUI installation tool from a Windows workstationThe interactive GUI uses an InstallShield interface to prompt you forinstallation options. Installing the product from a Windows workstation doesnot require direct physical access to the IBM i server, but typically requiresmore time to complete than a local installation.In this document we shall cover local silent install from IBM i QShell command line.Note: Before you install WebSphere Application Server, ensure that your user profile has *ALLOBJ and *SECADM special authorities.Installation steps1.Sign on the IBM i system with a user profile that has *ALLOBJ and *SECADMspecial authorities.2.Verify that the host server jobs have started on your IBM i server.The host server jobs allow the installation code to run on IBM i. On a CLcommand line, enter the following command:STRHOSTSVR SERVER(*ALL)3.Place the WebSphere Application Server for IBM i disk in the disk drive ofyour server. Do not use the WebSphere Application Server for Windows® disk or any other operating system disk other than the disk for IBM i.The application server product installer is spanned across multiple CDs. If you are installing the product from the CDs, then you must use the followingprocedure or the installation will not proceed:a.Copy both installation CDs into the same parent directory (forexample, WebSphere7) on your hard disk. the directories DISK1 and DISK2 (for example,WebSphere7/DISK1 and WebSphere7/DISK2).c.If your system's language is not set to English, then set the languageto English for the duration of the installation.Avoid trouble: If your language is set to something other thanEnglish, the installation will faild.Run the installer from the DISK1 directory after following theremaining instructions in this document.e.After you have completed the installation, reset your system'slanguage to its previous setting if you had changed it during theinstallation.e the Copy (CPY) command to create a copy of the responsefile.base.txt filefrom the disk.For example:CPY OBJ('/home/WEBSPHERE/WAS70/responsefile.base.txt') TODIR('/tmp')5.Edit the /tmp/responsefile.base.txt filea.Change the value for -OPT silentInstallLicenseAcceptance from false totrue.A value of true indicates that you have read and accept the terms ofthe license agreement. This change is required to run the installation.b.Specify a Java™ Software Development Kit (SDK) to invoke theinstaller and configure the product and profiles. You can force the useof a specific Java SDK with the i5osjdklocation option in the responsefile.c. Change the following parameter to false if you do not want toenable administrative security. You do not need to set thePROF_adminUserName or PROF_adminPassword in this case.-OPTPROF_enableAdminSecurity=”true”You do not need to set the PROF_adminUserName orPROF_adminPassword in this case. If you select above parameter astrue then you will have to also define (PROF_adminUserName andPROF_adminPassword) otherwise installation will fail. In our case wedon’t need admin security so we have made it false.6. Save the file by pressing F3 twice7. Open a Qshell session. On an IBM i command line, type STRQSH8. Change the directory to the WAS subdirectory on IBM i command line:/home/WEBSPHERE/WAS70cd9. Invoke the install script, and point to your response file:install -options /tmp/responsefile.base.txt10. After you invoke the installation script, messages are displayed that indicate the progress of the installation. When the setup program completes, check the last window. The last two messages should indicate the status of the installation: success, partial success, or failure, for example:com.ibm.ws.install.ni.ismp.actions.SetExitCodeAction, msg1,Process,EXIT-CODE=0CWUPI0000I:com.ibm.ws.install.ni.ismp.actions.ISMPLogSuccessMessageAction,Process,INSTCONFSUCCESSmsg1,An exit code of 0 means successful installation.13. You should also check the log file at: <install_root>/logs/install/log.txt Important: Do not exit the Qshell session (PF3) until the installation has completed. Doing so might cause the installation to stop prematurelyYou have successfully installed WebSphere Application Server for IBM i Version 7.0 Starting Server and Accessing Admin ConsoleNow as you have installed WebSphere Application Server successfully, you need to start the server and access admin console to verify the installation.To start the server:1. Open Qshell from IBM i command line by typing STRQSH and press Enter2. On the Qshell change the directory to where application server is installed, in our casecd /QIBM/ProdData/WebSphere/AppServer/V70/BASE/bin3. Before starting the server, we will check the status of the server to see if it is started or stopped to be on the safe side, type the following command serverStatus server14. Wait until it gets some information and see the last message, at the end if it says “Application server server1 can not be reached. It appears to be stopped” thenperform the following command. (Note: If it says “Application server server1 is STARTED” then no need to perform following command and skip to step 5) startServer server1Wait for a while until it gives a message like “Application server server1 in profile default has started and is ready to accept connections on admin port 9060”5. Next is to access the WAS admin console to verify that the server is started. We will access the admin console from our windows machine. Open internet explorer and type in the address bar:http://<iseriesHostIP>:9060/ibm/consoleAnd you will see the following login screen, type any user id like “admin” and click Login, and you are ready to install, uninstall applications and use many features of WebSphere Application Server.。
Websphere 7 VE环境搭建配置

WebSphere V7 VE环境搭建配置2011/12/281.环境规划准备1角色分配2操作系统准备2.1操作系统环境按要求安装好操作系统,这里为Windows Server 2003 Enterprise x86_64 with SP2。
2.2操作系统环境在hosts文件(C:\Windows\System32\drivers\etc\hosts)后面添加如下内容:10.123.91.170 gaweb17010.123.91.171 gaweb17110.123.91.172 gaweb17210.123.91.173 gaweb17310.123.91.175 gaweb17510.123.91.176 gaweb17610.123.91.177 gaweb17710.123.91.178 gaweb17810.123.91.180 gaweb18010.123.91.182 gaweb18210.123.91.183 gaweb183(该部分内容只是为了日后维护方便,并不是必须的)2.安装WAS介质按规划面向WAS/ODR/DMGR的服务器有如下几台:10.123.91.17010.123.91.17110.123.91.17310.123.91.17510.123.91.17610.123.91.17710.123.91.17810.123.91.18010.123.91.1831安装WAS7(注意:Windows平台环境下绝对不使用带有“Program Files”的默认目录)这里不创建WAS环境,即不创建概要文件,因为我们要先打补丁,安装完补丁后再来创建profile。
2安装IHS与Plugin这里的Application Server的主机名或IP地址要指向DMGR服务器,因为我们对外的IHS服务器通过DMGR来对外发布的,如果你在同一台物理服务器上安装单机版的was和IHS,那么application Server的主机名或IP地址指向本机即可。
WebSphere Application Server V7 性能调优

WebSphere Application Server V7 性能调优简介IBM WebSphere Application Server 是一种可靠的企业级应用服务器,它提供了一组核心组件、资源和服务,供开发人员在应用程序中使用。
每个应用程序都具备特有的需求,并且经常采用截然不同的方式使用应用服务器的资源。
为了提供高度灵活性并支持这种广泛的应用程序,WebSphere Application Server 提供了一组全面的参数来帮助您增强对应用程序的调优。
应用服务器已经为最常用的调优参数设置了默认值,以确保能为最广泛的应用程序提供开箱即用的性能改善。
但是,由于任意两个应用程序都不可能采用完全相同的方式来使用应用服务器,因此无法确保一组调优参数能适用于所有应用程序。
这也突显了对应用程序执行有重点的性能测试和调优的重要性。
本文将讨论在 WebSphere Application Server V7.0(和之前发行版)中最常使用的一些参数,以及对它们进行调优的方法。
与其他相关文章提供的调优建议不同,本文将使用Apache DayTrader Performance Benchmark Sample案例研究作为本文的上下文。
借助 DayTrader 应用程序,您可以清楚地确定所使用的主要服务器组件,对这些区域进行重点调优,并观察各种调优更改所带来的收益。
在继续阅读之前,需要记住关于应用服务器性能调优的一些事项:∙提高性能经常会牺牲应用程序或应用服务器的一些特性或功能。
在计算性能调优更改时应该仔细考虑性能和特性之间的权衡。
∙应用服务器之外的一些因素有时会影响性能,包括硬件和操作系统配置、系统中运行的进程、后端数据库资源的性能、网络延迟等等。
您在自己执行性能评估时,必须将这些因素考虑在内。
∙此处讨论的性能改善仅针对 DayTrader 应用程序,并且特定于此处描述的工作负载组成及所支持的硬件和软件栈。
您通过本文介绍的调优更改实现的应用程序性能提升肯定会有所不同,并且应该通过您自己的性能测试进行评估。
WebSphere Application Server使用及参数设置

停时间。这些信息将记录在 native_stderr.log 文件中。再通各种
工具打开此文件进行分析,这里推荐使用GCCollector,这个工具在这 里不细说,大家可以自己去研究。 3.如何监控:可以通WebSphere Application Server >性能监 视和调整>性能查看>当前活动>启动监视>JVM,可以查看内存空闲 free趋势图,如果是一条直线,说明内存不释放,如图:
WAS—参数设置
WAS—参数设置
3.监视: 语句高速缓存大小调整是否合适,可以查看 PrepStmtCach eDiscardCount值是否为0,而PrepStmtCacheDiscardCount正表示由于 缓存已满而被丢弃的语句的数量。所以当PrepStmtCacheDiscardCount 值为0时,表明没有被丢弃的语句。上图设置的语句高速缓存大小是10, 可以查看PrepStmtCacheDiscardCount值,如下图所示:
查看到WebContainer活动进程数大小,如下图所示:
WAS—参数设置
4.结论: 从上图可表明ActiveCount并发活动线程数29,Was6.1能够使 用相对较少的线程来扩展数千客户连接。这解释了图中平均只使
用 29 个线程来服务来自 HTTP 负载驱动程序的 50 个并发客户
机连接。根据此提供信息,可以参考减小线程池大小或加大线程 池,应该通过仔细考虑来确定线程池的大小,包括预期的平均和
WAS—参数设置
最大连接数:指当前连接池中允许创建的最大物理连接数,当到 达指定值后,将不允许创建物理连接。和连接超时相对应,当达到最 大值后,连接请求将等待,直到池中有空闲连接为止,否则报连接超 时错误。 最小连接数:指当前连接池要保留的最小物理连接,其决定未使 用超时维护机制的下限,连接池的创建不是根据最小连接数而特意创 建,而是根据用户请求而创建,系统会一直维护最小的连接数目。最 小连接数使应用服务器保持一定数量的物理连接,利用应用服务器维
WebSphere7.0在Windows下的安装

Window下WebSphere Application Server 7的安装一、安装WebSphere Application Server 71、单击WebSphere Application Server的安装程序launchpad.exe, 弹出安装欢迎窗口,单击启动WebSphere Application Server-Trial安装向导进行安装如下图:2、弹出初始化向导窗口,等待初始化完成,如下图3、弹出安装向导说明,单击下一步,如图4、弹出软件许可证协议窗口,选择我接受许可证协议的的全部条款,单击下一步,如下图5、弹出系统必备软件检查窗口,单击下一步6、弹出选择可选的功能部件,保持默认, 单击下一步,如下图7、弹出设置安装目录窗口、系统默认安装路径如下图,要改变安装路径,单击【浏览…】,改变安装目录。
设置完毕,单击下一步8、弹出选择要创建的WebSphere应用服务器的环境类型,这里选择“无“,单击下一步如下图此时会弹出一个警告询问窗体,单击是如图:9、弹出搜索临时修订窗口,等待完成,单击下一步如图10、弹出安装摘要窗口,单击下一步如图11、弹出安装窗口,安装过程可能需要等待一段时间12、安装完成,弹出安装结果窗口,选中“使用概要管理工具创建新的WebSphere ApplictionServer 概要文件”或开始->IBM_WebSphere->Application Server 7.0->概要管理工具,来启动概要管理工具,创建应用程序服务器单击完成。
二、创建应用程序服务器1、等待启动概要管理工具,进入概要管理工具页,如下图,单击【创建】2、弹出选择环境窗口,选择【应用服务器】,单击下一步3、弹出概要文件创建选项,选择【高级概要文件创建】单击下一步4、弹出可选应用程序部署,选中【部署管理控制台】,不选【部署缺省应用程序】,单击下一步5、弹出设置概要文件名和位置窗口,在这里设置文件名,概要文件目录(根据需要设置),不要选【使用开发模版来创建服务器】,我设置的如下图,设置完毕,单击下一步6、弹出设置节点名和主机名窗口,节点名和服务器名可随意设置,主机名必须是该计算机的名字或IP。
如何在WebSphere7.0上部署发布项目

图 3.6 7、点击“下一步”为 Web 模块映射上下文根,在“上下文根”中输入“/pms”或“/” ,此 处的“上下文根”是指要发布项目 war 包的名称,我这里 war 包的名称为“pms.war”所以 上下文根为“/pms” ,点击“下一步” 。
图 3.7
8、点击“完成” ,完成项目的发布。该步将会对发布的应用程序进行解压拷贝到应用服务器 上,所以要花费几分钟,需耐心等待。如下图所示:
图 2.18 12、定制属性,点击“新建”按钮,配置常规属性,分别配置 jdbcUrl(图 2.19) 、数据库登 录名、数据库登录密码、数据库驱动类型。
图 2.19 配置 jdbcUrl
图 2.20 配置数据库登录名
图 2.21 数据库登录密码
图 2.22 配置数据库驱动类型 注意: jdbcUrl 是指 war 包中配置文件中的数据库连接池的 URL。 例如下图是 war 包中配置文件的截图,这里的 jdbcUrl 指的是红色标出的部分:
2.1 创建 JDBC 提供者
如果尚未建立 JDBC 提供者,请参照以下步骤进行:如果已经建立则无需执行这一步。 1、 进入 WebSphere 管理控制台后,点击“资源”--“JDBC”--“JDBC 提供 者”如下图,点击“新建”按钮,准备创建数据源。
图 2.2
2、
选 择 “ 数 据 库 类 型 ” 为 “ 用 户 定 义 的 ”; 实 现 类 名 为 “ com.mysql.jdbc.jdbc2.optional.MysqlConnectionPoolDataSource ” ;类名可以 自定义。如下图点击控制台” ,系统会自动进入“WebSphere 系统集成解决方案控制 台” ,用户输入标识和密码进行登录,如图所示:
WebSphere 应用服务器使用指南

WebSphere 应用服务器使用指南上海吉贝克信息技术有限公司上海市杨浦区翔殷路1088号凯迪金融大厦15层WebSphere 应用服务器使用指南由 和1.0目录1. 安装说明 (1)1.1. 环境 (1)2. 安装WebSphere (2)2.1. 安装准备 (2)2.1.1. 上传文件 (2)2.1.2. 安装文件修改 (2)2.2. 安装界面图文 (3)2.2.1. 安装步骤 (3)2.2.2. 安装验证 (13)3. WebSphere启动 (18)3.1. WebSphere启动 (18)4. 安装应用程序 (21)4.1. 准备应用程序 (21)4.2. 安装应用程序 (21)5. 安装WebSphere补丁升级帮助程序 (36)5.1. 安装准备 (36)5.1.1. 查看安装文件 (36)5.1.2. 安装补丁升级帮助程序 (36)5.2. 下载补丁 (44)6. 给WebSphere打补丁 (48)6.1. 安装准备 (48)6.2. 给WAS打补丁 (49)7. 卸载WebSphere (60)7.1. 停止服务 (60)7.2. 卸载 (60)8. WAS问题 (61)8.1. 兼容Struts2或者SpringMVC (61)8.2. 兼容JAP2.0 (61)第 1 章 安装说明1.1. 环境本手册适合Center OS环境下 WebSphere7.0的安装和卸载。
WAS_HOME表示: /home/IBM/WebSphere/AppServer安装包: C1G35ML.tar、 C1G36ML.tar、 C1G37ML.tar第 2 章 安装WebSphere2.1. 安装准备2.1.1. 上传文件用root登录, 把文件上传至/opt/was目录下,并解压文件tar –xzvf /home/was/C1G35ML.tartar –xzvf /home/was/C1G36ML.tartar –xzvf /home/was/C1G37ML.tar2.1.2. 安装文件修改解压完成后,进入目录 /opt/was/WAS 目录下,执行./install由于安装介质问题,汇报install的435行有错误,使用VI编辑器,打开install文件,vi install:set nu (显示行号)修改为 : if [[ $version -ge 5 ]] ,将单括号改为双括号。
Websphere服务简单配置说明

Websphere服务简单配置说明一、项目文件进行打包:1.包前的准备工作:1)修改数据连接配置文件\WEB-INF\conf\op\OPConnectionPool.xml;2)修改\WEB-INF\web.xml,删除jspdebug相关的servlet;3)修改\js\unieap\Globals.js中的全局变量;2.项目文件进行打包:利用java环境自带的jar命令对项目文件进行打包,在命令提示符下,切换到项目目录,键入jar –cvf ps.war *进行打包,生成ps.war包文件二、Websphere服务配置:1配.置前的准备工作:将\WEB-INF\lib\xerces.jar拷贝至Websphere安装目录\WebSphere\AppServer\lib;2.websphere服务配置:1)启动服务器:启动Websphere服务启动成功启动Websphere管理控制台:以任何标志都可登陆说明:如果在websphere安装时,绑定了用户,则必须以安装时的用户登陆第一步,安装新的企业应用程序:选择应用程序包并声明程序名说明:如果为单个项目服务,建议选择绑定;说明:不必理会,继续;安装程序选项说明:1.如果此处选择预编译JSP,项目文件中如果有JSP错误,则安装企业应用程序失败,建议不选择预编译JSP;2.修改应用程序名,也就是将来访问时的目录;第二步,映射Web模块的虚拟主机说明:如果Webphere只对一个项目提供服务,建议选择,否则建议不选择第三步,映射模块到应用服务器映射模块到应用服务器说明:如果应用程序模块安装于不同服务器上,需要编辑群集和服务器第四步,摘要应用程序配置摘要应用程序建立编译JSP过程说明:编译过程较慢,需要较长几分钟;安装完成说明:安装完成后,建议现保存配置,在管理应用程序;保存配置保存成功后,返回主页面启动企业应用程序启动企业应用程序启动过程启动成功应用程序状态提示说明:将鼠标移至状态按钮上,弹出应用程序状态提示;三、应用程序测试:在IE地址栏中键入http://localhost:9080/gacx/测试成功页面配置修改:应用程序安装配置完成后的文件位于\WebSphere\AppServer\installedApps\csserver;如需修改数据库连接等配置文件,只需修改此处的配置文件即可;附:1.应用程序配置完成后,还需要正是发布;2.此配置文档是针对在程序种已经写好数据库连接的,否则,还需要重新JDBC连接池等。
WebSphere70集群及负载均衡搭建手册
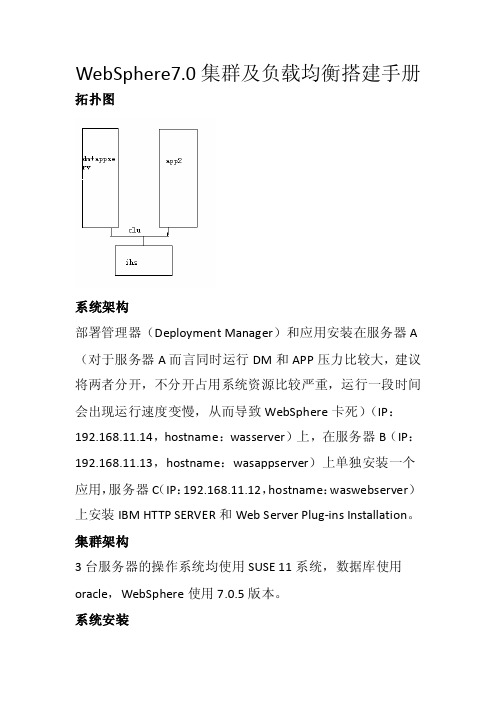
WebSphere7.0集群及负载均衡搭建手册拓扑图系统架构部署管理器(Deployment Manager)和应用安装在服务器A (对于服务器A而言同时运行DM和APP压力比较大,建议将两者分开,不分开占用系统资源比较严重,运行一段时间会出现运行速度变慢,从而导致WebSphere卡死)(IP:192.168.11.14,hostname:wasserver)上,在服务器B(IP:192.168.11.13,hostname:wasappserver)上单独安装一个应用,服务器C(IP:192.168.11.12,hostname:waswebserver)上安装IBM HTTP SERVER和Web Server Plug-ins Installation。
集群架构3台服务器的操作系统均使用SUSE 11系统,数据库使用oracle,WebSphere使用7.0.5版本。
系统安装将WebSphere安装包上传至所有服务器上,将安装包解压,使用命令tar –zxf file.tar.gz,安装之前编辑/etc/hosts文件将3台服务器的主机名及ip添加上,并且将3台服务器的主机名更改成不一致的,以免在安装后出现无法自动创建概要文件的故障,在服务器A上运行launchpad.sh,使用./launchpad.sh 运行(/与l之间无空格),运行后将出现上图界面,在左侧选择WebSphere Application Server Installation选择Launch the installation wizard for the WebSphere Application Server Network Deploment,选择完后会弹出界面,点击next,之后出现下图选择第一项,点击next点击next将出现下图将后2项打钩之后点击next选择安装路径,点击next选择Management,点击next按照默认所选直接next开启安全管理选项,输入用户名及密码,点击next选择Create a repository for Centralized Installation Managers 点击next,等待一会后将出现图中的检查是否有安装权限的选项,使用root用户安装的可以不选,但是使用其他用户安装的建议选择,这样可以避免不必要的麻烦,点击next选择next后,将开始进行安装,安装完成后出现则表示成功,如果提示success但是没有创建概要文件则到/opt/IBM/WebSphere/AppServer/bin/ProfileManagement目录下运行pmt.sh进行创建概要文件如图点击create…点击next保持默认,点击next保持默认点击next输入用户名及密码点击next确认Cell name,Nodename,Host name是否正确,点击create 进行概要文件的创建,创建成功后,查看PMT创建的概要文件是否已经存在点击create选择Application server点击next保持默认点击next同样Application server也建议开启安全管理选项,输入用户名、密码点击next确认信息无误后,点击create进行创建出现如上信息表示已经成功,点击finish,创建完成启动服务可以使用first steps(/opt/IBM/WebSphere/AppServer/firststeps目录下运行firststeps.sh)也可以使用命令(/opt/IBM/WebSphere/AppServer/profiles/Dmgr01/bin目录下运行startManager.sh及/opt/IBM/WebSphere/AppServer/profiles/AppSrv01/bin目下运行startServer.sh,命令./startServer.sh server1)进行启动。
WebSphere7.0集群及负载均衡搭建手册
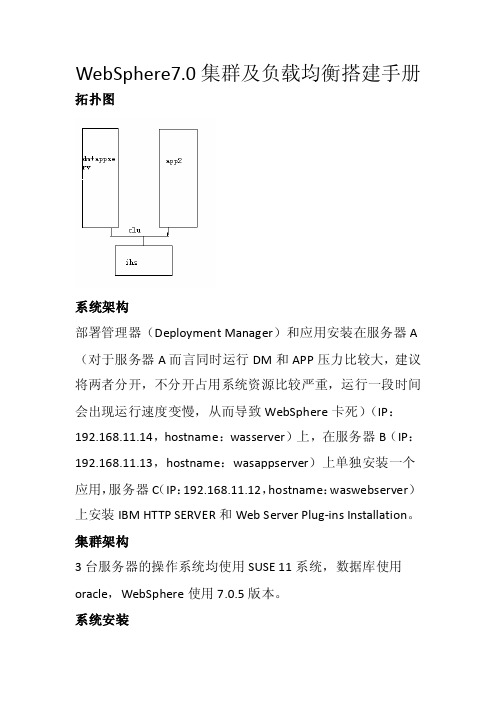
WebSphere7.0集群及负载均衡搭建手册拓扑图系统架构部署管理器(Deployment Manager)和应用安装在服务器A (对于服务器A而言同时运行DM和APP压力比较大,建议将两者分开,不分开占用系统资源比较严重,运行一段时间会出现运行速度变慢,从而导致WebSphere卡死)(IP:192.168.11.14,hostname:wasserver)上,在服务器B(IP:192.168.11.13,hostname:wasappserver)上单独安装一个应用,服务器C(IP:192.168.11.12,hostname:waswebserver)上安装IBM HTTP SERVER和Web Server Plug-ins Installation。
集群架构3台服务器的操作系统均使用SUSE 11系统,数据库使用oracle,WebSphere使用7.0.5版本。
系统安装将WebSphere安装包上传至所有服务器上,将安装包解压,使用命令tar –zxf file.tar.gz,安装之前编辑/etc/hosts文件将3台服务器的主机名及ip添加上,并且将3台服务器的主机名更改成不一致的,以免在安装后出现无法自动创建概要文件的故障,在服务器A上运行launchpad.sh,使用./launchpad.sh 运行(/与l之间无空格),运行后将出现上图界面,在左侧选择WebSphere Application Server Installation选择Launch the installation wizard for the WebSphere Application Server Network Deploment,选择完后会弹出界面,点击next,之后出现下图选择第一项,点击next点击next将出现下图将后2项打钩之后点击next选择安装路径,点击next选择Management,点击next按照默认所选直接next开启安全管理选项,输入用户名及密码,点击next选择Create a repository for Centralized Installation Managers 点击next,等待一会后将出现图中的检查是否有安装权限的选项,使用root用户安装的可以不选,但是使用其他用户安装的建议选择,这样可以避免不必要的麻烦,点击next选择next后,将开始进行安装,安装完成后出现则表示成功,如果提示success但是没有创建概要文件则到/opt/IBM/WebSphere/AppServer/bin/ProfileManagement目录下运行pmt.sh进行创建概要文件如图点击create…点击next保持默认,点击next保持默认点击next输入用户名及密码点击next确认Cell name,Nodename,Host name是否正确,点击create 进行概要文件的创建,创建成功后,查看PMT创建的概要文件是否已经存在点击create选择Application server点击next保持默认点击next同样Application server也建议开启安全管理选项,输入用户名、密码点击next确认信息无误后,点击create进行创建出现如上信息表示已经成功,点击finish,创建完成启动服务可以使用first steps(/opt/IBM/WebSphere/AppServer/firststeps目录下运行firststeps.sh)也可以使用命令(/opt/IBM/WebSphere/AppServer/profiles/Dmgr01/bin目录下运行startManager.sh及/opt/IBM/WebSphere/AppServer/profiles/AppSrv01/bin目下运行startServer.sh,命令./startServer.sh server1)进行启动。
Websphere的安装与配置应用服务器环境的安装配套置与发布

Websphere的安装与配置及应用发布应用服务器环境的安装1.服务器的application Server+http Server模式,默认安装。
2.安装Application Server●运行application Server的安装程序●选择“接受”●检查选决条件●选择安装目录选择安装内容●开始安装●安装完成后,进入概要表向导安装:进入安装验证3.安装Http Server4.进入插件安装E:\ProgramFiles\ibm\WebSphere\AppServer\profiles\AppSrv01\config\cells\PC1076-No1MeetingNode01Cel l\nodes\webserver1_node\servers\webserver1\plugin-cfg.xml5.5.重启机器。
应用服务器环境设置:1.打开管理控制台在菜单“程序—〉IBM WebShpere—〉Application Server Network Deployment v6—〉Profiles—〉AppSrv01”打开“管理控制台”。
2.设置应用程序安全认证参数路径:安全性—〉全局安全性—〉JAAS 配置--〉应用程序登录设置:新建com.cvicse.rbac.loginModule。
同时配置:“JAAS 登录模块”com.cvicse.rbac.base.BaseUserPwdLoginModule。
和com.cvicse.rbac.base.BaseCertificateLoginModule,策略为“充足”即可。
3.设置J2C认证参数路径:安全性—〉全局安全性—〉JAAS 配置--〉J2C认证数据设置:新建别名(oraclelogin),用户名(fda),密码(fda),然后应用保存即可。
新建别名(oraclelogin2),用户名(mon),密码(mon),然后应用保存即可。
4.设置系统的环境变量路径:环境—〉WebShere变量(将lib包copy到websphere/ AppServer/lib 目录下面)5.设置数据源链接池:资源——〉JDBC提供者——〉新建数据库类型:oracle提供者类型:Oracle JDBC Driver实现类型:连接池数据源确认以下项目:◆下一步:默认选项,保存◆其他属性:数据源新建:1.JNDI 名称: jdbc/default组件管理的认证别名:***Node01/oracleloginOracle 数据源属性:jdbc:oracle:thin:@192.168.20.80:1521:fdadb2.JNDI 名称: jdbc/fdarpt组件管理的认证别名:***Node01/oracleloginOracle 数据源属性:jdbc:oracle:thin:@192.168.20.80:1521:fdadb◆再次保存,测试连接,提示成功即可。
WebSphere7使用手册

WebSphere7使用手册Version 1.2Blog:2010-3-17修订历史记录目录1. 安装Putty和Xming (4)2. 安装AppServer (8)3. 使用First Steps 控制台 (12)4. 概要管理 (13)5. 打补丁 (14)6. 卸载AppServer (17)7. 日志 (19)8. 数据源 (20)1.安装Putty和Xming对于远程连接Linux的工具,大都使用Putty,先介绍Putty的安装,因为WebSphere的安装需要启动浏览器,所以还需要安装Xming和Putty配合提供远程连接的图形输出。
Putty1)下载2)安装后登录3)Putty显示中文的配置4)现在打开Putty,登录成功后,在shell中输入:export LC_ALL='zh_CN.utf8',现在已经可以完美的支持中文了XmingA.下载B.安装后,启动XLaunch2.安装AppServertar –xvf was70nd.tar.gz./launchpad.sh3.使用First Steps 控制台1)安装检验:检验WebSphere Application Server 的安装,确认安装正确并在这个过程中启动应用服务器。
2)启动服务器:启动WebSphere Application Server,为了提供方便和帮助判断问题,在一个单独的窗口中显示启动过程的输出。
当应用服务器开始运行之后,此链接会变成Stop the server 链接,这提供一种停止服务器的简便方法并在一个单独的窗口中显示服务器关闭过程的输出。
停止服务器需要在安装过程中设置的管理密码,这是对应用服务器的内部身份验证机制进行检查的简便方法。
3)管理控制台:在浏览器窗口中启动WebSphere 管理控制台,可以在这个控制台上执行安装过程中没有涉及到的配置任务。
启动管理控制台也需要在安装过程中设置的管理密码。
- 1、下载文档前请自行甄别文档内容的完整性,平台不提供额外的编辑、内容补充、找答案等附加服务。
- 2、"仅部分预览"的文档,不可在线预览部分如存在完整性等问题,可反馈申请退款(可完整预览的文档不适用该条件!)。
- 3、如文档侵犯您的权益,请联系客服反馈,我们会尽快为您处理(人工客服工作时间:9:00-18:30)。
(JVM) footprint per release Result of significant new functionality per release
▪ Pre V7 servers aggressively start components that might not be used by deployed applications
7
IBM Software Group
WAS v7 Runtime Performance
Achievement
… at the Foundation of IBM’s Project
‘B▪igIBGMreteona’ llocate $1 billion each year:
To accelerate “green” technologies and services
▪ Per square foot, annual data center energy costs are 10 to 30 times more than those of a typical office building. 2 - William Tschudi, March 2006
▪ US commercial electrical costs increased by 10 percent from 2005-06.4 - EPA Monthly Forecast, 2007
▪ Optimized runtime performance that decreases footprint, saves energy and cuts costs
▪ IBM Java SE Version 6 enhancements add scalability and performance
Updated April 26, 2021
IBM Software Group
Overview
▪ v7.0 Runtime Provisioning
Historical startup and runtime memory footprint Benefits of Runtime Provisioning How it works
© 2008 IBM Corporation
Discovering business application services, featuring IBM WebSphere Application Server ND V7.0
5
IBM Software Group
Section
Runtime Provisioning
© 2008 IBM Corporation
Discovering business application services, featuring IBM WebSphere Application Server ND V7.0
3
பைடு நூலகம்
IBM Software Group
Historical facts and figures
▪ Runtime provisioning selects only the needed function for memory and space improvements
▪ Benchmark results lead the industry
© 2008 IBM Corporation
Discovering business application services, featuring IBM WebSphere Application Server ND V7.0
© 2008 IBM Corporation
Discovering business application services, featuring IBM WebSphere Application Server ND V7.0
9
IBM Software Group
Goal: Leverage Benefits of Java SE 6 Support
▪ Asynchronous start capability for runtime components
▪ Lazy Enterprise Java™ Bean (EJB) initialization
▪ Framework uses Java 5 shared class cache for WebSphere runtime classes
®
IBM Software Group
Discovering business application services, featuring IBM WebSphere Application Server ND V7.0
Runtime provisioning
© 2008 IBM Corporation
▪ By 2012 for every $1 spent on hardware, $1 will be spent on power and cooling – IDC, 2007
▪ “Eighty-six percent of data centers were built before 2001”5
© 2008 IBM Corporation
Discovering business application services, featuring IBM WebSphere Application Server ND V7.0
4
IBM Software Group
Previous work to reduce footprint
(limited to platforms using IBM JRE)
▪ Light-weight Runtime Configuration Service
reduces up to 20% of runtime classes loaded
previously at startup
New in version 7
▪ In the next decade, growth in server shipments will be 6x and 69x for storage – IBM / Consultant studies
▪ Data centers have doubled their energy use in the past five years.3 - Koomey, February 2007
bit objects
10
© 2008 IBM Corporation
Discovering business application services, featuring IBM WebSphere Application Server ND V7.0
10
IBM Software Group
Leveraging Benefits of Java SE 6 Support
eliminating 3.5 million pounds of coal fired energy generation
$
$
$
$
© 2008 IBM Corporation
Discovering business application services, featuring IBM WebSphere Application Server ND V7.0
We can reduce average data center power costs by 40-50% Typical 25,000 square foot data center will save $1.3M in annual power cost Energy reduction equivalent to taking 1,300 automobiles off of the road…or
equivalent to 32-bit
Just-in-time compiler performance
• Enhanced problem determination
optimizations
tools
Compressed references allow applications to
access a larger heap space without using 64-
IBM “green” solutions include the strength of IBM’s hardware, software, services, research, and financing teams
▪ What “green” solutions can mean for clients:
© 2008 IBM Corporation
Discovering business application services, featuring IBM WebSphere Application Server ND V7.0
6
IBM Software Group
WAS v7 Runtime Performance Achievement
▪ Historically since WebSphere Application Server (WAS) V4.0 Startup time and memory footprint have grown
Approximately 15% growth in startup time per release Approximately 15% growth in memory footprint per
