ASA SSH配置
asa5520防火墙透明模式的配置例子

asa5520防火墙透明模式的配置例子ciscoasa# sh run: Saved:ASA Version 7.2(3)!firewall transparenthostname ciscoasadomain-name default.domain.invalidenable password 8Ry2YjIyt7RRXU24 encryptednames!interface GigabitEthernet0/0nameif outsidesecurity-level 0!interface GigabitEthernet0/1nameif insidesecurity-level 100!interface GigabitEthernet0/2shutdownno nameifno security-level!interface GigabitEthernet0/3shutdownno nameifno security-level!interface Management0/0nameif managementsecurity-level 100ip address 192.168.1.1 255.255.255.0management-only!passwd 2KFQnbNIdI.2KYOU encryptedftp mode passivedns server-group DefaultDNSdomain-name default.domain.invalidaccess-list acl_inside extended permit ip any any access-list acl_inside extended permit icmp any anyaccess-list acl_outside extended permit tcp any any eq 3306access-list acl_outside extended permit tcp any any eq wwwaccess-list acl_outside extended permit tcp any any eq 8080access-list acl_outside extended permit tcp any any eq httpsaccess-list acl_outside extended permit tcp any any eq sqlnetaccess-list acl_outside extended permit tcp any any eq ftpaccess-list acl_outside extended permit tcp any any eq 1433access-list acl_outside extended permit esp any anyaccess-list acl_outside extended permit udp any any eq isakmpaccess-list acl_outside extended permit tcp any any eq pop3access-list acl_outside extended permit tcp any any eq smtpaccess-list acl_outside extended permit icmp any anypager lines 24mtu outside 1500mtu inside 1500mtu management 1500ip address 172.16.177.208 255.255.255.0no failovericmp unreachable rate-limit 1 burst-size 1asdm image disk0:/ASDM-523.BINno asdm history enablearp timeout 14400access-group acl_outside in interface outsideaccess-group acl_inside in interface insidetimeout xlate 3:00:00timeout conn 0:20:00 half-closed 0:10:00 udp 0:02:00 icmp 0:00:02timeout sunrpc 0:10:00 h323 0:05:00 h225 1:00:00 mgcp 0:05:00 mgcp-pat 0:05:00 timeout sip 0:30:00 sip_media 0:02:00 sip-invite 0:03:00 sip-disconnect 0:02:00 timeout uauth 0:05:00 absolutehttp server enablehttp 192.168.1.0 255.255.255.0 managementhttp 0.0.0.0 0.0.0.0 insideno snmp-server locationno snmp-server contactsnmp-server enable traps snmp authentication linkup linkdown coldstarttelnet timeout 5ssh timeout 5console timeout 0!class-map inspection_defaultmatch default-inspection-traffic!!policy-map type inspect dns preset_dns_mapparametersmessage-length maximum 512policy-map global_policyclass inspection_defaultinspect dns preset_dns_mapinspect ftpinspect h323 h225inspect h323 rasinspect rshinspect rtspinspect esmtpinspect sqlnetinspect skinnyinspect sunrpcinspect xdmcpinspect sipinspect netbiosinspect tftpinspect pptp!service-policy global_policy globalusername cisco password 3USUcOPFUiMCO4Jk encryptedprompt hostname contextCryptochecksum:4682fd668f251c28d32a0cb82a3ac5f3: endciscoasa#注意点:语句ip address 172.16.177.208 255.255.255.0是在interface GigabitEthernet0/0下配的,自己跑到外面来了,如果不配这个,好像ping不通。
防火墙远程管理配置
防火墙远程管理配置一、Cisco ASA系列防火墙(1)telnet配置ciscoasa(config)#passwd xxxxxxx //设置登录密码ciscoasa(config)#telnet 192.168.0.1/192.168.0.0 255.255.255.0 inside/dmz注意:ASA默认不允许从outside口telnet(2)ssh配置ciscoasa(config)#crypto key generate rsa modulus 1024//指定rsa系数的大小,这个值越大,产生rsa的时间越长,cisco推荐使用1024. ciscoasa(config)#write mem //保存刚刚产生的密钥ciscoasa(config)#username sxit password cisco privilege 15//设置一个本地账号,15代表管理员,数据越大权限越大ciscoasa(config)#aaa authentication ssh console LOCAL //为SSH启用aaa认证ciscoasa(config)#ssh 0.0.0.0 0.0.0.0 outside# ciscoasa(config)#ssh 211.138.236.145 255.255.255.255 outside//0.0.0.0 0.0.0.0 表示任何外部主机都能通过SSH访问outside接口,当然你可以指定具体的主机或网络来进行访问,outside也可以改为inside即表示内部通过SSH访问防火墙ciscoasa(config)#ssh timeout 30 //设置超时时间,单位为分钟ciscoasa(config)#ssh version 1 //指定SSH版本,可以选择版本2二、Huawei Eudemon系统防火墙(1)telnet配置<Eudemon> system-view[Eudemon] aaa // 进入AAA视图。
Asa配置大全

1、ASA基本配置静态路由:route outside 192.168.100.0 255.255.255.0 192.168.1.99配置允许telnet:telnet 192.168.10.0 255.255.255.0 inside配置telnet超时时间:telnet timeout 5配置本地认证telnet与console:aaa authentication telnet console LOCAL配置SSH生成密钥对:aaa authentication ssh console LOCALciscoasa(config)# crypto key generate rsaINFO: The name for the keys will be: <Default-RSA-Key>Keypair generation process begin. Please wait...ciscoasa(config)#配置允许SSH:ssh 192.168.10.0 255.255.255.0 inside配置允许ASDM管理:http server enablehttp 192.168.10.0 255.255.255.0 insideasdm image disk0:/asdm-602.binusername cisco password cisco privilege 15配置PAT:nat (inside) 1 192.168.10.0 255.255.255.0global (outside) 1 interface配置端口映射:access-list to_server extended permit tcp any host 192.168.1.99 eq wwwaccess-group to_server in interface outsidestatic (inside,outside) tcp interface www 192.168.10.98 www netmask 255.255.255.255配置ACL:access-list to_server extended permit tcp any host 192.168.1.99 eq wwwaccess-group to_server in interface outside配置允许ICMP穿越:policy-map global_policyclass inspection_defaultinspect icmp配置URL过滤:url-server (outside) vendor websense host 192.168.1.100 timeout 30 protocol TCP version 1 connections 5filter url http 192.168.10.0 255.255.255.0 0.0.0.0 0.0.0.0 allow日志管理:开启logging:logging enable开启console日志:logging console 7将日志发送到日志服务器:logging trap 7logging host inside 192.168.10.98配置IPS:ip audit name zxd info action alarmip audit name cisco attack action alarmip audit interface outside zxdip audit interface outside cisco2、VPN配置ASA IPSec L2L配置:access-list nonat extended permit ip 192.168.10.0 255.255.255.0 192.168.100.0 255.255.255.0 nat (inside) 0 access-list nonatcrypto ipsec transform-set cisco esp-des esp-nonecrypto map cisco 10 match address nonatcrypto map cisco 10 set peer 192.168.1.96crypto map cisco 10 set transform-set ciscocrypto map cisco interface outsidecrypto isakmp enable outsidecrypto isakmp policy 1authentication pre-shareencryption deshash shagroup 1tunnel-group 192.168.1.96 type ipsec-l2ltunnel-group 192.168.1.96 ipsec-attributespre-shared-key ciscoASA Remote VPN Server配置:ip local pool vpnpool 192.168.2.250-192.168.2.254group-policy vpntest internalgroup-policy vpntest attributesvpn-tunnel-protocol IPSecusername zhong password xiaodongtunnel-group vpntest type remote-accesstunnel-group vpntest general-attributesaddress-pool vpnpooldefault-group-policy vpntesttunnel-group vpntest ipsec-attributespre-shared-key ciscocrypto ipsec transform-set cisco esp-des esp-md5-hmac crypto dynamic-map vpntest 1 set transform-set cisco crypto dynamic-map vpntest 1 set reverse-route crypto map cisco 1 ipsec-isakmp dynamic vpntest crypto map cisco interface outsidecrypto isakmp enable outsidecrypto isakmp policy 10authentication pre-shareencryption aeshash shagroup 2RADIUS认证用户:aaa-server vpntest protocol radiusaaa-server vpntest (outside) host 192.168.1.100key ciscotunnel-group vpntest general-attributes authentication-server-group (outside) vpntestASA SSL VPN配置ip local pool vpnpool 192.168.2.200-192.168.2.210 username zhong password xiaodongwebvpnenable outsidesvc image disk0:/sslclient-win-1.1.3.173.pkgsvc enabletunnel-group-list enablegroup-policy webvpn internalgroup-policy webvpn attributesvpn-tunnel-protocol svc webvpnwebvpnsvc ask enabletunnel-group webvpn type remote-accesstunnel-group webvpn general-attributesaddress-pool vpnpooldefault-group-policy webvpntunnel-group webvpn webvpn-attributesgroup-alias hnebony enableIOS SSL VPN配置aaa new-modelaaa authentication login vpnauthen localusername zhong password xiaodongip local pool vpnpool 192.168.20.200 192.168.20.254interface loopback 0ip address 192.168.20.1 255.255.255.0exitwebvpn install svc disk0:/webvpn/svc.pkgwebvpn gateway outip address 192.168.1.99inservicewebvpn context vpntestpolicy group vpntestfunctions svc-enabledsvc address-pool vpnpoolsvc split include 192.168.0.0 255.255.0.0exitdefault-group-policy vpntestaaa authentication list vpnauthengateway outinserviceIOS Easy VPN Server配置:aaa new-modelaaa authentication login vpnauthen localaaa authorization network vpnauthor localusername zhong password xiaodongip local pool vpnpool 192.168.20.200 192.168.20.254ip access-list extended splitpermit ip 192.168.0.0 0.0.255.255 192.168.20.0 0.0.0.255 crypto isakmp policy 1authentication pre-sharehash md5group 2crypto isakmp client configuration group vpntestkey ciscopool vpnpoolacl splitcrypto ipsec transform-set cisco esp-aes esp-sha-hmac crypto dynamic-map vpndymap 1set transform-set ciscoreverse-routecrypto map vpntest client authentication list vpnauthen crypto map vpntest client configuration address respond crypto map vpntest isakmp authorization list vpnauthor crypto map vpntest 10 ipsec-isakmp dynamic vpndymap inter f0/0crypto map vpntest使用ACS认证与授权:aaa authentication login vpnauthen group radiusaaa authorization network vpnauthor group radiusradius-server host 192.168.1.100 auth-port 1645 acct-port 1646 key ciscoRADIUS (IETF)选中6、64、65、69、81.建立用户:vpntest(vpn组路由器配置crypto isakmp client configuration group vpntest可以取消)然后建立用户IOS Easy VPN Client配置:crypto ipsec client ezvpn vpntestmode clientconnect autopeer 192.168.10.1group vpntest key ciscousername zhong password xiaodonginterface f0/0crypto ipsec client ezvpn vpntestinterface f1/0crypto ipsec client ezvpn vpntest inside R1#crypto ipsec client ezvpn xauthUsername: zhongPassword:3、802.1X认证aaa new-modelaaa authentication dot1x default group radius aaa authorization network default group radius radius-server host 192.168.1.100 key cisco dot1x system-auth-controlinterface f0/1dot1x port-control auto指定VLAN:4、RSTPAlternate port—Offers an alternate path toward the root switch to that provided by the current root port.Backup port—Acts as a backup for the path provided by a designated port toward the leaves of the spanning tree. A backup port can exist only when two ports are connected in a loopback by a point-to-point link or when a switch has two or more connections to a shared LAN segment.Edge ports—If you configure a port as an edge port on an RSTP switch by using the spanning-tree portfast interface configuration command, the edge port immediately transitions to the forwarding state. An edge port is the same as a Port Fast-enabled port, and you should enable it only on ports that connect to a single end station.Root ports—If the RSTP selects a new root port, it blocks the old root port and immediately transitions the new root port to the forwarding state.Point-to-point links—If you connect a port to another port through a point-to-point link and the local port becomes a designated port, it negotiates a rapid transition with the other port by using the proposal-agreement handshake to ensure a loop-free topology. As shown in Figure 18-4, Switch A is connected to Switch B through a point-to-point link, and all of the ports are in the blocking state. Assume that the priority of Switch A is a smaller numerical value than the priority of Switch B. Switch A sends a proposal message (a configuration BPDU with the proposal flag set) to Switch B, proposing itself as the designated switch. After receiving theproposal message, Switch B selects as its new root port the port from which the proposalmessage was received, forces all nonedge ports to the blocking state, and sends an agreement message (a BPDU with the agreement flag set) through its new root port. After receiving Switch B’s agreement message, Switch A also immediately transitions its designated port to the forwarding state. No loops in the network are formed because Switch B blocked all of its nonedge ports and because there is a point-to-point link between Switches A and B. When Switch C is connected to Switch B, a similar set of handshaking messages are exchanged.Switch C selects the port connected to Switch B as its root port, and both ends immediately transition to the forwarding state. With each iteration of this handshaking process, one more switch joins the active topology. As the network converges, this proposal-agreement handshaking progresses from the root toward the leaves of the spanning tree. The switch learns the link type from the port duplex mode: a full-duplex port is considered to have a point-to-point connection; a half-duplex port is considered to have a shared connection. You can override the default setting that is controlled by the duplex setting by using the spanning-tree link-type interface configuration command.5、时间访问列表time-range zxdabsolute start 08:30 24 August 2009 end 18:00 01 September 2009time-range ciscoperiodic daily 8:00 to 18:00access-list 110 permit ip any any time-range cisco6、QOSCAR:rate-limit input access-group 101 1000000 3000 4000 conform-action transmit exceed-action dropGTS:class-map match-all ciscomatch access-group 101!!policy-map ciscoclass ciscopolice cir 500000 bc 10000 pir 1000000 be 10000conform-action transmitexceed-action set-prec-transmit 2violate-action dropinterface f1/0service-policy output ciscoCBWFQ:class-map match-all cbwfqmatch access-group 101policy-map cbwfqclass cbwfqpriority percent 60interface f1/0service-policy output cbwfq7、NA T-T8、标准化产品特色:1定位准确,以就业为导向。
ciscio 路由器aggressive mode 和asa的配置
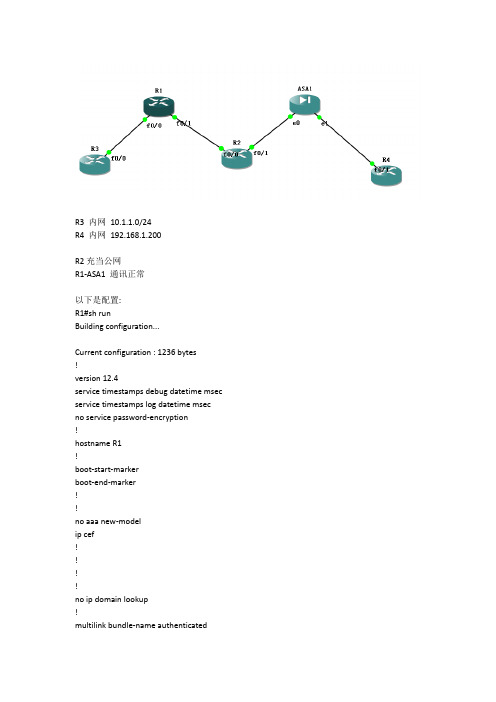
R3 内网10.1.1.0/24R4 内网192.168.1.200R2充当公网R1-ASA1 通讯正常以下是配置:R1#sh runBuilding configuration...Current configuration : 1236 bytes!version 12.4service timestamps debug datetimemsec service timestamps log datetimemsec no service password-encryption!hostname R1!boot-start-markerboot-end-marker!!no aaa new-modelipcef!!!!no ip domain lookup!multilink bundle-name authenticated!!!!!!!!!!!!!!!!crypto isakmp policy 1hash md5authentication pre-sharegroup 2crypto isakmp key cisco123 hostname ZGPTcrypto isakmp identity hostnamecrypto isakmpkeepalive 10 periodic!crypto isakmp peer address 23.1.1.3set aggressive-mode password cisco123!!crypto ipsec transform-set ccieesp-des esp-md5-hmac !crypto map cisco 1 ipsec-isakmpset peer 23.1.1.3set transform-set ccieset pfs group2match address A!!!!!interface FastEthernet0/0ip address 10.1.1.1 255.255.255.0duplex auto!interface FastEthernet0/1ip address 12.1.1.1 255.255.255.0duplex autospeed autocrypto map cisco!ip route 0.0.0.0 0.0.0.0 12.1.1.2no ip http serverno ip http secure-server!!!ip access-list extended Apermit ip 10.1.1.0 0.0.0.255 host 192.168.1.200 !logging alarm informational!!!!!!control-plane!!!!!!gatekeepershutdown!!line con 0stopbits 1line aux 0line vty 0 4!!endR1# sh cry isasaIPv4 Crypto ISAKMP SAdstsrc state conn-id slot status12.1.1.1 23.1.1.3 QM_IDLE 1002 0 ACTIVE IPv6 Crypto ISAKMP SAR1#R1#R2#sh runBuilding configuration...Current configuration : 661 bytes!version 12.4service timestamps debug datetimemsecservice timestamps log datetimemsecno service password-encryption!hostname R2!boot-start-markerboot-end-marker!!no aaa new-modelipcef!!!!!multilink bundle-name authenticated!!!!!!!!!!!!!!!!!!!!!interface FastEthernet0/0ip address 12.1.1.2 255.255.255.0 duplex autospeed auto!interface FastEthernet0/1ip address 23.1.1.2 255.255.255.0 duplex autospeed auto!no ip http serverno ip http secure-server!!!logging alarm informational!!!!!!control-plane!!!!!!gatekeepershutdown!!line con 0stopbits 1line aux 0line vty 0 4!!endR3#sh runBuilding configuration...Current configuration : 685 bytes!version 12.4service timestamps debug datetimemsec service timestamps log datetimemsec no service password-encryption!hostname R3!boot-start-markerboot-end-marker!!no aaa new-modelipcef!!!!!multilink bundle-name authenticated!!!!!!!!!!!!!!!!!!!!interface FastEthernet0/0ip address 10.1.1.3 255.255.255.0 duplex autospeed auto!interface FastEthernet0/1no ip addressshutdownduplex autospeed auto!ip route 0.0.0.0 0.0.0.0 10.1.1.1 no ip http serverno ip http secure-server!!!logging alarm informational!!!!!!control-plane!!!!!!gatekeepershutdown!line con 0stopbits 1line aux 0line vty 0 4!!endR3#ping 192.168.1.200Type escape sequence to abort.Sending 5, 100-byte ICMP Echos to 192.168.1.200, timeout is 2 seconds: !!!!!Success rate is 100 percent (5/5), round-trip min/avg/max = 8/55/168 msR4#sh runBuilding configuration...Current configuration : 693 bytes!version 12.4service timestamps debug datetimemsecservice timestamps log datetimemsecno service password-encryption!hostname R4!boot-start-markerboot-end-marker!!no aaa new-modelipcef!!!!!multilink bundle-name authenticated!!!!!!!!!!!!!!!!!!!!interface FastEthernet0/0no ip addressshutdownduplex autospeed auto!interface FastEthernet0/1ip address 192.168.1.200 255.255.255.0 duplex autospeed auto!ip route 0.0.0.0 0.0.0.0 192.168.1.3no ip http serverno ip http secure-server!!!logging alarm informational!!!!!!control-plane!!!!!gatekeepershutdown!!line con 0stopbits 1line aux 0line vty 0 4!!endR4#ping 10.1.1.3Type escape sequence to abort.Sending 5, 100-byte ICMP Echos to 10.1.1.3, timeout is 2 seconds:!!!!!Success rate is 100 percent (5/5), round-trip min/avg/max = 20/73/168 msASA(config)#ASA(config)#ASA(config)# sh run: Saved:ASA Version 8.0(2)!hostname ASAenable password 8Ry2YjIyt7RRXU24 encryptednames!interface Ethernet0/0nameif outsidesecurity-level 0ip address 23.1.1.3 255.255.255.0!interface Ethernet0/1nameif insidesecurity-level 100ip address 192.168.1.3 255.255.255.0!interface Ethernet0/2shutdownno nameifno security-levelno ip address!interface Ethernet0/3shutdownno nameifno security-levelno ip address!interface Ethernet0/4shutdownno nameifno security-levelno ip address!interface Ethernet0/5shutdownno nameifno security-levelno ip address!passwd 2KFQnbNIdI.2KYOU encryptedftp mode passiveaccess-list VPN extended permit ip host 192.168.1.200 10.1.1.0 255.255.255.0 pager lines 24mtu inside 1500mtu outside 1500no failovericmp unreachable rate-limit 1 burst-size 1no asdm history enablearp timeout 14400route outside 0.0.0.0 0.0.0.0 23.1.1.2 1timeout xlate 3:00:00timeout conn 1:00:00 half-closed 0:10:00 udp 0:02:00 icmp 0:00:02timeout sunrpc 0:10:00 h323 0:05:00 h225 1:00:00 mgcp 0:05:00 mgcp-pat 0:05:00 timeout sip 0:30:00 sip_media 0:02:00 sip-invite 0:03:00 sip-disconnect 0:02:00 timeout uauth 0:05:00 absolutedynamic-access-policy-record DfltAccessPolicyno snmp-server locationno snmp-server contactsnmp-server enable traps snmp authentication linkup linkdowncoldstart crypto ipsec transform-set ccieesp-des esp-md5-hmaccrypto map cisco 10 match address VPNcrypto map cisco 10 set pfscrypto map cisco 10 set peer 12.1.1.1crypto map cisco 10 set transform-set cciecrypto map cisco 10 set phase1-mode aggressivecrypto map cisco interface outsidecrypto isakmp identity hostnamecrypto isakmp enable outsidecrypto isakmp policy 10authentication pre-shareencryption deshash md5group 2lifetime 86400crypto isakmp policy 65535authentication pre-shareencryption 3deshash shagroup 2lifetime 86400telnet timeout 5ssh timeout 5console timeout 0threat-detection basic-threatthreat-detection statistics access-list!!tunnel-group 12.1.1.1 type ipsec-l2ltunnel-group 12.1.1.1 ipsec-attributespre-shared-key *prompt hostname contextCryptochecksum:00000000000000000000000000000000: endASA(config)#ASA(config)#ASA(config)#ASA(config)# sh cry isasaActive SA: 1Rekey SA: 0 (A tunnel will report 1 Active and 1 Rekey SA during rekey)Total IKE SA: 11 IKE Peer: 12.1.1.1Type : L2L Role : initiatorRekey : no State : AM_ACTIVEASA(config)# sh cry ipssainterface: outsideCrypto map tag: cisco, seqnum: 10, local addr: 23.1.1.3access-list VPN permit ip host 192.168.1.200 10.1.1.0 255.255.255.0local ident (addr/mask/prot/port): (192.168.1.200/255.255.255.255/0/0)remote ident (addr/mask/prot/port): (10.1.1.0/255.255.255.0/0/0) current_peer: 12.1.1.1#pktsencaps: 29, #pkts encrypt: 29, #pkts digest: 29#pktsdecaps: 29, #pkts decrypt: 29, #pkts verify: 29#pkts compressed: 0, #pkts decompressed: 0#pkts not compressed: 29, #pkts comp failed: 0, #pktsdecomp failed: 0#pre-frag successes: 0, #pre-frag failures: 0, #fragments created: 0#PMTUs sent: 0, #PMTUs rcvd: 0, #decapsulatedfrgs needing reassembly: 0 #send errors: 0, #recv errors: 0local crypto endpt.: 23.1.1.3, remote crypto endpt.: 12.1.1.1path mtu 1500, ipsec overhead 58, media mtu 1500current outbound spi: F8A5A2B4inbound espsas:spi: 0xD98DD580 (3649951104)transform: esp-des esp-md5-hmac nonein use settings ={L2L, Tunnel, PFS Group 2, }slot: 0, conn_id: 8192, crypto-map: ciscosa timing: remaining key lifetime (kB/sec): (4274997/3166)IV size: 8 bytesreplay detection support: Youtbound espsas:spi: 0xF8A5A2B4 (4171604660)transform: esp-des esp-md5-hmac nonein use settings ={L2L, Tunnel, PFS Group 2, }slot: 0, conn_id: 8192, crypto-map: ciscosa timing: remaining key lifetime (kB/sec): (4274997/3166)IV size: 8 bytesreplay detection support: Y。
配置asa 5505防火墙
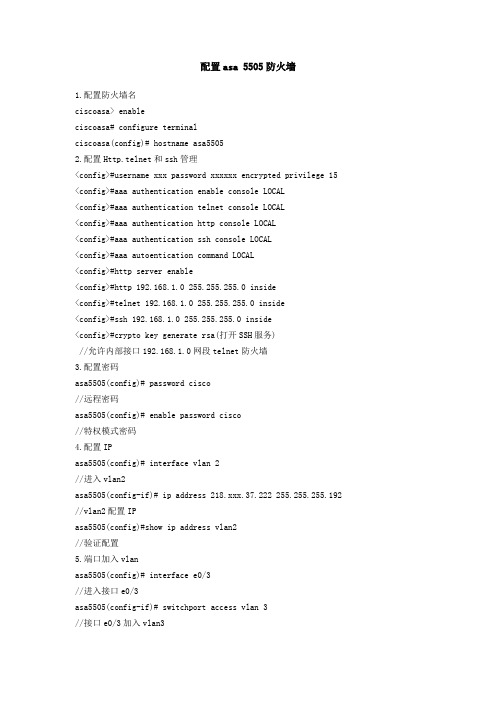
配置asa 5505防火墙1.配置防火墙名ciscoasa> enableciscoasa# configure terminalciscoasa(config)# hostname asa55052.配置Http.telnet和ssh管理<config>#username xxx password xxxxxx encrypted privilege 15 <config>#aaa authentication enable console LOCAL<config>#aaa authentication telnet console LOCAL<config>#aaa authentication http console LOCAL<config>#aaa authentication ssh console LOCAL<config>#aaa autoentication command LOCAL<config>#http server enable<config>#http 192.168.1.0 255.255.255.0 inside<config>#telnet 192.168.1.0 255.255.255.0 inside<config>#ssh 192.168.1.0 255.255.255.0 inside<config>#crypto key generate rsa(打开SSH服务)//允许内部接口192.168.1.0网段telnet防火墙3.配置密码asa5505(config)# password cisco//远程密码asa5505(config)# enable password cisco//特权模式密码4.配置IPasa5505(config)# interface vlan 2//进入vlan2asa5505(config-if)# ip address 218.xxx.37.222 255.255.255.192 //vlan2配置IPasa5505(config)#show ip address vlan2//验证配置5.端口加入vlanasa5505(config)# interface e0/3//进入接口e0/3asa5505(config-if)# switchport access vlan 3//接口e0/3加入vlan3asa5505(config)# interface vlan 3//进入vlan3asa5505(config-if)# ip address 10.10.10.36 255.255.255.224//vlan3配置IPasa5505(config-if)# nameif dmz//vlan3名asa5505(config-if)# no shutdown//开启asa5505(config-if)# show switch vlan//验证配置6.最大传输单元MTUasa5505(config)#mtu inside 1500//inside最大传输单元1500字节asa5505(config)#mtu outside 1500//outside最大传输单元1500字节asa5505(config)#mtu dmz 1500//dmz最大传输单元1500字节7.配置arp表的超时时间asa5505(config)#arp timeout 14400//arp表的超时时间14400秒8.FTP模式asa5505(config)#ftp mode passive//FTP被动模式9.配置域名asa5505(config)#domain-name 10.启动日志asa5505(config)#logging enable//启动日志asa5505(config)#logging asdm informational//启动asdm报告日志asa5505(config)#Show logging//验证配置11.启用http服务asa5505(config)#http server enable ///启动HTTP server,便于ASDM连接。
ASA防火墙疑难杂症与Cisco ASA 防火墙配置
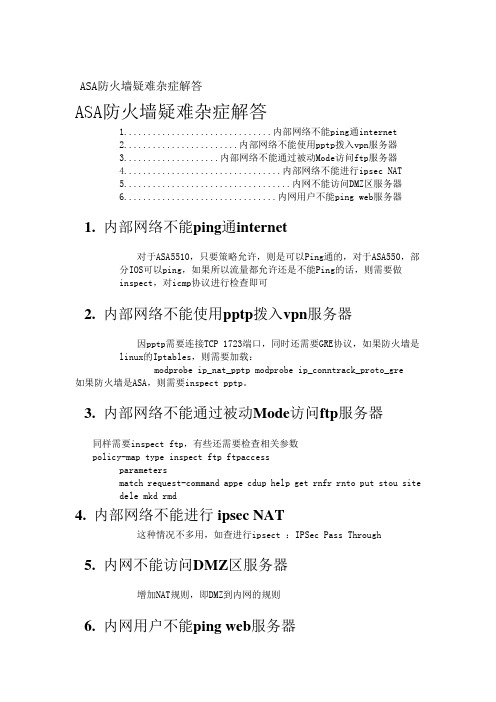
ASA防火墙疑难杂症解答ASA防火墙疑难杂症解答1...............................内部网络不能ping通internet2........................内部网络不能使用pptp拨入vpn服务器3....................内部网络不能通过被动Mode访问ftp服务器4.................................内部网络不能进行ipsec NAT5...................................内网不能访问DMZ区服务器6................................内网用户不能ping web服务器1. 内部网络不能ping通internet对于ASA5510,只要策略允许,则是可以Ping通的,对于ASA550,部分IOS可以ping,如果所以流量都允许还是不能Ping的话,则需要做inspect,对icmp协议进行检查即可2. 内部网络不能使用pptp拨入vpn服务器因pptp需要连接TCP 1723端口,同时还需要GRE协议,如果防火墙是linux的Iptables,则需要加载:modprobe ip_nat_pptp modprobe ip_conntrack_proto_gre如果防火墙是ASA,则需要inspect pptp。
3. 内部网络不能通过被动Mode访问ftp服务器同样需要inspect ftp,有些还需要检查相关参数policy-map type inspect ftp ftpaccessparametersmatch request-command appe cdup help get rnfr rnto put stou sitedele mkd rmd4. 内部网络不能进行ipsec NAT这种情况不多用,如查进行ipsect :IPSec Pass Through5. 内网不能访问DMZ区服务器增加NAT规则,即DMZ到内网的规则6. 内网用户不能ping web服务器如果内网中有一台web服务器,且已经配置了NAT,使用internet用户可以通过外部IP访问这台web服务器。
ASA5520双机配置案例(带状态state link的双机配置AA模式 带状态的多个state link接口)

hostname asa-1enable password cisco!interface GigabitEthernet0/0nameif insidesecurity-level 100ip address 192.200.31.249 255.255.255.192 standby 192.200.31.248!interface GigabitEthernet0/1description LAN Failover Interface(做failover link的接口不需要做地址配置)!interface GigabitEthernet0/2description STATE Failover Interface!interface GigabitEthernet0/3nameif outsidesecurity-level 100ip address 192.200.31.4 255.255.255.224 standby 192.200.31.5!interface Management0/0shutdownnameif managementsecurity-level 100ip address 10.168.1.1 255.255.255.0management-only!same-security-traffic permit inter-interface!failoverfailover lan unit primaryfailover lan interface faillink(自己起的failover名字)GigabitEthernet0/1(心跳线接口)failover polltime unit 1 holdtime 3failover link statelink GigabitEthernet0/2failover interface ip faillink 10.168.100.1 255.255.255.0 standby 10.168.100.2 failover interface ip statelink 10.168.101.1 255.255.255.0 standby 10.168.101.2 monitor-interface outsidemonitor-interface insideicmp permit any insideicmp permit any outsideroute inside 192.200.31.32 255.255.255.224 192.200.31.250 1route inside 192.200.31.64 255.255.255.192 192.200.31.250 1route inside 192.200.31.128 255.255.255.192 192.200.31.250 1route inside 192.200.31.192 255.255.255.192 192.200.31.250 1route outside 0.0.0.0 0.0.0.0 192.200.31.1 1telnet 0.0.0.0 0.0.0.0 insidetelnet 0.0.0.0 0.0.0.0 outside!hostname asa-2enable password 2KFQnbNIdI.2KYOU encryptedpasswd 2KFQnbNIdI.2KYOU encryptednamesno dns-guard!interface Ethernet0/0nameif insidesecurity-level 100ip address 192.200.31.249 255.255.255.192 standby 192.200.31.248 !interface Ethernet0/1description LAN Failover Interface!interface Ethernet0/2description STATE Failover Interfaceshutdown!interface Ethernet0/3nameif outsidesecurity-level 100ip address 192.200.31.4 255.255.255.224 standby 192.200.31.5!interface Management0/0nameif managementsecurity-level 100ip address 10.168.1.1 255.255.255.0management-only!no ftp mode passiveclock timezone CST 8same-security-traffic permit inter-interfacepager lines 24logging asdm informationalmtu inside 1500mtu outside 1500mtu management 1500failoverfailover lan unit primaryfailover lan interface faillink Ethernet0/1failover polltime unit 1 holdtime 3failover link statelink Ethernet0/2failover interface ip faillink 10.168.100.1 255.255.255.0 standby 10.168.100.2 failover interface ip statelink 10.168.101.1 255.255.255.0 standby 10.168.101.2 icmp permit any insideicmp permit any outsideno asdm history enablearp timeout 14400route inside 192.200.31.128 255.255.255.192 192.200.31.250 1route inside 192.200.31.64 255.255.255.192 192.200.31.250 1route inside 192.200.31.32 255.255.255.224 192.200.31.250 1route outside 0.0.0.0 0.0.0.0 192.200.31.1 1timeout xlate 3:00:00timeout conn 1:00:00 half-closed 0:10:00 udp 0:02:00 icmp 0:00:02timeout sunrpc 0:10:00 h323 0:05:00 h225 1:00:00 mgcp 0:05:00timeout mgcp-pat 0:05:00 sip 0:30:00 sip_media 0:02:00timeout uauth 0:05:00 absolutehttp server enableno snmp-server locationno snmp-server contactcrypto ipsec security-association lifetime seconds 28800crypto ipsec security-association lifetime kilobytes 4608000telnet 0.0.0.0 0.0.0.0 insidetelnet 0.0.0.0 0.0.0.0 outsidetelnet timeout 5ssh timeout 5console timeout 0dhcpd ping_timeout 50!<--- More --->class-map inspection_defaultmatch default-inspection-traffic!!policy-map global_policyclass inspection_defaultinspect dns maximum-length 512inspect ftpinspect h323 h225inspect h323 rasinspect rshinspect rtspinspect esmtpinspect sqlnetinspect skinnyinspect sunrpcinspect xdmcpinspect sipinspect netbiosinspect tftp!Cryptochecksum:a0b294ccce697e561e4e0fcf9e1cae91 : endasa-2#### END LOG - DATE: 090313, TIME: 024509 ###。
ASA基本配置与实验环境搭建

扩展ACL:asa802(config)#access-list acl-name extended {permit | deny} protocol src-ip-add src-mask dst-ip-add dst-mask [operator port]
NETSCREEN防火墙:通过对外网端口MIP和访问策略(set policy)来实现外网对内网及DMZ专项服务的访问限制。
ASA防火墙: 通过静态映射(static
(inside,outside))和策略(access-list)来实现外网对内网及DMZ专项服务的访问限制。
3、
内网地址转换
Telnet或SSH密码:
asa802(config)#passwd cisco
ASA接口名字和安全级别
asa802(config-if)#nameif inside(不起名,ping不通)
asa802(config-if)#security-level 100(取值0—100 ,值越大,安全级越高)
5、
路由的实现
PIX防火墙:通过route outside 、route inside来实现内外网的访问路由。
NETSCREEN防火墙:通过set route来实现内外网的访问路由。
ASA防火墙:通过route outside 、route inside来实现内外网的访问路由。
6、
管理地址的定义
定义一个全局地址池:
asa802(config)#global (outside) 1 200.1.1.100-200.0.0.110
Cisco ASA5500 配置手册

Cisco ASA5500系列防火墙基本配置手册一、配置基础1.1用户接口思科防火墙支持下列用户配置方式:Console,Telnet,SSH(1.x或者2.0,2.0为7.x新特性),ASDM的http方式,VMS的Firewall Management Center。
支持进入Rom Monitor模式,权限分为用户模式和特权模式,支持Help,History和命令输出的搜索和过滤。
用户模式:Firewall> 为用户模式,输入enable进入特权模式Firewall#。
特权模式下输入config t 可以进入全局配置模式。
通过exit,ctrl-z退回上级模式。
配置特性:在原有命令前加no可以取消该命令。
Show running-config 或者 write terminal显示当前配置。
Show running-config all显示所有配置,包含缺省配置。
Tab可以用于命令补全,ctrl-l可以用于重新显示输入的命令(适用于还没有输入完命令被系统输出打乱的情况),help和history相同于IOS命令集。
Show命令支持 begin,include,exclude,grep 加正则表达式的方式对输出进行过滤和搜索。
Terminal width 命令用于修改终端屏幕显示宽度,缺省为80个字符,pager命令用于修改终端显示屏幕显示行数,缺省为24行。
1.2初始配置跟路由器一样可以使用setup进行对话式的基本配置。
二、配置连接性2.1配置接口接口基础:防火墙的接口都必须配置接口名称,接口IP地址和掩码和安全等级。
接口基本配置:Firewall(config)# interface hardware-id 进入接口模式Firewall(config-if)# speed {auto | 10 | 100 | nonegotiate} 设置接口速率Firewall(config-if)# duplex {auto | full | half} 接口工作模式Firewall(config-if)# [no] shutdown 激活或关闭接口Firewall(config-if)# nameif if_name 配置接口名称Firewall(config-if)# security-level level 定义接口的安全级别例:interface GigabitEthernet0/0nameif outsidesecurity-level 0ip address 125.78.33.22 255.255.255.248!interface GigabitEthernet0/1nameif insidesecurity-level 100ip address 192.168.18.254 255.255.255.0在配置中,接口被命名为外部接口(outside),安全级别是0;被命名为内部接口(inside),安全级别是100.安全级别取值范围为1~99,数字越大安全级别越高。
思科ASA防火墙配置

思科ASA防火墙配置要想配置思科的防火墙得先了解这些命令:常用命令有:nameif、interface、ip address、nat、global、route、static等。
global指定公网地址范围:定义地址池。
Global命令的配置语法:global (if_name) nat_id ip_address-ip_address [netmark global_mask]其中:(if_name):表示外网接口名称,一般为outside。
nat_id:建立的地址池标识(nat要引用)。
ip_address-ip_address:表示一段ip地址范围。
[netmark global_mask]:表示全局ip地址的网络掩码。
nat地址转换命令,将内网的私有ip转换为外网公网ip。
nat命令配置语法:nat (if_name) nat_id local_ip [netmark]其中:(if_name):表示接口名称,一般为inside.nat_id:表示地址池,由global命令定义。
local_ip:表示内网的ip地址。
对于0.0.0.0表示内网所有主机。
[netmark]:表示内网ip地址的子网掩码。
routeroute命令定义静态路由。
语法:route (if_name) 0 0 gateway_ip [metric]其中:(if_name):表示接口名称。
0 0 :表示所有主机Gateway_ip:表示网关路由器的ip地址或下一跳。
[metric]:路由花费。
缺省值是1。
static配置静态IP地址翻译,使内部地址与外部地址一一对应。
语法:static(internal_if_name,external_if_name) outside_ip_addr inside_ ip_address 其中:internal_if_name表示内部网络接口,安全级别较高,如inside。
external_if_name表示外部网络接口,安全级别较低,如outside。
ASA基本配置

ASA命令介绍:一、基本配置1、显示ASA版本信息ciscoasa# show version2、配置主机名ciscoasa(config)# hostname asa8023、配置域名asa802(config)# domain-name 4、配置密码a、配置特权密码asa802(config)# enable password asa802b、配置远程登陆(telnet、SSH)密码asa802(config)# passwd cisco5、配置接口a、配置接口IP地址asa802(config-if)# ip address 192.168.1.1 255.255.255.0b、配置接口名字asa802(config-if)# nameif namec、配置接口安级级别asa802(config-if)# security-level number6、查看接口信息asa802(config-if)# show run interface(不必要在特权下)7、查看IP信息asa802(config-if)# show ip address(show ip)8、配置静态路由asa802(config)# route interface-name network mask next-hop-address 9、查看路由表asa802# show route10、配置远程管理接入a、配置Telnet接入----明文传输asa802(config)# telnet {network|ip-address} mask interface-name 注:ASA不允许telnet流量从安全级别为0的接口进入b、配置SSH(安全的telnet加密传输)接入(3个步骤)步骤1:配置主机名和域名步骤2:生成RSA密钥对(公钥和私钥)asa802(config)# crypto key generate rsa modulus 1024步骤3:配置防火墙允许SSH接入asa802(config)# ssh 192.168.0.0 255.255.255.0 insideasa802(config)# ssh 0 0 outside配置空闲超时时间与版本(可选)asa802(config)# ssh timeout 30asa802(config)# ssh version 2c、配置ASDM(ASA安全设备管理器)接入asa802(config)# http server enableasa802(config)# http 192.168.0.0 255.255.255.0 insideasa802(config)# asdm image disk0:/asdm-602.binasa802(config)# username benet password cisco privilege 1511、配置网络地址转换(NAT)a、配置PAT(2个步骤)---把多个私网地址转换成1个公网地址,多对少的转换步骤1:定义什么流量需要被转换asa802(config)# nat (interface_name) nat-id local-ip mask 步骤2:定义全局地址池(也可转到外部接口)asa802(config)# global (interface_name) nat-id {global-ip [-global-ip] |interface}b、配置Staticasa802(config)# static (real_interface,mapped_interface) mapped_ip real_ip注:从低到高需要通过ACL放行相应的流量c、查看NAT的转换条目asa802(config)#show xlate12、配置ACLa、标准ACLasa802(config)#access-list acl_name standard {permit | deny}ip_addr maskb、扩展ACLasa802(config)# access-list acl_name extended {permit | deny}protocol src_ip_addr src_mask dst_ip_addr dst_mask [operator port]c、将ACL应用到接口asa802(config)# access-group acl_name {in | out} interface interface_name12、清空当前ASA相关协议配置asa802(config)#clear config route|static|nat|global13、清空当前ASA所有配置asa802(config)#clear config all--------------------------------------------------------二、ASA的高级应用1、配置URL(统一资源定位符)过滤(4个步骤)步骤1:定义Regex(正则表达式)-定义URL匹配的字符串asa802(config)# regex url1 "\.sohu\.com"---""步骤2:创建class-map(类映射)-识别传输流量,分类流量asa802(config)# access-list tcp_filter permit tcp 192.168.10.0255.255.255.0 any eq wwwasa802(config)# class-map tcp_filter_classasa 802(config-cmap)# match access-list tcp_filter-------------------------------------------------------------------------------------------------asa802(config)# class-map type inspect http http_class--------把字符串划分类asa802(config-cmap)# match request header host regex url1 步骤3:创建policy-map(策略映射)-针对不同的类执行不同的操作 asa802(config)# policy-map type inspect http http_url_policy-----带http 检测类型的策略映射asa802(config-pmap)# class http_classasa802(config-pmap-c)# drop-connection log ---同时产生日志信息-----------------------------------------------------------------------------------------------------asa802(config)# policy-map inside_http_url_policy ---标准的策略映射asa802(config-pmap)# class tcp_filter_classasa802(config-pmap-c)# inspect http http_url_policy步骤4:应用policy-map应用接口上asa802(config)# service-policy inside_http_url_policy interface inside2、配置日志管理服务器(三种方式)第一种:本地Buffer保存日志asa802(config)# logging enableasa802(config)# logging buffered informational 第二种:配置ASDM日志asa802(config)# logging enableasa802(config)# logging asdm informational 第三种:配置日志服务器asa802(config)# logging enableasa802(config)# logging trap informationalasa802(config)# logging host inside 192.168.10.13、配置ASA安全特性a、基本威胁检测asa802(config)# threat-detection basic-threatb、防范IP分攻击asa802(config)# fragment chain 1c、启用IDS(入侵检测系统)功能(可选)。
ASA-NAT配置指南

ASA配置指南●文档属性●文档历史目录一、文档说明 (5)二、基础配置 (6)(一)查看系统信息 (6)(二)版本区别简介 (6)(三)接口配置与安全级别简介 (7)(四)NTP 配置 (8)(五)SNMP配置 (9)(六)telnet配置 (9)(七)SSH配置 (9)(八)配置管理 (10)(九)常用设备排错命令 (10)三、NAT静态方向写法 (12)(一)传统静态NAT配置方向写法 (12)(二)新静态NAT配置方向写法 (15)四、NAT配置举例 (16)(一)Dynamic NAT (16)(二)Static NAT (27)(三)Identity NAT (34)(四)NAT免除 (40)(五)Twice NAT(策略NAT) (40)(六)NAT执行顺序 (52)五、状态化应用监控 (53)(一)状态化监控策略配置 (53)(二)路由、NAT、ACL、策略执行顺序 (57)六、failover (65)(一)配置failover (65)(二)配置A/A (76)一、文档说明本文档主要介绍思科ASA防火墙在版本8.2之前与版本8.3之后配置区别和常用的一些管理和运维命令,如:系统管理、防火墙策略、NAT、日志配置等。
思科ASA防火墙目前新出厂的设备都在8.3以后,但有很多老的设备都在8.2以前,所以本文档通过使用ASA 8.0与8.4这两个版本来介绍。
请读者打开文档中的显示批注功能,文档中有部分批注内容。
二、基础配置(一)查看系统信息//ASA Software 8.4//ASA Software 8.0(二)版本区别简介两个版本除了在技术NAT和ACL配置方式有所不同外,其他技术配置方式都相同。
NAT:两个版本的NAT配置的动作和效果都是相同的,但配置方式都不通,详细见NAT 配置举例。
ACL:8.2之前的版本在放行inbound流量时放行的是映射的虚IP,而8.3以后的新版本放行inbound流量时是内网的真实IP,详细见配置举例。
ASA5500配置说明
择1024 bit
2. 保存RSA Keys到flash,
hostname(config)# write mem
3. 指定允许从哪个接口和哪个源地址通过SSH连入到ASA hostname(config)# ssh
source_IP_address mask source_interface
access-group outside_permit in interface outside
//把outside_permit控制列表运用在外部接口的入口方向。
route outside 0.0.0.0 0.0.0.0 202.98.131.126 1 //定义一个默认路由。
timeout conn 1:00:00 half-closed 0:10:00 udp 0:02:00 icmp 0:00:02
static (dmz,outside) tcp interface 30010 192.168.2.2 30010 netmask 255.255.255.255
static (dmz,outside) tcp interface 3389 192.168.2.2 3389 netmask 255.255.255.255
//端口映射 可以解决内部要公布的服务太多,而申请公网IP少问题。
static (dmz,outside) tcp interface 30001 192.168.2.2 30001 netmask 255.255.255.255
//把dmz区192.168.2.2 30002 映射给外部30002端口上。
//访问控制列表
access-list outside_permit extended permit tcp any interface outside range 30000
图解Cisco-ASA防火墙SSL-VPN的配置
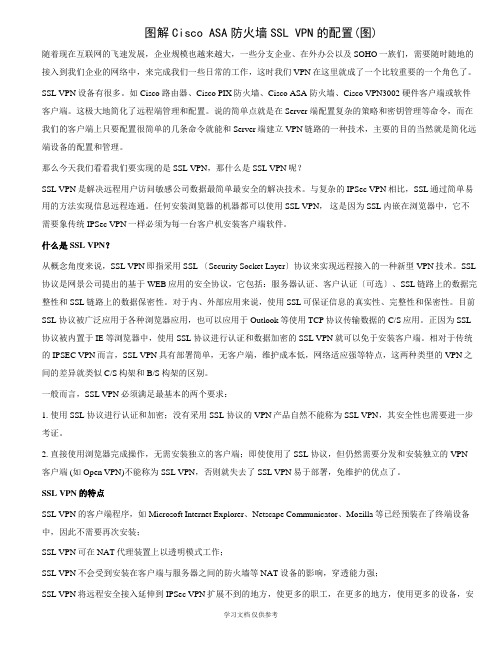
图解Cisco ASA防火墙SSL VPN的配置(图)随着现在互联网的飞速发展,企业规模也越来越大,一些分支企业、在外办公以及SOHO一族们,需要随时随地的接入到我们企业的网络中,来完成我们一些日常的工作,这时我们VPN在这里就成了一个比较重要的一个角色了。
SSL VPN设备有很多。
如Cisco 路由器、Cisco PIX防火墙、Cisco ASA 防火墙、Cisco VPN3002 硬件客户端或软件客户端。
这极大地简化了远程端管理和配置。
说的简单点就是在Server 端配置复杂的策略和密钥管理等命令,而在我们的客户端上只要配置很简单的几条命令就能和Server端建立VPN链路的一种技术,主要的目的当然就是简化远端设备的配置和管理。
那么今天我们看看我们要实现的是SSL VPN,那什么是SSL VPN呢?SSL VPN是解决远程用户访问敏感公司数据最简单最安全的解决技术。
与复杂的IPSec VPN相比,SSL通过简单易用的方法实现信息远程连通。
任何安装浏览器的机器都可以使用SSL VPN,这是因为SSL 内嵌在浏览器中,它不需要象传统IPSec VPN一样必须为每一台客户机安装客户端软件。
什么是SSL VPN?从概念角度来说,SSL VPN即指采用SSL 〔Security Socket Layer〕协议来实现远程接入的一种新型VPN技术。
SSL 协议是网景公司提出的基于WEB应用的安全协议,它包括:服务器认证、客户认证〔可选〕、SSL链路上的数据完整性和SSL链路上的数据保密性。
对于内、外部应用来说,使用SSL可保证信息的真实性、完整性和保密性。
目前SSL 协议被广泛应用于各种浏览器应用,也可以应用于Outlook等使用TCP协议传输数据的C/S应用。
正因为SSL 协议被内置于IE等浏览器中,使用SSL 协议进行认证和数据加密的SSL VPN就可以免于安装客户端。
相对于传统的IPSEC VPN而言,SSL VPN具有部署简单,无客户端,维护成本低,网络适应强等特点,这两种类型的VPN之间的差异就类似C/S构架和B/S构架的区别。
ASA防火墙配置
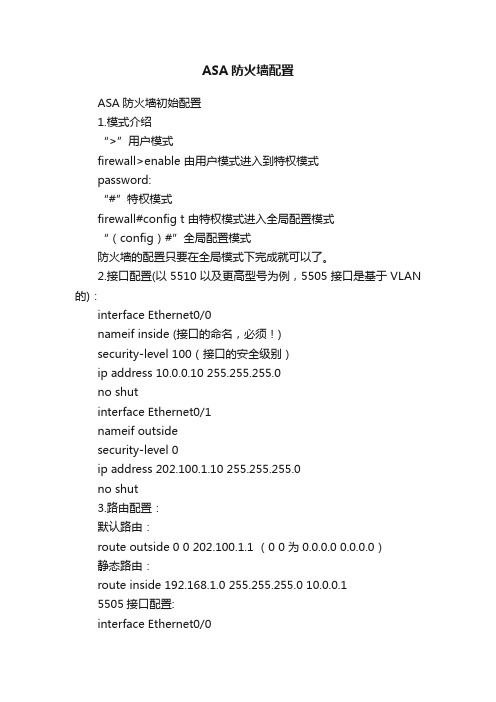
ASA防火墙配置ASA防火墙初始配置1.模式介绍“>”用户模式firewall>enable 由用户模式进入到特权模式password:“#”特权模式firewall#config t 由特权模式进入全局配置模式“(config)#”全局配置模式防火墙的配置只要在全局模式下完成就可以了。
2.接口配置(以5510以及更高型号为例,5505接口是基于VLAN 的):interface Ethernet0/0nameif inside (接口的命名,必须!)security-level 100(接口的安全级别)ip address 10.0.0.10 255.255.255.0no shutinterface Ethernet0/1nameif outsidesecurity-level 0ip address 202.100.1.10 255.255.255.0no shut3.路由配置:默认路由:route outside 0 0 202.100.1.1 (0 0 为0.0.0.0 0.0.0.0)静态路由:route inside 192.168.1.0 255.255.255.0 10.0.0.15505接口配置:interface Ethernet0/0!interface Ethernet0/1switchport access vlan 2interface Vlan1nameif insidesecurity-level 100ip address 192.168.6.1 255.255.255.0!interface Vlan2nameif outsidesecurity-level 0ip address 202.100.1.10ASA防火墙NAT配置内网用户要上网,我们必须对其进行地址转换,将其转换为在公网上可以路由的注册地址,防火墙的nat和global是同时工作的,nat定义了我们要进行转换的地址,而global定义了要被转换为的地址,这些配置都要在全局配置模式下完成,Nat配置:firewall(config)# nat (inside) 1 0 0上面inside代表是要被转换得地址,1要和global 后面的号对应,类似于访问控制列表号,也是从上往下执行,0 0 代表全部匹配(第一个0代表地址,第二个0代表掩码),内部所有地址都回进行转换。
ASA 5505配置手册
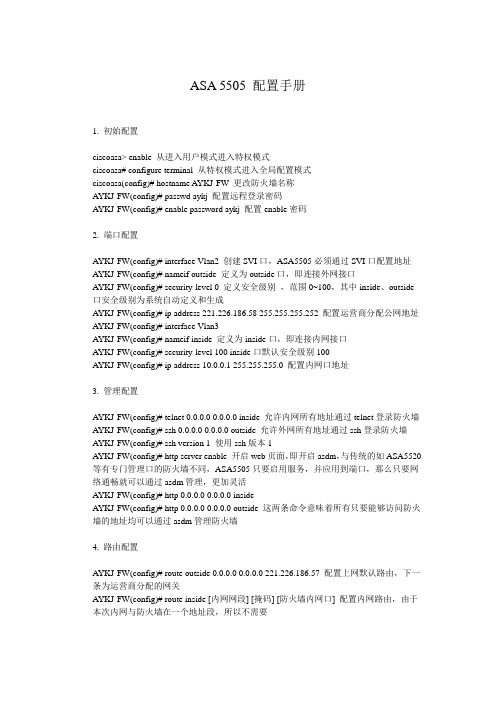
ASA 5505 配置手册1. 初始配置ciscoasa> enable 从进入用户模式进入特权模式ciscoasa# configure terminal 从特权模式进入全局配置模式ciscoasa(config)# hostname AYKJ-FW 更改防火墙名称AYKJ-FW(config)# passwd aykj 配置远程登录密码AYKJ-FW(config)# enable password aykj 配置enable密码2. 端口配置AYKJ-FW(config)# interface Vlan2 创建SVI口,ASA5505必须通过SVI口配置地址AYKJ-FW(config)# nameif outside 定义为outside口,即连接外网接口AYKJ-FW(config)# security-level 0 定义安全级别,范围0~100,其中inside、outside 口安全级别为系统自动定义和生成AYKJ-FW(config)# ip address 221.226.186.58 255.255.255.252 配置运营商分配公网地址AYKJ-FW(config)# interface Vlan3AYKJ-FW(config)# nameif inside 定义为inside口,即连接内网接口AYKJ-FW(config)# security-level 100 inside口默认安全级别100AYKJ-FW(config)# ip address 10.0.0.1 255.255.255.0 配置内网口地址3. 管理配置AYKJ-FW(config)# telnet 0.0.0.0 0.0.0.0 inside 允许内网所有地址通过telnet登录防火墙AYKJ-FW(config)# ssh 0.0.0.0 0.0.0.0 outside 允许外网所有地址通过ssh登录防火墙AYKJ-FW(config)# ssh version 1 使用ssh版本1AYKJ-FW(config)# http server enable 开启web页面,即开启asdm,与传统的如ASA5520等有专门管理口的防火墙不同,ASA5505只要启用服务,并应用到端口,那么只要网络通畅就可以通过asdm管理,更加灵活AYKJ-FW(config)# http 0.0.0.0 0.0.0.0 insideAYKJ-FW(config)# http 0.0.0.0 0.0.0.0 outside 这两条命令意味着所有只要能够访问防火墙的地址均可以通过asdm管理防火墙4. 路由配置AYKJ-FW(config)# route outside 0.0.0.0 0.0.0.0 221.226.186.57 配置上网默认路由,下一条为运营商分配的网关AYKJ-FW(config)# route inside [内网网段] [掩码] [防火墙内网口] 配置内网路由,由于本次内网与防火墙在一个地址段,所以不需要5. NAT配置5.1 动态NAT配置AYKJ-FW(config)# global (outside) 1 interface 将outside接口设置为NA T的外网接口AYKJ-FW(config)# nat (inside) 1 10.0.0.0 255.255.255.0 允许内网网段通过NA T访问互联网5.2 静态NAT映射AYKJ-FW(config)# access-list perout extended permit tcp any host 221.226.186.58 eq www 首先在防火墙外网口开放需要做映射的端口AYKJ-FW(config)# access-group perout in interface outside 在外网口启用该ACLAYKJ-FW(config)# static (inside,outside) tcp interface www 10.0.0.150 www netmask 255.255.255.255 将内网服务器的端口映射到外网AYKJ-FW(config)# global (inside) 1 interfaceAYKJ-FW(config)# static (inside,inside) tcp 221.226.186.58 www 10.0.0.150 www netmask 255.255.255.255 以上两条命令的作用是当内网用户通过外网地址去访问内网服务器时,直接映射到内网,如果不做则内网用户不能通过外网地址访问内网服务器6. VPN配置6.1 VPN基础配置AYKJ-FW(config)# ip local pool vpn 10.0.1.210-10.0.1.220 mask 255.255.255.0 创建vpn 地址池,地址池应与本地网段不在同一个段AYKJ-FW(config)# access-list inside_nat0_outbound extended permit ip 10.0.0.0255.255.255.0 10.0.1.0 255.255.255.0 定义vpn流量与内网流量的互访AYKJ-FW(config)# nat (inside) 0 access-list inside_nat0_outbound 该流量不参与nat翻译AYKJ-FW(config)# access-list split standard permit 10.0.0.0 255.255.255.0 定义vpn用户允许访问网段AYKJ-FW(config)# username asa password cisco 创建vpn用户,不做策略则该用户可以通过SSL和IPSEC拨入VPN6.2 SSL(WEB) VPN配置AYKJ-FW(config)# webvpn 配置webvpnAYKJ-FW(config-webvpn)# enable outside 在外网口启用webvpnAYKJ-FW(config-webvpn)# svc image disk0:/anyconnect-win-2.4.1012-k9.pkg 调用vpn 客户端软件AYKJ-FW(config-webvpn)# svc enable 启用客户端软件AYKJ-FW(config)# group-policy ssl internal 创建webvpn组策略AYKJ-FW(config)# group-policy ssl attributes 配置组策略属性AYKJ-FW(config-group-policy)# vpn-tunnel-protocol svc webvpn 启用webvpn隧道AYKJ-FW(config-group-policy)# split-tunnel-policy tunnelspecified 只允许split匹配流量通过vpn隧道AYKJ-FW(config-group-policy)# split-tunnel-network-list value split 水平分割策略使用split,由于vpn用户没有网关,需要通过该策略使vpn用户访问内网AYKJ-FW(config)# tunnel-group ssl type remote-access 创建vpn隧道,类型为远程接入AYKJ-FW(config)# tunnel-group ssl general-attributes 配置vpn隧道基础属性AYKJ-FW(config-tunnel-general)# address-pool vpn 调用vpn地址池6.3 IPSEC VPN 配置AYKJ-FW(config)# crypto isakmp enable outside 在outside口启用ipsec vpnAYKJ-FW(config)# crypto isakmp disconnect-notify 连接中断时报错AYKJ-FW(config)# crypto isakmp policy 10 配置策略优先级AYKJ-FW(config-isakmp-policy)# authentication pre-share 通过预共享密钥拨入vpn AYKJ-FW(config-isakmp-policy)# encryption 3des通过3des格式加密数据AYKJ-FW(config-isakmp-policy)# hash md5 通过md5算法校验数据AYKJ-FW(config-isakmp-policy)# group 2 设置迪夫-赫尔曼算法组AYKJ-FW(config-isakmp-policy)# lifetime 86400 设置连接时长AYKJ-FW(config)# group-policy aykj internal创建ipsec vpn策略组AYKJ-FW(config)# group-policy aykj attributes 配置策略组属性AYKJ-FW(config-group-policy)# vpn-tunnel-protocol IPSec 启用ipsec vpn隧道AYKJ-FW(config-group-policy)# split-tunnel-policy tunnelspecified 只允许split匹配流量通过vpn隧道AYKJ-FW(config-group-policy)# split-tunnel-network-list value split 水平分割策略使用split,由于vpn用户没有网关,需要通过该策略使vpn用户访问内网AYKJ-FW(config)# tunnel-group aykj type remote-access 创建vpn隧道,类型为远程接入AYKJ-FW(config)# tunnel-group aykj general-attributes 配置隧道基础属性AYKJ-FW(config-tunnel-general)# address-pool vpn调用地址池AYKJ-FW(config-tunnel-general)# default-group-policy aykj 调用组策略AYKJ-FW(config)# tunnel-group aykj ipsec-attributes 配置隧道ipsec属性AYKJ-FW(config-tunnel-ipsec)# pre-shared-key aykj 预共享密钥为aykj。
- 1、下载文档前请自行甄别文档内容的完整性,平台不提供额外的编辑、内容补充、找答案等附加服务。
- 2、"仅部分预览"的文档,不可在线预览部分如存在完整性等问题,可反馈申请退款(可完整预览的文档不适用该条件!)。
- 3、如文档侵犯您的权益,请联系客服反馈,我们会尽快为您处理(人工客服工作时间:9:00-18:30)。
Router (config-line)# transport input SSH
在你关闭现存的Telnet会话之前,你需要一个SSH终端客户端程序以测试你的配置。我极力推荐PuTTY;它是免费的,而且它是一个优秀的终端软件。
IOS设备配置实例
SSH是替代Telnet和其他远程控制台管理应用程序的行业标准。SSH命令是加密的并以几种方式进行保密。
在使用SSH的时候,一个数字证书将认证客户端(你的工作站)和服务器(你的网络设备)之间的连接,并加密受保护的口令。SSH1使用RSA加密密钥,SSH2使用数字签名算法(DSA)密钥保护连接和认证。
ciscoasa(config)#ssh version 1 //指定SSH版本,可以选择版本2
ciscoasa(config)#username sxit password cisco //设置一个本地账号
ciscoasa(config)#aaa authentication ssh rsa console LOCAL //为SSH启用aaa认证
3550交换机支持SSH需要12.1(11)EA1以上版本软件。
其他交换机可能不支持SSH.
b) 生成密钥
set crypto key rsa 2048
密钥的生成需要1-2分钟,执行完毕后可用命令show crypto key查看生成的密钥。
c) 限制管理工作站地址
set ip permit 10.10.1.100 ssh //只允许使用SSH登录的工作站 set ip permit 10.10.1.101 ssh set ip permit enable ssh //检查SSH连接的源地址 set ip permit enable telnet //检查telnet连接的源地址 set ip permit enable snmp //检查snmp请求的源地址
show crypto key mypubkey rsa //查看产生的rsa密钥值
crypto key zeroize //清空所有产生的密钥
使用Telnet这个用来访问远程计算机的TCP/IP协议以控制你的网络设备相当于在离开某个建筑时大喊你的用户名和口令。很快地,会有人进行监听,并且他们会利用你安全意识的缺乏。
f) 限制登录
line con 0 login local line vty 0 4 login local //使用本地定义的用户名和密码登录 transport input SSH //只允许用SSH登录(注意:禁止telnet和从交换引擎session!) access-class 90 in //只允许指定源主机登录
加密算法包括Blowfish,数据加密标准(DES),以及三重DES(3DES)。SSH保护并且有助于防止欺骗,“中间人”攻击,以及数据包监听。
实施SSH的第一步是验证你的设备支持SSH.请登录你的路由器或交换机,并确定你是否加载了一个支持SSH的IPSec IOS镜像。
在我们的例子中,我们将使用Cisco IOS命令。运行下面的命令:
基本上Cisco全系列路由器都已支持,但为运行指定版本的软件您可能需要相应地进行硬件升级
b) 定义用户
user BluShin secret p4ss
c) 定义域名
ip domain-name //配置SSH必需
d) 生成密钥
crypto key generate rsa modulus 2048
ciscoasa(config)#passwd 密码 //passwd命令所指定的密码为远程访问密码,同样适用于telnet
所有7.0版本以上的用户名默认为pix,密码为password密码
查看SSH相关命令
show ssh //参看SSH配置信息
set ip http server disable //关闭http服务 set ip permit enable snmp //限制SNMP源地址 set snmp comm. read-only //清空预设的SNMP COMM字 set snmp comm. read-write set snmp comm. read-write-all
如果服务的ip permit 处于disable状态,所有的连接将被允许(当然服务如telnet本身可能包含用户认证机制)。如果指定服务的ip permit 处于enable状态,则管理工作站的地址必须事先用set ip permit <管理工作站IP地址> [可选的子网掩码] [允许使用的服务类型(ssh/telnet/snmp)]来定义
ciscoasa(config)#ssh 0.0.0.0 0.0.0.0 outside //0.0.0.0 0.0.0.0 表示任何外部主机都能通过SSH访问outside接口,当然你可以指定具体的主机或网络来进行访问,outside也可以改为inside即表示内部通过SSH访问防火墙
ciscoasa(config)#ssh timeout 30 //设置超时时间,单位为分钟
SSH 客户端
a) 从管理工作站登录
必须使用支持SSH v1协议的终端仿真程序才能使用SSH协议管理设备,推荐使用Secure CRT 3.3, 也可以使用免费软件putty.下面介绍使用Secure CRT登录SSH设备的方法:
运行Secure CRT程序,选择菜单File – Quick Connect…设置以下参数:Protocol(协议): ssh1 Hostname(主机名): 10.10.1.1 Port(端口): 22 Username(用户名): mize Ciper(加密方法): 3DES Authentication(认证方式)assword 点击Connect,这时可能会提示您接受来自设备的加密公钥,选择Accept once(只用一次)或Accept & Save (保存密钥以便下次使用)。由于协议实现的问题,可能会碰到SSH Buffer Overflow的问题,如果出现“收到大于16k的密钥”的提示,请重新连接。连接正常,输入密码即可登录到系统。
Router (config)# ip ssh time-out
Router (config)# ip ssh authentication-retries
要验证你已经配置了SSH并且它正运行在你的路由器上,执行下面的命令:
Router# show ip ssh
在验证了配置之后,你就可以强制那些你在AAA配置过程中添加的用户使用SSH,而不是Telnet.你也可以在虚拟终端(vty)连接中应用SSH而实现同样的目的。这里给出一个例子:
CISCO ASA 系列防火墙SSH配置
ciscoasa(config)#crypto key generate rsa modulus 1024 //指定rsa系数的大小,这个值越大,产生rsa的时间越长,cisco推荐使用1024.
ciscoasa(config)#write mem //保存刚刚产生的密钥
第二次登录点击File – Connect 点击连接10.10.1.1即可。
b) 从IOS设备用SSH协议登录其他设备
IOS设备也可以发起SSH连接请求(作为SSH Client),从IOS设备登录支持3DES的IOS设备,使用以下命令(-l 指定用户名):
ssh –l mize 10.10.3.3
Router> Show flash
该命令显示已加载的IOS镜像名称。你可以用结果对比你的供应商的支持特性列表。
在你验证了你的设备支持SSH之后,请确保设备拥有一个主机名和配置正确的主机域,就像下面的一样:
Router> config terminal
Router (config)# hostname Router
8500、7500、MSFC等IOS设备:
no ip http server //关闭http服务 no snmp //关闭snmp服务 no service dhcp //关闭 dhcp 服务 no ip finger //关闭 finger 服务 no service tcp-small-server //关闭tcp基本服务 no service udp-small-server //关闭 udp基本服务 service password-encryption //启用明文密码加密服务
可用命令 show ip permit 来检查ip permit 的配置
某些服务可能存在安全漏洞(如http)或协议本身设计就是比较不安全的(如snmp、telnet)。如果服务不是必要的,可以将之关闭;如果服务是必须的,应采取措施保证这些服务仅向合法用户提供:
6500/4000交换引擎:
执行结果:
The name for the keys will be: % The key modulus size is 2048 bits Generating RSA keys ... [OK]
e)指定可以用SSH登录系统的主机的源IP地址
access-list 90 remark Hosts allowed to SSH in //低版本可能不支持remark关键字 access-list 90 permit 10.10.1.100 access-list 90 permit 10.10.1.101
Router (config)# ip domain-name
在这个时候,你就可以启用路由器上的SSH服务器。要启用SSH服务器,你首先必须利用下面的命令产生一对RSA密钥:
Router (config)# crypto key generate rsa