思科基础命令速查表
思科交换机命令大全

思科交换机命令大全集团文件发布号:(9816-UATWW-MWUB-WUNN-INNUL-DQQTY-思科交换机常用命令大全1.1 用户模式与特权模式用户模式:可以使用一些基本的查询命令特权模式:可以对交换机进行相关的配置进入特权模式命令:Switch>enable退出特权模式命令:Switch#exit启用命令查询:时间设置:Switch#clock set 时间(自选参数,参数必须符合交换机要求)显示信息命令:Switch#show 可选参数注意:可以用TAB键补齐命令,自选参数为用户自定义参数,可选参数为交换机设定参数查看交换机配置: Switch#show running-config保存交换机配置:Switch#copy running-config startup-configSwitch#wr查看端口信息:Switch#show interface查看MAC地址表:Switch#show mac-address-table查看交换机CPU的状态信息:Switch#show processes1.2 全局配置模式进入全局配置模式:Switch#configure terminal主机名修改:Switch(config)#hostname 主机名(自选参数)特权模式进入密码: Switch(config)#enable secret 密码(自选参数)取消特权模式密码:Switch(config)#no enable secret取消主机名设置: Switch(config)#no hostname退出配置模式: Switch(config)#exit需要特别注意的是在配置模式中无法使用show命令,如果要使用的话show前必须加do和空格,例如:do show *指定根交换机命令:Switch(config)#spanning-tree vlan 自选参数(VLAN号) root primary例如: Switch(config)#spanning-tree vlan 1 root primary需要注意的是:设置根交换机是基于VLAN的关闭生成树协议命令:Switch(config)#no spanning-tree vlan 自选参数(VLAN号)例如: Switch(config)#no spanning-tree vlan 11.3 接口配置模式进入接口配置模式:Switch(config)#interface 端口名称(可选参数)启用端口:Switch(config-if)#no shutdown停用端口:Switch(config-if)#shutdown进入同种类型多端口配置:Switch(config)# interface range fastethernet 0/1-5进入不同类型多端口配置:Switch(config)#interface range fastethernet 0/1-5,gigabitethernet 0/1-2退出接口配置模式:Switch(config-if)#exit1.4 二层端口的配置端口速率: Switch(config-if)#speed 可选参数双工模式: Switch(config-if)#duplex 可选参数禁用链路协商:Switch(config-if)#no negotiation auto启用链路协商:Switch(config-if)#negotiation auto1.5 VLAN的配置新建VLAN:Switch(config)#vlan 自选参数(VLAN号)Switch(config-vlan)#name自选参数(VLAN名)例如:Switch(config)#vlan 1Switch(config-vlan)#name lab1Switch(config-vlan)#exit删除VLAN: Switch#vlan databaseSwitch(vlan)#no vlan 自选参数(vlan号)例如:Switch#vlan databaseSwitch(vlan)#no vlan 2将一个接口加入VLAN:Switch(config)#interface 可选参数(接口号)Switch(config-if)#switchport mode accessSwitch(config-if)#switchport access vlan 自选参数(VLAN号)Switch(config-if)#no shutdownSwitch(config-if)#exit例如:Switch(config)#interface f0/1Switch(config-if)#switchport mode accessSwitch(config-if)#switchport access vlan 1Switch(config-if)#no shutdownSwitch(config-if)#exit将一个接口退出VLAN:Switch(config)#interface 可选参数(接口号)Switch(config-if)#no switchport access vlan 自选参数(VLAN 号)例如:Switch(config)#interface f0/1Switch(config-if)#no switchport access vlan 2修改一个接口为端口汇聚模式Switch(config)#interface 可选参数(接口号)Switch(config-if)#switchport mode trunkVLAN的验证命令:Switch#show vlan 显示VLAN列表Switch#show interface switchport 查看具体接口的VLAN成员资格信息1.6 VTP的配置VTP Domain Name(VTP域名)Switch#configure terminalSwitch(config)#vtp domain 自选参数例如: Switch(config)#vtp domain Lab_NetworkVTP mode(VTP模式)Switch(config)#vtp mode 可选参数(Server|Client| Transparent)例如: Switch(config)#vtp mode ServerVTP Pruning(VTP修剪)Switch(config)#vtp pruning注意:有的交换机不支持VTP修剪命令查看VTP的配置命令:Switch#show vtp status显示交换机运行的VTP模式,配置修订号和交换机所属的VTP域Switch#show vtp counters显示VTP消息相关的统计数据1.7 远程登录交换机设置配置管理VLAN:Switch(conf)#interface vlan 1Switch(config-if)#ip addressSwitch(config-if)#no shutdown注意:IP地址必须与远程连接交换机的PC机地址在同一网段在交换机上指定默认网关:S注意:指定的默认网关仅当前交换机有效。
(完整版)思科交换机命令大全
思科交换机常用命令大全1.1 用户模式与特权模式用户模式:可以使用一些基本的查询命令特权模式:可以对交换机进行相关的配置进入特权模式命令:Switch>enable退出特权模式命令:Switch#exit启用命令查询:?时间设置:Switch#clock set 时间(自选参数,参数必须符合交换机要求)显示信息命令:Switch#show 可选参数注意:可以用TAB键补齐命令,自选参数为用户自定义参数,可选参数为交换机设定参数查看交换机配置: Switch#show running-config保存交换机配置:Switch#copy running-config startup-configSwitch#wr查看端口信息:Switch#show interface查看MAC地址表:Switch#show mac-address-table查看交换机CPU的状态信息:Switch#show processes1.2 全局配置模式进入全局配置模式:Switch#configure terminal主机名修改:Switch(config)#hostname 主机名(自选参数)特权模式进入密码: Switch(config)#enable secret 密码(自选参数)取消特权模式密码:Switch(config)#no enable secret取消主机名设置: Switch(config)#no hostname退出配置模式: Switch(config)#exit需要特别注意的是在配置模式中无法使用show命令,如果要使用的话show前必须加do和空格,例如:do show *指定根交换机命令:Switch(config)#spanning-tree vlan 自选参数(VLAN号) root primary例如: Switch(config)#spanning-tree vlan 1 root primary需要注意的是:设置根交换机是基于VLAN的关闭生成树协议命令:Switch(config)#no spanning-tree vlan 自选参数(VLAN号)例如: Switch(config)#no spanning-tree vlan 11.3 接口配置模式进入接口配置模式:Switch(config)#interface 端口名称(可选参数)启用端口:Switch(config-if)#no shutdown停用端口:Switch(config-if)#shutdown进入同种类型多端口配置:Switch(config)# interface range fastethernet 0/1-5进入不同类型多端口配置:Switch(config)#interface range fastethernet 0/1-5,gigabitethernet 0/1-2退出接口配置模式:Switch(config-if)#exit1.4 二层端口的配置端口速率: Switch(config-if)#speed 可选参数双工模式: Switch(config-if)#duplex 可选参数禁用链路协商:Switch(config-if)#no negotiation auto启用链路协商:Switch(config-if)#negotiation auto1.5 VLAN的配置新建VLAN:Switch(config)#vlan 自选参数(VLAN号)Switch(config-vlan)#name自选参数(VLAN名)例如:Switch(config)#vlan 1Switch(config-vlan)#name lab1Switch(config-vlan)#exit删除VLAN: Switch#vlan databaseSwitch(vlan)#no vlan 自选参数(vlan号)例如:Switch#vlan databaseSwitch(vlan)#no vlan 2将一个接口加入VLAN:Switch(config)#interface 可选参数(接口号)Switch(config-if)#switchport mode accessSwitch(config-if)#switchport access vlan 自选参数(VLAN号)Switch(config-if)#no shutdownSwitch(config-if)#exit例如:Switch(config)#interface f0/1Switch(config-if)#switchport mode accessSwitch(config-if)#switchport access vlan 1Switch(config-if)#no shutdownSwitch(config-if)#exit将一个接口退出VLAN:Switch(config)#interface 可选参数(接口号)Switch(config-if)#no switchport access vlan 自选参数(VLAN号)例如:Switch(config)#interface f0/1Switch(config-if)#no switchport access vlan 2修改一个接口为端口汇聚模式Switch(config)#interface 可选参数(接口号)Switch(config-if)#switchport mode trunkVLAN的验证命令:Switch#show vlan 显示VLAN列表Switch#show interface switchport 查看具体接口的VLAN成员资格信息1.6 VTP的配置VTP Domain Name(VTP域名)Switch#configure terminalSwitch(config)#vtp domain 自选参数例如: Switch(config)#vtp domain Lab_NetworkVTP mode(VTP模式)Switch(config)#vtp mode 可选参数(Server|Client| Transparent)例如: Switch(config)#vtp mode ServerVTP Pruning(VTP修剪)Switch(config)#vtp pruning注意:有的交换机不支持VTP修剪命令查看VTP的配置命令:Switch#show vtp status显示交换机运行的VTP模式,配置修订号和交换机所属的VTP域Switch#show vtp counters显示VTP消息相关的统计数据1.7 远程登录交换机设置配置管理VLAN:Switch(conf)#interface vlan 1Switch(config-if)#ip address x.x.x.x 255.255.255.0Switch(config-if)#no shutdown注意:IP地址必须与远程连接交换机的PC机地址在同一网段在交换机上指定默认网关:Switch(config)#ip default-gateway x.x.x.x注意:指定的默认网关仅当前交换机有效。
思科路由器命令集

路由器基本操作命令:Router>enable(进入特权模式)Router#configure(进入全局配置模式)Router#show history(查看历史输入命令)Router#show flash(查看闪存信息)Router#show running-config(显示运行配置内容)Router#show startup-config(显示启动配置内容)Router#show interfaces(查看端口配置信息)Router#show protocols(查看配置协议信息)Router#show ip protocols(查看路由协议)Router#show ip route(查看路由表信息)Router#(config)hostname **(修改主机名称,“**”代表新的主机名称)Router(config-if)#description **(进入端口后修改端口标识,“**”代表你要修改的名称)设置console口密码:Router(config)#line console 0Router(config-line)#loginRouter(config-line)#password ****Telnet远程配置虚拟接口密码设置:Router(config)#line vty 0 4Router(config-line)#loginRouter(config-line)#password ****设置Enable密码和Secret密码:Router(config)#enable password ****Router(config)#enable secret ****配置以太网口:Router(config)#interface F0/0(进入端口)Router(config-if)#ip address 192.168.1.10 255.255.255.0(配置IP地址与子网掩码)Router(config-if)#no shutdown(激活端口)配置与子接口:Router(config)#interface F0/0.1Router(config-subif)#encapsulation dot1Q vlan号Router(config-subif)#ip address 192.168.1.100 255.255.255.0(配置IP地址与子网掩码)Router(config-subif)#no shutdown(激活端口)配置DCE串口:Router(config)#interface S0/0/0(进入端口)Router(config-if)#ip address 192.168.2.10 255.255.255.0(配置IP地址与子网掩码)Router(config-if)#clock rate 56000(在时钟端设置时钟频率)Router(config-if)#bandwidth 56(设置带宽端口)Router(config-if)#no shutdown(激活端口)路由器Telnet相关:Router#telnet 192.168.1.100(远程登录到路由器)Router#show user(查看当前用户)Router#clear line vty 0 4(终止Telnet连接)保存当前路由器配置:Router#writeRouter#copy running-config startup-configRouter#reload备份IOS配置到TFTP服务器:Router#show flash(确定内存配置信息的文件名)Router#copy flash tftpRouter#copy run tftpRouter#copy start tftp从TFTP服务器下载IOS配置Router#copy tftp flashRouter#copy tftp runRouter#copy tftp start主机名与域名静态解析:Router(config)#ip host name XXX 192.168.1.100(“XXX”为主机名或域名,后面跟IP,一个主机名可以对应多个IP)指定DNS服务器地址:Router(config)#ip domain-lookup(打开DNS服务)Router(config)#ip name-server 192.168.1.100(最多可添加6个)Router(config)#no ip domain-lookup(关闭DNS服务)静态路由:Router(config)#ip route 路由的网段子网掩码缺省路由:Router(config)#ip route 0.0.0.0 0.0.0.0 下一个路由器地址(可以是自己的端口号)RIP动态路由相关:Router(config)#router ripRouter(config-router)#version 2(启用RIP版本2)Router(config-router)#network 直连网段Router#debug ip rip(查看RIP动态学习信息)OSPF动态路由相关:Router(config)#router ospf 进程IDRouter(config-router)#network 直连网段反掩码 area 区域号(参与路由的区域必须在同一个)Router(config-if)#ip ospf cost 开销数(修改端口的开销)Router#show ip ospf interface(显示OSPF邻接信息)Router#show ip ospf(显示OSPF生效时间)Router#show ip ospf neighbor detail(显示DR/BDR和邻居信息)Router#show ip ospf databaseRouter#debug ip ospf(显示OSPF动态学习过程)EIGRP动态路由相关:Router(config)#router eigrp 进程IDRouter(config-router)#network 直连网段Router#show ip eigrp neighbors(查看EIGRP邻居信息)Router#show ip eigrp topology(查看EIGRP拓扑结构)Router#show ip eigrp traffic(查看EIGRP信息包)Router(config-if)#bandwidth 1000(设定路由信息传输带宽,单位为Kbps)标准访问控制列表:Router(config)#access-list 列表号(1-99) permit/deny(允许或拒绝)来源地址反掩码(创建ACL)Router(config)#interface F0/0Router(config-if)#ip access-group 列表号 in/out(在端口上应用列表规则)扩展访问控制列表:Router(config)#access-list 列表号(1-99) permit/deny(允许或拒绝)协议类型来源地址反掩码目标地址反掩码 eq等于/lt小于/gt大于/neq不等于端口号(创建ACL)Router(config)#interface F0/0Router(config-if)#ip access-group 列表号 in/out(在端口上应用列表规则)在虚拟接口上应用规则:Router(config)#line vty 0 4Router(config-line)#access-class 列表号 in/out查看已配置的ACL内容:Router#show access-lists复用动态NAT:Router(config)#ip nat pool 地址池名称200.200.200.200 200.200.200.200 netmask 子网掩码(建立地址池:由于可用外网地址只有一个,所以起始地址与结束地址都是同一个)Router(config)#access-list 列表号(1-99) permit/deny 源地址反掩码(定义ACL)Router(config)#ip nat inside source list ACL号 pool 地址池名称 overload (地址池与ACL绑定)Router(config-if)#ip nat inside(指定内部端口)Router(config-if)#ip nat outside(指定外部端口)动态NAT:Router(config)#ip nat pool 地址池名称起始地址终止地址netmask 子网掩码(建立地址池)Router(config)#access-list 列表号(1-99) permit/deny 源地址反掩码(定义ACL)Router(config)#ip nat inside source list ACL号 pool 地址池名称 overload (地址池与ACL绑定)Router(config-if)#ip nat inside(指定内部端口)Router(config-if)#ip nat outside(指定外部端口)静态NAT:Router(config)#ip nat pool 地址池名称起始地址终止地址netmask 子网掩码(建立地址池)Router(config)#access-list 列表号(1-99) permit/deny 源地址反掩码(定义ACL)Router(config)#ip nat inside source list ACL号 pool 地址池名称 overload (地址池与ACL绑定)Router(config)#ip nat inside source static 内网地址外网地址(内网地址与外网地址绑定)Router(config-if)#ip nat inside(指定内部端口)Router(config-if)#ip nat outside(指定外部端口)交换机的基本操作:Switch>enable (进入交换机特权模式)Switch#config (进入全局配置模式)→Switch(config)#Switch(config)#interface f0/0 → Switch(config-if)#(进入端口)Switch#show vlan(查看VLAN信息)其他的与路由器大同小异交换机enable密码与secret密码设置:Switch(config)#enable password ****Switch(config)#enable secret ****交换机TELNET虚拟接口配置:Switch(config)#line vty 0 15Switch(config-line)#loginSwitch(config-line)#password ****VLAN的配置相关:Switch#vlan database(进入vlan数据库)Switch(vlan)#vlan 2 vlan名称(创建VLAN)Switch(config)#interface f0/0Switch(config-if)#switch mode accessSwitch(config-if)#switch access vlan 2(将端口加入VLAN)Switch(config-if)#switchport access vlan 2Switch(config)#interface vlan 2Switch(config-if)#ip address 192.168.1.100 255.255.255.0(为VLAN配置IP地址,方便TELNET管理)设置端口工作模式:Switch(config)#interface f0/0Switch(config-if)#speed auto/10/100(设置工作带宽Mbps)Switch(config-if)#duplex auto/full/half(设置半双工、全双工)端口安全配置:Switch(config-if)#switchport mode access(修改端口为访问模式)Switch(config-if)#switchport port-security(开启端口安全)Switch(config-if)#switchport port-security mac-address 被绑定的MAC地址(端口绑定MAC地址)Switch(config-if)#switchport port-security maximum *(端口可学习的MAC地址最大数量)Switch(config-if)#switchport port-security violation shutdown/protect/restrict (激活端口安全规则)交换机二层汇聚配置:Switch(config)#interface f0/0Switch(config-if)#switchport mode trunk交换机添加网关Switch(config)#ip default-gateway 192.168.100.254三层交换作为DHCP服务器Switch(config)#ip dhcp excluded-address 192.168.100.254(设置保留地址)Switch(config)#ip dhcp pool xiaoshoubu(创建地址池)Switch(dhcp-config)#network 192.168.100.0 255.255.255.0(地址池网段)Switch(dhcp-config)#default-router 192.168.100.254(分配网关)批量进入端口s1(config)#interface range fastEthernet 0/1 - fastEthernet 0/2s1(config-if-range)#选择链路聚合协议s1(config-if-range)# channel-protocol lacp配置虚拟组号s1(config-if-range)#channel-group 1 mode active指定三层交换机汇聚链路封装类型Switch(config-if-range)#switchport trunk encapsulation dot1qSwitch(config-if-range)#switchport mode trunk。
思科命令大全
思科交换机命令大全1.设置主机名/系统名IOS:switch(config)# hostname "hostname"CLI:switch(enable) set system name name-string2.设置登录口令IOS:switch(config)# enable password level 1 passwordCLI:switch(enable) set passwordswitch(enable) set enalbepass3.设置远程访问IOS:switch(config)# interface vlan 1switch(config-if)# ip address ip-address netmaskswitch(config-if)# ip default-gateway ip-addressCLI:switch(enable) set interface sc0 ip-address netmask broadcast-address switch(enable) set interface sc0 vlanswitch(enable) set ip route default gateway4.启用和浏览CDP信息IOS:switch(config-if)# cdp enableswitch(config-if)# no cdp enableCLI:switch(enable) set cdp {enable|disable} module/port5.查看Cisco邻接设备的CDP通告IOS:switch# show cdp interface [type modle/port]switch# show cdp neighbors [type module/port] [detail]CLI:switch(enable) show cdp neighbors[module/port] [vlan|duplex|capabilities|detail] 6.端口描述 IOS:switch(config-if)#description escription-stringCLI:switch(enable)set port name module/number description-string7.设置端口速度IOS:switch(config-if)# speed{10|100|auto}CLI:switch(enable) set port speed moudle/number {10|100|auto}switch(enable) set port speed moudle/number {4|16|auto}8.设置以太网的链路模式IOS:switch(config-if)# duplex {auto|full|half}CLI:switch(enable) set port duplex module/number {full|half}9.配置静态VLANIOS:switch# vlan databaseswitch(vlan)# vlan vlan-num name vlaswitch(vlan)# exitswitch# configure teriminalswitch(config)#interface interface module/numberswitch(config-if)# switchport mode accessswitch(config-if)# switchport access vlan vlan-numswitch(config-if)# endCLI:switch(enable) set vlan vlan-num [name name]switch(enable) set vlan vlan-num mod-num/port-list10.配置VLAN中继线IOS:switch(config)# interface interface mod/portswitch(config-if)# switchport mode trunkswitch(config-if)#switchport trunk encapsulation {isl|dotlq}switch(config-if)# switchport trunk allowed vlan remove vlan-listswitch(config-if)# switchport trunk allowed vlan add vlan-list CLI:switch(enable)set trunk module/port [on|off|desirable|auto|nonegotiate] Vlan-range [isl|dotlq|dotl0|lane|negotiate]11.配置VTP管理域IOS:switch# vlan databaseswitch(vlan)# vtp domain domain-nameCLI:switch(enable) set vtp [domain domain-name]12.配置VTP 模式IOS:switch# vlan databaseswitch(vlan)# vtp domain domain-nameswitch(vlan)# vtp {sever|cilent|transparent}switch(vlan)# vtp password passwordCLI:switch(enable) set vtp [domain domain-name][mode{ sever|cilent|transparent }][password password]13.配置VTP版本IOS:switch# vlan databaseswitch(vlan)# vtp v2-modeCLI:switch(enable) set vtp v2 enable14.启动VTP剪裁IOS:switch# vlan databaseswitch(vlan)# vtp pruningCLI:switch(enable) set vtp pruning enable15.配置以太信道IOS:switch(config-if)# port group group-number [distribution {source|destination}] CLI:switch(enable) set port channel moudle/port-range mode{on|off|desirable|auto} 16.调整根路径成本IOS:switch(config-if)#spanning-tree [vlan vlan-list] cost costCLI:switch(enable)set spantree portcost moudle/port costswitch(enable)set spantree portvlancost moudle/port [cost cost][vlan-list] 17.调整端口IDIOS:switch(config-if)#spanning-tree[vlan vlan-list]port-priority port-priority CLI:switch(enable)set spantree portpri {mldule/port}priorityswitch(enable)set spantree portvlanpri {module/port}priority [vlans]18.修改STP时钟IOS:switch(config)# spanning-tree [vlan vlan-list] hello-time secondsswitch(config)#spanning-tree [vlan vlan-list] forward-time secondsswitch(config)#spanning-tree [vlan vlan-list] max-age seconds CLI:switch(enable) set spantree hello interval[vlan]switch(enable) set spantree fwddelay delay [vlan]switch(enable) set spantree maxage agingtiame[vlan]19.启用或禁用Port Fast 特征IOS:switch(config-if)#spanning-tree portfastCLI:switch(enable)set spantree portfast {module/port}{enable|disable}20.启用或禁用UplinkFast 特征IOS:switch(config)#spanning-tree uplinkfast [max-update-rate pkts-per-second]CLI:switch(enable)set spantree uplinkfast {enable|disable}[rate update-rate] [all-protocolsoff|on] 为了将交换机配置成一个集群的命令交换机,首先要给管理接口分配一个IP地址,然后使用下列命令: switch(config)# cluster enable cluster-name21. 为了从一条中继链路上删除VLAN,可使用下列命令:switch(enable) clear trunk module/port vlan-range22. 用show vtp domain 显示管理域的VTP参数.23. 用show vtp statistics显示管理域的VTP参数.24. 在Catalyst交换机上定义TrBRF的命令如下:switch(enable) set vlan vlan-name [name name] type trbrf bridge bridge-num[stp {ieee|ibm}] 25. 在Catalyst交换机上定义TrCRF的命令如下:switch (enable) set vlan vlan-num [name name] type trcrf {ring hex-ring-num|decring decimal-ring-num} parent vlan-num26. 在创建好TrBRF VLAN之后,就可以给它分配交换机端口.对于以太网交换,可以采用如下命令给VLAN分配端口:switch(enable) set vlan vlan-num mod-num/port-num27. 命令show spantree显示一个交换机端口的STP状态.28. 配置一个ELAN的LES和BUS,可以使用下列命令:ATM (config)# interface atm number.subint multiointATM(config-subif)# lane serber-bus ethernet elan-name29. 配置LECS:ATM(config)# lane database database-nameATM(lane-config-databade)# name elan1-name server-atm-address les1-nsap-addressATM(lane-config-databade)# name elan2-name server-atm-address les2-nsap-addressATM(lane-config-databade)# name ...30. 创建完数据库后,必须在主接口上启动LECS.命令如下: ATM(config)# interface atm numberATM(config-if)# lane config database database-nameATM(config-if)# lane config auto-config-atm-address31. 将每个LEC配置到一个不同的ATM子接口上.命令如下:ATM(config)# interface atm number.subint multipointATM(config)# lane client ethernet vlan-num elan-num32. 用show lane server 显示LES的状态.33. 用show lane bus显示bus的状态.34. 用show lane database显示LECS数据库可内容.35. 用show lane client显示LEC的状态.36. 用show module显示已安装的模块列表.37. 用物理接口建立与VLAN的连接:router# configure terminalrouter(config)# interface media module/portrouter(config-if)# description description-stringrouter(config-if)# ip address ip-addr subnet-maskrouter(config-if)# no shutdown38. 用中继链路来建立与VLAN的连接:router(config)# interface module/port.subinterfacerouter(config-ig)# encapsulation[isl|dotlq] vlan-numberrouter(config-if)# ip address ip-address subnet-mask39. 用LANE 来建立与VLAN的连接:router(config)# interface atm module/portrouter(config-if)# no ip addressrouter(config-if)# atm pvc 1 0 5 qsaalrouter(config-if)# atm pvc 2 0 16 ilnirouter(config-if)# interface atm module/port.subinterface multipointrouter(config-if)# ip address ip-address subnet-maskrouter(config-if)# lane client ethernet elan-numrouter(config-if)# interface atm module/port.subinterface multipointrouter(config-if)# ip address ip-address subnet-namerouter(config-if)# lane client ethernet elan-namerouter(config-if)# ...40. 为了在路由处理器上进行动态路由配置,可以用下列IOS命令来进行:router(config)# ip routingrouter(config)# router ip-routing-protocolrouter(config-router)# network ip-network-numberrouter(config-router)# network ip-network-number41. 配置默认路由: switch(enable) set ip route default gateway42. 为一个路由处理器分配VLANID,可在接口模式下使用下列命令:router(config)# interface interface numberrouter(config-if)# mls rp vlan-id vlan-id-num43. 在路由处理器启用MLSP: router(config)# mls rp ip44. 为了把一个外置的路由处理器接口和交换机安置在同一个VTP域中:router(config)# interface interface numberrouter(config-if)# mls rp vtp-domain domain-name45. 查看指定的VTP域的信息: router# show mls rp vtp-domain vtp domain name46. 要确定RSM或路由器上的管理接口,可以在接口模式下输入下列命令:router(config-if)#mls rp management-interface47. 要检验MLS-RP的配置情况: router# show mls rp48. 检验特定接口上的MLS配置:router# show mls rp interface interface number49. 为了在MLS-SE上设置流掩码而又不想在任一个路由处理器接口上设置访问列表:set mls flow [destination|destination-source|full]50. 为使MLS和输入访问列表可以兼容,可以在全局模式下使用下列命令:router(config)# mls rp ip input-acl51. 当某个交换机的第3层交换失效时,可在交换机的特权模式下输入下列命令:switch(enable) set mls enable52. 若想改变老化时间的值,可在特权模式下输入以下命令:switch(enable) set mls agingtime agingtime53. 设置快速老化:switch(enable) set mls agingtime fast fastagingtime pkt_threshold54. 确定那些MLS-RP和MLS-SE参与了MLS,可先显示交换机引用列表中的内容再确定:switch(enable) show mls include55. 显示MLS高速缓存记录: switch(enable) show mls entry56. 用命令show in arp显示ARP高速缓存区的内容。
思科交换机配置命令简写表

简写命令完整命令1)用户模式:switch> switch>2)特权模式:switch>en switch>enableswitch# switch#3)全局配置模式:switch#conf t switch#config terminalswitch(config)# switch(config)#4)接口配置模式:switch(config)#in f0/1 switch(config)#interface f0/1 switch(config-if)# switch(config-if)#5)line模式:switch(config)#lin c 0 switch(config)#line console 0switch(config-line)# switch(config-line)#6)更改交换机主机名:switch(config)#ho benet switch(config)#hostname benetbenet(config)# benet(config)#7)配置进入特权模式的明文口令:switch(config)#en pass 123 switch(config)#enable password 123 8)删除进入特权模式的明文口令:switch(config)#no ena pass switch(config)#no enable password9)配置进入特权模式的加密口令:switch(config)#en se 456 switch(config)#enable secret 45610)删除进入特权模式的加密口令switch(config)#no ena se switch(config)#no enable secret11)查看交换机配置:switch#sh run switch#show running-config12)配置console口令:switch(config)#lin cons 0 switch(config)#line console 0switch(config-line)#pass 123 switch(config-line)#password 123switch(config-line)#logi switch(config-line)#login13)配置交换机IP地址:switch(config)#in vl 1 switch(config)#interface vlan 1switch(config-if)#ip ad 192.168.0.2 255.255.255.0 switch(config-if)#ip address 192.168.0.2 255.255.255.0switch(config-if)#no sh switch(config-if)#no shutdown14)配置交换机默认网关:switch(config)#ip default-g 192.168.0.1 switch(config)#ip default-gateway 192.168.0.115)查看交换机的MAC地址表:switch#sh mac-a switch#show mac-address-table16)查看思科交换机相邻设备的详细信息:switch#sh cdp nei de switch#show cdp neighbors detail17)保存交换机配置:1:switch#cop run st 1:switch#copy running-config startup-config 2:switch#wr 2:switch#write18)恢复交换机出厂配置:switch#er st switch#erase startup-configswitch#relo switch#reload19)创建VLAN:1:switch#vl da switch#vlan databaseswitch(vlan)#vl 30 switch(vlan)#vlan 30switch(vlan)#e switch(vlan)#exit2:20)删除VLAN:switch(vlan)#n vl 20 switch(vlan)#no vlan 20Deleting VLAN 2... Deleting VLAN 2...switch(vlan)#e switch(vlan)#exit21)将端口加入到VLAN:switch(config)#in f0/2 switch(config)#interface f0/2switch(config-if)#sw a v 30 switch(config-if)#switchport access vlan 3022)验证VLAN配置信息:switch#sh vlan b switch#show vlan briefswitch#sh vlan-s switch#show vlan-switch23)删除VLAN中的端口:1:switch(config-if)#no sw a v 3 switch(config-if)#no switchport access vlan 3 switch(config-if)#end switch(config-if)#end2:switch(config-if)#def interface f0/2 switch(config-if)#default interface f0/2 Building configuration... Building configuration...Interface FastEthernet0/2 set to default configuration Interface FastEthernet0/2 set to default configurationswitch(config)#end switch(config)#end24)同时将多个端口加入VLAN并验证:switch(config)#in r f0/3 - 10 switch(config)#interface range f0/3 - 10switch(config-if-range)#sw a v 3 switch(config-if-range)#switchport access vlan 3switch(config)#end switch(config)#endswitch#sh vlan-s switch#show vlan-switch25)配置VLAN TRUHK:switch(config)#in f0/15 switch(config)#interface f0/15switch(config-if)#sw m t switch(config-if)#switchport mode trunk26)从TRUNK中添加某个VLAN:switch(config)#in f0/15 switch(config)#interface f0/15switch(config-if)#sw t a v ad 3 switch(config-if)#switchport trunk allowed vlan add 3switch(config-if)#end switch(config-if)#end27)从TRUNK中删除某个VLAN:switch(config)#in f0/15 switch(config)#interface f0/15switch(config-if)#sw t a v r 3 switch(config-if)#switchport trunk allowed vlan remove 3switch(config-if)#end switch(config-if)#end28)验证接口模式(检查中断端口允许的VLAN列表):switch#sh int f0/15 switchp switch#show interface f0/15 switchport29)查看用过的命令:switch#sh hi switch#show histor。
cisco思科命令大全
思科命令大全思科常用命令大权1用户模式2:特权模式enableshow vlanshow versionshow interfaceshow mac-address-tableshow running-configcopy running-config startup-config3:全局配置模式config terminalhostnameenable passwordip default-gateway4:接口配置模式interface 端口switchport mode trunk5:line模式line console 0第2章交换机的基本配置1.配置主机hostname2.查看交换机的配置show running-config使能口令enable password加密保存的使能口令enable secret配置IP地址interface vlan1ip addressno shutdown配置交换机的网关ip default-gateway ipaddress查看交换机的MAC地址表show mac-address-table使用CDP协议show cdpshow cdp interfaceshow cdp neighborsshow cdp neighbors detailshow cdp traffic保存与删除交换机配置copy running-config startup-config第三章:虚拟局域网(VLAN)VLAN的概述VLAN是对连接在第2层交换机端口的网络用户的逻辑分段。
VLAN的作用:1。
广播控制2。
安全(副产品)3。
带宽利用4。
延迟VLAN的种类静态:基于端口的VLAN动态:基于MAC地址的VLAN在交换机上配置静态VLAN创建VLAN1。
CONFIG TERMINALVLAN 2NAME 22。
特权模式下VLAN DATABASEVLAN 2 NAME 2查看VLANSHOW VLAN删除VLANNO VLAN 2验证:SHOW VLAN BRIEF在VLAN中添加端口INTERFACE F0/2INTERFACE RANGE F0/2 - 5SWITCHPORT MODE ACCESSSWITCHPORT ACCESS VLAN 2VLAN配置实例在交换机上添加VLAN2,VLAN3,VLAN3,端口范围分别为1-4,5-8,9-12这个实例的作用就是让不同的VLAN的计算机之间的通信隔开。
思科路由器命令大全
思科路由器命令大全思科路由器命令大全1.基本设置命令1.1 主机名配置●hostname [主机名]:设置路由器的主机名。
1.2 用户名和密码配置●enable password [密码]:设置特权模式的密码。
●enable secret [密码]:设置加密的特权模式密码。
●username [用户名] password [密码]:创建一个本地用户并设置密码。
●line console 0:进入控制台命令行配置模式。
●password [密码]:设置控制台访问密码。
●line vty [行号] [结束行号]:进入虚拟终端配置模式。
●password [密码]:设置虚拟终端访问密码。
1.3 IP 地质配置●interface [接口类型] [接口编号]:进入接口配置模式。
●ip address [IP 地质] [子网掩码]:设置接口的IP 地质和子网掩码。
●no shutdown:启用接口。
1.4 默认网关配置●ip default-gateway [默认网关地质]:设置默认网关。
2.路由配置命令2.1 静态路由配置●ip route [目标网络] [目标子网掩码] [下一跳地质]:配置静态路由。
2.2 动态路由配置●router rip:进入 RIP 路由配置模式。
●network [网络地质]:启动 RIP 并指定要进行路由的网络地质。
●router ospf [进程号]:进入 OSPF 路由配置模式。
●network [IP 地质] [反掩码] area [区域号]:配置 OSPF。
3.状态和监控命令3.1 接口状态命令●show ip interface brief:显示路由器接口的 IP 地质和状态。
●show interfaces [接口类型] [接口编号]:显示指定接口的详细信息。
●show interfaces status:显示接口的状态和统计信息。
3.2 路由表命令●show ip route:显示路由表信息。
思科路由器常用配置命令一览表

思科路由器常用配置命令一览表:1、Exec commands:<1-99> 恢复一个会话bfe 手工应急模式设置clear 复位功能clock 管理系统时钟configure 进入设置模式connect 打开一个终端copy 从tftp服务器拷贝设置文件或把设置文件拷贝到tftp服务器上debug 调试功能disable 退出优先命令状态disconnect 断开一个网络连接enable 进入优先命令状态erase 擦除快闪内存exit 退出exce模式help 交互帮助系统的描述lat 打开一个本地传输连接lock 锁定终端login 以一个用户名登录logout 退出终端mbranch 向树形下端分支跟踪多路由广播mrbranch 向树形上端分支跟踪反向多路由广播name-connection 给一个存在的网络连接命名no 关闭调试功能pad 打开X.29 PAD连接ping 发送回显信息ppp 开始点到点的连接协议reload 停机并执行冷启动resume 恢复一个活动的网络连接rlogin 打开远程注册连接rsh 执行一个远端命令send 发送信息到另外的终端行setup 运行setup命令show 显示正在运行系统信息slip 开始SLIP协议start-chat 在命令行上执行对话描述systat 显示终端行的信息telnet 远程登录terminal 终端行参数test 测试子系统内存和端口tn3270 打开一个tin3270连接trace 跟踪路由到目的地undebug 退出调试功能verify 验证检查闪烁文件的总数where 显示活动的连接which-route 执行OSI路由表查找并显示结果write 把正在运行的设置写入内存、网络、或终端x3 在PAD上设置X.3参数xremote 进入xremote模式2、#show ?access-expression 显示访问控制表达式access-lists 显示访问控制表apollo Apollo 网络信息appletalk Apple Talk 信息arap 显示Appletalk 远端通道统计arp 地址解析协议表async 访问路由接口的终端行上的信息bridge 前向网络数据库buffers 缓冲池统计clns CLNS网络信息clock 显示系统时钟cmns 连接模式网络服务信息compress 显示压缩状态configuration 非易失性内存的内容controllers 端口控制状态debugging 调试选项状态decnet DEC网络信息dialer 拨号参数和统计dnsix 显示Dnsix/DMPP信息entry 排队终端入口extended 扩展端口信息flash 系统闪烁信息flh-log 闪烁装载帮助日志缓冲区frame-relay 帧中继信息history 显示对话层历史命令hosts IP域名,查找方式,名字服务,主机表interfaces 端口状态和设置ip IP信息ipx Novell IPX信息isis IS-IS路由信息keymap 终端键盘映射lat DEC LAT信息line 终端行信息llc2 IBM LLC2 环路信息lnm IBM 局网管理local-ack 本地认知虚环路memory 内存统计netbios-cache NetBios命名缓冲存贮器内存node 显示已知LAT节点ntp 网络时间协议processes 活动进程统计protocols 活动网络路由协议queue 显示队列内容queueing 显示队列设置registry 功能注册信息rhosts 远程主机文件rif RIF存贮器入口route-map 路由器信息sdlle 显示sdlc-llc2转换信息services 已知LAT服务sessions 远程连接信息smds SMDS信息source-bridge 源网桥参数和统计spanning-tree 跨越树形拓朴stacks 进程堆栈应用standby 热支持协议信息stun STUN状态和设置subsystem 显示子系统tcp TCP连接状态terminal 显示终端设置tn3270 TN3270 设置translate 协议转换信息ttycap 终端容易表users 显示终端行的信息version 系统硬、软件状态vines VINES信息whoami 当前终端行信息x25 X.25信息xns XNS信息xermote Xremote统计3、#config ?Memory 从非易失性内存设置Network 从TFTP网络主机设置Overwrite-network 从TFTP网络主机设置覆盖非易失性内存Terminal 从终端设置4、Configure commads:Access-list 增加一个访问控制域Apollo Apollo全局设置命令appletalk Appletalk 全局设置命令arap Appletalk远程进出协议arp 设置一个静态ARP入口async-bootp 修改系统启动参数autonomous-system 本地所拥有的特殊自治系统成员banner 定义注册显示信息boot 修改系统启动时参数bridge 透明网桥buffers 调整系统缓冲池参数busy-message 定义当连接主机失败时显示信息chat-script 定义一个调制解调器对话文本clns 全局CLNS设置子命令clock 设置时间时钟config-register 定义设置寄存器decnet 全局DEC网络设置子命令default-value 缺省字符位值dialer-list 创建一个拨号清单入口dnsix-nat 为审计提供DMDM服务enable 修改优先命令口令end 从设置模式退出exit 从设置模式退出frame-relay 全局帧中继设置命令help 交互帮助系统的描述hostname 设置系统网络名iterface 选择设置的端口ip 全局地址设置子命令ipx Novell/IPX全局设置命令keymap 定义一个新的键盘映射lat DEC本地传输协议line 设置终端行lnm IBM局网管理locaddr-priority-list 在LU地址上建立优先队列logging 修改注册(设备)信息login-string 定义主机指定的注册字符串map-class 设置静态表类map-list 设置静态表清单menu 定义用户接口菜单mop 设置DEC MOP服务器netbios NETBIOS通道控制过滤no 否定一个命令或改为缺省设置ntp 设置NTPpriority-list 建立特权列表prompt 设置系统提示符queue-list 建立常规队列列表rcmd 远程命令设置命令rcp-enable 打开Rep服务rif 源路由进程router-map 建立路由表或进入路由表命令模式router 打开一个路由进程rsh-enable 打开一个RSH服务sap-priority-list 在SAP或MAC地址上建立一个优先队列service 修改网络基本服务snmp-server 修改SNMP参数state-machine 定义一个TCP分配状态的机器stun STUN全局设置命令tacacs-server 修改TACACS队列参数terminal-queue 终端队列命令tftp-server 为网络装载请求提供TFTP服务tn3270 tn3270设置命令translate 解释全局设置命令username 建立一个用户名及其权限vines VINES全局设置命令x25 X.25 的第三级x29 X.29 命令xns XNS 全局设置命令xremote 设置Xremote5、(config)#ipGlobal IP configuration subcommands:Accounting-list 选择保存IP记帐信息的主机Accounting-threshold 设置记帐入口的最大数accounting-transits 设置通过入口的最大数alias TCP端口的IP地址取别名as-path BGP自治系统路径过滤cache-invalidate-delay 延迟IP路由存贮池的无效classless 跟随无类前向路由规则default-network 标志网络作为缺省网关候选default-gateway 指定缺省网(如果没有路由IP)domain-list 完成无资格主机的域名domain-lookup 打开IP域名服务系统主机转换domain-name 定义缺省域名forward-protocol 控制前向的、物理的、直接的IP广播host 为IP主机表增加一个入口host-routing 打开基于主机的路由(代理ARP和再定向)hp-host 打开HP代理探测服务mobile-host 移动主机数据库multicast-routing 打开前向IPname-server 指定所用名字服务器的地址ospf-name-lookup 把OSPF路由作为DNS名显示pim PIM 全局命令route 建立静态路由routing 打开IP路由security 指定系统安全信息source-route 根据源路由头的选择处理包subnet-zero 允许子网0子网tcp 全局TCP参数路由器配置命令详细列表【内容摘要】cisco路由配置语句汇总启动接口,分配ip地址:router>router>enablerouter#router#configureterminalrouter(config)#router(config)#interfacetypeportrouter(config-if)#noshutdownrouter(config-if)#ipaddressip-addresssubnet-maskrouter(config-if)#^z配置rip路由协议:30秒更新一次router(config)#routerriprouter(config-if)#……-----------------------------------------------------------------------------cisco路由配置语句汇总启动接口,分配ip地址:router>router> enablerouter#router# configure terminalrouter(config)#router(config)# interface type portrouter(config-if)# no shutdownrouter(config-if)# ip address ip-address subnet-maskrouter(config-if)# ^z配置rip路由协议:30秒更新一次router(config)# router riprouter(config-if)# network network-number <——通告标准a,b,c类网——>router(config-if)# ^z配置igrp路由协议:90秒更新一次router(config)# router igrp as-number <——as-number范围1~65535——>router(config-if)# network network-number <——通告标准a,b,c类网——>router(config-if)# ^z配置novell ipx路由协议:novell rip 60秒更新一次router(config)# ipx routing [node address]router(config)# ipx maximum-paths paths <——设置负载平衡,范围1~512——> router(config)# interface type portrouter(config-if)# ipx network network-number [encapsulation encapsulation-type] [secondary] <——通告标准a,b,c类网——>router(config-if)# ^z配置ddr:router(config)# dialer-list group-number protocol protocol-type permit [listacl-number]router(config)# interface bri 0router(config-if)# dialer-group group-numberrouter(config-if)# dialer map protocol-type next-hop-address name hostname telphone-numberrouter(config-if)# ^z配置isdn:router(config)# isdnth-typeth-type <——配置isdn交换机类型,中国使用basic-net3——>router(config-if)# ^z配置frame relay:router(config-if)# encapsulation frame-relay [cisco | ietf ]router(config-if)# frame-relay lmi-type [ansi | cisco | q933a ]router(config-if)# bandwidth kilobitsrouter(config-if)# frame-relay invers-arp [ protocol ] [dlci ]<——配置静态invers arp表:router(config)# frame-relay protocol protocol-address dlci [ broadcast ] [ ietf | cisco ] [ payload-compress | packet-by-packet ]——><——设置keepalive间隔:router(config-if)# keepalive number——><——为本地接口指定dlci:router(config-if)# frame-lelay local-dlci number——><——子接口配置:router(config-if)# interface type port.subininterface-number [ multipoint |point-to-point ]router(config-subif)# ip unnumbered interfacerouter(config-subif)# frame-lelay local-dlci number——>router(config-if)# ^z配置标准acl:router(config)# access-list access-list-number [ permit | deny ] source [ source-mask ] <——access-list-number 范围:1~99标准acl;100~199扩展acl;800~899标准ipx acl;900~999扩展ipx acl;1000~1099 ipx sap acl;600~699apple talk acl——> router(config)# interface type portrouter(config-if)# ip access-group access-list-number [ in | out ]router(config-if)# ^z配置扩展acl:router(config)# access-list access-list-number [ permit | deny ] [ protocol | protocol-number ] source source-wildcard [ source-port ] destination destination-wildcard [ destination-port ] [ established ]router(config)# interface type portrouter(config-if)# ip access-group access-list-number [ in | out ]router(config-if)# ^z配置命名acl:router(config)# ip access-list [ standard | extended ] acl-namerouter(config [ std- | ext- ] nacl)# [ permit | deny ] [ ip-access-list-test-conditions ] router(config [ std- | ext- ] nacl)# no [ permit | deny ] [ ip-access-list-test-conditions ] router(config [ std- | ext- ] nacl)# ^zrouter(config)# interface type portrouter(config-if)# ip access-group [acl-name | 1~199 ] [ in | out ]router(config-if)# ^z配置dce时钟:router# show controllers type port <——确定dce接口——>router(confin-if)# clock rate 64000 <——进入dce接口设置时钟速率——>router(config-if)# ^z配置ppp协议:router(config)# username name password set-password-here <——验证方建立数据库——>router(config)# interface type portrouter(config-if)# encapsulation ppp <——启动ppp协议——>router(config-if)# ppp outhentication [ chap | chap pap | pap chap | pap ] <——选择ppp认证——>router(config-if)# ppp pap sent-username name password password <——发送验证信息——>router(config-if)# ^zpap单向认证配置实例:验证方:router-server(config)# username client password 12345 <——验证方建立数据库——>router-server(config)# interface serial 0router-server(config-if)# encapsulation ppprouter-server(config-if)# ppp authentication pap <——选择使用pap实现ppp认证——>router-server(config-if)# ^z被验证方:router-client(config-if)# encapsulation ppprouter-client(config-if)# ppp pap sent-username client password 12345 <——发送验证信息——>router-client(config-if)# ^zpap双向认证配置实例:路由器a:routera(config)# username b password 12345routera(config)# interface serial 0routera(config-if)# encapsulation ppproutera(config-if)# ppp authentication paproutera(config-if)# ppp pap sent-username a password 54321routera(config-if)# ^z路由器b:routerb(config)# username a password 54321routerb(config)# interface serial 1routerb(config-if)# encapsulation ppprouterb(config-if)# ppp authentication paprouterb(config-if)# ppp pap sent-username b password 12345routerb(config-if)# ^zchap单向认证配置实例:验证方:router-server(config)# username router-client password 12345router-server(config)# interface serial 0router-server(config-if)# encapsulation ppprouter-server(config-if)# ppp authentication chaprouter-server(config-if)# ^z被验证方:router-client(config-if)# encapsulation ppprouter-client(config-if)# ppp authentication chaprouter-client(config-if)# ppp chap hostname router-clientrouter-client(config-if)# ppp chap password 12345router-client(config-if)# ^z chap双向认证配置实例:路由器a:routera(config)# username routerb password 12345routera(config)# interface serial 0routera(config-if)# encapsulation ppproutera(config-if)# ppp authentication chaproutera(config-if)# ppp chap hostname routeraroutera(config-if)# ppp chap password 54321routera(config-if)# ^z路由器b:routerb(config)# username routera password 54321routerb(config)# interface serial 1routerb(config-if)# encapsulation ppprouterb(config-if)# ppp authentication chaprouterb(config-if)# ppp chap hostname routerbrouterb(config-if)# ppp chap password 12345routerb(config-if)# ^ztelnet使用:routera# terminal monitor <——可以传回在远端主机执行debug命令的结果——> routera# telnet ip-address [ router-name ] <——telnet到指定的地址或名字的主机——>routerb# [ exit | logout ] <——退出telnet——>routerb# ++<6>再按<——挂起telnet——>routera# show sessions <——显示当前所有telnet的信息,包括connect-number ——>routera# connect-number <——返回指定的telnet连接——>routera# disconnect ip-address [ router-name ] <——断开指定地址或名字的主机的连接——>routera# show user <——显示telnet到本机的连接信息——>routera# clear line [ 0 | 1 | 2 | 3 | 4 ] <——断开指定telnet到本机的连接——>禁止任何telnet到本机:router(config)# line vty 0 4router(config-line)# access-class acl-numberrouter(config)# ^z设置主机名:router(config)# hostname set-hostnamerouter(config)# ^zrouter(config)# ^z设置用户模式密码:router(config)# line console 0router(config-line)# loginrouter(config-line)# password set-passwordrouter(config-line)# ^z设置telnet密码:router(config)# line vty 0 4router(config-line)# loginrouter(config-line)# password set-passwordrouter(config-line)# ^z设置特权模式密码:router(config)# enable password set-password <——不加密的密码,明码——> router(config)# enable secret set-password <——经过加密的密码——>router(config)# ^z给所有密码加密:router(config)# service password-ancryption set-password-hererouter(config)# no service password-ancryption <——取消加密——>router(config)# ^z设置登录banner:router(config)# banner motd 分隔符set-banner-information-here 分隔符<——前后分隔符一定要一致——>设置接口的描述信息:router(config-if)# description set-port-information-hererouter(config)# ^zcdp的控制:router(config-if)# cdp enable <——在指定端口启用cdp,缺省——>router(config-if)# no cdp enable <——在指定端口关闭cdp——>router(config)# cdp run <——使所有端口启用cdp——>router(config)# no cdp run <——使所有端口关闭cdp——>ping的使用:router# ping ip-addressrouter# ping <——扩展ping命令——>protocol [ip]:[ protocol-type ] <——选择协议类型——>target ip address:ip-address <——输入测试地址——>repeat count [5]:<——选择发送的icmp包数量——>datagram size [100]:<——选择每个包的大小——>timeout in seconds [2]:<——设置每个包的超时时间——>extended commands [n]:y <——使用扩展ping命令——>sweep range of sizes [n]:tracke的使用:router# trace ip-address [ host-name ]为cisco 4000路由器指定媒体类型:router(config-if)# media-type 10baset <——使aui(默认)失效,改为使用rj-45——>router(config-if)# ^z更改路由器启动顺序:router(config)# boot system flash ios-filenamerouter(config)# boot system tftp ios-filename tftp-ip-addressrouter(config)# boot system romrouter(config)# ^z修改寄存器数值:router(config)# config-register value <——cisco出厂默认value=0x2102,value范围:0x2100(进入rom监视器),0x2101(使系统从rom启动),0x2102~0x210f(使系统从nvram启动)。
思科网络设备常用命令

网络设备安装与调试考纲要求1、IPV4地址划分(判断网络号,网段)2、交换机、路由器基本知识及配置3、交换机、路由器的Telnet远程登入4、虚拟局域网VLAN的配置5、PPP协议基本配置6、静态路由、缺省路由、RIP、OSPF的基本配置7、Ipconfig、Ping、Telnet等常用命令的应用一、交换机、路由器基本配置1.配置模式切换1.用户模式进入特权模式sw>enableSw#2. 特权模式进入全局配置模式Sw#configure terminalSw(config)#3. 全局配置模式进入接口配置模式Sw(config)#interface fastEthernet 0/1Sw(config-if)#2.路由器端口IP地址的配置Router(config)#interface fastEthernet 0/1 -----进入相应接口(进入F0/1接口)Router (config-if)#no shutdown -----开启端口(路由器默认为关闭)Router (config-if)#ip address 192.168.1.1 255.255.255.0 -----设置IP地址IP地址掩码备注:输入shutdown可关闭对应的端口或(可使用图形界面):(路由器端口默认是关闭,需要把On打钩)3.配置设备名称Switch(config)#hostname SW -----在配置模式输入hostname+名字或:二、交换机、路由器的Telnet远程登入Telnet 默认是开启,需要在设备接口配置可连通的IP地址,路由器在具体的物理接口上配置IP地址,交换机在VLAN上配置IP地址,确保PC机可以连通远程登入的设备(使用PING测试)。
可以连通在做如下操作(1)只配置登入密码Sw(config)#line vty 0 4 ---启用5条线路让5个用户接入,并进入line配置模式Switch(config-line)#password abc ----设置登录密码abcSwitch(config-line)#login ----要求密码登入(只要输入密码)(2)配置登入账号以及密码Sw(config)#username admin password admin ---------配置账号密码Sw(config)#line vty 0 4 ----启用5条线路让5个用户接入,并进入line配置模式Switch(config-line)#login local ----要求本地账号登入(需要输入账号以及密码)(3)无账号密码登入Sw(config)#line vty 0 4 ---启用5条线路让5个用户接入,并进入line配置模式Switch(config-line)#no login ----无账号密码登入注意1:在设置密码后如果无法登入,需要在输入命令login\login local,也就是login\login local需在设置完密码后输入。
思科路由器命令大全完整版
思科路由器命令大全完整版一、基本配置命令1、`enable`:进入特权模式。
2、`configure terminal`:进入全局配置模式。
3、`hostname 主机名`:设置路由器的主机名。
4、`interface 接口类型接口编号`:进入指定接口的配置模式,例如`interface ethernet 0/0`。
5、`ip address IP 地址子网掩码`:为接口配置 IP 地址和子网掩码。
6、`no shutdown`:启用接口。
二、路由配置命令1、`ip route 目标网络子网掩码下一跳地址`:添加静态路由。
2、`router ospf 进程号`:启用 OSPF 路由协议,并指定进程号。
3、`network 网络地址反掩码 area 区域号`:在 OSPF 中宣告网络。
三、访问控制列表(ACL)命令1、`accesslist 编号 permit|deny 源地址源掩码目的地址目的掩码协议端口`:创建访问控制列表规则。
2、`ip accessgroup 编号 in|out`:将访问控制列表应用到接口的入站或出站方向。
四、NAT 配置命令1、`ip nat inside source list 访问控制列表编号 interface 外部接口overload`:配置 PAT(端口地址转换)。
2、`interface 接口 ip nat inside`:指定接口为内部接口。
3、`interface 接口 ip nat outside`:指定接口为外部接口。
五、VLAN 配置命令1、`vlan VLAN 号`:创建 VLAN。
2、`name VLAN 名称`:为 VLAN 命名。
3、`interface vlan VLAN 号`:进入 VLAN 接口配置模式。
六、端口镜像命令1、`monitor session 会话号source interface 源接口`:指定源端口。
2、`monitor session 会话号 destination interface 目的接口`:指定目的端口。
CISCO交换机的常用操作项-思科常用命令手册速查手册
交换机的常用操作项1、更改主机名switch(config)#hostname sw12、设置进入特权模式的密码switch(config)#enable password 1234switch(config)#enable secret cisco3、设置console口密码switch(config)#line console 0switch(config-line)#password 123switch(config-line)#login4、查看mac地址列表switch#show mac-address-table5、查看mac地址列表刷新时间switch#show mac-address-table aging-time6、更改mac地址列表刷新时间switch(config)#mac-address-table aging-time 200 7、查看当前配置(RAM)switch#show running-config8、查看交换机的配置(NVRAM)switch#show startup-config9、保存配置switch#copy running-config startup-configswitch#write10、恢复出厂默认设置switch#erase startup-configswitch#reload11、查看cdp的全局信息switch#show cdp12、查看接口的cdp配置信息switch#show cdp interface f0/213、查看有关cdp包的统计信息switch#show cdp traffic14、查看邻居信息switch#show cdp neighbors15、查看所有入口项的详细信息switch#show cdp neighbors detailswitch#show cdp entry *16、添加接口的描述信息switch(config-if)# description connection to routerA 17、设置交换机的网关switch(config)#ip default-gateway 192.168.1.118、关掉DNS解析switch(config)# no ip domain-lookup19、实现交换机的远程管理switch(config)#enable secret ciscoswitch(config)#interface vlan 1switch(config-if)#ip address 192.168.1.100 255.255.255.0switch(config-if)#no shutdownswitch(config)#line vty 0 4switch(config-line)#password 123switch(config-line)#loginc:\>telnet 192.168.1.10020、交换机的密码恢复1、将交换机的电源拔下2、按mode键将电源插上,当出现switch:时将手松开3、switch:flash_init //加载到flash中4、switch:dir flash: //查看flash中的文件5、rename flash:config.text flash:config.old //更改文件名6、boot //重新启动交换机7、rename flash:config.old flash:config.text //将文件名改回8、copy flash:config.text running-config9、enable password cisco //重新设置密码10、write //保存21、创建vlan方法一switch#vlan databaseswitch(vlan)#vlan 10 name scswitch(vlan)#exit22、创建vlan方法二switch(config)#vlan 10switch(config-vlan)#name sc23、删除vlan方法一switch(vlan)#no vlan 10switch(vlan)#exit24、删除vlan方法二switch(config)#no vlan 1025、删除vlan方法三switch#delete vlan.dat26、将端口加入到vlan中switch(config-if)#switchport access vlan 1027、将一组连续的端口加入到vlan中switch(config)# interface range f0/1 – 5 (端口范围管理switch(config-if-range)#switchport access vlan 10 端口范围管理模式28、将端口从vlan中删除switch(config-if)#no switchport access vlan 10switch(config-if)#switchport access vlan 1switch(config-if-range)#no switchport access vlan 10 switch(config-if-range)#switchport access vlan 1 29、查看所有vlan的摘要信息switch#show vlan brief30、查看指定vlan的信息switch#show vlan id 1031、指定端口成为trunkswitch(config-if)#switchport mode trunk 两个端口全要设成trunk32、Trunk的自动协商switch(config-if)#switchport mode dynamic desirable switch(config-if)#switchport mode dynamic auto注意:如果中继链路两端都设置成auto将不能成为trunk 33、查看端口状态switch#show interface f0/24 switchport34、在trunk上移出vlanswitch(config-if)#switchport trunk allowed vlan remove 235、在trunk上添加vlanswitch(config-if)#switchport trunk allowed vlan add236、Cisco 2600路由器的基本操作从用户模式进入特权模式router>enablerouter#从特权模式进入全局配置模式router#config terminalrouter(config)#为路由器配置主机名router(config)#hostname teacherteacher(config)#进入路由器的以太口配置模式teacher(config)#interface fastethernet 0/0teacher(config_if)#37、查看Cisco 2600路由器的串口状态router#show interface serial 0/0serial 0/0 is up ,line protocol is up可操作状态………serial 0/0 is up ,line protocol is up连接问题…………serial 0/0 is up ,line protocol is down接口问题…………serial 0/0 is down ,line protocol isdown禁用状态…………serial 0/0 is administratively down ,line protocol is down38、 静态路由的实现router(config)#hostname AA(config)#interface f0/0 A(config-if)#ip address 192.168.1.1 255.255.255.0 A(config-if)#no shutdownA(config)#interface f0/1A(config-if)#ip address 192.168.2.1 255.255.255.0 A(config-if)#no shutdownA(config)#iproute 192.168.3.0 255.255.255.0 192.168.2.2B(config)#iproute 192.168.1.0 255.255.255.0 192.168.2.139、 配置默认路由route(config)#ip route 0.0.0.0 0.0.0.0 下一跳地址40、 查看路由表router#show ip route其中C 代表直连的网络,S 代表静态的路由,S*代表默认的路由 192.168.1.1 192.168.2.2 192.168.2.1 192.168.3.1 192.168.1.10 192.168.3.1041、为Cisco 2600路由器配置密码配置控制台密码router (config)#line console 0router (config-line)# password ciscorouter (config-line)# login42、配置特权模式密码router (config)#enable password cisco43、配置安全的加密密码router (config)#enable secret 123444、配置路由器标识router(config)#banner motd $This is Aptech company’s Router! Please don’t change the configuration whithout permissions$45、对所有密码进行加密router (config)#service password-encryption46、配置超时router(config)#line console 0router(config-line)#exec-timeout 0 0 //第一个0代表分钟,第二个0代表秒47、显示同步router(config)#line console 0router(config-line)#logging synchronous48、配置禁用DNSrouter(config)#no ip domain-lookup49、利用三台路由器实现静态路由和默认路由50、路由器密码恢复重启路由器按Ctrl+Break键进入ROM Monitor 模式rommon 1>confreg 0x2142rommon 2>reset重启后选择norouter>enablerouter#copy startup-config running-configrouter#config terminalrouter(config)#enable password ciscorouter(config)#config-register 0x2102router#copy running-config startup-configrouter#reload51、单臂路由——实现不同vlan之间的通信V L A N11、划分vlanswitch#vlan databaseswitch(vlan)#vlan 2写NAME,不行,switch(vlan)#vlan 3switch(vlan)#exit2、将端口加入vlanswitch(config)#interface range f0/6 -8switch(config-if-range)#switchport access vlan 2 switch(config-if-range)# interface range f0/9 -11 switch(config-if-range)#switchport access vlan 3 3、配置trunkswitch(config)#interface f0/12switch(config-if)#switchport mode trunk4、配置路由器的子接口封装dot1q,并设置IP地址router(config)#interface f0/0.1router(config-subif)#encapsulation dot1q 1router(config-subif)#ip address 192.168.0.1 255.255.255.0router(config-subif)#no shutrouter(config)#interface f0/0.2router(config-subif)#encapsulation dot1q 2router(config-subif)#ip address 192.168.1.1 255.255.255.0router(config-subif)#no shutrouter(config)#interface f0/0.3router(config-subif)#encapsulation dot1q 3router(config-subif)#ip address 192.168.2.1 255.255.255.0router(config-subif)#no shutrouter(config)#interface f0/0router(config-if)#no shut5、设置pc的IP地址和默认网关52、RIP版本V1和V2 的区别RIP v1发送路由更新时不携带子网掩码,属于有类路由协议发送路由更新时,目标地址为广播地址:255.255.255.255RIP v2发送路由更新时携带子网掩码,属于无类路由协议发送路由更新时,目标地址为组播地址:224.0.0.953、 RIP V1的配置配置步骤:1、配置路由器接口IP 地址routerA(config)#interface f0/0routerA(config-if)#ipaddress 192.168.1.1 255.255.255.0routerA(config-if)#no shutdownrouterA(config-if)#interface f0/1routerA(config-if)# ip address 10.0.0.2 255.0.0.0routerA(config-if)#no shutdownrouterB(config)#interface f0/0routerB(config-if)#ip address 10.0.0.1 255.0.0.0 192.168.2.0/24192.168.1.0/24routerB(config-if)#no shutdownrouterB(config)#interface f0/1routerB(config-if)#ip address 20.0.0.2 255.0.0.0 routerB(config-if)#no shutdownrouterC(config)#interface f0/0routerC(config-if)#ip address 20.0.0.1 255.0.0.0 routerC(config-if)#no shutdownrouterC(config)#interface f0/1routerC(config-if)#ip address 192.168.2.2 255.255.255.0routerC(config-if)#no shutdown2、在路由器上启动RIP进程,并宣告网络号:routerA(config)#router riprouterA(config-router)#network 10.0.0.0routerA(config-router)#network 192.168.1.0routerB(config)#router riprouterB(config-router)#network 10.0.0.0routerB(config-router)#network 20.0.0.0routerC(config)#router riprouterC(config-router)#network 20.0.0.0routerC(config-router)#network 192.168.2.03、验证配置是否正确1)查看路由表router#show ip route2)查看路由协议配置router#show ip protocols3)打开RIP协议调试命令router#debug ip rip4)退出router# no debug ip rip4、在PC上设置IP地址、子网掩码、默认网关,用ping命令测试连通性54、RIP V2的配置10.1.1.0/24 192.168.1.0/241、配置各路由器接口IP地址routerA(config)#interface f0/0routerA(config-if)#ip address 10.1.1.1 255.255.255.0routerA(config-if)#no shutdownrouterA(config-if)#interface f0/1routerA(config-if)# ip address 192.168.1.1 255.255.255.0routerA(config-if)#no shutdownrouterB(config)#interface f0/0routerB(config-if)#ip address 10.1.2.1 255.255.255.0routerB(config-if)#no shutdownrouterB(config)#interface f0/1routerB(config-if)#ip address 192.168.1.2 255.255.255.0routerB(config-if)#no shutdownrouterC(config)#interface f0/0routerC(config-if)#ip address 192.168.1.3 255.255.255.0routerC(config-if)#no shutdownrouterC(config)#interface f0/1routerC(config-if)#ip address 192.168.2.1 255.255.255.0routerC(config-if)#no shutdown2、在路由器上配置RIP V2 路由协议routerA(config)#router riprouterA(config-router)#version 2routerA(config-router)#no auto-summary不合并同段网络routerA(config-router)#network 10.0.0.0 routerA(config-router)#network 192.168.1.0 routerB(config)#router riprouterB(config-router)#version 2routerB(config-router)# no auto-summary routerB(config-router)#network 10.0.0.0 routerB(config-router)#network 192.168.1.0 routerC(config)#router riprouterC(config-router)# version 2routerC(config-router)# no auto-summary routerC(config-router)#network192.168.1.0 routerC(config-router)#network 192.168.2.0 3、验证配置是否正确1)查看路由表router#show ip route2)查看路由协议配置router#show ip protocols3)打开RIP协议调试命令router#debug ip rip4、在PC上设置IP地址、子网掩码、默认网关,用ping命令测试连通性55、上传路由器上的IOSrouter#show flash //查看IOS文件名router#copy flash tftpSource filename []? c2600-ik8o3s-mz.122-11.T.binAddress or name of remote host []? 192.168.1.11Destination filename [c2600-ik8o3s-mz.122-11.T.bin]?下载IOS到路由器router#copy tftp flash上传路由器上配置文件router#copy nvram:startup-config tftp:Address or name of remote host []? 192.168.1.11Destination filename [router-config]? startup-config下载配置文件到路由器router#copy tftp:startup-config nvramC2600路由器IOS被删除的恢复方法:1、ctrl+breakrommon 1>IP_ADDRESS=192.168.0.100 //路由器接口地址rommon 2>IP_SUBNET_MASK=255.255.255.0rommon 3>DEFAULT_GATEWAY=192.168.0.100rommon 4>TFTP_SERVER=192.168.0.254rommon 5>TFTP_FILE=c2600-ik8o3s-mz.122-11.T.binrommon 6>tftpdnld希望各位学员努力学习,将交换机和路由器的操作命令练会、练熟学如逆水行舟,不进则退。
思科路由器基础命令总结-电脑资料

思科路由器基础命令总结-电脑资料路由器是组网设备中必不可少的一员,那么它的配置问题就成了必不可缺的步骤之一,下面就让我们来看一下基本的命令的结合,有获得思科认证初步想法的人一定要会以下内容,。
路由器命令基础——模式转换命令用户模式----特权模式,使用命令"enable"特权模式----全局配置模式,使用命令"config t"全局配置模式----接口模式,使用命令"interface+接口类型+接口号"全局配置模式----线控模式,使用命令"line+接口类型+接口号"注:用户模式:查看初始化的信息.特权模式:查看所有信息、调试、保存配置信息全局模式:配置所有信息、针对整个路由器或交换机的所有接口接口模式:针对某一个接口的配置线控模式:对路由器进行控制的接口配置路由器命令基础——配置命令show running config 显示所有的配置show versin 显示版本号和寄存器值shut down 关闭接口no shutdown 打开接口ip add +ip地址配置IP地址secondary+IP地址为接口配置第二个IP地址show interface+接口类型+接口号查看接口管理性show controllers interface 查看接口是否有DCE电缆show history 查看历史记录show terminal 查看终端记录大小hostname+主机名配置路由器或交换机的标识config memory 修改保存在NVRAM中的启动配置exec timeout 0 0 设置控制台会话超时为0service password-encryptin 手工加密所有密码enable password +密码配置明文密码ena sec +密码配置密文密码line vty 0 4/15 进入telnet接口password +密码配置telnet密码line aux 0 进入AUX接口password +密码配置密码line con 0 进入CON接口password +密码配置密码bandwidth+数字配置带宽no ip address 删除已配置的IP地址show startup config 查看NVRAM中的配置信息copy run-config atartup config 保存信息到NVRAM write 保存信息到NVRAMerase startup-config 清除NVRAM中的配置信息show ip interface brief 查看接口的谪要信息banner motd # +信息 + # 配置路由器或交换机的描素信息description+信息配置接口听描素信息vlan database 进入VLAN数据库模式vlan +vlan号+ 名称创建VLANswitchport access vlan +vlan号为VLAN为配接口interface vlan +vlan号进入VLAN接口模式ip add +ip地址为VLAN配置管理IP地址vtp+service/tracsparent/client 配置SW的VTP工作模式vtp +domain+域名配置SW的VTP域名vtp +password +密码配置SW的密码switchport mode trunk 启用中继no vlan +vlan号删除VLANshow spamming-tree vlan +vlan号查看VLA怕生成树议路由器命令基础——配置命令ip route+非直连网段+子网掩码+下一跳地址配置静态/默认路由show ip route 查看路由表show protocols 显示出所有的被动路由协议和接口上哪些协议被设置show ip protocols 显示了被配置在路由器上的路由选择协议,同时给出了在路由选择协议中使用的定时器等信息router rip 激活RIP协议network +直连网段发布直连网段interface lookback 0 激活逻辑接口passive-interface +接口类型+接口号配置接口为被动模式debug ip +协议动态查看路由更新信息undebug all 关闭所有DEBUG信息router eigrp +as号激活EIGRP路由协议network +网段+子网掩码发布直连网段show ip eigrp neighbors 查看邻居表show ip eigrp topology 查看拓扑表show ip eigrp traffic 查看发送包数量router ospf +process-ID 激活OSPF协议network+直连网段+area+区域号发布直连网段show ip ospf 显示OSPF的进程号和ROUTER-IDencapsulation+封装格式更改封装格式no ip admain-lookup 关闭路由器的域名查找ip routing 在三层交换机上启用路由功能show user 查看SW的在线用户clear line +线路号清除线路路由器的基础命令的总结就到这,在这些命令基础上,你才可以继续更深入的思科知识的学习,电脑资料《思科路由器基础命令总结》(https://www.)。
CISCO配置命令简写速记表

全称 enable configure terminal interface f0/0 interface f0/0.1 line console 0 password 123 enable password 123 enable secret 321 service passwordencryption no shutdown hostname benet exit router rip network 192.168.1.0 network 172.16.1.0 no router rip show ip route hostname zsc show interfaces f0/0 show clock ip address 10.20.30.40 255.0.0.0 show version show running-config 简写 en conf t in f0/0 in f0/0.1 lin c 0 pas 123 ena p 123 ena s 321 ser pas n sh ho benet ex ro ne ne no sh ho rip 192.168.1.0 172.16.1.0 router r ip ro zsc 含义 特权模式 配置模式 f0/0 接口配置模式 子接口配置模式 line模式 配置控制台密码 配置特权模式密码 配置加密保存的密码 对所有密码加密 开启端口 更改交换机主机名 退出(特权、配置模 式支持) 路由模式用rip协议 动态路由配置,f0/0 动态路由配置,f0/1 删除RIP动态路由协议 查看路由表 更改路由器主机名 查看接口状态 查看路由器当前时间 配置路由器接口IP地 址 查看路由器版本信息 查看当前配置
sh int f0/0 sh clo ip ad 10.20.30.40 255.0.0.0 sh ve sh run
思科基本命令

1.1创建vlan,删除vlan,命名vlanSwitch(config)#vlan vlan-idSwitch(config)#no vlan vlan-idSwitch(config-vlan)name vlan-name1.2将某个端口加入某个vlanSwitch(config)# interface f0/1Switch(config-if)#switchport mode accessSwitch(config-if)#switchport access vlan vlan-id1.3一组端口的设置与trunk口设置相关Switch(config)#interface range f0/1-12Switch(config-if-range)#switchport trunk encapsulation dot1q(封装vlan协议,只在三层交换配置此命令)Switch(config-if-range)#switchport mode trunkSwitch(config-if)#switchport trunk allowed vlan vlan-list (全部允许就是:all,多个vlan号直接用逗号分隔)Switch(config-if)#switchport trunk allowed vlan remove vlan-id(在现有允许通过的vlan中指定不允许通过的vlan)Switch(config-if)#switchport trunk allowed vlan add vlan-id(增加允许的vlan通过)1.4VTP配置相关Switch(config)#vtp domain domain-name(配置vtp管理域名)Switch(config)#vtp version 1|2(指定vtp版本号)Switch(config)#vtp password password-name(指定vtp密码)Switch(config)#vtp mode server|client|transparent(指定vtp模式)Switch(config)#vtp pruning(修剪vtp域内不必要的vlan流量)创建vlan,设置相关trunk口,进行vtp通信1.5交换机,路由器基本参数配置Switch(config)#hostname nameSwitch(config)#no ip domain-lookup(禁止ip地址解析)Switch(config)#line console 0Switch(config-line)#exec-timeout 6 30(虚拟终端超时时间为6分30秒)Switch(config-line)#logging synchronous(开启日志同步功能,敲上这条命令之后日志信息不会分隔你敲到一半的命令行。
路由器查看命令(CISCO)大全

34、显示闪存的布局和内容信息 Router #Show flash
35、显示关于本地管理接口(LMI)的统计信息 Router #Show frame-relay lmi
14、查一条网络LSA通告信息 Router #show ip ospf database network
15、显示链路状态数据库中的网络汇总LSA信息 Router #show ip ospf database summary
16、查看数据库中列出的所有路由的LSA通告 Router #show ip ospf database router
36、显示关于连接的当前映射入口和信息 Router #Show frame-relay map
37、显示关于帧中继接口的永久虚电路(pvc)的统计信息 Router #Show frame-relay pvc
38、显示所有连接到路由器的用户 Router #show users
11、查链路状态数据库 Router #show ip ospf database
12、查OSPF的配置 Router #show ip ospf
13、查OSPF的接口数据结构 Router #show ip ospf interface 接口
30、显示路由器内存的大小,包括空闲内存的大小 Router #Show memory
31、显示路由器的进程 Router #Show processes
32、显示缓存器统计信息 Router #how buffers
42、查看IPsce策略 Router# show crypto ipsec transform-set
小白逆袭!思科基础命令大全,建议收藏~

小白逆袭!思科基础命令大全,建议收藏~思科基本端口设置命令no ip routing 二层交换关闭路由功能configure terminal (conf t) 进入全局模式interface fastEthernet 1/0 (int f1/0) 进入端口1/0 简写int f1/0 speed 100 设置速率为100MBduplex full 设置端口为双工 half 半双工show interfaces fastEthernet 1/0 在用户模式下显示端口信息do show interface fastEtherne 1/0 在端口或者全局模式显示端口信息show ip interface brie 显示所有端口和vlan的IP地址v l a n创建命令dir 查看设备存储空间erase flash: 格式化存储空间vlan database 进入vlan数据模式在数据模式下vlan 10 name caiwu 创建vlan10,名字为caiwuabort 退出vlan数据模式show vlan-switch brief 用户模式查看vlan 情况do show vlan-switch brief 在全局模式下查看vlan情况vlan 20 直接创建vlan 20vlan 20 name renshi 先进入vlan20 在修改名字为renshiswitchport mode access (sw mo acc) 设置端口为接入模式switchport access vlan 10 添加端口为vlan10interface range fastEthernet 1/1 -2 进入连续的多个端口进行设置switchport mode trunk 设置端口为trunk模式switchport trunk encapsulation dot1q 给trunk端口封装协议默认路由和静态路由ip ip address 192.168.10.1 255.255.255.0 给端口配置IP地址no shutdown 启动端口在路由或者三层交换上面ip route 0.0.0.0 0.0.0.0 1.1.1.1(下一跳地址) 添加默认路由ip route 192.168.10.0 255.255.255.0 1.1.1.1(下一跳地址) 添加静态路由三层交换do show interfaces fastEthernet 1/0 switchport 查看端口协议vlan 10 创建vlaninterface vlan num 进入 vlanip address 192.168.100.1 255.255.255.0 创建vlan的网关地址interface range fastEthernet 1/1 -4 进入连续的多个端口channel-group 1 mode on 绑定两个trunk端口增加链路,增加带宽即使一条链路损坏也不影响R I P路由协议router rip 启用rip协议进程network 192.168.10.0 声明直联网段version 2 启用rip2版本no auto-summary 关闭汇聚功能do show ip route 在全局模式查看路由表O S P F路由协议interface loopback 1 进入回环网口no shutdown 激活端口router ospf 1 启动ospf进程1router-id 例(1.1.1.1) 设置routerIDnetwork 192.168.10.0 0.0.0.255 area 0 宣告网段在area 0区域,注意反掩码show running-config 用户模式查看所有进程no router ospf 进程ID 清除OSPF进程redistribute connected subnets 注入直联网段redistribute static subnets 注入静态路由网段default-infomation originate 注入外部默认路由redistribute ospf 1 metric 5 在rip协议中注入ospf协议redistribute rip subnets 在ospf协议注入rip协议标准A C L访问列表针对源I P地址access-list 1-99 permit A.B.C.D 0.0.0.0 (反掩码)permit host A.B.C.D 允许该IP地址访问流量写允许规则默认拒绝所有access-list 1-99 deny A.B.C.D 0.0.0.0(反掩码)deny host A.B.C.D 拒绝该IP地址访问流量必须要写 permit any 允许其他IP地址访问流量do show access-list 全局模式,查看ACL已写规则列表ip access-group 1 in/out 进入端口,作用于端口no ip access-group 1 in/out 取消应用于端口no access-list 1 删除整个ACL列表扩展A C L访问列表(100-19) 源IP地址目标IP地址等于服务名或端口access-list 100 permit tcp host 192.168.1.2 host 192.168.100.100 eq www(或端口)允许192.168.1.2访问http服务acess-list 100 deny ip host 192.168.1.2 host 192.168.100.100拒绝192.168.1.2访问其他服务access-list 100 permit ip host 192.168.1.2 192.168.2.0 0.0.0.255允许192.168.1.2访问目标网段192.168.2.0命名型A C L访问控制列表•access-list (standard/extended) kgc写法跟标准和扩展一样删除条目 no 条目编号ip access-group kgc out/in 进入端口然后应用端口静态N A Tip nat inside source static 192.168.100.20 12.0.0.20 转换私网地址为公网地址ip nat inside/outside 应用于端口debug ip nat 启动debug模式监听NAT状态ip nat inside source static tcp 192.168.100.100 80 12.0.0.100 8080 extendable动态N A Taccess-list 1 permit 192.168.100.0 0.0.0.255 允许网段地址ip nat pool test 12.0.0.10 12.0.0.100 netmask 255.255.255.0 转换成的地址池名testip nat inside source list 1 pool test 把允许网段地址转换为地址池ip nat inside/outside 应用于端口debug ip nat 在用户模式启动debug模式P A T端口多路复用access-list 1 permit 192.168.100.0 0.0.0.255 添加ACL允许网段ip nat inside source list 1 interface fastEthernet 0/1 overload 设置网段伪装成0/1端口IPip nat inside/outside 应用于端口。
思科光交常用命令汇总
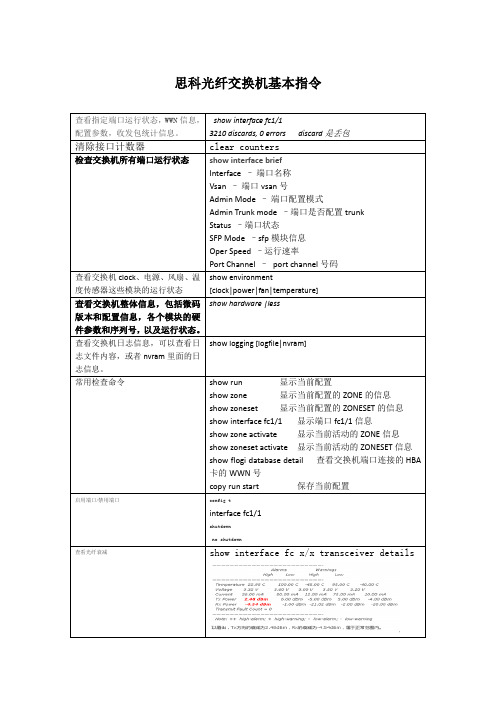
思科光纤交换机基本指令show interface fc x/x transceiver details/link?url=zQ1lfBIy40JkgAxS9ONkbwVlLlsAq_3umIWd6O5mbObcQfcM3Ly 88PhZNq9fBUOq7FJy92eRp0oMmJc58Md8hNePQ0ZVXKpSAwPua6Cvlk_1、配置VSANVSAN的作用是隔离每一个交换机端口:switch2# conf tswitch2(config)# vsan databaseswitch2(config-vsan-db)# vsan 4000 name sw2switch2(config-vsan-db)# vsan 4000 interface fc1/1Traffic on fc1/1 may be impacted. Do you want to continue? (y/n) yswitch2(config-vsan-db)# vsan 4000 interface fc1/2Traffic on fc1/2 may be impacted. Do you want to continue? (y/n) yswitch2(config-vsan-db)# vsan 4000 interface fc1/72、创建ZONE并且添加ZONE成员。
witch2# conf tEnter configuration commands, one per line. End with CNTL/Z.switch2(config)# zone name db2_3652_1 vsan 4000switch2(config-zone)# member interface fc1/1switch2(config-zone)# member interface fc1/2switch2(config-zone)# zone name db2_3652_2 vsan 4000switch2(config-zone)# member interface fc1/7switch2(config-zone)# member interface fc1/83、配置ZONESET包含2个ZONEswitch2(config-zone)# zoneset name db2_3652 vsan 4000switch2(config-zoneset)# member db2_3652_1switch2(config-zoneset)# member db2_3652_24、察看ZONE成员switch2# show zonezone name db2_3652_1 vsan 4000interface fc1/1 swwn 20:00:00:0d:ec:be:0d:40interface fc1/2 swwn 20:00:00:0d:ec:be:0d:40zone name db2_3652_2 vsan 4000interface fc1/7 swwn 20:00:00:0d:ec:be:0d:40interface fc1/8 swwn 20:00:00:0d:ec:be:0d:405、察看ZONESET成员switch2# show zonesetzoneset name db2_3652 vsan 4000zone name db2_3652_1 vsan 4000interface fc1/1 swwn 20:00:00:0d:ec:be:0d:40interface fc1/2 swwn 20:00:00:0d:ec:be:0d:40zone name db2_3652_2 vsan 4000interface fc1/7 swwn 20:00:00:0d:ec:be:0d:40interface fc1/8 swwn 20:00:00:0d:ec:be:0d:406、激活ZONESETswitch2# conf tEnter configuration commands, one per line. End with CNTL/Z.switch2(config)# zoneset activate name db2_3652 vsan 4000Zoneset activation initiated. check zone status7、察看激活ZONE的switch2# show zone activezone name db2_3652_1 vsan 4000* fcid 0x810000 [interface fc1/1 swwn 20:00:00:0d:ec:be:0d:40]* fcid 0x810100 [interface fc1/2 swwn 20:00:00:0d:ec:be:0d:40]zone name db2_3652_2 vsan 4000* fcid 0x810200 [interface fc1/7 swwn 20:00:00:0d:ec:be:0d:40]* fcid 0x810300 [interface fc1/8 swwn 20:00:00:0d:ec:be:0d:40]conf t 进入conf模式show zone act 显示活跃的zone,注意记录zoneset名称和vsan名称zone name zone_name vsan xxx 新建zonemem interface fc x/x,fc x/x,fc x/x 加入端口exitzoneset name zoneset_name vsan xxx 编辑zonesetmem zone_name 加入zoneexitzoneset activate name zoneset_name vsan xxx 使zoneset生效copy running-config startup-config 保存配置。
思科路由器基本指令集
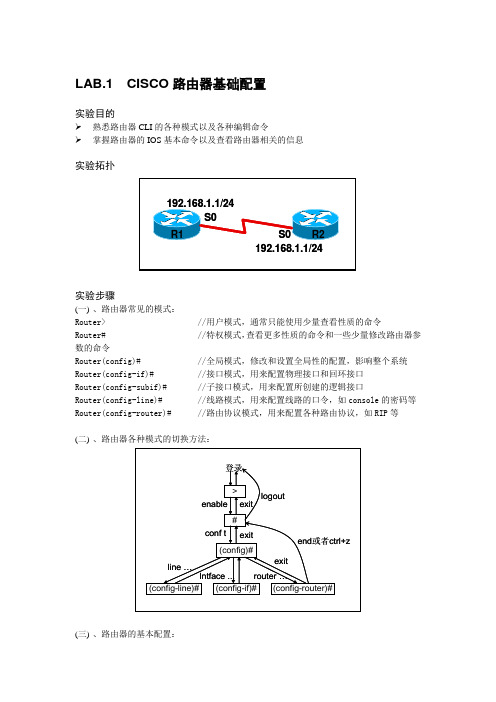
LAB.1 CISCO路由器基础配置实验目的熟悉路由器CLI的各种模式以及各种编辑命令掌握路由器的IOS基本命令以及查看路由器相关的信息实验拓扑实验步骤(一)、路由器常见的模式:Router> //用户模式,通常只能使用少量查看性质的命令Router# //特权模式,查看更多性质的命令和一些少量修改路由器参数的命令Router(config)# //全局模式,修改和设置全局性的配置,影响整个系统Router(config-if)# //接口模式,用来配置物理接口和回环接口Router(config-subif)# //子接口模式,用来配置所创建的逻辑接口Router(config-line)# //线路模式,用来配置线路的口令,如console的密码等Router(config-router)# //路由协议模式,用来配置各种路由协议,如RIP等(二)、路由器各种模式的切换方法:(三)、路由器的基本配置:Router>enable //进入用户模式Router#configure terminal //进入特权模式,可简写为config t Enter configuration commands, one per line. End with CNTL/Z. //路由器的实时输出日志Router(config)#no ip domain lookup //关闭动态域名解析,在某些型号路由器上命令格式为“no ip domain-lookup”Router(config)#line console 0Router(config-line)#exec-time 0 0 //关闭控制台的空闲会话超时,保证不被系统自动踢除Router(config-line)#logging synchronous //关闭日志同步,当输入命令时,阻止被一些日志信息或debug命令产生的调试命令所冲断Router(config-line)#exitRouter(config)#hostname R1 //配置路由器的主机名R1(config)#banner motd # //设置日期信息标志区,登录到路由器时显示Enter TEXT message. End with the character '#'.How are you!# //以#为结束符,并按下回车键R1(config)#banner exec # //设置执行标志区,Telnet到路由器时显示Enter TEXT message. End with the character '#'.Welcome!# //以#为结束符,并按下回车键R1(config)#exitR1#clock set 12:34:56 8 Aug 2009 //配置时钟//查看时钟配置(四)、路由器的基本查看信息R1#show version //显示系统硬件的配置,软件的版本等R1#show memory //显示路由器内存的信息R1#show flash //显示路由器flash的信息R1#show buffers //显示路由器缓存器的信息R1#show process cpu //显示CPU进程的信息(五)、路由器的各种口令设置R1(config)#enable password ccna //设置特权明文密码R1(config)#enable secret ccnp //设置特权密文密码,权限高于明文的,内容必须不同R1(config)#line console 0 //设置控制台密码,连接console口登录时使用R1(config-line)#password 连邦R1(config-line)#loginR1(config-line)#line vty 0 4 //设置VTY线路密码(也就是Telnet密码),0到4代表5条线路,可以支持5个IP同时登录R1(config-line)#password 连邦R1(config-line)#login //启用登录//验证口令R1(config)#service password-encryption//因为VTY和console的密码为明文密码,所以要对明文进行加密R1#show run //验证加密后的密码(六)、路由器配置文件的管理R1#show running-config//查看路由器当前配置文件R1#show startup-config//查看路由器启动配置文件R1#copy running-config startup-config //保存当前配置到启动配置文件R1#erase startup-config//删除启动配置文件R1#reload //重启路由器(七)、路由器接口配置IP地址配置R1R1#config tR1(config)#int s0R1(config-if)#ip address 192.168.1.1 255.255.255.0R1(config-if)#clock rate 64000 //DCE端要配置时钟频率同步R1(config-if)#no shutdown配置R2R2#config tR2(config)#int s0R2(config-if)#ip address 192.168.1.2 255.255.255.0R2(config-if)#no shutdown(八)、实验调试R1#sh ip int brief //查看接口及地址状态R1#ping 192.168.1.2 //测试直连网段连通性。
思科交换机路由常用命令基础

思科交换机路由常用命令基础1. 计算机命令:PCA login: root ;使用root用户password: linux ;口令是linux# shutdown -h now ;同init 0 关机# logout# login# ifconfig ;显示IP地址# ifconfig eth0 <ip address> netmask <netmask> ;设置IP 地址# ifconfig eht0 <ip address> netmask <netmask> down ;删除IP地址# route add 0.0.0.0 gw <ip># route del 0.0.0.0 gw <ip># route add default gw <ip> ;设置网关# route del default gw <ip> ;删除网关# route ;显示网关# ping <ip># telnet <ip>2. 交换机支持的命令:交换机基本状态:switch: ;交换机的ROM状态rommon> ;路由器的ROM状态hostname> ;用户模式hostname# ;特权模式hostname(config)# ;全局配置模式hostname(config-if)# ;接口状态交换机口令设置:switch>enable ;进入特权模式switch#config terminal ;进入全局配置模式switch(config)#hostname <hostname> ;设置交换机的主机名switch(config)#enable secret xxx ;设置特权加密口令switch(config)#enable password xxa ;设置特权非密口令switch(config)#line console 0 ;进入控制台口switch(config-line)#line vty 0 4 ;进入虚拟终端switch(config-line)#login ;允许登录switch(config-line)#password xx ;设置登录口令xxswitch#exit ;返回命令交换机VLAN设置:switch#vlan database ;进入VLAN设置switch(vlan)#vlan 2 ;建VLAN 2switch(vlan)#no vlan 2 ;删vlan 2switch(config)#int f0/1 ;进入端口1switch(config-if)#switchport access vlan 2 ;当前端口加入vlan 2switch(config-if)#switchport mode trunk ;设置为干线switch(config-if)#switchport trunk allowed vlan 1,2 ;设置允许的vlanswitch(config-if)#switchport trunk encap dot1q ;设置vlan 中继switch(config)#vtp domain <name> ;设置发vtp域名switch(config)#vtp password <word> ;设置发vtp密码switch(config)#vtp mode server ;设置发vtp模式switch(config)#vtp mode client ;设置发vtp模式交换机设置IP地址:switch(config)#interface vlan 1 ;进入vlan 1switch(config-if)#ip address <IP> <mask> ;设置IP地址switch(config)#ip default-gateway <IP> ;设置默认网关switch#dir flash: ;查看闪存交换机显示命令:switch#write ;保存配置信息switch#show vtp ;查看vtp配置信息switch#show run ;查看当前配置信息switch#show vlan ;查看vlan配置信息switch#show interface ;查看端口信息switch#show int f0/0 ;查看指定端口信息3. 路由器支持的命令:路由器显示命令:router#show run ;显示配置信息router#show interface ;显示接口信息router#show ip route ;显示路由信息router#show cdp nei ;显示邻居信息router#reload ;重新起动路由器口令设置:router>enable ;进入特权模式router#config terminal ;进入全局配置模式router(config)#hostname <hostname> ;设置交换机的主机名router(config)#enable secret xxx ;设置特权加密口令router(config)#enable password xxb ;设置特权非密口令router(config)#line console 0 ;进入控制台口router(config-line)#line vty 0 4 ;进入虚拟终端router(config-line)#login ;要求口令验证router(config-line)#password xx ;设置登录口令xxrouter(config)#(Ctrl+z) ;返回特权模式router#exit ;返回命令路由器配置:router(config)#int s0/0 ;进入Serail接口router(config-if)#no shutdown ;激活当前接口router(config-if)#clock rate 64000 ;设置同步时钟router(config-if)#ip address <ip> <netmask> ;设置IP地址router(config-if)#ip address <ip> <netmask> second ;设置第二个IProuter(config-if)#int f0/0.1 ;进入子接口router(config-subif.1)#ip address <ip> <netmask> ;设置子接口IProuter(config-subif.1)#encapsulation dot1q <n> ;绑定vlan 中继协议router(config)#config-register 0x2142 ;跳过配置文件router(config)#config-register 0x2102 ;正常使用配置文件router#reload ;重新引导路由器文件操作:router#copy running-config startup-config ;保存配置router#copy running-config tftp ;保存配置到tftprouter#copy startup-config tftp ;开机配置存到tftprouter#copy tftp flash: ;下传文件到flashrouter#copy tftp startup-config ;下载配置文件ROM状态:Ctrl+Break ;进入ROM监控状态rommon>confreg 0x2142 ;跳过配置文件rommon>confreg 0x2102 ;恢复配置文件rommon>reset ;重新引导rommon>copy xmodem:<sname> flash:<dname> ;从console传输文件rommon>IP_ADDRESS=10.65.1.2 ;设置路由器IPrommon>IP_SUBNET_MASK=255.255.0.0 ;设置路由器掩码rommon>TFTP_SERVER=10.65.1.1 ;指定TFTP服务器IPrommon>TFTP_FILE=c2600.bin ;指定下载的文件rommon>tftpdnld ;从tftp下载rommon>dir flash: ;查看闪存内容rommon>boot ;引导IOS静态路由:ip route <ip-address> <subnet-mask> <gateway> ;命令格式router(config)#ip route 2.0.0.0 255.0.0.0 1.1.1.2 ;静态路由举例router(config)#ip route 0.0.0.0 0.0.0.0 1.1.1.2 ;默认路由举例动态路由:router(config)#ip routing ;启动路由转发router(config)#router rip ;启动RIP路由协议。
- 1、下载文档前请自行甄别文档内容的完整性,平台不提供额外的编辑、内容补充、找答案等附加服务。
- 2、"仅部分预览"的文档,不可在线预览部分如存在完整性等问题,可反馈申请退款(可完整预览的文档不适用该条件!)。
- 3、如文档侵犯您的权益,请联系客服反馈,我们会尽快为您处理(人工客服工作时间:9:00-18:30)。
37 上传配置文件到路由器 Router#copy tftp:startup-config.cfg nvram
对所有密码加密
Router(config)#service password-encryption
配置接口标识
Router(config-if)#description this is zsc!
12 查看接口状态 Router#sh int f0/0
13 查看路由器当前时间 Router#sh clo 配置路由器接口IP地址
Router(config)#ip route 目标网段 目标网段掩码 下一跳入口IP地址
默认路由的配置
Router(config)#ip route 0.0.0.0 0.0.0.0 下一跳入口IP地址
Router(config)#ip route 目标网段 目标网段掩码 下一跳入口IP地址
9 默认路由的配置
Router(config)#ip route 0.0.0.0 0.0.0.0 下一跳入口IP地址
10 查看路由表 benet#sh ip ro 更改路由器主机名
11 Router(config)#ho zsc zsc(config)#
Router(config-subif)#no sh
配置RIP V1动态路由协议
26 Router(config)#router r Router(config-router)#net 10.1.1.0 Router(config-router)#net 192.168.1.0
宣告启用RIP的接 口的主网络号
配置超时
21 Router(config)#lin c 0
Router(config-line)#exec-t 0 0
显示同步
22 Router(config)#lin c 0
Router(config-line)#logg s
23 禁用DNS Router(config)#no ip domain-lo
简写命令
完整命令
简写命令
完整命令
18 对所有密码加密 Router(config)#ser pas
19 配置接口标识 Router(config-if)#des this is zsc!
20 配置路由器banner提示信息 Router(config)#ban m $this is a main router$
宣告启用RIP的接 口的主网络号
29 查看路由表 Router#sh ip ro
30 查看路由协议配置 Router#sh ip pro
31 打开RIP协议调试命令 Router#deb ip ri
32 查看交换机或路由器中的flash信息 Router#sh fla
设置VTY(虚拟终端接口)密码
33 Router(config)#lin v 0 1 Router(config-line)#logi
8 Router(config)#in f0/0 Router(config-if)#ip ad 192.168.2.2 255.255.255.0 Router(config-if)#no sh Router(config-if)#e
用户模式: Router> 特权模式: Router>enable Router# 全局配置模式 Router#config terminal Router(config)# 接口配置模式 Router(config)#interface f1/0 Router(config-if)# 子接口配置模式 Router(config)#interface f1/0.1 Router(config-subif)# line模式: Router(config)#line console 0 Router(config-line)# 路由模式 Router(config)#router rip(rip是一种路由协议) Router(config-router)# 静态路由的配置 Router>enable Router#config terminal Router(config)#interface f0/0 Router(config-if)#ip address 192.168.2.2 255.255.255.0 Router(config-if)#no shutdown Router(config-if)#exit
Router(config-subif)#encapsulation dot1Q 20 (封装802.1Q协议)
Router(config-subif)#ip address 192.168.3.1 255.255.255.0
Router(config-subif)#no shutdown
配置RIP V1动态路由协议
5 Router(config)#in f1/0.1 Router(config-subif)# line模式:
6 Router(config)#lin c 0 Router(config-line)# 路由模式
7 Router(config)#router rip(rip是一种路由协议) Router(config-router)# 静态路由的配置 Router>en Router#conf t
宣告启用RIP的接 口的主网络号
查看路由表
Router#show ip route
查看路由协议配置
Router#show ip protocol
打开RIP协议调试命令
Router#debug ip rip
查看交换机或路由器中的flash信息
Router#show flash
设置VTY(虚拟终端接口)密码
配置RIP V2动态路由协议
Router(config)#router rip
Router(config-router)#version 2
Router(config-router)#no auto-summary 关逼自动汇总
Router(config-router)#network 10.1.1.0 Router(config-router)#network 192.168.1.0
24 查看路由器版本信息 Router#sh ve
配置路由器和交换机间的单臂路由
Router(config)#in f0/0.1
(进入子接口模式)
25 Router(config-subif)#en d 20 (封装802.1Q协议)
Router(config-subif)#ip ad 192.168.3.1 255.255.255.0
27 删除RIP V1动态路由协议 Router(config)#no router r
配置RIP V2动态路由协议
Router(config)#router r
28 Router(config-router)#ve 2 Router(config-router)#no au
Router(config-router)#net 10.1.1.0 Router(config-router)#net 192.168.1.0
思科路由器配置命令
简写命令
ห้องสมุดไป่ตู้完整命令
1 用户模式: Router> 特权模式:
2 Router>en Router# 全局配置模式
3 Router#conf t Router(config)# 接口配置模式
4 Router(config)#in f1/0 Router(config-if)# 子接口配置模式
配置路由器banner提示信息
Router(config)#banner motd $this is a main router$
配置超时
Router(config)#line console 0
Router(config-line)#exec-timeout 0 0
显示同步
Router(config)#line console 0
Router(config)#router rip
Router(config-router)#network 10.1.1.0 Router(config-router)#network 192.168.1.0
宣告启用RIP的接 口的主网络号
删除RIP V1动态路由协议
Router(config)#no router rip
Router(config-line)#pas 123
34 下载路由器中的IOS Router#copy flash:flash文件名 tftp
35 上传IOS到路由器 Router#copy tftp:ios文件名 flash
36 下载路由器中的配置文件 Router#copy nvram:文件名 tftp
16 配置特权模式密码 Router(config)#ena p 123
17 配置加密保存的密码 Router(config)#ena s 321
Router(config)#interface f1/0 (有些写成e0/1,e0) Router(config-if)#ip address 10.20.30.40 255.0.0.0 Router(config-if)#no shutdown 配置控制台密码 Router(config)#line console 0 Router(config-line)#password 123 Router(config-line)#login 配置特权模式密码 Router(config)#enable password 123 配置加密保存的密码 Router(config)#enable secret 321
Router(config)#line vty 0 1
Router(config-line)#login
