DMG说明书
DMG12800T070_33WTC数据手册说明书
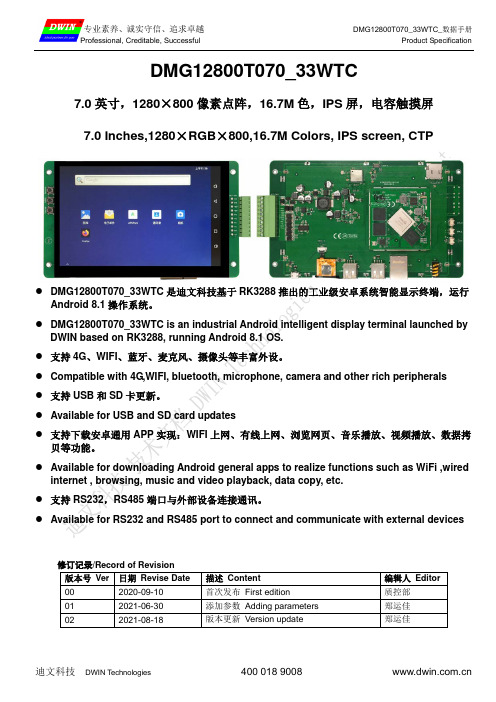
DMG12800T070_33WTC7.0英寸,1280×800像素点阵,16.7M色,IPS屏,电容触摸屏7.0 Inches,1280×RGB×800,16.7M Colors, IPS screen, CTP●DMG12800T070_33WTC是迪文科技基于RK3288推出的工业级安卓系统智能显示终端,运行Android 8.1操作系统。
●DMG12800T070_33WTC is an industrial Android intelligent display terminal launched byDWIN based on RK3288, running Android 8.1 OS.●支持4G、WIFI、蓝牙、麦克风、摄像头等丰富外设。
●Compatible with 4G,WIFI, bluetooth, microphone, camera and other rich peripherals●支持USB和SD卡更新。
●Available for USB and SD card updates●支持下载安卓通用APP实现:WIFI上网、有线上网、浏览网页、音乐播放、视频播放、数据拷贝等功能。
●Available for downloading Android general apps to realize functions such as WiFi ,wiredinternet , browsing, music and video playback, data copy, etc.●支持RS232,RS485端口与外部设备连接通讯。
●Available for RS232 and RS485 port to connect and communicate with external devices修订记录/Record of Revision版本号Ver 日期Revise Date 描述Content 编辑人Editor00 2020-09-10 首次发布First edition 质控部01 2021-06-30 添加参数Adding parameters 郑运佳02 2021-08-18 版本更新Version update 郑运佳●主控性能参数Master control Parameters参数Properties 数据Parameters主板级别Motherboard level 工业级IndustrialCPU处理器CPU 四核1.8GHz ARM Cortex-A17 4 core 1.8GHz ARM Cortex-A17操作系统OSAndroid 8.1FLASH存储器FLASH8Gbytes EMMC5.0 RAM 2Gbytes DDR3●显示性能参数Display Parameters参数Properties数据Parameters说明Description颜色Color16.7M(16777216)colors 24 bit color 8R8G8B液晶类型Panel Type IPSIPS工艺TFT显示屏,宽视角IPS process, TFT LCM with wide viewing angle可视角度Viewing Angle 85/85/85/85 (L/R/U/D)最佳视角:上下左右对称Best View: symmetrical视域尺寸View Area (V.A.)150.76 mm (W)×94.60mm (H) 1280×800 Pixel 显示尺寸Active Area (A.A.)149.76mm (W)×93.60mm (H) 1280×800 Pixel分辨率Resolution 1280×800 Pixel可以设置成0°/90°/180°/270°显示模式Available for 0°/90°/180°/270°rotated display背光模式Backlight LED不低于30000H(以最高亮度连续工作,亮度减半时间)≥30000H(time of the brightness decaying to 50% onthe condition of continuous working with the maximumbrightness)亮度Brightness 300nit可进行100级亮度调节(当亮度调节至最高亮度的1%~30%时,可能出现闪烁现象,不建议在此范围使用)。
DMG80480F070_01WTR产品数据手册说明书

DMG80480F070_01WTR产品概述:●基于T5L0芯片,运行DGUS II系统。
●7寸,800*480分辨率,262K色,TN屏,普通视角。
●液晶屏与触摸屏框贴工艺,产品厚度仅5.1mm。
●COF结构,将智能屏的整个核心电路固定于液晶模组FPC上,适合结构要求轻、薄,成本要求苛刻,生产简单的应用。
●排线共50个pin脚,引出用户CPU核的IO、UART、CAN、AD、PWM等接口,二次开发十分方便。
Features:●Based on T5L0,running DGUS II system.●7inch,800*480pixels resolution,262K colors,TN-TFT-LCD,normal viewing angel.●LCD and TP frame lamination process,only5.1mm thickness.●COF structure.The entire core circuit of the smart screen is fixed on the FPC of LCM,featured by lightand thin structure,low cost and easy production.●50pins,including IO,UART,CAN,AD and PWM from user CPU core for easy secondary development.1外部接口External InterfacePIN 序号Definition 定义I/O Functional Description 功能描述1+5V I 供电输入,DC3.6-5.5V 。
Power supply,DC3.6-5.5V.2+5V I 3GND GND GND4GND GND 5GND GND 6AD7I 5路ADC 输入,3.3V 电源做为参考,12bit 分辨率,输入电压范围0-3.3V 。
dmg2671兆欧表说明书

武汉市康达电气有限公司地 址:武汉市洪山区雄楚大街书城路30号 邮政编码:430070E -mail :KDDQ@ http :电 话:(027) 8738 1005 8739 9915 8738 3472 传 真:(027) 8738 6393使 用 说 明书武汉市康达电气有限公司DMG2671 绝缘测试仪4 使用方法敬告:●确认被测试品安全接地,试品不带电。
●确认仪表E端(接地端)已接地。
●按了高压开关按钮后,仪表E、L端就有高电压输出,请注意安全!●测试完毕,请及时关闭高压和工作电源。
4.1 电池检查及更换仪表在接通电源工作时,显示屏若显示“”欠压符号,表示电池电量不足,应更换新电池。
4.2 测试将仪表E端接试品的接地端(或一端),L端接试品的线路端(或另一端)。
将选择开关置所需的额定电压位,显示屏首位显示“1”,表示工作电源接通。
按一下高压开关按钮,高压指示灯点亮,显示屏上显示的数值就是被测试品的绝缘电阻值。
当试品的绝缘电阻值超过仪表量程的上限值时,显示屏首位显示“1”,后三位熄灭。
注:测量时,由于试品有吸收、极化过程,绝缘值读数逐渐向大数值漂移或有一些上下跳动,系正常现象。
4.3 G端(保护环)的使用测量高绝缘电阻值时,应在试品两测量端之间的表面上套一导体保护环,并将该导体保护环用一测试线连接到仪表的G端,以消除试品表面泄漏电流引起的测量误差,保障测试准确。
本仪器安全性能符合国际标准IEC61010-1:2001。
本仪器执行标准Q/KD 04-2004。
1 性能特点●适于在各种电气设备的维修、试验及检定中作绝缘测试。
●31/2LCD大屏幕数字显示,分辨率高,读数方便。
●有三种额定绝缘测试电压,负载能力强。
●操作便捷,携带方便,准确、可靠、稳定。
●低耗电、用8×1.5V(AA, R6)电池供电,使用时间长。
●电池电压不足,有欠压标志符“”显示。
●具有防震、防尘、防潮结构,适应恶劣工作环境。
武汉得鸣 DMGY-II 数字无线核相器 说明书
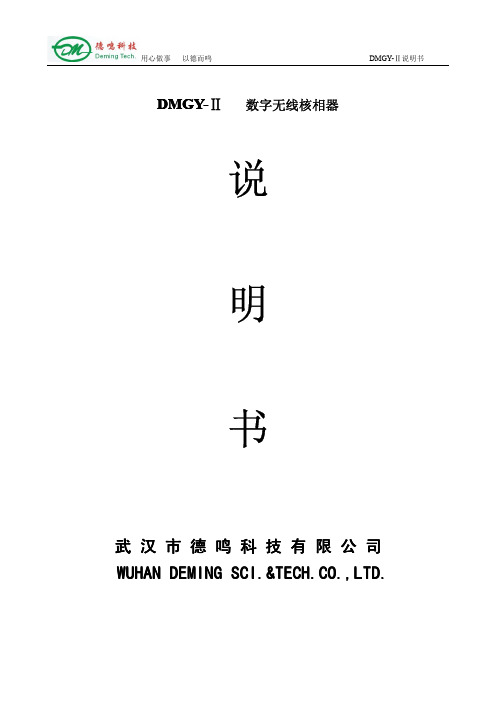
图 1 DMGY-Ⅱ数字无线核相器发射器
图 2 DMGY-Ⅱ数字无线核相器接收器
发射器是电压探测器和发射器的联合装置,首先判断线路是否带电,然后发出有关导体相位的信
号。接收器,获得发射器发出的信号,然后在测试时用信号通知用户导体达到了同相。
在使用中,首先对所有线路使用 DMGY-Ⅱ的发射器装置分别两条线路进行接触,通过发出蜂鸣声
四、仪器自校验
图 3 DMGY-Ⅱ型数字无线核相器发射器底座 � 发射器自校验
� 装上钩状电极
-2-
用心做事 以德而鸣
� 持续按试验按钮
DMGY-Ⅱ说明书
� 4 只灯闪烁,蜂鸣器同步发声
� 几秒后,声讯号及闪光停。只有 1 只 LED1 继续保持亮
� 如果未看到以上的各项指示(如部分亮灯或无声讯号,蜂鸣器连续叫不停等),需要更换电
三、技术参数
电压等级 无线传送距离 相位差测量精度 频率精度 工作频率 电源 环境温度 环境湿度
相位角范围
校验 重量 尺寸 包装
6KV~220KV (杆子标配 110KV) ﹥50m ±3 度 ±1Hz 50Hz~60Hz 12V GP 超霸碱性电池(两节) -20℃~+50℃ 全天候 相位角偏移小于±5°为同相 相位角偏移大于±5°为异相 自动校验,也可在带电导线上校验 发射器 0.45Kg、接收器 0.45 Kg 50×1180mm 铝合金箱
九、保修
自发货之日起一年内,在正常使用的状态下,仪器没有材料和制作工艺上的缺陷。如果出现仪器 无法操作,退回原厂修理。由于人为原因造成的仪器损坏不属保修范围之列。
-5-
用心做事 以德而鸣
一、产品简介
DMGY-Ⅱ说明书
DMGY 系列无线核相器的主要优点在于去掉了连接开路点两端的引线,仪器通过无线电信号来通 讯,使用范围可以扩展到 50 米以上,并且可以穿过围墙和隔板使用,使用起来比电压表或核相器要 简单。
迪文科技 DMG32240C024_03WTR 数据手册说明书

DMG32240C024_03WTR产品特点:●基于T5L1芯片,运行DGUS II系统,商业级产品。
● 2.4寸,320*240分辨率,262K色,TN屏,普通视角。
●电阻触摸屏。
Features:●Based on T5L1,running DGUS II system,commercial grade.● 2.4-inch,320*240Pixels resolution,262K Colors,TN-TFT-LCD,normal viewing angle.●Resistive touch screen.1、硬件及接口Hardware and interface1.1硬件接口图Hardware interface硬件接口图Hardware interface1.2接口说明Interface description序号No.名称Name说明Description1T5L1芯片T5L1ASIC迪文自主研发,2019年量产,1MBytes片内Nor Flash,其中512KBytes用于存储用户数据库,擦写次数>100,000次Developed by DWIN.Mass production in2019,1MBytes Nor Flash on thechip,512KBytes used to store the user database.Rewrite cycle:over100,000times2液晶屏接口LCM interfaceFPC40_0.5mm,RGB接口FPC40_0.5mm,RGB interface3电阻触摸屏接口RTP interfaceFPC4_1.0mmFPC4_1.0mm4用户接口User interface用于供电和串口通讯,10Pin_1.0mm带锁扣座子。
串口下载速率(典型值):12KByte/s10Pin_1.0mm latching socket for power supply and serial communication.Download rate(typical value):12KByte/s5Flash 16MBytes NOR Flash,存放字库、图片、音乐文件,擦写次数>100,000次16MBytes NOR Flash,for fonts,pictures and audio files.Rewrite cycle:over100,000times6蜂鸣器Buzzer3V无源蜂鸣器,功率:<1W3V passive buzzer.Power:<1W7SD卡接口SD interfaceFAT32格式,下载文件,文件可在屏幕统计显示,下载速率:4Mb/sFAT32.Download files by SD interface can be displayed in statistics.Download rate:4Mb/s8PGT05接口PGT05interface当产品因意外无法正常运行时,可通过PGT05更新DGUS底层,使产品重新恢复正常When product crashes by accident,you can use PGT05to update DGUSkernel and make the product return to normal2、规格参数Specification parameters 2.1显示参数Display parameters显示屏类型LCD TypeTN,TFT LCD视角Viewing Angle 普通视角,典型值70°/70°/50°/70°(L/R/U/D)Normal viewing angle,70°/70°/50°/70°(L/R/U/D)分辨率Resolution 320×240(支持0°/90°/180°/270°显示模式)320×240pixels(0°/90°/180°/270°)色彩Color 18位6R6G6B 18-bit6R6G6BAA区Active Area(A.A.)36.7mm(W)×49.0mm(H) VA区View Area(V.A.)37.9mm(W)×50.2mm(H)背光模式Backlight ModeLED背光寿命Backlight Service Life >20000小时(以最高亮度连续工作,亮度减半时间)>20000hours(Time of the brightness decaying to50%on the condition of continuous working with the maximum brightness)背光亮度Brightness240nit背光调节Brightness Control 100级亮度调节(当亮度调节至最高亮度的1%~30%时,可能出现闪烁现象,不建议在此范围使用)0~100grade(When the brightness is adjusted to1%~30%of the maximum brightness,flickering may occur and is not recommended to use in this range)注:超过30分钟长时间显示高对比度静止画面可能导致显示残影,请增加屏保避免该问题。
DMG窝沟封闭系统的使用方法

DMG窝沟封闭系统的使用方法Ionosit Seal 是一种呈白色的光固化窝沟封闭剂。
它可常期给牙齿释放氟和锌离子.应用一牙齿表面预备(釉质酸蚀)在使用Ionosit-seal前,牙釉质表面的窝沟,裂隙,点必须尽可能的清洗干净。
为了使预备好的牙面没有唾液污染,最好使用棉卷或者橡皮障隔绝唾液。
在ecu-pen(笔式)上装好透明的微型头和蓝色酸蚀凝胶,以便酸蚀凝胶可以精确的放置到术区.透明尖端头可随意弯曲便于使用。
恒牙酸蚀60到90秒,乳牙酸蚀15到60秒。
然后以清水冲洗牙表面,用无油、干燥和清洁的压缩空气吹干处理的表面直至出现白垩色。
二lonosit-seal的使用将黑色微型头装在Ecu-Pen上,封闭剂便可精确的放置到术区。
为了更好的使用,当然黑色微型头也是可以随意弯曲的。
然后便可将够量的封闭剂直接放置到已被酸蚀的釉质表面,可以使用小刷子将封闭剂更均匀的涂抹到窝沟。
不要使用过多的封闭剂。
三固化用标准的光固化灯照射40秒。
然后用探针检查表面的光滑度。
(如果需要,可追加少量材料,再固化)四注意为能更好地固化,建议用一表面层(如Oxystop),可避免氧化层。
溢出的材料可磨掉。
Ecu-Pen是可以耐受高压蒸汽灭菌消毒的。
五警告避免周围的光线使封闭剂提前固化。
避免酸蚀剂接触牙龈或邻近的牙. 避免接触眼睛。
万一发生此类情形,用大量水冲洗。
禁忌使用Ionosit Seal的情况:-窝沟内已有龋洞;-酸蚀过后,在用Ionosit Seal或固化过程中,很难将工作区控制在干燥的情况下;-如对任何成份过敏的话副作用无任何副作用。
有个别接触过敏情况。
成份Ionosit Seal:玻璃离子和光固化牙科树脂Ecusit Etch:磷酸37%储存不要储存在25°C以上!不能见阳光。
不使用时候必须封闭好。
过期的材料不要使用。
有效期3年。
DMG双固化树脂

LuxaCore Automix / Smartmix Dual珞赛可双固化型桩核树脂材料使用说明书LuxaCore Dual是一款专为各种冠桩重建和桩冠充填设计的简易双固化冠核材料。
阻射的LuxaCore Dual特性表现在:杰出的抗压强度,制备时与牙本质相同。
其能够光固化的特点可根据您的需要决定固化时间。
它的口内注射头能更精确在口内直接操作。
适应症所有冠核的重建和桩钉的粘接。
桩核材料。
符合ISO4049:2000、II级、III型要求。
时间操作时间:1:30分钟口内化学固化:5:00分钟光固化厚度≤2mm 光照20秒厚度≤4mm 光照40秒使用装置:LuxaCore Automix Dual珞赛可自动混合枪型双固化桩核树脂查看自动混合枪系统LuxaCore Smartmix Dual珞赛可注射器型双固化桩核树脂查看注射器系统Automix 自动混合枪系统:1.将型号25的注射枪后部的小控制杆(1)向上推,并完全撤回滑杆(2)。
推起注射枪顶端的塑料控制杆(3),并插入弹药筒。
按下注射枪控制杆(3)制锁弹药筒。
说明:使弹药筒底部的凹口对准25型注射枪的凹口。
2.在安置混合插管前,以90度逆时针旋转弹药筒头帽(4),前推并取下它。
插入一个新的混合插管,使软管(5)上的凹口对准弹药筒上相应的凹口,并顺时针旋转90度直至其锁定在位置上。
在混合插管末端插上口内注射头(6)可直接注射到牙齿上3.推动注射枪触动开关(7),通过混合插管输出材料,且可直接使用。
当首次使用弹药筒时,取出豌豆大小的材料并弃之。
在弹药筒头端留一个用过的插管,其可作为防护头帽使用。
4.向上推型号注射枪后部的控制杆(1),并直接拉出滑杆(2)。
推起注射枪顶端的塑料控制杆(3),并取下弹药筒。
Smartmix 注射器系统建议使用方法冠核重建1.预备前隔离牙齿。
我们建议使用橡皮障。
2.去除牙体上所有修复体和腐质。
3. 如果您所用的粘接系统需要另外酸蚀,可以根据您更喜欢的酸蚀技术,比如全酸蚀法,根据酸蚀剂的使用说明操作。
Honeywell DMG 970燃气燃烧控制箱说明书

max. 10 A during 0.5 sec
Air proving switch
1 working contact 4 A, 230V
Stray light monitoring
5 sec
Sensitivity (operation)
1 µA
Min. required ion. current
1.5 µA
tvz
3 3 3
ignition time total
tz
5.5 7.5 5.5
Stray light monitoring
tf
5 5 5
safety time
ts 3 5 3
delay 2nd-stage
tv2
12.5 14.5 12.5
1
0737.10-00-e/01/99
APPLICATION FEATURES
Message waiting for air proving switch pre-purge tv1 pre-ignition tvz safety time ts delay 2nd stage tv2 running low mains voltage
Possible flame detectors: - Ionisation probe - Infrared flicker detector 1020 - UV flame sensor UVD 971
INTRODUCTION
The burner control box DMG 970 controls and supervises power burner for gas and dual fuel. The control box is approved and certified according the relevant European standards. The use on direct air heaters according DIN 4794 is also possible. The microprocessor- based programming sequence ensures extremely stable timings independent of voltage variations, ambient temperature and/or switch-on cycles. The built-in information system not only provides a continuous monitoring of the actual state of the box (very helpful especially for monitoring the start-up phase) but also informs about the cause of a possible lock out. The lock out cause is stored in such a way that it can be retrieved even after a power failure. The control box is designed for maximum safety in case of fluctuations in the voltage supply. If the mains voltage drops below the permitted level, operation is interrupted and the control box automatically prevents the start sequence from being repeated. In this way, the safety of the system is not put at risk by a drop in the mains voltage. This low-voltage protection works not only during start-up but also permanently during operation.
德康达使用说明

仪表标定:完全标定:a 、在开机时,当仪表显示版本时按下TARE 键几秒,进入仪表的启动菜单;b 、进入标定的设置菜单,即SEtuP >> ConFiG >> CALIB ,并按ENTER 键;c 、选择标定的量程数并按ENTER 键确认,选择“1” ;d 、设置标定的小数位数:选择dECiM. 选项并按ENTER 键,用箭头键可选择所要的小数位数并按ENTER 键,选择0.000;e 、设置最大称量值或第一量程范围:选择CAP.1选项并按ENTER 键,然后设置值(从100至999999)并按ENTER 键,输入60.000;f 、设置称重显示器的分度值或第一量程的分度值:选择diV. 1选项并按ENTER 键,使用箭头键选择值(1、2、5、10、20、50、100、200)并按ENTER 键;选择10;g 、设置称重单位:选择u.M.选项并按ENTER 键,使用箭头键选择称重单位:克(G )、千克(kG )、吨(t )或磅(Lb )并按ENTER 键,选择kg ;h 、线性化信号点的数量:出现“calibration points beyond the zero”(除零点外的标定点)信息,输入值1(注:可设定从1至8个点,除了零点之外)并按ENTER 键;i 、零点:通过"PrSS.OK",出现"scale unloading and press enter"(卸载秤盘并按ENTER 键)信息;秤盘未加载并按ENTER 键;j 、第一个线性化点:根据标定时输入的重量值将出现"Point 1"信息;用数字键盘输入值按ENTER 键把物品放在秤盘上按ENTER 键;k 、一旦标定完成,LCD 显示屏将显示“CALIBRATION EXECUTED”(标定已完成)信息。
零点标定:a、在开机时,当仪表显示版本时按下TARE键几秒,进入仪表的启动菜单;b、进入标定的设置菜单,即SEtuP >> ConFiG >> CALIB,并按ENTER键;c、选择CALib选项并按ENTER键;出现"PrSS.OK"的同时也将出现“scale unloading and press enter”(卸载秤盘并按ENTER键)信息d、将预设皮重输入至清空或未加载的秤盘中并按ENTER键设置最大称量值或第一量程范围:选择CAP.1选项并按ENTER键,然后设置值(从100至999999)并按ENTER键,输入60.000;e、一旦标定完成,LCD显示屏显示“ZERO CALIBRATION EXECUTED”(零点标定已完成)信息,按ENTER键随后称重显示器返回到ParAM选项。
DMG MAXI Switch 产品说明书

USER MANUALWhat is the MAXI Switch?•120cm*75cm - 4*2.5 Feet •< 500 W•12 KG - 26 lb• Install the spigot on the MAXI YOKE with given wing knob.• Install the MAXI YOKE on a stand (two spigot sizes available 16mm & 28mm).• Make sure the handles are loose before installing the MAXI.• Approach the MAXI Switch head light in folded position between the MAXI YOKE’s arms.MAXI SWITCH USER MANUAL•Guide the MAXI Switch’s grooves onto the disks of the MAXI Yoke.•The MAXI Switch head light is now installed on the MAXI YOKE.>90°•Slide the safety catch into position on either side of the MAXI Switch.• Plug the MAXI Switch head light to the MAXI CONTROLLER.•If needed, you can install the MAXI CONTROLLER at the back of the fixture.T o do so, twist and lock it as easy as the marks suggest it.Make sure the locking pin is in position.•Insert MAXI YOKE’s ball pins on both sides to secure the MAXI Switch head light in folded position if needed (bag, transport, ect.).Ensure the handles are securely fastened.•Present the MAXI head light folded on a soft and flat surface.•Unscrew the nut with a 5mm allen key on both sides.You will be able to remove it completely once the two panels are separated.•Once the nuts are loose, separate the panels.You can screw back each nut on it’s axis in order not to loose them.1. Menu• Go to the general menu 2. Back• Step back in menu• Lock/unlock MAXI Switch when pressed for 2 secs 3. Switch• Change between CCT and intensity control• Hold the Switch button for 2 secs to activate split mode and control each panel separately4. CCT• Quickly change from 3200°k to 5600°K• Enter the preset menu to store or recall values when pressed for 2 secs 5. Dimmer button• Press to change intensity or CCT • Select fine or coarse dimming when pressed• Navigate through the menu and push to validate6. 24V outputs to light7. Wi-Fi antenna8. Wireless DMX antenna9. Mounting plate for K1 and K2 mount10. ON/OFF selector• Select witch mode to power the light on11. USB plug• Upgrade the MAXI Switch’s firmware 12. DMX IN 13. DMX OUT 14. LAN IN 15. 24VDC input123549812141311101576MAXI-CT-SW1. Connect the Maxi Switch Controls (MAXI-CT-SW) to the MAXI power supply unit(MAXI-PSU-SW) and connect the power supply to a 110VAC or 220VAC plug. Y ou can also input any 24VDC (min 20A) into the Maxi Switch Controls.2. Connect the head light to its controller.3. T urn on the MAXI Switch by selecting which power mode you want to use (MAXI or SPLIT) with the selector.Four modes are available :• LOCAL MODE • DMX MODE• Wireless DMX MODE • CUSTOM MODEMAXI SWITCH USER MANUALControl the MAXI Switch remotely with the Wireless DMX protocol• Make sure the Wireless DMX antenna is intalled• Press the dimmer button to enter the DMX address of the MAXI Switch • Validate by pressing goWireless DMX dot is red when no signal is received, green when the MAXI Switch is connected to a Wireless DMX emitter.T o synchronize with a new emitter, go back to general menu and enter Wireless DMX mode again.Control the MAXI Switch locally with the dimmer button.• Press the Switch button to change between CCT and intensity control• Press CCT button for a quick change between 3200°K and 5600°K• Press the dimmer button to select coarse or fine intensity tuningControl the MAXI Switch remotely with the cabled DMX protocol.In custom mode the MAXI Switch acts as a translator between different protocols. It still controls the head light connected to it.• Make sure the Wireless DMX antenna is intalled if using Wireless DMX• Make sure the Wi-Fi antenna is intalled if using Wi-Fi • Press the dimmer button to select data input, data output and DMX/Wireless DMX address • Validate by pressing goIf Wi-Fi input is selected, the MAXI Switch creates a Wi-Fi network with the following specifications :SSID: MAXI [serial number] Password: dmglumiere• Press the dimmer button to select the DMX address of the MAXI Switch DMX dot is red when no signal is received, green when the MAXI Switch is recieving DMX data.Displays the firmware version, the Network name and password for the Wi-Fi mode.These informations can be find in the “info” section of the MAXI Switch Controls menu.Wireless DMX dot is red when no signal is received, green when the MAXI Switch is connected to a Wireless DMX emitter.• T o synchronize with a new emitter, go back to general menu and enter Wireless DMX mode againWi-Fi dot is red when no signal is received, green when the MAXI Switch is connected to a Wi-Fi device with an Art-Net app enabled.• Download the firmware from DMG Lumière website : /upgrade • Copy the file to a USB stick• Insert the USB key in the MAXI SwitchIf a correct file is found on the USB stick, the MAXI Switch will prompt an upgrade menu• Select YES to upgrade• Wait for the upgrade process to finish, the MAXI Switch will turn off and on by itself to make the upgrade active• By holding the “CCT” button for 2 seconds in LOCAL MODE, you enter the preset menu. Here you can store presets or recall strored presets.• If you turned the MAXI Switch on SPLIT MODE, By holding the “SWITCH” button for 2 seconds you enter the SPLIT MODE where you control each panel independantly• T wo successive screens will appear when selecting DMX/Wireless DMX address, corresponding two each panel• By selecting «Panel 1+2», you can control the panels’ brightness together, without modifying their initial color temperature nor brightness differenceDMG Lumière lights or any Wireless DMX enabled lightOur wireless DMX is compatible with any powered devices.QTY : 1QTY : 2CHOGORI 24003131-04CHOGORI 24003231-04NLT4MX-BAGNL4FCQTY : 11,5 meterPowerCon True 1 Power chord(EU/US/UK/...)2m 2x13 AWG10 meters 2x13 AWGMAXI DRIVER OUTPUTNEUTRIK SpeakCON2x NL4MPMAXI PSU INPUTNEUTRIK PowerCONT rue1 Duplex NAC3PXNEUTRIK SpeakCON2x NL4FCMAXI HL INPUTCHOGORI 24003636-02MAXI PSU OUTPUTCHOGORI 24003536-02MAXI DRIVER INPUTStandard plug110/220VMAXI PSU 110/220V INPUTNEUTRIK PowerCONT rue1 Duplex NAC3PXNEUTRIK PowerCONT rue1 Duplex NAC3PX0,5/1/1,5 meterNEUTRIK PowerCon True 1 Extension Cord10 meters 2x13 AWGMAXI PSU 110/220V OUTPUTCHOGORI 24003636-02MAXI PSU OUTPUTCHOGORI 24003536-02MAXI DRIVER INPUTCHOGORI 24003131-04CHOGORI 24003231-04。
DMG德马吉数控机床用户手册大全 (35)

DMG – technologies for tomorrow0203应用与零件0405DMU P: 不带托盘交换装置的5 轴机床0607DMC U: 带托盘交换装置的5 轴机床0811FD 技术: DMU FD / DMC FD1213模块化机床结构14155 轴加工1617主轴技术1819刀具装卸2023特别解决方案2425应用示例2629控制技术3039平面安装图技术参数选配DMU / DMC 210 / 340 / 600 P / U / FD:在长达6000 mm 的行程上以最高的精度经济地生产重达40 t 的工件。
插图模箱起落架和柴油发动机V16 曲轴箱DMU / DMC 龙门系列应用与零件02 03德克尔马豪龙门系列–已安装850 多台此类机床生产变速箱这款采用高稳定性龙门构造的5 轴机床可实现最高精度和最高动态性能。
不仅可以进行钻孔和铣削还可以在带有铣/车复合加工功能的机床上进行车削加工。
长达6 m 的大行程和负载可达40 t 的工作台为此奠定了基础。
DMC 机床的托盘交换装置可在加工的同时进行装夹实现最高生产率。
机械制造刀具和模具制造能源工业航空工业1 横梁2 机床床身1 行星齿轮架2 螺旋锥齿轮1 挡泥板冲压模具2 保险杠模具嵌入件1 培尔顿式叶轮2 涡轮增压机外壳1 HP 压缩机外壳2 一体式结构件1111122222DMU / DMC 龙门系列DMU P: 不带托盘更换装置的5 轴机床DMU P –可加工重达40 t 的大型零件加工空间大占地面积小1800 × 2100 × 1250 mm 至6000 × 4200 × 2000 mm 的大行程重达40 t 的工作台负载创新性的加工能力例如一次装夹即可完成5 面/ 5 轴铣削和车削这些只是实现高效应用的一部分因素。
最佳的加工空间接近性多种主轴型号和更多过程优化的选配件使该方案更加完美。
DMG 100-110数字多功能测量器说明书
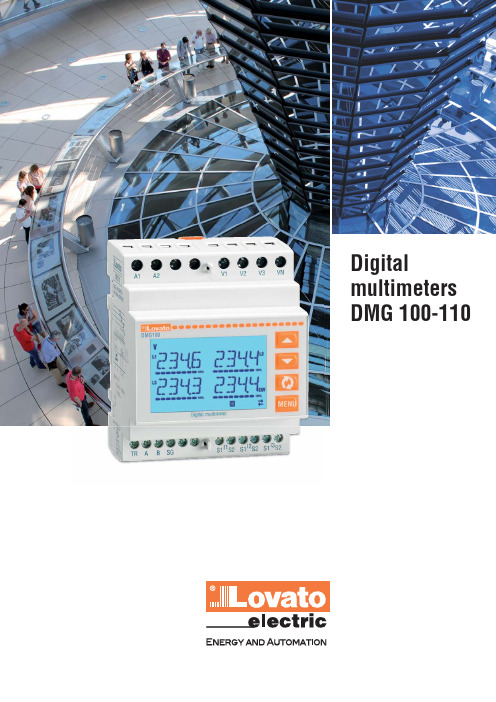
Digitalmultimeters DMG 100-110Digital multimeters are capable of viewing measurements with high accuracyon the wide LCD display which allow to control energy distribution networks.Easy and intuitive menu navigationLCD display with text in 6 languagesHigh measurement accuracyDisplay of voltage and current harmonics up to the 15th orderWide range for power supply, measurements and temperatureSuitable for LV, MV and HV electric systems and installationsDMG 100 - 110Voltage: phase, line and phase to neutral Phase current (calculated neutral current)Power: apparent, active, reactive per phase and totalPhase and total power factor FrequencyMaximum, average and minimum values for all measurementsMaximum power and current demand Voltage and current asymmetryVoltage and current harmonics up to the 15th orderTotal harmonic distortion (THD) of voltages and currentsPartial and total active, reactive andapparent energy meters (phase and system)Programmable partial and total hour countersPhase active power unbalance.The main features include an intuitive and easy-to-read LCD interface, excellent measurement accuracy (±0.5% for voltages and currents) and extended power supply compatibility (100...240VAC).Main measurements and functions include: Unit of measureMeasured valueIntegrated opto-isolated RS485 serial port (DMG 110 only)Type of measurementSubpage indicationInstantaneous, maximum, minimum, average values and maximum demandBar graphScrolling text for alarms,user messages,parameter settings and active energy measurementsDMG 100 - 110Maximum power demand managementUtility-user contracts often stipulate a limit for maximum power demand, calculated as anaverage over a time window. DMG100 and DMG110 multimeters include functions thatallow users to control demand limits:•A limit threshold can be set for average power demand.•The devices provide 4 methods for calculating average power demand to suit differentoperating requirements:- Fixed window- Mobile window- Synchronisation by serial bus (Modbus) message.LCD displayBacklit icon display for good visibility even in poor lighting.Scrolling text:• Alarm messages configured by the user• Help messages for the user• Description of setup menu and parametersText is available in 6 languages: English, Italian, French,Portuguese, Spanish and German.Alarms and messages with flashing displayFour user-programmable alarms with descriptive text can be configured for each limit threshold.When an alarm is triggered, a programmable message is displayed on a dedicated page. A dedicated parameteris provided for users to select flashing of the display backlight in case of alarms. This makes alarm conditionseasier to see even from a distance.HOW TO ORDERSTechnical specifications– Auxiliary power supply:100...240VAC / 115...250VDC– Voltage measurement range: 50...720VAC– Suitable for use in medium voltage systems withvoltage transformer– Rated input current: 1A or 5A– Frequency measurement range: 45...66Hz– TRMS voltage and current measurements– Measurement accuracy:•Voltage: ±0.5% (50...720VAC)•Current: ±0.5% (0.1...1.1 In)•Power: ±1% f.s.•Frequency: ±0.05%•Active energy: Class 1 (IEC/EN 62053-21)•Reactive energy: Class 2 (IEC/EN 62053-23)– Display of voltage and current harmonics up tothe 15th order– Modbus-RTU, ASCII communication protocol–Compatible with and software(DMG 110 only)– Modular 4U housing– IEC protection rating: IP40 on front;IP20 at terminals.Certifications and complianceCertifications obtained: EAC, cULus (bothpending).Comply with standards: IEC/EN 61010-1,IEC/EN 61000-6-2, IEC/EN 61000-6-3,UL 61010-1, CSA C22-2 n°61010-1.DMG 100 - DMG 110Code DescriptionDMG 100 Modular 4U multimeter with backlit LCD icon display, auxiliary power supply100...240VAC / 115...250VDCDMG 110 Modular 4U multimeter with backlit LCD icon display, auxiliary power supply100...240VAC / 115...250VDC, with integrated RS485 serial portenergy management softwareto supervise and control (via Web server) the electricalparameters measured by LOVATO Electric deviceswith a communication port.In addition to providing datalogs and simple,user-configured Web pages, it can also be used to:•Configure alarms (for sending by email)•Make and view trend graphs•Send commands to devices•Energy usage by time slots.configuration and remote control softwareprovides for:•Transfer parameter settings from PC to DMG 110and vice-versa•Read measurements•Display events and alarms•Send commands.T h e p r o d u c t s d e s c r i b e d i n t h i s p u b l i c a t i o n a r e s u b j e c t t o b e r e v i s e d o r i m p r o v e d a t a n y m o m e n t . C a t a l o g u e d e s c r i p t i o n s a n d d e t a i l s , s u c h a s t e c h n i c a l a n d o p e r a t i o n a l d a t a , d r a w i n g s , d i a g r a m s a n d i n s t r u c t i o n s , e t c ., d o n o t h a v e a n y c o n t r a c t u a l v a l u e . I n a d d i t i o n , p r o d u c t s s h o u l d b e i n s t a l l e d a n d u s e d b y q u a l i f i e d p e r s o n n e l a n d i n c o m p l i a n c e w i t h t h e r e g u l a t i o n s i n f o r c e f o r e l e c t r i c a l s y s t e m s i n o r d e r t o a v o i d d a m a g e s a n d s a f e t y h a z a r d s .P D 101 G B 04 15Follow uswww.L ovato E LOVATO ELECTRIC S.P .A.VIA DON E. MAZZA, 1224020 GORLE (BERGAMO) ITALYLOVATO Electric offices in the worldLOVATO Electric products are available in over 100 countries through its distributors.Sales Department:Tel.+39 035 4282354Fax +39 035 4282400Tel +39 035 4282111Fax +39 035 4282200E-mail info@L ovato E United Kingdom LOVATO ELECTRIC LTD Tel. +44 8458 Czech RepublicLOVATO ELECTRIC S.R.O.Tel. +420 226 203203www.LovatoElectric.czGermany LOVATO ELECTRIC GmbH Tel. +49 7243 7669370www.LovatoElectric.deUSALOVATO ELECTRIC INC.Tel. +1 757 Spain LOVATO ELECTRIC S.L.U.Tel. +34 93 7812016www.LovatoElectric.esCanadaLOVATO ELECTRIC CORP .Tel. +1 450 6819200www.Lovato.caPoland LOVATO ELECTRIC SP . Z O.O.Tel. +48 71 7979010www.LovatoElectric.plUnited Arab EmiratesLOVATO ELECTRIC ME FZE Tel. +971 4 3712713www.LovatoElectric.aeRomaniaLOVATO ELECTRIC SRL Tel. +40 372 074 155www.LovatoElectric.roTurkey LOVATO ELEKTR K LTD Tel. +90 216 .trChinaLOVATO ELECTRIC (SHANGHAI) CO LTD Tel. +86 21 。
dmg普玛2.0双固化粘接流程
dmg普玛2.0双固化粘接流程
DMG普玛2.0是一种双固化粘接材料,用于固化并粘接材料。
以下是DMG普玛2.0的双固化粘接流程:
1.牙体准备:先进行牙体准备,将患牙病变组织清除,保持牙体清洁和干燥。
2.酸蚀处理:使用酸蚀剂处理牙体表面,如3M的Etching Gel。
涂抹酸蚀剂在牙体表面,按照说明时间进行酸蚀,然后用水冲洗干净。
3.粘接剂涂布:将DMG普玛2.0的粘接剂涂布在牙体表面。
使用微刷擦拭涂布,确保涂布均匀,避免气泡形成。
4.光固化:将光引导管对准涂布的粘接剂,使用光固化设备进行光固化。
按照设备说明时间进行固化。
5.填充材料填充:根据患牙需要,选择合适的填充材料,如复合树脂等。
将填充材料填充牙体,采用适当的技术和工具进行修整和塑形。
6.再次光固化:将光引导管对准填充的材料,再次使用光固化设备进行光固化。
按照设备说明时间进行固化。
7.修整和抛光:完成粘接后,使用合适的工具进行修整和抛光,使得修复体与周围牙体表面平滑一致。
以上是DMG普玛2.0双固化粘接流程的基本步骤。
具体操作还需根据材料说明和临床实际情况来确定。
在操作过程中,也要遵循严格的消毒和防护措施,确保操作安全和卫生。
DMG 海德汉iTNC 操作培训

DMG培训照片文件整理总结(详见机床操作说明书)目录:一.手动拆刀和装刀:1.进入手动模式。
2.按刀具表软件,进入刀具表。
3.打开编辑开关。
4.建刀库刀位以外的刀具。
5.按结束。
6.进入MDI模式。
7.调用刚建立的刀具。
8.按START键执行。
9.显示更换刀具。
10.按开门键,打开工件间门。
11.按换刀键。
12.屏幕T 开始闪烁。
13.旋转按刀按扭,听到有松夹声音。
14.注意刀具的缺口方向,放刀具到位,松开换刀按扭,听到夹紧的声音,松开刀具。
15.刀具在主轴。
16.关闭工作间的门。
17.屏幕显示更换刀具。
18.刀具已经换入。
19.确认换刀完成。
20.换刀结束,二.手动拆除刀库以外的刀具。
1.按MDI 进入2.调用零号刀具。
3.按START 键执行。
4.屏幕显示从轴上取下刀具。
5.按开门键开工作间门。
6.按换刀键。
7.屏幕T 开始闪烁。
8.用手拿住刀具。
9.旋转拆刀旋扭,拆除刀具。
10.关闭工作间的门。
11.屏幕显示 T0 。
12.屏幕显示从轴人取下刀具,按START 键完成拆刀。
三.从刀库装入刀具。
1.按手动按扭,进入手动数据输入。
2.按刀具表软键,进入刀具表。
3.把光标移到要装入刀具的一行。
4.按左边的刀库管理软键。
5.按刀具拆除,6.等待屏幕显示 1。
20(1号刀库,20号刀位),刀库已经准备好。
7.因为只是装刀,并不是真正拆除,所以按中断结束。
8.打开后面的刀库门,放入刀具,注意缺口方向在里面,完成刀库装刀。
2.把光标移到要拆除的刀具的一行。
3.按刀具管理软键。
4.按刀具拆除。
5.屏幕显示(1。
32)一号刀库32号刀位。
6.按中断软键,不清除刀具参数。
7.打开刀库门,拆除刀具。
8.手动清除刀具数据,按结束,完成刀库拆除刀具。
五.标准刀的校正Z零点。
1.把标准刀放入32号刀位。
按MDI 进入。
2.调用32号刀具。
3.按START 执行。
4.调入标准刀具。
5.在刀具表中输入,标准刀的长度和半径。
DMG临时修复系列使用说明书
DMG临时修复系列使用说明书珞塞特自动混合枪型临时冠桥材料使用说明书Luxatemp-Handmix是一款专用于简易制作临时冠桥,嵌体,高嵌体及贴面的自凝复合树脂。
两组分的材料是基于多功能甲基丙烯酸酯的,通过自动混合。
适用症临时冠桥,嵌体,高嵌体,部分冠,贴面和长期的修复体操作时间0:00至0:45 分钟将材料放入口内(包括调和时间)2:00至3:00分钟从口内取出6:00至7:00分钟完全凝固Automix 自动混合枪型的使用1. 将型号25的注射枪后部的小控制杆(1)向上推,并完全撤回滑杆(2)。
推起注射枪顶端的塑料控制杆(3),并插入弹药筒。
说明:使弹药筒底部的凹口对准25型注射枪的凹口。
紧紧地按下注射枪控制杆(3)制锁弹药筒。
2. 在安置混合插管前,以90度逆时针旋转弹药筒头帽(4),前推并取下它。
插入一个新的混合插管,使软管(5)上的凹口对准弹药筒上相应的凹口,并顺时针旋转90度直至其锁定在位置上。
3. 推动注射枪触动开关(6),通过混合插管输出材料,且可直接使用。
当首次使用弹药筒时,取出豌豆大小的材料并弃之。
在弹药筒头端留一个用过的插管,其可作为防护头帽使用。
4. 向上推型号注射枪后部的控制杆(1),并直接拉出滑杆(2)。
推起注射枪顶端的塑料控制杆(3),并取下弹药筒。
建议操作方法1. 备牙或拔牙前,用藻酸盐,硅橡胶或热塑印模材料取相应牙位所在象限的印模。
2. 备牙并干燥,在用复合树脂桩核材料修复的残根和周围组织上,涂布凡士林或类似的分离剂。
3. 选择所需的Luxatemp颜色,并将其装入注射枪内(参考Automix 自动混合枪型的使用)。
4. 将搅拌输出的材料注入备牙前的印模或热塑印模内。
从印模的咬合面至牙龈部,依次注入,直至材料稍溢出印模边缘。
为避免产生气泡,注射时需将注射头浸没于在材料中。
5. 必须在45秒内,将Luxatemp注入备牙前的印模或热塑印模内,并轻轻加压,在口内复位固定。
DMG 产品介绍

个性化解决方案
DMG 电子
_DMG 控制 _DMG Powertools
DMG 服务
_服务支持 _服务产品
可再生能源
_SunCarrier _SkyCarrier
DMG –9 个产品线 车削技术
vertical 5th generation 5th generation
DMG Asia Pacific:
DMG Latin America:
DMG México S. A. de C.V. Querétaro
DMG Ibérica S.L. Barcelona, Bilbao
DMG Asia Pacific Pte. Ltd. DMG Brasil Ltda.
Singapore
DMG North America: DMG Service Fräsen Pfronten a+f GmbH
GmbH, Pfronten
Würzburg, Denver
DMG Chicago Inc.
Itasca (Illinois)
DMG Service Fräsen Seebach DMG AUTOMATION GmbH
Milling Centres
06
MSL
Multislide CNC
Automatic Turning
07 SPEED
CNC Swisstype Automatic Turning
08 SPRINT
CNC Automatic Turning
09 GMC/GM
CNC Multi-Spindle
Turning Centres / Automatic lathes
ESTUN-20DMG交流伺服驱动器说明书

ESTUN-20DMG交流伺服驱动器说明书1. 概述本产品为ESTUN-20DMG交流伺服驱动器,公司遵循国家行业执行标准:GB7000.13-1999,确属本公司产品质量问题,自购置之日起保修期为3个(非正常使用而致使产品损坏,烧坏的,不属保修之列。
)2. ESTUN-20DMG技术特性本产品额定容量高达900mAH。
超长寿命交流伺服驱动器,高达500次以上循环使用。
采用节能,高功率,超长寿命的LED灯泡。
充电保护:充电状态显示红灯,充电满显示绿灯。
3. ESTUN-20DMG工作原理LED灯由交流伺服驱动器提供电源而发光,此交流伺服驱动器充电后可重复使用。
4. ESTUN-20DMG结构特性:(略)6. ESTUN-20DMG使用和操作充电时灯头应朝下,将手电筒交流插头完全推出,直接插入AC110V/220V电源插座上,此时红灯亮起,表示手电筒处于充电状态;当充电充满时,绿灯亮起,表示充电已充满。
ESTUN-20DMG使用时推动开关按键,前档为6个LED灯亮,中间档为3个LED灯亮,后档为关灯。
ESTUN-20DMG充满电,3个LED灯可连续使用约26个小时,6个LED灯可连续使用16个小时7.ESTUN-20DMG 故障分析与排除①使用过程中若发现灯不亮或者光线很暗,则有可能是交流伺服驱动器电量不足,如果充电后灯变亮则说明手电筒功能正常,如果充电后仍然不亮,则有可能是线路故障,可以到本公司自费维修。
②使用几年后若发现充电后灯不亮,则极有可能是交流伺服驱动器寿命已到,应及时到本公司自费更换。
8. 维修和保养在使用过程中,如LED灯泡亮度变暗时,交流伺服驱动器处于完全放电状态,为保护交流伺服驱动器,应停止使用,并及时充电(不应在LED灯泡无光时才充电,否则交流伺服驱动器极易损坏失效。
)手电筒应该经常充电使用,请勿长期搁置,如不经常使用,请在存放2个月内补充电一次,否则会降低交流伺服驱动器寿命9.ESTUN-20DMG 注意事项请选择优质插座,并保持安全规范充电操作。
- 1、下载文档前请自行甄别文档内容的完整性,平台不提供额外的编辑、内容补充、找答案等附加服务。
- 2、"仅部分预览"的文档,不可在线预览部分如存在完整性等问题,可反馈申请退款(可完整预览的文档不适用该条件!)。
- 3、如文档侵犯您的权益,请联系客服反馈,我们会尽快为您处理(人工客服工作时间:9:00-18:30)。
DMG脉冲袋式除尘器
技术说明书
鞍山机电环保集团有限公司
一、概述
DMG型脉冲袋式除尘器是我公司研发的小型袋式除尘器。
该除尘器采用0.5-0.7Mpa高压气体脉冲喷吹清灰技术,与同类产品相比,具有清灰动能大、清灰效率高的特点。
而且设备体积小、钢耗比小、结构简单、安装维护方便。
广泛应用于建材、冶金、有色、煤炭等加工行业的含尘气体净化系统。
二、DMG型脉冲袋式除尘器构造及工作原理
1、DMG型脉冲袋式除尘器构造:
本设备有以下部分组成:
箱体:包括滤袋室、花板、滤袋、袋笼、检修门。
出风系统:有2种方式。
其一,自然出风,在设备净气室留有出气口,净化后的空气自然排出。
其二,配有风机及风机配套电机。
喷吹系统:包括气包、喷吹管、脉冲阀、脉冲控制仪。
进气方式:敞开法兰式。
2、DMG型脉冲袋式除尘器工作原理:
含尘气体由进气口(敞开法兰口)进入滤袋室,含尘气体透过滤袋过滤进入净气室,由净气室排气口或由风机排出。
粉尘积附在滤袋的外表面,通过脉冲控制仪定时对布袋进行喷吹,清灰程序由脉冲控制仪定时启动脉冲阀,使气包内压缩空气由喷吹管孔喷出的空气进入滤袋,使滤袋在瞬间急剧膨胀,在气流的反向作用抖落粉尘,达到清灰的目的。
