蒸汽成型设备说明书D
全自动电加热蒸汽锅炉使用说明书
全自动电加热蒸汽锅炉使用说明书全自动电加热蒸汽锅炉是一种高效、环保的蒸汽设备,广泛应用于工业、商业和家庭等领域。
以下是全自动电加热蒸汽锅炉的使用说明书,供您参考:1. 使用前的准备在开始使用前,请确保您已经仔细阅读并理解了本说明书。
检查电加热蒸汽锅炉的外观,确保没有损坏或异常情况。
确保电源线连接良好,没有裸露的电线或损坏的插头。
检查水箱和水管连接,确保没有泄漏。
2. 电源和水源连接将电加热蒸汽锅炉的电源线连接到合适的电源插座,并确保电源已开启。
同时,确保水源已连接,且水箱已加满水。
在加水时,请确保水箱的盖子已经打开。
3. 操作面板介绍电加热蒸汽锅炉的操作面板简单易用。
通常,操作面板上会有电源开关、温度控制旋钮、加热指示灯等。
根据需要调整温度控制旋钮,设定所需的蒸汽温度。
4. 启动与关闭在确认电源和水源都已连接后,打开电源开关,电加热蒸汽锅炉将开始工作。
当加热指示灯亮起时,表示锅炉正在加热。
要关闭锅炉,只需将电源开关转到关闭位置即可。
5. 维护与保养为了保持电加热蒸汽锅炉的性能和安全性,建议定期进行维护和保养。
定期清洗水箱和内部管道,以防止水垢和污垢的堆积。
根据需要更换过滤器,以确保良好的蒸汽质量。
6. 安全注意事项使用电加热蒸汽锅炉时,务必注意安全。
请勿在设备运行时接触内部的加热元件或电线。
在使用过程中,如发现任何异常情况,如泄漏、异味、异常声音等,请立即关闭电源并联系专业人员进行检修。
以上是全自动电加热蒸汽锅炉的基本使用说明。
如有更多问题或需要更详细的操作指导,请参考产品手册或联系专业人员。
蒸汽发生器操作说明书

蒸汽发生器操作说明书蒸汽发生器操作说明书一、概述本蒸汽发生器的主要用途是进行物品的蒸汽灭菌。
本蒸汽发生器操作简便,稳定性强,具有自我保护及自我诊断功能。
同时,本蒸汽发生器可带有记录打印功能,以更好地保证灭菌的数据可追溯。
二、操作步骤1. 打开蒸汽发生器的电源开关,启动设备。
设备会进行自我检查,确保所有零部件均正常运作。
2. 将灭菌品装入指定的容器中,并对容器进行透气装置的封闭。
3. 将灭菌品放置到本蒸汽发生器的蒸汽灭菌室内。
4. 根据灭菌品的要求,选择相应的灭菌程序,并进行设置。
5. 等待程序设定时间结束后,会自动弹出提示,并发出蜂鸣声。
6. 在确认蒸汽灭菌程序完全结束后,关闭蒸汽发生器的电源开关,关机。
三、注意事项1. 严禁在设备处于启动状态下,随意打开蒸汽发生器的门,如需打开蒸汽发生器的门,应事先停止设备工作。
2. 启动设备时,应确保电源稳定,并仔细检查设备各部件是否正常运转,防止出现操作不当等情况造成设备损坏或人员伤害。
3. 灭菌品的装载应符合规定要求,以保证灭菌效果。
4. 使用过程中,应注意设备及其周边环境的干净卫生,防止灰尘及其他杂质进入设备。
5. 在使用过程中,如设备发生任何异常情况,应及时关闭设备,排除故障,并在确认设备正常后再进行操作。
6. 本设备应由专业人员进行安装、调试和维护保养,确保设备的正常运作。
7. 禁止对设备进行任何未经授权的改装或维护,以免影响设备的安全性和可靠性。
以上就是蒸汽发生器的操作说明,希望能对各位用户有所帮助。
如有任何疑问或需要帮助,请联系我们的客服人员。
蒸汽发生器操作说明
引言概述:蒸汽发生器是一种重要的工业设备,广泛应用于电力、化工、钢铁、纺织等行业。
它可以将液体转化为蒸汽,提供动力和热能。
本文将详细介绍蒸汽发生器的操作说明,包括设备介绍、操作前的准备工作、操作步骤、常见问题及解决方法。
正文内容:一、设备介绍1.蒸汽发生器的原理及分类2.蒸汽发生器的组成结构3.蒸汽发生器的主要部件功能介绍二、操作前的准备工作1.检查设备运行状况2.检查蒸汽发生器的供水系统3.检查蒸汽发生器的燃烧系统4.检查蒸汽发生器的安全装置三、操作步骤1.启动蒸汽发生器1.1.打开燃烧器并点火1.2.观察燃烧情况并调整燃烧器参数1.3.逐渐加热蒸汽发生器2.调节蒸汽发生器的操作参数2.1.控制燃气或燃油供应2.2.调节蒸汽发生器的蒸发量2.3.调节蒸汽发生器的压力2.4.监测和调节蒸汽发生器的水位3.关闭蒸汽发生器3.1.停止燃烧3.2.清理蒸汽发生器内部3.3.关闭蒸汽发生器的供水和排污系统四、常见问题及解决方法1.蒸汽发生器压力异常1.1.检查蒸汽发生器的压力传感器1.2.清洗蒸汽发生器的水位计2.蒸汽发生器温度异常2.1.检查燃烧器的工作状态2.2.检查蒸汽发生器的燃气或燃油供应3.蒸汽发生器水位异常3.1.检查蒸汽发生器的供水系统3.2.检查水位控制器的工作状态四、安全注意事项1.注意蒸汽发生器的使用场所的通风情况2.禁止在蒸汽发生器附近带有易燃物品3.定期进行蒸汽发生器的维护保养总结:蒸汽发生器的操作涉及到多个方面的知识,包括设备介绍、操作前的准备工作、操作步骤、常见问题及解决方法等。
正确的操作蒸汽发生器可以确保设备的正常运行,保障工业生产的顺利进行。
同时,操作时需要注意安全事项,遵守相关规定,确保人员和设备的安全。
通过本文的操作说明,相信读者能够更好地理解和掌握蒸汽发生器的操作方法,实现安全、高效的使用。
海天 800P-Z 多功能电热蒸汽发生器 操作手册说明书

目录一、产品简介 (1)1.1产品型号命名规则 (1)1.2功能代号命名规则 (1)1.3产品铭牌 (3)1.4产品外观 (4)1.5技术规范 (8)1.6产品设计执行标准 (10)1.7安全事项 (10)1.8注意事项 (12)1.9日常检查和保养 (14)二、控制面板介绍 (15)2.1控制面板概述 (15)2.2控制面板及安装支架结构尺寸 (16)2.3控制面板操作说明 (18)2.4参数设置方法 (18)2.5功能码区内与区间的切换方法 (19)2.6面板显示内容介绍 (20)三、安装接线 (21)3.1外围接线图 (21)3.2变频器安装 (23)3.3接线 (23)3.4控制端子功能简介 (26)3.5主回路的电压、电流和功率的测量方法 (30)3.6功率回路推荐配线 (32)3.7保护导体(地线)的截面积 (32)3.8总体接线示意图 (33)3.9传导和辐射干扰对策 (34)四、简易操作与运行指南 (40)4.1产品基本知识 (40)4.2简易操作指南 (41)4.3基本控制运行指南 (44)五、功能参数 (50)5.1基本参数 (50)5.2运行控制 (60)5.3多功能输入输出端子 (69)5.4模拟量输入输出 (78)5.5多段速度控制 (84)5.6辅助功能 (89)5.7故障与保护 (94)5.8电机参数 (99)5.9通讯参数 (104)5.10PID参数 (105)5.11转矩控制参数区 (111)附录1 常见故障处理 (114)附录2 产品一览表及结构型式一览表 (118)附录3 制动电阻推荐选型表 (122)附录4 通讯手册 (123)附录5 供水系统参考连线图 (135)附录6 功能码速查表 (138)附录7 输入滤波器型号及尺寸 (169)升级记录: (174)敬告用户: (175)产 品 简 介一、产品简介本使用手册简要介绍了E800系列变频器的安装接线、参数设定及操作使用的有关事项,务请妥善保管。
小型蒸汽机的使用方法说明书

小型蒸汽机的使用方法说明书
小型蒸汽机使用方法说明书
1. 准备工作
a. 确保蒸汽机处于平稳的表面上,以防止倾倒或滑动。
b. 确保蒸汽机的水箱已经填满适量的水,并且水位在指示线范围内。
c. 确保蒸汽机的电源线已插入可靠的电源插座,并且电源开关处于关闭状态。
2. 启动蒸汽机
a. 打开蒸汽机的电源开关,待机指示灯将亮起。
b. 蒸汽机将开始加热水箱中的水,并产生蒸汽。
c. 等待几分钟,直到蒸汽机完全加热并达到所需的蒸汽压力。
3. 使用蒸汽机
a. 根据需要选择适当的蒸汽喷射头或配件,并将其安装在蒸汽机上。
b. 按下蒸汽机的扳机按钮或开关,开始释放蒸汽。
c. 将蒸汽喷射头或配件对准需要清洁或处理的表面,均匀地移动蒸汽机以覆盖整个区域。
d. 根据需要调整蒸汽喷射的角度和强度,以获得最佳效果。
4. 关闭蒸汽机
a. 停止使用蒸汽机前,先释放蒸汽喷射头或配件中的压力。
b. 关闭蒸汽机的电源开关,待机指示灯将熄灭。
c. 拔出蒸汽机的电源线,并将其存放在干燥的地方。
5. 清洁和维护
a. 在使用完蒸汽机后,等待其冷却后再进行清洁和维护。
b. 清洁蒸汽机的外壳和配件,使用湿布擦拭,并确保不进水。
c. 定期清洗蒸汽机的水箱,以确保水质清洁,避免堵塞和细菌滋生。
d. 根据蒸汽机的说明书,定期更换过滤器或其他易损件。
请注意:在使用蒸汽机时,务必遵循安全操作规范,并遵循制造商的说明和警告。
机械式蒸汽再压缩(MVR)蒸发器操作说明书

M340 PLC拥有卓越的运算能力,高性能,每毫秒处理7K条指令,4MB的超大程序内存,总共可处理70K条指令。全新的内存管理,即插即载型的储存卡,使系统的升级、维护更加便捷。拥有强大的开发功能,包含6种环境语言。处理器上的USB接口可以方便高效的与编程PC进行连接,还可以通过点对点模式或者局域网连接到以太网。
1、热效率高,节省能源,比能耗低,蒸发一顿水的能耗大约是传统蒸发器的1/6到1/5.运行成本大大降低。
2、低运行成本:由于能耗低,相应整个蒸发器运行成本也大大降低,只有传统蒸发器的三分之一到二分之一。
3、温差小,不容易腐蚀换热管,也不容易结垢,对热敏性的物料具有很好的蒸发效果。延长设备使用寿命。
4、智能化,本压缩机可以通过软件很容易的监控压缩机的各个运行参数,而且可以得出分析报告。
天然有机产品工业
发酵液
谷氨酸、赖氨酸、甜菜碱
胶与明胶
技术明胶、食用明胶、皮胶
提取物
橡胶提取物
粘稠水
屠宰场废水、渔业加工废水、果皮压榨水、纤维压榨水、纤维板压榨水
有机废水
洗涤水、淀粉废水
2.3 设备结构和原理
机械式蒸汽再压缩(MVR)蒸发器,其原理是利用高能效蒸汽压缩机压缩蒸发产生的二次蒸汽,把电能转换成热能,提高二次蒸汽的焓,被提高热能的二次蒸汽打入蒸发室进行加热,以达到循环利用二次蒸汽已有的热能,从而可以不需要外部鲜蒸汽,通过蒸发器自循环来实现蒸发浓缩的目的。通过PLC、工业计算机(FA)、组态等形式来控制系统温度、压力、马达转速,保持系统蒸发平衡。从理论上来看,使用MVR蒸发器比传蒸发器节省80%以上的能源,节省90%以上的冷凝水,减少50%以上的占地面积。设备原理意图如下:
成型机操作说明_2

開機流程
25).首件檢查
確
認成品品質(logo、菊心…等)PE膜顏
色等后 ,正式生產堆棧(圖二五)(圖
二六)
(圖二五)
26).注意事項
I.原料設定比例 ,須特別注意色母格數
(圖二七)
II.運轉操作中
需注意取出機動作 ,避免撞到頭部
I I I . 運轉操作中勿觸摸加熱料缸和射嘴
(圖二六)
GPPS HIPS
色母
(圖二七)
本資料為博錸科技內部授課講義為專有智產 , 非經書面許可 ,請勿將資料外流予非公司同仁。
關機流程
1).將料桶內原料生產完 ,或將料桶內原料
卸完(圖一)
下料口閥門
(圖一)
2).沖洗射出機料缸
將射座後退,使用約 600g PP 原料沖洗
(圖二)
(圖二)
3).進入『溫度』 畫面 ,按【1】將 「保溫切換」設定為保溫(圖三)
下料口閥門
(圖十六)
17). 自動樹脂交替
進入『沖洗』 畫面, 按【F1】 開始自動沖洗
(圖十七) 十八)
※沖洗次數設定以5次為宜 須沖洗至原料可用為止
F1
沖洗 (圖十七)
(圖
低壓手動
※
沖洗次數
(圖十八)
本資料為博錸科技內部授課講義為專有智產 , 非經書面許可 ,請勿將資料外流予非公司同仁。
開機流程
13).組合機電源OFF
關閉捆包機及組合機電源
※
清除組合機上殘留廢片(圖十三)
14).填寫『射出成型停機作業點檢確認表』 (圖十四)
(圖十三) (圖十四)
本資料為博錸科技內部授課講義為專有智產 , 非經書面許可 ,請勿將資料外流予非公司同仁。
DS设计说明_1200L热处理系统 Design specification of heated-treater

×××有限公司 设计说明——0051200L 热处理罐设计说明书Design specification of Heated-treater设备名称/Product name 1200L 热处理罐 制造厂商/Manufacturer××××××有限公司 使用单位/User××××××有限公司文件编号/Document number 起草日期/Draft date 2012 版本号/Version numberA/0Un Re gi st er ed第1页/共10页目录Content1 概述 (Overview )..............................................................................................................................2 2 目的及范围 (Purpose and range )....................................................................................................2 3 工艺概述(Process description ).........................................................................................................2 4 参考文件(Refer to document )..........................................................................................................2 5 项目描述(Refer to document ). (3)5.1 设计参数(Design parameter) (3)5.2 配件清单(Parts list).....................................................................................................................4 5.3 结构设计(Physical design).........................................................................................................5 5.4 工艺设计(Process design)..........................................................................................................6 5.5 制造工艺(Manufacturing process)..............................................................................................8 6 附件(Attachment).. (9)Un Re gi st er ed第2页/共10页1 概述 (Overview )山西亚宝药业集团公司在芮城新建工业园,拟生产小容量注射剂及其所用中药提取液,根据要求购买热处理罐1200L 一台。
海尔 G100308HB10S 10公斤智能蒸汽烘滚筒洗烘一体机 使用说明书

警告滚筒全自动洗衣机滚筒洗干一体机智能家电操控智慧场景定制智家商城购物家电报装报修警告/注意只能洗涤可以机洗的衣物,如有疑问请遵从衣物上的洗涤指南标识。
禁止洗涤、烘干染有挥发性或可燃性物质 ( 如稀释剂、汽油 ) 的衣物。
禁止洗涤雨衣、车罩、橡胶枕头、浴帽等防水性衣物以及地毯,以免异常振动或损坏衣物。
禁止将易燃物品放入筒内或靠近洗衣机放置。
不要靠近洗衣机使用可燃性喷雾剂。
切勿超过洗衣机最大装载量,超过最大装载量会损坏衣物和洗衣机的部件, 请遵守程序设定的最大容量。
机器运行时,不要打开分配器盒,否则洗涤剂溶液可能会溅出来,接触到眼睛和皮肤。
机门设有自锁保险装置,当洗衣机处于安全状态(水位低于观察窗下沿一定距离,筒内温度低于55℃,内筒不转)时,方可对机门进行解锁操作,不要强行开门,以免损坏机门或烫伤。
机器洗涤、烘干时,请勿拔下电源插头或切换电源,不要打开排水过滤器门等。
在高温洗涤或烘干运行及结束后的短时间内,不要触碰内筒、金属部件、窗屏、主控板及衣物的金属钮扣部分。
在排热水时,不要触碰排水管。
请避免硬物撞击玻璃部件,以防止玻璃碎裂而导致受伤。
洗衣机不要套塑料防尘罩,以免潮气聚集。
每次洗涤完成时,应关闭水龙头、拔下电源插头,确保洗衣机断水断电,同时检查观察窗垫夹层是否有小物件,将表面清理干净。
打开分配器盒时,注意不要碰到部件的边缘,同时注意保护儿童,以免误伤。
不要坐在或靠在打开的门体上,机器可能会翻倒。
请勿在洗衣机上放置物品,尤其不要将任何热的、重的物品(如盛有热水的壶)放在洗衣机上。
请勿攀爬到洗衣机上部。
爬到洗衣机上, 台面板可能会断裂。
请勿自行拆卸、修理或改装洗衣机,请联系本公司售后服务部门进行维修,只可使用原装配件。
提示禁止操作事项提示必须执行的事项本产品为家用洗衣机,只适用于一般家庭的日常使用,不适用于其它商业用途的有偿、大量清洗等。
为了您能更好使用本产品,防止人身伤害及物品损坏事故,请重点关注安全注意事项内容,遵守本说明书中有以下标志符号的内容。
Sporlan 蒸汽冷却控制器操作手册说明书
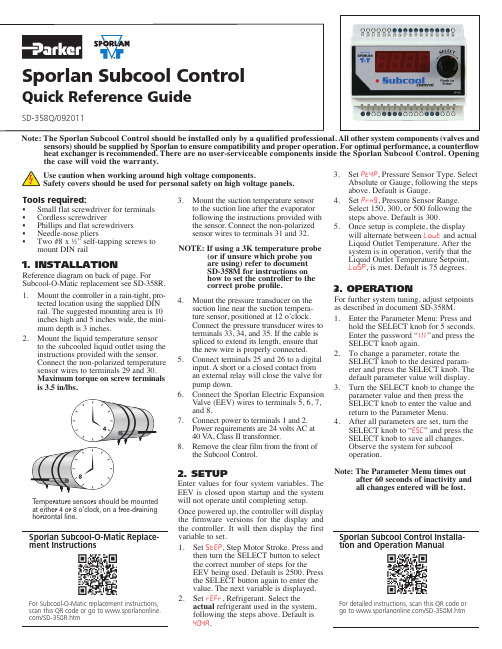
Sporlan Subcool Control Installa-tion and Operation Manual For detailed instructions, scan this QR code orgo to /SD-358M.htmsensors) should be supplied by Sporlan to ensure compatibility and proper operation. For optimal performance, a counterflow heat exchanger is recommended. There are no user-serviceable components inside the Sporlan Subcool Control. Opening the case will void the warranty.1. INSTALLATIONReference diagram on back of page. ForSubcool-O-Matic replacement see SD-358R. 1. Mount the controller in a rain-tight, pro-tected location using the supplied DIN rail. The suggested mounting area is 10 inches high and 5 inches wide, the mini-mum depth is 3 inches.2. Mount the liquid temperature sensorto the subcooled liquid outlet using the instructions provided with the sensor. Connect the non-polarized temperature sensor wires to terminals 29 and 30. Maximum torque on screw terminals is 3.5 in/lbs.Use caution when working around high voltage components.Safety covers should be used for personal safety on high voltage panels. Tools required:• Small flat screwdriver for terminals • Cordless screwdriver• Phillips and flat screwdrivers • Needle-nose pliers• Two #8 x ½” self-tapping screws tomount DIN rail2. SETUPEnter values for four system variables. The EEV is closed upon startup and the system will not operate until completing setup.Once powered up, the controller will display the firmware versions for the display and the controller. It will then display the first variable to set.1. Set StEP , Step Motor Stroke. Press andthen turn the SELECT button to select the correct number of steps for theEEV being used. Default is 2500. Press the SELECT button again to enter the value. The next variable is displayed.2. Set reFr , Refrigerant. Select theactual refrigerant used in the system, following the steps above. Default is 404A .Sporlan Subcool-O-Matic Replace-ment InstructionsFor Subcool-O-Matic replacement instructions, scan this QR code or go to /SD-358R.htm3. Mount the suction temperature sensorto the suction line after the evaporator following the instructions provided with the sensor. Connect the non-polarized sensor wires to terminals 31 and 32. 4. Mount the pressure transducer on thesuction line near the suction tempera-ture sensor, positioned at 12 o’clock. Connect the pressure transducer wires to terminals 33, 34, and 35. If the cable is spliced to extend its length, ensure that the new wire is properly connected.5. C onnect terminals 25 and 26 to a digitalinput. A short or a closed contact from an external relay will close the valve for pump down.6. Connect the Sporlan Electric ExpansionValve (EEV) wires to terminals 5, 6, 7, and 8.7. Connect power to terminals 1 and 2.Power requirements are 24 volts AC at 40 V A, Class II transformer.8. Remove the clear film from the front ofthe Subcool Control.3. OPERATIONFor further system tuning, adjust setpoints as described in document SD-358M. 1. Enter the Parameter Menu: Press andhold the SELECT knob for 5 seconds. Enter the password “111 ” and press the SELECT knob again.2. To change a parameter, rotate theSELECT knob to the desired param-eter and press the SELECT knob. The default parameter value will display. 3. Turn the SELECT knob to change theparameter value and then press the SELECT knob to enter the value and return to the Parameter Menu.4. After all parameters are set, turn theSELECT knob to “ESC ” and press the SELECT knob to save all changes. Observe the system for subcool operation.Note: The Parameter Menu times out after 60 seconds of inactivity andall changes entered will be lost.3. Set Pt4P , Pressure Sensor Type. SelectAbsolute or Gauge, following the steps above. Default is Gauge.4.Set Prng, Pressure Sensor Range.Select 150, 300, or 500 following the steps above. Default is 300.5. Once setup is complete, the displaywill alternate between LovT and actual Liquid Outlet Temperature. After the system is in operation, verify that the Liquid Outlet Temperature Setpoint, LoSP , is met. Default is 75 degrees.T emperature sensors should be mounted at either 4 or 8 o’clock, on a free-draining horizontal line.NOTE: If using a 3K temperature probe(or if unsure which probe you are using) refer to document SD-358M for instructions on how to set the controller to the correct probe profile.Parker Hannifin Corporation Sporlan Division206 Lange Drive • Washington, MO 63090 USA phone 636 239 1111 • fax 636 239 © 2011 Parker Hannifin Corporation092011 / SD-358QCounter Flow Brazed PlateHeat ExchangerDry Contacts (T4)Evap. Outlet Temp. (T1)Liquid Outlet Temp. (T2)White Green Black24V AC/DCRS485White B-GroundA+Suction Temperature SensorLiquid Temperature Sensor(optional)Temperature Sensor Warm Liquid In Pressure TransducerLiquid Inlet Temp. (T3)L1L2Liquid Line Solenoid ValveEEVSubcooled Liquid Out 10”-14”minimize 1”- 2” idealPumpdown Relay10”-14”Note: Use caution when working around high voltage components. Safety covers should be used for personal safety on high voltage panels.*Refer to the heat exchanger manufacturer’s installation/orientation instructions.Note: Piping and sensor insulation not shown.*。
WhisperGen模型PPS16 12MD和PPS16 24MD蒸汽机器件维护指南说明书
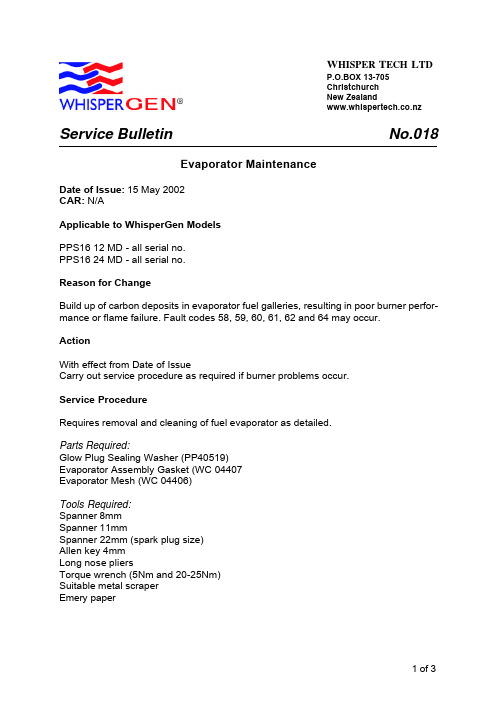
Service Bulletin No.018Evaporator MaintenanceDate of Issue: 15 May 2002CAR: N/AApplicable to WhisperGen ModelsPPS16 12 MD - all serial no.PPS16 24 MD - all serial no.Reason for ChangeBuild up of carbon deposits in evaporator fuel galleries, resulting in poor burner perfor-mance or flame failure. Fault codes 58, 59, 60, 61, 62 and 64 may occur.ActionWith effect from Date of IssueCarry out service procedure as required if burner problems occur.Service ProcedureRequires removal and cleaning of fuel evaporator as detailed.Parts Required:Glow Plug Sealing Washer (PP40519)Evaporator Assembly Gasket (WC 04407Evaporator Mesh (WC 04406)Tools Required:Spanner 8mmSpanner 11mmSpanner 22mm (spark plug size)Allen key 4mmLong nose pliersTorque wrench (5Nm and 20-25Nm)Suitable metal scraperEmery paperW HISPER T ECH L TDP.O.BOX 13-705ChristchurchNew ZealandRefer to User manual and heed all warnings, safety precautions and instruc-tions related to removal of evaporator and associated parts1.0 TO REMOVE EVAPORATOR1.1 Stop WhisperGen and wait until STANDBY indicator on control panel illuminates1.2 Set ENABLE STARTS mode to 0 to prevent unintentional starting1.3 Turn Fuel Valve to OFF1.4 Remove Enclosure Lid and wait for engine to cool 1.5 Remove glow plug (Refer to User Manual - Replacing Glow Plug)1.6 Remove FID (Refer to User Manual - Replacing FID)note - before removing FID measure installed height to aid in refitment1.7 Remove fuel line at fitting on evaporator1.8 Loosen the four screws holding evaporator to burner head 1.9 Lift evaporator out of burner!CAUTION - HOT SURFACESContact with some internal parts of WhisperGen may result in burnsProceed with careEVAPORATOR ASSEMBLY2.0 CLEAN EVAPORATORDismantle Evaporator as follows:2.1 Carefully prise evaporator cap from evaporator body.2.2 Remove mesh from evaporator body with long nose pliers, this may be difficult. due to carbon build and usually results in damaging mesh.Clean Evaporator as follows:2.3 Scrap carbon deposits from evaporator body and from inside of evaporator cap with a suitable scraper. Ensure that all areas are clean including recesses in evapora-tor body.2.4 When all deposits are removed finish cleaning with emery paper and rinse clean with suitable solvent (Methylated spirits or similar).Assemble Evaporator as follows:2.5 Fit new mesh into recess in evaporator body, ensuring mesh is pushed fully down and is a good fit with body2.6 Fit Cap over the top of the mesh and press down firmly until evaporator body is flush with end of cap3.0 REFIT EVAPORATOR3.1 Fit evaporator assembly into burner with new gasket, ensure fuel connection is in correct orientation.3.2 Apply anti-sieze compound sparingly to four retaining screws and refit - do not tighten fully.3.3 Fit fuel line to evaporator fitting ensure it is secure and no leakage occurs.3.4 Fit FID, ensuring it slides freely into burner and tighten retaining clip.3.5 Tighten evaporator retaining screws to 5Nm.3.6 Plug FID wires (blue) back together.3.7 Fit glow plug with new sealing washer and and torque to 20 - 25 Nm.3.8 Attach glow plug wire (pink) securely.3.9 Fit Enclosure Lid.Before starting WhisperGen set ENABLE START mode back to original setting.Turn fuel valve to ON.WhisperGen may now be operated normally.。
Getinge GSS610H蒸汽灭菌器使用指南说明书

Maximize efficiency and throughputwith the high-capacityGetinge GSS610H Steam SterilizerThis document is intended to provide information to an international audience outside of the US.Technologically advancedand highly integratedOur sterilizers integrate with your existing sterilization department to optimize throughput. They deliver consistent and reliable results while maintaining a low and predictable total cost of ownership.We designed the high-capacity Getinge GSS610H Steam Sterilizer without compromise. Getinge GSS610H automatically optimizes process time and media consumption for each load. It is compatible with both Getinge and Hupfer Känguruh Loading Systems to maximize the return on your sterilization investment.Getinge GSS610H is built on a foundation of trust, with nearly 90 years experience in steam sterilization. We understand your needs, and deliver the reliability, precision, and cost-effective operation needed to make your facility successful.A clean steam process improves the life of your instrumentsDissolved minerals in steam can shorten the life span of instruments through staining, pitting, and corrosion. Our clean steam adapted system, with premium stainless steel components as standard, reduces the long-term financial impact of premature instrument replacement.Faster throughputAutomated start-up and fast processing times ensure that your facility has a steady supply of sterilized instruments ready for use.Optimized resourcesThe Getinge GSS610H Sterilizer controls the temperature of thedrain water to minimize cooling water consumption. This optimizes utility consumption for every cycle.Robust and well-engineeredA modular design makes the sterilizer easy to access, streamlining routine service or parts replacement.High capacity for increased throughputProcess a high volume of instruments in short time. The spacious chamber of the Getinge GSS610H Sterilizer can handle large loads with ease.Hands-free loading and unloadingAutomatic loaders and unloaders improve efficiency and safety.Long-term success and satisfactionMaximize the value of your investmentThe GSS610H Sterilizer will keep yoursterilization department operating at peak performance, maximizing uptime and efficiency.Every triggered alarm comes with clear on-screen directions for what action to take.Enhanced workflowimproves efficiencyHighly intuitive user interfaceThe GSS610H Sterilizer features an innovative, user-friendly interface display. The intuitive design requires less training, and can be easily operated by staff at all experience levels.Large 10-inch high-resolution screens are easy to read and monitor, even at a distance. These screens display the most critical process information clearly and logically, including remaining cycle time and start-up selections.Automatic start-up / shut-down featureAn automatic start-up system effectively reduces the waiting time beforethe first process starts. Preheating the chamber jacket prior to system testing can effectively add an additional sterilization cycle per shift, boosting overall throughput.Hygienic, easy-to-clean designHigh-quality polished stainless steel surfaces feature smooth, rounded corners. A flushed chamber door and few seams facilitate fast and effective cleaning.RFID-enabled accountabilityAn RFID electronic log-in feature controls user access. This uses the same security coding employed elsewhere in the facility to save time, enhance the workflow, and improve tracking.Status at a glance: it’s easy to see the time remaining, even from a distance.The user interface provides clear, un c luttered information – only what you need at any particular stage, nothing more.Clear, easy-to-understand help forproblem solving or accessing advanced features are available directly from the user interface.The GSS610H Sterilizer was engineered in cooperation with sterilizer operators and CSSD managers to create an intuitive and efficient user interface for users at all experience levels.Getinge Automatic Loader / Unloader GL610Getinge GSS610H is compatible with the Hupfer Känguruh Loading System.Getinge Smart Trolley for loading and unloading.Choose the system that best maximizes your department’s efficiency and offers best ergonomics for the operator.Smart Trolleys move heavy loads with easeGetinge Smart Trolleys are easy to maneuver and clean, featuring effortless semi-automatic loading and unloading.Automatic loading and unloading improves efficiencyThe Getinge Automatic Loader / Unloader automatically loads and unloads goods as soon as the sterilizer is ready. The system optimizes the handling of goods without the need for direct supervision from the operator. It minimizes manual handling to support an ergonomic workflow for the staff.Optimizing your investmentGetinge GSS610H is compatible with the Hupfer Känguruh Loading System, improving the efficiency of your department and optimizing your capital investment.With the GetingeGSS610H Sterilizer, you have the choice of automatic or manual loading systems.Efficient loading and unloadingFor ergonomic handling of sterile goodsThe best practices of your central sterile department are on the front line in the never-ending battle against hospi-tal acquired infections (HAIs). The ability to efficiently document and recall sterility data provides assurance for regulatory agencies, accreditation organizations, and an increasingly well-informed public.Access data on demandGetinge Online is your personal web portal that delivers on-demand access to equipment data from your computer or smartphone. This highly secure and encrypted online tool provides real-time and historical performance data, cloud storage, spare parts ordering information, preventive maintenance guidance, and troubleshooting regimens.Capture and store real-time cycle data Getinge GSS610H Steam Sterilizers integrate with T-DOC, Getinge’s top-of-the-line sterile supply management and traceability solution. T-DOC captures and stores real-time cycle data and allows for reporting on equipment perfor-mance. This is a valuable source of information for CSSD managers and hospital administrators to help quickly remediate any issues, improve production planning, and verify compliance.Efficient data management streamlines workflowand ensures accountabilitySafely enclose devices for sterilizationSterilization rolls and pouches easily and safely enclose medical devices intended to be sterilized in steam, ethylene oxide or formaldehyde sterilizers.When used in combination with Getinge Rotary Sealers, the rolls and pouches are sealed in an automated process that ensures repeatable and effective sealing results.Efficiently seal rolls and pouchesUser-friendly Getinge Rotary Sealers improve operator efficiency while delivering a high-quality seal. They are designed to efficiently, effectively, and reliably seal rolls and pouches made of medical paper or non-woven materials.Comprehensive cleaning and sterility assurance indicatorsRoutine use of our Getinge Assured Indicators provides you with independent verification that the sterilization process is effective and consistent. The indicators can be used as part of a sterilization audit, or for routine performance monitoring to eliminate “judgement calls” about performance.The Getinge Bowie-Dick Type Test is to be used for daily testing of the mechanical function of your vacuum-assisted steam sterilizer, ensuring that its air removal system is working as expected.Getinge CleanOur Getinge Clean Chamber Foam makes caring for your sterilizer easier. The foam makes cleaning less time-consuming and is easily wiped off with a wet cloth. The product leaves the chamber clean and free of limestone, mineral deposits, and odors. Even rust can be removed.Packaging and sealers– Providing the right microbial barrierGetinge Assured Indicators– Ensuring accurate and consistent resultsIn addition to the Bowie-Dick Test packs, the comprehensive Getinge Assured Sterility Assurance Portfolio includes:• Wash monitoring• • Sterilization tapes • Biological indicators• Incubators• Chemical indicators• Batch load monitoring systemGetinge Pack Sterilization Pouches and Rolls used in combination with our rotary sealers provide an effectivemicrobial barrier. Together, they help you keep patients safe by significantly minimizing the risk of recontamination after sterilization.Are you certain that your reprocessed instruments and equipment are clean and sterile? With Getinge Assured Indicators, you can be certain that your disinfection and sterilization equipment is consistently in full compliance with all requirements and standards.Steam FormaldehydeStandard rolls ••Standard pouches ••Self-seal pouches••Standard pouchGetinge Pack Sealer Standard rollGetinge ProsealOptimizing your equipment’s services is often an un-tapped opportunity to maximize productivity and reduce costs. A Getinge Care service offering will ensure that your equipment always performs at peak levels allowing you to focus on saving lives.Prevent issues before they ariseWhether you’re purchasing a new steam sterilizer or an entire CSSD, we’ll be there to support you. By following a routine preventive maintenance schedule, Getinge Care keeps things running smoothly, withminimal interruption. If something should need urgent attention, our certified field service representatives will be there to promptly support you and resolve the issue. With a Getinge Care package, you can forecast your costs for the full life cycle of your equipment, minimizing unplanned expenses. Our financial services team can analyze your needs and numbers to deliver a servicepackage that gives you the best output for your investment. Ask your Getinge representative for more information.Getinge CareFor maximum uptimeTechnical dataThe sterilizer is available in four different chamber depths* B asket size SPRI: 585 x 395 x 195 mm / 23 x 15.55 x 7.68 in (L x W x H)ISO: 600 x 400 x 200 mm / 23.6 x 15.75 x 7.87 in (L x W x H) ** STU size: 600 x 300 x 300 mm / 23.6 x 11.81 x 11.81 in (L x W x H)*** See product specification to find the correct loading equipment for the usable space.10141521Chamber width mm / in. 672 / 26.46 672 / 26.46672 / 26.46672 / 26.46Chamber height mm / in. 1,080 / 42.521,080 / 42.521,080 / 42.521,080 / 42.52Chamber depth mm / in. 1,040 / 40.94 1,400 / 55.121,540 / 60.632,100 / 82.68Capacity baskets*pcs 81212 ***16Capacity STU**pcs9121218Getinge is a global provider of innovative solutions for operating rooms, intensive care units, sterilization departments and for life science companies and institutions. Based on our firsthand experience and close partnerships with clinical experts, healthcare professionals and medtech specialists, we are improving the everyday life for people – today and tomorrow.This document is intended to provide information to an international audience outside of the US.Maquet GmbH ·KehlerStr.31·76437Rastatt·Germany·+497222932-0·**********************2972-g e t i n g e -g s s 610h -b r o c h u r e -200429-e n -n o n u s · 04/2020 · G e t i n g e i s a r e g i s t e r e d T r a d e m a r k · C o p y r i g h t b y G e t i n g e · S u b j e c t t o m o d i fi c a t i o n s d u e t o t e c h n i c a l d e v e l o p m e n t .。
智能电动蒸汽熨斗产品说明书

智能电动蒸汽熨斗产品说明书一、产品概述智能电动蒸汽熨斗是一款现代化的家用电器,通过产生蒸汽来帮助用户快速、方便地熨烫衣物。
本产品采用高品质材料制造,拥有多项智能功能,旨在为用户带来更好的熨烫体验。
二、产品特点1. 蒸汽产生:智能电动蒸汽熨斗使用内置的蒸汽发生器,能够快速产生高温高压的蒸汽,使衣物熨烫更加顺滑。
2. 温度控制:产品配备温度控制装置,可以根据不同面料的需求进行温度调节,确保熨烫的安全性和效果。
3. 自动关机:为了保障使用安全和能源节约,智能电动蒸汽熨斗具有自动关机功能,当用户长时间不使用时,熨斗会自动关闭。
4. 独特设计:产品外观设计时尚简约,手感舒适,采用人体工程学设计原理,便于用户握持和操作。
5. 多功能使用:智能电动蒸汽熨斗不仅可以用于常规衣物的熨烫,还可以用于窗帘、床单等大件物品的烫平。
6. 安全性能:产品通过严格的安全认证,拥有过热保护功能,避免了长时间使用过热引起的安全隐患。
三、产品使用方法1. 准备工作:将智能电动蒸汽熨斗连接到电源插座,并确认电源指示灯亮起,表明设备已经正常供电。
2. 加水操作:打开产品顶部的加水盖,将适量清水倒入水箱内,并确保加水盖紧闭。
3. 温度调节:根据衣物的面料情况,选择合适的温度档位,通过旋钮使温度逐渐升高。
4. 准备熨烫:当产品温度升至设定的温度时,熨斗顶部的指示灯会亮起,表明已经可以开始熨烫衣物。
5. 开始熨烫:将需要熨烫的衣物平放在熨斗板上,利用熨斗板的重量和蒸汽的作用,慢慢地将衣物烫平。
6. 结束使用:完成熨烫后,将电源开关关闭,断开电源插座。
待产品冷却后,可以进行清洁和存储。
四、产品注意事项1. 使用前请仔细阅读产品说明书,确保正确操作和使用。
2. 确保使用环境通风良好,避免熨烫过程中的烟雾和水汽对人体和衣物造成伤害。
3. 使用时请避免将熨斗板接触到人体,以免烫伤。
4. 在清洁和保养产品时,请务必断开电源插座,避免电击等意外事故发生。
KARCHER SC 1702 说明书

目录1、设备介绍----------------------------------------------------------------------22、安全使用信息---------------------------------------------------------------43、操作----------------------------------------------------------------------------5 打开设备外包装--------------------------------------------------------------------5安装附件----------------------------------------------------------------------------5在水箱内注入操作用水------------------------------------------------------------7启动设备----------------------------------------------------------------------------7调节蒸汽喷出量--------------------------------------------------------------------7为设备续加操作用水---------------------------------------------------------------8 锁住设备----------------------------------------------------------------------------9关闭设备----------------------------------------------------------------------------9储存设备----------------------------------------------------------------------------94、操作信息---------------------------------------------------------------------9 清洁布制品-------------------------------------------------------------------------9清洁地毯或漆器表面-------------------------------------------- ------------------9清洁玻璃--------------------------------------------------------------------------105、如何使用配件-------------------------------------------------------------106、保养与维护-----------------------------------------------------------------12 清洁水箱---------------------------------------------------------------------------13保护绒布套------------------------------------------------------------------------147、故障排除--------------------------------------------------------------------148、安全部件---------------------------------------------------------------------15 压力控制开关-----------------------------------------------------------------------15低水位保护装置--------------------------------------------------------------------15安全保护装置-----------------------------------------------------------------------15安全锁------------------------------------------------------------------------------159、通用信息----------------------------------------------------------------------15 保修----------------------------------------------------------------------------------15废旧设备处理-----------------------------------------------------------------------1610、附件与零配件----------------------------------------------------------1611、技术参数----------------------------------------------------------------17在没有详细阅读产品使用说明,并了解使用情况之前,请不要使用设备,以免发生意外事故。
Philips PerfectCare Viva 蒸汽电钢说明书
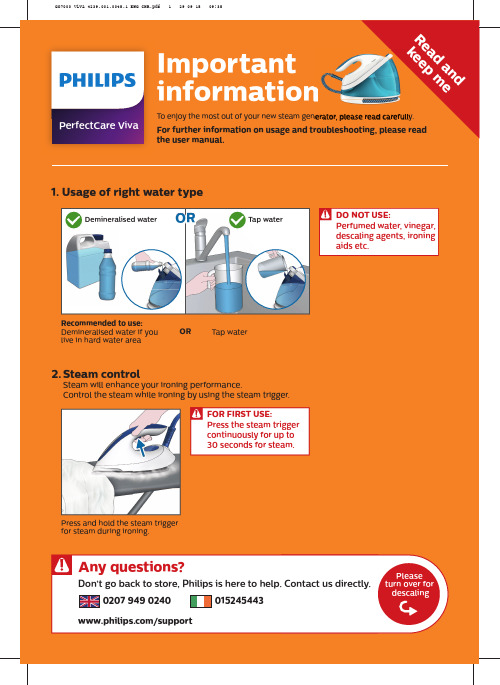
1. Usage of right water typeSteam will enhance your ironing performance.Control the steam while ironing by using the steam trigger.Important information To enjoy the most out of your new steam generator, please read carefully. For further information on usage and troubleshooting, please read PerfectCare VivaRecommended to use:Demineralised water if you live in hard water areaTap wateronenerator, please read carefully.Tap waterDemineralised waterR k eORAny questions?Don’t go back to store, Philips is here to help. Contact us directly./supportORPress and hold the steam trigger for steam during ironing.Perform descaling once the descaling light ashes and the appliance beeps. 4. Performing descalingFill the water tank halfway and switch on the appliance.Press and hold the ‘CALC CLEAN ’ button for 2 seconds until youhear short beeps.Wait approximately 2 minutes .You will hear short beeps.When the descaling process is completed, the iron stops beeping.• Do not leave the appliance unattended during the descaling process.Hot water and steam will come out of the soleplate. Do not interrupt the descaling process (approx. 2 minutes).With theCalc-Clean containerprovided, you can perform descaling easily and Steam function disabledPlace the iron on the Calc-Clean container on an even, stable surface.Press2 secANTI-CALC2 minCalc-Clean Container。
Bosch 炫耀 SHEM78WH5N 迷你蒸汽洗衣机说明书
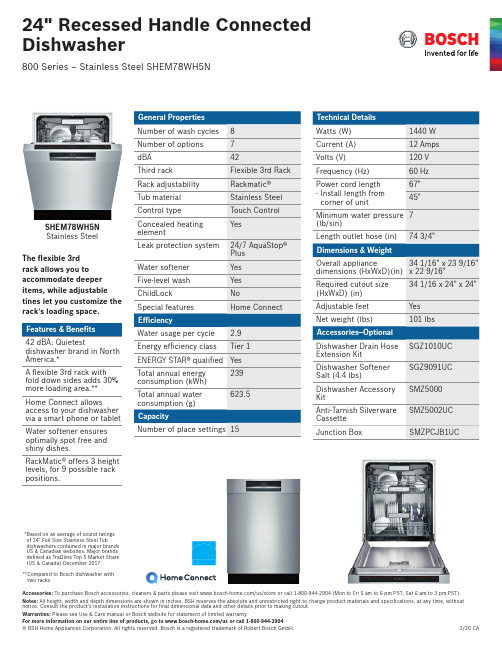
Accessories:To purchase Bosch accessories, cleaners & parts please visit /us/store or call 1-800-944-2904 (Mon to Fri 5 am to 6 pm PST, Sat 6 am to 3 pm PST).SHEM78WH5N Stainless SteelThe flexible 3rd rack allows you to accommodate deeper items, while adjustable tines let you customize the rack’s loading space.42 dBA: Quietestdishwasher brand in North America.*A flexible 3rd rack with fold down sides adds 30% more loading area.**Home Connect allowsaccess to your dishwasher via a smart phone or tablet Water softener ensures optimally spot free and shiny dishes.RackMatic® offers 3 height levels, for 9 possible rack positions.* B ased on an average of sound ratings of 24" Full Size Stainless Steel Tubdishwashers contained in major brands US & Canadian websites. Major brands defined as TraQline Top 5 Market Share (US & Canada) December 2017.** C ompared to Bosch dishwasher with two racks.Junction box accessoryInstallation DetailsAccessories: To purchase Bosch accessories, cleaners & parts please visit /us/store or call 1-800-944-2904 (Mon to Fri 5 am to 6 pm PST, Sat 6 am to 3 pm PST).Installation DetailsAccessories: To purchase Bosch accessories, cleaners & parts please visit /us/store or call 1-800-944-2904 (Mon to Fri 5 am to 6 pm PST, Sat 6 am to 3 pm PST).。
Philips Azur Pro 2800W 50 g min 蒸汽铁说明说明书
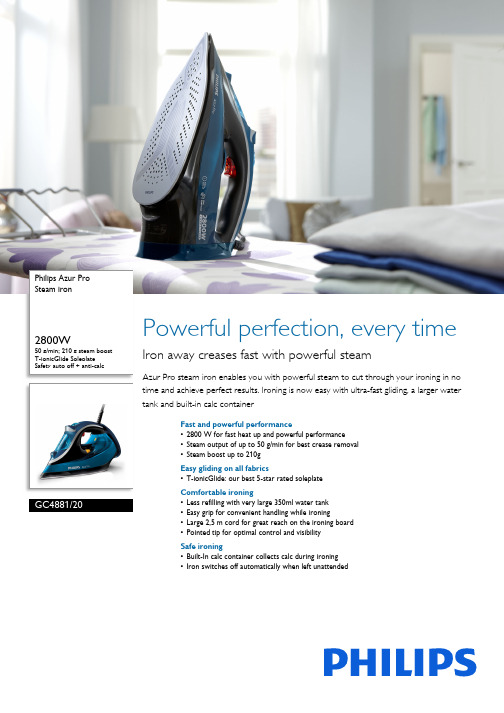
Philips Azur Pro Steam iron2800W50 g/min; 210 g steam boost T-ionicGlide Soleplate Safety auto off + anti-calcGC4881/20Powerful perfection, every time Iron away creases fast with powerful steamAzur Pro steam iron enables you with powerful steam to cut through your ironing in no time and achieve perfect results. Ironing is now easy with ultra-fast gliding, a larger water tank and built-in calc containerFast and powerful performance•2800 W for fast heat up and powerful performance•Steam output of up to 50 g/min for best crease removal•Steam boost up to 210gEasy gliding on all fabrics•T-ionicGlide: our best 5-star rated soleplateComfortable ironing•Less refilling with very large 350ml water tank•Easy grip for convenient handling while ironing•Large 2,5 m cord for great reach on the ironing board•Pointed tip for optimal control and visibilitySafe ironing•Built-In calc container collects calc during ironing•Iron switches off automatically when left unattendedHighlights2800 WPowerful 2800 W for fast heat up and best performance.Steam up to 50 g/minContinuous steam output of up to 50 g/min gives you the perfect amount of steam to efficiently remove all creases.Easy gripA well designed, soft grip on the top of the steam iron will make your ironing session more comfortable.T-ionicGlide soleplate T-ionicGlide is our best gliding and scratch-resistant, 5-star rated soleplate with integrated Titanium-Oxide layer.350 ml water tank Less refilling with the very large 350 ml water tank so you can iron more clothes in one go.Pointed tipPointed tip for optimal control and visibilityBuilt-In calc containerOur specially designed and built-in calccontainer collects calc particles during ironing. The Self Clean process flushes the calc out of the iron to maintain consistent ironing performance day after day.Automatic shut-offThe steam iron shuts off automatically when left unattended. It will switch off after 8minutes when left standing on its heelrest and after 30 seconds when left resting on its soleplate or sides.2,5 m cordA large 2,5 m cord gives you the reach you need during your ironing. Now you reach every corner of your ironing board without any problems.Issue date 2018-05-18 Version: 3.0.1EAN: 08 71010 37995 35© 2018 Koninklijke Philips N.V.All Rights reserved.Specifications are subject to change without notice. Trademarks are the property of Koninklijke Philips N.V. or their respective owners.SpecificationsEasy to use•Power cord length:2.5 m •Safety auto off•Soft grip•Water tank capacity: 350 ml •Drip Stop•Tap water suitableFast crease removal •Continuous steam: 50 g/min •Power: 2800 W•Steam boost: 210 g •Vertical steam •Voltage: 220-240 V •Water sprayGreen efficiency •Energy saving mode •Energy saving*: 20 %•User manual: 100% recycled paper Guarantee•2 year worldwide guaranteeScale management•Descaling and cleaning: Built-in calc container, Self clean, Double active calc cleanSize and weight•Weight of iron: 1.5 kg•Packaging dimensions (WxHxL): 34,1*30*36 cm •Product dimensions (WxHxL): 16*32*14 cm •Total weight with packaging: 1,75 kgFast & powerful crease removal •Soleplate: T-ionicGlide。
Trane Series S CenTraVac 蒸汽冷却机说明书
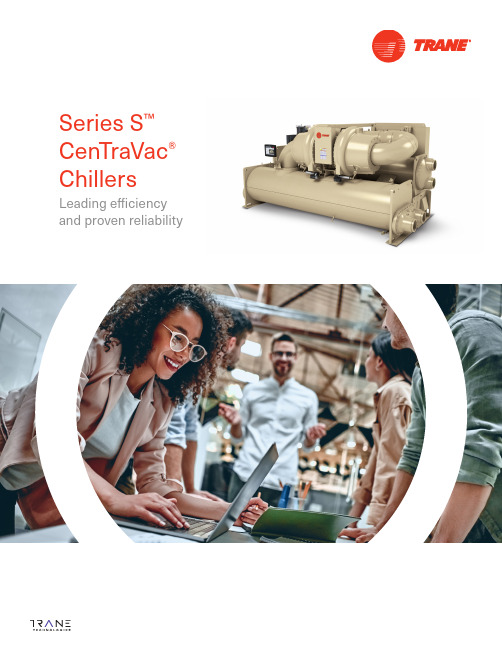
Series S™CenTraVac®Chillers Leading efficiency and proven reliability2The Trane Series S CenTraVac chillers:Delivering all that CenTraVac chillers stand for — and more!Continuing our commitment to provide the most comprehensive HVAC solutions in the industry, Trane ® Series S ™ CenTraVac ® chillers deliver the highest part- and full-load efficiencies, ultra-quiet operation, industry-leading reliability and the lowest total cost of ownership.Industry-leading efficienciesSeries S chillers deliver the highest part- and full-loadefficiencies in oil-free or oil-lubricated chiller configurations.• The highest full-load efficiency minimizes the electricalinfrastructure required and reduces the impact of demand-based charges and real-time pricing during peak periods.• The highest part-load efficiencies drive lower overall electrical consumption charges (kWh).• The best IPLV easily exceeds ASHRAE ® 90.1 part-load efficiency requirements.Series S chiller’s efficiencies are unmatched in the market. To quickly and accurately estimate future chiller performance for your specific application, there are tools available such as the myPLV ® calculator that take intoconsideration project-specific conditions, including location and building type, load, number and size of the chillers in the plant, and more. To learn more about myPLV, visit /myPLV.Trane products within the EcoWise ®portfolio are designed to lower environmental impact with next-generation, low global warming potential(GWP) refrigerants and high efficiency operation.3Simple installationInstalling a new chiller is about more than just its physical footprint; it’s about getting the unit into a mechanical room easily, with minimal disruption to the building and its occupants.• Fits through a standard double door for easy entry into an existing building.• Bolt-together design allows for easy disassembly into its major components, which can be moved into the building individually and reassembled on-site.Proven reliabilitySeries S chillers utilize the latest technologies to deliver reliable operation over the life of the unit. No matter what configuration you select, you receive the reliability you expect from Trane.• Balanced impellers in the compressor design provide abalanced thrust load on the driveline, reducing stress on the bearing system.• Third-generation Adaptive Frequency ™ drive (AFD3)effectively handles electrical dips and surges to maintainreliable operation.• Adaptive Control ™ maintains chiller operation even in the most extreme conditions.Each Series S chiller is custom-built following rigorous quality-control processes.Before it leaves our manufacturing facility, you as a Trane customer can take advantage of our fully customizable portfolio of myTest ™ chiller test packages and proof-of-performance options—all performed in the industry’s most advanced and comprehensive chiller testing facility. We invite you to witness all testing before your chiller ships—either in person at our factory or remotely from the comfort of your office.The reliability of Series S chillers allows Trane to offer the industry’s longest warranty — 100 percent backed and fulfilled by Trane, not a third party.Innovation for performanceAdvanced compressor designAt the core of the Trane® Series S™ CenTraVac® chiller’s performance is our AdaptiSpeed® technology, the integration of an all-new specific speed, direct drive compressor, a permanent magnet motor and the exclusive AFD3. This fusion of technologies delivers unmatched efficiency and the lowest sound levels in the industry. Each Series S chiller’s compressor is optimized to precisely match load requirements and operating conditions, delivering superior efficiency across a wide operating envelope.Mixed-flow, balanced impellersThe new specific-speed compressor features theindustry’s first mixed-flow impeller design. Offering thebest attributes of both radial and axial designs, theseimpellers—coupled with the specific-speed design—enable the compressor to deliver better efficiency acrossa wider operating range. In addition, the back-to-backimpeller orientation provides a balanced thrust load onthe driveline, reducing stress on the bearings. This designadds to overall unit reliability, maximizing chiller uptime.Permanent magnet motorBecause it doesn’t have the efficiency losses associated with the rotational slip of an induction motor, a permanent magnet motor can achieve up to 4 percent better efficiency than a comparable induction motor.Bearing systemThese bearings reliably support both oil-free and oil-lubricated chiller configurations. The high-strength hybrid ceramic bearings have been proven through extensive field operation for more than 20 years.4Third-generation Adaptive Frequency™ drive, AFD3Designed to last the life of the chiller, the AFD3 consumes less energy at all operating points without the risk of incurring excessive demand charges during near-full-load operation. The rugged AFD3 can effectively handle electrical dips, surges and other imbalances to maintain reliable chiller operation from any utility power source, including renewable power.A true 24-pulse design provides the harmonic solution to meet the requirements of IEEE® 519, reducing harmonic distortion to less than 5 percent total demand distortion (TDD).Unique in the industry, the AFD3 is a fully integrated variable-speed drive working with the motor and Symbio® 800unit controller to continuously optimize chiller efficiency through compressor speed and guide vane position.Symbio® 800 unit controllerThis unit controller provides the intelligence behind CenTraVac chillers and features the Adaptive Control™ algorithms, which offer control strategies that respond to a variety of conditions to maintain efficient chiller plant operation. An open-protocol design allows the controller to work with any building automation system without the need for gateways (BACnet®, Modbus® RTU and LonTalk®).The Symbio® 800 unit controllers provide a launch pointfor the evolution of all-digital HVAC systems. They do what Trane knows best: program-in performance to draw out the results you need within the realities of your world, creating comfortable and efficient environments.Safety first with Shore PowerCommissioning the chiller and servicing the AFD3 drive panel can be performed with only 110 volts of power through a standard extension cord—a design that helps protect technicians from higher line voltages.Flash economizerThe Series S chiller has a single-stage economizer that provides up to 4½ percent better efficiency than designs with no economizer. Since the Series S chiller uses two impellers, it is able to flash refrigerant gas at an intermediate pressure between the evaporator and condenser, significantly increasing chiller efficiency. This improvement in efficiency is not possible from single-stage chillers, in which all compression is done by one impeller. Refrigerant cooling systemRequired for the oil-free configuration, this highly effective system provides cooling to the motor, bearings and AFD3, delivering exceptional unit life without the added maintenance of stand-alone glycol systems.5Environmental sustainabilityEnvironmental sustainability is at the heart of the Trane® Series S™ CenTraVac® chiller’s design. Using low-pressure refrigerant, the chillers operate in a vacuum, which virtually eliminates leaks and enables near-zero emissions throughout their operational life. That’s a win in terms of the direct environmental impact of the refrigerant, minimizing the ozone depletion potential (ODP) and global warming potential (GWP).In fact, we are so confident in our ability to keep the refrigerant inside our Series S chillers that we back each one with a leak-tight warranty—free on all CenTraVac chillers installed in the U.S. and Canada for the first five years of ownership and extended for the life of the chiller when covered by a comprehensive Trane service agreement. Series S chillers are part of the EcoWise® portfolio of products designed to help lower environmental impact with next-generation, low global warming potential (GWP) refrigerants and high-efficiency operation. These chillers offer a choice of either R-123 or next generation R-514A refrigerant, which has a low GWP of less than 2.67Beyond building performancePerformanceTrane products are designed, engineered, built and tested to be solid performers, quietly doing their jobs year after year with minimal need for maintenance and repairs. The Series S chiller with AdaptiSpeed ™technology builds on a long history of centrifugal chiller performance—a history that shows many Series S chillers working reliably for more than 50 years.InnovationFounded a century ago on the belief that imagination and inspiration can overcome any obstacle, the Trane legacy of technological breakthroughs has made it an industry legend. Today’s Series S chiller contains more innovative solutions to boost performance and efficiency whilemaintaining higher levels of reliability and environmentalsustainability than any other chiller on the market.Capacity (in tons)Learn more at Trane – by Trane Technologies (NYSE: TT), a global climate innovator – creates comfortable, energy efficient indoor environments through a broad portfolio of heating, ventilating and air conditioning systems and controls, services, parts and supply. For more information, please visit or .© 2021 Trane. All Rights Reserved. All trademarks referenced in this document are the trademarks of their respective owners.CTV-SLB043-EN09/15/2021。
- 1、下载文档前请自行甄别文档内容的完整性,平台不提供额外的编辑、内容补充、找答案等附加服务。
- 2、"仅部分预览"的文档,不可在线预览部分如存在完整性等问题,可反馈申请退款(可完整预览的文档不适用该条件!)。
- 3、如文档侵犯您的权益,请联系客服反馈,我们会尽快为您处理(人工客服工作时间:9:00-18:30)。
内容答:修改1 .工作一般安全说明2。
介绍3。
蒸汽形成过程3.1。
预加热3.2。
形成3.3。
冷却3.4。
空气清扫3.5。
警报4。
运输和安装4.1。
运输条件4.2。
安装点4.2.1。
准备机机构设置4.2.2。
安装返回单元4.2.3。
配电盘的安装5。
机部分5.1。
机器的身体5.1.1。
模具连接部分5.1.2中。
比例阀内阁5.1.3。
气动内阁5.1.4。
操作面板是5.1.5。
阀箱5.2。
返回单位5.3。
电动面板6。
材料列表7 .工作。
技术图片8。
电气线路图9。
气动回路图10题。
维护10.1。
身体控制10.2。
您单位检查10.3。
电气控制面板11。
机器检查表B.INDEX责任。
图片B。
2表1 .工作一般安全说明⌝不删除或禁用安全设备的机器上。
这大大增加了受伤和事故的风险。
⌝紧急停止按钮位于操作面板。
它被用来完全停止机器。
⌝允许唯一的机器训练的人员操作机器。
明确指定哪些人员负责处理、维护和修理。
⌝继续接受培训的人员应该只使用机器的监督下授权和有经验的人。
⌝只有电气维护运营商,机械安装,机械维护运营商应该开展工作在机器的电气设备。
⌝身体伤害,削减…这样的事故是由运动部件或尖锐的角碎片的拆卸引起的。
⌝气动设备、蒸汽和水的安装工作应由维修操作符。
⌝所有管道和螺纹连接应定期检查泄漏和损坏,当检测到损坏,立即修复。
⌝开始前气动设备、蒸汽和水安装完成,应该重新设置系统中的压力和蒸汽安装应将降温。
⌝不要混淆空气、水和蒸汽线。
⌝可能有身体伤害由于机械损伤机器的部分电力。
⌝只允许经验丰富、训练有素的人员在电控箱工作。
⌝只使用保险丝的电流和电压等级定义。
在电源故障时,立即关闭机器。
⌝能源应该被切断的意外和维护干预。
⌝机器的电气设备应定期检查。
损坏和松动的连接应立即修复。
⌝有身体伤害的风险由于接触热的工件表面。
当手工拆卸机器时,工件必须小心处理。
⌝持有电气面板锁和识别预警信号。
2。
介绍本手册旨在描述蒸汽单位的工作原理,并收集用户所需的所有文件。
3。
蒸汽形成过程蒸汽成形工艺由四个主要阶段组成。
•预热•形成•冷却•空气席卷机器的加工顺序如上所述。
3.1。
预热预热是在短时间内通过蒸汽软化管道的过程,这样就可以很容易地将所需的塑料管道包裹在蒸汽模子中指定的半径内。
该步骤将自动与固定在模具上的塑料紧固件启动,并一直持续到屏幕上输入的时间参数。
由于预热是通过加热来软化管道的过程,蒸汽通过一个比未预热的管道更温暖的环境,而冷凝需要更长的时间。
这缩短了到达所需的时间所需的时间。
因此,预热过程是非常重要的,因为它影响了传播的持续时间,操作人员提供了方便的操作。
考虑到其他工艺步骤,应根据管道的长度、直径和形状选择预热期。
根据这些规范,如果有必要,可以在管道的中间部分进行预热。
图1:管模连接点3.2形成塑料管经过蒸汽加热后,经过模具上确定的点,准备成型。
当管道被包裹在它周围后,表格就会自动启动。
在这一步中,所需的规范是在理想的温度下形成管道。
在蒸汽装置中,这个过程是由压力控制的。
两种不同的蒸气压已经确定,考虑到管道的最高温度,管道将被暴露在安装在车辆上的地方。
1.8 bar和3.2 bar。
可以看到从表下面的饱和蒸汽压力温度,蒸汽的蒸汽温度决定形成过程约为116°C的1864酒吧,1354°C 1764 atm,135在3236年和135°C atm。
表1饱和蒸汽压温表这些工作压力的差异导致了机器运行和模具设计的不同。
例如,在一台运行在1.8棒的机器上,在池中没有压力控制。
预热过程完成后,模具缠绕成型,形成管子,形成“成型”,因为陷阱不是从出口,没有压力。
1.8条仅由输入压力控制。
在压力下形成这个过程,并在压力下形成,这个过程在进入屏幕达到所期望的压力后开始计算。
在完成“成型”时间后,保持较晚的时间形式,自动切换到与预制管机的冷却步骤。
3.3冷却冷却过程与形成管道的成形步骤一样重要。
管道加热到135°C需要立即冷却,以便它可以维持模具的形式接收。
冷却是通过在荧光屏上指定的时间内通过管道输送7个棒。
这水的最高温度是19°c .温度高于这个温度变送器是提醒由温度传感器和过程不会持续到水温下降。
塑料接触到水后在135°C 19°C是硬化和倾向于保留形式,直到再次暴露在相同的温度。
由于在冷却过程中,管道中所有的水都不能被抽干,因此必须在管道中进行额外的操作。
3.4空气席卷这个步骤用于在冷却过程中清洗管道中的水。
清洗过程非常重要,因为它是用6个大气压压缩空气制成的。
长时间的空气会导致管道的破裂。
相关时间从机器进入屏幕。
3.5警报在机器上定义警报,以控制工艺参数,确保工作安全和质量规范。
由机器的PLC程序定义和控制的报警器,并定义这些警报的条件如下。
1 .工作紧急停车2。
返回冷水泵3。
Face1输入检测错误4。
Face1输出检测错误5。
Face2输入检测错误6。
Face2输出检测错误7 .工作。
Face1蒸汽压下降8。
Face2蒸汽压下降9。
面注未达到蒸汽压10题。
面注未达到蒸汽压11。
输入蒸汽压高12题。
Face1输出蒸汽压高13题。
Face2输出蒸汽压高14题。
空气压力过低15。
冷却水温度高16。
Face1水低17题。
Face2水低18。
Face1气流很低19。
Face2空气很低20。
输入蒸汽压很低21。
输入代码的代码是不同的22。
Face1条目最快的错23。
Face1输出最快的错误24小时。
最快Face2条目错误25。
最快Face2退出错误26岁。
返回热水泵有缺陷4。
运输和安装4.1。
运输条件在运输和储存时,机器需要最大的注意和注意。
运输机器时应考虑以下因素。
•机器必须切断电源和供电电缆断开机器。
这应该由合格的电工来做。
•空气、水和蒸汽喷口应该关闭工厂和软管应分开。
•顶部灯光在操作员面板必须删除和存储。
这应该由合格的电工来做。
•返回单位的水应该是排水。
•之前,确保所有设备的连接断开。
•期间必须注意交通和这项工作必须由受过训练的人员完成。
4.2。
安装点图2:机器安装端口4.2.1机器身体准备安装这台机器身在两个地方。
它应该用4个螺栓固定。
图3:身体安装点水、空气、蒸汽和冷凝回流连接必须在机器体固定到位后进行。
图4:机身安装连接机器的内部连接必须在安装连接完成后进行。
气动柜的通气连接和助推器的空气连接必须进行。
图5:气动柜式空气连接4.2.2返回单元的安装在返回单元上安装的轮子必须被锁住,下面所述的连接必须被完成。
-返回软管必须连接。
空气连接必须进行。
-检查排水阀门是否关闭。
-必须更换通用电气面板上的插头。
4.2.3电气面板安装一般的供给线在电机的电板上绘制后,插座连接应与机器的其他部分进行通讯。
在图7中所示的箭头方向上必须连接以下插座。
-机器供电电缆-回执单位的收据-从充气袋中插入-回执单位的收据-从接线生终端插入-从模具中收到第一个块-模具2的插头。
5。
机械部分蒸汽成形机一般由3部分组成。
1 -身体2 -回到单位3 -电气面板5.1机器的身体机器阀体是由操作面板、气动柜、进气阀柜和比例阀柜等部件的进口连接组成的部件。
用于形成管的模具在这一节和返回单元之间连接。
机器主体由五个主要部分组成。
图8中显示了这些部分。
1 -模具连接部分2 -比例阀的衣橱3 -气动内阁4 -操作员面板5 -阀内阁5.1.1模具连接部分本单元包含模具的所有气动和液压连接,运动受到两个轴承的限制,模具旋转图9:模具连接部分在一个皮瓣下,在被要求的轴承上锁定了部分的模压轴承,使使用者能够定位传感器和活塞。
如果模具是双面的,它将是每个部件的旋转运动,所以它在转换中处于相同的位置并将其固定在那个位置是非常重要的。
这种情况是由传感器提供的,它通过轴上的机械部件来控制轴的位置。
所有的气动软管到模具,液压软管为每个面和模具连接插座通过这个轴。
在未密封部分,模具两侧的气动连接部分,附着在阀体上。
模具就座后,用两个螺栓固定,按模具上的位置进行气动连接。
图10:模具机气动连接机器上的模具气动连接点在表2中定义为阶段1,在表3中为阶段2表2:模具-机器第一阶段气动连接图这些桌子上显示的“-”软管是黄色的软管,如图10所示。
“+”软管是蓝色软管表3:模具-机器第二阶段气动连接图在模具的气动连接后,应制作图11所示的伤害电连接器和稳定的品牌液压连接器的连接。
图11:模具-机器电气和液压连接5.1.2比例阀内阁它是机器的蒸汽入口。
在这一节中,来自系统的蒸汽被还原成形成过程所需的蒸汽压力。
也正是在这个部分,控制压力降低到所需的水平,在紧急情况下,蒸汽被阻止进入机器。
图12所定义的比例阀柜中的设备。
图12:比例阀柜设备1 -比例蒸汽阀2 -蒸汽入口阀3 -压力传送器4 -高压阀蒸汽压成型过程中最重要的参数是由比例蒸汽阀控制的蒸汽压力。
比例蒸汽阀是机器上最重要的设备。
因此,有必要为该设备提供一定的条件和规范。
该规范基于mc - cos - 16规范TLV的规范。
表4:TLV mc - cos - 16规范在图13中描述了比例蒸汽阀的结构和子设备的结构。
图13:比例蒸汽阀和副设备比例蒸汽阀的位置可以通过设备和机器的PLC程序手动调节。
首先,适当的软件和电缆连接到PLC。
在图14中描述了与PLC连接的过程序列。
步骤1:打开程序后连接PLC步骤2:打开Cross References部分步骤3:输入相关的步骤% QW6.0步骤4:更改步骤QW6.0中定义的参数图14:PLC程序中的比例阀控制比例蒸汽阀前面有一个蒸汽进气阀。
蒸汽进气阀是机器的紧急停止阀。
当紧急停止时,按下按钮,通常打开的阀门关闭。
蒸汽被阻止进入机器。
这个阀门应该是1 / 2,因为蒸汽进口线是1 / 2。
蒸汽结构非常重要,因此蒸汽可以在短时间内产生。
在选择阀门时要考虑的最重要的特性是它们的设计能够承受高温,并且不会抵制蒸汽的通过。
规范可以基于SMC的vnd200d - 15a规范。
这些规范如图15所示。
图15:蒸汽输入阀规格如果我们归纳总结一下在这个规格书中要考虑的要点。
——阀应½。
”-间隙直径至少为15mm。
-阀门通常应该关闭。
- 4大气压的进汽压力必须调整,使输入阀的先导压力为3巴。
——阀门必须能够承受至少180°C。
虽然比例控制阀是非常敏感的设备,但阀门出口的压力必须是可控的。
压力发射器用于提供这种控制。
压力传感器即时控制压力,可以从机器的操作面板进行监控。
非常重要的是,设备执行正确的测量,因为与此发射机测量的值有关的蒸汽输入到机器上的报警。
这些机器中使用的压力变送器的规格如下所示。
——比例输出蒸汽阀蒸汽温度为150°c(68°f),这个温度最低为敏感测量应该能够做的。
-压力范围系统蒸汽压力必须高于。
