Cisco 4006交换机(IOS版)简明配置维护手册
思科交换机配置维护手册

思科交换机配置维护手册目录一、端口配置1.1 配置一组端口当使用interface range命令时有如下的规则:•有效的组范围:o vlan从1 到4094o fastethernet槽位/{first port} - {last port}, 槽位为0o gigabitethernet槽位/{first port} - {last port},槽位为0o port-channel port-channel-number - port-channel-number, port-channel号从1到64•端口号之间需要加入空格,如:interface range fastethernet 0/1 – 5是有效的,而interface range fastethernet 0/1-5是无效的.•interface range命令只能配置已经存在的interface vlan•所有在同一组的端口必须是相同类别的。
见以下例子:Switch# configure terminalSwitch(config)# interface range fastethernet0/1 - 5Switch(config-if-range)# no shutdown以下的例子显示使用句号来配置不同类型端口的组:Switch# configure terminalSwitch(config)# interface range fastethernet0/1 - 3, gigabitethernet0/1 - 2 Switch(config-if-range)# no shutdown1.2 配置二层端口1.2.1 配置端口速率及双工模式Switch# configure terminalSwitch(config)# interface fastethernet0/3 Switch(config-if)# speed 10Switch(config-if)# duplex half1.2.2 端口描述1.2.3 配置三层口Catalyst 3750支持三种类型的三层端口: •SVIs: 即interface vlan•三层以太网通道口(EtherChannel)•.路由口:路由口是指某一物理端口在端口配置状态下用no switchport命令生成的端口所有的三层都需要IP地址以实现路由交换配置步骤如下:配置举例如下:Switch# configure terminalEnter configuration commands, one per line. End with CNTL/Z.Switch(config)# interface gigabitethernet0/2Switch(config-if)# no switchportSwitch(config-if)# ip address 192.20.135.21 255.255.255.0 Switch(config-if)# no shutdownSwitch(config-if)# endshow ip interface命令:Switch# show ip interface gigabitethernet0/2 GigabitEthernet0/2 is up, line protocol is upInternet address is 192.20.135.21/24Broadcast address is 255.255.255.255Address determined by setup commandMTU is 1500 bytesHelper address is not setDirected broadcast forwarding is disabled<output truncated>1.3 监控及维护端口1.3.1 监控端口和控制器的状态主要命令见下表:举例如下:Switch# show interfaces statusPort Name Status Vlan Duplex Speed TypeGi0/1 connected routed a-full a-100 10/100/1000Base TXGi0/2 wce server 20.20.2 disabled routed auto auto 10/100/1000Base TX Gi0/3 ip wccp web-cache notconnect routed auto auto 10/100/1000Base TX Gi0/4 notconnect routed auto auto 10/100/1000Base TX Gi0/5 notconnect routed auto auto 10/100/1000Base TX Gi0/6 disabled routed auto auto 10/100/1000Base TX Gi0/7 disabled routed auto auto 10/100/1000Base TX Gi0/8 disabled routed auto 100 10/100/1000Base TX Gi0/9 notconnect routed auto auto 10/100/1000Base TX Gi0/10 notconnect routed auto auto 10/100/1000Base TX Gi0/11 disabled routed auto auto unknownGi0/12 notconnect routed auto auto unknownSwitch# show interfaces fastethernet 0/1 switchportName: Fa0/1Switchport: EnabledAdministrative Mode: static accessOperational Mode: downAdministrative Trunking Encapsulation: dot1qNegotiation of Trunking: OffAccess Mode VLAN: 1 (default)Trunking Native Mode VLAN: 1 (default)Trunking VLANs Enabled: ALLPruning VLANs Enabled: 2-1001Protected: falseUnknown unicast blocked: disabledUnknown multicast blocked: disabledVoice VLAN: dot1p (Inactive)Appliance trust: 5Switch# show running-config interface fastethernet0/2Building configuration...Current configuration : 131 bytes!interface FastEthernet0/2switchport mode accessswitchport protectedno ip addressmls qos cos 7mls qos cos overrideend1.3.2 刷新、重置端口及计数器Clear命令目的clear counters [interface-id] 清除端口计数器.clear interface interface-id重置某一端口的硬件逻辑clear line [number | console 0 | vty number] 重置异步串口的硬件逻辑Note clear counters 命令只清除用show interface所显示的计数,不影响用snmp得到的计数举例如下:Switch# clear counters fastethernet0/5Clear "show interface" counters on this interface [confirm] ySwitch#*Sep 30 08:42:55: %CLEAR-5-COUNTERS: Clear counter on interface FastEthernet0/5by vty1 (171.69.115.10)可使用clear interface或clear line命令来清除或重置某一端口或串口,在大部分情况下并不需要这样做:Switch# clear interface fastethernet0/51.3.3 关闭和打开端口使用no shutdown命令重新打开端口.举例如下:Switch# configure terminalSwitch(config)# interface fastethernet0/5Switch(config-if)# shutdownSwitch(config-if)#*Sep 30 08:33:47: %LINK-5-CHANGED: Interface FastEthernet0/5, changed state to a administratively downSwitch# configure terminalSwitch(config)# interface fastethernet0/5Switch(config-if)# no shutdownSwitch(config-if)#*Sep 30 08:36:00: %LINK-3-UPDOWN: Interface FastEthernet0/5, changed state to up二、配置VLAN2.1 VLAN论述一个VLAN就是一个交换网,其逻辑上按功能、项目、应用来分而不必考虑用户的物理位置。
思科交换机基本配置(非常详细)
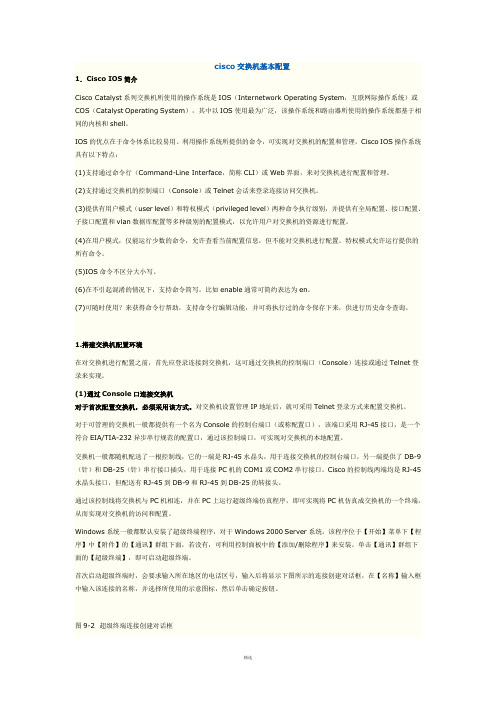
cisco交换机基本配置1.Cisco IOS简介Cisco Catalyst系列交换机所使用的操作系统是IOS(Internetwork Operating System,互联网际操作系统)或COS(Catalyst Operating System),其中以IOS使用最为广泛,该操作系统和路由器所使用的操作系统都基于相同的内核和shell。
IOS的优点在于命令体系比较易用。
利用操作系统所提供的命令,可实现对交换机的配置和管理。
Cisco IOS操作系统具有以下特点:(1)支持通过命令行(Command-Line Interface,简称CLI)或Web界面,来对交换机进行配置和管理。
(2)支持通过交换机的控制端口(Console)或Telnet会话来登录连接访问交换机。
(3)提供有用户模式(user level)和特权模式(privileged level)两种命令执行级别,并提供有全局配置、接口配置、子接口配置和vlan数据库配置等多种级别的配置模式,以允许用户对交换机的资源进行配置。
(4)在用户模式,仅能运行少数的命令,允许查看当前配置信息,但不能对交换机进行配置。
特权模式允许运行提供的所有命令。
(5)IOS命令不区分大小写。
(6)在不引起混淆的情况下,支持命令简写。
比如enable通常可简约表达为en。
(7)可随时使用?来获得命令行帮助,支持命令行编辑功能,并可将执行过的命令保存下来,供进行历史命令查询。
1.搭建交换机配置环境在对交换机进行配置之前,首先应登录连接到交换机,这可通过交换机的控制端口(Console)连接或通过Telnet登录来实现。
(1)通过Console口连接交换机对于首次配置交换机,必须采用该方式。
对交换机设置管理IP地址后,就可采用Telnet登录方式来配置交换机。
对于可管理的交换机一般都提供有一个名为Console的控制台端口(或称配置口),该端口采用RJ-45接口,是一个符合EIA/TIA-232异步串行规范的配置口,通过该控制端口,可实现对交换机的本地配置。
Cisco IOS操作与配置指南

access-profile Apply user-profile to interface
access-template Create a temporary Access-List entry
bfe
For manual emergency modes setting
cd
Change current directory
Configuration register is 0x2102
查看配置情况
RAM
NVRAM
Config
Config
IOS show
running-config
控制台
show startup-config
Enter your selection [2]:
登入路由器
Console
wg_ro_c con0 is now available Press RETURN to get started.
wg_ro_c> wg_ro_c>enable wg_ro_c# wg_ro_c#disable wg_ro_c>
Debugging functions (see also 'undebug')
delete
CISCO交换机常用维护手册
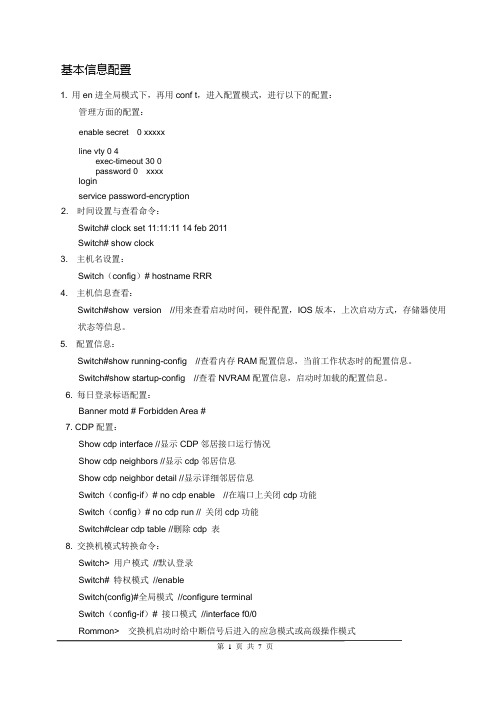
基本信息配置1. 用en进全局模式下,再用conf t,进入配置模式,进行以下的配置:管理方面的配置:enable secret 0 xxxxxline vty 0 4exec-timeout 30 0password 0 xxxxloginservice password-encryption2. 时间设置与查看命令:Switch# clock set 11:11:11 14 feb 2011Switch# show clock3. 主机名设置:Switch(config)# hostname RRR4. 主机信息查看:Switch#show version //用来查看启动时间,硬件配置,IOS版本,上次启动方式,存储器使用状态等信息。
5. 配置信息:Switch#show running-config //查看内存RAM配置信息,当前工作状态时的配置信息。
Switch#show startup-config //查看NVRAM配置信息,启动时加载的配置信息。
6. 每日登录标语配置:Banner motd # Forbidden Area #7. CDP配置:Show cdp interface //显示CDP邻居接口运行情况Show cdp neighbors //显示cdp邻居信息Show cdp neighbor detail //显示详细邻居信息Switch(config-if)# no cdp enable //在端口上关闭cdp功能Switch(config)# no cdp run // 关闭cdp功能Switch#clear cdp table //删除cdp 表8. 交换机模式转换命令:Switch> 用户模式//默认登录Switch# 特权模式//enableSwitch(config)#全局模式//configure terminalSwitch(config-if)# 接口模式//interface f0/0Rommon> 交换机启动时给中断信号后进入的应急模式或高级操作模式9. 启用三层交换功能Switch(config)#ip routing10 设置vlan nSwitch(config)#vlan 2Switch(config-vlan)#name vlan 2Switch(config)#exitSwitch(config-if)# switch mode accessSwitch(config-if)# switch mode access vlan 211 配置etherchannelSwitch(config)int port-channel 1 //建立捆绑口Switch(config)int range fa0/1-2 //Switch(config-if)channel-group 1 mode on // 将端口归属到捆绑口上Switch(config-if)switchport mode trunk enc dot1q // 定义TRUNK封装Switch(config-if)switchport mode trunk //Switch(config)port-channel load-balance dst-ip //定义负载方式检验命令:show etherchannel summary1配置接口速率和双工Switch(config-if)#speed [10 | 100 | auto](速度)Switch(config-if)# duplex [auto | full | half](双工)Switch(config-if)#des 描述字Switch(config-if)#shutdown 关闭接口Switch(config-if)#no sh 开启接口2 配置三层接口Switch(config-if)# ip add ip mask3 配置trunk接口Switch(config)# interface fastethernet x/y (以fastethernet为例,gigabitethernet一样)Switch(config-if)# shutdownSwitch(config-if)# switchportSwitch(config-if)# switchport mode dynamic desirable|trunk|autoSwitch(config-if)# switchport trunk encapsulation dot1qSwitch(config-if)# switchport trunk allowed vlan 2-3Switch(config-if)# no shutdownSwitch(config-if)# endSwitch# exit4端口划分vlanSwitch(config-if)# switch mode accessSwitch(config-if)# switch mode access vlan 25常用端口查看命令Switch# show int fa0/0Switch# show controllers s0/0Switch# show ip interface fa0/0Switch# show ip int briefSwitch# show vlan all //查看vlan信息Switch#show int trunk //查看trunk 端口6.修改NATIVE VLANSwitch(config-if)# switchport trunk native vlan 107.交换机端口安全Switch(config-if)# switch port-securitiySwitch(config-if)# switch port-securitiy maximum 1 //设置端口绑定mac地址数量Switch(config-if)# switch port-securitiy violation shutdown|protect|restrict //设置违规保护方式1. 配置HSRP在其中一台4507上按下面模版进行配置interface Vlan x //可选ip address 本机端口ip maskstandby 1 虚拟ipstandby 1 preemptstandby 1 priority 100可选standby 1 authentication 字符串Standby 1 时间参数1 时间参数2 // hello时间间隔1 失效时间间隔2Standby 1 track portnumber//没有实际意义在另一台4507上按下面模版进行配置interface Vlan x //可选ip address 本机端口ip maskstandby 1 虚拟ipstandby 1 preemptstandby 1 priority 100可选standby 1 authentication 字符串Standby 1 时间参数1 时间参数2 // hello时间间隔1 失效时间间隔2Standby 1 track portnumber//没有实际意义2. 基于策略的限速(QOS)配置1. Switch(config)# mls qos2. Access-list 12 permit 1.1.1.2 0.0.0.255 //用访问控制列表定义流量3. Switch(config)# class-map nameSwitch(config-cmap)# access-group 124. Switch(config)# policy-map nameSwitch(config-pmap)#class nameSwitch(config-pmap)#trust dscpSwitch(config-pmap)#police 1024000 1024000 exceed-action drop5. Switch(config-if)#service-policy input name日常维护及故障处理1. 常用系统检查命令:sh proc cpu // 检查cpu使用情况sh flash: //检查flash 内容sh mem //检查ram使用情况sh buffer //查看动态缓存利用状况sh env all //检查风扇,温度,电源状态sh module //检查机器板卡模块sh redundancy status // 检查冗余备引擎状态sh redundancy history //检查冗余主备引擎之间的状态sh redundancy switchover //检查系统状态sh log //检查系统日志sh runsh startup-config2. 系统配置备份命令:wr //配置保存命令copy run startup //同wrcopy flash: ios tftp: //备份ioscopy run tftp // 备份running-config3. 全面系统信息查看命令Show tech-support //全部系统状态信息的批处理显示建议利用secure-crt软件将其定期拷贝出来。
思科Cisco交换机配置手册配置教程
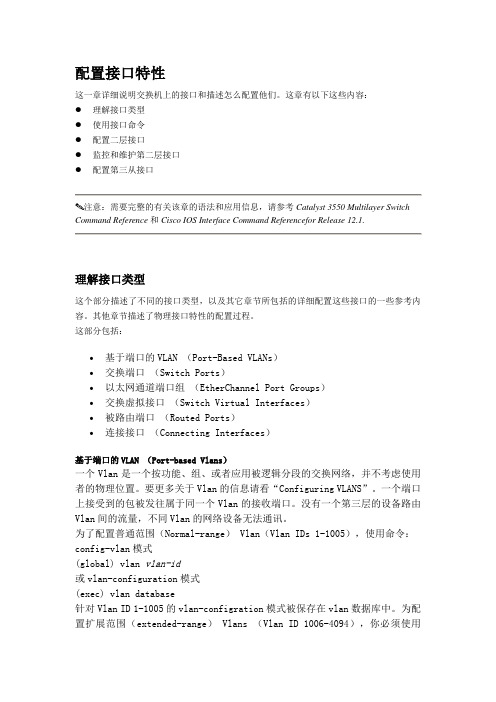
配置接口特性这一章详细说明交换机上的接口和描述怎么配置他们。
这章有以下这些内容:●理解接口类型●使用接口命令●配置二层接口●监控和维护第二层接口●配置第三从接口注意:需要完整的有关该章的语法和应用信息,请参考Catalyst 3550 Multilayer Switch Command Reference和Cisco IOS Interface Command Referencefor Release 12.1.理解接口类型这个部分描述了不同的接口类型,以及其它章节所包括的详细配置这些接口的一些参考内容。
其他章节描述了物理接口特性的配置过程。
这部分包括:•基于端口的VLAN (Port-Based VLANs)•交换端口(Switch Ports)•以太网通道端口组(EtherChannel Port Groups)•交换虚拟接口(Switch Virtual Interfaces)•被路由端口(Routed Ports)•连接接口(Connecting Interfaces)基于端口的VLAN (Port-based Vlans)一个Vlan是一个按功能、组、或者应用被逻辑分段的交换网络,并不考虑使用者的物理位置。
要更多关于Vlan的信息请看“Configuring VLANS”。
一个端口上接受到的包被发往属于同一个Vlan的接收端口。
没有一个第三层的设备路由Vlan间的流量,不同Vlan的网络设备无法通讯。
为了配置普通范围(Normal-range) Vlan(Vlan IDs 1-1005),使用命令:config-vlan模式(global) vlan vlan-id或vlan-configuration模式(exec) vlan database针对Vlan ID 1-1005的vlan-configration模式被保存在vlan数据库中。
为配置扩展范围(extended-range) Vlans (Vlan ID 1006-4094),你必须使用config-vlan模式,并把VTP的模式设为transparent透明模式。
Cisco交换机IOS命令及交换机的基本配置

实验3 Cisco交换机IOS命令及交换机的基本配置第一部分Cisco交换机IOS命令1、几种配置命令模式switch>这种提示符表示是在用户命令模式。
switch#这种提示符表示是在特权命令模式,只能使用一些查看命令。
switch(config)# 这种提示符表示是全局配置模式switch(config-if)# 端口配置命令模式2、检查、查看命令这些命令是查看当前配置状况,通常是以show(sh)为开始的命令。
show version查看IOS的版本、show flash查看flash内存使用状况、show mac-address-table查看MAC地址列表Show ? 帮助命令显示当前所有的查看命令3、密码设置命令Cisco交换机、路由器中有很多密码,设置好这些密码可以有效地提高设备的安全性。
switch(config)#enable password设置进入特权模式的密码switch(config-line)#可以设置通过console端口连接设备及telnet远程登录时所需要的密码默认情况下,这些密码都是以明文的形式存储,所以很容易查看到(采用show running-config命令)。
为了避免这种情况,我们可以以密文的形式存储各种密码:switch(config)#service password-encryption密码以明文形式存储密码以密文形式存储第二部分交换机的基本配置实验目的掌握交换机基本配置的步骤和方法;掌握查看和测试交换机基本配置的步骤和方法。
背景描述假设某学校的网络管理员第一次在设备机房对交换机进行了初次配置后,他希望以后在办公室或出差时也可以对设备进行远程管理,现要在交换机上做适当配置,使他可以实现这一愿望。
本实验以Cisco二层交换机为例,交换机命名为Switch。
一台PC机通过串口连接到交换机的控制(Console)端口,通过网卡(NIC)连接到交换机的F0/1端口。
CiscoIOS与交换机配置初步

2、通过浏览器配置 通过浏览器可在网络中对交换机进行远程管理,但通过该 方式前,必须已完成对交换机IP地址的设置,并将交换机与管 理计算机连在同一网段。 如在地址栏中输入192.168.1.1:8080
Cisco IOS命令模式
1.Cisco IOS命令模式简介 Cisco IOS提供了6种命令执行模式。
1、通过配置接口(console口) 交换机的配置接口是一串行接口,通过console线 将交换机与计算机相连,实现对交换机的配置。 其方法是: (1)建立配置环境,在配置计算机上安装超级终 端软件,并用console线将交换机与计算机相连。 (2)首次启动超级终端时,会要求输入所在地 区的电话区号,输入后将显示下图所示的连接创 建对话框,在“名称”输入框中输入该连接的名 称,并选择所使用的示意图标,然后单击确定按 钮 。
2.Cisco IOS命令模式与切换方法
(1)用户EXEC模式
交换机或路由器的最低运行模式,登录连接成功后,
所处的模式,就是用户EXEC模式,命令行提示符为“>”
例如:Switch>
(2)特权EXEC模式 通常简称特权模式,在用户 EXEC模式下,执行 enable 命令进入该模式。
(2)特权EXEC模式
用户模式:该模式下可查看交换机的软、硬件版本信息,并 进行简单的测试。用户模式的命令的操作结果不会被保存。用 户模式的提示符为switch> 特权模式:由用户模式进入的下一级模式,该模式下可对交 换机的配置文件进行管理,查看交换机的配置信息,进行网络 的测试和调试等操作。特权模式的提示符为switch# 全局配置模式:是特权模式的下一级模式,该模式下可以配 置交换机的全局性参数(如主机名,登陆信息等)。该模式下 进入下一级的配置模式,对交换机具体的功能进行配置。全局 配置模式的提示符为switch(config)# 端口模式:是全局模式的下一级模式,该模式下可对交换机 的端口进行参数配置,端口模式的提示符为switch(configif)# VLAN模式 是全局模式的下一级模式,配置交换机的VLAN 参数,端口模式的提示符为Swicth (config-vlan)#
网络教程——Cisco IOS基本操作

用户界面——登录到路由器
Router con0 is now available Press RETURN to get started. Router> User mode prompt Router>enable Password: Router# Privileged mode prompt Router#exit Router> Router>logout
载入配置文件
TFTP Server RAM Router#copy tftp running-config Host or network configuration file [host]? IP address of remote host [255.255.255.255]? 131.108.2.155 Name of configuration file [Router-config]? P1R1.2 Booting P1R1.2 from 131.108.2.155:!![OK – 874/16000 bytes] P1R1#
用户界面——使用密码
A line access password A privileged EXEC mode password Encrypted Passwords
IOS提供加密存放密码的服务。
用户界面——用户方式命令列表
DUT>? Exec commands: <1-99> Session number to resume access-enable Create a temporary Access-List entry access-profile Apply user-profile to interface attach attach to system component clear Reset functions connect Open a terminal connection disable Turn off privileged commands disconnect Disconnect an existing network connection enable Turn on privileged commands exit Exit from the EXEC help Description of the interactive help system lock Lock the terminal login Log in as a particular user logout Exit from the EXEC mls exec mls router commands mrinfo Request neighbor and version information from a multicast router mstat Show statistics after multiple multicast traceroutes mtrace Trace reverse multicast path from destination to source name-connection Name an existing network connection pad Open a X.29 PAD connection --More--
Cisco Ios交换机安装配置指导书

系统安全服务解决方案2.0版Cisco IOS交换机安装配置指导书华为技术华为技术有限公司综合业务服务产品部二〇一三年四月修订记录目录1CISCO IOS交换机简介 (4)1.1C ISCO 2950系列交换机 (4)1.2C ISCO 3550系列交换机 (5)1.3C ISCO 4000系列交换机 (7)2CISCO IOS的交换机的配置 (8)2.1访问交换机 (8)2.1.1通过console访问交换机 (8)2.1.2通过Telnet访问交换机 (10)2.2基本管理配置 (12)2.2.1设置交换机名字 (12)2.2.2设置交换机管理IP地址 (12)2.2.3设置交换机时间信息 (12)2.2.4设置交换机的密码 (12)2.2.5设置交换机的日志信息 (13)2.3以太网端口的配置 (14)2.3.1打开/关闭以太网端口 (14)2.3.2以太网端口的描述 (14)2.3.3设置以太网端口的双工状态 (15)2.3.4设置以太网端口的速率 (15)2.3.5设置以太网端口的工作模式 (15)2.4链路聚合(E THER C HANNEL) (15)2.5VLA N配置 (16)2.6T RUNK配置 (17)2.7VTP配置 (19)2.8STP协议 (20)3配置实例 (22)3.1C ATALYST 2924XL配置实例 (22)3.2C ATALYST 4006配置实例 (25)1Cisco IOS交换机简介在Cisco交换机簇中,有以下交换机的配置命令是采用IOS命令行进行配置的:Catalyst 2924、 Catalyst 2950、Catalyst 3500、Catalyst 3550、Catalyst 2948G-L3、采用新交换引擎的4000系列交换机、以及采用IOS软件的Catalyst 6000系列的交换机。
其中Catalyst 2950是Catalyst 2924的替代品,Catalyst 3550是Catalyst 3500的替代品。
操作与配置CiscoIOS设备

n 应用程序设计者 负责编写访问数据库的应用程 序,使得用户可以很友好的使用数据库.
n 普通用户 只需操作应用程序来访问所需要查询 的数据,不需要关心数据库地具体格式及其维护和 管理等问题.
操作与配置CiscoIOS设备
操作与配置CiscoIOS设备
操作与配置CiscoIOS设备
n 层次型数据库模型 层次型数据库模型采用树状结构,依据数
据的不同类型,将数据分门别类,存储在不同的 层次之下.
n 优点: 数据结构很类似于金字塔,不同层次 之间的关联性直接而且简单.
n 缺点: 由于数据纵向发展,横向关系难以建 立,数据可能会重复出现,造成管理维护的不便.
操作与配置CiscoIOS设备
关系数据的模型
n 关系数据库由多个表以及其他的数据库 对象组成的,表之间因为某些字段的相关 性而产生关联.
出版社表
* 出版社编 号
出版社名 称
地址 邮编
图书表
* 图书编号 图书名称 作者编号 出版社编
号 出版日期
作者表
*作者编 号
姓名 性别 年龄
注:带有*的为主健
操作与配置CiscoIOS设备
操作与配置CiscoIOS设备
操作与配置CiscoIOS设备
操作与配置CiscoIOS设备
操作与配置CiscoIOS设备
数据库系统(DBS):
数据库(DB)和数据库管理系统(DBMS)
的联合系统.
用户
用户
用户
数据库操作
数据库操作
操作系统
数据字典
数据库数据
数据文件数据
CISCO4006IOS启动问题网络知识-电脑资料

CISCO4006IOS启动问题网络知识-电脑资料cisco 4006 help 大家侃侃这样是什么问题?该怎么解决,我对cisco不熟,。
ROMMON: Entered init ROMMON: Cold Reset frame. @0x00000000 ROMMON: Reading reset reason register ROMMON: Valid NVRAM config System Bootstrap, Version 12.0(7)W5(15b) RELcisco 4006 help大家侃侃这样是什么问题?该怎么解决,我对cisco不熟。
ROMMON: Entered initROMMON: Cold Reset frame. @0x00000000ROMMON: Reading reset reason registerROMMON: Valid NVRAM configSystem Bootstrap, Version 12.0(7)W5(15b) RELEASE SOFTWARECopyright (c) 2000 by cisco Systems, Inc.ROMMON: Initializing exceptionsROMMON: Initializing TLBROMMON: Initializing cacheROMMON: Sizing and zeroing main memory ... 64 MBytes ROMMON: Sizing non-volatile memory ... 128 KBytesROMMON: Exiting initCatalyst-4232 platform. with 65536 Kbytes of main memory loadprog: bad file magic number: 0x0open: failed to find and/or load the bootloader: "bootflash:running-config"loadprog: error - on file openboot: cannot load "cisco2-Catalyst-4232"ROMMON: Entered initROMMON: Warm Reset frame. @0x00000000ROMMON: Valid NVRAM configSystem Bootstrap, Version 12.0(7)W5(15b) RELEASE SOFTWARECopyright (c) 2000 by cisco Systems, Inc.ROMMON: Initializing exceptionsROMMON: Initializing TLBROMMON: Initializing cacheROMMON: Sizing and zeroing main memory ... 64 MBytes ROMMON: Sizing non-volatile memory ... 128 KBytesROMMON: Exiting initCatalyst-4232 platform. with 65536 Kbytes of main memory loadprog: bad file magic number: 0x0boot: cannot load "bootflash:"ROMMON: Entered initROMMON: Warm Reset frame. @0x00000000ROMMON: Valid NVRAM configSystem Bootstrap, Version 12.0(7)W5(15b) RELEASE SOFTWARECopyright (c) 2000 by cisco Systems, Inc.ROMMON: Initializing exceptionsROMMON: Initializing TLBROMMON: Initializing cacheROMMON: Sizing and zeroing main memory ... 64 MBytes ROMMON: Sizing non-volatile memory ... 128 KBytesROMMON: Exiting initCatalyst-4232 platform. with 65536 Kbytes of main memoryloadprog: bad file magic number: 0x0boot: cannot load "bootflash:"ROMMON: Entered initROMMON: Warm Reset frame. @0x00000000ROMMON: Valid NVRAM configSystem Bootstrap, Version 12.0(7)W5(15b) RELEASE SOFTWARECopyright (c) 2000 by cisco Systems, Inc.ROMMON: Initializing exceptionsROMMON: Initializing TLBROMMON: Initializing cacheROMMON: Sizing and zeroing main memory ... 64 MBytesROMMON: Sizing non-volatile memory ... 128 KBytesROMMON: Exiting initCatalyst-4232 platform. with 65536 Kbytes of main memory rommon 1 >loadprog: bad file magic number: 0x0open: failed to find and/or load the bootloader: "bootflash:running-config"loadprog: error - on file openboot: cannot load "cisco2-Catalyst-4232"看起来象FLASH中的IOS坏了,电脑资料《CISCO4006IOS启动问题网络知识》(https://)。
交换机IOS维护
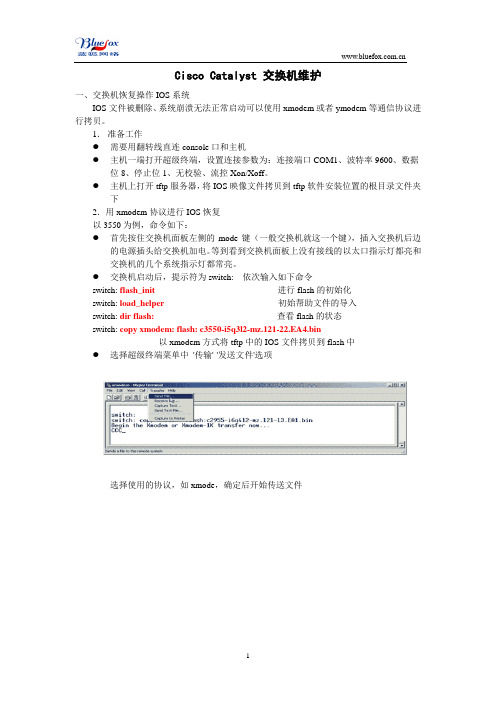
Cisco Catalyst 交换机维护一、交换机恢复操作IOS系统IOS文件被删除、系统崩溃无法正常启动可以使用xmodem或者ymodem等通信协议进行拷贝。
1.准备工作●需要用翻转线直连console口和主机●主机一端打开超级终端,设置连接参数为:连接端口COM1、波特率9600、数据位8、停止位1、无校验、流控Xon/Xoff。
●主机上打开tftp服务器,将IOS映像文件拷贝到tftp软件安装位置的根目录文件夹下2.用xmodem协议进行IOS恢复以3550为例,命令如下:●首先按住交换机面板左侧的mode键(一般交换机就这一个键),插入交换机后边的电源插头给交换机加电。
等到看到交换机面板上没有接线的以太口指示灯都亮和交换机的几个系统指示灯都常亮。
●交换机启动后,提示符为switch: 依次输入如下命令switch: flash_init进行flash的初始化switch:load_helper初始帮助文件的导入switch: dir flash:查看flash的状态switch: copy xmodem: flash: c3550-i5q3l2-mz.121-22.EA4.bin以xmodem方式将tftp中的IOS文件拷贝到flash中●选择超级终端菜单中'传输'-'发送文件'选项选择使用的协议,如xmode,确定后开始传送文件传输完成后重新启动设备即完成拷贝注:上面提到的Xmodem、Ymodem、Zmodem、Kermit几种协议是比较常见的,其中Xmodem是最早的协议之一,一种由几乎所有通讯程序支持的文件传送协议, 传送128个字节信息块;Ymodem和Zmodem都是它的改进协议,Ymodem传送1024字节长的信息块,快于Xmodem并且可送多个文件;Zmodem速度快于Ymodem和Xmodem,且可以更好地在断开后恢复传输。
Kermit协议有非常强的可移植性,它在从大型机到个人电脑的各种环境下都能够传输。
4006交换机简明配置手册(中文).

4006交换机(IOS版)简明配置维护手册湖南科诚科技发展有限公司2004-12-17目录说明 (3)产品特性 (3)配置端口 (5)配置一组端口 (5)配置二层端口 (7)配置端口速率及双工模式 (8)端口描述 (8)配置三层口 (10)监控及维护端口 (12)监控端口和控制器的状态 (12)刷新、重置端口及计数器 (13)关闭和打开端口 (14)配置VLAN (15)理解VLAN (15)可支持的VLAN (15)配置正常范围的VLAN (16)生成、修改以太网VLAN (16)删除VLAN (18)将端口分配给一个VLAN (18)配置VLAN Trunks (19)使用STP实现负载均衡 (22)配置EtherChannel (27)三层以太通道配置 (27)三层物理端口配置 (28)二层以太通道配置 (29)配置以太通道负载均衡 (31)配置SPAN (32)理解SPAN (32)SPAN会话 (33)目标端口 (33)源端口 (33)流量类型 (33)基于VLAN的SPAN (33)SPAN流量 (34)配置SPAN (34)指定源 (34)指定目标 (35)监视一个trunk接口上的源VLAN (35)说明本手册只包括日常使用的有关命令及特性,其它未涉及的命令及特性请参考英文的详细配置手册。
产品特性Cisco Catalyst 4006 Supervisor Engine III将非阻塞的第2/3/4层交换与增强的控制结合在一起,从而让企业和城域以太网用户在部署基于互联网的应用时具有业务灵活性。
作为Cisco A VVID(融合语音、视频和集成数据的网络体系架构)的一个关键性组件,Cisco Catalyst 4000利用智能化的网络服务,将控制从网络骨干扩展到了网络边缘,这些服务包括先进的服务质量(QoS)、可扩展的性能、全面的安全性和简便的管理功能。
第2层特性∙第2层硬件数据包转发率可达48Mpps∙第2层交换端口和VLAN中继∙IEEE 802.1Q VLAN封装∙ISL VLAN封装(不包括WS-X4418-GB 和WS-X4412-2GB-T 中的阻塞端口)∙动态中继协议(DTP)∙VLAN中继协议(VTP)和VTP域∙每个交换机支持4096个VLAN(将来的软件版本)∙每个VLAN的生成树(PVST)和PVST+∙STP PortFast和PortFast防护措施∙STP UplinkFast和BackboneFast∙STP根段防护措施∙Cisco搜索协议∙IGMP侦听v1和v2∙在线路卡中集成Cisco以太通道、快速以太通道、千兆位以太通道技术∙端口集中协议(PAgP)∙单向链路检测(UDLD)和主动型UDLD第3层特性∙IP Cisco快速传送(CEF)路由速度可达48Mpps∙静态IP路由∙IP路由协议(内部网关路由协议[IGRP]、增强型IGRP[EIGRP]、开放式最短路径优先[OSPF]、路由信息协议[RIP]、RIP2)∙边界网关协议[BGP4]和多播边界网关协议[MBGP]∙热待机路由协议(HSRP)∙IGMP v1、v2和v3∙IP多播路由协议(距离向量多播路由协议[DVMRP]、PIM、SSM)∙多播源发现协议(MSDP)∙Cisco群组多播协议(CGMP)服务器∙完全支持互联网控制消息协议(ICMP)∙ICMP路由器发现协议先进的服务质量和成熟流量管理∙针对每个端口的QoS配置∙硬件上支持每个端口四个队列∙严格优先级排序∙IP DSCP和IP 优先权∙基于IP服务类型(ToS)或者DSCP进行分类和标记∙基于完整的第3/4层报头(只限于IP)进行分类和标记∙基于完整的第3/4层报头(只限于IP)制定输入和输出策略∙能够集中或者单独在出口或者入口分别配置1024种监管器∙整形和共享输出队列管理∙细微的QoS功能不会影响正常的交换性能扩展性能∙64Gbps交换矩阵∙第2层硬件数据包转发率可达48Mpps∙第3层IP Cisco 快速转发路由速率可达48Mpps∙第4层(TCP/UDP)基于硬件的过滤速率可达48Mpps∙实现先进的第3/4层服务不会造成任何性能上的损失∙持续以每秒1000台主机的速度进行基于软件的查询∙支持32768个MAC地址∙在路由表(由单点播送和多播共享)中支持131072个记录∙可以扩展到2000个虚拟端口(VLAN端口)∙利用Cisco千兆位以太通道技术,可以汇聚高达16Gbps的带宽∙基于硬件的多播管理∙基于硬件的ACL简便的可管理性∙只需一个控制台端口和IP地址,来管理系统中的所有功能∙软件配置管理,包括本地和远程的存储∙可选的闪存卡,可以用于存储软件影像,进行备份和方便的软件升级∙通过CiscoWorks Windows网络管理软件,对每个端口、每个交换机进行管理,为Cisco的路由器、交换机和集线器提供一个统一的管理接口∙SNMP v1、v2和v3检测,提供全面的带内管理功能∙基于命令行界面(CLI)的管理控制台,提供详细的带外管理∙远程监控(RMON)软件代理,可以支持四个RMON群组(历史、统计、警报和事件),从而可以增强对流量的管理、监控和分析∙利用一个Cisco SwitchProbe Analyzer(交换端口分析器[SPAN]端口支持所有九个RMON群组,这个端口可以通过一个单一的网络分析器或者RMON探测器对一个端口、一组端口或者整个交换机进行流量监控)∙分析支持,包括入口、出口和VLAN SPAN全面的安全性∙TACACS+和RADIUS,它们可以对交换机进行集中控制,并防止未经授权的用户更改配置∙在所有端口上的标准和扩展ACL∙在所有端口上(没有性能损失)采用路由器访问控制列表(RACL)∙专用VLAN(PVLAN),可以在一个交换机的两个端口之间提供安全性和独立性指示灯和端口规格∙系统状态:绿色(正常)/红色(故障)∙交换机负载利用率:总交换使用率在1%到100%之间∙控制端口:RJ-45凹式端口∙重启(交换机隐含保护)∙管理端口:10/100BASE-TX(RJ-45凹式)数据终端设备(DTE);绿色(工作正常)/橙色(禁用)/关闭(没有连接)其它功能:支持以下的GBIC模块:∙1000BASE-SX GBIC: 光纤最长1804 feet (550 m)∙1000BASE-LX/LH GBIC: 光纤最长32,808 feet (6 miles or 10 km)∙1000BASE-ZX GBIC: 光纤最长328,084 feet (62 miles or 100 km)配置端口配置一组端口当使用interface range命令时有如下的规则:∙有效的组范围:o vlan从1 到4094o fastethernet槽位/{first port} - {last port}o gigabitethernet槽位/{first port} - {last port}∙端口号之间需要加入空格,如:interface range fastethernet 2/1 –5是有效的,而interface range fastethernet 2/1-5是无效的.∙interface range命令只能配置已经存在的interface vlan∙所有在同一组的端口必须是相同类别的。
思科交换机查看配置及日常维护命令
思科交换机查看配置及日常维护命令1.用户模式管理员通过超级终端或者telnet方式登陆交换机后,首先会进入XXX>模式,这里的尖括号代表用户模式,此模式下只能使用一些简单的查看命令,无法对设备进行配置。
2.特权模式管理员在用户模式下输入enable回车,经过密码验证后进入XXX#模式,这里的#代表特权模式,思科设备默认没有enable密码,此模式下可以使用show命令查看交换机的详细运行状态等信息。
3.全局配置模式管理员在如果需要对设备进行配置,例如增加vlan、修改网关、划分端口等操作时,必须先进入全局配置模式,在特权模式下输入configure terminal,会进入XXX(config)#模式,这里出现(config)#代表当前处于全局配置模式,全局配置模式退到特权模式输入命令exit。
大部分配制都需要在全局配置模式下输入。
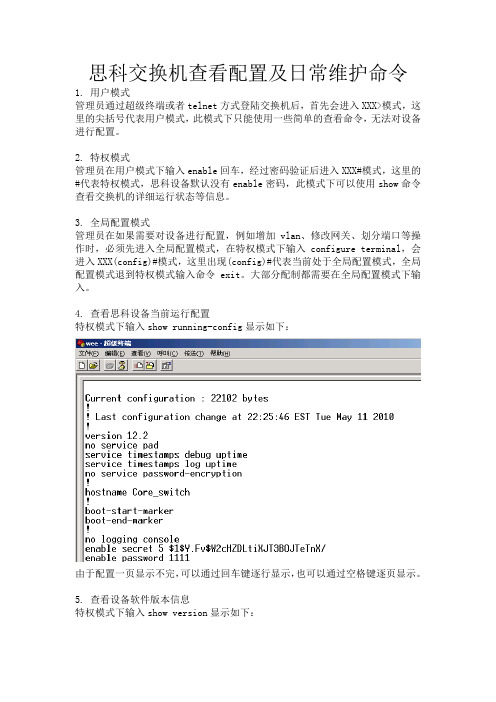
4.查看思科设备当前运行配置特权模式下输入show running-config显示如下:由于配置一页显示不完,可以通过回车键逐行显示,也可以通过空格键逐页显示。
5.查看设备软件版本信息特权模式下输入show version显示如下:此命令用于显示设备型号、序列号、系统版本和在线时间等等信息。
6.查看系统时钟特权模式下输入show clock用于显示当前系统时钟,可以用于查看LOG日志后对应时钟分析异常LOG的发起时间。
7.查看LOG日志特权模式下输入show log用于显示系统突发状况,例如端口异常关闭,链路的通断,主备机切换等等许多信息,可以帮助管理员分析故障原因。
8.查看端口详细状态特权模式下输入show interface显示如下:此命令用于显示端口的详细信息,例如IP地址、MAC地址、带宽负载及输入输出速率等。
9.快速查看端口UP or DOWN特权模式下输入show interface description和show interface status第一条命令查看端口的连接状态与描述,第二条命令查看端口的链接状态、所属vlan以及速率双工。
思科交换机简单配置命令

思科交换机简单配置命令1.在基于IOS的交换机上设置主机名/系统名:switch(config)# hostname hostname在基于CLI的交换机上设置主机名/系统名:switch(enable) set system name name-string2.在基于IOS的交换机上设置登录口令:switch(config)# enable password level 1 password在基于CLI的交换机上设置登录口令:switch(enable) set passwordswitch(enable) set enalbepass3.在基于IOS的交换机上设置远程访问:switch(config)# interface vlan 1switch(config-if)# ip address ip-address netmaskswitch(config-if)# ip default-gateway ip-address在基于CLI的交换机上设置远程访问:switch(enable) set interface sc0 ip-address netmask broadcast-addressswitch(enable) set interface sc0 vlanswitch(enable) set ip route default gateway4.在基于IOS的交换机上启用和浏览CDP信息:switch(config-if)# cdp enableswitch(config-if)# no cdp enable为了查看Cisco邻接设备的CDP通告信息:switch# show cdp interface [type modle/port]switch# show cdp neighbors [type module/port] [detail]在基于CLI的交换机上启用和浏览CDP信息:switch(enable) set cdp {enable|disable} module/port为了查看Cisco邻接设备的CDP通告信息:switch(enable) show cdp neighbors[module/port] [vlan|duplex|capabilities|detail]5.基于IOS的交换机的端口描述:switch(config-if)# description description-string基于CLI的交换机的端口描述:switch(enable)set port name module/number description-string 6.在基于IOS的交换机上设置端口速度:switch(config-if)# speed{10|100|auto}在基于CLI的交换机上设置端口速度:switch(enable) set port speed moudle/number {10|100|auto} switch(enable) set port speed moudle/number {4|16|auto}7.在基于IOS的交换机上设置以太网的链路模式:switch(config-if)# duplex {auto|full|half}在基于CLI的交换机上设置以太网的链路模式:switch(enable) set port duplex module/number {full|half}8.在基于IOS的交换机上配置静态VLAN:switch# vlan databaseswitch(vlan)# vlan vlan-num name vlaswitch(vlan)# exitswitch# configure teriminalswitch(config)# interface interface module/numberswitch(config-if)# switchport mode accessswitch(config-if)# switchport access vlan vlan-numswitch(config-if)# end在基于CLI的交换机上配置静态VLAN:switch(enable) set vlan vlan-num [name name]switch(enable) set vlan vlan-num mod-num/port-list9. 在基于IOS的交换机上配置VLAN中继线:switch(config)# interface interface mod/portswitch(config-if)# switchport mode trunkswitch(config-if)# switchport trunk encapsulation {isl|dotlq}switch(config-if)# switchport trunk allowed vlan remove vlan-listswitch(config-if)# switchport trunk allowed vlan add vlan-list在基于CLI的交换机上配置VLAN中继线:switch(enable) set trunk module/port [on|off|desirable|auto|nonegotiate]Vlan-range [isl|dotlq|dotl0|lane|negotiate]10.在基于IOS的交换机上配置VTP管理域:switch# vlan databaseswitch(vlan)# vtp domain domain-name在基于CLI的交换机上配置VTP管理域:switch(enable) set vtp [domain domain-name]11.在基于IOS的交换机上配置VTP 模式:switch# vlan databaseswitch(vlan)# vtp domain domain-nameswitch(vlan)# vtp {sever|cilent|transparent}switch(vlan)# vtp password password在基于CLI的交换机上配置VTP 模式:switch(enable) set vtp [domain domain-name] [mode{ sever|cilent|transparent }][password password]12. 在基于IOS的交换机上配置VTP版本:switch# vlan databaseswitch(vlan)# vtp v2-mode在基于CLI的交换机上配置VTP版本:switch(enable) set vtp v2 enable13. 在基于IOS的交换机上启动VTP剪裁:switch# vlan databaseswitch(vlan)# vtp pruning在基于CL I 的交换机上启动VTP剪裁:switch(enable) set vtp pruning enable14.在基于IOS的交换机上配置以太信道:switch(config-if)# port group group-number [distribution {source|destination}] 在基于CLI的交换机上配置以太信道:switch(enable) set port channel moudle/port-range mode{on|off|desirable|auto} 15.在基于IOS的交换机上调整根路径成本:switch(config-if)# spanning-tree [vlan vlan-list] cost cost在基于CLI的交换机上调整根路径成本:switch(enable) set spantree portcost moudle/port costswitch(enable) set spantree portvlancost moudle/port [cost cost][vlan-list] 16.在基于IOS的交换机上调整端口ID:switch(config-if)# spanning-tree[vlan vlan-list]port-priority port-priority在基于CLI的交换机上调整端口ID:switch(enable) set spantree portpri {mldule/port}priorityswitch(enable) set spantree portvlanpri {module/port}priority [vlans]17. 在基于IOS的交换机上修改STP时钟:switch(config)# spanning-tree [vlan vlan-list] hello-time secondsswitch(config)# spanning-tree [vlan vlan-list] forward-time secondsswitch(config)# spanning-tree [vlan vlan-list] max-age seconds在基于CLI的交换机上修改STP时钟:switch(enable) set spantree hello interval[vlan]switch(enable) set spantree fwddelay delay [vlan]switch(enable) set spantree maxage agingtiame[vlan]18. 在基于IOS的交换机端口上启用或禁用Port Fast 特征:switch(config-if)#spanning-tree portfast在基于CLI的交换机端口上启用或禁用Port Fast 特征:switch(enable) set spantree portfast {module/port}{enable|disable}19. 在基于IOS的交换机端口上启用或禁用UplinkFast 特征:switch(config)# spanning-tree uplinkfast [max-update-rate pkts-per-second]在基于CLI的交换机端口上启用或禁用UplinkFast 特征:switch(enable) set spantree uplinkfast {enable|disable}[rate update-rate] [all-protocols off|on]20. 为了将交换机配置成一个集群的命令交换机,首先要给管理接口分配一个IP地址,然后使用下列命令: switch(config)# cluster enable cluster-name cv。
Cisco Catalyst 2950、2960、3550、4006、4506交换机IOS升级
Cisco Catalyst 2950、2960、3550、4006、4506交换机IOS升级[复制链接]一、对于正常联网使用的交换机,可以通过Telent登录交换机并通过TFTP升级IOS。
(1)假设网管计算机的IP地址为192.168.1.2/255.255.255.0(2)在网管计算机上运行TFTP Server,配置目录位置并将新IOS拷贝到相关目录,配置允许发送和接收。
(3)网管计算机使用Telnet登录交换机。
(4)升级//备份原IOSSwitch#copy flash:/c2950-*.bin tftpAddress or name of remote host[]?192.168.1.2Destination filename [c2950-*.bin]?//删除原IOSSwitch#delete flash:/c2950-*.bin//释放存储空间Switch#squeeze//上传新IOSSwitch#copy t ftp://192.168.1.2/c2950-*.bin flash:(5)上传完成后可以使用reload命令重启交换机,或关机重新加电开机。
二、对于Cisco Catalyst 2950、2960、3550、4006、4506等交换机,如果未联网使用而作为冗余备用交换机时,也可以通过TFTP升级IOS。
(1)将管理计算机的IP地址设置为192.168.1.2/255.255.255.0。
(2)网管计算机的COM1口使用控制线连接交换机的Console口;网口使用普通网线连接交换机的Fa0/1口。
如果是4006或4506,则可以使用其WS-X4548-GB-RJ45或WS-X4232-GB-RJ45模块上的RJ45口。
(3)在网管计算机上运行TFTP Server,配置目录位置并将新IOS拷贝到相关目录,配置允许发送和接收。
(4)交换机加电开机,在网管计算机上运行超级终端并登录交换机。
思科设备维护手册说明书
Maintenance•Reset Device,page1•Reset Options and Load Upgrades,page2•Remote Lock,page3•Remote Wipe,page3•Boot Alternate Image for Cisco DX70,page4•Boot Alternate Image for Cisco DX80,page4•Boot Alternate Image for Cisco DX650,page5•Data Migration,page5•Debugging Log Profiles,page5•User Support,page6Reset DeviceA device reset provides a way to reset or restore various configuration and security settings or provides a wayto recover the device if the device encounters an error.The following procedure describes the types of resets that you can perform.All three reset methods cause deletion of all user data and reset all settings from the device.NoteThe following occurs on a device when you perform a reset:•User configuration settings-Reset to default values.•Network configuration settings-Reset to default values.•Call histories-Get erased.•Locale information-Reset to default values.•Security settings-Reset to default values;this includes deletion of the CTL file and change of the802.1xDevice Authentication parameter to Disabled.Do not power down the device until it completes the factory reset process.Note ProcedureYou can reset the device with any of these operations.Choose the operation that is appropriate for your situation.•Method 1:Cisco Unified Communications Manager Administrator Web GUI1From the Product Specific Configuration Layout area of the device configuration window,enableWipe Device .2Issue an Apply Config,Restart,or Reset command from the Admin GUI to push the wipe to thedevice.•Method 2:Settings application1In the Settings application,choose Backup &reset >Factory data reset .If a PIN or Password is configured on the device,it will need to be entered before the resetcan proceed.Note •Method 3:Key-press sequencesThis method should be used if the device is secured with a PIN or Password lock and the PIN/password has been lost.Follow these steps to reset a Cisco DX70on boot up:1Power on the device and wait for the Mute LED to blink.2Press and hold the Volume Up button until the Mute button is lit red.3Release the Volume Up button,then press and hold the Mute button for 3seconds.Follow these steps to reset a Cisco DX80on boot up:1Press and hold the Volume Up button and power on the device.2Release the Volume Up button when the Mute button is lit red,then press the Mute button.Follow these steps to reset a Cisco DX650on boot up:1Press and hold the #key and power on the device.2When the Message Waiting Indicator (MWI)flashes red once then stays lit,release the #key.Reset Options and Load UpgradesCisco DX Series devices receive configuration changes and load upgrades from Cisco Unified Communications Manager.The following protocol describes how the device handles change requests:•Reset waits for active call to end.MaintenanceReset Options and Load Upgrades•If the device screen is on,user receives a popup dialog box that notifies the user about the changes and the need for restart.The dialog box provides the following options:◦Restart:Dismisses the popup dialog box and restarts the device (default action).◦Snooze:Dismisses the popup dialog box for an hour.The user can set the device to snooze for amaximum of 24hours,after which the device willrestart.The popup dialog box has a countdown timer of 60seconds.The default action beginsif the user does not act.After the user sets the device to snooze,the user has the option to manually reset thedevice at any time from the notifications list.Note ◦If the device screen is off,active audio keeps the request waiting.Remote LockThis feature allows you to lock a device from the Device Configuration window in Cisco UnifiedCommunications Manager.When the device receives a remote lock request,the device immediately terminates any active calls,and the device locks.If the device is not registered with the system at the time of the request,the device is locked the next time that it registers to thesystem.After you issue a remote lock request,the request cannot be canceled.Note Remote Lock Device ProcedureStep 1In the Phone Configuration window for the device,click Lock .Step 2Click Lock to accept the Lock confirmation message.You can view the Lock status in the Device Lock/Wipe Status section of the Phone Configuration window for the device.Remote WipeThis feature allows you to erase the data on a device from the Device Configuration window in Cisco Unified Communications Manager.MaintenanceRemote LockWhen the device receives a remote wipe request,the device immediately terminates any active calls and erases the device data.If the device is not registered with the system at the time of the request,the data is erased the next time that the device registers to thesystem.After you issue a remote wipe request,the request cannot be canceled.Note Remote Wipe Device ProcedureStep 1In the Phone Configuration window for the device,click Wipe .Step 2Click Wipe to accept the Wipe confirmation message.You can view the Wipe status in the Device Lock/Wipe Status section of the Phone Configuration window for the device.Boot Alternate Image for Cisco DX70ProcedureStep 1Power on the device and wait for the Mute LED to blink.Step 2Press and hold the Volume Down button until the Mute button is lit red.Step 3Release the Volume Down button,then press and hold the Mute button for 3seconds.Boot Alternate Image for Cisco DX80ProcedureStep 1Press and hold the Volume Down button and power on the device.Step 2Release the Volume Down button when the Mute button is lit red,then press the Mute button.MaintenanceRemote Wipe DeviceBoot Alternate Image for Cisco DX650ProcedureStep 1Disconnect the power to turn the device off.Step 2Press and hold the *key,then connect the power supply.Step 3Keep the *key held until the message LED becomes solid.Step 4When the message LED flashes 3times,release the *key.The device uses the alternate image to boot.Data MigrationThe data migration feature ensures that a factory reset is not required when data incompatibility exists after a firmwareupgrade.Data may still be lost upon downgrade to an earlier release of firmware.If you upgrade to a newer firmwarerelease,you may not be able to revert to an earlier release without losing data.Note If you downgrade to earlier firmware and the device is not able to migrate data,you receive an alarm.Instruct the user to back up the user data or perform a remote wipe of the device.When the device registers to Cisco Unified Communications Manager,the device detects prior factory resets,overrides migration,downgrades,and reboots.When the device reboots,it loads the downgraded firmware.Debugging Log ProfilesYou can turn on debugging log profiles remotely for a device or group of devices.Set Debugging Log Profile for Call Processing ProcedureStep 1Go to the Product Specific Configuration Layout area of the individual device configuration window or Common Phone Profile window.Step 2Check Log Profile ,and choose Telephony.Step 3Save your changes.Step 4The user is notified that debug logging is enabled in the notification area.The user can expand the messagefor more information,but cannot dismiss the notification.MaintenanceBoot Alternate Image for Cisco DX650Reset Debugging Log Profile to Default ProcedureStep 1Go to the Product Specific Configuration Layout area of the individual device configuration window or Common Phone Profile window.Step 2Check Log Profile ,and select Default to reset all debugs to the default values.This includes debugs that have been set manually from Android Debug Bridge.Step 3Save and apply your changes.Step 4Choose Preset to keep the current debug levels.Step 5Save your changes.User SupportTo successfully use some of the features on their devices,users must receive information from you or from your network team or be able to contact you for assistance.Make sure to provide end users with the names of people to contact for assistance and with instructions for contacting those people.Cisco recommends that you create a web page on your internal support site that provides users with important information about their device.Problem Report ToolUsers submit problem reports to you with the Problem ReportTool.The Problem Report Tool logs are required by Cisco TAC when troubleshooting problems.Note To issue a problem report,users access the Problem Report Tool and provide the date and time that the problem occurred,and a description of the problem.You must add a server address to the Customer Support Upload URL field on Cisco Unified Communications Manager.If you are deploying devices with Mobile and Remote Access through Expressway,you must also add the PRT server address to the HTTP Server Allow list on the Expressway server.Configure Customer Support Upload URLYou must use a server with an upload script to receive PRT files.The PRT uses an HTTP POST mechanism,with the following parameters included in the upload (utilizing multipart MIME encoding):MaintenanceReset Debugging Log Profile to DefaultMaintenanceProblem Report Tool•devicename(example:“SEP001122334455”)•serialno(example:“FCH12345ABC”)•username(the username configured in CUCM,the device owner)•prt_file(example:“probrep-20141021-162840.tar.gz”)A sample script is shown below.This script is provided for reference only.Cisco does not provide supportfor the upload script installed on a customer's server.<?php//NOTE:you may need to edit your php.ini file to allow larger//size file uploads to work.//Modify the setting for upload_max_filesize//I used:upload_max_filesize=20M//Retrieve the name of the uploaded file$filename=basename($_FILES['prt_file']['name']);//Get rid of quotes around the device name,serial number and username if they exist$devicename=$_POST['devicename'];$devicename=trim($devicename,"'\"");$serialno=$_POST['serialno'];$serialno=trim($serialno,"'\"");$username=$_POST['username'];$username=trim($username,"'\"");//where to put the file$fullfilename="/var/prtuploads/".$filename;//If the file upload is unsuccessful,return a500error and//inform the user to try againif(!move_uploaded_file($_FILES['prt_file']['tmp_name'],$fullfilename)){header("HTTP/1.0500Internal Server Error");die("Error:You must select a file to upload.");}>ProcedureStep 1Set up a server that can run your PRT upload script.Step 2Write a script that can handle the parameters listed above,or edit the provided sample script to suit your needs.Step 3Upload your script to your server.Step 4In Cisco Unified Communications Manager,go to the Product Specific Configuration Layout area of the individual device configuration window,Common Phone Profile window,or Enterprise Phone Configurationwindow.Step 5Check Customer support upload URL and enter your upload server URL.Example:/prtscript.phpStep 6Save your changes.Maintenance Take Screenshot From Web BrowserTake Screenshot From Web BrowserProcedureUse your browser to go to this URL:http://<Endpoint IP Address>/CGI/ScreenshotYou receive a prompt that asks for e the associated user ID name and password. Take Screenshot From DeviceProcedurePress the Vol Down button and Power/Lock button for three seconds.Application SupportEvaluate whether the issue is a device issue or a problem with the application.If the problem is applicationrelated,contact the application support center directly.。
Cisco设备维护

备份及灾难性恢复
使用TFTP管理配置文件 管理配置文件 使用 备份过程: 备份过程: 步骤1、输入 步骤 、输入copy startup-config tftp 步骤2、输入用来保存配置文件的 服务器的ip 步骤 、输入用来保存配置文件的tftp服务器的 服务器的 步骤3、 步骤 、输入指派给配置文件的名称或者接受默认名称 步骤4、每次都键入 步骤 、每次都键入yes来确认选择 来确认选择
备份及灾难性恢复
使用TFTP管理配置文件 管理配置文件 使用
恢复配置过程注意事项: 恢复配置过程注意事项: 如果路由器配置文件丢失,使用erase 如果路由器配置文件丢失,使用erase startup-config 和 reload命令,那么该路由器将没有任何已配置的接口。Tftp需要 命令, 需要ip 命令 那么该路由器将没有任何已配置的接口。 需要 来进行连接,所以你需要使用控制台端口配置接口的ip地址 地址, 来进行连接,所以你需要使用控制台端口配置接口的 地址,从 而提供对tftp服务器的访问。 服务器的访问。 而提供对 服务器的访问
- 1、下载文档前请自行甄别文档内容的完整性,平台不提供额外的编辑、内容补充、找答案等附加服务。
- 2、"仅部分预览"的文档,不可在线预览部分如存在完整性等问题,可反馈申请退款(可完整预览的文档不适用该条件!)。
- 3、如文档侵犯您的权益,请联系客服反馈,我们会尽快为您处理(人工客服工作时间:9:00-18:30)。
4006交换机(IOS版)简明配置维护手册中望商业机器公司2002-12-17目录说明 (3)产品特性 (3)配置端口 (5)配置一组端口 (5)配置二层端口 (7)配置端口速率及双工模式 (8)端口描述 (8)配置三层口 (10)监控及维护端口 (12)监控端口和控制器的状态 (12)刷新、重置端口及计数器 (13)关闭和打开端口 (14)配置VLAN (15)理解VLAN (15)可支持的VLAN (15)配置正常范围的VLAN (16)生成、修改以太网VLAN (16)删除VLAN (18)将端口分配给一个VLAN (18)配置VLAN Trunks (19)使用STP实现负载均衡 (22)配置EtherChannel (27)三层以太通道配置 (27)三层物理端口配置 (28)二层以太通道配置 (29)配置以太通道负载均衡 (31)配置SPAN (32)理解SPAN (32)SPAN会话 (32)目标端口 (33)源端口 (33)流量类型 (33)基于VLAN的SPAN (33)SPAN流量 (34)配置SPAN (34)指定源 (34)指定目标 (35)监视一个trunk接口上的源VLAN (35)说明本手册只包括日常使用的有关命令及特性,其它未涉及的命令及特性请参考英文的详细配置手册。
产品特性Cisco Catalyst 4006 Supervisor Engine III将非阻塞的第2/3/4层交换与增强的控制结合在一起,从而让企业和城域以太网用户在部署基于互联网的应用时具有业务灵活性。
作为Cisco A VVID(融合语音、视频和集成数据的网络体系架构)的一个关键性组件,Cisco Catalyst 4000利用智能化的网络服务,将控制从网络骨干扩展到了网络边缘,这些服务包括先进的服务质量(QoS)、可扩展的性能、全面的安全性和简便的管理功能。
第2层特性∙第2层硬件数据包转发率可达48Mpps∙第2层交换端口和VLAN中继∙IEEE 802.1Q VLAN封装∙ISL VLAN封装(不包括WS-X4418-GB 和WS-X4412-2GB-T 中的阻塞端口)∙动态中继协议(DTP)∙VLAN中继协议(VTP)和VTP域∙每个交换机支持4096个VLAN(将来的软件版本)∙每个VLAN的生成树(PVST)和PVST+∙STP PortFast和PortFast防护措施∙STP UplinkFast和BackboneFast∙STP根段防护措施∙Cisco搜索协议∙IGMP侦听v1和v2∙在线路卡中集成Cisco以太通道、快速以太通道、千兆位以太通道技术∙端口集中协议(PAgP)∙单向链路检测(UDLD)和主动型UDLD第3层特性∙IP Cisco快速传送(CEF)路由速度可达48Mpps∙静态IP路由∙IP路由协议(内部网关路由协议[IGRP]、增强型IGRP[EIGRP]、开放式最短路径优先[OSPF]、路由信息协议[RIP]、RIP2)∙边界网关协议[BGP4]和多播边界网关协议[MBGP]∙热待机路由协议(HSRP)∙IGMP v1、v2和v3∙IP多播路由协议(距离向量多播路由协议[DVMRP]、PIM、SSM)∙多播源发现协议(MSDP)∙Cisco群组多播协议(CGMP)服务器∙完全支持互联网控制消息协议(ICMP)∙ICMP路由器发现协议先进的服务质量和成熟流量管理∙针对每个端口的QoS配置∙硬件上支持每个端口四个队列∙严格优先级排序∙IP DSCP和IP 优先权∙基于IP服务类型(ToS)或者DSCP进行分类和标记∙基于完整的第3/4层报头(只限于IP)进行分类和标记∙基于完整的第3/4层报头(只限于IP)制定输入和输出策略∙能够集中或者单独在出口或者入口分别配置1024种监管器∙整形和共享输出队列管理∙细微的QoS功能不会影响正常的交换性能扩展性能∙64Gbps交换矩阵∙第2层硬件数据包转发率可达48Mpps∙第3层IP Cisco 快速转发路由速率可达48Mpps∙第4层(TCP/UDP)基于硬件的过滤速率可达48Mpps∙实现先进的第3/4层服务不会造成任何性能上的损失∙持续以每秒1000台主机的速度进行基于软件的查询∙支持32768个MAC地址∙在路由表(由单点播送和多播共享)中支持131072个记录∙可以扩展到2000个虚拟端口(VLAN端口)∙利用Cisco千兆位以太通道技术,可以汇聚高达16Gbps的带宽∙基于硬件的多播管理∙基于硬件的ACL简便的可管理性∙只需一个控制台端口和IP地址,来管理系统中的所有功能∙软件配置管理,包括本地和远程的存储∙可选的闪存卡,可以用于存储软件影像,进行备份和方便的软件升级∙通过CiscoWorks Windows网络管理软件,对每个端口、每个交换机进行管理,为Cisco的路由器、交换机和集线器提供一个统一的管理接口∙SNMP v1、v2和v3检测,提供全面的带内管理功能∙基于命令行界面(CLI)的管理控制台,提供详细的带外管理∙远程监控(RMON)软件代理,可以支持四个RMON群组(历史、统计、警报和事件),从而可以增强对流量的管理、监控和分析∙利用一个Cisco SwitchProbe Analyzer(交换端口分析器[SPAN]端口支持所有九个RMON群组,这个端口可以通过一个单一的网络分析器或者RMON探测器对一个端口、一组端口或者整个交换机进行流量监控)∙分析支持,包括入口、出口和VLAN SPAN全面的安全性∙TACACS+和RADIUS,它们可以对交换机进行集中控制,并防止未经授权的用户更改配置∙在所有端口上的标准和扩展ACL∙在所有端口上(没有性能损失)采用路由器访问控制列表(RACL)∙专用VLAN(PVLAN),可以在一个交换机的两个端口之间提供安全性和独立性指示灯和端口规格∙系统状态:绿色(正常)/红色(故障)∙交换机负载利用率:总交换使用率在1%到100%之间∙控制端口:RJ-45凹式端口∙重启(交换机隐含保护)∙管理端口:10/100BASE-TX(RJ-45凹式)数据终端设备(DTE);绿色(工作正常)/橙色(禁用)/关闭(没有连接)其它功能:支持以下的GBIC模块:∙1000BASE-SX GBIC: 光纤最长1804 feet (550 m)∙1000BASE-LX/LH GBIC: 光纤最长32,808 feet (6 miles or 10 km)∙1000BASE-ZX GBIC: 光纤最长328,084 feet (62 miles or 100 km)配置端口配置一组端口当使用interface range命令时有如下的规则:∙有效的组范围:o vlan从1 到4094o fastethernet槽位/{first port} - {last port}o gigabitethernet槽位/{first port} - {last port}∙端口号之间需要加入空格,如:interface range fastethernet 2/1 –5是有效的,而interface range fastethernet 2/1-5是无效的.∙interface range命令只能配置已经存在的interface vlan∙所有在同一组的端口必须是相同类别的。
见以下例子:4006# configure terminal4006(config)# interface range fastethernet2/1 - 54006(config-if-range)# no shutdown40065(config-if-range)#*Oct 6 08:24:35: %LINK-3-UPDOWN: Interface FastEthernet2/1, changed state to up*Oct 6 08:24:35: %LINK-3-UPDOWN: Interface FastEthernet2/2, changed state to up*Oct 6 08:24:35: %LINK-3-UPDOWN: Interface FastEthernet2/3, changed state to up*Oct 6 08:24:35: %LINK-3-UPDOWN: Interface FastEthernet2/4, changed state to up*Oct 6 08:24:35: %LINK-3-UPDOWN: Interface FastEthernet2/5, changed state to up*Oct 6 08:24:36: %LINEPROTO-5-UPDOWN: Line protocol on Interface FastEthernet2/05, changed state to up*Oct 6 08:24:36: %LINEPROTO-5-UPDOWN: Line protocol on Interface FastEthernet2/3, changedstate to up*Oct 6 08:24:36: %LINEPROTO-5-UPDOWN: Line protocol on Interface FastEthernet2/4, changedstate to up以下的例子显示使用逗号来配置不同类型端口的组:4006# configure terminal4006(config)# interface range fastethernet2/1 – 3, gigabitethernet3/1 - 24006(config-if-range)# no shutdown4006(config-if-range)#*Oct 6 08:29:28: %LINK-3-UPDOWN: Interface FastEthernet2/1, changed state to up*Oct 6 08:29:28: %LINK-3-UPDOWN: Interface FastEthernet2/2, changed state to up*Oct 6 08:29:28: %LINK-3-UPDOWN: Interface FastEthernet2/3, changed state to up*Oct 6 08:29:28: %LINK-3-UPDOWN: Interface GigabitEthernet3/1, changed state to up *Oct 6 08:29:28: %LINK-3-UPDOWN: Interface GigabitEthernet3/2, changed state to up *Oct 6 08:29:29: %LINEPROTO-5-UPDOWN: Line protocol on Interface GigabitEthernet0/ 1, changed state to up*Oct 6 08:29:29: %LINEPROTO-5-UPDOWN: Line protocol on Interface FastEthernet0/ 2, changed state to up*Oct 6 08:29:29: %LINEPROTO-5-UPDOWN: Line protocol on Interface FastEthernet0/ 3, changed state to up配置二层端口4006的所有端口缺省的端口都是二层口,如果此端口已经配置成三层端口的话,则需要用switchport来使其成为二层端口。
