JavaScript自定义模式对话框
js中trigger的用法
js中trigger的用法一、什么是trigger?Trigger是JavaScript中的一个方法,它可以通过模拟用户事件来触发元素上的事件处理程序。
在某些情况下,触发器可以帮助我们模拟用户交互并自动执行一些操作。
二、trigger的语法在JavaScript中,使用trigger方法需要指定两个参数:要触发的事件类型和要传递给事件处理程序的数据对象(可选)。
语法如下:$(selector).trigger(eventType,[,extraParameters])其中,selector表示要触发事件的元素选择器;eventType表示要触发的事件类型,比如click、mouseover等;extraParameters是一个可选参数,它可以传递给事件处理程序。
三、trigger的使用场景1. 模拟用户交互当我们需要模拟用户行为时,可以使用trigger方法来实现。
比如说,在自动化测试中,我们需要测试一个表单是否能够正确地提交数据。
这时候就可以使用trigger方法来模拟用户点击提交按钮,并验证表单是否成功提交。
2. 触发自定义事件除了浏览器原生支持的事件类型外,我们也可以通过jQuery自定义一些事件类型,并使用trigger方法来触发这些自定义事件。
比如说,在一个网页应用中,我们可能需要监听一个名为"customEvent"的自定义事件,并在该事件被触发时执行一些操作。
这时候就可以使用trigger方法来手动触发该自定义事件。
3. 与其他插件配合使用在一些jQuery插件中,我们可能需要手动触发某个事件来实现一些特定的功能。
比如说,在jQuery UI的sortable插件中,我们需要手动触发"sortstop"事件来通知该插件排序已经完成。
四、trigger的实例1. 模拟点击事件在下面的示例中,我们创建了一个按钮,并为其绑定了一个点击事件。
当用户点击按钮时,会弹出一个对话框。
JavaScript自定义模拟alert弹出提示框–编码工具
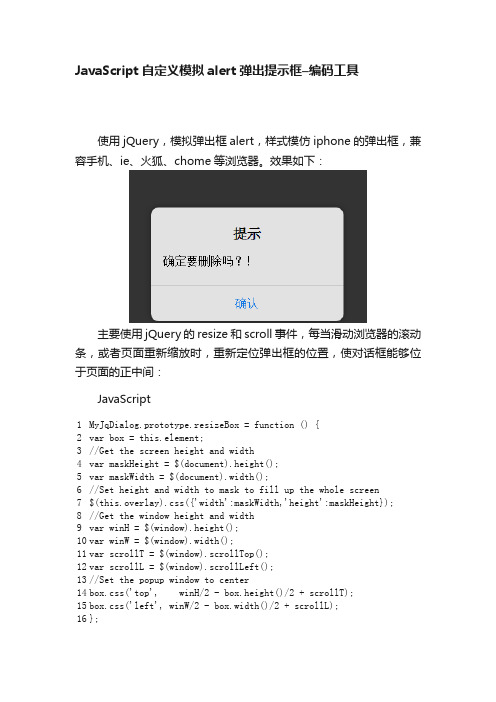
JavaScript 自定义模拟alert 弹出提示框–编码工具使用jQuery ,模拟弹出框alert ,样式模仿iphone 的弹出框,兼容手机、ie 、火狐、chome 等浏览器。
效果如下:主要使用jQuery 的resize 和scroll 事件,每当滑动浏览器的滚动条,或者页面重新缩放时,重新定位弹出框的位置,使对话框能够位于页面的正中间:JavaScript1 2 3 4 5 6 7 8 9 10 11 12 13 14 15 16 MyJqDialog.prototype.resizeBox = function () {var box = this.element;//Get the screen height and widthvar maskHeight = $(document).height();var maskWidth = $(document).width();//Set height and width to mask to fill up the whole screen $(this.overlay).css({'width':maskWidth,'height':maskHeight}); //Get the window height and widthvar winH = $(window).height();var winW = $(window).width();var scrollT = $(window).scrollTop();var scrollL = $(window).scrollLeft();//Set the popup window to centerbox.css('top', winH/2 - box.height()/2 + scrollT);box.css('left', winW/2 - box.width()/2 + scrollL);};17181920再配合css 样式。
[Javascript]40个轻量级JavaScript脚本库
![[Javascript]40个轻量级JavaScript脚本库](https://img.taocdn.com/s3/m/860a35aff021dd36a32d7375a417866fb84ac06e.png)
[Javascript]40个轻量级JavaScript脚本库诸如, , , 和等JavaScript脚本库,⼤家都已经很熟悉。
但这些脚本库有利也有弊——⽐如说JavaScript⽂件过⼤的问题。
有时你可能会愿意采⽤⼀些体积⼩巧、专注于特定任务的JavaScript脚本库。
以下是40个轻量级的JavaScript脚本库。
供每位⽹页设计师和程序员作参考。
1. 表单wForms 是⼀个开源的、⽆⼊侵的(unobstrusive)注*代码库,能够简化⼤部分与表单相关的常⽤JavaScript函数。
它能对表单的⽤户输⼊值进⾏验证,只需为表单元素添加⼀个特定的类即可使⽤。
另外,wForms 还具有强⼤的表单同步(例如“全选/全不选”)和条件表单(如,当x被选择则显⽰y)功能。
Validanguage 是⼀个⽆⼊侵的 JavaScript表单验证框架。
它有⼀个继承逻辑,可以全局定义,也可以对每个表单或每个元素分别定义。
利⽤作者提供的两个API,以及诸如综合的AJAX⽀持(integrated AJAX support)、缓存和调⽤函数等特性,该框架可以提供强健的(robust)验证体验。
两个API⽤以⾼级设置,分别是加在注释⾥的像HTML语⾔的 API和基于JavaScript对象的API。
LiveValidation是⼀个轻量级的JavaScript脚本库,提供⼀系列验证函数。
除了经典验证法,此库还具有实时验证(live validation)特性,能根据你键⼊的⽂字实时控制特定区域。
Ruby on Rails的开发者会发现LiveValidation异常好⽤,因为⼆者的命名规范和参数设置⾮常相似。
虽然它是独⽴库,不过也有⼀个Prototype版注*。
⼀个功能强⼤、可扩展、使⽤灵活的表单验证代码库。
yav可处理多种情况,从⽇期、email、整数之类的基本验证到和⾃定义正则表达式之类的⾼级应⽤,都得⼼应⼿。
js中dialog的用法

js中dialog的用法在Web开发中,JS作为一种客户端脚本语言,在页面交互中扮演着重要的角色。
其中,Dialog对话框作为JS中的一种组件,起到了与用户进行互动的作用。
本文将借助于jQuery,探讨JS中Dialog的使用方法。
一、弹窗的创建在使用Dialog的过程中,首先需要对其进行定义。
在jQuery UI中,Dialog的创建是通过 $("#dialog").dialog() 一行来实现的,其中dialog()函数中携带的参数可以根据需要进行设置。
例如:$('#dialog').dialog({autoOpen: false,modal: true,open: function() {// ...},close: function() {// ...}});我们通过这段代码,定义了一个id为“dialog”的Dialog组件。
其中,autoOpen 参数表示是否自动打开;modal参数表示是否为模态对话框;open和close参数表示在Dialog打开和关闭时需要执行的回调函数。
二、弹窗的打开当我们需要调用Dialog的时候,只需要调用dialog("open")函数即可。
例如: $('#dialog').dialog("open");也可以给触发打开Dialog的元素绑定事件,例如:$('button').click(function(){$('#dialog').dialog("open");});当然,为了更好的用户体验,我们可以通过修改autoOpen参数来实现Dialog 的自动打开。
例如:$('#dialog').dialog({autoOpen: true});三、弹窗的关闭Dialog的关闭方式可以通过close()函数来实现。
JS中window对象的open和openDialog方法使用

弹出窗口控制-window.open()弹出窗口控制-CSS+DIV弹出窗口控制-网页对话框2009-03-29 15:46分类:javaScript字号:大中小这里说的网页对话框是指通过脚本代码打开一个新的窗口,并且该窗口可以有返回值。
网页对话框分为网页模式对话框和网页非模式对话框。
(模式和非模式的区别我在这里就不赘述了)。
下面我们只针对网页模式对话框进行说明:弹出网页模式对话框:格式:var somevalue=window.showModalDialog(url[,Arguments[,Features]]);参数说明:url :指定url文件地址。
Argument :用于向网页对话框传递参数,传递参数的类型不限制,对于字符串类型,最大为4096字符。
也可以传递对象。
如index.html.在弹出的窗口中可通过var parameter=window.dialogArguments;获取传递来的参数。
Features:可选项。
窗口对话框的设置参数。
主要参数如下表:参数说明dialogWidth :number用于设置对话框的宽度dialogHeight :number用于设置对话框的高度dialogTop :number用于设置对话框窗口相对于桌面左上角的top位置dialogLeft :number用于设置对话框窗口相对于桌面左侧的left位置center :{yes|no|1|0}用于指定是否将对话框在桌面上居中,yes|1为居中,默认值为yesHelp :{yes|no 1|0}用于指定对话框窗口中是否显示上下文敏感的帮助图标。
默认为yesscroll :{yes|no 1|0}用于指定对话框中是否显示滚动条示例:说明:点击按钮后打开一网页模式对话框。
在网页对话框中选择一个值后关闭该模式对话框。
并将返回值传递到父窗口中。
如下:<script language="javascript">function openDialog(){var somevalue=window.openModalDialog("test.jsp","","dialogWidth=400p x;dialogHeight=300px;help=no;status=no")erName=somevalue;}在弹出的模式对话框中调用一个js函数向打开的窗口返回信息function action(user){parent.window.returnValue=user;window.close();}流程:通过window.openModalDialog()打开一模式窗口,在打开的窗口中调用action()函数将返回值传递给打开的对话框。
js中prompt用法
js中prompt用法JavaScript(简称JS)是一种广泛应用于Web页面交互的脚本语言。
它可以通过在页面上插入脚本代码来实现与用户的互动,其中prompt是JS中一个常用的方法。
本文将介绍prompt的用法及一些注意事项。
1. prompt的基本用法prompt是一个能弹出一个对话框,询问用户输入内容的方法。
它的基本语法如下:```prompt("message", "default value");```其中,"message"是一个字符串,用于向用户显示提示信息;"default value"是可选参数,用于设置文本框的默认值。
当用户在对话框中输入内容后,prompt会返回用户输入的值。
下面是一个示例:```javascriptvar name = prompt("请输入您的姓名:");alert("欢迎您," + name + "!");```在上述代码中,用户输入姓名后,会弹出一个欢迎框,显示用户输入的姓名。
2. prompt与数据类型需要注意的是,prompt返回的值始终是一个字符串类型,无论用户输入的是什么类型的数据。
因此,如果需要对用户输入的值进行数值计算或其他类型的操作,需要进行相应的数据类型转换。
例如,如果用户需要输入一个数字,并将其与另一个数字相加,可以使用parseInt()或parseFloat()方法将字符串转换为数值类型,如下所示:```javascriptvar number1 = 10;var number2 = prompt("请输入一个数字:");number2 = parseInt(number2);var result = number1 + number2;alert("结果为:" + result);```在上述代码中,将prompt返回的字符串转换为整数,然后与预设的数字相加,得到最终的结果。
javascript中alert写法
javascript中alert写法
在JavaScript中,`alert` 是一个用于显示简单提示框的方法。
它通常用于向用户显示一些信息或警告。
以下是`alert` 的基本用法:
```javascript
alert("这是一条提示信息");
```
在这个例子中,当这行代码执行时,会在用户的浏览器中显示一个包含指定文本的提示框。
你也可以将变量的值或表达式的结果显示在`alert` 中:
```javascript
var message = "Hello, World!";
alert(message);
```
或者直接在`alert` 中使用表达式:
```javascript
alert("2 + 2 的结果是:" + (2 + 2));
```
请注意,`alert` 主要用于调试目的或者在需要引起用户注意的情况下使用,因为它会中断用户的操作,直到用户关闭提示框。
在实际应用中,你可能更倾向于使用更灵活的界面元素,比如模态框或者自定义的弹出框。
javascript网页对话框
2008-12-31Javascript 弹出窗口总结(收集)Javascript 弹出窗口总结1: window.open<!--window.open('page.html', 'newwindow', 'height=100, width=400, top=0,left=0, toolbar=no, menubar=no, scrollbars=no, resizable=no,location=no, status=no')//写成一行-->参数解释:window.open 弹出新窗口的命令;'page.html' 弹出窗口的文件名;'newwindow' 弹出窗口的名字(不是文件名),非必须,可用空''代替;height=100 窗口高度;width=400 窗口宽度;top=0 窗口距离屏幕上方的象素值;left=0 窗口距离屏幕左侧的象素值;toolbar=no 是否显示工具栏,yes为显示;menubar,scrollbars 表示菜单栏和滚动栏。
resizable=no 是否允许改变窗口大小,yes为允许;location=no 是否显示地址栏,yes为允许;status=no 是否显示状态栏内的信息(通常是文件已经打开),yes为允许;2: showModalDialog()、showModelessDialog()(1) window.showModalDialog() 模态对话框模态对话框始终有焦点(焦点不可移走,直到它关闭)。
(2) window.showModelessDialog() 非模态对话框由于是对话框,因此它并没有一般用window.open()打开的窗口的所有属性。
不必用window.close()去关闭它,当以非模态方式[IE5]打开时,打开对话框的窗口仍可以进行其他的操作,即对话框不总是最上面的焦点,当打开它的窗口URL改变时,它自动关闭。
ExtJs基础知识总结:自定义弹窗和ComboBox自动联想加载(四)
ExtJs基础知识总结:⾃定义弹窗和ComboBox⾃动联想加载(四) Extjs弹窗可以分为消息弹窗、对话框,这些弹窗的⽅式ExtJs⾃带的Ext.Msg.alert就已经可以满⾜简单消息提⽰,但是相对复杂的提⽰,⽐如如何将Ext.grid.Panel的控件显⽰嵌套到widget.window,然后随着widget.window的show⽅法展⽰到页⾯上哪?另外⼀个就是ExtJs中的Combobox下拉控件,如何做到⼿动输⼊,⾃动联想⼿动输⼊的内容进⾏查询? 通过window显⽰⾃定义弹窗,下⾯有⼏种⽅案思路思路⼀、直接将gridpandel填充到widget.window对应的Items 代码如下:var InvoiceItemGrid = Ext.create('Ext.grid.Panel', {forceFit: false,autoHeight: true,autoScroll: true,frame: true,split: false,layout: "fit",height:document.documentElement.clientHeight,margin: 0,store: PrecStore,loadMask: { msg: '数据加载中...' },columnLines: true,//dockedItems: [PTxtInfo],//selType: "checkboxmodel",selModel: {mode: "multi",//multi,simple,single;默认为多选multicheckOnly: false,//如果值为true,则只⽤点击checkbox列才能选中此条记录allowDeselect: true,//如果值true,并且mode值为单选(single)时,可以通过点击checkbox取消对其的选择},viewConfig: {stripeRows: true,//在表格中显⽰斑马线enableTextSelection: true//可以复制单元格⽂字 "GGXH", "XMSL", "XMDJ", "XMJE", "SL", "SE", "SPBM", "TaxItem"],},bbar: { xtype: "pagingtoolbar", inputItemWidth: 100, store: PrecStore, displayInfo: true },columns: [{ text: "Id", width: 80, dataIndex: "Id", hidden: true },{ text: "商品名称", width: 80, dataIndex: "XMMC" },{ text: "单位", width: 80, dataIndex: "DW" },{ text: "规格型号", width: 120, dataIndex: "GGXH" },{ text: "数量", width: 80, dataIndex: "XMSL" },{ text: "项⽬单价", width: 120, dataIndex: "XMDJ" },{ text: "项⽬⾦额", width: 80, dataIndex: "XMJE" },{ text: "税额", width: 80, dataIndex: "SE" },{ text: "税率%", width: 80, dataIndex: "SL" },{ text: "税⽬编码", width: 160, dataIndex: "SPBM" },]});//主窗体var WindItem= Ext.create('widget.window', {title: '发票明细',closable: true,closeAction: 'hide',modal: true,frame: true,layout: 'fit',width: 895,minWidth: 895,height: 430,layout: {type: 'border',padding: 2},items: [InvoiceItemGrid]});显⽰的结果截图如下:结果分析:grid的标题也没显⽰出来,⽽且随着窗体⼤⼩的拉伸,内容不会全部显⽰。
JavaScript封装对话框代替系统alert功能

JavaScript封装对话框代替系统alert功能我们在使用Javascript编写网页代码时经常会使用alert功能,用来显示各种提示信息,虽然alert非常好用,但是也很难看,而且在各个浏览器中的显示也不相同。
这是在chrome中的显示(位于屏幕中上部):这是IE8.0中的显示(位于屏幕的中间):这是Firefox中的显示(位于屏幕的中间):可见,UI的样式的确不好看,而且提示信息没有标题栏。
那么可以使用自定义函数代替这个系统提供的函数吗?答案是肯定的,下面就我做的一些常识给大家说说。
我们需要的对话框函数必须要有良好的封装性,而且本人不喜欢为了个对话框还必须带上很多附加文件,因此,我将这个函数封装到一个dialog.js中,今后只要引用这个JS文件就可以使用自定义对话框。
我们的对话框是基于层DIV实现的,通过在文档流中插入一个DIV,从而显示我们的对话框,使用的函数是document.createElement("div")。
下面就是我的对话框样式:它的布局结构如上图所示,在对话框下面还有一个覆盖层,用于遮挡页面的显示。
我定义了一个函数:function showMessage(id,title,msg,width,height,colsefunc)来封装这个对话框的显示,id是最外面的div的名称,title是标题栏的内容,msg是显示的内容,width,height是对话框的宽和高,closefunc是在关闭对话框时回调的函数。
这样一个对话框已经能基本满足我们的要求了。
下面我就其中的一些核心知识点给大家讲讲。
1、创建层元素使用var div=document.createElement("div"),创建完成后,设置它的各项属性,比如div.id=id,最重要的是记得把你创建的层元素插入文档流:document.body.appendChild(div);2、创建完元素后最重要的是设置它们的CSS属性,这个在JavaScript中有对应的属性:div.style.cssText,只要设置好这个CSS属性就能显示任意样式的对话框,比如我们这个div的CSS可以这样写:position:absolute;width:"+width+"px;height:"+height+"px;background:white;border:10px solid #ccc;z-index:1002;/* 注意我们的Z轴坐标应该比较大,这样对话框才会显示在最上面*/刚才的CSS中缺少了最重要的left和top坐标的设置,因为坐标的计算是我们对话框的难点之一,首先我们需要得到浏览器可用空间的大小:var w=window.screen.availWidth;//宽度var h=window.screen.availHeight;//高度然后需要确定滚动条的位置:if(document.documentElement.scrollTop)var scrolltop=document.documentElement.scrollTop;elsevar scrolltop=document.body.scrollTop;if(document.documentElement.scrollLeft)var scrollleft=document.documentElement.scrollLeft;elsevar scrollleft=document.body.scrollLeft;由于在IE中没有指定DTD时document.documentElement.scrollTop 的值是0,需要访问document.body.scrollTop才能得到滚动条的坐标,经过测试,在三大浏览器IE、chrom、firefox中表现良好。
javascript弹出窗口代码大全
javascript弹出窗⼝代码⼤全如何利⽤⽹页弹出各种形式的窗⼝,我想⼤家⼤多都是知道些的,但那种多种多样的弹出式窗⼝是怎么搞出来的,今天找了⼀篇好⽂学习了: 1.弹启⼀个全屏窗⼝<html><body onload="window.open('','example01','fullscreen');">;<b></b></body></html> 2.弹启⼀个被F11化后的窗⼝<html><body onload="window.open(''','example02','channelmode');">;<b></b></body></html> 3.弹启⼀个带有收藏链接⼯具栏的窗⼝<html><body onload="window.open('','example03','width=400,height=300,directories');"><b></b></body></html> 4.⽹页对话框<html><SCRIPT LANGUAGE="javascript"><!--showModalDialog(','example04','dialogWidth:400px;dialogHeight:300px;dialogLeft:200px;dialogTop:150px;center:yes;help:yes;resizable:yes;status:yes')//--></SCRIPT><b></b></body></html><html><SCRIPT LANGUAGE="javascript"><!--showModelessDialog(','example05','dialogWidth:400px;dialogHeight:300px;dialogLeft:200px;dialogTop:150px;center:yes;help:yes;resizable:yes;status:yes')//--></SCRIPT><b></b></body></html> showModalDialog()或是showModelessDialog() 来调⽤⽹页对话框,⾄于showModalDialog()与showModelessDialog()的区别,在于showModalDialog()打开的窗⼝(简称模式窗⼝),置在⽗窗⼝上,必须关闭才能访问⽗窗⼝(建议尽量少⽤,以免招⼈反感);showModelessDialog()dialogHeight: iHeight 设置对话框窗⼝的⾼度。
JavaScript弹出对话框的三种方式
JavaScript弹出对话框的三种⽅式学习过js的⼩伙伴会发现,我们在⼀些实例中⽤到了alert()⽅法、prompt()⽅法、prompt()⽅法,他们都是在屏幕上弹出⼀个对话框,并且在上⾯显⽰括号内的内容,使⽤这种⽅法使得页⾯的交互性更精彩,实际上我们经常会在进⾏⽹页浏览时简单这种类型的对话框,在⽤户与应⽤程序进⾏双向交流时,经常要⽤到对话框。
javascript的三种对话框是通过调⽤window对象的三个⽅法alert(),confirm()和prompt()来获得,可以利⽤这些对话框来完成js 的输⼊和输出,实现与⽤户能进⾏交互的js代码。
今天⼩编就来简单介绍⼀下js中的三种弹出对话框,⼩编先单独对这⼏个⽅法进⾏详细讲解,接着,将这⼏个⽅法进⾏对⽐,好了,开始我们的js之旅吧`(*∩_∩*)′......第⼀种:alert()⽅法alert()⽅法是这三种对话框中最容易使⽤的⼀种,她可以⽤来简单⽽明了地将alert()括号内的⽂本信息显⽰在对话框中,我们将它称为警⽰对话框,要显⽰的信息放置在括号内,该对话框上包含⼀个“确认”按钮,⽤户阅读完所显⽰的信息后,只需单击该按钮就可以关闭对话框。
下⾯来看⼀个使⽤alert()⽅法的例⼦,代码如下所⽰:<html><head><title>编写html页⾯</title><script language="javascript"> //JavaScript脚本标注alert("上联:⼭⽯岩下古⽊枯");//在页⾯上弹出上联alert("下联:⽩⽔泉边少⼥妙");//在页⾯上弹出下联</script></head></html>执⾏上⾯的⼩例⼦,在页⾯上弹出对话框并显⽰⼀句话“上联:⼭⽯岩下古⽊枯”,如下所⽰:接着,单击“确认”按钮后再显⽰第⼆个对话框并显⽰“⽩⽔泉边少⼥妙!”,效果如下;在页⾯上弹出对话框并显⽰⼀句话“上联:⼭⽯岩下古⽊枯”,单击“确认”按钮后再显⽰第2个对话框并显⽰“⽩⽔泉边少⼥妙!”我们来分析⼀下这个⼩例⼦:a、在<script>脚本块中两次调⽤alert()⽅法;b、在每个alert()括号内分别添加了⼀段⽂本信息,运⾏出现如下图所⽰的页⾯,当使⽤⿏标单击页⾯上的“确定”按钮后,出现第⼆个页⾯,再点击“确定”按钮后就关闭页⾯上的对话框。
自定义提示框(alert、confirm可自定义标题内容图标取消按钮)
⾃定义提⽰框(alert、confirm可⾃定义标题内容图标取消按钮)声明:本例⼦是基于做的修改效果:【主函数】1、msgbox(title,text,func,cancel,focus,icon)参数说明:title :弹出对话框的标题,标题内容最好在25个字符内,否则会导致显⽰图⽚的异常text :弹出对话框的内容,可以使⽤HTML代码,例如<font color='red'>删除么?</font>,如果直接带⼊函数,注意转义func :弹出对话框点击确认后执⾏的函数,需要写全函数的引⽤,例如add(),如果直接带⼊函数,注意转义。
cancel :弹出对话框是否显⽰取消按钮,为空的话不显⽰,为1时显⽰focus :弹出对话框焦点的位置,0焦点在确认按钮上,1在取消按钮上,为空时默认在确认按钮上icon :弹出对话框的图标<p><input onclick="msgbox('提⽰','请⾄少选择⼀项需要删除的记录!','',null,0,'Warning')" type="button" value="提⽰"/><input onclick="msgbox('提⽰','操作执⾏成功!','',null,0,'true')" type="button" value="操作成功"/><input onclick="msgbox('提⽰','操作执⾏失败!','',null,0,'error')" type="button" value="操作失败"/><input onclick="msgbox('确认删除么?','点击确认执⾏删除操作,点击取消不再执⾏操作!','msgbox(\'操作提⽰\',\'删除成功!\',\'\',null,0,\'true\')',1,1,'Warning')" type="button" value="confirm"/></p><script type="text/javascript" language="javascript">// <
1.HTML代码<!DOCTYPE HTMLPUBLIC"-//W3C//DTD HTML 4.0 Transitional//EN"><htmlxmlns:v="urn:schemas-microsoft-com:vml"xmlns:o="urn:schemas-microsoft-com:office:office "><head id="Head1"runat="server"><title>JS弹出自定义菜单+警告框+确认框+HTML内容+对话框示例</title><script type="text/javascript"src="popup.js"></script><script type="text/javascript"src="popupclass.js"></script><style type="text/css">.singleStyle{margin:0000; padding:0000;border: solid1px#ffffff;background-color: #FEFEFE;text-align: left;vertical-align: middle;cursor: default;font-size: 12px;height:25px;border-collapse:collapse;}.doubleStyle{margin:0000; padding:0000;border: solid1px#ffffff;background-color: #FEFEFE;text-align: left;vertical-align: middle;cursor: default;font-size: 12px;height:25px;border-collapse:collapse;}.mouseOnStyle{margin:0000; padding:0000;border: solid1px#000000;background-color: #f6f6f6;text-align: left;vertical-align: middle;cursor: default;font-size: 12px;height:25px;}</style></head><body><div style='width: 100%; height: 300px; background-color:white; vertical-align:middle;padding:5px;text-align: center;'onclick='dealShowMenu()'>单击此处开始测试</div><table id="table_ShowInfo"style="margin-top:30px;border-width:1px;border-collapse:collapse;bo rder-color:Green;"border="1"cellpadding="2"cellspacing="0"borderColor="red"><tr><td>单元格11</td><td>单元格12</td></tr><tr><td>单元格21</td><td>单元格22</td></tr></table></body></html>2.JS代码<script type="text/javascript">function dealShowMenu() {var content = getMenuDivHTML();menuParamObj = { sTime: '20111106', eTime: '20111206' }; //绘制菜单前可以传递一个object类型参数,这样在菜单项单击后可以通过menuItemParamObj来访问此参数showMenu("选择菜单项", content, true,false,200, 50, window.event);}function showMenu(title, contentHTML, isCursorRelated,isShowTitleBar,width, height, event) { ShowHtmlString(title, contentHTML, isCursorRelated,isShowTitleBar,width, height, event); //调用的是popup.js里的方法}function getMenuDivHTML() {var containerHTML = "<table style='margin:0 0 0 0;width:100%;font-size:12px;' cellspacing='0' cellpadding='0' id='div_RightMenu'>";menuItemList = [{ text: "弹出警告框", clickFunc:"window.parent.menuItem_1_ClickHandler(0,'弹出警告框')", img: "images/table/sz1.gif" },{ text: "弹出确认框", clickFunc:"window.parent.menuItem_2_ClickHandler(1,'弹出确认框')", img: "images/table/fdj.gif" },{ text: "弹出HTML框", clickFunc:"window.parent.menuItem_3_ClickHandler(1,'弹出HTML')", img: "images/table/zq.gif" },{ text: "弹出对话框", clickFunc:"window.parent.menuItem_4_ClickHandler(1,'弹出对话框')", img: "images/table/sz2.gif" },{ text: "取消操作", clickFunc: "ClosePop();", img:"images/table/qx.gif"}];for (var i = 0; i < menuItemList.length; i++) {if (i % 2 == 0) {containerHTML += "<tr class='doubleStyle'onmouseover='this.className=\"mouseOnStyle\";' onmouseout='this.className=\"doubleStyle\";' style=\"cursor:pointer;vertical-align:middle;" + (i < menuItemList.length - 1 ?"border-bottom:none;" : "") + "\" onclick=\"" + menuItemList[i].clickFunc + "\" ><tdstyle='width:25px;text-align:right;border-right:1px solid #EEEEEE;padding:2px' ><img src='" + menuItemList[i].img + "' style='' /></td><td style='vertical-align:middle;padding:3px;'>" + menuItemList[i].text + "</td></tr>";}else {containerHTML += "<tr class='singleStyle'onmouseover='this.className=\"mouseOnStyle\";' onmouseout='this.className=\"singleStyle\";' style=\"cursor:pointer;vertical-align:middle;" + (i < menuItemList.length - 1 ?"border-bottom:none;" : "") + "\" onclick=\"" + menuItemList[i].clickFunc + "\" ><tdstyle='width:25px;text-align:right;border-right:1px solid #EEEEEE;padding:2px;' ><img src='"+ menuItemList[i].img + "' style='' /></td><td style='vertical-align:middle;padding:3px;'>" + menuItemList[i].text + "</td></tr>";}}containerHTML += "</table>";return containerHTML;}var hasMenuItemClicked = false;var menuParamObj = undefined; //菜单绘制参数var menuItemParamObj = { itemIndex: undefined, itemText: undefined, param: undefined }; //菜单项单击事件参数function menuItem_1_ClickHandler(index, text) {menuItemParamObj.itemIndex = index; menuItemParamObj.itemText =text;menuItemParamObj.param = menuParamObj;hasMenuItemClicked = true;ShowAlert("系统警告", getJSONString(menuItemParamObj),"知道了",300,100,window.event); //调用的是popup.js里的方法// ClosePop(); //调用的是popup.js里的方法}function menuItem_2_ClickHandler(index, text) {menuItemParamObj.itemIndex = index; menuItemParamObj.itemText = text; menuItemParamObj.param = menuParamObj;hasMenuItemClicked = true;ShowConfirm("系统确认", "下面的内容是正确的吗?<br/>" +getJSONString(menuItemParamObj), "okListener", "确定", null, "cancelListener", "取消", null, 300, 120, window.event); //调用的是popup.js里的方法// ClosePop(); //调用的是popup.js里的方法}function menuItem_3_ClickHandler(index, text) {menuItemParamObj.itemIndex = index; menuItemParamObj.itemText = text; menuItemParamObj.param = menuParamObj;hasMenuItemClicked = true;ShowHtmlString("系统HTML框", table_ShowInfo.outerHTML, false, true, 300, 120, window.event); //调用的是popup.js里的方法// ClosePop(); //调用的是popup.js里的方法}function menuItem_4_ClickHandler(index, text) {menuItemParamObj.itemIndex = index; menuItemParamObj.itemText = text; menuItemParamObj.param = menuParamObj;hasMenuItemClicked = true;ShowIframe("系统登录对话框", "demo.htm", 300, 120, window.event); //调用的是popup.js 里的方法// ClosePop(); //调用的是popup.js里的方法}function getJSONString(value) {return value.toJSONString();}</script><script type="text/javascript">if (!Object.prototype.toJSONString) {Array.prototype.toJSONString = function() {var a = [], // The array holding the partial texts.i, // Loop counter.l = this.length,v; // The value to be stringified.// For each value in this array...for (i = 0; i < l; i += 1) {v = this[i];switch (typeof v) {case'object':// Serialize a JavaScript object value. Ignore objects thats lack the // toJSONString method. Due to a specification error in ECMAScript, // typeof null is 'object', so watch out for that case.if (v) {if (typeof v.toJSONString === 'function') {a.push(v.toJSONString());}} else {a.push('null');}break;case'string':case'number':case'boolean':a.push(v.toJSONString());// Values without a JSON representation are ignored.}}// Join all of the member texts together and wrap them in brackets.return'[' + a.join(',') + ']';};Boolean.prototype.toJSONString = function() {return String(this);};Date.prototype.toJSONString = function() {// Eventually, this method will be based on the date.toISOString method. function f(n) {// Format integers to have at least two digits.return n < 10 ? '0' + n : n;}return'"' + this.getUTCFullYear() + '-' +f(this.getUTCMonth() + 1) + '-' +f(this.getUTCDate()) + 'T' +f(this.getUTCHours()) + ':' +f(this.getUTCMinutes()) + ':' +f(this.getUTCSeconds()) + 'Z"';};Number.prototype.toJSONString = function() {// JSON numbers must be finite. Encode non-finite numbers as null.return isFinite(this) ? String(this) : 'null';};Object.prototype.toJSONString = function() {var a = [], // The array holding the partial texts.k, // The current key.v; // The current value.// Iterate through all of the keys in the object, ignoring the proto chain// and keys that are not strings.for (k inthis) {if (typeof k === 'string'&&Object.prototype.hasOwnProperty.apply(this, [k])) {v = this[k];switch (typeof v) {case'object':// Serialize a JavaScript object value. Ignore objects that lack the// toJSONString method. Due to a specification error in ECMAScript,// typeof null is 'object', so watch out for that case.if (v) {if (typeof v.toJSONString === 'function') {a.push(k.toJSONString() + ':' + v.toJSONString()); }} else {a.push(k.toJSONString() + ':null');}break;case'string':case'number':case'boolean':a.push(k.toJSONString() + ':' + v.toJSONString());// Values without a JSON representation are ignored.}}}// Join all of the member texts together and wrap them in braces.return'{' + a.join(',') + '}';};(function(s) {// Augment String.prototype. We do this in an immediate anonymous function to // avoid defining global variables.// m is a table of character substitutions.var m = {'\b': '\\b','\t': '\\t','\n': '\\n','\f': '\\f','\r': '\\r','"': '\\"','\\': '\\\\'};s.parseJSON = function(filter) {var j;function walk(k, v) {var i;if (v &&typeof v === 'object') {for (i in v) {if (Object.prototype.hasOwnProperty.apply(v, [i])) {v[i] = walk(i, v[i]);}}}return filter(k, v);}// Parsing happens in three stages. In the first stage, we run the text against // a regular expression which looks for non-JSON characters. We are especially // concerned with '()' and 'new' because they can cause invocation, and '='// because it can cause mutation. But just to be safe, we will reject all// unexpected characters.// We split the first stage into 3 regexp operations in order to work around// crippling deficiencies in Safari's regexp engine. First we replace all// backslash pairs with '@' (a non-JSON character). Second we delete all of// the string literals. Third, we look to see if only JSON characters// remain. If so, then the text is safe for eval.if (/^[,:{}\[\]0-9.\-+Eaeflnr-u \n\r\t]*$/.test(this.replace(/\\./g, '@').replace(/"[^"\\\n\r]*"/g, ''))) {// In the second stage we use the eval function to compile the text into a// JavaScript structure. The '{' operator is subject to a syntactic ambiguity // in JavaScript: it can begin a block or an object literal. We wrap the text // in parens to eliminate the ambiguity.j = eval('(' + this + ')');// In the optional third stage, we recursively walk the new structure, passing // each name/value pair to a filter function for possible transformation.returntypeof filter === 'function' ? walk('', j) : j;}// If the text is not JSON parseable, then a SyntaxError is thrown.thrownew SyntaxError('parseJSON');};s.toJSONString = function() {// If the string contains no control characters, no quote characters, and no // backslash characters, then we can simply slap some quotes around it.// Otherwise we must also replace the offending characters with safe// sequences.if (/["\\\x00-\x1f]/.test(this)) {return'"' + this.replace(/[\x00-\x1f\\"]/g, function(a) {var c = m[a];if (c) {return c;}c = a.charCodeAt();return'\\u00' +Math.floor(c / 16).toString(16) +(c % 16).toString(16);}) + '"';}return'"' + this + '"';};})(String.prototype);}</script>3.Popup.jsvar pop =null;function ShowIframe(title, contentUrl, width, height, event){pop = new Popup({ contentType: 1, isReloadOnClose: false, width: width, height: height, event: event });pop.setContent("contentUrl",contentUrl);pop.setContent("title",title);pop.build();pop.show();}function ShowHtmlString(title, strHtml, isCursorRelative, isShowTitleBar,width, height,event) {pop = new Popup({ contentType: 2, isReloadOnClose: false, isCursorRelative: isCursorRelative, isShowTitleBar:isShowTitleBar, width: width, height: height, event:event }); pop.setContent("contentHtml",strHtml);pop.setContent("title",title);pop.build();pop.show();}function ShowConfirm(title, confirmCon, okListenerId, okButtonText, okParam, cancelListenerId, cancelButtonText, cancelParam, width, height, event){var pop=newPopup({ contentType:3,isReloadOnClose:false,width:width,height:height,event:event});pop.setContent("title",title);pop.setContent("confirmCon",confirmCon);pop.setContent("okCallBack", OKCallBack);pop.setContent("okListenerParameter", { listenerid: okListenerId, param: okParam, popObj: pop }); //添加确认框与外围交互的参数,str为备用参数pop.setContent("okButtonText", okButtonText);pop.setContent("cancelCallBack", CancelCallBack);pop.setContent("cancelListenerParameter", { listenerid: cancelListenerId, param: cancelParam, popObj: pop }); //添加确认框与外围交互的参数,str为备用参数pop.setContent("cancelButtonText", cancelButtonText);pop.build();pop.show();}//确认框“确定”按钮回调function OKCallBack(para) {var popObj = para["popObj"]var listener = document.getElementById(para["listenerid"]);popObj.close();if (listener != null) window.document.fireEvent("onclick",listener);}//确认框“取消”按钮回调function CancelCallBack(para) {var popObj = para["popObj"]var listener = document.getElementById(para["listenerid"]);popObj.close();if (listener != null) window.document.fireEvent("onclick", listener);}function ShowAlert(title, alertCon, yesButtonText, width, height, event){pop = new Popup({ contentType: 4, isReloadOnClose: false, width: width, height: height, event: event });pop.setContent("title",title);pop.setContent("alertCon", alertCon);pop.setContent("yesButtonText", yesButtonText);pop.build();pop.show();}//关闭弹出框function ClosePop(){if(pop != null)pop.close();}4.popoupclass.jsif (!Array.prototype.push) {Array.prototype.push = function() {var startLength = this.length;for (var i = 0; i < arguments.length; i++) this[startLength + i] = arguments[i]; returnthis.length}};function G() {var elements = new Array();for (var i = 0; i < arguments.length; i++) {var element = arguments[i];if (typeof element == 'string') element = document.getElementById(element);if (arguments.length == 1) return element;elements.push(element)};return elements};Function.prototype.bind = function(object) {var __method = this;returnfunction() {__method.apply(object, arguments)}};Function.prototype.bindAsEventListener = function(object) {var __method = this;returnfunction(event) {__method.call(object, event || window.event)}};Object.extend = function(destination, source) {for (property in source) {destination[property] = source[property]};return destination};if (!window.Event) {var Event = new Object()};Object.extend(Event,{observers: false, element: function(event) {return event.target || event.srcElement}, isLeftClick: function(event) {return (((event.which) && (event.which == 1)) || ((event.button) && (event.button == 1))) }, pointerX: function(event) {return event.pageX || (event.clientX + (document.documentElement.scrollLeft || document.body.scrollLeft))}, pointerY: function(event) {return event.pageY || (event.clientY + (document.documentElement.scrollTop || document.body.scrollTop))}, stop: function(event) {if (event.preventDefault) {event.preventDefault();event.stopPropagation()}else {event.returnValue = false;event.cancelBubble = true}}, findElement: function(event, tagName) {var element = Event.element(event);while (element.parentNode && (!element.tagName || (element.tagName.toUpperCase() != tagName.toUpperCase()))) element = element.parentNode;return element}, _observeAndCache: function(element, name, observer, useCapture) {if (!this.observers) this.observers = [];if (element.addEventListener) {this.observers.push([element, name, observer, useCapture]);element.addEventListener(name, observer, useCapture)}elseif (element.attachEvent) {this.observers.push([element, name, observer, useCapture]);element.attachEvent('on' + name, observer)}}, unloadCache: function() {if (!Event.observers) return;for (var i = 0; i < Event.observers.length; i++) {Event.stopObserving.apply(this, Event.observers[i]);Event.observers[i][0] = null};Event.observers = false}, observe: function(element, name, observer, useCapture) {var element = G(element);useCapture = useCapture || false;if (name == 'keypress'&& (navigator.appVersion.match(/Konqueror|Safari|KHTML/) || element.attachEvent)) name = 'keydown';if(element != null)this._observeAndCache(element, name, observer, useCapture)}, stopObserving: function(element, name, observer, useCapture) {var element = G(element);useCapture = useCapture || false;if (name == 'keypress'&& (navigator.appVersion.match(/Konqueror|Safari|KHTML/) || element.detachEvent)) name = 'keydown';if (element.removeEventListener) {element.removeEventListener(name, observer, useCapture)}elseif (element.detachEvent) {element.detachEvent('on' + name, observer)}}});Event.observe(window, 'unload', Event.unloadCache, false);var Class = function() {var _class = function() {this.initialize.apply(this, arguments)};for (i = 0; i < arguments.length; i++) {superClass = arguments[i];for (member in superClass.prototype) {_class.prototype[member] = superClass.prototype[member]}};_class.child = function() {returnnew Class(this)};_class.extend = function(f) {for (property in f) {_class.prototype[property] = f[property]}};return _class};function space(flag) {if (flag == "begin") {var ele = document.getElementById("ft");if (typeof (ele) != "undefined"&& ele != null) ele.id = "ft_popup";ele = document.getElementById("usrbar");if (typeof (ele) != "undefined"&& ele != null) ele.id = "usrbar_popup"}elseif (flag == "end") {var ele = document.getElementById("ft_popup");if (typeof (ele) != "undefined"&& ele != null) ele.id = "ft";ele = document.getElementById("usrbar_popup");if (typeof (ele) != "undefined"&& ele != null) ele.id = "usrbar"}};var Popup = new Class();Popup.prototype ={iframeIdName: 'ifr_popup', initialize: function(config) {this.config = Object.extend({contentType: 1, isHaveTitle: true, scrollType: 'auto', isBackgroundCanClick: false, isSupportDraging: true, isShowShadow: true, isReloadOnClose: true, isCursorRelative: false, isShowTitleBar: true, width: 400, height: 300, event: undefined}, config ||{}); ={shadowWidth: 0, title: "", contentUrl: "", contentHtml: "", callBack: null, parameter: null, confirmCon: "", alertCon: "", someHiddenTag: "select,object,embed", someDisabledBtn: "", someHiddenEle: "", overlay: 0, coverOpacity: 40};this.color ={cColor: "#EEEEEE", bColor: "#FFFFFF", tColor: "#C8C8C8", wColor: "#FFFFFF" };this.dropClass = null;this.someToHidden = [];this.someToDisabled = [];if (!this.config.isHaveTitle) this.config.isSupportDraging = false;this.iniBuild()}, setContent: function(arrt, val) {if (val != '') {switch (arrt) {case'width': this.config.width = val;break;case'height': this.config.height = val;break;case'title': .title = val;break;case'contentUrl': .contentUrl = val;break;case'contentHtml': .contentHtml = val;break;case'okCallBack': .okCallBack = val;break;case'cancelCallBack': .cancelCallBack = val;break;case'okListenerParameter': .okListenerParameter = val;break;case'cancelListenerParameter': .cancelListenerParameter = val;break;case'confirmCon': .confirmCon = val;break;case'okButtonText': .okButtonText = val;break;case'cancelButtonText': .cancelButtonText = val;break;case'alertCon': .alertCon = val;break;case'yesButtonText': .yesButtonText = val;break;case'someHiddenTag': .someHiddenTag = val;break;case'someHiddenEle': .someHiddenEle = val;break;case'someDisabledBtn': .someDisabledBtn = val;break;case'overlay': .overlay = val}}}, iniBuild: function() {G('dialogCase') ? G('dialogCase').parentNode.removeChild(G('dialogCase')) : function() {};var oDiv = document.createElement('span');oDiv.id = 'dialogCase';document.body.appendChild(oDiv)}, build: function() {var baseZIndex = 10001 + .overlay * 10;var showZIndex = baseZIndex + 2;this.iframeIdName = 'ifr_popup' + .overlay;var close = '<img id="dialogBoxClose" src="images/closewin.gif" border="0" width="15px" height="15px" align="absmiddle" title="关闭"/>';var cB = 'filter: alpha(opacity=' + .coverOpacity + ');opacity:' +.coverOpacity / 100 + ';';var cover = '<div id="dialogBoxBG" style="position:absolute;top:0px;left:0px;width:' + document.body.clientWidth + 'px;height:' + document.body.cientHeight + 'px;z-index:' + baseZIndex + ';' + cB + 'background-color:' + olor + ';display:none;"></div>'; var mainBox = '<div id="dialogBox" style="border:1px solid ' + this.color.tColor +';display:none;z-index:' + showZIndex + ';position:relative;width:' + this.config.width +'px;"><table width="100%" border="0" cellpadding="0" cellspacing="0" bgcolor="' +this.color.bColor + '">';if (this.config.isShowTitleBar) {if (this.config.isHaveTitle) {mainBox += '<tr height="24" bgcolor="'+ this.color.tColor + '"><td><table style="-moz-user-select:none;height:24px;margin-top:0px;" width="100%" border="0" cellpadding="0" cellspacing="0" ><tr>' + '<td width="6" height="24"></td><tdid="dialogBoxTitle" style="color:' + this.color.wColor + ';font-size:12px;padding-top:3px;">' + .title + ' </td>' + '<td id="dialogClose" width="20" align="right"valign="middle">' + close + '</td><td width="6"></td></tr></table></td></tr>'}else {mainBox += '<tr height="10"><td align="right">' + close + '</td></tr>' };}mainBox += '<tr style="height:' + this.config.height + 'px" valign="top"><tdid="dialogBody" style="position:relative;"></td></tr></table></div>' + '<divid="dialogBoxShadow" style="display:none;z-index:' + baseZIndex + ';"></div>';if (!this.config.isBackgroundCanClick) {G('dialogCase').innerHTML = cover + mainBox;G('dialogBoxBG').style.height = document.body.scrollHeight}else G('dialogCase').innerHTML = mainBox;Event.observe(G('dialogBoxClose'), "click",this.reset.bindAsEventListener(this), false);if (this.config.isSupportDraging) {dropClass = new Dragdrop(this.config.width, this.config.height,.shadowWidth, this.config.isSupportDraging, this.config.contentType);if (G("dialogBoxTitle") != null) G("dialogBoxTitle").style.cursor = "move"};stBuild()}, lastBuild: function() {var confirm = '<div style="width:100%;height:100%;text-align:center;"><div style="margin:10px 10px 0 10px;font-size:14px;line-height:16px;color:#000000;text-align:left;">' +.confirmCon + '</div><div style="margin:10px;"><input id="dialogOk"style="padding-left:5px;padding-right:5px;" type="button" value="' + .okButtonText + '"/> <input id="dialogCancel" style="padding-left:5px;padding-right:5px;" type="button" value="' + .cancelButtonText + '"/></div></div>';var alert = '<div style="width:100%;height:100%;text-align:center;"><div style="margin:10px 10px 0 10px;font-size:14px;line-height:16px;color:#000000;text-align:left;">' +.alertCon + '</div><div style="margin:10px;"><input id="dialogYES"style="padding-left:5px;padding-right:5px;" type="button" value="'+ .yesButtonText + '"/></div></div>';var baseZIndex = 10001 + .overlay * 10;var coverIfZIndex = baseZIndex + 4;if (this.config.contentType == 1) {var openIframe = "<iframe width='100%' style='height:" + this.config.height + "px' name='" + this.iframeIdName + "' id='" + this.iframeIdName + "' src='" + .contentUrl + "' frameborder='0' scrolling='" + this.config.scrollType + "'></iframe>";var coverIframe = "<div id='iframeBG'style='position:absolute;top:0px;left:0px;width:1px;height:1px;z-index:" + coverIfZIndex + ";filter: alpha(opacity=00);opacity:0.00;background-color:#ffffff;'><div>";G("dialogBody").innerHTML = openIframe + coverIframe}elseif (this.config.contentType == 2) {G("dialogBody").innerHTML = .contentHtml}elseif (this.config.contentType == 3) {G("dialogBody").innerHTML = confirm;Event.observe(G('dialogOk'), "click",this.forOKCallback.bindAsEventListener(this), false);Event.observe(G('dialogCancel'), "click",this.forCancelCallback.bindAsEventListener(this), false)}elseif (this.config.contentType == 4) {G("dialogBody").innerHTML = alert;Event.observe(G('dialogYES'), "click", this.close.bindAsEventListener(this), false)}}, reBuild: function() {G('dialogBody').height = G('dialogBody').clientHeight;。
JavaScript写的一个自定义弹出式对话框代码
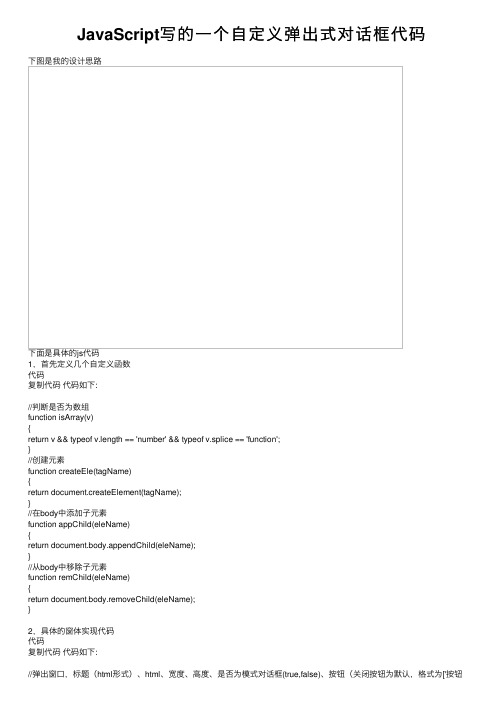
JavaScript写的⼀个⾃定义弹出式对话框代码下图是我的设计思路下⾯是具体的js代码1,⾸先定义⼏个⾃定义函数代码复制代码代码如下://判断是否为数组function isArray(v){return v && typeof v.length == 'number' && typeof v.splice == 'function';}//创建元素function createEle(tagName){return document.createElement(tagName);}//在body中添加⼦元素function appChild(eleName){return document.body.appendChild(eleName);}//从body中移除⼦元素function remChild(eleName){return document.body.removeChild(eleName);}2,具体的窗体实现代码代码复制代码代码如下://弹出窗⼝,标题(html形式)、html、宽度、⾼度、是否为模式对话框(true,false)、按钮(关闭按钮为默认,格式为['按钮1',fun1,'按钮2',fun2]数组形式,前⾯为按钮值,后⾯为按钮onclick事件)function showWindow(title,html,width,height,modal,buttons){//避免窗体过⼩if (width < 300){width = 300;}if (height < 200){height = 200;}//声明mask的宽度和⾼度(也即整个屏幕的宽度和⾼度)var w,h;//可见区域宽度和⾼度var cw = document.body.clientWidth;var ch = document.body.clientHeight;//正⽂的宽度和⾼度var sw = document.body.scrollWidth;var sh = document.body.scrollHeight;//可见区域顶部距离body顶部和左边距离var st = document.body.scrollTop;var sl = document.body.scrollLeft;w = cw > sw ? cw:sw;h = ch > sh ? ch:sh;//避免窗体过⼤if (width > w){width = w;}if (height > h){height = h;}//如果modal为true,即模式对话框的话,就要创建⼀透明的掩膜if (modal){var mask = createEle('div');mask.style.cssText = "position:absolute;left:0;top:0px;background:#fff;filter:Alpha(Opacity=30);opacity:0.5;z-index:10000;width:" + w + "px;height:" + h + "px;";appChild(mask);}//这是主窗体var win = createEle('div');win.style.cssText = "position:absolute;left:" + (sl + cw/2 - width/2) + "px;top:" + (st + ch/2 - height/2) +"px;background:#f0f0f0;z-index:10001;width:" + width + "px;height:" + height + "px;border:solid 2px #afccfe;"; //标题栏var tBar = createEle('div');//afccfe,dce8ff,2b2f79tBar.style.cssText = "margin:0;width:" + width + "px;height:25px;background:url(top-bottom.png);cursor:move;"; //标题栏中的⽂字部分var titleCon = createEle('div');titleCon.style.cssText = "float:left;margin:3px;";titleCon.innerHTML = title;//firefox不⽀持innerText,所以这⾥⽤innerHTMLtBar.appendChild(titleCon);//标题栏中的“关闭按钮”var closeCon = createEle('div');closeCon.style.cssText = "float:right;width:20px;margin:3px;cursor:pointer;";//cursor:hand在firefox中不可⽤closeCon.innerHTML = "×";tBar.appendChild(closeCon);win.appendChild(tBar);//窗体的内容部分,CSS中的overflow使得当内容⼤⼩超过此范围时,会出现滚动条var htmlCon = createEle('div');htmlCon.style.cssText = "text-align:center;width:" + width + "px;height:" + (height - 50) + "px;overflow:auto;"; htmlCon.innerHTML = html;win.appendChild(htmlCon);//窗体底部的按钮部分var btnCon = createEle('div');btnCon.style.cssText = "width:" + width + "px;height:25px;text-height:20px;background:url(top-bottom.png);text-align:center;padding-top:3px;";//如果参数buttons为数组的话,就会创建⾃定义按钮if (isArray(buttons)){var length = buttons.length;if (length > 0){if (length % 2 == 0){for (var i = 0; i < length; i = i + 2){//按钮数组var btn = createEle('button');btn.innerHTML = buttons[i];//firefox不⽀持value属性,所以这⾥⽤innerHTML// btn.value = buttons[i];btn.onclick = buttons[i + 1];btnCon.appendChild(btn);//⽤户填充按钮之间的空⽩var nbsp = createEle('label');nbsp.innerHTML = "  ";btnCon.appendChild(nbsp);}}}}//这是默认的关闭按钮var btn = createEle('button');// btn.setAttribute("value","关闭");btn.innerHTML = '关闭';// btn.value = '关闭';btnCon.appendChild(btn);win.appendChild(btnCon);appChild(win);/*************************************以下为拖动窗体事件*********************///⿏标停留的X坐标var mouseX = 0;//⿏标停留的Y坐标var mouseY = 0;//窗体到body顶部的距离var toTop = 0;//窗体到body左边的距离var toLeft = 0;//判断窗体是否可以移动var moveable = false;//标题栏的按下⿏标事件tBar.onmousedown = function(){var eve = getEvent();moveable = true;mouseX = eve.clientX;mouseY = eve.clientY;toTop = parseInt(win.style.top);toLeft = parseInt(win.style.left);//移动⿏标事件tBar.onmousemove = function(){if(moveable){var eve = getEvent();var x = toLeft + eve.clientX - mouseX;var y = toTop + eve.clientY - mouseY;if (x > 0 && (x + width < w) && y > 0 && (y + height < h)){win.style.left = x + "px";win.style.top = y + "px";}}}//放下⿏标事件,注意这⾥是document⽽不是tBardocument.onmouseup = function(){moveable = false;}}//获取浏览器事件的⽅法,兼容ie和firefoxfunction getEvent(){return window.event || arguments.callee.caller.arguments[0];}//顶部的标题栏和底部的按钮栏中的“关闭按钮”的关闭事件btn.onclick = closeCon.onclick = function(){remChild(win);remChild(mask);}}实例调⽤复制代码代码如下:str = "看看我的窗体效果";showWindow('我的提⽰框',str,850,250,true,['地区',fun1,'矿种',fun2]);更为完整实⽤的代码,包括定义和调⽤代码复制代码代码如下:<html><head><title>⾃定义弹出对话框</title><style type ="text/css" >.layout{width:2000px;height:400px;border:solid 1px red;text-align:center;}</style><script type="text/javascript">//判断是否为数组function isArray(v){return v && typeof v.length == 'number' && typeof v.splice == 'function'; }//创建元素function createEle(tagName){return document.createElement(tagName);}//在body中添加⼦元素function appChild(eleName){return document.body.appendChild(eleName);}//从body中移除⼦元素function remChild(eleName){return document.body.removeChild(eleName);}//弹出窗⼝,标题(html形式)、html、宽度、⾼度、是否为模式对话框(true,false)、按钮(关闭按钮为默认,格式为['按钮1',fun1,'按钮2',fun2]数组形式,前⾯为按钮值,后⾯为按钮onclick事件)function showWindow(title,html,width,height,modal,buttons){//避免窗体过⼩if (width < 300){width = 300;}if (height < 200){height = 200;}//声明mask的宽度和⾼度(也即整个屏幕的宽度和⾼度)var w,h;//可见区域宽度和⾼度var cw = document.body.clientWidth;var ch = document.body.clientHeight;//正⽂的宽度和⾼度var sw = document.body.scrollWidth;var sh = document.body.scrollHeight;//可见区域顶部距离body顶部和左边距离var st = document.body.scrollTop;var sl = document.body.scrollLeft;w = cw > sw ? cw:sw;h = ch > sh ? ch:sh;//避免窗体过⼤if (width > w){width = w;}if (height > h){height = h;}//如果modal为true,即模式对话框的话,就要创建⼀透明的掩膜if (modal){var mask = createEle('div');mask.style.cssText = "position:absolute;left:0;top:0px;background:#fff;filter:Alpha(Opacity=30);opacity:0.5;z-index:100;width:" + w + "px;height:" + h + "px;";appChild(mask);}//这是主窗体var win = createEle('div');win.style.cssText = "position:absolute;left:" + (sl + cw/2 - width/2) + "px;top:" + (st + ch/2 - height/2) +"px;background:#f0f0f0;z-index:101;width:" + width + "px;height:" + height + "px;border:solid 2px #afccfe;";//标题栏var tBar = createEle('div');//afccfe,dce8ff,2b2f79tBar.style.cssText = "margin:0;width:" + width + "px;height:25px;background:url(top-bottom.png);cursor:move;"; //标题栏中的⽂字部分var titleCon = createEle('div');titleCon.style.cssText = "float:left;margin:3px;";titleCon.innerHTML = title;//firefox不⽀持innerText,所以这⾥⽤innerHTMLtBar.appendChild(titleCon);//标题栏中的“关闭按钮”var closeCon = createEle('div');closeCon.style.cssText = "float:right;width:20px;margin:3px;cursor:pointer;";//cursor:hand在firefox中不可⽤closeCon.innerHTML = "×";tBar.appendChild(closeCon);win.appendChild(tBar);//窗体的内容部分,CSS中的overflow使得当内容⼤⼩超过此范围时,会出现滚动条var htmlCon = createEle('div');htmlCon.style.cssText = "text-align:center;width:" + width + "px;height:" + (height - 50) + "px;overflow:auto;"; htmlCon.innerHTML = html;win.appendChild(htmlCon);//窗体底部的按钮部分var btnCon = createEle('div');btnCon.style.cssText = "width:" + width + "px;height:25px;text-height:20px;background:url(top-bottom.png);text-align:center;padding-top:3px;";//如果参数buttons为数组的话,就会创建⾃定义按钮if (isArray(buttons)){var length = buttons.length;if (length > 0){if (length % 2 == 0){for (var i = 0; i < length; i = i + 2){//按钮数组var btn = createEle('button');btn.innerHTML = buttons[i];//firefox不⽀持value属性,所以这⾥⽤innerHTML// btn.value = buttons[i];btn.onclick = buttons[i + 1];btnCon.appendChild(btn);//⽤户填充按钮之间的空⽩var nbsp = createEle('label');nbsp.innerHTML = "  ";btnCon.appendChild(nbsp);}}}}//这是默认的关闭按钮var btn = createEle('button');// btn.setAttribute("value","关闭");btn.innerHTML = "关闭";// btn.value = '关闭';btnCon.appendChild(btn);win.appendChild(btnCon);appChild(win);/******************************************************以下为拖动窗体事件************************************************/ //⿏标停留的X坐标var mouseX = 0;//⿏标停留的Y坐标var mouseY = 0;//窗体到body顶部的距离var toTop = 0;//窗体到body左边的距离var toLeft = 0;//判断窗体是否可以移动var moveable = false;//标题栏的按下⿏标事件tBar.onmousedown = function(){var eve = getEvent();moveable = true;mouseX = eve.clientX;mouseY = eve.clientY;toTop = parseInt(win.style.top);toLeft = parseInt(win.style.left); //移动⿏标事件 tBar.onmousemove = function() { if(moveable) { var eve = getEvent(); var x = toLeft + eve.clientX - mouseX; var y = toTop + eve.clientY - mouseY; if (x > 0 && (x + width < w) && y > 0 && (y + height < h)) { win.style.left = x + "px"; win.style.top = y + "px"; } } } //放下⿏标事件,注意这⾥是document⽽不是tBar document.onmouseup = function() { moveable = false; } }//获取浏览器事件的⽅法,兼容ie和firefoxfunction getEvent(){return window.event || arguments.callee.caller.arguments[0];}//顶部的标题栏和底部的按钮栏中的“关闭按钮”的关闭事件btn.onclick = closeCon.onclick = function(){remChild(win);if (mask){remChild(mask);}}}function addCheckbox(name,value,id,click){var str = "<input type='checkbox' name='" + name + "' value='" + value + "' id='" + id + "' onclick='" + (click == null ? '':click) + "'/> <label for='" + id + "'>" + value + "</label>";return str;}function show(){var str = "<div><div style='border:dotted 1px blue'><table cellspacing='2'>";str += "<tr><td colspan='7' style='text-align:center'>请选择所在地区:" + addCheckbox('all','全(不)选','cities_all','selectAll(this,\"cities_cb\")') + "</td></tr>";str += "<tr><td>" + addCheckbox('cities_cb','长沙市','cities_cb1') + "</td><td>" + addCheckbox('cities_cb','株洲市','cities_cb2') + "</td><td>" + addCheckbox('cities_cb','湘潭市','cities_cb3') + "</td><td>" + addCheckbox('cities_cb','衡阳市','cities_cb4') + " </td><td>" + addCheckbox('cities_cb','益阳市','cities_cb5') + "</td>";str += "<td>" + addCheckbox('cities_cb','常德市','cities_cb6') + "</td><td>" + addCheckbox('cities_cb','岳阳市','cities_cb7') + "str += "<tr><td>" + addCheckbox('cities_cb','邵阳市','cities_cb8') + "</td><td>" + addCheckbox('cities_cb','郴州市','cities_cb9') + "</td><td>" + addCheckbox('cities_cb','娄底市','cities_cb10') + "</td>";str += "<td>" + addCheckbox('cities_cb','永州市','cities_cb11') + "</td><td>" + addCheckbox('cities_cb','怀化市','cities_cb12') + "</td><td>" + addCheckbox('cities_cb','张家界市','cities_cb13') + "</td><td>" + addCheckbox('cities_cb','湘西⾃治州','cities_cb14') + "</td></tr>";str += "</table></div><br/><div style='border:dotted 1px blue'><table cellspacing='2'>";str += "<tr><td colspan='10' style='text-align:center'>请选择矿种:" + addCheckbox('all','全(不)选','class_all','selectAll(this,\"class_cb\")') + "</td></tr>";str += "<tr><td>" + addCheckbox('class_cb','铋','class_cb1') + "</td><td>" + addCheckbox('class_cb','钒','class_cb2') + "</td> <td>" + addCheckbox('class_cb','⾦','class_cb3') + "</td><td>" + addCheckbox('class_cb','煤','class_cb4') + "</td><td>" + addCheckbox('class_cb','锰','class_cb5') + "</td><td>" + addCheckbox('class_cb','钼','class_cb6') + "</td><td>" + addCheckbox('class_cb','铅','class_cb7') + "</td><td>" + addCheckbox('class_cb','⽯膏','class_cb8') + "</td><td>" + addCheckbox('class_cb','⽯煤','class_cb9') + "</td><td>" + addCheckbox('class_cb','锑','class_cb10') + "</td></tr>";str += "<tr><td>" + addCheckbox('class_cb','铁','class_cb11') + "</td><td>" + addCheckbox('class_cb','铜','class_cb12') + "</td><td>" + addCheckbox('class_cb','钨','class_cb13') + "</td><td>" + addCheckbox('class_cb','锡','class_cb14') + "</td><td>" + addCheckbox('class_cb','锌','class_cb15') + "</td><td>" + addCheckbox('class_cb','银','class_cb16') + "</td><td>" + addCheckbox('class_cb','萤⽯','class_cb17') + "</td><td>" + addCheckbox('class_cb','铀','class_cb18') + "</td><td>" + addCheckbox('class_cb','稀⼟氧化物','class_cb19') + "</td><td>" + addCheckbox('class_cb','重晶⽯','class_cb20') + "</td> </tr>";str += "<tr><td>" + addCheckbox('class_cb','硼','class_cb21') + "</td><td>" + addCheckbox('class_cb','磷','class_cb22') + "</td><td>" + addCheckbox('class_cb','⽔泥灰岩','class_cb23') + "</td><td>" + addCheckbox('class_cb','熔剂灰岩','class_cb24') + "</td><td>" + addCheckbox('class_cb','冶⾦⽩云岩','class_cb25') + "</td><td>" +addCheckbox('class_cb','岩盐','class_cb26') + "</td><td>" + addCheckbox('class_cb','芒硝','class_cb27') + "</td><td>" + addCheckbox('class_cb','钙芒硝','class_cb28') + "</td><td>" + addCheckbox('class_cb','地下⽔','class_cb29') + "</td><td>" + addCheckbox('class_cb','地下热⽔','class_cb30') + "</td></tr>";str += "</table></div></div>";showWindow('我的提⽰框',str,850,250,true,['地区',fun1,'矿种',fun2]);}function selectAll(obj,oName){var checkboxs = document.getElementsByName(oName);for(var i=0;i<checkboxs.length;i++){checkboxs[i].checked = obj.checked;}}function getStr(cbName){var cbox = document.getElementsByName(cbName);var str = "";for (var i=0;i<cbox.length;i++){if(cbox[i].checked){str += "," + cbox[i].value;}}str = str.substr(1);return str;}function fun1(){var str = getStr('cities_cb');alert('你选择的地区为:' + str);}function fun2(){var str = getStr('class_cb');alert('你选择的矿种为:' + str);}</script><body><div class ="layout"></div><div class ="layout"></div><div class ="layout"><input type="button" value="显⽰" onclick="show()" /> </div></body></html>此脚本在ie,firefox浏览器下运⾏通过。
js实现自定义弹窗

js实现⾃定义弹窗 众所周知,浏览器⾃带的原⽣弹窗很不美观,⽽且功能⽐较单⼀,绝⼤部分时候我们都会按照设计图⾃定义弹窗或者直接使⽤注⼊layer 的弹窗等等。
前段时间在上看到了⼀个⾃定义弹窗的实现,⾃⼰顺便就学习尝试写了下,下⾯是主要的实现代码并添加了⽐较详细的注释,分享出来供⼤家参考。
(代码⽤了ES6部分写法如需兼容低版本浏览器请把相关代码转成es5写法,后⾯有时间更新为⼀个兼容性较好的es5版本)HTML部分:(没什么内容放置⼀个按钮调⽤函数,js中调⽤实例即可供参考)<!DOCTYPE html><html><head><meta charset="UTF-8"><meta name="viewport" content="width=device-width, initial-scale=1.0"><meta http-equiv="X-UA-Compatible" content="ie=edge"><title>⾃定义弹窗</title><link rel="stylesheet" href="alert.css"></head><body><button>Click me</button><script src="index.js"></script><script>document.querySelector("button").addEventListener("click",()=>{new $Msg({content:"我的⾃定义弹窗好了",type:"success",cancle:function(){let cancle = new $Msg({content:"我是取消后的回调"})},confirm:function(){new $Msg({content:"我是确定后的回调"})}})})</script></body></html>样式部分:也放出来供参考,样式可以根据⾃⼰的设计图⾃⾏更改即可/* 弹出框最外层 */.msg__wrap {position: fixed;top: 50%;left: 50%;z-index: 10;transition: all .3s;transform: translate(-50%, -50%) scale(0, 0);max-width: 50%;background: #fff;box-shadow: 0 0 10px #eee;font-size: 10px;}/* 弹出框头部 */.msg__wrap .msg-header {padding: 10px 10px 0 10px;font-size: 1.8em;}.msg__wrap .msg-header .msg-header-close-button {float: right;cursor: pointer;}/* 弹出框中部 */.msg__wrap .msg-body {padding: 10px 10px 10px 10px;display: flex;}/* 图标 */.msg__wrap .msg-body .msg-body-icon{width: 80px;}.msg__wrap .msg-body .msg-body-icon div{width: 45px;height: 45px;margin: 0 auto;line-height: 45px;color: #fff;border-radius: 50% 50%;font-size: 2em;}.msg__wrap .msg-body .msg-body-icon .msg-body-icon-success{background: #32a323;text-align: center;}.msg__wrap .msg-body .msg-body-icon .msg-body-icon-success::after{ content: "成";}.msg__wrap .msg-body .msg-body-icon .msg-body-icon-wrong{background: #ff8080;text-align: center;}.msg__wrap .msg-body .msg-body-icon .msg-body-icon-wrong::after{ content: "误";}.msg__wrap .msg-body .msg-body-icon .msg-body-icon-info{background: #80b7ff;text-align: center;}.msg__wrap .msg-body .msg-body-icon .msg-body-icon-info::after{content: "注";}/* 内容 */.msg__wrap .msg-body .msg-body-content{min-width: 200px;font-size: 1.5em;word-break: break-all;display: flex;align-items: center;padding-left: 10px;box-sizing: border-box;}/* 弹出框底部 */.msg__wrap .msg-footer {padding: 0 10px 10px 10px;display: flex;flex-direction: row-reverse;}.msg__wrap .msg-footer .msg-footer-btn {width: 50px;height: 30px;border: 0 none;color: #fff;outline: none;font-size: 1em;border-radius: 2px;margin-left: 5px;cursor: pointer;}.msg__wrap .msg-footer .msg-footer-cancel-button{background-color: #ff3b3b;}.msg__wrap .msg-footer .msg-footer-cancel-button:active{background-color: #ff6f6f;}.msg__wrap .msg-footer .msg-footer-confirm-button{background-color: #4896f0;}.msg__wrap .msg-footer .msg-footer-confirm-button:active{background-color: #1d5fac;}/* 遮罩层 */.msg__overlay {position: fixed;top: 0;right: 0;bottom: 0;left: 0;z-index: 5;background-color: rgba(0, 0, 0, .4);transition: all .3s;opacity: 0;}CSSJS部分:下⾯是最主要的部分,js⽅法及交互。
visual studio code javascript方法注释
(原创实用版4篇)编制人员:_______________审核人员:_______________审批人员:_______________编制单位:_______________编制时间:____年___月___日序言下面是本店铺为大家精心编写的4篇《visual studio code javascript方法注释》,供大家借鉴与参考。
下载后,可根据实际需要进行调整和使用,希望能够帮助到大家,谢射!(4篇)《visual studio code javascript方法注释》篇1在 Visual Studio Code 中给 JavaScript 方法添加注释,你可以按照以下步骤操作:1. 首先,选中需要添加注释的方法。
你可以单击并拖动鼠标选择方法,或者按住 Shift 键选择多个方法。
2. 然后,按下键盘上的`Ctrl + /`(Mac 上为`Cmd + /`)快捷键,弹出“添加注释”对话框。
3. 在对话框中,你可以选择注释的类型,如内联注释(//)或块注释(/* */)。
你也可以选择在注释中包含参数或返回值信息。
4. 填写注释内容。
在添加注释对话框中,你可以看到一个编辑器,可以在其中输入注释内容。
描述方法的作用、参数和返回值等信息。
5. 最后,点击“添加”按钮,完成方法注释的添加。
《visual studio code javascript方法注释》篇2在 Visual Studio Code 中给 JavaScript 方法添加注释,你可以按照以下步骤操作:1. 首先,选中需要添加注释的方法。
你可以单击并拖动鼠标选择方法,或者按住 Shift 键选择多个方法。
2. 然后,点击菜单栏上的“编辑”按钮,在下拉菜单中选择“新建文件”。
3. 在新文件对话框中,选择“JavaScript 注释”文件类型,输入注释内容,比如:```// 这是一个函数的注释function functionName(parameter1, parameter2) {// 在这里编写函数的实现代码}```4. 保存并关闭新文件。
alert js 用法

Alert JS 用法什么是 Alert JSAlert JS 是一种在网页中显示警告消息的方法。
它通过弹出一个对话框来向用户展示重要的信息或者提示。
Alert JS 是 JavaScript 的内置函数,可以直接在网页中使用。
使用 Alert JS使用 Alert JS 非常简单,只需要调用alert()函数并传入要显示的消息作为参数即可。
alert("这是一个警告消息");以上代码将会在浏览器中弹出一个对话框,并显示消息“这是一个警告消息”。
用户需要点击对话框上的确认按钮才能关闭对话框。
Alert JS 的特点和限制Alert JS 具有以下特点和限制:1.弹出的对话框会阻塞浏览器的其他操作,直到用户关闭对话框为止。
这意味着用户无法进行其他操作,直到处理完警告消息。
2.对话框中只能显示纯文本,无法支持格式化文本、图像或者其他富文本内容。
3.对话框的样式和外观由浏览器决定,无法自定义。
4.在移动设备上,Alert JS 的效果可能与在桌面浏览器上略有不同。
由于 Alert JS 具有阻塞浏览器操作的特性,因此在实际开发中应该谨慎使用。
过多的警告消息可能会打断用户的操作流程,降低用户体验。
如果需要在网页中展示更复杂的提示信息,可以考虑使用其他方法,比如自定义弹窗或者通知栏。
Alert JS 的参数Alert JS 函数可以接受一个字符串作为参数,用于显示在对话框中的消息。
这个字符串可以包含任意文本内容。
alert("这是一个警告消息");Alert JS 还有一些其他可选的参数:•title:对话框的标题。
不同浏览器可能会以不同方式显示标题。
•options:一个对象,用于设置对话框的其他选项,比如按钮文本、图标等。
alert("这是一个警告消息", { title: "警告", button: "确定" });Alert JS 的返回值Alert JS 函数没有返回值,因此不能直接获取用户对对话框的响应。
vant dialog用法 -回复
vant dialog用法-回复Vant Dialog用法Vant Dialog是一个基于Vue.js开发的对话框组件,提供了丰富的功能和样式定制选项。
在本篇文章中,我将详细介绍Vant Dialog的使用方法,并且通过一步一步的指导,帮助您使用该组件来创建自定义的对话框。
第一步:安装Vant Dialog在使用Vant Dialog之前,首先需要安装Vant组件库。
您可以通过npm 包管理器来安装Vant,或者使用cdn引入Vant的脚本文件。
以下是使用npm安装Vant的示例命令:npm install vant第二步:导入Vant Dialog组件一旦Vant组件库安装完成,您就可以在项目中导入Vant Dialog组件。
要使用Vant Dialog,需要在您的Vue组件中导入Vant Dialog的模块。
以下是一个示例代码:javascriptimport { Dialog } from 'vant';第三步:使用Vant Dialog现在,您已经成功导入了Vant Dialog组件,可以开始使用它来创建对话框了。
您可以调用`Dialog`方法来打开对话框,并传入对话框的内容和配置选项。
以下是一个使用Vant Dialog的示例代码:javascriptDialog.alert({title: '提示',message: '这是一个对话框示例',}).then(() => {对话框关闭后的回调函数});在上面的示例中,我们使用`Dialog.alert`方法创建了一个警示对话框,其中`title`参数用于指定对话框的标题,`message`参数用于指定对话框的内容。
另外,您还可以添加其它配置选项,如按钮文本、自定义样式等。
第四步:Vant Dialog的常用配置选项除了上述提到的`title`和`message`参数之外,Vant Dialog还支持许多其它常用的配置选项,以下是一些常用的选项:- `title`: 对话框的标题- `message`: 对话框的内容- `showCancelButton`: 是否显示取消按钮- `confirmButtonText`: 确认按钮的文本- `cancelButtonText`: 取消按钮的文本- `closeOnClickOverlay`: 点击遮罩层是否关闭对话框- `confirmButtonColor`: 确认按钮的颜色- `cancelButtonColor`: 取消按钮的颜色- `overlay`: 是否显示遮罩层- `overlayColor`: 遮罩层的颜色- `overlayOpacity`: 遮罩层的透明度- `transition`: 对话框的过渡动画- `beforeClose`: 对话框关闭前的回调函数您可以根据需要设置上述选项来定制对话框的样式和行为。
- 1、下载文档前请自行甄别文档内容的完整性,平台不提供额外的编辑、内容补充、找答案等附加服务。
- 2、"仅部分预览"的文档,不可在线预览部分如存在完整性等问题,可反馈申请退款(可完整预览的文档不适用该条件!)。
- 3、如文档侵犯您的权益,请联系客服反馈,我们会尽快为您处理(人工客服工作时间:9:00-18:30)。
JavaScript自定义模式对话框
更新日期:2006-09-19 10:03 网页教学网
<script language=javascript>
function openDialogWin()
{
var result = window.showModalDialog("ShowMessage.aspx","","dialogHeight:160px; dialogWidth:300px; status:no; help:no; scroll:no");
//window.show('ShowMessage.aspx', '','height=300, width=400, top=250, left=250, too lbar=no, menubar=no, scrollbars=no, resizable=no,location=no, status=no','_blank');
if(result == "Yes")
window.alert("You Clicked Yes!");
else if(result == "No")
window.alert("You Clicked No!");
//document.writeln(result);
}
</script><input type=button value="按钮" name="btn" onclick="openDialogWin()"
/> Response.Write("<script language='javascript'>");
Response.Write("function confirm(){ window.returnValue='Yes';window.close(); }");
Response.Write("function cancel(){ window.returnValue='No';window.close(); }");
Response.Write("</script>");
Response.Write("<div align='center'><input type='button' value='Yes' onclick='confirm ()' /><input type='button' value='No' onclick='cancel()' /></div>");。
