海尔冷柜BC_BD-103WEG说明书
海尔空调柜机说明书
何为空调的匹数?
选购海尔空调时提到空调的匹数,匹数指的是电器消耗功率,1匹=1马力=735W,匹并非指制冷量。平常所说的空调是多少匹,是依照空调消耗功率估算出空调的制冷量。一样来讲,适应用1匹等于2500W的制冷量(也确实是25机型),1.5匹约等于.3500的量(也确实是35机型)。其余机型能够依照制冷量来估算匹数
设定方式:在开机状态下(按时、送风状态除外),5秒内持续按遥控器或操纵盘睡眠键10次,蜂鸣器响4声后进入停电补偿状态。
取消方式:5秒内持续按遥控器睡眠键10次,蜂鸣器响2声后取消停电补偿功能。
10)产品的人性化设计
该系列产品包括一般冷暖型、单冷型、辅助电加热冷暖型和同时具有健康负离子功能和辅助电加热功能的冷暖型四种类型产品供用户依照自己的需求自由选择,充分知足人性化的需求。
空调是如何搜集房间温度数据的?
空调通过温度传感器搜集温度数据,传感器阻值随温度转变而转变,房间温度传感器一样放置在空调进风口 毛细管的作用是什么?
毛细管的作用是把从冷凝器出来的高温高压液态制冷剂降温、减压后再送入蒸发器,使之取得所需要的蒸发温度。
冷凝器的作用是什么?
冷凝器是将由紧缩机送出的高温、高压制冷剂气体冷却液化。
室内机显示灯 故障缘故
电源 按时 运转
闪 灭 灭 室内环温传感器
闪 亮 亮 室内热交传感器
亮 亮 闪 室外除霜传感器
闪 亮 灭 压机排气温度传感器
闪 灭 亮 室别传感器异样
闪 灭 亮 压机运转异样
闪 闪 亮 1.DC电流检知2.过电流爱惜动作3.功率模块温度太高爱惜4.功率模块低电压检知 室内机显示灯 故障缘故
海尔冰箱使用说明书
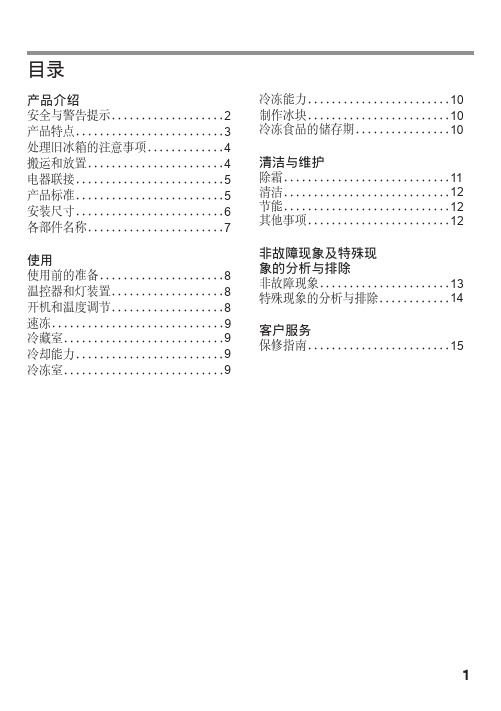
目录产品介绍安全与警告提示 (2)产品特点 (3)处理旧冰箱的注意事项 (4)搬运和放置 (4)电器联接 (5)产品标准 (5)安装尺寸 (6)各部件名称 (7)使用使用前的准备 (8)温控器和灯装置 (8)开机和温度调节 (8)速冻 (9)冷藏室 (9)冷却能力 (9)冷冻室...........................9冷冻能力 (10)制作冰块 (10)冷冻食品的储存期 (10)清洁与维护除霜 (11)清洁 (12)节能 (12)其他事项 (12)非故障现象及特殊现象的分析与排除非故障现象 (13)特殊现象的分析与排除 (14)客户服务保修指南 (15)危险-不要将冰箱安放在潮湿和容易溅到水的地方。
危险-勿用湿手触摸冷冻室的食品或金属容器,否则,易因低温而造成冻伤。
警告-本产品为家用电冰箱,只适用于储藏食品,不能用于其它用途,如储藏血液及制品,药品,生物制品,化学物品和技术资料等。
警告-禁止损坏制冷管路。
管路中的制冷剂若溅入眼睛,会造成严重伤害。
万一发生此类事件,应立即清洗眼睛并到医院就诊。
警告-除了本公司推荐使用的类型外,不得在箱内使用电器。
警告-冰箱顶部不宜放置和使用微波炉、电饭锅、稳压器等电器装置,也不能在冰箱顶部放置重物及盛有液体的容器,以防掉下伤人或液体溢出导致漏电而引起的触电和火灾。
警告-易燃性气体泄漏时,应先关闭泄漏源的阀门,并设法排出室内空气。
切不可拔冰箱电源插座及操作冰箱,以防火灾发生。
警告-在冰箱的外壳或嵌入式结构中,必须保持通风顺畅并不得有阻碍物。
务必使用单独的、带可靠接地线的三芯电源插座。
冰箱应放置在电源插头容易接触的地方, 当发生事故时可以快速切断电源。
避免挤压、折叠、打结或损坏电源软线。
如果电源软线损坏,为避免危险,必须由制造厂或其维修部或类似的专职人员来更换。
更换电源线后冰箱才可通电使用,否则易造成触电甚至引发火灾。
拔电源插头时,不要直接拉拔电源软线,以防拉断。
海尔家居电器产品说明书

c
ANCHOR BOLT ACCESS HOLE
TYPICAL VIEW OF AKD-l0 SWITCHGEAR
LIFT I NG PLATES MUST BE REMOVED WHERE SECT IONS ARE JO I NED
B
~- -
0-
:0 -0 -0
o
-0 F==F== -0
-J
(J)
OAMAGE. IFDAMAGEDNDTIFYSHIPPERIYllEOIATELY. IF FREE OF"
DAMACE,RESTOREPACKllClItTILREAOYFORINSlALLATIQN.
FOOT POUNDS
D
SrOREI!IOOORSIIiACLEIJI.DAYAl!E .... PItEFERABLYCLOS[TOTH[ INSTALLATIDNPOIMT.
HOIST RAIL
TOP WIRE TROUGH {SEE NOTE JJ
DEPTH OF
SUB BASE
NCHOR BOL T SPAC I NG DEPTH OF SUB BASE
SPECTRA B/W CONNECT IONS
SW:~g~g~AR STANDARD OPT. GM STANDARD OPT. GM STANDARD OPT. GM
BOL T SIZE
W/MACH I NE NUT, LOCKWASHER.
HATWASHER WOR
D
BELLVILLE WASHER
PRQTECT 'HE ECiUIP!ENTFROUIllECHANICAL DAMAGE AND ANY COt.lTAC'WITH.OR[XPO~ETO.COAROSlvEFUIlES.lIQIJIDS.
冷柜使用说明书
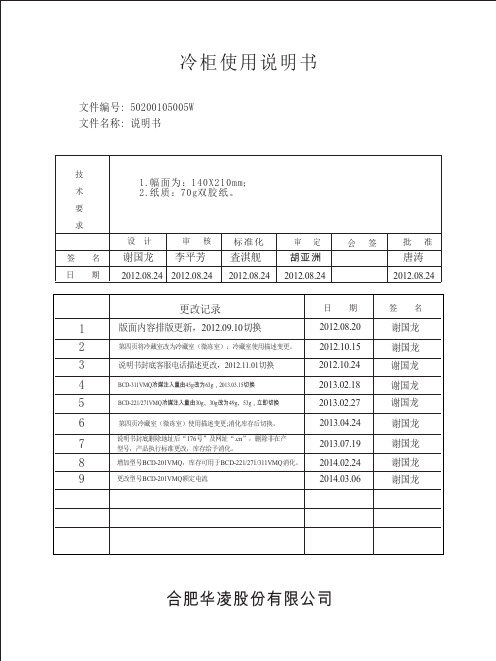
1.幅面为:140X 210mm ;
2.纸质:70g双胶纸。
谢国龙李平芳査淇舰
唐涛
2012.08.242012.08.242012.08.24
2012.08.24
2012.08.24
技 术 要 求
签 名日 期
设 计 审 核标准化审 定
会 签
批 准
冷柜使用说明书
文件编号: 50200105005W 文件名称: 说明书
日 期
签 名
1更改记录
235合肥华凌股份有限公司
胡亚洲版面内容排版更新,2012.09.10切换
谢国龙2012.08.20第四页将冷藏室改为冷藏室(微冻室);冷藏室使用描述变更。
谢国龙2012.10.15说明书封底客服电话描述更改,2012.11.01切换
谢国龙2012.10.24BCD-221/271VMQ 冷媒注入量由30g 、改为g 、53g ,立即切换
30g 49谢国龙2013.02.274BCD-311VMQ 冷媒注入量由45g 改为63g ,2013.03.15切换谢国龙2013.02.186第四页冷藏室(微冻室)使用描述变更;消化库存后切换。
谢国龙2013.04.247说明书封底删除地址后“176号”及网址“.cn ”,删除非在产型号,产品执行标准更改,库存给予消化。
谢国龙2013.07.198增加型号BCD-201VMQ ,库存可用于BCD-221/271/311VMQ 消化。
谢国龙2014.02.249
更改型号BCD-201VMQ 额定电流
谢国龙
2014.03.06。
海尔冰箱用户手册说明书
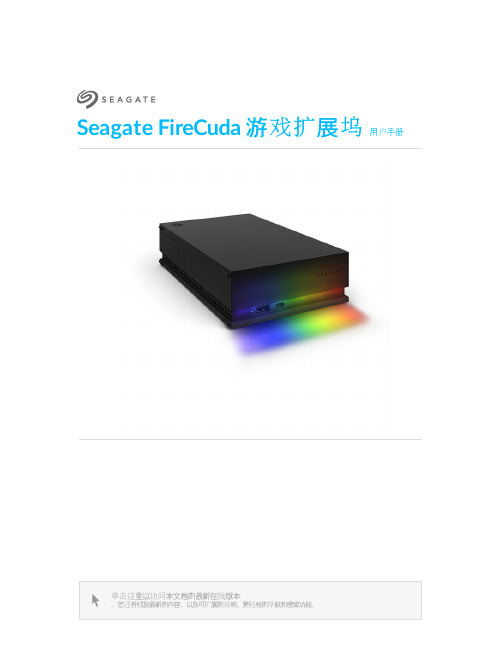
Seagate FireCuda 游戏扩展坞用户手册单击这里以访问本文档的最新在线版本。
您还将找到最新的内容,以及可扩展的说明、更轻松的导航和搜索功能。
. . . . . . . . . . . . . . . . . . . . . . . . . . . . . . . . . . . . . . . . . . . . . . . . . . . . . . . . . . . . . . . . . . . . . . . . . . . . . . . . . . . . . . . .. . . . . . . . . . . . . . . . . . . . . . . . . . . . . . . . . . . . . . . . . . . . . . . . . . . . . . . . . . . . . . . . . . . . . . . . . . . . . . . . . . . . . . . . . . . . . . . . . . . . . . . . . . . . . . . . . . . . . . . . . .. . . . . . . . . . . . . . . . . . . . . . . . . . . . . . . . . . . . . . . . . . . . . . . . . . . . . . . . . . . . . . . . . . . . . . . . . . . . . . . . . . . . . . . . . . . . . . . . . . . . . . . . . . . . . . . . . . . . . . . . . .. . . . . . . . . . . . . . . . . . . . . . . . . . . . . . . . . . . . . . . . . . . . . . . . . . . . . . . . . . . . . . . . . . . . . . . . . . . . . . . . . . . . . . . . . . . . . . . . . . . . . . . . . . . . . . . . . . . . . . . . . .. . . . . . . . . . . . . . . . . . . . . . . . . . . . . . . . . . . . . . . . . . . . . . . . . . . . . . . . . . . . . . . . . . . . . . . . . . . . . . . . . . . . . . . . . . . . . . . . . . . . . . . . . . . . . . . . . . . . . . . . . . . . . . . . . . . . . . . . . . . . . . . . . . . . . . . . . . . . . . . . . . . . . . . . . . . . . . . . . . . . . . . . . . . . . . . . . . . . . . . . . . . . . . . . . . . . .. . . . . . . . . . . . . . . . . . . . . . . . . . . . . . . . . . . . . . . . . . . . . . . . . . . . . . . . . . . . . . . . . . . . . . . . . . . . . . . . . . . . . . . . . . . . . . . . . . . . . . . . . . . . . . . . . . . . . . . . . .. . . . . . . . . . . . . . . . . . . . . . . . . . . . . . . . . . . . . . . . . . . . . . . . . . . . . . . . . . . . . . . . . . . . . . . . . . . . . . . . . . . . . . . . . . . . . . . . . . . . . . . . . . . . . . . . . . . . . . . . . .. . . . . . . . . . . . . . . . . . . . . . . . . . . . . . . . . . . . . . . . . . . . . . . . . . . . . . . . . . . . . . . . . . . . . . . . . . . . . . . . . . . . . . . . . . . . . . . . . . . . . . . . . . . . . . . . . . . . . . . . . . . . . . . . . . . . . . . . . . . . . . . . . . . . . . . . . . . . . . . . . . . . . . . . . . . . . . . . . . . . . . . . . . . . . . . . . . . . . . . . . . . . . . . . . . . . .. . . . . . . . . . . . . . . . . . . . . . . . . . . . . . . . . . . . . . . . . . . . . . . . . . . . . . . . . . . . . . . . . . . . . . . . . . . . . . . . . . . . . . . . . . . . . . . . . . . . . . . . . . . . . . . . . . . . . . . . . .. . . . . . . . . . . . . . . . . . . . . . . . . . . . . . . . . . . . . . . . . . . . . . . . . . . . . . . . . . . . . . . . . . . . . . . . . . . . . . . . . . . . . . . . . . . . . . . . . . . . . . . . . . . . . . . . . . . . . . . . . .. . . . . . . . . . . . . . . . . . . . . . . . . . . . . . . . . . . . . . . . . . . . . . . . . . . . . . . . . . . . . . . . . . . . . . . . . . . . . . . . . . . . . . . . . . . . . . . . . . . . . . . . . . . . . . . . . . . . . . . . . . . . . . . . . . . . . . . . . . . . . . . . . . . . . . . . . . . . . . . . . . . . . . . . . . . . . . . . . . . . . . . . . . . . . . . . . . . . . . . . . . . . . . . . . . . . .. . . . . . . . . . . . . . . . . . . . . . . . . . . . . . . . . . . . . . . . . . . . . . . . . . . . . . . . . . . . . . . . . . . . . . . . . . . . . . . . . . . . . . . . . . . . . . . . . . . . . . . . . . . . . . . . . . . . . . . . . .. . . . . . . . . . . . . . . . . . . . . . . . . . . . . . . . . . . . . . . . . . . . . . . . . . . . . . . . . . . . . . . . . . . . . . . . . . . . . . . . . . . . . . . . . . . . . . . . . . . . . . . . . . . . . . . . . . . . . . . . . . . . . . . . . . . . . . . . . . . . . . . . . . . . . . . . . . . . . . . . . . . . . . . . . . . . . . . . . . . . . . . . . . . . . . . . . . . . . . . . . . . . . . . . . . . . .. . . . . . . . . . . . . . . . . . . . . . . . . . . . . . . . . . . . . . . . . . . . . . . . . . . . . . . . . . . . . . . . . . . . . . . . . . . . . . . . . . . . . . . . . . . . . . . . . . . . . . . . . . . . . . . . . . . . . . . . . .. . . . . . . . . . . . . . . . . . . . . . . . . . . . . . . . . . . . . . . . . . . . . . . . . . . . . . . . . . . . . . . . . . . . . . . . . . . . . . . . . . . . . . . . . . . Contents1欢迎使用包装内容最低系统要求视图2使用入门连接电源连接到计算机设置 FireCuda 游戏扩展坞3使用 Toolkit 自定义 RGB 以及更多内容自定义 RGB 颜色设置启动备份计划(仅限 Windows )设置镜像文件夹4格式化和分区(可选)选择文件系统格式格式化说明5从您的计算机安全移除设备Windows Mac 6常见问题解答. . . . . . . . . . . . . . . . . . . . . . . . . . . . . . . . . . . . . . . . . . . . . . . . . . . . . . . . . . . . . . . . . . . . . . . . . . . . . . . . . . . . . . . . . . . . . . . . . . . . . . . . . . . . . . . . . . 端口. . . . . . . . . . . . . . . . . . . . . . . . . . . . . . . . . . . . . . . . . . . . . . . . . . . . . . . . . . . . . . . . . . . . . . . . . . . . . . . . . . . . . . . . . . . . . . . . . . . . . . . . . . . . . . . . . . 操作系统. . . . . . . . . . . . . . . . . . . . . . . . . . . . . . . . . . . . . . . . . . . . . . . . . . . . . . . . . . . . . . . . . . . . . . . . . . . . . . . . . . . . . . . . . . . . . . . . . . . . . . . . . . . . . . . . . . 最低可用磁盘空间:. . . . . . . . . . . . . . . . . . . . . . . . . . . . . . . . . . . . . . . . . . . . . . . . . . . . . . . . . . . . . . . . . . . . . . . . . . . . . . . . . . . . . . . . . . . . . . . . . . . . . . . . . . . . . . . . . . 前面. . . . . . . . . . . . . . . . . . . . . . . . . . . . . . . . . . . . . . . . . . . . . . . . . . . . . . . . . . . . . . . . . . . . . . . . . . . . . . . . . . . . . . . . . . . . . . . . . . . . . . . . . . . . . . . . . . 上一步. . . . . . . . . . . . . . . . . . . . . . . . . . . . . . . . . . . . . . . . . . . . . . . . . . . . . . . . . . . . . . . . . . . . . . . . . . . . . . . . . . . . . . . . . . . . . . . . . . . . . . . . . . . . . . . . . . 在这里开始. . . . . . . . . . . . . . . . . . . . . . . . . . . . . . . . . . . . . . . . . . . . . . . . . . . . . . . . . . . . . . . . . . . . . . . . . . . . . . . . . . . . . . . . . . . . . . . . . . . . . . . . . . . . . . . . . . 注册您的设备. . . . . . . . . . . . . . . . . . . . . . . . . . . . . . . . . . . . . . . . . . . . . . . . . . . . . . . . . . . . . . . . . . . . . . . . . . . . . . . . . . . . . . . . . . . . . . . . . . . . . . . . . . . . . . . . . . 下载 Toolkit . . . . . . . . . . . . . . . . . . . . . . . . . . . . . . . . . . . . . . . . . . . . . . . . . . . . . . . . . . . . . . . . . . . . . . . . . . . . . . . . . . . . . . . . . . . . . . . . . . . . . . . . . . . . . . . . . . 安装 Toolkit . . . . . . . . . . . . . . . . . . . . . . . . . . . . . . . . . . . . . . . . . . . . . . . . . . . . . . . . . . . . . . . . . . . . . . . . . . . . . . . . . . . . . . . . . . . . . . . . . . . . . . . . . . . . . . . . . . 同时兼容 Windows 和 Mac . . . . . . . . . . . . . . . . . . . . . . . . . . . . . . . . . . . . . . . . . . . . . . . . . . . . . . . . . . . . . . . . . . . . . . . . . . . . . . . . . . . . . . . . . . . . . . . . . . . . . . . . . . . . . . . . . . 针对 Windows 优化性能. . . . . . . . . . . . . . . . . . . . . . . . . . . . . . . . . . . . . . . . . . . . . . . . . . . . . . . . . . . . . . . . . . . . . . . . . . . . . . . . . . . . . . . . . . . . . . . . . . . . . . . . . . . . . . . . . . 针对 macOS 优化性能. . . . . . . . . . . . . . . . . . . . . . . . . . . . . . . . . . . . . . . . . . . . . . . . . . . . . . . . . . . . . . . . . . . . . . . . . . . . . . . . . . . . . . . . . . . . . . . . . . . . . . . . . . . . . . . . . . 了解更多. . . . . . . . . . . . . . . . . . . . . . . . . . . . . . . . . . . . . . . . . . . . . . . . . . . . . . . . . . . . . . . . . . . . . . . . . . . . . . . . . . . . . . . . . . . . . . . . . . . . . . . . . . . . . . . . . . 通过 Finder 窗口退出. . . . . . . . . . . . . . . . . . . . . . . . . . . . . . . . . . . . . . . . . . . . . . . . . . . . . . . . . . . . . . . . . . . . . . . . . . . . . . . . . . . . . . . . . . . . . . . . . . . . . . . . . . . . . . . . . . 通过桌面退出444444445667889991111111112121212121313141414141415. . . . . . . . . . . . . . . . . . . . . . . . . . . . . . . . . . . . . . . . . . . . . . . . . . . . . . . . . . . . . . . . . . . . . . . . . . . . . . . . . . . . . . . . . . . . . . . . . . . . . . . . . . . . . . . . . . . . . . . . . . . . . . . . . . . . . . . . . . . . . . . . . . . . . . . . . . . . . . . . . . . . . . . . . . . . . . . . . . . . . . . . . . . . . . . . . . . . . . . . . . . . . . . . . . . . . . . . . . . . . . . . . . . . . . . . . . . . . .. . . . . . . . . . . . . . . . . . . . . . . . . . . . . . . . . . . . . . . . . . . . . . . . . . . . . . . . . . . . . . . . . . . . . . . . . . . . . . . . . . . . . . . . . . . . . . . . . . . . . . . . . . . . . . . . . . . . . . . . . .. . . . . . . . . . . . . . . . . . . . . . . . . . . . . . . . . . . . . . . . . . . . . . . . . . . . . . . . . . . . . . . . . . . . . . . . . . . . . . . . . . . . . . . . . . . . . . . . . . . . . . . . . . . . . . . . . . . . . . . . . . . . . . . . . . . . . . . . . . . . . . . . . . . . . . . . . . . . . . . . . . . . . . . . . . . . . . . . . . . . . . . . . . . . . . . . . . . . . . . . . . . . . . . . . . . . .. . . . . . . . . . . . . . . . . . . . . . . . . . . . . . . . . . . . . . . . . . . . . . . . . . . . . . . . . . . . . . . . . . . . . . . . . . . . . . . . . . . . . . . . . . . . . . . . . . . . . . . . . . . . . . . . . . . . . . . . . .所有用户Windows Mac 7Regulatory Compliance China RoHS Taiwan RoHS . . . . . . . . . . . . . . . . . . . . . . . . . . . . . . . . . . . . . . . . . . . . . . . . . . . . . . . . . . . . . . . . . . . . . . . . . . . . . . . . . . . . . . . . . . . . . . . . . . . . . . . . . . . . . . . . . . 问题:我的文件传输速度很慢. . . . . . . . . . . . . . . . . . . . . . . . . . . . . . . . . . . . . . . . . . . . . . . . . . . . . . . . . . . . . . . . . . . . . . . . . . . . . . . . . . . . . . . . . . . . . . . . . . . . . . . . . . . . . . . . . . 问题:我的计算机只有 USB-C 端口. . . . . . . . . . . . . . . . . . . . . . . . . . . . . . . . . . . . . . . . . . . . . . . . . . . . . . . . . . . . . . . . . . . . . . . . . . . . . . . . . . . . . . . . . . . . . . . . . . . . . . . . . . . . . . . . . . 问题:我必须对 USB 设备使用 USB 集线器. . . . . . . . . . . . . . . . . . . . . . . . . . . . . . . . . . . . . . . . . . . . . . . . . . . . . . . . . . . . . . . . . . . . . . . . . . . . . . . . . . . . . . . . . . . . . . . . . . . . . . . . . . . . . . . . . . 问题:提供的 USB 电缆太短. . . . . . . . . . . . . . . . . . . . . . . . . . . . . . . . . . . . . . . . . . . . . . . . . . . . . . . . . . . . . . . . . . . . . . . . . . . . . . . . . . . . . . . . . . . . . . . . . . . . . . . . . . . . . . . . . . 问题:我收到了文件传输错误消息. . . . . . . . . . . . . . . . . . . . . . . . . . . . . . . . . . . . . . . . . . . . . . . . . . . . . . . . . . . . . . . . . . . . . . . . . . . . . . . . . . . . . . . . . . . . . . . . . . . . . . . . . . . . . . . . . . 问题:计算机中未显示硬盘图标. . . . . . . . . . . . . . . . . . . . . . . . . . . . . . . . . . . . . . . . . . . . . . . . . . . . . . . . . . . . . . . . . . . . . . . . . . . . . . . . . . . . . . . . . . . . . . . . . . . . . . . . . . . . . . . . . . 问题:我的桌面上未显示硬盘图标15151515161616161717181818欢迎使用包装内容®®Seagate FireCuda游戏扩展坞电源适配器USB 3.0 电缆(USB micro-B 转 USB-A)快速入门指南最低系统要求端口您可以使用 USB-A(USB 3.0 或 USB 2.0)端口将 Seagate 设备连接到计算机。
海尔家电产品说明书
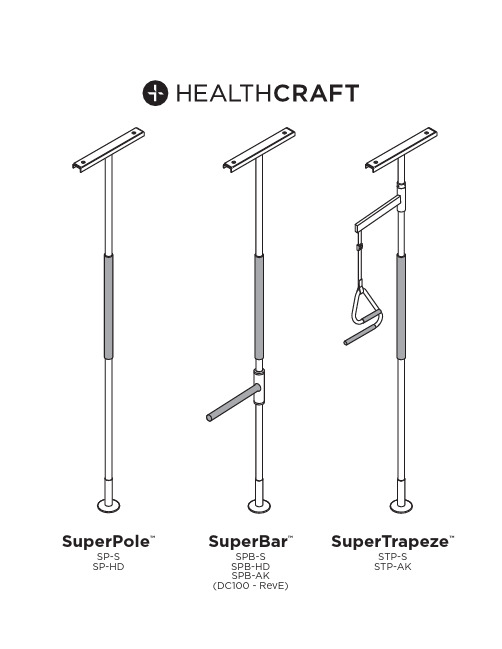
SuperPole™SuperBar™SuperTrapeze™SP-S SP-HDSPB-SSPB-HDSPB-AK(DC100 - RevE)STP-SSTP-AK89111012131457346212HW318HW323HW302202122232829301724252726182315181917163HW100SP102HW320HW300HW320HW112+++SP-SSPB-SSTP-SSP-SSPB-SSTP-SSP-HDSPB-HD12345 678910 42"/51mm6"/154mm3"/76mm10"/254mm ABC D EABCEDFACEBD45612351234 56 6HW318HW323HW30278910+(2-5)111271234HW100 56889101112HW100984"2134mm3+4567101289101111Ø 5" / 127mm 20"508mm93-99"2362-2515mm2.50" / 64mm1.0625" / 27mm8"203mm20"508mmØ 1.50" / 38.1mmFE / PVC / UHMW SP-P 13lbs / 5.9kgFE / NBR SP4034lbs / 1.8kgFE / NBR SP4021lbs / 0.4kg1216"406mm8"203mmØ 2.50"64mmØ 2"51mmØ 1.50"38.1mm3.875"98mm17"432mm8"203mm3-29"76-737mm12.25"311mm13.5"343mmPOMFEFE / PA / LDPE FE / PVC SP102.05lbs / .02kgFE / PVC SP4044.20lbs / 1.91kgSP4085.25lbs / 2.38kgSP411.85lbs / .39kgSP4092.05lbs / .93kgSUPERPOLE (SP-S)93-99"2362-2515mm 93-99"2362-2515mm 100-120"2540-3048mm 121-140"3073-3556mm < 93"2362mmSUPERBAR300lbs / 136kg450lbs / 205kg 300lbs / 136kg 300lbs / 136kg 300lbs / 136kgMAXANGLED CEILING PLATEUNI-FIT EXTENDERCEILING PLATE EXTENDERSUPER-TRAPEZESUPERPOLE HEAVY DUTY (SP-HD)UNI-FITEXTENDER (SP-UF)SUPERPOLEULTRA (SP-ULTRA)SUPERPOLE CUSTOM (SP-CUSTOM)SUPERPOLE CEILING PLATE EXTENDER (SP-CPE)SUPERPOLE ANGLED CEILING PLATE (SP-ACP)13OVERVIEWThank you for choosing the SuperPole System from HealthCraft. Please read and understand the instructions in this manual; keep manual for future reference. It is your responsibility to see that your SuperPole System is properly assembled, installed, and cared for. Failure to follow instructions in this manual could result in serious injury or death. If you are not equipped to undertake the outlined work, we would recommend that you have your SuperPole System installed by a qualified contractor.The SuperPole System is intended for moderate vertical load bearing to provide sitting and standing support for people with reduced mobility. The floor to ceiling range and maximum user weight dependent on model (see Page 13 for details and product / accessory compatibility chart). Product is not intended to support full body weight. The SuperPole System is not to be used in any other way than described above.The SuperPole is a high quality, commercial grade floor to ceiling safety pole. The SuperPole must be installed between a structural floor and ceiling by turning a jackscrew at the bottom of the pole. The pressure created by the jackscrew is strong enough for the SuperPole to support the user, yet it does not require drilling holes into the floor or ceiling. This is ideal for relocating or removing the pole. NOTE: The top plate has two holes that may be used to fix the plate directly to the ceiling joist if necessary. See Page 4 for details.The SuperBar is a high quality, commercial grade pivoting and locking horizontal bar that connects to the SuperPole (floor to ceiling safety pole). The horizontal bar can be lifted, pivoted and lowered to the next locking position around the SuperPole. In any of the 8 lowered position (every 45 degrees) the SuperBar can be used to support the user. It is important to set proper height and orientation of the SuperBar to optimize the user’s range of motion.The SuperTrapeze is a high quality, commercial grade over-bed trapeze that connects to the SuperPole (floor to ceiling safety pole). The SuperTrapeze handle features two offset ladder rungs to allow for improved use of arm strength and increased comfort. Additionally, it can hook around the pole to store out of the way when not in use. The support arm has an adjustable strap that attaches to the trapeze handle. It is important to set proper height and orientation of the SuperTrapeze to optimize the user’s range of motion.WARNING - PATIENT ENTRAPMENT (see additional guidelines)The potential risk of entrapment (limb, neck, head, torso) between the pole and adjacent item (i.e. bed, toilet, etc.) can be reduced or avoided by the following strategies:1. Situate the pole at a distance that is considerably smaller or larger than that which could result in entrapment.2. Consider situations that could change with time or usage such as mattress compression, patient movement, bed position changes due to electrically powered beds, etc.3. Realize that this product is not intended as a physical constraint or barrier to exiting the bed.LIMITED LIFETIME WARRANTYProducts are covered by a limited lifetime warranty against defects in materials and workmanship for the original purchaser. Warranty excludes products that have been damaged through misuse, accidental damage, alteration, normal wear and tear, wood material and stain, or the use of corrosive or abrasive cleaning products.Buyer hereby indemnifies, agrees to hold harmless and defend HealthCraft Products Inc. from and against any and all liabilities, claims, (founded and unfounded), losses, damages, costs and expenses (including without limitation consequential damages and reasonable professional fees) resulting from buyers specification, application, or improper use of goods described hereon; buyers omission or neglect. HealthCraft Products Inc. does not assume any liability for damage resulting from services performed by others or faulty installation, misuse or misapplication of goods sold by HealthCraft Products Inc. HealthCraft Products Inc. shall not be liable for prospective profits or special, indirect, or consequential damages, or for the cost of any corrective work done without HealthCraft Products Inc. prior approval. HealthCraft Products Inc. total liability hereunder shall in no event exceed the purchase price of the goods specified hereon. Specifications subject to change without notice.DELIVERY CONTENTS - SUPERPOLE FIGURE A.SP400 - POLE ASSEMBLY1. Pole2. Pole Grip, 20" length3. Cover Sleeve (with warning label)4. Threaded Collar5. Jam Nut6. Extension Screw7. Plastic WasherDELIVERY CONTENTS - SUPERBAR FIGURE B.SP404 - T-BAR ASSEMBLY15. T-Bar Weldment16. GripSP411 - COLLAR ASSEMBLY17. Spring Ring (with warning label)18. 5/16-24 Set Screw (x3)19. Castellated CollarSP403 - TOP PLATE ASSEMBLY8. Top Plate Rubber9. Top Plate10. Nylon Washer11. Cotter Pin12. Clevis PinSP402 - BASE PLATE ASSEMBLY13. Base Plate14. Base Plate RubberHARDWARE20. #8-32 Set Screw (x2)21. Pivot Bushing (x2)22. 3/32"Hex Key23. 5/32" Hex Key14DELIVERY CONTENTS - SUPERTRAPEZE FIGURE C. SP408 - SUPPORT ARM24. Support Arm Weldment25. Rectangular Plug26. Plastic Buckle27. Safety StrapSP409 - TRAPEZE ASSEMBLY28. Trapeze Handle29. Top Grip, 6" length30. Bottom Grip, 10" lengthINSTALLATION WARNINGS FIGURE D.1. Use caution while maneuvering pole during installation.2. Standard pole can be installed directly under 1 ceiling joist.3. Standard pole can be installed directly under 2 ceiling joists.4. Heavy Duty (HD) pole must be secured to ceiling joist (s).5. If subject to heavy usage, pole must be secured to ceiling joist (s).6. CAUTION - Damage may occur if extension screw is overtightened.7. CAUTION - Do not install if the structure above ceiling is unknown.8.CAUTION - Do not install on loose floor coverings.9. CAUTION - Do not install in rooms with radiant ceiling heat.10. CAUTION - Do not install on angled ceilings.SUPERPOLE PLACEMENT FIGURE E. 1. BEDROOM - Locate pole adjacent to waistline, and as close to bed as possible while allowing clearance for bed coverings.2. BATHTUB ONLY - Locate pole base against tub, approximately half way along its length3. SEATING (TOILET or CHAIR) - To provide clearance when standing, locate pole 3-10" / 76mm-254mm forward of the knees, and 2-6" /51mm-154mm to the side of knees when sitting.SUGGESTED SUPERBAR POSITIONS FIGURE E.4. BEDROOMA = side support / out of the wayB = in-bed supportC = sitting supportD = standing supportE = transfer support towalker / wheelchairSUPERPOLE INSTALLATION INSTRUCTIONS FIGURE F.1. On a flat horizontal surface, place top plate onto pole.2. Align holes and install clevis pin with washer on opposite side.3. Install cotter pin into clevis pin.4. Place base plate on floor at intended location, and tilt pole.5. When upright, install the pole into the base plate hole.6. Insert shaft of screwdriver thru drive hole of extension screw.7. Hold pole and turn screwdriver clockwise to raise pole.8. Top plate must contact ceiling squarely.9. Continue turning extension screw approx 2-5 turns until pole is secure.10. Turn jam nut until it is tight against bottom of pole.11. Turn both jam nut and extension screw together to jam tight.12. Remove screwdriver and lower cover sleeve to conceal screw.SUPERBAR INSTALLATION INSTRUCTIONS FIGURE G.1. Slide spring ring upwards on castellated collar to expose 3 set screws.2. Back off 3 cone point set screws with hex key so castellated collar canslide onto pole without set screws contacting pole.3. Install pivot bushing into T-bar assembly.4. Align hole and install screw with hex key.5. Remove cover sleeve from bottom of pole.6. Slide items onto bottom of pole (note order and orientation): T-Barassembly with installed pivot bushing top/first, spring ring withcastellated collar, pivot bushing and cover sleeve.7. Install SuperPole as per instructions Page 6-7.8. Install castellated collar to pole by tightening 3 set screws with hex key.The set screws MUST be tightened until the back of the screw is flushwith the collar or injury may result.9. Slide spring ring downwards on the castellated collar to retain set screws.10. Lower T-bar assembly onto castellated collar.11. Install bottom pivot bushing into T-bar assembly.12. Align hole and install screw with hex key.SUPERTRAPEZE INSTALLATION INSTRUCTIONS FIGURE H.1. Slide support arm onto top of pole with strap hook facing towards grip.Rest support arm on top of grip.2. Install SuperPole as per instructions Page 6-7.3. Rotate support arm over bed.4. Hold the trapeze handle under the support arm, such that the shorter rail of the handle is closest to the head of the bed.5. Rotate the strap 180° and slide onto the shorter rail of the trapezehandle until it reaches the top bend of the trapeze.6. Position support arm such that the trapeze handle hangs directly overthe user’s hands (on thighs) when they lay on the bed.7. Raise support arm approx 84"/2134mm from floor to top of support arm.8. Slide spring ring upwards on support arm to expose threaded holes.9. Install support arm to pole by tightening 3 set screws with hex key. Theset screws MUST be tightened until the back of the screw is flush withthe collar or injury may result.10. Slide spring ring downwards on the castellated collar to retain set screws.11. Adjust length of strap such that the user can comfortably grasp thebottom rail of the trapeze handle when laying down.TECHNICAL DATASee Figure I.PRODUCT COMPATIBILITY CHARTSee Figure J.PRODUCT USAGESee Figure I.HARDWARE18. 5/16-24 Set Screw (x4)23. 5/32" Hex Key5.BATHROOM or6.SITTINGA = side support / out of the wayB = standing or transfer supportC = standing supportD = standing or transfer supportE = standing or transfer supportF = transfer support in/out of bathtub1520。
海尔冷柜说明书

HRE/HFE-127B-_HD使用说明书是本产品不可分割的重要组成部分,用户须妥善保管。
请务必仔细阅读本使用说明书中描述的指南和警告事项,因为这些指南和警告事项中文I. 一般信息 (1)1.1...................................................................................................... )D H C -B 741-E R H (构结 ............. ..... 2. 附件...................................................................................................................................................1 3. 安装位置.. (1)4.2................................................................................................................................................... 装安 5. 层板和导轨 . (3)3...................................................................................................................... )准标(托板层和板层]a [3.................................................................................................................................... )制定(轨导 4................................................................................................................................. )制定(杆撑支 6. 电气连接.. (4)7.4........................................................................................................................................接连管水排 II. 操作说明 (5)1. 启动 ................................................................................................................................................5 2. 前板 ...................................................................................................................................................5 3. 柜内温度设置 (6)4. 框架加热器 ........................................................................................................................................6 5. 除霜 (6)6. 关机 ...................................................................................................................................................7 III. 保养和清洁说明 .. (7)1. 内部、外部、层板 .............................................................................................................................7 2. 空气过滤网 ........................................................................................................................................7 IV. 报修前 .. (8)1. 显示故障代码的故障 (8)2. 不显示故障代码的故障 .....................................................................................................................8 V. 废弃处理.................................................................................................................................................8 VII. 气候类型说明 (9)ENGLISHI. INSTALLATION INSTRUCTIONS (10)1. CONSTRUCTION (HRE-147B-SHD) .........................................................................................10 2. ACCESSORIES ..........................................................................................................................10 3. LOCATION .................................................................................................................................10 4. SET UP .......................................................................................................................................11 5. SHELF AND RAIL .......................................................................................................................12 21.................................................................................... )d r a d n a t s ( P I L C F L E H S D N A F L E H S ]a [ [b] RAIL (customized) .................................................................................................................12 [c] HANGER (customized) ..........................................................................................................13 6. ELECTRICAL CONNECTIONS .................................................................................................13 7. DRAIN CONNECTIONS .............................................................................................................13 II. OPERATING INSTRUCTIONS ........................................................................................................14 1. START UP ..................................................................................................................................14 2. FRONT PANEL ...........................................................................................................................15 3. CABINET TEMPERATURE SETTING .......................................................................................15 4. FRAME HEATER ........................................................................................................................16 5. DEFROST ...................................................................................................................................16 6. SHUT DOWN ..............................................................................................................................16 III. MAINTENANCE ...............................................................................................................................16 1. INTERIOR, EXTERIOR, SHELF .................................................................................................16 2. AIR FILTER ................................................................................................................................17 IV. BEFORE CALLING A SERVICE AGENT .........................................................................................17 1. TROUBLES WITH ERROR CODE INDICATION .......................................................................17 2. TROUBLES WITHOUT ERROR CODE INDICATION ...............................................................18 V. DISPOSAL .......................................................................................................................................18 VI. WARRANTY . (18)[b][c]VI. 保修 (9)警告请勿弄湿本产品或在潮湿环境下使用本产品。
海尔水冷冷柜服务部件清单说明书
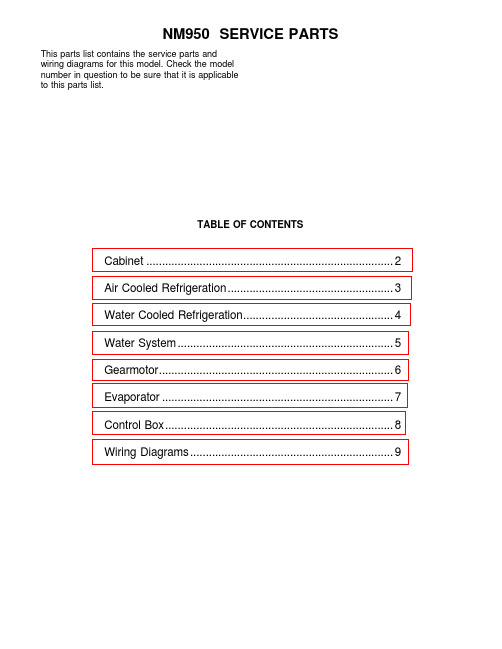
This parts list contains the service parts andwiring diagrams for this model. Check the modelnumber in question to be sure that it is applicableto this parts list.TABLE OF CONTENTSCabinet (2)Air Cooled Refrigeration (3)Water Cooled Refrigeration (4)Water System (5)Gearmotor (6)Evaporator (7)Control Box (8)Wiring Diagrams (9)1234658101113314AIR COOLED16ITEMPART NUMBER NUMBER DESCRIPTION 902-2976-01Filter Assembly 10A31462-001Tube Bracket 11A31461-001Tube Bracket12A34039-001Control Box Support 13A32435-001Left Side Panel, Painted A32435-002Left Side Panel, S.S. 1403-1404-12Screw15A33252-001Rear Panel, Water Cooled Painted Only 16.A34042-001BaseWater Cooled15ITEMPART NUMBER NUMBER DESCRIPTION 1A33233-001Condenser Support 2A33256-001Top Panel, Painted A33256-002Top Panel, S.S.3A34038-001Service Panel, Painted A34038-002Service Panel, S.S.4A33292-001Right Side Panel, Painted A33292-002Right Side Panel, S.S.503-0271-00Speed Clip 615-0711-01Emblem 703-1419-08Screw8A33255-001Front Panel, Painted A33255-002Front Panel, S.S.Cabinet AssemblyNM950 SERVICE PARTS1119181715141312134567108920162NOTE: ReplacementCompressors include a crankcase heater which was not part of the original design.The crankcase heater may beused or disconnected.ITEM PART NUMBER NUMBER DESCRIPTION 1218-6800-01Grommet 1318-2300-26Sleeve 1403-1407-07Washer 1503-1405-20Cap Screw 1602-3319-02Dryer17A33231-001Fan Shroud 1818-7202-01Condenser19A33233-001Condenser Mount 2018-8879-21Compressor (1 phase)18-8879-22Compressor (3 phase)(both are 208-230 volt and have internal overloads &crankcase heaters)ITEM PART NUMBER NUMBER DESCRIPTION 118-3815-01Fan Blade212-1576-02Fan Motor (with screws)302-2378-01Fan Bracket 403-1531-01Screw5A32961-020Insulation Kit (3 piece)616-0780-21Thermo Expansion Valve 7A34050-001Suction Line 8A32890-020 Evaporator 916-0560-00Valve Core 16-0563-00Valve Cap1011-0446-23Hi Pressure Cut Out 1103-1645-01 ScrewAir Cooled Refrigeration123457891061812131415161711NOTE: ReplacementCompressors include acrankcase heater which wasnot part of the original design.The crankcase heater may beused or disconnected.191216-0560-00Valve Core16-0563-00Valve Cap1311-0446-23Hi Pressure Cut Out1416-0401-02Elbow1511-0424-01Water Reg. Valve1603-1403-14Screw17A34044-001Drain Assembly1818-8879-21Compressor 1 phase18-8879-22Compressor 3 phase(both are 208-230 volt & have internal overloads &crankcase heaters)1902-3319-02DryerITEM PARTNUMBER NUMBER DESCRIPTION118-6900-25Condenser203-1645-01Screw316-0780-21Thermo Expansion Valve4A32961-020Insulation Kit (3 piece)5A34050-001Suction Line6A32890-020Evaporator703-1405-20Cap Screw803-1407-07Washer918-2300-26Sleeve1018-6800-01Grommmet1103-1645-01ScrewWater Cooled Refrigeration12221182016171514131089812645272311192023252426ITEM PART NUMBER NUMBER DESCRIPTION 14A32050-001Drip Pan15A27318-001Water Inlet Fitting 1603-1394-01Pal Nut1713-0079-03Res. Overflow, 8" req.18A34045-001Drain Casting, air cooled 1913-0704-00Gasket 2002-2814-08Clamps2113-0674-06Evap. Drain, 14" req.22A33205-001Plug2313-0674-06Evap. Inlet Tube, 5" req.2416-0670-01Tee25A33203-001Tube, Preformed 2613-0079-03Drain Tube, 24" req.27.03-1417-13LockwasherITEM PART NUMBER NUMBER DESCRIPTION 103-1420-03Cap Screw2A33101-022Water Level Sensor 3A32890-020Evaporator 402-2936-01Res. Cover5A32922-020Float Assembly with pin housing seal, rubber seal, insert & float 6A32929-020Reservoir Assy Complete 7A32777-001Retaining Ring for seal 816-0791-01Half Union 916-0162-00Strainer1013-0079-03Tube, 3.2" req.1116-0670-02Tee1202-0929-02Water Seal 1313-0868-01Water Shed Water System101115121389765421*NOTE: GEARCASE COVER INCLUDES COVER, OUTPUT SHAFT, KEY, OUTPUT GEAR, BEARINGSAND SEALITEM PART NUMBER NUMBER DESCRIPTION 113-0868-01Water Shed 2A32379-029Seal 4A32379-026Bolt5A32379-022Gearcase Cover*6A32379-0241st Gear and Bearings 7A32379-0232nd Gear and Bearings 8A32379-021Gasket 9A32379-020Gearcase10A32898-020Centrifugal Switch, GE PSC 12-2430-24Start sw, Emerson12-2430-44Start sw, GE split phase 1112-2430-22Drive Motor1212-1741-29Rotor Bearing, GE PSC 12-2430-29Rotor bearing, Emerson12-2430-49Rotor bearing, GE split phase 13A32379-028Seal14A32379-027Oil, 1 Container1512-2314-22Capacitor, GE PSC only16A33220-022Complete Assembly 208-230 volt A33220-030Gears, oil and cases. No motorGearmotor43231302928272629232521241918171615141311108987654321EvaporatorITEM PART NUMBER NUMBER DESCRIPTION 1.02-2933-01Hex Stud2.A32891-020Housing & Switch3.02-2930-01Ice Chute Cover4.A32963-001Insulation Top (half)5.02-2926-01Ice Chute Body6.A33102-001Insulation Collar Inside A33210-001Rubber Band7.02-2929-01Ice Chute Lower8.A37708-021Bin Controls Assy.(set of 2)9.A32930-001Chute Gasket 10.03-1405-52Hex Cap Screw 11.02-3001-01Ice Sweep 12.13-0871-01Water Shed 13.02-2978-01Lip Seal14.02-3128-20Breaker Cover 15.13-0617-54O-Ring 16.08-0660-01Auger Stud17.part of item 16Thrust Washer 18.A34559-020Bearing 19.02-2977-01Lip Seal 20.no number21.13-0617-52O-Ring 22.no number23.13-0617-45O-Ring24.03-1544-08Soc. Head Screw 25.A32900-020Breaker(includes 13, 14, 15, 18,19 & 23)26.A38071-022Auger27.A32890-020Evaporator 28.03-1405-41Cap Screw29.A32962-001Insulation Bot. (half)30.A32050-001Drip Pan31.13-0704-00Drip Pan Gasket 32.13-0868-01Water Shed910117635182412ITEM PART NUMBER NUMBER DESCRIPTION 118-1901-48Start Capacitor18-4300-50Start Capacitor Cap.2.18-2200-39Start Capacitor Bracket 03-1638-04Screw03-1417-15Lockwasher3.A32872-001Run Cap Bracket 03-1652-02Bolt03-0255-04Wing Nut 4.03-1638-03Screw5.18-1902-45Run Capacitor6.12-2469-03Single Phase Contactor 12-0739-02Three Phase ContactorITEM PART NUMBER NUMBER DESCRIPTION 7A37750-021Circuit Board 8.12-0426-01Master Switch 9.11-0447-21Low Pressure Control 1018-1903-46Potential Relay 11.12-2285-22Transformer 12no number Control Box NOT ILLUSTRATED 13.12-2337-02 3 Pin Plug Assy(Safety Circuit to Circuit Board)14.12-2340-01 4 Pin Plug Assy(Transformer to Circuit Board)15.A34055-001Control Box CoverControl BoxNM950 SERVICE PARTS AIR AND WATER COOLED, 208-230/60/1AIR AND WATER COOLED, 208-230/60/1USE COPPER CONDUCTORS ONLYALL CONTROLS SHOWN IN NORMAL ICEMAKING MODE THIS UNIT MUST BE GROUNDEDAIR AND WATER COOLED, 208-230/60/3AIR AND WATER COOLED, 208-230/60/3USE COPPER CONDUCTORS ONLYALL CONTROLS SHOWN IN NORMAL ICEMAKING MODE THIS UNIT MUST BE GROUNDED。
海尔 卧式冷藏冷冻转换柜 说明书
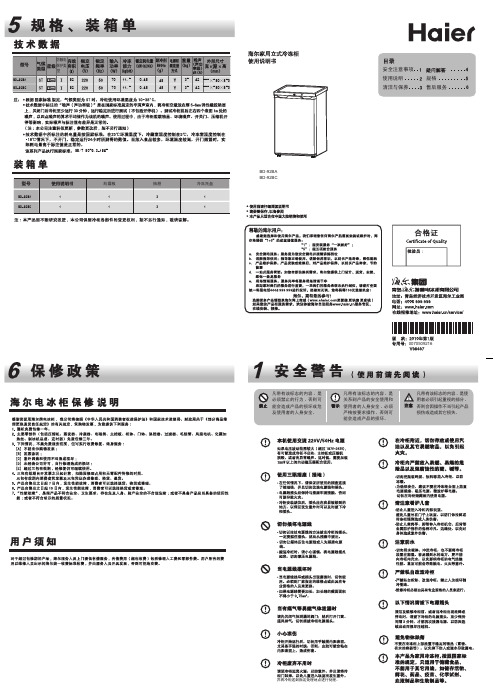
~GB/T 8059.3-1995并将冷柜送到指定处理地点进行处理。
BD-92BABD-92BC0070509216为保证冷柜的制冷效果,箱内的制冷管路设计并不是均匀排布,结霜不匀是正常现象;结霜多少还受冷柜周围湿度、开关门频次、食品是否密封包装等影响,结霜少或不结霜也是正常现象。
温馨提示:冷柜的制冷性能与结霜情况没有直接关系,当结霜较厚时,会造成耗电量增大,请及时除霜。
噪声过大吗?• 请保持冷柜放置平稳,放置不平稳运行时会产生噪声。
• 请保持冷柜外表没有接触其他物体或墙壁。
•如果冷柜放置在木地板上或靠近木质的墙壁,声音就会变的更大。
请尽可能不要将冷柜放置在以上地方。
冷柜不工作?•确保冷柜插头与电源插座连接正常。
电源插座通电。
家中保险丝良好。
•请保持温控旋钮设置在工作位置。
门体关不严、冷气泄漏?•产品使用一段时间后,因柜内温度较低,容易造成门封条变硬、变形。
处理方法:1、用吹风机热风烘烤变形处或用热毛巾捂在变形处。
2、门封条变软后关门压紧。
压缩机长时间保持运转?•如果在夏季环境温度较高或初次使用时,压缩机工作时间较长属于正常现象。
•如果冷柜内不够冷,请检查:冷柜内壁如果结霜太厚,请除霜。
冷柜门如果没关严或开门次数过多,请将门关严或减少开门次数。
一次性放入食品量不宜过多,同时食品之间应保留一定空隙。
•设定温度档位不宜过高,请参阅“温度档位的设定与调节”•请保持通风良好。
冷柜运转时,可能发出不同的声音?• 冷柜在初次使用或在启动时,由于运行状态没有稳定,会发出较大的“嗡嗡”声,运行稳定后,声音就会减小。
• 冷柜在工作时,由于温度的变化,蒸发器和管路会由于热胀冷缩发出“啪啪”的声音,为正常现象。
• 压缩机工作时发出的声音,以及开停机时压缩机发出的“嗒嗒”声,是正常现象。
• 冷柜在开停时,启动继电器、热保护器等电气件会由于动作而发出“咔嗒”声,是正常现象。
• 冷柜内部有时会发出液体流动的声音,这是制冷剂在制冷系统循环管路内流动的声音,属于正常现象。
Whirlpool 雪柜 说明书

使用說明書使用說明書使用雪櫃前.......................................................................................2.保護環境...........................................................................................2.注意事項和一般建議.. (3)雪櫃圖解 (4)冷藏室 (5)冷凍室 (7)食物冷藏及解凍指引 (9)保養及清潔 (11)外遊須知 (11)故障排除指引/售後服務 (12)售後服務 (13)連接電源 (14)保護環境1) 包裝包裝物料是可完全循環再用,並印有循環再用符號,請根據當地法例作出棄置,請將包裝物料(膠袋,聚苯乙烯零件等)遠離兒童,因它們具有潛在危險。
2) 棄置本產品使用循環物料製造。
本產品是根據廢棄電器及電子設備(WEEE)的歐洲指令2002/96/EC標記。
如能確保本產品可適當棄置,你便可減少對環境和人體健康造成不良的影響,否則不適當棄置電器產品,可能會對環境造成嚴重影響。
在本產品或本文件上的符號,代表不可將雪櫃作為家居垃圾處理,你需要將本產品送到適當的收集中心作為電器和電子設備的循環再造。
在掉棄本電器前,請先剪斷電源線,將機門和擱架拆去,使產品不能再用,以及令兒童不能爬進雪櫃內。
必須根據當地環境法例,掉棄本產品,請將本產品立即送到認可的收集中心,因產品對兒童具有潛在危險,切勿讓產品棄置數日沒有人理會,如要獲得處理回收和循環再用的資料,請聯絡當地的城市辦事處,棄置舊家電的服務公司,或購買商品的店鋪。
使用雪櫃前本產品是特別為家居用途而設計,如要發揮本雪櫃的最佳性能,請參閱使用說明書,本說明書已詳細列明雪櫃的各種功能,和儲存食物的小貼示。
請保留本手冊作將來參考用途。
1) 拆開包裝箱後,請確保本雪櫃沒有損毀而機門是適當關閉的。
海尔电器产品说明书

OVER-THE-SIDE IMMERSION HEATERS For Corrosive SolutionsߜCorrosion ResistantߜSolutions up to 100°C(212°F)ߜThin Blade HeatingElementߜ3 Phase DesignߜOvertemperatureProtectionFEATURES• Thin Blade HeatingElement—304 StainlessSteel Electropolishedsurface.• 3 phase, 20 W/in2—provides long life service inmany corrosive fluids.• Low Profile—takes up lessspace in the tank.• Integral Over-TemperatureProtection—protects theheater against overheatconditions.• PVC Terminal Box andMounting Plate—protectswiring against corrosivefumes.• Lightweight—easy toinstall.Ordering Example: PTHF-604,480V, 3 phase immersion heater, $650.PTHF Series$500Basic Unit(2) 1/2" conduit openings(one side plugged)PTHF-304, $500, shownsmaller than actual size.F-81F-82FCIT-2219CIT-2319Iron Casting1DHEAVY DUTY SOFT METAL HEATERS WITH CAST IRON SHEATHMtg. Bracketߜ3 to 10 kW ߜ240V, 1 PhaseߜUsed for Soft Metal Melting ߜRugged, ReliableߜEfficient Heat Transfer ߜThree Configurations Available APPLICATIONSUsed with metals such as solder,lead tin, stereotype metals, and babbitt (with 4% or less coppercontent) which can be melted for top working temperatures of 950°F or less. Not suitable for immersion heating of zinc or aluminum.*FEATURESMaximum heavy duty construction.0.475" steel sheath tubularelements are cast into heavy iron bodies. Terminal connections are protected against rough handling and spillage by fully enclosed cast iron terminal box.Large heat output with good heat transfer and high resistance to overheating.Easy to maintain. Simple to de-energize and remove foroccasional pot cleaning or transfer to other melt pots.Three configurations availableincluding through-the-side mounting (CIT-218) and special stereotype metal melting design (CIT-2219 and CIT-2319).Mounting flange and heater body are one casting in CIT-218 model.Cold ends of the element extend 2"beyond flange to terminal box.Stereotype metal heaters CIT-2219and CIT-2319 have combination of effective heating length, low watt density and shape which permits cold starts without damage to the heater. Also used with low-melt-point alloys.*Clamped on OMEGALUX ®strip or tubularheaters are used in these applications.CIT Series Starts at$975CANADA www.omega.ca Laval(Quebec) 1-800-TC-OMEGA UNITED KINGDOM www. Manchester, England0800-488-488GERMANY www.omega.deDeckenpfronn, Germany************FRANCE www.omega.frGuyancourt, France088-466-342BENELUX www.omega.nl Amstelveen, NL 0800-099-33-44UNITED STATES 1-800-TC-OMEGA Stamford, CT.CZECH REPUBLIC www.omegaeng.cz Karviná, Czech Republic596-311-899TemperatureCalibrators, Connectors, General Test and MeasurementInstruments, Glass Bulb Thermometers, Handheld Instruments for Temperature Measurement, Ice Point References,Indicating Labels, Crayons, Cements and Lacquers, Infrared Temperature Measurement Instruments, Recorders Relative Humidity Measurement Instruments, RTD Probes, Elements and Assemblies, Temperature & Process Meters, Timers and Counters, Temperature and Process Controllers and Power Switching Devices, Thermistor Elements, Probes andAssemblies,Thermocouples Thermowells and Head and Well Assemblies, Transmitters, WirePressure, Strain and ForceDisplacement Transducers, Dynamic Measurement Force Sensors, Instrumentation for Pressure and Strain Measurements, Load Cells, Pressure Gauges, PressureReference Section, Pressure Switches, Pressure Transducers, Proximity Transducers, Regulators,Strain Gages, Torque Transducers, ValvespH and ConductivityConductivity Instrumentation, Dissolved OxygenInstrumentation, Environmental Instrumentation, pH Electrodes and Instruments, Water and Soil Analysis InstrumentationHeatersBand Heaters, Cartridge Heaters, Circulation Heaters, Comfort Heaters, Controllers, Meters and SwitchingDevices, Flexible Heaters, General Test and Measurement Instruments, Heater Hook-up Wire, Heating Cable Systems, Immersion Heaters, Process Air and Duct, Heaters, Radiant Heaters, Strip Heaters, Tubular HeatersFlow and LevelAir Velocity Indicators, Doppler Flowmeters, LevelMeasurement, Magnetic Flowmeters, Mass Flowmeters,Pitot Tubes, Pumps, Rotameters, Turbine and Paddle Wheel Flowmeters, Ultrasonic Flowmeters, Valves, Variable Area Flowmeters, Vortex Shedding FlowmetersData AcquisitionAuto-Dialers and Alarm Monitoring Systems, Communication Products and Converters, Data Acquisition and Analysis Software, Data LoggersPlug-in Cards, Signal Conditioners, USB, RS232, RS485 and Parallel Port Data Acquisition Systems, Wireless Transmitters and Receivers。
海尔 BC BD-103HTD 103升冷藏冷冻转换柜 使用说明书

产品外形尺寸示意图(单位:mm):
型号 BC/BD-103HTD BC/BD-143HTD BC/BD-203HTD
宽深高 a 570 560 845 1330
720 560 845 1330
940 560 845 1330
深
注:1. 各系列型号产品的尺寸见技术数据。
2. 以上尺寸为参考尺寸,具体以实物测量为准。
体现海尔真诚、贴心的服务,海尔友情提醒您:
产品的安装服务,因用户的安装环境、个性需求不同,如需辅加材料或有特殊服务项目支付材料费, 具体付费请参照服务工程师出示的《服务收费指导价格标准手册》,请给予监督。 如服务工程师不按标准收费或服务规范执行不到位,请拨打海尔全国客服电话: 4006 999 999或登 录海尔自助服务专区评价、投诉。
请保持冷柜放置平稳,冷柜放置不平稳时会产生噪声。 请确保冷柜外表面没有接触其他物体或墙壁。
流水声:听到类似流水声或气泡咕噜声,是制冷剂流动时发出的声音,属于正常现象。 嗡嗡声:压缩机工作会产生“嗡嗡”声,启动或停止时声音较大,属于正常现象。 咔嗒声:冷柜在开停机时,启动继电器等元件由于动作发出的声音,属于正常现象。 啪啪声:冷柜工作时,由于温度的变化,导致蒸发器和管路因热胀冷缩发出的声音,属于正常现象。
类型 (I) 频率(Hz) (W) (kg/12h) (kW·h/y) (kW·h/24h) R600a 方式
dB(A)
外形尺寸 宽x深x高 (mm)
SN N ST T
103 220/50 70
5.5
153
0.38
45
Y 27
38
570X560X845
SN N ST T
143 220/50 80
保温柜说明书
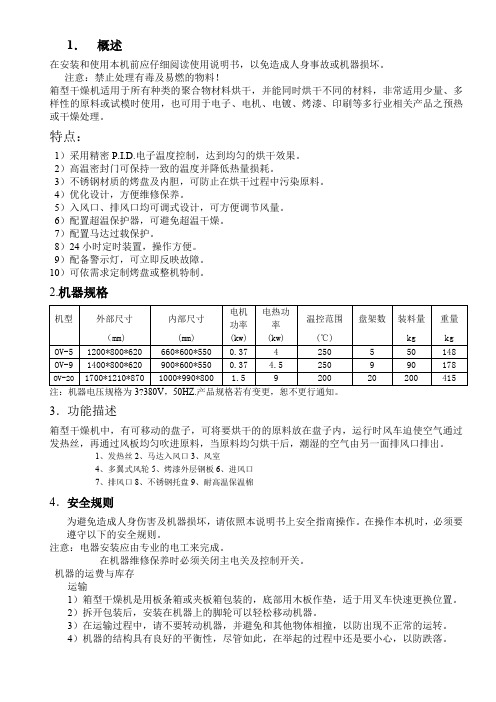
1.概述在安装和使用本机前应仔细阅读使用说明书,以免造成人身事故或机器损坏。
注意:禁止处理有毒及易燃的物料!箱型干燥机适用于所有种类的聚合物材料烘干,并能同时烘干不同的材料,非常适用少量、多样性的原料或试模时使用,也可用于电子、电机、电镀、烤漆、印刷等多行业相关产品之预热或干燥处理。
特点:1)采用精密P.I.D.电子温度控制,达到均匀的烘干效果。
2)高温密封门可保持一致的温度并降低热量损耗。
3)不锈钢材质的烤盘及内胆,可防止在烘干过程中污染原料。
4)优化设计,方便维修保养。
5)入风口、排风口均可调式设计,可方便调节风量。
6)配置超温保护器,可避免超温干燥。
7)配置马达过载保护。
8)24小时定时装置,操作方便。
9)配备警示灯,可立即反映故障。
10)可依需求定制烤盘或整机特制。
2.机器规格3.功能描述箱型干燥机中,有可移动的盘子,可将要烘干的的原料放在盘子内,运行时风车迫使空气通过发热丝,再通过风板均匀吹进原料,当原料均匀烘干后,潮湿的空气由另一面排风口排出。
1、发热丝2、马达入风口3、风室4、多翼式风轮5、烤漆外层钢板6、进风口7、排风口8、不锈钢托盘9、耐高温保温棉4.安全规则为避免造成人身伤害及机器损坏,请依照本说明书上安全指南操作。
在操作本机时,必须要遵守以下的安全规则。
注意:电器安装应由专业的电工来完成。
在机器维修保养时必须关闭主电关及控制开关。
机器的运费与库存运输1)箱型干燥机是用板条箱或夹板箱包装的,底部用木板作垫,适于用叉车快速更换位置。
2)拆开包装后,安装在机器上的脚轮可以轻松移动机器。
3)在运输过程中,请不要转动机器,并避免和其他物体相撞,以防出现不正常的运转。
4)机器的结构具有良好的平衡性,尽管如此,在举起的过程中还是要小心,以防跌落。
库存1)箱型干燥机应于室内库存,环境温度在5℃到40℃之间,湿度低于80%2)切断所有的电源,并关闭主电源开关和控制开关。
3)为避免由于水汽而带来的潜在的故障,请将整机特别是电器元件部分与水源隔离。
- 1、下载文档前请自行甄别文档内容的完整性,平台不提供额外的编辑、内容补充、找答案等附加服务。
- 2、"仅部分预览"的文档,不可在线预览部分如存在完整性等问题,可反馈申请退款(可完整预览的文档不适用该条件!)。
- 3、如文档侵犯您的权益,请联系客服反馈,我们会尽快为您处理(人工客服工作时间:9:00-18:30)。
在解锁状态下,通过功能选择按键B,可以选择不同的 功能模式,被选中的功能,对应的功能图标会点亮,未被选 中的功能,对应的功能图标熄灭,调节过程伴有蜂鸣器响 声。功能模式可以在“冷藏” – “冷冻” – “茶叶” – “速冻”– “深冷”– “母乳”– “冷藏”之间顺序循环。
注意:冰箱功能模式改变后,请注意更换冰箱内储存的食 品,以免因为冰箱功能模式改变造成食品损坏。
制冷管件
至有资质的回收站点。
照明灯
2.由回收处理站点按照国家相关规定进行分类拆
POP广告贴画 本表格依据SJ/T11364的规定编制。 ○:表示该有害物质在该部件所有均质材料中的含量在GB/T26572规定的限量要求以下。
解、回收再利用等。 3.有关本产品的回收处理的详细信息,请咨询当 地政府、废品处理机构等。
显示屏锁定/解锁功能
在解锁状态下,按下功能选择按键B持续3秒,蜂鸣器 响一声,则手动进入锁定状态,锁定图标a亮起。显示屏 熄灭时或显示屏无人操作30秒后,也自动进入锁定状态。 再次按下功能选择按键B持续3秒,蜂鸣器响一声,锁定 图标a熄灭,显示屏退出锁定功能。
注意:在锁定状态下,不能进行功能选择和温度调节的设定。 在锁定状态下,若进行以上调节,则锁定图标闪烁三次,以 提示处于锁定状态。
小时后,自动退出速冻功能,退出后自动进入冷冻功能模式。
注意:1.进入速冻前冰箱处于冷冻功能模式:如果档位设定在“-01℃”~“-18℃”之间,那么速冻退出后,档位自动按照-18℃ 运行;如果档位设定在“-19℃”~“-24℃”之间,那么速冻退出后,档位按照进入速冻前的档位运行;如果此时断电再 上电,那么速冻功能退出后,档位自动按照“-18℃”运行。
“-20”并闪烁,无其他按键操作5s后温度档位图标停止闪烁,冰箱进入母乳功能模式。
注意:1.选择母乳功能后,温度显示区域显示实际温度,等达到制冷效果后,显示-20℃。 2.在母乳模式下,温度档位默认-20℃,档位无法调节。
显示控制 显示板在无按键操作情况下30秒后显示屏自动熄灭并自动进入锁定状态,按下显示板上任一按键,显示屏点亮。
冰箱
冰箱
冰箱
冰箱
BC/BD-103WEG
托盘
制冰盒
2
2
1
产品中有害物质的名称及含量表
有害物质
*上述明细中的部件为不同型号产品所包含的主要
部件名称
铅
汞 镉 六价铬 多溴联苯 多溴二苯醚 部件的汇总,本产品是否包含该部件,以产品的
(Pb) (Hg) (Cd) (Cr(VI)) (PBB)
(PBDE)
实际结构为准。
2.如果进入速冻前冷柜处于“冷藏”、“茶叶”、“深冷”、“母乳”功能模式下,那么速冻退出后,冰箱进入冷冻功能, 档位设定在“-18℃”。
3.在速冻功能模式下,温度显示区域显示“SF”,温度档位无法调节。
深冷模式
在解锁状态下,通过功能选择按键B,选择到深冷功能模式,此深冷功能对应的图标g点亮,同时左侧温度档位图标e显示 “LL”并闪烁,无其他按键操作5s后温度档位图标停止闪烁,冰箱进入深冷功能模式。
一键设定5℃,绿茶、乌龙茶等发酵和半发酵茶密封状态下中长 期储藏,锁留茶叶原味、色泽鲜亮。
母乳功能 -20℃国际母乳协会专业指导母乳存储温度,让母乳低温储存更长 久,只需轻轻一按迅速制冷,便捷省心。
深冷功能 冰箱温度达到-30℃左右时深冷温度锁定,长期食材存储,保持食 材细胞内水分完整。
速冻功能 一键设定,快速冷冻食材, 50小时后自动复位到冷冻状态,食材 将在最短时间内冻透,从而有效锁住营养。
茶叶模式(5℃) 在解锁状态下,通过功能选择按键B,选择到茶叶功能模式,此茶叶功能对应的图标d点亮,同时左侧温度档位图标e显示“05”
并闪烁,无其他按键操作5S后温度档位图标停止闪烁,冰箱进入茶叶功能模式。
注意:1.选择茶叶功能后,温度显示区域显示实际温度,等达到制冷效果后,显示05℃。 2.在茶叶模式下,温度档位默认05℃,档位无法调节。
箱壳、门壳
*明细表中未列明的,除客户定制产品的部分POP
内胆、门衬、门封
广告贴画外,本产品中含有的其它部件或材料均
压缩机 温控器、开关、指示灯 电源线、电线、电脑板、 风机、电磁阀、变压器 保温材料 制冷剂
不含有害物质。 *明细含有害物质的所有部件及材料,均符合欧盟 RoHS对有害物质限制使用的严格要求,请放心使 用。 温馨提示: 1.为了保护环境,本产品或其中的部件报废后, 作为消费者的您有责任将其与生活垃圾分开,送
故障显示 本产品设有故障报警功能,当冰箱出现故障时,温度显示区域会根据不同的故障原因显示不同的故障代码,此时冰箱仍然能够
制冷,但应尽快联系售后维修部门进行维修,以实现冰箱的优化控制。
BC/BD-103WEG
冰箱
(L)
类
103
Hz
50 0.65 150 44
(kg/12h)
36
0.55
4.5
48 558X651X882
刚接通电源时,冰箱处于冷冻功能,档位为-18℃。
在非冷藏状态时请勿把瓶装饮料等放入冰箱以防冻裂。
651
882
开门最大尺寸图
1076
锁定图标
冷藏图标
冷冻图标
茶叶图标
温度显示图标
速冻图标
g 深冷图标
h 母乳图标
g
h
温度调节按键: 调节选中功能图标的温度档位
功能选择按键:
选择冷藏,冷冻,茶叶,速冻, 深冷,母乳功能或锁定/解锁显 示屏
×:表示该有害物质至少在该部件的某一均质材料中的含量超出GB/T26572规定的限量要求。
注意:由其他功能模式切换到冷藏功能模式时,初始档 位为04℃
冷冻模式(-1℃~-24℃) 在解锁状态下,通过功能选择按键B,选择到冷冻功能模式,此时冷冻功能对应的图标c点亮,同时左侧温度档位图标e显示当
前档位并开始闪烁,无其他按键操作5S后温度档位图标停止闪烁,冰箱进入冷冻功能模式。 解锁状态下,按一下温度调节按键A,蜂鸣器响一声,温度档位图标e显示当前档位并开始闪烁,之后每按一下温度调节按键A,
在深冷功能模式下,冰箱内部可以达到更低的温度,环温32℃以内,深冷功能模式下,冰箱内部可以达到-30℃左右。
注意:选择深冷功能后,温度显示区域显示“LL”,温度档位无法调节。
母乳模式(-20℃) 在解锁状态下,通过功能选择按键B,选择到母乳功能模式,此母乳功能对应的图标h点亮,同时左侧温度档位图标e显示
速冻模式 速冻功能是为了保存冷冻食品的营养价值而设计的,可将食品在更短的时间内冻透。一次性放入大量食物时,可提前打开速冻,
待箱内温度达到更低温度的时候,冷冻效果更好。 在解锁状态下,通过功能选择按键B,选择到速冻功能模式,此时速冻功能对应的图标f点亮,同时左侧温度档位图标e显示“SF”
并闪烁,无其他按键操作5S后温度档位图标停止闪烁,冰箱进入速冻功能模式。 当处于速冻功能模式并且显示屏未锁定时,通过功能选择按键B可以手动退出速冻功能。若不人为退出,冰箱进入速冻功能50
断电记忆功能 本产品有断电记忆功能,断电前的工作状态被记忆,再次通电后,冰箱仍按照断电前设定的档位和功能状态继续工作。
超温报警
本产品设有超温报警功能。在“冷冻”、“速冻”、“深冷”、“母乳”功能模式下,如果冷柜在正常使用过程中温度显示 区域显示“HH”并伴有蜂鸣器“滴滴“报警声,此时按一下任一按键,报警声会消失,表示冰箱内温度过高,应检查冷柜箱门 是否关严,或是否放入大量的较热食品,经过一段时间后,“HH”消失并恢复正常显示;否则,请联系售后维修部门。
冷藏模式(2℃~8℃)
在解锁状态下,通过功能选择按键B,选择到冷藏 功能模式,此时冷藏功能对应的图标b点亮,同时左侧 温度档位图标e显示当前档位并开始闪烁,无其他按键 操作5s后温度档位图标停止闪烁,冰箱进入冷藏功能模 式。
解锁状态下,按一下温度调节按键A,蜂鸣器响一声, 温度档位图标e显示当前档位并开始闪烁,之后每按一 下温度调节按键A,蜂鸣器响一声,冰箱温度档位降低 1档,冷藏功能的温度档位在 “08℃”~“02℃”之 间循环。温度设定好后,5s内不进行按键操作,系统 自动确定并保存该设定温度,图标停止闪烁,恢复为显 示实际温度,等达到制冷效果后显示所定的设温度。
BC/BD-103WEG
台面
显示面板
托盘 上抽屉
下抽屉 可调底脚
A 0070513563
全域变温 全域变温,可设置冷藏保鲜、5℃茶叶、-18℃冷冻(此档位为出 厂默认设 置)、-20℃母乳、速冻、深冷功能。
冷藏功能 适宜存储果蔬、饮料、啤酒、牛奶、保健品等食材,延长保鲜时 效,保留更多营养。
茶叶功能
蜂鸣器响一声,冰箱温度档位降低1档,冷冻功能的温度档位在“-01℃”~ “-24℃”之间循环。温度设定好后,5秒内不进行按 键操作,系统自动确定并保存该设定温度,图标停止闪烁,恢复为显示实际温度,等达到制冷效果后显示所设定的温度。
注意:由其他功能模式(速冻模式除外)切换到冷冻功能模式时,初始档位为-18℃
