CC-A80-Android-Installation-Guide
CC-A80-android安装指南
E-mail: s upport@ CC-A80 android系统安装指南文档版本作者V-1.0Parker [parker@]E-mail: s upport@内容目录 (2)硬件要求 (3)下载刷机工具和固件 (3)刷机步骤 (3)3.1 开启刷机工具,选好固件 (3)3.2连接板子和电脑 (4)系统体验和简单设置 (6)4.1 系统上电 (6)4.2 界面一览 (7)4.3 系统设置 (9)附CC-A80接口图 (10)E-mail: s upport@硬件要求CC-A80板子一块、一条USB3.0线、一台运行windows系统(win8以下版本)或linux系统的电脑。
下载刷机工具和固件CC-A80android固件下载地址:/s/1bncXfAZwindows刷机工具下载地址:/s/1fbbGylinux刷机工具下载地址:64位操作系统:/s/1XrsU32位操作系统/s/1eQnGzlC注:压缩包中自带刷机工具的安装和使用教程,这里就不再详细说明。
刷机步骤注:这里以ubuntu12.04操作系统为例子,进行说明3.1 开启刷机工具,选好固件进入到Bin目录双击打开刷机工具,点击Image选择刚才下载的CC-A80android固件。
E-mail: s upport@3.2连接板子和电脑如下图,选择好刷机固件后,按住板子的BOOT键,然后用USB3.0线,把板子和电脑连接起来。
E-mail: s upport@这时,可以看到板子的电源指示灯亮起,刷机工具弹出格式化的对话框,松开BOOT键。
点击 “Y es”后,等待刷机完成。
E-mail: s upport@系统体验和简单设置4.1 系统上电当固件烧写成功后,我们可以上电开机了。
如下图,依次接入HDMI(VGA),鼠标键盘,网线,耳机和电源。
E-mail: s upport@系统默认HDMI的显示级别最高,当系统检测不到HDMI插入的时候,就会从VGA显示输出。
NCStudio操作手册
维宏®数控系统NCSTUDIO V5.4软件使用手册目录升级纪录............................................................................................................................ I I 目录.. (I)1概述 (1)1.1软件特性 (1)2系统安装与连接 (3)2.1N CSTUDIO™的系统基本配置 (3)计算机主机 (3)操作系统 (3)2.2N CSTUDIO™系统的安装 (4)安装Ncstudio™软件 (5)安装Ncstudio™运动控制卡 (8)重新启动计算机 (8)2.3其他安装问题 (8)2.4卸载N CSTUDIO™系统 (9)2.5N CSTUDIO™控制卡与驱动系统的连接 (10)3NCSTUDIO™基本概念 (11)3.1操作模式与状态 (11)操作模式 (11)操作状态 (12)3.2机床坐标系 (13)机械坐标系 (13)工件坐标系 (13)4NCSTUDIO™操作界面 (15)4.1标题栏 (16)4.2菜单栏 (17)4.3工具栏 (18)4.4数控信息栏 (19)4.5状态栏 (19)4.6数控状态窗口 (19)加工状态和时间信息 (20)当前位置 (20)进给速度 (21)机床控制 (22)4.7自动操作窗口 (23)4.8手动操作窗口 (25)4.9加工轨迹窗口 (28)三维视图模式 (28)上下文菜单 (31)设置个性化参数 (31)4.10系统日志窗口 (32)4.11程序管理窗口 (33)4.12系统参数窗口 (34)加工参数 (35)厂商参数 (38)4.13程序编辑窗口 (41)4.14输入输出状态(I/O状态)窗口 (42)5NCSTUDIO™菜单系统 (44)5.1“文件”菜单 (44)打开并装载 (44)卸载 (45)新建加工程序 (46)打开并编辑 (46)编辑当前加工程序 (46)保存 (46)另存为 (46)关闭 (47)最近装载的加工程序 (47)最近编辑的加工程序 (47)退出 (47)5.2“编辑”菜单 (48)5.3“查看”菜单 (49)工具栏 (50)状态栏 (50)全屏 (50)显示加工程序行号 (51)跟踪加工程序当前行 (51)加工程序信息 (52)5.4“操作”菜单 (52)单步执行 (53)设置当前点为工件原点 (53)设置当前点工件坐标 (54)回工件原点 (54)开始 (55)暂停 (56)停止 (56)进入仿真模式并开始仿真 (56)高级开始 (57)断点继续 (57)执行加工指令 (58)微调 (61)对刀 (62)回机械原点 (62)复位 (63)5.5“机床”菜单 (64)5.6“窗口”菜单 (64)5.7“帮助”菜单 (65)6操作步骤 (66)6.1开机 (66)6.2机械复位(可选) (66)6.3载入加工程序 (66)6.4手动操作 (67)6.5确定工件原点 (67)6.6执行自动加工 (68)6.7直接定位功能 (69)7操作时的注意事项 (70)7.1多任务执行注意事项 (70)7.2回机械原点注意事项 (70)8最终用户软件许可协议 .................................................... 错误!未定义书签。
Adobe Connect 8 安装核对清单说明书
ADOBE® CONNECT™ 8安装核对清单目录Adobe Connect 8 安装核对清单安装前. . . . . . . . . . . . . . . . . . . . . . . . . . . . . . . . . . . . . . . . . . . . . . . . . . . . . . . . . . . . . . . . . . . . . . . . . . . . . . . . . . . . . . . . . . . . . . . . . . . . . . . . . . . 1最终用户的系统要求. . . . . . . . . . . . . . . . . . . . . . . . . . . . . . . . . . . . . . . . . . . . . . . . . . . . . . . . . . . . . . . . . . . . . . . . . . . . . . . . . . . . . . . . . . . . . . . . 2安装. . . . . . . . . . . . . . . . . . . . . . . . . . . . . . . . . . . . . . . . . . . . . . . . . . . . . . . . . . . . . . . . . . . . . . . . . . . . . . . . . . . . . . . . . . . . . . . . . . . . . . . . . . . . . 2安装后. . . . . . . . . . . . . . . . . . . . . . . . . . . . . . . . . . . . . . . . . . . . . . . . . . . . . . . . . . . . . . . . . . . . . . . . . . . . . . . . . . . . . . . . . . . . . . . . . . . . . . . . . . . 2疑难解答. . . . . . . . . . . . . . . . . . . . . . . . . . . . . . . . . . . . . . . . . . . . . . . . . . . . . . . . . . . . . . . . . . . . . . . . . . . . . . . . . . . . . . . . . . . . . . . . . . . . . . . . . 2 Adobe Connect 资源 . . . . . . . . . . . . . . . . . . . . . . . . . . . . . . . . . . . . . . . . . . . . . . . . . . . . . . . . . . . . . . . . . . . . . . . . . . . . . . . . . . . . . . . . . . . . . . 3Adobe Connect 8 安装核对清单安装前开始安装 Adobe® Connect™之前,请确认您的资源满足以下安装要求:•操作系统要求•Microsoft Windows Server® 2008R2 和 2003 SP2;32 位或 64 位;巴西葡萄牙语、简体中文、荷兰语、英语、法语、德语、意大利语、日语、韩语、西班牙语和俄语。
精简v880
我想:很多购买了中兴联通定制版V880智能手机的网友和我一样想把:联通定制的软件给以删除。
理由很简单:1.定制版的应用软件都是安装在ROOM里面,而ROOM空间有限。
2.有一些机油和我一样虽买了联通定制版的V880而用的SIM卡是中国移动也就是说很多的联通的软件无法使用。
因为联通定制的软件不支持移动卡。
3.联通定制版的V880开机后台运行的程序太多难免会影响低配的V880的运行速度。
4.没有安卓系统的最高权限是无法删除联通的定制的软件。
好了闲话不多说。
下面着重讲解一下本人ROOT的经过和注意的要点。
准备工作:1.去中兴官网下载一个V880 T卡升级包和指导书,里面有联通定制版原版ROOM 下载地址可以把网址复制粘帖到浏览器的地址栏里。
作为备用。
2.下载一个ROOT专用工具:visionaryplus.r14(ROOT)下载地址并安装用来获得系统的最高权限。
3.下载一个R E管理器并安装用来删除联通定制软件和安装包。
ROOT具体经过:1.确认你之前有没有用过Universal Androot操作过临时权限如果有,请先执行Universal Androot,点Unroot操作。
清除Universal Androot创建的文件(重启卸载Universal Androot)2.备份你需要备份的数据,电话本啊,短信啊啥的,基本没什么必要先重启下手机(非必要)建议先用文件结束那些非必需的进程,腾出足够的内存和cpu资源。
3..执行VISIONary +(以下非常重要,严格按照此教程操作)打开后,勾选Run visionary.sh after root和set system r/w root 执行Temproot now 等待结束返回ok你应该已经取得了临时root权限了。
测试下需要root权限的软件是否能正常运行,比如re浏览器,检查所有程序里应该有个骷髅安卓小人的程序,功能是权限分配用的。
如果不行再次执行以下Temproot now (多试几次一定可以的)4.取得永久root。
中兴V880系统程序可删除列表
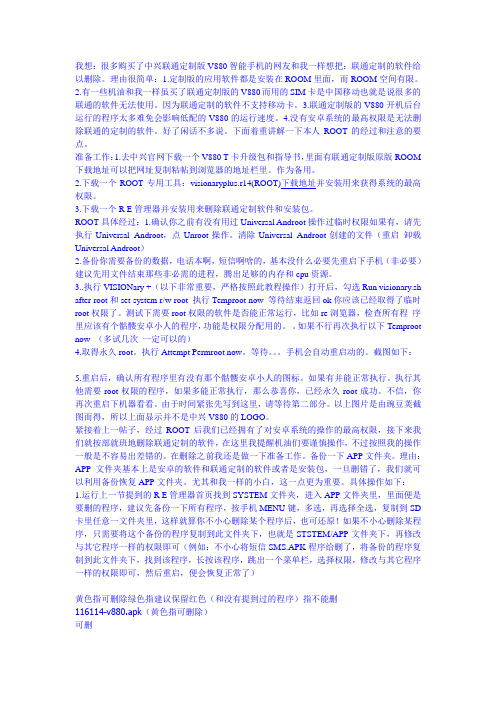
大伙儿在删除的时候,最好是用钛备份先冻结程序红色表示,不可删除,蓝色表示建议保留程序名称程序中文名称功能说明及删除建议删除建议AccountAndSyncSettings.apk 帐号同步设置可删除用于同步联系人,删除后设置帐户同步报错,谷歌帐户同步不可用. 不用谷歌同步效劳的可删除ADWLauncher.apk ADW桌面程序,用第三方桌面可删除可删除用第三方桌面Androidian.apk 主题文件可删除AndroidTerm.apk 终端模拟器刷RECOVERY用,其它高级功能一样用不到可删除建议刷完RECOVERY后再删除,或要刷的时候再装ApplicationsProvider.apk 应用程序支持效劳保留Bluetooth.apk 蓝牙可删除用第三方软件替代Browser.apk 谷歌阅读器可删除用第三方软件替代Calculator.apk 计算器可删除Calendar.apk 日历可删除CalendarProvider.apk 日历贮存删除后,日历有问题可删除Camera.apk 相机可删除CertInstaller.apk 证书安装位置和平安中从SD卡安装证书可删除ChsPack.apk touchpal输入法拼音语言包(可删)ChtPack.apk touchpal输入法注音语言包(从来不用注音的删)CMParts.apk CM设置保留CMWallpapers.apk CM自带壁纸可删除,和动态壁纸选择器一路删除后设置壁纸时默许进入图库可删除CMScreenshot.apk 截图功能CMStats.apk CM搜集报告的软件CMUpdateNotify.apk CM自动更新Development.apk 开发者的一些应用及高级设置,一样用户用不到,可删Contacts.apk 联系人可删除ContactsProvider.apk 联系人存储保留Cyanbread.apk 主题文件可删除DefaultContainerService.apk 默许通信录效劳可删除DeskClock.apk 闹钟可删除Development.apk 开发可删除DownloadProvider.apk 下载治理器DownloadProviderUi.apk 电子市场下载用户界面谷歌电子市场下载部件可删除不用电子市场的可删DownloadProvider.apk 电子市场下载效劳谷歌电子市场下载部件可删除DrmProvider.apk 受爱惜数据存储效劳数据版权爱惜可删除DSPManager.apk DSP均衡器不明白怎么用可删除Email.apk 电子邮件可删除Facebook.apk Facebook(用不到的删)FileManager.apk OI文件治理器可删除FM.apk 收音机可删除Gallery.apk 媒体库Gallery3D.apk 3d图库图片阅览,比较慢. 可删除GenieWidget.apk 天气与新闻(我自己不用他看新闻,删了)GoMarket.apk 安智市场可删除GoogleBackupTransport.apk 谷歌备份(可删)GoogleCalendarSyncAdapter.apk 谷歌日历同步适配器(可删)GoogleContactsSyncAdapter.apk 谷歌联系人同步适配器(可删)GoogleFeedback.apk 谷歌反馈(可删)GooglePartnerSetup.apk Google合作伙伴设置(可删)GoogleQuickSearchBox.apk 谷歌搜索(删了阻碍到桌面的搜索插件)GoogleServicesFramework.apk 谷歌同步支持效劳框架(删了不能同步联系人,不能登录google)HTMLViewer.apk HTML查看器查看本地HTML用可删除HWCalla_TaiWan.apk 繁体中文手写输入法(可写简体的,不用手写的可删)LatinIME.apk 安卓键盘只有E文的系统自带输入法可删除LatinImeTutorial.apk android键盘输入法设置(可删)Launcher2.apk 2.2原生桌面(用ADW和PRO的可删,删了以后第三方桌面要在开机以后从电脑安装,91,豌豆助手都可)LiveWallpapers.apk 动态壁纸极地时钟,水面落叶,天空草地,线性光幕,星系可删除LiveWallpapersPicker.apk 动态壁纸选择器删除后,MENU-壁纸下就没有动态壁纸的选项可删除.建议保留MagicSmokeWallpapers.apk 魔幻烟雾壁纸一团烟雾,可调颜色可删除Maps.apk Google地图(可删,自行换成brust版本)MarketUpdater.apk 谷歌市场升级(软件更新用到,可删)MediaProvider.apk 媒体存储可删除MediaUploader.apk 媒体上传(可删)Mms.apk 短信可删除,建议保留,听说有些第三方短信软件还需要那个,具体的你看你删除有阻碍没,我不用第三方短信,临时意外Music.apk 音乐可删除NetworkLocation.apk 网络位置(可删)NotePad.apk 记事本(可删)Pacman.apk 不明白是什么可删除Google Map 配合 GPS 在真实路面上玩吃豆子游戏PackageInstaller.apk 打包安装程序安装APK程序时挪用保留Phone.apk 拨号器保留PicoTts.apk 文本转语音可删除,建议保留,说不定哪天用到了.Protips.apk 桌面提示桌面操作提示,确实是桌面上那个有提示框的小机械人可删除Provision.apk 设置向导可删除QuickSearchBox.apk 快速搜索可删除RomManager.apk 固件治理器RootExplorer.apk RE文件治理器经常使用工具可删除,壮大的工具,建议保留,SettingsProvider.apk 设置提供保留Settings.apk 设置保留SoundRecorder.apk 录音机可删除SpareParts.apk 附加设置全E文的可看电池信息,调整菜单字体大小(设置里面的字体大小) 可删除Stk.apk SIM卡工具删除后开机时无"没错,我确实是M-ZONE人","轻松由我神州行",没用过全世界通的,因此不明白全世界通啥,呵呵可删除Superuser.apk 超级权限治理 ROOT权限治理保留SetupWizard.apk 开机引导(在定制rom时不可删,刷好机可用rootexplorer删掉,恢复出厂前要装归去) Street.apk 谷歌街道(可删,关于国内街道无成效的貌似,与地图关联)SystemUI.apk 系统插件保留Talk.apk 谷歌talk(可删,但删了就用不了电子市场)TelephonyProvider.apk 拨号器提供保留ThemeChooser.apk 主题选择工具可删除ThemeManager.apk 主题治理工具可删除Torch.apk 手电筒TouchPal.apk TouchPal输入法(可删,但自带的三种输入法最好至少保留一种)TtsService.apk 文本转语音效劳可删除TwidroydFree342-Huawei-rev1.apk twitter客户端(不用的删了)Updataonline.apk 在线升级(可删)UserDictionaryProvider.apk 用户词典支持安卓键盘的自带输入法词典,第三方输入法可无视.删除后,设置-语言和键盘-用户词典时报错可删除Vending.apk 电子市场(可删,只是不建议,很多软件的自动升级时候有它很方便)VisualizationWallpapers.apk 音乐可视化壁纸动态壁纸中的VU计/缤纷/波形/频谱,播放音乐时,会有频谱跳动,删除后就没有这几个壁纸了可删除VoiceDialer.apk 语音拨号器VoiceSearch.apk 语音搜索(可删,尽管看上去很美好,事实上我从未用过)VpnServices.apk VPN效劳(vpn效劳,可删)YouTube.apk YouTube视频(可删)。
长虹说明书
长虹窗式空调使用说明书篇二:长虹白板软件使用说明书长虹白板软件使用说明书用户使用手册(v1.6.3)目录一. 系统特点 ............................................................................. ...............................................................................4二. 系统安装 ............................................................................. ...............................................................................62.1. 运行环境 ............................................................................. . (6)2.2. 系统安装 ............................................................................. . (7)三. 基础操作 ............................................................................. ...............................................................................83.1. 运行程序 ............................................................................. . (8)3.2. 基本操作 ............................................................................. . (9)3.2.1 切换模式 ............................................................................. .. (9)3.2.2 关闭白板软件 ............................................................................. (9)3.2.3 快捷功能区 ............................................................................. .. (10)3.3. 工具条操作 ............................................................................. . (11)3.4. 主要功能 ............................................................................. (12)3.4.1 书写功能 ............................................................................. (12)3.4.2 绘图功能 ............................................................................. (14)3.4.3 工具功能 ............................................................................. (20)3.4.4 背景功能 ............................................................................. (27)3.4.5 管理页面 ............................................................................. (29)3.4.6 素材 ............................................................................. ................................................................................293.4.7 资源 ............................................................................. ................................................................................323.4.8 实验 ............................................................................. ................................................................................353.4.9 题库 ............................................................................. ................................................................................383.5. 对象编辑 ............................................................................. .. (39)3.6. 页面缩放 ............................................................................. .. (42)3.7. 文件功能 ............................................................................. .. (42)3.8. 异常退出自动恢复功能 ............................................................................. (43)前言一、东方中原互动教学支撑系统的介绍东方中原互动教学支撑系统(以下简称东方中原白板软件)可以结合电子白板或液晶平板通过与电脑、投影机,组成一个交互式的协作会议或教学环境,配备的电子笔可代替鼠标和粉笔,在电子白板或液晶平板上书写、绘图、直接操控电脑。
Visual Components产品家的安装与许可指南说明书
User Guide Installation and Licensing Visual Components Product FamilyContentsIntroduction (3)System requirements (3)Installation Requirements (3)Installation (3)Installing Visual Components (3)Uninstalling Visual Components (6)Licensing (8)Evaluation license (8)Commercial license (10)Standalone product key (10)Online Activation (10)Offline Manual Activation (13)KUKA OLP Activation (14)Register Product Key (18)Updating Registration Information (21)Online Deactivation (22)Offline Manual Deactivation (24)Deactivation limit/Transfer limit (24)Activation renewal (26)Network License (27)Online Activation (27)Using a Network License Key (28)Manual Activation (29)Deactivation (29)Activation renewal (29)Upgrade License (30)Command line deployment (31)Installation/Uninstallation (31)Frequently Asked Questions (32)IntroductionThis User Guide has been designed to assist users who are installing and activating software license keys for a Visual Components product. Should any user still require assistance, then please contact Visual Components Support via email at **************************** System requirementsThe updated system requirements for using a Visual Components product can be found at: https:///system-requirements/Installation RequirementsFor a successful installation you will need:•Visual Components product installer•Software license keyA software license key can only be activated for a specified product and version. We recommend that prior to installation, you confirm for which product and version your license key is intended. InstallationTo install Visual Components, you will first need to download an installer from the website. Installing Visual Components1.Begin by visiting the downloads page to download the Installer for your Visual Componentsproduct and run the installer.2.On the Welcome dialog, click Next.3.On the License Agreement dialog, read and accept the agreement, and then click Next.4.Review the Privacy Policy and click Next.5.On the Installation Folder dialog, accept or change the location for storing your VisualComponents program files, and then click Next.6.Then click Finish.Uninstalling Visual Components1.Depending on your device and version of Windows, use the Control Panel to access theUninstall a program screen.2.In the Uninstall or change a program panel find and select the Visual Components productyou wish to remove, and then click Uninstall.3.On the Uninstall Visual Components product dialog, click Next.4.On the License Deactivation dialog, choose whether you wish to deactivate any standalonelicenses that are currently active on your device, and then click Next.5.On the Uninstallation Successful dialog, click Finish.Important: We recommend deactivation of a product key during uninstallation to avoid possible future issues when re-installing the software on a different computer.LicensingThe first time you run a Visual Components application you will be prompted to provide either a standalone software license key or the address to a Visual Components Network License Server. Refer to the Commercial License section for more information.Important: Your computer and network must allow traffic from Visual Components software, so you may need to modify your firewall settings. For more information, refer to the FAQ section. Evaluation licenseEvaluation licenses are software license keys with a specific number of activation days. Once activated on a standalone computer system, they cannot be deactivated, nor can they be transferred to another system.The activation of the evaluation license will expire automatically after the specified number of days. After the evaluation period, the user is required to purchase a Commercial License to continue using the Visual Components product.1.To start your evaluation period, download and install your Visual Components applicationand activate your evaluation license key.2.When starting your application, from the Evaluation License dialog, you can eitherUpgrade or continue to Evaluate the software.NOTE! You can use this dialog to track how many days remain of your evaluation period.3.Selecting the Evaluate option allows you to continue using the software within theevaluation period.4.To upgrade during the evaluation period, select the FILE tab to access the Backstage view,then select Info and License.5.And from the Application License tab click Upgrade.Commercial licenseA commercial license is either a time limited or perpetual license key that can be found in your shipping note.Standalone product keyOnline ActivationTo use your commercial product key to activate a Visual Components product, follow these steps:1.Run your Visual Components application.2.On the Welcome dialog, click Next.3.On the License type dialog, select I have a standalone product key, and then click Next.4.On the Standalone license dialog, enter your 16-digit product key, and then click Next.5.If there is an error or issue with the license, contact Visual Components licensing supportvia email at ******************************.6.Following product activation, use the Registration dialog to create a licensing accountusing an email address and password. Or you can select Skip and register an account later, using the steps outlined in the Register Product Key section.NOTE! Registration requires an active Internet connection and the password you create must be at least eight characters in length, and include the following:•At least one lower case letter.•At least one upper case letter.•At least one special character.•At least one number.7.Once you have registered your product you can use the account to manage your softwarelicenses online in the Customer Portal at and requestCustomer Support at .8.Click Finish to complete licensing.Offline Manual ActivationFor detailed information on how to manually activate your copy of Visual Components, please use this link Manually Activate a Standalone License to view a detailed video guide on the Visual Components Academy.KUKA OLP ActivationThe KUKA OLP Add On is available for users of Visual Components Premium. To activate the Add On follow these steps:1.Start your Visual Components Premium application.2.Select the FILE tab to access the Backstage view, then select Options and Add On.3.From the View and mange Add-Ons section for KUKA OLP click Enable.4.On the KUKA OLP panel, select your license type Standalone license, and then click Next.5.Then enter your KUKA OLP License key and click Activate.6.Once the KUKA OLP Add On has been enabled, the status will change toKUKA OLP – restart required, so then click OK below.7.Then select the FILE tab to access the Backstage view and use Exit to close the application.8.Then restart the application and your KUKA OLP add on will be enabled.NOTE: To manage or check the status of the Add On, use the FILE tab to access theBackstage view, then select Options and Add On. And under View and mange Add-Ons, refer to the KUKA Option packages section.9.To check the status of your KUKA OLP Add On license, use the FILE tab to access theBackstage view, then select Info and License and the Add-On Licenses tab.NOTE: Should you ever need to transfer your software licenses to another VisualComponents Customer Account, any Add-On Licenses you have activated will also be transferred. For more information refer to the Updating Registration Information section.Register Product KeyIf you skipped the product Registration option while activating your software license key, you can register using the following options:1.Select the FILE tab to access the Backstage view, then select Info and License. And underRegistration Information click Register.2.You can then Register by either selecting Yes, I have an account and signing in using theemail and password for an existing account. Or create a new account by choosingNo, create one for me now.3.And to create a new account complete the registration form.NOTE! The password you create must be at least eight characters in length, and include the following:•At least one lower case letter.•At least one upper case letter.•At least one special character.•At least one number.4.Then once your account has been added, your account details will appear underRegistration Information in the License section of the Backstage view.5.Once the product key has been registered, you can check the activation history of yoursoftware license keys online in the Customer Portal at .NOTE: Network License keys are not visible through the Customer Portal.Updating Registration InformationShould you ever need to update your registered user information or transfer your product licenses to another account, visit the Registration Information section, enter your account password, and click Change registration.And then use either the Transfer to another account or Update current user information options.NOTE: Transferring your product licenses will also include any currently activated Add-On Licenses e.g. KUKA OLP Add On.Online DeactivationYou can deactivate a standalone license for use on a different machine. For more information, refer to the Deactivation limit/Transfer limit section below.1.Select the FILE tab to access the Backstage view, then select Info and License. And underProject License Settings click Deactivate.2.In the Deactivate dialog, click Deactivate.3.If your license was successfully deactivated, on the Deactivation status dialog, do one ofthe following:•To complete deactivation, click Close.•To configure a new license, click Configure.4.To configure a new license refer to the Online Activation section of this document.Offline Manual DeactivationFor detailed information on how to manually deactivate your copy of Visual Components, please use this link Manually Deactivate a Standalone License to view a detailed video guide on the Visual Components Academy.Deactivation limit/Transfer limitA perpetual standalone software license key can be activated and deactivated up to 3 times during a 30-day period. This transfer limit is defined in our End User License Agreement (EULA). Once this limit is reached, the date on which the next transfer is possible will be displayed in an error message.If there is a requirement to transfer a key more than 3 times in a month, you will need to upgrade to a Network License. Contact your Sales Representative to upgrade from a standalone to a Network License Key.If you have Registered your product key, you can check the activation history of your software licenses online in the Customer Portal at .1.To view the activation history of an individual license, from the My Product Keys page clickon the Product Key link.2.Then in the Details page for that specific Product Key, you can examine its Activationhistory.NOTE: Network License keys are not visible through the Customer Portal.Activation renewal• A standalone license is activated for example, for 90 days.•Upon expiration of the current activation period, the product key will attempt to automatically re-activate when you launch the application.•This requires your computer to be connected to the internet.•If online renewal fails, you will receive a notification that asks you to renew the license manually.To view the renewal date of your active License, select the FILE tab to access the Backstage view, then select Info and License. And under Project License Settings refer to the Online renewal date.Network LicenseManagement of Network License keys for Visual Components is managed by the Visual Components License Server Management Console that is installed on a centralized server PC inside an organization’s network. And a client PC needs to be inside the same network to access a Visual Components product using a Network License key.To download the Visual Components License Server Management Console and the User Guide visit the Network License Server section of the Visual Components downloads page.Online ActivationTo activate a Network License, your License Admin should already have setup a Network License Server.NOTE: For information on setting up your License Admin, refer to the Upgrade License section below•To install the Network License Server application, download the installer from the downloads page here.•To manage Network Licenses refer to the Network License Server User Guide available from the downloads page here.•To configure your network to support a Network License Server refer to the FAQ section of this document.Using a Network License KeyTo use your Network License key to activate a Visual Components product follow these steps:1.Run your Visual Components application.2.On the Welcome dialog, click Next.3.On the License type dialog, select My organization is using network floating licenseserver, and then click Next.4.On the Floating license server settings dialog, type in your Floating network license serverhost name or IP address and keep the Floating network license server port number as 5093 (if not modified in the Network License), and then click Next.5.Click Finish to complete the Network license setup.Manual ActivationFor instructions on how to manually activate your Network License, refer to page 14 of the Network License Server User Guide available here.DeactivationTo deactivate a Network License refer to pages 15 and 16 of the Network License Server User Guide available here.Activation renewalTo renew a Network License refer to page 17 of the Network License Server User Guide available here.Upgrade LicenseSoftware license upgrades requires a designated License Admin User. The License Admin is a first point of contact and the only person in your organization entitled to request version upgrades.•You only need to register a License Admin once.•Only one License Admin User per company can be registered.•You must provide a valid email address for the License Admin.•To register a License Admin User, please submit a request at/license-managementWhen upgrading your software license(s) please note the following:• A new software license key is required to install and activate Visual Components 4.7. And you can upgrade your current license free of charge, if you have a valid maintenancecontract.• A Visual Components product key can only be used for the specified version. For example, a4.7 Premium product key can be used only for Visual Components Premium 4.7. Therefore,every version needs a separate product key.•Users with valid maintenance, can upgrade to the latest version for free, for example VC Product1 4.0/4.1/4.2 to VC Product 4.7.•To request an upgrade your License Admin should submit a request at/upgrade-license/•Upgrade requests are validated and upgraded keys will be delivered to the registered License Admin User only.•Requests will be answered within 2 working days.•Please note when upgrading to the new version, your old perpetual keys will become inactive after 90 days, and time-limited keys will become inactive after 30 days.•Before upgrading license keys, the Admin User should check that their Network License Server installation is up to date. To install the latest version of the Network License Server application, visit the Network License Server section of the Visual Components download page.1 VC Product refers to Visual Components Essentials/Visual Components Professional/Visual Components Premium application.Command line deploymentA command line interface can be used to deploy Visual Components product.Installation/UninstallationName Parameters DescriptionNormal Mode None The installer interacts with the user and installs3rd-party libraries (.NET, DirectX and SQL Server)if required on the machine.Example:<Installer Name>.exeSilent Mode Silent Similar to Normal and Auto Update modeswithout requiring interactions from user. AnyVisual Components 4.7 version running on adevice will be terminated silently. Duringinstallation, a standard dialog box will bedisplayed, thereby allowing a user to cancelsetup.Example:<Installer Name>.exe Silent Silent Mode with config file /S,[IniFile] Similar to Silent mode but no screens or dialogsare shown to user.Example:<Installer Name>.exe /SAn INI file can be passed as an optional argumentfor implementing custom configurations. Youmust give the absolute path of the INI file, andthe file should be formatted as follows:[SetupValues]%AppFolder%=C:\Program Files\<Product Name>Example:C:\<Installer Name>.exe /S:"C:\setupvars.ini"Note: /S accepts absolute paths only.Uninstall Silent Mode /U, /S Uninstalls Visual Components 4.7 silently from adevice in which the /U parameter is responsiblefor passing the absolute path to the uninstall.xmlfile located in program's Uninstall folder.Example:C:\Program Files\<Company Name>\<ProductName>\uninstall.exe /U:"C:\ProgramFiles\<Company Name>\<ProductName>\Uninstall\uninstall.xml" /SFrequently Asked Questions•Do I need to configure a firewall on my network to access Visual Components Network License Server?work Access: Firewall needs to be configured to allow UDP traffic on the chosenport (default is 5093).b.Internet Access: Access to the Internet (HTTPS) is required on the server for automaticlicense activation.Additionally:c.Every client needs to be able to access the local network server through the definedaccess point to use Visual Components products with network licenses.d.Distributing network licenses over the Internet is explicitly not supported by thenetwork license server as stated in the End User License Agreement (EULA) for VisualComponents products.•How do I create a Visual Components Customer Account that I can use to register my software license keys?a.You can create a Customer Account using Visual Components software, refer to theRegister Product Key section.b.Or you can create a Customer Account online through the Visual Components CustomerPortal at .。
CBS8用户手册

Strength CBS 8.0 用 户 手 册目录第一章StrengthCBS介绍 (3)1.产品概述 (3)1.1 CBS8.0概述 (3)2.系统组成 (4)2.1 StrengthCBS软件组成 (4)3.StrengthCBS各模块功能介绍 (4)3.1前端界面管理程序 (5)3.2中心服务器: (5)3.3存储服务器: (5)3.4备份客户端服务器 (5)3.5应用代理: (5)第二章安装与卸载 (6)1.安装准备 (6)1.1 Strength CBS环境检查 (6)1.2 Strength CBS服务帐户 (7)2.系统要求 (7)2.1 Strength CBS系统要求 (7)3.安装说明 (7)3.1 主程序安装 (7)3.2代理安装 (13)4.卸载程序 (13)4.1 Strength CBS8.0卸载 (13)第三章StrengthCBS入门 (13)1.连接Strength CBS 8.0 (13)2. 启动Strength CBS 8.0 (14)第四章StrengthCBS配置和管理 (14)1.License 服务配置 (14)1.1配置中心服务模块的License服务器地址 (15)1.2配置备份客户代理的License服务器地址 (16)2.登录系统 (17)2.1登录系统 (17)3.注销 (17)3.1注销 (17)4.License注册信息查看 (18)4.1License注册信息查看 (18)5.视图管理 (19)5.1视图管理 (19)6.系统选项配置 (19)6.1界面配置 (19)7.界面风格切换 (20)7.1界面风格切换 (20)8.资源管理 (20)8.1 备份客户端 (20)8.2 存储服务器 (22)8.3 介质池 (23)8.4 设备 (26)8.5 介质 (29)8.6 消息模板 (31)9.作业管理 (35)9.1 备份作业 (35)9.2 恢复作业 (43)9.3 运行作业 (46)9.4 查看正在运行作业 (47)10.历史管理 (48)10.1 查看历史作业 (48)11.事件管理 (49)11.1 历史事件保留时间设置 (49)11.2 历史事件查看 (49)12.报表管理 (51)12.1 历史作业报表 (51)12.2 服务器信息报表 (52)12.3介质信息报表 (52)12.4设备信息报表 (52)13.服务器自动搜索 (53)13.1 搜索等待时间设置 (53)13.2 搜索局域网内的CBS服务器 (53)14.配置导入导出 (54)14.1 配置导出 (54)14.2 配置导入 (55)15.用户管理 (55)15.1 用户组 (55)15.2 用户管理 (57)16.中心服务器配置 (59)16.1 启动配置程序 (59)16.2 基本参数配置 (60)16.3 日志参数配置 (60)16.4 保存设置 (61)17.存储服务器配置 (61)17.1 启动存储服务器配置程序 (61)17.2 基本参数配置 (62)17.3 日志参数配置 (63)17.4 设备管理 (64)18.备份客户端配置 (66)18.1 基本参数配置 (66)18.2 基本参数配置 (67)18.3 日志参数配置 (68)18.4 应用代理参数配置 (69)18.5 保存设置 (75)20.服务管理工具 (76)20.1 打开服务管理工具主界面 (76)20.2 设置定时检测服务状态时间 (76)20.3 启动服务 (76)20.4 停止服务 (76)20.5 重启服务 (76)21.高级使用 (77)21.1 介质编录 (77)第一章StrengthCBS介绍1.产品概述1.1C B S8.0概述S t r e n g t h C B S存储备份管理软件是由深圳思创科达技术有限公司开发的可以运行于L i n u x,W i n d o w s,U n i x等操作系统平台下的数据存储备份软件系统(注:目前S t r e n g t h C B S8.0只支持W i n d o w s操作系统),是国内第一款基于模块化设计的跨平台备份和恢复的网络存储备份软件 .网络版软件采用多线程、多任务的存储管理解决方案,适合异构平台的服务器和客户端的数据集中管理有效备份与恢复,为中小企业数据管理、数据保护量身定做,它为企业提供了基于多平台和网络结构的高性能数据管理解决方案,能为整个网络中的服务器和工作站提供高速、可靠的备份和恢复能力,从而确保您宝贵的财富“数据”得到保护。
- 1、下载文档前请自行甄别文档内容的完整性,平台不提供额外的编辑、内容补充、找答案等附加服务。
- 2、"仅部分预览"的文档,不可在线预览部分如存在完整性等问题,可反馈申请退款(可完整预览的文档不适用该条件!)。
- 3、如文档侵犯您的权益,请联系客服反馈,我们会尽快为您处理(人工客服工作时间:9:00-18:30)。
E-mail: s upport@
内容目录
1.system installation guide (2)
2.Download flash tools and firmware (2)
3.Flash steps (3)
3.1 Open the flash tool, choose the right firmware (3)
3.2 Connect the board and computer (4)
4.System experience and the simple Settings (6)
4.1 To the system is powered on (6)
4.2 Take a look at the interface (6)
4.3System Settings (8)
-A80 interface figure (10)
Version update records (10)
E-mail: s upport@
CC-A80 android4.4 system installation guide 1.system installation guide
CC-A80 board piece, a USB3.0 line, a new Windows machine (below "windows8" version) or Linux system computer.
2.Download flash tools and firmware
CC-A80 android firmware download address :
/model/cc-a80/Image/Android/ CC-
A80_android4.4_v1.0.img.tar.gz
windows flash tools download address :
/software/tools/livesuit/PhoenixSui t1.0.7.rar
linux flash tools download address :
64-bit operating system
/software/tools/livesuit/LiveSuitV3 06_For_Linux64.zip
32-bit operating system
/software/tools/livesuit/LiveSuitV306_F or_Linux32.zip
Note:Installation steps please refer to the package within own guide.
E-mail: s upport@
3.Flash steps
Note: here ubuntu12.04 operating system as example, to explain.
3.1 Open the flash tool, choose the right firmware
Double-click to open the flash tool into the Bin folder and click the Image to select just download the CC -
A80android firmware.
E-mail: s upport@
3.2 Connect the board and computer
As shown in figure, choose good after the flash firmware, hold the BOOT key board, and then use the USB3.0 line, connect board and computer.
At this time, you can see the board the power light is lit up, flash format tool pop-up dialog box, the BOOT release button. Click "Yes", after waiting for the flash.
E-mail: s upport@
4.System experience and the simple Settings
4.1 To the system is powered on
When the firmware to burn after the success of the writing, we can get the electricity boot. The following figure, which in turn connected to the HDMI (VGA), mouse and keyboard, network cable, headphones and power supply.
E-mail: s upport@
System default HDMI display the highest level, when the system detect HDMI insert from VGA display output.
Note: near the reset button is the work light system, CPU frequency modulation are shown in green, red is the heart lamp, when the system to work normally, will have rules to beat a red light, green light will be according to the CPU usage flashing.
4.2 Take a look at the interface
After entering the android system interface can see interface of concise and relaxed.
System with some of the more commonly used apk, if you feel enough, can continue to add.
E-mail: s upport@
CC - A80android system comes with decoding ability strong 4 k player, support for multiple high-definition video format. But for the moment, does not support multiple screen display function, so when playing video, to "disable screen vision more show" this option selected.
Look at a drawing of the high-definition video.
E-mail: s upport@
4.3System Settings
Here introduces the CC - A80 android4.4 system Settings. Enter the setting interface can see clearly that the wifi and bluetooth connection, but the setting of Ethernet is hard to find, the following figure.
Below is the display Settings. As shown in figure, in the "output mode" has a corresponding HDMI and VGA resolution options. When select the corresponding resolution and output mode, if there is a phenomenon of trimming, can be used to adjust the trimming "screen".
E-mail: s upport@
Finally in the "language and input" change the system language and add the input method option, as shown in the figure below:
Note: audio switch is automatically, when the headset insert, voice automatically switch to the headphone output, pull out the headphones, the sound switch to HDMI output.
E-mail: s upport@ -A80 interface figure
Version update records。