Transvalor.Forge.NXT.1.0.WINDOWS.LINUX-SSQ锻造成形模拟软件
NXT 编程手册

购入后如要转卖给第三方,请务必事先与我公司联系。
模组型高速多功能贴片机NXT编程手册本机器手册包含下列内容。
NXT安装手册NXT系统手册NXT机械手册FUJI智能供料器使用手册NXT编程手册为了您能安全高效地使用本机器,请仔细阅读以上手册,并遵守上面记载的步骤及注意事项。
请将手册放置在机器附近,以便使用时能立即浏览。
QD025-00著作权本手册的著作权属于富士机械制造株式会社所有。
未经本公司同意,严禁任意复制和转载本手册中的部分或全部内容。
商标保证和责任本公司对在使用富士产品的时候,由于没有使用纯正的富士公司所生产的零部件制品,或者由于使用者的不恰当的设定以及不合适的使用环境而所产生的结果及其所造成的影响不负任何责任。
注意事项· 本手册中的内容在没有预告的情况下,有进行变更的可能性。
· 本手册中的内容在编写时虽力求精益求精,万一有错误之处敬请和本公司联系。
· 除了因本公司制品所引起的故障以外,本公司对于使用本手册的结果及其所造成的影响不负任何责任。
QD025-00目录目录1. Fuji Flexa与NXT机 (1)1.1 序言 (1)2. Job编制器 (3)2.1 序言 (3)2.2 创建Job的基本操作方法 (3)2.2.1 从修改已有Job开始 (3)2.2.2 从手动输入顺序数据开始 (3)2.2.3 从导入Centroid CAD数据开始 (4)2.2.4 从导入CCIMF数据开始 (4)2.2.5 从导入MCSIMF文件开始 (5)2.2.6 从导入Allegro CAD数据开始 (5)2.2.7 从导入Mentor CAD数据开始 (6)2.2.8 从导入CR5000(PWS/Board Designer) CAD数据开始 (6)2.2.9 从导入OrCAD CAD数据开始 (7)2.2.10 从导入SFX-J1 CAD数据开始 (7)2.2.11 从导入Specctra CAD数据开始 (8)2.2.12 从导入PowerPCB CAD数据开始 (8)2.2.13 从导入PanaCAD数据开始 (9)2.3 NXT的设定方法 (10)2.3.1 将当前Job的生产线设定更改为NXT机的生产线设定 (10)2.3.2 将NXT机添加至Job (10)2.3.3 编辑NXT机的Configuration数据 (11)2.4 生产线平衡 (17)2.5 优化 (18)2.5.1 在Job编制器中进行优化 (18)2.5.2 Dual Job Optimize (18)2.6 生成报告 (20)2.6.1 手动生成报告 (20)2.6.2 在保存Job时自动创建生产程序 (20)3. 元件数据 (21)3.1 序言 (21)目录QD025-003.2 元件数据 (22)3.2.1 元件数据详情 (22)3.3 Shape Data (24)3.3.1 Shape information详情 (26)3.3.2 形状过外形程详情 (29)3.4 Package Data (33)3.4.1 Package information详情 (33)3.4.2 Package process详情 (34)3.5 关于P_pattern (36)3.5.1 NXT机可使用的P_patern (36)3.5.2 NXT机无法使用的P_pattern (37)3.5.3 P_pattern详情 (38)3.5.4 P_Pattern选择表 (43)3.6 Vision Type详情 (45)3.6.1 关于元件基准点 (45)3.6.2 NXT机Vision Type 输入说明 (46)3.7 同已有PD之间的兼容性 (60)3.7.1 原因 (60)3.7.2 已有机种的Vision Type和NXT机的Vision Type对照一览表 (61)3.7.3 设置元件数据的“Override” (66)4. Job传输 (67)4.1 序言 (67)4.2 传输 (68)4.2.1 从Job创建器传输Job (68)4.2.2 拖放Job以进行传输 (68)4.2.3 使用[传输]指令进行传输 (69)4.3 基本操作方法 (70)4.3.1 更改当前Job (70)4.3.2 从机器中删除Job (70)5. Fujitrax与NXT (71)5.1 序言 (71)6. Fujitrax Verifier (73)6.1 序言 (73)6.2 必需条件 (73)QD025-00目录6.2.1 安装和运行Central Server (73)6.2.2 在Fujitrax的生产线结构中添加NXT机 (73)6.2.3 NXT机的Fujitrax configuration设置 (74)6.2.4 Kit Handy access的用户注册 (75)6.3 将供料器和料卷进行关联 (76)6.3.1 ID创建方法 (76)6.3.2 快速检验的执行方法 (76)6.4 进行供料装置检查 (78)6.4.1 使用Kit Handy (78)6.5 供料装置状态检查 (79)6.5.1 使用Kit Manager时 (79)6.5.2 使用Kit Handy时 (79)6.6 在生产中补给元件 (80)6.6.1 更换供料器 (80)6.6.2 料带拼接 (80)7. 用语表 (83)7.1 英文、数字 (83)7.2 拼音:B (83)7.3 拼音:C (83)7.4 拼音:D (84)7.5 拼音:F (84)7.6 拼音:G (84)7.7 拼音:H (85)7.8 拼音:J (85)7.9 拼音:L (86)7.10 拼音:M (86)7.11 拼音:Q (86)7.12 拼音:R (86)7.13 拼音:S (86)7.14 拼音:T (87)7.15 拼音:W (87)7.16 拼音:X (87)7.17 拼音:Y (88)7.18 拼音:Z (88)目录QD025-00 MEMO:QD025-00关于本手册关于本手册本手册介绍Fuji Flexa和Fujitrax的操作方法,以及有关NXT机的元件数据的详细情况。
Agilent WaferPro Express 2015.01

Keysight Advanced Design System (ADS) 2015.01\
Keysight Advanced Design System (ADS) 2015.01 Linux\
mb AEC WorkSuite 2014\
WASP-NetLeabharlann 5.4.3_Installer\
337\
DESIGN_DATA_SDS2 6.336.rar
MecaStack v5.1.9.7.rar
Primavera P6安装教程.doc
Vista操作演示教程.rar
[CATIA.P2.V5R16 Catia.CADAM.Drafting.v5r16SP1.rar
Bentely BridgeMaster China 12.01.02.01\
DHI MIKE Zero 2014\
Keil ARM7, ARM9 & Cortex-R Legacy Device Support for MDK-ARM 5.15\
Keil C166 v7.55\
Keil Cortex-M Legacy Device Support for MDK-ARM 5.15\
NI.Vision.v2015.SP1 1DVD\
WinGslib 1.5.7 Win32 1CD\
340\
MITCalc.v1.7.rar
Moviconv 11.4.1151 Multilanguage.zip
solidThinking Click2Cast v3.0.5.003 Win64 1CD
脆和响应得益于先进的压缩功能LizardTech GeoExpress Unlimited v9.5.2.4437 Win32_64

StLatUEase ZLExpert 2015.0.1 Win32_64 2CD
Stat-Ease.Design.Expert.v10.0.1.Win32_64 2CD
ZWCAD.ZW3D.v2016.CHINESE.Win32_64 2DVD
PowerMILL 2016 SP10 Multilanguage Win64 1DVD
VERO WORKNC v24.03A 1CD
3D Systems Geomagic Freeform Plus v2016.0.22 Win64 1DVD
CST STUDIO SUITE 2016 SP1-ISO 1DVD
SolidThinking.Inspire.v2016.1.5557.MacOSX 1CD
Altair HyperWorks Desktop v14.0.110 Win64 & Linux64 4DVD
Altair HyperWorks FEKO v14.0.410 Win64 & Linux64 2DVD
Sidelinesoft.NL5.Circuit.Simulator.v2.2.1 1CD
The Foundry Mari v3.0V3 Linux64 1CD
The Foundry Mari v3.0V3 MacOSX64 1CD
The Foundry Mari v3.0V3 Win64 1CD
ARANZ.Geo.Leapfrog.v2.2.1.44 1CD
solidThinking Click2Cast v3.0.5.003 Win64 1CD
Infoprint 250 導入と計画の手引き 第 7 章ホスト

SUBNETMASK
255.255.255.128
Type of service...............: TOS
*NORMAL
Maximum transmission unit.....: MTU
*LIND
Autostart.....................:
AUTOSTART
*YES
: xx.xxx.xxx.xxx
: xx.xxx.xxx.xxx
*
(
)
IEEE802.3
60 1500
: xxxx
48 Infoprint 250
31. AS/400
IP
MTU
1
1
IPDS TCP
CRTPSFCFG (V3R2)
WRKAFP2 (V3R1 & V3R6)
RMTLOCNAME RMTSYS
MODEL
0
Advanced function printing............:
AFP
*YES
AFP attachment........................:
AFPATTACH
*APPC
Online at IPL.........................:
ONLINE
FORMFEED
*CONT
Separator drawer......................:
SEPDRAWER
*FILE
Separator program.....................:
SEPPGM
*NONE
Library.............................:
Win10+vs2017编译并配置tesseract4.1.0
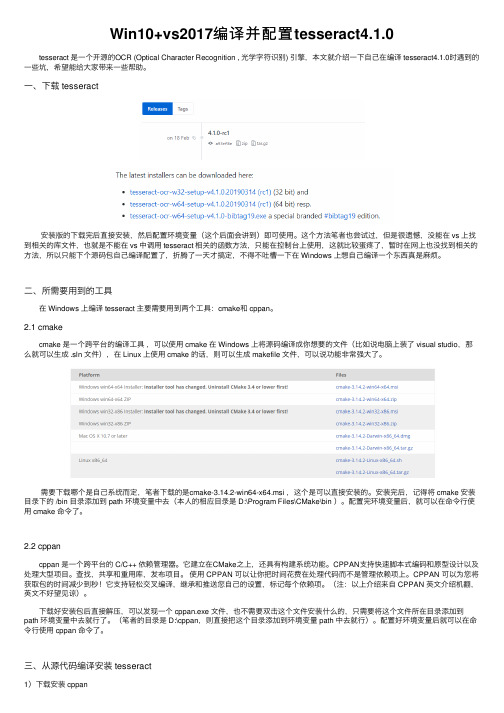
Win10+vs2017编译并配置tesseract4.1.0 tesseract 是⼀个开源的OCR (Optical Character Recognition , 光学字符识别) 引擎,本⽂就介绍⼀下⾃⼰在编译 tesseract4.1.0时遇到的⼀些坑,希望能给⼤家带来⼀些帮助。
⼀、下载 tesseract 安装版的下载完后直接安装,然后配置环境变量(这个后⾯会讲到)即可使⽤。
这个⽅法笔者也尝试过,但是很遗憾,没能在 vs 上找到相关的库⽂件,也就是不能在 vs 中调⽤ tesseract 相关的函数⽅法,只能在控制台上使⽤,这就⽐较蛋疼了,暂时在⽹上也没找到相关的⽅法,所以只能下个源码包⾃⼰编译配置了,折腾了⼀天才搞定,不得不吐槽⼀下在 Windows 上想⾃⼰编译⼀个东西真是⿇烦。
⼆、所需要⽤到的⼯具 在 Windows 上编译 tesseract 主要需要⽤到两个⼯具:cmake和 cppan。
2.1 cmake cmake 是⼀个跨平台的编译⼯具,可以使⽤ cmake 在 Windows 上将源码编译成你想要的⽂件(⽐如说电脑上装了 visual studio,那么就可以⽣成 .sln ⽂件),在 Linux 上使⽤ cmake 的话,则可以⽣成 makefile ⽂件,可以说功能⾮常强⼤了。
需要下载哪个是⾃⼰系统⽽定,笔者下载的是cmake-3.14.2-win64-x64.msi ,这个是可以直接安装的。
安装完后,记得将 cmake 安装⽬录下的 /bin ⽬录添加到 path 环境变量中去(本⼈的相应⽬录是 D:\Program Files\CMake\bin )。
配置完环境变量后,就可以在命令⾏使⽤ cmake 命令了。
2.2 cppan cppan 是⼀个跨平台的 C/C++ 依赖管理器。
它建⽴在CMake之上,还具有构建系统功能。
CPPAN⽀持快速脚本式编码和原型设计以及处理⼤型项⽬。
openslide用法 -回复

openslide用法-回复首先,让我们来了解openslide是什么。
OpenSlide是一个开源库,旨在提供一种高效读取大尺寸高分辨率图像的方法。
这种图像通常在数字病理学和其他医学领域中使用,并且可以包含多个尺寸级别和通道。
OpenSlide支持许多常见的图像格式,如SVS、NDPI和TIF。
接下来,我们将逐步介绍如何使用openslide来读取和处理大型高分辨率图像。
第一步是安装OpenSlide库。
可以通过在终端中运行适当的命令来安装OpenSlide。
在Ubuntu上,可以使用以下命令:sudo apt-get install openslide-tools在基于Debian的系统上,可以使用以下命令:sudo yum install openslide-tools对于Windows系统,可以从OpenSlide官方网站上下载适用于Windows 的预编译二进制文件。
安装完成后,我们可以开始使用OpenSlide来读取图像。
第二步是导入OpenSlide库。
在Python中,可以使用以下代码行导入openslide库:import openslide第三步是打开图像文件。
使用`openslide.open()`函数,可以打开图像文件并获取一个OpenSlide对象,如下所示:slide = openslide.OpenSlide("/path/to/image.svs")在此代码中,`"/path/to/image.svs"`应替换为实际图像文件的路径。
第四步是获取图像的基本信息。
可以使用OpenSlide对象的各种属性和方法来获取有关图像的信息,例如图像的尺寸、级别和通道数等。
下面是一些示例代码:# 获取图像的宽度和高度width, height = slide.dimensions# 获取图像的级别数level_count = slide.level_count# 获取图像的通道数channel_count = slide.associated_images.count# 获取指定级别的尺寸level_width, level_height = slide.level_dimensions[level]第五步是读取图像的指定区域。
Transvalor Forge 2008安装教程

FORGE 2008Standard PackageFORGE 2008 Standard Package© Copyright 2003 Transvalor S.A. All rights Reserved Copyright in the whole and every part of this computer program belongs to Transvalor S.A. and may not be used, licensed, sold, transferred, copied, reproduced or transmitted in whole or in part in any manner or form or any media to any person other than in accordance with the terms of the License Agreement governing the use of « Forge », or if Transvalor S.A. has given prior written consent..Forging Simulation SoftwareTRANSVALOR S.A.FORGE 2008Standard PackageTABLE OF CONTENTSINSTALLATION MANUAL..................................................................................................... 3 About Forge Package Installation.................................................................................... 3 Recommendations for usual configurations .................................................................... 4 About Login Prerequisites................................................................................................. 5 About Prerequisites Installation ....................................................................................... 6 Server Installation Procedure ........................................................................................... 7 Client Installation Procedure.......................................................................................... 14 Maintenance Procedure .................................................................................................. 19 Package Emergency Repair Procedure .......................................................................... 27 Uninstallation Procedure ................................................................................................ 28TRANSVALOR SOLUTIONS : FLEXLM LICENSE MANAGER INSTALLATION ....... 31 Introduction ..................................................................................................................... 31 Installation Procedure..................................................................................................... 32 Package Emergency Repair Procedure .......................................................................... 35 Uninstallation Procedure ................................................................................................ 36USING FLEXLM LICENSE MANAGER FOR FORGE 2008............................................ 37 Introduction ..................................................................................................................... 37 License Manager installation on a Windows License Server........................................ 39 Compatible Versions of License Manager and Vendor Daemons ................................ 41 Client Installation............................................................................................................ 41 License Server administration on Windows ................................................................... 42 License Manager installation on a Linux License Server ............................................. 43Forging Simulation SoftwareTRANSVALOR S.A.FORGE 2008Standard PackageINSTALLATION MANUALAbout Forge Package InstallationStandalone or Client-Server installation Forge 2008 can be installed on a single workstation as a standalone version. This is applicable for single seat license. Forge 2008 can also be installed as a client – server installation. This is applicable for multiple seats license (or for Standard environment). • • A ”server installation” is performed on the application server. A ”client installation” is performed on each individual seat. All seats will access the same central location on the application server.FlexLM licence manager Forge 2008 is controlled via FlexLM license manager. A license server needs to be installed. • The license server can be ”local”. In that case, the PC hosts Forge 2008 and is defined as license server as well. This is applicable in case of a standalone installation. The license server can be ”deported”. In that case, the PC executing Forge 2008 will access another PC defined as the license server. This is applicable in case of a client – server installation.•TRANSVALOR S.A.-3-Forging Simulation SoftwareFORGE 2008Standard PackageRecommendations for usual configurationsThis section gives some guidance with respect to the most traditional configurations existing today at our customers’ places. #1 : single seat license for Windows PC : a standalone installation is recommended.#2 : multiple seats license for Windows PCs : a client-server installation is recommended.TRANSVALOR S.A.-4-Forging Simulation SoftwareFORGE 2008Standard PackageAbout Login PrerequisitesIn order to perform the installation of the Forge 2008 Package, you must be logged as : • The Domain Administrator if the machines and the application server belong to a domain. The Local Administrator if the machine belongs to a workgroup or is not connected to a network.•TRANSVALOR S.A.-5-Forging Simulation SoftwareFORGE 2008Standard PackageAbout Prerequisites InstallationSome standard applications are essential to make the package work correctly. Indeed, the following programs will be installed automatically on the local computer if they are not already present : • • Microsoft .NET Framework 2.0 required to generate computation reports Windows Installer 3.0, which is required for the installation of the .NET Framework 2.0 (only for system before Windows XP SP2)TRANSVALOR S.A.-6-Forging Simulation SoftwareFORGE 2008Standard PackageServer Installation ProcedureTo launch the installation setup, double click on the Forge 2008.exe file on your installation CD, and follow the different stages. At various steps of the installation process, you have the possibility to abort installation. Then, the temporary files created on the system will be deleted, as well as all components of the package already installed. The auto-extractible package is decompressed and the following picture is shown :Click Next to continue.Check the line « I accept the terms of the license agreement » to accept the license agreement, and then click Next to continue.TRANSVALOR S.A.-7-Forging Simulation SoftwareFORGE 2008Standard PackageClick Next to install the prerequisites applications. The InstallShield setup will first analyze the computer in order to determine if required applications are already present. If not, prerequisites installations setup are launched. Once this stage is finished, the following dialog is displayed :Then, the setup asks for the installation path.Note:The default installation path is C:\Forge_2008. If you wish to change this location, click on the Browse button. You must select a location without spaces (for example C:\Program Files is not correct).TRANSVALOR S.A.-8-Forging Simulation SoftwareFORGE 2008Standard PackageIf another path is specified, the setup will automatically add “Forge_2008” at the end of the new path. Click Next button to continue.The setup now asks for license management options, namely : • The current computer (the application server or the standalone computer) is the license server for other computers of a network, or for its own needs. Then, FlexLM is installed locally.OR • The current computer is not the license server. Then, another computer on the local network will be in charge with the license management. The license manager installation will be done later. Please refer to the installation document “Install Forge 2008 - FlexLM License Manager” for more details about the installation of FlexLM on another system.Choose the options that best suit your needs. Click Next button to continue.TRANSVALOR S.A.-9-Forging Simulation SoftwareFORGE 2008Standard PackageClick on Install to start copying files and trigger the package installation. In addition, several batch tasks with essential services (such as smpd) are installed on your system. The installation procedure may require several minutes, depending on your computer’s performance. When the copy is completed, the setup ends asking for an additional task :•Install an additional external tool. This tool is not compulsory but it is worthwhile for post-processing purposes. GLView 3D Plug-in is a viewer interface for Office applications (Word, PowerPoint). The complete installation setup is available on the main Forge 2008 CD. By default, this option is unchecked. If the options is checked, the setup that installs GLView 3D Plug-in is launched.TRANSVALOR S.A.- 10 -Forging Simulation SoftwareClick on Finish to complete the installation process.Depending on the installation of the license manager, the following notice is displayed : •FlexLM is installed locally :•FlexLM is not installed locally :For each situation, please follow the procedure described in the dialog before launching computations.The setup ends. Forge 2008 package has been installed successfully on your system.Post installation procedure for server installationThe last dialog of the setup is used to configure Remote computers on which computations can be launched, providing licenses are available.Choosing this option will open a specific dialog, where it is possible to add, delete and manage the available clusters of a network.Note :This dialog can also be opened from the Start Menu :Transvalor Solutions / Forge 2008 Simulation software Administrative tools / Configure Remote Computers and ClustersYou can specify another remote computer using the Add Machine button, then :•Specify the Machine Name. This is the name which will be seen in the main launcher interface. We recommend to use the name of the front server in case of a Windows cluster. It must be the name of the head node in case of a Linux cluster. Please note that spaces are authorized.•Choose the Windows Platform and select 32 or 64 bits•Specify the Nodes options (Add Node) :o Set the name of the machineo Set the number of Coreso Set the number of Nodes to 1o Click on Add node(s) to create and update the List of cluster nodes •Set the Front Server options :o Specify the Storage server name (hostname). The front server (or the head node) is usually the Storage server.o Specify the connexion protocol to : none.o Specify the connexion Login•Specify the Queue manager options :o Give the queue Manager name if any.o Set the Queue Nameo Click on Add Queueo It is possible the remove any existing queue using the Delete Queue(s) button. Click on Register to save the specified options.Client Installation ProcedureTo launch the installation setup, double click on the Forge 2008 Client.exe file on your installation CD, and follow the different stages.At various steps of the installation process, you have the possibility to abort installation. Then, the temporary files created on the system will be deleted, as well as all components of the package already installed.The auto-extractible package is decompressed and the following picture is shown :Click Next to continue.Check the line « I accept the terms of the license agreement » to accept the license agreement, and then click Next to continue.Click Next to install the prerequisites applications.The InstallShield setup will first analyze the computer in order to determine if required applications are already present.If not, prerequisites installations setup are launched.Once this stage is finished, the following dialog is displayed :Then, the setup asks for the remote server path.Click on the Browse button to parse the local network, and specify path of the remote installation.Important Note :If you meet network parsing issues, you can click on the checkbox “I would like to define the network path manually” to specify the server path in the edit field. This option is reserved to advanced users.Caution : the specified path must exist unless the installation procedure will fail.Click Next button to continue.The dialog now asks for projects and geometries location.By default, these directories will point on the applications server path. However, it is possible to specify another path (local folder, CAD server, storage server…) using the Browse button.Click Next button to continue.Click on Install to start copying files and trigger the package installation.Only essential files are copied on the local system.The installation procedure may require several minutes, depending on your computer’s performance.When the copy is completed, the setup ends asking for an additional task.•Install an additional external tool. This tool is not compulsory but it is worthwhile for post-processing purposes.GLView 3D Plug-in is a viewer interface for Office applications (Word, PowerPoint).The complete installation setup is available on the main Forge 2008 CD. By default, this option is unchecked. If the options is checked, the setup that installs GLView 3D Plug-in is launched.Click on Finish to complete the installation process.The following notice is displayed :Please follow the procedure described in the dialog before launching computations.The setup ends. Forge 2008 package has been installed successfully on your system.Remote computers configuration updateModification of the remote computers configuration.In some situations, it might be needed to modify the current remote computers configuration (e.g. integration of a new remote computers, name changes, host …). Therefore, two tasks are required.On the machine where the ‘server installation’ has been performed (e.g. the front server or the application server) :•Connect as administrator•From the Start Menu, choose Transvalor Solutions / Forge 2008 Simulation software Administrative tools / Configure Remote computers and Clusters•Update the remote computers configuration•Click on Register to save the specified optionsThen it is needed to update the remote computers configuration on the machine(s) where the ‘client installation’ has been performed.•Connect as standard user•From the Start Menu, choose Transvalor Solutions / Forge 2008 Simulation software Administrative tools / Update Cluster Configuration Data from Server •The information is automatically updated on the client from the data recorded on the server.Maintenance ProcedureTo perform maintenance of the package, you can open the Control Panel, and select the Add or Remove Programs section. Then select Forge 2008 package Modify button. Alternatively, you can select the shortcut of the Start Menu / Program s :Transvalor Solutions / Forge 2008 Simulation software Administrative tools / Modify Forge 2008At various steps of the installation process, you have the possibility to abort installation. Then, the temporary files created on the system will be deleted, as well as all components of the package already installed.The auto-extractible package is decompressed and the following picture is shown :Click Next to continue.The following step depends on the installation type : •Forge 2008 Standard Server Installation•Forge 2008 Standard Client InstallationClick Next button to continue.Modify installationNote:Following FlexLM dialog is only displayed for a Server installation.The setup now asks for license management options, namely :•The current computer(the application server or the standalone computer) is the license server for other computers of a network, or for its own needs. Then, FlexLM is installed locally.OR•The current computer is not the license serve r. Then, another computer on the local network will be in charge with the license management. The license manager installation will be done later. Please refer to the installation document “Distant License Manager Installation Procedure” for more details about the installation of FlexLM on another system.Choose the options that best suit your needs.Click Next button to continue.Click on Install to start updating files and trigger the package modification.The installation procedure may require several minutes, depending on your computer’s performance.Click on Finish to complete the installation process.Depending on the installation of the license manager, the following notice is displayed : •FlexLM is installed locally :•FlexLM is not installed locally :For each situation, please follow the procedure described in the dialog before launching computations.The setup ends. Forge 2008 package has been installed successfully on your system. Repair – Update a Client InstallationThe repair procedure is suitable :•When the software doesn’t work correctly : files are missing, shortcuts are corrupted…•When a rollback to the original version is needed, to restore initial path and files.•Specifically for a Client Installation, when the Standard configuration has been updated on the server. We called the repair procedure “Update a Client Installation”.The Standard information is obtained from the server and updated on the client system.Choose the Repair or Update a Client Installation option and click Next button to continue.Click on Install to start updating files and trigger the package re-installation.The installation procedure may require several minutes, depending on your computer’s performance.Click on Finish to complete the installation process.The following notice is displayed :Please follow the procedure described in the dialog before launching computations.The setup ends. Forge 2008 package has been installed successfully on your system.Package Emergency Repair ProcedureThis procedure describes the fastest way to restore a corrupted installation : •Open the Add or Remove Programs section of the Control Panel.•Choose the icon of the Forge 2008•Click on the link : “Click here to obtain technical support information”•The following dialog appears•Click on “Repair”. The procedure is launched, and the package is reinstalled using the default options.Uninstallation ProcedureTo uninstall the package, you can open the Control Panel, and select the Add or Remove Programs section. Then select Forge 2008 package Remove button.Alternatively, you can select the shortcut of the Start Menu / Program s :Transvalor Solution / Forge 2008 Simulation software / Administrative tools / Uninstall Forge 2008For both solutions, the installer asks for a confirmation and uninstalls the package without prompting any further specific dialog. Please refer to the end of this section for more details about post-uninstallation tasks.Another solution is to open the Control Panel, and select the Add or Remove Programs section. Then select Forge 2008 package Modify button.The following step depends on the installation type :•Forge 2008 Standard Server Installation•Forge 2008 Standard Client InstallationFor both solutions, choose RemoveClick Next button to continue.The setup asks for a confirmation. Click Remove to continue uninstallation or Cancel to exit uninstallationIf you click Remove, the setup will uninstall and remove all previously installed components. Any added file (setup, license…) will not be removed.Click Finish to end the setup.The setup ends. Your Forge 2008 package has been uninstalled from your system.Post-uninstallation tasksTo remove completely the folder Forge_2008 (including the remaining folders or files), please delete it from the Windows Explorer.Note:Some resources files are also present in the directory :C:\Program Files\Common Files\Transvalor Solutions\Important Note:In case a user-executable file had replaced an original one in the BIN directory, the setup cannot distinguish a user-file and the original one if the same name was kept (eg. xf2_p1.exe or seqfg3_v73.exe). Therefore, please make sure to make a safe copy of the user-executable file prior to uninstall the software, otherwise it will be removed.TRANSVALOR SOLUTIONS :FLEXLM LICENSE MANAGER INSTALLATIONIntroductionPerforming the installation of FlexLM License Manager is suitable if the Transvalor Solutions License Manager is not installed on the main application server, i.e. if the application server is not the license server.This situation may appear if another server is specifically dedicated to license managing. Note:It is necessary to perform this installation because it was answered “No” to the installer question about the FlexLM License Manager installation options.Installation ProcedurePlease follow the procedure below to install the FlexLM License Manager on the license server.Important note :You must have administrator privileges to install the applicationTo launch the installation setup, double click on the Transvalor Solutions - FlexLM License Manager.exe file available in the Transvalor Solutions - FlexLM Installer folder of your installation CD, and follow the different stages.At various steps of the installation process, you have the possibility to abort installation. Then, the temporary files created on the system will be deleted, as well as all components of the package already installed.The auto-extractible package is decompressed and the following picture is shown :Click Next to continue.Note:The installation path is the same than if FlexLM license manager was installed with a Server installation.You cannot change it.Click on Install to start copying files and trigger the package installation. In addition, several batch tasks with essential services (TSVSOFT) are installed on your system.The installation procedure may require several minutes, depending on your computer’s performance.Click on Finish to complete the installation process. The following notice is displayed :Click OK. The setup ends. FlexLM License Manager package has been installed successfully on your system.Important Note:•The log off procedure must be done to take into account a new environment variables used by the license manager service.•The installation procedure outputs a text file named info_tsv_[Computer_name].info located in the directory:C:\Program Files\Common Files\Transvalor Solutions\LicensesPlease return this file to support@ to obtain your license files.•Copy the license files provided by the Support Department of Transvalor S.A.(license.dat and served_license.dat) in that directory.•Then, start the service TSVSoft using the Start Menu / Programs shortcut : Transvalor Solutions / FlexLM for Transvalor Solutions / Start service (Administrator only)Package Emergency Repair ProcedureImportant note :You must have administrator privileges to perform this operationThis procedure describes the fastest way to restore a corrupted installation :•Open the Add or Remove Programs section of the Control Panel.•Choose the icon of the Transvalor Solutions – FlexLM License Manager•Click on the link : “Click here to obtain technical support informations”•The following dialog appears•Click on “Repair”. The procedure is launched, and the package is reinstalled using the default options.•The TSVSoft service can be restarted using the Start Menu / Programs shortcut :Transvalor Solutions / FlexLM for Transvalor Solutions / Start service (Administrator only)Uninstallation ProcedurePlease follow the procedure below to uninstall the FlexLM License Manager from the license server.Important note :You must have administrator privileges to uninstall the applicationTo uninstall the package, you can open the Control Panel, and select the Add or Remove Programs section. Then select Transvalor Solutions - FlexLM License Manager package Remove button.The installer ask for a confirmation and uninstalls the package without prompting any further specific dialog.Note:The service TSVSoft is stopped and removed during the uninstallation.USING FLEXLM LICENSE MANAGER FOR FORGE 2008IntroductionImportant note:You must have administrator privileges to operate license managing operations.Before using Forge2008, you must have the correct license installed. This document describes the installation and the use of the FlexLM License Manager for Forge2008 on supported platforms.Document conventionsThis document assumes the following terms and conventions:•The term License Manager refers to the Transvalor License Manager for FlexLM.•The term License Server refers to the machine on which the License Manager is installed.•Files names and command-line entries are written in italic (ex: license.dat).•Folder names are written in italic bold (ex: Program Files).Supported PlatformsForge2008 is designed for Microsoft Windows platforms and Linux platforms. Forge2008 is supported on all platforms listed below:•Microsoft Windows IA-32 XP, 2003 server•Linux:o Red Hat Enterprise 3 and 4o Suse 9License types•Node-locked: The license is dedicated for use on a/some computer(s).•Floating: A given number of tokens are available across a network. You can execute on any platforms providing that the required tokens are available.•Counted: A given number of tokens (i.e. of instances of the application) are allowed to run at the same moment.•Uncounted: No restrictions on the number of tokens used.Forge2008 licenses are always counted either node-locked or floating.The License ManagerCounting the number of concurrent instance of Forge2008 solvers is the main function of the License Manager. The License Manager has to be installed on a machine referred as the License Server which controls user’s access to Forge2008 solvers. The License Server can be either a Windows or a Linux machine but must be visible by all the client machines.No specific installation is required on all the other machines referred as License Client. Only a license file called license.dat has to be located on the machine in a specific folder (seeClient Installation).License Manager Installation on a Windows License Server Executing Transvalor Solutions - FlexLM License Manager.msi installs the License Manager on the License Server. It requires full Administrator privileges.The installation is completed in the folder referred by the environment variable COMMONPROGRAMFILES on the License Server (typically C:\Program Files\Common Files). A folder Transvalor Solutions is created with three sub-folders:•FlexLM: contains the FlexLM distribution, including administrative tools (see License Server administration on Windows) and TSVSOFT.exe the Transvalor daemon.•Licenses: this folder will be used to store the file required for the generation of your license, your licenses files and the License Manager log file.•Ressources: contains some Transvalor files and tools.In Licenses folder a file named info_tsv_ is created (generated by InfoPc.exe located in Ressources folder). This file contains the information required for the generation of your license and has to be sent to Transvalor support support@.You will then receive two files from Transvalor:•served_license.dat: The license file that will be served by FlexLm through Transvalor .•license.dat: The license file used on each client machine. Its object is only to specify to the application which license server is to be used.Theses files must be copied in directory Transvalor Solutions/Licenses Starting License Manager on Windows:After installing the License Manager and having copied the licenses files you need to start it before running Forge 2008.It is done from the Windows Start Menu (see Figure 1) by selecting:Programs > Transvalor Solutions > FlexLM for Transvalor Solutions > Install and Start Service。
Forge2011入门教程
超高速和超强的 求解算能力
•并行计算能力
注意:步骤1(前处理)是我们操作时所需时间最长的步骤。
一、FORGE 2011界面介绍
1.主启动程序界面
1.前处理:链接到前处理工具,即 GLPre、QCad、流变数据库、TTT数据库、 刚性压机计算、Windows的记事本++编辑 器和MS-DOS窗口(其中,GLPre可以新建 工程或者打开当前的工程)。 2.计算:链接到计算管理器,文件 管理器,以及注册用户解算器。 3.后处理:链接到后处理工具,即 GLviewInova和所有的特殊工具。 4.设定:改变主窗口界面的语言设 置。 5.帮助:链接到软件的在线帮助, Transvalor支持电子邮件和关于可用模块。 6.退出:退出并关闭程序。 7.浏览按钮:指定当前工程文件。 8.刷新按钮:通过刷新显示来反映 当前工程的修改。
5调节模具到坯料
网格划分完成后,用户可通过变换和调节选项来调整模具和坯料接触。
19变换和标
准调节选项卡
(位移变换选项卡)
(标准调节选项卡)
6坯料属性定义
7模具属性定义
23依次选择下 模和上模为对象
21选择坯料
材质和温度
22选择坯料(与模
具)的摩擦条件和 坯料(与模具)的 热交换文件
24设置模具温 度
9选择模板
10定义模拟名称
11
3加载几何文件
13依次选择目 标对象
14依次选择对 象的几何文件
12选择对象 选项卡
4网格划分(坯料和模具)
18通过该区域内的快捷选项
划分表面网格和体积网格
16选择网格划 分设置选项
17通过区域内的选项(粗、 中和细)或用户自定义划分网 格
Nsight Eclipse Plugins Edition DG-06450-001 _v9.1

Getting Started GuideTABLE OF CONTENTS Chapter 1. Introduction (1)1.1. About Nsight Eclipse Plugins Edition (1)Chapter 2. Using Nsight Eclipse Edition (2)2.1. Installing Nsight Eclipse Edition (2)2.1.1. Installing CUDA T oolkit (2)2.1.2. Configure CUDA T oolkit Path (2)2.2. Nsight Eclipse Main Window (4)2.3. Creating a New Project (5)2.4. Importing CUDA Samples (6)2.4.1. cuHook Sample (6)2.5. Configure Build Settings (7)2.6. Debugging CUDA Applications (8)2.7. Remote development of CUDA Applications (10)2.8. Debugging Remote CUDA Applications (12)2.9. Profiling CUDA applications (18)2.10. Importing Nsight Eclipse Projects (19)2.11. More Information (21)LIST OF FIGURESFigure 1 Nsight main window after creating a new project (5)Figure 2 Debugging CUDA application (9)Figure 3 Debugging CUDA application (10)Figure 4 Debugging remote CUDA application (18)Figure 5 Profiling CUDA Application (19)This guide introduces Nsight Eclipse Plugins Edition and provides instructions necessary to start using this tool. Nsight Eclipse is based on Eclipse CDT project. Fora detailed description of Eclipse CDT features consult the integrated help "C/C++ Development User Guide" available from inside Nsight (through Help->Help Contents menu).1.1. About Nsight Eclipse Plugins EditionNVIDIA® Nsight™ Eclipse Edition is a unified CPU plus GPU integrated development environment (IDE) for developing CUDA® applications on Linux and Mac OS X for the x86, POWER and ARM platforms. It is designed to help developers on all stages of the software development process. Nsight Eclipse Plugins can be installed on vanilla Eclipse 4.4 or later using the standard Help->Install New Software.. Menu. The principal features are as follows:‣Edit, build, debug and profile CUDA-C applications‣CUDA aware source code editor – syntax highlighting, code completion and inline help‣Graphical user interface for debugging heterogeneous applications‣Profiler integration – Launch visual profiler as an external application with the CUDA application built in this IDE to easily identify performance bottlenecksFor more information about Eclipse Platform, visit 2.1. Installing Nsight Eclipse EditionNsight Eclipse Plugins archive is part of the CUDA Toolkit. Nsight Eclipse Plugins archive can be installed using the Help -> Install New Software... Menu on Eclipse 4.4 or later2.1.1. Installing CUDA T oolkitTo install CUDA Toolkit:1.Visit the NVIDIA CUDA Zone download page:/object/cuda_get.html2.Select appropriate operating system. Nsight Eclipse Edition is available in Mac OS X and Linux toolkit packages.3.Download and install the CUDA Driver.4.Download and install the CUDA Toolkit.5.Follow instructions to configure CUDA Driver and Toolkit on your system.2.1.2. Configure CUDA T oolkit PathTo get started, CUDA Toolkit path must be configured in Eclipse with Nsight Plugins:1.Open the Preferences page, Window > Preferences.2.Go to CUDA toolkit section.3.Select the CUDA toolkit path to be used by Nsight. CUDA tookits that are installed in the default location will automatically appear.4.CUDA toolkit path can be also specified in the project properties page in order to use different toolkit for a project.5.For QNX: When QNX is selected as Target OS, a dialog will be displayed to set theQNX_HOST and QNX_TARGET environment variables if they were not already set.QNX_HOST environment variable identifies the directory that holds the host-related components:QNX_TARGET environment variable identifies the directory that holds the target-related components:2.2. Nsight Eclipse Main WindowOn the first run Eclipse will ask to pick a workspace location. The workspace is a folder where Nsight will store its settings, local files history and caches. An empty folder should be selected to avoid overwriting existing files.The main Nsight window will open after the workspace location is selected. The main window is divided into the following areas:‣Editor - displays source files that are opened for editing.‣Project Explorer - displays project files‣Outline - displays structure of the source file in the current editor.‣Problems - displays errors and warnings detected by static code analysis in IDE or bya compiler during the build.‣Console - displays make output during the build or output from the running application.2.3. Creating a New Project1.From the main menu, open the new project wizard - File > New... > C/C++ Project2.Specify the project name and project files location.3.Specify the project type like executable project.4.Specify the CUDA toolchain from the list of toolchains.5.Specify the project configurations on the next wizard page.plete the wizard.The project will be shown in the Project Explorer view and source editor will be opened.7.Build the project by clicking on the hammer button on the main toolbar.Figure 1 Nsight main window after creating a new project2.4. Importing CUDA SamplesThe CUDA samples are an optional component of the CUDA Toolkit installation. Nsight provides a mechanism to import these samples and work with them easily: Samples that use the CUDA driver API (suffixed with "Drv") are not supported byNsight.1.From the main menu, open the new project wizard - File > New... > C/C++ Project2.Specify the project name and project files location.3.Select Import CUDA Sample under Executable in the Project type tree.4.Select CUDA toolchain from the Toolchains option. location.5.On the next wizard page select project sample you want to import. Also select the target CPU architecture. Press Next...6.Specify the project parameters on the next wizard page.plete the wizard.The project will be shown in the Project Explorer view and source editor will be opened.8.Build the project by clicking on the hammer button on the main toolbar.2.4.1. cuHook SamplecuHook sample builds both the library and the executable. cuHook sample should be imported as the "makefile" project using the following steps.1.From the main menu, open the new project wizard - File > New... > C/C++ Project2.Select project type "Makefile project" and choose "Empty Project"3.Specify the project name and project files location.plete the wizard.The project will be shown in the Project Explorer view.5.Right click on the project - Import... > General > File System6.On the next wizard page, select the location of cuHooksample(Samples/7_CUDALibraries/cuHook)7.Select all the source files and makefile and Finish the wizard8.Build the project by clicking on the hammer button on the main toolbar.9.To run the sample, from the main menu - Run > Run Configurations... > Select the executable > Go to Environment tab > New... > enter Name=LD_PRELOAD, Value=./ libcuhook.so.1 > Run will execute the sample2.5. Configure Build SettingsTo define build settings: In the C/C++ Projects view, right-click your project, and select Properties. Select C/C++ Build, Settings from the list.The following are the categories of Nvcc linker settings that can be configured for the selected project.All options field in the main page is not editable and it's the collection of options setin the child categories.‣Libraries - Configure library search path(-L) and to include linker libraries(-l). When you are cross compiling for different target os, the library search path should point to the appropriate location where the target os libraries are present.‣Miscellaneous - Set additional linker options and option to link with OpenGL libraries.‣Shared Library Settings - Set option to build a shared library.The following are the categories of Nvcc Compiler settings that can be configured for the selected project.All options field in the main page is not editable and it's the collection of options set‣Dialect - Select the language standard and dialect options.‣Preprocessor - Add the defined and undefined symbols for the preprocessor.‣Includes - Set include paths and include files for the compiler.‣Optimization - Set the compiler optimization level.‣Debugging - Set the options to generate debug information.‣Warnings - Set inhibit all warning messages.‣CUDA - Generate code for different real architectures with the PTX for the same vitrual architectures.2.6. Debugging CUDA ApplicationsNsight must be running and at least one project must exist.1.In the Project Explorer view, select project you want to debug. Make sure the project executable is compiled and no error markers are shown on the project.2.Right click on the project and go to Debug As > NVIDIA CUDA GDB Debugger menu.3.You will be offered to switch perspective when you run debugger for the first time. Click "Yes".Perspective is a window layout preset specifically designed for a particular task.4.Application will suspend in the main function. At this point there is no GPU code running.5.Add a breakpoint in the device code. Resume the application.Debugger will break when application reaches the breakpoint. You can now explore your CUDA device state, step through your GPU code or resume the application.Figure 2 Debugging CUDA applicationAdditional debugger options can be set in the debug configuration dialog through Run > Debug Configurations .. menu..Figure 3 Debugging CUDA application2.7. Remote development of CUDA ApplicationsNsight Eclipse Edition also supports remote development of CUDA application starting with CUDA Toolkit 6.0. The picture below shows how Nsight Eclipse Edition can beused for local as well as remote development:For remote development you do not need any NVIDIA GPU on your host system. The remote target system can be a Linux x86 or POWER system with an NVIDIA GPU or an Tegra-based ARM system. Nsight IDE and UI tools can only be hosted on x86 and POWER systems.Nsight Eclipse Plugins supports the cross compilation mode for remote devices.In the cross compilation mode the project resides on the host system and the cross compilation is also done on the host system. The cross compilation mode is only supported on an Ubuntu x86 host system.To cross compile select the target cross compile architecture in CPU architecture dropdown in the project properties page:2.8. Debugging Remote CUDA Applications Remote debugging is available starting with CUDA Toolkit 5.5. A dedicated GPU is not required to use Nsight remote debugging UI. A dedicated GPU is still required on the debug target. Only Linux targets are supported. Debug host and target may run different operating systems or have different CPU architectures. The remote machine must be accessible via SSH and CUDA Toolkit must be installed on both machines.If there is a firewall between the host and the target, it must be set up to let RSP1.Select the project and right click then go to Debug As...>NVIDIA CUDA GDBDebugger(Remote) menu item.2.Type the full path to a local executable or select one using the Local file... button.3.Select a remote connection from a drop-down list or press the Add connection... button to create a new one.4.If you are creating a new remote connection, select the SSH Only connection type, press Next, and type the host name(or IP address) as well as the connection name anddescription (both are optional) and then press Finish.5.For Android devices: To configure the remote connection using Android debug bridge, select the Android debug bridge from the Remote Connection drop-downlist, Android device must be connected to the host system using USB port.Press Manage button, and enter or select the path to adb utility. You need to install Android SDK platform tools to use Android debug bridge. press Detect button tofind the android device available through ADB.6.Optional: Press Connect to verify the selected remote connection.7.Press the Next button.8.Type the full path to cuda-gdbserver on the remote system or select one using theBrowse... button.9.Click on "Add new path" or on the Browse... button to specify the path to the shared libraries the remote application depends on.10.C lick on the Finish button to finish the new debug configuration wizard and start debugging the application.11.Y ou will be offered to switch perspective when you run the debugger for the first time. Click Yes.Perspective is a window layout preset specifically designed for a particular task. The debugger will stop at the application main routine. You can now set breakpoints, orresume the application.Figure 4 Debugging remote CUDA application2.9. Profiling CUDA applicationsNsight must be running and at least one project must exist. Profiler cannot be used when debugging session is in progress.Nsight Eclipse Edition profiling features are based on the NVIDIA Visual Profiler ( nvvp ) code. Nsight Eclipse Plugins Edition will launch the Visual Profiler as an external tool with the executable and other information from the selected project.1.In the Project Explorer view, select project you want to profile. Make sure the project executable is compiled and no error markers are shown on the project.2.Select the project and right click and go to Profile As>NVIDIA Visual Profiler menu.Nsight Eclipse will launch the Visual Profiler to specify extra profiler options with the executable information already passed from the selected project.Figure 5 Profiling CUDA Application2.10. Importing Nsight Eclipse ProjectsThe projects that are created with Nsight Eclipse Edition can be imported into the Eclipse workbench with Nsight Eclipse plugins.1.Open Nsight Eclipse edition and select the project that needs to be exported.2.Right click on the Nsight Eclipse project and go to - Export > C/C++ > C/C++ Project Settings > Next menu.3.Select the project and settings to export.4.Specify the "Export to file" location.5.Settings will be stored in the given XML file.6.Go to Eclipse workbench where the project settings needs to be imported.7.Create a C/C++ Project from the main menu File > New > C/C++ Project8.Specify the project name and choose Empty project type with CUDA toolchains.9.Right click on the project to import the source files. Import > General > File System >(From directory) or copy the source files from the existing project.10.I mport the project settings like include paths and symbols using the following right click menu Import > C/C++ > C/C++ Project Settings >Next...11.S elect the location of the project settigns file and select the project and configurationon the next wizard page.12.C omplete the wizard.The project settings will be imported from the file exported from Nsight Eclipse Edition.13.B uild the project by clicking on the hammer button on the main toolbar.2.11. More InformationMore information about the Eclipse CDT features and other topics is available in the Help contents. To access Help contents select Help->Help Contents from the Nsight main menu.More information about CUDA, CUDA Toolkit and other tools is available on CUDAweb page at /cudaNoticeALL NVIDIA DESIGN SPECIFICATIONS, REFERENCE BOARDS, FILES, DRAWINGS, DIAGNOSTICS, LISTS, AND OTHER DOCUMENTS (TOGETHER AND SEPARATEL Y, "MATERIALS") ARE BEING PROVIDED "AS IS." NVIDIA MAKES NO WARRANTIES, EXPRESSED, IMPLIED, STATUTORY, OR OTHERWISE WITH RESPECT TO THE MATERIALS, AND EXPRESSL Y DISCLAIMS ALL IMPLIED WARRANTIES OF NONINFRINGEMENT, MERCHANTABILITY, AND FITNESS FOR A PARTICULAR PURPOSE.Information furnished is believed to be accurate and reliable. However, NVIDIA Corporation assumes no responsibility for the consequences of use of such information or for any infringement of patents or other rights of third parties that may result from its use. No license is granted by implication of otherwise under any patent rights of NVIDIA Corporation. Specifications mentioned in this publication are subject to change without notice. This publication supersedes and replaces all other information previously supplied. NVIDIA Corporation products are not authorized as critical components in life support devices or systems without express written approval of NVIDIA Corporation.TrademarksNVIDIA and the NVIDIA logo are trademarks or registered trademarks of NVIDIA Corporation in the U.S. and other countries. Other company and product names may be trademarks of the respective companies with which they are associated. Copyright© 2007-2018 NVIDIA Corporation. All rights reserved.。
1 LRK-TRH-DFX 反应应用修复安装说明书
IMPORTANT SAFEGUARDSWhen using electrical equipment, basic safety precautions should always be followed including the following: READ AND FOLLOW ALL SAFETY INSTRUCTIONSa) This equipment is designed for use with germicidal UV radiation sources and must be installed in compliance with competent technical directions to prevent risk of personal injury from UV radiation.b) UV radiation can pose a risk of personal injury. Overexposure can result in damage to eyes and bare skin. To reduce the risk of overexposure this equipment must be installed in accordance with the manufacturer’s site plan-ning recommendations. This may include instructions on the relative location of each germicidal system compo-nent, the minimum distances between UV-generating devices and other objects or surfaces, and protection from line-of-sight exposure to UV radiation in occupied spaces located above the equipment mounting area (e. g. upper floor balconies, open staircases, etc.)c) UV and optical radiation can be reflected by surrounding surfaces such as ceilings and walls. Since the reflec-tive properties of surfaces can vary widely, it should be considered as part of site planning. Follow the manufactur-er’s recommendations for selecting appropriate ceiling and wall finishes.d) IT IS THE RESPONSIBILITY OF THE INSTALLER TO ENSURE THAT PERSONS WILL NOT BE EXPOSED TO EXCESSIVE UV OR OPTICAL RADIATION DURING EQUIPMENT OPERATION. THIS WILL REQUIRE THE INSTALLER TO CONDUCT AN ASSESSMENT OF IRRANDIANCE OR ILLUMINANCE LEVELS IN THE SURROUNDING OCCUPIED SPACES PRIOR TO OCCUPANCY.e) Equipment should be mounted in locations and at heights where it will not readily be subjected to tampering by unauthorized personnel.f) Maintenance and servicing of this UV generating equipment shall be performed by authorized personnel. Ser-vice personnel must wear appropriate Personal Protective Equipment (PPE) if the equipment will be in operation during the maintenance or servicing work. Contact the equipment manufacturer for PPE recommendations and guidance.g) The use of accessory equipment not recommended by the manufacturer may cause an unsafe condition.h) Do not use this equipment for other than intended use.SAVE THESE INSTRUCTIONSInstallation Instruction GuideAvailable in a wide range of configurations with standard sizes.The retrofit kit is designed to retrofit Listed Recessed Fluorescent Troffer Luminaires of sizes 2x2, 2x4, 1x4 with minimum depth of 3.5”NOTES- Installation should be completed by an individual familiar with the construction and operation of the luminaire.- Installation of luminaire must be in accordance with the requirements of the Canadian Electrical Code and National electrical code for the specific hazardous locations area classification of the installation.- Carefully read and follow all warnings and instructions before installing or servicing the luminaire.- Do not restrict luminaire ventilation.- Ensure LED luminaire is not covered with material that will prevent convection or conduction cooling.- Do not exceed luminaire’s maximum ambient temperature rating as marked on the luminaire.- The retrofit kit is accepted as a component of a luminaire where the suitability of the combination shall be determined by authorities having jurisdic-tion. Product must be installed by a qualified electrician in accordance with the applicable and appropriate codes. The installation guide does not supersede local or national regulations for electrical installations.WARNINGSElectric shock:- Disconnect or turn off power before installing or servicing luminaire. - All electrical wiring to be completed by a qualified licensed electrician in accordance with local and National/Canadian Electrical Code.- Ensure supply voltage corresponds to that marked on the luminaire. If there is a mismatch DO NOT proceed!- Avoid exposing wiring to metal edges and sharp objects.- Ensure that the luminaire is properly grounded to prevent electric hazards.- All supply field wiring to the luminaire shall be rated 600V and 75°C minimum.Fire:-Keep flammable and combustible materials away from the light sourceand/or lens.-Use correctly rated supply conductors as indicated by product label-ing.Burn:- Allow luminaire to cool before handling luminaire.Personal Injury:- Wear safety glasses and gloves when handling the luminaire to avoidphysical injury.- Avoid direct eye contact with light source.Manufacturer is not responsible for any injuries due to the improper installation or handling of its products.READ AND FOLLOW ALL SAFETY INSTRUCTIONSTools RequiredWARNINGRISK OF FIRE, ELECTRIC SHOCK, OR PERSONAL INJURY- LED retrofit kit installation requires knowledge of luminaires electrical system. If not qualified, do not attempt installation. Contact qualified electrician.- Install this kit only in the luminaires that have the construction features and dimensions shown in the photographs and/or drawings and where the input rating of the retrofit kit does not exceed the input rating of the luminaire.- To prevent wiring damage or abrasion, do not expose wiring to edges of sheet metal or sharp objects.- Luminaire wiring and electrical parts may be damaged when drilling for installation of LED retrofit kit. Check for enclosed wiring and com-ponents.- Only those open holes indicated in the photographs and/or drawings may be made or altered as a result of kit installation. Do not leave any other open holes in an enclosure of wiring or electrical components.- CAUTION—RISK OF PERSONAL INJURY. Do not use this retrofit kit to convert portable or hand-held luminaires.- Do not install this equipment in a dwelling.Component List for Kit- 1x Door Frame Assembly- 2x Frame Angle Bracket- 2x Tether Cables- 1x Fixture LabelVerify Voltage of the Retrofit kit matches existing Voltage – If there is a mismatch DO NOT proceed! The luminaire needs to be supported independent of ceiling grid.Remove the lens, cover with ballast,socket strap from the fluorescent fixture.Disconnect any wiring from the electricalcomponents being retrofitted.Step 4:Raise the frame, push up into the existing fixture and close the cam latches. Installation complete.Diffuser retaining bracket comes with 2 tamper resistant center-pin Torx screws. For servic-ing luminaire from room side, a center-pin Torx screwdriver (by others) will be required to remove diffuser.。
Virtual User Generator(VuGen)软件版本2023-2023 R1安装指南说
Installation GuideGo to Help Center onlinehttps:///vugen/Virtual User Generator (VuGen)Software version: 2023-2023R1Document release date: August2023Send Us FeedbackLet us know how we can improve your experience with theInstallation Guide.Send your email to: **********************Legal Notices©Copyright2023Open Text.The only warranties for products and services of Open Text and its affiliates and licensors (“Open Text”)are as may be set forth in the express warranty statements accompanying such products and services.Nothing herein should be construed as constituting an additional warranty.Open Text shall not be liable for technical or editorial errors or omissions contained herein.The information contained herein is subject to change without notice.DisclaimerCertain versions of software accessible here may contain branding from Hewlett-Packard Company(now HP Inc.)and Hewlett Packard Enterprise Company.This software was acquired on September1,2017by Micro Focus and is now offered by Open Text,a separately owned and operated company.Any reference to the HP and Hewlett Packard Enterprise/HPE marks is historical in nature,and the HP and Hewlett Packard Enterprise/HPE marks are the property of their respective owners.ContentsWelcome to VuGen4 VuGen Help Center4 VuGen components5 Download installation packages5System requirements and prerequisites6 System requirements6 Before you install6Installing VuGen9 Installation workflow9 Upgrade VuGen10 Install VuGen using the Setup wizardInstall VuGen silently12 Installation command line options13 Install a VuGen language pack15Welcome to VuGenWelcome to the OpenText™VuGen Installation Guide.VuGen is a tool for creating virtual user(Vuser)scripts,primarily through recording. Vuser scripts emulate users without a graphical user interface by using direct function calls.This guide describes how to install and set up VuGen.VuGen Help CenterFor context sensitive help within VuGen,press F1within a dialog box or use the Help menu.You can access the LoadRunner Professional and VuGen Help Centers on the web. l https:///lr/l https:///vugen/When you open a link to a Help Center,make sure that the relevant product version is selected.You can also download and install local versions of the help from the Download Help Centers page.To switch between online and local modes,select Help> Help Center Options> Open Online or Open Locally.VuGen componentsThis installation guide describes the installation of VuGen.VuGen is a tool for creating virtual user(Vuser)scripts,primarily through recording.Vuser scripts emulate users without a graphical user interface by using direct function calls.Additional componentsAdditional components(such as the Citrix agent)can be found in the installation package's Additional Components folder.For details and installation instructions, see Additional components and applications in the VuGen Help Center.Download installation packagesYou can access the installation packages from the free trial page or by selecting your account on the Software Licenses and Downloads page.You can also download VuGen,LoadRunner Developer,VTS,LoadRunner Data Hub,and more,for free from AppDelivery Marketplace.System requirements and prerequisitesThis chapter includes:•System requirements6•Before you install6System requirementsThe following information can be found in the Support Matrix:l System requirements for running VuGen on a Windows systeml A full list of components that can be installed on the same physical machine at the same timeFor system requirements and installation instructions for Network Virtualization, see the Network Virtualization for LoadRunner Help.You can install Network Virtualization during the VuGen installation,or at a later time.Before you installBefore you install VuGen,review the information below.For additional notes and limitations,see Known issues in the VuGen Help Center.Security review We strongly recommend that you install VuGen components on dedicated machines that do not contain,or provide access to, sensitive information;and that you do a thorough security review of the network topology and access levels in your testing environment.Permission requirements The installation process for VuGen requires a full administrator account for all operating systems.You can install VuGen components with UAC and DEP enabled, but we recommend to keep them disabled during installation(or enable DEP for essential Windows programs and services only). After installation,VuGen can run under a standard user account (an administrator account is not required),with UAC and DEP enabled.Antivirus applications It is recommended that you close all antivirus applications before installing VuGen.Running Java Vusers on Windows OpenJDK32-bit is no longer automatically installed with LoadRunner.To work with Java protocols,you need to manually install a supported version of the JDK.VuGen uses internal logic to automatically detect your JRE version.For details,see Set up the environment for Java protocols.VuGen and UFT coexistence If you install VuGen and UFT on the same machine,and then uninstall one of them,the remaining software program may not function correctly.Resolution:Run a Repair of the software program you want to use on the machine.Custom certificates When upgrading from version12.55or earlier,if you used custom certificates in your previous installation of LoadRunner, install them again when prompted for certificates during setup. Otherwise,the setup program will overwrite them using the defaults.Network Virtualization If you choose to install NV automatically(as part of VuGen installation),you must disable Windows SmartScreen before proceeding with the NV installation:Open HKEY_LOCAL_MACHINE\SOFTWARE\Microsoft\Windows\CurrentVersion\Expl orer in the Registry Editor,and change the Value data for SmartScreenEnabled to Off.Note:You do not need to disable SmartScreen when installing NV manually.Virtual environments The architectures provided by virtualization vendors are rapidly evolving.VuGen is expected to function as designed in these changing environments,as long as the third-party vendor guarantees full compatibility of the virtualized environment with theVuGen-approved hardware requirements.If you follow the system requirements and support matrix to create the virtual machine,VuGen will work correctly.Working on top of a virtual machine may require access to the virtualization server hardware/monitoring environment,to ensure the virtualization server is not saturated;otherwise,this might obscure the virtual machine's measurements and lead to false results.Installing VuGenThis chapter describes how to install VuGen on a Windows platform.This chapter includes:•Installation workflow9•Upgrade VuGen10•Install VuGen using the Setup wizard10•Install VuGen silently12•Installation command line options13•Install a VuGen language pack15Installation workflowThe VuGen installation package includes the Setup wizard that guides you through the process of installing VuGen.Installing VuGen on a Windows system involves the steps shown below:1.Prerequisitesl Make sure that your system meets the hardware and software requirements.For details,see"System requirements"on page 6.l Review the information here:"Before you install"on page 6.l Installation must be performed at the destination machine.VuGen does not support installation via terminal service.Installation GuideInstalling VuGen2.Run the setupl Wizard installation:To run the installation using the Setup wizard,see"Install VuGen using the Setup wizard"below.l Silent installation:To perform a silent installation,see"Install VuGensilently"on page 12.After you run the setup,run any patch installations if necessary.3.Install a language pack(optional)After you complete the VuGen installation,you can install a localized version to view the VuGen user interface in your local language.For details,see"Install a VuGen language pack"on page 15.Upgrade VuGenVuGen is a full installation that can be installed over any VuGen installation(version 12.5x and later).To upgrade all components in your Windows installation using the Setup wizard, follow the installation process as described in"Install VuGen using the Setup wizard"below.The installation process detects the older version and gives you the option to upgrade.For silent upgrade,see"Install VuGen silently"on page 12.Install VuGen using the Setup wizardThis section describes how to install VuGen using the Setup wizard.To install VuGen or an additional component:1.Make sure the Windows Update process is not running on your machine.2.Run the setup.exe file in the root folder of the installation package.The VuGen installation program begins and displays the installation options. 3.Select the required installation option.For details on each of the availablecomponents,see"VuGen components"on page 5.4.Specific software needs to be installed on Windows before you can installVuGen(see the Support Matrix).If the prerequisite software is not already installed on your computer,a dialog box opens displaying the list ofprerequisite programs that are required.Click OK to install the listed software before continuing with the VuGeninstallation.If you click Cancel,the VuGen Setup wizard exits because VuGen cannot be installed without the prerequisite software.After installing prerequisite software,VuGen may restart the machine.If that occurs,rerun setup.exe.5.Perform the installation.The Setup wizard opens,displaying the Welcome page.Follow the instructions in the wizard to complete the installation.6.After the installation is complete,you can choose to install NetworkVirtualization(NV).In the Setup wizard,select:l Typical mode for an automatic installation of the NV for Load Generator and VuGen component.l Custom mode to change the installation folder,data folder,and the port.For more details,see the installation section of the Network Virtualization for LoadRunner Help.7.If there is a patch available for the installed version:a.Run the patch installation file provided with the installation package.b.Follow the on-screen instructions.Install VuGen silentlyA silent installation is an installation that is performed without the need for user interaction.You use the command line to run the setup files.For details,see "Installation command line options"on the next page.To perform a silent installation of VuGen:1.Run one of the following commands from the command line:l To install VuGen:l To install additional components:2.If you are installing an upgrade,run the following command:The msp files are located in the installation package.For details,see"Upgrade VuGen"on page 10.Installation command line optionsYou can install VuGen or one of the additional components via the Package for the web(PFTW)files that are included with the LoadRunner Professional installation media.The installation files are located under the Standalone Applications or Additional Components folders on the installation media.Double-click on the packaged file,or run it from the command line using the following options:ExamplesThe following commands silently run setup,and install the application in the specified folder.Where relevant,they also start the agent after installation:l Examples for SetupVuGen.exe and SetupOneLG.exe:l Examples for other standalone applications:Install a VuGen language packThe language packs enable you to view the VuGen user interface in your local language.You install the language pack from the LoadRunner Professional installation package.For a list of supported languages,see the Support Matrix.The language packs are supported for native non-English operating systems only.To install a language pack:1.Make sure that VuGen in English is already installed.2.In the root folder of the LoadRunner Professional installation package,runsetup.exe.The VuGen installation program begins and displays the installation options.3.Click Language Packs.The Language Packs folder in the installation packageopens.4.Navigate to the folder for the language and component you want to install andrun the installation file.For example,to install the French language pack on a VuGen standalone machine,the path is..\LanguagePacks\French\VugenSA\Vugen_FRA.msp.Follow the online instructions.。
理想的Graitec OMD arche melody 2015结构设计

Oasys.ADC.v8.4.10 1CD
Oasys.AdSec.v8.3.10 1CD
Oasys.Alp.v19.2.0.12 1CD
Oasys.CADrebar.v3.2.0.1.Win64 1CD
Mentor Graphics Xpedition Enterprise VX.1.1 Win32_64 4DVD
Ansys.Products.16.2.Win64-ISO 1DVD
BioSolveIT.SeeSAR.v3.2 1CD
CADSWES.RiverWare.v6.7.Win32_64 2CD
Oasys.Pdisp.v19.3.0.4.Win64 1CD
Oasys.Pile.v19.5.0.21.Win64 1CD
Oasys.SlopeFE.v20.0.0.27 1CD
Oasys.Xdisp.v19.3.1.35 1CD
Oasys.Greta.v19.1 1CD
Oasys.GSA.Suite.v8.7.45.Win64 1CD
Altera Quartus II version 15.0 Update 2 Only Win64 & Linux64 2DVD
DICAD.Strakon.Premium.v2015.MultiLanguage-ISO 1DVD
Abaqus 6.14-4 Win64.&.Linux64 2DVD
Mentor Graphics FloTHERM Suite 11.0 Win32_64 5CD
Mentor Graphics FloTHERM XT v2.2 Win64-ISO
xortool用法 -回复
xortool用法-回复Xortool是一个用于自动破解单字符加密和重复密钥异或(XOR)加密算法的Python脚本。
这个工具可以帮助我们破解加密信息并恢复原始文本。
本文将详细介绍如何安装和使用Xortool来解密加密文件。
第一部分:安装Xortool首先,我们需要确保Python环境已正确安装在计算机上。
可以在终端窗口中输入"python version"来检查Python的版本。
如果没有安装,我们可以从Python官方网站下载并安装最新版本。
接下来,我们需要安装Xortool脚本。
可以从github上下载xortool的源代码,并将其解压到一个目录中。
然后,在终端窗口中导航到该目录并运行以下命令:python setup.py install这将自动安装xortool并将其添加到系统的可执行路径中。
第二部分:使用Xortool解密文件现在我们已经安装了Xortool,可以开始使用它来解密加密文件了。
首先,我们需要找到一个加密过的文件,然后使用Xortool进行解密。
假设我们有一个名为encrypted.txt的文件,我们可以使用以下命令来运行xortool:xortool encrypted.txtXortool将自动分析文件并尝试使用不同的密钥来解密它。
该工具将生成多个解密的候选结果,我们可以通过检查它们的输出来找到正确的解密。
接下来,我们可以使用-x选项来指定一个字符集,该字符集将用于生成解密结果。
例如,如果我们知道原始文本只包含英文字母,我们可以使用以下命令进行解密:xortool -x'abcdefghijklmnopqrstuvwxyzABCDEFGHIJKLMNOPQRSTUVWXYZ ' encrypted.txtxortool将使用提供的字符集生成解密结果,并将它们输出到终端窗口。
此外,我们还可以通过使用-m选项来指定一个最小重复字节数。
这对于重复密钥异或加密算法非常有用。
onnxruntime windows推理编译 -回复
onnxruntime windows推理编译-回复ONNX Runtime 是一个高性能的开源推理引擎,用于机器学习模型的推理。
它支持多种硬件平台和操作系统,并且提供了易于使用的API,使得模型的集成和部署变得非常简单。
本文将介绍如何在Windows 操作系统上编译和使用ONNX Runtime 进行推理。
一、环境准备在开始编译ONNX Runtime 之前,我们需要确保准备好以下环境:1. Windows 操作系统:ONNX Runtime 支持Windows 7、Windows 10 和Windows Server 2016 及更新版本。
2. Visual Studio:我们需要一个C++ 编译环境来编译ONNX Runtime。
建议使用Visual Studio 2017 或更新版本。
3. Git:我们需要安装Git 以便从源代码库中获取ONNX Runtime 的源代码。
二、获取源代码首先,我们需要使用Git 从ONNX Runtime 的GitHub 代码库中获取最新的源代码。
打开命令行终端,并输入以下命令:git clone这将克隆ONNX Runtime 代码库到本地。
三、配置编译环境在成功获取源代码之后,我们需要配置编译环境。
首先,打开Visual Studio,并选择“文件”->“打开”->“文件或项目”,然后导航到ONNX Runtime 代码库的根目录,并选择“onnxruntime.sln”文件。
这将打开解决方案。
在Visual Studio 中,我们需要设置一些编译选项。
选择“生成”->“批处理构建变量...”菜单,然后在“确定”按钮下方的文本框中输入以下命令:/src:onnxruntime点击“确定”按钮保存设置。
四、编译ONNX Runtime现在,我们已经准备好编译ONNX Runtime 了。
在Visual Studio 中,选择“生成”->“生成解决方案”菜单。
libsndfile编译 -回复
libsndfile编译-回复关于编译libsndfile的方法,下面将一步一步地回答您的问题。
第一步:下载libsndfile源代码在开始编译之前,您需要先从官方网站(第二步:安装必要的编译工具在编译libsndfile之前,您需要确保已经安装了一些必要的编译工具和库文件。
具体要求因操作系统而异,下面是一些常见系统的示例:- 对于Ubuntu或Debian,请使用以下命令安装所需工具和库文件:sudo apt-get install build-essential automake libtool- 对于Fedora或Red Hat,请使用以下命令安装所需工具和库文件:sudo dnf install gcc automake libtool- 对于MacOS,请使用以下命令安装所需工具和库文件:xcode-select installbrew install automake libtool- 对于Windows,请安装MinGW-w64,并确保在系统路径中添加相关工具的安装目录。
第三步:解压和配置将下载好的libsndfile源代码文件解压到您选择的目录中。
打开终端并将当前工作目录更改为解压后的目录。
然后运行以下命令以配置编译环境:./configure根据您的系统配置,此过程可能需要一些时间。
完成后,您可以使用以下命令来查看配置的详细信息:make config.log配置完成后,您可以根据需要添加自定义选项并重新运行configure 命令。
第四步:编译和安装运行以下命令以编译libsndfile:make这将编译源代码并生成可执行文件。
完成后,您可以运行以下命令以安装libsndfile:sudo make install这将安装libsndfile到系统默认的库目录中。
第五步:测试安装为了确保libsndfile编译和安装成功,您可以运行一个简单的测试程序。
创建一个名为test.c的文件,并将以下代码复制到文件中:cinclude <stdio.h>include <sndfile.h>int main(){SNDFILE* sndFile = sf_open("test.wav", SFM_READ, NULL);if (sndFile == NULL){printf("Failed to open the file.\n");return 1;}sf_close(sndFile);printf("File opened and closed successfully.\n");return 0;}然后,使用以下命令将其编译为可执行文件:gcc test.c -o test -lsndfile运行生成的可执行文件:./test如果输出为"File opened and closed successfully.",则表明libsndfile已经成功编译和安装。
testssl使用手册
TestSSL是一个用于测试SSL/TLS协议实现的工具,它可以检查服务器的SSL/TLS实现是否符合标准,并提供有关服务器安全性和性能的信息。
以下是TestSSL使用手册的概述:1. 概述TestSSL是一个命令行工具,可以在Linux和Unix系统上使用,也可以在Windows上使用。
它可以测试SSL/TLS协议的实现,并提供有关服务器安全性和性能的信息。
TestSSL支持多种加密算法和协议版本,并可以测试服务器的证书验证、握手速度等方面。
2. 安装和配置要使用TestSSL,需要先安装OpenSSL库和命令行工具。
在Linux和Unix系统上,可以使用以下命令安装:sudo apt-get install openssl在Windows上,可以从OpenSSL官方网站下载TestSSL工具,并按照说明进行安装。
安装完成后,可以通过命令行运行TestSSL工具。
3. 使用说明使用TestSSL时,需要指定要测试的服务器地址和端口号,并指定要测试的协议版本和加密算法。
以下是一些常用的命令行选项:testssl <server_address> <server_port> [options]其中,<server_address>是服务器地址和端口号的组合,<server_port>是服务器的端口号,[options]是可选的选项。
以下是一些常用的选项:--c:指定要测试的加密算法;--k:指定要测试的密钥长度;--tls1_3:指定要测试的TLS协议版本为TLS 1.3;--cipher none:指定不使用任何加密算法。
4. 常见问题和解决方案在使用TestSSL时,可能会遇到一些常见问题,例如连接失败、测试结果不准确等。
为了解决这些问题,可以查阅TestSSL的官方文档或在线社区,或者联系OpenSSL的技术支持团队。
以上是TestSSL使用手册的概述,如果需要更详细的操作指南,请查阅TestSSL的官方文档或在线教程。
dxvk用法 -回复
dxvk用法-回复DXVK是一个开源的Vulkan实现,它可以为许多Windows游戏提供DirectX 11/12到Vulkan的转换,从而在Linux运行这些游戏。
本文将详细介绍DXVK的用法并提供一步一步的操作指南。
第一步- 安装Vulkan驱动和依赖项在使用DXVK之前,您需要为您的系统安装Vulkan驱动和相应的依赖项。
对于大多数Linux发行版来说,这可以通过包管理器完成。
例如,在基于Debian的发行版中,可以使用以下命令安装Vulkan驱动和库:shellsudo apt install vulkan-utils vulkan-tools vulkan-validationlayers libvulkan1 mesa-vulkan-drivers请注意,不同的Linux发行版可能具有不同的包名称,但是您可以根据发行版文档来确定正确的包名称。
第二步- 下载DXVK您可以在DXVK的GitHub存储库中找到最新的版本。
通过以下命令克隆存储库:shellgit clone此命令将在当前目录下创建一个名为"dxvk"的文件夹,其中包含DXVK的源代码和脚本。
第三步- 编译DXVK将您的当前工作目录更改为DXVK存储库所在的文件夹:shellcd dxvk然后,使用以下命令编译DXVK:shell./package-release.sh master此命令将在DXVK存储库文件夹中创建一个名为"dxvk-1.x.x.tar.gz"的文件,其中的"x.x"表示DXVK的版本号。
第四步- 安装DXVK解压缩刚刚创建的.tar.gz文件并进入解压后的文件夹:shelltar -xf dxvk-1.x.x.tar.gzcd dxvk-1.x.x现在,使用以下命令来安装DXVK:shell./setup_dxvk.sh install此命令将在系统中安装DXVK并将其作为Vulkan的一部分。
- 1、下载文档前请自行甄别文档内容的完整性,平台不提供额外的编辑、内容补充、找答案等附加服务。
- 2、"仅部分预览"的文档,不可在线预览部分如存在完整性等问题,可反馈申请退款(可完整预览的文档不适用该条件!)。
- 3、如文档侵犯您的权益,请联系客服反馈,我们会尽快为您处理(人工客服工作时间:9:00-18:30)。
bVIEW.2015.v15.0.Chinese 1DVD
CEI.ENSIGHT.GOLD.v10.1.5a.RedHat.Linux64 1CD
Golden Software Surfer 13.0.383 Win64 1CD
Integrated Engineering Software(IES) Visual Analysis v12.00.0008 1CD
mercial.v4.2.0l.Win64 1CD
mercial.v4.2.0l.Linux32 1CD
mercial.v4.2.0l.Linux64 1CD
mercial.v4.2.0l.MacOSX 1CD
Wolfram Mathematica 10.2.0 1DVD
Bentley GEOPAK Civil Engineering Suite V8i v08.11.09.845 1CD
Bentley MicroStation V8i v08.11.09.714 1DVD
Bentley RM Bridge Advanced+ V8i v08.11.28.02 1CD
EdgeCAM 2015 R2-ISO 1DVD
bVIEW.2015.v15.0.JAPANESE 1DVD
bVIEW.2015.v15.0.KOREAN 1DVD
CSI SAFE 2014 v14.1.1 1CD
GibbsCAM 2015 v10.9.33.0 Multilanguage Win64 1DVD
FAST Survey 3.1.0 22 1CD
Franson CoordTrans v2.0 1CD
GeoDLL.v11.11 1CD(大地测量)
GXII v4.02 1CD
Hans.Gerd.Duenck.Kerst.AllTrans.v2.325 1CD
Magixity Online Help(中文)
Interpex.IXRefrax.v1.14(一个整合的地震波分析软件,功能多样)
Interpex.IX1D.v3.53 1CD
Interpex.IX2D.GM.v1.03 1CD
mercial.v4.2.0l.Win32 1CD(地震目标检测系统)
Orima v8.72 for Socet Set v5.2 1CD(定位软件)
■□■□■□■□■□■□■□■□■□■□■□■□■□■□■□■□■□■□
+ 诚信合作,保证质量!!!长期有效:
+ 电话TEL:18980583122 客服 QQ:1140988741 邮件(Email):buysoftware@
FORGE NXT 1.0带来的新功能,将提高工程生产率和效率令人印象深刻。与现实的运动,一个端到端的组织演变能力和完全重新设计的直观的用户界面,FORGE NXT 1.0提供了最佳的一流的锻造模拟一个易于使用的工作环境。
bVIEW.2015.v15.0.Win64 1DVD
MicroSurvey Layout Pro 2013 for Windows PCs & Tablets 1CD
MicroSurvey Layout Pro 2013 Manual 1CD
MicroSurvey MapScenes Forensic CAD 2013 v13.0.2.7 1CD
Microsurvey Fieldgenius 2008 for PPC 1CD
Microsurvey Fieldgenius 2011 v5.0.0.4 1CD(野外精灵测量手簿软件)
MicroSurvey Layout 2 v1.0.6 1CD
MicroSurvey Layout Pro 2013 for Windows Mobile Devices 1CD
VERO EdgeCAM 2015 R2 SU1 Update only 1DVD
CEI.Ensight.Gold.v10.1.5a 1DVD
CEI.Ensight.Gold.v10.1.5a.Linux.Debian.X64 1DVD
CEI.Ensight.Gold.v10.1.5a.MacOSX 1DVD
Transvalor.Forge.NXT.1.0.WINDOWS.LINUX-SSQ锻造成形模拟软件
Transvalor S.A,一个在全球范围内领先的研发和市场推广成形模拟软件,发布了其FORGE NXT软件版本1.0。随着这项宣布,Transvalor S.A巩固了其成形仿真和建模技术的领导者。
Delcam Crispin ShoeMaker 2015 R2 SP5 Update Only 1CD
Chasm Consulting PumpSim v1.0.3.2 1CD
FTI FormingSuite 2015.1 Win32_64 2CD
Siemens NX 8.5-10.0 version 2015.06 Solvers Updates 6CD
Chasm.Ventsim.Visual.Premium.v4.0.5.6.Win32_64 1CD
Brüel & Kj?r B&k Pulse 19.0 WinALL(声学)材料测试系统震动分析
是一种多用途分析平台,通过与相关的软件和硬件配合使用,可以进行多种振动和声学信号测试分析,如:模态试验分析、振动测试与控制、机械故障诊断、动平衡、声强和声功率测试、声源识别、声学全息分析以及数据采集、管理和输出等。配置激光单点振动测量单元后,可进行微系统的微位移微振动的测量和检测。PULSE软件具有多种信号处理功能,支持OLE2.0规范,可以利用VB、EXCELMACRO实现外部控制和数据输出,软件体系开放,可以通过接口和LabVIEW、Matlab连接配合使用,可以进一步开发其他先进信号处理方法。
Hale Waihona Puke MicroSurvey.PointCloud.CAD.2010.v10.2.0.6 1CD
MicroSurvey Point Prep 2013 v13.0.0.37 1CD
MicroSurvey STAR NET v8.0.2.630 1CD(最小二乘法网形平差软件)
Nobeltec Visual Navigation Suite v7.0 1CD (电子航海图、导航及天候海象分析套件)
MicroSurvey embeddedCAD 2013 Premium v13.0.1.0 Win32_64 2DVD
MicroSurvey FieldGenius 2014 v7.0.0.0 1CD
MicroSurvey.FieldGenius.2012.v6.0.3.5 1CD
■□■□■□■□■□■□■□■□■□■□■□■□■□■□■□■□■□■□
IMAGIS v2.3+中文使用手册(三维可视地理信息系统)
IMSTutoria(英文教程)
Interpex.IXSeg2Segy.v3.30 1CD(读取SEG-1、SEG-2、SEG-Y、ASCII、CSV 和其它量测厂商多信道的地震数据格式,可输出SEG-2、SEG-Y或ASCII文件)
3DBrowser Online Help(中文)
Engenius.QuickPLOT.Pro.v3.5.10 1CD
Engenius.SurvOPT.Coil.v3.5.10 1CD
Engenius.SurvOPT.v3.6a3 1CD
EngGeo 1.1.8.204 1CD
MapScenes Pro 2010 1CD
MicroSurvey.inCAD.Premium.2014.v14.2.0.126 1CD
Microsurvey InCAD 2013 for AutoCAD 2013 Win32_64 1CD
MicroSurvey CAD 2014 Studio v14.0.2.13 1CD(高级测量勘测软件)
B&K Pulse 18.1 Windows 1DVD
Bentley InRoads Suite V8i v08.11.09.845 1CD
Bentley RM Bridge View V8i v08.11.28.02 1CD
CADSWES.RiverWare.v6.7.Pre.Release.Win64 1CD
Integrated Engineering Software VisualPlate v3.00.0001 1CD
Integrated Engineering Software VisualShearWall v3.00.0002 1CD
bVIEW.2015.v15.0.Win32 1DVD
