Radius Manager与ROS对接设置.pdf
ROS软路由安装与设置步骤
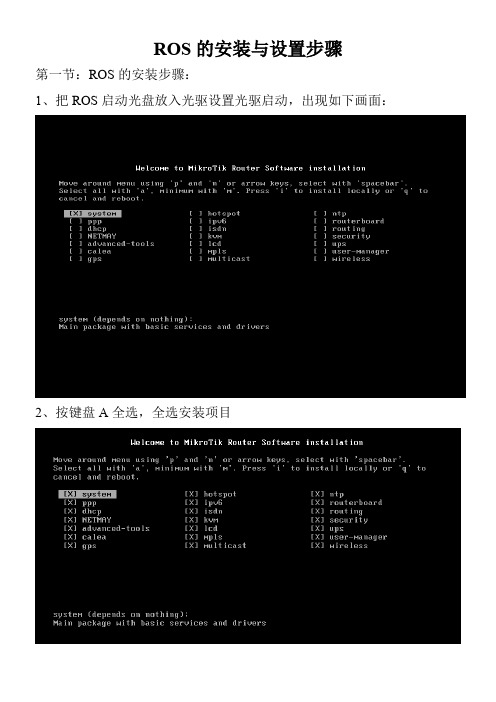
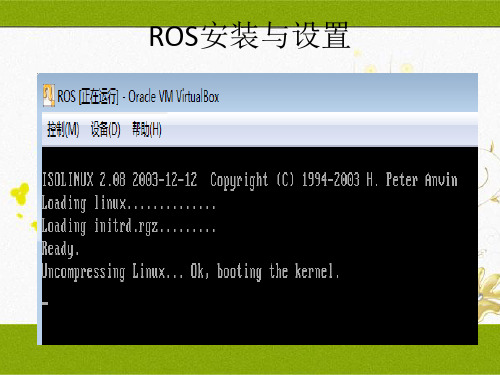
ROS的安装与设置步骤第一节:ROS的安装步骤:1、把ROS启动光盘放入光驱设置光驱启动,出现如下画面:2、按键盘A全选,全选安装项目3、按键盘i进行下一步,然后Y确定全新安装、N为不覆盖上次安装。
4、Y确定安装,N不安装。
我们选择Y5、系统在安装中,出现如下画面按回车重启,系统安装成功。
6、NETMAY 5.24 (版本意思)NETMAY Login: (用户名) 默认为:admin 输入完按回车7、Password(密码) 默认密码为空。
按回车8、按回车9、输入suetup 按回车安装配置10、输入a进行网关服务安装11、再输入a确定安装网关服务13、默认ether1网卡为内网网卡(即网关),根据个人用途可以手动修改ether2、ether3、ether4任何一个为内网网卡,(注:这个根据个人主机安装了几张网卡而定)14、输入你要作为网关的IP地址,如:192.168.1.1/24 回车15、输入x退出并保存回车16、到这步路由就已经安装成功了,在IE浏览其地址输入你刚才设置的路由器地址,就可以访问路由了。
第二节:登录器下载,网卡WAN、LAN识别、光纤网线的接入设置1、在IE浏览器输入网关地址出现如下画面选择点击第一图标登录器下载2、双击登陆器打开如下:Connect to: 填网关IP 也在右边按钮处选择MAC 获取 Logingl:用户名(默认为:admin ) Password:(默认为空)填完以上回车即可登陆2、如何识别网卡WAN 、LAN 。
3、光纤网线的介入设置1、接口设置2、有数字流量的为LAN 3、ether1到ether4到可以改名,可以改为相对应名字方便记忆。
如:ether2改为LAN 其他为WAN2、IP地址3、添加4、填写服务商提供上网IP地址。
如:192.168.1.6/246、确定。
ROS教程设置总结
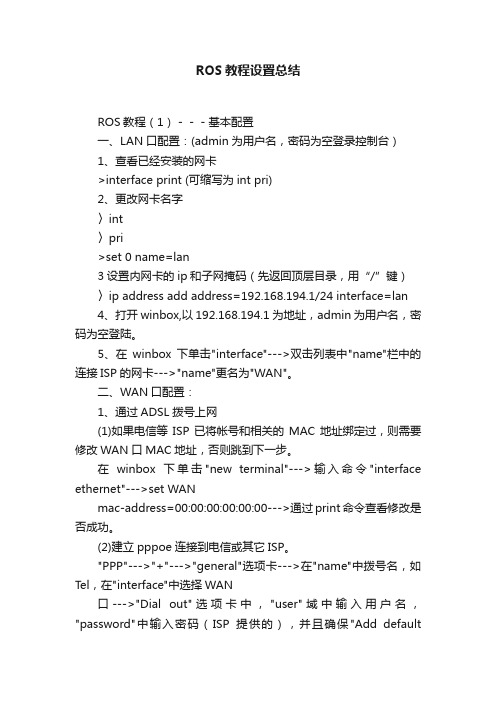
ROS教程设置总结ROS教程(1)---基本配置一、LAN口配置:(admin为用户名,密码为空登录控制台)1、查看已经安装的网卡>interface print (可缩写为int pri)2、更改网卡名字〉int〉pri>set 0 name=lan3设置内网卡的ip和子网掩码(先返回顶层目录,用“/”键)〉ip address add address=192.168.194.1/24 interface=lan4、打开winbox,以192.168.194.1为地址,admin为用户名,密码为空登陆。
5、在winbox下单击"interface"--->双击列表中"name"栏中的连接ISP的网卡--->"name"更名为"WAN"。
二、WAN口配置:1、通过ADSL拨号上网(1)如果电信等ISP已将帐号和相关的MAC地址绑定过,则需要修改WAN口MAC地址,否则跳到下一步。
在winbox下单击"new terminal"--->输入命令"interface ethernet"--->set WANmac-address=00:00:00:00:00:00--->通过print命令查看修改是否成功。
(2)建立pppoe连接到电信或其它ISP。
"PPP"--->"+"--->"general"选项卡--->在"name"中拨号名,如Tel,在"interface"中选择WAN口--->"Dial out"选项卡中,"user"域中输入用户名,"password"中输入密码(ISP提供的),并且确保"Add defaultRoute"处于选中状态--->"apply"--->"OK"。
ROS软路由详细教程

ROS软路由详细教程ROS软路由基本设置非常简单,如果只做路由转发,以下几步数分钟即可高定:硬件准备:1、首先下载软路由的ghost硬盘版,如果没有,从/download/ros297.rar下载2、释放后,ghost至一个小硬盘(20G以下),注意,是整盘GHOST而不是分区。
3、将该硬盘挂在要做路由电脑上,注意必须接在第一个IDE并且是主硬盘接口。
插上一张网卡,这是接内网的LAN。
开机。
软件设置:1、开机,出现登陆提示。
用户:admin 密码:空2、输入setup再按两次A3、在ether1后面输入你的内网IP,如:192.168.0.254/24 (这里/24是24位掩码与255.255.255.0一样)4、输入完ip后,按两次x退出,现在可以可以ping通192.168.0.254了,也可用winbox在图形界面下访问路由了。
5、关机,插上另一张网卡,这个是接外网的,即WAN,现在可以去掉软路由电脑的显示器和键盘了。
6、开机,运行winbox以admin身份登陆7、添加外网网卡。
在ip---address里按+,address输入你的外网ip和掩码位,比如218.56.37.11/29。
network 和BROADCAST不填,INTERFACE里选择ethr28、增加外网网关。
ip-routes按+,Destination用默认的0.0.0.0/0 ,Gateway输入外网网关,比如218.56.37.109、实现NAT转发:IP-FIREWALL在NAT里点+,在ACTION里选masquerade10、现在该路由已经做好雏形,可以正常上网了。
其他的诸如防火墙、双线策略等,可以参考其他资料。
这篇文章是我自己按经验来编写的,安装过程太简单了,就不说了,希望能帮到大家安装完成后什么都没有设置的情况下.登录用户: admin密码: 为空1、查看已安装的网卡>/int>pri2、确认已安装两块网卡后,如果看到网卡前面的英文为X,则要激活网卡,2.9系列版本是自动激活网卡的.>enable 0>enable 13、激活之后网卡前面的英文为R,然后改网卡名字,>set 0 name=lan>set 1 name=wan>/这里“/”为退出的意思4、设置内网卡IP和子网掩码>set>a>a>lan回车后输入你服务器内网卡的IP地址,我的内网卡的IP地址是192.168.1.1 ,下面IP后面的“/24”是代表子网掩码255.255.255.0 ,192.168.1.1/24回车后按G设置网关192.168.1.15、设置外网卡IP和子网掩码>set>a>a>wan回车后输入你服务器外网卡的IP地址,下面IP后面的“/29”是代表子网掩码255.255.255.248,如果你的子网掩码不是255.255.255.248,请自己计算,不要跟着我填29210.137.174.1/29回车后按G设网关219.137.174.193然后按X退出。
ros软路由实用技术ros软路由adsl双线 pppoe服务器设置(图文讲解)
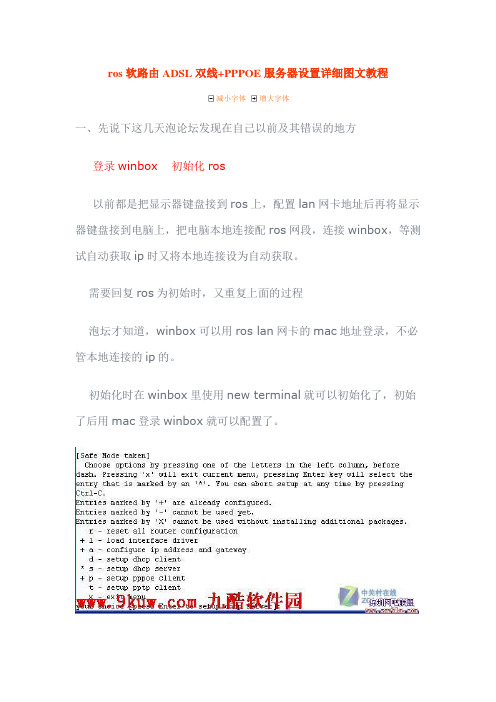
ros软路由ADSL双线+PPPOE服务器设置详细图文教程减小字体增大字体一、先说下这几天泡论坛发现在自己以前及其错误的地方登录winbox 初始化ros以前都是把显示器键盘接到ros上,配置lan网卡地址后再将显示器键盘接到电脑上,把电脑本地连接配ros网段,连接winbox,等测试自动获取ip时又将本地连接设为自动获取。
需要回复ros为初始时,又重复上面的过程泡坛才知道,winbox可以用ros lan网卡的mac地址登录,不必管本地连接的ip的。
初始化时在winbox里使用new terminal就可以初始化了,初始了后用mac登录winbox就可以配置了。
总结:把ros的电脑先设BIOS设为来电自动开机,忽略一切错误开机,就可以再也不接键盘和显示器了。
二、配置ros 双ADSl负载均衡走的弯路因为夹杂了pppoe服务,一直配不通,用脚本生成器生成的也不通,看很多教程,互相影响,自己最后也不知道在配什么了。
总结:先一步一步配,看到哪一步不通。
不如1、先配好lan,看winbox能否登陆winbox2、配置双线adsl,看2条adsl是否拨号成功,双线adsl脚本配置后,在ip里是不应该出现58类ip的,因为之前不理解自动刷新网关,看到脚本里58类ip,自己的机子里没有,以为不正常,重复添加脚本。
(增加pppoe服务后,拨号用户不通,这个后面详解)3、客户机配置手动ip和dns,看能否上网。
3、增加pppoe服务,导入pppoe账号,可以用脚本生成器生成。
三:配置双线adsl+pppoe服务过程1、安装ros,这个这里省略。
2、配置lan ip3、电脑配ip,和ros一个网段,winbox登陆,获取到lan的MAC,把ip换为mac登陆。
方法是ip登陆后点下后面小□(里面有三个...的那个,connect左边那个)在打开的菜单里点mac就可以换了。
4、改网卡名字我把第一个改为wan1,第二个改为wan2,第三个改为lan。
中文手册RouterOS
中文手册RouterOSISP级软件路由器之王RouerOS 宽带接入服务器用户手册――配置指南RouerOS 系列宽带接入服务器配置指南内容摘要一.概述 (3)1.RouerOS 宽带接入服务器的网络接口类型 (3) 2.RouerOS 宽带接入服务器具有以下网络功能 (3)二.基本的配置管理 (5)1 1.系统的缺省帐号 (5)1 2.登录方式 (5)1 3.命令行配置的基本操作 (6)1 远程管理-权限管理 (7)1 5.日志管理 (8)1 91 7.系统时间设置 (10)8. 系统热启动 (10)三.物理接口的配置管理 (10)四.查看当前配置 (11)4.1 查看全部配置 (11)4.2 查看子项配置 (11)五.IP 参数配置 (11)1 1. 路径: (11)1 2. 功能: (11)1 3. 配置IP 地址及路由 (12)1 4. 配置Firewall (14)1 5. 配置IP Service,限定远程管理RouerOS 的地址和方式 (16) 1 6. 配置Hotspot(WEB 认证) (16)1 7. 配置IP Pool (16)1 8. 启用NAT 后的策略路由配置 (16)六.配置ppp 参数 (21)1. 配置PPP 模板 (22)2. 配置Radius-client (22)七.PPPoE 配置 (23)八.HOTSPOT 配置 (25)九.VLAN 配置 (30)十.VPN 配置 (31)10.1 PPTP VPN (31)10.2 EOIP VPN (32)十一.DHCP 配置 (33)11.1 DHCP Server (33)MAC 地址(及IP 地址)与端口绑定 (34)十二.防火墙配置 (35)12.1 防“冲击波”病毒 (35)十三. 配置文件的备份与恢复 (36)1 1. 显示文件系统 (36)1 2. 备份配置文件 (36)1 3. 恢复配置文件 (37)1 4. 配置文件上载与下载 (37)1 5. 配置复位 (37)1 6. 查看系统资源状况 (37)2 7. 监视端口流量 (37)Reference: (37)一.概述RouerOS 宽带接入服务器是基于嵌入式专用网络操作系统而设计的,具有丰富的网络接口,具备多数常见的网络设备功能,处理能力超群,运行十分稳健,性价比极高。
RADIUS认证服务器的安装与配置实训
RADIUS认证服务器的安装与配置实训RADIUS(Remote Authentication Dial-In User Service)是一种广泛应用于企业网络中的认证和授权服务。
它通过提供集中化的身份认证和授权管理,使得多个网络设备可以共享同一个认证服务器,从而简化了网络管理和用户访问的控制。
在本篇文章中,我们将介绍如何安装和配置一个RADIUS认证服务器。
首先,我们需要选择适合自己需求的操作系统来安装RADIUS 服务器。
常用的操作系统选择包括Linux、Windows和FreeBSD等。
在本实训中,我们将选择使用Linux操作系统来安装和配置RADIUS服务器。
我们选择的Linux发行版是Ubuntu Server。
1. 安装Ubuntu Server:首先,在物理或虚拟机上安装Ubuntu Server操作系统。
下载最新的Ubuntu Server ISO镜像文件,并使用它创建一个启动USB或光盘。
启动计算机,并按照提示进行操作系统安装。
2. 安装FreeRADIUS:在Ubuntu Server上安装RADIUS服务器,我们将使用FreeRADIUS。
在终端中运行以下命令,以安装FreeRADIUS:```sudo apt-get updatesudo apt-get install freeradius```3. 配置FreeRADIUS:安装完成后,我们需要对FreeRADIUS进行配置。
首先,编辑`/etc/freeradius/users`文件,该文件包含用户的认证信息。
添加以下示例行,其中用户名为`testuser`,密码为`testpassword`:```testuser Cleartext-Password := "testpassword"```4. 配置FreeRADIUS服务器参数:接下来,我们需要编辑`/etc/freeradius/clients.conf`文件,该文件包含了RADIUS服务器的配置信息。
ROS安装及配置教程
ROS安装方法及设置教程ROS的配置要求CPU和主板–核心频率在100MHz或更高的单核心X86处理器,以及与兼容的主板。
RAM –最小32 MiB, 最大1 GB; 推荐64 MB或更高。
ROM –标准ATA/IDE接口〔SCSI和USB控制器不支持;RAID控制器驱动不支持;SATA不完全支持〕最小需要64 Mb空间;Flash和一些微型驱动器使用ATA接口能连接使用。
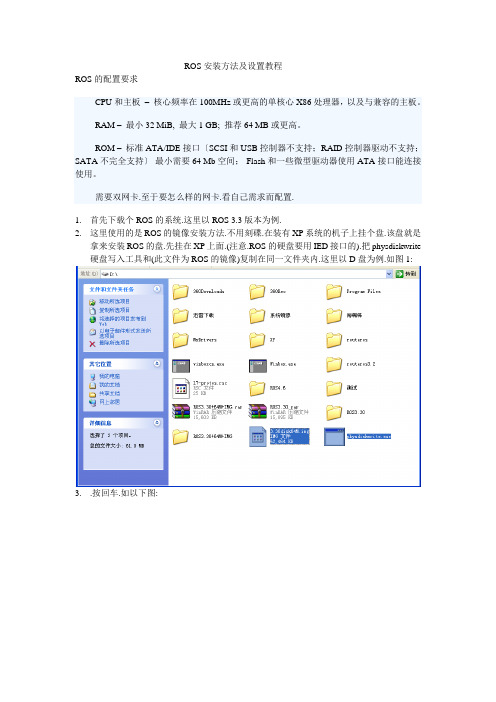
需要双网卡.至于要怎么样的网卡.看自己需求而配置.1.首先下载个ROS的系统.这里以ROS 3.3版本为例.2.这里使用的是ROS的镜像安装方法.不用刻碟.在装有XP系统的机子上挂个盘.该盘就是拿来安装ROS的盘.先挂在XP上面.(注意.ROS的硬盘要用IED接口的).把physdiskwrite 硬盘写入工具和(此文件为ROS的镜像)复制在同一文件夹内.这里以D盘为例.如图1:3..按回车.如以下图:4..接着会问你是否确定.输入y.然后会把镜像写入硬盘.写入完了手动重启即可.如以下图.5.开机之后.会重启几次.当提示输入用户名和密码的时候输入admin.密码为空.直接回车进去.第一次进入程序会自动进展破解.破解完会自动重启(这里下载的这个镜像会自动破解的.如果是另外下载的.请参考他给予的破解方法进展破解).当第二次进入的时候就可以使用了.输入用户名和密码进入就可以使用ROS了.安装到这就完毕了.接下来进展配置. physdiskwrite和这2个工具放到C盘进展安装.)6.配置网卡方法.进入ROS后.输入/int(简写即可)-pri进展查看网卡信息.如以下图:Lan网卡是内网.wan网卡是外网.这些名字是自己改的.初始的名字是ether1和ether2.Lan和wan前面的R表示网卡以激活.为X的话表示未激活.7.输入命令;/ip add进展配置网卡.然后输入add adderss=这里是内网的IP.这里设置为192.168.0.1/24.24表示子网掩码.然后是要修改的网卡名字.完整的命令是如以下图:这里就配置好网卡了.然后在浏览器输入192.168.0.1,这里是路由的IP.点击右边的winbox把winbox下载下来.然后在winbox输入IP.用户名是admin.密码为空.如图.点击链接.进入路由的控制界面.如图:8.进展配置路由.点击如以下图:点击IP-Address设置第二块网卡的IP也就是外网IP比方我的是假设外网IP是:假设外网掩码是:255.255.255.0就这样设Address:Network:Broadcast:Interface:这里选择外网的网卡.我的是wan如以下图:9.增加静态路由再次点去Ip-Route设置路由表.很简单点击+号Destination这个如果用.0/0就表示路由所有ip段其他不懂就不要设了.Gateway:这里就是设网关的输入你的外网网关比方我的外网网关为192.168.1.1.如以下图:10.设置DNS.在IP-DNS这里设置.进入后点击settings设置DNS如以下图:完了点击OK11.设置NAT共享上网点击IP-Firewall设置共享上网选Nat点+选第一项GeneralChain:srcnat选第四项Action设置Action:masquerade这样设置就可以共享上网了.到这就能上网了.接下来就是设置DHCP这些了.12.进入WINBOX后选IP POOL在这里添加地址池,NAME设置为DHCP,ADDRESSES设置192.168.0.*-192.168.0.*这里设置你要分给下面机器的IP段.后进入IP-DHCPSERVER设置网关和DNSNAME=DHCP,INTERFACE=LAN ,lease-time=3d,ADDRESS POOL=DHCP,其他默认~ 如图:在设置ip->dhcp-server->network,address=192.168.0.0/24,gateway=192.168.0.1,netmask=24\dns-server=192.168.0.1?根据ISP给你的DNS来设置如以下图:到这DHCP就设置完成了.接下来设置绑定MAC地址.未绑定的机子不给上网.13.应用要求:将IP与MAC地址绑定,制止改IP与改MAC地址者上网。
ros安装及设置完整版
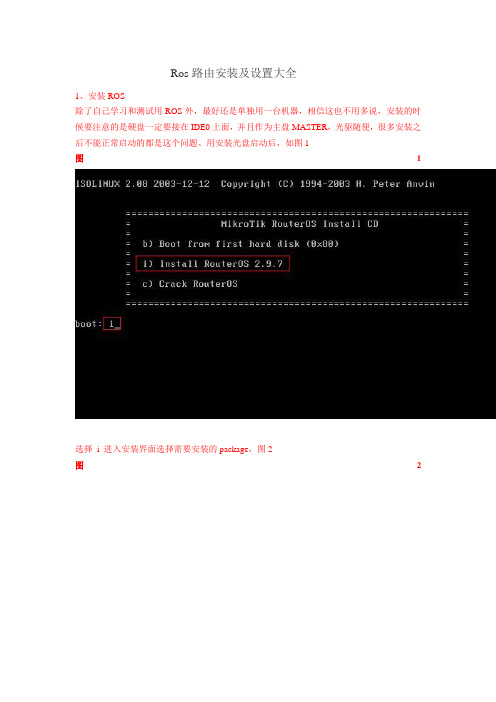
Ros路由安装及设置大全1、安装ROS除了自己学习和测试用ROS外,最好还是单独用一台机器,相信这也不用多说,安装的时候要注意的是硬盘一定要接在IDE0上面,并且作为主盘MASTER,光驱随便,很多安装之后不能正常启动的都是这个问题、用安装光盘启动后,如图1图1选择i 进入安装界面选择需要安装的package,图2图2选择完后,再按i安装,y确定,再按n不保存旧配置。
最后回车重新启动,这时进入ROS 是未注册的版本,如图4图4用光驱启动,在启动菜单按c破解,图5图5破解之后进入已经没有了未注册提示。
见图6图32、服务端配置/interface pri 能显示出你现在可用的网卡。
如图6图6/ip addressadd address=192.168.1.1/24 interface=ether1设置ether1为内网IP,其中192.168.1.1/24添自己的内网IP ,设置成功没有提示,可以用pri查看见图7图73、winbox配置(所有配置都在这里进行)在局域网其他机器IE浏览器192.168.1.1 进入WEBBOX,左边可以下载WINBOX,当然如果你已经有WINBOX可以省略这步。
打开WINBOX输入IP和用户名连接(图8)图8进入配置界面(1)点左侧INTERFACE,双击ether1将name改为lan,同样将另两个改为cnc和tel。
图9 图9(2)左侧IP->ADDRESS ,+号,分别设置CNC和TEL的IP地址,添网通和电信给的IP/子网掩码(不要和我的一样...),红*部分是自动添加的.图10图10(3)IP->ROUTE,+号添加默认的网关,默认网通就添网通网关,默认电信就添电信的网关,这里默认电信.如图11,正常下黑圈处为AS,黄圈出为ment设注释为tel图11(4)IP->FIREWALL,NAT选项卡,+号添加chain:srcnat,src.addr:192.168.1.0/24,ACTION选项卡里为masquerade.OK,现在可以通过电信上网了.图12图12(5) 上传路由表文件cnc.rsc,如图13图13在WINBOX中,NEW TERMINAL,输入import cnc完成.如图14图14现在已经可以电信网通自动切换了.(6)只是切换也不太安全,一定要配制一下防火墙么,同5一样,上传防火墙的RSC文件到192.168.1.1,在NEW TERMINAL里执行import firewall,整体和第5步相近.(7)配置的差不多了,该改管理员账号了,左侧USERS,双击ADMIN改个名字和右下脚的password,如果不需要远程修改ROS的话,可以设定访问IP,192.168.1.0/24之类的~~~图16至此,基本OK了.第一次写教程用了2个多小时呵呵..有什么不完整的地方欢迎大家补充,大家可以从本站下载R OS 2.9.6破解版。
RouterOS配置手册
MikroTik RouterOS v2.9基本操作说明CDNATRouterOS应用说明主要特征TCP/IP协议组:∙Firewall和NAT–包状态过滤;P2P协议过滤;源和目标NAT;对源MAC、IP地址、端口、IP协议、协议(ICMP、TCP、MSS等)、接口、对内部的数据包和连接作标记、ToS 字节、内容过滤、顺序优先与数据频繁和时间控制、包长度控制...∙路由–静态路由;多线路平衡路由;基于策略的路由(在防火墙中分类); RIP v1 / v2, OSPF v2, BGP v4∙数据流控制–能对每个IP、协议、子网、端口、防火墙标记做流量控制;支持PCQ, RED, SFQ, FIFO对列; Peer-to-Peer协议限制∙HotSpot– HotSpot认证网关支持RADIUS验证和记录;用户可用即插即用访问网络;流量控制功能;具备防火墙功能;实时信息状态显示;自定义HTML登录页;支持iPass;支持SSL安全验证;支持广告功能。
∙点对点隧道协议–支持PPTP, PPPoE和L2TP访问控制和客户端;支持PAP, CHAP, MSCHAPv1和MSCHAPv2 验证协议;支持RADIUS验证和记录;MPPE加密;PPPoE 压缩;数据流控制;具备防火墙功能;支持PPPoE按需拨号。
∙简单隧道– IPIP隧道、EoIP隧道(Ethernet over IP)∙IPsec–支持IP安全加密AH和ESP协议;∙Proxy–支持FTP和HTTP缓存服务器;支持HTTPS代理;支持透明代理;支持SOCKS协议;DNS static entries; 支持独立的缓存驱动器;访问控制列表;支持父系代理。
∙DHCP– DHCP服务器;DHCP接力;DHCP客户端; 多DHCP网络;静态和动态DHCP租约;支持RADIUS。
∙VRRP–高效率的VRRP协议(虚拟路由冗余协议)∙UPnP–支持即插即用∙NTP–网络对时协议服务器和客户端;同步GPS系统∙Monitoring/Accounting– IP传输日志记录;防火墙活动记录;静态HTTP图形资源管理。
ROS安装与设置
从IP >ARP 选择需要绑定的IP 和MAC 点击右键 选择 MAKE STATIC 设置中 绑定MAC和IP
从IP >FIREWALL>FILTER RULES 设置规 则
从IP>FIREWALL>FIREWALL RULE >GENERAL 设置FORWARD
从IP>FIREWALL>FIREWALL RULE >ADVANCED 设置 CONTENT 为网站的 关键字或者 域名
再次使用PRINT命令查看网卡状态: 别名设置成功
输入/ 退回初始配置界面
输入IP ADDRESS 进入IP 地址配置界 面
使用ADD 命令添加网卡IP 地址
找台客户机连接到路由器的内网接 口然后使用PING 检查是否PING通
输入172.17.11.238的IP 登陆界面下载 WINBOX
从IP>FIREWALL>FIREWALL RULE >ADVANCED 设置 ACTIVE为DROP或者 REJECT
从files 选项中 点击BACKUP 备份ROS 系统 RESTORE恢复系统配置
从客户机浏览器输入 FTP://172.17.11.238 登陆ROS 将备份 文件拷贝到客户机完成备份
从USER>users 双击ADMIN账号选择 PASSWORD 选项设置ADMIN密码
从SYSTEM>reboot 选项重启ROS SHUTDOWN 选项关闭ROS
ROS安装与设置
安装需要的组件
按A 选择所有组件
按I 进行安装并按Y 确定
询问是否保留旧的配置
选择N 创建分区安装系统
安装完成 按回车重启
重启完成使用默认账户ADMIN密码 为空登陆系统
ROS软路由详细设置 图文

ROS软路由设置提示:此软件为顶级软路由软件!赶快用吧!记的要《全盘ghost!不是分区ghost恢复哦!是全盘恢复!》不要怀疑软路由的性能,也不用担心所谓的耗电多少。
所谓的软路由耗电大,只不过是商家搞的噱头而已。
软路由完全不需要显示器、键盘鼠标。
甚至,可以在BIOS 里设置系统启动完即关闭硬盘。
至于主板,带集成显卡的即可。
这样的配置下来,软路由功率仅仅20-30瓦左右。
软路由具有极高的性能和广泛的应用。
可轻易实现双线策略、arp绑定、限速、封杀BT 以及网吧借线、vpn等。
尤其对有连锁网吧经营者,利用IPIP协议,不仅可实现借线目的,还可象本地操作一样远程管理其他网吧。
这些,一般硬路由根本无法与之比拟。
我以前对硬路由一直情有独钟,换上软路由后,对它的强大功能赞叹不已。
现在利用它的内置VPN技术轻易做出电信网通加速软件-南北网桥(),又给两家网吧试做了IPIP借线,在这种比较大的压力下,软路由依然运行良好。
我软路由配置:730主板,128M内存,早期的AMD800毒龙CPU,集成显卡和一个8139网卡,外加两块3C905网卡抓图状态:vpn在线拨号,IPIP二家网吧,总用户数量在500多。
ROS软路由基本设置非常简单,如果只做路由转发,以下几步数分钟即可高定:硬件准备:A.首先下载软路由的ghost硬盘版,本站已经在压缩包总提供!B.释放后,ghost至一个小硬盘(20G以下),注意,是整盘GHOST而不是分区。
C.将该硬盘挂在要做路由电脑上,注意必须接在第一个IDE并且是主硬盘接口。
插上一张网卡,这是接内网的LAN。
开机。
软件设置:1.开机,出现登陆提示。
用户:admin 密码:空2.输入setup再按两次A3.在ether1后面输入你的内网IP,如:192.168.0.254/24 (这里/24是24位掩码与255.255.255.0一样)4.输入完ip后,按两次x退出,现在可以可以ping通192.168.0.254了,也可用winbox在图形界面下访问路由了。
RouterOS+RadiusManager3.8实现互联进行认证计费
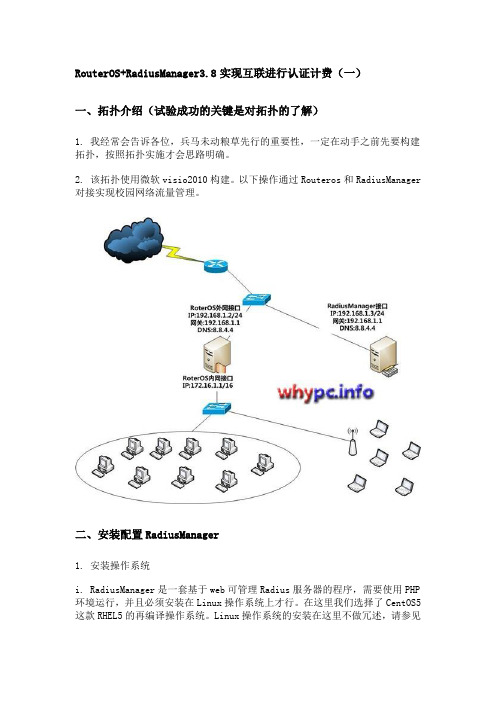
RouterOS+RadiusManager3.8实现互联进行认证计费(一)一、拓扑介绍(试验成功的关键是对拓扑的了解)1. 我经常会告诉各位,兵马未动粮草先行的重要性,一定在动手之前先要构建拓扑,按照拓扑实施才会思路明确。
2. 该拓扑使用微软visio2010构建。
以下操作通过Routeros和RadiusManager 对接实现校园网络流量管理。
二、安装配置RadiusManager1. 安装操作系统i. RadiusManager是一套基于web可管理Radius服务器的程序,需要使用PHP 环境运行,并且必须安装在Linux操作系统上才行。
在这里我们选择了CentOS5这款RHEL5的再编译操作系统。
Linux操作系统的安装在这里不做冗述,请参见其他文章进行安装。
(当然,其他Linux发行版也可用,目前我只测试过Debian、RHEL和CentOS可以正常运行)ii. 更改IP地址,执行setup进行设置即可,设置完成之后执行:service network restart指令使网卡ip设置生效。
iii. 更改系统默认运行级别和默认语言# vi /etc/sysconfig/i18n #更改系统默认语言为英文LANG="en_US"# vim /etc/inittabid:3:initdefault: #找到类似内容更改为3,使Linux默认工作在文本模式# reboot #重启系统让更改生效2. 添加YUM源,实现在线yum安装php5.2#安装GPG密钥# rpm --import /media/RPM-GPG-KEY-jlitka#添加源实现yum安装php5.2。
请注意:用系统默认php5.1是不行的。
# vi /etc/yum.repos.d/utterramblings.repo[utterramblings]name=Jason’s Utter Ramblings Repobaseurl=/media/EL$releasever/$basearch/ enabled=1gpgcheck=1gpgkey=/media/RPM-GPG-KEY-jlitka3. 使用YUM安装必须软件#安装RadiusManager所需RPM包,目前发现PHP5.2可以正常工作,PHP5.1中症状为访问RadiusManager页面为空白页。
ros路由器的设置
Setup命令配置
利用Winbox图形界面进行配置
在配好RouteOS的ether1接口后,在windows IE 地址栏里输 入ether1的IP地址192.168.0.111来下载WinBox。如图:
利用Winbox图形界面进行配置
运行winbox并登录
利用Winbox图形界面进行配置
实例讲解
基本配置
这时候如果windows的网关为192.168.0.111,那么就可 以从windows ping 通60.191.18.6这个端口了。
IP地址伪装
做完以上步骤,我们将还不能访问公网。除 非你的ISP会在网关上专门为你做一条路由, 对所有的192.168.0.0/24地址段的访问均指向 60.191.18.6这一地址,否则你是无法访问公 网的。所以接下来我们要进行地址伪装,也 就是通常说的NAT,让私网中所有192.168.0.X 的地址从公网出去都是60.191.18.6地址
ip address>add address 192.168.0.111/24 int lan ip address>add address 60.191.18.5/24 int wan1 ip address>add address 122.226.141.5/24 int wan1
标记链接和路由
RouterOS2.96的部署 的部署
一、RouterOS的介绍 二、RouterOS的安装 三、RouterOS基本命令讲解 四、RouterOS实例讲解
RouteOS的介绍
MikroTik RouterOS是一种路由操作系统,通过该软 件可以将标准的PC电脑变成相当于专业路由器性能 的路由+防火墙。特别在无线、认证、策略路由、 带宽控制和防火墙过滤等功能上有着非常突出的功 能,其极高的性价比,受到许多网络人士的青睐。 RouterOS具备现有路由系统的大部分功能,能针对 网吧、企业、小型ISP接入商、社区等网络设备的 接入,基于标准的x86构架的PC。一台586PC机就 可以实现路由功能,提高硬件性能同样也能提高网 络的访问速度和吞吐量。完全是一套低成本,高性 能的路由器系统
RadiusManager3.8使用说明
RADIUS MANAGER 3 USER’S MANUALVersion 3.8©DMA Softlab LLC7/10/2010TABLE OF CONTENTSTABLE OF CONTENTS (2)FOREWORD (4)GENERAL DESCRIPTION (5)Administration Control Panel (ACP) (6)Getting started (6)Setting up basic authentication and accounting (6)Administering managers (resellers) (8)Administering services (8)Example services (11)Prepaid card system (15)Instant Access Services (IAS) (19)Self registration feature (21)Account verification (22)User Control Panel (UCP) (23)Getting started (23)Editing personal data (24)Examining the traffic report (24)Listing the invoices (24)Using refill cards (24)Selecting services (24)Purchasing prepaid credits (24)Account verification (25)Hints for setting up the UCP (25)REFERENCE MANUAL (26)Administration Control Panel (ACP) (27)Overview (27)Menu descriptions (27)System / Home (27)System / System settings (27)System / Logout (29)Users / List users (29)Users / List users with limits (29)Users / List users / Edit user (29)Users / List users / Edit user / Traffic report (31)Users / List users / Edit user / Add credits (31)Users / List users / Edit user / Add deposit (31)Users / List users / Edit user / Postpaid billing (32)Users / List users / Edit user / List invoices (32)Users / List users / Edit user / Change service (32)Users / List users / Edit user / Service history (32)Users / List users / Edit user / Delete user (32)Users / Find users (33)Users / New user (34)Users / List user groups (35)Users / New user group (35)Services / List services (35)Services / List services / Edit service (36)Services / New service (38)Services / Scheduled changes (41)Services / Service change history (41)Managers / List managers (41)Managers / List managers / Edit manager (41)Managers / List managers / Edit manager / Financial informations (42)Managers / New manager (43)NAS / List NASs (44)NAS / Edit NAS (44)NAS / New NAS (44)Financials / List invoices (44)Financials / Generate postpaid invoices (45)Card system / List series (45)Card system / List card users (46)Card system / Generate cards (46)Card system / Revoke card (47)Card system / Export revoked cards (47)Card system / Check refill card (47)Card system / Card statistics (47)IAS / List IAS templates (47)IAS / New IAS template (48)IAS / List IAS users (48)Reports / Online users (48)Reports / Traffic report (49)Reports / Find traffic data (49)Reports / Traffic summary (49)Reports / Connection report (49)Reports / Last syslog events (50)Reports / Browse syslog (50)Reports / System statistics (50)Tools / Send email for all users (50)Tools / Start RADIUS server (50)Tools / Stop RADIUS server (50)Tools / Restart RADIUS server (50)User Control Panel (UCP) (51)Overview (51)Menu descriptions (51)Home (51)Traffic report (51)List invoices (51)Change password (51)Redeem voucher (51)Purchase service (51)Change service (51)Edit personal data (52)Logout (52)Customizing the invoice form (53)Customizing the email forms (54)Database maintenance (55)Cumulating the old accounting data (55)Deleting the old accounting data (55)LEGAL NOTE (56)FOREWORDRadius Manager is an easy to use RADIUS accounting and billing solution designed for Linux systems. It uses a free and stable RADIUS server – FreeRadius 2. The automated tasks are:1. Prepaid billing2. Postpaid billing3. Monthly billing (packet, flat)4. Special service billingThe main features are:1. User authentication2. Traffic accounting (download, upload, total)3. Billing4. Creating invoices5. Managing UNIX mailbox users6. Tracking of payments7. Creating financial reports8. Internet access using prepaid card system and IAS9. Accept payments onlineSpecial features are:1. Connection Tracking System (CTS)2. Self registration3. Instant Access Services (IAS)4. Online payment system support:a. PayPal Express Checkoutb. PayPal Website Payments Standardc. PayPal Website Payments Prod. Netcash, Authorize. DPS Payment ExpressPayPal Express Checkout and Website Payments Standard works with premier and business accounts, but PayPal Website Payments Pro requires US / UK Pro or better account.Radius Manager currently supports the following NAS devices:•Mikrotik 2.9+ – Use final 2.9 or newer versions only, RC versions are not recommended.Supported authentication methods are: PPPoE,PPtP,L2tP,Hotspot,Wireless AccessList (ACL)•ChilliSpot 1.1 Hotspot system running on Linux.•StarOS v2 or v3server. Supported authentication methods are: full PPPoE and limited RADIUS Wireless Access List support.•Cisco VPDN and BBA server(PPPoE, PPtP, L2tP) with the appropriate IOS version.VPDN / BBA and Virtual template support is necessary.•pfSense 1.2 or newer – Captive portal.This manual consists of two parts:1. General description2. Reference manualTo achieve the best results with Radius Manager billing system we strongly recommend to read this user’s manual entirely.GENERAL DESCRIPTIONRadius Manager consists of two main web interfaces:1. ACP – Administration Control Panel2. UCP – User Control PanelThere are also another websites available in the system:•New user registration (self register)•Purchase Instant Access Service (IAS)ACP is used by system administrators to manage users, services, billing etc, while UCP is reserved for regular RADIUS users. With the help of UCP users can track their traffic data, payments, buy services and do other things.In the following chapters You will find a detailed description of usage of both Control Panels (CP).Administration Control Panel (ACP)Getting startedWhen You first time try to access Radius Manager, usually You will do it via the ACP. You can access the ACP with your favorite Javascript enabled browser.The URL of ACP is (assuming default installation):http://yourhost/radiusmanager/admin.phpYou will be asked for the username and password. For new installations they are: admin / 1111.If the login was successful You will find yourself on the main screen of ACP:You can access various system functions via the drop down menus.Setting up basic authentication and accountingYou have to complete the following tasks to enable user authentication and accounting:1. Define a NAS2. Define a service3. Create a new account and assign a serviceDefining the NAS is the first step You have to do to be able to accept RADIUS requests from the NAS. Use the function NAS / New NAS to begin this operation.1. Define the NAS name, IP address, NAS type, shared secret and NAS password (forStarOS only). Radius Manager 3.8+ automatically manages the raddb/clients.conf file.After modifying the NASs restarting of FreeRadius server is required. It can be done fromUnix shell or from ACP directly (Tools menu).Use Add NAS button to store the newly defined NAS in the system.Be sure You have defined the correct NAS type in ACP.2. The next step is to define the service (billing plan). To do it use option Services / Newservice.Enter the name of the service. For the most simple service use the followingparameters:•Enable service:checked•Type of the service:Prepaid regular•Set data rate:512 / 128It defines a simple prepaid service with bandwidth limitation enabled (download bandwidth 512 kbps, upload bandwidth 128 kbps) without any traffic (MegaByte) limits.Use Store service button to save the service data.3. To create a new user use option Users / New user.The required data are:•Username:define the name of the user•Enable user:checked•User type:regular user•Password:enter the desired password two times•Service:select the previously created serviceFinally press button Add user to store user data in the system.Now if You select Users / List users,You will see the newly created user in marked with green (enabled). You will also see the name of the service assigned to the user and the actual limits. In our example there are no limits set for the user (download, upload, combined, expiry, online time).Now configure the PPP or Hotspot system in your Mikrotik (assume we are using Mikrotik NAS) and try to log on (PPPoE / PPtP / Hotspot – configure the service first) with the newly created user. If the login operation fails, You can also try the default username and password combination (user / 1111). By default it is available in every Radius Manager installation.If You still cannot log on, try to debug the RADIUS communication enabling FreeRadius debug mode. First stop the running daemon (Fedora):[root@localhost]# service radiusd stopOn Debian:[root@localhost]# /etc/init.d/radiusd stopOr use the universal method:[root@localhost]# ps ax|grep radiusd32442 ? Ssl 0:00 /usr/local/sbin/radiusd16715 pts/0 R+ 0:00 grep radiusd[root@localhost]# kill 32442Be sure to kill the proper process. In our example the PID is 32442.Now start radiusd in debug mode:[root@localhost]# radiusd –XYou have to see the following output if FreeRadius and MySql are working properly:Listening on authentication address * port 1812Listening on accounting address * port 1813Listening on command file /usr/local/var/run/radiusd/radiusd.sockListening on proxy address * port 1814Ready to process requests.If there are errors it means FreeRadius was not set up properly. Consult the Installation Manual to locate and fix the FreeRadius related installation problems.After a successful PPP or Hotspot login You have to see the active user and a simple queue created for the user (Queues / Simple queues) in Winbox. If the simple queue is not there the bandwidth limitation is not working. It can be a permission problem on binary files, maybe a problem in /etc/radiusmanager.cfg or raddb/users files etc. Consult the Radius Manager installation manual to ensure You have configured the system properly.When a test user has been connected You have to see him in the online user list in ACP (Reports / Online users)with the used online time, start time, used Bytes. The correct NAS is also displayed on this page.The last thing You have to do is to try the remote disconnection feature. Select the desired user in online list and select the action Logout users.It has to disconnect the user immediately. Check the Winbox log for the incoming disconnection packets. The remote disconnection must work with all supported NAS types (pfSense is exception, it uses re authentication instead of POD). If it is not working, You cannot use the auto disconnection feature and the special pricing periods.Administering managers (resellers)The system supports multiple resellers, called “managers”. There is only one super user in the system – the admin –while unlimited number of regular managers can be created. The super user cannot be deleted, while You can freely create, edit and delete other managers.When You create managers with function Managers / New managers,You can define the following data: manager name, password, personal data and permissions.With defining permissions You can specify which managers what can do in the system. Multiple resellers are useful in certain situations. A such example is if You have many different locations (different cities) with one reseller on each location. The local manager can create new users and add credits for them, but he cannot delete the users and cannot modify the user data. With this method You ensure the data will be always correct for users and cannot be forged by anyone (limits, expiration etc.) without logging the changes. When a local manager sells credits for the user (the user pays for the service and gives the money to the local manager), it will be logged and the super user can track the sold services and always can see the amount of money collected by managers.Resellers have a precise accounting in the system, every credit and debit is trackable (List invoices). You can credit or debit a certain manager in ACP / Manager / Edit manager form.Administering servicesOne of the most complicated thing of Radius Manager is the service system. Using the service system You can define various properties for users. It is like a user group – You can assign oneservice to multiple users.You have to fully understand the theory of defining and using services to be able to configure them. Please read the following part carefully.To create a new service, use option Services / New service.The first thing You need is to define the name of the service.Define the type of the service.It can be:•Prepaid regular – Used for prepaid registered users•Prepaid card or IAS – It will be used for generating classic prepaid cards and for instant access services (IAS). Fill up cards doesn’t use services.•Postpaid –It is used with postpaid users. They are billed monthly, for the previous month.•Email only –When this is used, users cannot log on via Radius, only Unix mailboxes are created for storing emails, personal www presentations etc.•Access list entry –special account types for Mikrotik and StarOS wireless access list handling.When You select the type of the service, define the traffic limits.They can be:•Limit download Bytes –Use this if You want to limit the downloadable traffic for the user.When reaching the limit, the account gets disconnected automatically.•Limit upload Bytes –Use this if You want to limit the uploadable traffic for the user.When reaching the limit, the account gets disconnected automatically.•Limit total traffic –Use this if You want to limit the total traffic for the user. When reaching the limit, the account gets disconnected automatically.Define the time limitations for the account:•Limit expiration –This is classic date based limitation (You will define the account expiry date for the users).•Limit online time –Use this limitation if You want to create classic dial-up like service. It limits the available online time for the user (for example 10 hours Internet etc.).Define the data rate for the service. Set the download and upload data rates in kbps.Enter 0 if You don’t want to limit the bandwidth for the service. For Cisco You can define the policy maps here if your Cisco doesn’t support the rate-limit directive.Daily quotas are also supported. It is the daily available traffic for the user. They are working even if the download and / or upload are not limited. To enable quotas enter a number in fields larger than 0.•Download quota per day – Define the daily available download traffic in Bytes.•Upload quota per day – Define the daily available upload traffic in Bytes.•Total quota per day – Define the daily available total traffic in Bytes.•Time quota per day – Define the daily available time in format HH:MM:SS.You can set the Mikrotik supported burst mode in service definition:To enable burst mode check its checkbox. It will enable the numeric fields and You can enter the burst parameters. They are:•Burst limit (DL / UL) – Define the burst limit for download and upload. This is the peak of the traffic the user can achieve. Burst limit is always greater or equal than the nominal data rate.•Burst threshold (DL / UL) – Define the threshold for download and upload. If the user overloads this limit after a predefined time the limitation will begin and the actual data rate will be reduced to the nominal value (defined in Set data rates). Use higher burst limit thannominal data rates.•Burst time (DL / UL) – Define the timeout after the limitation will start if the client overloads the predefined threshold limits. Please experiment with this timeout, because some versions of Mikrotik don’t interpret this value properly. So measure the time more times if required and add a correctional value to the nominal value.•Priority –Define the priority of the queue created in Mikrotik.In service definition You can also control the IP pool name from which the user will get the IP address. Define the pool name which already exists in Mikrotik. If the pool doesn’t exist in Mikrotik, the user will not be able to connect (no IP address will be assigned to the session).The Dropdown list “Next service”is used to define the next service name if the current service limits have been reached. It is very useful if You plan the following service (for example): 1 GB / month (limited traffic) and You don’t want to disable the user in a middle of the month if the user reaches his traffic limits. If You define a “next service” the user can log on to the system – even if he has no more available MegaBytes left – with assigning a “next service” to him automatically. The “next service” can define lower (shared) bandwidth or anything else You need.After filling up the basic parameters the price definition follows. You have to define the price parameters precisely if You want to use Radius Manager for creating invoices and use for precise financial accounting.The first thing is to define the price calculation method for postpaid users. If the current service is not postpaid, do not check the following checkboxes. You can also combine the various calculation methods:•Downloaded traffic –The price of the downloaded traffic will be added to the total price when creating postpaid invoice for any period.•Uploaded traffic –The price of the uploaded traffic will be added to the total price when creating postpaid invoice for any period.•Online time –The price of the used online time will be added to the total price when creating postpaid invoice for any period.If the account is monthly,check the monthly checkbox. Monthly accounts are the most complicated types. They are based on one month and can combine upload, download or total limits. If the user reaches one of these limits, the account will expire.Use option auto renew to renew the accounts automatically. Postpaid accounts will be renewed on the day of the month defined in ACP / system settings, while prepaid accounts on the day when they expire (if they have enough deposit available). In a same time an email will be sent for all renewed users.There are one more special option for monthly accounts: enable additional credit.It is used if You define monthly account with traffic limits. For example, You sell 1 GB download traffic for a period of 1 month (1 GB / month). If the user reaches the traffic limit (he uses all his 1 GB), the accounts gets expired. If the expiry date has not been reached You can add additional MegaBytes for the user, while the original expiration date remains untouched.Reset counters if date expired is a special option. It is useful if You are using date limited services together with traffic limitations. Enabling this option when the account expiry date has been reached and You add credits, the system will reset the remaining credits for the user. It is useful in situations when You sell for example 10 GB for 3 months. If the 3 months has been passed and the user hasn’t used all his 10 GB, next time when he buys credits he will get again 10 GB and the new expiration date will be calculated from the date of new purchase.Define the net unit price for the service. For example, You sell 1 MB of traffic for $0.1 Define the net price of $0.1. The system will automatically calculate the gross price and the tax for the unit.In a same manner define the price of the additional units.It is used for monthly services only with additional credits enabled.The time and date addition modes describe how the system adds time or calculates the new expiration when adding credits for the user:•Reset online time or expiration date – If You select this option the time will be added to the current time. It is useful for monthly accounts, when You add 1 month to the currentdate.•Prolong time or expiration date – It is mainly used for dial-up like accounts and service, when a user can buy hours. The hours will be added to the remaining hours. For examplehe has bought 10 hours in the past, and left him 2 hours. When he buys again 10 hours,he will get totally 12 hours available.Define the traffic add mode:•Reset traffic counters –When You add credits the system will reset the currently available Bytes. It is useful for monthly, traffic limited accounts. For example the userused one month Internet with 1 GB traffic and his account expired (date), but he has 100MB remaining traffic. When he next time buys Internet, his 100 MB will be lost and getsagain 1GB and 1 month service subscription.•Additive –This option never resets the remaining traffic. New traffic will be added to the remaining traffic.Now define the credit addition units:•Expiration date unit –Defines the date unit when adding credits. It can be days and months.•Online time unit –Defines the time unit when adding credits. It can be minutes and hours.•Download traffic unit –How many traffic to add at once. For MegaByte based services use value 1, while for monthly traffic limited services define the monthly traffic amount. Forexample, if You sell monthly 1 GB of download traffic, enter 1024 in this field.•Upload traffic unit –This is the same as the download traffic unit but it defines the amount for the upload.•Total traffic unit –This is the same as the download traffic unit but it defines the total amount.•Minimal base amount – This defines the minimal amount of the base traffic the user can buy at once from the UCP.•Minimal additional amount – This defines the minimal amount of the additional traffic the user can buy at once from the UCP.The initial fields are used to set the initial amount of data / time for the self registered users and for the auto renew feature.You can also define on which NASs the current service is available using the allowed NASs list box.Special billing periods are also available. You can access the special billing period editor from the ACP / List services / Edit service screen. In the special billing period editor You can define the used accounting rate for any period of a day. Connection can also be allowed or denied for a certain time in this editor. Days of week are also supported.After You have defined the new service use the Store service button to save it in the database.Example servicesIn this section You can read about the services included in default Radius Manager installation as examples. This list doesn’t cover all the possible services, only the most frequently used types aredescribed here.1. Prepaid MB (dl, ul, dl and ul, dl + ul) – Standard prepaid service. The user pays for theInternet service in advance and he can use the Internet while he has enough MegaBytesavailable. When he consumes all the traffic / time (depending on the limit switches), he willbe disconnected from the system and can’t reconnect while he doesn’t prolong thesubscription (buys MegaBytes or time). You can define the traffic limitations using anycombinations (download only, upload only, both, total traffic). See the example servicePrepaid MB dl+ul in Radius Manager ACP for combined limitation.In this service definition the Traffic add mode is Additive and the Combined traffic unitis 1MB.You can define the Minimal amount of the MegaBytes that users can purchaseat once. In our example it is 1MB.You can increase the Minimal amount to be 10 MB or50 MB or any value You like.2. Prepaid online time – This service limits the user’s available online time. It is a classicprepaid dial-up like tariff plan: You pay for the available time in advance. The Limit onlinetime checkbox is turned on in the service definition. When the user has no more timeavailable, he will be disconnected automatically and can’t reconnect again while hedoesn’t purchase additional time. The Time add mode is set to Prolong online time.TheTime unit is 1hour.The Minimal amount is 1hour.3. Prepaid monthly (1 month and n MB dl, n MB ul, n MB total traffic) – This definition is amonthly prepaid service. It is limited with 1 month of time and n MB of traffic. The exampleservice is called Prepaid monthly 1 GB dl.The user pays for the monthly Internet servicein advance and gets one month time (calculated form the day of the purchase) and 1 GBavailable download traffic.The Limit download Bytes checkbox is turned on. The checkbox Monthly accountdefines the account type. In this example (Prepaid monthly 1 GB dl)the additionalcredits are also enabled. When a user has no more available traffic (initially he has got 1GB) but the account is not expired yet (he hasn’t reached the expiration date), he canpurchase additional MegaBytes for special price while the expiration date remainsunchanged.The system handles the additional credits in UCP automatically. If additional credits areenabled and the user selects the option Purchase service in UCP, the system will informhim about the additional credit mode (normal or additional).Managers have to manually select the credit adding mode: normal or additional.Normally, You never add a month again if the expiration date has not been reached. Thenew month can be added after the old month has expired.The system can handle monthly accounts from any date in the month. Example: Theclient purchases a monthly service on 13th September. He has to buy again a monthlysubscription on 13th October. The old subscription will expire at 00:00 hours on 13thOctober.Only one month can be added at once. Why? Because if You sell one month Internetservice with 1 GB limits, and if You set the amount to 2 when You buy the service (doesn’tallowed, we assume this only), the account will expire after 2 months and has 2 GB oftraffic. This isn’t limited anymore by the end of the month. If You need to add moremonths, turn off Monthly account checkbox, and use Limit expiration as Time limit mode.Set the Time add mode to Additive,and You can add (prolong) the subscription with anynumber of months. The Time unit has to be 1month.With this setup, You can add 1, 2or more months at once and You are able to prolong the subscription. If You combine thisservice with traffic limits – depending on the setup – the traffic will be added to theremaining value or added to zero when You prolong credits.Usual problem is when user forgets to buy a new monthly service and his actual serviceexpires. In our example, administrators cannot add new monthly service before the 13th October, only after the service has been expired. But what to do in a period from 00:00 hours to normal working hours when the office is open and users can purchase again a monthly service?The solution is the Money deposit system. Managers will not add credits for specific (in this case monthly) services, but they deposit the user’s money in the system. This will be handled in UCP as available credits. Users can purchase additional credits for their deposited money using the UCP any time. They can renew their monthly service when the current monthly service has been expired.In our example, the new monthly service can be bought after 00:00 hours on 13th October. The system handles these subscription renewals automatically and always informs the user about the renewal method.In service definition, separate prices are defined for the base unit (the price of the monthly service) and for the additional MegaBytes. The Time unit is 1month,while the Download traffic unit is 1000 MB.Time addition mode is Reset time,while Traffic add mode is Reset traffic counters.The Minimal amount is 1month.4. Prepaid monthly flat service with daily quota only (1 month) – This is a monthlyservice with no total traffic limitation. It is limited by one month time and with limited daily usage of the service. In our example (Prepaid monthly flat + quotas), the daily download limit is 100 MB,while the available daily time is 2hours.Time unit is 1month,minimal amount is 1.5. Postpaid MB (dl, ul, dl + ul) – These are the standard postpaid services. The user willnever get disconnected. He can use the Internet in a whole month without limitations. The administrator will create bill for the previous month and the first days of the next month.For example, on 1st –5th December You will create invoices for all postpaid users for the period 1st November to 30th November. Print these invoices (from your browser) and mail them to the users.Users have a grace period defined is system settings to pay their dues. You will check your banking account every day for the incoming payments and define the date in Radius Manager when a money has arrived. For this use option List invoices / Edit invoice.The system checks the payment dates daily. If the grace period has expired and the user hasn’t paid the service fee, his account will be disabled.Select the Postpaid Service type and turn off all types of traffic and time limitations.Define the bandwidth freely.Select the desired Price calculation method.In our example it is Downloaded traffic.When creating invoices, the system will add the price of the downloaded MegaBytes to the total price. You can also add the price of the uploaded traffic, the used hours and You can also combine all these methods (for example 100 MB download $10,00 + 10 MB upload $1,00 = $11,00 total).Every started MegaByte is calculated as one whole MegaByte.It is important to define postpaid service prices precisely otherwise You will have incorrect billing.The name of the example service is Postpaid MB dl.6. Postpaid hours –Postpaid hours are like postpaid MegaBytes, but online time iscalculated as the total price. If the user spent 30 hours online in the previous billing period (month), he will be charged for the price of 30 hours. In our example, the name of the service is Postpaid hours and the gross price for one hour is $1,18, so the price of the 30 hours would be: 30 x $1,18 = $35,40. Every started hour is counted as one whole hour.The name of this sample service is Postpaid online time.。
ROS教程设置总结
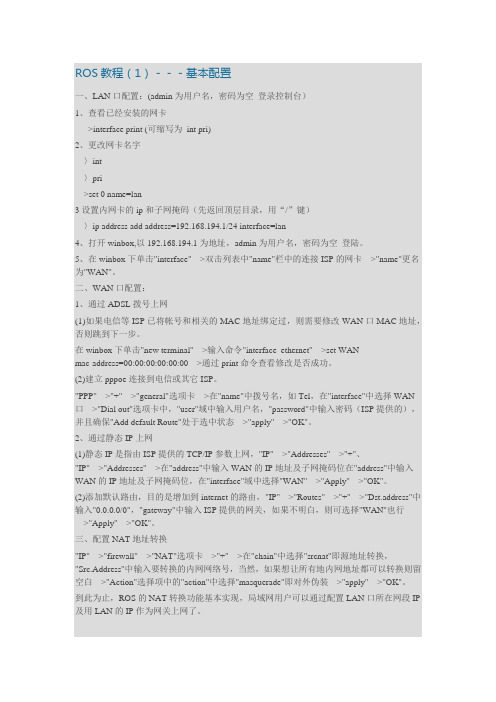
ROS教程(1)---基本配置一、LAN口配置:(admin为用户名,密码为空登录控制台)1、查看已经安装的网卡>interface print (可缩写为int pri)2、更改网卡名字〉int〉pri>set 0 name=lan3设置内网卡的ip和子网掩码(先返回顶层目录,用“/”键)〉ip address add address=192.168.194.1/24 interface=lan4、打开winbox,以192.168.194.1为地址,admin为用户名,密码为空登陆。
5、在winbox下单击"interface"--->双击列表中"name"栏中的连接ISP的网卡--->"name"更名为"WAN"。
二、WAN口配置:1、通过ADSL拨号上网(1)如果电信等ISP已将帐号和相关的MAC地址绑定过,则需要修改WAN口MAC地址,否则跳到下一步。
在winbox下单击"new terminal"--->输入命令"interface ethernet"--->set WANmac-address=00:00:00:00:00:00--->通过print命令查看修改是否成功。
(2)建立pppoe连接到电信或其它ISP。
"PPP"--->"+"--->"general"选项卡--->在"name"中拨号名,如Tel,在"interface"中选择WAN口--->"Dial out"选项卡中,"user"域中输入用户名,"password"中输入密码(ISP提供的),并且确保"Add default Route"处于选中状态--->"apply"--->"OK"。
ROS安装及配置教程

ROS安装及配置教程ROS(Robot Operating System)是一个开源机器人操作系统,它提供了一系列的工具和库以帮助开发者构建机器人应用程序。
本文将介绍ROS的安装和配置过程。
ROS支持多个操作系统,包括Ubuntu、Debian、Fedora等。
在本教程中,我们将使用最常用的Ubuntu系统进行演示。
第一步:安装Ubuntu首先,在您的计算机上安装Ubuntu操作系统。
ROS支持多个Ubuntu 版本,但在本教程中,我们将使用最新版本的Ubuntu 20.04 LTS作为示例。
第二步:添加ROS软件包仓库在安装ROS之前,我们需要将ROS软件包仓库添加到Ubuntu的软件源中。
打开终端并执行以下命令:``````第三步:添加ROS密钥运行以下命令以添加ROS密钥:```sudo apt install curl```第四步:安装ROS运行以下命令以安装ROS桌面完整版:```sudo apt updatesudo apt install ros-noetic-desktop-full```在这个例子中,我们使用的是ROS Noetic版本。
根据您的需求,您可以安装不同的ROS版本。
第五步:初始化ROS在安装完成后,我们需要初始化ROS环境。
打开终端并运行以下命令:```source /opt/ros/noetic/setup.bash```要使ROS环境变量在每次打开新终端时都自动加载,可以将上述命令添加到您的`.bashrc`文件中。
第六步:创建ROS工作空间在使用ROS之前,我们需要创建一个ROS工作空间。
ROS工作空间是您存放ROS代码和构建项目的地方。
首先,创建一个名为`catkin_ws`的目录,并进入该目录:```mkdir -p ~/catkin_ws/srccd ~/catkin_ws/```然后,初始化工作空间:```catkin_make```完成初始化后```source devel/setup.bash```第七步:安装ROS工具运行以下命令以安装常用的ROS工具:```sudo apt install python-rosdep python-rosinstall python-rosinstall-generator python-wstool build-essential ```第八步:配置ROS最后,运行以下命令以更新ROS依赖项:```sudo rosdep initrosdep update```至此,ROS的安装和配置已经完成。
RouterOS+RadiusManager3.8实现互联进行认证计费

RouterOS+RadiusManager3.8实现互联进行认证计费(一)一、拓扑介绍(试验成功的关键是对拓扑的了解)1. 我经常会告诉各位,兵马未动粮草先行的重要性,一定在动手之前先要构建拓扑,按照拓扑实施才会思路明确。
2. 该拓扑使用微软visio2010构建。
以下操作通过Routeros和RadiusManager 对接实现校园网络流量管理。
二、安装配置RadiusManager1. 安装操作系统i. RadiusManager是一套基于web可管理Radius服务器的程序,需要使用PHP 环境运行,并且必须安装在Linux操作系统上才行。
在这里我们选择了CentOS5这款RHEL5的再编译操作系统。
Linux操作系统的安装在这里不做冗述,请参见其他文章进行安装。
(当然,其他Linux发行版也可用,目前我只测试过Debian、RHEL和CentOS可以正常运行)ii. 更改IP地址,执行setup进行设置即可,设置完成之后执行:service network restart指令使网卡ip设置生效。
iii. 更改系统默认运行级别和默认语言# vi /etc/sysconfig/i18n #更改系统默认语言为英文LANG="en_US"# vim /etc/inittabid:3:initdefault: #找到类似内容更改为3,使Linux默认工作在文本模式# reboot #重启系统让更改生效2. 添加YUM源,实现在线yum安装php5.2#安装GPG密钥# rpm --import /media/RPM-GPG-KEY-jlitka#添加源实现yum安装php5.2。
请注意:用系统默认php5.1是不行的。
# vi /etc/yum.repos.d/utterramblings.repo[utterramblings]name=Jason’s Utter Ramblings Repobaseurl=/media/EL$releasever/$basearch/ enabled=1gpgcheck=1gpgkey=/media/RPM-GPG-KEY-jlitka3. 使用YUM安装必须软件#安装RadiusManager所需RPM包,目前发现PHP5.2可以正常工作,PHP5.1中症状为访问RadiusManager页面为空白页。
ROS路由与海蜘蛛计费系统对接指导

ROS路由和海蜘蛛计费系统对接指导此刻随着小区宽带运营市场的进一步进展,很多宽带运营商为采纳了收费或免费的ROS软路由做为拨号效劳器,进行宽带运营,但在实际的利用进程中,存在着以下问题:1.路由配置需要熟悉ROS系统技术人员进行配置,不然将会致使利用成效不睬想,和容易将网络平安维系在一个或几个技术人员手中。
如此无益于公司进展2.由于宽带用户账号录入及治理都在ROS路由上操作,致使对宽带用户账号治理比较麻烦,和存在技术人员死开黑户的可能。
3.若是采纳在路由上进行开户,那么关于用户账目的收支情形只能通过手工做账,如此就存在治理困难和漏洞。
针对以上的各类情形,海蜘蛛计费系统进行了有效的解决,海蜘蛛计费系统在通过对ROS兼容性优化后,更适合与ROS配套进行宽带项目的计费治理和该系统时基于稳固的linux平台,支持万万条以上的记录处置,为宽带运营商量身打造的优秀计费系统。
那么海蜘蛛计费系统如何与ROS进行对接呢说明:本方式测试环境采纳ROS 版本,海蜘蛛计费系统版本为 Build-8,其余版本理论上应当通用。
一、ROS端配置方式:1.利用ROS的WINBOX,配置ROS的内外网IP地址(此项如可不能,请自行参考网络上其他文档)进入菜单→IP→address项中,点击“添加”如以下图所示:点击“添加”按钮后,在address中设置内网及外网IP地址。
如以下图所示:Address:填写要设置的IP地址Network:填写网络地址Interface:选择要设置IP地址的接口。
2.创建PPPOE地址池进入菜单→IP→Pool项中点击“添加”在添加地址池设置窗口中设置地址池:Name:IP地址池名称Address:IP地址范围Next Pool:下一个地址池3.创建profile模板,进入菜单→PPP下的Profiles ,点击“添加”,配置PPPOE效劳器地址池和DNS地址,如下图:Name:ppp属性名称Local Address:本地DHCP地址池Remote Address:用户获取地址的地址池DNS Server:DNS地址4.设置PPPOE Servers进入菜单→PPP→配置PPP效劳,选择PPPOE SERVERS,点添加,添加一条默许的即可,如以下图所示:Service Name:PPPOE servers名称(可自概念)Interface:选择与PPPOE servers绑定的路由LAN接口Default Profile:选择PPPOE servers属性模板(PPPOE profile模板设置请参考本文档第3步)Authentication :PPPOE Servers认证方式,建议chap5.配置静态地址:进入菜单→IP→routers,点击“+”号添加默许的网关地址,如以下图所示:6.Radius效劳配置进入菜单→RADIUS选项,点击“添加”,在radius添加窗口设置radius 效劳:如以下图所示Service:选择效劳类型(PPP:PPPOE效劳,hotspot:WEB效劳)Address:radius效劳器地址Secret:ROS和radius效劳器之间共享密钥(该共享密钥务必和NAS中共享密钥维持一致)Authentication Port:radius效劳器认证端口,一般是1812Accounting Port:radius计费端口,一般是1813Timeout:radius报文超不时刻。
【中文版】DMA-Radius-Manager计费系统用户手册-v4.1--
DMA Radius Manager 计费系统用户手册Version 4.1目录前言 (3)基本功能: (3)特色功能: (3)NAS的兼容性: (4)CMTS的兼容性: (4)系统描述 (5)管理员控制面板 (5)入门 (5)RADIUS认证和计费 (6)管理员 (9)服务计划 (9)服务示例 (14)预付卡系统 (17)开始之前 (17)设置卡服务 (18)生成卡 (18)前言DMA Radius Manager计费系统是一款容易使用的Radius和Docsis应用系统。
它适用于ISP运营商用户,网吧,机场及其它使用公共互联网接入上网的场合。
该系统是在Linux操作系统上运行的,其使用了非常稳定的FreeRadius 2.X Radius服务器和Mysql数据库构成的服务后台。
通过集成的软件组件来保障系统的高稳定性和可靠性。
基本功能:1.支持对PPPoE,PPtP,L2tP协议和热点的Radius验证和审计;2.Docsis3.支持对下载,上传,在线时间和数据传输速率进行策略控制;4.支持预付费和后付费两种计费方式;5.支持付款跟踪;6.支持财务报告;7.支持预付卡系统;8.支持在线支付;9.支持账户更新同步;特色功能:1.支持系统连接跟踪;2.支持无线和DOCSIS两种方式信号监测;3.支持用户自注册;4.支持即时访问服务;5.设置好支付网关支持PayPal在线支付PayPal快捷支付●PayPal网站标准付款●PayPal标准付款NAS的兼容性:1.Mikrotik 2.8+ 。
仅使用最终版本不建议使用RC版本。
该版本主要支持的功能有:PPPoE协议,PPTP,L2TP,热点和无线接入的认证和审计。
2.Chillispot 。
在Linux上运行DD-WRT设备时可以从我们的网站下载测试版的版本。
3.StarOS V2或者v3。
支持的功能:全PPPoE协议认证和部分的无线访问认证。
4.Cisco NAS。
