Acer Iconia B1-A71平板电脑(中文)说明书
爱国者平板电脑使用说明书
联系我们
爱国者电子 公司名称:爱国者电子科技有限公司 地址:北京市海淀区北四环西路58号理想国际大厦1006室 网址: 邮政编码:100080 阳光服务热线: 400-610-6666
5
目
录
第 一 章 认识您的 aigoPad................................................................................ 7 1.主要功能.................................................................................................................... 7 2.包装内容.................................................................................................................... 7 3.按键说明.................................................................................................................... 7 第 二 章 准备使用............................................................................................... 8 1.充电............................................................................................................................ 8 2.连接电脑传输文件..................................................................................................... 9 3.插入存储卡.................................................................................................................9 4.开/关机.................................................................................................................... 10 5.主界面...................................................................................................................... 10 6.使用虚拟键盘........................................................................................................... 11 7.使用触摸屏或按键................................................................................................... 12 第 三 章 使用您的 aigoPad.............................................................................. 12 1.无线上网.................................................................................................................. 12 2.资源管理器.............................................................................................................. 13 3.播放视频.................................................................................................................. 14 4.播放音乐.................................................................................................................. 16 5.浏览图片.................................................................................................................. 19 6.录音.......................................................................................................................... 20 7.相机.......................................................................................................................... 21 8.电子邮件.................................................................................................................. 23 9.管理应用程序.......................................................................................................... 26 10.其它功能................................................................................................................ 26 11.系统设置................................................................................................................ 27 第四章故障诊断.......................................................................................................... 29 第五章技术规格.......................................................................................................... 30
平板电脑产品说明书快速掌握平板电脑的各项功能和特点
平板电脑产品说明书快速掌握平板电脑的各项功能和特点平板电脑产品说明书尊敬的用户:感谢您选择我们的平板电脑产品。
本说明书将为您详细介绍我们平板电脑的各项功能和特点,帮助您快速掌握和使用该产品。
在使用前,请仔细阅读本说明书,以确保能够更好地使用我们的平板电脑。
一、外观与结构我们平板电脑外观精美,采用轻薄设计,便于携带。
机身采用高质量材料制造,手感舒适,具有抗摔、防刮等特性,同时具备一定的防水功能。
屏幕采用技术先进的触摸屏,操作流畅灵敏,画面清晰。
机身正面为触摸屏,底部配备了操作按钮,包括主页、返回、音量控制等,方便用户进行各项操作。
机身背面为平整设计,配备了摄像头和喇叭,以满足用户对于摄影和音频播放的需求。
侧面为接口和按键设计,提供了充电口、耳机孔、SD卡插槽等接口,以及电源键、音量键等按键。
二、核心功能1. 操作系统我们的平板电脑采用最新版本的操作系统,具有友好的用户界面和更强大的功能。
您可以通过触摸屏进行各项操作,包括浏览网页、阅读电子书、观看视频等。
操作系统支持多任务处理,您可以同时进行多项操作,提高工作效率。
2. 网络连接平板电脑支持多种无线网络连接方式,包括Wi-Fi和蓝牙。
您可以通过Wi-Fi连接到互联网,浏览网页、收发电子邮件等。
同时,蓝牙功能可以实现设备之间的数据传输和文件共享,方便您与其他设备进行连接。
3. 娱乐功能平板电脑提供了丰富的娱乐功能,您可以通过应用商店下载各类应用程序,包括游戏、音乐、影视等。
摄像头支持拍照和录像功能,您可以随时记录生活中的美好瞬间。
喇叭质量出色,音质清晰,为您带来更好的音频体验。
4. 办公功能我们的平板电脑支持办公软件,包括文档编辑、电子表格、演示文稿等。
您可以随时处理办公事务,提高工作效率。
同时,我们还提供云存储服务,您可以将文件存储在云端,随时随地进行访问和编辑。
三、注意事项在使用平板电脑时,请注意以下事项:1. 请避免使用过于尖锐的物体对屏幕进行敲击,以免导致屏幕损坏。
宏碁Acer Iconia Tab A100平板电脑 中文使用说明书指南
相机图标和指示器 . . . . . . . . . . . . . . . . . . . . . . . . . . . . . . . . . . . . . . . . . . . . . . . 42 拍摄照片 . . . . . . . . . . . . . . . . . . . . . . . . . . . . . . . . . . . . . . . . . . . . . . . . . . . . . . 43 拍摄视频 . . . . . . . . . . . . . . . . . . . . . . . . . . . . . . . . . . . . . . . . . . . . . . . . . . . . . . 44 使用蜂窝数据网络 (仅适用于 Wi-Fi+3G 模式) 安装 SIM 卡 . . . . . . . . . . . . . . . . . . . . . . . . . . . . . . . . . . . . . . . . . . . . . . . . . . . . 46 调整连接设置 . . . . . . . . . . . . . . . . . . . . . . . . . . . . . . . . . . . . . . . . . . . . . . . . . . 47 Internet 共享 . . . . . . . . . . . . . . . . . . . . . . . . . . . . . . . . . . . . . . . . . . . . . . . . . . 48 高级设置 声音 . . . . . . . . . . . . . . . . . . . . . . . . . . . . . . . . . . . . . . . . . . . . . . . . . . . . . . . . . 49 屏幕 . . . . . . . . . . . . . . . . . . . . . . . . . . . . . . . . . . . . . . . . . . . . . . . . . . . . . . . . . 49 将平板电脑设为飞行模式 . . . . . . . . . . . . . . . . . . . . . . . . . . . . . . . . . . . . . . . . . 49 激活或关闭连接 . . . . . . . . . . . . . . . . . . . . . . . . . . . . . . . . . . . . . . . . . . . . . . . . 50 调整蓝牙设置 . . . . . . . . . . . . . . . . . . . . . . . . . . . . . . . . . . . . . . . . . . . . . . . . . . 50 连接到 PC . . . . . . . . . . . . . . . . . . . . . . . . . . . . . . . . . . . . . . . . . . . . . . . . . . . . . 51 同步 . . . . . . . . . . . . . . . . . . . . . . . . . . . . . . . . . . . . . . . . . . . . . . . . . . . . . . . . . 51 设置日期和时间 . . . . . . . . . . . . . . . . . . . . . . . . . . . . . . . . . . . . . . . . . . . . . . . . 52 设置闹钟 . . . . . . . . . . . . . . . . . . . . . . . . . . . . . . . . . . . . . . . . . . . . . . . . . . . . . . 52 更改语言和文字选项 . . . . . . . . . . . . . . . . . . . . . . . . . . . . . . . . . . . . . . . . . . . . . 52 管理应用程序 . . . . . . . . . . . . . . . . . . . . . . . . . . . . . . . . . . . . . . . . . . . . . . . . . . 52 更新平板电脑的操作系统 . . . . . . . . . . . . . . . . . . . . . . . . . . . . . . . . . . . . . . . . . 53 重置平板电脑 . . . . . . . . . . . . . . . . . . . . . . . . . . . . . . . . . . . . . . . . . . . . . . . . . . 53 附录 常见问题和故障排除 . . . . . . . . . . . . . . . . . . . . . . . . . . . . . . . . . . . . . . . . . . . . . 54 其他帮助资源 . . . . . . . . . . . . . . . . . . . . . . . . . . . . . . . . . . . . . . . . . . . . . . . . . . 55 规格 . . . . . . . . . . . . . . . . . . . . . . . . . . . . . . . . . . . . . . . . . . . . . . . . . . . . . . . . . 56 安全 . . . . . . . . . . . . . . . . . . . . . . . . . . . . . . . . . . . . . . . . . . . . . . . . . . . . . . . . . 58
ACER_用户手册说明书
Figure 3: ACER program main window.
Within the first section “Build ACER functions for different k” you have to load data and initiate constants that enable calculation and plotting of ACER functions.
3 www.cesos.ntnu.no
Figure 1: Extraction of files
1. Using “Browse…” and “Install” buttons to extract files. Installation of MATLAB Compiler Runtime (MCR) will start automatically after extracting files. This is crucial since the MATLAB Compiler lets you run ACER_v2 application outside the MATLAB environment. We recommend that you to restart your computer after setup has finished.
ACER_v2_Online_Installer - 3 Mb installation wizard, which also comprises the ACER app, but this time - together with the downloader of the MATLAB Runtime Compiler R2021b. It requires a good stable Internet connection to first download the MCR and then install it and the ACER app. Other than that, the installation wizard is absolutely alike the offline one. Download ACER_v2_Online_Installer.exe
电子产品平板电脑说明书

电子产品平板电脑说明书注意:以下是对电子产品平板电脑的一份说明书,为了方便阅读,我按照章节对相关内容进行了整理和排版。
请您详细阅读以下内容,以便正确操作和使用平板电脑。
第一章:介绍欢迎使用我们的电子产品平板电脑。
本说明书将为您提供有关平板电脑的基本信息,包括产品特性、操作指南、常见问题解答和保养建议。
第二章:产品特性平板电脑的特点:1. 超薄设计:平板电脑采用先进的薄型显示技术,外观轻薄时尚,便于携带和使用。
2. 高分辨率屏幕:平板电脑配备高分辨率触控屏幕,提供清晰且细腻的显示效果,使您享受更好的视觉体验。
3. 强大的处理性能:平板电脑搭载高性能处理器,能够运行多个应用程序,并实现流畅的操作和快速的响应。
4. 多功能支持:平板电脑支持多种功能,如上网冲浪、观看视频、阅读电子书籍等,满足您的多样化需求。
5. 长续航时间:平板电脑采用高容量电池,可以让您长时间使用而无需频繁充电。
第三章:操作指南3.1 开机与关机- 开机:按下电源按钮,屏幕将显示启动logo,并在几秒钟后进入主界面。
- 关机:在主界面或者任何应用程序中,按住电源按钮,选择关机选项并确认即可关机。
3.2 主界面介绍- 桌面:在主界面上,您可以看到各种应用程序的图标。
点击图标即可进入相应的应用程序。
- 通知栏:位于屏幕顶部的状态栏中,您可以看到一些常用设置和通知,如电池状态、Wi-Fi连接等。
3.3 应用程序的使用- 在主界面上,您可以找到各种预装的应用程序,如浏览器、相册、音乐播放器等。
点击相应的图标即可进入应用程序,并根据您的需求进行操作。
第四章:常见问题解答4.1 如何连接无线网络?- 打开设置界面,在无线网络选项中,选择可用的Wi-Fi网络并输入密码进行连接。
4.2 如何传输文件?- 使用数据线连接平板电脑和电脑,将平板电脑切换为传输文件模式,然后在电脑上访问平板电脑的存储设备,进行文件的传输。
第五章:保养与维护5.1 平板电脑的保养- 避免将平板电脑暴露在极端温度下。
平板电脑通用说明书

安卓平板系统通用使用指南目录1、逐步了解主屏幕 (3)1.1 主界面解锁........................................................................................ (3)1.2 主界面........................................................................................ (4)1.3 主界面各按键介绍........................................................................................ (5)1.3.1 屏幕上始终显示的按钮 (5)1.3.2 自动显示/隐藏的按钮........................................................................................ (6)1.4 通知栏........................................................................................ (7)1.5 应用程序和窗口小部件界面 (9)1.5.1 进入应用程序界面.................................................................................................9 1.5.2 进入窗口小部件界面...........................................................................................10 1.6 桌面快捷图标创建和管理..............................................................................................11 1.6.1 在桌面上创建应用程序快捷图标.......................................................................11 1.6.2 桌面应用程序的快捷图标管理...........................................................................11 1.7 删除桌面应用程序的快捷图标......................................................................................14 1.8 更换壁纸.. (15)1.9 连接电脑 (16)2、应用程序................................................................................... 18 2.1 2.2 2.3 2.4 2.5 打开本机自带的程序......................................................................................................18 屏幕兼容性缩放..............................................................................................................21 打开/关闭后台运行的程序.............................................................................................22 获取应用程序并在平板上安装......................................................................................23 删除已安装在平板上的应用程序..................................................................................263、设置........................................................................................... 29 3.1 无线和网络......................................................................................................................30 3.1.1 Wi-Fi ......................................................................................................................30 3.1.2 流量使用情况.......................................................................................................33 3.1.3 更多…...................................................................................................................34 3.2 设备..................................................................................................................................35 3.2.1 声音.......................................................................................................................35 3.2.2 显示.......................................................................................................................36 3.2.3 存储........................................................................................ (37)3.2.4 电池........................................................................................ (38)3.2.5 应用程序........................................................................................ (38)3.3 个人........................................................................................ (39)3.3.1 帐户与同步........................................................................................ (39)3.3.2 位置服务........................................................................................ (39)3.3.3 安全........................................................................................ (39)3.3.4 语言和输入法.......................................................................................................41 3.3.5 备份和重置...........................................................................................................42 3.4 系统..................................................................................................................................43 3.4.1 日期和时间........................................................................................ (43)3.4.2 辅助功能........................................................................................ (43)3.4.3 开发人员选项........................................................................................ (44)3.4.4 关于平板电脑........................................................................................ (45)4、相机........................................................................................... 46 4.1 拍照...............................................................................................................................46 4.2 摄像...............................................................................................................................48 5、平板电脑连接网络................................................................... 50 5.1 5.2 5.3 WiFi 上网........................................................................................................................50 外接以太(有线)网卡连网线上网............................................................................52 外接 3G 网卡上网. (54)1、逐步了解主屏幕Android4.0 的启动器(即:开机显示的主界面)较之前版本,有很大的改变,这里简单介绍一下基本使用。
清华紫光 平板电脑 产品说明书
清华紫光平板电脑产品说明书前言您好:欢迎您参阅产品说明,本说明书只作为参考使用,具体图像与功能说明请以实物为准,有更改另不通知!!!1、此说明书中的描述基于MID Android系统的默认设定。
2、产品及产品颜色款式请以购买的实物为准。
产品包装及产品配件:彩盒包装、充电器1个、USB数据线1条、OTG数据线1条、平板电脑1台。
版本信息:产品采用Android2.3系统目录1、外观描述 (4)1.1正面图 (4)1.1右侧面图 (5)1.3上侧面图 (5)1.4左侧图 (5)1.5背面图 (5)2、入门指南 (5)2.1电池充电 (6)2.2开关机 (6)2.3输入操作 (7)2.4WIFI设置和3G的设置 (7)3、主界面快捷键(提示与技巧) (8)3.1.状态栏 (8)3.2快捷方式 (8)4、存储设备 (9)4.1存储卡使用 (9)4.2存储空间 (9)4.3存储卡使用的注意事项 (9)5、网络应用 (9)5.1网页浏览器 (9)5.2电子市场 (10)6、娱乐应用 (10)6.1照相机及摄像机 (10)6.2图库 (10)6.3视频播放器及音乐播放器 (10)7、通信应用 (11)7.1聊天工具 (11)7.2电子邮件 (11)8、个性化设定(设置) (11)8.1应用程序的管理 (11)8.2日期和时间 (11)8.3声音和显示 (12)8.4语言和键盘设置 (12)8.5关于设备 (13)8.6HDMI高清设置 (13)9、工具 (14)9.1闹铃 (14)9.2计算器 (14)9.3ES文件浏览器9.4O FFICE (15)10、屏幕的开启和关闭 (15)11、恢复出厂设置 (16)1、外观描述1.1正面图CameraHome按键1.2右侧面图1.3上侧面图说明:音量+/-键的复用功能,当音量“-”短时间按制时,轻按1下是 Back 功能,长按制时(约2秒)是音量“-”功能, 当音量“+”短时间按制时,轻按1下是Menu 功能,长按制时(约2秒)是音量“+”功能,1.4左侧图1.5背面图2、入门指南声明:本公司不断致力于产品质量的提高,软件版本时有更新,若最终出货产品与本说明 书所描述功能有所不同,请以最终出货产品为准,谢谢!2.1电池充电本机器内置了一个锂电池,当电池电量低的时候建议给本机器充电。
使用产品前请仔细阅读本使用说明书
致谢! 方正科技集团股份有限公司
目 次
1 注意事项 ................................................................................................................................. 1 1.1 特别提示.......................................................................................................................... 1 1.2 笔记本使用重要提示—请务必阅读 ............................................................
7寸平板电脑最新中文说明书(安卓4.1)通用版。

平板电脑用户手册(通用版)目录目录 (3)温馨提示 (4)注意事项 (4)连接AC适合器........ .. (5)入门指南与整机介绍入门指南 (5)整机介绍 (6)基本操作与设备连接开关机介绍 (6)设备的连接.................................... ................... (7)使用入门....................................................................................7-30温馨提示感谢您购买安卓系统4.1平板电脑,使用前请仔细阅读说明书。
不提供关于本产品软件的所有保证,无论是明示、默示还是法定的。
有关软件质量和性能的所有风险均由您承担,双生利不保证本软件所含有的功能将满足您的要求或软件的运行将不会中断或没有错误。
1.在更新操作系统平台前,请您把保存在本电脑的数据拷贝到其他设备上进行保存,具体的升级方法和升级文件请通过经销商索取。
2.本电脑采用Android4.0操作系统,Android是一个对第三方软件完全开放的平台,用户可自行下载软件进行安装,但部分安装软件可能存在不兼容现象。
若用户自行安装软件,而导致死机、黑屏、系统崩溃等现象,不提供免费售后服务。
3.目前绝大部分网站都是基于X86架构的CPU和Windows操作系统而设计,本机由于采用ARM A8架构CPU Android操作系统,故对于上网可能存在兼容性问题。
如某些网页不能显示、视频播放插件无法下载、视频无法播放等问题,属正常现象。
4.如果某些功能不能正常工作,请尝试重新启动本电脑。
请不要点触“设置”菜单里的“恢复出厂设置”键,会导致您自行安装的应用软件被强行删除无法恢复。
5.本书中的内容仅供参考,具体请以实物、实际显示或实际操作为准。
本书中所涉及到的产品名称或图片仅做识别之用,这些名称或图片可能是属于其他公司的注册商标或版权。
宏碁笔记本电脑软件使用手册说明书

使用产品前请仔细阅读本使用手册笔记本电脑软件使用手册敬告尊敬的用户:感谢您购买和使用宏碁公司笔记本电脑产品。
为了您的安全和利益,在使用产品前请您仔细阅读产品用户手册和软件使用手册及随机附带的全部资料。
如果您未按照用户手册操作和使用产品,而导致任何的人身伤害、财产或其他损失,宏碁公司将不承担责任。
关于本软件使用手册(以下简称“手册”)●手册版权属于宏碁所有;●手册提及的商标、字号属于他们各自的权利拥有者;●手册内容如同实际产品不一致,以实际产品为准。
如果您对手册的任何内容或者条款存在不明或者异议,请再购机七日内向宏碁提出书面异议,否则视为您已经同意、理解并接受本手册全部内容。
宏碁保留对手册的解释和修改的权利,对手册的任何修正、更新、解释将在宏碁公司产品网站(宏碁电脑: ,方正电脑:)予以公布,请您留意。
致谢!宏碁股份有限公司二零一二注:1. 本说明书根据软件不同适用于不同的操作系统,请参考软件说明安装使用,出厂时上述软件已安装或者备份在随机附带光盘中,请妥善保管。
如需要重新安装软件可参见以下使用手册安装部分介绍,或者和当地服务机构联系指导安装。
2. 预装软件的内容和安装方式可能会发生变化,请以实际预装内容为准。
3. 图示内容主要用作使用说明,具体内容请以实际出货的软件界面为准。
2目录目录 (3)1中标麒麟操作系统使用手册 (5)1.1中标麒麟操作系统安装说明安装 (5)1.1.1创建分区 (5)1.1.2系统安装 (9)1.2硬件检测和配置 (11)1.2.1显卡设置 (11)1.2.2网络配置 (13)1.3网络应用软件 (15)1.3.1电子邮件和日历系统 (15)1.3.2浏览网页 (17)1.4多媒体和附件 (18)1.4.1多媒体 (18)1.4.2附加组件 (19)1.5软件更新 (21)1.5.1在线更新 (21)1.5.2添加/删除软件 (21)1.6备份还原功能 (22)1.6.1系统备份 (22)1.6.2系统还原 (25)1.7杀毒软件 (26)1.8电脑学习系统 (27)1.8.1软件特点 (27)1.8.2使用方法 (27)2庄络智能农贸通系统介绍 (29)2.1概述 (29)2.2运行环境 (29)2.3主要功能和特点 (29)2.4系统模块 (30)2.5系统使用说明 (30)3ABSpro软件介绍 (35)3.1ABSpro概述 (35)3.2系统需求 (35)3.3ABSpro Windows操作系统下使用说明 (36)3.3.1备份与恢复 (36)3.3.2保险箱 (40)3.3.3设备密码保护 (45)3.4ABSpro一键救护平台 (46)3.4.1数据拯救 (47)3.4.2系统恢复 (48)3.5ABSpro设置 (50)4简单课堂使用说明 (52)4.1功能简介 (52)4.2系统需求 (52)4.3功能使用介绍 (52)4.4课程及功能详细说明 (53)5金山安全套装 (60)5.1金山安全套装软件介绍 (60)5.2安装环境要求 (60)5.3金山毒霸介绍 (60)5.3.1特色功能 (61)5.3.2金山毒霸使用说明 (63)5.4金山卫士介绍 (68)5.4.1查杀木马 (69)5.4.2修复漏洞 (70)5.4.3系统优化 (70)5.4.4垃圾清理 (71)5.4.5软件管理 (72)5.4.6重装系统 (72)5.4.7百宝箱 (73)5.5安装与卸载 (73)5.5.1安装金山安全套装软件 (73)5.5.2卸载金山安全套装软件 (74)41中标麒麟操作系统使用手册1.1中标麒麟操作系统安装说明安装放入中标麒麟安装光盘,从光驱引导启动,进入中标麒麟操作系统安装界面,选择快速安装。
戴尔平板电脑键盘说明书

Dock the tabletDock de tablet | Insérez la tablette dans la station d’accueil Docken des Tablets | Inserire il tablet1Press the release button and undock the tabletDruk de ontgrendelknop in en ontkoppel de tablet Appuyez sur le bouton d’éjection et retirez la tablette de la station d’accueilEntriegelungstaste drücken und Tablet trennenPremere il pulsante di sblocco e disinserire il tabletOpen and turn on your tabletOpen de tablet en draai hem om Ouvrez votre tablette et allumez-la Tablet öffnen und einschalten Aprire ed accendere il tablet2NOTE: You can also charge the keyboard dock using the micro USB connector located on the dock hinge.N.B.: U kunt de toetsenbord opladen met behulp van de micro-USB-connector op de dockscharnier.REMARQUE : Vous pouvez également recharger la station d’accueil du clavier à l’aide du connecteur micro USB situé sur la charnière de la station.ANMERKUNG: Sie können das Tastatur-Dock auf über den Micro-USB-Anschluss am Dock-Scharnier laden.N.B.: È inoltre possibile ricaricare l’alloggiamento della tastiera usando connettori micro USB localizzati sul cardine dell’alloggiamento.Printed in China.2013-09© 2013 Dell Inc.FeaturesKenmerken | Fonctionnalités | Funktionen | FunzioniProduct support and manualsProductondersteuning en handleidingen Supports produit et manuelsProdukt-Support und Handbücher Supporto prodotto e manuali/support/support/manuals /windows8Contact DellNeem contact op met Dell | Contacter Dell Kontakt zu Dell | Contattare Dell/contactdellRegulatory and safetyRegelgeving en veiligheid | Réglementation et sécuritéRichtlinien und Sicherheitshinweise | Normative e sicurezza /regulatory_complianceRegulatory model and type Beschreven model en type Modèle et type réglementaires Muster-Modellnummer und Typ Normativa modello e tipoK12A K12A001Información para NOM, o Norma Oficial MexicanaLa información que se proporciona a continuación se mostrará en los dispositivos que se describen en este documento, en conformidad con los requisitos de la Norma Oficial Mexicana (NOM):Importador:Dell México S.A. de C.V.Paseo de la Reforma 2620 - Piso 11.° Col. Lomas Altas 11950 México, D.F.Número de modelo reglamentario:K12A Voltaje de entrada:100 V CA–240 V CA Corriente de entrada (máxima):1,00 A–1,30 A Frecuencia de entrada:50 Hz–60 Hz Corriente de salida:1,2 A Voltaje de salida:19,5 VCC1. docking connector2. touch pad3. docking pins4. micro USB power connector5. Caps Lock status light6. power status light1. koppelingsconnector2. touchpad3. dockingpennen4. micro-USB-stroomconnector5. Caps-lock statuslampje6. lampje energieniveau1. connecteur pour station2. tablette tactile3. broches de la station d’accueil4. connecteur d’alimentation micro USB5. voyant d’état du Verr Maj6. voyant d’état de l’alimentation1. Docking-Anschluss2. Touchpad3. Docking-Stifte4. Micro-USB-Stromversorgungsanschluss5. Feststelltastenanzeige6. Stromanzeige1. connettore di inserimento2. touchpad3. piedini di alloggiamento4. connettore micro USB alimentazione5. indicatore di stato di BLOC MAIUSC6. indicatore di stato dell’alimentazione。
戴尔平板电脑快速入门指南说明书

Guide d’information rapide | Guia de Início Rápido Guía de inicio rápido10About Your TabletÀ propos de votre tablette | Sobre o seu tablet Acerca de su equipo1. Bouton d’alimentation2. Emplacement de lacarte MicroSD 3. Caméra avant 4. Voyant d’étatde la caméra5. Capteur de lumièred’ambiance 6. Port casque7. Boutons de volume (2)8. Bouton d’accueilde Windows9. Microphone arrière 10. Caméra arrière 11. Haut-parleur 12. Fente du loquetd’amarrage13. Port adaptateursecteur/amarrage 14. Port micro-USB 15. Fente du loquetd’amarrage 16. Haut-parleur 17. Voyant derechargement de la batterie18. Microphones avant (2)1. Botão liga/desliga2. Slot para cartãoMicroSD3. Câmera frontal4. Luz de status dacâmera5. Sensor de luz ambiente6. Conector para fonede ouvido7. Botões de volume (2)8. Botão do Windows 9. Microfone traseiro 10. Câmera traseira11. Alto-falante 12. Slot da trava deacoplamento13. Adaptador de energia/porta de acoplamento 14. Porta micro USB 15. Slot da trava deacoplamento 16. Alto-falante17. Luz de carga da bateria 18. Microfones frontais (2)1. Power button2. MicroSD-card slot3. Front camera4. Camera-status light5. Ambient-light sensor6. Headphone port7. Volume buttons (2)8. Windows button9.Rear microphone10. Rear camera 11. Speaker12. Docking-latch slot 13. Power-adapter/docking port 14. Micro-USB port 15. Docking-latch slot 16. Speaker17. Battery-charging light 18.Front microphones (2)1. Botón de encendido2. Ranura para tarjetaMicroSD3. Cámara frontal4. Indicador del estadode la cámara5. Sensor de luz ambiental6. Puerto de audífonos7. Botones de volumen (2)8. Botón de Windows9. Micrófono posterior 10. Cámara posterior11. Altavoz12. Ranura para el pasadorde acoplamiento13. Puerto de adaptadorde alimentación14. Conector micro USB 15. Ranura para el pasadorde acoplamiento 16. Altavoz17. Luz indicadora decarga de batería18. Micrófonos digitales (2)Setting Up Your TabletInsert the microSD card (optional)Insérez la carte microSD (facultatif) | Insira o cartão microSD (opcional) Inserte la tarjeta microSD (opcional)Charge the battery (at least 4 hours)Rechargez la batterie (4 heures au moins)Carregue a bateria (no mínimo por 4 horas)Cargue la batería (al menos durante 4 horas)Press and hold the power button to turn on the tablet Maintenez enfoncé le bouton d’alimentation pour mettre en marche la tabletteMantenha pressionado o botão liga/desliga para ligar o tablet Mantenga presionado el botón de encendido paraencender la tabletaConfigurer votre tablette | Como configurar o seu tablet Configuración de su equipoLocate the Service TagRepérez le numéro de service Localize a Etiqueta de serviçoBusque la etiqueta de servicioWindows 8Swipe to access more tilesBalayez pour accéder à d’autres mosaïquesPasse o dedo para ter acesso a mais blocos Desplace para acceder a más íconosTilesMosaïques | Blocos | IconosSwipe from right edge of the display Balayez à partir du bord droit de l’écran Passe o dedo a partir da borda direita da tela Deslice desde el borde derecho de la pantalla| Barra lateral de botões |Barra de atractivosGetting started Mise en route Primeiros passos IntroducciónMy Dell Support Center Mon Dell Support Center My Dell Centro de Suporte Mi centro de soporte técnico de DellResourcesRessources | Recursos |Recursos。
Acer Iconia One 7 用户手册说明书

用户手册2 -© 2014保留所有权利Acer Iconia One 7 用户手册封面:B1-750管制型号 (RMN):A1408本次修订时间:2014 年 10 月注册一个 Acer ID,尽享诸多优势从[Start](开始)屏幕打开[Acer Portal](Acer 门户),注册一个 Acer ID; 如果已经有 Acer ID,请直接登录。
注册 Acer ID 有三大原因:•借助 Acer BYOC 构建您自己的云。
•获取最新优惠和产品信息。
•注册设备,享受保修服务。
要了解更多信息,请访问 Acer BYOC 网站:/byoc-start重要本手册包含受版权法保护的所有权信息。
本手册包含的信息若有变更,恕不另行通知。
本手册提供的图像仅供参考,包含的信息或功能可能不适用于您的计算机。
Acer Group 对于本手册包含的技术、编辑错误或疏忽不应承担责任。
Acer Iconia Tab 7型号:___________________________________________________________序列号:_________________________________________________________购买日期:_______________________________________________________购买地点:_______________________________________________________目录 - 3 目录平板电脑使用入门 4功能和特点 (4)打开平板电脑包装 (4)熟悉您的平板电脑 (5)首次开机 (6)为平板电脑充电 8装配电源适配器 (8)使用平板电脑 10使用触摸屏 (10)主屏幕 (10)屏幕键盘 (16)编辑文字 (17)关闭平板电脑 (18)将设备连接到平板电脑 19连接到交流电源 (19)插入 microSD 卡 (19)在平板电脑和 PC 之间互相传输文件 (19)连接蓝牙设备 (20)附件 (20)上网 21管理 Wi-Fi 连接 (21)浏览 Internet (21)设置“电子邮件”应用程序..................... 22Google 服务. (22)播放音乐 27多媒体播放 (27)管理人员和联系人 29使用相机和摄像机 32相机/摄像机图标和指示器 (32)拍摄照片 (35)拍摄视频 (35)Acer Touch WakeApp 37如何使用 Touch WakeApp (37)高级设置 39无线和网络 (39)设备 (41)个人 (42)系统 (43)更新平板电脑的操作系统 (44)重置平板电脑 (45)常见问题和故障排除 46其他帮助源 (47)规格 48最终用户许可协议 514 - 平板电脑使用入门平板电脑使用入门功能和特点您的新平板电脑提供先进且易用的多媒体和娱乐功能。
埃德折叠式笔记本电脑系列使用指南说明书
Turn over*P42856A0116*P42856A©2015 Pearson Education Ltd.1/1/1/1/1/1/1Instructions• Use black ink or ball-point pen.•Fill in the boxes at the top of this page with your name,centre number and candidate number.• Answer all questions.•A nswer the questions in the spaces provided– there may be more space than you need.Information•The total mark for this paper is 70.•T he marks for each question are shown in brackets– use this as a guide as to how much time to spend on each question.•Q uestions labelled with an asterisk (*) are ones where the quality of yourwritten communication will be assessed– y ou should take particular care on these questions with your spelling, punctuationand grammar, as well as the clarity of expression.Advice•Read each question carefully before you start to answer it.•Try to answer every question.•Check your answers if you have time at the end.2*P42856A0216*Answer ALL questions. Write your answers in the spaces provided.Ethan is 22 years of age. He works as a housing officer for the local council. As a way ofrelaxing, Ethan enjoys playing games on his iPhone and iPad.1 (a ) Identify two ways in which playing games on his iPhone and iPad will meet Ethan’s intellectual needs.(2)1 ...................................................................................................................................................................................................................................................................................................................................................................................................................................................................................................................................................................2 ................................................................................................................................................................................................................................................................................................................................................................................................................................................................................................................................................................... Another way in which Ethan relaxes is by volunteering to garden for older people inthe community.(b ) Identify and describe two ways in which gardening may affect Ethan’s physicalhealth.(4)............................................................................................................................................................................................................................................................................................................................................................................................................................................................................................................................................................................................................................................................................................................................................................................................................................................................................................................................................................................................................................................................................................................................................................................................................................................................................................................................................................................................................................................................................................................................................................................................................................................................................................................................................................................................................................................................................................................................................................................................................................................................................................................................................................................................................................................................................................................................................................................................................................................................................................................................................................................................................................................................................................................................................................................................................................................................................................................................................................................................................................................................................................................................................................3*P42856A0316*Turn overEthan receives great pleasure and satisfaction from his volunteering activities. (c) Explain how this might affect Ethan’s self-esteem.(6)....................................................................................................................................................................................................................................................................................................................................................................................................................................................................................................................................................................................................................................................................................................................................................................................................................................................................................................................................................................................................................................................................................................................................................................................................................................................................................................................................................................................................................................................................................................................................................................................................................................................................................................................................................................................................................................................................................................................................................................................................................................................................................................................................................................................................................................................................................................................................................................................................................................................................................................................................................................................................................................................................................................................................................................................................................................................................................................................................................................................................................................................................................................................................................................................................................................................................................................................................................................................................................................................................................................................................................................................................................................................................................................................................................................................................................................................................................................................................................................................................................................................................................................................................................................................................................................................................................................................................................................................................................................................................................................................................................................................................................................................................................................................................................................................................................................................................................................................................................................................................................................................................................................................................................................................................................................................................................................................................................................................................................................................................................................................................................................................................................................................................................................................................................................................................................................................................................................................................................................................................................................4*P42856A0416*Ethan has recently been promoted at work.*(d) Discuss how this positive life course event may affect Ethan and lead to new learning.(10)..................................................................................................................................................................................................................................................................................................................................................................................................................................................................................................................................................................................................................................................................................................................................................................................................................................................................................................................................................................................................................................................................................................................................................................................................................................................................................................................................................................................................................................................................................................................................................................................................................................................................................................................................................................................................................................................................................................................................................................................................................................................................................................................................................................................................................................................................................................................................................................................................................................................................................................................................................................................................................................................................................................................................................................................................................................................................................................................................................................................................................................................................................................................................................................................................................................................................................................................................................................................................................................................................................................................................................................................................................................................................................................................................................................................................................................................................................................................................................................................................................................................................................................................................................................................................................................................................................................................................................................................................................................................................................................................................................................................................................................................................................................................................................................................................................................................................................................................................................................................................................................................................................................................................................................................................................................................................................................................................................................................................................................................................................................................................................................................................................................................................................................................................................................................................................................................................................................................................................................................................................................... ........................................................................................................................................................................................................................................................................................................................................................................................................................................................................................................................................................................5*P42856A0516*Turn over......................................................................................................................................................................................................................................................................................................................................................................................................................................................................................................................................................................................................................................................................................................................................................................................................................................................................................................................................................................................................................................................................................................................................................................................................................................................................................................................................................................................................................................................................................................................................................................................................................................................................................................................................................................................................................................................................................................................................................................................................................................................................................................................................................................................................................................................................................................................................................................................................................................................................................................................................................................................................................................................................................................................................................................................................................................................................................................................................................................................................................................................................................................................................................................................................................................................................................................................................................................................................................................................................................................................................................................................................................................................................................................................................................................................................................................................................................................................................................................................................................................................................................................................................................................................................................................................................................................................................................................................................................................................................................................................................................................................................................................................................................................................................................................................................................................................................................................................................................................................................................................................................................................................................................................... ............................................................................................................................................................................................................................................................................................................................................................................................................................................................................................................................................................................................................................................................................................................................................................................................................................................................................................................................................................................................................................................................................................................................................................................................................................................................................................................................................................................................................................................................................................................................................................................................................................................................................................................................................................................................................................................................................................................................................................................................................(Total for Question 1 = 22 marks)6*P42856A0616*2 Theo is Ethan’s supervisor for the volunteer work and he is very effective in building relationships as he believes in treating everybody equally.(a) Define the care value ‘anti-discriminatory practice’.(2)................................................................................................................................................................................................................................................................................................................................................................................................................................................................................................................................................................................................................................................................................................................................................................................................................................................................................................................................................................................................................................................................................................................................................ (b ) Describe two ways Theo may promote anti-discriminatory practice with thepeople he supervises.(4)1 ...................................................................................................................................................................................................................................................................................................................................................................................................................................................................................................................................................................................................................................................................................................................................................................................................................................................................................................................................................................................................................................................................................................................................................................................................................................................................................................................................................................................................................................................................................................................................................................................................................................................................................................................2 ...................................................................................................................................................................................................................................................................................................................................................................................................................................................................................................................................................................................................................................................................................................................................................................................................................................................................................................................................................................................................................................................................................................................................................................................................................................................................................................................................................................................................................................................................................................................................................................................................................................................................................................................。
宏碁Acer Veriton Desktop Computer 用户手册说明书 (2)
- 1 Veriton Desktop Computer User’s Manual2 -© 2021. All Rights Reserved.Veriton Desktop ComputerCovers: Tower modelsThis revision: November 2021Register your Acer productIf your new device runs on Windows OS, you may have had your product registered automatically while you start up your device with Windows OS.Log in at /myproducts with the email address you registered for Windows OS to review your product record. (Reset your password if you do not know it.)If the record is not found, please follow the steps below to register.1.Ensure you are connected to the Internet.2.Go to /register-product .3.Sign in or sign up for an Acer ID.4.Enter S/N or SNID of your device to register it. ImportantThis manual contains proprietary information that is protected by copyright laws. The information contained in this manual is subject to change without notice. Some features described in this manual may not be supported depending on the Operating System version. Images provided herein are for reference only and may contain information or features that do not apply to your computer. Acer Group shall not be liable for technical or editorial errors or omissions contained in thismanual.Model number: _________________________________Serial number: _________________________________Date of purchase: ______________________________Place of purchase: ______________________________The terms HDMI and HDMI High-Definition Multimedia Interface, and the HDMI Logo aretrademarks or registered trademarks of HDMI Licensing Administrator, Inc. in the United Statesand other countries.Table of contents - 3 T ABLE OF CONTENTSFirst things first 5 Your guides (5)Basic care and tips for using your computer (5)Turning your computer off (5)Taking care of your computer (6)Taking care of your AC adapter (7)Cleaning and servicing (7)The Windows OS Desktop 8 Tips and hints for using Windows (9)Where are my apps? (9)Can I turn off notifications? (9)How do I check for Windows updates? (9)Where can I get more information? (9)Recovery 10 Creating a file history backup (10)Creating a factory default backup (11)Backing up your wireless and LAN drivers (11)Restoring your computer (12)Reset this PC and keep my files (12)Reset this PC and remove everything (13)Using a Bluetooth connection 14 Enabling and disabling Bluetooth (14)Enable Bluetooth and add a device (14)Connecting to the Internet 16 Connecting to a wireless network (16)Connecting to a wireless LAN (16)Connecting with a cable (17)Built-in network feature (17)Securing your computer 19 Using passwords (19)Entering passwords.................................. 19BIOS utility 21 Boot sequence (21)Setting passwords (21)Power management 22 Saving power (22)Ports and connectors 24 USB 3.2 Gen 1 information (25)USB 3.2 Gen 2 information (25)Rear panel audio ports (25)Universal Serial Bus (USB) 26 USB Type-C port 27 HDMI 28 SD card reader 29 Video and audio connectors 30 Connecting a monitor (30)Headphones and microphone (30)Frequently asked questions 32 Requesting service (34)Troubleshooting (35)Troubleshooting tips (35)Error messages (35)Internet and online security 37 First steps on the net (37)Protecting your computer (37)Choose an Internet Service Provider (37)Network connections (38)Surf the Net! (40)Internet security software (40)Playing Blu-Ray or DVD movies 45Getting started...In this section you will find:•Useful information on caring for your computer and your health•How to create recovery backups•Guidelines for connecting to a network•Information on using Acer’s bundled softwareFirst things first - 5F IRST THINGS FIRSTWe would like to thank you for making this Acer desktop computer your choice for meeting your computing needs.Your guidesTo help you use your Acer desktop computer, we have designed a set of guides:First off, the Setup Guide helps you get started with setting up your computer.For more on how your computer can help you to be more productive, please refer to the User’s Manual.This guide contains detailed information on such subjects as system utilities, data recovery, expansion options and troubleshooting.Once you have connected to the internet, you can download updates for your computer from:/support1.The link will open the Acer Support webpage.2.Scroll down to Drivers and Manuals and search for your model bypasting in or manually entering the serial number, SNID, orproduct model.3.From this page you can also download and install the Aceridentification utility that will automatically detect your computer’sserial number and SNID and allow you to copy it to the clipboard.4.Once you have found your product model, any updates, ordocuments will be listed.Basic care and tips for using your computer Turning your computer offTo turn the power off, do any of the following:•Use the Windows shutdown command: Press the Windows key orselect the Windows Start button, select Power > Shut down.6 - First things first•Right-click the Windows Start button > Shut down or sign out >Shut down.If you need to power down the computer for a short while, but don’t want to completely shut it down, you can put it to Sleep by doing any of the following:•Press the power button.•Press the sleep hotkey.•Press the Windows key or select the Windows Start button, selectPower > Sleep.•Right-click the Windows Start button > Shut down or sign out >Sleep.NoteIf you cannot power off the computer normally, press and hold the power button for up to ten seconds to shut down the computer. If you turn off the computer and want to turn it on again, wait at least two seconds before powering up.Taking care of your computerYour computer will serve you well if you take care of it.•Only use the adapter provided with your device, or an Acer-approved adapter to power your device.•Do not expose the computer to direct sunlight. Do not place it nearsources of heat, such as a radiator.•Do not expose the computer to temperatures below 0º C (32º F) orabove 50º C (122º F).•Do not subject the computer to magnetic fields.•Do not expose the computer to rain or moisture.•Do not spill water or any liquid on the computer.•Do not subject the computer to heavy shock or vibration.•Do not expose the computer to dust or dirt.•Never place objects on top of the computer.•Do not slam the computer display when you close it.First things first - 7•Never place the computer on uneven surfaces.Taking care of your AC adapterHere are some ways to take care of your AC adapter:•Do not connect the adapter to any other device.•Do not step on the power cord or place heavy objects on top of it. Route the power cord and any cables away from where people walk.•When unplugging the power cord, do not pull on the cord itself but pull on the plug.•The total ampere ratings of the equipment plugged in should not exceed the ampere rating of the cord if you are using an extension cord. Also, the total current rating of all equipment plugged into a single wall outlet should not exceed the fuse rating.Cleaning and servicingWhen cleaning the computer, follow these steps:1.Turn off the computer.2.Disconnect the AC adapter.e a soft, moist cloth. Do not use liquid or aerosol cleaners.If your computer is dropped or visibly damaged, or does not work normally, please contact your nearest authorized Acer service center.WARNING: Hot surface. Do not touch.8 - The Windows OS DesktopT HE W INDOWS OS D ESKTOP #Item Description 1Settings Changes the apps settings for your computer.2StartLaunches apps, through Pinned, Recommended, or All apps.3Search Types in the texts to search on your computer and the Internet.4Task View Allows to switch between running applications and add the virtual desktop. 5Widgets Provides the weather, news, stocks, and sports information.6Power Shut down, sleep or restart your computer.7Quick settings Displays the situation of network connection, battery level and sound setting. You can toggle quick actions to instantly adjust or open settings.8Notification Displays the notifications and calendar.12345786The Windows OS Desktop - 9 Tips and hints for using WindowsWe know this is a new operating system that will take some getting used to, so we've created a few pointers to help you get started. Where are my apps?Move your cursor to the lower center of the screen and click search icon, start typing the name of the app you would like to open.How do I make an app appear on Start?If you're in all apps list and you want to make an app appear on Start, right-click an app and select Pin to Start.How do I remove an app from Start?Right-click an app to select it and select Unpin from Start to remove the app from Start.How do I make an app appear on my taskbar?If you're in all apps list and you want to make an app appear on the taskbar, right-click an app and select More > Pin to taskbar.Can I turn off notifications?Press the Windows key or select the Windows Start button and select Settings > System > Notifications. From here you can enable/ disable notifications for all of your apps or choose which apps to enable/disable.How do I check for Windows updates?Press the Windows key or select the Windows Start button > Settings > Windows Update. Select Advanced options to configure the settings.Where can I get more information?For more information please visit the following pages:•Windows 11 information: /Windows•Support FAQs: 10 - RecoveryR ECOVERYIf you are having trouble with your computer, and the frequently asked questions (see Got a question? on page 31) do not help, you can recover your computer.This section describes the recovery tools available on your computer.Acer provides Acer Control Center, which allows you to reset your PC, refresh your PC, backup files/data or create a factory default backup.If you cannot access Acer Control Center, click Settings in the Start menu, select System and then click Recovery.NoteAcer Control Center vary depending on model or Operating System. Creating a file history backupRecovery Management allows you to quickly and easily back up your files and restore them if the originals are lost, damaged or deleted.1.From Start, select Control Center in all apps list then RecoveryManagement.2.Select the Backup tab and click Get started for Create backup toopen the Backup window.3.Click Set up syncing for OneDrive folder syncing to continue.4.Make sure the folders that you want to back up are selected andclick Start back up to continue.5.You can select View sync progress to watch files sync until itcompletes.6.To open the OneDrive folder, double click OneDrive icon in thenotification area.Recovery - 11 Creating a factory default backupRecovery Drive allows you to quickly and easily back up youroperating system, installed apps and data.1.From Start, select Windows Tools in all apps list then RecoveryDrive.2.Select Yes to open the Recovery Drive window.3.Make sure Back up system files to the recovery drive is selectedand click Next.4.Plug in the USB drive and wait for the PC to detect the USB drivethen click Next.5.Everything on the drive will be deleted. Click Create to continue.6.You will be shown the backup progress on the screen.7.Follow the process until it completes.8.Unplug the USB drive and label it clearly.ImportantWrite a unique, descriptive label on the backup, such as 'WindowsRecovery Backup'. Make sure you keep the backup in a safe place thatyou will remember.NoteSince the recovery backup requires at least 8GB of storage after formatting, it is recommended to use a USB drive with a capacity of 16GB or larger.Backing up your wireless and LAN drivers Back up your wireless and LAN drivers. You can use these backups toinstall the wireless and LAN drivers if you install another operatingsystem.1.From Start, select Control Center in all apps list then RecoveryManagement.2.Select the Backup tab and click Get started for Backup wirelessand LAN drivers. Choose a folder to save your drivers and selectOK.3.You will be shown the backup progress on the screen.12 - RecoveryRestoring your computerRecovery Management allows you to quickly and easily restore your computer back to its default status. You can choose to keep your files or remove them before reinstalling Windows.Reset this PC and keep my files1.From Start , select Control Center in all apps list then Recovery Management .2.Select the Restore tab and click Get started to open the Recovery window .3.Click Reset PC to Choose an option .4.Select Keep my files to refresh your PC and reinstall your operating system without removing your personal files.5.Choose from the two options - Cloud download or Local reinstall to reinstall Windows. (Ensure you are connected to the internet when using Cloud download.)6.Click Change settings to open the Choose settings options.7.Choose your settings options and follow the instructions on screen. Click Confirm then Next to continue.8.Resetting the PC will reinstall Windows, change settings back to their factory defaults and remove all preinstalled apps and programs without removing your personal files. Click Reset to continue. This will take a while and your PC will restart.9.You will be shown the reset progress on the screen. The screen will turn off during the reset process.10.The screen will turn back on when it is installing Windows. Your PC will restart several times during the reset process.11.Follow the process until it completes.12.When your PC has completed the reset process, Windows will have been reset back to its factory default settings without removing your personal files.ImportantIf you have apps installed on your PC, they will be removed.Recovery - 13 Reset this PC and remove everything1.From Start, select Control Center in all apps list then RecoveryManagement.2.Select the Restore tab and click Get Started to open the Recoverywindow.3.Click Reset PC to Choose an option.4.Select Remove everything to reset your PC back to its factorydefault.5.Choose from the two options - Cloud download or Local reinstallto reinstall Windows. (Ensure you are connected to the internet when using Cloud download.)6.Click Change settings to open the Choose settings options.7.Choose your settings options and follow the instructions on screen.Click Confirm then Next to continue.8. Click Reset to continue.9.You will be shown the reset progress on the screen. The screen willturn off during the reset process.10.The screen will turn back on when it is installing Windows. Your PCwill restart several times during the reset process.11.Follow the process until it completes.12.When your PC has completed the reset process, Windows will usefactory default settings.14 - Using a Bluetooth connectionU SING A B LUETOOTH CONNECTION Bluetooth is a technology enabling you to transfer data wirelessly over short distances between many different types of devices. Bluetooth-enabled devices include computers, cell phones, tablets, wireless headsets, and keyboards.To use Bluetooth, you must ensure the following:1.Bluetooth is enabled on both devices.2.Your devices are "paired" (or connected).Enabling and disabling BluetoothThe Bluetooth adapter must be enabled on both devices. For your computer, this may be an external switch, a software setting, or a separate Bluetooth dongle plugged into the computer’s USB port (if no internal Bluetooth adapter is available).NotePlease check your devices owner’s manual to determine how to turn on itsBluetooth adapter.Enable Bluetooth and add a deviceEvery new device must first be "paired" with your computer’s Bluetooth adapter. This means it must first be authenticated for security purposes. You only need to pair once. After that, simply turning on the Bluetooth adapter of both devices will connect them.Bluetooth on your computer is disabled by default. To enable your computer’s Bluetooth adapter, do the following:1.Press the Windows key or select the Windows Start button >Settings > Bluetooth & devices, and click the toggle underBluetooth to enable/disable it.2.Click on Add device then select the device that you want to add.3.Your computer will automatically start searching for devices, as wellas make itself visible to other devices.Using a Bluetooth connection - 15 4.Select the device you wish to pair from the list of discovered devices.5.After pairing, if there is a code displaying on the screen, enter that code on the device to proceed the connection.NoteSome devices using older versions of the Bluetooth technology require both devices to enter a PIN. In the case of one of the devices not having any inputs (as in a headset), the passcode is hardcoded into the device (usually "0000" or "1234"). Consult your device’s user manual for more information.You can also enter the Bluetooth settings by selecting the Network, Sound and Battery icon in the lower right-hand corner of the screen to open the Quick settings pane. From here, you can enable or disable Bluetooth or right-click on Bluetooth > Go to Settings to enter the Bluetooth settings.16 - Connecting to the InternetC ONNECTING TO THE I NTERNETThis chapter includes general information on types of connections, and getting connected to the internet. For detailed information, please refer to Network connections on page 38.Your computer’s built-in network features make it easy for you to connect your computer to the internet using a cable or a wireless connection.First though, in order to connect to the internet, you’ll need to sign up for internet services from an ISP (Internet Service Provider) -- usuallya phone or cable company -- that will have to go to your home oroffice to set up internet service. The ISP will install a small box, a router or modem, that will allow you to connect to the internet. Connecting to a wireless networkConnecting to a wireless LANA wireless LAN (or WLAN) is a wireless local area network, which canlink two or more computers without using wires. Once connected to WLAN, you can access the internet. You can also share files, other devices, and even your internet connection itself.Your computer's wireless connection is turned on by default and Windows will detect and display a list of available networks during setup. Select your network and enter the password if required. You can use the network management options to turn your wireless network on/off or control what is shared over the network.To connect to a wireless network, please follow the steps below.1.Ensure you have a wireless router/access point and current internetconnection through the ISP of your choice. Make a note of thewireless network’s name and password (if necessary).NotePlease refer to your ISP or router documentation for details on connecting tothe internet.Connecting to the Internet - 172.Click Network icon in the notification area.3.Select Manage WiFi connections.4.You will see a list of available wireless networks. Select the one you wish to use.5.Once you select a wireless network, select Connect .6.If required, enter the network’s password.Connecting with a cableBuilt-in network featureIf your computer has a network port, plug one end of a network cable into the network port on your computer, and the other end into a port on your router (refer to the image below.) Then, you'll be ready to get online.Note If Wi-Fi is turned off, please clickWi-Fi tile to turn it on.Keeping your computer and data safe...In this section you will find:•How to secure your computer•Setting passwordsSecuring your computer - 19 S ECURING YOUR COMPUTER Your computer is a valuable investment that you need to take care of.Learn how to protect and take care of your computer.Using passwordsPasswords protect your computer from unauthorized access. Setting these passwords creates several different levels of protection for your computer and data:•Supervisor Password prevents unauthorized entry into the BIOSutility. Once set, you must enter this password to gain access to theBIOS utility. See Setting passwords on page 21.•User Password secures your computer against unauthorized use.Combine the use of this password with password checkpoints onboot-up and resume from Hibernation (if available) for maximumsecurity.•Password on Boot secures your computer against unauthorizeduse. Combine the use of this password with password checkpointson boot-up and resume from Hibernation (if available) for maximumsecurity.ImportantDo not forget your Supervisor Password! If you forget your password,please get in touch with your dealer or an authorized service center. Entering passwordsWhen a password is set, a password prompt appears in the center of the display screen.•When the Supervisor Password is set, a prompt appears when youenter the BIOS utility.•Type the Supervisor Password and press Enter to access the BIOSutility. If you enter the password incorrectly, a warning messageappears. Try again and press Enter.•When the User Password is set and the password on bootparameter is enabled, a prompt appears at boot-up.20 - Securing your computer•Type the User Password and press Enter to use the computer. Ifyou enter the password incorrectly, a warning message appears. Tryagain and press Enter.ImportantYou have three chances to enter a password. If you fail to enter the password correctly after three tries, the system halts. Press and hold the power button for four seconds to shut down the computer. Then turn on the computer again, and try again.BIOS utility - 21BIOS UTILITYThe BIOS utility is a hardware configuration program built into your computer's BIOS.Your computer is already properly configured and optimized, and you do not normally need to run this utility. However, if you encounter configuration problems, you may need to run it.To activate the BIOS utility, press F2 while the computer logo is being displayed.Boot sequenceTo set the boot sequence in the BIOS utility, activate the BIOS utility, then select Boot from the categories listed on the top of the screen. Setting passwordsTo set a password on boot, activate the BIOS utility, then select Security from the categories listed on the top of the screen.Find Set Supervisor Password and enter a password to enable this feature. Once you have entered a password for this feature, you may then enable/disable Password on Boot.Remember to select F10 to properly save and exit the BIOS utility when you are done making changes.22 - Power managementP OWER MANAGEMENTThis computer has a built-in power management unit that monitors system activity. System activity refers to any activity involving one or more of the following devices: keyboard, mouse, hard disk, peripherals connected to the computer, and video memory. If no activity is detected for a period of time, the computer stops some or all of these devices in order to conserve energy.Saving powerDisable Fast startupYour computer uses Fast startup to start quickly, but also uses a small amount of power to check for signals to start.These checks consume extra power.If you prefer to reduce your computer’s power requirements and environmental impact, turn off Fast startup:NoteIf Fast startup is off, your computer will take longer to start from Sleep.Your computer will also not start if it receives an instruction to start over anetwork (Wake on LAN).1.Press the Windows key or select the Windows Start button thenthen search for "Choose a power plan".2.Select Choose what the power buttons do.3.Select Change settings that are currently unavailable.4.Scroll down and disable Turn on fast startup.5.Select Save changes.Ports and connectors...In this section you will find:•Information on the ports and connectors fitted to your computer24 - Ports and connectorsP ORTS AND CONNECTORS The tables below indicate what the different icons represent.NoteThe ports and connectors listed below may not be available on all models.Icon Item Icon ItemPower button Serial portMicrophone jack Line-in jackSpeaker or headphonejackAudio combo-jackUSB port HDMI portExternal display (VGA)connectorDC-in jackRJ-45 EthernetconnectorDP DisplayPortLine-out / speaker-outjackDVI DVI portRecovery button USB port with power-off chargingKensington lock slot USB Type-C port SD card readerPorts and connectors - 25 USB 3.2 Gen 1 information•USB 3.2 Gen 1 compatible ports are blue.•Compatible with 3.2 Gen 1 and earlier devices.•For optimal performance, use 3.2 Gen 1-certified devices.•Defined by the 3.2 Gen 1 specification (SuperSpeed USB).USB 3.2 Gen 2 information•USB 3.2 Gen 2 compatible ports are red.•Compatible with 3.2 Gen 2 and earlier devices.•For optimal performance, use 3.2 Gen 2-certified devices.•Defined by the 3.2 Gen 2 specification (SuperSpeed USB).Rear panel audio portsThe table below indicates the functions of the audio jacks on the rear panel (if available).Icon color Headset Stereo Quadrophonic 5.1-channelBlueRear RearGreenMic-in Mic-in Mic-in Center/ woofer26 - Universal Serial Bus (USB)U NIVERSAL S ERIAL B US (USB)The USB port is a high-speed port which allows you to connect USB peripherals, such as a mouse, an external keyboard, additional storage (external hard disks), or any other compatible device.NoteTwo USB standards are currently available on Acer computers: USB 2.0 (High-speed USB) and USB 3.2 Gen 1 (SuperSpeed USB). USB 2.0 ports onAcer computers have a black tongue in the port, while USB 3.2 Gen 1 portshave a blue tongue. For best performance, USB 3.2 Gen 1 devices should always be plugged into USB 3.2 Gen 1 ports. Consult your device’s documentation to see which standard it supports.You can also charge devices such as tablets, smartphones, or other devices through a USB port. Some USB 3.2 Gen 1 ports support charging devices when the computer is in Hibernate or turned off.Additionally, you can use a USB hub to connect multiple devices to a single USB port.ImportantWhen removing a USB storage device, you should right-click on the USB icon in the Windows task bar and select "Eject <device>" to tell theoperating system to stop using the device before removing it. Failure todo this may result in data loss or damage to your peripheral.USB Type-C port - 27 USB T YPE-C PORTA USB Type-C port is a connector that allows you to easily connect USB Type-C peripherals, such as additional storage (e.g. an external drive), or any other compatible device.The Type-C port is reversable; connectors may be inserted with either side up.NoteOn Acer computers USB Type-C ports support up to USB 3.2 (SuperSpeed USB, 10 Gbps).Other USB devices with a USB Type-C connector are supported, but transfer speed may be reduced and certain functions will be disabled (such as Thunderbolt video support).ImportantWhen removing a USB storage device, you should right-click on the USB icon in the Windows task bar and select "Eject <device>" to tell the operating system to stop using the device before removing it. Failure todo this may result in data loss or damage to your peripheral.。
acer电脑使用说明方案

Aspire 系列普通用户指南产品型号:________________________________产品序号:________________________________购买日期:________________________________购买地点:________________________________? 2010 保留所有权利AspireAspireiii说明。
请按照以下的说明来保护您的听力。
? 逐步增大音量,直至您可以清晰地听到声音并感觉舒适。
? 请勿在调节耳机好后再增大音量。
? 请勿长时间以高音量收听音乐。
? 请勿增大音量来排除周围环境的噪声。
? 如果您听不到旁边人说话,请降低音量。
iv警告? 切勿将该设备靠近水源。
? 切勿将该设备置于不稳定的平台,椅子或桌面上。
以免滑落而损坏。
? 电脑上的槽口用于通风目的。
为确保本产品的可靠运行,不至于出现过热高温,严禁堵塞和盖住这些槽口。
此外,请勿将机器置于床褥、沙发、毛毯上或其它类似地方。
同时,若非有良好的通风,请将该设备远离暖炉和电热器等热源。
? 切勿将其它物品插入该设备的插槽内,以免误触电路、造成短路、引起火灾或触电。
切勿泼洒任何液体到本产品上。
? 为避免对内部元件的损害和防止电池漏液,切勿将产品置于振动的表面上。
? 请勿在运动、锻炼或任何可能造成意外短路或损坏转动装置、HDD 和光驱甚至锂电池组的震动环境中使用。
? 底面、通风口周围的区域以及交流电适配器可能会产生热。
为避免受到伤害,请确保不要让您的皮肤或身体碰到这些区域。
? 您的设备和增强附加件可能包含小型零件,请置于小童不能拿到的地方。
使用电源? 该设备只有在标签上注明的电压类型下方能正常工作。
若您不能确定您所使用???率的80%。
? 本产品的AC警告!?v产品维修?? 有液体浸入机身。
? 有雨水或水溅到该设备。
? 依照说明书进行操作,而设备仍然无法正常运作。
? 产品不小心掉落到地面或外壳有损伤。
平板电脑说明书

注意:当同时充电和使用时,充电时间相对比较长
使用记忆卡
插入记忆卡:用手指把卡插入,知道听到“卡擦”一声
浏览记忆卡文档
运行浏览分档程序,显示在主目录下所有文档,选择SD卡文档既可
移动存储
关闭所有应用和打开的程序,轻轻按下卡片,即可部分移除,,抽出卡,即显示:SD卡已经移动
点击“”改变图片排序
点击“”删除和属性
点击“”设置播放模式: 普通,浪漫,活动,安静。。。等模式
过滤文件夹
点击菜单,出现如下图
点击过滤文件夹然后你可以过滤所有文件夹,如下图
选择“删除全部”
不选则不会被删
如果没选择文件夹,只选择删除全部,文件不会被删
如果只选择某个文件夹+删除 删除该文件夹
图片支持格式:JPEG,BMP,PNG
注意:1插入卡在合适的位置,否则将会损坏卡
2一旦卡被锁,则不能格式化
3不要再短时间内频繁插入抽出卡
4建议使用主要知名记忆卡品牌,以免不兼容
2.3移动和插入记忆卡U盘
在使用文档时,请不要直接插入或者移除记忆卡,否则可能会引起数据丢失或者损坏记忆卡
2.4存储空间
装置有3个存储空间:机子内置自带装置存储,U盘,记忆卡,自带存储又叫本地磁盘,记忆卡为SD卡, 本地盘为1 G ,外置存储(U盘 和记忆卡,最大可以支持32G)
例如点击:featured进入下个界面
点击你想下载的应用,点击下载则会出现输入密码,开始下载后请输入密码,下图就是中国象棋
下载完毕,则会自动出现安装条款,点击安装应用!
安装完毕你可以点击历史记录管理已经安装的应用如下图
第11页
你可以对应用进行的操作:评价,打开,卸载
戴尔电脑说明书.pdf_1700484175.3604815
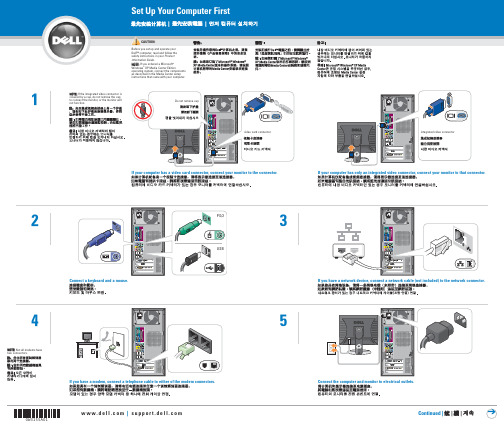
• To access the Dell™ Dimension™ Help file, click User and system guides, click User's guides, and then click Dell Dimension Help.
Reproduction in any manner whatsoever without the written permission of Dell Inc. is strictly forbidden.
Dell, the DELL logo, and Dimension are trademarks of Dell Inc.; Microsoft and Windows are registered trademarks of Microsoft Corporation. Dell disclaims proprietary interest in the marks and names of others.
April 2004
Connect other devices according to their documentation.
optional floppy drive
front/back USB 2.0 connectors
headphone connector
NOTE: If the integrated video connector is covered by a cap, do not remove the cap to connect the monitor, or the monitor will not function.
Acer lconia双屏笔记本电脑

Acer lconia双屏笔记本电脑
佚名
【期刊名称】《数字家庭》
【年(卷),期】2011(000)003
【摘要】Acer iconia双屏笔记本电脑拥有铝合金金属外壳设计。
整机外观设计透露出浓厚的科技气息与典雅气质。
在硬件配置方面.iconia采用了英特尔酷睿
i5—480M处理器,支持英特尔睿频加速技术,能够格局当前任务状况智能将频率提升至2.93GHz。
轻松满足日常办公及娱乐应用的需求。
4GB DDR3内存、640GB硬盘、USB3.0接口及杜比第三代家庭影院系统的配备。
都使Acer iconia 双屏笔记本电脑的实用性大增,足以令它成为数字生活中不可或缺的装备。
【总页数】1页(P172-172)
【正文语种】中文
【中图分类】TP368.32
【相关文献】
1.双屏记 Acer双屏笔记本电脑ICONIA首测 [J],
2.如何使用Acer lconia Tab A500的GPS功能 [J],
3.双屏记Acer双屏笔记本电脑ICONIA首测 [J],
4.acer lconia One 7 [J], 无
5.惊艳双屏·BenQ发布双屏笔记本电脑Q41 [J],
因版权原因,仅展示原文概要,查看原文内容请购买。
- 1、下载文档前请自行甄别文档内容的完整性,平台不提供额外的编辑、内容补充、找答案等附加服务。
- 2、"仅部分预览"的文档,不可在线预览部分如存在完整性等问题,可反馈申请退款(可完整预览的文档不适用该条件!)。
- 3、如文档侵犯您的权益,请联系客服反馈,我们会尽快为您处理(人工客服工作时间:9:00-18:30)。
3
目录
熟悉您的平板电脑
4 撰写电子邮件 ................................................... 24
功能和特点......................................................... 4 设置电子邮件应用程序 ..................................... 25
搜索
要在 Internet 上搜索应用程序、文件或信息,点按左上角的 Google 图标。 只需 输 入 您 要 搜 索 的 文 字 即 可。点 按 箭 头 或 Enter 键可搜索 Internet,或点按列表中显示的建议、应用程序或文件。
语音搜索
如果有语音搜索功能,点按麦克风图标然后讲出您的搜索要求。请参见第 24 页的 “ 语音搜索 ”。
2
© 2012. 保留所有权利。 Acer Iconia 用户指南 型号:B1-A71 本次修订:12/2012
Acer Iconia 型号:...................................................................... 序列号 *:................................................................... 购机日期:.................................................................. 购机地点:..................................................................
装配电源适配器
将插头配件滑入电源适配器主体,直至卡入到位。
连接电源
将电源接口孔连接到平板电脑,然后将交流适配器端插入交流插座。
注:充电时或长时间使用后平板电脑表面会发热,这是正常现象。 警告:仅适用随附的电源适配器给设备充电。
10
首次开机
首次开机
要开启平板电脑,按住电源按钮直至您看到 Acer 标志。稍等平板电脑启动。系 统将在您使用平板电脑之前询问您几个问题。 要启动,选择您的语言,然后点按开始。然后按照屏幕提示进行操作。
将设备连接到平板电脑
21
连接到交流电源 ............................................... 21
插入 microSD 卡 (可选)................................ 21
将文件在您的平板电脑和电脑之间相互传输 .... 21
连接蓝牙设备 ................................................... 22
注:如果平板电脑屏幕关闭,其进入了睡眠模式。短按电源按钮将其唤醒。 有关详细信息,请参见第 19 页的 “ 唤醒平板电脑 ”。
登录或创建 Google 帐户
如果连接了 Internet,平板电脑就可与 Google 帐户的信息同步。 在启动过程中,您可以创建或登录帐户,用该帐户进行联系人列表、电子邮件、 日历和其他信息的同步。如果尚未连接 Internet,或不想使用此功能,可点按跳 过。
熟悉您的平板电脑.............................................. 6 管理人员和联系人
30
使用平板电脑
9
为平板电脑充电 ................................................. 9
首次开机 .......................................................... 10
拍摄视频........................................................... 36
编辑文字 .......................................................... 18 高级设置
38
关闭平板电脑 ................................................... 20 无线和网络 ....................................................... 38
使用相机和摄像机
33
相机图标和指示器 ............................................ 33
拍摄照片........................................................... 34
摄像机图标和指示器......................................... 35
12
主屏幕
导航
要在菜单和选项中导航,屏幕左下角有三个 (或更多)图标。
返回
返回
主页
最近访问的 项目
点按此图标可返回上一个页面,或进入上一
级菜单。该图标在某些情况下会变为隐藏图标 (例如 , 当键盘或当前
应用程序列表显示时)。
隐藏
主页
点按此图标可直接进入主屏幕。
最近访问的项目
点按此图标可查看最近打开过的应用程序。点按应用程序可打开它,或点按屏幕 的任意位置可返回主屏幕。
俯视图
说明 长按可开启平板电脑,短按可开启 / 关闭或进入睡 眠模式;按住可关闭平板电脑。 提高和降低平板电脑音量。
1
序号 项目 1 3.5 mm 耳机插孔说明 连接立体声耳机。8仰视图1
2
熟悉您的平板电脑
序号 项目 1 microSD 卡插槽
2 微型 USB 端口 (从属)
说明
将 microSD 卡插入此插槽。请参见第 21 页的 “ 插 入 microSD 卡 (可选) ”。
重要提示:您必须登录 Google 帐户才能使用 Gmail、 Google Talk、 Google Calendar 和其它 Google 应用程序;从 Google Play 下载应用程 序;备份 Google 服务器的设置;利用平板电脑上的其它 Google 服务。 如果要从其它运行 Android 2.0 或更新版本的设备中恢复已有设置,必须 在安装时登录 Google 帐户。如果等待至安装完成,设置将不会恢复。 注:如果您有多个 Google 帐户 (如个人和业务分开的帐户),可从帐户 摂设置部分进行访问和同步这些帐户。请参见第 40 页的 “ 多个 Google 帐 户 ”。
使用触摸屏....................................................... 10
主屏幕.............................................................. 11
屏幕键盘 .......................................................... 17
11
使用触摸屏
您的平板电脑通过触摸屏来选择项目和输入信息。使用手指点按屏幕。 点按:触摸屏幕一次可打开项目和选择选项。 拖动:在屏幕上按住并拖动手指可选择文本和图像。 按住:按住一个项目可查看对应的可用操作列表。在显示的弹出菜单中,可以点 按要执行的操作。 滚动:要在屏幕上下滚动,只需将手指在屏幕上朝要滚动的方向上下拖动即可。
如何注册
要注册您的 Acer 产品,请访问 。单击注册,再按照简单提示进 行操作。 您也可以点按注册图标,直接从平板电脑上进行注册。 收到您的产品注册后,会向您发送确认电子邮件,其中包含重要数据,请妥善保 存。
5
设置
打开平板电脑包装
您的新平板电脑包装在一个保护盒中。小心地打开包装盒,取出其中的物品。若 下列物品中有任何缺失或损坏,请立即与经销商联系: • Acer Iconia B1-A71 • 安装彩图 • USB 线 • 交流适配器 • 质保卡
扩展主屏幕
主屏幕可向屏幕的任意一侧延伸,使您有更多空间可用来添加小工具或组织快 捷方式。要查看扩展的主屏幕,向左或向右滑动手指。
用 USB 线连接到电脑。还可用作交流适配器的充 电端口。有关详细信息,请参见第 9 页的 “ 为平板 电脑充电 ”。
后视图
序号 项目 1 扬声器
1
说明 发出音频。
9
使用平板电脑
为平板电脑充电
首次使用时,需要为平板电脑充电 4 个小时。之后,您可按需要再对电池进行充 电。
注:充电器图示仅供参考。实际配置可能有所不同。
熟悉您的平板电脑
功能和特点
您的新平板电脑提供先进且方便使用的多媒体和娱乐功能。您可以: • 连接到 Internet。 • 在旅途中查看电子邮件。 • 通过 “ 人员 ” 和社交网络应用程序与好友保持联系。
产品注册
建议您在首次使用本产品时就进行注册。这可给您带来有用的好处,例如: • 享受训练有素的专业人士提供的高效服务。 • Acer 社区中的成员资格:获得促销信息,并参加客户调查。 • 来自 Acer 的最新消息。 马上注册,更多精彩等着您!
设备.................................................................. 39 个人.................................................................. 40 系统.................................................................. 41 更新平板电脑的操作系统 ................................. 41 重置平板电脑 ................................................... 41
