oracle setup11-17
Oracle客户端安装步骤

Oracle客户端安装详细步骤,分为安装和配置两大块。
一安装1.进入client文件夹,如:“图1”所示。
(图1)2.鼠标双击,运行setup.exe文件。
如:“图2”所示。
(图2)3.耐心等一会,当出现下面界面是,如果你以前没装过Oracle,请单击下一步。
如:“图3”所示。
(图3)4.安装类型,选择管理员,请单击下一步。
如:“图4”所示。
(图4)5.指定你的Oracle想要装的地方,然后请单击下一步如:“图5”所示。
(图5)6. 请您注意了!!!请查看“检查”中的“状态”项,确保“状态”全部是成功。
然后,请单击下一步。
如:“图6”所示。
(图6)7.单击“安装”。
如:“图7”所示。
(图7)8.这是正在安装的时的画面。
如:“图8”所示。
(图8)9.安装完成后将出现下面的画面。
如:“图9”所示。
10.选择“执行典型配置”。
请单击“下一步”。
一直到“完成”。
如:“图10”,“图11”所示。
(图10)(图11)11.安装已经成功,请单击“退出”,并选择“是”。
如:“图12”,“图13”所示。
(图12)(图13)二配置1.如果不配置tasnames.ora文件,将会报错,如“图14”。
(图14)2.复制tasnames.ora文件。
如“图15”所示。
(图15)3.打开安装好的客户端的文件夹,如“图16”所示。
(图16)4.将第2步中复制的文件,粘贴到第3步所打开的文件夹。
如(图17)所示。
(图17)5. 在路径“C:\WINDOWS\system32\drivers\etc”中,打开用记事本打开HOSTS文件,如:“图18”,“图19”所示。
(图18)6.如果在打开的“HOSTS”中,没有下图中的蓝色部分,请你自己添加,后保存。
如:“图20”所示。
(图20)。
oracleruninstaller参数
oracleruninstaller参数Oracle RunInstaller 是一个用于安装Oracle数据库软件的命令行实用程序。
它提供了一组参数,可以在安装过程中指定不同的选项和配置信息。
以下是一些常用的Oracle RunInstaller 参数:1. -silent:以静默方式运行安装程序,不显示图形用户界面。
此参数适用于无人参与的批量安装。
2. -responseFile:指定包含安装选项的响应文件的路径。
安装程序将从该文件中读取选项,并根据其内容执行安装过程。
3. -ignorePrereq:忽略先决条件检查。
此参数用于强制安装程序在检查系统配置之前继续安装。
4. -force:强制覆盖现有的Oracle软件安装。
使用此参数时,请谨慎操作,因为它将删除现有的Oracle软件并重新安装新版本。
6. -invPtrLoc:指定 oraInst.loc 文件路径。
oraInst.loc 文件指向安装程序使用的 Inventory 目录。
使用此参数时,您可以指定一个自定义的 oraInst.loc 文件。
7. -attachHome:将此参数与已安装的 Oracle home 目录路径一起使用,以将新组件连接到该 Oracle home。
此参数将安装程序视为增量安装,并将新组件添加到现有的 Oracle home。
8. -deinstall:从系统中卸载 Oracle 软件。
此参数用于卸载旧版本的Oracle软件。
9. -clone:使用此参数来克隆现有的 Oracle home。
克隆是指创建一个与原始 Oracle home 相同的副本,可以在不同的机器上使用。
10. -waitForLockTimeout:指定等待锁的超时时间(以秒为单位)。
默认情况下,安装程序将等待锁的时间为7200秒。
11. -instype:指定安装程序安装的 Oracle 软件类型。
例如,typical 表示典型安装,advanced 表示高级安装。
Oracle-通用补丁安装操作手册
Oracle 通用补丁安装操作手册1.概述近几年,随着我们用户ORACLE数据库的应用越来越深入,环境越来越复杂,一些ORACLE常见的BUG也会偶尔的被触发.因此,我们对技术人员要求不能再像以前一样只要求会安装数据库,还应该要求其掌握在遇到数据库BUG的时候,能够熟练的找到并安装对应的修复补丁才行。
因此该文档用于指导技术人员,能够查看和检查数据库环境的补丁安装情况,并对提供的ORACLE补丁文件进行安装操作。
2. ORACLE补丁体系ORACLE数据库同其他企业软件一样,正式版的发布和运维都要经过一个漫长的周期,当正式版发布后,在其生命周期内会oracle公司会在官网上定期发布更新补丁程序,根据发布周期和集合程度不同,它们分别是维护版本(Version)、补丁集(Patch Set)、关键补丁更新(Critical Patch Update)、补丁集更新(Patch SetUpdate)和小补丁(One—off patch)几类,下面简单的介绍下它们的区别.Ø Version/维护版本针对前一个维护版本的所有补丁进行整理,增加新的功能或对软件有较大的改动,进行整体测试,得到一个软件版本”包”,称为版本Version.比如 11.2Ø Patch Set/补丁集在两次产品版本之间发布的一组经过全面测试的累计整体修复程序(一般每年发布一两次),如11.2。
0。
211.2。
0.3。
Ø Critical Patch Update(CPU)/关键补丁更新指每季度提供一次的一组高优先级修复程序(往往针对安全性问题)。
对于以前的安全性修复程序而言,这些CPU是累积的,只需要安装最近最后一个就可以,它就包含了之前的所有CPU补丁,但也可包含其他修复程序,目的是解决与非安全性补丁之间的补丁冲突问题(即降低合并请求的必要性).目前已经更名为Security Patch Update (SPU)。
Oracle ATG 一手指南版本 11.0说明书
Version 11.0Repository Guide Oracle ATGOne Main StreetCambridge, MA 02142USARepository GuideProduct version: 11.0Release date: 01-10-14Document identifier: AtgRepositoryGuide1402071827Copyright © 1997, 2014 Oracle and/or its affiliates. All rights reserved.Oracle and Java are registered trademarks of Oracle and/or its affiliates. Other names may be trademarks of their respective owners.This software and related documentation are provided under a license agreement containing restrictions on use and disclosure and are protected by intellectual property laws. Except as expressly permitted in your license agreement or allowed by law, you may not use, copy, reproduce, translate, broadcast, modify, license, transmit, distribute, exhibit, perform, publish, or display any part, in any form, or by any means. Reverse engineering, disassembly, or decompilation of this software, unless required by law for interoperability, is prohibited.The information contained herein is subject to change without notice and is not warranted to be error-free. If you find any errors, please report them to us in writing.If this is software or related documentation that is delivered to the U.S. Government or anyone licensing it on behalf of the U.S. Government, the following notice is applicable:U.S. GOVERNMENT END USERS: Oracle programs, including any operating system, integrated software, any programs installed on the hardware, and/or documentation, delivered to U.S. Government end users are "commercial computer software" pursuant to the applicable Federal Acquisition Regulation and agency-specific supplemental regulations. As such, use, duplication, disclosure, modification, and adaptation of the programs, including any operating system, integrated software, any programs installed on the hardware, and/or documentation, shall be subject to license terms and license restrictions applicable to the programs. No other rights are granted to the U.S. Government.This software or hardware is developed for general use in a variety of information management applications. It is not developed or intended for use in any inherently dangerous applications, including applications that may create a risk of personal injury. If you use this software or hardware in dangerous applications, then you shall be responsible to take all appropriate fail-safe, backup, redundancy, and other measures to ensure its safe use. Oracle Corporation and its affiliates disclaim any liability for any damages caused by use of this software or hardware in dangerous applications.Oracle and Java are registered trademarks of Oracle and/or its affiliates. Other names may be trademarks of their respective owners.Intel and Intel Xeon are trademarks or registered trademarks of Intel Corporation. All SPARC trademarks are used under license and are trademarks or registered trademarks of SPARC International, Inc. AMD, Opteron, the AMD logo, and the AMD Opteron logo are trademarks or registered trademarks of Advanced Micro Devices. UNIX is a registered trademark of The Open Group.This software or hardware and documentation may provide access to or information on content, products, and services from third parties. Oracle Corporation and its affiliates are not responsible for and expressly disclaim all warranties of any kind with respect to third-party content, products, and services. Oracle Corporation and its affiliates will not be responsible for any loss, costs, or damages incurred due to your access to or use of third-party content, products, or services.For information about Oracle's commitment to accessibility, visit the Oracle Accessibility Program website at /pls/ topic/lookup?ctx=acc&id=docacc.Access to Oracle Support: Oracle customers have access to electronic support through My Oracle Support. For information, visit http:// /pls/topic/lookup?ctx=acc&id=info or visit /pls/topic/lookup?ctx=acc&id=trs if you are hearing impaired.Table of Contents1. Introduction (1)2. Repository API (3)Repository Architecture (4)Repository Items (4)Item Descriptors (5)MutableRepository (6)Core Repository API Elements (6)atg.repository.Repository (7)atg.repository.RepositoryView (7)atg.repository.RepositoryItem (8)atg.repository.MutableRepository (8)atg.repository.PropertiesChangedEvent (10)Cloning Repository Items (11)3. Repository Queries (13)Repository Query API (13)atg.repository.QueryBuilder (13)atg.repository.QueryOptions (14)Repository Query Examples (15)Repository Queries in the ATG Control Center (17)Repository Query Language (18)RQL Overview (18)Comparison Queries (19)Text Comparison Queries (19)Date and Timestamp Queries (20)Property of Property Queries (20)Logical Operators (20)Multi-Valued Property Queries (20)INCLUDES ITEM (21)IS NULL (21)COUNT (21)ALL (22)PROPERTY HINT (22)Full Text Search Queries (22)ID-based Queries (22)ORDER BY (23)RANGE (23)Parameters in Queries (24)Parameterized Field Queries (24)RQL Examples (25)RQL Grammar (25)4. SQL Repository Overview (27)5. SQL Repository Architecture (29)Repositories and Transactions (29)Managing Transactions (30)Repository Definition Files (31)Default Values and XML File Combination (32)SQL Repository Items (32)SQL Repository Item Descriptors (33)6. SQL Repository Data Models (35)Primary and Auxiliary Tables (35)id Property (35)Repository Guide iiiCompound Repository IDs (36)IdSpaces and the id Property (37)Database Sequences and Repository IDs (38)Auxiliary Tables (38)References Constraints (39)Properties and Database Columns (39)One-to-Many Relationships: Multi-Valued Properties (40)Operating on Multi-Valued Properties (42)Many-to-Many Relationships (42)Default Item Descriptor (43)Cascading Data Relationships (43)Cascade Insert (43)Cascade Update (44)Cascade Delete (44)Cascade Example (45)Item Descriptor Inheritance (46)Benefits of Item Descriptor Inheritance (47)Queries and Item Descriptor Inheritance (49)Item Descriptor Inheritance with the copy-from Attribute (49)Limitations of SQL Repository Inheritance (49)Derived Properties (50)Derivation Syntax (50)Override Properties (52)Properties Derived from the Same Item (52)Complex Derivations (52)Derivation Methods (53)Repository Items and Session Backup (56)7. SQL Repository Item Properties (59)Enumerated Properties (59)enumerated (60)enumerated String (61)Required Properties (62)Unique Properties (63)Date and Timestamp Properties (63)Last-Modified Properties (63)Null Properties (64)Grouping and Sorting Properties (64)Property Validation with a Property Editor Class (65)Maintaining Item Concurrency with the Version Property (66)Repository Items as Properties (67)Multiple Item Properties (68)Adding an Item to a Multi-Item Property (69)Querying Subproperties (70)Transient Properties (70)Assigning FeatureDescriptorValues with the <attribute> Tag (70)Attributes Used in the ACC (71)Linking between Repositories (72)SQL Types and Repository Data Types (72)User-Defined Property Types (73)Identifying a User-Defined Property Type (74)Using the property-type Attribute (74)Implementing a User-Defined Property Type (74)Property Conversion Methods (76)iv Repository GuideNull Values in User-Defined Property Types (76)User-Defined Properties and the ACC (76)User-Defined Property Type Examples (77)Property Fetching (79)Handling Large Database Columns (80)8. SQL Repository Queries (81)Repository Filtering (81)<rql-filter> (82)filterQuery and rqlFilterString Properties (83)Overriding RQL-Generated SQL (83)Parameterized Queries (84)Parameterized Query API (84)Query Types that Support Parameters (85)QueryCache and Parameterized Queries (85)Parameterized Query Example (85)Named Queries (87)Named Queries in an SQL Repository Definition File (87)Java Code Access to Named Queries (90)Text Search Queries (92)Simulating Text Search Queries (94)Wildcards in Queries (94)Not Queries and Null Values (95)Outer Joins (95)Table Ownership Issues (96)Constraints (97)Setting Ownership at the Repository Level (97)Unsupported Queries in the SQL Repository (97)9. Localizing SQL Repository Definitions (99)Defining a Resource Bundle (99)Localizing Properties (100)Localizing Enumerated Properties (100)10. SQL Repository Caching (103)Item and Query Caches (103)Item Caches (104)Query Caches (104)Caching Modes (104)Setting Caching Mode (105)Disabling Caching (105)Inherited Caching Modes (106)Simple Caching (106)Locked Caching (106)Prerequisites (106)ClientLockManager Component (107)ServerLockManager Component (107)Processing Lock Requests (109)Isolation Levels (110)Locking Exceptions (111)Resolving Lock Contention (111)Monitoring Lock Managers (112)Locking Scenarios and Workflows (113)Distributed Caching Modes (114)Simple versus Distributed Caching (114)Distributed Caching Mode Options (114)Repository Guide vDistributed TCP Caching (115)Distributed TCP Caching Setup (116)Restoring Subscriber Data (117)Invalidating Cached Items (117)Disabling Automatic Updates to das_gsa_subscriber (117)Distributed JMS Caching (118)Distributed JMS Caching Setup (118)Distributed Hybrid Caching (119)Distributed Hybrid Caching Setup (120)Distributed Hybrid Caching Initialization (123)Optimizing Performance (123)Monitoring Cache Manager Activity (124)Distributed External Caching (124)Cache Configuration (124)Query Cache Tuning (126)Item Cache Tuning: ATG Commerce (126)Cache Timeout (126)Monitoring Cache Usage (127)Weak Cache Hashtable (128)Caching by Repository IDs (129)Restoring Item Caches (129)Preloading Caches (130)Enabling Lazy Loading (131)Lazy Loading Settings (132)Integration with Batch Loading (133)Using Preloading Hints in Lazy-Loaded Queries (133)Cache Flushing (134)Flushing All Repository Caches (134)Flushing Item Caches (135)Flushing Query Caches (136)Cache Invalidation Service (136)Enabling the Cache Invalidator (136)Invoke the Cache Invalidator Manually (136)Use the Cache Invalidator with Distributed JMS Caching (137)11. External SQL Repository Caching (139)Choosing Repository Items for External Caching (139)Configuring Repository Items for External Caching (139)Cache Locality (140)Cache Modes for External Caching (141)External Caching and Cache Invalidation (142)External Caching and Cache Warming (142)External Cache Naming (143)External Caching Statistics (144)Batch Mode for External Caching (145)Enabling Batch Mode for External Caching (145)Repository Configuration for Batch Mode (146)12. Developing and Testing an SQL Repository (147)Adding Items (147)Adding Items with Composite IDs (148)Adding Items without Specifying IDs (148)Adding Items to Multi-Item Properties (149)Updating Items (149)Removing Items (150)vi Repository GuideRemoving References to Items (150)Querying Items (151)Importing and Exporting Items and DDLs (151)startSQLRepository (151)Requirements (152)Syntax (152)Exporting Repository Data (155)Importing Repository Data (155)Importing to a Versioned Repository (156)SQL Repository Test Example (157)Using Operation Tags in the Repository Administration Interface (158)Debug Levels (159)Modifying a Repository Definition (159)13. SQL Repository Reference (161)SQL Repository Definition Tag Reference (161)<!DOCTYTPE> (162)<gsa-template> (162)<header> (162)<item-descriptor> (163)<property> (168)<derivation> (173)<option> (173)<attribute> (174)<table> (175)<expression> (176)<rql-filter> (176)<named-query> (177)<rql-query> (177)<rql> (177)<param> (177)<sql-query> (177)<sql> (177)<input-parameter-types> (178)<returns> (178)<dependencies> (178)<transaction> (178)<rollback-transaction> (179)<add-item> (179)<update-item> (180)<remove-item> (180)<remove-all-items> (181)<query-items> (181)<print-item> (182)<set-property> (183)<import-items> (183)<export-items> (184)<load-items> (184)<dump-caches> (185)<print-ddl> (186)DTD for SQL Repository Definition Files (186)Sample SQL Repository Definition Files (192)Simple One-to-One (193)One-to-One with Auxiliary Table (194)Repository Guide viiOne-to-Many with an Array (195)One-to-Many with a Set (196)One-to-Many with a Map (197)One-to-Many Mapping to Other Repository Items (198)Ordered One-to-Many (199)Many-to-Many (200)Multi-Column Repository IDs (201)Configuring the SQL Repository Component (203)Registering a Content Repository (203)SQL Repository Component Properties (204)14. SQL Content Repositories (213)Setting Up an SQL Content Repository (213)Creating an SQL Content Repository Definition (214)Folder and Content Item Descriptors (214)Path and Item ID Attributes (215)Defining Content Item Descriptors (217)Content Attributes and Properties (217)Storing Content on a File System (218)Content Repository Example (218)Book Item Type Properties (219)Locating the Content with Path and Folder Properties (219)Book Example Repository Definition File (220)Book Example SQL Table Creation Statements (220)Adding Content to the Content Repository (221)Accessing Items in the Content Repository (221)Configuring an SQL Content Repository (222)15. Repository Loader (223)Repository Loader Architecture (223)Repository Loader Components (224)FileSystemMonitorScheduler (225)FileSystemMonitorService (225)LoaderManager (227)TypeMapper and TypeMappings (229)ContentHandlers (232)Repository Loader Administration (233)RLClient (234)Supplemental RLClient Parameters (234)Repository Loader Manifest (235)Manifest File Tags and Attributes (236)Importing Versioned Repository Data (236)Configuring the VersionedLoaderEventListener (237)Importing Targeters that Reference rules Files (240)Configuring TypeMapping Components for the PublishingFileRepository (241)Repository Loader Example (241)User Item Type (242)Item Pathnames (243)Type Mappings and Content Handlers (244)TypeMapper (244)xml2repository Schemas (245)Running the Repository Loader Example (245)16. Purging Repository Items (247)Selecting Repository Items (248)Related Conditions and Actions (249)viii Repository GuidePurge Statistics (249)Scheduling a Purge Operation (251)Stopping a Purge Operation (252)Asset Purge Error Handling (252)Throttling and Performance (252)Configuring Throttle Settings for an Asset Purge Function (252)Configuring the Thread Count for an Asset Purge Function (253)Using the Profile Asset Purge Function (253)Creating and Configuring an Asset Purge Function (254)Asset Purge Process Overview (255)Configuring Asset Condition Components (256)Configuring Related Condition Components (257)Configuring Related Action Components (260)Configuring Basic Purging Components (264)Configuring Additional Processing Components (267)Configuring the Asset Purge Pipeline (267)Configuring the Asset Purge User Interface (270)17. Repository Web Services (271)GetRepositoryItem Web Service (271)PerformRQLQuery Web Service (274)PerformRQLCountQuery Web Service (275)Repository Web Service Security (277)18. Composite Repositories (279)Use Example (279)Primary and Contributing Item Descriptors (279)Item Inheritance and Composite Repositories (280)Transient Properties and Composite Repositories (280)Non-Serializable Items and Composite Repositories (280)Property Derivation (281)Configuring a Composite Repository (281)Property Mappings (281)Excluding Properties (282)Link Methods (282)Creating Composite and Contributing Items (283)Missing Contributing Items (283)Configuring the Composite Repository Component (284)Composite Repository Queries (284)Composite Repository Caching (285)Composite Repository Definition Tag Reference (285)<composite-repository-template> (285)<header> (composite repository) (285)<item-descriptor> composite repository (286)<primary-item-descriptor> (287)<contributing-item-descriptor> (288)<attribute> composite repository (288)<property> composite repository (289)<primary-item-descriptor-link> (290)<link-via-id> (291)<link-via-property> (292)DTD for Composite Repository Definition Files (292)Sample Composite Repository Definition File (294)19. Secured Repositories (299)Features and Architecture (299)Repository Guide ixCreating a Secured Repository (301)Modify the Underlying Repository (301)Configure the Secured Repository Adapter Component (302)Register the Secured Repository Adapter Component (303)Create the Secured Repository Definition File (304)Secured Repository Example (305)Modify the SQL for the Repository Data Store (305)Modify the XML definition file (306)Define the Secured Repository Adapter’s Definition File (307)Configure a Secured Repository Adapter Component (308)Register the Repositories (309)ACL Syntax (309)Standard Access Rights (310)ACL Examples (310)Secured Repository Definition File Tag Reference (311)<secured-repository-template> (311)<item-descriptor> secured repository (311)<property> secured repository (312)<default-acl> (312)<descriptor-acl> (312)<owner-property> (313)<acl-property> (313)<creation-base-acl> (313)<creation-owner-acl-template> (314)<creation-group-acl-template> (314)DTD for Secured Repository Definition File (315)Performance Considerations (317)Exceptions Thrown by the Secured Repository (318)20. LDAP Repositories (319)Overview: Setting Up an LDAP Repository (320)LDAP Directory Primer (320)Hierarchical Tree Structure (321)LDAP Data Representation (321)Hierarchical Entry Types (322)Directory Schema (322)LDAP and JNDI (324)LDAP Sources (324)LDAP Repository Architecture (324)LDAP Repository Items and Repository IDs (325)Item Descriptors and LDAP Object Classes (325)Item Descriptor Hierarchies and Inheritance (327)Id and ObjectClasses Properties (328)Additional Property Tag Attributes (329)New Item Creation (330)Repository Views in the LDAP Repository (331)Repository View Definition (331)LDAP Repository View Example (332)LDAP Repository Queries (333)ID Matching Queries (333)Unsupported Queries in the LDAP Repository (334)Configuring LDAP Repository Components (334)/atg/adapter/ldap/LDAPRepository (335)/atg/adapter/ldap/InitialContextPool (336)x Repository Guide/atg/adapter/ldap/InitialContextEnvironment (337)/atg/adapter/ldap/LDAPItemCache (339)/atg/adapter/ldap/LDAPItemCacheAdapter (339)/atg/adapter/ldap/LDAPQueryCache (339)/atg/adapter/ldap/LDAPQueryCacheAdapter (340)LDAP Password Encryption (340)LDAP Repository Definition Tag Reference (341)<!DOCTYPE>LDAP repository (341)<ldap-adapter-template> (342)<header>LDAP repository (342)<view> (342)<item-descriptor>LDAP repository (342)<id-property> (343)<object-classes-property> (344)<object-class> (345)<property>LDAP repository (345)<option>LDAP repository (347)<attribute>LDAP repository (347)<child-property> (348)<new-items> (349)<search-root> (350)Sample LDAP Repository Definition File (351)DTD for LDAP Repository Definition Files (352)Index (355)Repository Guide xixii Repository Guide1 Introduction 11IntroductionData access is a large part of most Internet applications. Oracle ATG Web Commerce Data Anywhere Architecture™ provides a unified view of content and data across a business for organizations and their customers. The core of the Oracle ATG Web Commerce Data Anywhere Architecture is the Repository API.Through the Repository API, you can employ a single approach to accessing disparate data types, including SQL databases, LDAP directories, content management systems, and file systems.With the Oracle ATG Web Commerce Data Anywhere, the application logic created by developers uses the same approach to interact with data regardless of the source of that data. One of the most powerful aspects of this architecture is that the source of the data is hidden behind the Oracle ATG Web Commerce Repository abstraction. It is easy to change from a relational data source to an LDAP directory as none of the application logic needs to change. After data is retrieved from a data source, it is transformed into an object-oriented representation. Manipulation of the data can be done using simple getPropertyValue and setPropertyValue methods. The Repository API ties in closely with Oracle ATG Web Commerce’s targeting APIs, so you can retrieve items from the repository based on a variety of targeting rules, as well as retrieving specific identified items.The figure below provides a high-level overview of the Oracle ATG Web Commerce Data Anywhere Architecture.Oracle ATG Web Commerce Data Anywhere Architecture offers several advantages over the standard data access methods such as Java Data Objects (JDO), Enterprise JavaBeans (EJB), and Java Database Connectivity (JDBC).Among the differences:Data source independenceOracle ATG Web Commerce Data Anywhere Architecture provides access to relational database managementsystems, LDAP directories, and file systems using the same interfaces. This insulates application developersfrom schema changes and also storage mechanism. Data can even move from a relational database to an LDAPdirectory without requiring recoding. Java Data Objects support data source independence, but it is up tovendors to provide an LDAP implementation.Fewer lines of Java codeLess code leads to faster time-to-market and reduced maintenance cost. Persistent data types created withOracle ATG Web Commerce Data Anywhere are described in an XML file, with no Java code required.Unified view of all customer interactionsA unified view of customer data (gathered by web applications, call center applications, and ERP systems) can beprovided without copying data into a central data source. This unified view of customer data leads to a coherentand consistent customer experience.Maximum performanceIntelligent caching of data objects ensures excellent performance and timely, accurate results. The JDO and EJBstandards rely on a vendor implementation of caching that might not be available.Simplified transactional controlThe key to overall system performance is minimizing the impact of transactions while maintaining the integrityof your data. In addition to full Java Transaction API (JTA) support, Oracle ATG Web Commerce Data Anywherelets both page developers and software engineers control the scope of transactions with the same transactionalmodes—required, supports, never—used by EJB deployment engineers.Fine-grained access controlYou can control who has access to which data at the data type, data object, even down to the individualproperty with Access Control Lists (ACLs).Integration with ATG product suitesOracle ATG Web Commerce personalization, scenarios, commerce, portal, and content administrationapplications all make use of repositories for data access. A development team is free to use EJBs along sideof Oracle ATG Web Commerce technology, but the easiest way to leverage investment in Oracle ATG WebCommerce technology is to follow the example set by the solution sets. The Oracle ATG Web Commerce solutionsets satisfy all their data access needs with repositories.2 1 Introduction2Repository APIThe Oracle ATG Web Commerce Repository API (atg.repository.*) is the foundation of persistent objectstorage, user profiling, and content targeting in Oracle ATG Web Commerce products. A repository is a dataaccess layer that defines a generic representation of a data store. Application developers use this genericrepresentation to access data by using only interfaces such as Repository and RepositoryItem. Repositoriesaccess the underlying data storage device through a connector, which translates the request into whatever callsare needed to access that particular data store. Connectors for relational databases and LDAP directories areprovided out-of-the-box. Connectors use an open, published interface, so additional custom connectors can beadded if necessary.Developers use repositories to create, query, modify, and remove repository items. A repository item is likea JavaBean, but its properties are determined dynamically at runtime. From the developer’s perspective, theavailable properties in a particular repository item depend on the type of item they are working with. One itemmight represent the user profile (name, address, phone number), while another might represent the meta-dataassociated with a news article (author, keywords, synopsis).The purpose of the Repository interface system is to provide a unified perspective for data access. For example,developers can use targeting rules with the same syntax to find people or content.Applications that use only the Repository interfaces to access data can interface to any number of back-end datastores solely through configuration. Developers do not need to write a single interface or Java class to add a newpersistent data type to an applicationEach repository connects to a single data store, but multiple repositories can coexist within Oracle ATG WebCommerce products, where various applications and subsystems use different repositories or share the samerepository. Applications that use only the Repository API to access data can interface to any number of back-end data stores solely through configuration. For example, the security system can be directed to maintainits list of usernames and passwords in an SQL database by pointing the security system at an SQL repository.Later, the security system can be changed to use an LDAP directory by reconfiguring it to point to an LDAPrepository. Which repositories you use depends on the data access needs of your application, including thepossible requirement to access data in a legacy data store.The Oracle ATG Web Commerce platform includes the following models for repositories:•SQL repositories use Oracle ATG Web Commerce’s Generic SQL Adapter (GSA) connector to map betweenOracle ATG Web Commerce and the data in an SQL database. You can use an SQL repository to access content,user profiles, application security information, and more.•SQL profile repository, included in the Oracle ATG Web Commerce Personalization module, uses the GenericSQL Adapter connector to map user data that is contained in an SQL database. See the PersonalizationProgramming Guide.•LDAP Repositories (page 319) use the Oracle ATG Web Commerce LDAP connector to access user data in anLDAP directory. See the LDAP Repositories (page 319) chapter.•Composite Repositories (page 279) let you use multiple data stores as sources for a single repository.2 Repository API3。
Oracle Database Appliance 部署和用户指南说明书
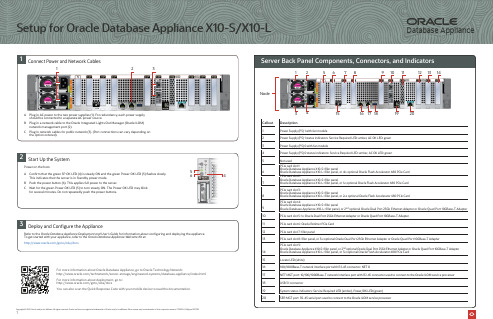
A Plug in AC power to the two power supplies (1). For redundancy, each power supply should be connected to a separate AC power source.B Plug in a network cable to the Oracle Integrated Lights Out Manager (Oracle ILOM) network management port (2).C Plug in network cables for public network (3). (Port connections can vary depending on the option ordered).1Server Back Panel Components, Connectors, and Indicators13Deploy and Con�gure the ApplianceRefer to the Oracle Database Appliance Deployment and User’s Guide for information about con�guring and deploying the appliance.To get started with your appliance, refer to the Oracle Database Appliance Welcome Kit at: h�p:///goto/oda/docsCopyright © 2023, Oracle and/or its a�liates. All rights reserved. Oracle and Java are registered trademarks of Oracle and/or its a�liates. Other names may be trademarks of their respective owners. F79893-01; Mfg no 82173292Start Up the SystemPower on the host.A Con�rm that the green SP OK LED (4) is steady ON and the green Power OK LED (5) �ashes slowly.This indicates that the server is in Standby power mode.B Push the power bu�on (6). This applies full power to the server.C Wait for the green Power OK LED (5) to turn steady ON. The Power OK LED may blink for several minutes. Do not repeatedly push the power bu�ons.1Power Supply (PS) 1 with fan module2Power Supply (PS) 1 status indicators: Service Required LED: amber, AC OK LED: green 3Power Supply (PS) 0 with fan module4Power Supply (PS) 0 status indicators: Service Required LED: amber, AC OK LED: green 5Not usedCallout Description11PCIe card slot 6: Oracle Retimer PCIe Card 12PCIe card slot 7: �ller panel13PCIe card slot 8: �ller panel, or 3rd optional Oracle Dual Port 25Gb Ethernet Adapter or Oracle Quad Port 10GBase-T Adapter14PCIe card slot 9:Oracle Database Appliance X10-S: �ller panel, or 2nd optional Oracle Dual Port 25Gb Ethernet Adapter or Oracle Quad Port 10GBase-T Adapter Oracle Database Appliance X10-L: �ller panel, or 3rd optional Oracle Flash Accelerator 680 PCIe Card PCIe card slot 4:Oracle Database Appliance X10-S: �ller panelOracle Database Appliance X10-L: �ller panel, or 2nd optional Oracle Dual Port 25Gb Ethernet Adapter or Oracle Quad Port 10GBase-T Adapter PCIe card slot 3:Oracle Database Appliance X10-S: �ller panelOracle Database Appliance X10-L: �ller panel, or 2nd optional Oracle Flash Accelerator 680 PCIe CardPCIe card slot 2:Oracle Database Appliance X10-S: �ller panelOracle Database Appliance X10-L: �ller panel, or 1st optional Oracle Flash Accelerator 680 PCIe Card PCIe card slot 1:Oracle Database Appliance X10-S: �ller panelOracle Database Appliance X10-L: �ller panel, or 4th optional Oracle Flash Accelerator 680 PCIe Card 18USB 3.1 connector19System status indicators: Service Required LED (amber), Power/OK LED (green)20SER MGT port: RJ-45 serial port used to connect to the Oracle ILOM service processor15Locate LED (white)16100/1000Base-T network interface port with RJ-45 connector: NET 0179NET MGT port: 10/100/1000Base-T network interface port with RJ-45 connector used to connect to the Oracle ILOM service processor 768For more information about Oracle Database Appliance, go to Oracle Technology Network:h�p:///technetwork/server-storage/engineered-systems/database-appliance/index.html For more information about deployment, go to: h�p:///goto/oda/docsYou can also scan the Quick Response Code with your mobile device to read the documentation.Database ApplianceSetup for Oracle Database Appliance X10-S/X10-L10PCIe card slot 5: 1st Oracle Dual Port 25Gb Ethernet Adapter or Oracle Quad Port 10GBase-T Adapter Connect Power and Network Cables5641323419151617181256789101113142012Node。
安装Oracle11g
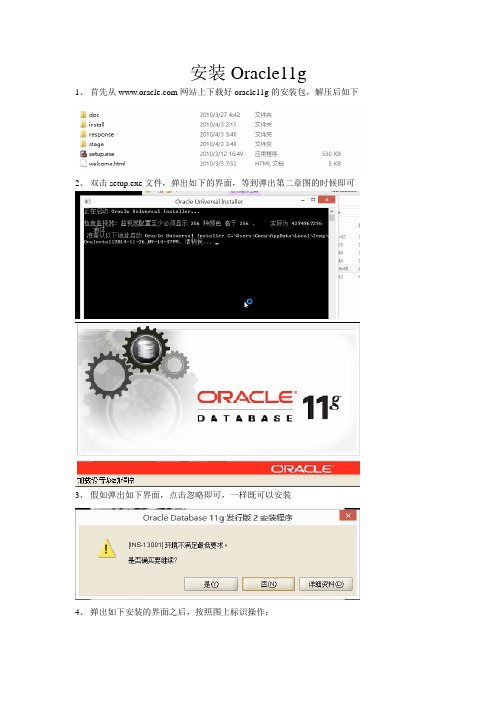
安装Oracle11g
1、首先从网站上下载好oracle11g的安装包,解压后如下
2、双击setup.exe文件,弹出如下的界面,等到弹出第二章图的时候即可
3、假如弹出如下界面,点击忽略即可,一样既可以安装
4、弹出如下安装的界面之后,按照图上标识操作;
弹出如下窗口之后,点击是
5、选择创建和配置数据库,点击下一步;
6、选择单实例数据库安装,点击下一步;
6、选择高级安装,点击下一步;
7、一般有默认的中文,点击下一步;
8、选择企业版,下一步;
9、修改路径后,点击下一步;
10、选择一般用途,点击下一步;
11、设置数据库名称,点击下一步;
12、此选项卡默认
13、单击字符集选项卡,选择UTF-8的编码;
14、选择实例方案选项卡,选择好创建具有实例方案的数据库,点击下一步;
15、此步骤默认,直接下一步;
16、此步骤,默认下一步;
17、此步骤,默认下一步;
18、选择使用相同口令,下一步;
19、弹出以下弹框,选择是;
20、选择完成,开始安装;
21、然后,在安装完成后,假如你需要修改刚刚你填写的口令的话,选择口令管理,将以下
五个用户修改下密码,并解锁;超级管理账户:sys
密码:change_on_install;
普通管理账户:system
密码:manager;
经典账户:scott
密码:tiger;
大数据账户:sh
密码:sh
以上为学习所用的用户和密码;OK 到此安装完成了;。
oracle中文使用手册
oracle中文使用手册Oracle是一款功能强大的关系型数据库管理系统,广泛应用于企业数据管理和应用开发领域。
本手册将详细介绍Oracle数据库的基本概念、常用命令和操作方法,以帮助初学者快速上手和熟练使用Oracle。
1. Oracle简介Oracle是美国Oracle公司开发的一种关系型数据库管理系统。
它是目前企业级应用系统首选的数据库产品之一,被广泛应用于各个行业的数据管理和应用开发中。
Oracle具有可靠性高、性能优异、安全性强等特点,成为大型企业数据处理的首选。
2. 安装与配置在开始使用Oracle之前,首先需要进行安装和配置。
可以从Oracle官方网站下载安装程序,根据提示进行安装。
安装完成后,需要进行一些基本的配置,如创建数据库实例、设置监听器等。
详细的安装和配置过程可以参考Oracle官方提供的文档或手册。
3. 数据库连接与登录使用Oracle数据库前,需要先进行数据库连接和登录。
可以使用SQL*Plus命令行工具或Oracle SQL Developer等图形化界面工具来进行连接和登录。
在连接时需要提供数据库的主机名、端口号和SID等信息,以及合法的用户名和密码。
连接成功后,即可开始对数据库进行操作。
4. SQL基本操作SQL是结构化查询语言,用于在关系型数据库中进行数据的增删改查等操作。
下面介绍一些常用的SQL命令:- 创建表: 使用CREATE TABLE语句可以创建数据表,并指定表的字段、数据类型、约束等信息。
- 插入数据: 使用INSERT INTO语句可以向表中插入数据。
- 更新数据: 使用UPDATE语句可以更新表中的数据。
- 删除数据: 使用DELETE FROM语句可以删除表中的数据。
- 查询数据: 使用SELECT语句可以查询表中的数据。
5. 数据库事务和锁机制数据库事务是指对数据库进行的一系列操作,要么全部执行成功,要么全部不执行。
Oracle提供了事务管理机制,可以确保数据库的一致性和完整性。
ORACLE 11g配置安装文档
Orcal 11g安装配置文档1.首先同时选择图片中选择的两个文件,解压到文件夹生成oracle文件夹
2.打开Oracle文件夹
3.打开database文件夹
4.选择Setup.Exe运行文件
5.运行出现此页面不要关闭,等待跳转
6.跳转完成出现下示图片
7.进入安装界面
8.电子邮箱不用填写,直接下一步,弹出下示错误直接点是
10.选择服务器类,否则下面没有高级安装选项
12.出现高级安装并选择,若没有则表示第10步未选择安装服务器类
13.查看所选语言是否有中文,如若没有找到之后添加上
14.选择安装企业版,点击下一步
15.设定Oracle基目录与软件位置,确认位置之后点击下一步注:不要选择C盘,C盘空间太小影响电脑正常工作运行
16.默认安装一般用途/事务处理
17.设置全局数据库名与Oracle服务标识符(SID),确认后点击进入下一步
18.注意选择字符集更改选项
19.选择使用Unicode(Al32UTF8),确认后点击进入下一步
20.选择使用Database Control管理数据库
21.默认为文件西永不用更改,路径可以自己设置
22.默认不启用自动备份
23.选择对所有账户使用相同的口令,输入口令(大小写字母加数字,最少8位)
24.等待检验
25.确认安装信息没有错误,点击进入下一步
26.检测环境
27.等待安装复制数据库文件
28.跳出此页面点击口令管理
29.取消SCOTT勾选项
30.确认SCOTT没有勾选,点击确定。
oracle instant client的安装和使用方法 -回复
oracle instant client的安装和使用方法-回复Oracle Instant Client是Oracle提供的一个轻量级Oracle数据库客户端,可以用于进行数据库连接和数据访问。
本文将一步一步介绍Oracle Instant Client的安装和使用方法。
第一步:下载Oracle Instant Client首先,我们需要从Oracle官方网站下载Oracle Instant Client的安装包。
您可以访问Oracle官方网站的下载页面,选择适合您操作系统平台的安装包进行下载。
Oracle Instant Client提供了各种不同的版本,包括Windows、Linux和Mac OS X等,确保您选择了正确的版本。
第二步:解压安装包下载完成后,您可以将安装包文件解压到您选择的目录中。
您可以使用系统自带的压缩工具或者第三方解压软件进行解压。
解压后,您将会看到一些文件和文件夹,包括一个SQL*Plus可执行文件和一些动态链接库文件。
第三步:设置环境变量在使用Oracle Instant Client之前,我们需要设置一些环境变量,以确保系统能够正确找到客户端库文件。
在Windows系统上,您可以右键单击“我的电脑”图标,选择“属性”,然后在弹出窗口中选择“高级系统设置”。
在系统属性窗口中,点击“环境变量”按钮,在系统变量列表中找到“Path”变量,并添加Oracle Instant Client安装目录的路径,以分号分隔不同的路径。
点击“确定”保存设置。
在Linux和Mac OS X系统上,您可以编辑.bash_profile或者.bashrc等文件,在其中添加以下行,将Oracle Instant Client安装目录的路径加入到系统的PATH变量中:export PATH=/path/to/instantclient:PATHexportLD_LIBRARY_PATH=/path/to/instantclient:LD_LIBRARY_PATH请注意,上述路径应该替换为您实际的Oracle Instant Client安装目录的路径。
Oracle11下载,安装,如何使用
1从Oracle官方网站下载本机操作系统对应版本的oracle安装文件。
本人安装的是支持WINDOWS 32位的oracle11的版本。
装的过程若报错,就需要把oracle删除干净再从新装。
彻底删除Oracle 方法如下。
打开注册表:regedit 打开路径:1.HKEY_LOCAL_MACHINE\SYSTEM\CurrentControlSet\Services\删除该路径下的所有以oracle开始的服务名称,这个键是标识Oracle在windows下注册的各种服务!2.打开注册表,找到路径:HKEY_LOCAL_MACHINE\SOFTWARE\ORACLE删除该oracle目录,该目录下注册着Oracle数据库的软件安装信息。
3.删除注册的oracle事件日志,打开注册表HKEY_LOCAL_MACHINE\SYSTEM\CurrentControlSet\Services\Eventlog\Ap plication删除注册表的以oracle开头的所有项目。
4.删除环境变量path中关于oracle的内容。
鼠标右键右单击“我的电脑-->属性-->高级-->环境变量-->PATH 变量。
删除Oracle在该值中的内容。
注意:path中记录着一堆操作系统的目录,在windows中各个目录之间使用分号(; )隔开的,删除时注意。
建议:删除PATH环境变量中关于Oracle的值时,将该值全部拷贝到文本编辑器中,找到对应的Oracle的值,删除后,再拷贝修改的串,粘贴到PATH环境变量中,这样相对而言比较安全。
5.重新启动操作系统。
6.重启操作系统后各种Oracle相关的进程都不会加载了。
这时删除Oracle_Home下的所有数据。
(Oracle_Home指Oracle程序的安装目录)7.删除C:\Program Files下oracle目录。
(该目录视Oracle安装所在路径而定)8.删除开始菜单下oracle项,如:C:\Documents and Settings\All Users\「开始」菜单\程序\Oracle - Ora10g不同的安装这个目录稍有不同。
Win7安装Oracle10g方法
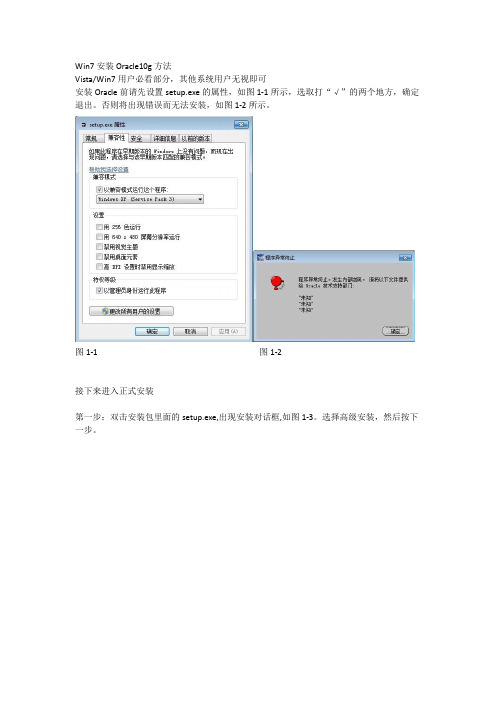
Win7安装Oracle10g方法Vista/Win7用户必看部分,其他系统用户无视即可安装Oracle前请先设置setup.exe的属性,如图1-1所示,选取打“√”的两个地方,确定退出。
否则将出现错误而无法安装,如图1-2所示。
图1-1 图1-2接下来进入正式安装第一步:双击安装包里面的setup.exe,出现安装对话框,如图1-3。
选择高级安装,然后按下一步。
图1-3第二步:根据你的需要选择安装的类型,然后下一步,如图1-4。
这里建议安装企业版,因为企业版功能比较强大,图1-4第三步:选择安装路径,然后下一步,如图1-5。
建议使用默认路径,若要修改尽量只改盘符,即尽量不要破坏其结构。
另外安装路径不要有空格,否则很可能导致安装完成后有些功能运行不起来。
图1-5第四步:之后会进行先决条件检查,可见这里出现了个警告,如图1-6,这里的任何警告都必须解决掉,否则安装的软件必定出问题。
Oracle必须要有一个固定的IP以供日后设置监听器时使用,这里显然就是这个问题,这里先跳到第五步。
图1-6第五步:添加一个假网卡,按CTRL+R(或者"开始"->"运行"),输入hdwwiz.exe打开硬件添加界面,如图1-7。
图1-7选择手动添加(第二项),如图1-8图1-8选择"网络适配器",如图1-9。
图1-9左边选择"Microsoft",右边选择"Loopback Adapter",确定,如图1-10图1-10点击完成即可,如图1-11。
图1-11第六步:打开网络共享中心,在右侧选择“更改适配器设置”,如图1-12。
图1-12如图1-13本地连接2就是第五步新建的假网卡。
对着它右键->属性,给新添加的假网卡"Microsoft Loopback Adapter"随便配置一个IP,例如"192.168.0.5/24",如图1-14。
oracle11详细安装步骤
安装oracle11g的步骤Oracle11gR2官方联机文档:/pls/db112/homepage一、安装Oracle前的准备工作1、检查物理内存及Swap# grep MemTotal /proc/meminfoMemTotal: 1031320 kB(1G内存)#grep SwapTotal /proc/meminfoSwapTotal: 2064376 kB(2G)2、检查可用的内存和Swapfree –mtotal used free shared buffers cached Mem: 1007 696 310 0 43 479 -/+ buffers/cache: 172 834Swap: 2015 0 2015建议:物理内存最好是2GB及以上。
1024MB的物理内存,可用的只有1001MB,安装时不能通过Oracle“执行先决条件检查”,事实证明即使物理内存低于1GB一,也可以忽略此警告,并不影响Oracle软件的成功安装,如下:物理内存- 此先决条件将测试系统物理内存总量是否至少为1GB (1048576.0KB)。
预期值: 1GB (1031320.0KB)实际值: 1007.9MB (1025944.0KB)错误列表:-PRVF-7530 : 节点"ctcdb01" 上的物理内存不足[所需物理内存= 1GB (1048576.0KB)] - Cause: 发现物理内存(RAM) 的数量不满足最低内存要求。
- Action: 向指定的节点添加物理内存(RAM)。
二、检查Oracle11gR2所需要的rpm包如果你的是 Oracle 11g Release 2 (11.2) for Linux x86,请看下面链接的安装文档/docs/cd/E11882_01/install.112/e10857/toc.htm我使用操作系统 , CentOS release 6.0(Final) Kernel 2.6.32-71.el6.i686检查相关的开发工具和一些包The following or later version of packages for Asianux 3, Oracle Enterprise Linux 5, and Red Hat Enterprise Linux 5 should be installed: /cd/E11882_01/install.112/e24322/pre_install.htm#BABCFBDG1、检查命令格式如下:rpm -qa | grep 名字binutils-2.17.50.0.6 okcompat-libstdc++-33-3.2.3 okelfutils-libelf-0.125 okelfutils-libelf-devel-0.125 okelfutils-libelf-devel-static-0.125 okgcc-4.1.2 okgcc-c++-4.1.2 okglibc-2.5-24 okglibc-common-2.5 okglibc-devel-2.5 okglibc-headers-2.5 okkernel-headers-2.6.18 okksh-20060214 oklibaio-0.3.106 oklibaio-devel-0.3.106 oklibgcc-4.1.2 oklibgomp-4.1.2 oklibstdc++-4.1.2 oklibstdc++-devel-4.1.2 okmake-3.81 oknumactl-devel-0.9.8.i386 oksysstat-7.0.2 okunixODBC-2.2.11 okunixODBC-devel-2.2.11 okpdksh-5.2.14-8.i386 ok(先移除自带的ksh yum remove ksh 在yum install pdksh-* centos6.2中会遇到此情况)下载地址:/index.php3?stat=3&search=pdksh从 CentOS-5.5-i386-bin-DVD.iso\CentOS 文件找到缺少的包,并且上传到 linux 上去ls *.rpmrpm -ivh *.rpm2、配置内核参数# sysctl -a | grep semkernel.sem = 250 32000 32 128(centos6.2可能会出现内核不对头,修改参数echo "kernel.sem=250 32000 100 128" >> /etc/sysctl.conf)# sysctl -a | grep ip_local_port_rangenet.ipv4.ip_local_port_range = 32768 61000如果原有的内核参数值大于Oracle建议的内核参数值,则不用修改该内核值,反之,则需要修改,建议内存大于2G的正式,一定一条条要仔细检查;Oracle建议的内核最小值3、这里使用Oracle建议值配置:vi /etc/sysctl.conffs.aio-max-nr = 1048576fs.file-max = 6815744kernel.shmall = 2097152kernel.shmmax = 1010000000kernel.shmmni = 4096kernel.sem = 250 32000 100 128net.ipv4.ip_local_port_range = 9000 65500net.core.rmem_default = 262144net.core.rmem_max = 4194304net.core.wmem_default = 262144net.core.wmem_max = 1048586etcsysctl.conf 参数说明.txt# sysctl -p #使内核参数立即生效# sysctl -a |grep kernel.shmmax #查看内核参数的值kernel.shmmax = 5368709124 、配置Oracle用户资源限制# vi /etc/security/limits.conforacle soft nproc 2047oracle hard nproc 16384oracle soft nofile 1024oracle hard nofile 65536oracle soft stack 10240加入以下行到/etc/pam.d/login,如果存在,则不加入# grep pam_limits.so /etc/pam.d/loginvi /etc/pam.d/loginsession required pam_limits.so5、在/etc/profile文件中加入以下行For the Bourne, Bash, or Korn shell, add the following lines in the /etc/profile file (or the /etc/profile.local file on SUSE Linux Enterprise Server systems): # vi /etc/profileif [ $USER = "oracle" ]; thenif [ $SHELL = "/bin/ksh" ]; thenulimit -p 16384ulimit -n 65536elseulimit -u 16384 -n 65536fifi强调:Oracle用户资源限制这个部分,不配置也不会影响Oracle数据库的成功安装;但是考虑到,若有糟糕的sql语句对服务器资源的无限占用,导致长时间对用户请求无响应,还是建议提前限制Oracle用户资源为好。
oracle常见错误及代码
1、ORA-12541:TNS:没有监听器原因:没有启动监听器或者监听器损坏。
若是前者,使用命令net start OracleOraH ome10gTNSListener(名字可能有出入)即可;如果是后者,则使用“Net Configuration Assistant”工具向导之“监听程序配置”增加一个监听器即可(基本不用写任何信息,一路O K。
在添加之前可能需要把所有的监听器先删!)2、ORA-12500:TNS:监听程序无法启动专用服务器进程或ORA-12560:TNS:协议适配器错误原因:ORACLE的数据库服务没有启动。
使用命令net start ORACLESERVICEORA DB(ORADB为数据库名字)即可。
如果仍没有解决,请继续向下看。
3、如果数据库服务启动失败,则很有可能是其注册表项值损坏,最好的做法是以下两步:1)ORADIM -DELETE -SID oradb 删除数据库服务项2)ORADIM -NEW -SID oradb 新增数据库服务项注:这个过程中如果出错,就重启计算机!4、ORA-12154:TNS:能解析服务名原因:ORACLE的网络服务名没有正确配置。
请使用“Net8 Configuration Assistan t”工具向导之“本地网络服务名配置”配置TNS即可。
如果仍没有解决,请继续向下看。
5、ORA-1034 :TNS:ORACLE不可用原因:ORACLE的数据库服务正确启动,但是数据库没有打开!使用命令:1)svrmgrl 启动服务管理器2)connect internal 以internal身份登陆3)startup 打开数据库6、ORA-12560:TNS:协议适配器错误(顽固性的)原因:未知。
解决:必杀技--打开“Windows任务管理器”,杀死ORACLE.exe及ORADIM.exe进程,书写自己的ora_startup.bat,执行之!PS:1、ora_startup.bat:net start OracleOraHome81TNSListenernet start ORACLESERVICEORADBsvrmgrl 一般情况下不用,不过有时少不了它的,具体步骤见第5步。
Oracle安装步骤图解
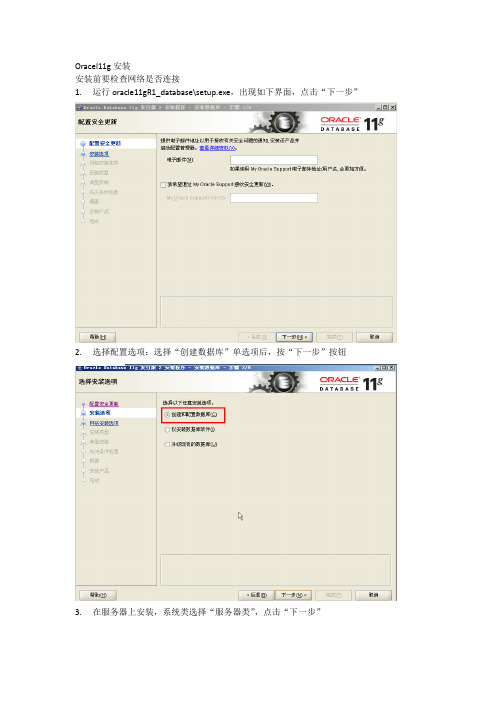
Oracel11g安装
安装前要检查网络是否连接
1.运行oracle11gR1_database\setup.exe,出现如下界面,点击“下一步”
2.选择配置选项:选择“创建数据库”单选项后,按“下一步”按钮
3.在服务器上安装,系统类选择“服务器类”,点击“下一步”
4.网格安装选项选择“单实例数据库安装”,点击“下一步”:
5.安装类型的选择:
5.1选择“典型安装”,选择典型安装后,出现如下界面:
在这里可以将需要设置的Oracle基目录、软件位置、数据库文件位置以及全局数据库等一并设置好,点击下一步就可以完成安装。
5.2选择“高级安装”后,见下图:
点击“下一步”:
6.选择语言,点击“下一步”:
7.版本选择,选择“企业版”,点击选择选项:
弹出的是Oracle组件的选项,根据需要选择,点击“确定”:
然后点击“下一步”:
8.安装位置设置,可默认,也可自己定义后选择,点击“下一步”
9.数据库类型选择,选择“一般用途/事务处理”,点击“下一步”:
10.配置类型设置,填写好全局数据库名,点击“下一步”:
11.管理选项选择,点击“下一步”:
12.数据库存储选择,点击“下一步”:
13.存储设置,指定好文件位置,点击“下一步”:
14.指定恢复选项,点击“下一步”:
15.设定密码,可对所有用户使用同一口令,要做好口令的记录,避免忘记,填写好后,点
击“下一步”:
16.先决条件检查,通过后,弹出如下界面;
17.设置内容的概要,如下图,点击“完成”。
18.开始安装:
19.数据库创建完成
20.口令管理。
21.安装结束。
Oracle11g安装详细步骤
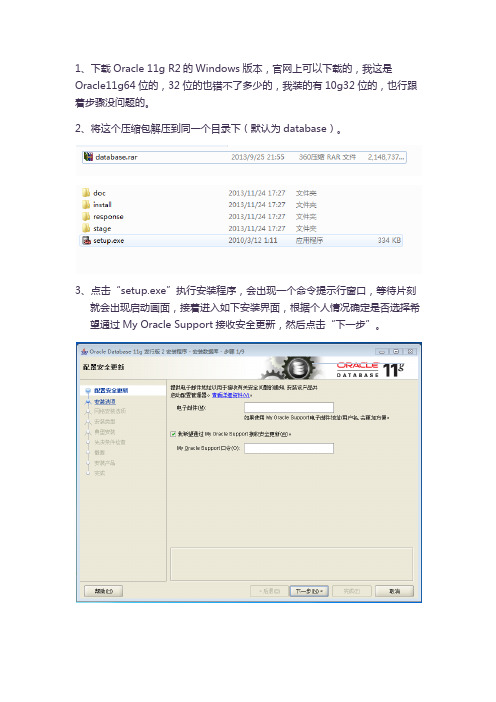
1、下载Oracle 11g R2的Windows版本,官网上可以下载的,我这是Oracle11g64位的,32位的也错不了多少的,我装的有10g32位的,也行跟着步骤没问题的。
2、将这个压缩包解压到同一个目录下(默认为database)。
3、点击“setup.exe”执行安装程序,会出现一个命令提示行窗口,等待片刻就会出现启动画面,接着进入如下安装界面,根据个人情况确定是否选择希望通过My Oracle Support接收安全更新,然后点击“下一步”。
4、此处可以选择创建和配置数据库或者仅安装数据库软件,我们先选择安仅安装数据库软件,然后点击“下一步”5、选择单实例数据库安装,然后点击“下一步”6、安装程序会进行安装的先决条件检查,等待检查完毕,进入下一步。
7、显示安装信息的概要情况,确认后点击完成进入安装步骤。
8、等待此时安装数据库。
9、程序文件安装完成,进入Database Configuration Assistant配置。
10、可在开始->所有程序->Oracle - OraDb11g_home1->配置和移植工具->Database Configuration Assistant11、单击“下一步”可到第四步,如下图。
12、单击“下一步”时,出现如图警告,这时还未配置监听程序。
13、由于使用Database Control配置数据库时,要求在当前Oracle主目录中配置监听程序。
所以必须运行Netca以配置监听程序,然后再继续。
在所有程序目录下依次Oracle - OraDb11g_home1 —>配置和移植工具——>Net Configuration Assistant ;界面如下。
14、点击“下一步”进入监听陈程序配置页面进行监听程序配置。
15、点击“下一步”进行协议选择;界面如下。
16、单击“下一步”进行TCP/IP协议端口配置,可以使用标准端口或者自己进行端口设置。
【勇猛精进】Oracle_EBS_R12_操作手册_超级详细
Oracle EBS R12 操作手册AP & PO Manual目录Oracle EBS R12 操作手册 (1)目录 (2)实验操作需要用到职责 (4)建立新员工 (5)执行人员员工阶层处理 (6)设定采购员 (6)定义付款群组 (7)定义供应商 (7)定义税 (7)定义供应商地址 (8)定义联系人 (9)定义银行 (9)定义账户信息 (10)定义采购方法 (11)定义接收方式 (12)定义发票管理 (12)定义1099供应商 (13)定义供应商地址 (13)定义物料类别 (15)建立费用物料 (17)建立存货物料 (19)建立采购的资产物料 (22)定义供应商列表 (22)建立询价单 (22)根据询价单建立报价单 (27)建立供应商列表状态 (29)物料使用已审核供应商的设置 (30)建立报价单 (31)建立ASL(Approved Supplier List) (33)定义Source与Source rules (35)建立请购单 (35)建立请购单模板 (37)利用采购申请模板建立采购申请 (38)IProcurement定制个性化信息 (41)Iprocurement中提交请购单 (42)创建PO (42)打印采购订单 (46)PO register (47)建立一揽子采购协议 (48)发布一揽子采购协议 (51)建立采购合同 (53)查看合同订单详情 (56)请购单退货操作 (57)建立采购申请单 (57)退回请购单 (58)重新核发请购单 (60)自动建立采购单 (61)通过Sourcing rules 控制的采购协议来建立采购订单 (63)建立ASL项目为一揽子采购协议的Source Document (65)提交请购单 (66)执行发放程序 (67)检查请购单情况 (67)根据报价单自动建立采购订单 (69)创建报价单 (69)创建采购申请 (70)检查是否已经建立采购订单 (71)收货设置 (72)建立采购订单 (73)标准收货 (74)快速收货 (76)自动收货 (78)验货与交货 (80)退货给供应商 (82)更正收货 (84)实验操作需要用到职责⏹Alert Manager⏹Application Diagnostics⏹Globa l Super HRMS Manager⏹iProcurement⏹LE_AP_SUPER_00⏹LE_GL_SUPER_00⏹LE_INV⏹LE_PO_SUPER⏹Preferences SSW A⏹System Administrator建立新员工(N) Global Super HRMS Manager>People>Enter and Maintain>New(上面那些信息的建立,可以参考我所写的PO配置文档)以下操作都在PO超级用户职责下进行执行人员员工阶层处理(N)Reports>Run>Fill Employee Hierarchy设定采购员(N)Setup>Personal>Buyers定义付款群组(N)Setup>Purchasing>Lookup Codes定义供应商(N)Supply Base>Suppliers定义税(根据自己的实际情况进行定义)定义供应商地址定义联系人定义银行定义账户信息(这些信息一般在设置系统信息时已经指定了,无特殊情况默认即可)Distribut e Set建立方法(Distribut e Set主要用于你需要把一类发票记到某一个科目中,你可以建立一个Distribut e Set,把某一类发票自动指定到某一个科目。
Oracle11g常用基本操作命令
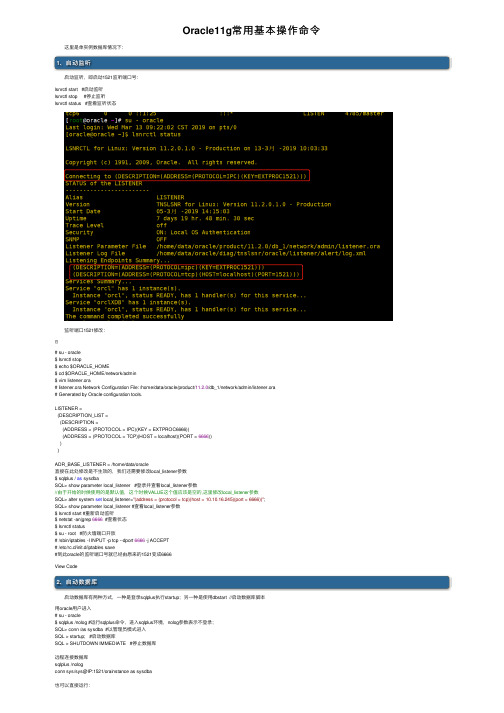
Oracle11g常⽤基本操作命令 这⾥是单实例数据库情况下:1、启动监听 启动监听,即启动1521监听端⼝号:lsnrctl start #启动监听lsnrctl stop #停⽌监听lsnrctl status #查看监听状态 监听端⼝1521修改:# su - oracle$ lsnrctl stop$ echo $ORACLE_HOME$ cd $ORACLE_HOME/network/admin$ vim listener.ora# listener.ora Network Configuration File: /home/data/oracle/product/11.2.0/db_1/network/admin/listener.ora# Generated by Oracle configuration tools.LISTENER =(DESCRIPTION_LIST =(DESCRIPTION =(ADDRESS = (PROTOCOL = IPC)(KEY = EXTPROC6666))(ADDRESS = (PROTOCOL = TCP)(HOST = localhost)(PORT = 6666))))ADR_BASE_LISTENER = /home/data/oracle直接在此处修改是不⽣效的,我们还需要修改local_listener参数$ sqlplus / as sysdbaSQL> show parameter local_listener #登录并查看local_listener参数//由于开始的时候使⽤的是默认值,这个时候VALUE这个值应该是空的,这⾥修改local_listener参数SQL> alter system set local_listener="(address = (protocol = tcp)(host = 10.10.16.245)(port = 6666))";SQL> show parameter local_listener #查看local_listener参数$ lsnrctl start #重新启动监听$ netstat -an|grep 6666 #查看状态$ lsnrctl status$ su - root #防⽕墙端⼝开放# /sbin/iptables -I INPUT -p tcp --dport 6666 -j ACCEPT# /etc/rc.d/init.d/iptables save#到此oracle的监听端⼝号就已经由原来的1521变成6666View Code2、启动数据库 启动数据库有两种⽅式,⼀种是登录sqlplus执⾏startup;另⼀种是使⽤dbstart //启动数据库脚本⽤oracle⽤户进⼊# su - oracle$ sqlplus /nolog #运⾏sqlplus命令,进⼊sqlplus环境,nolog参数表⽰不登录;SQL> conn /as sysdba #以管理员模式进⼊SQL > startup; #启动数据库SQL > SHUTDOWN IMMEDIATE #停⽌数据库远程连接数据库sqlplus /nologconn sys/sys@IP:1521/orainstance as sysdba也可以直接运⾏:dbstart //启动数据库脚本dbshut //停⽌数据库脚本3、⽤户管理 创建普通⽤户,权限相关:创建⽤户:SQL> create user "username" identified by "userpasswd" ; #注:后⾯可带表空间删除⽤户:SQL> drop user “username” cascade; #注:cascade 参数是级联删除该⽤户所有对象,经常遇到如⽤户有对象⽽未加此参数则⽤户删不了的问题,所以习惯性的加此参数授权⽤户:SQL> grant connect,resource,dba to "username" ;查看当前⽤户的⾓⾊SQL> select * from user_role_privs;SQL> select * from session_privs;查看当前⽤户的系统权限和表级权限SQL> select * from user_sys_privs;SQL> select * from user_tab_privs;查询⽤户表SQL> select username from dba_users;修改⽤户⼝令SQL> alter user "username" identified by "password";显⽰当前⽤户SQL> show user;4、表和表空间创建表空间SQL> CREATE TABLESPACE data01 DATAFILE '/oracle/oradata/db/DATA01.dbf' SIZE 500M;删除表空间SQL> DROP TABLESPACE data01 INCLUDING CONTENTS AND DATAFILES;修改表空间⼤⼩SQL> alter database datafile '/path/NADDate05.dbf' resize 100M;增加表空间SQL> ALTER TABLESPACE NEWCCS ADD DATAFILE '/u03/oradata/newccs/newccs04.dbf' SIZE 4896M;查询数据库⽂件SQL> select * from dba_data_files;查询当前存在的表空间SQL> select * from v$tablespace;表空间情况SQL> select tablespace_name,sum(bytes)/1024/1024 from dba_data_files group by tablespace_name;查询表空间剩余空间SQL> select tablespace_name,sum(bytes)/1024/1024 from dba_free_space group by tablespace_name;查看表结构SQL> desc table;修改连接数:要重启数据库SQL> alter system set processes=1000 scope=spfile;SQL> shutdown immediate;SQL> startup;查看⽤户当前连接数SQL> select count(*) from sys.v_$session;5、修改字符集相关 将数据库启动到RESTRICTED模式下做字符集更改:$ sqlplus / as sysdbaSQL> select * from v$nls_parameters; #查看当前系统使⽤的各种字符集SQL> select * from nls_database_parameters where parameter ='NLS_CHARACTERSET'; #精确查询NLS_CHARACTERSET值SQL> shutdown immediate; #关闭数据库SQL> startup mount #启动实例,可以加载数据库,不运⾏数据库DBA在做⼀些操作的时候不希望有⼈登⼊数据库可以使⽤restrict模式:SQL> ALTER SYSTEM ENABLE RESTRICTED SESSION; #开启限制会话模式Oracle job进程,包含协调进程(主进程)以及奴⾪进程(⼦进程),job_queue_processes取值范围为0到1000,总共可创建多少个job进程由job_queue_processes参数来决定。
Oracle11g安装说明

1Oracle11G安装配置说明1.1环境需求1.1.1硬件环境a)内存>1G, 命令:prtconf|moreb)Paging space物理内存在2-16GB之间,交换空间与物理内存大小相同物理内存大于16GB交换,交换空间设为物理内存的0.75倍命令:lsps –ac)检查是否是64位命令:/usr/bin/getconf HARDWARE_BITMODEBootinfo -kd)磁盘空间temp 空间>=1GBoracle 软件安装目录>=8GBe)操作系统runlevel为2命令:who –r1.1.2软件环境a)操作系统版本AIX 6,64bit及以上版本1.2安装Oracle 11g1.2.1安装前检查1.2.2安装Oracle 11g For AIX1.点击安装文件出现如下图所示界面。
2.直接点击下一步选择跳过软件更新选项点击下一步3.选择仅安装数据库软件选项,点击下一步如下图所示:4.选择单实例数据库安装选项,点击下一步。
如下图所示:5.出现请选择运行产品时所使用的语言,选择简体中文和英文。
如下图所示:6.点击下一步出现如下图所示的界面7.选择安装数据的版本,在此选择企业版点击下一步出现如下图所示的界面8.选择产品安装文件的目录,在此我们选择/u01/app/oralnventory,选择oralnventory组名为oinstall。
点击下一步如下图所示:9.选择数据库管理员(OSDBA)组为dba,数据库操作者组为dba,点击下一步如下图所示:10.正在检查执行的先决条件,检查完成后出现如下所示的操作界面,如下图所示11.点击下一步,显示了数据库Oracle11g的安装概要。
如下图所示:12.点击安装按钮正式开始安装Oracle11g数据库,如下图所示:13.出现如下窗口14.点击确定按钮出现下面如图所示的界面15.在欢迎使用配置Oracle数据库界面,点击下一步出现如下图所示的界面16.选择创建数据库选择,点击下一步,如下图所示17.选择一般用途或数据处理选项,点击下一步18.选择配置Enterprise Manager 选项和配置Database Control以进行本地管理,点击下一步,如下图所示:19.选择监听程序配置选项,点击下一步20.选择添加选项,点击下一步,如下图所示:21.输入监听程序的名称为LISTENER,点击下一步如下图所示:22.选择要用的协议TCP,点击下一步如下图所示:23.选择使用的标准端口号1521选项,点击下一步,如下图所示:24.在是否配置另一个监听程序,选择否选项,点击下一步,如下图所示:25.输入管理员口令,点击下一步。
Oracle常见问题
Oracle使用常见问题/*本文档由yhz完成,我会不断完善该文档,出现难以解决的问题时请发邮件到yanhaizhen@neusof ,并列出错误信息提示。
*/1.在安装Oracle的过程中出现下面的提示:“文件定位错误。
area queries ”,以及两个单选按钮,选择“停止安装所有组件”或者“只停止安装此组件”。
错误原因:Oracle的安装文件放在了中文目录下。
解决方法:将Oracle的安装文件放在英文目录下。
2.安装的时候点setup的时候出现错误,提示“Java V irtual machine launcher could not find the main class. program will exit”。
错误原因:可能是安装版本的问题,或者是安装路径放在中文目录下。
解决方法:将安装文件放在英文目录下。
3.在安装Oracle的过程中出现下面的提示:“在安装程序交换区C:\Documents and Settings\Administrator\Local Settings\Temp没有足够的磁盘空间,请保证至少有110KB 的磁盘空间”。
错误原因:oracle安装程序在安装过程中需要400M以上的临时硬盘空间,一般使用/tmp 文件夹作为临时文件夹,一般情况下/tmp文件夹会有足够的磁盘空间,但也可能磁盘空间不足。
解决方法:新创建一个文件夹作为安装的临时目录,之后设置环境变量TEMP指向相应的位置。
假定d盘有足够大的空间,那么可以在d盘下先创建一个临时文件夹供安装Oracle 使用,安装完之后删去即可。
例如:在d盘根目录下创建文件夹temp,然后先记录下原来的环境变量,然后修改。
右键点击“我的电脑”,选择“属性”,在弹出的“属性”对话框中选择“高级”页,点击“环境变量”按钮,在弹出的“环境变量”对话框中,从administrator的用户变量(也就是安装Oracle的当前用户)中,找到temp和tmp环境变量进行修改,先记录下修改以前的值,便于以后恢复。
Oracle HTTP Server 11g R1配置指南说明书
Oracle HTTP Server 11g R1 Configuration for FLEXCUBEOracle FLEXCUBE Universal BankingRelease 12.4.0.0.0[May] [2017]Table of Contents1.PURPOSE (3)2.INTRODUCTION TO ORACLE HTTP SERVER (OHS) (3)2.1HTTP L ISTENER (3)2.2M ODULES (MODS) (3)3.INSTALLATION OF OHS 11G (4)4.CONFIGURE ORACLE HTTP SERVER INFRONT OF WEBLOGIC SERVER (11)4.1F OR W EB L OGIC IN SINGLE INSTANCE (11)4.2F OR W EBLOGIC INSTANCES IN CLUSTER (12)5.ENABLE “WEBLOGIC PLU G-IN ENABLED” FLAG I N WEBLOGIC (13)PRESSION RULE SETTING (13)6.1L OADING MOD_DEFLATE (13)6.2C ONFIGURING FILE TYPES (14)6.3HTTPD.CONF FILE CHANGES (14)7.CONFIGURING SSL FOR ORACLE HTTP SERVER (16)7.1SSL CONFIGURATION FOR I NBOUND R EQUEST TO O RACLE HTTP S ERVER (16)7.1.1Create a new Wallet and import Certificate (16)7.1.2Configuring Wallet in ssl.conf file (20)7.2C ONFIGURING SSL BETWEEN O RACLE HTTP S ERVER AND O RACLE W EBLOGIC S ERVER (21)7.2.1Turn off KeepAliveEnabled (21)7.2.2To enable one-way SSL (21)7.2.3To enable two-way SSL (22)8.SAMPLE CONFIGURATION FILES (23)9.STARTING, STOPPING, AND RESTARTING ORACLE HTTP SERVER (23)9.1S TART (23)9.2S TOP (23)9.3R ESTART (23)10.TEST THE APPLICATION (24)11.SERVER LOGS LOCATION (24)12.REFERENCES (24)1. PurposeThe objective of this document is to explain the installation and configuration of Oracle HTTP Server 11g R1(11.1.1.6.0). This includes setting up of server details, configuration of compression rules and enabling SSL.2. Introduction to Oracle HTTP Server (OHS)Oracle HTTP Server is the Web server component for Oracle Fusion Middleware. It is based on Apache web server, and includes all base Apache modules and modules developed specifically by Oracle. It provides a HTTP listener for Oracle WebLogic Server and the framework for hosting static pages, dynamic pages, and applications over the Web. Key aspects of Oracle HTTP Server are its technology, its serving of both static and dynamic content and its integration with both Oracle and non-Oracle products.Oracle HTTP Server consists of several components that run within the same process. These components provide the extensive list of features that Oracle HTTP Server offers when handling client requests.Following are the major components:2.1 HTTP ListenerOracle HTTP Server is based on an Apache HTTP listener to serve client requests. An HTTP server listener handles incoming requests and routes them to the appropriate processing utility.2.2 Modules (mods)Modules extend the basic functionality of Oracle HTTP Server, and support integration between Oracle HTTP Server and other Oracle Fusion Middleware components. There are modules developed specifically by Oracle for Oracle HTTP Server. Ex: mod_wl_ohs, mod_plsqlOracle HTTP Server also includes the base Apache and third-party modules out-of-the-box.These modules are not developed by Oracle. Ex: mod_proxy, mod_perl3. Installation of OHS 11gInvoke the setup exe to start the installationSelect Skip Software UpdatesSelect Install and ConfigureSelect only Oracle HTTP ServerEnter the required OHS instance and component namesThis completes the installation of Oracle HTTP Server with <Instance> and <component>. Example: Instance is instance1 and component is ohs1.If you would like to change the port after the installation(OHS Listen Port) edit$ORACLE_INSTANCE/config/OHS/<component_name>/httpd.conf and change the listen port.NOTE: This port is for http protocol and not for https.4. Configure Oracle HTTP Server infront of Weblogic ServerIn Oracle HTTP Server requests from Oracle HTTP Server to Weblogic server are proxied usingmod_wl_ohs module. This configuration file needs to be modified to include the Weblogic server and port details.mod_wl_ohs.conf file is located at${ORACLE_INSTANCE}/config/OHS/{COMPONENT_NAME}/mod_wl_ohs.confAdd the below directives to mod_wl_ohs.conf file.4.1 For WebLogic in single instance<Location /<<context/url>> >SetHandler weblogic-handlerWebLogicHost <<server name>>WeblogicPort <<port>></Location>Example:<Location /FCJNeoWeb>SetHandler weblogic-handlerWebLogicHost wlserver1WeblogicPort 7707</Location>This will forward /FCJNeoWeb from HTTP server to /FCJNeoWeb on WebLogic Server wlserver1: 77074.2 For Weblogic instances in cluster<Location /<<context/url>> >SetHandler weblogic-handlerWebLogicCluster <server1>:<port1>,<server2>:<port2></Location>Example<Location / FCJNeoWeb >SetHandler weblogic-handlerWebLogicCluster wlserver1:7010, wlserver2:7010</Location>This will forward /FCJNeoWeb from HTTP server to /FCJNeoWeb on WebLogic Cluster wlserver1:7010 and wlserver2:70105.Enable “WebLogic Plug-In Enabled” flag in weblogicThis flag needs to be enabled in weblogic if it is accessed through proxy plugins. When the WebLogic plugin is enabled, a call to getRemoteAddr will return the address of the browser client from the proprietary WL-Proxy-Client-IP header instead of the web server.a. Plugin flag at managed server leveli. Click on ‘Environment’- > 'Servers' -> '<ManagedServer>' -> 'General' -> 'Advanced'ii. Check the 'WebLogic Plug-In Enabled' box.iii. Click 'Save'iv. Restart the Server.b. Plugin flag at domain levelv. Click on <Domain> -> 'Web Applications'vi. Check the 'WebLogic Plug-In Enabled' box.vii. Click 'Save'viii. Restart the server.6. Compression rule settingContent compression in Oracle HTTP Server is done using mod_deflate. This can compress HTML, text or XML files to approx. 20 - 30% of their original sizes, thus saving on server traffic. However, compressing files causes a slightly higher load on the server, but clients' connection times to server is reduced.6.1 Loading mod_deflatemod_deflate is used for compression in OHS and this is installed in Oracle HTTP Server under location "${ORACLE_HOME}/OHS/modules/mod_deflate.so"But it might not be loaded.To load the file add the below directive in mod_wl_ohs.conf fileLoadModule deflate_module "${ORACLE_HOME}/OHS/modules/mod_deflate.so"6.2 Configuring file typesmod_deflate also requires to specify which type files are going to be compressed.In the LOCATION section of mod_wl_ohs.conf file add the below entries.AddOutputFilterByType DEFLATE text/plainAddOutputFilterByType DEFLATE text/xmlAddOutputFilterByType DEFLATE application/xhtml+xmlAddOutputFilterByType DEFLATE text/cssAddOutputFilterByType DEFLATE application/xmlAddOutputFilterByType DEFLATE application/x-javascriptAddOutputFilterByType DEFLATE text/htmlSetOutputFilter DEFLATEImages are supposed to be in a compressed format, and therefore are bypassed by mod_deflate.6.3 httpd.conf file changesThis is a server configuration file which typically contains directives that affect how the server runs, such as user and group IDs it should use, and location of other files. Cross check the existence of mod_wl_ohs.conf include in httpd.conf file.httpd.conf file is present under location“${ORACLE_INSTANCE}/config/OHS/{COMPONENT_NAME}/httpd.conf”In this file cross check for the below entryinclude "${ORACLE_INSTANCE}/config/OHS/${COMPONENT_NAME}/mod_wl_ohs.conf"If above include entry is not present, then add the above include section.7. Configuring SSL for Oracle HTTP ServerSecure Sockets Layer (SSL) is required to run any Web site securely. Secure Sockets Layer (SSL) is an encrypted communication protocol that is designed to securely send messages across the Internet.Reading of “SSL_Configuration on Weblogic” document provide d as part of FCUBS installation isrecommended before proceeding with further setup.In Oracle HTTP server, SSL configuration can be done between1. Browser to Oracle HTTP Server(Mandatory)2. Oracle HTTP Server to Oracle Weblogic Server(If required)7.1 SSL configuration for Inbound Request to Oracle HTTP ServerPerform these tasks to enable and configure SSL between browser and Oracle HTTP Server.1. Obtain a certificate from CA or create a self signed certificate.2. Create an Oracle Wallet which contains the above SSL Certificate. The default wallet that isautomatically installed with Oracle HTTP Server is for testing purposes only. The default wallet is located in "${ORACLE_INSTANCE}/config/OHS/${COMPONENT_NAME}/keystores/default"3. Configuring Wallet in ssl.conf file7.1.1 Create a new Wallet and import Certificate1. Go to the \Oracle_WT1\bin\launch.exe, this will launch your wallet manager2. Click on Create new and then click no option.3. Enter the wallet password and click on OK, this will create a new wallet.4. Not it will ask for certificate request creation, Click on NO to proceed5. Right click on trusted certificates and then import trusted certificate.6. Browse to the folder where certificate is stored and click on Open7. Click on Save Wallet button on the left side navigation and save the wallet either to defaultlocation("${ORACLE_INSTANCE}/config/OHS/${COMPONENT_NAME}/keystores/default") or folder of your choice.8. Click on Wallet tab and enable Auto Login7.1.2 Configuring Wallet in ssl.conf fileIn ssl.conf file the newly created wallet need to updated. This file is located under folder"${ORACLE_INSTANCE}/config/OHS/${COMPONENT_NAME}/1. Change the SSLWallet directive to point to the location of new wallet created.SSLWallet "${ORACLE_INSTANCE}/config/${COMPONENT_TYPE}/${COMPONENT_NAME}/keystores/"2. Change the Listen port number in ssl.conf file to the SSL enabled port, by default the value is 44437.2 Configuring SSL between Oracle HTTP Server and Oracle Weblogic ServerSSL for outbound requests from Oracle HTTP Server are configured in mod_wl_ohs.Refer to “SSL_Configura tion on Weblogic” document for weblogic server setting mentioned in below section.7.2.1 Turn off KeepAliveEnabledThe below parameter in mod_wl_ohs should be turned off, by default it is on. Add the below directive under LOCATION section of mod_wl_ohs fileKeepAliveEnabled OFF7.2.2 To enable one-way SSL1. Generate a custom keystore identity.jks for Weblogic Server containing a certificate.2. At Identity section in Keystores tab in weblogic Admin Console for server seta. The custom trust store with the identity.jks file locationb. The keystore type as JKSc. The passphrase used to created the keystore3. Copy the certificate to Oracle HTTP Server and import the new certificate into OHS wallet as a trustedcertificate.4. Add following new directive in mod_wl_ohs.conf to point to the wallet locationWlSSLWallet "${ORACLE_INSTANCE}/config/OHS/{COMPONENT_NAME}/keystores/default"5. Change the port in mod_wl_ohs file to point to SSL port of Weblogic server.6. Restart both Weblogic Server and Oracle HTTP Server7.2.3 To enable two-way SSL1. Perform one-way SSL configuration steps2. Generate a new trust store, trust.jks for Weblogic server3. Keystore created for one-way SSL could be used, but it is recommended to create a separate truststore4. Export the user certificate from Oracle HTTP Server wallet, and import it into truststore created above5. At Trust section in Keystores tab in Weblogic Admin Console for the server seta. The custom trust store with the trust.jks file locationb. The keystore type as JKSc. The passphrase used to created the keystore6. Under the SSL tabEnsure trusted CA is set as from Custom Trust Keystore.7. Restart Weblogic Server8. Sample Configuration Fileshttpd.conf mod_wl_ohs.conf ssl.conf9. Starting, Stopping, and Restarting Oracle HTTP ServerNavigate to the below location in command prompt ${ORACLE_INSTANCE}/bin/ and run below commands 9.1 Startopmnctl startproc ias-component={COMPONENT_NAME}Example: opmnctl startproc ias-component=ohs19.2 Stopopmnctl stopproc ias-component={COMPONENT_NAME}Example: opmnctl stopproc ias-component=ohs19.3 Restartopmnctl restartproc ias-component={COMPONENT_NAME}Example: opmnctl restartproc ias-component=ohs110. Test the applicationTest the application deployed on Weblogic using Oracle HTTP Server after restarting both the oracle http server and weblogic serverhttps://ohs_servername:ohs_https_port/<<context/url>>http://ohs_servername:ohs_http_port/<<context/url>>ohs_servername: server on which OHS is deployedohs_https_port: port number mentioned against LISTEN directive in SSL.conf fileohs_http_port: port number mentioned against LISTEN directive in httpd.conf fileExample:https://localhost:4443/FCJNeoWeb/welcome.jspOrhttp://localhost:7777/FCJNeoWeb/welcome.jsp11. Server Logs LocationOracle HTTP Server Logs are generated under folder${ORACLE_INSTANCE}/diagnostics/logs/OHS/{COMPONENT_NAME}/12. ReferencesSSL_Configuration.doc for Weblogic provided as part of FCUBS installation./cd/E16764_01/web.1111/e10144/under_mods.htm/cd/E25054_01/core.1111/e10105/sslconfig.htmOracle_HTTP_Server_Configuration[May] [2017]Version 12.4.0.0.0Oracle Financial Services Software LimitedOracle ParkOff Western Express HighwayGoregaon (East)Mumbai, Maharashtra 400 063IndiaWorldwide Inquiries:Phone: +91 22 6718 3000Fax:+91 22 6718 3001/financialservices/Copyright © 2007, 2017, Oracle and/or its affiliates. All rights reserved.Oracle and Java are registered trademarks of Oracle and/or its affiliates. Other names may be trademarks of their respective owners. U.S. GOVERNMENT END USERS: Oracle programs, including any operating system, integrated software, any programs installed on the hardware, and/or documentation, delivered to U.S. Government end users are "commercial computer software" pursuant to the applicable Federal Acquisition Regulation and agency-specific supplemental regulations. As such, use, duplication, disclosure, modification, and adaptation of the programs, including any operating system, integrated software, any programs installed on the hardware, and/or documentation, shall be subject to license terms and license restrictions applicable to the programs. No other rights are granted to the U.S. Government.This software or hardware is developed for general use in a variety of information management applications. It is not developed or intended for use in any inherently dangerous applications, including applications that may create a risk of personal injury. If you use this software or hardware in dangerous applications, then you shall be responsible to take all appropriate failsafe, backup, redundancy, and other measures to ensure its safe use. Oracle Corporation and its affiliates disclaim any liability for any damages caused by use of this software or hardware in dangerous applications.This software and related documentation are provided under a license agreement containing restrictions on use and disclosure and are protected by intellectual property laws. Except as expressly permitted in your license agreement or allowed by law, you may not use, copy, reproduce, translate, broadcast, modify, license, transmit, distribute, exhibit, perform, publish or display any part, in any form, or by any means. Reverse engineering, disassembly, or decompilation of this software, unless required by law for interoperability, is prohibited.The information contained herein is subject to change without notice and is not warranted to be error-free. If you find any errors, please report them to us in writing.This software or hardware and documentation may provide access to or information on content, products and services from third parties. Oracle Corporation and its affiliates are not responsible for and expressly disclaim all warranties of any kind with respect to third-party content, products, and services. Oracle Corporation and its affiliates will not be responsible for any loss, costs, or damages incurred due to your access to or use of third-party content, products, or services.。
- 1、下载文档前请自行甄别文档内容的完整性,平台不提供额外的编辑、内容补充、找答案等附加服务。
- 2、"仅部分预览"的文档,不可在线预览部分如存在完整性等问题,可反馈申请退款(可完整预览的文档不适用该条件!)。
- 3、如文档侵犯您的权益,请联系客服反馈,我们会尽快为您处理(人工客服工作时间:9:00-18:30)。
1) unmirrorvg rootvg hdisk1 #取消镜像
2) chpv -c hdisk1 #清除引导区
3) reducevg rootvg hdisk1 #将PV从VG中删除
4) bootlist -m normal hdisk0 #更改启动序列
VG STATE: active PP SIZE: 256 megabyte(s)
VG PERMISSION: read/write TOTAL PPs: 546 (139776 megabytes)
# lsvg datavg
VOLUME GROUP: datavg VG IDENTIFIER: 000c26300000d7000000011db69eed87
VG STATE: active PP SIZE: 256 megabyte(s)
export ORACLE_BASE ORACLE_SID ORACLE_HOME
NLS_LANG=AMERICAN_AMERICA.ZHS16GBK
export NLS_LANG
ORA_NLS33=$ORACLE_HOME/ocommon/nls/admin/data
export ORA_NLS33
bos.perf.libperfstat
bos.perf.perfstat
bos.perf.proctools
bos.cifs_fs.rte
xlC.aix50.rte :7.0.0.4 or later
xlC.rte :7.0.0.1 or later
7.安装中文语言环境
PATH增加:$ORACLE_HOME/bin
例如:
# more .profile
ORACLE_BASE=/oracle
ORACLE_SID=testdw1
ORACLE_HOME=$ORACLE_BASE/product/10.2.0
export PS1=[`whoami`@`hostname`\$PWD">"]
/usr需要调整为5G;/var调整为2G;/tmp调整为5G;/home调整为5G;/调整为1G;
命令 smit jfs2 调整
3.调整page space
lsps -a查看现在的大小,这里物理内存为8G,分页空间一般调整为物理内存的1-1.5倍,通过命令smit chps调整,我也改为8G。
LVs: 0 USED PPs: 0 (0 megabytes)
OPEN LVs: 0 QUORUM: 2 (Enabled)
12.设置/home/oracle
ORACLE_BASE=/oracle
ORACLE_SID=test_DB,安装oracle时test_DB名字不支持,改为testdb。
ORACLE_HOME=$ORACLE_BASE/product/10.2.0
export ORACLE_BASE ORACLE_SID ORACLE_HOME
1.安装前磁盘情况
# lspv
hdisk0 000c26308a5a556b rootvg active
hdisk1 000c2630abaa2771 datavg active
MAX LVs: 256 FREE PPs: 526 (134656 megabytes)
LVs: 11 USED PPs: 20 (5120 megabytes)
CLASSPATH=$ORACLE_HOME/JRE/lib:$ORACLE_HOME/JRE/lib/rt.jar:$ORACLE_HOME/jlib:$ORACLE_HOME/rdbms/jlib
export CLASSPATH
LD_LIBRARY_PATH=$ORACLE_HOME/lib:$ORACLE_HOME/lib32:/usr/lib
/dev/hd9var 0.25 0.24 5% 402 1% /var
/dev/hd3 0.25 0.25 1% 17 1% /tmp
/dev/fwdump 0.25 0.25 1% 4 1% /var/adm/ras/platform
HOT SPARE: no BB POLICY: relocatable
# lsvg rootvg
VOLUME GROUP: rootvg VG IDENTIFIER: 000c26300000d7000000011da86f2235
core = 2097151
cpu = -1
data = 262144
rss = 65536
stack = 65536
nofiles = 2000
修改为如下:
default:
fsize = -1
rss_hard = -1
stack = -1
stack_hard = -1
nofiles = 20000
Байду номын сангаас
root:
fsize = -1
data = -1
stack = -1
9.更改 oracle目录权限
# chown -R oracle:oinstall /oracle
# chmod -R 755 /oracle
10.建立oinstall和dba组
smit mkgroup
11.建立oracle
smit mkuser 并且主组为oinstall 第二个组设置为dba
/dev/hd1 0.25 0.25 1% 7 1% /home
/proc - - - - - /proc
/dev/hd10opt 0.25 0.15 42% 3118 9% /opt
OPEN LVs: 10 QUORUM: 2 (Enabled)
TOTAL PVs: 1 VG DESCRIPTORS: 2
STALE PVs: 0 STALE PPs: 0
LTG size (Dynamic): 256 kilobyte(s) AUTO SYNC: no
HOT SPARE: no BB POLICY: relocatable
2.磁盘分区
# df -g
Filesystem GB blocks Free %Used Iused %Iused Mounted on
/dev/hd4 0.25 0.24 6% 1745 4% /
/dev/hd2 1.50 0.07 96% 35089 63% /usr
smit进入系统环境,增加额外语言环境
8.建立oracle分区和oracle_cd分区
smit->System Storage Management (Physical & Logical Storage)->File Systems->Add / Change / Show / Delete File Systems来建立文件系统,然后Mount a File System菜单中mount上
fsize_hard = -1
core = -1
core_hard = -1
cpu = -1
cpu_hard = -1
data = -1
data_hard = -1
rss = -1
export LD_LIBRARY_PATH
PATH=/usr/bin:/etc:/usr/sbin:/usr/ucb:$HOME/bin:/usr/bin/X11:/sbin:.:$ORACLE_HOME/bin
oracle:
fsize = -1
data = -1
stack = -1
6.检查oracle需要系统支持文件
通过命令 lslpp -l来检查,需要的文件如下:
bos.adt.prof
bos.adt.base
bos.adt.lib
bos.adt.libm
4.修改进程数
smit chgsys-->Maximum number of PROCESSES allowed per user 修改为2048
oslevel -r
5.修改限制文件
/etc/security/limits
内容如下:
default:
fsize = 2097151
ACTIVE PVs: 1 AUTO ON: yes
MAX PPs per VG: 32512
MAX PPs per PV: 1016 MAX PVs: 32
TOTAL PVs: 1 VG DESCRIPTORS: 2
STALE PVs: 0 STALE PPs: 0
ACTIVE PVs: 1 AUTO ON: yes
VG PERMISSION: read/write TOTAL PPs: 546 (139776 megabytes)
MAX LVs: 512 FREE PPs: 546 (139776 megabytes)
MAX PPs per VG: 130048
MAX PPs per PV: 1016 MAX PVs: 128
LTG size (Dynamic): 256 kilobyte(s) AUTO SYNC: no
