bruker安装方法
布鲁克傅里叶变换红外光谱仪显微镜说明书
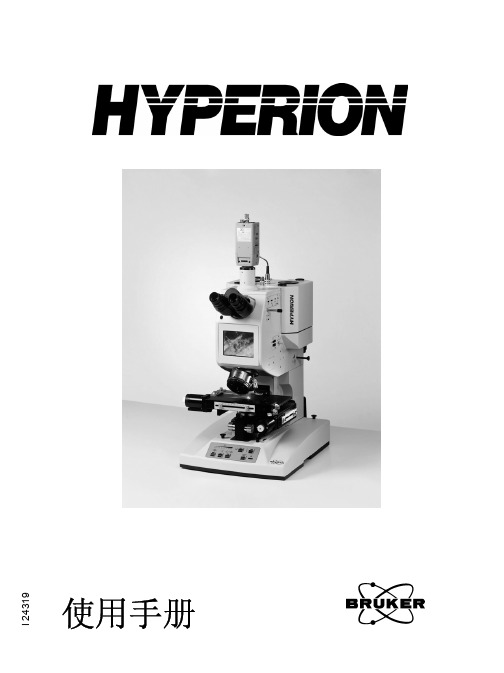
使用手册
© 2003 BRUKER OPTIK GmbH, Rudolf Plank Str. 23, D-76275 Ettlingen, Germany
The text, figures and programs have been worked out with the utmost care. However, we can accept neither legal responsibility nor any liability for any incorrect statements which may remain, or their consequences. The following publication is protected by copyright. All rights reserved. No part of this publication may be reproduced in any form by photocopy, microfilm or other procedures or transmitted in a usable language for machines, in particular data processing systems without our written authorization. The rights of reproduction through lectures, radio and television are also reserved. The software and hardware descriptions referred to in this manual are in many cases registered trademarks and as such are subject to legal requirements.
BRUKER TENSOR 说明书

用户手册I 22200© 2002 BRUKER OPTIK GmbHThe text, figures and programs have been worked out with the utmost care. However, we can accept neither legal responsibility nor any liability for any incorrect statements which may remain, or their consequences. The following publication is protected by copyright. All rights reserved. No part of this publication may be reproduced in any form by photocopy, microfilm or other procedures or transmitted in a usable language for machines, in particular data pro-cessing systems without our written authorization. The rights of reproduction through lec-tures, radio and television are also reserved. The software and hardware descriptions referred to in this manual are in many cases registered trademarks and as such are subject to legal requirements.This manual is the original documentation for the TENSOR.T ABLE OF C ONTENTS. . . . . . . . . . . . . . . . . . . . . . . . . . . . . . . . . . . . . . .1光谱仪安全事项 . . . . . . . . . . . . . . . . . . . . . . . . . . . . . . . . . . . . . .1基本安全原则. . . . . . . . . . . . . . . . . . . . . . . . . . . . . . . . . . . . . . . . . . . . . . 2警告标记. . . . . . . . . . . . . . . . . . . . . . . . . . . . . . . . . . . . . . . . . . . . . . . . . . 3分束器的安全 (仅对TENSOR37). . . . . . . . . . . . . . . . . . . . . . . . . . . . . . 62简介 . . . . . . . . . . . . . . . . . . . . . . . . . . . . . . . . . . . . . . . . . . . . . . .7运输 . . . . . . . . . . . . . . . . . . . . . . . . . . . . . . . . . . . . . . . . . . . . . . . . . . . . . 8清洁 . . . . . . . . . . . . . . . . . . . . . . . . . . . . . . . . . . . . . . . . . . . . . . . . . . . . . 8场地要求. . . . . . . . . . . . . . . . . . . . . . . . . . . . . . . . . . . . . . . . . . . . . . . . . . 8光路 . . . . . . . . . . . . . . . . . . . . . . . . . . . . . . . . . . . . . . . . . . . . . . . . . . . . 103开箱与安装. . . . . . . . . . . . . . . . . . . . . . . . . . . . . . . . . . . . . . . . .11简介 . . . . . . . . . . . . . . . . . . . . . . . . . . . . . . . . . . . . . . . . . . . . . . . . . . . . 11装箱内容. . . . . . . . . . . . . . . . . . . . . . . . . . . . . . . . . . . . . . . . . . . . . . . . . 11安装光谱仪. . . . . . . . . . . . . . . . . . . . . . . . . . . . . . . . . . . . . . . . . . . . . . . 124光谱仪介绍. . . . . . . . . . . . . . . . . . . . . . . . . . . . . . . . . . . . . . . . .15简介 . . . . . . . . . . . . . . . . . . . . . . . . . . . . . . . . . . . . . . . . . . . . . . . . . . . . 15状态灯 . . . . . . . . . . . . . . . . . . . . . . . . . . . . . . . . . . . . . . . . . . . . . . . . . . 16样品腔 . . . . . . . . . . . . . . . . . . . . . . . . . . . . . . . . . . . . . . . . . . . . . . . . . . 17外光路出口. . . . . . . . . . . . . . . . . . . . . . . . . . . . . . . . . . . . . . . . . . . . . . . 18后视图 . . . . . . . . . . . . . . . . . . . . . . . . . . . . . . . . . . . . . . . . . . . . . . . . . . 195仪器的操作. . . . . . . . . . . . . . . . . . . . . . . . . . . . . . . . . . . . . . . . .21简介 . . . . . . . . . . . . . . . . . . . . . . . . . . . . . . . . . . . . . . . . . . . . . . . . . . . . 21光谱仪的开与关 . . . . . . . . . . . . . . . . . . . . . . . . . . . . . . . . . . . . . . . . . . . 21快速卡式接口QuickLock™ . . . . . . . . . . . . . . . . . . . . . . . . . . . . . . . . . . 22自动样品识别. . . . . . . . . . . . . . . . . . . . . . . . . . . . . . . . . . . . . . . . . . . . . 24更换红外光源. . . . . . . . . . . . . . . . . . . . . . . . . . . . . . . . . . . . . . . . . . . . . 24更换分束器 ( 仅对TENSOR37 ). . . . . . . . . . . . . . . . . . . . . . . . . . . . . . 28更换探测器. . . . . . . . . . . . . . . . . . . . . . . . . . . . . . . . . . . . . . . . . . . . . . . 296维护 . . . . . . . . . . . . . . . . . . . . . . . . . . . . . . . . . . . . . . . . . . . . . .31避免静电. . . . . . . . . . . . . . . . . . . . . . . . . . . . . . . . . . . . . . . . . . . . . . . . . 31取出与再生干燥剂 . . . . . . . . . . . . . . . . . . . . . . . . . . . . . . . . . . . . . . . . . 32更换激光器模块 . . . . . . . . . . . . . . . . . . . . . . . . . . . . . . . . . . . . . . . . . . . 34更换红外光源. . . . . . . . . . . . . . . . . . . . . . . . . . . . . . . . . . . . . . . . . . . . . 35更换保险丝. . . . . . . . . . . . . . . . . . . . . . . . . . . . . . . . . . . . . . . . . . . . . . . 35取下窗片. . . . . . . . . . . . . . . . . . . . . . . . . . . . . . . . . . . . . . . . . . . . . . . . . 36TENSOR User’s Manual iii7故检分析. . . . . . . . . . . . . . . . . . . . . . . . . . . . . . . . . . . . . . . . . . .39 TENSOR不工作 . . . . . . . . . . . . . . . . . . . . . . . . . . . . . . . . . . . . . . . . . . 40达不到仪器指标 . . . . . . . . . . . . . . . . . . . . . . . . . . . . . . . . . . . . . . . . . . . 44A TENSOR指标B Tensor选件/消耗品C缺省参数设置D尺寸图E与TENSOR交换数据F电子与电源部分G样品制备iv TENSOR User’s ManualTENSOR User’s Manual 7. . . . . . . . . . . . . . . . . . . . . . . . . . . . . . . . . . . . .光谱仪安全事项1本手册指出了应该注意到的安全事项,它涉及到操作者个人的安全、以及保护光谱仪和相连接的其他设备。
Bruker 400MHz核磁共振谱仪的使用的管理办法

一. Bruker 400MHz核磁共振谱仪的使用管理办法1.该仪器属于学院大型贵重仪器设备,面向全院开放使用,实行24小时开放制度。
使用者须经过仪器管理员的培训,考核合格后方可独立使用。
其余人员一律不准上机操作,否则给予院内通报批评,对造成仪器故障者,其所属课题组将取消上机操作资格1年。
2.独立使用仪器者必须严格遵守本室制定的相关规章制度和安全卫生制度,严格按操作规程使用仪器。
如因违反上述规定而造成仪器损坏、影响性能者,本人将被取消仪器使用资格,并院内通报批评,其所属课题组将取消上机操作资格1年。
3.该仪器的使用实行分段预约制度,请使用者根据样品的测试要求进行预约,并按要求登记预约信息。
遵守预约时间使用仪器,以免浪费机时。
使用结束后如实登记使用记录。
如果迟到超过预约时间5分钟或使用后不做记录者将被取消2周仪器使用资格4.核磁数据不允许在仪器工作站上进行处理,尤其不允许用U盘直接拷贝。
应根据要求在数据处理机上进行处理或发送。
违者将被取消2周仪器使用资格5.使用期间仪器出现故障,使用者应及时通知仪器管理员,以便尽快维修,隐瞒不报者将被追究责任,加重处理。
6.本室仅对使用者开放,不允许带无关人员进入实验室,否则出现故障将追究使用者责任。
进入实验室之后,请务必关好门。
请大家互相督促,杜绝安全隐患。
若发现有违规人员,将取消测试资格。
7.使用者应保持核磁室的卫生清洁,测试完毕请及时带走样品,本室不负责保管。
二. 管理员的工作细则1.了解核磁技术的原理及其应用的多学科背景知识,不断跟踪学习核磁技术的最新发展,积极开发应用仪器在不同学科的应用,使其在相关科研工作中尽可能发挥最大作用。
2.熟悉仪器的原理、构造及各部分的功能,严格遵守仪器部件的开关顺序,在突然停电时能及时处理仪器;关注仪器各部件有无异常,包括液氮和液氦出口是否有结冰现象。
3.能够制定该仪器相关的各种管理制度,包括仪器室管理制度、测试预约制度,培训制度,详细的仪器操作规程等。
Bruker Toolbox 安装指南说明书

030.0122.03.0S1 TITAN/T RACER 5/CTX Bruker Toolbox Installation Guide1.7.0.128This page intentionally left blank.Table of Contents1. Introduction and Requirements (5)2. Setting User Access Control (6)3. Installing Bruker Toolbox (8)4. Connecting the Instrument (12)Appendix A C++ Redistributable (14)Appendix B Installing the Driver (15)Appendix C Working with a Firewall (17)This page intentionally left blank.1.Introduction and RequirementsDescription Bruker S1 TITAN, T RACER 5, and CTX instruments can be operated remotely from a PC with – ∙Windows operating system 7, 8.1, or 10.∙Bruker Toolbox, part number710.0042, included on the Bruker USB stick User Manuals, Toolbox, Videos, part number 160.0209.This manual describes how to install Bruker Toolbox onto a PC. Windows administrator rightsare required.Microsoft requirements Bruker Toolbox software requires appropriate Microsoft support packages – ∙.NET 4.6.2 or higher.∙Visual C++ Redistributable package..NET If the available version of .NET is not 4.6.2 or higher, the installation process is exited. To install the latest version, go to https:///en-us/download/details.aspx?id=55170 orsearch Google for “.NET download.”IP address The S1 TITAN, T RACER 5, and CTX default IP address is 192.168.137.139. To change the IP address, from the Ready to Test screen on an instrument, tap Utilities -> Connections -> Connection ->USB tab or Wireless tab. See the Supervisor Manual, Bruker document 030.0113.Contacting Bruker Email: **********************Address: 415 N. Quay Street Phone: +1 (509) 783-9850, Option 4 Kennewick, WA 99336 USA Web: /hhxrf2.Setting User Access ControlDescription Before installing Bruker Toolbox, the User Access Control must be set.Process To change User Account Control settings in Windows –Step Action Result1 On the PC, open the Control Panel. The Control Panel window is displayed.2 Select User Accounts. The User Accounts window is displayed.3 Click Change User Account Control settings. The User Account Control Settingsdialog box is displayed.4 Drag the slider down and click OK. The change is saved and the dialog boxis closed.3. Installing Bruker ToolboxDescriptionThis section describes how to install Bruker Toolbox onto a PC. The two different methods are based on whether Toolbox was installed previously. If so, the old version is automatically uninstalled, with one exception, as described below.Exception: version 1.6.0.110In the case of Bruker Toolbox version 1.6.0.110, before a new version can be installed, version 1.6.0.110 must be explicitly uninstalled using Windows Start -> Control Panel -> Programs and Features . Right click Bruker Toolbox and click Uninstall .Process if not installed previouslyTo install Bruker Toolbox onto a PC for the first time –Step Action Result 1 Disconnect the instrument from the PC. 2 Install the provided USB stick, part number 160.209. Navigate to and double-click the Bruker Toolbox file name or download from the Bruker website.The Bruker Instrument Tools and BrukerRemoteCtrl Installation dialog box is displayed.3 Click Next . The Installation Folder dialog box is displayed.4Accept the default folder by clicking Next .ORChange the destination folder by – 1. Clicking Browse…2. From the Browse for Folder dialogbox, selecting a folder and clicking OK .3. Clicking NEXT . The Installing Files progress box is displayed briefly, then the Bruker Instrument Tools and Bruker RemoteCtrl Install Successful dialog box.If a previous version is already installed, the Uninstall Previous Version dialog box is displayed. See the following table for steps. 5Click Finish .Bruker Instrument Tools and BrukerRemoteCtrl icons are displayed on the desktop.Process if previously installedStep ActionResult1 Starting at Step 4 of the previoustable, click OK on the Uninstall Previous Version dialog box.After a moment, the Bruker Instrument Tools and Bruker RemoteCtrl Uninstallation! dialog box is displayed.2 Click Next. A progress bar is displayed briefly, then the UninstallSuccessful dialog box.3 Click Finish. The Installing Files progress box is displayed briefly,then the Bruker Instrument Tools and BrukerRemoteCtrl Install Successful dialog box.4 Click Finish .Bruker Instrument Tools and Bruker RemoteCtrl icons are displayed on the desktop.Cancelling uninstallation To cancel the uninstallation , click Cancel on an Uninstalling dialog box. The following dialog box is displayed.Click OK .4.Connecting the InstrumentDescription To finalize the driver installation for the first time only, connecting the instrument to the PC through a USB cable is recommended.Process To connect the instrument to the PC –Step Action Result1 Power on the PC and the instrument.2 Connect the instrument to the PC with a USB cable(Bruker part number 160.0012.01.0).3 On the PC, double-click the Bruker RemoteCtrl icon. The Bruker RemoteCtrl windowis displayed.4 Click File.A dropdown list is displayed.5 Click Connect. The Connect popup is displayed.6 Log into the instrument in Supervisor mode andfollow instructions on the instrument screen. Thedefault password is 54321.The Ready to Test screen isdisplayed.7 On the instrument, tap Utilities -> System Setup-> Connections.The Connection screen is displayed.8 On the instrument, select USB Enable and click OK. After a few minutes, the firsttime the PC and instrument areconnected after the first timethe driver is installed, theWindows Security Alertwindow is displayed on the PC.If not, see Working with aFirewall on page 17.9 Check the box for Public network, such as … andclick Allow access. After a few seconds, the instrument serial number is displayed in the Connect dialog box.10 On the PC, click the instrument name and click OK. After a few seconds, theinstrument screen is displayedon the PC.Appendix A C++ RedistributableC++RedistributableThe installation process should include automatic installation of .dll files. If not, see the following.When accessing Bruker RemoteCtrl, if an error message stating that msvcp140.dll and/orvcruntine.dll are missing is displayed, Visual C++ Redistributable for Visual Studio 2015 must beinstalled.To install msvcp140.dll and/or vcruntine.dll –Step Action Result1 Navigate to/en-us/download/details.aspx?id=48145. The download page is displayed.2 Click the red Download button. A new page isdisplayed.3 Select the vc_redist.x86.exe checkbox and click Next.Note: x86 version is required even on a 64-bit OS. vc_redist.x86.exe is available at the bottom of the browser.4 Click Save and Run. The installationwindow is displayed.5 Read, and click the box to agree to, the license terms andconditions. Click Install. Libraries are installed in the appropriate location.Appendix B Installing the DriverDescriptionThe installation process should include automatic installation of the driver. If not, see the following.This section describes how to manually install the driver for Windows operating systems 7, 8.1, or 10. For subsequent installations of Bruker Toolbox, these steps are not required as the driver is automatically installed.ProcessTo install the driver –Step ActionResult1 Power on the PC and the instrument.2 Connect the instrument to the PC with a USBcable (Bruker part number 160.0012.01.0). 3 Navigate to the folder containing BrukerToolbox. The default location isC:\Programs Files (x86)\Bruker\Bruker Toolbox\.4 Right click on the file name appropriate to theoperating system.Windows 7 – rndisbruker.infWindows 8.1 and 10 - brukerrndis.inf A dropdown list is displayed.5 Click Install .The Windows Security dialog box is displayed.6Select Install this driver software anyway .The message Device driver software installed successfully is displayed.If the message Device driver software was not successfullyinstalled , unplug the USB cable, wait 15 seconds, and plug it in again.Appendix C Working with a FirewallDescription The installation process should include automatic access through a firewall. If not, see the following.A firewall may interfere with the connection between a PC and an instrument and prevent theinstrument serial number from displaying in the Connect dialog box. This section describes howto work around a firewall by deleting certain firewall rules.Port numbers Fixed port numbers are 55000, 55101, 55102, 55203. Artax uses 55204. Data Stream uses 55001, 55204, 55205, and 55500. These must stay open.Process To delete firewall rules that block Bruker programs –Step Action Result1 On the PC, open the Control Panel. The Control Panel window is displayed.2 Click Windows Firewall. The Windows Firewall window isdisplayed.3 Click Allow a program or feature throughWindows Firewall. The Allow programs to communicate through Windows Firewall window is displayed.4 For each program to be deleted, highlightthe name and click Remove. Remove thefollow programs:∙All entries that start with S1RemoteCtrl,e.g., S1RemoteCtrl, S1 RemoteCtrl,S1 RemoteCtrl.exe.∙S1 Sync.∙Bruker Instrument Tools.∙Bruker RemoteCtrl.The window reflects the changes.5 Close all windows.6 Repeat the steps in Connecting theInstrument on page 12 for both BrukerRemoteCtrl and Bruker Instrument Tools.。
brukerin-vivoxtreme小动物活体成像系统标准操作规程(1)
Bruker In-Vivo Xtreme小动物活体成像系统标准操作规程【目的】通过制定本操作规程,规范小动物活体成像系统使用。
【准备】1、实验试剂(药物、染料、麻醉剂、水、脱毛膏等);2、实验对象(小鼠、大鼠、黑鼠、裸鼠等);3、如需要气体麻醉则要进行氧气准备,将麻醉剂倒入麻醉机中,并检查麻醉机检查窗中液位位于“min”和“Max”之间;气体麻醉前根据室内温度情况酌情打开动物空气加热器。
【开机】主机部分:1、打开X-Ray光源,将开关钥匙打到“ON”的位置;2、打开主机,将主机右后方的电源开关打到“ON”的位置。
接着打开电脑,等待网线图标出现一个黄色三角叹号后,将MI软件打开。
注意:仪器开机以后,需要大约20分钟的预冷时间。
附属部分:1、如需要进行气体麻醉,则需要打开麻醉机,并对实验对象进行预麻醉;2、如果需要进行三维旋转拍摄,则需准备动物旋转系统(MARS),动物旋转系统的准备需要在不开拍摄软件和MARS控制器按钮打到manual的情况下,先按要求将旋转器安装到暗箱中,然后将按钮打到auto,完成之后即可打开MI软件【拍照】1、将实验对象摆放到托盘中,拍照部位朝下,如拍摄腹部影像,需将实验对象腹部朝下,并将四肢伸展开,然后将托盘放入暗箱拍摄位置,放置是托盘缺口朝右侧摆放;2、双击桌面MI图标,打开MI软件,单击“Capture”按钮,打开拍摄参数设置界面;1):拍摄界面顶部显示仪器型号。
MI软件提供同时拍摄两张图像的功能,即第一张图像是Foreground,主图像,第二张图像是Background,背景图像。
点击Foreground和Background按钮进行切换,对两张图像的拍摄程序分别进行编辑。
2):左边第一部分File里可以执行和创建、编辑修改一个Protocol,同时,Protocol还可以通过点击软件顶部的工具栏中Protocol按钮打开。
3):第二部分是选择拍摄模式,共有5种,分别为Fluorescence荧光,Luminescence化学发光,Radioisotopix同位素,X-Ray X光,Reflectance 反射光,另外可以Custom定制程序。
核磁处理软件使用说明
谱图显示
可使用工具按钮上有关谱图显示的按钮进 行谱图放大,缩小等操作
Mestre-C有关参数的设置
窗口背景,options-》seting 谱图参数,options-》properties
2D 处理
找出变换好的图谱路径如下: File\open\文件所存盘\文件名\样品编号 \pdata\文件类型(所有文件all files)\ 文件名1D为 1r,2D为 2rr
可以拉大边框对图谱大小调整,拉后要选中上 边和左边的1d调整,点击右面automatic factor改为2 调整画面。
放大图谱只要用鼠标框中2d在点击鼠标左右键,然后分别 用鼠标点击上边和左边的1d调整,通过点击一边把一边变为 灰色,另一边变为蓝色进行调整(灰色不变,蓝色变)。
打印要把右面colors设置为黑色
核磁处理软件
Mestre-C WINNMR
核磁数据处理软件
有:NUTS、MestRe-C、Gifa等; NUTS可以处理一维及二维核磁数据,其功 能包括付立叶变换、相位校正、差谱、模 拟谱、匀场练习等几乎所有核磁仪器操作 软件的功能;其演示版在 下载
MestRe-C为处理一维二维核磁数据的免费软件,功 能完善。其最新版本为2.3,有兴趣可在 c.es/jsgroup/MestRe-C/MestReC.html处查看有关信息即下载;或所内网站上下 载; Gifa可以处理一至三维核磁数据,为运行在LINUX 操作系统中X-Window上的免费软件,有关信息可 查看http://www.cbs.univ-montp1.fr/GIFA
File\open\文件所存盘\文件名\碳谱编号\1r
analysis/peak picking/pc/ok/mouse pp框出所需的峰/
Bruker InVivo Xtreme小动物活体成像系统标准操作规程
Bruker In-Vivo Xtreme小动物活体成像系统标准操作规程【目的】通过制定本操作规程,规范小动物活体成像系统使用。
【准备】1、实验试剂(药物、染料、麻醉剂、水、脱毛膏等);2、实验对象(小鼠、大鼠、黑鼠、裸鼠等);3、如需要气体麻醉则要进行氧气准备,将麻醉剂倒入麻醉机中,并检查麻醉机检查窗中液位位于“min”与“Max”之间;气体麻醉前根据室内温度情况酌情打开动物空气加热器。
【开机】主机部分:1、打开X-Ray光源,将开关钥匙打到“ON”的位置;2、打开主机,将主机右后方的电源开关打到“ON”的位置。
接着打开电脑,等待网线图标出现一个黄色三角叹号后,将MI软件打开。
注意:仪器开机以后,需要大约20分钟的预冷时间。
附属部分:1、如需要进行气体麻醉,则需要打开麻醉机,并对实验对象进行预麻醉;2、如果需要进行三维旋转拍摄,则需准备动物旋转系统(MARS),动物旋转系统的准备需要在不开拍摄软件与MARS控制器按钮打到manual的情况下,先按要求将旋转器安装到暗箱中,然后将按钮打到auto,完成之后即可打开MI软件【拍照】1、将实验对象摆放到托盘中,拍照部位朝下,如拍摄腹部影像,需将实验对象腹部朝下,并将四肢伸展开,然后将托盘放入暗箱拍摄位置,放置就是托盘缺口朝右侧摆放;2、双击桌面MI图标,打开MI软件,单击“Capture”按钮,打开拍摄参数设置界面;1):拍摄界面顶部显示仪器型号。
MI软件提供同时拍摄两张图像的功能,即第一张图像就是Foreground,主图像,第二张图像就是Background,背景图像。
点击Foreground与Background按钮进行切换,对两张图像的拍摄程序分别进行编辑。
2):左边第一部分File里可以执行与创建、编辑修改一个Protocol,同时,Protocol还可以通过点击软件顶部的工具栏中Protocol按钮打开。
3):第二部分就是选择拍摄模式,共有5种,分别为Fluorescence荧光,Luminescence化学发光,Radioisotopix同位素,X-Ray X光,Reflectance反射光,另外可以Custom定制程序。
topspin下载地址及安装全过程
结束TopSpin后,黑色的DOS窗口会自动关闭,手动关闭可能导致系统时间不能正确恢复,在任务管理器中强制关闭下列
任何进程,也可能导致出错:cpr.exe, java.exe, cprclient.exe, tsvlic.exe, cprserver.exe, dataserver.exe。
Bruker TopSpin 2.1下载地址:,用户名:nmr,密码:bruker
位于目录NMR/downloபைடு நூலகம்d/TopSpin/下,下载TS21*开头的,不要下TS30开头的。
1. 下载TopSpin 2.x(大约1GB),解压,运行安装程序(点击install.cmd),如果出现安装模式选项,选Data Processing Only(默认),安装中不能选择目录等;
注意:该插件安装程序只接受默认的TopSpin安装路径。
更改系统时间有时会被反病毒软件拦截,需要你允许该时间更改。关闭系统时间服务,也会导致此插件不能正常工作。
顺便说一句,TopSpin运行期间位移和积分工具会检查当前时间,如果当前时间不在许可证有效时间内,这两项功能将不可用。
4. 运行TopSpin,先执行expinstall命令(在窗口底部输入并回车);
5. 在数据列表中添加你的数据目录,鼠标右键菜单中点击Add New Data Dir…,选中目录,目录格式:[NMR数据目录名]
\Data\[user name]\NMR\[dataset name],你从测试那里拷贝回的数据就是那个[dataset name]目录及其中的文件,
其中[]中的内容连同[]一起分别替换为你的计算机名和申请demo license时用的那个hostid,并将文件保存到
Ubuntu操作系统安装使用教程(详细步骤)
Ubuntu操作系统安装使⽤教程(详细步骤)随着微软的步步紧逼,包括早先的Windows⿊屏计划、实施,逮捕番茄花园作者并判刑,种种迹象表明,中国⽤户免费使⽤盗版Windows的⽇⼦将不会太长久了,那么这个世界上有没有即免费⼜易⽤的操作系统呢?答案是有,那就是Ubuntu操作系统。
Ubuntu是⼀个流⾏的Linux操作系统,基于Debian发⾏版和GNOME桌⾯环境,和其他Linux发⾏版相⽐,Ubuntu⾮常易⽤,和Windows相容性很好,⾮常适合Windows⽤户的迁移,预装了⼤量常⽤软件,中⽂版的功能也较全,⽀持拼⾳输⼊法,预装了Firefox、Open Office、多媒体播放、图像处理等⼤多数常⽤软件,⼀般会⾃动安装⽹卡、⾳效卡等设备的驱动,对于不打游戏不⽤⽹银的⽤户来说,基本上能⽤的功能都有了,在Windows操作系统下不⽤分区即可安装使⽤,就如同安装⼀个应⽤软件那么容易,整个Ubuntu操作系统在Windows下就如同⼀个⼤⽂件⼀样,很容易卸载掉。
下⾯我就介绍⼀下Ubuntu操作系统安装使⽤的⽅法,供Ubuntu新⼿参考,希望能起到Linux扫盲的作⽤。
下载Ubuntu Ubuntu有三个版本,分别是桌⾯版(Desktop Edition),服务器版(Server Edition),上⽹本版(Netbook Remix),普通桌⾯电脑使⽤桌⾯版即可,下载地址请点,32位CPU请选择32bit version,上⽹本则可下载Netbook Remix,⽬前Ubuntu已经占据三分之⼀的上⽹本市场,仅次于WIndows XP系统。
Google的Chrome操作系统强有⼒的对⼿就是Ubuntu Netbook Remix。
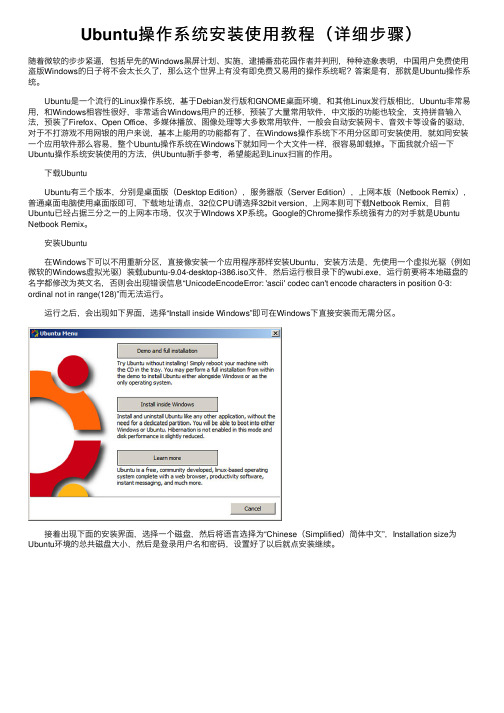
安装Ubuntu 在Windows下可以不⽤重新分区,直接像安装⼀个应⽤程序那样安装Ubuntu,安装⽅法是,先使⽤⼀个虚拟光驱(例如微软的Windows虚拟光驱)装载ubuntu-9.04-desktop-i386.iso⽂件,然后运⾏根⽬录下的wubi.exe,运⾏前要将本地磁盘的名字都修改为英⽂名,否则会出现错误信息“UnicodeEncodeError: 'ascii' codec can't encode characters in position 0-3: ordinal not in range(128)”⽽⽆法运⾏。
BackTrack5使用硬盘安装的方法

BackTrack5使用硬盘安装的方法BackTrack5使用硬盘安装的方法很多用户都了解到BackTrack5使用硬盘安装的话,是要分两步走的。
一步是BT5的硬盘引导,另一步是BT5的硬盘安装。
下面我们就一起来看看具体的步骤吧。
步骤如下:第一部分 BackTrack5(BT5)硬盘引导BackTrack5 (BT5)的硬盘引导借助Grub4DOS完成。
如果你是Wn7,在系统盘根目录下新建 boot.ini。
写入内容(xp系统在文件最后加上上面这行):c:grldr="GRUB4DOS Menu"menu.lst引导BT5的内容title BackTrack5 Text - Default Boot T ext Moderoot (hd0,0) kernel /casper/vmlinuz file=/preseed/custom.seed boot=casper text splash vga=791-- initrd /casper/initrd.gzboot下载好CD镜像后,用UltraISO将全部文件解压缩到系统盘根目录(你的系统盘)下即可。
重启时选择进入BackTrack5的引导。
进入BT5的LIVE了默认账户是root,密码是toor,进入图形化桌面是startx。
第二部分 BackTrack5(BT5)硬盘安装真正的方法,用loop将iso文件挂载到/cdrom目录下。
具体做法:1.准备好你的.bt5的安装iso,最好是放在你的系统盘也就是sda1中。
打开一个终端,在终端中运行cd /sudo mkdir nenewsudo umount -l /cdromsudo mount /dev/sda1 /nenewls /nenew运行到这一步的时候,看看回显的结果中是否有你的镜像文件,如果你放到了第一个分区中,应该可以看到你的镜像名称,可以继续第二步了。
如果你没有放到系统根目录下,就执行下面的命令,将sda的数字依次递增,直到ls 的结果有你的镜像为止。
布鲁克Q4-170操作规程
废气瓶
废气瓶应装 1/2 以上的水,必要时请更换清洁水。
三、仪器开启与关闭
打开墙上总电源开关――――打开稳压电源开关(等待一分钟左右,待电 压输出稳定――――打开仪器主机开关――――打开氩气供应并调整输出压力 (0.3~0.4MPa),――――开启计算机主机及显示器等其它附属设备――――启动仪 器操作软件 QMtrix――执行初始化 UV 光学系统――软件将按上次退出时的设置 自动启动。
对于 Q4-170/130 设备,由于仪器增加了 UV 光学系统,需要使用光室吹扫 功能。若仪器关闭时间较长,再开机后,系统会要求重新光室初始化。请按步骤 操作执行即可。 执行步骤: 1.Qmatrix 软件启动――提示需要光室吹扫。
2.点击〔OK〕――-系统提示操作选项
YDM
Q4 TASMAN 直读光谱仪操作规程
于停止某次测量过程,该按钮只在样块前处理不当或在火花台上位置放 置不当的情况下使用,按下该按钮后,分析过程终止,屏幕上将不出现分析数据。 I 形图案按钮用于开始某次测量,该功能也可通过键盘上的 F2 功能键实现 下边旋钮为维护旋钮,当对仪器进行维护时,须将旋钮旋至关闭状态(向左),在该状 态下,仪器将切断高压及火花激发源,只有在所有部件都归位的情况下,才可将维护旋 钮打开。
仪器背面视图
仪器背面面板包括了主电源开关,氩气输入输出端等,虽然在日常工作中较少接触仪器 背面面板,但为维修方便,请将仪器背面通道让出。
旋钮
电源插座
仪器背面的电源插座 为计算机、显示器、打印机及其它设备提供电源输 出,所借设备的功率不得高于 300W。该电源接口不 可用于真空净化器、打磨机、车床等高功率设备。
Bruker Q4 TASMAN全谱直读光谱仪使用手册

德国BRUKER公司Q4TASMAN直读光谱仪用户使用手册仪器正面视图仪器日常分析的所有操作均可通过仪器正面的操作按钮实现,由于仪器的简洁以及人性化设计,使得Q8的操作变得异常简单火花台火花台是用于样品检测过程中放置样快的地方,Q8的火花台包括:●气动样品夹,针对不同形状样品,上方固定针可垂直放置或倾斜放置;●火花台板及火花开口以及下电极。
操作按钮在Q4仪器正面面板上有三个操作按钮:✧O形图案按钮用于停止某次测量过程,该按钮只在样快前处理不当或在火花台上位置放置不当的情况下使用,按下该按钮后,屏幕上将不出现分析数据。
✧I形图案按钮用于开始某次测量,该功能也可通过键盘上的F2功能键实现✧下边旋钮为维护旋钮,当对仪器进行维护时,须将旋钮旋至关闭状态(向左),在该状态下,仪器将切断高压及火花激发源,只有在所有部件都归位的情况下,才可将维护旋钮打开。
火花台盒火花台盒位于火花台的下方,通过把手可将火花台盒拉开。
这时,可相应的把电极和火花台板松开。
若要将其重新关上,只需用力往上推,直到听见清脆的锁紧声为止。
注意:在打开火花台盒之前,请将仪器背面的维修旋钮旋至关闭状态。
仪器背面视图仪器背面面板包括了主电源开关,维修旋钮,氩气输入输出端等,虽然在日常工作中较少接触仪器背面面板,但为维修方便,请将仪器背面通道让出。
旋钮在仪器背面面板上,有两个旋钮,分别是电源开关和维修旋钮。
在进行仪器维护工作时,请将维修旋钮置于关闭状态,这样将断开高电压及火花激发源。
只有在所有部件都归位的情况下,才可将维护旋钮打开。
只有在主电源开关和维护旋钮都开启的状态下,才可进行样快的分析工作。
电源插座仪器背面的电源插座为计算机、显示器、打印机及其它设备提供电源输出,所借设备的功率不得高于300W。
该电源接口不可用于真空净化器、打磨机、车床等高功率设备。
注意:即使仪器开关关闭,接口仍带有230V的电压。
仪器准备检查氩气输出及压力对于仪器的日常使用必须确保具有充足的氩气供应,氩气的输出压力应设定为3 bar 假如氩气通过氩气瓶供应的话,钢瓶压力应高于10bar,假如低于这个数值,请及时更换氩气瓶废气瓶废气瓶应装3/4左右的水仪器开启打开主机开关及维修旋钮,维修旋钮位于开始及停止按钮的下面,仪器开始进入待机状态。
Bruker布鲁克核磁共振仪器上机操作规程完整

核磁上机操作设置导向一、打开气源,调节到0.5 Pa 的输出压力。
常温下可以用压缩空气,变温实验室要使用高纯氮。
二、依次按下BSMS盒子上的里面的样品弹出,换上要做的样品。
三、按下BSMS盒子上的后(“down”显示绿色)点选主菜单Spectrometer Data Acquisition Guide 打开实验设置向导。
1、新建文件:点击New Experiment;或输入命令“new”,得到如下图:【NAME】:文件名;【EXPNO】:试验号(一般1H—11;13C—21;其他杂核--31);【PROCNO】:处理号;【USER】:老师名;【Solvent】:选择要进行试验的样品所用的氘代试剂;【Experiment】选择所需做核磁谱的类型(建议打开已知的文件夹,在此基础上新建,此时新建文件的实验设置参数与已知文件夹相同)。
2、查看通道:点击Frequency Routing ;或输入命令“edasp”,确认选择实验核种及连线。
注意:只有19F 事可能需要改动连线,其他只需要看,而不需要改动。
3、锁场:点击Lock,选择需要锁场的氘代试剂;或者直接输入“lock_氘代试剂简称(如lock h2o)”。
4、查看温度:只有在变温实验时才需要用到。
5、调谐:点击Probe Match;或者输入“atma”(自动调谐),或者“atmm”(手动调谐)。
6、Sample Rotation:依需求决定样品,是否需要旋转及转速设置。
一般液体转速为20Hz ,现在大多数样品不提倡旋转。
7、匀场:点击shim图标或者输入shim命令,得到如下图:之后可以选择匀场方式,如Gradient shimming、Topshim。
另外也可以直接输入“topshim”(三维匀场),or“gradshim”(Z方向梯度匀场)而直接进入匀场,不会出现以上对话框。
8、查看参数:点击Acquisition pars;或者直接输入命令“eda”。
ubuntu常见软件包安装方法
ubuntu下*.sh和*.bin软件包的安装方法在ubuntu下经常下载到*.sh和*.bin两种软件包。
*.sh文件安装方法:运行终端到文件目录下1.在终端输入:sudo sh *.sh直接运行2.在终端输入:sudo chmod +x *.sh在输入:sudo ./*.sh可安装到任意目录,./*.sh可安装到当前用户有权限的目录*.bin文件安装方法运行终端到文件目录下在终端输入:sudo chmod +x *.bin在输入:sudo ./*.bin可安装到任意目录,./*.bin可安装到当前用户有权限的目录例如:jdk的安装sudo chmod +x *.bin./jdk-6u13-linux-i586.bin然后根据安装提示即可~~tar rpm在使用Linux系统的过程中,软件包的安装是避免不了的,在Linux下,软件安装程序的种类很多,安装方法也各式各样,(舒适性自然比不上windows :-不过我们常见的软件包有两种:1含有软件的源代码的压缩包,解压后需要手动编译。
这种软件安装包通常是用gzip压缩过的tar包(后缀为.tar.gz。
./configure (配置make (编译make install (安装make clean (卸载注:典型的源代码包可以这样安装,但不都是这样,如webmin要执行其目录下./setup.sh进入交互式配置安装卸载用uninstall程序具体如果不清楚看要安装的包下的README文件2软件的可执行程序,你只要安装它就可以了(习惯windows安装的朋友的最爱!。
这种软件安装包叫做RPM包(RedhatLinuxPacketManager,就是Redhat的包管理器,后缀是.rpm。
当然,还有有用rpm格式打包的源代码;用gzip压缩过的可执行程序包。
但是只要理解了以下的安装思路,这两种形式的安装包也不在话下了。
下面,我们进行不同软件包安装的详细介绍第一部分:安装.tar.gz软件包1.首先,使用tar -xzvf来解开这个包,如:# tar -xzvf apache_1_3_6_tar.gz*******************************************tar命令参数解释:x 从档案文件中释放文件。
bruker 600的基本操作
[H]谱一维谱图操作步骤1.打开BSMS键盘上按钮,取出原样品,再关掉BSMS键盘上按钮。
2.装好待测样品,按钮,将样品垂直放入仪器中,关掉.3.键入“edc”命令,建立新文件.实验号操作者名字选择相应的溶剂。
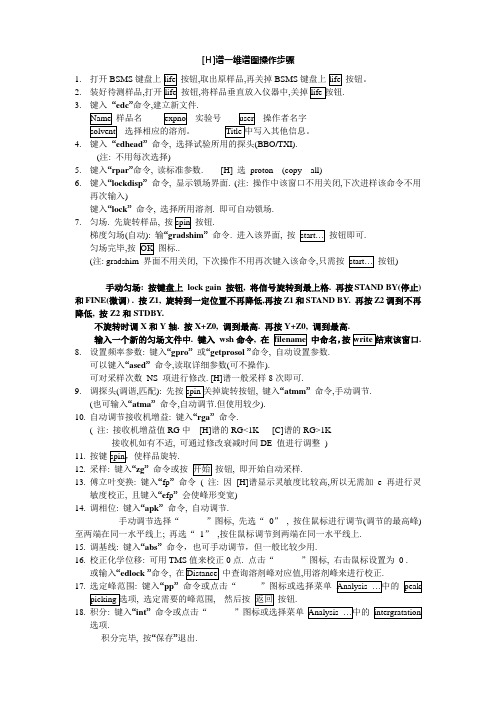
4.键入“edhead”命令, 选择试验所用的探头(BBO/TXI).(注: 不用每次选择)5.键入“rpar”命令, 读标准参数. [H] 选proton (copy all)6.键入“lockdisp”命令, 显示锁场界面. (注: 操作中该窗口不用关闭,下次进样该命令不用再次输入)键入“lock”命令, 选择所用溶剂. 即可自动锁场.7.匀场. 先旋转样品, 按按钮.梯度匀场(自动): 输“gradshim”命令. 进入该界面, 按按钮即可.匀场完毕,按图标..(注: gradshim 界面不用关闭, 下次操作不用再次键入该命令,只需按按钮)手动匀场: 按键盘上lock gain 按钮, 将信号旋转到最上格. 再按STAND BY(停止)和FINE(微调) . 按Z1, 旋转到一定位置不再降低,再按Z1和STAND BY. 再按Z2调到不再降低, 按Z2和STDBY.不旋转时调X和Y轴. 按X+Z0, 调到最高. 再按Y+Z0, 调到最高.输入一个新的匀场文件中. 键入wsh命令, 在中命名,按.8.设置频率参数: 键入“gpro”或“getprosol ”命令, 自动设置参数.可以键入“ased”命令,读取详细参数(可不操作).可对采样次数NS 项进行修改. [H]谱一般采样8次即可.9.调探头(调谐,匹配): 先按, 键入“atmm”命令,手动调节.(也可输入“atma”命令,自动调节.但使用较少).10.自动调节接收机增益: 键入“rga”命令.( 注: 接收机增益值RG中[H]谱的RG<1K [C]谱的RG>1K接收机如有不适, 可通过修改衰减时间DE 值进行调整)11.按键.12.采样: 键入“zg”命令或按按钮, 即开始自动采样.13.傅立叶变换: 键入“fp”命令( 注: 因[H]谱显示灵敏度比较高,所以无需加e再进行灵敏度校正, 且键入“e fp”会使峰形变宽)14.调相位: 键入“apk”命令, 自动调节.手动调节选择“”图标, 先选“0”, 按住鼠标进行调节(调节的最高峰)至两端在同一水平线上; 再选“1”,按住鼠标调节到两端在同一水平线上.15.调基线: 键入“abs”命令,也可手动调节,但一般比较少用.16.校正化学位移: 可用TMS值来校正0点. 点击“”图标, 右击鼠标设置为0 .或输入“edlock ”命令, 在中查询溶剂峰对应值,用溶剂峰来进行校正.17.选定峰范围: 键入“pp”命令或点击“, 选定需要的峰范围, 然后按按钮.18.积分: 键入“int”命令或点击“”图标或选择菜单选项.积分完毕, 按“保存”退出.19.画图: 键入“xwinplot”命令.编辑图表,右击鼠标选修改图形,右击鼠标选选择完先再19. 如要关闭程序,可键入kill 命令, 在弹出的对话框中删掉想关闭的程序即可.[C]谱一维谱图操作步骤1. 打开BSMS键盘上,取出原样品,再关掉BSMS键盘上按钮。
brukerav500m核磁共振使用说明

brukerav500m核磁共振使用说明Bruker AV500 仪使用指南开机,密码“ topspin ”。
开机后运行TOPSPIN 。
装样品:①将核磁管用核磁塞比对高度;②按下控制面板“ DFT on”按钮,绿灯亮起;③待听到有气体吹出,将核磁管连同核磁塞放入核磁仪器中;④再按下控制面板“DFT off ”按钮。
采集1H NMR丿点击Spectrometer 宀Data Acquisition Flowchart—点击New Experiment — NAME 栏“命名” ,EXPN0“实验序号”,PROCNO“1 ”,DIR “ d:/Youlin Zeng ”,USER“你的目录”,Solvent“ 你用的溶剂”,Experiment Dirs“ 选择C:/Bruker/T0PSPIN/explstan/nmr/.par ”,Experient “ 选择proton ”,TITLE “注释” —OK—点击“ Lock”,选择溶剂,点OK,等待显示finished后—点击probe Match/Tune “选择自动”,等待显示job successed —点击菜单栏上的“ topshim tuneaz ” , 显示job successed后—点击Acquisition Pars. 可设置扫场次数(一般不用设),不用等待,接着—点击“ Prosol. Pars”—点击Receiver Gain “选择自动” , 等显示job successed 后T 点击“ go, start Acquisition ”,等显示job successed 后T扫场结束后点击“ To processing"t Window Function (氢谱不点窗函数,碳谱点),接着点击,T Fourier Transform,接着点击T Phase Correction “自动”, 接着点击T Axis Calibration (定溶剂峰CCI3是,DMSO是“自动或手动”t Baseline Corr. (氢谱调基线,碳谱不调)“自动”,接着T点击Peak picking “手动”t integration “手动” t Plot/Print “选择Superthin. xwp ” .T右键“ 1D/2D_Edit”,调整谱图高度,宽度等T打印采集13C NMR同1H NMR类似,Experiment栏选择“C13CPD'。
blackberry黑莓bb轨迹球拆安教程

安装的时候没脚的对着上面,因此取出也是从没脚的地方下手.这样取出来不费
劲!
第一步:要把圆圈取出来, 用指甲或工具从上往外扣.这样很容易的就把圆圈取下来了!
第二步:取球步骤和取圆圈是一样的.取出来相当简单.
这样很容易的就把圆圈和球取出来的
拿出新球出来对比一下,嘿嘿...
开始安装啦....球球先来,先看看球放的位置是什么样的,然后看看球的构造,放球非常简单
球左右有两个凹进去的地方,这样对准放下去就可以了!
到最后了,圆圈要怎么放呢.注意啦,圆圈的三只脚
三只脚对应着三个槽,分别为左,右,下,最上面是没有脚的。
先对准下面脚,按下去。
然后再按两边的脚,最后整个按一下,这样就完成了!
换上新球感觉就是不一样,焕然一新。
哈哈。
又回到了最初买它的时候了!。
