音络USB便携型会议电话使用说明书
soundstation2 电话会议使用说明

背景灯.................................................................................................. 12
语言 ..................................................................................................... 13
结束呼叫................................................................................................. 9
Байду номын сангаас
呼叫保持............................................................................................... 10
管理设置 — 概述 ........................................ 24
密码 ..................................................................................................... 25 地点信息............................................................................................... 26 电话系统............................................................................................... 28
视频会议系统简要使用说明

视频会议终端简易操作
拨主会场通知的会议号
视频会议终端简易操作
被邀请加入会议
视频会议终端简易操作
会议建立
视频会议终端简易操作
遥控器介绍
视频会议终端简易操作
遥控器介绍
视频会议终端简易操作
菜单键
视频会议终端简易操作
根据学校不同需要开启/关闭本地声音
菜单高级设置音频音效
视频会议终端简易操作
视频电话简易操作
登录账号
视频电话简易操作
拨号界面
视频电话简易操作
来电显示
视频电话简易操作
接通会议
视频电话简易操作
创建多人会议
视频电话简易操作
添加与会成员
视频电话简易操作
添加与会成员
视频电Байду номын сангаас简易操作
添加与会成员
四、其他视频会议设备操作
遥控器
其他视频会议设备操作
机柜内设备: 1.功放 2.华为视频终端TE50 3.会议话筒主机
1xHD-AI阵列mic 1x3.5mm Line in
1xHDMI
音频输出(6出) 4xRCA 2xHDMI
其它接口
2xUSB 2.0 2x10/100/1000M LAN 2xCOM口(RS232) 1xPSTN 1xWIFI(内置)
TE50连线总览
视频会议终端简易操作
拨出单个号码
视频会议终端简易操作
连接笔记本,显示演示桌面
将VGA接头插入笔记本, 部分笔记本需手动切换。
视频会议终端简易操作
根据学校不同需要开启/关闭双屏显示笔记本桌面
菜单高级设置视频公共设置 主视频源
三、视频电话简易操作
华为Espace 8950
INNOTRIK AUCTOPUS会议电话产品
INNOTRIK AUCTOPUS会议电话产品产品介绍:AUCTOPUS 扩展型会议电话是企业级会议电话的理想之选,适合在大、中、小型会议室和办公室中使用。
360度范围4米的试音距离涵盖了绝大部分会议应有场景。
AUCTOPUS扩展麦会议电话产品是业界全新的具有真正的INNOTRIK全双工技术、清晰的语音通话质量,可同时进行双向、自然流畅的会谈,其表现得相当优秀。
其麦克风的拾音灵敏度高,现场与会者在4米之内以正常语音说话,可以自然流畅地与远端会场的与会者交流,这使得每一次通话都成为更高效率的会谈。
其主要功能和特点:1.适用商务,造形典雅大方。
2.液晶显示屏幕大,屏幕背光明亮,字体显示清晰。
3.菜单式操作界面。
4.按键舒适,触感好,操作方便。
5.新颖的LED状态指示灯,响铃、通话、静音、保留等,一目了然。
6.容易操作的预拨号、重拨、静音、保留等电话功能。
7.内置10 组可存储的电话簿。
8.支持多方通话。
9.可以扩展2个麦克风装置10.扩展麦克风装置---具有大方的静音按键11.扩展麦克风装置---具有透明的环形指示灯产品结构:1.主控机:包括音频处理和功能控制单元、输入键盘、液晶显示屏。
2.电源接口装置:包括电源适配器、模拟电话线转换接口。
3.线缆:包括1根长6.4米主控机连接电缆和1根长2.1米的连接公共模拟电话网的电话线;4.可以扩展2个麦克风装置:每个装置包括1根2.4米长的专用连接线。
4、主控机尺寸:37.4 x 33.0 x 7.0 (cm)。
5、主控机重量:960克6、电源接口装置尺寸:22.0 x 9.8 x 6.0(cm)。
7、电源接口装置重量:720克8、扩展麦克风装置(可选配件)重量:110克9、扩展麦克风装置(可选配件)尺寸:8.98 x 8.36 x 2.77(cm)。
10、电源: 交流电压AC 220V/50Hz。
11、网络接口: 适合RJ-11,模拟PBX或者PSTN接口。
好会通Meeteasy系列会议电话产品说明书

好会通Meeteasy 系列会议电话产品说明书深圳市好会通科技有限公司 ®Mini 2Mini Mid Ex Mid 2Mid 2ExMidMid HC Mid 2HC®说明书目录一、产品简介 (2)二、好会通Meeteasy系列会议电话及配件 (3)三、好会通Meeteasy系列会议电话接线及接口示意图 (3)四、好会通Meeteasy会议电话功能键说明 (6)五、好会通Meeteasy会议电话的应用示意图 (7)六、好会通Meeteasy会议电话与好会通多方电话会议系统组网应用 (7)七、好会通Meeteasy会议电话详细介绍 (8)7.1.好会通Meeteasy Mini会议电话 (8)7.2.好会通Meeteasy Mini2会议电话 (9)7.3.好会通Meeteasy Mid会议电话 (10)7.4.好会通Meeteasy Mid2会议电话 (11)7.5.好会通Meeteasy Mid EX会议电话 (12)7.6.好会通Meeteasy Mid2EX会议电话 (13)7.7.好会通Meeteasy Mid HC会场终端 (14)7.8.好会通Meeteasy Mid2HC会场终 (15)八、好会通Meeteasy会议电话型号参数比较表 (16)九、型号及配件表 (16)一、产品简介:好会通®/Meeteasy®系列会议电话关注客户需求,贯彻以人为本的设计理念,采用先进的数字信号语音处理(DSP)技术和创新的模块化设计方案,具有卓越的会议电话通话效果和强大的扩展功能,可支持电脑网络通话和3方通话,兼具会议电话和个人电话的功能。
其造型稳重大方,简洁清爽,优美的弧线穿插其中,整体而富有细节,高贵而不张扬。
自主研发的回音消除技术及动态噪音抑制技术,高品质的喇叭和麦克风让会议电话语音音质、音量有质的飞跃。
其无与伦比的全双工通话性能,更是绝无仅有。
好会通®/Meeteasy®系列会议电话包括8款产品,充分满足用户的多样化需求,易于扩展,保护用户投资。
alcatel-lucent_h3p_h3g_h6_桌面电话 用户手册说明书

桌面电话用户手册第一版介绍感谢您选择阿尔卡特朗讯电话。
本文主要介绍连接到服务器的桌面电话以及提供的服务桌面电话桌面电话桌面电话本文中描述的电话在不同的服务器上受支持,本文档中描述的某些功能取决于电话连接到的服务器。
如果需要有关系统兼容性或给定服务器的功能级别的详细信息,请联系系统管理员。
显示的标签和图标取决于集的类型和外观。
如果未在电话系统上配置相应的功能,则不显示标签。
根据显示器的大小,某些标签可能会被截断。
话机的主要功能列表如下多账号彩色屏幕英寸黑白屏,英寸屏幕亮度可调话机角度可调高清手柄耳机耳机兼容双百兆网口双千兆网口外接电源可挂墙多种音频模式切换本地方会议呼叫网页管理现在就开始了解您的话机安装脚架连接您的话机安装有线手柄了解您的电话使用您的电话事件信息话机状态信息设置账号编程键设置缺省账号开启拨号盘拨话机号码按名字拨号从通话记录发起呼叫使用您的个人目录进行呼叫使用快速拨号键呼叫进行点对点呼叫重拨列表联系人联系人管理呼叫您的联系人添加新联系人创建新群组编辑联系人删除联系人删除所有联系人本地话簿删除组删除本地话簿全部组呼叫联系人仅显示未接来电从通话记录中删除联系人清除呼叫记录创建一个快速呼叫使用快速呼叫键发起通话给话机上锁给话机解锁开启或关闭自动键盘锁将电话转移到另一个被保持的联系人将您的电话转移到另一个联系人盲转结束会议会议结束后,让其余两位人员交流结束会议用您的桌面电话做更多的事配置无线网络管理无线网络登录到桌面共享登出桌面共享为您的话机进行个性化设置选择铃声调整铃声大小配置铃声配置蜂鸣模式响铃设备新建可编程按键删除可编程按键支持的可编程按键类型联系您的管理员(技术支持)默认密码高级设置网页管理()配件基本技术规格订购信息担保和条款现在就开始了解您的话机包装清单话机手柄脚架手柄线网线安全手册和快速安装指南安装您的话机安装脚架话机背面有道脚架槽是用来固定话机的脚架,基于脚架放入的不同脚架槽,您的话机可以在在桌面倾斜个角度,分别是度和度要撤下脚架,请安箭头方向向左推拉即可连接您的话机请首先阅读安全说明。
AT2020USBi 心型指向性 USB电容话筒 说明书
音量控制 : 话筒增益控制
重量 : 350 g
大小 : 162.0 mm 长,52.0 mm 机 体 最 大 直 径
输 出连接头 : Micro HDMI 接 头
随 机附件 : ⅝"-27 接头转轴式 支 架 套 环 ; ⅝"-27 至 ⅜"-16 螺 纹 转 接 头 ; 保 护 袋 ; 三脚桌面支架; 1.5m 长 USB 连 线 ;1.5m 长 Lightning 连 线
iPad 或 iPhone 6 . USB 连接线 7. Lightning 连接线
以附设的转轴支架套环和三脚桌面支架设置您的话筒 A. 把转轴支架套环旋扭固定到三脚桌面支架的顶部 B. 把三脚桌面支架放置在一个平滑的平面位置(三脚架的座架应拉开以提供一个宽阔而安全
的底部) C . 把 AT2020USBi 话 筒 插 入 安 装 到 转 轴 支 架 套 环 的 螺 纹 套 筒 的 枢 轴 中, 并 把 话 筒 紧 锁。 话 筒 前
3. 开始菜单 > 控制面板 > 声音 要 选择 AT2020USBi 作为 默 认 的 录 音 设 备 , 首 先 在“ 开 始 ”菜 单 中 选 择“ 控 制 面 板 ”。
6
4 . 选 择“声音”。
Windows 8 的 初 步 设 置 ( 继续 )
5. 下面的视窗将会弹出:
Yealink CP965 触摸敏感 HD IP会议电话说明书
CP965 T ouch-Sensitive HD IP Conference PhoneY ealink CP965 is designed for medium and large-sized conference rooms. Based on Android 9.0 system, it is a flagship HD conference phone with powerful voice conferencing features and easy control operation. CP965 adopts a business and introverted design that per-fectly matches the calm style of the conference room, but also a acoustic fabric, which is impervious to any accidental liquid spills. Its fingerprint-proof LCD screen with a clear UI interaction page makes it easy for everyone to control the meeting. CP965 has 13 built-in microphones, providing you with a clear and natural conference call experience. In addition, you can also connect CP965 to your mobile device (such as PC device, smart phone, etc.) via Bluetooth or USB to achieve a variety of UC hybrid meeting modes. CP965 can be connected with 3 CPs in star shape to realize synchronous sound pickup and playback, providing users with an optimum audio expe-rience. CP965 provides you with a new intelligent voice conferencing solution, which is the ideal office assistant for your conference room.Key Features and BenefitsModest Design, Easy-to-Use User InterfaceY ealink CP965 is a hermit in the conference room. Its black acoustics fabric can realize crys-tal-clear audio and is resistant to water, oil, and stain. Its ultra-thin body, appropriate desktopfit, and ingenious hidden wiring slot, perfectly fit for the simple business style in the conferencerooms. Additionally, its built-in Android 9.0 system and easy-to-use UI interface, allow users tolaunch a meeting with one button and increase user adoptionHD Audio, Smooth CommunicationCP965 adopts Y-shaped design and has 12 built-in microphones for sound picking and 1 micro-phone for noise cancellation. Its 20-foot and 360° omni-direction voice pickup provides userswith clear and natural voice conference experience.Rich Features and High ExpandabilityCP965 supports 10-way conference call, enabling participants from different locations to com-municate smoothly, reducing costs for your company. Y ou can also connect CP965 to yourmobile devices (such as computer, smart phone, PSTN device CPN10, etc.) through Bluetoothor T ype C or USB 2.0 port to realize Hybrid UC meeting (including PSTN, SIP, mobile phone).Moreover, when working with the DECT wireless expansion microphone CPW65, a up to30-meter connection distance with CP965 can be achieved while still keeping the conferenceroom table clean.• Red Dot[2021]• Android 9.0• 5-inch multi-touch screen with 720x1280 resolution• Optimal HD audio, full duplex technology• Y ealink Noise Proof Technology• 20-foot (6-meter) and 360-degree voice pickup• Built-in 12-microphone array for voice pickup• Built-in 1-microphone array for noise cancellation• Power over Ethernet• 10-way conference call• Hybrid UC meeting• Built-in Wi-Fi (2.4GHz/5GHz, 802.11a/b/g/n) Android 9Pairing via BluetoothY ealink DecagonMeeting RoomHybrid UCMeetingSpecificationsYEALINK NETWORK TECHNOLOGY CO., LTD.Email:********************:Email:********************:About YealinkY ealink (Stock Code: 300628) is a global-leading provider of Unified Communication & Collaboration Solutions specialized in video conferencing, voice communications, and collaboration, dedicated to helping every person and organization embrace the power of "Easy Collaboration, High Productivity".With best-in-class quality, innovative technology, and user-friendly experiences, Y ealink is one of the best providers in more than 140 countries and regions, ranks No.1 in the global market share of IP Phone, and is the T op 5 leader in the video conferencing market (Frost & Sullivan, 2021).For more information about Y ealink, click here .CopyrightCopyright © 2022 YEALINK(XIAMEN) NETWORK TECHNOLOGY CO., LTD.All rights reserved. No parts of this publication may be reproduced or transmitted in any form or by any means, electronic or mechanical, photocopying, recording, or otherwise, for any purpose, without the express written permission of Y ealink(Xiamen) Network T echnology CO., LTD.Technical SupportVisit Y ealink WIKI (/) for firmware downloads, product documents, FAQ, and more. For better service, we sincerely recommend you to use Y ealink Ticketing system (https://) to submit all your technical issues.YEALINK(XIAMEN) NETWORK TECHNOLOGY CO.,LTD.Web: Addr: No.1 Ling-Xia North Road, High Tech Park,Huli District, Xiamen, Fujian, P .R.CCopyright©2022 Y ealink Inc. All rights reserved.。
MXL Tempo USB 麦克风使用说明书

TEMPO USB MICROPHONEC ongratulations on your purchase of the MXL T empo USBmicrophone. MXL microphones are the result of world-class engineering and manufacturing capabilities. They are designed to provide you with outstanding performance and exceptional value. While we encourage you to review this entire manual, there are a few key points about handling this microphone that we want you to familiarize yourself with right from the start.MXL USB mics are professional quality, cardioid condenser studio microphones designed specificallyfor recording, podcasting, and video chats. Unlike microphones designed for live performance or dynamic model microphones, this instrument requires careful handling. Hence, you should observe the following:ALWAYS: Handle the microphone carefully, avoidingsudden shocks such as dropping or bumpingthe microphone into other objects. ALWAYS: Maintain a distance of approximately 4 – 6inches when speaking or singing into themicrophone. You are encouraged to use apop filter for added protection of the sensitivecapsule and to shield the instrument from salivaand sudden bursts of air.NEVER:Tap the microphone to check if it’s working. The RED LED on the back of the microphone locatednext to the headphone jack will tell you it’s onand that the correct side is facing you. NEVER:Blow into the microphone to check if it’sworking. The RED LED on the back of themicrophone located next to the headphone jackwill tell you it’s on and that the correct side isfacing you.By following these few basic handling procedures, you can expect a long and trouble-free relationship with your new microphone. Again, thank you for your purchase of this outstanding MXL microphone.A Little Background InformationMXL condenser microphones use what is known asa cardioid pickup pattern, which is more sensitive to sound waves arriving at the front of the microphone as opposed to those arriving from the sides or rear. This microphone benefits from being a USB (Universal Serial Bus) device—meaning this is a plug and play microphone2that will interface with Windows® operating system and Mac® computers without the need for any special drivers. Because it is a USB device, this microphone does not require an external microphone preamp, as is the case with most condenser microphones.When recording an outdoor performance, use a windscreen to protect your microphone from recording problems caused by wind and damage from the elements.Unpack Your MicrophoneBegin by examining the contents of your MXL USB kit. You should have the following components:• One MXL Tempo USB microphone• USB 2.0 high speed cable• Tripod stand• Hard mount mic stand adapter• Owner’s manualGetting Familiar with Your MicrophoneIn addition to speaking or singing into the side of the microphone with the cardioid symbol you should also notice the 1/8” stereo headphone jack on the back. This is a stereo headphone jack for monitoring the microphone’s signal as well as hearing the audio played back from your computer. The 1/8” jack accepts most headphones but the maximum headphone volume will vary by manufacturer and model so care should always be exercised when first plugging in.Using the Supplied Desktop Microphone Stand1. Screw the microphone stand mount to the desktopstand.2. Separate the desktop stand’s legs and place it on a flatsurface.3. While holding the microphone upright and firmly in onehand, secure the microphone to the desktop stand byscrewing the black mounting ring into the microphone’s base. The microphone should now sit securely in thedesktop stand.4. Adjustments can be made to the angle of themicrophone by loosening the thumbscrew on the side of the stand adapter.5. At this point, attach the end of the USB cable thatmatches the microphone’s connector. The other end3 4Connecting the Microphone to Your Computer (Windows)The MXL Tempo USB microphone will operate with both USB 2.0 (high speed USB) and USB 1.1 data buses. We recommend you connect your microphone directly to the computer’s USB port as opposed to using a USB hub. USB hubs have been known to interfere with the performance of various USB devices.PLEASE NOTE: Audio and video recording can be very taxing to a computer’s resources. For this reason, you should close any and all running applications that are not essential.Please take the following steps to get connected:1. If open, close your audio recording application. Youwill open it after the microphone is connected and operational.2. Connect the remaining end of the USB cable to thecomputer’s USB port. You will see a red LED illuminate on the back of the microphone located next to the headphone jack, and Windows will display the New Hardware Found dialog message.3. Allow Windows time to identify the device.4. In approximately one minute, Windows should displaya dialog message stating that Your New Hardware is Installed and Ready for Use . After this first connection, Windows will require just a few moments to identify themicrophone.of the cable will connect to your computer’s USB port .5Initial Setup with Windows XP Operating System1. To select the MXL Tempo USB microphone as thedefault audio device, go to the Start Menu and select Control Panel.2. Select Sounds and Audio Devices.3. Click on the Audio tab and select USB audio CODECas the default device for Sound playback and Sound Recording .64. To adjust the headphone volume, click on the Volumebutton under Sound playback.5. The master volume can be changed by moving the Speaker fader up or down.6. T o adjust the volume of the microphone signal directlyto the headphones, adjust the Microphone fader up or down (this does not affect the volume of the microphone signal being recorded).77. To adjust the volume of the microphone signal thatgoes to the computer and is recorded, click on the Volume button under sound recording.8. Adjust the level by moving the Microphone fader upor down. The gain of the microphone is very sensitive. For most applications, the gain will be set towards the bottom of the fader.Your computer is now setup to use the MXL TempoUSB microphone with most recording applications. Some applications will require additional settings to be changed within the program. Please see your recording software’s manual for proper setup. 8Initial Setup with Windows Vista/Windows 7 Operating Systems1. To select the Tempo USB microphone as the defaultaudio device, go to the Start Menu and select Control Panel.2. Double click the Sound icon.3. Select the Playback tab. Highlight the speaker iconlabeled as USB AUDIO CODEC and click Set Default . T o make further adjustments to the playback volume, double-click on the speaker icon labeled USB AUDIO CODEC.94. Click on the tab labeled Levels. The volume of theheadphones can be adjusted by moving the fader labeled as Speakers.T o adjust the volume of the microphone signal directly to the headphones, adjust the Microphone fader (this does not affect the volume of the microphone signal being recorded). Then click OK .5. To set the MXL Tempo USB microphone as the defaultinput, select the Recording tab in the Sound window. Highlight the microphone icon labeled USB AUDIO CODEC and click Set Default.T o make further adjustments to the microphone volume, double-click on the microphone icon labeled USB AUDIO CODEC.10Initial Setup with Mac OS X1. To select the Tempo USB as the default sound deviceclick on the Apple icon at the top of the screen then select the System Preferences .6. Click on the tab labeled Levels and adjust the Microphone fader. The gain of the microphone is verysensitive. For most applications the fader will be set towards the left.T o make adjustments to the sample rate and bit depth, click on the tab labeled Advanced and select the appropriate set-ting in the drop down menu.Your computer is now setup to use the MXL TempoUSB microphone with most recording applications. Some applications will require additional settings to be changed within the program. Please see your recording software’s manual for proper setup.2. Click on the Sound icon.113. Click on the Output tab, then select the device named USB Audio CODEC. Y ou can adjust the headphonevolume by moving the fader labeled Output Volume.4. Next click on the Input tab and select the devicenamed USB Audio CODEC. Y ou can adjust themicrophone volume by moving the Input Volume fader. The gain of the microphone is very sensitive. For most applications the fader will be set more towards the left. Your computer is now setup to use the MXL TempoUSB microphone with most recording applications. Some applications will require additional settings to be changed within the program. Please see your recording software’s manual for proper setup.For More InformationFor additional information about your MXL USBmicrophone, how to contact technical support, as well as information on other products manufactured by MXL, please visit us online at .。
360°会议录音机产品说明说明书
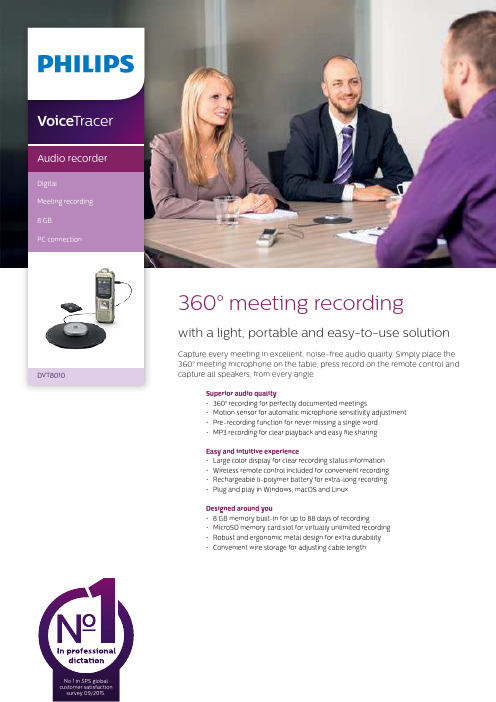
360° meeting recordingwith a light, portable and easy-to-use solutionCapture every meeting in excellent, noise-free audio quality. Simply place the 360° meeting microphone on the table, press record on the remote control and capture all speakers, from every angle.Superior audio quality• 360° recording for perfectly documented meetings• Motion sensor for automatic microphone sensitivity adjustment • Pre-recording function for never missing a single word • MP3 recording for clear playback and easy file sharing Easy and intuitive experience• Large color display for clear recording status information • Wireless remote control included for convenient recording • Rechargeable li-polymer battery for extra-long recording • Plug and play in Windows, macOS and Linux Designed around you• 8 GB memory built-in for up to 88 days of recording • MicroSD memory card slot for virtually unlimited recording • Robust and ergonomic metal design for extra durability • Convenient wire storage for adjusting cable lengthVoice TracerAudio recorderDigitalMeeting recording 8 GBPC connectionDVT1110DVT8010360° recordingThe innovative full radius meeting recorder captures everyone’s ideas in excellent audio quality no matter where they are seated at the table. The meeting microphone’s boundary layer design uses dynamic acoustic pressure to provide excellent sound and recording quality with a full 360° sound pick-up.Motion sensorThe built-in motion sensor detects the recorder when it is placed on a desk or held and selects the microphone sensitivity to suit the recording situation preventing you from accidently blocking the audio you want to record.Pre-recording functionThe pre-recording function allows you to record the last five seconds before you press the record key. The device switches into a standby mode and records a five-second loop without saving it. Press the record key to save the five-second loop. This feature allows you to spontaneously record important parts of a conversation.MP3 recordingCapture your recordings in MP3. The popular file format allows you to play back your files virtually anywhere and simply share them with rge color displayThe large color display offers sharp images, making it easier to see and read everything at first glance. The clear user interface supports eight languages and is optimized for easy,intuitive operation.Wireless remote control The included wireless remote control enables convenient placement of the recorder to best meet the needs of the audio environment while maintaining ease of operation. Start, pause, and stop recording, without havingto clumsily reach over things even from a distance.Extra long battery lifeThe high-capacity Li-polymer battery can be easily charged through a standard micro USB jack. This guarantees extended battery life for extra-long recording ensuring that your recorder will always be ready to work when you are.Plug and playThanks to Plug and Play in Windows, macOS and Linux, you can quickly access your recordings without installing any additional software. The recorder is automatically displayed as a removable drive once connected to your computer via USB. It can also be used as a convenient way to store, back up and share files.8 GB internal memoryCapture and store up to 88 days of continuous recording thanks to the 8 GB of internal memory.MicroSD memory card slotVirtually unlimited recording and storage capacity thanks to a microSD memory card slot supporting up to 32 GB of additional memory.Robust metal designIts robust and lightweight design maximizes comfort and the metal surface creates a robust shell around the device. With the integrated fold-out stand you can conveniently position the recorder towards the sound source. Two ergonomically placed soft keys allow for convenient, quick and direct access to the most important functions.Convenient wire storageThe wire storage in the meeting microphone allows you to adjust the length of the cable to make sure your desk always looks tidy and professional.Connectivity Headphones: 3.5 mmMicrophone: 3.5 mm, Built-in microphone, Microphone stereo socket Micro-SD card socket USB: High-speed USB 2.0DisplayType: LCD color display BacklightDiagonal screen size: 1.77"/4.5 cm Resolution: 128 × 160 pixels Audio recordingBuilt-in microphone: 3 Mic System, high-sensitivity, HQ Stereo, low-noise microphone Recording formats: MPEG1 layer 3 (MP3), PCM (WAV)Recording modes: PCM 1411 kbps, SHQ 192 kbps, HQ 96 kbps, SP 64 kbps, LP 8 kbps Sample rate: 44,1 kHz (PCM/SHQ), 32 kHz (HQ), 22 kHz (SP), 16 kHz (LP)Bit rate: 8, 64, 96, 192, 1411 kbps File overwrite and append mode Record monitor functionRecording time: 2280 h (LP), 284 h (SP), 190 h (HQ), 90 h (SHQ), 12 h (PCM)Silent recording mode Prerecording mode SoundSound enhancement: ClearVoice Frequency response: 50–20,000 Hz Signal-to-noise ratio: > 60 dB Speaker output power: 110 mW Speaker diameter: 28 mm Storage mediaBuilt-in memory capacity: 8 GB Built-in memory type: NAND Flash Mass storage class compliant TunerFrequency range: 87.5–108 MHz Station presets: 20Auto digital tuning Tuner bands: FM stereoSpecificationsMusic playbackCompression format: MP3, WMA Equalizer settings: Jazz, Pop, Classic ID3 tag supportMP3 bit rates: 8–320 kbpsWMA bit rates: 48–320 kbps (44 kHz), 64–192 (48 kHz), stereoMeeting microphone Cable length: 2 m/6.5 ft.Connector: 3.5 mmDesign: boundary layer microphone Frequency response: 30–18,000 Hz Impedance: approx. 2.2 kOhm @ 1 kHz Net weight: 108 g/3.8 oz.Phantom supply voltage: 1.5 to 5 V/0.5 mA Product dimensions (W × D × H): 13 × 13 × 1.8 cm/5.1 × 5.1 × 0.7 inch Sensitivity: -38 dBVType: electret condenser microphoneConvenienceFirmware upgradeable Keypad lockMulti language: English, French, German, Spanish, Italian, Russian, Polish, Simplified ChineseVariable playback speed Voice volume indicator Voice-activated recording AutoAdjust+ recordingAutoZoom+ recording: 15 m zoom Calendar searchInstant one-touch recordingOptimized for notes, conversations, lectures and interviews, meetings PowerLi-polymer built-in batteryBattery lifetime: up to 50/25 hours in LP record mode (built-in memory / microSD memory card)System requirements Free USB portOperating system: Windows 10/8/7, macOS 10, Linux Design and finishingColour(s): Champagne/silver shadow Issue date 2016-12-22Version 1.0/dictation© 2016 Speech Processing Solutions GmbH. All rights reserved.Specifications are subject to change without notice. Philips and the Philips shield emblem are registered trademarks of Koninklijke Philips N.V. and are used by Speech Processing Solutions GmbH underlicense from Koninklijke Philips N.V. All trademarks are the property of their respective owners.Green specifications Lead-free soldered productPackage contents RecorderMeeting microphone Stereo headphones Wireless remote control Carry case USB cable Quick start guide Product dimensionsProduct dimensions (W × H × D): 4.5 × 12.5 × 1.8 cm / 1.75 × 4.9 × 0.71 inch Weight: 85 g / 3.0 oz.EAN: 0855971006243。
多音频会议 机电话快速入门指南说明书

Multi-Mic Conference SpeakerphoneSpeakerphone Quick Start GuideUSB CablePackingListFunctions*Indicator•White:Working Normally•Red:Microphone MuteSpeaker *MuteUSB Type C*Press and hold the Mute button for 5seconds to turn on the Transient Noise Reduction.Press and hold again to turn off the function.*It is recommended to turn off the Transient Noise Reduction for long-distance pickup.Connection*Connect the device to intelligent terminals,such as computers and conference flat panels. *It is recommended to plug into USB3.0interface of the terminal.*It is recommended to use original cable for audio quality.Setup GuidePlug the microphone in the computer and open the conference/video software to use the device.*What should I do if the device cannot work in the conference/video software:Check if the microphone and speaker of the software is set as8-mic Speakerphone in the audio settings; Check if the computer or the conference panel set the audio input and ouput as8-mic Speakerphone.FAQVisit /analysisQR/showQR/304d56e7for frequently asked questions.Warnings Laws and Regulations The device should be used in compliance with local laws,electrical safety regulations,and fire prevention regulations.Electrical Safety The socket-outlet shall be installed near the equipment and shall be easily accessible.Battery CAUTION:Risk of explosion if the battery is replaced by an incorrect type.Improper replacement of the battery with an incorrect type may defeat a safeguard (for example,in the case of some lithium battery types).Do not dispose of the battery into fire or a hot oven,or mechanically crush or cut the battery,which may result in an explosion.Do not leave the battery in an extremely high temperature surrounding environment,which may result in an explosion or the leakage of flammable liquid or gas.Do not subject the battery to extremely low air pressure,which may result in an explosion or the leakage of flammable liquid or gas.Dispose of used batteries according to the instructions.Cautions Fire Prevention No naked flame sources,such as lighted candles,should be placed on the equipment.Transportation Keep the device in original or similar packaging while transporting it.DO NOT drop the product or subject it to physical shock.Power Supply EUT will be charged by specified source which the output circuit comply with LPS/PS 2.Refer to the device label for the standard power supply.Please make sure your power supply matches with your e a power adapter provided by qualified manufacturers.It is recommended to provide an independent power adapter for each device as adapter overload may cause over-heating or a fire hazard.Maintenance If the product does not work properly,please contact your dealer or the nearest service center.We shall not assume any responsibility for problems caused by unauthorized repair or maintenance.Cleaning Please use a soft and dry cloth to clean the interior and exterior surfaces.Do not use alkaline ing Environment To avoid heat accumulation,good ventilation is required for a proper operating environment.DO NOT expose the device to extremely hot,cold,dusty,corrosive,saline-alkali,or damp environments.For temperature and humidity requirements,see device specification.DO NOT expose the device to high electromagnetic radiation.Emergency SafetyInstructionRegulatory InformationFCC InformationPlease take attention that changes or modification not expressly approved by the party responsible for compliance could void the user’s authority to operate the equipment.FCC compliance:This equipment has been tested and found to comply with the limits for a Class B digital device,pursuant to part15of the FCC Rules.These limits are designed to provide reasonable protection against harmful interference when the equipment is operated in a commercial environment.This equipment generates, uses,and can radiate radio frequency energy and,if not installed and used in accordance with the instruction manual,may cause harmful interference to radio communications.Operation of this equipment in a residential area is likely to cause harmful interference in which case the user will be required to correct the interference at his own expense.FCC ConditionsThis device complies with part15of the FCC Rules.Operation is subject to the following two conditions:1.This device may not cause harmful interference.2.This device must accept any interference received,including interference that may cause undesired operation.This equipment complies with FCC radiation exposure limits set forth for an uncontrolled environment.This equipment should be installed and operated with minimum distance20cm between the radiator&your body.EU Conformity StatementThis product and-if applicable-the supplied accessories too are marked with"CE"and comply therefore with the applicable harmonized European standards listed under the Low Voltage Directive2014/35/EU,the EMC Directive2014/30/EU,the RoHS Directive2011/65/EU.2012/19/EU(WEEE directive):Products marked with this symbol cannot be disposed of as unsorted municipal waste in the European Union.For proper recycling, return this product to your local supplier upon the purchase of equivalent new equipment,or dispose of it at designated collection points.For more information see: .2006/66/EC(battery directive):This product contains a battery that cannot be disposed of as unsorted municipal waste in the European Union.See the product documentation for specific battery information.The battery is marked with this symbol,which may include lettering to indicate cadmium(Cd),lead(Pb),or mercury (Hg).For proper recycling,return the battery to your supplier or to a designated collection point.For more information,see:.Industry Canada ICES-003ComplianceThis device meets the CAN ICES-3(B)/NMB-3(B)standards requirements.©2022Hangzhou Hikvision Digital Technology Co.,Ltd.All rights reserved.About this ManualThe Manual includes instructions for using and managing the Product.Pictures,charts,images and all other information hereinafter are for description and explanation only.The information contained in the Manual is subject to change,without notice,due to firmware updates or other reasons.Please find the latest version of this Manual at the Hikvision website(https:///).Please use this Manual with the guidance and assistance of professionals trained in supporting the Product.Trademarksand other Hikvision’s trademarks and logos are the properties of Hikvision in various jurisdictions.Other trademarks and logos mentioned are the properties of their respective owners.DisclaimerTO THE MAXIMUM EXTENT PERMITTED BY APPLICABLE LAW,THIS MANUAL AND THE PRODUCT DESCRIBED,WITH ITS HARDWARE,SOFTWARE AND FIRMWARE, ARE PROVIDED“AS IS”AND“WITH ALL FAULTS AND ERRORS”.HIKVISION MAKES NO WARRANTIES,EXPRESS OR IMPLIED,INCLUDING WITHOUT LIMITATION, MERCHANTABILITY,SATISFACTORY QUALITY,OR FITNESS FOR A PARTICULAR PURPOSE.THE USE OF THE PRODUCT BY YOU IS AT YOUR OWN RISK.IN NO EVENT WILL HIKVISION BE LIABLE TO YOU FOR ANY SPECIAL,CONSEQUENTIAL,INCIDENTAL,OR INDIRECT DAMAGES,INCLUDING,AMONG OTHERS,DAMAGES FOR LOSS OF BUSINESS PROFITS,BUSINESS INTERRUPTION,OR LOSS OF DATA,CORRUPTION OF SYSTEMS,OR LOSS OF DOCUMENTATION,WHETHER BASED ON BREACH OF CONTRACT,TORT(INCLUDING NEGLIGENCE),PRODUCT LIABILITY,OR OTHERWISE,IN CONNECTION WITH THE USE OF THE PRODUCT,EVEN IF HIKVISION HAS BEEN ADVISED OF THE POSSIBILITY OF SUCH DAMAGES OR LOSS.YOU ACKNOWLEDGE THAT THE NATURE OF THE INTERNET PROVIDES FOR INHERENT SECURITY RISKS,AND HIKVISION SHALL NOT TAKE ANY RESPONSIBILITIES FOR ABNORMAL OPERATION,PRIVACY LEAKAGE OR OTHER DAMAGES RESULTING FROM CYBER-ATTACK,HACKER ATTACK,VIRUS INFECTION,OR OTHER INTERNET SECURITY RISKS;HOWEVER,HIKVISION WILL PROVIDE TIMELY TECHNICAL SUPPORT IF REQUIRED.YOU AGREE TO USE THIS PRODUCT IN COMPLIANCE WITH ALL APPLICABLE LAWS,AND YOU ARE SOLELY RESPONSIBLE FOR ENSURING THAT YOUR USE CONFORMS TO THE APPLICABLE LAW.ESPECIALLY,YOU ARE RESPONSIBLE,FOR USING THIS PRODUCT IN A MANNER THAT DOES NOT INFRINGE ON THE RIGHTS OF THIRD PARTIES,INCLUDING WITHOUT LIMITATION,RIGHTS OF PUBLICITY,INTELLECTUAL PROPERTY RIGHTS,OR DATA PROTECTION AND OTHER PRIVACY RIGHTS.YOU SHALL NOT USE THIS PRODUCT FOR ANY PROHIBITED END-USES,INCLUDING THE DEVELOPMENT OR PRODUCTION OF WEAPONS OF MASS DESTRUCTION,THE DEVELOPMENT OR PRODUCTION OF CHEMICAL OR BIOLOGICAL WEAPONS,ANY ACTIVITIES IN THE CONTEXT RELATED TO ANY NUCLEAR EXPLOSIVE OR UNSAFE NUCLEAR FUEL-CYCLE,OR IN SUPPORT OF HUMAN RIGHTS ABUSES.IN THE EVENT OF ANY CONFLICTS BETWEEN THIS MANUAL AND THE APPLICABLE LAW,THE LATER PREVAILS.Open Source Software DisclaimerThis product cannot be launched without the contribution of open source software.HIKVISION respects the Intellectual Property of others,has established and will continue to improve its open source compliance system.You can get this product's Open Source Software Declaration and Copyleft Source Code by visiting /Home.UD27743B。
poly-sync40-ug-zh-cn说明书
Poly Sync 40 系列蓝牙扬声器用户指南内容首次设置3控件4LED5请注意安全5USB 蓝牙适配器5设置7有绳设置7手机设置7USB 适配器设置(仅适用于适配器型号)8再次配对 USB 适配器8充电10检查电池的电量状况10充电10为手机充电10加载软件11更新您的 Poly 博诣设备11日常使用12电源12应答或结束通话12静音/取消静音12音量12管理铃声音量12语音助手(智能手机功能)12启动 Microsoft Teams(仅适用于 Teams 型号)12自定义设置您的扬声器12链接扬声器(菊花链音频)13已连接的扬声器音频设置13故障诊断14包装清单15支持16注意:您的扬声器在出厂时设置为深度睡眠模式以便节省电量。
首次使用前,请通过USB 线缆将您的扬声器连接至电源将其激活。
1将扬声器 USB 线缆连接至插座充电器或电脑。
注部分型号配有 USB-A 转 USB-C 适配器,方便轻松连接任一类型端口。
扬声器激活后,LED灯条会亮起。
2将您的扬声器进行连接或配对,以便接听电话或使用流媒体。
首次设置控件一种可连接手机的有绳便携式扬声器。
蓝牙配对按下可与 Microsoft Teams 交互(仅适用于 Teams 型号,需要安装桌面应用程序)调小音量静音/取消静音调大音量呼叫Siri、Google默认语音助手(移动功能)Assistant电源开/关USB 电话充电端口链接 2 台扬声器(移动功能)播放/暂停媒体(默认)。
在 Poly Lens 桌面应用程序中定义功能注播放/暂停功能可能不适用于基于网页的应用程序。
LED 灯条指示灯说明蓝色交叉图案配对模式蓝色常亮配对成功(已连接)闪烁绿色来电绿色常亮正在通话红色常亮已启用静音白色交叉图案链接模式(菊花链音频)白灯闪烁 2次链接成功注LED 在待机模式下不会亮起。
使用新设备前,请阅读关于安全和管制重要信息的安全指南。
您的高保真蓝牙 USB 适配器和您的 Poly 博诣设备已预先配对。
shure mv88plus 立体声 usb 话筒 使用指南说明书
MV88plus Stereo USB MicrophoneShure MV88+ 立体声 USB 话筒The Shure digital USB microphone, MV88+ Stereo USB, user guide.Version: 1.0 (2021-J)Table of ContentsMV88plus Stereo USB Microphone Shure MV88+ 立体声USB 话筒3简要说明3产品特点 3快速设置3防风罩 4 MV88+ 话筒4麦克风方向 5 MV88+ 输出 5对准话筒5音频录制 6录音采访(桌面) 6手持式录制 7 Shure MOTIV 桌面应用程序7话筒设置 8预设模式 9定制预设 9指向性选择(立体声和单声道设置) 9监听混音合成11高级话筒设置 11限幅器11压缩器11高通滤波器11左右通道交换11均衡器11流媒体提示12控制音量 12使用锁定模式锁定您的声音 12监听声音 12故障排除12固件更新12在更新过程中保持设备连接 13系统要求13系统要求和兼容性:Mac 13系统要求和兼容性:Windows 13系统要求和兼容性:iOS 13系统要求和兼容性:Android 13规格 13认证15 Information to the user 15•••••••••••MV88plus Stereo USB Microphone Shure MV88+ 立体声 USB 话筒简要说明Shure MV88+ 是一款专业的高品质电容话筒,可通过 Lightning 或 USB-C 接头直接插入到移动设备中。
两个话筒炭精盒按中侧配置排列,提供可调节的立体声声像,适合捕获各种音源,包括音乐和语音。
ShurePlus MOTIV 应用允许您通过数字信号处理(DSP)、预设模式选择、增益调节、压缩和立体声宽度控制来自定义声音。
产品特点Mid-Side 立体声支持经典的 mid-side 立体声录制技术。
无线会议扬声器手机通话器用户手册说明书
User ManualUser ManualSpeakerphoneUSB Dongle(at the bottom of thespeakerphone)USB Dongle:The accessory is included in some models.Packing ListMicrophoneLightPhone Volume-/+Power BluetoothLightPowerCableDongleAfter a successful cable connection,if you want to switch the connection method,please disconnect the USB cable first.Connect the device to intelligent terminals,such as computers and conference flat panels.It is recommended to plug into USB3.0interface of the terminal.If the device is plugged into a USB hub,and there are multiple devices on the hub,the power supply may be inadequate.It is recommended to connect the device to the computer directly.After a successful Bluetooth connection,if you connect a USB cable,the cable will be used for charging only.To switch the connection method,please disconnect from Bluetooth first.Bluetooth ConnectionUSB Dongle Connection:Models with a USB dongle support this connection method.Turn on the microphone speaker and the terminal,and plug in the USB dongle at the terminal,the device will be automatically connected,and the Bluetooth light will be on.After a successful Bluetooth connection,if you want to switch the connection method,please disconnect the USB dongle first. USB Dongle ConnectionChargingPlease fully charge the device before first use.Charging Methods•Use the supplied cable to connect the speakerphone and the USB3.0interface of a laptop to charge the device.•Use a power adapter to charge the speakerphone.It is recommended to use a charging adapter with power above5V/1A.Setup GuideConnect the speakerphone to intelligent terminals and run the conference/video software to use the speakerphone.If the device cannot work in the conference/video software,check if the microphone and speaker of the software is set as "4-mic Speakerphone"in the audio settings.*If you use USB Dongle connection method,check if the microphone and speaker of the software is set as "multi-mic Speakerphone"in the audio settings.WarningsLaws and RegulationsThe device should be used in compliance with local laws,electrical safety regulations,and fire prevention regulations.Electrical SafetyThe socket-outlet shall be installed near the equipment and shall be easily accessible.BatteryCAUTION:Risk of explosion if the battery is replaced by an incorrect type.Improper replacement of the battery with an incorrect type may defeat a safeguard (for example,in the case of some lithium battery types).Do not dispose of the battery into fire or a hot oven,or mechanically crush or cut the battery,which may result in an explosion.Do not leave the battery in an extremely high temperature surrounding environment,which may result in an explosion or the leakage of flammable liquid or gas.Do not subject the battery to extremely low air pressure,which may result in an explosion or the leakage of flammable liquid or gas.Dispose of used batteries according to the instructions.Cautions Fire PreventionNo naked flame sources,such as lighted candles,should be placed on the equipment.TransportationKeep the device in original or similar packaging while transporting it.DO NOT drop the product or subject it to physical shock.Power SupplyEUT will be charged by specified source which the output circuit comply with LPS/PS 2.Refer to the device label for the standard power supply.Please make sure your power supply matches with your device.Use a power adapter provided by qualified manufacturers.It is recommended to provide an independent power adapter for each device as adapter overload may cause over-heating or a fire hazard.MaintenanceIf the product does not work properly,please contact your dealer or the nearest service center.We shall not assume any responsibility for problems caused by unauthorized repair or maintenance.CleaningPlease use a soft and dry cloth to clean the interior and exterior surfaces.Do not use alkaline ing EnvironmentTo avoid heat accumulation,good ventilation is required for a proper operating environment.DO NOT expose the device to extremely hot,cold,dusty,corrosive,saline-alkali,or damp environments.For temperature and humidity requirements,see device specification.DO NOT expose the device to high electromagnetic radiation.EmergencyIf smoke,odor,or noise arises from the device,immediately turn off the power,unplug the power cable,and contact the service center.SafetyInstructionRegulatory InformationThese clauses apply only to the products bearing the corresponding mark or information.FCC InformationPlease take attention that changes or modification not expressly approved by the party responsible for compliance could void the user’s authority to operate the equipment.FCC compliance:Note:This product has been tested and found to comply with the limits for a Class B digital device,pursuant to part15of the FCC Rules.These limits are designed to provide reasonable protection against harmful interference in a residential installation.This product generates,uses,and can radiate radio frequency energy and,if not installed and used in accordance with the instructions,may cause harmful interference to radio communications.However,there is no guarantee that interference will not occur in a particular installation.If this product does cause harmful interference to radio or television reception,which can be determined by turning the equipment off and on,the user is encouraged to try to correct the interference by one or more of the following measures:—Reorient or relocate the receiving antenna.—Increase the separation between the equipment and receiver.—Connect the equipment into an outlet on a circuit different from that to which the receiver is connected.—Consult the dealer or an experienced radio/TV technician for help.FCC ConditionsThis device complies with part15of the FCC Rules.Operation is subject to the following two conditions:(1)this device may not cause harmful interference,and(2)this device must accept any interference received,including interference that may cause undesired operation.This equipment complies with FCC radiation exposure limits set forth for an uncontrolled environment.This equipment should be installed and operated with minimum distance20cm between the radiator&your body.EU Conformity StatementThis product and-if applicable-the supplied accessories too are marked with"CE"and comply therefore with the applicable harmonized European standards listed under Directive2014/53/EU(RED),the Directive2014/30/EU(EMCD), Directive2014/35/EU(LVD),Directive2011/65/EU(RoHS).Directive2012/19/EU(WEEE Directive):Products marked with this symbol cannot be disposed of as unsorted municipalwaste in the European Union.For proper recycling,return this product to your local supplier upon the purchase of equivalent new equipment,or dispose of it at designated collection points.For more information see:.Directive2006/66/EC and its amendment2013/56/EU(Battery Directive):This product contains a battery that cannot bedisposed of as unsorted municipal waste in the European Union.See the product documentation for specific battery information.The battery is marked with this symbol,which may include lettering to indicate cadmium(Cd),lead(Pb),or mercury(Hg).For proper recycling,return the battery to your supplier or to a designated collection point.For more information see:.Industry Canada ICES-003ComplianceThis device meets the CAN ICES-3(B)/NMB-3(B)standards requirements.This device complies with Industry Canada licence-exempt RSS standard(s).Operation is subject to the following two conditions:(1)this device may not cause interference,and(2)this device must accept any interference,including interference that may cause undesired operation of the device.Le présent appareil est conforme aux CNR d'Industrie Canada applicables aux appareils radioexempts de licence.L'exploitation est autorisée aux deux conditions suivantes:(1)l'appareil ne doit pas produire de brouillage,et(2)l'utilisateur de l'appareil doit accepter tout brouillage radioélectrique subi,même si le brouillage est susceptible d'en compromettre le fonctionnement.This equipment complies with IC RSS-102radiation exposure limits set forth for an uncontrolled environment.This equipment should be installed and operated with minimum distance20cm between the radiator&your body.ce matériel est conforme aux limites de dose d'exposition aux rayonnements,CNR-102énoncée dans un autre environnement.cette eqipment devraitêtre installéet exploitéavec distance minimale de20entre le radiateur et votre corps. Frequency Bands and Power(for CE/UKCA)The frequency bands and transmitting power(radiated and/or conducted)nominal limits applicable to the following radio equipment are as follows:Equipment ModelFrequency Bands and PowerDS-UAC-*W*Bluetooth(2402-2480MHz):10dbmDS-UVC-*W**W*refers to wireless models.©2023Hangzhou Hikvision Digital Technology Co.,Ltd.All rights reserved.About this ManualThe Manual includes instructions for using and managing the Product.Pictures,charts,images and all other information hereinafter are for description and explanation only.The information contained in the Manual is subject to change,without notice,due to firmware updates or other reasons.Please find the latest version of this Manual at the Hikvision website(https:///).Please use this Manual with the guidance and assistance of professionals trained in supporting the Product.Trademarksand other Hikvision’s trademarks and logos are the properties of Hikvision in various jurisdictions.Other trademarks and logos mentioned are the properties of their respective owners.DisclaimerTO THE MAXIMUM EXTENT PERMITTED BY APPLICABLE LAW,THIS MANUAL AND THE PRODUCT DESCRIBED,WITH ITS HARDWARE,SOFTWARE AND FIRMWARE, ARE PROVIDED“AS IS”AND“WITH ALL FAULTS AND ERRORS”.HIKVISION MAKES NO WARRANTIES,EXPRESS OR IMPLIED,INCLUDING WITHOUT LIMITATION, MERCHANTABILITY,SATISFACTORY QUALITY,OR FITNESS FOR A PARTICULAR PURPOSE.THE USE OF THE PRODUCT BY YOU IS AT YOUR OWN RISK.IN NO EVENT WILL HIKVISION BE LIABLE TO YOU FOR ANY SPECIAL,CONSEQUENTIAL,INCIDENTAL,OR INDIRECT DAMAGES,INCLUDING,AMONG OTHERS,DAMAGES FOR LOSS OF BUSINESS PROFITS,BUSINESS INTERRUPTION,OR LOSS OF DATA,CORRUPTION OF SYSTEMS,OR LOSS OF DOCUMENTATION,WHETHER BASED ON BREACH OF CONTRACT,TORT(INCLUDING NEGLIGENCE),PRODUCT LIABILITY,OR OTHERWISE,IN CONNECTION WITH THE USE OF THE PRODUCT,EVEN IF HIKVISION HAS BEEN ADVISED OF THE POSSIBILITY OF SUCH DAMAGES OR LOSS.YOU ACKNOWLEDGE THAT THE NATURE OF THE INTERNET PROVIDES FOR INHERENT SECURITY RISKS,AND HIKVISION SHALL NOT TAKE ANY RESPONSIBILITIES FOR ABNORMAL OPERATION,PRIVACY LEAKAGE OR OTHER DAMAGES RESULTING FROM CYBER-ATTACK,HACKER ATTACK,VIRUS INFECTION,OR OTHER INTERNET SECURITY RISKS;HOWEVER,HIKVISION WILL PROVIDE TIMELY TECHNICAL SUPPORT IF REQUIRED.YOU AGREE TO USE THIS PRODUCT IN COMPLIANCE WITH ALL APPLICABLE LAWS,AND YOU ARE SOLELY RESPONSIBLE FOR ENSURING THAT YOUR USE CONFORMS TO THE APPLICABLE LAW.ESPECIALLY,YOU ARE RESPONSIBLE,FOR USING THIS PRODUCT IN A MANNER THAT DOES NOT INFRINGE ON THE RIGHTS OF THIRD PARTIES,INCLUDING WITHOUT LIMITATION,RIGHTS OF PUBLICITY,INTELLECTUAL PROPERTY RIGHTS,OR DATA PROTECTION AND OTHER PRIVACY RIGHTS.YOU SHALL NOT USE THIS PRODUCT FOR ANY PROHIBITED END-USES,INCLUDING THE DEVELOPMENT OR PRODUCTION OF WEAPONS OF MASS DESTRUCTION,THE DEVELOPMENT OR PRODUCTION OF CHEMICAL OR BIOLOGICAL WEAPONS,ANY ACTIVITIES IN THE CONTEXT RELATED TO ANY NUCLEAR EXPLOSIVE OR UNSAFE NUCLEAR FUEL-CYCLE,OR IN SUPPORT OF HUMAN RIGHTS ABUSES.IN THE EVENT OF ANY CONFLICTS BETWEEN THIS MANUAL AND THE APPLICABLE LAW,THE LATTER PREVAILS.Open Source Software DisclaimerThis product cannot be launched without the contribution of open source software.HIKVISION respects the Intellectual Property of others,has established and will continue to improve its open source compliance system.You can get this product's Open Source Software Declaration and Copyleft Source Code by visiting /Home.UD32298B-A。
SP 10 20 音频会议设备操作指南说明书

Sound QualityQ: How do I ensure best possible sound quality for the people in the other end of the conference? A:∙Use softphones on computer USB port or softphone apps on mobile phone. Softphones use wideband audio quality, which gives better sound quality than narrow band. Narrow band isseen on mobile phone networks.∙Avoid meeting rooms with high reverberation (echo)∙Speak directly into the SP 10/20.∙Do not have any laptop screens between your mouth and the SP 10/20.∙Keep objects 50 cm away from the SP 10/20∙Use network cable instead of WIFI∙When using a mobile phone, ensure that the mobile volume is set to maximum.∙Lync speaker default volume is at ~40%. Turn it up for higher volume. See details in the Lync section at the end of this FAQQ: How does the microphone pick up the sound and where is the microphone placed?A: The microphone is omni-directional. It picks up sounds in a 360 ° angle around the SP 10/20 and is placed below the surface in approximately 7 o’clock position below the answer call button.Q: Music on USB sounds good. Can it be the same on the 3.5 mm jack connection?A:Yes. Press and hold the “Mic” button until the LEDs turn red. The microphone is muted and sound is optimized for music reproduction. If a USB call is detected on the USB, SP 10/20 will change to speech mode. When the USB call is terminated, SP 10/20 will change back to music mode.Connectivity and user interfaceQ: Can I connect the SP 20 to a cell phone and a soft phone at the same time?A: Yes. The SP 20 acts as a mixer with full duplex, so calls are connected together. Just plug in both USB and 3.5 mm jackQ: Does SP 10/20 have Bluetooth?A: Our philosophy is that SP 10/20 will often be used for in-promptu meetings. This requires quick set-up which is best achieved by wired connections – just plug-in and talkQ: My SP 20 don’t turn on when co nnected via 3.5 mm jack plug to my device. Why?A: SP 20 turns on when it detects a bias voltage on the microphone terminal. If you just play music for example, the device may turn off the bias to save power. You can force the SP 10/20 on by press and hold the red and green buttons for 5 seconds. Please note that SP 20 does NOT turn off automatically if it has been turned on manually. This can also be used when listening to music from a MP3 player.Q: Can I play/pause/skip track when I play music on the SP 10/20?A: On SP 20 it is possible. Use the green buttonQ: Can I connect the 3.5 mm jack in SP 20 to deskphones?A: No. The volume and microphone levels are not guaranteed to match those of the desk phone.Q: Can I connect the USB plug in SP 10/20 to deskphones with USB port?A: We only guarantee to work properly with Cisco 8961, 9951 and 9971. You need to change manually to the Cisco interface type:∙Plug USB into phone∙Simultaneously press “Hook On” (Red button) and “Mute” until all Mute LEDs start to blink either red or blue∙Red = PC softphone mode, Blue = Cisco mode∙Keep pressing until the Mute LEDs changes color to the desired mode.∙If you release the buttons before the desired mode is indicated, SP 10/20 will not change the mode.∙When you release the buttons, the speakerphone will restart in the desired mode.∙If Cisco USB mode is enabled, call control will not work with Lync and HeadSetup.Q: Why can’t I unmute on the SP 10/20 microphone, after I muted on the computer button?A: SP 10/20 can control application specific mute functions. It can not control the PC master mute (microphone button on PC/Laptop). No applications can control the master muteQ: How is the built-in battery charged and how long talk time does it have?A: The battery is 600 mAh and is charged via the USB port at 100 mA. When only the 3.5 mm jack is connected, the battery will last for 8 hours – depending on volume.Q: What voice prompts are there, and can I disable them?A: There is a voice prompt for low battery indication. It can not be disabled. PerformanceQ: Why does the volume drop when we speak at the same time as the other end?A: When SP 10/20 detects speech, it will optimize the microphone path. This is done by reducing the speaker volume. This will kick in after 2 seconds of speech from the far end.Q: What is the power output level?A:∙ 2.8W into 4ohm < 10% THD using 5V supply (USB Connected)∙ 2.2W into 4ohm < 1% THD using 5V supply (USB Connected)Q: Why does sound distort on high levels on the USB version?A: SP 10/20 needs 500 mA from the USB port to play at max volume. If the USB port cannot deliver that, SP 10/20 will continue playing, but distortion will occur.Q: Is there any noise canceling in SP 10/20?A: Yes, we have several noise reduction algorithms. They will remove constant noise, such as ventilators and some echoLyncQ: How is the Lync version different?A: To the user there is no difference, except that Lync optimized products get a higher priority when Lync decides what audio device to choose.Q: Is there an optimal setting in Lync’s sound properties?A: During the call, set the speaker volume to max in the call window:ServiceQ: Are the batteries replaceable?A: NoQ: Are there any serviceable parts?A: No. To maximize sound quality and performance, it has been necessary to seal the entire SP 10/20 acoustically. All internal cables are fixed with adhesive to avoid rattling. It requires special tools and skills to assemble the SP 10/20.。
Polycom VoiceStation 300 小型会议电话说明书
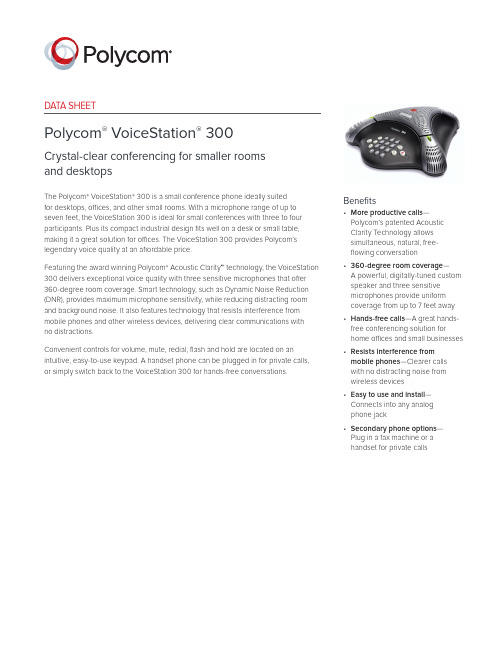
DATA SHEETPolycom® VoiceStation® 300C rystal-clear conferencing for smaller rooms and desktopsThe Polycom® VoiceStation® 300 is a small conference phone ideally suitedfor desktops, offices, and other small rooms. With a microphone range of up to seven feet, the VoiceStation 300 is ideal for small conferences with three to four participants. Plus its compact industrial design fits well on a desk or small table, making it a great solution for offices. The VoiceStation 300 provides Polycom’s legendary voice quality at an affordable price.Featuring the award winning Polycom® Acoustic Clarity™ technology, the VoiceStation 300 delivers exceptional voice quality with three sensitive microphones that offer 360-degree room coverage. Smart technology, such as Dynamic Noise Reduction (DNR), provides maximum microphone sensitivity, while reducing distracting room and background noise. It also features technology that resists interference from mobile phones and other wireless devices, delivering clear communications withno distractions.Convenient controls for volume, mute, redial, flash and hold are located on an intuitive, easy-to-use keypad. A handset phone can be plugged in for private calls, or simply switch back to the VoiceStation 300 for hands-free conversations.Benefits• More productive calls— Polycom’s patented Acoustic Clarity Technology allows simultaneous, natural, free- flowing conversation• 360-degree room coverage—A powerful, digitally-tuned custom speaker and three sensitive microphones provide uniform coverage from up to 7 feet away • Hands-free calls—A great hands-free conferencing solution for home offices and small businesses • Resists interference from mobile phones—Clearer calls with no distracting noise from wireless devices• E asy to use and install— Connects into any analog phone jack• S econdary phone options— Plug in a fax machine or ahandset for private callsDATA SHEET Polycom VoiceStation 300 Specifications16039-1214© 2014 Polycom, Inc. All rights reserved. All Polycom® names and marks associated with Polycom products are trademarks or service marks of Polycom, Inc. and are registered or common law marks in the United States and other countries. All other trademarks are property of their respective owners. No portion hereof may be reproduced or transmitted in any form or by any means, for any purpose other than the recipient’s personal use, without the express written permission of Polycom.Polycom, Inc.1.800.POLYCOM Polycom Asia Pacific Pte Ltd +65 6389 Polycom EMEA +44 (0)1753 About PolycomPolycom helps organizations unleash the power of human collaboration. More than 400,000 companies and institutionsworldwide defy distance with video, voice and content solutions from Polycom. Polycom and its global partner ecosystem provide flexible collaboration solutions for any environment that deliver the best user experience and unmatched investment protection.Product specificationsConference areasPolycom ® VoiceStation ® 300 is ideal for basic conferencing in offices and small conference rooms, accommodating 4 or fewer meeting participantsFeatures and functionsVoiceStation 300 is easy-to-use, with its universal keypad and intuitive functionsConsole size (L x W x H)9.5 x 9.25 x 3.0 in (24.2 x 23.5 x 7.6 cm)Weight1.25 lbs (0.57 kg)Power110V 60Hz AC/220V 50Hz AC (depending on country)Network interfaceAnalogue PBX or public switched telephoneKeypad• 12-key telephone keypad including: -On-hook/off-hook-Flash, redial, mute, hold -Volume up, volume down • LEDs• Off-hook, active call, hold, muteConsole loudspeaker• Frequency response—300 to 3300 Hz • Volume—adjustable to 86 dBA SPL (peak) volume at 0.5 mConsole microphone3 x cardioid microphones 300–3500 HzAudio• Polycom Acoustic Clarity full duplex (IEEE 1329 Type 1)• Up to 7 ft. microphone pickup range • G ated microphones with intelligent microphone mixing• Dynamic Noise ReductionRegulatory compliance• NA UL/C-UL• FCC part 68• FCC part 15 class B • Canadian ICES-003• CE mark (R and TTE directive)• VCCI class B (Japan)Environmental requirements• O perating temperature: 40–104ºF (5–40ºC) operating• Relative humidity: 20–85% (non-condensing)• S torage Temperature: -22–131ºF (-30–55ºC)Recommended room conditions• Room Size: less than 225 sq ft or 15 x 15 ft (less than 25 sq m or 5 x 5 m)• Reverberation time: <0.4 seconds • N oise level: <48 dBAVoiceStation 300 ships with• Telephone console unit • Power module• 21 ft (6.4 m) cord to console • 7 ft (2.1 m) telco cable to RJ-11 telephone jack • User GuideWarranty12 months。
中文使用说明书
中文使用说明书(1)(总44页)--本页仅作为文档封面,使用时请直接删除即可----内页可以根据需求调整合适字体及大小--用户使用说明目录1.手机外观和按键说明2.使用手机存储卡做为U盘3.WLAN4.蓝牙5.电子邮件GMAIL电子邮件6.拨号7.信息8. 通讯录9. 浏览器10.录音机11.时钟12.计算器13.相机相机摄像机14.图库15.音乐16.日历17.收音机18. 设置19. 手机使用注意安全1 .手机外观和按键说明在任何的应用程序或界面上,按下此键可返回首页界面。
按下此键可开启动作清单,让您在目前的界面或选项菜单中执行动作。
按下此键可返回前一个界面,或是关闭对话框、选项菜单、通知面板或屏幕键盘。
按住此键可开启电话的选项菜单,然后您可以选择要锁定屏幕、关闭手机,或将手机设成静音模式。
按此键可以增大音量。
按此键可以减小音量。
静音状态时按此键可以将手机调为振动状态。
进入相机界面,可切换至前摄像头自拍2.使用手机存储卡做为U盘若要从计算机传送音乐、相片和其它档案到您的储存卡,您必须先将手机储存卡设成U盘。
将手机储存卡设成U盘1)选择“USB已连接”,可以装载U盘,可将音乐、相片和其它档案到您的储存卡或内置存储卡中。
2)选择“作为USB存储设备使用”可以打开右边的选项。
具体如下图所示:1 2 3 4 53:有截图会显示的状态栏1:USB已连接电脑(当连接360手机助2:作为USB存储设备使用3)插入SD卡。
打开USB连接。
3)连接后可以直接在PC端查看相机拍摄的图片注意:不同的个人电脑操作系统如何操作正常使用U盘。
1)这个主题可以直接使用2)xp更新windows媒体播放器到113)安装wpdmtp。
inf司机4)vista未经证实的注意:在个人电脑业务助理工具如手机,必须打开USB调试。
WLAN提供最远300英尺(100M)的无线网络接入范围。
若要使用手机上的WLAN,您必须连接到无线接入点或「热点」。
yealink CP900 USB扬声器快速入门指南说明书

Quick Start Guide (V1.4)English |简体中文快速入门指南Plug the CP900 into a USB power source. The CP900 battery lasts for up to 12 hours of talk time and takes approximately 3 hours (5V/1A) to fully charge.CP900BT50(optional)Quick Start GuideCarrying Case Tap to view the battery status.Full batteryMedium batterygreenLow batteryExtremely low on power, flashing redConnect to PC via BluetoothConnect the BT50 into a USB port on your PC. The CP900 and the BT50 are pre-paired and ready to use out of the box. The Bluetooth range is 30m/100ft.Connect to PC via USB CableConnect to smartphone via BluetoothHold for 2 seconds to enter the pairing mode, and pair to your smartphone.Note: If there is no sound coming from your CP900, you may need to set the CP900 as the playback device in your operating system’s audio settings.Place the speakerphone in the center of the table, up to 2m/6.5ft fromeach participant. A CP900 is ideal for up to 6 people.Volume Up Answer CallTo disconnect, double-tap .To reconnect, tap again.Note: You can connect your CP900 to 2 Bluetooth devices at the same time.The CP900 is compatible with Microsoft Teams/Skype for Business client and Yealink VCD client. The CP900 can connect to PC via USB cable or Bluetooth, and to smartphone via Bluetooth. After connected, you can control the calls on the CP900. ArrayNote: If connected to PC or smartphone via Bluetooth, CP900 will enter the power safe mode after 60 seconds without operation. In this mode, you can tap any key to awake CP900.The Bluetooth pairing information will be cleared after a factory reset.Teams Button functionsNote: Before using the Teams button functions, you should install the Microsoft Teams client on your PC or smartphone.Teams Button LED IndicatorBT50 LED Indicator充电使用CP900自带的USB线缆接入USB电源。
Polycom 高保真, 应 Skype 免提通话 说明书

两个高质量麦克风– 保证Skype上的其他人能够清晰地 听到您的声音,7英尺的麦克风有 效距离充分保障了Skype上的双人 或多人通话
用户界面 – 简单明了的按钮和通话状态指示 灯。快捷键让您轻松激活Skype服 务便于控制音量、消音、接听及挂 断电话,可发光指示灯显示通话状 态
for audio pass-through • 录音放音频率: 200 Hz to 22 kHz
增强的音频 • 自动的增强控制 • 动态噪音消除 • 高灵敏度麦克风
CD 安装盘向导 • Polycom AGC / AEC 软件和驱动 • Skype 用户界面综合软件
最低系统要求 • Internet 链接 • 1 GHz 处理器 • 256 MB RAM • 30 MB 磁盘空间 • Windows® XP • 兼容的 Skype 2.0 以上版本 • CD-ROM 驱动器 • 一个 USB 接口
内置立体声耳机接口– 插入耳机进行私人交谈,拔掉耳机 进行免提通话
出色的便携性- 隐藏于机身内部的 USB 线缆让携带 更加方便
非凡的语音品质 ——为你带来尽善尽美的Skype免提通话体验
Polycom Communicator为您带来尽善尽美的Skype免提通话体验。这种Skype认证产品 的技术根基,与宝利通传奇性的SoundStation三角型会议电话系列产品采用了同样的 技术,令Skype通话无比清晰、自然。不戴话筒即可Skype免提通话,无拘无束;在内 置的立体声耳机插孔中插入耳机还可私密通话。
可选择的钴蓝色和炭灰色
从今以后解决你在 Skype 上一对一的交流 让小团队会谈成为可能
- 1、下载文档前请自行甄别文档内容的完整性,平台不提供额外的编辑、内容补充、找答案等附加服务。
- 2、"仅部分预览"的文档,不可在线预览部分如存在完整性等问题,可反馈申请退款(可完整预览的文档不适用该条件!)。
- 3、如文档侵犯您的权益,请联系客服反馈,我们会尽快为您处理(人工客服工作时间:9:00-18:30)。
* 您不能在电脑上同时连接多个传声扬声器设备包括本机 * 请将本机直接连接至电脑。通过 USB 集线器连接可能会引起操
1、本设备位于墙壁较近,使本设备远离墙壁。 2、有一个物体放置在本设备较近,避免在本设备的麦克风前面放置物
体。 3、应用本设备的房间混响现象严重。解决办法将具有高吸音性能的物体
放置在房间里,但不要放在本设备麦克风前面。 4、将本设备扬声器音量调低,以减轻混响。
设备产生回声(在另一方自己听到自己说话的声音)。 另外电脑多连接了一个开启的麦克风。需在电脑系统和网络电话软件的 音频设置中,选择本设备的麦克风和喇叭。 另一个设备的设备配置出现问题。Leabharlann , ,, ,4
, ,
,
无线移动电话
专用音频连接线
电 脑U S B接 口 供 电 U S B数 据 线
,
,
,
,
,
,
5
可以按照移动电话的操作方法按挂机键,就可以结束无线移动电话会议 的通话。
本机可以做为电脑或移动电话的一种外接便携式麦克风和扬声器设备, 按上述的连接方法,可以通过电脑或移动电话的音乐播放器和录音应用 程序,进行电脑的音乐播放和录音。
9 —U S B 接口 : 用于 连 接随 附 的U S B数据 线 。
2
1
2
3
1 —扬声器静音指示灯:
本机作为电脑的一种外置麦克风和扬声器设备,可以进行电脑网络电话 会议。
本机适合于Windows 2000 / Windows XP / Windows Vista / Windows7 and Mac OS X操作系统的电脑,要求USB 接口为USB1.1 或更高(建议 USB2.0),并且连接互联网的电脑,已安装有网络电话功能的即时通讯 或VoIP软件包(如:QQVoice、skype、MSN、uucall等)。 本设备的USB数据线为随插即用,无须额外安装驱动程序。
在进行电话会议时,请关闭电脑的音乐播放和录音功能的操作。
本设备按使用说明书操作,首先要检查设备之间的各种连接线是否完 好,插头插入插座是否到位,然后依照下列问题检查处理,如果问题仍 然有,请与您的经销商或客户服务中心联系,按售后三包服务。
听不到其它设备发出的声音。 1、可能本设备扬声器处于静音状态,请关闭本设备扬声器静音功能。其
使用说明书
1
7
1
2 3 4 5 6 89
1 —扬声器: 发出声音的喇叭。
2 —扬声器静音按键: 按下此按键,以暂时关闭扬声器的声音。若要打开扬声器的 声音,请再按下此按键。
3 — 音量 减 小按 键: 依次按下此按键,会逐步降低喇叭的音量。
4 —麦克风选择按键: 依次按下此按键,会顺序选择开启麦克风的拾音方向。
5 — 音量 增 加按 键: 依次按下此按键,会逐步增加喇叭的音量。
6 — 麦克 风 静音 按 键: 按下此按键,以暂时关闭所有麦克风。若要取消静音功能, 请再次按下。
7 — 麦克 风: 收集对应区域的声音,共有三个拾音麦克风。
8 — 音频 输 入/输出 接 口( A U D I O I N / O U T ): 用于连接专用的音频连接线。
它设备上的麦克风处于静音状态,请关闭静音。 2、本设备扬声器音量设置为最小,请调高本设备扬声器音量。其它设备
上的麦克风敏感度设置为最低,请适当调高。 在其它设备上听不到本设备所发出的声音。
1、本设备上的麦克风可能处于静音状态,关闭麦克风静音功能。其它设 备上的扬声器可能处于静音状态,请关闭静音。
2、本设备麦克风敏感度设置为最低,提高本设备麦克风敏感度。其它设 备上的扬声器音量设置为最低,请适当调高。 设备产生反馈噪音(振鸣啸叫)。
1.款式轻便、经典大方,便于携带。 2.结构设计紧密结实,保证品质。 3.全双工新技术,会议通话效果清晰。 4.支持电脑互联网络电话会议。 5.支持无线移动电话会议。 6.支持电脑或移动电话的音乐播放和录音。 B接口免驱动,即插即用。 B总线提供电源简单方便。
主机
USB数据 线
便携包
设备产生背景噪音。 设备附近放有一个干扰设备。使设备远离此干扰设备(比如有使用的风 扇和电热壶等产生的干扰噪声)。
喇叭声音发劈。
6
本设备扬声器音量过大,调低本设备扬声器音量。 ,
, ,
7
17.不打算长期使用本机时,请从电脑上拔下USB数据线,以避免引起火 灾。
18.请勿随意松开本设备的合盖螺钉,造成密封不良,影响品质效果。 19.请勿尝试维修本设备。如果设备存在问题需要维修,请与您的经销商
或客户服务中心联系,按售后三包服务。 产品的技术支持和服务,请登录网址: 查询。
Windows 7 /Windows Vista/Windows XP/Windows 2000和Mac OS X
USB 数据线(1.8 米),使用说明书,便携包 专用音频连接线
8
作问题。 3
U S B数 据 线
连接互联网络的个人电脑
在电脑上启动具有网络电话功能的软件,按照软件说明进行电话功能操 作,网络电话接通后,就可以和对方进行网络电话会议了。
在会议通话过程中,如果喇叭音量太小或太大,可以先重复按下本机的 “音量增加”或“音量减小”按键,调整合适的音量来满足要求,若觉 得不够,可再调整电脑上的喇叭音量大小。
首先感谢您选择使用深圳市音络科技有限公司的会议电话产品。 AUCTOPUS是深圳市音络科技有限公司的注册商标。 深圳市音络科技有限公司的AUCTOPUS I-20会议电话产品,不仅能通过电 脑的USB接口在互联网上进行高品质的网络电话会议;而且也能通过耳机 接口作为无线移动电话的一种扬声器和麦克风的免提通话设备,进行高品 质的无线移动电话会议。其造型经典大方,便于携带。麦克风拾音方向可 以根据会议场景进行选择设置,适合在会议室和办公室等场所使用。 AUCTOPUS I-20产品是业界全新的具有INNOTRIK全双工音频技术,可同时 进行双向、自然流畅的会谈,其清晰的语音通话性能表现得相当卓越。 另外,AUCTOPUS I-20产品也可以作为电脑和无线移动电话的一种 扩展麦克风和音箱,进行相应功能的音乐播放和录音。
在会议通话过程中,如果对方听到声音太小或太大,可以先要求对方调 节接收音量的大小来满足要求,若觉得不够,可再调整本机电脑的麦克 风送话音量的大小。
在会议通话过程中,想把您的声音静音,请按主机“麦克风静音”键。 同时主机的麦克风静音指示灯会亮起,并且被启用的麦克风指示灯也会 熄灭。这时您只能听到对方的声音,而对方听不到您的声音;如要取消 静音,请再一次按主机“麦克风静音”键,立即可以恢复通话。此时主 机的麦克风静音指示灯会熄灭,并且被启用的麦克风指示灯也会亮起。