VMagellan简明操作指南
VANXVM智慧屏幕用户手册-万像科技
第 2 页/ 共 15 页
西安万像电子科技有限公司
目录
1 概述...................................................................................................................................... - 4 -
5 控制屏幕显示.................................................................................................................... - 11 -
5.1
选择图像源........................................................................................................ - 11 -
如果本产品进行改进或技术变更,恕不另行专门通知。
当出现产品改进或者技术变更时,您可以通过万像网站 查询有关
信息。
修订历史
版本 v0.1 v0.2
撰写时间 6.15 6.16
撰写人 审核人 张望 张望
阅读对象 用户 用户
修订说明 文档未评审 文档未评审
陕西省西安市雁塔区唐延南路 8 号酷派产业园 B 座 302 室 710065 Tel: 86 29 81110385
2 进入主页.............................................................................................................................. - 5 -
酶标仪Magellan标准操作规程
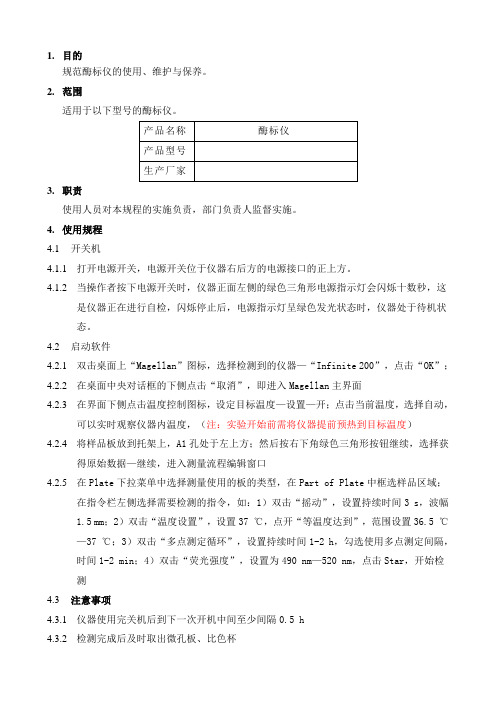
1.目的规范酶标仪的使用、维护与保养。
2.范围适用于以下型号的酶标仪。
3.职责使用人员对本规程的实施负责,部门负责人监督实施。
4.使用规程4.1开关机4.1.1打开电源开关,电源开关位于仪器右后方的电源接口的正上方。
4.1.2当操作者按下电源开关时,仪器正面左侧的绿色三角形电源指示灯会闪烁十数秒,这是仪器正在进行自检,闪烁停止后,电源指示灯呈绿色发光状态时,仪器处于待机状态。
4.2启动软件4.2.1双击桌面上“Magellan”图标,选择检测到的仪器—“Infinite 200”,点击“OK”;4.2.2在桌面中央对话框的下侧点击“取消”,即进入Magellan主界面4.2.3在界面下侧点击温度控制图标,设定目标温度—设置—开;点击当前温度,选择自动,可以实时观察仪器内温度,(注:实验开始前需将仪器提前预热到目标温度)4.2.4将样品板放到托架上,A1孔处于左上方;然后按右下角绿色三角形按钮继续,选择获得原始数据—继续,进入测量流程编辑窗口4.2.5在Plate下拉菜单中选择测量使用的板的类型,在Part of Plate中框选样品区域;在指令栏左侧选择需要检测的指令,如:1)双击“摇动”,设置持续时间3 s,波幅1.5 mm;2)双击“温度设置”,设置37 ℃,点开“等温度达到”,范围设置36.5 ℃—37 ℃;3)双击“多点测定循环”,设置持续时间1-2 h,勾选使用多点测定间隔,时间1-2 min;4)双击“荧光强度”,设置为490 nm—520 nm,点击Star,开始检测4.3注意事项4.3.1仪器使用完关机后到下一次开机中间至少间隔0.5 h4.3.2检测完成后及时取出微孔板、比色杯4.3.3注意防水防尘,不要在机箱上放置缓冲液、试剂或者重物4.3.4仪器在弹出、吸入微孔板托架时,不要阻挡或者推进4.3.5开机后稳定至少5分钟,再进行发光检测4.3.6如果仪器发出非正常的噪声,或者背面电源风扇停止转动,立即退出软件,关闭仪器电源,拔下电源插头,拨打报修电话,在客服工程师的指导下进行进一步处理或等待客户工程师到达现场处理4.4清洁与维护4.4.1仪器背后右上的风扇外的空气过滤垫如积累灰尘较多,需要及时更换4.4.2定期用干净的软布蘸取少量温和的去污剂或清水清洁仪器表面和操作台面4.4.3避免频繁开关仪器,仪器关闭后等待30分钟后再次开机4.4.4若有液体溅出,要立即用吸水布或纸擦去溅出的液体,并用温和的去污剂清洁仪器表面;如有液体溅入仪器内,立即退出软件,关闭仪器电源,用手搬开微孔板托架门,采用脱脂棉或质量好的吸水纸吸取可见的液体,随后拨打报修电话,在客服工程师的指导下进行进一步的处理或等待客户工程师到达现场处理。
维纳斯立体观察系统操作说明和维修手册说明书
E N G I N E E R I N GMantis Stereo Viewing SystemOperating InstructionsAndService ManualUse this manual only after assembling the Mantis Viewing system.After assembling the Mantis Stereo Viewing System you should be familiar with its various components. These instructions will help you become familiar with the operation and use of the Mantis as well as some of the available options. Also included in this manual is a more comprehensive maintenance, troubleshooting and service guide.NOTE: REFER TO THE MANTIS USER GUIDE AS REQUIRED1/Mantis/7/98CONTENTS Page1) System Diagrams (2)M antis Universal Boom Mount (3)M antis FX Bench Mount (4)1) The Basic Systems (5)1) Objective Specifications (7)1) Using the Mantis (9)T urning the Power “ON” (10)F ocusing (10)A djusting the Lighting .................................... (10)C hanging the Magnification (11)A djusting the Eye Spacing (11)5) Options (12)L ens Protective Covers (13)6)Maintenance (14)Lamp Replacement (15)Lens Cleaning (15)Moisture Control (15)Optical Path Alignment (15)Fan (15)7)Troubleshooting (16)Mantis has No Power (17)Optical View ............... (17)8)Service (18)C leaning the Mirrors (19)F an Replacement (20)R epairing Eye Spacing Adjustment (21)M irror Removal (22)9)Warranty (23)10) Information (25)SYSTEM DIAGRAMSSYSTEM DIAGRAMMANTIS UNIVERSAL BOOM MOUNTE N G I N E E R I N GDescription User Guide Des.Part No.1. Yaw Bolt Cover Cover Plate 187-A-00792. Yaw Bolt Assembly Yaw Spigot YB-A-0013. Anti-glare Shield Anti-glare Shield 187-B-00904. Adj. Friction Handle Height Friction Clamp HAN-05675. Table Mount Base Universal Mount 187-C-02586. C Clamp Assembly G ClampHDW-10927. Power Switch SWI-01228. Switch Cover 187-A-01119. Fan Cover Assembly 187-A-021110. Desiccant(10 pack)Desiccant CartridgeM00611. Grommet HDW-103012. Turret Assembly 187-A-020813. Filter Tray - Left 187-C-007614. Filter Tray - Right 187-C-007515. Lamp Diffuser 187-A-011516. Lamp Diffuser(Blue)187-A-0115A 17. Lamp, 12volt, 20wattLAM-13001241314151617101139128756MANTIS FX BENCH STANDVisi nE N G I N E E R I N GDescription User Guide Des.Part No.1. Yaw Bolt Cover Cover Plate 187-A-00792. Yaw Bolt Assembly Yaw Spigot YB-A-0013. Anti-glare Shield Anti-glare Shield187-B-00904. Focusing Thumbwheel 5. Focusing Platform 187-D-292*6. Surface Lighting Switch7. Substage Lighting Switch8. FX Base187-C-03109. Fan Cover Assembly 187-A-021110. Desiccant(10 pack)Desiccant CartridgeM00611. Grommet HDW-103012. Turret Assembly 187-A-020813. Filter Tray - Left 187-C-007614. Filter Tray - Right 187-C-007515. Lamp Diffuser 187-A-011516. Lamp Diffuser(Blue)187-A-0115A 17. Lamp, 12volt, 20wattLAM-1300*Requires Sub-Assembly187-B-3071231011121314151617956784SYSTEM DIAGRAMThe Basic Systems2) The Basic SystemsThe Mantis Stereo Viewing System is a powerful optical inspection system. The patented optical technology provides a bright, crystal clear overhead image in a fatigue free viewing environment. Long working distance offers ample room for rework and part rotation.Mantis systems are available in two versions. One version is the boom mount (refer to page 3 of this manual) which can be mounted on almost any table surface. This is good for general inspection, viewing and rework, especially in a production environment. The other version is the Mantis FX (refer to page 4 of this manual). This version has a portable stand that resembles a traditional microscope stand. This version is better suited to off-line inspection.Each Mantis system can be equipped with any two of the objective lenses listed below. It is common to use a lower magnification lens (such as 2X or 4X) for general inspection and a higher magnification lens (such as 8X or 10X) for closer inspection of possible defects.Mantis - Boom MountDescription Vision Engineering Inc. Part No.1) Mantis viewing head M0012) Mantis Boom Mount M003Mantis FX - Bench StandDescription Vision Engineering Inc. Part No.1) Mantis viewing head M0012) FX Bench Stand M002Objectives - For use with either systemDescription Vision Engineering Inc. Part No.1) 2X Magnification Lens M2222) 4X Magnification Lens M4443) 6X Magnification Lens M0044) 8X Magnification Lens M0085) 10X Magnification Lens M0096) 6X SLWD Magnification Lens M013The 6X SLWD magnification lens has a much longer working distance than the standard 6X magnification lens. It is specifically designed for rework applications.Objective Specifications 3)Objective SpecificationsThe Mantis objectives provide different levels of magnification ranging from 2X to 10X. As magnification changes, working distance (the distance between the objective lens and the subject when properly focused), field of view (the area of subject that is visible in the viewing screen at any one time) and depth of field (the maximum subject height variation that will remain in focus) also change. The chart below shows the characteristics of each lens.Lens Working Distance Field of View Depth of Field2X171 mm ~ 6.7 in.56 mm ~ 2.2 in. 25 mm ~ 1.0 in.4X 86 mm ~ 3.4 in.28 mm ~ 1.1 in. 11 mm ~ 0.4 in.6X 55 mm ~ 2.2 in.20 mm ~ 0.8 in. 5 mm ~ 0.2 in.6X SLWD112 mm ~ 4.4 in.20 mm ~ 0.8 in. 5 mm ~ 0.2 in.8X 41 mm ~ 1.6 in.15 mm ~ 0.6 in. 3 mm ~ 0.1 in.10X 41 mm ~ 1.6 in.12 mm ~ 0.5 in. 2.5 mm ~ 0.1 in.Using the Mantis 4) Using the MantisTurning the Power “ON”Boom Mount (refer to page 3 of this manual)There is one power switch for the Mantis boom mount system. It is located on the front panel of the vertical support column. Flip the switch to energize the Mantis illuminatorFX Bench Stand (refer to page 4 of this manual)There are three power switches for the Mantis FX bench stand system. The first is the main power switch. It is located on the back of the bench stand vertical support. When energized the switch is illuminated. The remaining power switches are on the front of the bench stand vertical support. The upper switch powers the main illuminator incorporated in the Mantis viewing head. The lower switch powers the substage illuminator built into the focusing platform.FocusingAll of the Mantis objective lenses (except 2X) are parfocal. This means that the image stays in focus when switching between objectives without re-focusing. For best results always focus with the highest magnification lens, then switch to the lower magnification.Boom Mount (refer to page 3 of this manual)To focus the boom mount Mantis system move the Mantis viewing head “UP” or “DOWN”. (Before moving the Mantis head always loosen the boom friction clamp lever located on the right side of the boom mount pivot). To facilitate focusing there are 4 plastic lugs located on the underside of the Mantis head. Hold one of the lugs between your thumb and index finger and gently move the head until proper focus is obtained. Tighten the boom friction clamp.FX Bench Stand (refer to page 4 of this manual)To focus the FX bench stand locate the focus adjustment wheel on the front, right hand corner of the bench stand base plate. Turning this wheel will move the focusing platform “UP” or “DOWN”. With a subject on the focusing platform look into the viewing screen and turn the focus adjustment wheel until a clear image is obtained.Adjusting the LightingThe main illuminator built into the Mantis viewing head features an adjustment to optimize lighting for different applications. The illumination adjustment is a horizontal disc on the right side of the Mantis viewing head. Rotate the disc while looking into the viewing screen until optimal lighting is achieved.4) Using the Mantis (con’t)Changing the Magnification (refer to pages 3 or 4 of this manual)Both Mantis systems use a turret assembly to allow the user to select between two different magnification levels. Objective lenses are screwed onto the threaded turret underneath the Mantis viewing head.After two objectives have been selected and screwed into place on the Mantis turret, they can be switched using the objective selection lever. The lever is located on the left side of the Mantis viewing head. The objective selection lever can be moved into two positions. Each position corresponds to a different objective lens being activated. Select the position that provides the magnification required for your application.Adjusting the Eye Spacing (IPD)The Mantis has an adjustment for different eye spacing. The Inter-pupilary Distance (IPD) must be adjusted to obtain a comfortable view. The IPD adjustment is located on the right side of the Mantis viewing head. While looking in the viewing screen rotate the adjustment knob (the left side optical path will move “LEFT” or “RIGHT”) until a comfortable view is achieved.Note: This adjustment is very important to comfortable and effective inspection. It must be re-adjusted for every individual using the Mantis.Options5) OptionsLens Protective coversAll mantis objectives can be fitted with a replaceable, clear plastic protective cap. These inexpensive caps protect the objective lens from damage and are especially useful when using the Mantis for rework operations. Choose from the chart below.Lens Vision Engineering Part No.2X, 4X, 6X, 8X M0106X SLWD M01610X M011Maintenance6)MaintenanceLamp Replacement (refer to pages 3 or 4 of this manual)Replace the lamps using the following procedure.1) Remove the Mantis viewing head by removing the Yaw Spigot nut.2) Turn the Mantis viewing head upside down.3) Remove the lamp cover (filter tray) by sliding it away from the Mantis head. Do not allow thediffuser lens to drop when removing the lamp covers.4) Pull the lamp out by holding it between your thumb and index finger.5) Replace lamp.6) Reassemble by reversing previous steps.Lens CleaningClean the objective lens using a lint free cloth. An anti-static cleaner may be used to reduce static charging.If frequent contamination is experienced it is recommended to use the optional Protective Lens Covers.Moisture Control (refer to pages 3 or 4 of this manual)The Mantis head is equipped with a blue desiccant cartridge for moisture control. This should be checked regularly. When the desiccant turns pink it is ready for replacement.To replace the cartridge remove the rubber plug under the Mantis viewing head, pull out the desiccant cartridge, replace and re-install the rubber plug.Replace with Desiccant 10 pack, Part No. M006.Optical Path AlignmentIt is a good idea to periodically check the Optical Path Alignment of the Mantis stereo view. Look into the viewing screen from a distance of 12”. The view will appear as two illuminated circles. These two circles must be horizontally aligned within 2/3 of their diameter of each other. Improper alignment will cause imaging problems.If the illuminated circles are out of alignment then they can be adjusted. Locate the large Phillips screw head on the back of the Mantis viewing head (this screw head is locked in place with black silicon). While still looking at the viewing screen from a 12” distance, adjust the screw until the two paths are in acceptable alignment.Fan (refer to pages 3 or 4 of this manual)Blow out the fan assembly with CLEAN, DRY AIR (up to 100 PSI) at least once a month to prevent excessive particulate build-up. This will maximize fan life.Troubleshooting7) TroubleshootingMantis has no powerIf the Mantis head has no power and the illuminator will not come “ON” then check the following items:•Is the Mantis power cord plugged in?•Is the wall outlet functioning properly and supplying sufficient voltage?•Is the fuse in the Mantis support column in good working condition?Optical ViewIf over time the optical view of the Mantis has degraded, check for the following:Are the objectives dirty or damaged?•Dirty or damaged lenses will cause an inferior image.Are both lighting lamps functioning properly?•Both lights must be working to supply sufficient light.Is the Eye Spacing control properly adjusted?•The eye spacing adjustment must be set correctly to obtain a comfortable view.Has the lighting adjustment been used to optimize the lighting?•Optimized lighting is important to maintaining a clear image.Have the Mirrors within the Mantis head become dirty?•Mirrors contaminated with particulate will impede image performance.Is the viewing screen dirty?•Clean the viewing screen regularly to prevent dirt build-up from degrading the image.Has the Optical Path alignment been checked?•Proper Optical path alignment will greatly improve viewing ease.Service 8) ServiceShould the Mantis stereo viewing system require service the unit may be returned to Vision Engineering Inc. Some of the simpler repair procedures are discussed here to prevent excessive downtime.Cleaning the mirrorsThe mirrors within the Mantis viewing head can be cleaned. These mirrors are very delicate and can only be blown off with clean, dry air. Never wipe the mirrors with any type of cloth. Required Tools:Small Phillips screwdriverMedium Phillips screwdriver (magnetic preferred)Work in a dust free environment1. Remove the Mantis viewing head from its support by removing the Yaw bolt.2. Rest the viewing head upside down (objective turret facing “UP”)3. Remove the two screws on the rear of the viewing head.4. Remove both filter trays to gain access to the lamps. Do not allow the diffuser lens to dropwhen removing the lamp covers.5. Remove the screw located in each lamp socket.6. The lower viewing head assembly (black lower section) should now be removable7. Turn the lower viewing head assembly over to prevent dust accumulation on the mirror.8. Without Touching the Mirrors, blow off mirrors with CLEAN, DRY AIR while holding unitupright. Ensure that any dust falls out of the viewing head.9. If any contaminant is on the beam splitter, it can be gently wiped with a soft cloth.10. Reassemble by reversing the disassembly instructions.8)Service (con’t)Fan ReplacementRequired Tools:Small Phillips screwdriverMedium Phillips screwdriverWork in a dust free environment1. Remove the objective lenses.2. Remove the Mantis viewing head from its support by removing the Yaw bolt.3. Rest the Mantis viewing head upside down (turret facing “UP”)4. Remove the three screws from the turret.5. Remove the two screws on the infinity lens.6. Remove the two screws holding the fan assembly in place.7. Remove the two screws on the rear of the Mantis viewing head.8. Remove both filter trays providing access to the lamps. Be careful not to allow the diffuserlens to drop when removing the filter tray.9. Remove the single screw in each lamp socket.10. The lower viewing head assembly (black lower section) now lifts off.11. Gently turn over the viewing head assembly to reduce the risk of the mirror collecting dust.12. Disconnect fan wires from P.C. board and remove old fan. Pay close attention to the wireconnection orientation on the P.C. board.13. Install new fan. Feed new fan wires through grommet one at a time. Connect the wires tothe P.C. board being careful to follow the same orientation as the prior fan.14. Reassemble by reversing disassembly steps.8)Service (con’t)Repairing Eye Spacing Control (IPD)Required Tools:Small Phillips screwdriverMedium Phillips screwdriver (magnetic preferred)Work in a dust free environment1. Remove the magnification objectives2. Remove the Mantis viewing head from its support by removing the Yaw bolt.3. Remove the eye spacing adjustment knob.4. Rest the Mantis head upside down (turret facing “UP”).5. Remove the two screws on the rear of the viewing head.6. Remove both filter trays providing access to the lamps. Be careful not to allow the diffuserlens to drop when removing filter tray.7. Remove the single screw from each lamp socket.8. The lower viewing head assembly (lower black section) can now be removed.9. Gently turn over the viewing head assembly to reduce the chance of dust collecting on themirror.10. Without Touching the Mirrors, replace the detached pin through the viewing head and intothe narrow groove on the eye spacing control knob.11. If necessary, blow off the mirrors with CLEAN, DRY AIR while holding the unit upright.Ensure that any dust falls out of the viewing head.12. Reassemble by reversing the disassembly steps.8)Service (con’t)Remove Mirror from Mantis HeadIn the event that a mirror become dislodged within the Mantis viewing head it may be possible to reattach it by following these steps. If a repair cannot be made then follow these steps toremove the loose mirror. Removing the loose mirror will prevent any internal damage during shipping when returning the unit for service. The mirror can now be packed separately and both units sent back to the factory for service.Required Tools:Small Phillips head screwdriverMedium Phillips head screwdriver (magnetic preferred)Work in a dust free environment1. Remove the Mantis viewing head from its support by removing the Yaw bolt.2. Rest the viewing head upside down (turret facing “UP”).3. Remove the two screws on the rear of the viewing head.4. Remove both filter trays providing access to the lamps. Be careful not to let the diffuser lensdrop when removing the filter trays.5. Remove the single screw in each lamp socket.6. The lower viewing head assembly (lower black section) can now be removed.7. Without Touching the Mirror, remove the mirror or reattach if required.8. Reassemble by reversing the disassembly steps.Warranty9) WarrantyThis product is warranted to be free from defects in material and workmanship for a period of one year from the date of invoice to the original purchaser.If, during the warranty period the product is found to be defective, it will be repaired or replaced at facilities of Vision Engineering Inc. or elsewhere, all at the option of Vision Engineering Inc. However, Vision Engineering Inc. reserves the right to refund the purchase price if it is unable to provide replacement, and repair is not commercially practicable or cannot be timely made. Parts not of Vision Engineering Inc. manufacture carry only the warranty of their manufacturer. Expendable components such as lamps and fuses carry no warranty.This warranty does not cover damage caused in transit, damage caused by misuse, neglect, or carelessness, or damage resulting from either improper servicing or modification by other than Vision Engineering Inc. approved service personnel. Further this warranty does not cover any routine maintenance work which is reasonably expected to be performed by the purchaser.No responsibility is assumed for unsatisfactory operating performance due to environmental conditions such as humidity, dust, corrosive chemicals, deposition of oil or other foreign matter, spillage, or other conditions beyond the control of Vision Engineering Inc..Except as stated herein, Vision Engineering Inc. MAKES NO OTHER WARRANTIES, EXPRESS OR IMPLIED BY LAW, WHETHER OR MERCHANTABILITY, FITNESS FOR A PARTICULAR PURPOSE OR OTHERWISE. Further, Vision Engineering Inc. shall not under any circumstances be liable for incidental, consequential or other damages.Information10) InformationVision Engineering Inc. is committed to providing top quality optical inspection systems. We employ a staff of trained Sales and Service engineers and have a network of Authorized distributors to assist you. Please call whenever you have questions.For additional information contact your local Vision Engineering Distributor or call:Corporate Headquarters Western Region Sales Office Vision Engineering Inc.Vision Engineering Inc.570 Danbury Road745 W. Taft AvenueNew Milford, CT 06776Orange, CA 92865Phone: (860) 355-3776Phone: (714) 974-6966。
麦哲伦GPS说明书
前言感谢您选用magellan 公司出品的个人全球卫星定位〔gps〕导航仪:gps315/320。
以下简称导航仪。
1 这是一个优秀的导航产品,但不可代替其它越野识途比赛的所需产品,也不可做比赛公证。
为了您的平安,请不要将其视为导航的唯一设备。
2 全球定位系统〔gps〕由美国政府控制,它单独负责系统的精度和维护。
现有的定位精度为不大于10 米。
3 应配套使用magellan 公司提供的专用电缆和天线,用其它电缆和天线可能会导致定位精度下降、导航仪损坏,由此造成的后果不在产品保修之列。
4 无需每次使用都进展初始化设置,只有当导航仪在第一次使用、卫星星历丧失,或在关闭的情况下挪动了300 公里以上的时候才需要初始化;严禁浸泡。
5 请务必认真阅读本手册,以免由于使用不当,给您的平安带来威胁。
对于专业用户,手册的某些局部可能需要与英文手册配合使用,请注意参考。
简介欢送选用麦哲伦(magellan)公司出品的个人全球卫星定位〔gps〕导航仪: gps315/320。
以下简称导航仪。
自1989 年开发出第一个导航仪以来,麦哲伦公司在定位和导航方面一直指导着gps 技术革新的潮流!如今,您所购置的麦哲伦导航仪将充分天表达出易学易用性。
这本手册是gps315 和gps320 的使用手册。
它们的区别是:gps315 只有世界上主要的大、中、小型城市的坐标数据库,gps320 除了具有以上数据库以外,还有灯塔、航标、浮标等航海助航数据库。
其中gps320 的城市数据库分为三个区域〔北/中/南美洲、欧洲和非洲、澳大利亚和亚洲〕,根据不同的城市数据库,销往不同国家和地区。
在中国地区销售的gps320仅包括亚洲和澳大利亚的城市数据库,如需其它区域的数据请与天测企业或当地的分销商联络。
gps 知识介绍一、gps 定位系统构成gps 是global positioning system 的缩写,即全球卫星定位系统。
它是由空间站、地面站和用户三局部组成。
VMagellan简明操作指南
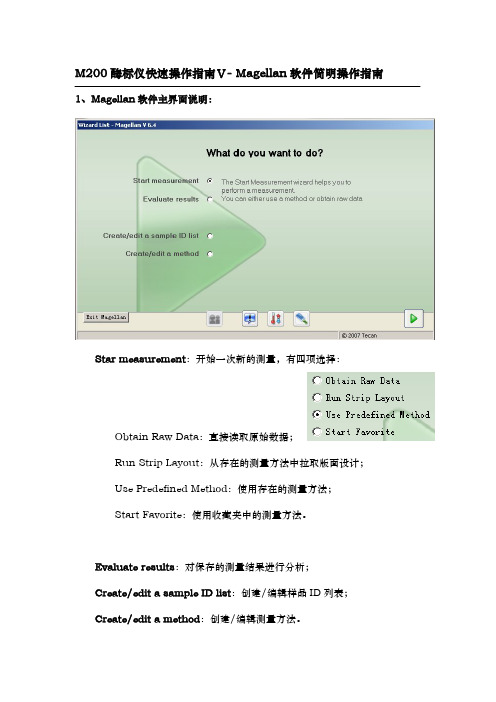
5.判断方法定义:通过设置本选项,软件可以对样品进行判断和分类显示, 点击后在弹出窗口中输入数据源、判断值等即可。
6.质控参数定义:通过本项设置,可以输入测量的质控标准,测量结束后 软件会自动判断测量是否达到质控标准,并给出 True 或 False 的判断结果。
7.数据操作栏:可以设置数据导出的内容和格式,打印的内容和格式,以 及测量完成后要立即开始的数据操作,详情请参考 Magellan 软件说明书或东胜 创新培训课件光盘。
:文件操作功能; :选项,从这里可更改文件保存默认文件夹位置;
:用户管理;
:软件版本和注册信息。 :温度控制,点击此按钮将弹出温控窗口:
填写好目标温度(至少比室温高 5 度,最高 42 度),点击 set 按 钮确认输入,点 On 按钮即可开启控温,点击 Read 按钮可读取当前仪 器内温度,点击 Off 按钮关闭控温。
4.标准曲线定义:当填写了“ST”-标准样品浓度后,就可以点击此选项, 在弹出窗口中定义标准曲线的数据源、坐标、回归方式、扩展因子、外观等设置。 设置完成后软件会自动产生一个“Conc.transforme”-浓度转换栏,并生成 一个浓度转换,在测量获得数据后,软件将根据标准曲线公式自动计算出样品的 浓度。
8.杂项栏:可以为测量填写提示信息和注解,比较有用的功能是设置数据 显示的数值格式:
根据测量要求设置即可。 有关数据处理方法的详尽说明请参考 Magellan 软件说明书或东胜创新培 训课件光盘。 测量方法创建/编辑完成后,点击窗口右下角绿色三角形“Fininsh”,在下 一窗口中保存创建/编辑过的方法。
存和打印功能将不可用,注册方法见软件说明书。注册应由 Tecan 代理商负责, 如需要注册和需要了解注册问题请联系代理商。
Magellan_完整中文手册
QUANTRON Magellan Operation Manual操作手册欢迎您选用Quantron Magellan在您使用Magellan开始工作之前,请仔细阅读我们为您编写的手册。
本手册为您详细介绍了仪器的特点和操作,使您能够充分享受到Quantron光谱仪优越的技术性能。
同时介绍了如何进行维护工作,使您的系统保持高的分析质量。
我们相信使用Quantron Magellan光谱仪,是您满意的选择。
祝您成功愉快!QUANTRON公司全体员工商标Quantron®是德国Quantron Advanced Analytical Systems GmbH的注册商标。
本手册中所提到的全部公司或产品的名称均指其公司的商标或注册商标。
公司名称及地址、电话、传真、信箱:Quantron GmbHAdvanced Analytical SystemsTiergartenstrasse 64D-47533 KleveTel. +49 (0) 2821 / 97 70 80Fax. +49 (0) 2821 / 97 70 8-10e-Mail: info@Table of Contents目录QUANTRON MAGELLAN (1)OPERATION MANUAL (1)操作手册TABLE OF CONTENTS (3)目录34A FIRST GENERAL VIEW (5)概论OPERATION (188)操作SERVICE AND MAINTENANCE (211)服务及维护QMATRIX REFERENCE (233)参考资料40404040404040关于这本手册本手册介绍了QUANTRON Magellan光学发射光谱仪的安装、操作、结构及日常维护本手册的组成本手册由以下主要章节组成:概论系统设计及构造概论操作仪器的基本操作:开机、关机、日常分析、标准化、类型标准化维护介绍了仪器的常规维修保养参考资料参考资料对直读光谱仪QMatrix操作软件将有所帮助。
Magellan Switch系列中文使用手册
MiTAC Digital Corp. 471 El Camino Real Santa Clara, CA 95050 USA 美国和加拿大: 800-707-9971
© 2012 MiTAC International Corporation。 Magellan标识和Magellan是MiTAC International Corporation的注册商标,Switch是MiTAC International Corporation的商标。 保留所有权利。 所有其他商标和注册商标分别是其各自所有者的资产。
112-0045-001 A
i
目录
Switch 概述
Switch ...................................................................................................................1 Switch Up..............................................................................................................1 Switch 按钮............................................................................................................2 电源 ........................................................................................................................2
Magellan导航软件使用说明

Magellan导航软件使用说明版本:1.02011-6-1目 录1.地图界面 (4)1.1.地图基本功能介绍 (4)1.2.真实导航功能 (5)1.3.停车场导航功能 (7)2.目的地设定 (7)2.1.设施检索 (8)2.1.1设施名称检索 (9)2.1.2设施首拼检索 (12)2.2.道路检索 (15)2.1.1道路名称检索 (16)2.1.2道路首拼检索 (18)2.3.历史目的地检索 (20)2.4.地址簿检索 (22)2.5.家 (24)2.6.公司 (25)2.7.分类检索 (26)2.8.附近检索 (30)2.8.1指定点附近检索 (31)2.8.2图上选择检索 (35)2.8.3沿路径检索 (36)2.9.检索区域变更 (40)3.行程规划 (42)4.用户数据 (43)4.1.家 (44)4.2.公司 (45)4.3.历史目的地 (46)4.4.地址簿 (48)4.5.回避区域 (49)4.6.用户数据编辑功能 (51)5.导航设置 (56)5.1.语音音量 (57)5.2.设施图标显示 (58)5.3.安全设置 (59)5.4.电子眼设置 (60)5.5.功能选项 (62)5.6.车辆位置 (63)5.7.默认设置 (63)6.版本信息 (64)7.声音导航 (65)8.查看GPS信息 (66)9.退出导航 (67)1.地图界面1.1. 地图基本功能介绍地图界面导航主菜单在地图界面中,各功能按键介绍如下:〖〗:菜单键,点击可以进入导航主菜单。
〖〗:点击可以进入路径界面。
〖GPS〗:GPS键,点击可以GPS信息界面。
〖〗:放大比例尺键,点击可以放大地图比例尺。
〖〗:缩小比例尺键,点击可以缩小地图比例尺。
〖〗:地图方位键,点击可以将地图方位切换为车头向上、北向上或者3D模式。
隐藏功能键的单地图滚动地图界面在地图界面中,点击地图区域后,会显示功能键,如果5S内没有操作功能键,功能键自动隐藏。
微微创新AG-加利欧功能概述 M000204-08说明书

Description M000204-08 Galileo Function OverviewMicro Innovation AGSpinnereistrasse 8-14CH-9008 St.GallenTel. +41 71 243 24 24Fax +41 71 243 24 90Table of contents1General (5)1.1System Requirements (5)1.2MICRO PANEL GF-x / XV (5)2Possibilities and Limits (6)2.1Project (6)2.2Mask (7)2.3Printing Functions (7)2.4Windows CE (7)3Project Handling (8)3.1Project Handling (8)3.2Project Documentation (8)3.3Project Settings (8)3.4Project Conversion (8)4Mask Handling (9)4.1Mask Handling (9)4.2Sub Mask (9)4.3Mask Documentation (9)4.4Mask Settings (9)4.5Object Handling (10)5Static Objects (11)5.1Drawing Objects (11)5.2Background and Images (11)5.3Dynamic Properties (11)5.4General Functions of Static Objects (11)6Dynamic Objects (12)6.1Basic Objects (12)6.2Graphical Presentation of Objects (12)6.3Keyboards (13)6.4Function Objects (13)6.5Special Function Objects (13)6.6Dynamic Properties (14)6.7General Functions of Dynamic Objects (14)7Script (15)7.1Loop-Script (15)7.2Event-Script (15)8PLC, panel type selection and data definition (16)8.1PLC Selection (16)8.2Definition of Tags (16)8.3Assign Tags (16)8.4Handling (16)8.5MICRO Panel Configuration (17)8.6Text Editing (17)8.7Further Settings and Handling (17)9Testing and Operating (18)9.1Simulation of Objects (18)9.2Optimizing (18)9.3Compiling (18)9.4Download and Upload (18)9.5Online Testing and Operating from PC (18)10PLC Protocols (19)10.1M PB-TP (19)10.2M PB1-TP / MPB2-TP (20)10.3P DP-TP (20)10.4E IB-TP (20)10.5I BS-TP (20)10.6B CB-TP (21)10.7P anel System Port (without a communication card) (21)10.8E thernet (depending on the panel type) (21)Proper useHardware, software, operating systems and drivers must only be used for the applica-tions specified in this description and only in conjunction with the components recom-mended by Micro Innovation AG.Warning!No warranty claims will be recognized for faults arising from the improper handling of any device.Devices and communication should not be used for the implementation of any safety functions relating to the protection of personnel and machinery.No liability is accepted for claims for damages arising from a failure or functional defect. All data specified in this document do not represent guaranteed specifications in the legal sense.Legend* The file size of recipe management depends on the number of data records, the number of variables and used variable types. Within Galileo the exact file size is displayed.Note: The specification of the 'Maximum Data' relate to the limiting values which are managed by the software. The number of available amounts used in the different panels depends on the free memory (depending upon type of device of the internal flash memory or of the PCMCIA card).M000204-08.doc / PD 21 / 21 19.04.2010。
Magellan RoadMate 快速入门指南说明书
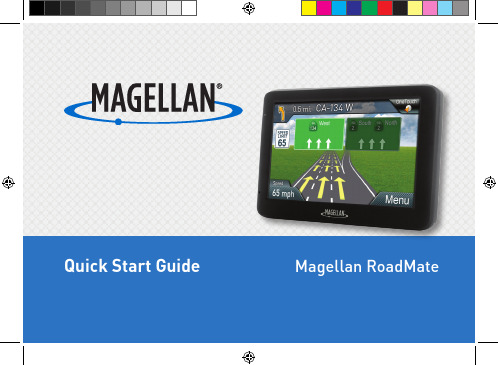
provided instructions and the antenna(s) used for this transmitter must be installed to provide a separation distance of at least 20 cm from all persons and must not be co-located or operating in conjunction with any other antenna or transmitter. End-users and installers must be provided with antenna installation instructions and transmitter operating conditions for satisfying RF exposure compliance.
Visit for more information.
3
Safety
Federal Communication Commission Interference Statement
This device complies with Part 15 of the FCC Rules. Operation is subject to the following two conditions: (1) This device may not cause harmful interference, and (2) this device must accept any interference received, including interference that may cause undesired operation.
Magellan_eXplorist_510_610_用户手册

仪表盘....................................................................................................................................................................... 14 进入仪表盘 ·································································································································································15
使用合适的配件
只能使用麦哲伦电缆和天线;使用非麦哲伦电缆和天线可致性能严重退化并损坏接收机,将无法保修。未经神达电 脑股份有限公司事先书面同意,任何人均不得为任何目的,以任何方式复制、翻版或传送此手册。
立威微波的操作规范和流程
立威微波的操作规范和流程下载温馨提示:该文档是我店铺精心编制而成,希望大家下载以后,能够帮助大家解决实际的问题。
文档下载后可定制随意修改,请根据实际需要进行相应的调整和使用,谢谢!并且,本店铺为大家提供各种各样类型的实用资料,如教育随笔、日记赏析、句子摘抄、古诗大全、经典美文、话题作文、工作总结、词语解析、文案摘录、其他资料等等,如想了解不同资料格式和写法,敬请关注!Download tips: This document is carefully compiled by theeditor. I hope that after you download them,they can help yousolve practical problems. The document can be customized andmodified after downloading,please adjust and use it according toactual needs, thank you!In addition, our shop provides you with various types ofpractical materials,such as educational essays, diaryappreciation,sentence excerpts,ancient poems,classic articles,topic composition,work summary,word parsing,copy excerpts,other materials and so on,want to know different data formats andwriting methods,please pay attention!立威微波是一种利用微波能量进行加热和处理的设备,广泛应用于食品加工、医疗、化工等领域。
Magellan Triton 400手持GPS导航仪说明书
400Pocket-Sized and Amazingly Easy to UseThe Magellan Triton 400 reinvents handheld GPS navigation by combining advanced features, precise navigation, andexceptional ease of use. Completely re-engineered both inside and out, the Triton 400 is the eighth generation of handheld devices from Magellan and also features the rugged, waterproof design that outdoor enthusiasts need and expect.Key Features and Benefits:• E xpandable SD card slot—allows users to store additional maps, terrain, and geocache data• D etailed uploadable maps—maximize the Triton 400’s navigation capabilities• 2.2" (5.9 cm) QVGA full-color display—for crisp, crystal clear graphicsUser Manual OptionalThe Triton 400 is so easy to use that its user manual may never make it out of the box. The “Go To” menu includes friendly icons and helpful categories like Go To, Create, and View. From there a few ‘Go’ button clicks are all that’s needed to navigate its many advanced features. No Ph.D. required!Additional Product FeaturesDetailed MapsPre-loaded base maps identify major rivers, lakes, cities, and other geographical boundaries. The Triton 400 also allows users to upload third-party topo and street maps.Extremely Rugged and WaterproofThe Triton 400’s rugged design defeats harsh environments. Built to withstand a drop to concrete, it’s also waterproof to IPX-7 standards—which means it can be immersed in up to one meter of water for as long as 30 minutes.Battery PoweredEasily replaceable in the field, AA batteries provide users with a readily-available power source.Clear ReceptionAn integrated, low-power, high-sensitivity antenna offers clear reception, even in heavy cloud cover and deep canyons.Rapid PositioningSiRFstarIII ™ gives Triton 400 users the fastest GPS position acquisition in the industry.Accurate Bearing and HeadingThe Triton 400’s directional pointer and compass screen keep users moving in the right direction, with precise directional heading and bearing details.Magellan ®Triton ™e s c a p e t o t h e o u t d o o r st o d a yReinventing Handheld GPS ™T R I 400 D L S 0707 0034 G N E N400Magellan TritonOptional Accessories• Bike mount • Swivel mount• Windshield mount• Cigarette lighter power adapter (12-24 watts)• AC/DC power adapter • Canvas carrying case • Serial cable • USB cableBattery TypeAA USB1.1Package ContentsTriton 400 GPS receiver VantagePoint ™ softwareQuick reference guide, reference manual on CD-ROM GPS Chipset SiRFstarIII User InterfaceKeypadProduct SpecificationsPart Number 980-0002-001UPC Code 7 63357 11776 9Harmonized Code 8526.91.0030Unit Package Dimensions6.0" W x 3.1" D x 8.4" H(15.2 cm W x 7.9 cm D x 21.1 cm H)Unit Package Weight 1.4 lbs. (.64 kg)Case Pack Quantity 8Case Pack Dimensions12.4" L x 9.0" W x 13.5" H(31.5 cm L x 22.9 cm W x 34.3 cm H)Case Pack Weight 12.7 lbs. (5.8 kg)Multi-Pack Quantity 32Multi-Pack Dimensions25.5" L x 18.7" W x 14.5" H(64.8 cm L x 47.5 cm W x 36.8 cm H)Multi-Pack Weight 53.8 lbs.(24.4 kg)Pallet Quantity 512 (16 multi-packs / pallet)Pallet Dimensions51.0" L x 40.0" W x 63.8" H (1.3 m L x 1 m W x 1.6 m H)Pallet Weight910.8 lbs. (413.1 kg)Warranty 1 Year Country of OriginChinaSet-Up InformationThe Triton 400’s compass screen provides preciseheading and bearing information.Magellan471 El Camino RealSanta Clara, CA 95050-4300 USA Tel: 866.601.3118 Fax: Product information shown herein is subject to change without notice.Compatible with an extensive range of detailed maps which identify major rivers, lakes, cities, and other geographical boundaries.© 2007 Magellan Navigation, Inc. All rights reserved. The Magellan logo, Magellan, Triton, VantagePoint, and Reinventing Handheld GPS are trademarks of Magellan Navigation, Inc. All other products and brand names are trademarks of their respective holders.。
Magellan 3011 GPS 罗经仪操作指南
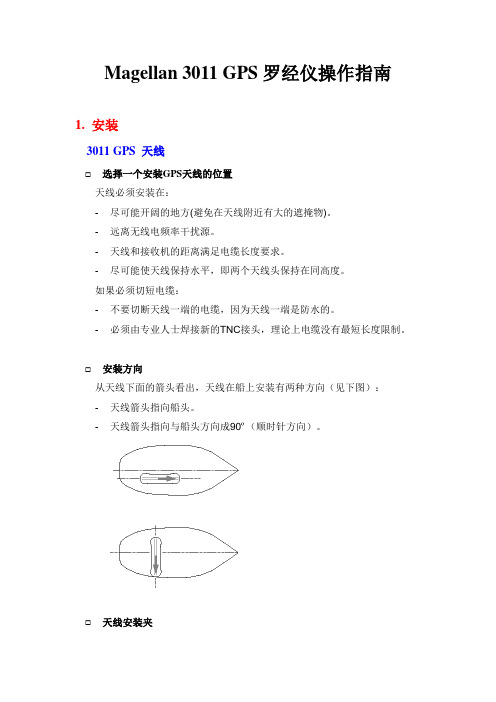
Magellan 3011 GPS罗经仪操作指南1. 安装3011 GPS 天线☐选择一个安装GPS天线的位置天线必须安装在:-尽可能开阔的地方(避免在天线附近有大的遮掩物)。
-远离无线电频率干扰源。
-天线和接收机的距离满足电缆长度要求。
-尽可能使天线保持水平,即两个天线头保持在同高度。
如果必须切短电缆:-不要切断天线一端的电缆,因为天线一端是防水的。
-必须由专业人士焊接新的TNC接头,理论上电缆没有最短长度限制。
☐安装方向从天线下面的箭头看出,天线在船上安装有两种方向(见下图):-天线箭头指向船头。
-天线箭头指向与船头方向成90º(顺时针方向)。
☐天线安装夹3011 GPS分体天线安装示意图如下:连接到3011主机注意:箭头所指方向为安装方向,双接头天线为主天线,GGA位置数据由主天线位置确定。
为了保证3011的定位精度,天线安装必须牢固,不允许绕天线轴有摆动或很小的旋转。
基线长度最大可到2米。
3011 处理器系统连接图2. 开始直流电源☐安装时会自动启动3011当你通过电源线给3011供电时,电源指示灯(绿色)会马上发亮指示3011处理器已启动。
☐人工关掉3011(不用拔掉电源线)用一个尖的工具,按下控制按钮大约2秒钟。
几秒钟后电源关闭。
如果在电源关闭前放开按钮,电源指示灯会闪烁直到电源关闭。
如果在电源关闭后放开按钮,电源指示灯将从亮直到电源关闭。
☐故意关闭电源后启动电源3011用同样的工具,只按一下开关按钮,电源指示灯会马上亮,指示3011处理器已启动。
☐开机以后3011初始化开机数秒后,开始初始化,操作状态指示灯将闪烁,指示接收的卫星数。
初始化完成后,指示灯将通过闪烁反应3011收到的卫星数。
这个状态表示3011将进入完全可操作状态。
只要卫星数足够(定位4颗,定向5颗)。
基线校准当你通过电源线给3011供电时,电源指示灯(绿色)会马上发亮指示3011处理器已启动。
先决条件1.连接PC机到3011上:用RS232串行线把PC机的RS232口和3011的“B”口相连接。
Magento中文操作手册25p

一、会员中心
介绍:会员中心能够使企业与客户间产生互动,为其会员提供的一个功能强大的服务界面和统一的管理平台,会员登录会员中心后,便可在此享受提供的各项服务,例如不同的会员级别有不同的价格优惠等。
会员中心页面具体包括以下功能:
1)客户基本面板:包括客户购买过的最近订单、客户资料、地址、NewsLetter订阅。
具体可分为:
页面管理:可根据不同的店面设置onepage,方便前台调用以及管理
静态模块:创建一个或多个静态模块方便前台调用以及管理
部件:挂件可作为扩展性使用
投票:可设置投票项,让浏览者进行投票,获取投票信息
九、
介绍:提供分析与报告,包括销售报告、税费报告、被放弃的购物车报告、访问最多的商品报告、订购最多的商品报告、低库存报告、搜索关键词报告、商品评论报告、优惠券使用报告等。
后台功能
一、
二、
介绍:销售管理是客户关系管理的有效延伸,能更好的把个性化、差异化服务有机的融入到客户管理去。
这里面包括了:
1)显示订单列表,可进行订单的处理如添加、修改、查询。
2)税务的管理:可设置税收的规则、管理税收的项目
三、
介绍:管理产品、管理分类、设置产品属性、评论与评级管理、标签管理、URL重写管理、网站地图。
5)所有退款
本报告可以按照范围和指定的时间段统计信用备忘信息。范围可以在页面上方的Show Report for下拉菜单中指定。将在每个时期之间有一条线。一个日期段可以是日,月,或一年,可以在页面顶部的Show by下拉菜单中指定。日期段的一些报告中依赖于在顶部指定的日期范围。每一日期段,您可以看到已经有关联信用备忘的总订单数,和总的退款金额,包括多少是在线退款多少是线下退款。在报告中的最后一行是总计所有的数目的。
佳能相机MagicLantern使用教程解读

佳能相机 Magic Lantern 使用教程Magic Lantern 菜单按删除按钮显示菜单,使用箭头键导航。
要更改值,使用 SET ,PLAY 和Q:对于大多数菜单项,你可以:* 按 SET 数值向前变化* 按 PLAY 数值向后变化* 按 Q 调用专项动作(见帮助文本或屏幕上的提示) 复杂的菜单项目按这 3 个键可能是不同的动作。
请参阅您要使用特定的菜单项的文件。
拍照模式下,除实时查看,你可以使用滚轮在 ML 菜单中导航。
按下放大按钮来激活编辑菜单项模式,并用滚轮改变数值。
按 DISP 或 INFO 按钮以获取有关特定菜单项的帮助。
各菜单功能简介Audio:1.Audio Meters 音频测量器2.Analog Gain 声音插值模拟增益3.L-DigitalGain 左声道增益4.R-DigitalGain 右声道增益5.AGC ACG 自动增益6.Input Source 声音输入源7.Mic Power 麦克风供电8.Output volume 输出音量9.Monitoring-USB USB 端口监听LiveV1.Global Draw 全局信息显示2.Zebras 斑马纹曝光不足区域显示3.Focus Peak 对焦峰值4.Magic Zoom MW 对焦同步放大器5.Cropmks(0/7) 剪裁比例6.Ghost Image 鬼影显示,要选定一张照片按 LV 键7.Live Defish8.Spotmeter 点测光9.False Color 伪色图, SET 为开关, Q 键选种类10.Histo/Wavefm 录像时显示直方图11.ClearScreen 清屏,半按快门时 /待机时Expo:1.ISO 自定感光率2.WhiteBalance 自定色温, LV 模式下按 Q 可以检测3. WBShift G/M 自定白平衡偏移4. WBShift B/A 自定白平衡偏移LV 模式下按 Q 检测 5. Shutter 自定快门速度,6. Aperture 自定光圈7. Light Adjust 光线调节, 8. PictureStyle 照片风格9. REC PicStyle 录像的画面风格10. Contrast 对比度, LV 模式下可实时查看11. Saturation 饱和度, LV 模式下可实时查看12. Sharpness 清晰度照片曝光补偿高光色调优先 /ALO 浓度13. Flash AEcomp Movie: 1. Bit Rate(CBR)2. BuffWarnLevel 自定视频码率 缓冲区报警设置3. Time Indicator 时间指示器4. Bitrate Info 比特率信息5. Movie Logging 生成短片文件日志6. Movie Restart 录像中断时( 29 分 29 秒)重新录像7. MovieModeRemap 视频模式映射8. REC/STBY notif 录制备用通知9. Movie REC key 录制热键设置10. Force LiveView 强制保持实时显示模式11. Force HDMI-VGA 强制同步输出 HDIM 或 VGA 信号Shoot:1. HDR Bracketing HDR 档次, Q 关闭/SET 快门数 /PLAY 键设置 EV 值。
维萨拉天气站设备使用说明书

Two-thirds of the earth is covered by oceans, home to an abundance of life and many unique ecosys-
tems. In order to understand the sea, we
need information about it. In Finland, this work is done by the Finnish Institute of Marine Research.
The Finnish Institute of Marine Research also carries out advanced research on wave action. Their high-level expertise has many practical applications. Water level research is mainly used for improving safety at sea and supporting the construction of waterways, harbors and coastal buildings.
of the long-term mean water
level value. Both the normal
upheave of the earth and the
slow rise in sea level are taken
into account in the calculation
of this value, which has a num-
territorial waters. Statistical ap-
- 1、下载文档前请自行甄别文档内容的完整性,平台不提供额外的编辑、内容补充、找答案等附加服务。
- 2、"仅部分预览"的文档,不可在线预览部分如存在完整性等问题,可反馈申请退款(可完整预览的文档不适用该条件!)。
- 3、如文档侵犯您的权益,请联系客服反馈,我们会尽快为您处理(人工客服工作时间:9:00-18:30)。
数据分析方法栏说明:
板面定义 定义样品浓度/稀释度
增加新的数据转换方法
标准曲线定义
判断方法定义 质控参数定义
数据导出设置 打印设置
自动数据操作设置
提示信息 数字格式设置
记事本
隐藏栏目按钮 板面定义栏
标签 数据转换栏 浓度计算栏 数据评估栏
数据操作栏
杂项栏
各种数据处理指令的内容简述: 1.板面定义:即定义微孔板上的样品分ቤተ መጻሕፍቲ ባይዱ,在一块板上可定义多组样品,
查看数据处理得到的分析结果点击“Evaluate results”标签 即可,点击各栏目条上的向下双箭头 可以展开各自的内容。
查看数据处理得到的分析结果的详尽操作请参考 Magellan 软 件说明书或东胜创新培训课件光盘。
4、软件的注册 Magellan 软件需在安装后 30 天内进行注册,超过 30 天未注册软件的保
点击 Add new transformation 可生产一个新的数据转换,在右侧窗口选 择要做数据转换的孔,在上方 Input data 栏中选择数据源,在下方 fx 栏中填入 数据转换公式,点击对号填入即可。拖动已经填入转换公式的孔可以将公式复制 到其它孔中去。左侧方法栏中数据转换的方法名称可以单击后修改。
编辑测量流程后点击 继续,进入数据处理方法设定窗口。在数据处理方 法定义窗口中可定义样品的分布和数据处理的方法。
样品定义工具窗
板面定义窗口
方法栏
样品定义工具窗说明:
样品分类列表
查看各类样品的定义 在选定孔中填入 选择的样品分类
实验分组 样品起始 ID 和排布方向
样品的重复孔数和排布方向
删除选定孔中 存在的样品分类
M200 酶标仪快速操作指南Ⅴ- Magellan 软件简明操作指南
1、Magellan 软件主界面说明:
Star measurement:开始一次新的测量,有四项选择:
Obtain Raw Data:直接读取原始数据; Run Strip Layout:从存在的测量方法中拉取版面设计; Use Predefined Method:使用存在的测量方法; Start Favorite:使用收藏夹中的测量方法。 Evaluate results:对保存的测量结果进行分析; Create/edit a sample ID list:创建/编辑样品 ID 列表; Create/edit a method:创建/编辑测量方法。
3、分析测量结果 选择 Magellan 主菜单中的“Evaluate results”,按右下角绿色三角形
按钮继续,在弹出窗口中选择要查看/分析的结果文件,点击右下角绿色三角形 按钮继续,进入数据分析窗口。
数据分析窗口分为“Evaluate results”和“Edit method” 两个菜单,可以通过窗口中间的按钮切换。通过更改数据处理方法 得到不同的分析结果,并可以导出和打印数据。数据处理方法设置 参见本指南章节 2。
8.杂项栏:可以为测量填写提示信息和注解,比较有用的功能是设置数据 显示的数值格式:
根据测量要求设置即可。 有关数据处理方法的详尽说明请参考 Magellan 软件说明书或东胜创新培 训课件光盘。 测量方法创建/编辑完成后,点击窗口右下角绿色三角形“Fininsh”,在下 一窗口中保存创建/编辑过的方法。
主菜单按钮说明:
:更改当前用户。 :杂项菜单,点击后进入杂项窗口,可启动以下功能:
:仪器控制,一般不需要用户更改,点击 后将弹出仪器控制窗口:
点击 Movements 按钮可以控制可移动部件的进出运动,如 托架、比色杯; 点击 Temperature control 可以打开/关闭温度控制功能; 点击 Change instrument 可以更改联机的仪器。
:弹出/吸入微孔板托架。
:退出 Magellan 软件。
2、创建/编辑测量方法 Magellan 软件可以将测量流程和数据处理方法保存成一个方法文件(mth
文件),以后可直接调用方法文件测量数据,并在测量结束后自动对数据进行处 理,包括数据分析和结果导出。
选择软件主菜单中的“Create/edit a method”,按右下角绿色三角形 按 钮继续,在弹出窗口中选择“New”新建方法文件,或者“Open”打开已有的 方法文件,点击右下角绿色三角形按钮继续,进入测量流程编辑窗口。测量流程 的设置参见 M200 酶标仪快速操作指南的 I、II、III、Ⅳ部分。
存和打印功能将不可用,注册方法见软件说明书。注册应由 Tecan 代理商负责, 如需要注册和需要了解注册问题请联系代理商。
其它更多的功能详见 Magellan 软件说明书和东胜窗口培训课件光盘内容。
:文件操作功能; :选项,从这里可更改文件保存默认文件夹位置;
:用户管理;
:软件版本和注册信息。 :温度控制,点击此按钮将弹出温控窗口:
填写好目标温度(至少比室温高 5 度,最高 42 度),点击 set 按 钮确认输入,点 On 按钮即可开启控温,点击 Read 按钮可读取当前仪 器内温度,点击 Off 按钮关闭控温。
5.判断方法定义:通过设置本选项,软件可以对样品进行判断和分类显示, 点击后在弹出窗口中输入数据源、判断值等即可。
6.质控参数定义:通过本项设置,可以输入测量的质控标准,测量结束后 软件会自动判断测量是否达到质控标准,并给出 True 或 False 的判断结果。
7.数据操作栏:可以设置数据导出的内容和格式,打印的内容和格式,以 及测量完成后要立即开始的数据操作,详情请参考 Magellan 软件说明书或东胜 创新培训课件光盘。
在数据处理时相互间不干扰; 2.定义样品浓度/稀释度:
可在弹出窗口中选择不同类型的样品,定义它们的浓度和稀释度。在定义 “ST”-标准品时可输入浓度单位,并有自动填充选项。也可以在“Conc.”下 方手工输入数值,但是不可以在选择自动填充时采用手工输入的方式点击 “Conc.”栏。
3.增加新的数据转换方法:如果有“BL”-空白样品存在,软件会自动提 示是否生成空白扣除,点击 yes 确定即可自动产生空白扣除的转换方式。
4.标准曲线定义:当填写了“ST”-标准样品浓度后,就可以点击此选项, 在弹出窗口中定义标准曲线的数据源、坐标、回归方式、扩展因子、外观等设置。 设置完成后软件会自动产生一个“Conc.transforme”-浓度转换栏,并生成 一个浓度转换,在测量获得数据后,软件将根据标准曲线公式自动计算出样品的 浓度。
