D610
Dell D610笔记本硬盘并口改串口 IDE改sata

Dell D610笔记本硬盘并口改串口,IDE转SATA
今天来讲解一下笔记本硬盘并口改串口,很多老笔记本的硬盘都是并口的,想升级成大硬盘,但是现在很多大硬盘都是串口的。
难道就没有办法使用了吗,今天就来讲解一下,老笔记本并口如何改造成串口。
就拿我的DELL D610开刀吧,我的DELL610是40G硬盘,已经不够用了,买了一块320G的串口硬盘,先把C542 C543 C545 C546用3900P的园片电容替换,方便连接,我开始是用笔记本自带的电容,但是一焊接就断,把4根信号线和3根电源线接在串口硬盘插座上。
我偷懒了,没有换插座,就直接用线连接好,就是线长了点。
主板上就把C542 C543 C545 C546断开接插座,其他没有拆动。
笔记本并口改串口,IDE转SATA的方法就是这些了,不过要注意的是,要主板是915的才可以改哦,如果有朋友有兴趣一定要先看自己本本的型号。
D610AC中文说明书_1

9.0售后与保修感谢你购买本公司的高性能充电器,EV-PEAK将竭尽全力为您提供完善的售后服务,全面维护您的权益自购买之日起一年内因产品本身质量问题,所有保修都是免费的,客户无法提供有效购买凭证的,将以及其内部的日期码为准自购买之日起超过一年期限,将酌情收取成本费用,用户需自行承担来回运输费用用户自行拆装、改造、或使用不当造成的损失有客户自行承担维修和运输费用。
610AC D中文说明书DC输入电压范围:11.0V-18.0V充电电流调节范围:0.1-7.0A放电电流调节范围:0.1-2.0A充电功率限制:max.100W×2放电功率限制:max.8W×2均衡电流:max.250Ma均衡精度:±0.01V支持镍氢/镍镉电池节数 1-16节支持锂电池类型:Li-Po、Li-ion、Li-Fe支持锂电池节数:1-6节铅电池电压:2-20V数字电源:3-24V重量:1250g尺寸:208*170*63mm▼CH1/CH2▼按钮:通道选择功能键。
按下它们可打开▼CH1 和CH2▼MODE/ESC按钮:模式选择/停止/退回功能键。
使用该按键选择主菜单中选择或在子菜单中退回主菜单DEC/INC按钮:水平翻动与增减按键,在子菜单选择中,可循环翻看同级菜单,充放电过程中可以循环浏览同级咨询菜单,设定各种数据值时DEC=减少,INC=增加ENTER/START按钮:选择、确定按键;长按2秒为开始功能警告:使用之前认真阅读操作手册熟悉菜单结构,错误操作将损害充电器, 个人财产和 严重伤害警告:使用充电器时,请遵守以下警告否则将导致机器故障,电气问题,机器过 热,火灾,最终受损和物产受损2. 性能参数3. 按键功能4. 警告安全须知目 录1.功能特点 (01)2.性能参数 (02)3.按键功能 (02)4.警告安全须知 (02)5.外部结构 (03)6.菜单说明 (05)7.操作说明 (06)8.警告和错误信息 (14)9.售后服务和保证 (15)充电器采用最先进的充电算法及多重错误兼容设计,能最大限度的创造一个安全充电的状态,降低因用户疏忽或错误设定而引发的危险支持目前模型行业所有常用电池:Lipo、Life、NiMH、NiCd、Pd内置单节电压均衡器,无论充放电都能保障电池组中的每一个单元尽量一致(误差在±0.01V)支持1-5节电池循环充放电,提供NiMH/NiCd电池激活功能可设置电池容量,1C时充电器开始充电放电截止电压在3.0V-4.0V范围内可调数字电源:可设置3-24V的输入与输出功率外部温度监控USB监控可同时使用屏幕背光保护:操作几秒后,背光自动变暗;可自己设定时间(0-10分钟)长按INC&DEC长达3秒,可看到单节电压和总电压预充功能保护电池:当电池电压低于最低安全电压时,可设置恢复时间,充电器可在短时间内充电,当电池电压达到最低电压时,充电器切换到普通充电模式1.功能特点D610AC 用户手册警告:充电器未连接电池之前请勿通电,否则会损坏充电器和电池1.连接电源2.电源通电3.充电器连接电源4.所用电池选择正确的模式5.充电器连接转接板6.电池连接到转接板7.开始充电·使用时请勿将电源,充电器和电池放置无人管置的地方·请勿损害充电器或者使用湿电池·请勿使用包含不同类型的电池包·未成年请勿使用,以免发生意外·请勿在过热和过冷的环境或者阳光直射的条件下使用·请勿在线路损坏和短路的条件下使用·一次只能充一个电池包·不要在电线损坏或者短路的条件下使用·机器运转时不要把充电器与12V 电池连接·不要自行拆卸或者使用已坏的充电器·请勿错误连接正负端·请勿将DC 输入与AC 电源连接·使用适合该充电器的专用电池·充电前请检查电池·电池始终远离可能被受热所影响的材料·始终监控充电环境并有可用的灭火器·在充电过程中如果电池变热或者开始膨胀请结束充电·首先把配线连接好,然后再接电池,以避免与电源板的短路。
7SD610线路光纤差动保护整定原则

7SD610线路光纤差动保护的整定原则 1 装置的总体功能整定(Device Configuration) (1) 定值组切换功能,地址为0103,可选Disable或Enable。
(2) 分相/三相跳闸方式选择,地址为0110,可选3pole only或1-3pole。
(3) 开放差动保护功能,地址为0112,选Enable,存在。
(4) 直接远方跳闸功能(DTT Direct Transfer Trip),地址为0122,选择Enable存在。
(5) 瞬时快速SOFT过流保护,地址为0124。
(6) 后备保护(Backup overcurrent),地址为0126,选择IEC时限或ANSI时限。
(7) 重合闸功能,地址为0133根据需要可选1 ̄8AR-cycles或ADT(间隙时间自适应)或Disable。
重合闸运行模式,地址为0134则可选Trip w/Tact或Trip w/o Tact。
(8) 地址0139 ̄0142一般设置为Disable。
(9) 地址0144“Voltage Trans”根据是否接有电压互感器选择connected或not connected。
如果选择not connected则无电压显示。
(10)如果保护区域内有变压器组,则地址0145选择YES,反之NO。
2 系统参数1的整定 2.1 如果地址0145是yes,那么地址0201 ̄0221用作设置线路上变压器的各项参数,具体如下: (1)0201 CT STARPT 变压器绕组的CT中性点的指向 指向母线或线路 (2)0203 Rated Primary Voltage 电压互感器的一次额定电压 设定范围为0.4 ̄800.00kV (3)0204 Rated Secondary Voltage(L-L) 电压互感器的二次额定电压 设定范围为80 ̄125V (4)0205 CT Rated Primary Current 电流互感器的一次额定电流 设定范围为10 ̄5000A (5)0206 CT Rated Secondary Current 电流互感器的二次额定电流 可选1或5A (6)0210 U4 voltage transfomer is 零序电压互感器是否连接 not connected或Udelta transformer (7)0211 Matching ratio Phase VT To Open-delta-VT 零序电压因子 设定范围为0.10 ̄9.99 (8)0220 I4 voltage transfomer is 零序电流互感器是否连接 not connected或Neutral transformer (9)0221 Matching ratio Phase I4/Iph for CT’s 零序电流因子 设定范围为0.010 ̄5.000 2.2 地址0230 额定频率选择50Hz 2.3 地址0240A Minimum TRIP Command Duration 最小跳闸出口闭合时间 0241A Maximum Close Command Duration 最大合闸出口保持时间 0242 Deadtime for CB test-autoreclosure 断路器分-合测试时间,此时间应设置为不小于0.1s 2.4 电流互感器特性的设置(CT datas) 地址:0251 k_alf/k_alf nominal 工作精度极限因子 即为上面装置原理中所讲n’/n的值,用来区分CT额定负荷及以下情况下的误差还是CT饱和情况下的误差,具体见地址0253和0254。
nikon d610 使用技巧
nikon d610 使用技巧尼康D610是一台功能强大,适合各种摄影需求的全画幅单反相机。
以下是一些使用技巧,帮助您更好地使用尼康D610:1. 学习手动模式:尼康D610具有丰富的手动控制选项,包括光圈、快门速度和ISO感光度。
学习手动模式将使您能够更精确地控制曝光和深度。
2. 使用RAW格式拍摄:D610支持RAW格式,这种格式不会进行任何图像处理,保留了更多的图像细节。
虽然RAW格式的文件更大,但它可以给您更多的后期调整和编辑的余地。
3. 深入了解对焦系统:D610配有39个对焦点和9个十字型传感器,具有高度准确和快速的对焦能力。
学习如何使用不同的对焦模式和对焦点选择功能,以便于不同的拍摄场景,例如运动或低光环境。
4. 了解白平衡:D610具有多种白平衡选项,以校正不同照明条件下的色彩偏差。
学习如何使用预设的白平衡模式,或者使用自定义白平衡进行更准确的校正。
5. 利用ISO控制噪点:D610具有出色的高ISO性能,这意味着您可以在低光条件下仍然获得清晰的照片。
学习如何使用ISO设置,以在不同场景下平衡噪点和图像细节。
6. 使用导轨模式和防抖功能:D610具有导轨模式和防抖功能,这可以帮助您拍摄长时间曝光的清晰照片。
学习如何使用这些功能,以消除由手持相机引起的模糊或抖动。
7. 定期清洁相机和镜头:尼康D610是一台高级相机,因此它需要保持清洁和维护。
使用适当的清洁工具和方法来清洁相机和镜头,以确保图像质量和相机寿命。
8. 学习使用高级功能:D610还具有一些高级功能,例如多重曝光、活动D照片和HDR模式。
学习如何使用这些功能可以为您的创意摄影带来更多可能性。
总之,尼康D610是一款功能强大且易于使用的相机。
通过学习如何使用不同的拍摄模式、对焦系统和曝光控制,您将能够更好地利用D610的潜力,并获得高质量的照片。
尼康D610
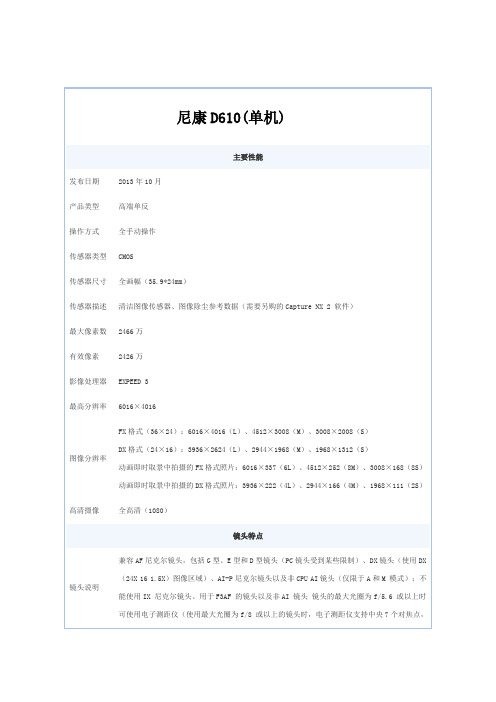
尼康D610(单机)主要性能发布日期2013年10月产品类型高端单反操作方式全手动操作传感器类型CMOS传感器尺寸全画幅(35.9*24mm)传感器描述清洁图像传感器、图像除尘参考数据(需要另购的Capture NX 2 软件)最大像素数2466万有效像素2426万影像处理器EXPEED 3最高分辨率6016×4016图像分辨率FX格式(36×24):6016×4016(L)、4512×3008(M)、3008×2008(S)DX格式(24×16):3936×2624(L)、2944×1968(M)、1968×1312(S)动画即时取景中拍摄的FX格式照片:6016×337(6L)、4512×252(8M)、3008×168(8S)动画即时取景中拍摄的DX格式照片:3936×222(4L)、2944×166(4M)、1968×111(2S)高清摄像全高清(1080)镜头特点镜头说明兼容AF尼克尔镜头,包括G型、E型和D型镜头(PC镜头受到某些限制)、DX镜头(使用DX (24X 16 1.5X)图像区域)、AI-P尼克尔镜头以及非CPU AI镜头(仅限于A和M 模式);不能使用IX 尼克尔镜头、用于F3AF 的镜头以及非AI 镜头镜头的最大光圈为f/5.6 或以上时可使用电子测距仪(使用最大光圈为f/8 或以上的镜头时,电子测距仪支持中央7个对焦点,而使用最大光圈为f/6.8或以上的镜头时,则支持中央33个对焦点)对焦区域单点AF,动态区域AF(9,21或39点),3D 跟踪,自动区域AF对焦点数39点或11点显示功能显示屏类型高清屏显示屏尺寸 3.2英寸显示屏像素92.1万像素液晶屏液晶屏特性约170°可视角度的低温多晶硅TFT LCD 显示屏,约100% 画面覆盖率,可通过环境亮度感应器自动控制显示屏亮度菜单语言阿拉伯语,中文(简体中文和繁体中文),捷克语,丹麦语,荷兰语,英语,芬兰语,法语,德语,希腊语,印地语,匈牙利语,印尼语,意大利语,日语,韩语,挪威语,波兰语,葡萄牙语(葡萄牙和巴西),罗马尼亚语,俄语,西班牙语,瑞典语,泰语,土耳其语及乌克兰语取景器类型光学取景器描述类型:眼平五棱镜单镜反光取景器放大倍率:约0.7倍(50mm f/1.4 镜头设为无穷远;屈光度为-1.0m-1)视点:距离取景器接目镜表面中心21mm(屈光度为-1.0m-1)屈光度调节:-3至+1m-1对焦屏:B型光亮磨砂对焦屏Mark VIII,带有AF区域框(可显示取景网格)反光板:即时返回型景深预览:按下景深预览按钮可将镜头光圈缩小为用户(A和M模式)或照相机(其它模式)选择的数值快门性能快门类型电子控制纵走式焦平面快门快门速度30-1/4000秒(以1/3或1/2EV为步长进行微调)B门,遥控B门(需要另购的ML- L3遥控器),X200闪光同步速度:X=1/200 秒;在1/250 秒或以下速度时,与快门保持同步(速度为1/200至1/250秒之间时闪光范围缩小)闪光灯闪光灯类型内置外接闪光灯(热靴)支持闪光模式自动,自动带防红眼,自动慢同步,自动慢同步带防红眼,补充闪光,防红眼,慢同步,慢同步带防红眼,后帘慢同步,后帘同步,关闭;支持自动FP高速同步闪光指数约12;手动闪光时12(m,ISO 100,20℃)曝光控制曝光模式自动(自动;自动(闪光灯关闭)),场景,带有柔性程序的程序自动(P),快门优先自动(S),光圈优先自动(A),手动(M),U1(用户设定1),U2(用户设定2)曝光补偿±5EV(1/3EV步长或1/2EV步长)测光方式矩阵:3D彩色矩阵测光II(G型、E型和D型镜头);彩色矩阵测光II(其它CPU镜头);若用户提供镜头数据,彩色矩阵测光适用于非CPU镜头中央重点:约75%的比重集中在画面中央12mm直径圈中;或可更改为集中在画面中央8、15或20mm直径圈中,或者平均分布于整个画面上(非CPU镜头使用12mm直径圈或全画面平均值)点:集中在以所选对焦点(使用非CPU镜头时为中央对焦点)为中心的4mm直径圈中(大约是整个画面的1.5%)白平衡自动,预设(白炽灯,荧光灯,晴天,闪光灯,阴天,背阴,手动预设(最多可保存4个值),选择色温(2500K至10000K);全部都可进行微调)感光度以1/3或1/2EV为步长在ISO 100 至6400之间进行微调;可在ISO 100的基础上约减少(推荐曝光指数)0.3,0.5,0.7 或EV(相当于ISO 50),或者在ISO 6400的基础上约增加0.3,0.5,0.7,1或2EV(相当于ISO 25600);自动ISO感光度控制可用场景模式人像,风景,儿童照,运动,近摄,夜间人像,夜景,宴会/室内,海滩/雪景,日落,黄昏/黎明,宠物像,烛光,花,秋色,食物,剪影,高色调,低色调拍摄性能短片拍摄1920×1080 ;30p(逐行),25p,24p1280×720 ;60p,50p,30p,25p 60p,50p,30p,25p 及24p时的实际帧频分别为59. 94,50,29. 97,25及23. 976幅/秒自拍功能2秒,5秒,10秒,20秒;以0.5,1,2或3秒为间隔曝光1至9次连拍功能支持(最高约6张/秒)功能参数遥控功能支持(可选)遥控模式:遥控延迟、快速响应遥控、遥控弹起反光板存储参数存储卡类型SD卡/兼容UHS-I的SDHC和SDXC存储卡文件格式图片:NEF(RAW):12 位或14 位无损压缩或压缩;JPEG:兼容JPEG-Baseline,压缩比(约)为精细(1:4)、标准(1:8)或基本(1:16)(文件大小优先);最佳品质压缩可用;NEF(RAW)+JPEG :以NEF(RAW)和JPEG两种格式记录单张照片视频:MOV接口参数HDMI接口支持视频接口AV接口其它接口USB2.0配件端子:遥控线:MC-DC2(另购)GPS单元:GP-1(另购)音频输入:立体声迷你针式插孔(3.5mm直径;支持插入式电源)音频输出:立体声迷你针式插孔(3.5mm直径)电池性能电池类型锂电池(EN-EL15)电源性能另购的MB-D14 多功能电池匣可容纳1 块EN-EL15 锂离子可充电电池或6节AA碱性电池、镍氢电池或锂电池EH-5b电源适配器;需要EP-5B照相机电源连接器(另购)外观设计外形特点大屏幕外形尺寸141×113×82mm产品重量约760g(仅机身),850g(包含电池和存储卡,不含机身盖)其它性能麦克风/扬声器立体声/单声道播放模式全屏和缩略图(4张,9 张,72 张图像或日历)播放,变焦播放,动画播放,照片和/或动画幻灯播放,直方图显示,加亮显示,照片信息,GPS数据显示及自动旋转图像其它性能优化校准系统:标准,自然,鲜艳,单色,人像,风景;可修改所选优化校准;可保存自定义优化校准双卡插槽:插槽2 可用作额外空间或备份存储空间,也可用于分别存储使用NEF+JPEG 所创建的图像;两张存储卡之间的影像可以相互复制文件系统:DCF(DCF 规则)2.0、DPOF(DPOF 格式)、Exif(数码照相机可交换图像文件格式)2.3、PictBridge(图像跨接格式)释放模式:S(单张拍摄),CL(低速连拍),CH(高速连拍),Q(安静快门释放),Qc(安静连拍快门释放),(自拍),(遥控器),UP(反光板弹起)动态D-Lighting:自动,极高,高,标准,低或关闭动态D-Lighting包围:拍摄2 幅,在其中一幅使用所选值;或者拍摄3幅,在所有照片中都使用预设值对焦锁定:半按快门释放按钮(单次伺服AF)或按下AE-L/AF-L按钮可锁定对焦即时取景模式:即时取景静态拍摄(静止图像),动画即时取景(动画)即时取景镜头伺服:自动对焦(AF):单次伺服AF(AF-S);全时伺服AF(AF-F);手动对焦(M)AF区域模式:脸部优先AF,宽区域AF,标准区域AF,对象跟踪AF自动对焦:可在画的任何位置进行对比侦测AF(选择了脸部优先AF或对象跟踪AF时,照相机自动选择对焦点)相机附件包装清单尼康D610 x1EN-EL15锂离子可充电电池 x1MH-25充电器 x1DK-5接目镜盖 x1DK-21橡胶接目镜罩 x1UC-E15 USB 连接线 x1AN-DC8照相机背带 x1BM-14LCD 显示屏盖 x1BF-1B机身盖 x1BS-1配件热靴盖 x1ViewNX 2 CD-ROM光盘 x1保修信息保修政策全国联保,享受三包服务质保时间1年客服电话400-820-1665电话备注周一至周日:9:00-18:00详细内容您的尼康器材自购买日起享有一年免费保修,以保证对应任何生产中的瑕疵。
天然气管道专项安全技术交底

2)、爆破可能危及建(构)筑物、公共设施或人员的安全而无有效防护措施;
3)、洞室、炮孔温度异常;
4)、作业通道不安全或堵塞;
5)、恶劣天气条件下(包括:雷电、暴雨、能见度不超过100米的大雾天气、风力超过六级等)
5、装药工作必须遵守下列规定:
1)、装药前应对硐室、药壶和炮孔进行清理和验收;
5)、导爆管联结不应打死弯,联接角度亦为10°-15°。
12、电力起爆注意事项
1)、距爆区边界50米范围内不应有电缆通过或存留电器设备。放主线时,不应通过电缆线,若必须通过时,要用木板或绝缘物品垫好。爆破施工前应对杂散电流进行测试,对高压电、射频电等进行调查,存在危险立即采取预防和排除措施。
2)、联线时各接头要擦净。每孔都应进行导通试验,应使用专用导通器和爆破电桥,仪器仪表应每月检查一次。电阻应符合设计要求。接头要结牢,缠绕圈数不应少于6圈,并用胶布包好。
6、炸药、雷管不准同车运输或与其它物品混装、搬运过程中不得扔、砸、撞,应轻拿轻放。
7、药包加工、装药作业中,严禁携带火柴、Biblioteka 火机等引火物品,严禁在作业场所吸烟。
8、装药和充填应用木质炮棍;深孔爆破出现药包堵塞时,在未装入雷管、起爆药柱等敏感爆破器材前,应采用铜或木制长杆处理;装起爆药柱时严禁投掷或冲击。
2、爆破作业必须严格遵守国家标准
GB6722-2014《爆破安全规程》等规定。
3、爆破物品应使用专用的火药车搬运,起爆材料应专人背送。禁止炸药与起爆材料同车装运,装卸爆破材料时,要轻拿轻放,不准摔打碰撞。
4、爆破作业前,班组长应组织爆破工认真学习、讨论爆破计划方案与安全措施,做好作业分工布置工作。
5、爆破作业必须严格按《爆破设计说明书》的要求进行作业,作业过程中,一切行动必须听从爆破班长和工程技术员的指挥,并接受安全员的监督。如实际情况发生变化,或存在严重威协安全作业的情况,应报告有关领导作处理,或由技术员作修改爆破方案后,再进行作业。
DELL戴尔D610维修经验-JM5主板常见不良现象汇总(原创)

JM5常见不良现象汇总一, NO POWER1)M/B大电流,PWR_SRC短路,PC37\PC176\PC80\PC56电容之一烧毁.更换即可。
2)M/B大电流,DC_IN+短路,PC126电容烧毁. 更换即可。
3)M/B大电流,SDC_IN+短路,PC116电容烧毁. 更换即可。
4)M/B大电流,PQ14烧毁, 更换即可。
5)M/B上电0.01A:a)+DC_IN有19V输入,而DC_IN+没有19V输出,检测PQ30的第4PIN是否是3V,如果不是3V,一般PC52 fail, 更换即可。
b)ACAV_IN没有3.3V输出,PU10 fail,更换即可。
c)PWR_SRC为19V,而PU5(PIN20)的电压小于18.5V, PR110阻值异常, 更换即可。
d)+3/+5VALW没输出,测量+3/+5V ALW的对地阻值,如果对地阻值正常,更换PU5即可,如果对地短路,更换USIO1。
e)+RTC_PWR3_3V没输出, 更换C462或U38即可。
f)VCCRTC短路,更换U8或U12(南桥)即可。
二,NO POST1) J1锡裂, 加锡补焊J1即可2)M/B上电0.02A:a)POWER_SW#是否是3.3V, 如果不是3.3V,一般C430 fail, 更换即可。
b) SUS_ON/AUX_EN是否是3.3V, 如果不是3.3V, 更换USIO1即可。
c) PU6第5PIN是否是3.3V, 如果不是3.3V, 更换PU6即可。
d) UPW1第5、6PIN是否是3.3V, 如果不是3.3V, 更换UPW1或USIO1即可。
e)ALWON是否是3.3V, 如果不是3.3V, 更换USIO1即可。
3) M/B上电0.08A:a)检测晶振W2是否是32.768KHZ, 如果不是, 更换即可。
b) 检测VCCRTC是否是3.3V, 如果不是3.3V,一般C550或U8 fail, 更换即可。
c) VCCRTC对地阻抗异常, 更换U122(南桥)即可。
老生常谈:买佳能6D?尼康D750?D610?

⽼⽣常谈:买佳能6D?尼康D750?D610?虽然⽬前微单市场是主⼒的相机消费市场,但是在全画幅相机的市场中,单反的专业地位依旧是不可动摇的,对影像品质有要求的消费者都仍然会选择系统成熟的单反作为拍摄创作的主⼒器材。
⽽在消费级全画幅相机市场⾥⾯,尼康D750/D610和佳能6D已经多年没有更新了,均已成为市场上的⽼将了,⾯对不断追赶的索尼A7系列产品,⾃然是有点紧迫。
不过,影像系统毕竟是以系统来讨论⽣产⼒的,因此,单反的地位由于多年来的积累,⾄少现在是不会被微单动摇的。
所以,问题来了,现在买佳能6D?尼康D750?D610?我想这个是现在的⼀个⽐较⼤的问题了。
⾸先,我们来介绍⼀下三个产品吧。
尼康D750是⼀款全新定位的产品,拥有全新的产品理念,融合了轻便、坚固和突破的三种特性。
轻便和坚固⽅⾯,D750采⽤了全新的碳纤维+镁合⾦为材质的机⾝,搭载⽐D610更强的性能,却保持原来的机⾝⼤⼩。
并通过改善机⾝细节,使D750握持⼿感更接近D810。
配置⽅⾯,⽀持-3EV的51点对焦系统,2432万像素全画幅传感器和EXPEED4图像处理器,成像画质⼗分优秀,上下翻90度的折叠屏,还有⾼品质的视频拍摄能⼒和Wi-Fi功能等⽀持,可以说,这是尼康单反中,综合性能最强的全画幅单反了。
尼康D610是⽬前市⾯上最便宜的全画幅单反相机,D6X0也是⾸个⼊门全画幅感念的单反产品。
虽说D610是⼊门级别的单反相机,但配置⼀点也不含糊,配置了2400万像素全画幅传感器、39点对焦系统、EXPEED 3图像处理器、15万次⾼精度快门寿命、6张/秒连拍,配上低廉的价格,性价⽐爆表。
佳能6D是继尼康D600后的另⼀款⼊门全画幅单反相机,定位更低,整体没什么亮点,但拥有±3EV的中⼼对焦点,超轻机⾝和内置较完整的Wi-Fi功能是6D最⼤的卖点。
机⾝设定更为⼩巧,2020万像素,最⾼ISO 102400,从配置来说,的确是⼗分够⽤了。
旅客列车停站时刻表

旅客列车停站时刻表2007年9月29日起实施D51(北京—四方)北京开6.50,潍坊11.34/11.35,四方12.43到。
D54(四方—北京)四方开13.05,潍坊14.06/14.07,天津西17.48,北京18.50到。
D55(北京—四方)北京开11.20,潍坊16.04/16.05,四方17.13到。
D56(四方—北京)四方开17.33,潍坊18.34/18.35,天津西22.16,北京23.18到。
D59(北京—四方)北京开15.50,潍坊20.34/20.35,四方21.43到。
D77(上海—四方)上海7:43、无锡8:30、南京9:46、蚌埠11:07、徐州12:15、泰山14:13、济南14:54、淄博15:43、潍坊16:26/16:27、四方17:34到。
D78(四方—上海)四方10:37、潍坊11:37/11:38、淄博12:18、济南13:15、泰山14:01、徐州15:59、蚌埠17:05、南京18:28、无锡19:38、上海20:32到。
D601(济南—四方)济南开07.45,潍坊09.20/ 09.22,四方10.29。
D602(四方—济南)四方开07.39,潍坊08.39/ 08.41,淄博09.21,济南10.19。
D603(济南—四方)济南开10.40,潍坊12.11/ 12.13,高密12.40,四方13.24。
D604(四方—济南)四方开10.50,潍坊11.50/ 11.52,淄博12.32,济南13.30。
D605(济南—四方)济南13.51开,潍坊15.26/15.28,四方16.35。
D606(四方—济南)四方13.45开,潍坊14.45/14.47,淄博15.27,济南16.25。
D607(济南—四方)济南开16.56,潍坊18.27/18.29,高密18.56,四方19.40。
D608(四方—济南)四方开16.56,潍坊17.56/ 17.58,青州市18.20,淄博18.42,济南19.39。
7SD610光纤纵差配置说明

图 5: 缺省 CT精度因子 保持缺省断路器 Breaker设置。 每一个继电器有一个唯一的 ID号码,其范围为 1-65535,对保护互相通讯是 必须的,它使本保护接收属于其自己的规约而屏蔽不属于其的规约。 在地址 3217 Prot.Int1: Own datas received,指示接收到属于自己的报 文。 在我们的例子中 ID 是1 ,错误的ID号会在事件缓冲区中产生记录,出厂缺 省配置的LED告警灯会点亮,地址为 3234 DT unequal 指示本侧 ID号与对侧设的 ID号不符;地址为 3487 Equal IDs 指示两侧的 ID设成相同了。 在1710地址中设为: relay 1 说明该继电器是主继电器,作为时间同步源, 如果使用了外部时钟信号必须接于该继电器,另一侧继电器就会有相同时标了。虽 然各种对时方法可以在 DIGSI 4 中 Time Synchronization 设置,但这不建议, 因为两侧的不时间的事件记录会使故障分析变得困难。
2. 7SD610/522提供将本地差动跳闸信号远传到对侧7SD610/522的功能, 地址1301 “State of transmit.the intertrip command”设为on;当保 护设为3相跳闸时,发生Ia故障,保护将远传3相总调命令,对侧和本地 保护都会收到3相跳闸的起动命令,如果把Relay PICKUP L1(00503), PICKUP L2(00504), PICKUP L3(00505)或Relay TRIP L1(00507), Relay TRIP L2(00508)动作了. 3. 后备过流保护(>,>>)功能(2601) “Operating mode”可被定义为只有保 护差动功能失灵时起作用(Only Emergency protection)或ON/OFF. 4. 要使用后备过流保护(>>>)必须把断路器的位置信号接入才能起作用, 在矩阵P.system Data2中00379,00380定义.通常用作SOTF保护.
彩色LED 显示,D610气体探测器技术参数
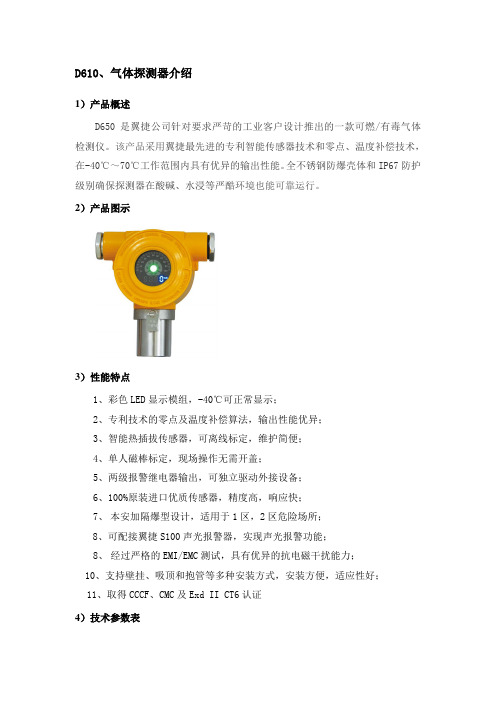
D610、气体探测器介绍1)产品概述D650是翼捷公司针对要求严苛的工业客户设计推出的一款可燃/有毒气体检测仪。
该产品采用翼捷最先进的专利智能传感器技术和零点、温度补偿技术,在-40℃~70℃工作范围内具有优异的输出性能。
全不锈钢防爆壳体和IP67防护级别确保探测器在酸碱、水浸等严酷环境也能可靠运行。
2)产品图示3)性能特点1、彩色LED显示模组,-40℃可正常显示;2、专利技术的零点及温度补偿算法,输出性能优异;3、智能热插拔传感器,可离线标定,维护简便;4、单人磁棒标定,现场操作无需开盖;5、两级报警继电器输出,可独立驱动外接设备;6、100%原装进口优质传感器,精度高,响应快;7、本安加隔爆型设计,适用于1区,2区危险场所;8、可配接翼捷S100声光报警器,实现声光报警功能;8、经过严格的EMI/EMC测试,具有优异的抗电磁干扰能力;10、支持壁挂、吸顶和抱管等多种安装方式,安装方便,适应性好;11、取得CCCF、CMC及Exd II CT6认证4)技术参数表5)结构尺寸6)安装说明⏹安装步骤该探测器适合横、竖抱管以及壁挂安装。
壁挂安装只需要一个弓形支架即可。
探测器安装时,气体传感器应朝下,避免灰尘或雨水在传感器上堆积或进入传感器内,通常应记录探测器的安装位置。
壁挂安装:首先需要将安装套环与弓形支架装配好(弓形支架与圆形法向),拧紧螺丝形成组件,将该组件固定到指定位置,拧松安装套环上的螺丝,将探测器插入套环,这时候探测器可水平转动,可转到方便接线的角度接好线后,拧紧套环螺丝即可。
抱管安装:首先需要将安装套环与弓形支架按需要的角度(横向抱管法向或竖向抱管平行)装配好,拧紧螺丝形成组件,将该组件与另外一弓形支架用两根M6长螺杆固定在管上的指定位置,拧松安装套环上的螺丝,将探测器插入套环,这时候探测器可水平转动,可转到方便接线的角度接好线后,拧紧套环螺丝即可。
⏹安装示意竖抱管横抱管壁挂7)接线端子端子标识功能+24V 检测仪电源正S 4-20mA 输出GND 检测仪电源负+24VP +24V 有源输出A1-C 低限继电器中点A1-NO 低限继电器常开点(软件可设为常闭点或脉冲输出)A2-C 高限继电器中点A2-NO 高限继电器常开点(软件可设为常闭点或脉冲输出,并可设为与故障联动输出)。
尼康有哪些全画幅相机值得购买
尼康有哪些全画幅相机值得购买全画幅单反相机拥有更大的CMOS感光元件尺寸,能够获得更加完美的画质,是很多专业摄影工作者以及摄影发烧友所追捧的。
下面是小编为大家精心推荐尼康几款值得购买的全画幅相机,希望能够对您有所帮助。
尼康5款全画幅相机尼康D4S——自动对焦功能得到强化,专业摄影师钟爱的顶级机型主要规格:1623万像素,约11张/秒,51点自动对焦,ISO25600尼康旗舰机一直有小升级的习惯。
尼康 D4S发布于2014年2月,是比佳能1DX新两年的机器。
按照以往的时间推算,尼康下一代旗舰机“D5”应该已经进入实际测试阶段了。
同时,小道消息表示“D5”将会是一款有大变动的产品。
所以,对于尼康用户,小编的建议是再等等,看到新机器后再决定是否购进尼康D4S。
与前代产品D4相比,D4S最显著提升在于内置网卡的传输速度和持续连拍张数,而后者也是相对于佳能1DX的最大优势。
至于短板,依然是十字对焦点数量较少并且全部集中在画面中心(传闻尼康下一代旗舰机可能升级AF模块)。
对于非专业的生态、体育拍摄者,尼康还有一个附加优势是对腾龙、适马副厂镜头的兼容性较好。
与之相比,其他同等级竞争对手相机在搭配副厂镜头时,连续对焦性能可能稍逊一些。
尼康D810——高像素机型又兼具易用性,最适合需要最大限度发挥镜头特征,适合摄影创作的用户使用主要规格:3635万像素,约5张/秒,51点自动对焦,ISO12800 D810可以看做是D800E的完美版,具有更好的分辨率,更高的动态范围、更强的运动拍摄能力和更完善的短片拍摄功能。
与性能方面的提升相比,其实小编更在乎D810在机身设计方面的改进——手柄终于恢复到D700时代的饱满感,不再像D800、D800E那样难以长时间握持。
与D610、D750、Df相比,D810不仅具有更高的分辨率,同时对焦、操控和机身可靠性也要更胜一筹。
当然,如果你更在意内置Wi-Fi和翻折屏,可以考虑价格更便宜的D750。
尼康单反相机有哪些值得购买的组合

尼康单反相机有哪些值得购买的组合尼康单反相机高性价比组合尼康D7200搭配18-105mm、18-140mm和18-200mm三镜头尼康D750搭配24-70mm镜头尼康D750作为一款中端全画幅单反,拥有2432万像素,搭配EXPEED 4处理器,画质出色细腻。
尼康AF-S 24-70mm f/2.8G镜头具备了众多先进特性,24-70mm焦段加上F2.8恒定光圈使得它适合拍摄人像以及风光。
另外,这款镜头还采用了纳米结晶镀膜,有效抑制了眩光和鬼影,9片叶片的圆形光圈环营造了柔和的焦外成像。
尼康D750搭配18-105mm镜头尼康18-105 VR镜头是一款针对初级用户的廉价旅游头,等效全画幅焦距约为27-157mm,有广角,有长焦,适合大多数拍摄使用。
该镜头支持尼康VR镜头防抖功能,镜头内的超轻便宁静波动马达确保了快速、安静及精确的自动对焦操作,紧凑的设计提供了优质的手感。
尼康D5200搭配18-35mm新银广角镜头尼康AF-S 18-35mm f/3.5-4.5G ED新银广角镜头,在尼康的FX格式和DX格式的单反相机上都可以使用,在尼康D5200相机上的等效焦距为27-52.5mm。
笔者建议,如果是刚刚接触摄影同时又想升级为全画幅相机的朋友,一定要选择这套方案。
这是因为对于相机来说,镜头往往比机身更保值,所以购入一款质量优秀的全画幅镜头搭配一个便宜的机身,可以为以后升级全画幅提供不少方便。
尼康D5200搭配16-85mm镜头尼康AF-S DX 16-85mm f/3.5-5.6G ED VR是一款十分优秀的镜头,它的等效焦距为24-127.5mm,覆盖了日常人文拍摄所需的所有焦段。
用一个入门级的机身搭配一款成像质量不错的镜头,这套组合的优势就在于性价比很高。
而且尼康D5200机身重量比较小,方便携带。
尼康D5200搭配18-300mm镜头尼康AF-S DX NIKKOR 18-300mm f/3.5-5.6G ED VR可以算作是尼康旗下的“一镜走天下”镜头,只看这个称呼就知道这是为了爱旅游的人士推出的一款镜头。
ASTM_D610-08涂漆钢表面锈蚀程度评价的试验标准试验方法

涂漆钢表面锈蚀程度评价的试验标准试验方法ASTM标准号:D610-08本标准以固定的标准号D 610发行;标准号后面的数字是首次采用时的年份,或在修订时最后一版的年份。
括号内的数字是前一次重新批准的年份。
上标(ε)表示自前一次修订或重新批准以来所做的编辑上的变动。
本标准经美国国防部有关部门批准使用。
1. 适用范围*1.1 这个试验方法包括对涂漆的钢材表面上锈蚀等级的评价。
目视的例子中描述在写出的技术规范中的锈蚀百分数,形成标准中的一部分。
即使有争议,以文字写明的为准。
这些目视的试验样品是和SSPC合作发展的:保护涂层学会对各种方法进行进一步的标准化。
这些照片可用来评估在各种材料上其他涂层缺陷的百分数。
此标准不包括事先准备的点、线或者漏涂周围的锈传播评价。
1.2 本标准并非企图将一切有关安全事项完全写入,如遇有此类问题,应结合其使用做出考虑,建立适当的安全和保健实践方法,并在使用前确定受规章限制的各项规定的可应用性,都是使用者应负的责任。
2. 参考文件2.1 ASTM附件/SSPC:保护层涂料学会SSPC-VIS 2/ASTM D 610涂漆钢材表面上锈蚀等级评估的标准方法。
3. 重要性和使用3.1 在油漆膜底下或通过油漆膜的锈蚀量,是测定覆盖系统是否应进行修理或更换的重要因素。
这项试验方法提供了一个标准化的手段用定量法测定可以看到的表面锈蚀的量及其分布。
3.2 锈蚀程度的等级,用从零到十标出来衡量,这是以可目视到的表面锈蚀百分数为基础的。
3.3 锈蚀的分布可分成斑点锈,一般锈、针尖锈和混合锈几类。
4. 干扰4.1 属本试验方法中一部分的目视试样和连带的锈蚀等级标度,只包括由可见的表面锈蚀表现的锈迹。
4.2 可见的试样的使用,需对下列事项加以注意:4.2.1 有些表面光洁层被锈沾污。
这种沾污必须和实际锈蚀分别开,不可混为一谈。
4.2.2 积累的脏物或其他物质,可能使准确的测定锈蚀等级产生困难。
4.2.3 某些类型的脏物粘附在表面上,这些脏物含有铁质或铁的化合物,有可能使表面裉色,这种情况不应错误地当做锈蚀对待。
戴尔Latitude D610快速参考指南说明书

Dell™ Latitude™ D610 Quick Reference Guidew w w.d e l l.c o m|s u p p o r t.d e l l.c o mNotes, Notices, and CautionsNOTE: A NOTE indicates important information that helps you make better use of your computer.NOTICE: A NOTICE indicates either potential damage to hardware or loss of data and tells you how to avoidthe problem.CAUTION: A CAUTION indicates a potential for property damage, personal injury, or death.Abbreviations and AcronymsFor a complete list of abbreviations and acronyms, see the User’s Guide (depending on your operating system, double-click the User’s Guide icon on your desktop or click the Start button, click Help and Support Center, and click User and system guides).If you purchased a Dell™ n Series computer, any references in this document to Microsoft® Windows®operating systems are not applicable.NOTE: Some features may not be available for your computer or in certain countries.____________________Information in this document is subject to change without notice.©2004Dell Inc.All rights reserved.Reproduction in any manner whatsoever without the written permission of Dell Inc.is strictly forbidden.Trademarks used in this text: Dell, the DELL logo, and Latitude are trademarks of Dell Inc.; Intel and Pentium are registered trademarks of Intel Corporation; Microsoft and Windows are registered trademarks of Microsoft Corporation.Other trademarks and trade names may be used in this document to refer to either the entities claiming the marks and names or their products. Dell Inc. disclaims any proprietary interest in trademarks and trade names other than its own.October 2004P/N U4721Rev. A00ContentsFinding Information (5)Setting Up Your Computer (8)Battery Performance (9)Checking the Battery Charge (11)Dell™ QuickSet Battery Meter (11)Microsoft® Windows® Power Meter (11)Charge Gauge (12)Health Gauge (12)Low-Battery Warning (13)Charging the Battery (13)Removing a Battery (14)Installing a Battery (14)Storing a Battery (14)About Your Computer (15)Front View (15)Left View (16)Right View (17)Back View (18)Bottom View (19)Solving Problems (20)Notebook System Software (20)Lockups and Software Problems (20)Running the Dell Diagnostics (22)Index (27)Contents34ContentsFinding InformationNOTE: Some features may not be available for your computer or in certain countries.NOTE: Additional information may ship with your computer.What Are You Looking For?Find It Here•A diagnostic program for my computer •Drivers for my computer•My computer documentation•My device documentation •Notebook System Software (NSS)Drivers and Utilities CD (also known as ResourceCD) Documentation and drivers are already installed on your computer. Y ou can use the CD to reinstall drivers, run the Dell Diagnostics, or access your documentation.Readme files may beincluded on your CD toprovide last-minuteupdates about technicalchanges to yourcomputer or advancedtechnical-referencematerial for techniciansor experienced users. NOTE: Drivers and documentation updates can be found at .NOTE: The Drivers and Utilities CD is optional and may not ship with your computer.•Warranty information•Terms and Conditions (U.S. only)•Safety instructions•Regulatory information•Ergonomics information•End User License AgreementDell™ Product Information Guide•How to remove and replace parts •Specifications•How to configure system settings •How to troubleshoot and solve problems User’s GuideMicrosoft® Windows® XP Help and Support Center1Click the Start button and click Help and Support.2Click User’s and system guides and click User’s guides. The User’s Guide is also available on the optional Drivers and UtilitiesCD.Quick Reference Guide56Quick Reference Guidew w w .d e l l .c o m | s u p p o r t .d e l l .c o m•Service Tag and Express Service Code •Microsoft Windows License LabelService Tag and Microsoft Windows LicenseThese labels are located on the bottom of your computer.•Use the Service Tag to identify yourcomputer when you use or contacttechnical support.•Enter the Express Service Code to direct your call when contacting technical support.•Solutions — Troubleshooting hints and tips, articles from technicians, online courses, frequently asked questions•Community — Online discussion with other Dell customers•Upgrades — Upgrade information for components, such as memory, the hard drive, and the operating system •Customer Care — Contact information, service call and order status, warranty, and repair information•Service and support — Service call status and support history, service contract, online discussions with technical support•Reference — Computer documentation, details on my computer configuration, product specifications, and white papers•Downloads — Certified drivers, patches, and software updates•Notebook System Software (NSS) — If you reinstall the operating system for your computer, you should also reinstall the NSS utility. NSS provides critical updates for your operating system and support forDell™3.5-inch USB floppy drives, Intel ® Pentium ®M processors, optical drives, and USB devices. NSS is necessary for correct operation of your Dell computer. The software automatically detects your computer and operating system and installs the updates appropriate for your configuration.Dell Support Website — NOTE: Select your region to view the appropriate support site.NOTE: Corporate, government, and education customers can also use the customized Dell Premier Support website at . The website may not be available in all regions.What Are You Looking For?Find It HereQuick Reference Guide 7•How to use Windows XP•Documentation for my computer•Documentation for devices (such as a modem)Windows Help and Support Center1Click the Start button and click Help and Support .2T ype a word or phrase that describes your problem and click the arrow icon.3Click the topic that describes your problem.4Follow the instructions on the screen.•How to reinstall my operating systemOperating System CDThe operating system is already installed on your computer. To reinstall your operating system, use the Operating System CD. See your Latitude User’s Guide for instructions.After you reinstall your operating system, use the Drivers and Utilities CD to reinstall drivers for the devices that came with your computer.Y our operating system product key label is located on your computer.NOTE: The color of your CD varies based on the operatingsystem you ordered.NOTE: The Operating System CD is optional and may not ship with your computer.What Are You Looking For?Find It Here8Quick Reference Guidew w w .d e l l .c o m | s u pp o r t.d e l l .c o mSetting Up Your ComputerCAUTION: Before you begin any of the procedures in this section, follow the safety instructions in the Product Information Guide .1Unpack the accessories box.2Set aside the contents of the accessories box, which you will need to complete the setup of your computer.The accessories box also contains user documentation and any software or additional hardware (such as PC Cards, drives, or batteries) that you have ordered.3Connect the AC adapter to the AC adapter connector on the computer and to the electrical outlet.4Open the computer display and press the power button to turn on the computer.NOTE: Do not connect the computer to the docking device until the computer has been turned on andshut down at least once.Battery PerformanceCAUTION: Before you begin any of the procedures in this section, follow the safety instructionslocated in theProduct Information Guide.NOTE: Batteries for portable computers are covered only during the initial 1-year period of the limitedwarranty for your computer. For more information about the Dell warranty for your computer, see theProduct Information Guide or separate paper warranty document that shipped with your computer.For optimal computer performance and to help preserve BIOS settings, operate your Dell™portable computer with the main battery installed at all times. Use a battery to run the computerwhen it is not connected to an electrical outlet. One battery is supplied as standard equipment inthe battery bay.NOTE: Battery operating time (the time the battery can hold a charge) decreases over time. Dependingon how often the battery is used and the conditions under which it is used, you may need to purchase anew battery during the life of your computer.powerbuttonQuick Reference Guide910Quick Reference Guidew w w .d e l l .c o m | s u p p o r t .d e l l .c o mBattery operating time varies depending on operating conditions. Y ou can install an optional second battery in the module bay to significantly increase operating time. For more information about the second battery, see your User’s Guide .Operating time is significantly reduced when you perform operations including, but not limited to, the following:•Using optical drives, such as DVD and CD drives•Using wireless communications devices, PC Cards, or USB devices•Using high-brightness display settings, 3D screen savers, or other power-intensive programs such as 3D games•Running the computer in maximum performance modeNOTE:It is recommended that you connect your computer to an electrical outlet when writing to a CD orDVD.Y ou can check the battery charge before you insert the battery into the computer. Y ou can also set power management options to alert you when the battery charge is low.CAUTION: Using an incompatible battery may increase the risk of fire or explosion. Replace thebattery only with a compatible battery purchased from Dell. The lithium-ion battery is designed to work with your Dell computer. Do not use a battery from other computers with your computer.CAUTION: Do not dispose of batteries with household waste. When your battery no longer holds a charge, call your local waste disposal or environmental agency for advice on disposing of a lithium-ion battery. See "Battery Disposal" in the Product Information Guide .CAUTION: Misuse of the battery may increase the risk of fire or chemical burn. Do not puncture, incinerate, disassemble, or expose the battery to temperatures above 65°C (149°F). Keep the battery away from children. Handle damaged or leaking batteries with extreme care. Damaged batteries may leak and cause personal injury or equipment damage.Checking the Battery ChargeThe Dell QuickSet Battery Meter, the Microsoft ® Windows ® Power Meter window and icon, the battery charge gauge and health gauge, and the low-battery warning provide information on thebattery charge.For more information about checking the charge on the second battery, see your User’s Guide.Dell™ QuickSet Battery Meter If Dell QuickSet is installed, press <Fn><F8> to display the QuickSet Battery Meter.The Battery Meter window displays status, charge level, and charge completion time for the batteryin your computer. NOTE: You can use your docking device to charge a computer battery. However, a battery in a docking device does not power the docking device or computer.In addition, when your computer is connected to a docking device (docked), the Battery Meter window includes aDock Battery tab, which displays the charge level and current status of the docking device battery.The following icons appear in the Battery Meter window:For more information about QuickSet, right-click the icon in the taskbar, and click Help .Microsoft ® Windows ® Power MeterThe Windows Power Meter indicates the remaining battery charge. To check the Power Meter, double-click the icon on the taskbar. For more information about the Power Meter tab, see your User’s Guide .If the computer is connected to an electrical outlet, a icon appears.•The computer or docking device is running on battery power.•The battery is discharging or idle.•The computer or docking device is connected to an electrical outlet andrunning on AC power.•The battery is charging.•The computer or docking device is connected to an electrical outlet andrunning on AC power.•The battery is discharging, idle, or charging.www.dell.com|s u p port.dell.comCharge Gauge Before you insert a battery, press the status button on the battery charge gauge to illuminate the charge-level lights. Each light represents approximately 20 percent of the total battery charge. For example, if the battery has 80 percent of its charge remaining, four of the lights are on. If no lights appear, the battery has no charge.Health Gauge The battery operating time is largely determined by the number of times it is charged. After hundreds of charge and discharge cycles, batteries lose some charge capacity, or battery health. To check the battery health, press and hold the status button on the battery charge gauge for at least 3seconds. If no lights appear, the battery is in good condition, and more than 80 percent of its original charge capacity remains. Each light represents incremental degradation. If five lights appear, less than 60 percent of the charge capacity remains, and you should consider replacing the battery. See your User’s Guide for more information about the battery operating time.Low-Battery WarningNOTICE: To avoid losing or corrupting data, save your work immediately after a low-battery warning.Then connect the computer to an electrical outlet, or install a second battery in the module bay. If the battery runs completely out of power, hibernate mode begins automatically.A pop-up window warns you when the battery charge is approximately 90 percent depleted. For more information about low-battery alarms, see your User’s Guide.A low-battery warning occurs when the battery charge is approximately 90percent depleted. The computer beeps once, indicating that minimal battery operating time remains. During that time, the speaker beeps periodically. If two batteries are installed, the low-battery warning means that the combined charge of both batteries is approximately 90 percent depleted. The computer enters hibernate mode when the battery charge is at a critically low level. For more information about low-battery alarms, see your User’s Guide.Charging the BatteryNOTE: The AC adapter charges a completely discharged battery in approximately 1 hour with thecomputer turned off. Charge time is longer with the computer turned on. You can leave the battery in the computer as long as you like. The battery’s internal circuitry prevents the battery from overcharging. When you connect the computer to an electrical outlet or install a battery while the computer is connected to an electrical outlet, the computer checks the battery charge and temperature. If necessary, the AC adapter then charges the battery and maintains the battery charge.If the battery is hot from being used in your computer or being in a hot environment, the battery may not charge when you connect the computer to an electrical outlet.The battery is too hot to start charging if the light flashes alternately green and orange. Disconnect the computer from the electrical outlet and allow the computer and the battery to cool to room temperature. Then connect the computer to an electrical outlet to continue charging the battery.For more information about resolving problems with a battery, see your User’s Guide.www.dell.com|support.dell.co m Removing a Battery CAUTION: Before performing these procedures, disconnect the modem from the telephone wall jack.For information about removing the second battery, see your User’s Guide . NOTICE: If you choose to replace the battery with the computer in standby mode, you have up to 1minute to complete the battery replacement before the computer shuts down and loses any unsaved data.1Ensure that the computer is turned off, suspended in a power management mode, or connected to an electrical outlet.2If the computer is connected to a docking device (docked), undock it. See the documentation that came with your docking device for instructions.3Slide and hold the battery-bay (or module-bay) latch release on the bottom of the computer, and then remove the battery from the bay.Installing a Battery Slide the battery into the bay until the latch release clicks.For information about installing the second battery, see your User’s Guide .Storing a Battery Remove the battery when you store your computer for an extended period of time. A battery discharges during prolonged storage. After a long storage period, charge the battery fully before you use it.About Your Computer Front View displaytouch padpower buttonvolume controlbuttons displaylatchmute buttonkeyboard track sticktrack stick/touch pad button keyboard andwireless status lightsdevice statuslightsspeakersww w .dell.com|support.dell.comLeft View audio connectors (2)PC Card slot smart card slot infrared sensor security cable slotRight Viewmodule bay device latchrelease USB connectors (2)www.de ll .co m|support.dell.comBack View CAUTION: Do not block, push objects into, or allow dust to accumulate in the air vents. Do not store your computer in a low-airflow environment, such as a closed briefcase, while it is running. Restricting the airflow can damage the computer or cause a fire.air vents network connector (RJ-45) S-video TV-out connector USB connectors (2) modem connector (RJ-11)parallel connector serial connector video connector AC adapter connectorBottom View fan memory module cover batterydocking device slotmodem coverbattery-bay latch releasebattery charge gaugehard driveww w .d e l l .c o m | s u p p o r t .d e l l .c o m Solving Problems Notebook System Software Notebook System Software (NSS) is a utility that provides critical updates for your operating system. Install the Notebook System Software program to gain support for Dell 3.5-inch USB floppy drives, Intel ® Pentium ® M processors, optical drives, and USB devices. NSS is necessary forcorrect operation of your Dell computer. NOTICE:NSS is critical for the correct operation of USB devices, including the Dell D/Bay, D/Dock, D/Port, and D/View devices.Lockups and Software ProblemsCAUTION: Before you begin any of the procedures in this section, follow the safety instructions in the Product Information Guide .The computer does not start up The computer stops responding NOTICE: You might lose data if you are unable to perform an operating system shutdown.A program stops responding E N S U R E T H A T T H E AC A D A P T E R I S F I R M L Y C O N N E C T E D T O T H E C O M P U T E R A N D T O T H E E L E C T R I C A L O U T L E T T U R N T H E C O M P U T E R O F F —If you are unable to get a response by pressing a key on your keyboard or moving your mouse, press and hold the power button for at least 8 to 10 seconds until the computer turns off. Then restart your computer. E N D T H E P R O G R A M —1Press <Ctrl><Shift><Esc> simultaneously.2Click Applications .3Click the program that is no longer responding.4Click End Task .Quick Reference Guide 21A program crashes repeatedlyNOTE: Software usually includes installation instructions in its documentation or on a floppy disk or CD.A program is designed for an earlier Windows operating systemA solid blue screen appearsOther software problemsC H E C K T H E S O F T W A R ED O C U ME N T A T I O N —If necessary, uninstall and then reinstall the program.I F Y O U A R E U S I N G W I N D O W S XP, R U N T H E P R O G R A M C O M P A T I B I L I T Y W I Z A R D —The Program Compatibility Wizard configures a program so it runs in an environment similar to non-Windows XP operating system environments.1Click the Start button, point to All Programs → Accessories , and then click Program Compatibility Wizard .2In the welcome screen, click Next .3Follow the instructions on the screen.T U R N T H E C O M P U T E R O F F —If you are unable to get a response by pressing a key on your keyboard or moving your mouse, press and hold the power button for at least 8 to 10 seconds until the computer turns off. Then restart your computer.C H E C K T H E S O F T W A R ED O C U ME N T A T I O N O R C O N T A C T T H E S OF T W A R E M A N U F A C T U R E R F O R T R O U B L E S H O O T I NG I N F O R M A T I O N —•Ensure that the program is compatible with the operating system installed on your computer.•Ensure that your computer meets the minimum hardware requirements needed to run the software. See the software documentation for information.•Ensure that the program is installed and configured properly.•Verify that the device drivers do not conflict with the program.•If necessary, uninstall and then reinstall the program.B A C K U P Y O U R F I L E S I M M E D I A T E L YU S E A V I R U S -S C A N N I N G P R O G R A M T O C H E C K T H E H A R D D R I V E , F L O P P Y D I S K S , O R CD S22Quick Reference Guidew w w .d e l l .c o m | s u p p o r t .d e l l .c o mRunning the Dell DiagnosticsCAUTION:Before you begin any of the procedures in this section, follow the safety instructions located in the Product Information Guide.When to Use the Dell DiagnosticsIf you experience a problem with your computer, perform the checks in "Solving Problems" and run the Dell Diagnostics before you contact Dell for technical assistance.It is recommended that you print these procedures before you begin.NOTICE: The Dell Diagnostics works only on Dell computers.Start the Dell Diagnostics from either your hard drive or from the Drivers and Utilities CD (also known as the ResourceCD ).Starting the Dell Diagnostics From Your Hard DriveThe Dell Diagnostics is located on a hidden diagnostic utility partition on your hard drive.NOTE: If your computer cannot display a screen image, see "Contacting Dell" section in your User’s Guide .1Shut down the computer.2If the computer is connected to a docking device (docked), undock it. See the documentation that came with your docking device for instructions.3Connect the computer to an electrical outlet.S A V E A N D C L O S E A N Y O P E N F I L E S O R P R O G R A M S A N D S H U T D O W N Y O U R C O M P U T E R T H R O U G H T H E Start M E N US C A N T H E C O M P U T E R F O R S P Y W A R E —If you are experiencing slow computer performance, you frequently receive pop-up advertisements, or you are having problems connecting to the Internet, your computer might be infected with spyware. Use an anti-virus program that includes anti-spywareprotection (your program may require an upgrade) to scan the computer and remove spyware. For more information, go to and search for the keyword spyware .R U N T H E R U N N I N G T H E D E L L D I A G N O S T I C S —If all tests run successfully, the error condition is related to a software problem.Quick Reference Guide 234T urn on the computer. When the DELL™ logo appears, press <F12> immediately.NOTE:If you cannot see anything on your display, hold down the mute button and press the computer’spower button to begin the Dell Diagnostics. The computer automatically runs the Pre-boot System Assessment.NOTE: If you see a message stating that no diagnostics utility partition has been found, run the Starting the Dell Diagnostics From the Drivers and Utilities CD.If you wait too long and the operating system logo appears, continue to wait until you see the Microsoft ® Windows ® desktop. Then shut down your computer and try again.5When the boot device list appears, highlight Diagnostics and press <Enter>.The computer runs the Pre-boot System Assessment, a series of initial tests of your system board, keyboard, hard drive, and display.•During the assessment, answer any questions that appear.•If a failure is detected, the computer stops and beeps. To stop the assessment and restart the computer, press <n>; to continue to the next test, press <y>; to retest the component that failed, press <r>.•If failures are detected during the Pre-boot System Assessment, write down the error code(s) and see "Contacting Dell" in your User’s Guide before continuing on to the Dell Diagnostics.If the Pre-boot System Assessment completes successfully, you receive the message Booting Dell Diagnostic Utility Partition. Press any key to continue .6Press any key to start the Dell Diagnostics from the diagnostics utility partition on your hard drive.Starting the Dell Diagnostics From the Drivers and Utilities CD1Insert the Drivers and Utilities CD.2Shut down and restart the computer.When the DELL logo appears, press <F12> immediately.If you wait too long and the Windows logo appears, continue to wait until you see the Windows desktop. Then shut down your computer and try again.NOTE: The next steps change the boot sequence for one time only. On the next start-up, the computer boots according to the devices specified in system setup.3When the boot device list appears, highlight CD/DVD/CD-RW Drive and press <Enter>.4Select the CD/DVD/CD-RW Drive option from the CD boot menu.5Select the Boot from CD-ROM option from the menu that appears.24Quick Reference Guidew w w .d e l l .c o m | s u p p o r t .d e l l .c o m6T ype 1 to start the ResourceCD menu.7T ype 2 to start the Dell Diagnostics.8Select Run the 32 Bit Dell Diagnostics from the numbered list. If multiple versions are listed, select the version appropriate for your computer.9When the Dell Diagnostics Main Menu appears, select the test you want to run.Dell Diagnostics Main Menu1After the Dell Diagnostics loads and the Main Menu screen appears, click the button for the option you want.2If a problem is encountered during a test, a message appears with an error code and adescription of the problem. Write down the error code and problem description and follow the instructions on the screen.If you cannot resolve the error condition, see "Contacting Dell" section in yourUser’s Guide .NOTE: The Service Tag for your computer is located at the top of each test screen. If you contact Dell, technical support will ask for your Service Tag.Option FunctionExpress TestPerforms a quick test of devices. This test typically takes 10 to 20 minutes and requires no interaction on your part. Run Express Test first to increase the possibility of tracing the problem quickly.Extended TestPerforms a thorough check of devices. This test typically takes 1 hour or more and requires you to answer questions periodically.Custom Test Tests a specific device. Y ou can customize the tests you want to run.Symptom TreeLists the most common symptoms encountered and allows you to select a test based on the symptom of the problem you are having.。
尼康d610录相使用技巧
尼康d610录相使用技巧尼康D610是一款功能强大的全画幅数码单反相机,除了拥有出色的拍照性能外,它还具备优秀的录像功能。
下面将介绍一些尼康D610的录像使用技巧。
首先,尼康D610内置了1080P全高清视频录制功能,可以拍摄出清晰细腻的影像。
在菜单中选择“视频模式”,然后设置分辨率为1920x1080,选择帧速度为30或25帧/秒,可根据实际需求调整。
同时,它还支持外接麦克风,用于提高录音效果。
其次,尼康D610具备实时视角(Live View)功能,在录像过程中可以实时观看画面。
按下录像按钮后,取景器中的图像会自动切换到液晶屏上,这样可以更清楚地看到所拍摄的画面。
同时,液晶屏的角度可调节,可以根据需要进行翻转、旋转或可倾斜,方便实现不同角度的拍摄。
另外,尼康D610录像功能还支持手动模式,可以自定义相机的设置,以获得更具个性化的录像效果。
在菜单中选择“手动模式”,根据实际情况调整相机的快门速度、光圈和ISO值等参数,以达到理想的录像效果。
同时,可以根据需要进行对焦调节,手动对焦能够更准确地锁定焦点。
此外,尼康D610还内置了多种录像模式,如普通录像模式、定时拍摄录像、慢动作录像等。
在菜单中选择“录像模式”,根据实际需求选择相应的模式,以满足不同的拍摄要求。
最后,尼康D610录像功能还支持照片和视频同时拍摄。
在录像过程中,按下快门按钮即可拍摄照片,同时会保留当前录像的画面。
这样可以实现在录像过程中捕捉精彩瞬间的同时,还能获得高质量的静态照片。
总的来说,尼康D610的录像功能非常出色,通过合理的设置和操作,可以拍摄出清晰、流畅的高质量影像。
在使用过程中,可以根据具体需求灵活调整各项参数,发挥相机的最佳性能。
希望以上提示对你有所帮助。
d610使用技巧
d610使用技巧如何利用D610相机进行拍摄和拍摄技巧。
1.使用手动模式:D610相机具有多种拍摄模式,但手动模式是最灵活和全面的模式。
使用手动模式可以完全控制曝光、快门速度、光圈和ISO等设置,以获得精确的拍摄效果。
2.使用稳定器:由于D610是一款全副画幅相机,其相机镜头组件相对较重,所以拍摄时要注意使用稳定器以避免模糊或抖动的照片。
可以使用三脚架或手持稳定器来增加稳定性。
3.利用自动对焦:D610具有快速且准确的自动对焦系统,可以确保拍摄的主题清晰且锐利。
可以使用自动对焦模式或手动选择对焦点,以便根据需要进行调整。
4.使用RAW格式:D610相机允许拍摄RAW格式的图像,这意味着相机将捕捉并保留更多的图像细节和动态范围。
这为后期处理提供了更多的灵活性,并允许进行更多的编辑和校正。
5.使用透视调整功能:D610具有一个称为透视控制的功能,它可以校正建筑物拍摄时产生的透视畸变。
通过调整相机角度可以让建筑物看起来更加垂直和平衡。
6.利用景深控制:通过控制光圈大小,可以控制景深,从而以不同方式表现主题。
小光圈可以获得较大景深,适用于风景和建筑摄影,而大光圈可以获得浅景深,适用于人物和小品摄影。
7.利用曝光补偿:在拍摄高对比度场景时,使用曝光补偿功能可以调整亮度水平,以避免细节丢失或发生高光或阴影过曝。
8.自定义用户设置:D610具有多个用户设置存储存储器卡上,用户可以根据不同的拍摄场景和需求来自定义相机设置。
这使得在不同拍摄环境之间的切换更加方便和快速。
通过运用以上的技巧和功能,可以在使用D610相机时获得更加专业和出色的拍摄结果。
对于初学者来说,更多的实践和探索也是提高拍摄技巧的关键。
AD610 ShowLink 无线存取点 说明书

AD610®ShowLink無線存取點Print and web guide for AD610 ShowLink Access PointVersion: 4.1 (2022-J)Table of ContentsAD610 ShowLink® 無線存取點3 AD610 ShowLink 無線存取點3功能 3 ShowLink 無線存取點概覽3提供的附件5選配附件5 ShowLink 基本特性5 ShowLink 頻道和 2.4 GHz 頻譜 5覆蓋範圍 6裝置容量 6裝置控制項 6 2.4 GHz 頻道捷變用以避免干擾 6 ShowLink 圖示 6功率6乙太網路供電 6外置電源選配件 6連網7復位選項7定位無線存取點8網路模式9使用 Wireless Workbench 控制並設定無線存取點9設定功率級別10聯絡客戶支援部門10規格10認證12重要安全事項!13重要產品資訊14許可資訊 14 Information to the user 14••••••••••AD610ShowLink 無線存取點AD610 ShowLink 無線存取點AD610 ShowLink 無線存取點啟用 ShowLink 已啟用的 Axient 裝置的即時遠端控制,包括數位和類比型號。
本無線存取點可以使用 2.4 GHz 無線網路通信對接收機或 Wireless Workbench 的裝置參數進行全面管理。
可以在不影響演出者表演的情況下實現對所有參數的更改。
使用多個無線存取點可以擴大工作範圍或提高 ShowLink 網路支持的裝置數量。
存取點亦具備真正的分集天線輸入。
功能每個 ShowLink 存取點最多可以對 24 部裝置進行實時遠程控制用於改善連結性能的新射頻設計和純自動選訊天線配置。
簡易裝置授權驗證—透過 IR 同步識別連結裝置多個無線存取點之間自動傳遞可擴展操作範圍頻道自動選擇 - 獨立掃描 2.4 GHz 頻率範圍,並確定最佳的使用頻道頻率自動捷變 - 可在信號衰減情況下,將 ShowLink 網路移動到最佳的 2.4 GHz 可用頻道Wireless Workbench 軟體支持對所有裝置功能的連網控制,並且提供了用於查看 2.4 GHz 信號電平的 ShowLink 記錄圖通過乙太 (PoE) 網路連接的過電源或通過外置電源供電多重安裝選項 - 適合話筒座轉接器並具有用於安裝的內建 ¼"-20 和 M6 x 1.0 螺紋向下相容於 Axient 類比發射機和接收機®™®◦◦◦◦◦◦◦ShowLink無線存取點概覽① ShowLink 2.4 GHz 可拆卸天線適用於 2.4 GHz 信號② ShowLink 資料狀態 LED (藍色)穩定點亮:已連接,無資料傳輸閃爍:正在傳輸資料。
- 1、下载文档前请自行甄别文档内容的完整性,平台不提供额外的编辑、内容补充、找答案等附加服务。
- 2、"仅部分预览"的文档,不可在线预览部分如存在完整性等问题,可反馈申请退款(可完整预览的文档不适用该条件!)。
- 3、如文档侵犯您的权益,请联系客服反馈,我们会尽快为您处理(人工客服工作时间:9:00-18:30)。
D
S/PDIF to DOCK PG 41
Audio Jacks PG 36
RJ11 to DOCK PG 41
Tip Ring PG 26
PG 27,28
X-Bus
D
PS/2 IrDA PG 39 Keyboard PG 39 Serial PG 28 Parallel PG 29 Touchpad/ Stick point PG 32
C
6
HTRDY# 6 RS#0 6 RS#1 6 RS#2 A20M# FERR# IGNNE# CPUPWRGD SMI# TCK TDO TDI TMS TRST# PREQ# PR DY# DBR#
11
11 A20M# 11 FERR# 11 IGNNE# CPUPWRGD 11 SMI#
HDSTBN0# HDSTBP0# HDSTBN1# HDSTBP1# HDSTBN2# HDSTBP2# HDSTBN3# HDSTBP3# HDBI0# HDBI1# HDBI2# HDBI3# DBSY# DRDY# 6 6 6 6 6 6
(478 Micro-FCPGA)
DC/DC +3V_SRC +5VSUS PG 47
CPU VR
PG 45
CLOCKS
PG 16
RESET CKT
PG 42
PG 43 PG 4,5
PG 44
Panel Connector
PG 20 4X133MHZ sDVO SI1362 PG 17 LVDS DVI
B
DRUNPWROK
CPU CORE POWER (1.25/1.15V) RUNPWROK AGTL+ POWER (1.2V) RUNPWROK
+3VRUN +3VSUS +5VALW +5VRUN +5VSUS +5VHDD +5VMOD STRB#/5V +5VFAN1, +5VFAN2 VDDA 1_8VSUS 1_8VRUN +3VALW V1_5RUN
DC_IN+ PBATT+ PWR_SRC RTC_PWR3_3V +12V VHCORE V1_2RUN
Description Schematic Block Diagram 1 Blank Page Front Page Dothan Alviso ICH6 DDRII SO-DIMM(200P) Clock Generator CH7306/7 Blank Pages LCD Conn. & SSP CRT & TV Conn.
Power Good Battery Selector & Charger CPU Power 1.8V,0.9V,1.5V,1.05V 3VALW/5V/3V/Power ON RUN Power Switch VGA DC/DC DCIN/Batt Conn.
D
47 48 49 50
D
Title Size Date:
1
2
3
4
5
6
7
8
AZEDA-INTEGRATED
A
PWA: K3885, SCHEM: J3964 VER : 3A
A
JM5B M/B PCB
AC/BATT CONNECTOR RUN POWER SW PG 48 BATT SELECTOR BATT CHARGER
PG 50
Dothan/Yonah
6 6 6 6 6 6 6 6 16 16
TDI TMS TCK TDO TRST# CPURST# TCK BPM0# BPM1# BPM2# BPM3# PR DY# PREQ# DBR#
C
HCLK_ITP# HCLK_ITP
42
DBR#
11 INTR 11 NMI 11 STPCLK# 6,11 CPUSLP# 11 DPSLP# 11 DPRSTP# 34 34
11 6
D
34
1
2
3
4
5
6
7
8
1
2
3
4
5
6
7
8
U9A HXRCOMP 1 R62 24.9/F 2 4 HD#[0..63] HD#[0..63] HD#0 HD#1 HD#2 HD#3 HD#4 HD#5 HD#6 HD#7 HD#8 HD#9 HD#10 HD#11 HD#12 HD#13 HD#14 HD#15 HD#16 HD#17 HD#18 HD#19 HD#20 HD#21 HD#22 HD#23 HD#24 HD#25 HD#26 HD#27 HD#28 HD#29 HD#30 HD#31 HD#32 HD#33 HD#34 HD#35 HD#36 HD#37 HD#38 HD#39 HD#40 HD#41 HD#42 HD#43 HD#44 HD#45 HD#46 HD#47 HD#48 HD#49 HD#50 HD#51 HD#52 HD#53 HD#54 HD#55 HD#56 HD#57 HD#58 HD#59 HD#60 HD#61 HD#62 HD#63 HXRCOMP HXSCOMP HXSWING H YRCOMP HYSCOMP HYSW ING E4 E1 F4 H7 E2 F1 E3 D3 K7 F2 J7 J8 H6 F3 K8 H5 H1 H2 K5 K6 J4 G3 H3 J1 L5 K4 J5 P7 L7 J3 P5 L3 U7 V6 R6 R5 P3 T8 R7 R8 U8 R4 T4 T5 R1 T3 V8 U6 W6 U3 V5 W8 W7 U2 U1 Y5 Y2 V4 Y7 W1 W3 Y3 Y6 W2 C1 C2 D1 T1 L1 P1 HD0# HD1# HD2# HD3# HD4# HD5# HD6# HD7# HD8# HD9# HD10# HD11# HD12# HD13# HD14# HD15# HD16# HD17# HD18# HD19# HD20# HD21# HD22# HD23# HD24# HD25# HD26# HD27# HD28# HD29# HD30# HD31# HD32# HD33# HD34# HD35# HD36# HD37# HD38# HD39# HD40# HD41# HD42# HD43# HD44# HD45# HD46# HD47# HD48# HD49# HD50# HD51# HD52# HD53# HD54# HD55# HD56# HD57# HD58# HD59# HD60# HD61# HD62# HD63# HXRCOMP HXSCOMP HXSWING HYRCOMP HYSCOMP HYSWING HA3# HA4# HA5# HA6# HA7# HA8# HA9# HA10# HA11# HA12# HA13# HA14# HA15# HA16# HA17# HA18# HA19# HA20# HA21# HA22# HA23# HA24# HA25# HA26# HA27# HA28# HA29# HA30# HA31# HADS# HADSTB0# HADSTB1# HVREF HBNR# HBPRI# BREQ0# HCPURST# G9 C9 E9 B7 A10 F9 D8 B10 E10 G10 D9 E11 F10 G11 G13 C10 C11 D11 C12 B13 A12 F12 G12 E12 C13 B11 D13 A13 F13 F8 B9 E13 J11 A5 D5 E7 H10 HA#3 HA#4 HA#5 HA#6 HA#7 HA#8 HA#9 HA#10 HA#11 HA#12 HA#13 HA#14 HA#15 HA#16 HA#17 HA#18 HA#19 HA#20 HA#21 HA#22 HA#23 HA#24 HA#25 HA#26 HA#27 HA#28 HA#29 HA#30 HA#31 HA#[3..31] HA#[3..31] 4
RUN_ON SUS_ON
22 23 24 25 26 27-28 29 30 31 32
RUN_ON SUS_ON HDDC_EN# MODC_EN# FDD/LPT# FAN_OFF/ON# RUN_ON
B
Screw Hole
TI PIC6515 Mini PCI Conn. MDC Conn.
B
B
Alviso
DDR-SODIMM1
PG 14,15 400/533 MHZ DDR II 400/533 MHZ DDR II 1257 PCBGA PG 6,7,8,9,10 DMI interface
TVOUT
I/O(S-Video)
PG 33
VGA USB2.0 (P5,P7) USB2.0 (P4,P6) USB2.0 (P1)
VGA
DDR-SODIMM2
PG 14,15
PG 21
PG 29 2 Rear Ports 2 Right Side(I/O) PG 33
PATA - HDD PG 22
C
88SA8040 PG 22
SATA
33MHz PCI
ICH6-M
IDE
PG 40
Q-SWITCH
DOCKING CONNECTOR
SIO (LPC47N354) SERIAL PORT & USB PARALLEL CONN. Flash ROM
TOUCH PAD & BLUE TOOTH
C
33 34 35-36 37-38 39 40-41 42 43-44 45 46
Switch Board Conn. & LED
FAN & Thermal Audio CODEC (STAC9751) & Phone Jack
