Linux2.6内核的Initrd机制解析
linux中init命令的详细解释
linux中init命令的详细解释linxu下的init命令是进程初始化工具。
下面由店铺为大家整理了linux的init命令的详细解释的相关知识,希望对大家有帮助!一、linux中的init命令的详细解释init命令init命令是Linux下的进程初始化工具,init进程是所有Linux的进程的父进程,它的进程号为1。
init命令是Linux操作系统中不可缺少的程序之一,init进程是Linux内核引导运行的,是系统中的第一个进程。
语法init(选项)(参数)选项-b:不执行相关脚本而直接进入单用户模式;-s:切换到单用户模式。
参数运行等级:指定Linux系统要切换到的运行等级。
二、linux中的init命令的详解实例几个常用的命令查看系统进程命令:ps -ef | head查看init的配置文件:more /etc/inittab查看系统当前运行的级别:runlevel运行级别到底什么是运行级呢?简单的说,运行级就是操作系统当前正在运行的功能级别。
这个级别从0到6 ,具有不同的功能。
你也可以在/etc/inittab中查看它的英文介绍。
#0 停机(千万不能把initdefault 设置为0)#1 单用户模式#2 多用户,没有 NFS(和级别3相似,会停止部分服务)#3 完全多用户模式#4 没有用到#5 x11(Xwindow)#6 重新启动(千万不要把initdefault 设置为6)三、linux的init命令的六种模式简介6种模式中有两种是系统内定的:0:停止系统运行。
init 0〈回车〉相当于 halt〈回车〉。
6:重启系统。
init 6〈回车〉相当于 reboot〈回车〉。
如果你了解/etc/inittab文件,就千万不要把0设为缺省登录模式,否则你的Linux的运行就只能两点一线了——开机←→停机,或者是开机←→重启的无限循环。
initrd 文件中的init
第 4 章 initrd 中的 init本章学习重点■ 在initrd文件系统中的init文件所扮演的角色■ init文件在系统加载前的操作■ 每一个操作对即将加载的系统的意义■ 在开机时所看到的开机信息从何而来软件架构设计第4章 initrd 中的initLinux 操作系统之奥秘102 在了解 kernel 及 initrd 这两个重要的系统组件后,接下来就可以慢慢接近 Linux 操作系统的 整个流程。
initrd 被 kernel 加载后的开机流程,是依照隐藏在 initrd 文件中的一个 init 文件(在2.4 版 kernel 中的 initrd 文件名为 linuxrc )进行的,按照它所提供的脚本一步一步往下做,包括 之后要从实体硬盘加载实际的操作系统,也是由这个文件提供的。
因此,本章将通过这个文件 让您更深刻地知道 Linux 在进入实际用户所操作的操作系统前做了哪些操作。
首先,请不要将 initrd 中的 init 及 Linux 操作系统中的 init 指令混在一起,这是两个完全不 同的文件,只是刚好文件名称是一样的,Linux 中的 init 指令会在下一章中说明,这里的重点是 initrd 中的脚本文件——init 。
本章一开始,先将整个 init 文件展开来(展开的步骤请参考第 3.3.2 节“修改 initrd ” ),分成几个区块介绍,图 41 是 Fedora Core 6 中的 init 文件的完整内容(每一 个 Linux 版本的 init 文件或多或少会有些许不同),下面我们分别说明每个用框线所区分的区 块。
图中的每一区块都有其目的与该做的事,若贸然拿掉其中一部分,都有可能造成无法开机 的后果。
先介绍图 41 中 A 到 F 每一段的主要功能,并按照 init 执行的顺序,对每一段作较完 整的说明。
A :nash 指令。
B :挂载主要的文件系统。
linux 调整根分区大小方法(非LVM)
Linux 调整根分区大小(非LVM)2016.7.24 by flb起因:因一个项目需求,需在线将ubuntu系统刷成openwrt x86。
30G的磁盘升级成openwrt后,只用了50M左右。
固需将其根目录挂载的分区进行扩容。
因为不能使用live CD之类的工具(gparted),固有以下文章。
配置:Linux version 3.2.0-72-generic (buildd@toyol) (gcc version 4.6.3 (Ubuntu/Linaro 4.6.3-1ubuntu5) )本文主要完成两个工作:1、将ubuntu系统刷成openwrt x86。
2、扩大磁盘的容量。
一、刷成openwrt x86有两种方法。
1)简易部署使用U盘启动,将combined.img直接dd到目标盘。
gunzip bin/x86/openwrt-x86-generic-combined-ext4.img.gzdd if=bin/x86/openwrt-x86-generic-combined-ext4.img of=/dev/sdb #根据自己情况选择磁盘2)自定义部署a、建立分区、文件系统。
b、用dd将rootfs.ext4.img写入分区。
c、复制vmlinuz到分区。
d、修改grub文件,使其使用该vmlinuz加载内核。
e、启动。
二、调整根分区磁盘容量。
基本思路:我们知道,我们不能调整mount的分区,也不可能umount根分区。
固最简单调整磁盘容易的方法就是使用live CD或U盘启动后使用Gparted工具。
或者进入rescue 模式,然后使用fdisk及resize2fs这两个命令就可以轻松搞定。
但以上都不符合我的情况。
查资料方法大概有两种:1、使用pivot_root ,umount 掉根目录;然后对其操作。
具体方法参加:/questions/226872/how-to-shrink-root-filesystem-without-booting-a-livecd/227318#227318 (本人未成功)2、既然不能操作已mount的根目录;故只能在未mount根目录时对分区进行操作。
linux内核initrd文件自定义方法
linux内核initrd文件自定义方法重新编译内核后,可能加入了自定义的模块,就有可能需要修改init文件,而init文件就在initrd中,这里记录下操作步骤,以防遗忘。
1. cp /boot/initrd-3.2.img /tmp/mylinux/initrd-3.2.img.gz这里之所以进行改名,是因为initrd-3.2.img是经过gzip压缩过的,所以需要对其解压,但是gzip对解压的文件的文件后缀名又有要求,所以就先进行改名。
2. gunzip initrd-3.2.9.img.gz3. cpio -id < initrd-3.2.9.img经过以上三步,就在当前目录下解压了initrd文件,从而得到了init文件。
根据自己的需求修改init文件后,通过下面命令重新生成initrd文件。
4. find . | cpio -H newc -o | gzip -9 > /boot/initrd-3.2.9.img注意一下内容摘自网上资料,留作参考:en_init_cpio获取gen_init_cpio,工具,gen_init_cpio是编译内核时得到的,在内核源代码的usr 目录下,我们可以通过以下步骤获取它,进入内核源代码执行:# make menuconfig# make usr/这样即编译好gen_init_cpio,gen_initramfs_list.sh 在内核源代码的 script 目录下,将这两个文件 copy 到 /tmp 目录下,/tmp/initrd 为解压好的initrd 目录,执行以下命令制作initrd :#制作initrd :# gen_initramfs_list.sh initrd/ > filelist# gen_init_cpio filelist >initrd.img# gzip initrd.img# mv initrd.img initrd-'uname –r’.img只有用这个方式压缩的initrd ,在Linux系统重启的时候才能一正确的文件格式 boot 起来,也可以用这种方式修改安装光盘的initrd文件然后进行系统安装。
linux内核进程cpu调度基本原理

linux内核进程cpu调度基本原理Linux内核的CPU调度基本原理是通过多任务处理,将CPU 时间片分配给不同的进程或线程来实现。
1. 调度策略:Linux内核支持多种调度策略,包括先来先服务(FCFS)、时间片轮转、优先级调度等。
默认的调度策略是时间片轮转调度策略,即每个进程被分配一个时间片,在时间片用完之后,将CPU切换到下一个就绪状态的进程上。
2. 就绪队列:内核会维护一个就绪队列,存放所有准备好运行但还未分配CPU时间的进程。
根据进程的优先级和调度策略,内核会从就绪队列中选择一个合适的进程来执行。
3. 进程优先级:每个进程都有一个优先级值,表示其重要性和紧急程度。
较高优先级的进程在调度时会获得更多的CPU时间。
Linux内核使用动态优先级调度策略,根据进程的历史行为和资源使用情况动态调整进程的优先级。
4. 时间片和抢占:时间片是CPU分配给进程的最小单位,当一个进程的时间片用完后,如果它还未完成,内核会将其置于就绪队列末尾,并将CPU分配给下一个就绪进程。
此外,Linux 内核支持抢占式调度,即当一个优先级更高的进程出现时,可立
即抢占当前运行的进程,将CPU资源分配给新的进程。
5. 实时进程:除了普通进程,Linux内核还支持实时进程。
实时进程具有更高的优先级和较小的延迟要求,它们得到更快的响应时间。
实时进程的调度算法相对于普通进程更加严格,以满足实时性要求。
Linux内核的CPU调度基本原理是通过就绪队列、进程优先级和时间片轮转等策略,将CPU时间动态地分配给不同的进程或线程,以完成多任务处理。
全存--使用isolinux制作Linux启动光盘

使用isolinux制作Linux启动光盘-原理:任何一个操作系统在任何一个硬件平台上的运行都需要一个引导的过程,即,初始化软件环境、把内核从存储介质放到内存当中去,并开始运行。
当然对于某些简单软硬件系统,这个过程可能及其简单,而对于PC 就要略微复杂一些了。
PC 的引导程序上承BIOS,下接内核的初始化代码,虽然开一次机只运行一次后就不留痕迹了,不过还是相当重要的。
所有的引导程序都在做类似的事情:驻留在存贮介质的特殊位置可以被BIOS 启动,或是自己是某一系统的可执行文件,可以被用户显式或隐式在该系统(宿主系统)内启动;了解要被启动的必要启动文件的位置,包括系统内核、ramdisk 等,并把它们读取出来、装载到内存之中;构造环境、运行操作系统的内核,自己则就此退出历史舞台。
历史上,用于Linux 的最著名的引导程序莫过于LILO 和Grub 了,作为通用的引导程序,二者用途广泛,但对于一些特殊的场合,譬如引导程序可利用的空间比较有限的可移动存储介质(通俗地说,包括光盘、软盘、u 盘等),它们有些过于厚重了,这就引出了我们今天的主角SYSLINUX/ISOLINUX。
SYSLINUX/ISOLINUX 是专门用来引导可移动介质的轻量级引导程序,因为这样的介质通常不会固定只针对一种硬件。
我们主要介绍以下ISOLINUX 引导安装程序。
ISOLINUX其实是一个简单的Linux系统。
其构造很简单。
主要包括以下几个方面的内容:引导程序isolinux.bin这个文件是ISOLINUX的引导文件。
相当于Linux系统中的grub程序一样,在系统启动时,先加载isolinux.bin来启动系统,当isolinux.bin启动以后,会根据下面的配置文件isolinux.cfg来选择不同的启动选项来启动系统。
这个文件是一个二进制文件,在编译isolinux时可以得到,在这里不做过多讲述。
配置引导项文件isolinux.cfg这个文件是ISOLINUX启动的配置文件,有了这个文件,引导程序isolinux.bin在引导时才会根据该配置文件的配置内容的不同,而选择不同的引导项来启动系统。
linux init级别

Linux的init级别是用来定义系统启动时运行的服务和操作系统的行为。
init是Linux系统的第一个进程,它的主要任务是运行用户级别的应用程序,并在需要时以不同的运行级别(runlevel)来改变系统的运行状态。
Linux的init级别有以下几种:
•0:停机(千万不能把initdefault设置为0,系统默认运行级别不能设为0,否则不能正常启动)。
•1:单用户模式(root权限,用于系统维护,禁止远程登陆)。
•2:多用户状态(没有NFS)。
•3:完全的多用户状态(有NFS),登陆后进入控制台命令行模式。
•4:系统未使用,保留。
•5:X11控制台,登陆后进入图形GUI模式。
•6:系统正常关闭并重启。
拆解initrd.img

拆解initrd.img(转载)拆解2.4内核的initrd.img1. 什么是initrd.img,它有什么用?initrd.img是Linux启动过程中很重要的一个文件,如果你编译内核时将一部分功能编译为可加载模块。
如果系统的一些设备的驱动编译为可加载模,那么启动时如果没有指定INITRD=/path_to_initrd.img,那么系统启动或者会失败,或者启动后会有设备无法使用(像网卡或者其它设备)。
比如我的Dell Precision 470 计算机的Adaptec HostRaid 39320B SCSI控制卡驱动就编为可加载模块,如果没指定initrd.img或者指定的initrd.img中并没有包含正确的驱动模块(有些硬件很多系列的驱动都是一个名称,像Adaptec 的一系列Ultra320卡用的驱动模块名称都是aic79xx.o,但当前很多2.4版本内核模块中并不支持较新的39320B驱动),则系统启动时会挂起,并报告"kernel panic: VFS: Unable to mount root fs on 08:06"的错误。
2. 拆解initrd.img很庆幸initrd.img可以进行拆解,或许这正是设计者高明所在。
initrd.img不像通常的以.img为扩展名的ramdisk cramfs文件。
它是经过用gzip -9进行压缩过的ramdisk文件。
所以,如果直接用#mount initrd.img /temppath -o loop不能mount上,会报告你指定一个文件类型。
所以我拆解它的过程要先将其进行解压缩,然后再mount。
下面是我的操作过程,可能有些命令用加些参数的方式更简捷,当我知道后会进行更新。
#cd 假设已经到你的initrd.img文件所在目录(最好先将其备份一个)#mv initrd.img initrd.gz <--在我的RHEL AS3 U3 /bsh下,不做这一步的话,用gunzip解压时会报告扩展名不对#gunzip initrd.gz /tmp/initrd <--解压后会生成一个不带扩展名的initrd文件#mkdir /mnt/tmp#mv /tmp/initrd /tmp/initrd.img <--将解压出的initrd文件加个.img的扩展名,在我的RHEL AS3 U3 下不做这一步,mount时会出错#mount /tmp/initrd.img /mnt/tmp -o loop <--mount成功后,/mnt/tmp目录中将能看到initrd.img中的所有文件及目录#cp -a /mnt/tmp/* /tmp/initrd.new <--拷贝一份方便编辑#umount /mnt/tmp#cd /tmp/initrd.new切换到/tmp/initrd.new目录后,你可以按需要进行编辑。
initrd详解(转)

initrd详解(转)1.什么是 Initrdinitrd 的英⽂含义是 boot loader initialized RAM disk,就是由 boot loader 初始化的内存盘。
在 linux内核启动前, boot loader 会将存储介质中的 initrd ⽂件加载到内存,内核启动时会在访问真正的根⽂件系统前先访问该内存中的 initrd ⽂件系统。
在 boot loader 配置了 initrd 的情况下,内核启动被分成了两个阶段,第⼀阶段先执⾏ initrd ⽂件系统中的“某个⽂件“,完成加载驱动模块等任务,第⼆阶段才会执⾏真正的根⽂件系统中的 /sbin/init 进程。
这⾥提到的“某个⽂件“,Linux2.6 内核会同以前版本内核的不同,所以这⾥暂时使⽤了“某个⽂件“这个称呼,后⾯会详细讲到。
第⼀阶段启动的⽬的是为第⼆阶段的启动扫清⼀切障爱,最主要的是加载根⽂件系统存储介质的驱动模块。
我们知道根⽂件系统可以存储在包括IDE、SCSI、USB在内的多种介质上,如果将这些设备的驱动都编译进内核,可以想象内核会多么庞⼤、臃肿。
Initrd 的⽤途主要有以下四种:1. linux 发⾏版的必备部件linux 发⾏版必须适应各种不同的硬件架构,将所有的驱动编译进内核是不现实的,initrd 技术是解决该问题的关键技术。
Linux 发⾏版在内核中只编译了基本的硬件驱动,在安装过程中通过检测系统硬件,⽣成包含安装系统硬件驱动的initrd,⽆⾮是⼀种即可⾏⼜灵活的解决⽅案。
2. livecd 的必备部件同 linux 发⾏版相⽐,livecd 可能会⾯对更加复杂的硬件环境,所以也必须使⽤ initrd。
3. 制作 Linux usb 启动盘必须使⽤ initrdusb 设备是启动⽐较慢的设备,从驱动加载到设备真正可⽤⼤概需要⼏秒钟时间。
如果将 usb 驱动编译进内核,内核通常不能成功访问 usb 设备中的⽂件系统。
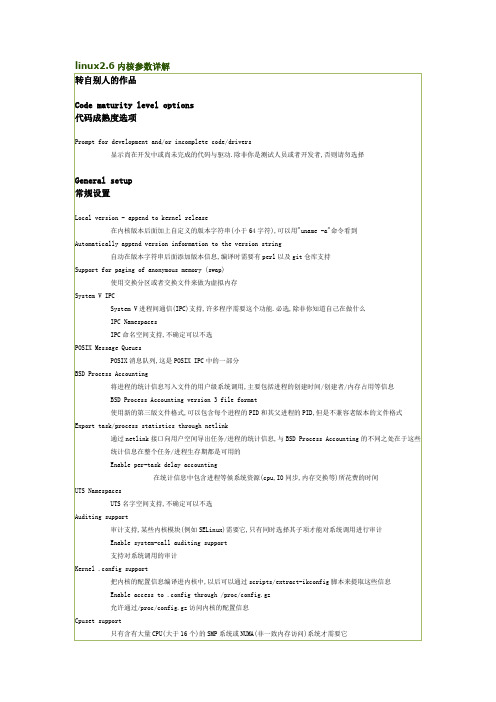
linux2.6内核参数详解
收集额外的进程统计信息并通过taskstats接口发送到用户空间
Configure standard kernel features (for small systems)
配置标准的内核特性(为小型系统)
Enable 16-bit UID system calls
Subarchitecture Type
处理器的子架构,大多数人都应当选择"PC-compatible"
Processor family
处理器系列,请按照你实际使用的CPU选择
Generic x86 support
通用x86支持,如果你的CPU能够在上述"Processor family"中找到就别选
Initramfs source file(s)
initrd已经被initramfs取代,如果你不明白这是什么意思,请保持空白
Optimize for size (Look out for broken compilers!)
编译时优化内核尺寸(使用"-Os"而不是"-O2"参数编译),有时会产生错误的二进制代码
在多cpu系统中让特权CPU访问x86的MSR寄存器
/dev/cpu/*/cpuid - CPU information support
能从/dev/cpu/x/cpuid获得CPU的唯一标识符(CPUID)
IPC Namespaces
IPC命名空间支持,不确定可以不选
POSIX Message Queues
POSIX消息队列,这是POSIX IPC中的一部分
BSD Process Accounting
linux 2.6内核initrd.img文件分析

如果对系统进行驱动的升级或添加新硬件,此时,常会用到mkinitrd命令。
而该命令其实是一个脚本,通过一系列的流程来生成系统启动需要的initrd.img文件。
通过分析该文件,我们可以更清楚的知道系统启动时候加载驱动的顺序,以及修正或加入一些自定义的配置。
一、什么是initrdinitrd 的英文含义是boot loader initialized RAM disk,就是由boot loader 初始化的内存盘。
initrd 的最初的目的是为了把kernel的启动分成两个阶段:在kernel中保留最少最基本的启动代码,然后把对各种各样硬件设备的支持以模块的方式放在initrd中,这样就在启动过程中可以从initrd所mount的根文件系统中装载需要的模块。
这样的一个好处就是在保持kernel不变的情况下,通过修改initrd中的内容就可以灵活的支持不同的硬件。
在启动完成的最后阶段,根文件系统可以重新mount到其他设备上。
二、是否必须initrd.img是Linux启动过程中很重要的一个文件,如果你编译内核时将一部分功能编译为可加载模块。
如果系统的一些设备的驱动编译为可加载模,那么启动时如果没有指定INITRD=/path_to_initrd.img,那么系统启动或者会失败,或者启动后会有设备无法使用(像网卡或者其它设备)。
如果没指定initrd.img或者指定的initrd.img中并没有包含正确的驱动模块,则系统启动时会挂起,并报告"kernel panic: VFS: Unable to mount root fs on 08:06"的错误。
initrd文件不是必须的,当需要具有适应在不同的硬件环境下使用的要求,那使用initrd会更方便。
我们常在编译核心的使用,使用make menuconfig,其中对某些而外的驱动,是可以选择以模块编译,还是<*>直接编译到核心里面。
Linux init详解

Linux init详解init是Linux系统操作中不可缺少的程序之一。
所谓的init进程,它是一个由内核启动的用户级进程。
内核自行启动(已经被载入内存,开始运行,并已初始化所有的设备驱动程序和数据结构等)之后,就通过启动一个用户级程序init的方式,完成引导进程。
所以,init始终是第一个进程(其进程编号始终为1)。
内核会在过去曾使用过init的几个地方查找它,它的正确位置(对Linux系统来说)是/sbin/init。
如果内核找不到init,它就会试着运行/bin/sh,如果运行失败,系统的启动也会失败。
一、什么是INIT:init是Linux系统操作中不可缺少的程序之一。
所谓的init进程,它是一个由内核启动的用户级进程。
内核自行启动(已经被载入内存,开始运行,并已初始化所有的设备驱动程序和数据结构等)之后,就通过启动一个用户级程序init的方式,完成引导进程。
所以,init始终是第一个进程(其进程编号始终为1)。
内核会在过去曾使用过init的几个地方查找它,它的正确位置(对Linux系统来说)是/sbin/init。
如果内核找不到init,它就会试着运行/bin/sh,如果运行失败,系统的启动也会失败。
二、运行级别那么,到底什么是运行级呢?简单的说,运行级就是操作系统当前正在运行的功能级别。
这个级别从1到6 ,具有不同的功能。
不同的运行级定义如下:(可以参考Red Hat Linux 里面的/etc/inittab)# 0 - 停机(千万不能把initdefault 设置为0 )# 1 - 单用户模式# 2 - 多用户,没有NFS# 3 - 完全多用户模式(标准的运行级)# 4 - 没有用到# 5 - X11 (xwindow)# 6 - 重新启动(千万不要把initdefault 设置为6 )这些级别在/etc/inittab 文件里指定。
这个文件是init 程序寻找的主要文件,最先运行的服务是放在/etc/rc.d 目录下的文件。
linux init_delayed_work原理

在Linux中,`INIT_DELAYED_WORK()`是一个被广泛应用的宏,主要用于处理需要延迟执行的操作。
其基本工作原理如下:
首先,我们需要定义一个延迟的工作队列和任务对象。
例如,我们可以定义一个名为ms_workqueue的工作队列和一个名为ms_queue_work的任务对象。
然后,我们会定义一个周期性执行的函数,比如`work_func()`。
这个函数会在指定的时间间隔内反复执行某些操作,如读取某些外设数据等。
接着,我们利用`INIT_DELAYED_WORK()`宏将任务对象添加到工作队列中。
这样,当特定的条件满足时(如系统启动后),工作队列就会开始执行对应的任务。
此外,我们还可以使用`queue_delayed_work()`或`schedule_delayed_work()`函数来进一步控制任务的执行时机。
其中,`queue_delayed_work()`需要自行指定工作队列,而`schedule_delayed_work()`则在系统默认的工作队列上执行一个work。
总的来说,通过使用这些机制,Linux内核能够有效地管理系统资源,避免了在中断中处理过多操作的风险,保证了对中断的及时响应。
linux2.6内核启动分析--李枝果(不看是你的损失^_^)

S h e n z h e n F a. lizhiguo0532@ 2010-6-041Linux 2.6lizhiguo0532@ 2010-6-04----------------------------------------------------------------------------------------------------------------------/sz_farsight---------------------------------------------------------------------------------------------------------------------- ^_^SDMakefile uImageMakefile uImage *.o1. arm-linux-gnu-ld arch/arm/kernel/vmlinux.ldsarch/arm/kernel/head.o arch/arm/kernel/init_task.oS h e nz h e n F a r silizhiguo0532@ 2010-6-042 vmlinux.lds2. 3. 4. piggy.gz5.S h e ns i gh t In c . lizhiguo0532@ 2010-6-043piggy.gz piggy.o ld6. arm-linux-gnu-ld arch/arm/boot/compressed/piggy.o27 *(.piggydata) piggydata piggydata Image piggy.gzvmlinux.ldsS h e n zc . lizhiguo0532@ 2010-6-0447.8.uboot arch/arm/boot/compressed/piggy.gz- arch/arm/boot/compressed/piggy.o 0xc0008000 (arch/arm/boot/compressed/vmlinux- arch/arm/boot/zImage) 0x0 0x00000000 0x0 0x30008000 Image vmlinux 0xc0008000S h e n z h e nF a r s i g h t In c . lizhiguo0532@ 2010-6-0450x0 arch/arm/boot/compressed/head.s misc.c 1. uboot thekernelr0—>r8,r1- r7.2. LC00x0 0x300080003. 0x00x30008000 CONFIG_ZBOOT_ROM r2, r3 r5, r6, ip, sp r6 ip got4. clear bss5. cache 4K.align.section ".stack", "w"user_stack: .space 4096S h eh tI nc.lizhiguo0532@ 2010-6-0466.Zreladdr vmlinuxarch/arm/mach-s3c2410/Makefile.bootarch/arm/boot/MakefileS h e nz h e n F a r si gh t I n c .lizhiguo0532@ 2010-6-047 arch/arm/boot/compressed/Makefile ZRELADDR vmlinux ImageuImage load zImage load uImage zImage uboot zImage load entryuImage zImage mkimage uImage -a data load -e entry arch/arm/boot/Makefile0x30008000S h e n z h e n F a r s i g h t In c . lizhiguo0532@ 2010-6-048 r4 Image 0x30008000 r5 zImage r2 zImager4>=r2, r4=0x30800000 Image r2=0x30008000+(zImage+bss size)+stack size 4K + malloc size 64K zImage Image 0x30800000r4+4M<r5, r5=0x30800000 r4=30008000 zImage r4r4+4M>r5, r4=r5=0x30008000 0x30008000@ r0 = malloc end or decompress space,@ r1 = sp end or malloc begin,@ r2 = malloc end ,@ r3 = architecture IDdecompress_kernelmalloc 0x300080007. decompress_kernel in arch/arm/boot/compressed/misc.cS h e nn F a r s i gh t I n c .lizhiguo0532@ 2010-6-049Gunzip() lib/inflate.c gunzip 8. 128add r0, r0, #127bic r0, r0, #127 @ align the kernel length9 head.S 0x30008000R1 128 r2 reloc_start r3 reloc_end head.Scache_clean_flush cache cache reloc_startzImage gdb9. reloc_startS h e n z h enF a r s i g h t I n c . lizhiguo0532@ 2010-6-0410* r0 = decompressed kernel length * r1-r3 = unused* r4 = kernel execution address* r5 = decompressed kernel start* r6 = processor ID* r7 = architecture ID* r8-r14 = unused0x30008000 cache r0 r1 pc 0x30008000 /node/3VMLINUX arch/arm/kernel/head.S init/Main.c 0x0 0xC0008000Mmu I Cache D Cache r0=0 r1=architecture ID arch/arm/kernel/vmlinux.lds stext1. SVC FIR IRQ2. __lookup_processor_type cp15 cpuid .init proc_info_list cpu3. __lookup_machine_type uboot machinearchitecture number .init machine number machine_descS h e n z h n F a r si g h t I n c .lizhiguo0532@ 2010-6-0411 ……………………arch-arm-kernel-head.Sarch-arm-kernel-head/node/4start_kernel in init/Main.c1. printk(linux_banner)2. a. setup_processor()proc_info_list list cpu_name cpuname idproc_arch system_utsname= list->arch_name armv4telf_platform= list->elf_name v4 elf_hwcap = list->elf_hwcap;/* 1|2|4 */ cpu_proc_init()Cpu-single.h#define cpu_proc_init __cpu_fn(CPU_NAME,_proc_init)#define __cpu_fn(name,x) __catify_fn(name,x)#define __catify_fn(name,x) name##xCPU_NAME = cpu_arm920cpu_proc_init(); cpu_arm920_proc_init()proc_arm920.S b. mdesc = setup_machine(machine_arch_type).init machine_desclist list-namec. machine_name = mdesc->name machine_named. tags = phys_to_virt(mdesc->boot_params)uboot 0x300001000xc0000100e.if (tags->hdr.tag == ATAG_CORE) {if (meminfo.nr_banks != 0) /* meminfo defined in setup.c */squash_mem_tags(tags);parse_tags(tags);}static struct meminfo meminfo __initdata = { 0, };in steup.cparse_tags(tags) in steup.cS h e n z h e n F a r s i g h t In clizhiguo0532@ 2010-6-0412Steup_arch()- parse_tags()- parse_tag(), all function in steup.c __tagtable_begin, __tagtable_end arch/arm/kernel/vmlinux.ldsparse_tag()parseIgnoring unrecognised tag 0x%08x\n ubootf. struct mm_struct init_mm = INIT_MM(init_mm);init_mm.start_code = (unsigned long) &_text;init_mm.end_code = (unsigned long) &_etext;init_mm.end_data = (unsigned long) &_edata;init_mm.brk = (unsigned long) &_end;_text, _etext, _edata, _end arch/arm/kernel/vmlinux.ldsg. parse_cmdline(cmdline_p, from) uboot commond_linefrom command_linecommand_linestart_kernerl mem initrdstart_kernel()->parse_option() mem initrdcommand_line *cmdline_pstart_kernelmem initrdh. paging_init(&meminfo, mdesc);/**/ in arch/arm/mm/init.cmemtable_init(mi)/bbstcon,board,Embedded,reid,1165977462.html0xffff0000mdesc->map_io() smdk2410arch/arm/mach-s3c2410/mach-smdk2410.c Linux , smdk2410_map_io() 1 iotable_init(s3c_iodesc, GPIO,IRQ,MEMCTRL,UARTS h e nz h e n F a r s i gh t In c . lizhiguo0532@ 2010-6-0413 2 (cpu->map_io)(mach_desc, size) LCD, map.h S3C2410_ADDR(x) ((void __iomem *)0xF0000000 + (x)) IO 0xF0000000 1M 1. GPIO IRQ UART MEMCRTL WATCHDOG USB 2. kmalloc 0x30008000 phys_to_virt virt_to_ phys 3. mmu TTB 0x30004000 16K mmu arch/arm/kernel/head.S 4M mmu sector Uarth.request_standard_resources(&meminfo, mdesc) memory kernel_text kernel_data video_ram new new resource NULLi. cpu_init() in arch/arm/kernel/setup.ccpu cpu id cache IRQ ABT UND stack 12 svci. __mach_desc_SMDK2410_typeinit_arch_irq init_machine system_timer3. sched_init()init_idle (current, smp_processor_id()) idle4. preempt_disable()5. (zone) build_all_zonelists()6. printk(KERN_NOTICE "Kernel command line: %s\n", saved_command_line); uboot command_line setup_arch7. parse_early_param()S h e n z h e n F a r s i g h t In c . lizhiguo0532@ 2010-6-0414 __setup setup_arch &command_line command_linesaved_command_line8. parse_args("Booting kernel", command_line, __start___param,__stop___param - __start___param,&unknown_bootoption);parse_early_param(); setup paramcommand_line setup_arch__start___param param System.map__stop___param - __start___paramunknown_bootoption paramparse_one()parse_one() param __setupLinux bootargs9. sort_main_extable()__start___ex_table __stop___ex_table *(__ex_table) struct exception_table_entry insn10. setup_arch- paging_init- memtable_initinit_maps, alloc_bootmem_low_pages ARM 0xFFFF0000 0xFFFF0000trap_init .Lcvectors 0xffff0000 __stubs_start __stubs_end 0xffff0200 0xffff0500 0xffff0000 cache DOMAIN_USER DOMAIN_MANAGER DOMAIN_CLIENT11.rcu_init() cpu struct rcu_dataper_cpu_rcu_data per_cpu_rcu_bh_data.12.init_IRQstruct irqdesc irq_desc[NR_IRQS], irq_desc[n] bad_irq_desc pendS h e nz h e n F a r s i gh t I n c . lizhiguo0532@ 2010-6-0415 init_arch_irq setup_arch smdk2410_init_irq in mach-smdk2410.cs3c24xx_init_irq do_level_IRQ do_edge_IRQ __do_irquart ADC13.pidhash_init()pid_hash hash pidhash_shift pidhash_shift min 12 hash hash pid_hash[n](n=1~3), hash hash struct hlist_head first NULL14.init_timers()struct tvec_t_base_s per_cpu_tvec_bases, per_cpu_tvec_bases lock15.softirq_initS h e n z h e n F a r s i gh t I n c .lizhiguo0532@ 2010-6-041616.time_init() timersetup_archtime_init if s3c2410_timer_init timer417.console_initprintk log_bufa. tty_register_ldisc TTYtty ttyttytty ttyS h e n z h e n F ar s i g h t I n c . lizhiguo0532@ 2010-6-0417 ppp tty tty b. s3c24xx_serial_initconsole /*vmlinux.lds.S__con_initcall_start = .;*(.con_initcall.init)__con_initcall_end = .;con_initcall.initfn .con_initcall.init :#define console_initcall(fn) \static initcall_t __initcall_##fn \__attribute_used____attribute__((__section__(".con_initcall.init")))=fn*///:console_initcall(s3c24xx_serial_initconsole);//:start_kernel->console_init->s3c24xx_serial_initconsolecall = __con_initcall_start; /* console_initcall */while (call < __con_initcall_end) {(*call)();call++;}18.profile_init()/* *///profile// bootargs profile/*profile menuconfig profiling support1. profileprofile profile=1 profile=schedule 12. /proc/profile readprofilereadprofile -m /proc/kallsyms | sort -nr > ~/cur_profile.log,readprofile -r -m /proc/kallsyms |sort -nr,readprofile -r && sleep 1 && readprofile -m /proc/kallsymsS h e n z h e n F a r s i g h t In c . lizhiguo0532@ 2010-6-0418|sort -nr >~/cur_profile.log 3. /proc/profile profile profile=?profile=schedule ? schedule schedule*/19.local_irq_enable()IRQ20.mem_init()alloc_bootmem(),alloc_bootmem_low(),alloc_bootmem_pages()21.kmem_cache_init()slab22. numa_policy_init();if (late_time_init)late_time_init();calibrate_delay();// BogMIPS23. pidmap_init();pgtable_cache_init();prio_tree_init();/*index_bits_to_maxindex[BITS_PER_LONG]index_bits_to_maxindex[n] -1index_bits_to_maxindex[BITS_PER_LONG-1] ~0UL*/24 anon_vma_init();/*kmem_cache_creat() struct anon_vmakmem_cache_t anon_vma ,void anon_vma_ctor NULLkmem_cache_t anon_vma_chachepS h e n z h e n F a r s i g h tlizhiguo0532@ 2010-6-0419 */ 25. fork_init(num_physpages);/* */ 26. proc_caches_init();buffer_init();/*kmem_cache_create("buffer_head",sizeof(struct buffer_head), 0,SLAB_RECLAIM_ACCOUNT|SLAB_PANIC, init_buffer_head, NULL) struct buffer_head kmem_cache_t */27. security_init();/* */28. vfs_caches_init(num_physpages);radix_tree_init();signals_init();kmem_cache_create("sigqueue",sizeof(struct sigqueue),__alignof__(struct sigqueue),SLAB_PANIC, NULL, NULL) struct sigqueue kmem_cache_t sigqueue cache line kmem_cache_t sihqueue_cachep.29. page_writeback_init()buffer_pages.30. proc_root_init();/* proc CONFIG_PROC_FS */31. check_bugs();/* arm */32 rest_init()initlinux :0 rest_init()a. in arch/arm/kernel/process.cinitb. schedule() idle schedulec. cpu_idle()0S h e n z h e n F a r s i g h t In c . lizhiguo0532@ 2010-6-0420 init in main.c a. lock_kernel() lock b. smpc. populate_rootfs() initcallsd. do_basic_setup()#define module_init(x) __initcall(x);#define __initcall(fn) device_initcall(fn)#define core_initcall(fn) __define_initcall("1",fn)#define postcore_initcall(fn) __define_initcall("2",fn) #define arch_initcall(fn) __define_initcall("3",fn) #define subsys_initcall(fn) __define_initcall("4",fn) #define fs_initcall(fn) __define_initcall("5",fn) #define device_initcall(fn) __define_initcall("6",fn) #define late_initcall(fn) __define_initcall("7",fn)#define __define_initcall(level,fn) \static initcall_t __initcall_##fn __attribute_used__ \__attribute__((__section__(".initcall" level ".init"))) = fn include/linux/init.harch_initcall initcall module_init init 1 do_basic_setup do_initcalls()S h e n z h e n F a r s i gh t I n c . lizhiguo0532@ 2010-6-0421 Start_kernel * -- rest_init()* -- kernel_thread()* init 1 -- Init* -- populate_rootfs() -- do_basic_setup()* initcall modlue_init -- init_workqueues() -- usermodehelper_init() khelper-- driver_init()-- sysctl_init()-- sock_init() socket-- do_initcalls()*-- (*call)()* initcall-- prepare_namespace()-- name_to_dev_t()root bootargs root=/dev/** root=31:03 /dev/mtdblock3 root /dev/ 31-- mount_root();/* */-- free_initmem() init:Freeing init memory: 116K-- sys_open() and sys_dup(0) 0 1 2-- run_init_process(execute_command) init=/initrd command_line-- cpu_idle() 0init 1 …… run_init_process("/sbin/init");run_init_process("/etc/init");run_init_process("/bin/init");run_init_process("/bin/sh");……S h n n F a r s i g h t In c . lizhiguo0532@ 2010-6-0422 ARM Linux -- -PXA255--- Linux bootargs/u3/99423/article.html/bbstcon,board,Embedded,reid,1165977462.html/node/4。
Linux 2.6.19.x内核编译配置选项简介(1)
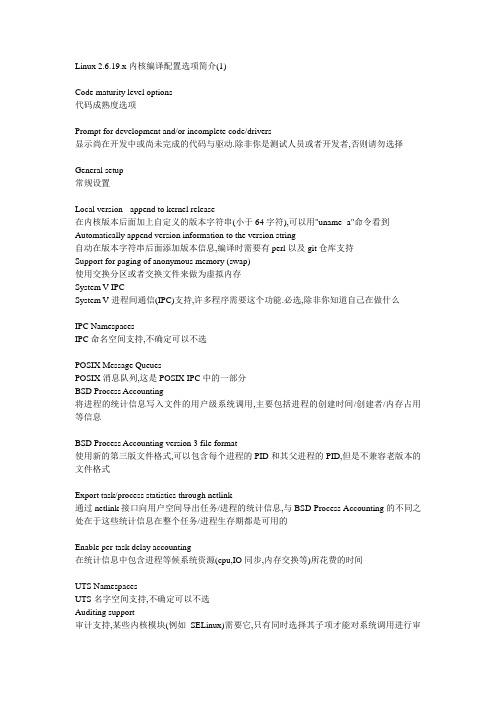
Linux 2.6.19.x内核编译配置选项简介(1)Code maturity level options代码成熟度选项Prompt for development and/or incomplete code/drivers显示尚在开发中或尚未完成的代码与驱动.除非你是测试人员或者开发者,否则请勿选择General setup常规设置Local version - append to kernel release在内核版本后面加上自定义的版本字符串(小于64字符),可以用"uname -a"命令看到Automatically append version information to the version string自动在版本字符串后面添加版本信息,编译时需要有perl以及git仓库支持Support for paging of anonymous memory (swap)使用交换分区或者交换文件来做为虚拟内存System V IPCSystem V进程间通信(IPC)支持,许多程序需要这个功能.必选,除非你知道自己在做什么IPC NamespacesIPC命名空间支持,不确定可以不选POSIX Message QueuesPOSIX消息队列,这是POSIX IPC中的一部分BSD Process Accounting将进程的统计信息写入文件的用户级系统调用,主要包括进程的创建时间/创建者/内存占用等信息BSD Process Accounting version 3 file format使用新的第三版文件格式,可以包含每个进程的PID和其父进程的PID,但是不兼容老版本的文件格式Export task/process statistics through netlink通过netlink接口向用户空间导出任务/进程的统计信息,与BSD Process Accounting的不同之处在于这些统计信息在整个任务/进程生存期都是可用的Enable per-task delay accounting在统计信息中包含进程等候系统资源(cpu,IO同步,内存交换等)所花费的时间UTS NamespacesUTS名字空间支持,不确定可以不选Auditing support审计支持,某些内核模块(例如SELinux)需要它,只有同时选择其子项才能对系统调用进行审计Enable system-call auditing support支持对系统调用的审计Kernel .config support把内核的配置信息编译进内核中,以后可以通过scripts/extract-ikconfig脚本来提取这些信息Enable access to .config through /proc/config.gz允许通过/proc/config.gz访问内核的配置信息Cpuset support只有含有大量CPU(大于16个)的SMP系统或NUMA(非一致内存访问)系统才需要它Kernel->user space relay support (formerly relayfs)在某些文件系统上(比如debugfs)提供从内核空间向用户空间传递大量数据的接口Initramfs source file(s)initrd已经被initramfs取代,如果你不明白这是什么意思,请保持空白Optimize for size (Look out for broken compilers!)编译时优化内核尺寸(使用"-Os"而不是"-O2"参数编译),有时会产生错误的二进制代码Enable extended accounting over taskstats收集额外的进程统计信息并通过taskstats接口发送到用户空间Configure standard kernel features (for small systems)配置标准的内核特性(为小型系统)Enable 16-bit UID system calls允许对UID系统调用进行过时的16-bit包装Sysctl syscall support不需要重启就能修改内核的某些参数和变量,如果你也选择了支持/proc,将能从/proc/sys存取可以影响内核行为的参数或变量Load all symbols for debugging/kksymoops装载所有的调试符号表信息,仅供调试时选择Include all symbols in kallsyms在kallsyms中包含内核知道的所有符号,内核将会增大300KDo an extra kallsyms pass除非你在kallsyms中发现了bug并需要报告这个bug才打开该选项Support for hot-pluggable devices支持热插拔设备,如usb与pc卡等,Udev也需要它Enable support for printk允许内核向终端打印字符信息,在需要诊断内核为什么不能运行时选择BUG() support显示故障和失败条件(BUG和W ARN),禁用它将可能导致隐含的错误被忽略Enable ELF core dumps内存转储支持,可以帮助调试ELF格式的程序Enable full-sized data structures for core在内核中使用全尺寸的数据结构.禁用它将使得某些内核的数据结构减小以节约内存,但是将会降低性能Enable futex support快速用户空间互斥体可以使线程串行化以避免竞态条件,也提高了响应速度.禁用它将导致内核不能正确的运行基于glibc的程序Enable eventpoll support支持事件轮循的系统调用Use full shmem filesystem启用shmem支持.shmem是基于共享内存的文件系统(可能用到swap),在启用TMPFS后可以挂载为tmpfs供用户空间使用,它比简单的ramfs先进许多Use full SLAB allocator使用SLAB完全取代SLOB进行内存分配,SLAB是一种优秀的内存分配管理器,推荐使用Enable VM event counters for /proc/vmstat允许在/proc/vmstat中包含虚拟内存事件记数器Loadable module support可加载模块支持Enable loadable module support打开可加载模块支持,如果打开它则必须通过"make modules_install"把内核模块安装在/lib/modules/中Module unloading允许卸载已经加载的模块Forced module unloading允许强制卸载正在使用中的模块(比较危险)Module versioning support允许使用其他内核版本的模块(可能会出问题)Source checksum for all modules为所有的模块校验源码,如果你不是自己编写内核模块就不需要它Automatic kernel module loading让内核通过运行modprobe来自动加载所需要的模块,比如可以自动解决模块的依赖关系Block layer块设备层Enable the block layer块设备支持,使用硬盘/USB/SCSI设备者必选Support for Large Block Devices仅在使用大于2TB的块设备时需要Support for tracing block io actions块队列IO跟踪支持,它允许用户查看在一个块设备队列上发生的所有事件,可以通过blktrace 程序获得磁盘当前的详细统计数据Support for Large Single Files仅在可能使用大于2TB的文件时需要IO SchedulersIO调度器Anticipatory I/O scheduler适用于大多数环境,但不太合适数据库应用Deadline I/O scheduler通常与Anticipatory相当,但更简洁小巧,更适合于数据库应用CFQ I/O scheduler为所有进程分配等量的带宽,适合于桌面多任务及多媒体应用Default I/O scheduler默认IO调度器Processor type and features中央处理器(CPU)类型及特性Symmetric multi-processing support对称多处理器支持,如果你有多个CPU或者使用的是多核CPU就选上.此时"Enhanced Real Time Clock Support"选项必须开启,"Advanced Power Management"选项必须关闭Subarchitecture Type处理器的子架构,大多数人都应当选择"PC-compatible"Processor family处理器系列,请按照你实际使用的CPU选择Generic x86 support通用x86支持,如果你的CPU能够在上述"Processor family"中找到就别选HPET Timer SupportHPET是替代8254芯片的新一代定时器,i686及以上级别的主板都支持,可以安全的选上Maximum number of CPUs支持的最大CPU数,每增加一个内核将增加8K体积SMT (Hyperthreading) scheduler support支持Intel的超线程(HT)技术Multi-core scheduler support针对多核CPU进行调度策略优化Preemption Model内核抢占模式No Forced Preemption (Server)适合服务器环境的禁止内核抢占V oluntary Kernel Preemption (Desktop)适合普通桌面环境的自愿内核抢占Preemptible Kernel (Low-Latency Desktop)适合运行实时程序的主动内核抢占Preempt The Big Kernel Lock可以抢占大内核锁,应用于实时要求高的场合,不适合服务器环境Machine Check Exception让CPU检测到系统故障时通知内核,以便内核采取相应的措施(如过热关机等)Check for non-fatal errors on AMD Athlon/Duron / Intel Pentium 4每5秒检测一次这些cpu的非致命错误并纠正它们,同时记入日志check for P4 thermal throttling interrupt当P4的cpu过热时显示一条警告消息Enable VM86 support虚拟X86支持,在DOSEMU下运行16-bit程序或XFree86通过BIOS初始化某些显卡的时候才需要Toshiba Laptop supportToshiba笔记本模块支持Dell laptop supportDell笔记本模块支持Enable X86 board specific fixups for reboot修正某些旧x86主板的重起bug,这种主板基本绝种了/dev/cpu/microcode - Intel IA32 CPU microcode support使用不随Linux内核发行的IA32微代码,你必需有IA32微代码二进制文件,仅对Intel的CPU 有效/dev/cpu/*/msr - Model-specific register support在多cpu系统中让特权CPU访问x86的MSR寄存器/dev/cpu/*/cpuid - CPU information support能从/dev/cpu/x/cpuid获得CPU的唯一标识符(CPUID)Firmware Drivers固件驱动程序BIOS Enhanced Disk Drive calls determine boot disk有些BIOS支持从某块特定的硬盘启动(如果BIOS不支持则可能无法启动),目前大多数BIOS 还不支持BIOS update support for DELL systems via sysfs仅适用于DELL机器Dell Systems Management Base Driver仅适用于DELL机器High Memory Support最高内存支持,总内存小于等于1G的选"off",大于4G的选"64G"Memory split如果你不是绝对清楚自己在做什么,不要改动这个选项Memory model一般选"Flat Memory",其他选项涉及内存热插拔64 bit Memory and IO resources使用64位的内存和IO资源Allocate 3rd-level pagetables from highmem在内存很多(大于4G)的机器上将用户空间的页表放到高位内存区,以节约宝贵的低端内存Math emulation数学协处理器仿真,486DX以上的cpu就不要选它了MTRR (Memory Type Range Register) support打开它可以提升PCI/AGP总线上的显卡2倍以上的速度,并且可以修正某些BIOS错误Boot from EFI supportEFI是一种可代替传统BIOS的技术(目前的Grub/LILO尚不能识别它),但是现在远未普及Enable kernel irq balancing让内核将irq中断平均分配给多个CPU以进行负载均衡,但是要配合irqbanlance守护进程才行Use register arguments使用"-mregparm=3"参数编译内核,将前3个参数以寄存器方式进行参数调用,可以生成更紧凑和高效的代码Enable seccomp to safely compute untrusted bytecode只有嵌入式系统可以不选Timer frequency内核时钟频率,桌面推荐"1000 HZ",服务器推荐"100 HZ"或"250 HZ"kexec system call提供kexec系统调用,可以不必重启而切换到另一个内核kernel crash dumps被kexec启动后产生内核崩溃转储Physical address where the kernel is loaded内核加载的物理地址,除非你知道自己在做什么,否则不要修改.在提供kexec系统调用的情况下可能要修改它Support for hot-pluggable CPUs对热插拔CPU提供支持Compat VDSO support如果Glibc版本大于等于2.3.3就不选,否则就选上Power management options电源管理选项Power Management support电源管理有APM和ACPI两种标准且不能同时使用.即使关闭该选项,X86上运行的Linux也会在空闲时发出HLT指令将CPU进入睡眠状态Legacy Power Management API传统的电源管理API,比如软关机和系统休眠等接口Power Management Debug Support仅供调试使用Driver model /sys/devices/.../power/state files内核帮助文档反对使用该选项,即将被废除ACPI (Advanced Configuration and Power Interface) Support必须运行acpid守护程序ACPI才能起作用.ACPI是为了取代APM而设计的,因此应该尽量使用ACPI而不是APMAC Adapter如果你的系统可以在AC和电池之间转换就可以选Battery通过/proc/acpi/battery向用户提供电池状态信息,用电池的笔记本可以选Button守护程序捕获Power,Sleep,Lid按钮事件,并根据/proc/acpi/event做相应的动作,软件控制的poweroff需要它Video仅对集成在主板上的显卡提供ACPI2.0支持,且不是所有集成显卡都支持Generic Hotkey统一的热键驱动,建议不选Fan允许通过用户层的程序来对系统风扇进行控制(开,关,查询状态),支持它的硬件并不多Dock支持由ACPI控制的集线器(docking stations)Processor让ACPI处理空闲状态,并使用ACPI C2和C3处理器状态在空闲时节省电能,同时它还被cpufreq的"Performance-state drivers"选项所依赖Thermal Zone系统温度过高时可以利用ACPI thermal zone及时调整工作状态以避免你的CPU被烧毁ASUS/Medion Laptop ExtrasASUS笔记本专用,以提供额外按钮的支持,用户可以通过/proc/acpi/asus来打开或者关闭LCD 的背光/调整亮度/定制LED的闪烁指示等功能IBM ThinkPad Laptop ExtrasIBM ThinkPad专用Toshiba Laptop ExtrasToshiba笔记本专用Disable ACPI for systems before Jan 1st this year输入四位数的年份,在该年的1月1日前不使用ACPI的功能("0"表示一直使用)Debug Statements详细的ACPI调试信息,不搞开发就别选Power Management Timer Support这个Timer在所有ACPI兼容的平台上都可用,且不会受PM功能的影响,建议总是启用它.如果你在kernel log中看到了'many lost ticks'那就必须启用它ACPI0004,PNP0A05 and PNP0A06 Container Driver支持内存和CPU的热插拔Smart Battery System支持依赖于I2C的"智能电池".这种电池非常老旧且罕见,还与当前的ACPI标准兼容性差APM (Advanced Power Management) BIOS SupportAPM在SMP机器上必须关闭,一般来说当前的笔记本都支持ACPI,所以应尽量关闭该该选项Ignore USER SUSPEND只有NEC Versa M系列的笔记本才需要选择这一项Enable PM at boot time系统启动时即启用APM,选上这个选项能让系统自动的进行电源管理,但常常导致启动时死机Make CPU Idle calls when idle系统空闲时调用空闲指令(halt),只有老式的CPU才需要选它,且对于SMP系统必须关闭Enable console blanking using APM在屏幕空白时关闭LCD背光,事实上对所有的笔记本都无效RTC stores time in GMT将硬件时钟应该设为格林威治时间,否则视为本地时间.建议你使用GMT,这样你无须为时区的改变而担心Allow interrupts during APM BIOS calls允许APM的BIOS调用时中断,IBM Thinkpad的一些新机器需要这项.如果休眠时挂机(包括睡下去就醒不来),可以试试它Use real mode APM BIOS call to power off此驱动为某些有Bug的BIOS准备,如果你的系统不能正常关机或关机时崩溃,可以试试它CPU Frequency scaling允许动态改变CPU主频,达到省电和降温的目的,必须同时启用下面的一种governor才行Enable CPUfreq debugging允许对CPUfreq进行调试CPU frequency translation statistics通过sysfs文件系统输出CPU频率变换的统计信息CPU frequency translation statistics details输出详细的CPU频率变换统计信息Default CPUFreq governor默认的CPU频率调节器'performance' governor'性能'优先,静态的将频率设置为cpu支持的最高频率'powersave' governor'节能'优先,静态的将频率设置为cpu支持的最低频率'userspace' governor for userspace frequency scaling既允许手动调整cpu频率,也允许用户空间的程序动态的调整cpu频率(需要额外的调频软件,比如cpufreqd)'ondemand' cpufreq policy governor'立即响应',周期性的考察CPU负载并自动的动态调整cpu频率(不需要额外的调频软件),适合台式机'conservative' cpufreq governor'保守',和'ondemand'相似,但是频率的升降是渐变式的(幅度不会很大),更适合用于笔记本/PDA/AMD64环境ACPI Processor P-States driver将ACPI2.0的处理器性能状态报告给CPUFreq processor drivers以决定如何调整频率,该选项依赖于ACPI->Processor{省略的部分请按照自己实际使用的CPU选择}/proc/acpi/processor/../performance interface内核帮助文档反对使用该选项,即将被废除Relaxed speedstep capability checks放松对系统的speedstep兼容性检查,仅在某些老旧的Intel系统上需要打开Bus options (PCI, PCMCIA, EISA, MCA, ISA)总线选项PCI supportPCI支持,如果使用了PCI或PCI Express设备就必选PCI access modePCI访问模式,强列建议选"Any"(系统将优先使用"MMConfig",然后使用"BIOS",最后使用"Direct"检测PCI设备)PCI Express supportPCI Express支持(目前主要用于显卡和千兆网卡)PCI Express Hotplug driver如果你的主板和设备都支持PCI Express热插拔就可以选上Use polling mechanism for hot-plug events对热插拔事件采用轮询机制,仅用于测试目的Root Port Advanced Error Reporting support由PCI Express AER驱动程序处理发送到Root Port的错误信息Message Signaled Interrupts (MSI and MSI-X)充许设备通过PCI总线写入内存堆栈产生一个中断而不是使用默认的IRQ中断,建议不选PCI Debugging将PCI调试信息输出到系统日志里Interrupts on hypertransport devices允许本地的hypertransport设备使用中断ISA support现在基本上没有ISA的设备了,如果你有就选吧MCA support微通道总线,老旧的IBM的台式机和笔记本上可能会有这种总线NatSemi SCx200 support在使用AMD Geode处理器的机器上才可能有PCCARD (PCMCIA/CardBus) supportPCMCIA卡(主要用于笔记本)支持Enable PCCARD debugging仅供调试16-bit PCMCIA support一些老的PCMCIA卡使用16位的CardBus32-bit CardBus support当前的PCMCIA卡基本上都是32位的CardBusCardBus yenta-compatible bridge support使用PCMCIA卡的基本上都需要选择这一项,子项请按照自己实际使用的PCMCIA卡选择{省略的部分请按照自己实际使用的PCMCIA卡选择}PCI Hotplug SupportPCI热插拔支持,如果你有这样的设备就到子项中去选吧Executable file formats可执行文件格式Kernel support for ELF binariesELF是开放平台下最常用的二进制文件格式,支持动态连接,支持不同的硬件平台.除非你知道自己在做什么,否则必选Kernel support for a.out and ECOFF binaries早期UNIX系统的可执行文件格式,目前已经被ELF格式取代Kernel support for MISC binaries允许插入二进制的封装层到内核中,使用Java,.NET,Python,Lisp等语言编写的程序时需要它Networking网络Networking options网络选项Network packet debugging在调试不合格的包时加上额外的附加信息,但在遇到Dos攻击时你可能会被日志淹没Packet socket这种Socket可以让应用程序(比如tcpdump,iptables)直接与网络设备通讯,而不通过内核中的其它中介协议Packet socket: mmapped IO让Packet socket驱动程序使用IO映射机制以使连接速度更快Unix domain sockets一种仅运行于本机上的效率高于TCP/IP的Socket,简称Unix socket.许多程序都使用它在操作系统内部进行进程间通信(IPC),比如X Window和syslogTransformation user configuration interface为IPsec(可在ip层加密)之类的工具提供XFRM用户配置接口支持Transformation sub policy supportXFRM子策略支持,仅供开发者使用PF_KEY sockets用于可信任的密钥管理程序和操作系统内核内部的密钥管理进行通信,IPsec依赖于它TCP/IP networkingTCP/IP协议当然要选IP: multicasting群组广播,似乎与网格计算有关,仅在使用MBONE的时候才需要IP: advanced router高级路由,如果想做一个路由器就选吧IP: policy routing策略路由IP: equal cost multipath用于路由的基于目的地址的负载均衡IP: verbose route monitoring显示冗余的路由监控信息IP: kernel level autoconfiguration在内核启动时自动配置ip地址/路由表等,需要从网络启动的无盘工作站才需要这个东西IP: tunnelingIP隧道,将一个IP报文封装在另一个IP报文内的技术IP: GRE tunnels over IP基于IP的GRE(通用路由封装)隧道IP: multicast routing多重传播路由IP: ARP daemon support这东西尚处于试验阶段就已经被废弃了IP: TCP syncookie support抵抗SYN flood攻击的好东西,要启用它必须同时启用/proc文件系统和"Sysctl support",然后在系统启动并挂载了/proc之后执行"echo 1 >/proc/sys/net/ipv4/tcp_syncookies"命令IP: AH transformationIPsec验证头(AH)实现了数据发送方的验证处理,可确保数据既对于未经验证的站点不可用也不能在路由过程中更改IP: ESP transformationIPsec封闭安全负载(ESP)实现了发送方的验证处理和数据加密处理,用以确保数据不会被拦截/查看或复制IP: IPComp transformationIPComp(IP静荷载压缩协议),用于支持IPsecIP: IPsec transport modeIPsec传输模式,常用于对等通信,用以提供内网安全.数据包经过了加密但IP头没有加密,因此任何标准设备或软件都可查看和使用IP头IP: IPsec tunnel modeIPsec隧道模式,用于提供外网安全(包括虚拟专用网络).整个数据包(数据头和负载)都已经过加密处理且分配有新的ESP头/IP头和验证尾,从而能够隐藏受保护站点的拓扑结构IP: IPsec BEET modeIPsec BEET模式INET: socket monitoring interfacesocket监视接口,一些Linux本地工具(如:包含ss的iproute2)需要使用它TCP: advanced congestion control高级拥塞控制,如果没有特殊需求(比如无线网络)就别选了,内核会自动将默认的拥塞控制设为"Cubic"并将"Reno"作为候补IP: Virtual Server ConfigurationIP虚拟服务器允许你基于多台物理机器构建一台高性能的虚拟服务器,不玩集群就别选了The IPv6 protocol你要是需要IPv6就选吧NetLabel subsystem supportNetLabel子系统为诸如CIPSO与RIPSO之类能够在分组信息上添加标签的协议提供支持,如果你看不懂就别选了。
LINUX内核STARTINGKERNEL...串口无输出问题归纳

下面两篇文章是ARM9论坛上的讲解ramdisk文件系统的很不错的文章今天做了个试验,让Linux2.6.29.4从ramdisk根文件系统启动成功,总结一下。
其中涉及的内容较多,很多东西不再详述,如需深入研究请查阅相关资料(百度或谷歌一下一大堆)。
开发环境:Fedora 9交叉编译工具链:arm-linux-gcc 4.3.2 with EABI嵌入式Linux内核版本:2.6.29.4-FriendlyARM。
昨天写贴子的时候具体记不清了,今天起来启动开发板用uname -r查一下,就是叫做2.6.29.4-FriendlyARM,帖子已经改好了。
本文就是友善之臂的2.6.29.4-FriendlyARM的那个版本的内核的基础上改的。
其它版本的应该也类似,仅供参考。
开发板:mini2440-128M Nand FlashBootloader:u-boot-2009.11具体步骤如下:1.解压内核源码树解压linux-2.6.29-mini2440-20090708.tgz到自己的工作目录,会生成一个友善之臂修改过的并且有几个mini2440默认配置文件的内核源码目录linux-2.6.29。
具体步骤参照友善之臂mini2440开发板用户手册,具体不详述了。
2.修改内核配置选项进入内核源码目录linux-2.6.29目录#cp config_mini2440_t35 .config#make menuconfig ARCH=arm打开配置菜单,修改两个配置项,分别是:a):General setup-->选择Initial RAM filesystem and RAM disk...... 项b):Device Drivers-->Block devices-->选择RAM block device support 项并检查Optimize for size是否被选中,如果没有则选中,此项优化内核大小,根据需要进行配置。
Linux内核Ramdisk(initrd)机制

摘要:对于Linux用户来说,Ramdisk并不陌生,可是为什么需要它呢?本文对Ramdisk在内核启动过程中的作用,以及它的内部机制进行深入介绍。
标题initrd 和initramfs在内核中的处理临时的根目录rootfs的挂载initrd的解压缩老式的initrd的处理cpio格式的initrd的处理initrd实例分析:在早期的Linux系统中,一般就只有软盘或者硬盘被用来作为Linux的根文件系统,因此很容易把这些设备的驱动程序集成到内核中。
但是现在根文件系统可能保存在各种存储设备上,包括SCSI, SATA, U盘等等。
因此把这些设备驱动程序全部编译到内核中显得不太方便。
在Linux内核模块自动加载机制的介绍中,我们看到利用udevd可以实现实现内核模块的自动加载,因此我们希望根文件系统的设备驱动程序也能够实现自动加载。
但是这里有一个矛盾,udevd是一个可执行文件,在根文件系统被挂载前,是不可能执行udevd 的,但是如果udevd没有启动,那就无法自动加载根根据系统设备的驱动程序,同时也无法在/dev目录下建立相应的设备节点。
为了解决这个矛盾,于是出现了initrd(boot loader initialized RAM disk)。
initrd是一个被压缩过的小型根目录,这个目录中包含了启动阶段中必须的驱动模块,可执行文件和启动脚本。
包括上面提到的udevd,当系统启动的时候,booload会把initrd 文件读到内存中,然后把initrd的起始地址告诉内核。
内核在运行过程中会解压initrd,然后把initrd挂载为根目录,然后执行根目录中的/initrc脚本,您可以在这个脚本中运行initrd中的udevd,让它来自动加载设备驱动程序以及在/dev目录下建立必要的设备节点。
在udevd自动加载磁盘驱动程序之后,就可以mount真正的根目录,并切换到这个根目录中。
您可以通过下面的方法来制作一个initrd文件。
linux的initrd机制和initramfs机制之概述

linux的initrd机制和initramfs机制之概述我们知道linux的一般启动过程是uboot引导内核、内核挂载文件系统,文件系统挂载完毕之后开始执行初试化的用户程序,这里文件系统是怎么被挂载的呢?今天就来详细的剖析一下。
我们在uboot的环境变量里经常看到root=/dev/mtdblock3这样的字样,我们知道这个是用来指定我们最后要挂载的文件系统的位置的。
但是问题出现了,/dev/mtdblock3是指文件系统当中的一个文件,但是在挂载文件系统之前根本还没有目录和文件和文件的概念,典型的先有鸡还是先有蛋的问题。
挂载文件系统需要目录文件,有目录文件的前提是要挂载了文件系统。
这样肯定是不行的。
所以我们就要现提供一只“鸡”,就是文件系统,让我们能找到/dev/mtdblock3这个文件,然后再去挂载其上面的文件系统。
那么又有问题了,我们是通过什么方法和步骤提供的那只“鸡”(文件系统)的?这就是下面要讲的initrd机制和initramfs机制这两个机制的原理和作用有很大的相似:1. 在挂载真正的文件系统之前,它们会挂载一个基于内存的虚拟文件系统,这个文件系统只是起个过度的作用,为了挂载真正的文件系统(root=/dev/mtdblock3指定位置的文件系统)做铺垫的。
2. 在挂载虚拟文件系统后都会执行一个可执行文件,initrd机制会执行虚拟文件系统根目录下的linuxrc或init文件文件,initramfs会执行虚拟文件系统根目录下的init文件。
3. 使用这两种机制还有一个好处:现在文件系统可以存在多种介质上,每一种介质都有相应的驱动,如果把这些驱动全部编进内核,势必造成内核十分庞大。
引入了这两种机制后,我们可以把各种驱动编译成模块,然后在启动的时候根据检测到的硬件来插入模块驱动。
插入模块驱动这个动作就是在上面的linuxrc或init可执行文件中。
插入模块之后,就有了操作硬件的驱动,然后就可以进行真正的文件系统挂载了。
Initrd启动及功能分析
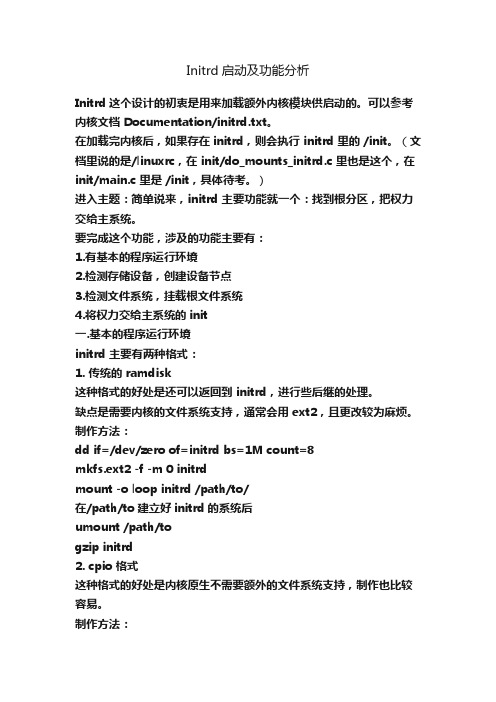
Initrd启动及功能分析Initrd这个设计的初衷是用来加载额外内核模块供启动的。
可以参考内核文档 Documentation/initrd.txt。
在加载完内核后,如果存在initrd,则会执行 initrd 里的 /init。
(文档里说的是/linuxrc,在 init/do_mounts_initrd.c 里也是这个,在init/main.c 里是 /init,具体待考。
)进入主题:简单说来,initrd 主要功能就一个:找到根分区,把权力交给主系统。
要完成这个功能,涉及的功能主要有:1.有基本的程序运行环境2.检测存储设备,创建设备节点3.检测文件系统,挂载根文件系统4.将权力交给主系统的init一.基本的程序运行环境initrd 主要有两种格式:1. 传统的 ramdisk这种格式的好处是还可以返回到 initrd,进行些后继的处理。
缺点是需要内核的文件系统支持,通常会用 ext2,且更改较为麻烦。
制作方法:dd if=/dev/zero of=initrd bs=1M count=8mkfs.ext2 -f -m 0 initrdmount -o loop initrd /path/to/在/path/to建立好initrd的系统后umount /path/togzip initrd2. cpio 格式这种格式的好处是内核原生不需要额外的文件系统支持,制作也比较容易。
制作方法:cd /path/tofind . |cpio -o -H newc |gzip -c > ../initrd.gz如果没有特别的需要,通常使用cpio格式。
找到根文件系统的任务通常是用shell脚本来完成,主要原因是:1.体积所限,通常initrd不会做很大,因为它功能很明确单一2.方便修改,针对不同硬件/系统通常会做一定更改,编译型语言更改起来较麻烦通常使用的shell有busybox的ash,klibc的sh等。
- 1、下载文档前请自行甄别文档内容的完整性,平台不提供额外的编辑、内容补充、找答案等附加服务。
- 2、"仅部分预览"的文档,不可在线预览部分如存在完整性等问题,可反馈申请退款(可完整预览的文档不适用该条件!)。
- 3、如文档侵犯您的权益,请联系客服反馈,我们会尽快为您处理(人工客服工作时间:9:00-18:30)。
Linux 2.6 内核的Initrd 机制解析1.什么是 Initrdinitrd 的英文含义是 boot loader initialized RAM disk,就是由 boot loader 初始化的内存盘。
在 linux内核启动前, boot loader 会把存储介质中的initrd 文件加载到内存,内核启动时会在访问真正的根文件系统前先访问该内存中的 initrd 文件系统。
在 boot loader 配置了 initrd 的情况下,内核启动被分成了两个阶段,第一阶段先执行 initrd 文件系统中的"某个文件",完成加载驱动模块等任务,第二阶段才会执行真正的根文件系统中的 /sbin/init 进程。
这里提到的"某个文件",Linux2.6 内核会同以前版本内核的不同,所以这里暂时使用了"某个文件"这个称呼,后面会详细讲到。
第一阶段启动的目的是为第二阶段的启动扫清一切障爱,最主要的是加载根文件系统存储介质的驱动模块。
我们知道根文件系统可以存储在包括IDE、SCSI、USB在内的多种介质上,如果把这些设备的驱动都编译进内核,可以想象内核会多么庞大、臃肿。
Initrd 的用途主要有以下四种:1. linux 发行版的必备部件linux 发行版必须适应各种不同的硬件架构,把所有的驱动编译进内核是不现实的,initrd 技术是解决该问题的关键技术。
Linux 发行版在内核中只编译了基本的硬件驱动,在安装过程中通过检测系统硬件,生成包含安装系统硬件驱动的initrd,无非是一种即可行又灵活的解决方案。
2. livecd 的必备部件同 linux 发行版相比,livecd 可能会面对更加复杂的硬件环境,所以也必须使用 initrd。
3. 制作 Linux usb 启动盘必须使用 initrdusb 设备是启动比较慢的设备,从驱动加载到设备真正可用大概需要几秒钟时间。
如果把 usb 驱动编译进内核,内核通常不能成功访问 usb 设备中的文件系统。
因为在内核访问 usb 设备时, usb 设备通常没有初始化完毕。
所以常规的做法是,在 initrd 中加载 usb 驱动,然后休眠几秒中,等待 usb设备初始化完毕后再挂载 usb 设备中的文件系统。
4. 在 linuxrc 脚本中可以很方便地启用个性化 bootsplash。
2.Linux2.4内核对 Initrd 的处理流程为了使读者清晰的了解Linux2.6内核initrd机制的变化,在重点介绍Linux2.6内核initrd之前,先对linux2.4内核的 initrd进行一个简单的介绍。
Linux2.4内核的initrd的格式是文件系统镜像文件,本文把其称为image-initrd,以区别后面介绍的linux2.6内核的cpio格式的initrd。
linux2.4内核对initrd 的处理流程如下:1. boot loader把内核以及/dev/initrd的内容加载到内存,/dev/initrd是由boot loader初始化的设备,存储着initrd。
2. 在内核初始化过程中,内核把 /dev/initrd 设备的内容解压缩并拷贝到/dev/ram0 设备上。
3. 内核以可读写的方式把 /dev/ram0 设备挂载为原始的根文件系统。
4. 如果 /dev/ram0 被指定为真正的根文件系统,那么内核跳至最后一步正常启动。
5. 执行 initrd 上的 /linuxrc 文件,linuxrc 通常是一个脚本文件,负责加载内核访问根文件系统必须的驱动,以及加载根文件系统。
6. /linuxrc 执行完毕,真正的根文件系统被挂载。
7. 如果真正的根文件系统存在 /initrd 目录,那么 /dev/ram0 把从 / 移动到/initrd。
否则如果 /initrd 目录不存在, /dev/ram0 把被卸载。
8. 在真正的根文件系统上进行正常启动过程,执行 /sbin/init。
linux2.4 内核的 initrd 的执行是作为内核启动的一个中间阶段,也就是说 initrd 的/linuxrc 执行以后,内核会继续执行初始化代码,我们后面会看到这是linux2.4 内核同 2.6 内核的 initrd 处理流程的一个显著区别。
3.Linux2.6 内核对 Initrd 的处理流程linux2.6 内核支持两种格式的 initrd,一种是前面第 3 部分介绍的 linux2.4 内核那种传统格式的文件系统镜像-image-initrd,它的制作方法同 Linux2.4 内核的 initrd 一样,其核心文件就是 /linuxrc。
另外一种格式的 initrd 是cpio 格式的,这种格式的 initrd 从 linux2.5 起开始引入,使用 cpio 工具生成,其核心文件不再是 /linuxrc,而是 /init,本文把这种 initrd 称为cpio-initrd。
尽管 linux2.6 内核对 cpio-initrd和 image-initrd 这两种格式的 initrd 均支持,但对其处理流程有着显著的区别,下面分别介绍 linux2.6 内核对这两种 initrd 的处理流程。
cpio-initrd 的处理流程1. boot loader 把内核以及 initrd 文件加载到内存的特定位置。
2.内核判断initrd的文件格式,如果是cpio格式。
3.把initrd的内容释放到rootfs中。
4.执行initrd中的/init文件,执行到这一点,内核的工作全部结束,完全交给/init文件处理。
image-initrd的处理流程1. boot loader把内核以及initrd文件加载到内存的特定位置。
2.内核判断initrd的文件格式,如果不是cpio格式,把其作为image-initrd 处理。
3.内核把initrd的内容保存在rootfs下的/initrd.image文件中。
4.内核把/initrd.image的内容读入/dev/ram0设备中,也就是读入了一个内存盘中。
5.接着内核以可读写的方式把/dev/ram0设备挂载为原始的根文件系统。
6. .如果/dev/ram0被指定为真正的根文件系统,那么内核跳至最后一步正常启动。
7.执行initrd上的/linuxrc文件,linuxrc通常是一个脚本文件,负责加载内核访问根文件系统必须的驱动,以及加载根文件系统。
8. /linuxrc执行完毕,常规根文件系统被挂载9.如果常规根文件系统存在/initrd目录,那么/dev/ram0把从/移动到/initrd。
否则如果/initrd目录不存在, /dev/ram0把被卸载。
10.在常规根文件系统上进行正常启动过程,执行/sbin/init。
通过上面的流程介绍可知,Linux2.6内核对image-initrd的处理流程同linux2.4内核相比并没有显著的变化, cpio-initrd的处理流程相比于image-initrd的处理流程却有很大的区别,流程非常简单,在后面的源代码分析中,读者更能体会到处理的简捷。
Using the initial RAM disk (initrd)===================================Written 1996,2000 by Werner Almesberger <werner.almesberger@epfl.ch> and Hans Lermen <lermen@fgan.de>initrd provides the capability to load a RAM disk by the boot loader. This RAM disk can then bemounted as the root file system and programs can be run from it. Afterwards, a new root file system can be mounted from a different device. The previous root (from initrd) is then moved to a directory and can be subsequently unmounted.initrd is mainly designed to allow system startup to occur in two phases, where the kernel comes up with a minimum set of compiled-in drivers, and where additional modules are loaded from initrd.This document gives a brief overview of the use of initrd. A more detailed discussion of the boot process can be found in [1].Operation---------When using initrd, the system typically boots as follows:1) the boot loader loads the kernel and the initial RAM disk 2) the kernel converts initrd intoa "normal" RAM disk and frees the memory used by initrd 3) if the root device is not /dev/ram0, the old (deprecated) change_root procedure is followed. see the "Obsolete root change mechanism" section below. 4) root device is mounted. if it is /dev/ram0, the initrd image is then mounted as root 5) /sbin/init is executed (this can be any valid executable, including shell scripts; it is run with uid 0 and can do basically everything init can do). 6) init mounts the "real" root file system 7) init places the root file system at the root directory using the pivot_root system call 8) init execs the /sbin/init on the new root filesystem, performing the usual boot sequence 9) the initrd file system is removedNote that changing the root directory does not involve unmounting it. It is therefore possible to leave processes running on initrd during that procedure. Also note that file systems mounted under initrd continue to be accessible.Boot command-line options-------------------------initrd adds the following new options:initrd=<path> (e.g. LOADLIN)Loads the specified file as the initial RAM disk. When using LILO, you have to specify the RAM disk image file in /etc/lilo.conf, using the INITRD configuration variable.noinitrdinitrd data is preserved but it is not converted to a RAM disk and the "normal" root file system is mounted. initrd data can be readfrom /dev/initrd. Note that the data in initrd can have any structure in this case and doesn't necessarily have to be a file system image. This option is used mainly for debugging.Note: /dev/initrd is read-only and it can only be used once. As soon as the last process has closed it, all data is freed and /dev/initrdcan't be opened anymore.root=/dev/ram0initrd is mounted as root, and the normal boot procedure is followed, with the RAM disk mounted as root.Compressed cpio images----------------------Recent kernels have support for populating a ramdisk from a compressed cpio archive. On such systems, the creation of a ramdisk image doesn't need to involve special block devicesor loopbacks; you merely create a directory on disk with the desired initrd content, cd to that directory, and run (as an example):find . | cpio --quiet -H newc -o | gzip -9 -n > /boot/imagefile.imgExamining the contents of an existing image file is just as simple:mkdir /tmp/imagefile cd /tmp/imagefile gzip -cd /boot/imagefile.img | cpio -imd --quiet Installation------------First, a directory for the initrd file system has to be created on the "normal" root file system, e.g.# mkdir /initrdThe name is not relevant. More details can be found on the pivot_root(2) man page.If the root file system is created during the boot procedure (i.e. if you're building an install floppy), the root file system creation procedure should create the /initrd directory.If initrd will not be mounted in some cases, its content is still accessible if the following device has been created:# mknod /dev/initrd b 1 250 # chmod 400 /dev/initrdSecond, the kernel has to be compiled with RAM disk support and with support for the initial RAM disk enabled. Also, at least all components needed to execute programs from initrd (e.g. executable format and file system) must be compiled into the kernel.Third, you have to create the RAM disk image. This is done by creating a file system on a block device, copying files to it as needed, and then copying the content of the block device to the initrd file. With recent kernels, at least three types of devices are suitable for that:- a floppy disk (works everywhere but it's painfully slow)- a RAM disk (fast, but allocates physical memory)- a loopback device (the most elegant solution)We'll describe the loopback device method:1) make sure loopback block devices are configured into the kernel 2) create an empty file system of the appropriate size, e.g. # dd if=/dev/zero of=initrd bs=300k count=1 # mke2fs -F -m0 initrd(if space is critical, you may want to use the Minix FS instead of Ext2) 3) mount the file system, e.g. # mount -t ext2 -o loop initrd /mnt 4) create the console device: # mkdir /mnt/dev# mknod /mnt/dev/console c 5 1 5) copy all the files that are needed to properly use the initrd environment. Don't forget the most important file, /sbin/initNote that /sbin/init's permissions must include "x" (execute). 6) correct operation the initrd environment can frequently be tested even without rebooting with the command # chroot /mnt /sbin/initThis is of course limited to initrds that do not interfere with the general system state (e.g. by reconfiguring network interfaces, overwriting mounted devices, trying to start already running demons,etc. Note however that it is usually possible to use pivot_root in such a chroot'ed initrd environment.) 7) unmount the file system # umount /mnt 8) the initrd is now in the file "initrd". Optionally, it can now be compressed# gzip -9 initrdFor experimenting with initrd, you may want to take a rescue floppy and only add a symbolic link from /sbin/init to /bin/sh. Alternatively, you can try the experimental newlib environment [2] to create a small initrd.Finally, you have to boot the kernel and load initrd. Almost all Linux boot loaders support initrd. Since the boot process is still compatible with an older mechanism, the following boot command line parameters have to be given:root=/dev/ram0 rw(rw is only necessary if writing to the initrd file system.)With LOADLIN, you simply executeLOADLIN <kernel> initrd=<disk_image> e.g. LOADLIN C:\LINUX\BZIMAGE initrd=C:\LINUX\INITRD.GZ root=/dev/ram0 rwWith LILO, you add the option INITRD=<path> to either the global section or to the section of the respective kernel in /etc/lilo.conf, and pass the options using APPEND, e.g.image = /bzImage initrd = /boot/initrd.gzappend = "root=/dev/ram0 rw"and run /sbin/liloFor other boot loaders, please refer to the respective documentation.Now you can boot and enjoy using initrd.Changing the root device------------------------When finished with its duties, init typically changes the root device and proceeds with starting the Linux system on the "real" root device.The procedure involves the following steps:- mounting the new root file system- turning it into the root file system- removing all accesses to the old (initrd) root file system- unmounting the initrd file system and de-allocating the RAM diskMounting the new root file system is easy: it just needs to be mounted on a directory under the current root. Example:# mkdir /new-root # mount -o ro /dev/hda1 /new-rootThe root change is accomplished with the pivot_root system call, which is also available via the pivot_root utility (see pivot_root(8) man page; pivot_root is distributed with util-linux version 2.10h or higher [3]). pivot_root moves the current root to a directory under the new root, and puts the new root at its place. The directory for the old root must exist before calling pivot_root. Example:# cd /new-root # mkdir initrd # pivot_root . initrdNow, the init process may still access the old root via its executable, shared libraries, standard input/output/error, and its current root directory. All these references are dropped by the following command:# exec chroot . what-follows <dev/console >dev/console 2>&1Where what-follows is a program under the new root, e.g. /sbin/init If the new root file system will be used with udev and has no valid /dev directory, udev must be initialized before invoking chroot in order to provide /dev/console.Note: implementation details of pivot_root may change with time. In order to ensurecompatibility, the following points should be observed:- before calling pivot_root, the current directory of the invoking process should point to the new root directory- use . as the first argument, and the _relative_ path of the directory for the old root as the second argument- a chroot program must be available under the old and the new root- chroot to the new root afterwards- use relative paths for dev/console in the exec commandNow, the initrd can be unmounted and the memory allocated by the RAM disk can be freed: # umount /initrd # blockdev --flushbufs /dev/ram0It is also possible to use initrd with an NFS-mounted root, see the pivot_root(8) man page for details.Usage scenarios---------------The main motivation for implementing initrd was to allow for modular kernel configuration at system installation. The procedure would work as follows:1) system boots from floppy or other media with a minimal kernel (e.g. support for RAM disks, initrd, a.out, and the Ext2 FS) andloads initrd 2) /sbin/init determines what is needed to (1) mount the "real" root FS (i.e. device type, device drivers, file system) and (2) thedistribution media (e.g. CD-ROM, network, tape, ...). This can be done by asking the user, by auto-probing, or by using a hybridapproach. 3) /sbin/init loads the necessary kernel modules 4) /sbin/init creates and populates the root file system (this doesn't have to be a very usable system yet) 5) /sbin/init invokes pivot_root to change the root file system and execs - via chroot - a program that continues the installation 6) the boot loader is installed 7) the boot loader is configured to load an initrd with the set of modules that was used to bring up the system (e.g. /initrd can be modified, then unmounted, and finally, the image is written from/dev/ram0 or /dev/rd/0 to a file) 8) now the system is bootable and additional installation tasks can be performedThe key role of initrd here is to re-use the configuration data during normal system operation without requiring the use of a bloated "generic" kernel or re-compiling or re-linking the kernel.A second scenario is for installations where Linux runs on systems with different hardware configurations in a single administrative domain. In such cases, it is desirable to generate only a small set of kernels (ideally only one) and to keep the system-specific part of configuration information as small as possible. In this case, a common initrd could be generated with all the necessary modules. Then, only /sbin/init or a file read by it would have to be different.A third scenario is more convenient recovery disks, because information like the location of the root FS partition doesn't have to be provided at boot time, but the system loaded from initrd can invoke a user-friendly dialog and it can also perform some sanity checks (or even some form of auto-detection).Last not least, CD-ROM distributors may use it for better installation from CD, e.g. by using a boot floppy and bootstrapping a bigger RAM disk via initrd from CD; or by booting via aloader like LOADLIN or directly from the CD-ROM, and loading the RAM disk from CD without need of floppies.Obsolete root change mechanism------------------------------The following mechanism was used before the introduction of pivot_root. Current kernels still support it, but you should _not_ rely on its continued availability.It works by mounting the "real" root device (i.e. the one set with rdev in the kernel image or with root=... at the boot command line) as the root file system when linuxrc exits. The initrd file system is then unmounted, or, if it is still busy, moved to a directory /initrd, if such a directory exists on the new root file system.In order to use this mechanism, you do not have to specify the boot command options root, init, or rw. (If specified, they will affect the real root file system, not the initrd environment.) If /proc is mounted, the "real" root device can be changed from within linuxrc by writing the number of the new root FS device to the special file /proc/sys/kernel/real-root-dev, e.g.# echo 0x301 >/proc/sys/kernel/real-root-devNote that the mechanism is incompatible with NFS and similar file systems.This old, deprecated mechanism is commonly called "change_root", while the new, supported mechanism is called "pivot_root".Mixed change_root and pivot_root mechanism------------------------------------------In case you did not want to use root=/dev/ram0 to trigger the pivot_root mechanism, you may create both /linuxrc and /sbin/init in your initrd image./linuxrc would contain only the following:#! /bin/sh mount -n -t proc proc /proc echo 0x0100 >/proc/sys/kernel/real-root-dev umount -n /procOnce linuxrc exited, the kernel would mount again your initrd as root, this time executing /sbin/init. Again, it would be the duty of this init to build the right environment (maybe using the root= device passed on the cmdline) before the final execution of the real /sbin/init. Resources---------[1] Almesberger, Werner; "Booting Linux: The History and the Future" /cv/papers/ols2k-9.ps.gz[2] newlib package (experimental), with initrd example /newlib/[3] Brouwer, Andries; "util-linux: Miscellaneous utilities for Linux" ftp://ftp.win.tue.nl/pub/linux-local/utils/util-linux/。
