2.实战Drupal 7安装配置图文教程
checkpointr77初始化配置文档
航信2012防火墙初始化向导防火墙安装简介及版本一:通过Console选择防火墙版本和安装二:通过WEB UI初始化防火墙三:通过WEB UI配置防火墙基本信息,包括(主机名、接口IP、路由、NTP、SIC)四:通过SmartConsole连接到SmartCenter配置防火墙对象及ClusterXL五:防火墙安装版本为基于GAIA的R75.47一:通过Console选择防火墙版本和安装1:通过Console线连接防火墙,COM口参数设置(bps:9600,Data bits:8,Parity:none,Stop bits:1,Flow control:None)2:启动防火墙,当提示Press any key to …….任意键进入如下界面,下行键选择Reset to factory defaults – Gaia R75.473:当提示将清空所有配置,你是否继续,输入yes4:当命令行进入如下界面开始从Web UI初始化防火墙二:通过WEB UI初始化防火墙1:本机电脑IP配置成192.168.1.xxx/24,通过RJ45网线连接防火墙Mgmt端口,Web界面输入https://192.168.1.1进入如下界面:2:输入User name:admin Password:admin(默认用户名和密码)进入如下界面3:点击Next,进入如下界面,选择Continue with configuration of Gaia R75.474:点击Next进入如下界面,输入密码:njhgfc123$ 并确认密码5:点击Next进入如下界面:选择日期、时间及时区6:点击Next进入如下界面:输入Host Name: TSN-FW4600-JC1A (此主机名仅为举例)7:点击Next进入如下界面:输入分配的管理地址:DHCP Server选择Disabled8:点击Next,出现如下对话框,意思是管理口IP已经改变,为了保持当前浏览器不关闭,系统保留了192.168.1.1为第二个IP地址作为管理。
Drupal安装
Drupal安装一、下载drupal你可以从/project/drupal下载最新版本的drupal。
Drupal已经被翻译成很多种语言。
可以到/project/translations 查看是否有需要的语言包。
Drupal的文件和模块是以“.tar.gz”格式压缩的,且大多数的解压缩软件都能对其进行解压缩。
Linux用户下载和解压缩如果你想使用传统的命令行来下载版本为x.x的drupal,请使用如下的命令(用你想要的版本号替换以下命令中的x.x,如5.7,6.13,7.2等):wget /files/projects/drupal-x.x.tar.gztar -zxvpf drupal-x.x.tar.gz这将创建一个包含所有drupal文件和目录的新目录drupal-x.x/,并且将保持drupal文件和目录的访问权限。
把这个目录移动到你网页服务器的文档根目录或者你的公共HTML目录。
mv drupal-x.x/* drupal-x.x/.htaccess /var/www/html主URL(网站主域名)是在你网页服务器的设置文件中进行设置的。
在进行下一步安装前,你需要知道这个URL。
如果你是在本机安装drupal,那么主URL应该是http://localhost。
如果你是在一个网页服务器上安装drupal,那么主URL应该是一个指定的域名(比如)。
苹果系统用户苹果用户在安装过程中可能还需要阅览以下的手册页:/node/22676特别是当你不知道上面提到的“网页服务器的文档根目录或你的公共HTML目录”在本机的什么位置时。
Windows用户一些像7-zip这样的程序可以用来解压.tar.gz文件。
要使用7-zip,在.tar.gz文件上点击右键,然后在弹出的菜单中选择7-zip->解压到这里。
将出现一个.tar文件。
在.tar文件上点击右键,再次选择7-zip->解压到这里。
稍等一会,最终的drupal文件夹就出现了。
Drupal安装配置过程(含常见报错化解方法)
首先,用VMware workstation 安装Ubuntu 12.04操作系统在终端之下sudo apt-get install apapche2 安装阿帕奇服务器在浏览器中,键入地址:127.0.0.1 如果出现it works 表示阿帕奇服务器安装成功在终端之下,sudo apt-get install drupal7 安装drupal7允许 dbconfig-common 配置你的数据库 (默认数据库: MySQL)然后,向apache注册drupal模块:sudo cp /etc/drupal/7/apache2.conf /etc/apache2/mods-enabled/drupal.conf最后,重启apache服务器:sudo service apache2 restart———————————————————————————————————————在此时,在浏览器地址栏中,键入127.0.0.1/drupal7/install.php 显示正常会出现drupal的安装界面但是此时还不行还得进行下一步的配置———————————————————————————————————————为Drupal手工配置mysql数据库你需要为drupal创建一个数据库用来导入drupal的数据库表,可以通过phpmyadmin或者命令行创建该数据库mysqladmin -u root -p create drupal为drupal创建一个名为drupal的数据库,当然,你可以自定义该数据库名mysql -u root -pmysql> GRANT SELECT, INSERT, UPDA TE, DELETE, CREATE, DROP, INDEX, ALTER, CR EATE TEMPORARY TABLES, LOCK TABLES ON drupal.* TO 'drupaluser'@'localhost' IDEN TIFIED BY 'drupalpass';你肯定不想drupal使用root账号连接数据库,上面命令创建了一个拥有一定权限的不同于mysql root的数据库用户:drupaluser ,drupalpass ,你可以使用其他用户名和密码来替换drupaluser和drupalpass,如果命令成功激活新的权限:mysql> FLUSH PRIVILEGES;退出mysql命令:mysql> \q———————————————————————————————————————此时127.0.0.1/drupal7/install.php 依然正常——————————————————————————————————————————————————————————————————————————————下面开始出现了问题:为drupal配置 PostgreSQL 数据库编辑 /var/www/drupal/sites/default/settings.php 文件,指定drupal使用的用户名,密码和数据库sudo gedit /var/www/drupal/sites/default/settings.php* Database URL format:$db_url = 'pgsql://username:password@localhost/databasename';where username = drupaluser password = drupaluserpass databasename = drupaldb照着网上的教程进行完这一步操作之后,并且成功restart Apache之后,在地址栏键入127.0.0.1/drupal7/install.php 屏幕上一片空白暂时原因不详,待解决于是只好重新gedit setting.php文件,把之前敲进去的三行删除。
实战Drupal7-模块安装教程
一.实战Drupal 7模块安装Drupal7模块安装的步骤:
1.打开本地网站/ 用管理员kesjc登陆
2.安装Captcha模块
3.启用captcha模块
4.汉化模块:汉化captcha模块
1.打开本地网站/ 用管理员kesjc登陆
2.比如以安装Captcha模块为例。
来安装模块在搜索框中输入captcha 点search进行搜索找到captcha模块
复制模块下载链接地址:点右键,进行复制下图红色框gz的下载链接地址:
接下来回到的模块安装画面进行,captcha模块的安装
点击安装新模块。
如下图:
粘贴模块的下载地址:/files/projects/captcha-7.x-1.0.tar.gz
模块安装成功后,出现如下画面:
3.启用captcha模块
点中间那个启用刚安装成功的模块,并返回到启用模块的界面,拉动到页面底部,选中刚安装的模块,选中并启用,保存配置。
如下图:
4.汉化模块:汉化captcha模块
1.打开网址:https:///translate/languages/zh-hans
并下载captcha模块的汉化文件,如下图:
下载captcha汉化包captcha-7.x-1.0.zh-hans.po到本地如下图:
2.安装模块的汉化包:
点翻译后进后下图:
点导入模块汉化包。
即可!
模块汉化包,导入汉化成功!!。
drupal建站教程---全过程
drupal建站教程(全过程)介绍Drupal :建立一个简单的CMS (1)∙安装设置∙Drupal6.x由ctz556 于星期一, 2009-01-05 21:37 发表最近Drupal越来越流行,它是一个伟大的平台,可用于建立内容管理系统和社区驱动的网站。
在这里,我简单的介绍一下Drupal,并为一个虚拟的客户建立一个简单的网站。
我将首先概述客户的需求,安装和配置一些模块,创建用户角色和分配权限,最后我们将新增一些内容。
我们不会修改主题,因为它有点超出了本文的范围。
作者:Steve JamessonSteve Jamesson是一位居住在Asheville, North Carolina州的WEB设计师,他专注于前端开发、内容管理系统(CMS)和大图片创作。
没有编程时他通常会调制一些不错的啤酒,虽然这两个经常同时进行。
虚拟客户让我们先虚拟一个客户SmartMarks是一个很小的市场营销咨询公司,4名员工。
每一位员工想拥有一个自己的博客。
该网站除了博客还需要几个页面:∙Home(首页)∙About(关于)∙Contact(联络)∙Links(链接)∙Blogs(博客)Shannon,企业老板,要完全控制网站。
其余的员工(Bill, Jean, 和Terry)应只允许写博客,但是Bill允许发布Links(链接)。
联络方式是按用户的姓名,电话,电子邮件和短信息。
提交的联络信息只发送给Shannon。
听起来很简单,是吧?我们将利用Drupal,一些核心功能已经内置。
我们可以使用很多核心功能,当然我们需要添加一些其他模块来建立这个网站。
安装某些东西首先,开始安装Drupal,我将在本地计算机进行开发,当然您可以安装在任何您想要的地方。
本教程将使用Drupal 6.x。
安装Drupal,先下载()解压并创建数据库,并访问http://localhost/ (或您自己的开发网址)。
安装过程非常简单。
您需要创建配置文件,可以复制/webroot/sites/default/default.settings.php 到/webroot/sites/default/settings.php,并在您的服务器上设置为可写。
Drupal基础教程
Drupal基础教程一、中文支持 (1)二、网站信息设置 (3)三、用户创建 (4)四、界面基本概念 (5)(一)主题(theme) (5)(二)区块(block) (6)(三)主菜单(main menu) (6)五、内容管理的基本概念 (7)(一)添加内容 (7)(二)内容管理 (8)六、允许论坛和博客 (8)七、创建新的内容类型 (9)(一)读书笔记(书名,文件,阅读日期) (9)(二)View 模块 (11)一、中文支持1.允许 Locale 模块2.导入语言包:1)Configuration-language-简体中文2)添加中文3)设置默认语言为中文4)Configuration-Translate interface-import5)导入语言包6)刷新。
最终效果:二、网站信息设置1.配置—站点信息2.配置网站名称和口号最终效果:三、用户创建1.用户-添加用户2.添加用户设置3.删除用户四、界面基本概念(一)主题(theme)法一:1.安装新主题2.上传主题包并安装最终效果:法二:解压缩主题文件,拷贝到..\acquia-drupal\sites\all\themes 目录下。
(二)区块(block)结构-区块-创建(编辑/查看)最终效果:(三)主菜单(main menu)1.新建内容2.内容设置3.指定到菜单五、内容管理的基本概念(一)添加内容内容的概念:内容包括网页或者媒体文件,都是以节点的形式存在。
1.添加内容2.article最终效果:(二) 内容管理六、允许论坛和博客1. 模块-勾选blog 、forum 后,确定最终效果:刷新后,添加内容多出两项,如下图:七、创建新的内容类型(一)读书笔记(书名,文件,阅读日期)1.结构-内容类型-添加内容类型2.添加新字段3.文件字段的设置4.添加内容-读书笔记最终效果显示:(二)View 模块1.将 view 解压到 ..\acquia-drupal\sites\all\modules 目录下2.开启模块-chaos tools3.开启模块-view ,之后结构中可见 views。
Drupal7 安装 CKEditor 和 IMCE 模块 及配置方法
习惯了使用所见即所得(Wysiwyg)编辑器, Drupal7安装CKEditor编辑器的方法及配置:1.首先要下载模块和编辑器CKEditor Moudle: /project/ckeditorIMCE Module: /project/imceCKEditor 编辑器: /download2.安装 CKEditor Moudle和IMCE Moudle将解压的 CKEditor Moudle 和 IMCE Moudle 模块分别放到sites/all/moudles/ckeditor/sites/all/moudles/imce/然后将CKEditor 编辑器压缩包里面的放到/sites/all/moudles/ckeditor/ckeditor/中, 如下图放好后的路径如:/sites/all/moudles/ckeditor/ckeditor/ckeditor.config.js/sites/all/moudles/ckeditor/ckeditor/ckeditor_php5.php/sites/all/moudles/ckeditor/ckeditor/ckeditor_php4.php/sites/all/moudles/ckeditor/ckeditor/ckeditor/plugins/*/sites/all/moudles/ckeditor/ckeditor/ckeditor/_samples/*/sites/all/moudles/ckeditor/ckeditor/ckeditor/_source/*/sites/all/modules/imce/css/*...3.在 Modules 中启用 CKEditor 和 ICME 这两个模块.4.在Home » Administration » Configuration » Content authoring中配置CKEditor ( 路径为 /admin/config/content/ckeditor)选择Full HTML的edit Operations 进入 CKEditor 配置. ( 路径为/admin/config/content/ckeditor/edit/Full )然后点击EDITOR APPEARANCE选项进去, 在显示的表单中有个Toolbar, 这个是配置CKEditor显示哪些操作标签的.在默认的这行['Image','Media','Flash','Table','HorizontalRule','Smiley','Spe cialChar'], 中添加一个‘IMCE‘ 这样才能在编辑器里显示 IMCE上传图片的图标.添加后为:['Image','IMCE','Media','Flash','Table','HorizontalRule','Smile y','SpecialChar'],接着在Plugins中选中IMCE Window button in toolbar最后在 File browser settings 中的File browser type (Link dialog)File browser type (Image dialog)File browser type (Flash dialog)三个选项都选择IMCE , 如下图5. OK, 配置完毕, 在 add Content 时选择 FULL HTML 就行了.另外也可以配置 Filtered HTML , 在 Toolbar 配置里面设置一下, 比如我的设置如下1 2 3 4 5 6 7 [ ['Source'], ['Cut','Copy','Paste','PasteText','Undo','Redo'], ['Bold','Italic','Underline','Strike','-'], ['NumberedList','BulletedList','-','Outdent','Indent','Blockqu ote'], ['JustifyLeft','JustifyCenter','JustifyRight','JustifyBlock'],]6.显示在 Filtered HTML 的效果为:。
drupal7.x模块开发教程
在本教程中,我们将会建立一个模块,这个模块将列出最近一周内所有新建立的内容节点,比如日志或者论坛的帖子。
本章将讲述如何建立最初的模块文件和目录。
开始之前如果您需要用PHP来查出您站点上的错误,请访问此链接。
它将告诉您如何更改Drupal 的设置,使drupal显示错误信息。
为您的模块命名建立模块的第一步是为它取一个不太长的名字。
这个名字将被用在所有的模块文件名和方法名中。
所以这个名字必须以字母开头并只能有小写字母和下划线。
比如,我们会用"current_posts"作为一个模块名称。
注意:一定要确保根据以上规则来取名,因为它将被用于模块名和方法名的前缀。
当您运行drupal“钩子“时(请参看后面的章节),drupal将只能识别拥有与您模块文件名称相同前缀的钩子。
请注意不要使用与您站点所有主题相同的名称,这样会使drupal混淆。
创建一个模块目录和模块文件假如我们决定用"current_posts“的模块名,我们将会在drupal的根目录的以下路径(sites/all/modules /current_posts)创建一个目录。
或者如果您要把自己的自定义模块与其他模块区分开,您也可以选择这个路径(sites/all/modules/custom /current_posts)。
然后在sites/all/modules/currents_posts目录创建一个名为current_posts.module的文件。
注意drupal 并不识别扩展名为.php的文件。
如果您为模块添加了php的扩展名,那将不会被识别。
drupal 只识别扩展名为.module的php文件。
在Drupal6中,sites/all /modules/是存放自定义模块的理想目录(sites/all/themes/是存放自定义主题的理想目录),因为这个目录存放这所有只与您的站点相关的模块和主题,在您以后升级您的核心模块时,这些自定义模块和主题不会被改写。
RHEL7.0安装详细说明(有图有真相)
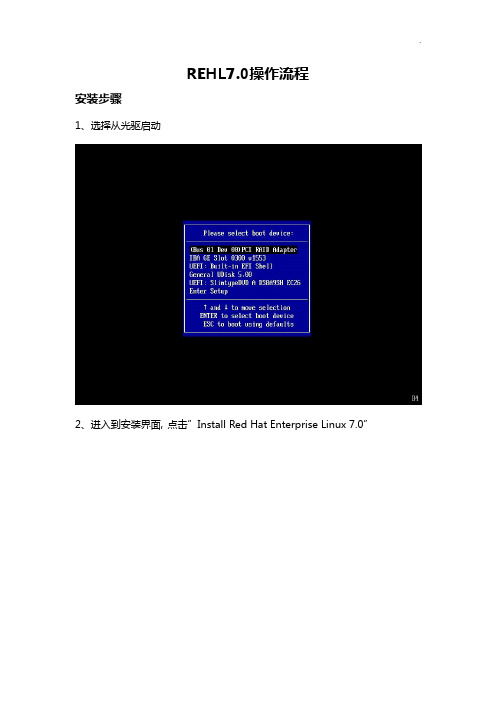
REHL7.0操作流程安装步骤1、选择从光驱启动2、进入到安装界面,点击”Install Red Hat Enterprise Linux 7.0”3、跳过测试media,根据提示,点击[Esc]4、出现引导界面,点击“LOCALIZATION”5、选择Region为亚洲、City为上海,点击左上角Done6、键盘布局选择“English(US)”点击Done7、系统支持语言选择“English”点击Done8、软件安装位置选择默认值,点击Done9、进入软件选择,点击图标10、选择“Server with GUI”,勾选右面所有软件,点击Done11、弹出如下界面,点击“Accept Changes”12、选择系统分区设置,点击“INSTALLATION DESTINATION”13、选择自己配置分区,如图,点击Done14、点击左下角“+”来添加分区15、建立根目录(/)分区,大小配置100G,点击“Add mount point”16、建立启动目录(/boot)分区,大小配置2G,点击“Add mount point”17、建立转换(/swap)分区,大小配置8G,点击“Add mount point”18、所有分区建立完毕,点击Done19、点击“Begin Installation”20、系统开始安装,同时可以设置Root密码,点击“ROOT PASSWORD”21、输入111111后点击Done22、等待大概一小时后,系统安装完毕,点击“Reboot”23、系统重启后进入配置界面,选择“LOCALIZATION”24、勾选同意许可,点击Done25、去掉Kdump前的√,不启用Kdump,点击Forward26、点击Yes27、设置订阅管理注册,选择“No,I prefer to register at a later time”,点击finish。
Centos7安装Docker教程
Centos7安装Docker教程1.安装前必读在安装 Docker 之前,先说⼀下配置,我这⾥是Centos7 Linux 内核:官⽅建议 3.10 以上,3.8以上貌似也可。
注意:本⽂的命令使⽤的是 root ⽤户登录执⾏,不是 root 的话所有命令前⾯要加 sudo1.1 查看当前的内核版本uanme -r1.2使⽤ root 权限更新 yum 包(⽣产环境中此步操作需慎重,看⾃⼰情况,学习的话随便搞)yum -y update注:这个命令不是必须执⾏的,看个⼈情况,后⾯出现不兼容的情况的话就必须update了#升级所有包同时也升级软件和系统内核yum -y update#只升级所有包,不升级软件和系统内核yum -y upgrade1.3卸载旧版本(如果之前安装过的话)yum remove docker docker-common docker-selinux docker-engine2.安装Docker的详细步骤2.1安装需要的软件包, yum-util 提供yum-config-manager功能,另两个是devicemapper驱动依赖yum install -y yum-utils device-mapper-persistent-data lvm22.2设置 yum 源设置⼀个yum源,下⾯两个都可⽤#中央仓库yum-config-manager --add-repo /linux/centos/docker-ce.repo#阿⾥仓库yum-config-manager --add-repo /docker-ce/linux/centos/docker-ce.repo2.3选择docker版本并安装(1)查看可⽤版本有哪些yum list docker-ce --showduplicates | sort -r(2)选择⼀个版本并安装:yum install docker-ce-版本号yum -y install docker-ce-18.03.1.ce出现下图说明安装成功2.4启动 Docker 并设置开机⾃启systemctl start dockersystemctl enable docker。
Drupal安装教程
1.下载Drupal 7:到Drupal 项目页面下载drupal程序包,项目地址:/project/drupal2.解压Drupal 7:将下载下来drupal程序包进行解压缩,得到名为drupal-版本号的目录,为目录改名,如改成drupal73.下载语言包文件:到/translate/languages/zh-hans(linkis external)页面下载对应版本的语言包(.po文件)4.安装语言包文件:将 .po文件放置到drupal7/profiles/standard/translations 目录下5.上传:将drupal7 目录下的所有内容放置/上传到网站根目录6.创建配置文件:进入sites/default 目录,将default.settings.php复制一份,命名为settings.php7.创建用户文件目录:在sites/default 目录下新建一个目录,名为files8.设置权限:如果是Linux平台,请将files 目录的权限设置为777,settings.php设置为web服务器用户可写,如果不清楚,也可先设置为777Drupal 7 中文安装教程1.安装页面:执行完准备工作之后,便可通过浏览器访问drupal网站地址即可看到安装界面,默认选中“Standard”,点击Save and continue 执行下一步2.选择语言:如果执行了准备工作中的第3,4步,则此页面会出现语言选择项,选中Chinese,Simplified(简体中文),点击Save and continue 执行下一步3.Drupal 7 需要phpdom扩展,如果没有安装dom扩展则会出现错误,为PHP安装dom扩展后,重启web服务器即可;如果没有完成准备工作中的第4,5,6步,也会出现错误提示,执行完准备工作中的第4,5,6步,错误消息就会消失4.数据库配置:填写数据库的配置配置信息,包括数据库名、数据库用户名和数据库用户密码,填好之后点击下一步,开始安装Drupal5.安装Drupal:这一步中系统执行Drupal的安装工作,然后进入Drupal站点配置页面6.导入翻译:这一步也由系统自动执行7.修正配置文件权限:如果是Linux平台,执行完此步操作之后,请将sites/default/settings.php文件权限改为只读(444)8.站点设置:在站点设置页面,填写网站名称、网站邮箱、超级管理员帐号、超级管理员邮箱、超级管理员密码、默认时区和简洁链接,配置完成之后,点击"Save and Continue"即完成了Drupal 的安装。
REHL7安装Oracle步骤内容

:wq! #保存退出
使用yum命令自动安装软件
yum clean all #清除yum缓存
yum makecache #缓存本地yum源中的软件包信息
-A INPUT -j REJECT --reject-with hibited
-A FORWARD -j REJECT --reject-with icmp-host-prohibited
COMMIT
:wq! #保存退出
systemctl start iptables.service #启动防火墙
chmod -R 700 /home/oracle/database
chown -R oracle:oinstall /home/oracle/database
修改内核参数
修改后运行sysctl -p 使修改生效
# vi /etc/sysctl.conf
-A INPUT -i lo -j ACCEPT
-A INPUT -m state --state NEW -m tcp -p tcp --dport 22 -j ACCEPT
-A INPUT -m state --state NEW -m tcp -p tcp --dport 80 -j ACCEPT
yum install httpd #安装apache
rpm -ql httpd #查询所有安装httpd的目录和文件
systemctl start httpd.service #启动apache
systemctl stop httpd.service #停止apache
MA2.7服务器安装配置指南
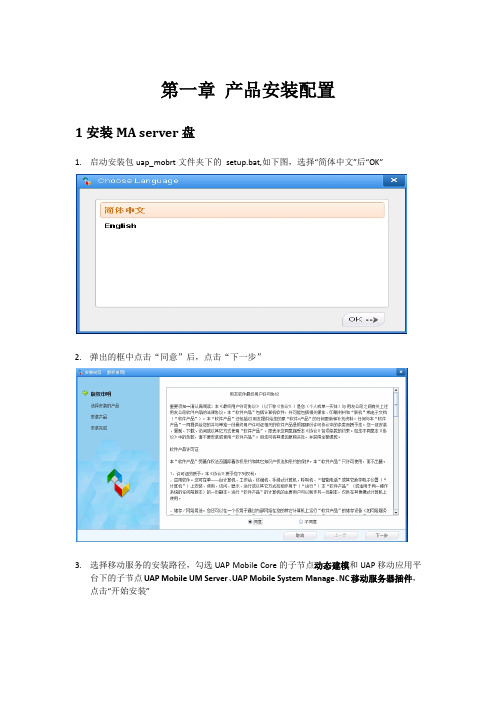
第一章产品安装配置1安装MA server盘1.启动安装包uap_mobrt文件夹下的setup.bat,如下图,选择“简体中文”后“OK”2.弹出的框中点击“同意”后,点击“下一步”3.选择移动服务的安装路径,勾选UAP Mobile Core的子节点动态建模和UAP移动应用平台下的子节点UAP Mobile UM Server、UAP Mobile System Manage、NC移动服务器插件,点击“开始安装”4.如没有路径,会弹出创建路径,点击“确定”即可,安装过程如下,点击“完成”。
5.点击“完成”后弹出如下图,点击“完成”,完成MA服务的安装6.uap_mobrt盘安装完后,接下来安装yonyou_nc_ma盘,运行setup.bat,如下图,选择“简体中文”后“OK”7.弹出的框中点击“同意”后,点击“下一步”8.根据购买的产品情况勾选需要安装的产品模块,安装到前面安装了uap_mobrt的mahome9.安装完成后点击“完成”,至此完成了ma代码的安装。
2产品配置2.1设置服务访问IP和端口该端口主要是移动端访问MA服务时的IP和端口进入MA安装目录\bin文件夹,启动sysConfig.bat,弹出的界面中,双击“服务器”,点击读取,设置移动服务所在机器IP和服务端口,点击“保存”注:检查下虚拟机参数中-Dfile.encoding值是否为UTF-8,如果不是则需要改为UTF-8,否则影响移动端数据库初始化。
2.2设置数据源数据源主要设置连接建立的MA数据库。
点击数据源节点,点击修改,连接oracle为例需要设置数据库类型,数据源名称:设置为design(其中数据源名称必须是design)数据库地址和端口:连接oracle所在机器的ip和连接oracle服务访问端口数据库ODBC:为oracle全局数据库的服务名,数据库OID标识:设置为数字+大写字母如1T 即可用户名和密码:建立连接WA数据库的用户和密码,设置完成后点击“确定” ,点击“测试”,测试成功后,点击“保存”文件服务器配置要和NC端文件服务配置一致,涉及地址、端口、存储路径。
MA2.7服务器安装配置指南

第一章产品安装配置1安装MA server盘1.启动安装包uap_mobrt文件夹下的setup.bat,如下图,选择“简体中文”后“OK”2.弹出的框中点击“同意”后,点击“下一步”3.选择移动服务的安装路径,勾选UAP Mobile Core的子节点动态建模和UAP移动应用平台下的子节点UAP Mobile UM Server、UAP Mobile System Manage、NC移动服务器插件,点击“开始安装”4.如没有路径,会弹出创建路径,点击“确定”即可,安装过程如下,点击“完成”。
5.点击“完成”后弹出如下图,点击“完成”,完成MA服务的安装6.uap_mobrt盘安装完后,接下来安装yonyou_nc_ma盘,运行setup.bat,如下图,选择“简体中文”后“OK”7.弹出的框中点击“同意”后,点击“下一步”8.根据购买的产品情况勾选需要安装的产品模块,安装到前面安装了uap_mobrt的mahome9.安装完成后点击“完成”,至此完成了ma代码的安装。
2产品配置2.1设置服务访问IP和端口该端口主要是移动端访问MA服务时的IP和端口进入MA安装目录\bin文件夹,启动sysConfig.bat,弹出的界面中,双击“服务器”,点击读取,设置移动服务所在机器IP和服务端口,点击“保存”注:检查下虚拟机参数中-Dfile.encoding值是否为UTF-8,如果不是则需要改为UTF-8,否则影响移动端数据库初始化。
2.2设置数据源数据源主要设置连接建立的MA数据库。
点击数据源节点,点击修改,连接oracle为例需要设置数据库类型,数据源名称:设置为design(其中数据源名称必须是design)数据库地址和端口:连接oracle所在机器的ip和连接oracle服务访问端口数据库ODBC:为oracle全局数据库的服务名,数据库OID标识:设置为数字+大写字母如1T 即可用户名和密码:建立连接WA数据库的用户和密码,设置完成后点击“确定” ,点击“测试”,测试成功后,点击“保存”文件服务器配置要和NC端文件服务配置一致,涉及地址、端口、存储路径。
实战Drupal7内核升级和更新(图文教程)
实战Drupal7内核升级和更新实战Drupal7内核升级和更新:1.Drupal7源码备份和数据库备份2.下载Drupal7最新包装程序并上传到网站目录3.到模块页面执行update.php,进行更新本次Drupal7升级是在linux环境下进行的,所有的操作都是以linux为例进这行讲解的。
1.Drupal7源码备份和数据库备份(1)Drupal7源码备份在根目录下建立网站备份目录[root@AY131014*********e11Z /]# mkdir /site_bak将网站的根目录下的所有源码复制到/site_bak/目录下[root@AY131014*********e11Z /]# cp -R /alidata/www// /site_bak/查看网站源码备份成功[root@AY131014*********e11Z /]# ll /site_bak/total 4drwxr-xr-x 10 root root 4096 May 15 17:41 [root@AY131014*********e11Z /]#(2)Drupal7 mysql数据库备份在linux下用管理员登陆mysql数据库[root@AY131014*********e11Z ]# mysql -uroot -pEnter password:Welcome to the MySQL monitor. Commands end with ; or \g.Your MySQL connection id is 394955Server version: 5.1.63-log Source distributionCopyright (c) 2000, 2011, Oracle and/or its affiliates. All rights reserved.Oracle is a registered trademark of Oracle Corporation and/or itsaffiliates. Other names may be trademarks of their respectiveowners.Type 'help;' or '\h' for help. Type '\c' to clear the current input statement.用show查看要备份的数据库名为v_kesjc_commysql> show databases;+--------------------+| Database |+--------------------+| information_schema || film_yxtx_tv || kesjc_com || kesyy_com || mysql || test || v_kesjc_com || www_kestv_com || www_yxwg_tv |+--------------------+9 rows in set (0.00 sec)mysql>用which查看mysql数据库的安装目录[root@AY131014*********e11Z ]# which mysql/alidata/server/mysql/bin/进入mysql数据库的安装目录[root@AY131014*********e11Z ]# cd /alidata/server/mysql/bin/Mysqldump 备份数据库v_kesjc_com[root@AY131014*********e11Z bin]#./mysqldump -u root -p v_kesjc_com > /site_bak/v_kesjc_com.sqlEnter password:查看刚备份的数据库文件v_kesjc_com.sql[root@AY131014*********e11Z bin]# ll /site_bak/total 4840drwxr-xr-x 10 root root 4096 May 15 17:41 -rw-r--r-- 1 root root 4935913 May 15 18:28 v_kesjc_com.sql利用gzip压缩数据并备份,命令如下:./mysqldump -u root -p v_kesjc_com | gzip > /site_bak/v_kesjc_com.sql.gzMysqldump 还原数据库v_kesjc_com[root@AY131014*********e11Z bin]#mysql -u root -p v_kesjc_com< /site_bak/v_kesjc_com.sql利用gzip解压缩数据并还原,命令如下:#gzip < /site_bak/v_kesjc_com.sql.gz | mysql -u root -p v_kesjc_com[root@AY131014*********e11Z bin]# ll /site_bak/total 5536drwxr-xr-x 10 root root 4096 May 15 17:41 -rw-r--r-- 1 root root 4935913 May 15 18:28 v_kesjc_com.sql-rw-r--r-- 1 root root 706872 May 15 18:49 v_kesjc_com.sql.gz[root@AY131014*********e11Z bin]#2.下载Drupal7最新包装程序并上传到网站目录(1)下载drupal7最新版:/files/projects/drupal-7.28.tar.gz下载并解压最新版如下图:(2)将之前备份的sites目录,复制到刚解压的drupal-7.28目录下将备份目录中的有变动的目录和文件复制到最新安装包目录(3)打开drupal-7.28目录,将该目录下的所有内容上传至网站根下3.到模块页面执行update.php,进行更新更新目录的所有权和读取权限如下:[root@AY131014*********e11Z www]# chown -R vkesjc:vkesjc [root@AY131014*********e11Z www]# chmod -R 755 上传完成后,到模块。
Linux 下安装配置 JDK7 配置环境(debian 7)
Linux 下安装配置JDK7 配置环境(debian 7)自从从Oracle收购Sun近三年来,已经有很多变化。
早在8月,甲骨文将“Operating System Distributor License for Java”许可证终结,这意味着第三方将不可以依据这一许可分发他们的软件包。
因此Ubuntu Linux已经开始禁用所有机器上的Oracle JDK浏览器插件,并很快会从档案中删除软件包。
公司指出,禁用Oracle的插件将可以帮助提高安全性,因为这些插件已经被证实包含许多漏洞,虽然这是一个事实,但真正的原因恐怕是Sun的JDK在升级时会清理掉用户机器上自认为不安全的软件,大多数PC用户认为这样很安全,但通常基于UNIX系统的用户并不这么认为。
Oracle的JDK被废弃后,OpenJDK将取代它的位置在Ubuntu及其它Linux中默认安装。
虽然很多Linux发行版现在已经自带OpenJDK,但是在开发过程中与Oracle-JDK(SUN-JDK)还是略有不同。
通常,Java开发人员还是以Oracle-JDK为标准来进行开发。
下面介绍一下Linux下的JDK安装与配置,这里使用的Linux发行版是Ubuntu 12.04。
1.下载JDK目前最新的JDK版本是:Java SE Development Kit 7u5下载地址:/technetwork/java/javase/downloads/jdk7-downloads-1880260.html 查看最新:/technetwork/java/javase/downloads/index.html2.解压安装我们把JDK安装到这个路径:/usr/lib/jvm如果没有这个目录(第一次当然没有),我们就新建一个目录cd /usr/libsudo mkdir jvm建立好了以后,我们来到刚才下载好的压缩包的目录,解压到我们刚才新建的文件夹里面去,并且修改好名字方便我们管理sudo tar zxvf ./jdk-7-linux-i586.tar.gz -C /usr/lib/jvmcd /usr/lib/jvmsudo mv jdk1.7.0_05/ jdk73.配置环境变量gedit ~/.bashrc在打开的文件的末尾添加export JAVA_HOME=/usr/lib/jvm/jdk7export JRE_HOME=${JAVA_HOME}/jreexport CLASSPATH=.:${JAVA_HOME}/lib:${JRE_HOME}/libexport PATH=${JAVA_HOME}/bin:$PATH保存退出,然后输入下面的命令来使之生效source ~/.bashrc4.配置默认JDK由于一些Linux的发行版中已经存在默认的JDK,如OpenJDK等。
Drupal7模块Views实站教程
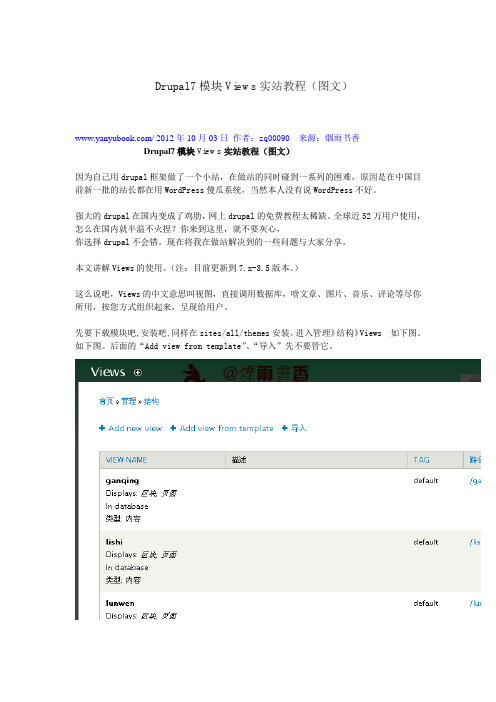
Drupal7模块Views实站教程(图文)/ 2012年10月03日作者:zq00090来源:烟雨书香Drupal7模块Views实站教程(图文)因为自己用drupal框架做了一个小站,在做站的同时碰到一系列的困难,原因是在中国目前新一批的站长都在用WordPress傻瓜系统,当然本人没有说WordPress不好。
强大的drupal在国内变成了鸡肋,网上drupal的免费教程太稀缺。
全球近52万用户使用,怎么在国内就半温不火捏?你来到这里,就不要灰心,你选择drupal不会错。
现在将我在做站解决到的一些问题与大家分享。
本文讲解Views的使用。
(注:目前更新到7.x-3.5版本。
)这么说吧,Views的中文意思叫视图,直接调用数据库,啥文章、图片、音乐、评论等尽你所用,按您方式组织起来,呈现给用户。
先要下载模块吧,安装吧,同样在sites/all/themes安装。
进入管理》结构》Views 如下图。
如下图。
后面的“Add view from template”、“导入”先不要管它。
很好,现在我们可以来点击“Add new view”标签添加一个view,即创建一个页面。
为“View name”添加一个名字(drupal xuexi),最好是英文或拼音名,下面会自动获取相同的路径名。
当然中文名(drupal 学习)可以在下面的“Create a page”页面标题里或后面的高级设置随时修改。
接下来选择你喜欢的“Display format”的显示规则:有下拉式、横排、竖排、表格等,本人选择"HTML list"如/首页样式。
再调整“Items to display”文章的显示数量。
选择好之后,点击"save & exit",即创建了一个“drupal学习”的区块,然后调用它。
好嘞~我们点击"continue & edit"我们需要编辑一些高级功能来美化它。
安装指南:PanelView Plus 7 Performance和PanelView 5500终端
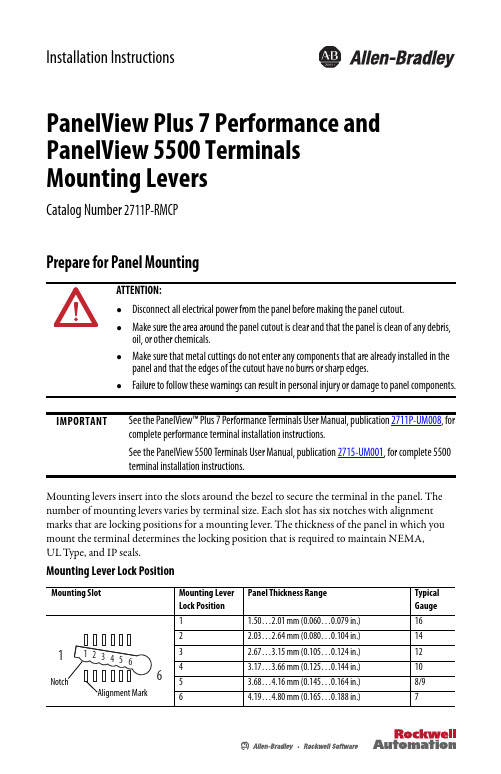
Installation InstructionsPanelView Plus 7 Performance and PanelView 5500 Terminals Mounting LeversCatalog Number 2711P-RMCPPrepare for Panel MountingMounting levers insert into the slots around the bezel to secure the terminal in the panel. The number of mounting levers varies by terminal size. Each slot has six notches with alignment marks that are locking positions for a mounting lever. The thickness of the panel in which you mount the terminal determines the locking position that is required to maintain NEMA, ULType, and IP seals.Mounting Lever Lock PositionATTENTION:•Disconnect all electrical power from the panel before making the panel cutout.•Make sure the area around the panel cutout is clear and that the panel is clean of any debris, oil, or other chemicals.•Make sure that metal cuttings do not enter any components that are already installed in the panel and that the edges of the cutout have no burrs or sharp edges.•Failure to follow these warnings can result in personal injury or damage to panel components.IMPORTANTSee the PanelView™ Plus 7 Performance Terminals User Manual, publication 2711P-UM008, for complete performance terminal installation instructions.See the PanelView 5500 Terminals User Manual, publication 2715-UM001, for complete 5500 terminal installation instructions.2 PanelView Plus 7 Performance and PanelView 5500 Terminals Mounting LeversMounting Lever Orientation and Lock SequenceIMPORTANT The mounting lever orientations that are shown are required to maintain NEMA, UL Type, and IP seals. If you require a NEMA, UL Type, or IP seal, do not use a mounting lever in a differentorientation than shown.6.5-in. Only Touch – 6 Levers 6.5-in. Keypad and Touch – 8 LeversRockwell Automation Publication VIEW-IN001A-EN-P - March 2015PanelView Plus 7 Performance and PanelView 5500 Terminals Mounting Levers 3Rockwell Automation Publication VIEW-IN001A-EN-P - March 2015Mount the Terminal in a PanelFollow these steps to mount the terminal in a panel cutout.e the cutout template that is shipped with your terminal to mark the cutout dimensions and cut the hole in the panel.See Panel Cutout Dimensions on page 6 if you do not have the cutout template.2.Verify the sealing gasket is present on the terminal.This gasket forms a compression type seal. Do not use sealing compounds.3.Insert and stabilize the terminal in the panel cutout.a.Insert the mounting levers in the top corner slots by using the orientation inMounting Lever Orientation and Lock Sequence on page 2 and rotate the round side of the mounting levers toward the panel.This installation example uses the 10.4-in. touch screen terminal.b.Tilt the terminal toward the panel cutout and guide the terminal upward into the cutout; make sure that the mounting levers stay intact.IMPORTANTCatalog number 2711P-RMCP mounting levers are used only with the PanelView 5500 and PanelView Plus 7 Performance terminals. Do not use these mounting levers with other PanelView terminals.TIPThe mounting levers in the top corner slots help to stabilize the terminal in thepanel while you install the remaining mounting levers.TIP The mounting levers for PanelView Plus 7 Performance and PanelView 5500 terminals are black. Do not use the gray mounting levers; they arenot compatible with these terminals.4 PanelView Plus 7 Performance and PanelView 5500 Terminals Mounting LeversRockwell Automation Publication VIEW-IN001A-EN-P - March 2015c.Pull the top of the terminal toward you to verify that the mounting levers are still intact and the terminal is stabilized in the panel.d.Insert the remaining mounting levers in the slots by using the orientations inMounting Lever Orientation and Lock Sequence on page 2 that are correct for your terminal. e.Reposition the top two mounting levers so that the flat side of the levers makes contact with the panel.The direction that you rotate the mounting levers varies for each terminal size.4.Slide and rotate each lever to a notch that is one or two positions greater than the final lock position; start with the first lever in the sequence.For example, if the final lock position is 3, slide the lever to notch 4 or5.a.See Mounting Lever Lock Position on page 1 for the final lock position of the mounting levers.b.See Mounting Lever Orientation and Lock Sequence on page 2 for the locking sequence.c.Rotate each mounting lever until the flat side comes in contact with the panel.Use an erasable marker or grease pencil to mark the alignment marks for visibilityof the slot positions and to mark the final lock position.Flat Side in Contact With the PanelPanelView Plus 7 Performance and PanelView 5500 Terminals Mounting Levers 55.Adjust each mounting lever to its final lock position by using the locking sequence in Mounting Lever Orientation and Lock Sequence on page 2.a.Unlock mounting lever one in the sequence by rotating it away from the bezel.b.With the mounting lever positioned vertically to the slot, slide the mounting lever to the final locking position as shown in Mounting Lever Lock Position on page 1.The outer notch of the mounting lever aligns with the bezel indentation.c.Carefully rotate the mounting lever back toward the panel.d.Lock the remaining mounting levers to their final position.6.Inspect all mounting levers to make sure each is in the correct locked position.The notch on the outside of mounting lever shows its locked position. These two views show the mounting levers that are locked in position 3.TIPIf the mounting levers are over torqued, they are designed to break off the pin to guard against damage to the bezel. If a pin is broken, turn the mounting lever over and use the other pin to continue the installation.ATTENTION: All mounting levers must be in the correct locked position and follow the correct lever installation sequence to provide an adequate gasket seal between the terminal and the panel. Rockwell Automation assumes no responsibility for water or chemical damage to the terminal or other equipment within the enclosure because of improper installation.6 PanelView Plus7 Performance and PanelView 5500 Terminals Mounting LeversRockwell Automation Publication VIEW-IN001A-EN-P - March 2015Panel Cutout DimensionsAdditional InformationThese documents contain additional information concerning related products from Rockwell Automation.Y ou can view or download publications at /literature/. T o order paper copies of technical documentation, contact your local Allen-Bradley distributor or Rockwell Automation sales representative.Terminal Size Input Type Height, mm (in.)Width, mm (in.)6.5-in.Keypad and touch 142 (5.59)237 (9.33)Touch 142 (5.59)184 (7.24)9-in.Touch 162 (6.38)252 (9.92)10.4-in.Keypad and touch 224 (8.82)335 (13.19)Touch 224 (8.82)269 (10.59)12.1-in.Touch 218 (8.58)312 (12.28)15-in.Keypad and touch 290 (11.42)418 (16.46)Touch 290 (11.42)353 (13.90)19-in.Touch383 (15.08)457 (17.99)ResourceDescriptionPanelView Plus 7 Performance Terminals User Manual, publication 2711P-UM008Provides details on how to install, configure, and operate the PanelView Plus 7 Performance terminals.PanelView 5500 Terminals User Manual, publication 2715-UM001Provides details on how to install, configure, and operate the PanelView 5500 terminals.Cutout Templates for PanelView Plus 7 Performance and PanelView 5500 Terminals, publication VIEW-DS001Provides cutout templates for the terminals.PanelView Plus 7 Performance and PanelView 5500 Terminals Mounting Levers 7 Notes:Rockwell Automation Publication VIEW-IN001A-EN-P - March 2015Publication VIEW-IN001A-EN-P - March 2015Copyright © 2015 Rockwell Automation, Inc. All rights reserved. Printed in the U.S.A.Rockwell Automation SupportRockwell Automation provides technical information on the Web to assist you in using its products.At /support you can find technical and application notes, sample code, and links to software service packs. You can also visit our Support Center at https:/// for software updates, support chats and forums, technical information, FAQs, and to sign up for product notification updates.In addition, we offer multiple support programs for installation, configuration, and troubleshooting. For more information, contact your local distributor or Rockwell Automation representative, or visit /services/online-phone .Installation AssistanceIf you experience a problem within the first 24 hours of installation, please review the information that's contained in this manual. You can also contact a special Customer Support number for initial help in getting your product up and running.New Product Satisfaction ReturnRockwell Automation tests all of its products to help ensure that they are fully operational when shipped from the manufacturing facility. However, if your product is not functioning and needs to be returned, follow these procedures.Documentation FeedbackYour comments will help us serve your documentation needs better. If you have any suggestions on how to improve this document, complete this form, publication RA-DU002, available at /literature/.United States or Canada 1.440.646.3434Outside United States or CanadaUse the Worldwide Locator at/rockwellautomation/support/overview.page , or contact your local Rockwell Automation representative.United States Contact your distributor. You must provide a Customer Support case number (call the phone number above to obtain one) to your distributor to complete the return process.Outside United StatesPlease contact your local Rockwell Automation representative for the return procedure.Allen-Bradley, PanelView, Rockwell Software, and Rockwell Automation are trademarks of Rockwell Automation, Inc.Trademarks not belonging to Rockwell Automation are property of their respective companies.Rockwell Otomasyon Ticaret A.Ş., Kar Plaza İş Merkezi E Blok Kat:6 34752 İçerenköy, İstanbul, T el: +90 (216) 5698400Rockwell Automation maintains current product environmental information on its website at/rockwellautomation/about-us/sustainability-ethics/product-environmental-compliance.page .*PN-304068*PN-304068。
- 1、下载文档前请自行甄别文档内容的完整性,平台不提供额外的编辑、内容补充、找答案等附加服务。
- 2、"仅部分预览"的文档,不可在线预览部分如存在完整性等问题,可反馈申请退款(可完整预览的文档不适用该条件!)。
- 3、如文档侵犯您的权益,请联系客服反馈,我们会尽快为您处理(人工客服工作时间:9:00-18:30)。
一.实战Drupal 7安装图文教程Drupal7成功安装的6大步骤:
1.打开官方网站https:/// 下载安装包
2.打开官方网站https:/// 查看安装文档
3.新drupal7 mysql数据库并安装drupal7
4.安装drupal7的中文汉化包
5.Drupal7安装过程中报错的三种解决办法
6.进入网站设置画面,并成功安装完drupal7
1.打开官方网站https:/// 下载安装包
进入下载页面进行下载:
2.打开官方网站https:/// 查看安装文档
3.安装drupal7
(1)先将drupal7解压到环境的根下。
F:\DrMeng_Web_Site\
将解压drupal-7.27目录中的内容复制到根目录下
(2)用phpmyadmin建立一个drupal7的数据库。
/phpmyadmin/输入用户名:root密码:hncctv
创建一个测试数据库:drupal727
(3)在ie中访问/ 就直接安装drupal7
4.安装drupal7的中文汉化包
首先:安装drupal7的中文汉化包
点击Translations Homepage进入下载汉化包页面:
下载汉化包后将它放到这个目录:
F:\DrMeng_Web_Site\\profiles\standard\translations\drupal-7.27.zh-hans.po
如下图
汉化包放好后。
返回drupal7安装界面,点如下链接
进入开始安装进度画面
5.Drupal7安装过程中报错的三种解决办法
drupal初始化错误解决-An AJAX HTTP error occurred. HTTP Result Code: 500drupal7 初始化翻译时出错:
导入翻译出错
请到错误页面
An AJAX HTTP error occurred. HTTP Result Code: 500 Debugging information follows. Path: http://127.0.0.5/drupal/install.php?profile=standard&locale=zh-hans&i d=2&op=do StatusText: Internal Server Error ResponseText:
这里如果有报错。
请用下面的方法来解决
解决方法(一)打开php.ini 修改
memory_limit = 1280M
max_execution_time = 3000
解决方法(二)打开\sites\default\settings.php文件,在最后增加以下两行:
ini_set('memory_limit', '1280M'); //加大php的内存也可以在php.ini 中设置
ini_set('max_execution_time', 200); //加大页面执行时间 php.ini中的默认值是30 (秒)
解决方法(三)
但这种办法还是过不去。
下面给出补充方法:
1、修改php.ini中的下列参数值
max_execution_time = 300
max_input_time = 300
memory_limit = 1280M
然后重启Web服务器
2、在Drupal安装时进行语言包安装,有一个重要的组件还未启用,所以安装不成功在所难免。
最好是先安装英文版,然后安装启用组件(Locate)(见图一),再导入语言包(见图二)。
以后是安装的过程,最后一张是显示翻译率。
图一
图二
6.进入网站设置画面,并成功安装完drupal7
在地址栏输入测试网站如下面图:。
