EQUES智能猫眼产品功能比较表-新款
130万像素更清晰,小维智能猫眼K2新品惊艳上市!
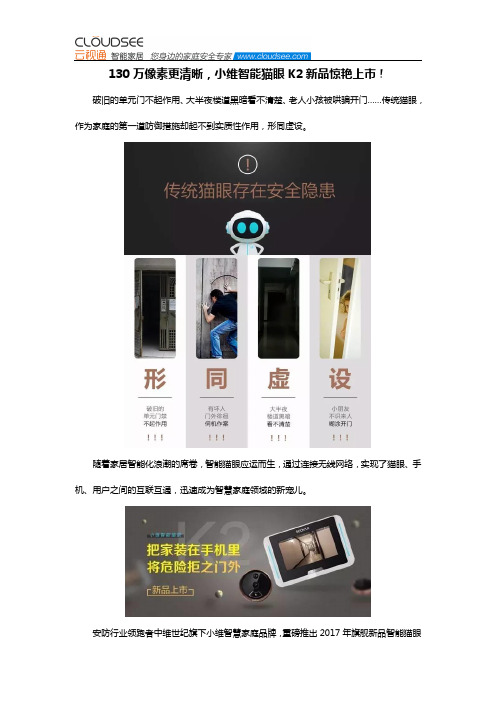
130万像素更清晰,小维智能猫眼K2新品惊艳上市!破旧的单元门不起作用、大半夜楼道黑暗看不清楚、老人小孩被哄骗开门……传统猫眼,作为家庭的第一道防御措施却起不到实质性作用,形同虚设。
随着家居智能化浪潮的席卷,智能猫眼应运而生,通过连接无线网络,实现了猫眼、手机、用户之间的互联互通,迅速成为智慧家庭领域的新宠儿。
安防行业领跑者中维世纪旗下小维智慧家庭品牌,重磅推出2017年旗舰新品智能猫眼K2,让你一手掌握家门安全,把危险拒之门外!老人、小孩再也不会为看不清、够不到而发愁了小维智能猫眼K2最大的优势就是“内外兼修”:门外有猫头,并带有门铃按键;室内有4.3寸高清显示屏,可即时显示门外画面。
无需趴在门上就能辨别来访者,在室内就可一览无余,省心又安心。
APP远程视频对讲,随时掌握门外任何风吹草动当你在小区里遛弯,远道而来的朋友突然登门“造访”,让他们在楼道苦等俩小时?或许这是以前的做法。
而现在,当你家的门铃被按响时,手机APP会自动接收到信息,实时显示来访人员面貌,并能实现双向语音对讲,就是这么简单!当你出差家里没人,不法分子在门外徘徊逗留,这种潜在的危险怎样扼杀在摇篮之中?智能猫眼K2可以自动捕捉徘徊在门口的可疑人员,并抓拍图片同步推送到手机APP,随时了解来访者信息,不放过门外任何可疑情况。
漆黑夜晚不用怕,超强红外夜视看得清小维智能猫眼K2拥有130万高清像素,猫头上面镶嵌了四颗led红外夜视灯,会根据光线的强弱自动开启。
即使在伸手不见五指的夜里,我们也可以毫不费力地看清门外一切,再也不会因半夜的门铃声而担惊受怕了。
可拆卸电池,让充电更自由既然是一款智能产品,耗电量也是大家比较关心的问题。
相比市面上同类产品耗电快、充电方式繁琐的使用体验,小维智能猫眼K2在这方面表现出色。
K2电池采用3000mAh 锂电池,可拆卸设计,并配备1个座充。
再也不会担心出去旅游,家里的猫眼“罢工”了!免施工,轻松完成安装安装难不难?只要我们原来的防盗门上有猫眼孔,简单四步即可轻松完成安装。
猫眼MSC-CY300码表中文说明书

感谢您购买 CATEYE Q3a Multi-Sport Computer 多功能运动手表。 Q3a 是一款附加有秒表功能的手表型心率监测器,能协助运动选手们更安全、 更科学地进行运动训练。 整合型踏频/速度传感器与心率传感器两者皆采用 2.4 GHz 频率数字无线技 术此种用于无线网络等日常设备的相同技术。此一技术可使计测不易受外部 信号干扰,能够记录和保存高信赖度的数据。 使用前请彻底阅读本份使用手册与熟悉手表的各项功能,并将手册妥为保存 以供未来参考之用。
继续 简体中文 -3
海拔高度与大气压力 之间关系. ........................................ 62 与天气和海拔高度 有关之知识. ................................... 62 心率训练..................................63 目标心率区. ................................... 63 比赛训练. ........................................ 66 目标区之运用. .............................. 67 故障排除..................................68 显示问题. ........................................ 68 操作问题. ........................................ 70 手表之防水性..........................71 从事水上和室外活动之前. ..... 71 更换电池..................................71 手表. .................................................. 72 心率传感器. ................................... 72 速度传感器. ................................... 72 维护. .........................................73 备用配件..................................73 画面操作之流程图. ..................74 规格. .........................................76 注册. .........................................78 有限保固..................................78 索引. .........................................79
猫眼cateye_velo8中文说明书

感应器和磁铁问的空隙是否过大? 磁铁的中心和感应器的标示线是否排成一列?
重新调整磁铁和感应器的位置(中间的空隙必须要小于5mm) 电线是否有损坏?
即使电线的外表看起来正常,也有可能遭受到损害。
更换新的固定座和感应器。
是否有任何东西粘于码表和固定座的接触点上? 用布清除接触点
在雨中使用时,目前的速度没有出现。 在接触的地方将水及灰尘擦除,并涂上防水硅脂(silicon grease)。
L (cm)
57-559 26 x 3.00 217
27 x 1
215
27 x 1-1/8 216
32-630 27 x 1-1/4 216
27 x 1-3/8 217
650 x 35A 209
650 x 38A 212
650 x 38B 211
18-622 700 x 18C 207
700 x 19C 208
10目前速度00402999kmh00301850mphvelo8velo5tmdstavmxcalodoclocktmdstavmxcalcmvelo169955016651501699691n169956016993021699307169930316993041699760有限保固重新設定重新設定重新設定重新設定cr2032模式模式模式模式模式模式模式模式模式模式模式模式模式模式模式模式模式模式模式时间电池托座感应组件锂电池cr2032重型金属线及托座感应组件中心固定托座组件长aero把手托座感应组件柄部固定托座组件复合轮子磁铁设定全部清除设定模式2个按键选择kmh或是mph设定设定结束选择kmh设定模式2630027118271142713865035a65038a65038b70018c70019c70020c70023c70025c70028c70030c70032c700ctubular70035c70038c70040c217215216216217209212211207208209210211214217216213217218220轮胎尺寸cm141501417516150161751815018175201752013822138221122434tubular24118241142417524200242125267826159261652612526118261382611226140261502617526195262002621026212526235102106119120134135152162177179175178179191189192196192191195195190207210200201202205206207207208轮胎尺寸cm轮子尺寸57559326301862220622236222562228622326223762240522etrto47305474064750723571375904055947559505595455957559设定结束设定轮胎尺寸轮胎尺寸设定结束快速设定尺寸详细设定尺寸设定标准磁铁资料重设时间设定重新设定设定时间设定结束设定设定设定设定设定2年保固
埃菲斯智能锁A500说明书
埃菲斯智能锁A500说明书1.初始状态1.1初始状态下管理员密码为“123456”;1.2初始状态需通过管理员密码,进入系统菜单增加用户才可正常开门。
注:“123456”为出厂默认的管理员密码,当注册管理员用户后,该密码会自动失效,下次进入系统菜单需要验证已经注册的管理员指纹或密码。
2.操作概述◆系统菜单:唤醒状态下按“*#”号键后可开始验证管理员用户,并进入系统菜单,支持指纹/密码验证,不支持刷卡进入系统菜单----管理员用户。
◆开门:直接刷卡/输入密码/指纹正常开门,不进入系统菜单----管理员/普通用户。
◆系统导航键:系统将播报数字对应的语音内容,通过选定数字来进入对应功能设置。
◆门铃键:在系统主界面按“门铃符号按键”触发门铃。
3.开锁用户管理与信息概述3.1用户信息包括:用户指纹信息(1个),用户密码信息(1个),用户刷卡信息(1个);用户ID号将对应用户权限等级信息。
3.2用户权限等级分为管理员用户,普通用户。
普通用户无法进行相关设置,只可验证身份开门;管理员用户除验证开门外,还可进入系统配置菜单。
3.3用户信息可创建,修改,删除;不能删除当前登录的管理员信息。
3.4开锁用户存储个数为100组,开锁记录信息为512个,此为门锁本地贮存的开锁日志,而云端开锁日志不限制个数。
注:密码不可重复设置,即用户A设置过的密码,用户B不可再重复使用。
4.密码开锁4.1有效密码位为最低不少于6位,最高不超过9位。
两个管理级别的密码,分为管理员密码,普通用户密码;4.2支持虚位密码,输入密码不超过12位,其中有连续的密码信息在其中,即可开锁。
4.3连续输入密码错误超过5次,门锁进入锁定状态180s。
5.指纹开锁5.1使用录入的手指触摸指纹头接触面,即可开锁;5.2胁迫指纹输入时,门锁也可打开,并推送信息给用户指定的手机(推送需定制联网);5.3连续录入指纹错误超过5次,门锁上报报警信息触发报警器。
6.刷卡开锁6.1使用录入的NFC卡即可开锁;6.2刷卡与指纹类似绑定于用户,可识别用户ID并上报;6.3响应时间1s以内。
可攜式投影機 V300X V260X V230X V260 V230 使用手冊说明书

型號
V300X/V260X/V230X/V260/V230
使用手冊
2011 年 1 月第一版
DLP 和 BrilliantColor 是 Texas Instruments (德州儀器有限公司)的商標。 IBM 爲 International Business Machines Corporation (國際商業機器公司)的商標或註冊商標。 Macintosh, Mac OS X 和 PowerBook 爲 Apple Inc. (蘋果公司)在美國和其他國家註冊的商標。 Microsoft、Windows、Windows Vista、Internet Explorer、 .NET Framework 和 PowerPoint 爲 Microsoft Corporation (微軟公司)在美國和/或其他國家的註冊商標或商標。 MicroSaver 爲 ACCO 品牌的一個分公司 Kensington Computer Products Group 的註冊商標。 Virtual Remote Tool (虛擬遙控工具)使用 WinI2C/DDC library, © Nicomsoft Ltd。 HDMI、HDMI 標誌和 High-Definition Multimedia Interface 爲 HDMI Licensing LLC.的商標或註冊商標。
切勿讓紙夾和紙屑等異物掉入投影機內。切勿試圖找回可能掉入投影機內的任何物品。切勿將鐵絲或者螺絲起子 等金屬物體插入投影機內。若發現有物體掉入投影機內部,須立即斷開電源,然後委託有維修資格的維修服務人 員取出物體。 切勿在投影機上面放置任何物體。 雷雨天不要觸摸電源插頭。此舉可能引起電擊或者火災。 投影機規定操作電源爲 200-240 伏特 50/60 赫茲交流電。在使用投影機之前,須確認所用電源是否符合本投影機 要求。 切勿在投影機啓動狀態下窺視鏡頭。此舉會導致眼睛嚴重受傷。
菲尔斯OLED+4KUHDAndroid TV - 保时感耳音有光四周P5 AI双图像引擎声音保时感

Philips OLED 9 series 4K UHD Android TV - Bowers&Wilkins Sound with Ambilight 4-sidedP5 AI dual picture engine Sound by Bowers & WilkinsAmbilight 4-sided139 cm (55") Android TV 55OLED935Breathtaking picture. Cinematic sound. 4K UHD OLED Android TVGive your movies the TV they deserve. This stunning Philips OLED+ TV boasts up-firing Bowers & Wilkins speakers, and the latest P5 picture processing with AI. You get a lifelike picture and thrilling sound with crystal-clear dialogue.Designed to thrill.•Philips OLED+ TV with HDR. The difference is real.•The magic of Ambilight. Only from Philips.•Immersive sound. Bowers & Wilkins meets Dolby Atmos.•Kvadrat speaker cloth. Muirhead leather-backed remoteIncredible picture. Bowers & Wilkins sound.•P5 engine with AI. Whatever you watch, a picture so real.•Dolby Vision and Dolby Atmos. Cinematic vision and sound.•3.1.2 sound system. Up-firing speakers for Dolby Atmos.•Integrated sub-woofer and full-range drivers.•Separate central tweeter for pristine dialogue.Content at your command.•Voice control. Google Assistant built-in. Works with Alexa.•DTS Play-Fi. Multi-room audio.•Android TV. Simply smart.HighlightsP5 engine with AIPhilips P5 processor with AI dual picture engine delivers a picture so real it feels like you could step right into it. A deep-learning AI algorithm processes images in a manner similar to the human brain. No matter what you're watching, you get lifelike detail and contrast, rich color, and smooth motion.Sound by Bowers & WilkinsAn exclusive speaker design by legendary audio engineers Bowers & Wilkins delivers thrillingly lifelike performance. Up-firing speakers let you get the most out of Dolby Atmos. A central tweeter keeps the dialogue pristine no matter how intense the drama gets.Ambilight 4-sidedWith Philips 4-sided Ambilight, every moment feels closer. Intelligent LEDs around the edgeof the TV respond to the on-screen action and emit an immersive glow that's simplycaptivating. Experience it once and wonder how you enjoyed TV without it.Philips OLED+ TVA Philips 4K UHD OLED+ TV is compatible with all major HDR formats. Whether it's a must-watch series or the latest video game, shadows will be deeper. Bright surfaces will shine. Colors will be truer. Motion is incredibly smooth.Tactile harmonyPremium materials make all the difference to your Philips TV. Kvadrat's acousticallytransparent wool-blend speaker fabric allows the sound to flow freely into the room. Responsibly sourced Muirhead leather and backlit keys add a sophisticated finish to the remote control.Voice assistantControl your Philips Android TV with your voice. Want to play a game, watch Netflix, or find content and apps in the Google Play store? Just tell your TV. You can even command all Google Assistant-compatible smart home devices, like dimming the lights and setting the thermostat on movie night. Without leaving the sofa. The days of searching for the TVremote are over. Now you can use your voice to control your Philips smart TV via Alexa-enabled devices, like Amazon Echo. Turn your TV on, change the channel, switch to your gaming console and more with Alexa.DTS Play-FiWith DTS Play-Fi on your Philips TV you can connect to compatible speakers in any room. Got wireless speakers in the kitchen? Listen to the movie while you make a snack, or keep up with the sports commentary while you get everyone a drink.Android TVYour Philips Android TV gives you the content you want-when you want it. You cancustomize the home screen to display your favorite apps, making it simple to startstreaming the movies and shows you love. Orpick up where you left off.Issue date 2022-10-25 Version: 6.0.112 NC: 8670 001 74981 EAN: 87 18863 02892 6© 2022 Koninklijke Philips N.V.All Rights reserved.Specifications are subject to change without notice. Trademarks are the property of Koninklijke Philips N.V. or their respective owners.SpecificationsAmbilight•Ambilight Version: 4-sided•Ambilight Features: Built in Ambilight+hue, Ambilight Music, Game Mode, Wall colour adaptive, Lounge mode, AmbiSleep, Sunrise Alarm Picture/Display•Display: 4K Ultra HD OLED•Panel resolution: 3840x2160•Aspect ratio: 16:9•Picture engine: P5 AI Perfect Picture Engine •Picture enhancement: Ultra Resolution, Wide Color Gamut 99% DCI/P3, Dolby Vision, Perfect Natural Motion, Super Resolution Supported Display Resolution •Computer inputs on all HDMI: up to 4K UHD 3840x2160 @60Hz, HDR supported, HDR10+/ HLG, HDR supported, HDR10/ HLG•Video inputs on all HDMI: up to 4K UHD3840x2160@60Hz, HDR supported, HDR10/HLG (Hybrid Log Gamma), HDR10+/Dolby Vision Android TV•OS: Android TV™ 9 (Pie)•Pre-installed apps: Google Play Movies*, Google Play Music*, Google Search, YouTube, BBC iplayer, Netflix, Amazon Prime Video•Memory size(Flash): 16GB*Smart TV Features•Program: Pause TV, USB recording*•Ease of Installation: Auto detect Philips devices, Device connection wizard, Network installation wizard, Settings assistant wizard•Ease of Use: One-stop smart menu button, Onscreen usermanual•Firmware upgradeable: Firmware auto upgrade wizard, Firmware upgradeable via USB, Online firmware upgrade•Screen Format Adjustments: Basic - Fill Screen, Fit to screen, Advance - Shift, Zoom, stretch, Wide screen•Remote Control: with Voice, with Key light •User Interaction: SimplyShare•Voice assistant*: Google Assistant built-in, RC with Mic., Works with AlexaProcessing•Processing Power: Quad Core Tuner/Reception/Transmission•HEVC support•Digital TV: DVB-T/T2•MPEG Support: MPEG2, MPEG4•Video Playback: PAL, SECAM•TV Program guide*: 8 day Electronic ProgramGuide•Signal strength indication•Teletext: 1000 page HypertextConnectivity•Number of HDMI connections: 4•Number of USBs: 2•Wireless connection: Bluetooth 4.2, Wi-Fi802.11ac, 2x2, Dual band•Other connections: Digital audio out (optical),Ethernet-LAN RJ-45, Headphone out•HDMI features: 4K, Audio Return Channel•EasyLink (HDMI-CEC): Remote control pass-through, System audio control, System standby,One touch play•HDCP 2.3: Yes on all HDMIMultimedia Applications•Video Playback Formats: Containers: AVI, MKV,H264/MPEG-4 AVC, MPEG-1, MPEG-2, MPEG-4,WMV9/VC1, VP9, HEVC (H.265)•Subtitles Formats Support: .SRT, .SUB, .TXT, .SMI•Music Playback Formats: AAC, MP3, WAV, WMA(v2 up to v9.2), WMA-PRO (v9 and v10)•Picture Playback Formats: JPEG, BMP, GIF, PNG,360 photo, HEIFPower•Mains power: AC 220 - 240 V 50/60Hz•Standby power consumption: <0.3W•Ambient temperature: 5 °C to 35 °C•Power Saving Features: Auto switch-off timer,Light sensor, Picture mute (for radio), Eco modeSound•Audio: Sound by Bowers & Wilkins, 3.1.2 Channel,Output power : 70 Watt (RMS)•Codec: AC-4, Dolby Atmos, Dolby Digital MS12V2.3, DTS-HD(M6)•Speaker configuration: 10W x2, 5W x1, woofer20W, height 12.5W x2•Sound Enhancement: 5 Band Equalizer, A.I. Sound,Clear Dialogue, Dolby Atmos, Dolby BassEnhancement, Dolby Volume Leveler, Night mode,Auto Volume Leveler, Bass EnhancementDimensions•Box dimensions(W x H x D):1400.0 x 953.0 x 174.0 mm•Set dimensions(W x H x D):1227.8 x 705.6 x 49.3 mm•Set dimensions with stand (W x H x D):1227.8 x 805.5 x 260.7 mm•Product weight: 21.0 kg•Product weight (+stand): 28.1 kg•Weight incl. Packaging: 32.7 kg•Wall mount compatible: 300 x 300 mmAccessories•Included Accessories: Legal and safety brochure,Power cord, Quick start guide (x1), Stand withsound solution, 2 x AAA Batteries, RemoteControlEU Energy card•Panel technology used: OLED*EPG and actual visibility (up to 8 days) is country and operatordependent.*Android App offerings vary per country. For more details please visityour local Google Play Store.*Philips TV Remote app and related functionalities vary per TV model,operator, and country, as well as smart device model and OS. Formore details please visit: /TVRemoteapp.*Smart TV app offerings vary per TV model and country. For moredetails please visit: /smarttv.*Its functionality is subject to ChromeCast built-in apps and smartdevises. For more details, please visit ChromeCast built-in productpages.*Memory size (Flash) : 16G, the actual available disc space may differ(dependant on e.g. (pre-)installed apps, installed operating system,etc.)*Image depicted on the website are non-contractual pictures. Pleasealways refer to the actual TV that are sold in the retail or stores.。
I-CUE 智能镜操作手册说明书

I-CUE INTELLIGENT MIRROR Operations ManualTable of ContentsProduct Overview pg1 Product Description pg 2 Operation pg 2 Unpacking the unit pg 3 Control and power cables pg 3 Connections pg 4 Mounting the unit pg 4 Operating the unit pg 6 Modes of Operation pg 7 Summary of Control pg 9 Troubleshooting pg 10 Technical overview pg 12 Technical specifications pg 13 Drawings pg 15 I-Cue Mirror and Broadway scroller combined pg 15 I-Cue Mirror used without a color scroller pg 15 I-Cue Intelligent Mirror Parts List pg 16 Product OverviewThe I-Cue Mirror is designed to give years of trouble free use, providing that it is r e g ularly maintained and is used in accordance with the instructions detailed in this manual. If you should experience any problems that fall outside of the scope of this manual, please contact the selling dealer for further details.If the selling dealer is unable to satisfy your servicing needs, please contact the following, for full factory service:ROTAD1330 30th StreetSuite GSan Diego CA, 92154Attn: Repair Department800-468-0114 x25Product DescriptionThe I-Cue Mirror is a motorized mirror attachment which mounts onto fixed position spotlights to achieve many of the effects traditionally only available with high priced intelligent moving lights The compact and stylish design is equally at home in a t h e atre, exhibition centre, shopping mall, or car showroom.The moving mirror accurately redirects a fixed position beam of light through a pan of 230˚ and a tilt of 57˚, making it a very cost-effective and space-saving option for illuminating multiple locations using just a single spotlight. As well as being compatible with most standard medium and narrow beam profile fixtures, the unit can also be used with a color scroller to provide moving color and daisy chained to other lantern accessories to combine moving light with dynamic color changing and gobo rotating effects.The I-Cue Mirror is designed to operate either on the USITT DMX512 (1990) protocol or in stand-alone mode.The DMX serial data system allows for the individual addressing of multiple units on one data cabling system. The unit is addressed by using the three push button switches and LED display.The unit equipped with a diagnostic section on the LED display showing Power, DMX signal and level presence.When operating in stand-alone mode, the I-Cue Mirror only requires a 24 VDC supply to operate.Note:The quantity of I-Cue Mirrors used and the maximum cable length per power supply output is dependent upon the size of PSU/splitter box used. Operation• Unpacking the Unit• Control and power cables• Connections• Mounting the unit• Operating the unit• Modes of operation•Troubleshooting•Technical overview•Technical specificationsUnpacking the unitThe I-Cue Mirror package comes with the following items:• I-Cue Mirror• Safety wire (supplied fitted)• User manualThe unit is shipped in a specially constructed shipping carton to provide protection to the unit. Carefully open the carton and remove the unit by grasping the support arm in the middle and lifting the unit vertically out of the carton. Next, carefully remove the rubber restraint band used to stabilize the mirror unit during shipment.Note:The packing material protects the fixture during shipment; always use it to transport the fixture.The front light shield had been designed so that it can act as a shipping support and must be repositioned before using the unit. Loosen the two M4 wing screws on the front of the unit and reposition the light shield by moving the shield downward to the position necessary to prevent light leaks depending on the beam angle and focusing.Control and power cablesThe I-Cue Mirror utilizes an XLR 4-pin cable system.In DMX mode, this is used to supply power and data transfer. Pins 1 and 4 are supply 24V DC power. Pins 2 and 3 supply USITT1990 DMX512 control protocol, with a ground/drain wire to the connector shell.For use in ‘Stand-alone’mode, the unit requires a suitable 24V DC connected to Pins 1 and 4, with a ground/drain wire to the connector shell (not required, but suggested). Damage will occur if power connections short to data or ground/shield connections. When assembling XLR 4-pin cables, heat shrink should be used on each individual pin to prevent short circuits. (See diagram on following page.)N o t e:It is very important to ensure that the drain wire from the cable shield is c o n nected to both the XLR connector cases.Pin #1234 ChassisFunctionGround (-ve)Control data minus (-)Control data plus (+)24 VDC (+ve)Cable shield/Drain wireMinimum Cable size2.50mm_ (14 AWG)0.35mm_ (22 AWG)0.35mm_ (22 AWG)2.50mm_ (14 AWG)0.25mm_ (24 AWG) Detail of connector wiring (typical)(Note: Cable length should not exceed more than 75 M (250’) with return line) ConnectionsCorrect connection of the units to the power supply will decrease the chances of units malfunctioning due to cabling problems. Please follow these basic rules:a) Use the correct and gauge type of cable and connectors.b) Keep cable runs as short as possible to reduce line loss.c) Always use a return cable for each run.This will ensure balanced DC power to all units that the line is correctlyt e r m i nated and that all units receive power if one link of the chain is faulty. The correct wiring between male and female connectors is ‘one to one’.Mounting the unitFor proper operation, the unit must be firmly attached to the light fixture it is mounted on. To achieve this, the mounting plate of the unit has two flat springs at the outer edge. The unit is designed to mount in the rear color frame slot of the ellipsoidal fixture.The back plate should be inserted in the rear color slot and gently pushed down until the unit is firmly seated in the bottom of the slot. The safety wire supplied with the f i x ture should then be attached as a means of secondary fixing.Input power and DMX should be brought to the unit by way of XLR-4 cable. If daisy chaining is desired, a XLR-4 cable should be run from the output connector on the unit to the next device in the chain.When DMX is first applied to the unit, it will go through a homing sequence, which will cause the mirror to momentarily move around.Note:If the rear slot is not available for mounting of the unit because of the use of a gel holder in this slot, the front slot may be used for mounting instead.I-Cue Mirror mounted on a lighting fixture.Ensure the safety wire is used as a means of secondary attachment.Control FunctionRED button Mode access and ‘Record’BLACK button Decrements the mode level, or value BLUE button Increments the mode level, or value3 digit display Displays modes, monitor, or blank display.Red ButtonBlack ButtonBlue Button3 digit DisplayOperating the unitAll the unit functions are accessed using the LED display and the three push-button switches on the left side panel.PUSH BUTTON OPERATION:The RED button is used to scroll through the different modes of operation, and the BLUE or BLACK buttons used to select the level, or value, in that mode. If any mode or value is changed, the last digit of the display will flash until the RED button is pushed to acknowledge (or record) the change.DISPLAY OPERATION:Power-up DisplayOn power-up, the display will show ‘ini’during the initialization sequence, and then show the DMX address.MONITOR DISPLAY:If left undisturbed for 5-7 seconds, the display will revert to ‘Monitor Mode’•The first vertical bar indicates that there is Power (24V DC) at the unit.•The second vertical bar indicates that there is Data (DMX) at the unit.•The horizontal bars indicate the data Signal Level (DMX) at the unit.(See also: ‘Tr o u b l e s h o o t i n g ’section of this manual)power datasignal levelDISPLAY BLANK:The display can be set to auto-blackout after short time. This is selected through the mode menu. (See later in this section)RESET:If the RED button is held down, and the BLUE buttonpressed, the unit will reset to the factory default settings.This feature is particularly useful when the units are usein many different configurations/shows.Modes of OperationEFFECTIVE (STAND-ALONE) MODEIn this mode, the unit can be used without a DMX control signal; only a 24v DC sup-ply is required. To use the stand-alone mode;• Connect a suitable 24V DC power supply to the unit.• Press the RED button to scroll through the menu until the display reads ‘At0’.• Press the BLUE button once, so that the display reads ‘At1’(Auto mode) and press the RED button.• Press the RED button to scroll through the menu until the display reads ‘Pn’. This accesses the mirror panning movement in the auto mode. Using the BLUE/BLACK buttons select the range of movement you require Pn0 – Pn7, continuous back & forth sweep Pn8, or mirror held at the centre position Pn9. Press the RED b u t t o n to store the pan value and change the display to ‘tL’, the mirror tilting movement in the auto mode.• Repeat the above process to set a tilt movement value.• When the desired effect is selected, press the RED buttonDMX CONTROL MODEIn this mode, the unit can be fully controlled using two or four DMX channels (see below). Acombined DMX and 24v DC supply cabling system is required in this system. Press the RED button to move between modes, and to record any changes made.DMX CHANNELADDRESS MODEThis mode is used to set the DMX start address in the range of 1-511 (2 channels,8 -bit resolution) and 1-509 (4 channels, 16-bit resolution).The display shows thec u r rent DMX address. (To alter the address, press BLUE or BLACK button once to increment/ decrement the value; hold down the BLUE or BLACK for fast increments/ decrements of the value.PAN / TILT MOVEMENT MODESThese modes allow the user to reverse the direction of the pan, tilt, or pan and tilt motion, when the configurations of the lighting fixture/mirror unit dictate. The display shows either the pan movement or the tilt movement (‘Pn’pan/ ‘tL’tilt) and the cur-rent direction (‘0’= normal/ ‘1’= reverse) of travel. (Press BLUE or BLACK button to switch directions, and the RED button to change modes.)DMX RESOLUTIONThis mode is used to set the movement resolution, or accuracy, of the unit. The unit operates either with two or four DMX control channels, or stand-alone mode (with no DMX control). The display shows the current DMX mode (‘rn0’= 8-bit or ‘rn1’= 16-bit resolution). (Press BLUE or BLACK to switch between modes.)DISPLAY MODEThis mode is used to switch the display on or off. This feature can be used to blank displays that may be an unwanted distraction. The display will re-activate when any button is pressed. The display shows the current display mode (‘dP0’= display off or ‘dP1’= display on),(Press BLUE or BLACK to switch between on and off.)DMX / AUTOMATIC MODEThis mode is used to select either DMX control or automatic (stand-alone) operation of the unit. The display shows the current mode (‘ A t0’= DMX control, or ‘ A t1’= a u t o matic mode). (Press BLUE or BLACK to switch between modes.)DMX channel address modePanmovement modeTilt movement modeDMX resolution modeDisplay modeDMX/Automatic modeSets the units DMX address.This mode allows the user to reverse the direction of the pan motion.This mode allows the user to reverse the direction of the tilt motion.Sets unit operating with 2or 4 DMX control c h a n nels, with 8 or 16-bit resolution.This mode is used to switch the display on or off.This mode allows the user to select to between DMX and Automatic modes.To alter the address,press BLUE or BLACK button once to increase or decrease the value;hold down the BLUE or BLACK for fast incre-ments/ decrements.To alter the mode, press BLUE or BLACK button once to switch between modes.To alter the mode, press BLUE or BLACK button once to switch between modes.To alter the mode, press BLUE or BLACK button once to switch between modes.To alter the mode, press BLUE or BLACK button once to switch between modes.To alter the mode, press BLUE or BLACK button once to switch between modes.The display shows the current DMX address.In the range of 1-511(2 channel, 8-bit resolution)In the range of 1-509(4 channel, 16-bit resolution).The display shows that the PAN movement is set for normal direction.The display shows that the PAN movement is set for reverse direction.The display shows that the TILT movement is set for normal direction.The display shows that the TILT movement is set for reverse direction.The display shows the unit is set for 8-bit resolution.The display shows the unit is set for 16-bit resolution.This shows that the display is set for auto-blanking.This shows that the display is set to be permanently on.The display shows that the unit is set for DMX control. The display shows that the unit is set for automatic operation.Summary of control functions:Note: - Press the RED button to move between modes, and to record any changes made.DEFAULT SETTINGS:‘Factory’default settingsIf the unit is reset, using the RED button (held down), and the BLUE button pressed for 2 Sec’s, the unit will revert to the factory default settings.The ‘Factory’default settings put the unit in its normal operating mode.DMX Address = 001Pan/tilt direction = NormalResolution = 8-bit Display = On DMX/Auto = DMX Display Flip = Normal‘USER’DEFAULT SETTINGSEach time the RED record button is pressed, the unit will save that change and these ‘user defaults’will take precedence on the next power cycle. These ‘User’defaults can be reset to the ‘factory’defaults using the method detailed above.TroubleshootingThe LED display aids in the troubleshooting of the system. These indicators are located on the on the side panel of each unit.The first vertical bar indicates that there is power (24VDC) at the unit.The second vertical bar indicates that there is data (DMX) at the unit.The horizontal bars indicate the data (DMX) signal level at the unit.Note:The signal level changes during normal operation of the unit, and is present during stand-alone operation. 1st bar = 25%, 2nd bar = 50% and 3rd bar = 75%.Note:A high percentage of problems are a direct result of poor cabling, corrupt DMX control signals, and lack of suitable signal termination.power datasignal levelSYMPTOMUnit does not respond to DMX control, but DMX display indicator is on.Unit does not respond to DMX, DMX display indicator is off.Units run at different speeds. Units have dim display indicators and run slowly. Display indicators appear OK but unit does not move. The tilt doesn’t respond to DMX.Mirror panning/tilting in opposite direction.The mirror vibrates in one place when it is supposed to move.POSSIBLE CAUSEUnit set to wrong or differentDMX address.Bad cable.No DMX at splitter/PSU.Cable lengths are too long.No cable return line.Overloading of chain orcable runs too long.PSU overloaded.Mechanical (or electrical)failure in the unit.16-bit mode setting when8-bit control is intended, orvice versa.Pan/tilt reverse switch withimproper setting.Broken motor cablePopped out motor connector.SOLUTIONCheck DMX addresssettings.Check cable and DMX runfrom the console.Check the cable length andconfiguration. Ensure there is acable return line in the system.Check voltage levels on lastunit. Should not be below20VDC.Turn unit on and off. Returnunit for repair.Check and reset.Check and reset.Contact distributor for serviceReconnect and checkTechnical overviewThe electronics card consists of four key components: L298 Motor driver (x 2), 75176 Transceiver, and a processor.The 75176 transceiver operates in the receive config-uration to convert serial protocol to a TTL level. All data relevant to the operation of the unit is stored onboard in ‘flash’memory.The majority of electronics problems are usually created by external factors such as shorted cables, etc. The 75176 transceivers are susceptible to damage if 24VDC is present on the DMX signal lines. Troubleshooting is a process of elimination. First, rule out the other field factors (i.e. faulty cables, power sources). If an electronics problem is suspected try replacing the electronics card first. If accuracy problems should occur, check for obvious mechanical problems. For technical advice and/ or parts, please contact your selling dealer or the offices listed in this manual.Dimensions:Weight:Resolution: Accuracy:Movement Speed:DMX Protocol:DMX Addressing: Working Voltage:Power Consumption:Connectors:Body Material:Body Color:Mounting Plate:Max. Ambient Temperature Cooling:European Approvals: North American Approvals:260 x 230 x 265 mm (10.25” x 9” x 10.5")1.6 Kg (3.5 lbs)8 or 16 bitPan(230º Max.)0.9º8-bit mode0.028º16-bit mode Tilt (57.3º Max.)0.225º8-bit mode0.028º16-bit mode0-100% pan (max)= 2 sec0-100% tilt (max)= 1 secUSITT DMX512 (1990)Digitally, via push buttons (3) and LED display 24 VDC (+/- 10%)17 watts0.7 ampsXLR-4 (male) in and XLR-4 (female) through SteelBlack powder coat(Other colors available, P.O.A.)Integral mounting plate, designed for use in any ellipsoidal fixture with a 160 mm (6.25") gel slot. 40º C (104º F)Convection (natural)PendingPendingTechnical SpecificationsSpecificationsDrawingsI-Cue Mirror and Color Scroller combined.I-Cue mirror used with a color scroller.I-Cue Intelligent Mirror Parts ListPart NumberIC-01 Mounting Plate Assembly205 81001 0000 IC-02 Broadway Mounting Bracket205 81002 0000 IC-03 XLR Connector Assembly205 81003 0000 IC-04 Stepper Motor Lead (each)205 81004 0000 IC-05 Safety Chain Assembly205 81005 0000 IC-06 Mirror/Mounting Bracket Assembly205 81006 0000 IC-07 Digital Control Card205 81007 0000 IC-08 Stepper Motor (each)205 81008 0000 IC-09 Mirror Back Plate205 81009 0000 IC-10 Front Light Shield Assembly205 8101 00000Please call Rosco or your local Rosco dealer for pricing and availability.Rosco Laboratories,I n c.52 Harbor View Ave., Stamford, CT06902(203) 708-8900 1 (800) ROSCO N Y FA X(203) 708-89191120 N. Citrus Ave., Hollywood, CA90038(323) 462-2233 1 (800)R O S C O L A FA X:(323) 462-3338Rosco Laboratories,L t d.1241 Denison St. #44, Markham, Ontario, Canada L3R 4B4(905) 475-1400 (888)R O S C O TO FA X:(905) 475-3351R o s c o l a b,L t d.Blanchard Works, Kangley Bridge Rd., Sydenham, London SE26 5AQ England (208) 659-2300 FAX: (208) 659-3153Rosco Iberica,S.A.C/ Del Oro 76A, Pol. Industrial Sur, 28770 Colmenar Viejo, Madrid, Spain (341) 846-3602 FA X:(341) 846-3634Rosco do Brasil Ltda.Rua Antonio De Barros, 827, São Paulo SP Brasil CEP03401-000Te l:( 011) 218-2865 FA X:( 011) 218-0193Rosco Australia Pty Ltd.42 Sawyer Lane, Artarmon 2064, New South Wales, A u s t r a l i a(02) 9906-6262 FAX: (02) 9906-3430。
艾奇安防产品说明书

Privacy Mask Text Overlay Image Orientation
• Audio
Compression Audio-In Audio-Out
• Network
Protocol &larm
Simultaneous dual streams based on two configurations 28 Kbps - 6 Mbps (per stream) Constant, Variable
Basic WDR (74 dB); White balance: automatic, hold, and manual; Brightness; Contrast; Sharpness (auto); Auto gain control; Digital noise reduction; Flickerless
Hemispheric
Dome
Bullet
Box
PRODUCT SPECIFICATION
E81A
• Device
Device Type Image Sensor Sensor Size Day / Night Superior Low Light Sensitivity Minimum Illumination Color to B/W Switch Mechanical IR Cut Filter IR Sensitivity Range IR LED IR Working Distance Electronic Shutter
PHOTO INDICATION
3 4
1 2
1 Reset Button 2 Memory Card Slot 3 Reset Button
电子猫眼方案

电子猫眼方案简介电子猫眼是一种智能安防设备,通常安装在室内门上,用于监控门外的情况。
传统的猫眼通过一个小孔来观察门外的情况,但是这种方式有很多局限性,如视野狭窄、无法拍摄照片或录像等。
电子猫眼解决了这些问题,提供了更广阔的视野和更多的功能。
功能特点1.高清图像:电子猫眼配备了高分辨率摄像头,可以提供清晰的图像,让用户更清楚地看到门外的情况。
2.视角广阔:相比传统猫眼的有限视野,电子猫眼提供了更广阔的视角,可以覆盖更大范围的区域。
3.录像功能:电子猫眼可以录制门外的视频,供用户随时回放。
这对于监控家庭安全非常有帮助。
4.夜视功能:电子猫眼配备了红外夜视功能,即使在完全黑暗的环境下,也能看清门外的情况。
5.移动警报:电子猫眼可以通过移动侦测功能,实时检测门外的活动,当有不寻常的活动发生时,会向用户发送警报信息。
6.远程访问:用户可以通过手机应用或电脑远程访问电子猫眼,随时随地查看门外的情况。
安装步骤1.准备工作:选择一个合适的安装位置,通常是室内门的眼洞处。
确保该位置没有障碍物遮挡视线,并保证可以连接到电源。
2.安装支架:将电子猫眼的支架安装在合适的位置,并用螺丝固定好。
3.连接电源:将电子猫眼的电源适配器连接到电源插座,然后将电源线与电子猫眼连接。
4.连接网络:如果电子猫眼支持网络连接,按照说明书的指导,将其与家庭无线网络连接。
5.调试设置:按照电子猫眼的说明书,设置相关参数,例如画质、移动侦测灵敏度等。
6.完成安装:测试一下电子猫眼是否正常工作,确保能够看到门外的图像。
使用指南1.查看图像:打开手机应用或电脑,通过远程访问功能,查看电子猫眼传输的图像。
2.录像回放:如果有需要,用户可以查看之前录制的视频,随时回放门外情况。
3.移动警报:设置移动侦测警报功能,在有不寻常活动时,及时接收警报信息。
4.夜视模式:在夜间或光线较暗的情况下,切换到夜视模式,确保清晰的图像。
5.定期维护:保持电子猫眼清洁,并检查是否有损坏或故障。
萤石 猫眼门铃 智能猫眼-DP2系列 CS-DP2-6E2WPFBSL 使用说明书

注意事项外观介绍选择安装位置启动设备安装猫眼将手机连上您的Wi-Fi网络,点击下方的 ,查看设备的安装指导视频。
主机子机底座配件如果您不方便看视频,可以根据以下步骤安装设备。
长按Home键3~5秒,设备开机。
1根据设备界面提示完成Wi-Fi连接。
2用手机或Pad扫描主机界面或者用户指南封面的二维码,根据界面提示完成设备添加。
3登录“萤石云视频”客户端,根据提示完成用户注册。
1选择添加设备,进入扫描二维码的界面。
2添加到“萤石云视频”请勿将猫眼放在高温、高湿或大量灰尘、盐雾等恶劣环境,也不要暴露在雨淋的地方。
否则可能会引起机器损坏。
请勿将子机镜头朝下放置,以免磨损镜头。
请勿用力挤压门外子机的镜头和顶部突出的黑色圆球,否则可能会造成硬件损坏。
在安装过程中,务必小心操作,不要用力拉扯子机的连接线,也要防止连接线刮伤或者割裂(因操作不当,导致连接线损坏不属于保修范围)。
如果门上没有猫眼孔,建议在门上距离地面145cm左右的位置打孔,钻孔直径建议范围16.5~45mm。
如果门上有猫眼孔并已经装有猫眼,请拆除原有的猫眼进行安装。
.. . .连接线门铃按键传感器(请勿遮挡)镜头传感器(请勿遮挡)传感器(请勿遮挡)扬声器麦克风连接线接口装箱清单用户指南电源线电源适配器卡扣螺钉配件子机主机底座配件螺钉孔挂钩凹槽底座槽口充电宝挂钩USB充电接口Micro SD卡槽(用于连接子机连接线)连接接口显示屏Home键Home键(即开关机键)**扬声器长按3~5秒:开机/关机短按:亮屏/息屏撕掉子机背面3M胶表面的离型纸将子机拿到门外,将螺钉和连接线穿过猫眼孔(如果门比较厚,可将白纸卷成筒状,将连接线通过纸筒穿过门洞)56后用力按压子机,确保与门的表面贴合将连接线接口按图示插入底座槽口3498抽出拧紧两颗螺钉固定底座,使底座贴紧门面不晃动即可10整理连接线,将连接线折入底座7将螺钉按图示穿过底座螺钉孔,使底座挂在螺钉上13将主机底部的连接接口对准底座上的连接线接口,把主机插到底座上,插入到位后会听到“咔哒”一声底座开口处并扣紧安装完成14入底座上方的挂钩凹槽丈量门的厚度,选择合适的螺钉1当门厚在35~60mm时,选短钉当门厚在60~85mm时,选中钉当门厚在85~105mm时,选长钉将选好的两颗螺钉拧入子机(固定住即可,无需拧紧)2充电日常维护如果您使用的是TV,请在手机或Pad端完成用户注册和设备添加后,在TV端进行实时预览等操作。
因特 智能锁 V6-智能猫眼款 用户手册 说明书
2
⼆、如何开通微信提醒
4
1. 点击“开通提醒”进⼊设置⻚⾯,如未登录,请先登录;“开通提醒”,如下图即为开通成功;
.当智能锁发⽣开锁或远程开锁等事件时,微信实时提醒。
2 . 远程开锁操作
远程开锁需在锁上按⻔铃键发出请求,“客⼈请求,主⼈开锁”,⽤收到开锁请求,或点击播放进视频对讲,或直接输⼊安全密码开锁
五、如何备注⻔锁⽤⼾
. 进⼊⻔锁界⾯,点击右上⻆“更多−⽤⼾列表”,进⼊⽤⼾列表界
⾯,如下图;
.点击⽤⼾,直接备注⽤⼾名称如下图。
3. ⽤⼾备注好后,就清楚地知道是谁开了锁,关⼼家⼈。
四、如何分享设备
侧边栏,选择“家庭管理”−点击
输⼊要添加的⽤⼾⼿机号码和称谓。
注意该
⽤⼾必须提前关注此公众号并注册。
6。
智能猫眼产品功能比较表(1)+(2)

非侦测版侦测版产品图片产品颜色如图香槟色/银色香槟色/银色香槟色/锖色香槟色玫瑰金银色玫瑰金玫瑰金屏幕尺寸 2.8英寸 2.8英寸 2.8英寸 3.7英寸3.7英寸无7英寸2.8英寸 2.8英寸摄像头像素30万专业安防摄像头30万专业安防摄像头30万专业安防摄像头200万专业安防摄像头200万专业安防摄像头/200万专业安防摄像头200万专业安防摄像头200万专业安防摄像头屏幕分辨率320*240(QVGA)320*240(QVGA)320*240(QVGA)480*320(HVGA)480*320(HVGA)/800*480(HVGA)800*480(HVGA)800*480(HVGA)屏幕方式高清显示屏高清显示屏高清显示屏高清触摸屏高清触摸屏/高清触摸屏//摄像头普通摄像头日、夜两用型/安防专用日、夜两用型/安防专用日、夜两用型/安防专用日、夜两用型/安防专用日、夜两用型/安防专用日、夜两用型/安防专用日、夜两用型/安防专用日、夜两用型/安防专用门外可视角度80°165°超广角 165°超广角165°超广角165°超广角165°超广角165°超广角165°超广角165°超广角变焦倍数固定5级数码变焦5级数码变焦42倍手动变焦42倍手动变焦固定固定固定固定拍照室内手动门铃手动自动抓拍自动抓拍自动抓拍自动抓拍自动抓拍门铃手动自动抓拍录像 室内手动门铃手动自动录像自动录像自动录像自动录像(新版软件)自动录像门铃手动自动录像红外感应距离无无(门外2~3米)(门外2~3米)(门外2~3米)(门外2~3米)(门外2~3米)(门外2~3米)(门外2~3米)照片格式Jpeg Jpeg Jpeg Jpeg Jpeg Jpeg Jpeg Jpeg Jpeg 录像格式AVI AVI AVI MP4MP4MP4MP4MP4MP4标配4G卡照片数量10万张10万张10万张2万张2万张/2万张2万张2万张Micro-SD卡存储最大支持32GB 最大支持32GB 最大支持32GB 最大支持32GB 最大支持32GB 内置2.5GB 内置2.5GB 最大支持32GB 最大支持32GB 适合门孔直径12~25mm 12~58mm 12~58mm 12~58mm 12~58mm 14~58mm 14~58mm 14~58mm 14~58mm 适合门厚35~110mm 35~110mm 35~110mm 35~110mm 35~110mm 35~110mm 35~115mm 35~110mm 35~110mm 供电方式1500mAh锂电池1500mAh锂电池1500mAh锂电池1500+250mAh锂电池1500+250mAh锂电池8000mAh锂电池8000mAh锂电池3600mAh锂电池3600mAh锂电池待机时间2~3个月1~2个月1~2个月1个月左右1个月左右2个月左右1个月左右20天左右20天左右USB数据线充电无支持支持支持支持支持支持支持支持门外有人室内提示无无支持支持支持支持支持支持支持照片/录像自动归档 支持支持支持支持支持支持支持支持支持访客来访时间提示支持支持支持支持支持支持支持支持支持电量提示功能支持支持支持支持支持支持支持支持支持叮咚二代EQUES移康智能产品功能对比表本产品是行业内第一家通过公安部权威认证,并通过CE、FCC认证,荣获多项国家专利,获得山西省公安厅科技部,上海闵行电视台,第一财经大力宣传的科技产品。
PreSonus Eris E5 E8 高分辨率近场录音室监控器使用说明书
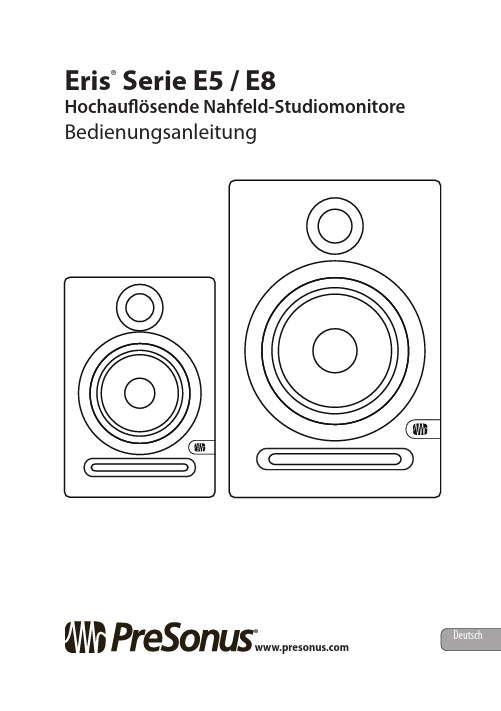
Eris ® Serie E5 / E8Hochauflösende Nahfeld-StudiomonitoreBedienungsanleitung®1 Übersicht — 11.1 Vorwort — 11.2 Merkmale des Eris E5/E8 — 21.3 Lieferumfang — 22 Anschlüsse — 32.1 Anschlüsse und Bedienelemente aufder Rückseite — 32.1.1 Eingänge — 32.1.2 Stromversorgung— 42.1.3Bedienelemente AcousticTuning — 42.2 Anschlussbeispiele — 62.2.1 GrundlegendesSetup — 62.2.2Erweitertes Setupmit umschaltbarenLautsprechern — 73 Tut orials — 83.1 Platzieren der Monitore — 83.2 Anpassen des Eingangspegels — 9 3.3 Empfohlene Einstellungen fürEqualizer — 103.4 Empfohlene Einstellungen fürAcoustic Space — 114 Ressourcen — 124.1 Technische Spezifikationen — 12 4.2 Fehlerbehebung — 144.3 PreSonusGarantiebestimmungen — 151Eris™ Serie E5 und E8 – Bedienungsanleitung11.1VorwortVielen Dank, dass Sie sich für die PreSonus Eris E5/E8 Studiomonitore entschieden haben. Die aktiven Nahfeldmonitore E5 und E8zeichnen sich durch herausragende Leistung zu einem attraktiven Preis aus, der speziell für preisbewusste Projektstudios interessant ist, und bieten Merkmale, die man von deutlich teureren Monitoren kennt.Sofern Sie Fragen oder Anregungen bezüglich der PreSonus Eris E5/E8 haben, setzen Sie sich unter der Telefonnummer (001) 225-216-7887(zwischen 9.00 und 17.00 Uhr, US Central-Time) mit uns in Verbindung. Wir bei PreSonus Audio Electronics bemühen uns um eine stetige Weiterentwicklung unserer Produkte und freuen uns daher sehr über Ihre Anregungen. Denn schließlich wissen Sie als Anwender am besten, was Sie von Ihrem Werkzeug erwarten. Vielen Dank für Ihr Vertrauen und viel Erfolg mit Ihren Eris E5/E8!ÜBER DIESES HANDBUCH: Bitte lesen Sie sich diese Bedienungsanleitung vollständig durch, um sich mit den Funktionen, Anwendungs- und Anschlusshinweisen für Ihre Eris E5/E8 vertraut zu machen und schließen Sie sie bitte erst nach der Lektüre an Ihr Studioequipment an. Auf diese Weise können Sie Probleme bei der Installation und Inbetriebnahme vermeiden.In dieser Bedienungsanleitung finden Sie immer wieder Profi-Tipps , die Ihnen helfen werden, schnell zu einemExperten für Eris zu werden . Neben den Profi-Tipps finden Sie zusätzlich verschiedene Tutorials, die Themen wie die Monitor-Aufstellung oder auch die Einstellung der Eingangspegel, desEQ sowie der Bedienelemente für Acoustic Space behandeln.21.2 Merkmale des Eris E5/E81.2 Merkmale des Eris E5/E8• 3 Eingänge: 2 symmetrische (XLR und 6,3 mm TRS-Klinke) sowie 1 unsymmetrischer Eingang (Cinch) •Verbundgewebe-Woofer und Tweeter mit Seidenkalotte •Separate, für den Woofer und den Tweeter optimierte Endstufen•Bassreflex-Öffnung auf der Vorderseite für eine optimale Wiedergabe des tieffrequenten Spektrums •Regler für den Eingangspegel mit einer Verstärkung von 35 dB über Nominalpegel •Shelving-EQ für den Höhenbereich ab 4,5 kHz mit einem Hub von ±6 dB •Peak-EQ im Mittenbereich mit einem Hub von ±6 dB und einer Scheitelfrequenz von 1 kHz •Schaltbarer Hochpassfilter (Flat, 80 Hz, 100 Hz) mit einer Flankensteilheit von -12 dB/Oktave•Schalter Acoustic Space (0, -2 dB, -4 dB) zur Kompensation von Bass-Maxima in der Nähe von Wänden1.3 LieferumfangAußer diesem Handbuch enthält die Verpackung Ihres Eris E5/E8 folgendes:•(1) Aktiver Studiomonitor PreSonus Eris E5 oder E8•(1) IEC-Netzkabel•(4) Schaumgummi-Füße zur Anbringung auf der Unterseitedes Lautsprechers zugunsten einer besseren Entkopplung32.1 Anschlüsse und Bedienelemente auf der RückseiteInput Gain: Hier passen Sie den Pegel des Eingangssignals vordem Verstärker an.2.1.2 StromversorgungIEC-Netzbuchse: Ihr Eris E5/E8 bietet eine Buchse zumAnschluss eines Standard IEC-Netzkabels.Warnung: Entfernen oder überkleben Sie in keinem Fall denmittleren Massekontakt und verwenden Sie keinen Groundlift-Adapter, da dies zu einem Stromschlag führen kann.Netzschalter. Hierbei handelt es sich um den Ein-/Ausschalter.Der aktuelle Status wird über eine LED auf derGehäusevorderseite dargestellt.Schalter AC Select. Ab Werk wurde die Eingangsspannungbereits auf die Netzspannung des Auslieferungslandeseingestellt. Verwenden Sie diesen Schalter nur dann, wenn Siedie Eris-Lautsprecher in einem Land verwenden möchten, daseine andere Netzspannung nutzt als das Land, in dem Sie IhreEris E5 oder E8 gekauft haben.2.1.3 Bedienelemente Acoustic TuningHigh: Verstärkt oder dämpft alle Frequenzen oberhalb von 4,5kHzum ±6 dB.Profi-Tipp: Der Regler High im Eris E5/E8 ist ein High-Shelf-EQund dämpft oder verstärkt Frequenzen oberhalb von 4,5kHz. Dieser EQ arbeitet ähnlich wie der Höhenregler bei einerStereoanlage: Er hebt alle Frequenzen über der vorgegebenenEinsatzfrequenz an oder senkt sie ab. Shelving-EQs könnenden Klangeindruck schnell und massiv verändern, da sie einenganzen Frequenzbereich verstärken oder abschwächen.4Eris™ Serie E5 und E8 – Bedienungsanleitung Mid: Verstärkt oder dämpft die Frequenzen im Bereich um 1 kHz um ±6 dB.Der Mid-Regler arbeitet als Peak-EQ, der das vorgegebene Frequenzband (in diesem Fall ein Band mit etwa 1Oktave ober- und unterhalb der Scheitelfrequenz1 kHz) anhebt oder absenkt. Mit diesem Reglersind deutlich feinere Änderungen möglich.Low Cutoff: Senkt den Pegel aller Frequenzen unterhalb der definierten Grenzfrequenz (80 oder 100 Hz) mit einer Flankensteilheit von -12 dB/Oktave ab. In der Stellung Flat hat der Filter keine Funktion, stattdessen kommt dienatürliche Bassabsenkung des Monitors zum Einsatz. Acoustic Space: Dämpft alle Frequenzen unterhalb von 800 Hz um den jeweiligen Wert (-2 oder -4 dB), um etwaige Bass-Maxima auszugleichen, die bei einer geringen Entfernung zu einer Wand oder Raumecke auftretenkönnen. In der Stellung 0 dB ist diese Funktion nicht aktiv.52.2 Anschlussbeispiele2.2 Anschlussbeispiele 2.2.1 Grundlegendes Setup67Eris™ Serie E5 und E8 – Bedienungsanleitung2.2.2 Erweitertes Setup mit umschaltbaren Lautsprechern83.1 Platzieren der Monitore33.1Platzieren der MonitoreIdealerweise sollten die Lautsprecher soaufgestellt werden, dass sich die Hochtöner bei der Mischung auf Ohrhöhe befinden.Die Eris-Lautsprecher können vertikal oder horizontal aufgestellt werden. In der horizontalen Ausrichtung sollten sie jedoch spiegelverkehrt ausgerichtet werden, sodass die Hochtöner jeweils auf der Außenseite liegen.Zudem sollte der Abstand zwischen den Lautsprecher so gewählt werden, dass die Hochtöner mit Ihrem Kopf ein gleichseitiges Dreieck bilden. Schließlich sollten die Monitore Ihnen zugewandt sein undnicht im rechten Winkel nach vorne zeigen.Eris™ Serie E5 und E8 – Bedienungsanleitung3.2 Anpassen des EingangspegelsAm besten beginnen Sie, indem Sie den Regler Input Gainauf die mit …U“ (für …Unity Gain“/Nominalpegel)gekennzeichnete 12-Uhr-Position einstellen. Das bedeutet,dass der Pegel am Eingang des Verstärkers dem Pegel amEingang des Monitors entspricht – es findet also keineVerstärkung statt. Dadurch wird ein guter und kräftigerSignalpegel ohne Verstärkung von externen Störgeräuschenerreicht. Vergewissern Sie sich, dass die externe Quelleoptimal ausgesteuert ist, sodass ein maximaler Signalpegelbei minimalen Nebengeräuschen erzielt wird. DieserVorgang wird als …Gain Staging“ bezeichnet. Für weitereInformationen stehen eine Vielzahl Online-Quellen zurVerfügung. Sie sollten das Input Gain an Ihren Eris-Monitoren immer so einstellen, dass auch ohne weitereLautstärkeanpassungen am System eine angenehmeAbhörlautstärke gewährleistet ist.Wenn die Nominaleinstellung für Input Gain keinezufriedenstellenden Ergebnisse liefert, können Sie auchandere Einstellungen verwenden. Grundsätzlich sollten Sieeine Anhebung über Nominalpegel (U) jedoch vermeiden.Wenn die Lautstärke bei Nominalpegel zu hoch ist,können Sie das Input Gain nach Bedarf etwas absenken– allerdings nicht so sehr, dass Sie den Ausgangspegelder Audioquelle maximal anheben müssen. Wenn Sieden Ausgangspegel der Quelle extrem anheben, werdenauch etwaige Nebengeräusche im Quellsignal verstärkt.Wenn Sie den Eingangspegel dagegen zu hoch einstellen,werden auch alle Nebengeräusche im Signal verstärkt, wasSie sicherlich nicht wünschen! Auch hier gilt: Wenn Sie IhreAudioquelle korrekt aussteuern, sollte die Einstellung vonInput Gain auf Nominalpegel (U) gute Ergebnisse liefern.Sobald Sie die Regler Input Gain an den Monitoreneingestellt haben, sollten Sie ihre Einstellung nichtmehr verändern: Verwenden Sie Input Gain in keinemFall als Lautstärkeregler für Ihr System! Nutzen Sie fürdiesen Zweck den Lautstärkeregler Ihres Audiogeräts.91011Eris™ Serie E5 und E8 – Bedienungsanleitung3.4 Empfohlene Einstellungen für Acoustic SpaceWenn ein Monitor in der Nähe einer Wand oder in einer Raumecke aufgestellt wird, kann es im Vergleich zu Freifeldaufstellung im Raum zu einer Überbetonung im Bassbereich kommen: Diese Schalldruckmaxima treten besonders ausgeprägt bei Raumecken und leicht abgeschwächt bei einer Aufstellung vor einer Wand auf.Um diese Bass-Maxima zu kompensieren, bietet der E5/E8 den Schalter Acoustic Space, der alle Frequenzenunterhalb von 800 Hz um einen festen Pegelwert absenkt.Wenn die Monitore wie in Abbildung A dargestellt in der Nähe einer Raumecke aufgestellt werden, stellen Sie den Schalter Acoustic Space zunächst auf -4 dB, was für eine maximale Bassdämpfung sorgt.Wenn die Monitore direkt vor einer Wand aufgestellt werden, arbeiten Sie mit einer geringeren Dämpfung,indem Sie den Schalter Acoustic Space auf -2 dB einstellen.Wenn die Monitore nicht in der Nähe einer Wand aufgestellt werden, entsteht auch keine Verstärkung im Bassbereich:Stellen Sie den Schalter entsprechend auf 0 dB ein.4.1 Technische Spezifikationen44.1 Technische SpezifikationenEINGÄNGE (E5 und E8)1- XLR symmetrisch1- 6,3 mm TRS-Klinke symmetrisch1- Cinch unsymmetrischTECHNISCHE DATENFrequenzgangE553 Hz – 22 kHz E835 Hz – 22 kHz ÜbergangsfrequenzE5 3 kHz E82,2 kHz LF-VerstärkerleistungE5 45W E8 75W HF-VerstärkerleistungE5 35W E8 65W Max. Schalldruckpegel in 1 mE5102 dB E8105 dB LF-TreiberE55,25" Verbundgewebe E88" Verbundgewebe HF-TreiberE51" Seidenkalotte E81,25" Seidenkalotte EingangsimpedanzE5 und E810 kΩ12Eris™ Serie E5 und E8 – BedienungsanleitungBEDIENELEMENTELautstärkebereichE5 und E8Klemmbuchse vom Typ A MF-ReglerE5 und E8Variabel (-6 bis +6 dB) HF-ReglerE5 und E8Variabel (-6 bis +6 dB) Low CutE5 und E8Flat, 80 Hz, 100 Hz Acoustic SpaceE5 und E8Flat, -2 dB, -4 dB SCHUTZSCHALTUNGEN (E5 und E8)RF-EinstreuungenBegrenzung des AusgangsstromsÜberhitzungsschutzEinschaltverzögerung zur Dämpfung von TransientenSubsonic-FilterExterne NetzsicherungSTROMVERSORGUNGE5 und E8100-120 V ~50/60 Hz oder 220-240 V ~50/60 Hz GEHÄUSEE5 und E8Vinyl-beschichtete MDF PHYSIKALISCHE DATEN(Breite/Höhe/Tiefe)E5 178 mm / 195 mm / 260 mm E8 250 mm / 299 mm / 384 mm GewichtE54,63 kg E810,07 kg134.2 Fehlerbehebung4.2 FehlerbehebungKein Strom. Stellen Sie zuerst sicher, dass Ihr Eris E5/E8 am Stromnetz angeschlossen ist. Wenn Sie dasGerät an einem Spannungsstabilisator angeschlossenhaben, müssen Sie sicherstellen, dass diesereingeschaltet ist und ordnungsgemäß funktioniert.Wenn das Problem weiterhin besteht, ziehen Sie das Netzkabelvon Ihrem E5/E8 ab und überprüfen die Sicherung auf derRückseite des E5/E8. Der Sicherungshalter befindet sichdirekt unter der IEC-Netzbuchse. Bei einer durchgebranntenSicherung ist entweder das Innere schwarz verfärbt oder derSicherungsdraht ist durchgebrannt. Eine sehr dunkel verfärbteSicherung weist auf einen Kurzschluss hin. Ersetzen Sie diedurchgebrannte Sicherung durch eine neue. Im E5 kommteine T1L-Sicherung zum Einsatz. Der Eris E8 arbeitet mit einerT2L-Sicherung. Wenn die Sicherung erneut durchbrennt,wenden Sie sich zwecks einer Reparatur an PreSonus.Keine Audiowiedergabe. Wenn Ihr Eris E5/E8-Lautsprecher offensichtlich eingeschaltet ist, jedoch keinAudiosignal wiedergegeben wird (das Licht ist an, aberes ist keiner zuhause), stellen Sie zuerst sicher, dass dasVerbindungskabel zu Ihrer Audioquelle in Ordnung ist.Überprüfen Sie zudem, ob der Regler Input Gain eineausreichende Verstärkung für das Audiosignal bietet.Brummen. In der Regel entsteht Brummen durchMasseschleifen. Vergewissern Sie sich, dass alle Audiogerätean derselben Stromquelle angeschlossen sind. SofernSie bisher keinen Spannungsstabilisator verwenden,möchten wir Ihnen diese Anschaffung ans Herz legen.Ein Spannungsstabilisator eliminiert nicht nur etwaigesBrummen, sondern schützt das Equipment auch vorSpannungsspitzen und anderen Stromschäden.Verwenden Sie nach Möglichkeit immer symmetrischeKabel. Wenn Ihr Audiogerät keinen symmetrischenAusgang bietet, können Sie es an einer DI Boxanschließen, die einen Groundlift-Schalter sowieeinen symmetrischen Anschluss bietet.Vergewissern Sie sich schließlich, dass Ihre Audiokabel nicht inder Nähe von Stromkabeln verlegt sind und dass Sie Kabel mitpassender Länge verwenden. Bei zu langen Kabeln steigt nichtnur die Gefahr von Einstreuungen, sondern zudem kann dasKabel eventuell verdreht werden, wodurch eine Art Antenneentsteht, die dann alle Arten von Einstreuungen aufnimmt.14Guten Appetit! Das streng geheime PreSonus-Rezept für…Rice DressingZutaten:•500 g Hackfleisch•500 g gehackte Hühnerleber• 1 Zwiebel (gewürfelt)• 2 grüne Paprikaschote (gewürfelt)• 4 - 6 Stangen Sellerie (gewürfelt)• 2 Knoblauchzehen (fein gehackt)•50 g frische Petersilie (fein gehackt)•720 ml Geflügelfond•950 g gekochter Reis• 1 EL Öl•Salz und Pfeffer zum Würzen•Cayennepfeffer nach GeschmackZubereitung:1. Das Öl bei mittlerer Hitze in einem großen Topf erhitzen, das Fleisch hinzuge-ben und mit Salz und Pfeffer würzen. Das Fleisch unter Rühren von allen Seiten anbräunen.2. Die Hitze reduzieren und das Gemüse hinzugeben. Garen, bis die Zwiebelnglasig und die Selleriewürfel weich sind. Nach Bedarf Brühe zugeben, damitnichts anbrennt.3. Den Reis unterrühren, dann die restliche Brühe hinzugeben und bei kleinerHitze fertigköcheln.©2021 PreSonus Audio Electronics, Inc. Alle Rechte vorbehalten. AudioBox USB, Capture, CoActual, EarMix, Eris, FaderPort, FireStudio, MixVerb, Notion, PreSonus, PreSonus AudioBox, QMix, RedLightDist, SampleOne, Sceptre, StudioLive, Temblor, Tricomp, WorxAudio, und das Wellen-Logo sind eingetragene Marken der PreSonus Software Ltd. Andere genannte Produktnamen könnten Marken der respektiven Unternehmen sein. Alle Angaben sind ohne Gewähr und Änderungen sind vorbehalten...außer am Rezept, das ist ein Klassiker.Eris® Serie E5 / E8Hochauflösende Nahfeld-Studiomonitore BedienungsanleitungBaton Rouge • USAPart# 820-PAE0024-G。
智能眼镜

中国科学院深圳先进技术研究院
SHENZHEN INSTITUTES OF ADVANCED TECHNOLOGY CHINESE ACADEMY OF SCIENCES
猎隼智能眼镜
猎隼智能眼镜一代
技术参数:
产品折叠尺寸:160*140*40mm; 实际重量:大约35g; 读写接口速度:USB2.0,1.5MBps-60MBps; 电池:内置280mAh 聚合锂电池,可以录像1~2小时; 电源:5V DC/ 500毫安时; 设备功率:<0.8W 音频属性:立体声; 摄录速度:最大30帧/秒; CMOS高清摄像头; 1280x720 高清视频分辨率;1280*960 拍照像素; 高清摄像、拍照、录音、移动U盘功能; 配16GB TF 内存卡。
应用领域:
公安军警部门,远程监测、拍照、录像取证
猎隼智能眼镜二代
技术参数:
WIFI或者蓝牙与后台及手机数据传输; 产品折叠尺寸:160*140*40mm;实际重量:大约35g; 读写接口速度:USB2.0,1.5MBps-60MBps; 电池:内置800mAh 聚合锂电池,可以录像2~3小时; 电源:5V DC/ 500毫安时; 设备功率:<0.8W 音频属性:立体声; 摄录速度:最大30帧/秒 CMOS高清摄像头; 1280x720 高清视频分辨率;1280*960 拍照像素; 高清摄像、拍照、录音、移动U盘功能; 配32GB TF 内存卡。
易博锐思智能型7寸门口机说明书
H.264视频最高可达720p,每秒30帧,
摄像头
COMS传感器200万像素
摄像机镜头
F=2(手动调焦),78度可视角,0.1LuLED)
网络类型
TCP/IP局域网及广域网
待机电流
150mA
工作电流
500mA
直流电压
DC 12~18V
音频传输
单线全双工,延时200ms
视频传输
300~3,400Hz,延时200ms
环境温度
-20~50℃
湿度
45%-95%
IC/ID卡最大存储量
5000张
IC/ID卡读写时间
500ms
组网距离
无距离限制(以太网口距离100m),超过距离采用光纤
防护等级
IP33
外观尺寸:327MM*230MM*35MM
安装尺寸:315MM*240MM*45MM
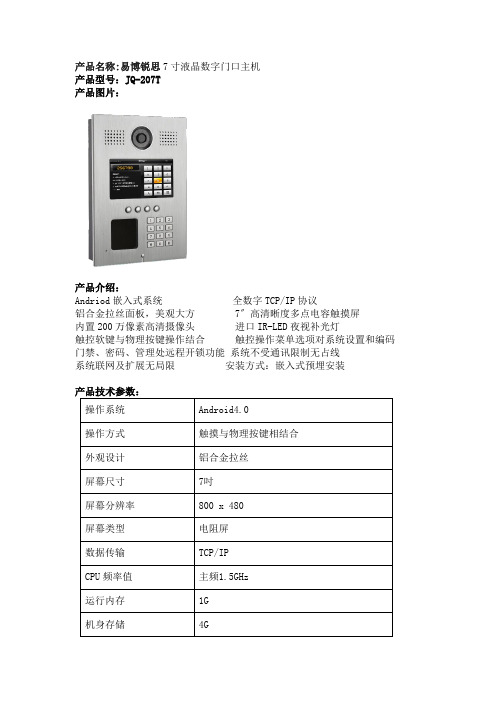
产品名称:易博锐思7寸液晶数字门口主机
产品型号:JQ-207T
产品图片:
产品介绍:
Andriod嵌入式系统全数字TCP/IP协议
铝合金拉丝面板,美观大方7〞高清晰度多点电容触摸屏
内置200万像素高清摄像头进口IR-LED夜视补光灯
触控软键与物理按键操作结合触控操作菜单选项对系统设置和编码
门禁、密码、管理处远程开锁功能系统不受通讯限制无占线
系统联网及扩展无局限安装方式:嵌入式预埋安装
产品技术参数:
操作系统
Android4.0
操作方式
触摸与物理按键相结合
外观设计
铝合金拉丝
屏幕尺寸
7吋
屏幕分辨率
800 x 480
屏幕类型
电阻屏
数据传输
TCP/IP
华为 智能门锁 SE 猫眼版 快速指南

SE华为智能门锁猫眼版快速指南01 产品介绍室外(前面板)USB Type-C室内(后面板)装入电池后门锁自动开机。
03 开机打开电池盖,装入锂电池和干电池。
02 门锁安装智能门锁安装请参考门锁安装说明书。
将底部凸出部分向上抠起,打开电池盖。
在干电池仓装入4节5号干电池。
安装时请注意正负极,并且请勿将新旧电池混用。
04 快速设置1 连接智慧生活App本产品推荐使用智慧生活App进行管理。
若未安装,可扫描下方二维码或在应用市场搜索“智慧生活”(华为手机)或“华为智慧生活”(非华为手机),下载安装App。
首次使用智慧生活App,请根据指引注册/登录华为帐号。
2 添加用户进入智慧生活App的门锁设备主界面,根据界面提示添加首个用户(默认为管理员用户)。
1进入智慧生活App首页,点击右上角的“+”,选择“添加设备”,根据界面提示完成设备连接。
设备名称可打开门锁后面板在铭牌处查看。
请选择2.4GHz Wi-Fi 频段连接。
21添加管理员用户提示:2添加普通用户进入门锁设备主界面,在用户管理中根据界面提示添加普通用户。
由于智慧生活App的升级与更新,实际操作可能与以上描述略有差异,请按照智慧生活App的实际界面进行操作。
智慧生活06 本地设置使用指南07 更多信息更多功能的使用方法,请扫描使用指南二维码获取。
在不方便使用智慧生活App设置门锁的情况下,可通过短按电池盖下的“设置”键,根据语音提示进行如下操作:添加管理员密码、指纹。
验证管理员密码或指纹后,可添加普通用户密码、指纹。
锂电池充电1 打开电池盖,按压锂电池仓上方按键,锂电池弹出,取出锂电池。
2 使用USB Type-C 充电线为锂电池充电即可。
提示: 推荐使用5V2A的充电器,充电时间预计5-6小时。
锂电池充电时,门锁通过干电池供电,猫眼功能不可用。
08 安全信息微功率信息,请查看使用指南。
在使用和操作设备前,请阅读并遵守下面的注意事项,以确保设备性能最佳,并避免出现危险或非法情况。
电子猫眼S2S新品上市:传统猫眼的价格,智能猫眼的享受!

电子猫眼S2S新品上市:传统猫眼的价格,智能猫眼的享受!为了让广大消费者,告别传统猫眼的安全隐患,用上更清晰更安全的智能猫眼,云视通智能猫眼工程师团队,设计推出智能猫眼S2S。
传统猫眼的价格,智能猫眼的享受!致我们终将逝去的传统猫眼传统猫眼,由凹透镜和凸透镜组成,是装在住宅门上的一个小型光学仪器。
自被发明以来,给人们的生活带来了很大的便利。
但自从智能猫眼问世以来,传统猫眼的弊端也逐渐显现。
1.视角不够大,观看范围有限2.没有夜视功能,晚上楼道没有灯就不能用3.图像会缩小变形,老人和孩子不方便使用4.社会上已经出现了猫眼偷窥器,可以从门外看到室内的情况5.传统猫眼容易被撬,更会给犯罪分子实施入室犯罪提供便利智能猫眼升级你的门禁针对传统猫眼的种种弊端,云视通工程师团队将猫眼和智能结合,推出了云视通智能猫眼S2S,门铃+监控二合一,夜视功能不怕黑,出门回家还能查看一天的访客,而且价格只要399元,快抱一台回家!智能猫眼S2S怎么用云视通智能猫眼S2S,由室内5.0寸大屏+室外锌合金猫头组成。
其功能,就好比在你的门上安装了一颗广角高清摄像机+智能门铃。
当有人按智能猫眼S2S上的门铃按钮时,智能猫眼S2S的屏幕就会被唤醒,你可以从室内大屏上,清楚地看清门外访客。
即使你不在家,当有人按门铃的时候,这台摄像机也会把来访者抓拍下来,等你出门回来,就可以查看一天的访客了。
智能猫眼S2S,还会对在门口徘徊的可疑人员进行侦测和抓拍,并发出警报,不放过任何不速之客。
只要399元的价格,就可以拥有一台高清智能猫眼,有些人心里要问了:智能猫眼S2S 的低价优势从何而来呢?智能猫眼S2S的低价优势主要来自于其对WiFi功能的精简,虽然用户不能从手APP 上实时查看监控画面,但是智能猫眼S2S,满足了用户对于更高清的猫头,访客回放功能、移动侦测报警、抓拍等功能的需要,也给了不需要WiFi功能的用户更低价的选择。
清晰视野全新升级芯片不怕光线不好进口玻璃镜头组可视角度高达140°门外来人清晰可见不怕小贼玩角色扮演进口长波段红外灯LED红点不可见设计给你的黑夜最强的守护PIR红外监测技术自动捕捉门口徘徊人员并抓拍关键时刻的有力证据工业级锌合金一体铸造军工级安全性能防盗防撬更可靠安装简单开机即有安装指导动画无需破坏家门四步简单安装传统猫眼的价格,智能猫眼的享受!云视通S2S新品上市,价格压至冰点:只要399元!升级的内芯,进口的镜头组、进口的红外灯,夜视功能、移动侦测功能的人性化设计,满足现代家庭想要安全猫眼的愿望!你们家,真的是时候来一台智能猫眼了~。
Greenlee GVIS 300 直观视觉辅助设备说明书

GVIS 300Indirect Viewing AidVideo Inspection ScopeInspection by a Unique Focus System...The GVIS 300 from Greenlee eliminates the need to place the users hand in the same position each time to attain effective focus control. To inspect the backplane connector the user simply inserts the probe into the connectorbulkhead. To focus simply turn the entire probe ¼ to ½ a turn for complete focus range. No longer is it necessary for the user to keep one hand on the focus wheel.The connector end face is displayed on a bright 3.5 inch LCD display and precision optics to provide an unmatched FOV (field of view) of 630μm by 440μm.Extended use Lithium Ion batteries provide 8-10 hours of continuous use. The battery can be charged in 3 hours using the “smart AC charger” (included). The GVIS 300 can continue to be used whilst charging.A 2.5mm Universal Connector and SC Bulkhead Adaptor are provided as standard. Optional tips for the most commonly used connectors are available.The GVIS 300 Monitor and Probe are supplied with separate carry cases. Also included is a battery charger, User Guide, cleaning Pen and Square.For digital archiving of the connector end-face the GVCM 410 Video Capture Module allows quick storage of the image to any Windows based computer.。
芬妮克斯1000系列智能门观察器说明书
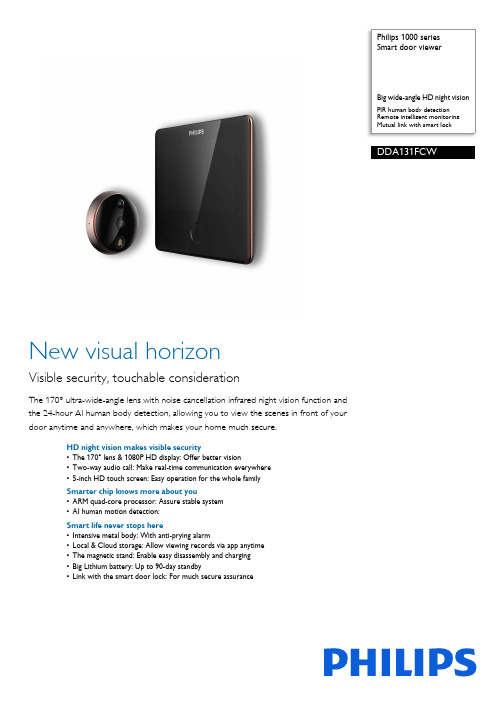
Philips 1000 seriesSmart door viewerBig wide-angle HD night visionPIR human body detectionRemote intelligent monitoringMutual link with smart lockDDA131FCWNew visual horizonVisible security, touchable considerationThe 170° ultra-wide-angle lens with noise cancellation infrared night vision function andthe 24-hour AI human body detection, allowing you to view the scenes in front of yourdoor anytime and anywhere, which makes your home much secure.HD night vision makes visible security•The 170° lens & 1080P HD display: Offer better vision•Two-way audio call: Make real-time communication everywhere•5-inch HD touch screen: Easy operation for the whole familySmarter chip knows more about you•ARM quad-core processor: Assure stable system•AI human motion detection:Smart life never stops here•Intensive metal body: With anti-prying alarm•Local & Cloud storage: Allow viewing records via app anytime•The magnetic stand: Enable easy disassembly and charging•Big Lithium battery: Up to 90-day standby•Link with the smart door lock: For much secure assuranceThe 170° lens & HD display Features with a monitoring-level 170 ° lens, the smart door viewer can absorb a high volume of light, together with four bright infraredsupplement lights and a professional infrared lampshade, it offers better night vision, even under insufficient lighting environments.Two-way audio callWhen you ring the doorbell or press the [call] button on the screen, you can start the real-time audio call with the built-in microphone and speaker. It can offer you a perfect calling experience.5-inch HD touch screenThe 5-inch IPS multi-touch HD screen adopts 2.5D full lamination curved glasses, which make everything look terrific. The interactive design is easy for children and the elderly to operate.ARM quad-core processorAdopt the quad-core ARM processor, the product shows strong performance with lower power consumption, which runs multi-task easier and makes the alert control system of the door to be more swift and stable.AI human motion detectionAdopted a PIR infrared sensor, when someone appears within three meters outside the door, the smart door viewer will identify through the AI human body detection algorithm and instantly captures a photo or video. Meanwhile, it pushes notifications to themobile app via the Cloud encryption server to monitor the situation at the door.Intensive metal bodyAdopted with the intensive metal body design and built-in anti-prying sensor, when the smart door viewer recognizes abnormal dynamics and offline from the Internet, the product will trigger an alarm to warn the strangers andremind your family, then the mobile app will receive push notifications in the real-time.Local and Cloud storageThe 4G local storage could satisfy your daily requirement, it could save the records even offline from the Internet. Any encrypted photo or video uploads to the Cloud server can be saved for 3 days, and you could view the records via the Philips app at any time.The magnetic standTo simply use the four built-in magnets to install the product and remove the display to disassemble the product. With the reinforced cable, the product could be much durable.Big Lithium batteryWith standby time up to 90 days, the built-in high-density polymer lithium battery has power-saving functionality. When theremaining battery level is 10%, the indicator in the upper left corner of the host's screen turns red and there will be a low battery level alert.Issue date 2023-11-28 Version: 3.1.1EAN: 69 71318 50230 9© 2023 Koninklijke Philips N.V.All Rights reserved.Specifications are subject to change without notice. Trademarks are the property of Koninklijke Philips N.V. or their respective owners.Design & Appearance •Color:Red copper Extended Function •IoT Module: Wifi Accessory Parts •Power adapter •Magnetic stand •User Manual •Warranty Card。
电子猫眼新款 om12中文资料

偷窺產品==反貓眼 新聞:产品實物照片:系列產品:产品及功能Ominia 电子猫眼在國內是一个全新概念的产品,由歐子明於去年正式在國內大力推廣,它采用数字芯片,并采用最新影像技术,其特殊的连接方式,不破坏现有的门结构由消費者買回自行安裝,將國外多年的DIY概念導入國內消費概念,產品使用低照度感光元件,就算是低光線的走廊也可很清楚的辨識來訪者。
这是一个真正实用的高科技居家安防产品,在某些產品上還擁有自動偵測 自動說話來提示門外的陌生來訪者,達到事前有效嚇阻,事後有效舉證,對家人的安全100%的保護,且擁有自动关闭系統以节省电池寿命,Ominia为国内最具有创新的产品设计公司‧公司背景:<< Ominia擁有台灣專業的電子軟件 及 硬件設計團隊及歐洲外觀團隊,無論在影像品直質及安裝方式,都同部領先同業,產品專利已達13項之多>>传统猫眼与电子猫眼比较:产品特色:行业领先工艺◎时尚尊贵的金属門眼:采用最先进的金属表面处理技术,使产品更显豪华大气、高贵更安全,防止門外破壞‧◎颠覆传统的外观设计:结合当今歐洲流行设计元素,流线形外观设计,彰显住家的豪华尊贵‧◎人体工程学设计键盘:按键中间微凹,客人按键时倍感舒适‧◎阻燃塑料及磨砂工艺:采用进口阻燃ABS+PC塑料及磨砂工艺,防火,防滑,不褪色,耐磨,抗冲击、抗疲劳性能优良‧◎高标准SMT贴片工艺:线路板采用日本SMT贴片技术,可靠性高、抗振能力强、焊点缺陷率非常低,电气性能极佳‧◎采用双色注塑工艺:数字按键采用双色注塑生产工艺,极具耐磨,长时间使用永不褪色‧◎操作简单安全:一指即见大影像,更清楚更安全更时尚‧◎拍照存证功能: 按门铃即刻拍照,让家人生活更安全有保障‧◎高分辨率影像:清晰LCD屏幕,影像聚焦生动,优于传统猫眼‧◎简易DIY不需施工:五分钟快速安装简单方便‧◎辨识度优于传统:先进低照度科技处理,让光线在暗的走道也能一清二楚,能清晰的显示影像,不像传统门窥视孔扭曲变形‧◎使用者不受限制:不论小孩身高不够,老人视力较差,都可简单清楚看到门外的人且拍照功能,可查询看来访者讯息‧◎超省电:使用2颗AA电池,特殊省电力管理技术‧◎超大视野:可观看160度‧产品规格:●型号:OM12,不受门孔大小及门厚限制,市面90%门都可使用(門孔直徑:12mm~~55 mm, 門厚:35mm~~90mm)‧●摄像:30万,超高夜视A规影像镜头●自带门铃,拍照,功能●TF 卡插口●LCD屏幕:2.8吋高清晰屏(台湾进口)●可视角度:160度●叮咚 門鈴聲●配件工具:電子貓眼顯示器 专利底座固定圓盤 固定工具 全国保卡及使用说明书電子貓眼市場:<<电子猫眼>>在国内此產品尚未打開市場,還處於推展期,一般消費者並不了解電子貓眼,新產品 新市場 新商機,想從事電子貓眼的合作伙伴,需要有一定的市場了解,此產品目前以安防工程公司小區推展 開發商及酒店業者為主要消費群,安全品味与档次是我司品特色,产品除了时尚的设计,最主要的就是安装简单,专利结构设计,使用现有门眼,无需破坏无需拉现即装即现,Ominia是目前国内最具档次及品味的可视门铃设计供货商‧產品安裝說明:公司國際展會情形:產品使用與展示效果:產品部分專利:產品國際認證:公司與工廠:Ominia 公司介绍:Ominia公司是一家成立于台湾跨国产品设计,生产为一体的高科技公司,致力于提高享受安全的家庭生活。
- 1、下载文档前请自行甄别文档内容的完整性,平台不提供额外的编辑、内容补充、找答案等附加服务。
- 2、"仅部分预览"的文档,不可在线预览部分如存在完整性等问题,可反馈申请退款(可完整预览的文档不适用该条件!)。
- 3、如文档侵犯您的权益,请联系客服反馈,我们会尽快为您处理(人工客服工作时间:9:00-18:30)。
EQUES移康智能产品功能对比表
本产品是行业内第一家通过公安部权威认证,并通过CE、FCC认证,荣获多项国家专利,获得山西省公安厅科技部,上海闵行电视台,第一财经大力宣传的科技产品。
型号工程/酒店版先锋盾金刚盾宙斯盾B宙斯盾G
产品图片
产品颜色如图香槟色/银色香槟色/银色香槟色/锖色香槟色
屏幕尺寸 2.8英寸 2.8英寸 2.8英寸 3.7英寸 3.7英寸
屏幕像素30万30万30万200万200万
屏幕分辨率320*240(QVGA)320*240(QVGA)320*240(QVGA)480*320(HVGA)480*320(HVGA)
屏幕方式高清显示屏高清显示屏高清显示屏高清触摸屏高清触摸屏
摄像头普通摄像头日、夜两用型/安防专用日、夜两用型/安防专用日、夜两用型/安防专用日、夜两用型/安防专用门外可视角度80°165°超广角 165°超广角165°超广角165°超广角
变焦倍数固定5级数码变焦5级数码变焦42倍手动变焦42倍手动变焦
拍照室内手动门铃手动自动抓拍自动抓拍自动抓拍
录像 室内手动门铃手动自动录像自动录像自动录像
红外感应距离无无(门外2~3米)(门外2~3米)(门外2~3米)
照片格式Jpeg Jpeg Jpeg Jpeg Jpeg
录像格式AVI AVI AVI MP4MP4
标配4G卡照片数量10万张10万张10万张2万张2万张
Micro-SD卡存储最大支持32GB最大支持32GB最大支持32GB最大支持32GB最大支持32GB
适合门孔直径12~25mm12~58mm12~58mm12~58mm12~58mm
适合门厚35~110mm35~110mm35~110mm35~110mm35~110mm
供电方式1500mAh锂电池1500mAh锂电池1500mAh锂电池1500+250mAh锂电池1500+250mAh锂电池
待机时间2~3个月1~2个月1~2个月1个月左右1个月左右
USB数据线充电无支持支持支持支持
门外有人室内提示无无支持支持支持。