思科实验-实验2
实验二VLAN以及Trunk实验(思科)
实验二VLAN以及Trunk配置(第2 次课 1 学时)一、【实验目的】1.了解交换机的工作原理,掌握交换机的基本配置命令。
1、掌握VLAN基本配置。
2、掌握静态接口VLAN划分。
二、【实验器材】1.思科3400交换机2台、PC机每组个2台。
2.连接console电缆线两条、标准网线若干。
三、【实验重点和难点】1.熟练使用交换机的常用配置命令。
2. 验证VLAN实现两个PC之间的连通性。
四、【实现功能】通过VLAN实现两个PC之间的连通性。
五、【思考题】不同VLAN间的PC是否可以相互访问,相同VLAN间的PC是否可以相互访问。
实验内容一、基本VLAN实验实验拓扑:实验需求:在交换机switch上面创建两个VLAN,vlan2和vlan3,vlan 名称分别为HR、ENG ,将主机PC1、PC2分别划入两个VLAN中步骤一:创建VLAN2与VLAN3Switch#config terminalSwitch(config)#vlan 2Switch(config-vlan)name HRSwitch(config-vlan) exitSwitch(config)#vlan 3Switch(config-vlan) name ENG步骤二:将与两台PC连接的两个接口分别划入相同的VLAN2中Switch(config)#int f0/1Switch(config-if) switch access vlan 2Switch(config-if)port nni//将接口划入指定VLAN中Switch(config-if)int f0/2Switch(config-if) switch access vlan 2Switch(config-if)port nni//将接口划入指定VLAN中Switch(config-if)exit验证结果:使用show vlan 2查看试验结果,在PC1以及PC2上使用ping 命令查看连通性。
计算机网络实验指导书CISCO版

计算机网络实验指导书 CISCO版实验一网络设备与通信协议实验1实验二 EIA568标准与双绞线水晶头制作13实验三交换机基本配置20实验四交换机VLAN配置25实验五路由器基本配置31实验六配置静态路由36实验七动态路由RIP配置42实验八动态路由OSPF协议配置50实验九访问控制列表ACL实验60实验十网络地址转换NAT实验65实验一网络设备与通信协议实验一、实验容学习使用网络基本设备,掌握设备性能和配置方法,熟悉LINUX和WINDOWS环境的TCP/IP协议配置方法,熟悉Internet环境,学习使用DOS下的常用网络命令。
二、实验目的了解网络适配器、调制解调器、集线器、交换机、路由器等网络硬件设备,熟悉多种网络操作系统,如LINUX和WINDOWS,掌握TCP/IP协议在不同操作系统下的安装与配置,初步掌握TCP/IP协议的应用。
掌握WINDOWS 环境常用网络命令的用法,学会使用网络命令查看网络信息,解决网络故障。
三、实验工具Quidway R2621模块化路由器、QuidwayS3026E交换机、Console配置线缆、双绞线、V24串口线缆、调制解调器、网络检测设备、PC等。
四、实验要求熟悉TCP/IP协议标准,准确理解IP地址与其子网划分方法,理解网关和子网掩码与其DNS的概念和原理;学习使用各种网络设备,掌握TCP/IP配置方法,熟练使用常用的网络命令。
五、实验容(1)在计算机上配置IP地址等TCP/IP属性信息(2)学习使用windows环境下常用的网络命令1.IP地址与以太网卡硬件地址查看命令:ipconfig2.网络连接测试命令:ping3.地址解析命令:ARP4.文件传输命令:FTP5.显示协议与其端口信息和当前的 TCP/IP 网络连接:Netstat6.控制网络路由表:Route7.将文件传输到正在运行TFTP 服务的远程计算机或从正在运行 TFTP服务的远程计算机传输文件:Tftp8.Tracert:该诊断实用程序将包含不同生存时间 (TTL) 值的 Internet 控制消息协议 (ICMP) 回显数据包发送到目标,以决定到达目标采用的路由。
实验2CiscoPacketTracer入门(实验详细说明)
实验2CiscoPacketTracer⼊门(实验详细说明)实验2 模拟组⽹软件⼊门【实验⽬的】⼀、认识Packet Tracer 。
⼆、学习使⽤Packet Tracer进⾏拓扑的搭建。
三、学习使⽤Packet Tracer对设备进⾏配置,并进⾏简单的测试。
【背景知识】⼀、认识Packet TracerPacket Tracer是与新版CCNA Discovery和CCNA Exploration并⾏发布的⼀个⽹络模拟器。
PT提供可视化、可交互的⽤户图形界⾯,来模拟各种⽹络设备及其⽹络处理过程,使得实验更直观、更灵活、更⽅便。
PT提供两个⼯作区:逻辑⼯作区(Logical)与物理⼯作区(Physical)。
逻辑⼯作区:主要⼯作区,在该区域⾥⾯完成⽹络设备的逻辑连接及配置。
物理⼯作区:该区域提供了办公地点(城市、办公室、⼯作间等)和设备的直观图,可以对它们进⾏相应配置。
左上⾓可以切换这两个⼯作区域。
PT提供两种⼯作模式:实时模式(Real-time)与模拟模式(simulation)。
实时模式:默认模式。
提供实时的设备配置和Cisco IOS CLI(Command LineInterface)模拟。
模拟模式:Simulation模式⽤于模拟数据包的产⽣、传递和接收过程,可逐步查看。
右下⾓可以切换这两种模式。
⼆、界⾯操作简介逻辑⼯作区(Logical Workplace)(中间最⼤块的地⽅):显⽰当前的拓扑结构和各个设备的状态。
图例导航区(Symbol Navigation)(左下⾓):切换不同的设备图例。
如单击路由器图标,右边出现所有可选的路由器型号。
从导航区可以拖动某个设备图标到⼯作区。
单击⼯作区中的设备,可以调出该设备的设置界⾯:1. 在Physical标签下可以进⾏设备模块的配置。
默认情况下,设备没有安装任何模块。
我们可以从左边的MODULES列表拖动需要的模块到设备的空插槽中(左下⾓有相应的模块说明)。
思科实验报告

2.HUB(集线器)或交换机1台;
3.制作完成的直通双绞线若干;
4•机房的电脑能上网。
三、实验内容
1.每个学生申请一个邮箱,交给老师;
2.老师在AC网站上导入学生信息,系统会将每个学生的ID号和
Password自动发至学生注册的邮箱;
3•然后学员在浏览器中输入以下地址登录全球思科网站:
Win2000或Win XP系统);
2.HUB(集线器)或交换机1台;
3.十字螺丝刀、压线钳各2把,测线仪2个;
4.水晶头和超五类双绞线若干;
三、实验内容
1.使用所提供的网线制作工具(压线钳和测线仪)和器材参照T568B
标准制作直通双绞线;
2.使用所提供的网线制作工具(压线钳和测线仪)和器材参照T568B
网络应用基础课程实验报告
院 系:
专 业:
班 级:
指导老师:
学 号:
姓 名:
实验一Google地球和维基3
实验二AC网站注册6
实验三网线制作1.0
实验四Ad-Hoc点对点无线局域网方案13
实验五基本结构型无线局域网方案17
实验六交换机的基本配置2 1
实验学时
2
实验时间
实验地点
同组成员
指导老师:
实验一
一、实验目的
2•什么OSI模型?OSI模型各层从最高层到最低层的正确顺序是什么 样的?
OSI开放式系统互联。一般都叫OSI参考模型
是ISO(国际标准化组织)组织在1985年研究的网络互联模型。
最早的时候网络刚刚出现的时候,很多大型的公司都拥有了网络技术公
司内部计算机可以相互连接。可以却不能与其它公司连接。因为没有一个 统一的规范。计算机之间相互传输的信息对方不能理解。所以不能互联。
《计算机网络》 实验二 CISCO交换机的基本操作 实验报告

千里之行,始于足下。
计算机网络》实验二 CISCO交换机的基本操作实验报告计算机网络》实验二 CISCO交换机的基本操作实验报告摘要:计算机网络的使用已经变得日常化,而交换机作为网络中常见的设备,对网络的稳定运行起着重要的作用。
本实验旨在通过对CISCO交换机的基本操作进行实践,加深对交换机工作原理的理解,掌握交换机的基本配置和网络故障排除等技能。
本文将详细介绍实验过程及结果,并对实验中所遇到的问题和解决方法进行讨论。
一、引言计算机网络是现代社会中信息传输的基础设施,其中交换机作为实现计算机之间进行数据传输和通信的关键设备,对网络的稳定运行起着重要的作用。
本实验通过对CISCO交换机的基本操作进行实践,旨在加深对交换机工作原理的理解,并掌握交换机的基本配置和故障排除等技能。
二、实验目的1. 掌握CISCO交换机的基本使用方法和操作步骤;2. 理解交换机的工作原理和基本配置;3. 能够进行交换机的基本配置和故障排除。
三、实验步骤及结果1. 实验环境准备(1) 操作系统:Windows 10;(2) 软件:PuTTY、CISCO交换机模拟器。
第1页/共3页锲而不舍,金石可镂。
2. 实验步骤(1) 打开PuTTY,通过SSH协议连接到CISCO交换机模拟器;(2) 输入用户名和密码以登录交换机;(3) 配置交换机的基本信息,如主机名、IP地址、子网掩码等;(4) 配置交换机的端口 VLAN 和端口模式;(5) 配置交换机的端口速率和双工模式;(6) 进行网络连通性测试,检查配置是否成功。
3. 实验结果及分析经过实验操作,成功登录CISCO交换机,并按照实验指导书要求进行了基本配置。
通过网络连通性测试,确认配置生效,并能正常进行数据传输和通信。
实验结果表明,基本操作步骤能够顺利实现,并取得了预期的实验效果。
四、问题与解决1. 问题1:无法连接到CISCO交换机。
解决方法:检查网络连接是否正常,重新配置PuTTY连接参数。
思科实训报告

思科实训路由器操作及配置班级:网络1031姓名:闫晓彤学院:轻工山西轻工职业技术学院2011年6月17日实验 1 简单的路由配置与抓包工具的使用实验目的1 学习使用CISCO仿真软件;2 学习使用路由配置基本命令.实验要求单独配置自己的路由器,完成路由的配置后,各路由器要能够ping通拓扑图中的所有网段。
并且使用抓包工具观察ping的数据流.实验项目性质设备的连通性。
实验设备计算机及CISCO仿真软件。
连接方式IP配置表名称地址网关PC0 172.168.1.12172.168.1.1PC1 172.168.1.22172.168.1.1路由器172.168.1.23172.168.1.1实验步骤1 将路由器、交换机和两台终端设备拖拽出来。
2 连接路由器和交换机,连接交换机和两台终端设备。
3 配置PC0,PC1 的IP地址,4 用抓包软件来看数据流的传输方向是否连通。
5 在PC0上使用PING命令去检测是否和PC1相连通.实验数据及结果数据流:先从PC0发送数据包到交换机,再从交换机将数据包发送到PC1,然后数据包从PC1返回到交换机,交换机将数据包发送到PC0,完成数据流的流通。
实验总结在试验的过程中我学会了用思科仿真软件来使用简单的路由配置和抓包操作。
通过使用PING命令来配置路由器等。
实验二简单的路由配置与抓包工具的使用一:实验目的1 学习使用CISCO仿真软件;2 学习使用路由配置基本命令。
二:实验要求单独配置自己的路由器,PC,完成路由与PC的配置后,各路由器要能够ping通拓扑图中的所有网段。
三:实验项目性质检测设备之间的连通性。
四:实验设备计算机及CISCO仿真软件。
五:连接方式IP配置表名称地址网关PC0 172.16.1.23 172.16.1.1PC1 172.16.1.13 172.16.1.1PC2 172.17.1.23 172.17.1.1PC3 172.17.1.13 172.17.1.1Router0 172.16.1.1 2172.16.1.1Router1 172.17.1.1 172.17.1.1六:实验步骤1 将两台路由器、两台交换机、以及四台PC机拖到思科仿真软件中。
思科网络实验报告2静态路由的配置

集美大学计算机工程学院实验报告实验名称基本静态路由配置课程名称计算机网络班级日期—成绩_________________一、实验目的1、为接口分配适当的地址,并进行记录。
2、根据拓扑图进行网络布线。
3、清除启动配置并将路由器重新加载为默认状态。
4、在路由器上执行基本配置任务。
5、配置并激活串行接口和以太网接口。
6、确定适当的静态路由、总结路由和默认路由。
二、实验场景对一个网络地址进行子网划分以便完成拓扑结构图所示的网络编址。
连接到ISP路由器的LAN编址和HQ与ISP路由器之间的链路已经完成。
但还需要配置静态路由以便非直连网络中的主机能够彼此通信。
实际拓扑图:192.163.2. E伽三、实验器材(1 )直通以太网电缆 3 条(2 )交叉以太网电缆 1 条(3)PC机 3 台(4)路由器 3 台(5)交换器 2 台四、实验内容任务1 :对地址空间划分子网步骤1 :研究网络要求。
在网络设计中,使用192.16820/24 地址空间。
对该网络进行子网划分,以提供足够的IP地址来支持60台主机。
步骤2 :创建网络设计时思考以下问题:需要将192.168.2.0/24 网络划分为多少个子网?_4个___这些子网的网络地址分别是什么?子网0: _192.168.2. 0/26 ___________________________子网 1 : _192.168.2.64/26 __________________________子网2: _192.168.2.128/26 _________________________子网3: _192.168.2.192/26 _________________________这些网络以点分十进制格式表示的子网掩码是什么?255.255.255.192以斜杠格式表示的网络子网掩码是什么?_/26 ___每个子网可支持多少台主机?_62 ______步骤3 :为拓扑图分配子网地址。
思科CCNA2实验报告

1.1.3.5Packet Tracer - 配置IPv4 和IPv6 接口地址分配表目标第 1 部分:配置IPv4 编址并验证连接第 2 部分:配置IPv6 编址并验证连接背景信息路由器R1 和R2 分别有两个LAN。
您的任务是在每台设备上配置合适的编址并验证LAN 之间的连接。
注:用户EXEC 密码是cisco。
特权EXEC 密码为class。
第 1 部分:配置IPv4 编址并验证连接步骤1:为R1 和LAN 设备分配IPv4 地址。
参照地址分配表,为R1 LAN 接口PC1和PC2配置IP 编址。
串行端口已配置。
R1#conf tR1(config)#interface gigabitEthernet 0/0R1(config-if)#ip address 172.16.20.1 255.255.255.128R1(config-if)#no shutdownR1(config-if)#int g0/1R1(config-if)#ip address 172.16.20.129 255.255.255.128R1(config-if)#no shutdown步骤2:验证连接。
PC1和PC2应能够彼此以及对双堆栈服务器执行ping 操作。
PC1:PC2:第 2 部分:配置IPv6 编址并验证连接步骤1:为R2 和LAN 设备分配IPv6 地址。
参照地址分配表,为R2 LAN 接口PC3和PC4配置IP 编址。
串行端口已配置。
R2#conf tR2(config)#int g0/0R2(config-if)#ipv6 address 2001:DB8:C0DE:12::1/64R2(config-if)#ipv6 address FE80::2 link-localR2(config-if)#int g0/1R2(config-if)#ipv6 address 2001:DB8:C0DE:13::1/64R2(config-if)#ipv6 address FE80::2 link-local步骤2:验证连接。
思科BGP实验2完整版

2. 在路由器 AS100-B、AS100-C、AS100-D 上配置 RIP version2 协议,相互之间通告 172.16.0.0 网络路由信息;
3. 在各台路由器上都启动 BGP 协议,各 AS 号如图所示。 4. 下面是各台路由器完成配置后,用 show run 命令看到的配置结果 1) 路由器AS200-A TOP hostname As200-A ! enable password cisco ! interface Loopback1
5
! no scheduler allocate end
5)路由器AS300-E TOP hostname as300-E ! enable password cisco ! interface Loopback1
ip address 192.168.2.1 255.255.255.0 ! interface Ethernet0
2
2)路由器AS100-B TOP hostname AS100-B ! enable password cisco ! interface Loopback3
ip address 172.16.2.1 255.255.255.0 no ip directed-broadcast ! interface FastEthernet0/0 ip address 172.16.16.2 255.255.255.0 no ip directed-broadcast ! interface Serial0/0 ip address 172.16.4.2 255.255.255.0 no ip directed-broadcast no ip mroute-cache no fair-queue ! interface Serial0/1 ip address 172.16.5.2 255.255.255.0 no ip directed-broadcast ! router rip version 2 network 172.16.0.0 ! router bgp 100 network 172.16.2.0 mask 255.255.255.0 network 172.16.4.0 mask 255.255.255.0 network 172.16.5.0 mask 255.255.255.0 network 172.16.16.0 mask 255.255.255.0 neighbor 172.16.4.1 remote-as 100 neighbor 172.16.5.1 remote-as 200 neighbor 172.16.7.2 remote-as 100 neighbor 172.16.16.1 remote-as 300 !
思科模拟器实训
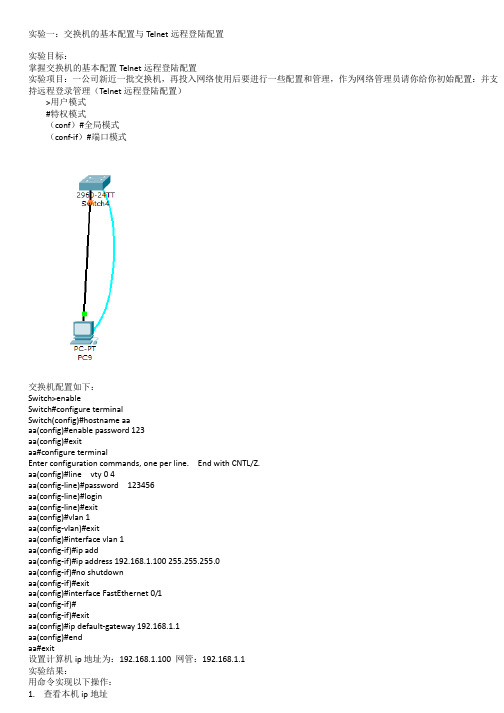
实验一:交换机的基本配置与Telnet远程登陆配置实验目标:掌握交换机的基本配置Telnet远程登陆配置实验项目:一公司新近一批交换机,再投入网络使用后要进行一些配置和管理,作为网络管理员请你给你初始配置:并支持远程登录管理(Telnet远程登陆配置)>用户模式#特权模式(conf)#全局模式(conf-if)#端口模式交换机配置如下:Switch>enableSwitch#configure terminalSwitch(config)#hostname aaaa(config)#enable password 123aa(config)#exitaa#configure terminalEnter configuration commands, one per line. End with CNTL/Z.aa(config)#line vty 0 4aa(config-line)#password 123456aa(config-line)#loginaa(config-line)#exitaa(config)#vlan 1aa(config-vlan)#exitaa(config)#interface vlan 1aa(config-if)#ip addaa(config-if)#ip address 192.168.1.100 255.255.255.0aa(config-if)#no shutdownaa(config-if)#exitaa(config)#interface FastEthernet 0/1aa(config-if)#aa(config-if)#exitaa(config)#ip default-gateway 192.168.1.1aa(config)#endaa#exit设置计算机ip地址为:192.168.1.100 网管:192.168.1.1实验结果:用命令实现以下操作:1.查看本机ip地址2.Ping 交换机地址3.Ping网关地址4.Ping本机地址5.远程登录交换机查看交换机运行信息实验二:交换机划分vlan设置实验目标:交换机划分vlan设置实验项目:某公司财务部和销售部的计算机通过两台交换机实现通讯,要求财务部和销售部内部的计算机可以互通,但为了安全期间要求财务部和销售部进行安全隔离,请做配置1.单个交换机划分vlanSwitch>enableSwitch#configure tSwitch#configure terminalEnter configuration commands, one per line. End with CNTL/Z.Switch(config)#hSwitch(config)#hostname aaaa(config)#vlan 1aa(config-vlan)#exitaa(config)#interface vlan 1aa(config-if)#ip address 192.168.1.100 255.255.255.0aa(config-if)#no shutdownaa(config-if)#exitaa(config)#ip default-gateway 192.168.1.1aa(config)#vlan 10aa(config-vlan)#exitaa(config)#vlan 20aa(config-vlan)#exitaa(config)#interface range fastEthernet 0/1-12aa(config-if-range)#switchport access vlan 10aa(config-if-range)#exitaa(config)#interface range fastEthernet 0/13-24aa(config-if-range)#switchport access vlan 20aa(config-if-range)#exitaa(config)#exitaa#实验结果:用命令实现以下操作:1,pc1 ip地址192.168.1.2 24 网管:192.168.1.1 端口接1-122,pc2 ip地址192.168.1.3 24 网管:192.168.1.1 端口接13-243,pc3 ip地址192.168.1.4 24 网管:192.168.1.1 端口接1-124,pc4 ip地址192.168.1.5 24 网管:192.168.1.1 端口接13-245,四台pc机相互ping6,Ping 交换机地址2.多交换机划分vlan 两台交换机配置一样Switch>enableSwitch#configure terminalEnter configuration commands, one per line. End with CNTL/Z.Switch(config)#hostname aaaa(config)#vlan 2aa(config-vlan)#exitaa(config)#vlan 3aa(config-vlan)#exitaa(config)#interface faa(config)#interface fastEthernet 0/1aa(config-if)#switchport access vlan 2aa(config-if)#exitaa(config)#interface fastEthernet 0/2aa(config-if)#switchport access vlan 3aa(config-if)#exitaa(config)#interface fastEthernet 0/24aa(config-if)#switchport mode trunkaa(config-if)#exitaa(config)#interface vlan 1aa(config-if)#ip address 192.168.1.100 255.255.255.0aa(config-if)#no shutdownaa(config-if)#exitaa(config)#ip default-gateway 192.168.1.1aa(config)#exitaa#实验结果:用命令实现以下操作:1,pc1 ip地址192.168.1.2 24 网管:192.168.1.1 端口接12,pc2 ip地址192.168.1.3 24 网管:192.168.1.1 端口接23,pc3 ip地址192.168.1.4 24 网管:192.168.1.1 端口接14,pc4 ip地址192.168.1.5 24 网管:192.168.1.1 端口接25,四台pc机相互ping6,Ping 交换机地址实验三:不同vlan之间的通讯一、实验目的1、理解多层交换机的路由原理2、了解多层交换机在实际网络中的常用配置3、回顾二层交换机VLAN 的划分方法4、进一步理解802.1Q 的原理和使用方法二、应用环境二层交换机属于接入层交换机,在二层交换机上根据连接用户的不同,划分了不同VLAN,有时候会出现同一个VLAN 处于不同的交换机上。
思科 路由与交换基础实验lab2

实验 1.5.2:路由器基本配置拓扑图地址分配表设备接口IP 地址子网掩码默认网关Fa0/0192.168.1.1 255.255.255.0 不适用R1S0/0/0192.168.2.1 255.255.255.0 不适用Fa0/0192.168.3.1 255.255.255.0 不适用R2S0/0/0192.168.2.2 255.255.255.0 不适用PC1不适用192.168.1.10 255.255.255.0 192.168.1.1 PC2不适用192.168.3.10 255.255.255.0 192.168.3.1学习目标完成本实验后,您将能够:•根据拓扑图进行网络布线。
•清除启动配置并将路由器重新加载为默认状态。
•在路由器上执行基本配置任务。
•配置并激活以太网接口。
•测试并检验配置。
•思考网络实施方案并整理成文档。
场景在本次实验中,您将创建一个与拓扑图类似的网络。
首先请根据拓扑图布线。
然后执行网络连通所需的初始路由器配置。
使用拓扑图中提供的 IP 地址为网络设备分配地址。
网络配置完成后检查路由表,验证网络是否能够正常工作。
本实验是实验1.5.1:网络布线和路由器基本配置的精简版,开始实验之前,您需要熟练掌握基本布线技能和配置文件管理技能。
任务 1:网络布线。
构建一个类似拓扑图所示的网络。
本实验中使用的输出来自 1841 路由器。
您可以在实验中使用任何路由器,只要它具备拓扑图中所要求的接口即可。
请确保使用正确类型的以太网电缆连接主机与交换机、交换机与路由器,以及主机与路由器。
如果您在连接设备时遇到问题,请参考实验 1.5.1:网络布线和基本路由器配置。
请确保将串行 DCE 电缆连接到路由器 R1,并将串行 DTE 电缆连接到路由器 R2。
回答以下问题:应该使用什么类型的电缆将主机 PC 上的以太网接口连接到交换机上的以太网接口?___________应该使用什么类型的电缆将交换机上的以太网接口连接到路由器上的以太网接口?___________应该使用什么类型的电缆将路由器上的以太网接口连接到主机 PC 上的以太网接口?___________任务 2:清除配置并重新启动路由器。
思科实验报告

思科实验报告思科实验报告一、实验目的本实验旨在通过模拟真实的网络环境,了解思科设备的配置和管理方法,掌握基本的网络协议和概念,加深对网络技术的理解。
二、实验原理思科设备是全球领先的网络设备供应商,其产品在企业和组织中得到广泛应用。
本实验将使用思科模拟器软件,模拟真实的网络环境,包括路由器、交换机、终端设备等。
通过网络协议的配置和管理,实现不同设备之间的通信和数据传输。
本实验中涉及的网络技术主要包括以下几个方面:1.网络拓扑结构:网络拓扑结构是指网络设备的连接方式和布局。
本实验将采用简单的星型拓扑结构,包括一台中心交换机和若干台终端设备。
2.IP地址分配:IP地址是网络设备的唯一标识,用于识别设备并确定其在网络中的位置。
本实验将采用私有IP地址段,为每台设备分配一个唯一的IP 地址。
3.路由协议:路由协议是用于确定数据包在网络中传输路径的协议。
本实验将采用静态路由协议,手动配置路由表项,实现不同网络之间的通信。
4.VLAN技术:VLAN技术是将一个物理网络划分为多个逻辑网络的技术,可以提高网络的安全性和灵活性。
本实验将采用VLAN技术,将终端设备划分到不同的VLAN中。
5.访问控制列表:访问控制列表是用于控制网络访问的技术,可以根据源地址、目标地址、端口等条件限制网络访问。
本实验将采用访问控制列表,实现终端设备的访问控制。
三、实验步骤1.配置网络拓扑结构:使用思科模拟器软件,创建星型拓扑结构,包括一台中心交换机和若干台终端设备。
连接设备和线路,确保网络连通性。
2.分配IP地址:为每台设备分配一个唯一的IP地址,包括中心交换机和终端设备。
使用私有IP地址段,避免与公共网络冲突。
3.配置静态路由协议:在中心交换机上配置静态路由协议,手动添加路由表项,实现不同网络之间的通信。
测试网络通信是否正常。
4.配置VLAN技术:在中心交换机上配置VLAN技术,将终端设备划分到不同的VLAN中。
测试VLAN之间的通信是否正常。
2思科模拟器实验指导书.docx

Packet Tracer 5.0软件使用教程深入详解cisco刖s可以这么说,我用过有许多好的网络模拟软件,其中不乏有特别优秀的!比如Boson的Boson NetSim for CCNA 6.0就很优秀。
但是自从我用了Packet Tracer这个思科官方模拟软件后,我发现竟冇更优秀的。
他的最新版本是Packet Tracer 5.0,直到现在我使用这个工貝仍然是爱不释手,好了闲话不多说,工作!网络上有相关Packet Tracer的所谓“教程”,但是都只是皮毛,今天我从以下三个方而入手介绍Packet Tracer 5.0这个软件。
力求做到“深入、详解S另外我不反对大家转载这篇文章,但是我希望朋友转载后请注明链接:第一篇、熟悉界面一、设备的选择与连接在界面的左下角一块区域,这里有许多种类的硬件设备,从左至右,从上到下依次为“路由器”、“交换机”、“集线器”、“无线设备”、“设备之间的连线(Connections)”、“终端设备”、“仿真广域网”、以及"Custom Made Devices (自定义设备)”。
下面着重讲一下“设备之间的连线:Connections",用鼠标点一下它之后,在右边你会看到各种类型的线,依次为Automatically Choose Connection Type (自动选线,万能的,一般不建议使用,除非你真的不知道设备Z间该用什么线)、控制线、直通线、交叉线、光纤、电话线、同轴电缆、DCE、DTEo其中DCE和DTE是用于路由器之间的连线。
实际当中,你需要把DCE和一台路由器相连,DTE和另一台设备相连。
而在这里,你只需选一根就是了,若你选了DCE这一根线,贝U和这根线先连的路由器为DCE,配置该路由器吋需配置吋钟哦。
交叉线只在路由器和电脑直接相连,或交换机和交换机之间相连时才会用到。
注释:那么Custom Made Devices (口定义设备)是做什么的呢?通过实验发现:当我们用鼠标单击不放开左键把位于第一行的第一个设备也就是Router中的任意一个拖到工作区,然后再拖一个然后我们尝试用串行线Serial DTE连接两个路由器时发现,他们Z间是不会正常连接的,原因是这两个设备初始化对然虽然都是模块化的,但是没冇添加,比如多个串口等等。
思科实验练习题

思科实验练习题思科实验练习题是网络工程师培训中常见的一种学习方法,通过实际操作和解答问题来提升学员的技能水平。
本文将通过一系列的实验练习题,帮助读者加深对思科网络设备的理解,并提升解决网络问题的能力。
一、实验练习题1:基本配置1. 在思科路由器上配置一个名称为“LabRouter”的主机名。
2. 设置主机名的提示符为“LabRouter>”。
3. 配置控制台口令为“cisco”。
4. 配置虚拟终端口令为“cisco”。
5. 为路由器配置一个管理IP地址为192.168.0.1/24。
6. 启用路由器上的SSH服务,并设置远程管理口令为“cisco”。
二、实验练习题2:静态路由1. 在思科路由器上配置两个接口,分别连接到两个局域网,网络地址分别为192.168.1.0/24和192.168.2.0/24。
2. 配置路由器上的静态路由,将流量从192.168.1.0/24网络发送到192.168.2.0/24网络。
三、实验练习题3:动态路由1. 在思科路由器上启用RIPv2协议,并配置路由器上的网络地址,包括192.168.1.0/24和192.168.2.0/24。
2. 配置路由器上的RIPv2协议,将流量从192.168.1.0/24网络发送到192.168.2.0/24网络。
四、实验练习题4:VLAN1. 在思科交换机上创建两个VLAN,分别为VLAN10和VLAN20。
2. 将端口1-10划分到VLAN10,端口11-20划分到VLAN20。
3. 配置交换机上的端口1为VLAN10的访问端口,端口10为VLAN10的特许端口。
4. 配置交换机上的端口11为VLAN20的访问端口,端口20为VLAN20的特许端口。
五、实验练习题5:STP1. 在思科交换机上启用Spanning Tree Protocol(STP)。
2. 配置交换机上的端口1为根桥接口。
3. 配置交换机上的端口2为备用根桥接口。
思科实验实验报告2
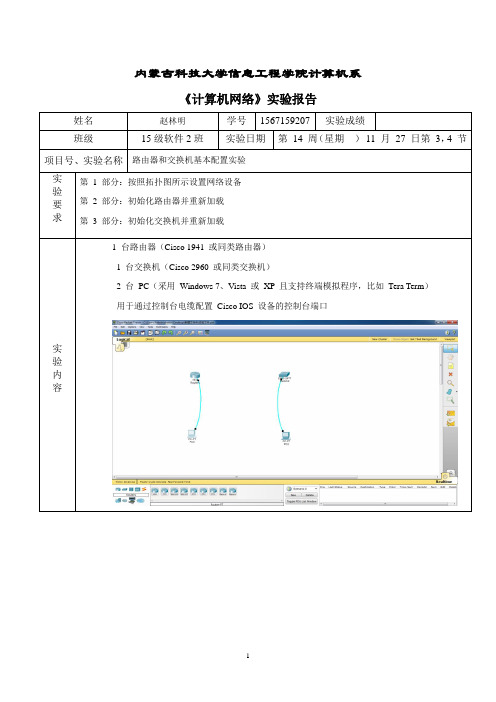
内蒙古科技大学信息工程学院计算机系《计算机网络》实验报告
说明:
1、每个实验项目填写一份实验报告,电子版命名方式为:学号姓名项目号.doc。
例如:1167111182张三3.doc表示张三做的第3个项目的实验报告。
2、实验报告电子版应该在实验后一周内由学习委员收齐后存放在一个文件夹下,文件夹命
名方式为:软件12-1班3,表示软件12-1班第3个项目的实验报告,压缩。
第一时间发送给任课教师。
必须以班级为单位上交。
3、任课教师要求在收到实验报告的一周内进行批阅,并给出成绩及评语。
4、实验报告电子版由任课教师保存。
5、表格宽度可以根据实际情况伸缩。
计算机网络实验指导书CISCO版
计算机网络实验指导书CISCO版计算机网络实验指导书(CISCO版)一、实验目的本实验主要旨在通过搭建计算机网络,了解并学习计算机网络的基本原理和工作原理,掌握网络设备的基本配置和管理,加深对计算机网络的理解和应用。
二、实验环境1. 硬件环境:计算机、路由器、交换机、网线等。
2. 软件环境:Windows操作系统、CISCO网络设备配置软件。
三、实验内容1. 实验一:计算机网络的基本配置(1) 将计算机、路由器和交换机连接起来,搭建起基本的计算机网络。
(2) 在计算机上配置IP地址、子网掩码、默认网关等网络参数。
(3) 在路由器上配置IP地址、子网掩码、默认网关、静态路由等网络参数。
(4) 在交换机上配置VLAN、端口速率、端口模式等网络参数。
(5) 测试网络连通性,确保计算机可以正常访问互联网。
2. 实验二:计算机网络的路由配置(1) 学习并了解动态路由和静态路由的概念和原理。
(2) 在路由器上配置RIP、OSPF等动态路由协议。
(3) 在计算机上配置默认网关为路由器的接口IP地址。
(4) 测试不同网络之间的连通性,观察路由表的变化。
3. 实验三:计算机网络的交换配置(1) 学习并理解交换机的工作原理和基本配置。
(2) 在交换机上配置STP、VTP等网络协议。
(3) 将多个交换机连接起来,搭建起适用于大型网络的交换机网络。
(4) 测试不同子网之间的连通性,观察交换机表的变化。
4. 实验四:计算机网络的安全配置(1) 学习并理解计算机网络的安全问题和解决方法。
(2) 配置路由器的ACL(访问控制列表)和防火墙规则,阻止非法访问和网络攻击。
(3) 配置交换机的端口安全、VLAN安全等功能,维护网络的安全性。
(4) 测试网络的安全性,观察安全日志和记录非法访问。
四、实验步骤1. 实验一:计算机网络的基本配置(1) 搭建计算机网络:将计算机、路由器和交换机连接起来,使用网线将它们依次连接。
(2) 配置计算机的网络参数:在计算机的控制面板中找到网络设置,配置IP地址、子网掩码、默认网关等参数。
- 1、下载文档前请自行甄别文档内容的完整性,平台不提供额外的编辑、内容补充、找答案等附加服务。
- 2、"仅部分预览"的文档,不可在线预览部分如存在完整性等问题,可反馈申请退款(可完整预览的文档不适用该条件!)。
- 3、如文档侵犯您的权益,请联系客服反馈,我们会尽快为您处理(人工客服工作时间:9:00-18:30)。
高级网络技术实验报告一、实验目的(本次实验所涉及并要求掌握的知识点)6.2 实验 1:点到点链路上的 OSPF通过本实验可以掌握①在路由器上OSPF 路由进程;②启用参与路由协议的接口,并且通告网络及所在的区域;③度量值Cost 的计算;④Hello 相关参数的配置;⑤点到点链路上的OSPF 特征;⑥查看和调试OSPF 路由协议相关信息。
6.4.1 实验3:基于区域的OSPF 简单口令认证①OSPF 认证的类型和意义;②基于区域的OSPF 简单口令认证的配置和调试6.4.2 实验4:基于区域的OSPF MD5 认证①OSPF 认证的类型和意义;②基于区域的OSPF MD5 认证的配置和调试6.4.3 实验5:基于链路的OSPF 简单口令认证①OSPF 认证的类型和意义;②基于链路的OSPF 简单口令认证的配置和调试6.4.4 实验6:基于链路的OSPF MD5 认证(1)OSPF 认证的类型和意义;(2)基于链路的OSPF MD5 认证的配置和调二、实验内容与设计思想(设计思路、主要数据结构、主要代码结构)6.2 实验 1:点到点链路上的 OSPF拓扑图6.1,题目要求把192.168.X.X换成192.学号.X.X6.4.1 实验3:基于区域的OSPF 简单口令认证6.4.2 实验4:基于区域的OSPF MD5 认证6.4.3 实验5:基于链路的OSPF 简单口令认证6.4.4 实验6:基于链路的OSPF MD5 认证二、实验使用环境(本次实验所使用的平台和相关软件)WIN10Cisco Packet Tracer四、实验步骤和调试过程(实验步骤、测试数据设计、测试结果分析)6.2 实验 1:点到点链路上的 OSPF(1)步骤1:配置路由器R1R1(config)#router ospf 1R1(config-router)#router-id 1.1.1.1R1(config-router)#network 1.1.1.0 255.255.255.0 area 0R1(config-router)#network 192.103.12.0 255.255.255.0 area 0(2)步骤2:配置路由器R2R2(config)#router ospf 1R2(config-router)#router-id 2.2.2.2R2(config-router)#network 192.103.12.0 255.255.255.0 area 0R2(config-router)#network 192.103.23.0 255.255.255.0 area 0R2(config-router)#network 2.2.2.0 255.255.255.0 area 0(3)步骤3:配置路由器R3R3(config)#router ospf 1R3(config-router)#router-id 3.3.3.3R3(config-router)#network 192.103.23.0 255.255.255.0 area 0 R3(config-router)#network 192.103.34.0 255.255.255.0 area 0 R3(config-router)#network 3.3.3.3 255.255.255.0 area 0(4)步骤4:配置路由器R4R4(config)#router ospf 1R4(config-router)#router-id 4.4.4.4R4(config-router)#network 4.4.4.0 0.0.0.255 area 0R4(config-router)#network 192.103.34.0 0.0.0.255 area 0(5)步骤5:调试参数show ip router环回接口下修改网络类型为”Point-to-Point”,操作如下:R2(config)#interface loopback 0R2(config-if)#ip ospf network point-to-point这样收到的路由条目的掩码长度和通告的就一致了Show ip ospfShow ip ospf interfaceShow ip ospf dateba(6)实验截图6.4.1 实验3:基于区域的OSPF 简单口令认证1、先按照实验要求连接好设备,并配置名称、ip、环回口IP2、配置路由器R1R1(config)#router ospf 1R1(config-router)#router-id 1.1.1.1R1(config-router)#network 192.103.12.0 255.255.255.0 area 0R1(config-router)#network 1.1.1.1 255.255.255.0 area 0R1(config-router)#area 0 authentication //区域0 启用简单口令认R1(config)#interface s0/0/0R1(confi-if)#ip ospf authentication-ke cisco //配置认证3、配置路由器R2R1(config)#router ospf 1R1(config-router)#router-id 2.2.2.2R1(config-router)#network 192.103.12.0 255.255.255.0 area 0R1(config-router)#network 2.2.2.2 255.255.255.0 area 0R1(config-router)#area 0 authentication //区域0 启用简单口令认R1(config)#interface s0/0/0R1(confi-if)#ip ospf authentication-ke cisco //配置认证4、实验调试(1)show ip ospf interface环回接口下修改网络类型为”Point-to-Point”,操作如下:R2(config)#interface loopback 0R2(config-if)#ip ospf network point-to-point(2)show ip ospf5、情况:以上输出表明区域0 采用简单口令认证。
①如果R1 区域0 没有启动认证,而R2 区域0 启动简单口令认证,则R2 上出现下面的信息:*Feb 10 11;03;03.071;OSPF;Rcv pkt from 192.168.12.1 Serial0/0/0 ;Mismatch Authentication Type.Input packet sp0,we use type 1②如果R1 和R2 的区域0 都启动简单口令认证,但是R2 的接口下没有配置密码或密码错误,则R2 上出现下*Feb 10 10;55;53.071;OSPF;Rcv pkt from 192.168.12.1 Serial0/0/0 ;Mismatch Authentication Key-Clear Te6、实验拓扑图:6.4.2 实验4:基于区域的OSPF MD5 认证1、先按照实验要求连接好设备,并配置名称、ip、环回口IP2、配置路由器R1R1(config)#router ospf 1R1(config-router)#router-id 1.1.1.1R1(config-router)#network 192.103.12.0 255.255.255.0 area 0R1(config-router)#network 1.1.1.1 255.255.255.0 area 0R1(config-router)#area 0 authentication message-digest //区域0 启用MD5 认证R1(config)#interface s0/0/0R1(config-if)#ip ospf message-digest-key 1 md5 cisco //配置认证key ID 及密匙3、配置路由器R2R2(config)#router ospf 1R2(config-router)#router-id 2.2.2.2R2(config-router)#network 192.103.12.0 255.255.255.0 area 0R2(config-router)#network 2.2.2.2 255.255.255.0 area 0R2(config-router)#area 0 authentication message-digest //区域0 启用MD5 认证R2(config)#interface s0/0/0R2(config-if)#ip ospf message-digest-key 1 md5 cisco //配置认证key ID 及密匙4、实验调试(1)show ip ospf interface环回接口下修改网络类型为”Point-to-Point”,操作如下:R1(config)#interface loopback 0R1(config-if)#ip ospf network point-to-point输出最后两行信息表明该接口启用了MD5 认证,而且密钥ID 为0 (2)show ip ospf以上输出表明区域0 采用MD5 认证5、情况:①如果R1 区域0 启动MD5 认证,而R2 区域0 启动简单口令认证,则R2 上出现下面的信息:*Feb 10 11;08;13.075;OSPF;Rcv pkt from 192.168.12.1 Serial0/0/0 ;Mismatch Authentication Type.Input packet specified type2,we use type 1②如果R1 和R2 的区域0 都启动MD5 认证,但是R2 的接口下没有配置key ID和密码或密码错误,则R2 上出现下面的信息:*Feb 10 11;08;13.075;OSPF;Rcv pkt from 192.168.12.1 Serial0/0/0 ;Mismatch Authentication Key-No message digest key 1on interface6、实验拓扑图:6.4.3 实验5:基于链路的OSPF 简单口令认证1、先按照实验要求连接好设备,并配置名称、ip、环回口IP2、配置路由器R1R1(config)#router ospf 1R1(config-router)#router-id 1.1.1.1R1(config-router)#network 192.103.12.0 255.255.255.0 area 0R1(config)#interface s0/0/0R1(config-if)#ip ospf authentication //链路启用简单口令认证R1(confi-if)#ip ospf authentication-ke cisco //配置认证3、配置路由器R2R2(config)#router ospf 1R2(config-router)#router-id 2.2.2.2R2(config-router)#network 192.103.12.0 255.255.255.0 area 0R2(config)#interface s0/0/0R2(config-if)#ip ospf authentication //链路启用简单口令认证R2(confi-if)#ip ospf authentication-ke cisco //配置认证4、实验调试(1)show ip ospf interface环回接口下修改网络类型为”Point-to-Point”,操作如下:R2(config)#interface loopback 0R2(config-if)#ip ospf network point-to-point5、链路拓扑:6.4.4 实验6:基于链路的OSPF MD5 认证1、先按照实验要求连接好设备,并配置名称、ip、环回口IP2、配置路由器R1R1(config)#router ospf 1R1(config-router)#router-id 1.1.1.1R1(config-router)#network 192.103.12.0 255.255.255.0 area 0R1(config-router)#network 1.1.1.1 255.255.255.0 area 0R1(config)#interface s0/0/0R1(config-if)#ip ospf authentication message-digest //接口s0/0/0 启用MD5 认证R1(config-if)#ip ospf message-digest-key 1 md5 cisco //配置认证key ID 及3、配置路由器R2R1(config)#router ospf 1R1(config-router)#router-id 2.2.2.2R1(config-router)#network 192.103.12.0 255.255.255.0 area 0R1(config-router)#network 2.2.2.2 255.255.255.0 area 0R1(config)#interface s0/0/0R1(config-if)#ip ospf authentication message-digest //接口s0/0/0 启用MD5 认证R1(config-if)#ip ospf message-digest-key 1 md5 cisco //配置认证key ID 及4、实验调试(1)show ip ospf interface五、实验小结(实验中遇到的问题及解决过程、实验体会和收获)1、实验一基本没有遇到什么问题,就是开启点对点后Show ip ospf interface 看不到想要的接口数据但是另外一个接口不开启的时候就是可以的2、实验6.4.3和实验6.4.4不知道为什么最后不能开启简单密钥认证和MD5认证,一开始以为是实验数据或者拓扑连错了,又重做了一遍,但是发现还是不行,下来再找找原因。
