爱信电话使用说明书
爱信 HCD8588P
爱信HCD8588P/TSDL 08 电话说明书型号:HCD8588P/TSDL08-21、08-22 HCD8588P/TSDL 14c 若发现本机不能显示来电号码,可能是制式不对,请按“**#”,可实现来电制式互换。
设置说明:挂机状态下,按“设置”键,液晶显示“12345678”按“上、下查”或数字键改变设置项,再按“设置”键进入该项设置,每项功能设置完毕后按“删除”键返回上级菜单.各项功能设置如下:时间日期设置:按“设置”,按“1”两次,设置日期,按“1”和“2”设置时间。
后按设置键确认即可。
铃声选择及铃声音量调节:按设置,按21,按“上、下查”选择振铃铃声。
按设置键确认。
按设置,按22,进入贵宾铃声选择,设置方法同上。
按设置,按23,进入铃声音量调节,按“上、下查”调节音量。
闹钟设置:按设置,按3,有三组闹铃可供选择。
按1进入第一组,显示“ALAR OFF”,“OFF”闪烁,直接按数字键输入时间,设置确认。
第二组、三组同。
注:第一组闹铃24小时有效。
第二组、三组每天均会闹铃,闹铃过程按任意键终止。
如要关闭闹铃,进入闹钟设置,按“上、下查”选择“OFF”关闭。
接收来电:如果申请了来电显示服务,当外线来电话时,本机会在响铃的同时显示对方的电话号码(如果您所在地区的电信局送的是FSK信号还会显示来电日期、时间),如果对方号码是第一次来电,液晶屏会显示“新来电”,如是第二次等显示“重复”字样。
来电查询:按“上查”键往前查,或按“下查”往后查询来电。
去电查询:按“去电”,按“上、下查”查询。
来电、去电号码删除:在查询来电/去电时,按“删除”即可。
按住此键3秒可删除所有来电、去电号码。
注:挂机状态、预拨号时,按“删除”可逐位删除。
IP功能设定:按设置,按8,LCD显示“IP—RV 2-3-I P”,按1进入自动IP设置,按上、下查选择IP号码,IP号码为17909,17908,193,17911,17921,17931,17951,17991,068,96300,96333,196,默认为关,选择好后按设置确认;按2进入第一组IP(IP1)号码设定,直接输入号码即可,如有错误,按删除即可,若要更改原号码,按删除后重新输入号码,而后按设置确认,此时LCD显示“IP1 CODE”(表示已经存入号码);按3进入第二组IP(IP2)号码设定,方法如前组,略。
at t cl80109scn 2.4ghz 数字无绳增设子机用户手册说明书

用户手册CL80109SCN2.4GHz 数字无绳增设子机可登记到以下型号的 AT&T 电话座机CL81109SCN/CL81209SCN/CL84109SCN欢迎欢迎购买 AT&T 产品。
在使用此 AT&T 产品前,请仔细阅读使用手册中第 15 至 16 页的重要安全信息。
为了更好地安装和使用您的电话,也请仔细阅读使用手册中所有操作说明和常见问题的帮助信息。
您也可以访问我们的网站:或者拨打我们的服务热线:400-022-9929产品型号: CL80109SCN产品类别: 2.4GHz 数字无绳增设子机序列号:购买日期:购买地点:产品型号和序列号标记在充电座的底部。
© 2011 伟易达通讯设备有限公司保留所有权利。
此使用手冊上所载述的 AT&T 商标及 AT&T 图标为 AT&T 拥有的商号,并在 AT&T 的品牌许可协议下授权予香港伟易达通讯设备有限公司使用。
中国印刷。
部件清单请保管好销货收据和原始包装,以便在享受质保服务时作为相关 证明。
CL80109的包装盒中包括以下物品:用户手册子机电池仓盖专用镍氢电池包带电源适配器的充电座保修卡[用户手册CL80109SCN2.4GHz 数字无绳增设子机可登记到以下型号的 AT&T 电话座机CL81109SCN/CL81209SCN/CL84109SCN初始安装电话概览 – 子机 .............................................................................................1安装您的电话 ..................................................................................................6安装充电座 .................................................................................................6安装电池并充电 ........................................................................................6增设子机增设子机 ..........................................................................................................8登记子机 .....................................................................................................8解除已登记子机 ........................................................................................9附录 A 常见问题 ........................................................................................................10附录 B维护 ................................................................................................................14附录 C重要安全信息 ................................................................................................15安全信息 ...................................................................................................15特别注意 ...................................................................................................16附录 D产品中有毒有害物质或元素的名称及含量表 ..........................................17附录 E产品技术参数 (18)目录1.向上键(来电显示)待机状态:按下进入来电显示清单。
AT T EL31109 EL31209 EL31309 EL31409 2.4GHz数字 无绳电话

用户手册EL31109/EL31209/ EL31309/EL31409 2.4GHz数字无绳电话欢迎欢迎购买 AT&T 产品。
在使用此 AT&T 产品前,请仔细阅读用户手册中第 37 至 38 页的重要安全信息。
为了更好地安装和使用您的电话,也请仔细阅读用户手册中所有操作说明和常见问题的帮助信息。
您也可以访问我们的网站:或者拨打我们的服务热线:400-022-9929企业型号: EL31109 MKII产品名称:2.4GHz数字无绳电话中国专用型号:HWDCD2309(1)TSD序列号:购买日期:购买地点:产品型号和序列号标记在座机的底部。
请保管好销货收据和 和原始包装,以便在享受质保服务时作为相关证明。
© 2012-2019 伟易达通讯设备有限公司保留所有权利。
此使用手冊上所载述的AT&T 商标及 AT&T 图标为 AT&T 拥有的商号,并在 AT&T 的品牌许可协议下授权予香请保管好销货收据和原始包装,以便在享受质保服务时作为相关证明。
EL31109/EL31209/EL31309/EL31409的包装盒中包括以下物品:用户手册座机子机电池仓盖座机电源适配器电话线保修卡专用镍氢电池 X 2部件清单无绳子机充电器及电源适配器(EL31109不含此充电器用户手册EL31109/EL31209/ EL31309/EL31409 2.4GHz数字无绳电话目录初始安装电话概览 - 子机 (2)电话概览 - 充电插座 (4)安装您的电话 (5)安装座机 (5)安装电池并充电 (6)设置菜单结构 (7)使用菜单 (8)日期及时间设置 (8)设置日期格式 (8)设置时间格式 (8)设置时间 (9)设置日期 (9)闹钟设置 (10)开启/ 关闭闹钟 (10)设定闹钟时间(如果闹钟已设定为ON ) (10)子机设置 (11)设置内部呼叫铃声 (11)设置外部呼叫铃声 (11)设置铃声音量 (12)设置提示音 (12)重命名子机 (13)选择待机状态下的屏幕显示 (13)座机设置 (14)更改系统密码 (14)电话操作拨打、接听电话和结束通话 (15)拨打外部电话 (15)通话时间 (15)接听电话 (16)结束通话 (16)通话状态下的操作 (16)调节耳机和免提通话声音音量 (16)麦克风静音 (16)电话操作 (17)设置安静模式 (17)键盘锁定/解锁 (17)寻找子机 (17)重拨清单 (17)从重拨清单中重拨号码 .........17将重拨号码存储到电话簿中 (18)删除一个重拨号码 (18)删除所有重拨号码 (18)进行内部呼叫 (19)内部呼叫另一子机 (19)进行内部呼叫 (20)转移外部通话 (20)进行内部呼叫 (21)进行三方通话 (21)电话簿电话簿 (22)新增电话簿记录 (22)查看电话簿记录 (22)呼叫电话簿记录号码 (23)编辑电话簿记录 (23)删除一个电话簿记录 (24)删除所有电话簿记录 (24)查看电话簿状态 (24)来电显示来电显示(需网络支持) (25)查看来电显示清单 (25)拨打来电显示清单中的号码 (25)储存来电显示清单号码至电话簿 (26)删除来电显示清单中的一个记录 (26)删除来电显示清单中的所有记录 (26)查看来电者记录明细 (26)附录增加及登记新子机 (27)登记子机到座机 (27)解除子机登记 (28)将子机从座机解除登记 (28)重设子机 (29)恢复子机到默认设置状态 (29)子机屏幕显示 (30)子机提示音 (31)常见问题 (32)维护 (36)重要安全信息 (37)安全信息 (37)特别注意 (38)产品中有毒有害物质或元素的 名称及含量表 (39)产品技术参数 (40)在电话线墙壁插口和非开关控制的电源插座附近安装您的座机。
OPSSON U5 GSM GPRS 数字移动电话 说明书
4.8.3 PUK2 码 ....................................... 15 4.8.4 手机密码 ...................................... 15 5 功能菜单 ......................................... 16 5.1 欧博信乐园 ...................................... 16 5.2 相机 ............................................ 16 5.2.1 相册 .......................................... 16 5.2.2 相机设置 ...................................... 16 5.2.3 照片设置 ...................................... 17 5.2.4 白平衡 ........................................ 17 5.2.5 情境模式 ...................................... 17 5.2.6 特效设置 ...................................... 17 5.2.7 自拍 .......................................... 17 5.2.8 存储位置 ...................................... 17 5.2.9 恢复默认值 .................................... 17 5.3 网络服务 ........................................ 17 5.3.1 数据帐户 ...................................... 17 5.3.2 网际网络服务 .................................. 17 5.4.1 快速查找 ...................................... 18 5.4.2 来电组群 ...................................... 19 5.4.3 编辑 .......................................... 19 5.4.4 电话簿设置: .................................. 20 5.5.1 短信 .......................................... 20 5.5.1.1 写短信 ...................................... 20 5.5.1.2 收件箱 ...................................... 21 5.5.1.3 草稿箱: .................................... 21 5.5.1.4 发件箱 ...................................... 21 5.5.1.5 模版 ........................................ 22 5.5.1.6 短信签名 .................................... 22 5.5.1.7 短信搜索 .................................... 22 5.5.1.8 短信设置 .................................... 22 5.5.2 彩信 .......................................... 23
OPSSON Wi-3 GSM GPRS 数字移动电话 说明书

使用手册
1
【目 录】
前言.............................................. 7 安全事项.......................................... 7 1 您的手机 ....................................... 8 1.1 手机外观....................................... 8 1.2 按键说明....................................... 8 1.3 界面图标说明................................... 9 1.4 待机桌面...................................... 10 1.5 待机桌面精灵.................................. 10 1.6 耳机.......................................... 11 2 开始使用 ...................................... 11 2.1 电池.......................................... 11 2.1.1电池的拆装 .................................. 11 2.1.2电池的充电 .................................. 11 2.2 SIM 卡的安装 .................................. 12 2.3 存储卡的安装.................................. 12 2.4 资源管理...................................... 12 2.5 开机和关机.................................... 13 3 通话功能 ...................................... 13 3.1 拨打电话...................................... 13 3.1.1拨打国内电话 ................................ 13 3.1.2拨打固定电话分机 ............................ 13 3.1.3拨打国际长途电话 ............................ 13 3.1.4使用电话本拨打电话 .......................... 14 3.1.5 重拨最近拨过的电话号码 ...................... 14 3.2 听电话........................................ 14 3.3 拒绝接听电话.................................. 14 3.4 通话中选项.................................... 14 4 输入文本 ...................................... 15 4.1 切换输入法.................................... 15
OPSSON Wi-9 GSM GPRS 数字移动电话 说明书

在飞机上、医院里等禁止使用手机的地方请关闭手机,手机会影响 电子设备和医疗仪器的正常工作,在这些地方使用手机,请遵照该场所 的相关规定。手机具有定时自动开关机功能,请查看您的定时开关机设 置,以确认您的手机在飞机飞行过程中不会自动开机。 请勿在弱信号或高精度电子设备附近使用手机。无线电波干扰可能 引起电子设备的误操作和其它问题。尤其在以下设备附近需特别注意: 助听器、起搏器和其它医疗电子设备、火灾探测器、自动门和其它自动 控制装置。手机对起搏器和其它医疗电子设备的影响请咨询该设备制造 商或当地销售商。 请勿对液晶显示屏用力或用它敲打其它东西,否则会造成液晶板的
2
1.1 简介
1 基本知识
感谢您选择 Wi-9 GSM/GPRS 数字移动电话。您可以通过阅读本手册,全
面地了解 Wi-9 手机的使用,领略其完善的功能和简捷的操作方法。
Wi-9 手机是针对 GSM/GPRS 网络环境而设计的一款直板手机。除了基本
的通话功能外,Wi-9 还为您提供了包括智能中英文输入、个性化 64 和
使用电池的注意事项
请勿把电池扔到火里,否则会导致电池起火和爆裂。 安装电池时,不要强行施加压力,否则会引起电池的漏液、过热、 爆裂和起火。 请勿用电线、针等金属物将电池短路,也不要将电池跟项链等金属 物放在一起,否则会导致电池漏液、过热、爆裂和起火。 请勿焊接电池端头,否则会导致漏液、过热、爆裂和起火。 如果电池的液体进入眼睛会有失明的危险,这时请不要用手揉眼睛, 要用清水冲洗,然后立即到医院就诊。 请勿拆卸或改装电池,否则会导致电池漏液、过热、爆裂和起火。
4
破损和液晶液体的渗漏。若液晶液体进入眼睛会有失明的危险。这时请 立即用清水冲洗眼睛(千万不要揉眼睛)并到医院就诊。 不要拆卸或改装手机,否则会造成手机的损坏、漏电和电路故障。 在极少数情况下,手机在某些型号的车内使用时可能会对车内电子 设备有不良影响。这时请不要使用手机以免失去安全保证。 请勿用针、笔头等尖锐的东西按键,否则会损坏手机或产生误操作。 如果天线被损坏,请不要使用手机,否则可能会对人身造成伤害。 避免手机太靠近磁卡等磁性物体,手机的辐射波可能会清除软盘、 储金卡、信用卡上存储的信息。 请将图钉等小的金属物放在远离手机听筒的地方。扬声器工作时具 有磁性,会吸引这些小金属物,因而可能会对人身造成伤害或损坏手机。 避免手机受潮,水或其它液体进入手机会造成手机过热、漏电和故 障。
IsatPhone Pro 全球手持卫星电话说明书

the ultimate combinationWhen it comes to what you really need in a satellite phone, IsatPhone Pro delivers. This is the first global handheld from Inmarsat – purpose-built for the most reliable satellite communications network in the world. With clear voice quality that you’d expect from the market leader.IsatPhone Pro. Now there’s a real choice.Robust handsetClear voice qualityReliable network connectionLong battery lifeEasy to useFrom the world’s leading providerof mobile satellite communicationsThe essential services: satellite telephony, voicemail, text and email messaging, GPS location dataThe longest battery life: up to 8 hours talk time and up to 100 hours standby timeThe most robust handset: operates at -20°C to +55°C;dust, splash and shock resistant (IP54); humidity tolerance from 0 to 95 per centThe only global handheld satellite phone to supportBluetooth: place the handset on its side, with full manoeuvrability of the antenna, for easy handsfree useEasy to use: intuitive GSM-style interface;high-visibility colour screen; larger keypad for easy dialling with gloves onReliable network connection: operates over globalgeostationary satellites that will be operational into the 2020s; significantly less possibility of call droppingThe ultimate value: highly competitive handset,accessories and airtime pricingthe headlinesthe details Dimensions Length: 170mm (6.7”)Width: 54mm (2.1”)Depth: 39mm (1.5”)Weight 279g (9.8oz) – including battery Display High visibility colour screen Interfaces Micro USB Audio socket Antenna port Bluetooth 2.0Water and dust ingress protection IP54Operating range -20ºC to +55ºC (-4ºF to +131ºF)Storage range -20ºC to +70ºC (-4ºF to +158ºF) (with battery) Charging range 0ºC to 45ºC (32ºF to 113ºF)Humidity tolerance 0 to 95 per centType Lithium-ion, 3.7 voltsTalk time Up to 8 hoursStandby time Up to 100 hoursI-4 Asia-PacificI-4 Americas I-4 EMEA This map depicts Inmarsat’s expectations of coverage, but does notrepresent a guarantee of service. The availability of service at the edgeof coverage areas fluctuates depending on various conditions.IsatPhone Pro operates globally over the Inmarsat-4 satellites. coverageSatellite telephony 2.4kbps voice codec Speakerphone optionVoicemail Speed dial 1Supplementary voice services Call historyCaller IDCall waitingCall divertCall holding ConferencingCall barringSpeed dialling Fixed number diallingText-to-text160 Latin / ~74 non-Latin charactersUp to 10 concatenationsStandard and predictive textText-to-email160 Latin / ~74 non-Latin charactersUp to 10 concatenationsIncoming email – 160 Latin characters /~74 non-Latin charactersWeb message-to-IsatPhone Pro Free fromGPS location data View positionSend as text/email Features CalendarAlarmCalculatorMinute minder – in-call alertMicrophone mutingContactsynchronisationWith MS Outlook 2007 (PC)O/S compatibility: Windows XP ProSP3 and Windows Vista SP1 LanguagessupportedArabic, Chinese, English, French,Japanese, Portuguese, Russian, Spanish Security At keypad, phone, SIM and network levelsIn the box BatteryChargers:• Mains universal AC charger(4 adaptors)• Car charger – 10-30 volts• PC charger – micro USB cableWired handsfree headsetWrist strapQuick start guide (8 languages)Warranty documentationSupport CDAlso available Carry caseDocking unitsBluetooth headsetSolar chargerhow to buy /isatphone。
NEC Aspila EX 专用电话用户指南

指示灯
当信息等待时,绿灯闪亮,当 电话振铃时,红灯闪亮。
内线键 (CALL1/CALL2)
用于内线呼出和应答。如果已 占用了一个内线 – 可以使用 另一个。
拨号键
按 CALL1 键和 DIAL 键,拨存储 码用于缩位拨号。
暂断键
在通话中,按 FLASH 键挂机或 暂断。
勿打扰键
当您的工作不想被打断时,勿 打扰功能锁断您的电话。当呼 叫前转时,该键也闪亮。
3
简便应用
可编程功能键
可以设置可编程功能键为“中继线”键和 / 或其他功能键。不用拨服务码,您只需要按功能键就可以激活设置的 功能。
CALL 1
功能键
服务码 + 附加数据
SPK
851
??
?
852
功能键分为两种。(一般功能键:用 851 设置,线路键:用 852 设置)。 线路键具有优先权。可以将一般功能键改为线路键。 如果要将线路键改为一般功能键,在设置一般功能键之前,您必须先拨“852 + 000”删除线路键。 在缺省设置中,可编程功能键 No. 1 到 12 是“中继线”键。如果您要将无用的中继线键改为功能键(一般), 必须先用“852 + 000”删除这个无用的中继线键。 可编程功能键可以用服务码“852 + 000”或“851 + 00”删除。
综合通信系统
专用电话机 快速参考指南
使用电话机之前…
感谢您购买 NEC Infrontia “Aspila EX” 集团电话系统
由于灵活的系统设置,您的拨码和功能可能与本手册有所不同。请与您的供货商或系统管理人员联系,注 明不同的部分。
使用电话机 <专用电话机>
Teledex BTX3500 3510 电话使用说明书

CONNECTING THE BTX3500/3510Included with the BTX3500/3510 are (one each):•Base unit•Coiled handset cord•User guide •Handset•Clear plastic overlay•Line cord Contact your supplier or Teledex for information on ordering custom designed and printed faceplates to enhance the look of your Teledex BTX3500/3510 telephone.1)Located on the left side of the BTX3500/3510 is a modular jacklabeled TO HANDSET.Insert one end of the coiled handset cord into this jack (you should hear it click when properly inserted).2)Insert the other end of the coiled handset cord into the modularjack on the handset.3)Located at the top side of the telephone is the modular jacklabeled LINE, insert one end of the line cord into the jack andthe other end of the line cord into the telephone wall outlet jack.4)The overlay is easiest to remove by, with your fingers, squeezingthe outer edges causing a slight bow in the middle, then carefully remove one side of the overlay from the 4 tab guides. The over-lay is easiest to insert when; The left or right side tabs are insert-ed first, and the middle part of the overlay is slightly bowed to allow for insertion of the other tabs.RECEIVING A CALL1)Lift the handset to connect to the ringing line.2)T o end the call, hang up by replacing the handset. PLACING A CALL1)Lift the handset.2)Listen for dial tone. Dial the desired number, or press an AUTODIAL key to automatically dial a number (AUTO DIAL Keys are located on the BTX3510 only).3)T o end the call, hang up by replacing the handset.VISUAL RING INDICATOR AND MESSAGE WAITING LIGHTThe raised red lens is a Visual Ring Indicator and Message W aiting light. The lens will flash when the telephone is ringing. Additionally, some telephone systems permit an operator or message center to turn on the red Message W aiting light to alert you that you have a message waiting.USING THE DATA PORTThe DATA PORT provides convenient access to the telephone line for connecting modems, fax and answering machines or other tele-phone components.Insert the modular line cord from your facsimile machine, modem, etc., into the jack labeled DATA.ADJUSTING THE RING VOLUMELocate the adjustment control on the top side of the telephone labeled RINGER LOW/HI. Slide the switch to the desired LOW or HI ring volume. The ring volume can be changed at any time. AUTO DIAL KEYS (APPLIES TO BTX3510 ONLY) The BTX3510 has 3 programmable AUTO DIAL keys. These keys can be programmed to automatically dial telephone numbers or, to activate telephone system features when connected to a compatible PBX.The telephone will dial the number each time an AUTO DIAL key is pressed. Some of the AUTO DIAL locations may have been prepro-grammed and labeled before installation.STORING AUTO DIAL KEYS (APPLIES TO BTX3510 ONLY)The telephone must be connected to a telephone jack.1)Lift the handset.2)Use the back of a pencil to Press the STORE key and release it(see back page for key location).3)Enter the telephone number (including PAUSE* as required).The dialing sequence can be up to 15 digits.4)Press the STORE key.5)Press the AUTO DIAL key where the number is to be stored.6)Replace the handset.*A 3.6 second pause can be entered in a dialing sequence by pressing the REDIAL key for each PAUSE required.REDIAL KEY (APPLIES TO BTX3510 ONLY)T o REDIAL the last telephone number dialed:1)Lift the handset, listen for dial tone.2)Press the REDIAL key, the BTX3510 will dial the last numberdialed.HANDSET VOLUME KEYThe handset has three volume levels. When the handset is first lifted, the handset volume is normal.T o change the HANDSET VOLUME:Locate the HANDSET VOLUME key to the right of the keypad. Press the key once and the volume level will increase one level (to medium volume).Press the key once more an the volume level will increase an addi-tional level (to high volume).T o return the handset volume back to normal volume, press the handset volume key again.FLASH KEYPressing the FLASH key initiates a 600ms hookflash. Typical usage is to access PBX/CO features like call waiting.RMA PROCEDURESThe following procedure should be followed with all Teledex telephone products prior to sending the telephone to the factoryfor repair.1)Please perform the tests listed below:a. Test the telephone on a different telephone jack.b. Test telephone with a different line cord.c. Test with a different handset cord (coiled cord).d. For two line products, please ensure that one of the linebuttons is pressed (if both line buttons are in the UP position,the telephone will not operate).2)If the steps listed above do not provide a remedy for the suspecttelephone, please place a tag on the individual telephonedescribing the defect. Next, call the Teledex Repair Department at 1 (800) 875-8539for an RMA number. You must have anRMA number to return products to Teledex.3)Kindly note: An RMA number is unique to each returnshipment. Do not duplicate this number on any future shipments. SHIPPING INSTRUCTIONS:Please print the RMA number clearly on the outside of your shipping carton(s). Please ship to the following address:Teledex LLC / RMA#___________6311 San Ignacio AvenueSan Jose, CA 95119FREIGHT CHARGES:The Customer is responsible for shipping products for repair to Teledex. After repair, Teledex will return telephone products to the Customer freight prepaid in the same manner in which is was sent (i.e. Freight sent to Teledex UPS Blue, will be returned via 2 day ship-ping).**Please note: When telephones are returned for repair due to misuse (i.e. liquid spills, abuse, or Customer modification - warranty label broken), the Customer will be charged the standard repair fee, regard-less of warranty status.BTX3500/3510GUESTROOM TELEPHONEUSERS GUIDEFOR CUSTOMER SERVICE CALL1-800-783-8353Teledex,LLC6311 San Ignacio Avenue San Jose,CA 95119Telephone:(408) 363-3100Fax:(408) 363-3136email:*****************Internet:Part Number 606-3510-00A*Applies to the BTX3510 only.。
A1X(W) IP 电话用户手册说明书

A1X(W) IP电话用户手册Version: 2.02017-02-16目录联系 ATCOM (5)1、A1X(W)简介 (6)1.1、接口 (7)1.2、硬件 (7)1.3、软件 (7)1.4、网络 (8)1.5、管理和维护 (9)1.6、协议 (9)1.7、兼容和认证标准 (10)1.8、产品包装 (10)1.9、安装 (11)2、通话功能 (19)2.1、接听电话 (19)2.2、拨打电话 (19)2.3、预拨号 (21)2.4、多线通话 (21)2.5、通话保持 (21)2.6、通话转移 (21)2.7、静音 (22)2.8、三方会议 (22)2.9、结束通话 (24)2.10、语音邮件 (24)3、话机界面 (25)3.1、话机面板 (25)3.2、启动界面 (27)3.3、待机界面 (28)3.4、话机配置 (30)3.4.1、状态信息 (31)3.4.2 、呼叫功能 (33)3.4.3、电话簿 (43)3.4.4、远程电话簿 (48)3.4.5、LDAP (48)3.4.6、历史记录 (50)3.4.7、信息 (53)3.4.8、设置 (54)3.4.9、显示 (75)4、高级功能 (76)4.1、选用编解码 (76)4.2、抓包、升级 (77)4.3、自动更新 (79)4.4、导入、导入配置文件 (81)4.4.1、导出配置文件 (81)4.4.2、导入配置文件 (82)4.5、导入、导出CFG文件 (83)4.6、导出系统日志 (83)4.7、拨号规则 (84)4.7.1、替换规则 (84)4.7.2、立即呼出 (85)4.7.3、地区代码 (86)4.7.4、呼出限制 (87)4.8、TR069 (83)4.9、Action URL (83)4.10、远程控制 (83)5、WI-FI(仅A10W) (88)5.1、 LCD配置 (92)5.2、 WEB界面中配置WIFI (92)5.3、企业WIFI (92)6、常见问题 (94)6.1、如何恢复出厂设置 (94)6.2、在安全模式下升级软件 (95)6.3、如何进行IP拨号 (96)7、故障排除 (97)7.1、话机不能注册到SIP服务器 (97)7.2、话机不能获得IP地址 (97)7.3、通话中只有一方听到声音 (97)8、话机缩略词说明 (98)联系ATCOM公司简介ATCOM是全球领先的VOIP解决方案供应商。
TELECOM 电话使用手册说明书
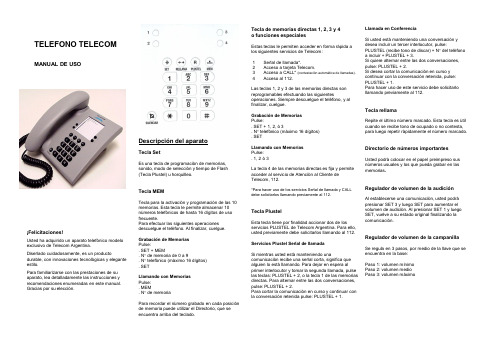
Descripción del aparatoTecla SetEs una tecla de programación de memorias, sonido, modo de selección y tiempo de Flash (Tecla Plustel) u horquilleo.Tecla MEMTecla para la activación y programación de las 10 memorias. Esta tecla le permite almacenar 10 números telefónicos de hasta 16 dígitos de uso frecuente.Para efectuar las siguientes operaciones descuelgue el teléfono. Al finalizar, cuelgue.Grabación de Memorias Pulse:. SET + MEM. N ° de memoria de 0 a 9. N ° telefónico (máximo 16 dígitos) . SETLlamando con Memorias Pulse: . MEM. N ° de memoriaPara recordar el número grabado en cada posición de memoria puede utilizar el Directorio, que se encuentra arriba del teclado.TELEFONO TELECOMMANUAL DE USOTecla de memorias directas 1, 2, 3 y 4 o funciones especialesEstas teclas le permiten acceder en forma rápida a los siguientes servicios de Telecom:1 Señal de llamada*.2 Acceso a tarjeta Telecom.3 Acceso a CALL* (contestación automática de llamadas).4 Acceso al 112.Las teclas 1, 2 y 3 de las memorias directas son reprogramables efectuando las siguientesoperaciones. Siempre descuelgue el teléfono, y al finalizar, cuelgue.Grabación de Memorias Pulse: . SET + 1, 2, ó 3 . N ° telefónico (máximo 16 dígitos) . SETLlamando con Memorias Pulse: . 1, 2 ó 3La tecla 4 de las memorias directas es fija y permite acceder al servicio de Atención al Cliente de Telecom, 112.*Para hacer uso de los servicios Señal de llamada y CALL debe solicitarlos llamando previamente al 112.Tecla PlustelEsta tecla tiene por finalidad accionar dos de los servicios PLUSTEL de Telecom Argentina. Para ello, usted previamente debe solicitarlos llamando al 112.Servicios Plustel Señal de llamadaSi mientras usted está manteniendo unacomunicación recibe una señal corta, significa que alguien lo está llamando. Para dejar en espera al primer interlocutor y tomar la segunda llamada, pulse las teclas: PLUSTEL + 2, o la tecla 1 de las memorias directas. Para alternar entre las dos conversaciones, pulse: PLUSTEL + 2.Para cortar la comunicación en curso y continuar con la conversación retenida pulse: PLUSTEL + 1.Llamada en ConferenciaSi usted está manteniendo una conversación y desea incluir un tercer interlocutor, pulse:PLUSTEL (recibe tono de discar) + N ° del teléfono a incluir + PLUSTEL + 3.Si quiere alternar entre las dos conversaciones, pulse: PLUSTEL + 2.Si desea cortar la comunicación en curso y continuar con la conversación retenida, pulse: PLUSTEL + 1.Para hacer uso de este servicio debe solicitarlo llamando previamente al 112.Tecla rellamaRepite el último número marcado. Esta tecla es útil cuando se recibe tono de ocupado o no contesta, para luego repetir rápidamente el número marcado.Directorio de números importantesUsted podrá colocar en el papel preimpreso sus números usuales y los que pueda grabar en las memorias .Regulador de volumen de la audiciónAl establecerse una comunicación, usted podrá presionar SET 3 y luego SET para aumentar el volumen de audición. Al presionar SET 1 y luego SET, vuelve a su estado original finalizando la comunicación.Regulador de volumen de la campanillaSe regula en 3 pasos, por medio de la llave que se encuentra en la base:Paso 1: volumen mínimo Paso 2: volumen medio Paso 3: volumen máximo¡Felicitaciones!Usted ha adquirido un aparato telefónico modelo exclusivo de Telecom Argentina.Diseñado cuidadosamente, es un productodurable, con innovaciones tecnológicas y elegante estilo.Para familiarizarse con las prestaciones de su aparato, lea detalladamente las instrucciones y recomendaciones enumeradas en este manual. Gracias por su elección.Base del aparato:1. Zócalo conector cable de líneaUna vez insertado el cable en el zócalo, puede sacarse hacia delante o hacia atrás, a través de las guías en la base del aparato.2. Zócalo conector cable del microteléfono Una vez insertado el cable en el zócalo, debe sacarse hacia el lateral, a través de la guía en la base del aparato.GARANTIATelecom Argentina Stet-France Telecom S.A.(Telecom) garantiza el correcto funcionamiento del terminal entregado, por doce meses contados a partir de la fecha de venta, período durante el cual reparará o en su caso reemplazará por otro de similares características, sin cargo alguno para el Cliente, el terminal o aquella parte del mismo que no obstante su normal utilización, resultaradeficiente en razón de material vicioso o defectos de fabricación.Quedan expresamente excluidas de la cobertura las fallas y/o roturas del terminal, atribuibles a su incorrecta instalación, inadecuada manipulación, quita de componentes, o las debidas a cualquier causa ajena al producto y todo supuesto de caso fortuito o fuerza mayor. Esta garantía se extinguirá anticipada y automáticamente si Telecomcomprobara a su único criterio, que el terminal fue desarmado y/o reparado por personas no autorizadas.Las reparaciones y/o reemplazos de aparatos y/o piezas realizadas en cumplimiento de la garantía no interrumpirán ni extenderán de modo alguno el período de vigencia de la misma.Para hacer uso de la garantía, además de éste documento es imprescindible presentar elrespectivo terminal con su identificación y número de serie original y sin enmiendas así como el original de recibo o factura correspondiente. Para realizar consultas, llame sin cargo al 112.Nombre y Apellido: ……………….........…………… Dirección: ……………………….........……………… N° de serie del aparato: …….........………………… N° de teléfono: …………………..….......……………Regulador de melodías de la campanillaAntes de realizar cualquiera de estas operaciones, descuelgue el teléfono. Al finalizar, cuelgue.Tecla silenciarPermite cancelar la recepción y emisión de la voz durante una conversación.Teclas especialesLa mayoría de las centrales públicas y privadas modernas (con selección por multifrecuencias) ofrecen facilidades adicionales que pueden activarse pulsando la tecla Plustel, la teclaasterisco (*) o la tecla numeral (#). Para mayores detalles llame al 112.Cambio en el modo de selecciónEl uso de esta función está reservado al técnico instalador de su teléfono. Antes de realizarcualquiera de estas operaciones, descuelgue el teléfono. Al finalizar, cuelgue.Es recomendable utilizar el discado por tonos.SET SET SET 6 5 4 SET SET SET Pulse: Pulse: Pulse: Sonido 3 Sonido 2 Sonido 1 Sonido SET SET 1 1 8 7 SET SET Pulse: Pulse: Discado por pulso Discado por tonos Conectando su aparato telefónico1. Enchufe la ficha terminal del cordón del microteléfono dentro del mismo.2. Enchufe la ficha terminal del cordón del microteléfono en la base del aparato.3. Enchufe la ficha terminal del cordón de entrada de línea dentro de la base del aparato.4. Enchufe la ficha terminal del cordón de entrada de línea en el conector ubicado en la pared.5. Controle el nivel de volumen del tono decampanilla de llamada marcando 115 y cuelgue. 6. Para fijar parámetros por defecto (volumen del tono de llamada alto, sonido 1, discado por tonos y velocidad de FLASH de 300 ms.), descuelgue y pulse: SET + * + SET. Cuelgue. Para fijar los mismos parámetros y borrar la memoria, descuelgue y pulse: SET + # + SET.Consejos útilesLa siguiente información le será útil para que su aparato telefónico funcione y luzca correctamente durante la vida útil del mismo. Lea detalladamente y conserve este manual y certificado de garantía para su futura consulta:No instale o sitúe su aparato cerca de fuentes de calor o dispositivos que puedan producir ruido eléctrico (Ej. Motores, lámparas fluorescentes). No exponga su aparato en forma directa a los rayos solares.Evite caídas de su aparato telefónico y no lo golpee. Para limpiar su aparato telefónico proceda solamente con un trapo humedecido con agua (recuerde desconectar la ficha de conexión de la ficha de la pared).Nunca utilice agentes químicos o abrasivos que puedan dañar el acabado superficial del aparato. No lo sumerja y evite que chorros de agua se introduzcan en su aparato, pues lo dañarán seriamente.No obstruya las aberturas provistas en el aparato para su ventilación.Coloque siempre su aparato sobre una superficie segura y regular.No enchufe ni introduzca las fichas terminales de los cordones de conexión en otras fuentes de poder que no sean las específicas de la línea de servicio telefónico.No instale su aparato donde los cordones de conexión puedan ser afectados por el paso de personas sobre ellos.No deposite sobre el teléfono lámparas eléctricas, velas, cigarrillos encendidos, etc.En caso de detectar pérdidas de gas, evite utilizar el aparato hasta ventilar correctamente el ambiente afectado.No modifique o instale los cables de conexión de su aparato durante una tormenta eléctrica. Siempre consulte a su Centro de Reparaciones (disque 114) en los siguientes casos: Si el equipo se encuentra dentro del período de garantía.Cuando los cordones o fichas de conexión estén dañados.Si el aparato fue expuesto a líquidos (agua, lluvia, café, etc.).Si el aparto no funciona correctamente, de ser posible desconéctelo y pruebe con otro aparato, o conéctelo en otra boca de la línea para comprobar si la falla está en el mismo.Si con esta verificación usted comprueba que la dificultad está en su aparato, controle la lista de solución de desperfectos sencillos enumerados en este manual. Si no encontró solución al mismo, consulte al Servicio de Reparaciones llamando al 114.No proceda nunca a la apertura, desarme o reemplazo de piezas del aparato.Lista de chequeo de ServiceProblema: 1) No hay tono de discar.Solución: Controle los cordones. ¿Están correctamente conectados? ¿Están dañados? Conecte bien cada cordón. Solicite reemplazo.2) La campanilla no funciona. Solución: Verifique correctamente el procedimiento de control de llave de volumen de la campanilla. Verifique que los aparatos conectados sobre la misma línea no excedan la cantidad de tres, aconsejada por Telecom Argentina. ¿Estáncorrectamente conectados?Verifique el regulador de campanilla.。
OMEGAPHONE八路报警拨号器说明书

OMEGAPHONE ® Eight Channel Alarm DialersModel OMA-VM606 monitors up to eight switch closures (dry contacts) which allows you to connect a wide variety of sensors such as magnetic door or window switches, thermostats, fluid level switches and motion sensors. The OMA-VM606 allows you to program a “normal” state and a time delay for each dry contact input. A five-second message can be recorded to define each input. An additional local identification message can be recorded to identify the OMA-VM606 dialer. When an input is different from the programmed “normal” state for longer than the time delay, or the power is out for longer than five minutes (default is 5 minutes however this is user selectable) the unit will dial up to eight phone or pager numbers. If contact has not been made after dialing all phone numbers, the OMA-VM606 will wait 20 minutes and begin calling again. This sequence is repeated until contact is made. The integrated voice tells you which input is in alarm and the current status. Y ou can call the unit at any time to hear a status report including power status. All programming is accomplished over the phone following simple voice instructions.When the OMA-VM606 goes into an emergency state it will energize the alarm relay, activate the alarm buzzer and begin making emergency calls. When the unit dials a voice number it will first play the local identification message and the current status of any inputs which caused the emergency state. The unit ceases to be in the emergency state once contact is made with the unit. Contact is made by the user entering a personal identification number (PIN) after receiving a call from the unit, by entering the PIN number when calling in to the unit or by pressing the pushbutton located on the top of the dialer. If the input(s) return to theprogrammed “normal” states, the unit will also cease to be in the emergency state. If the OMA-VM606 calls an answering machine or voice mail, the warning message will be left and the unit will continue to call. When the OMA-VM606 calls a pager number, it will transmit the local identification number, any inputs which have caused an alarm and the power status.U M onitors Power Statusand Up to Eight Switch Closures (Dry Contacts)U P rogram Up to Eight 20-Digit Phone Numbers U W orks with Telephone Pagers U E asy-to-Follow Menu Driven Programming Done Over the Phone U W all Mount Enclosure U 4-Line LCD DisplayOMA-VM606OMA-VM606E shown smaller than actual size.2Range of Incoming Rings Before Answer: 1 to 20up to a 5-second identification message for each input Operation: Operates with answering machine on the same phone lineAlarm Notification:relay closes if any input(s) go into an alert condition Alarm Cancellation:silences the alarm and cancels emergency telephone callsAlarm Relay Output:Alarm Relay Operation:automatically energized during an emergency state (turn off from top button) or to be remotely controlled (turn on or off) via touch tone phone Alarm Buzzer:Display:Power:transformer power supplyBattery Backup:Operating Ambient:Electrical Connections:terminal blocksDimensions: 127 H x 191 W x 45 mm D (5.0 x 7.5 x 1.75")Material:Weight: 1.4 kg (3 lb)Ethernet Data Collection (OMA-VM606E Only)LAN: Ethernet 10Base-T or 100Base-TX (auto-sensing)Transport Protocol: TCP/IP , UDP Connector: RJ45LED Indicators: 10Base-T connection, 100Base-TX connectionfor free from ) you can view real time SM a total of 2 years.DescriptionEight channel alarm dialerOMA-VM606EEight channel alarm dialer with ethernetBottom view of OMA-VM606E showing ports.OMEGACARE SM extended warranty program is available for models shown on this page. Ask your sales representative for full details when placing an order. OMEGACARE SM labor and equivalent loaners.Extended Warranty。
爱信HCD8588P TSDL08
2011-10-28 08:37爱信 HCD8588P/TSDL 08 电话说明书型号:HCD8588P/TSDL08-21、08-22 HCD8588P/TSDL 14c若发现本机不能显示来电号码,可能是制式不对,请按“**#”,可实现来电制式互换。
设置说明:挂机状态下,按“设置”键,液晶显示“12345678”按“上、下查”或数字键改变设置项,再按“设置”键进入该项设置,每项功能设置完毕后按“删除”键返回上级菜单,各项功能设置如下:时间日期设置:按“设置”,按“1”两次,设置日期,按“1”和“2”设置时间。
后按设置键确认即可。
铃声选择及铃声音量调节:按设置,按21,按“上、下查”选择振铃铃声。
按设置键确认。
按设置,按22,进入贵宾铃声选择,设置方法同上。
按设置,按23,进入铃声音量调节,按“上、下查”调节音量。
闹钟设置:按设置,按3,有三组闹铃可供选择。
按1进入第一组,显示“ALAR OFF”,“OFF”闪烁,直接按数字键输入时间,设置确认。
第二组、三组同。
注:第一组闹铃24小时有效。
第二组、三组每天均会闹铃,闹铃过程按任意键终止。
如要关闭闹铃,进入闹钟设置,按“上、下查”选择“OFF”关闭。
接收来电:如果申请了来电显示服务,当外线来电话时,本机会在响铃的同时显示对方的电话号码(如果您所在地区的电信局送的是FSK信号还会显示来电日期、时间),如果对方号码是第一次来电,液晶屏会显示“新来电”,如是第二次等显示“重复”字样。
来电查询:按“上查”键往前查,或按“下查”往后查询来电。
去电查询:按“去电”,按“上、下查”查询。
来电、去电号码删除:在查询来电/去电时,按“删除”即可。
按住此键3秒可删除所有来电、去电号码。
注:挂机状态、预拨号时,按“删除”可逐位删除。
IP功能设定:按设置,按8,LCD显示“IP—RV 2-3-IP”,按1进入自动IP设置,按上、下查选择IP号码,IP号码为17909,17908,193,17911,17921,17931, 17951,17991,068,96300,96333,196,默认为关,选择好后按设置确认;按2进入第一组IP(IP1)号码设定,直接输入号码即可,如有错误,按删除即可,若要更改原号码,按删除后重新输入号码,而后按设置确认,此时LCD显示“IP1 CODE”(表示已经存入号码);按3进入第二组IP(IP2)号码设定,方法如前组,略。
美国CelTel 2.4G数字 无绳电话说明书

美国CelTel 2.4G数字无绳电话使用说明书注1、有些是电话方面术语不知道翻的准不准。
如果有看不懂的再讨论。
2、很多时候我把handset翻成手机、移动电话、听筒、分机等不同词;base unit翻成主机、支架等词。
要是哪读着不通顺,就试着在几个词间换一下3、“陆线”大概就是固定电话的意思封面:大意是恭喜购入S4200型celtel(cel应该是手机缩写,tel是固定电话缩写)docking Station(插接站,底座),可以使用多年,物超所值,很少需要维护,设置及使用方便。
第3页:重要服务信息安装及使用产品前阅读本手册。
手册内容包括相关的安全安装、使用的重要信息。
请保存好此手册,用作参考。
同时请保留包装、购买证明等物品,以备不时之需。
▲!警告为防止火灾雷击等危险,请勿将此产品暴露于雨中及任何过湿的环境下。
若不慎入水,需立即将适配器(电源)及电话线从墙上拔出。
▲!这个符号是用来提醒用户此处有重要的使用和维护(服务)方面的指导。
第4页:1、底座部分2、电话听筒部分3、交换底座适配器4、交流电适配器(插头吧?)5、镍氢充电电池6、电话线7、带子的夹子第5页:▲!重要安全指导为防止使用时出现火灾电击及对人的伤害,请遵循以下的基本安全预防措施:1、阅读和了解所有指导。
2、遵循标记在产品上的所有警告和指导(要是有需要可以把标在电话机上的英文也拍给我翻,要是单词不多可以用有道查)3、清洗之前将插头从墙上拔出。
不要用液体或喷雾的清洁器。
用湿抹布进行清洁。
4、请勿在水附近使用话机,例如,浴缸,洗脸盆,厨房水槽,洗衣盆,湿润的地下室中或游泳池边。
5、勿将话机放置于不稳的车子、台子、桌子上。
以防产品掉落并对其造成损害。
6、背部和底部的槽与开口是通风散热用的。
不要塞住或盖住。
也注意不要摆在床、沙发、地毯等地方而塞住了通风口。
不要放在散热器等物品上或旁边,不要放在封闭的设施(我想有点像一楼的电话机盒子)里面,除非通风良好。
爱信电话使用说明书
爱信电话使用说明书挂机状态下按‘吸置”键液晶显示“12345678"按“上、下查”或数字键改变设置项再按‘吸置”键进入该项设置每项功能设置完毕后按“删除”键返回上级菜单各项功能设置如下1.时间日期设置按“设置”按,"1”两次设置日期按“1”和“2”设置时间。
后按设置键确认即可。
2.铃声选择及铃声音量调竹按设置按21按“上、下查”选择振铃铃声。
按设置键确认。
按设置按22进入贵宾铃声选择设置方法同上。
按设置按23进入铃声音量调i-i按“上、‘下查”调竹音量。
3闹钟设置按设置按3有三组闹铃可供选择。
按1进入第一组显示“ALAR OFF''WF"闪烁直接按数字键输入时间设置确认。
第咒组、三组同。
注第一组闹铃24小时有效.第二组、三组每天均会闹铃闹铃过程按任意键终止.如要关闭闹铃进入闹钟设置按‘上、下查”选择"OFF" 关闭。
4.接收来电如果申请了来电显示服务当外线来电话时本机会在响铃的同时显示对方的电话号码如果您所在地区的电信局送的是FS K信号还会显示来电日期、时间如果对方号码是第一次来电液晶屏会显示“新来电,匆是第二次等显示“重复”字样。
5.来电查询按“上查’键往前查或按“下查”往后查询来电。
6.去电查询按“去电”按‘上、下查”查询。
7.来电、去电号码删除在查询来电2去电时按“删除”即可。
按住此键3秒可删除所有来电、去电号码。
注挂机状态、预拨号时按‘删除”可逐位删除.8.IP功能设定按设置按8LCD显示,"IP-RV 2-3-IP'’按1进入自动IP设置按上、下查选择IP号码IP号码为1790917908193179111792117931 17951179910689630096333196默认为关选择好后按设置确认按2进入第一组IPIP1号码设定直接输入号码即可如有错误按删除即可若要更改原号码按删除后重新输入号码而后按设置确认此时LCD显示“IP1 CODE”表示已经存入号码按3进入第二组IPIP2号码设定方法如前组略。
电话机使用说明书

电话机使用说明书—、使用注意事项1、电话机应安装在干燥、通风、无腐蚀气体的地方.2、来电显示功能必须要本地电信局开通并向电信局申请才能显示对方号码.没有开通来电显示的地方不影响话机普通功能使用.二、主要功能1、8种普通铃声 + 1组贵宾铃声,普通铃声可选。
2、DTMF/FSK多制式兼容,来电自动识别。
3、来电30组(16位显示),去电5组(16位显示),贵宾35组,回拨功能.4、键盘设置防盗功能.5,全自动IP(32位)快速、保密拨号.6、机械锁“0 ”.7、预拨号及消号、回拨功能.8、2位出局码,适应虚拟网.9、本地区号过滤功能.三、操作说明1、铃声设置挂机状态下连续按“铃声选择”犍,当LCD屏幕显示“TING 1至8 ”,表示有八种铃声可选.2、功能设置挂机状态按“设置”键进入设置菜单,LCD显示“SET 1 DRTE ” ,此时用上、下查健可改变设置项,再按设置键进入该项设置。
在设置完成该项后,按设置键进入下一项设置。
所有设置均用上、下查键修改该具体设置项.用“删除”键退出设置状态.具体设置如下:(1)日期/时间设置:按“设置”键LCD显示“SET 1 DRTE ”,此时按设置键确认。
进入设置后,年的显示闪烁,可按上、下查键修改,完成后再按设置健进入月的设置,修改方法与年的设置相同,再按设置键可依次修改日、小时和分钟。
小时和分钟的设置可分十位和个位分别设置.(2)设置区域码(即本地区号):LCD会提示“SET 2 CODE ” ,此时按设置键确认,LCD会显示“CODE - - - - - ”,进入区号的设置,第一个“-”闪烁(若已设置了区号,则显示设置的区号,区号第一个号码闪烁)。
按上、下查健可设置或修改为0-9,完成第一位设置后,按设置键进入第二位设置,以此类推。
如北京用户则设置区域码为:CODE 010--。
(3)设置出局码:LCD提示“SEt 3 PCODE”,按设置键确认,LCD会显示“PCODE - - ”,第一个“-”闪烁(若已设置了出局码,则显示已设置的号码,号码的第一位闪烁)。
NEC SV8100多线电话用户指南说明书

Prepared by Warner Telecom Group, LLC For Questions on your Telephone or Voicemail Call: Warner Telecom Group 206-575-4200********************Visit our website for copies of user guides at under Resources TabMultiline User GuideNEC SV8100Prepared By: Valerie Young Warner Telecom Group 206-575-4200 ********************Function Keys 12 or 24Programmable KeysCursor—Adjust Phone LCD/Ring, Handset and Speaker Volume Up/Down. Cursor Left for Redial. Cursor Right for Stored Speed DialRing/Message IndictorSoftkeysAccessing VoicemailFrom Your Telephone: Press VMsg Softkey in displayFrom Another Telephone In the Office: Dial Voice Mail Extension 200(0) You will be prompted for your mailbox number Dial Mailbox Number (same as extension) Enter Security Code if askedFrom Outside the Office if you have a DID (Direct Inward Dial): Dial your Direct Dial Number When you hear your greeting Press # # + Ext. No. to log on to your mailbox Enter Security Code if askedFrom Outside the Office if you have a Voicemail Back Door Number or when Auto Attendant Is On: Dial Voicemail Back Door Number: When company greeting answers Press # + Mailbox Number Enter security code if askedFrom Outside the Office if speaking with a Coworker: Dial main company number Ask Co Worker to transfer you to Ext. 200(0) Press # to Log On to your Mailbox Enter security code if askedVoicemailSetting Up Your MailboxWhen you access your mailbox for the first time, take a few minutes to set up your mailbox by recording a personal greeting, recording your name for the company direc-tory and setting an optional security code to safeguard your mailbox.To Record GreetingFrom Your TelephonePress VMsg Sofkey in displayPress Greet SoftkeyPush Gr1, Gr2 or Gr3 Softkey to select which greeting to recordFollow instructions or press Softkey to set up which greeting you wantactivated and recordedTo Record Your NameFrom Your TelephonePress VMsg Sofkey in displayPush More> + RcNam SoftkeysFollow instructions or press Softkeys to record nameTo Set A Security Code On Your MailboxFrom Your TelephonePress VMsg Sofkey in displayPush More> + Setup + Code SoftkeysFollow instructions or press Softkeys to set a security codeBasic FeaturesICM Key The ICM (intercom) Key is used to place and answerinternal calls from other Extensions. When you lift yourhandset to place or answer an internal call your ICM willbe lit Red.Line Keys This is where outside calls live. The Line Key will flash redwhen an outside call is ringing and then light Greenwhen the call is answered & flash Green when on hold. Answer A Call Lift handset or press Speaker to answer calls hands-freeIf answering an internal call ICM key will be litIf answering an outside call Line Key will be litCalling Another Extension Lift Handset or Press SpeakerDial extension, or press button for extension if you haveone programmedCalling An Outside Number Lift Handset or Press SpeakerDial 9, or press available Line Key & Dial NumberMUTE (MIC Light)For hands free: turn MIC light on to be heard. Turn MIClight off to be muted. Keep MIC light on to be able toanswer an internal intercom call hands-freeOn Handset: Press MIC light to mute yourself duringconversation (light will flash). Press it again to unmuteyourself (light will be solid)Internal Extension Button You may have another extension programmed as a key (DSS/One Touch Key)on your phone:♦ Press Key to call that extension♦ Key will light Red when the extension is in use♦ Key will flash Red when extension is in DNDSee Advance features for Programming KeysHold While on an outside call:Press RED Hold KeyYour Line Key you are using will flash GreenPress Green flashing Line Key to return to the call on hold Call Park (optional feature)Your phone may be programmed with Park KeysTo place a call on Park:Press available Park KeyKey will light Red on all phonesTo Retrieve call on Park:Press Red Park Key call is on from any phoneKey will now be free to park another call.Transfer A Call While on callPress Transfer KeyCall will automatically go on holdDial the extension number or press programmable buttonOptionally, you may announce the callHang Up to complete transferTransfer A Caller While on callTo A Mailbox Press Transfer KeyPress VMsg Sofkey in screenDial the extension number or press programmable buttonHang Up to complete transferConference Place or answer a callPress Conf Soft Key in DisplayPlace second call (either internal by dialing the extensionor external by dialing 9 and the phone number)When party answers Press Add Soft Key in displayPlace your next call orPress Begin Soft Key in display to begin conference Personal Speed Dials (cont.)To Dial Personal Speed Dials:Lift Handset or Press SpeakerDial #7 + 1-Digit Bin Number (0-9)OrPress DIR SoftkeyPress STA SoftkeyUse Arrow Keys to scroll through numbersLift handset or press Dial SoftkeyRedial and Caller ID To Preview the Last Number You Dialed:With handset downPress List SoftkeyPress Redial SoftkeyUse Softkeys to scroll through your Redial ListLift Handset or Press Speaker to dial numberTo Preview Caller ID (Press List SoftkeyPress CID SoftkeyUse Softkeys to scroll through your Caller ID ListLift Handset or Press Speaker to dial number Forward An Extension To forward your extension to another location:With handset downPress ↓ Soft KeyPress Prog Soft KeyPress Cfwd Soft KeyPress All Soft KeyPress Set Soft Key to Set or Cncl Soft Key to CancelEnter another extension number, or dial 9+outside numberPress Speaker to saveAdvanced FeaturesProgram Function Key With Handset DownFor Internal Extension or Dial 751 (display will show KEY PROGRAM) Outside Phone number Press unused Function Key (see page 2) Dial 01 (display will show DSS/ONE TOUCH)Dial the extension number or dial 9+phone number Press HOLD Key to saveUse Dial Pad to program a name (see chart bellow) Press HOLD Key to savePress Speaker to hang upPersonal Speed Dials The system allows you to program up to 10 speed dialsthat are accessible only from your phone.To Program Personal Abbreviated Dialing Number: With handset down Dial 755Dial bin number (0-9) you want to programDial 9 + outside phone number you want to program Press HOLD Key to program a nameUse Dial Pad to program name (see chart above) Press HOLD Key to save namePress Speaker to hang upAll Call Page Page will broadcast over every idle phone (excludes DNDand phones in use) Lift handsetPress InPg Soft Key Dial 1Make Announcement Hang upDo Not Disturb (DND) DND permits you to work at your desk without Interruptions from the phone. With handset down Press ↓ Soft Key Press Prog Soft Key Press DND Soft KeyPress Set Soft Key to Set or Cncl Soft Key to Cancel Press DND Soft Key option All—All Calls Ext—External Only Calls Icm—Internal Only Calls Cfwto—Transferred CallsRing Tone Changes ring tone for your phone Press SpeakerDial 720—Screen will display 1=Int 2=ExtChoose 1 to change ring tone for internal calls or Choose 2 to change ring tone for external calls Press 1-8 on the dial pad to listen to tones When you hear the tone you like Press Speaker。
爱信电话使用说明书

挂机状态下,按“设置”键,液晶显示“”按“上、下查”或数字键改变设置项,再按“设置”键进入该项设置,每项功能设置完毕后按“删除”键返回上级菜单,各项功能设置如下:1.时间日期设置:按“设置”,按“1”两次,设置日期,按“1”和“2”设置时间。
后按设置键确认即可。
2.铃声选择及铃声音量调节:按设置,按21,按“上、下查”选择振铃铃声。
按设置键确认。
按设置,按22,进入贵宾铃声选择,设置方法同上。
按设置,按23,进入铃声音量调节,按“上、下查”调节音量。
3.闹钟设置:按设置,按3,有三组闹铃可供选择。
按1进入第一组,显示“ALAR OFF”,“OFF”闪烁,直接按数字键输入时间,设置确认。
第二组、三组同。
注:第一组闹铃24小时有效。
第二组、三组每天均会闹铃,闹铃过程按任意键终止。
如要关闭闹铃,进入闹钟设置,按“上、下查”选择“OFF”关闭。
4.接收来电:如果申请了来电显示服务,当外线来电话时,本机会在响铃的同时显示对方的电话号码(如果您所在地区的电信局送的是FSK信号还会显示来电日期、时间),如果对方号码是第一次来电,液晶屏会显示“新来电”,如是第二次等显示“重复”字样。
5.来电查询:按“上查”键往前查,或按“下查”往后查询来电。
6.去电查询:按“去电”,按“上、下查”查询。
7.来电、去电号码删除:在查询来电/去电时,按“删除”即可。
按住此键3秒可删除所有来电、去电号码。
注:挂机状态、预拨号时,按“删除”可逐位删除。
8.IP功能设定:按设置,按8,LCD显示“IP—RV 2-3-IP”,按1进入自动IP设置,按上、下查选择IP号码,IP号码为17909,17908,193,17911,17921,17931,17951,17991,068,96300,96333,196,默认为关,选择好后按设置确认;按2进入第一组IP(IP1)号码设定,直接输入号码即可,如有错误,按删除即可,若要更改原号码,按删除后重新输入号码,而后按设置确认,此时LCD显示“IP1 CODE”(表示已经存入号码);按3进入第二组IP(IP2)号码设定,方法如前组,略。
OMEGAPHONE7-Channel 4-20mA 输入报警拨号器说明书

OMEGAPHONE®7-Channel, 4 to 20 mA Input Alarm Dialer Model OMA-VM500-4ߜMonitors 7-Channelsof 4 to 20 mA Input,One Dry-Contact Input,and Power StatusߜIsolated InputsPrevent Ground LoopsߜProgram Up to Four20-Digit Phone NumbersߜWorks withTelephone PagersߜIntegral 4-Line LCDߜWall-Mount EnclosureModel OMA-VM500-4 monitors upto seven 4 to 20 mA inputs and dials up to 4 phone or pager numbers if any 4 to 20 mA input goes out of limits, if the dry-contact input is not in its programmed normal state,or if there is a power outage. The integrated voice tells the user which input is out of limits. The user can call the unit at any time to hear a report on the input and power status. The OMA-VM500-4 is easily programmed over the phone. Simply locate the unit in the area where you want to measure the 4 to 20 mA inputs, plug in the phone line and the power adaptor, turn the unit on, and call the unit from another phone or cell phone. Follow the spoken instructions and the instructions in the operator’s manual to program the phone numbers where you want the dialer to call in case of an alert condition and the upper and lower limits for the4 to 20 mA signals. Then hang upby pressing the “0” key on your phone until the unit says “good-bye.”The system is nowprogrammed and ismonitoring your facilityfor 4 to 20 mA inputand power status. SpecificationsNumber of AnalogInputs:7Sensor Type:Self-powered4 to 20 mA outputsensors Sensor Input:Isolated, 20 Ωinput impedanceResponse Time:50 msAccuracy:±0.05 mAHigh and Low Limits on4 to 20 mA Inputs:ProgrammableScaling in Engineering Unitsfor Each 4 to 20 mA Input:ProgrammableDry-Contact Input:12 Vdc 10 mAsource; input is normally openTelephone:Standard RJ11 phone jack connectionTelephone Numbers:Stores up to4 phone numbers up to 20 digits longPersonal Identification Message:Records up to a 10-second messageover the phoneOperation:Operates with answering machineon the same phone lineDisplay:Integral 4-line LCDAlarm Notification:Alarm sirensounds and alarm relay closes ifany input goes out of limitsAlarm Cancellation:Pushbuttonon front of the unit silences thealarm and cancels emergencyAlarm Relay Output:5 A, 125 VacAlarm Buzzer:85 dBPower:Powered from included120 Vac wall mount transformerpower supplyBattery Backup:4-hourrechargeable battery backup;20 or 30 hours optionalOperating Temperature:0 to 52°C (32 to 125°F)Electrical Connections:Plug-in terminal blockDimensions:117 H x 223 W x 57 mm D(4.62 x 8.79 x 2.26")Material:ABS plasticWeight:0.9 kg (2 lb)Ordering Example: OMA-VM500-4-B20, 7-channel automatic 4 to 20 mA alarm dialer with 20-hour battery backup and integral LCD display, OMEGACARE SM,1-year extended warranty for OMA-VM500-4-B20 (adds 1 year to standard 1-year warranty), $652 + 65 = $717.Starts at $615OMEGACARE SM extended warranty programis available for models shown on this page.Ask your sales representative for full detailswhen placing an order. OMEGACARE SMcovers parts, labor and equivalent loaners.OMA-VM500-4, $615,shown smaller thanactual size.G-1CANADA www.omega.ca Laval(Quebec) 1-800-TC-OMEGA UNITED KINGDOM www. Manchester, England0800-488-488GERMANY www.omega.deDeckenpfronn, Germany************FRANCE www.omega.frGuyancourt, France088-466-342BENELUX www.omega.nl Amstelveen, NL 0800-099-33-44UNITED STATES 1-800-TC-OMEGA Stamford, CT.CZECH REPUBLIC www.omegaeng.cz Karviná, Czech Republic596-311-899TemperatureCalibrators, Connectors, General Test and MeasurementInstruments, Glass Bulb Thermometers, Handheld Instruments for Temperature Measurement, Ice Point References,Indicating Labels, Crayons, Cements and Lacquers, Infrared Temperature Measurement Instruments, Recorders Relative Humidity Measurement Instruments, RTD Probes, Elements and Assemblies, Temperature & Process Meters, Timers and Counters, Temperature and Process Controllers and Power Switching Devices, Thermistor Elements, Probes andAssemblies,Thermocouples Thermowells and Head and Well Assemblies, Transmitters, WirePressure, Strain and ForceDisplacement Transducers, Dynamic Measurement Force Sensors, Instrumentation for Pressure and Strain Measurements, Load Cells, Pressure Gauges, PressureReference Section, Pressure Switches, Pressure Transducers, Proximity Transducers, Regulators,Strain Gages, Torque Transducers, ValvespH and ConductivityConductivity Instrumentation, Dissolved OxygenInstrumentation, Environmental Instrumentation, pH Electrodes and Instruments, Water and Soil Analysis InstrumentationHeatersBand Heaters, Cartridge Heaters, Circulation Heaters, Comfort Heaters, Controllers, Meters and SwitchingDevices, Flexible Heaters, General Test and Measurement Instruments, Heater Hook-up Wire, Heating Cable Systems, Immersion Heaters, Process Air and Duct, Heaters, Radiant Heaters, Strip Heaters, Tubular HeatersFlow and LevelAir Velocity Indicators, Doppler Flowmeters, LevelMeasurement, Magnetic Flowmeters, Mass Flowmeters,Pitot Tubes, Pumps, Rotameters, Turbine and Paddle Wheel Flowmeters, Ultrasonic Flowmeters, Valves, Variable Area Flowmeters, Vortex Shedding FlowmetersData AcquisitionAuto-Dialers and Alarm Monitoring Systems, Communication Products and Converters, Data Acquisition and Analysis Software, Data LoggersPlug-in Cards, Signal Conditioners, USB, RS232, RS485 and Parallel Port Data Acquisition Systems, Wireless Transmitters and Receivers。
- 1、下载文档前请自行甄别文档内容的完整性,平台不提供额外的编辑、内容补充、找答案等附加服务。
- 2、"仅部分预览"的文档,不可在线预览部分如存在完整性等问题,可反馈申请退款(可完整预览的文档不适用该条件!)。
- 3、如文档侵犯您的权益,请联系客服反馈,我们会尽快为您处理(人工客服工作时间:9:00-18:30)。
爱信电话使用说明书
挂机状态下,按“设置”键,液晶显示“12345678”按“上、下查”或数字键改变设置项,再按“设置”键进入该项设置,每项功能设置完毕后按“删除”键返回上级菜单,各项功能设置如下:
1.时间日期设置:按“设置”,按“1”两次,设置日期,按“1”和“2”设置时间。
后按设置键确认即可。
2.铃声选择及铃声音量调节:按设置,按21,按“上、下查”选择振铃铃声。
按设置键确认。
按设置,按22,进入贵宾铃声选择,设置方法同上。
按设置,按23,进入铃声音量调节,按“上、下查”调节音量。
3.闹钟设置:按设置,按3,有三组闹铃可供选择。
按1进入第一组,显示“ALAR OFF”,“OFF”闪烁,直接按数字键输入时间,设置确认。
第二组、三组同。
注:第一组闹铃24小时有效。
第二组、三组每天均会闹铃,闹铃过程按任意键终止。
如要关闭闹铃,进入闹钟设置,按“上、下查”选择“OFF”关闭。
4.接收来电:如果申请了来电显示服务,当外线来电话时,本机会在响铃的同时显示对方的电话号码(如果您所在地区的电信局送的是FSK信号还会显示来电日期、时间),如果对方号码是第一次来电,液晶屏会显示“新来电”,如是第二次等显示“重复”字样。
5.来电查询:按“上查”键往前查,或按“下查”往后查询来电。
6.去电查询:按“去电”,按“上、下查”查询。
7.来电、去电号码删除:在查询来电/去电时,按“删除”即可。
按住此键3秒可删除所有来电、去电号码。
注:挂机状态、预拨号时,按“删除”可逐位删除。
8.IP功能设定:按设置,按8,LCD显示“IP—RV 2-3-IP”,按1进入自动IP设置,按上、下查选择IP号码,IP号码为17909,17908,193,17911,17921,17931,17951,17991,068,96300,96333,196,默认为关,选择好后按设置确认;按2进入第一组IP(IP1)号码设定,直接输入号码即可,如有错误,按删除即可,若要更改原号码,按删除后重新输入号码,而后按设置确认,此时LCD显示“IP1 CODE”(表示已经存入号码);按3进入第二组IP(IP2)号码设定,方法如前组,略。
9.回拨/追拨:挂机状态预拨号后按“回拨”,则自动摘机拨出预拨号码;摘机/挂机状态查询来电、去电号码时,按“回拨”则将最新拨打号码每隔5秒重播一次,遇忙音占线自动重拨,直至拨通,追拨过程中按任意键终止重拨。
10.LCD亮度调节:按“设置”,按7,LCD显示“LCD CON3”,此时按“上、下查”调节LCD亮度,按“设置”确认。
11.音量:挂机状态按“音量”(数字键旁边),按“上、下查”选择1234不同音量,按“设置”确认。
12.计算:按“计算”进入计数器模式,使用完毕,按“删除”退出。
运算符号对应按钮:+:上查,-:下查,×:去电,÷:回拨,.(小数点):*,=:# 删除键:删除输入错误键。
爱信来电显示电话使用说明书
型号:HCD8588P/TSDL08-21、08-22 HCD8588P/TSDL 14c
若发现本机不能显示来电号码,可能是制式不对,请按“**#”,可实现来电制式互换。
设置说明:
挂机状态下,按“设置”键,液晶显示“12345678”按“上、下查”或数字键改变设置项,再按“设置”键进入该项设置,每项功能设置完毕后按“删除”键返回上级菜单,各项功能设置如下:
时间日期设置:按“设置”,按“1”两次,设置日期,按“1”和“2”设置时间。
后按设置键确认即可。
铃声选择及铃声音量调节:
按设置,按21,按“上、下查”选择振铃铃声。
按设置键确认。
按设置,按22,进入贵宾铃声选择,设置方法同上。
按设置,按23,进入铃声音量调节,按“上、下查”调节音量。
闹钟设置:按设置,按3,有三组闹铃可供选择。
按1进入第一组,显示“ALAR OFF”,“OFF”闪烁,直接按数字键输入时间,设置确认。
第二组、三组同。
注:第一组闹铃24小时有效。
第二组、三组每天均会闹铃,闹铃过程按任意键终止。
如要关闭闹铃,进入闹钟设置,按“上、下查”选择“OFF”关闭。
接收来电:如果申请了来电显示服务,当外线来电话时,本机会在响铃的同时显示对方的电话号码(如果您所在地区的电信局送的是FSK信号还会显示来电日期、时间),如果对方号码是第一次来电,液晶屏会显示“新来电”,如是第二次等显示“重复”字样。
来电查询:按“上查”键往前查,或按“下查”往后查询来电。
去电查询:按“去电”,按“上、下查”查询。
来电、去电号码删除:在查询来电/去电时,按“删除”即可。
按住此键3秒可删除所有来电、去电号码。
注:挂机状态、预拨号时,按“删除”可逐位删除。
IP功能设定:按设置,按8,LCD显示“IP—RV 2-3-IP”,按1进入自动IP设置,按上、下查选择IP号码,IP号码为17909,17908,193,17911,17921,17931,17951,17991,068,96300,96333,196,默认为关,选择好后按设置确认;按2进入第一组IP(IP1)号码设定,直接输入号码即可,如有错误,按删除即可,若要更改原号码,按删除后重新输入号码,而后按设置确认,此时LCD显示“IP1 CODE”(表示已经存入号码);按3进入第二组IP(IP2)号码设定,方法如前组,略。
回拨/追拨:挂机状态预拨号后按“回拨”,则自动摘机拨出预拨号码;摘机/挂机状态查询来电、去电号码时,按“回拨”则将最新拨打号码每隔5秒重播一次,遇忙音占线自动重拨,直至拨通,追拨过程中按任意键终止重拨。
LCD亮度调节:按“设置”,按7,LCD显示“LCD CON3”,此时按“上、下查”调节LCD亮度,按“设置”确认。
音量:挂机状态按“音量”(数字键旁边),按“上、下查”选择1234不同音量,按“设置”确认。
计算:按“计算”进入计数器模式,使用完毕,按“删除”退出。
运算符号对应按钮:+:上查,-:下查,×:去电,÷:回拨,.(小数点):*,=:# 删除键:删除输入错误键。