oracle11g客户端for-linux安装文档
ORACLE 11G for Linux安装指南
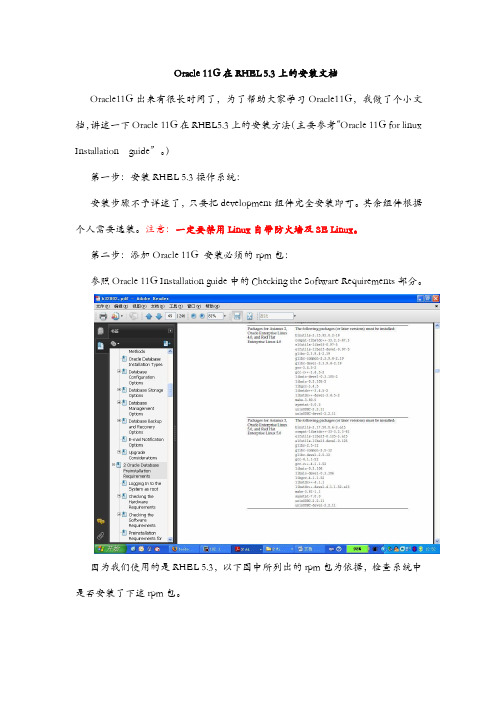
Oracle 11G在RHEL 5.3上的安装文档Oracle11G出来有很长时间了,为了帮助大家学习Oracle11G,我做了个小文档,讲述一下Oracle 11G在RHEL5.3上的安装方法(主要参考“Oracle 11G for linux Installation guide”。
)第一步:安装RHEL 5.3操作系统:安装步骤不予详述了,只要把development组件完全安装即可。
其余组件根据个人需要选装。
注意:一定要禁用Linux自带防火墙及SE Linux。
第二步:添加Oracle 11G 安装必须的rpm包:参照Oracle 11G Installation guide中的Checking the Software Requirements部分。
因为我们使用的是RHEL 5.3,以下图中所列出的rpm包为依据,检查系统中是否安装了下述rpm包。
如果系统采用的是SUSE Linux操作系统,则使用下图中列出的包:下面我们开始检查所装系统里是否安装了上述安装oracle 11G所需的包:命令行及输出如下所示:[root@localhost ~]# rpm -qa compat* compat-dapl-2.0.13-4.el5compat-openldap-2.3.43_2.2.29-3.el5 compat-gcc-34-g77-3.4.6-4compat-libstdc++-296-2.96-138 compat-glibc-2.3.4-2.26compat-libcom_err-1.0-7compat-glibc-headers-2.3.4-2.26 compat-libgcc-296-2.96-138 compat-libf2c-34-3.4.6-4compat-slang-1.4.9-27.2.2compat-dapl-utils-2.0.13-4.el5compat-gcc-34-3.4.6-4compat-readline43-4.3-3compat-dapl-devel-2.0.13-4.el5compat-dapl-static-2.0.13-4.el5compat-gcc-34-c++-3.4.6-4compat-libstdc++-33-3.2.3-61compat-db-4.2.52-5.1[root@localhost ~]# rpm -qa |grep elfutils* elfutils-0.137-3.el5elfutils-libelf-0.137-3.el5elfutils-libs-0.137-3.el5elfutils-libelf-devel-0.137-3.el5elfutils-libelf-devel-static-0.137-3.el5 [root@localhost ~]# rpm -qa |grep glibc* glibc-headers-2.5-34glibc-2.5-34glib2-devel-2.12.3-2.fc6compat-glibc-2.3.4-2.26glib2-2.12.3-2.fc6compat-glibc-headers-2.3.4-2.26glibc-common-2.5-34NetworkManager-glib-0.7.0-3.el5glibc-devel-2.5-34dbus-glib-devel-0.73-8.el5glib-java-0.2.6-3.fc6avahi-glib-0.6.16-1.el5dbus-glib-0.73-8.el5[root@localhost ~]# rpm -qa |grep glibc glibc-headers-2.5-34glibc-2.5-34compat-glibc-2.3.4-2.26compat-glibc-headers-2.3.4-2.26glibc-common-2.5-34glibc-devel-2.5-34[root@localhost ~]# rpm -qa |grep gcc gcc-java-4.1.2-44.el5compat-gcc-34-g77-3.4.6-4libgcc-4.1.2-44.el5compat-libgcc-296-2.96-138gcc-c++-4.1.2-44.el5gcc-gnat-4.1.2-44.el5compat-gcc-34-3.4.6-4gcc43-4.3.2-7.el5gcc43-gfortran-4.3.2-7.el5compat-gcc-34-c++-3.4.6-4gcc43-c++-4.3.2-7.el5gcc-4.1.2-44.el5gcc-gfortran-4.1.2-44.el5gcc-objc-4.1.2-44.el5[root@localhost ~]# rpm -qa |grep libaio libaio-0.3.106-3.2[root@localhost ~]# rpm -qa |grep libgcc libgcc-4.1.2-44.el5compat-libgcc-296-2.96-138[root@localhost ~]# rpm -qa |grep libstdc compat-libstdc++-296-2.96-138libstdc++43-devel-4.3.2-7.el5libstdc++-devel-4.1.2-44.el5compat-libstdc++-33-3.2.3-61libstdc++-4.1.2-44.el5[root@localhost ~]# rpm -qa |grep make-3 make-3.81-3.el5[root@localhost ~]# rpm -qa |grep sysstat sysstat-7.0.2-3.el5[root@localhost ~]# rpm -qa |grep unixODBC[root@localhost ~]#从上面的输出显示我们可以看出,系统缺少了libaio-devel-0.3.106、unixODBC-2.2.11及unixODBC-devel-2.2.11三个包。
Linux系统(X64)安装Oracle11g完整安装教程
Linux系统(X64)安装Oracle11g完整安装图文教程1修改操作系统核心参数(Root用户)1)修改用户的SHELL的限制,修改 /etc/security/ 文件输入命令:vi /etc/security/,按i键进入编辑模式,将下列内容加入该文件。
oracle soft nproc 2047oracle hard nproc 16384oracle soft nofile 1024oracle hard nofile 65536编辑完成后按Esc键,输入“:wq”存盘退出2)修改/etc/login 文件,输入命令:vi /etc/login,按i键进入编辑模式,将下列内容加入该文件。
session required /lib/security/session required编辑完成后按Esc键,输入“:wq”存盘退出3)修改linux内核,修改/etc/文件,输入命令: vi /etc/ ,按i键进入编辑模式,将下列内容加入该文件= 6815744= 1048576= 2097152= 48= 4096= 250 32000 100 128= 1024 65500= 4194304= 4194304= 262144= 1048576编辑完成后按Esc键,输入“:wq”存盘退出。
注意: = 9000 65500 网络默认9000 655004)要使 /etc/ 更改立即生效,执行以下命令。
输入:sysctl -p显示如下:linux:~ # sysctl -p= 1= 1= 6815744= 1048576= 2097152= 48= 4096= 250 32000 100 128= 1024 65500= 4194304= 4194304= 262144= 10485765)编辑 /etc/profile ,输入命令:vi /etc/profile,按i键进入编辑模式,将下列内容加入该文件。
oracle11g for Linux安装
Oracle 11gR2 for Linux 安装一、环境搭建1.需要软件:OracleLinux-R6-U5-Server-x86_64-dvd.iso,linux_11gR2_grid,linux_11gR2_database,SecureCRT6.1。
2.安装OracleLinux系统64位虚拟机,需要设置BIOS,Virtualization Technology 为 enabled 后,保存。
例如我的win7系统:在开机时,按F1键,进入BIOS模式,在菜单栏找到Config ==> Security ==> Virtualization ===> Intel(R) Virtualization Technology ==> 设置为 Enabled设置完成后保存退出,这样就可以根据ISO镜像文件创建响应的虚拟机系统。
3.在系统安装完成后启动,窗口是命令行模式,当安装oracle时需要图形桌面窗口。
固在命令行窗口时,输入startx命令,看是否能切换到图形窗口模式。
网上收索到的内容是直接安装gdm或者kde包就可以了,安装图形界面涉及到很多包,并且包之间的依赖关系也很复杂,所以不推荐使用rpm -ivh来安装,最好使用yum install来安装。
sudo yum groupinstall gnome 安装gnome界面sudo yum groupinstall kde 安装kde界面或者你可以把光盘里的Server目录复制到系统的某个目录下,然后参考yum 的配置方法做一个yum仓库,这样就可以自动解决包的依赖关系。
最后yum install gnome-*就能把所有与GNOME相关的包安装上。
[root@localhost ~]# yum groupinstall "X Window System"[root@localhost ~]# yum groupinstall "Desktop"启动Gnome桌面[root@localhost ~]# startx我使用的方法是重装虚拟机,在装的过程中选择安装桌面组件,安装后就进入到桌面窗口。
Linux系统Oracle 11g安装文档
Linux系统Oracle 11g安装文档1.下载Oracle 11g的2个zip格式安装文件file1和file2/technetwork/database/in-memory/downloads/index.html2.添加用户组oinstall(清单组)和dba(数据库管理员)命令:groupadd oinstallgroupadd dba3.创建oracle用户,并添加到oinstall和dba组中命令:useradd -g oinstall -g dba -m oracle4.设置oracle用户的密码命令:passwd oracle5.创建数据库安装目录(oracle)、配置文件目录(oraInventory)和软件包解压目录(database)命令:mkdir -p /data/oraclemkdir -p /data/oraInventorymkdir -p /data/database6.将步骤5创建的目录所有者改为oinstall组的oracle用户7.修改/etc/redhat-release 文件为redhat-7命令:vi /etc/redhat-releasecat /etc/redhat-release8.安装oracle所需软件,使用命令安装下面的软件命令:yum install xxx(软件名)binutils compat-libcap1 gcc gcc-c++ glibc glibc-devel ksh libaio libaio-devel libgcc libstdc++ libstdc++-devel libXi libXtst make sysstat9.关闭防火墙命令:systemctl stop firewalld.service10.查看防火墙是否关闭,Active:inactive(dead)表示已关闭命令:systemctl status firewalld.service11.禁用防火墙命令:systemctl disable firewalld.service12.关闭selinux,状态改成disabled命令:vi /etc/selinux/config13.修改内核参数命令:vi /etc/sysctl.conf添加下列参数(Ctrl+Shift+V):net.ipv4.icmp_echo_ignore_broadcasts = 1 net.ipv4.conf.all.rp_filter = 1fs.file-max = 6815744fs.aio-max-nr = 1048576kernel.shmall = 2097152kernel.shmmax = 2147483648kernel.shmmni = 4096kernel.sem = 250 32000 100 128net.ipv4.ip_local_port_range = 9000 65500 net.core.rmem_default = 262144net.core.rmem_max= 4194304net.core.wmem_default= 262144net.core.wmem_max= 1048514.生效参数命令:system-p system-p15.提升软件性能命令:vi /etc/security/limits.conf增加下列参数:oracle soft nproc 2047oracle hard nproc 16384oracle soft nofile 1024oracle hard nofile 6553616.配置环境变量命令:vi /home/oracle/.bash_profile增加一下参数:export ORACLE_BASE=/data/oracleexport ORACLE_HOME=$ORACLE_BASE/product/11.2.0/db_1 export ORACLE_SID=orclexport ORACLE_TERM=xtermexport PATH=$ORACLE_HOME/bin:/usr/sbin:$PATHexport LD_LIBRARY_PATH=$ORACLE_HOME/lib:/lib:/usr/lib export LANG=Cexport NLS_LANG=AMERICAN_AMERICA.ZHS16GBK17.生效配置命令:source /home/oracle/.bash_profile18.将安装包传输到linux中(根据保存目录不同,更改以下的命令,这里保存在fxj目录下)19.解压安装包命令:unzip 压缩包名-d /data/database20.修改database文件夹的所有者命令:chown -R oracle:oinstall /data/database/database21.重启进入Oracle用户22.进入到安装路径命令:cd /data/database/database/23.执行runInstaller文件命令:./runInstaller24.根据是否需要自动接受Oracle更新来确定填写email,下一步25.选择创建和配置数据库,下一步26.根据自己的需求选择系统类,此处选择服务器类,下一步桌面类:如果要在笔记本或桌面类系统中安装,则选择此项。
Linux安装Oracle 11g(图文版)
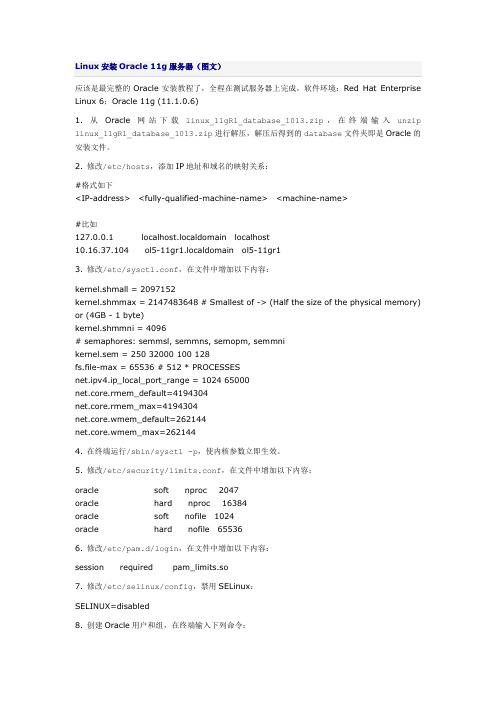
Linux安装Oracle 11g服务器(图文)应该是最完整的Oracle安装教程了,全程在测试服务器上完成,软件环境:Red Hat Enterprise Linux 6;Oracle 11g (11.1.0.6)1. 从Oracle网站下载linux_11gR1_database_1013.zip,在终端输入unzip linux_11gR1_database_1013.zip进行解压,解压后得到的database文件夹即是Oracle的安装文件。
2. 修改/etc/hosts,添加IP地址和域名的映射关系:#格式如下<IP-address> <fully-qualified-machine-name> <machine-name>#比如127.0.0.1 localhost.localdomain localhost10.16.37.104 ol5-11gr1.localdomain ol5-11gr13. 修改/etc/sysctl.conf,在文件中增加以下内容:kernel.shmall = 2097152kernel.shmmax = 2147483648 # Smallest of -> (Half the size of the physical memory) or (4GB - 1 byte)kernel.shmmni = 4096# semaphores: semmsl, semmns, semopm, semmnikernel.sem = 250 32000 100 128fs.file-max = 65536 # 512 * PROCESSESnet.ipv4.ip_local_port_range = 1024 65000net.core.rmem_default=4194304net.core.rmem_max=4194304net.core.wmem_default=262144net.core.wmem_max=2621444. 在终端运行/sbin/sysctl -p,使内核参数立即生效。
1在linux64上安装oracle11g完整
1在linux64上安装oracle11g完整
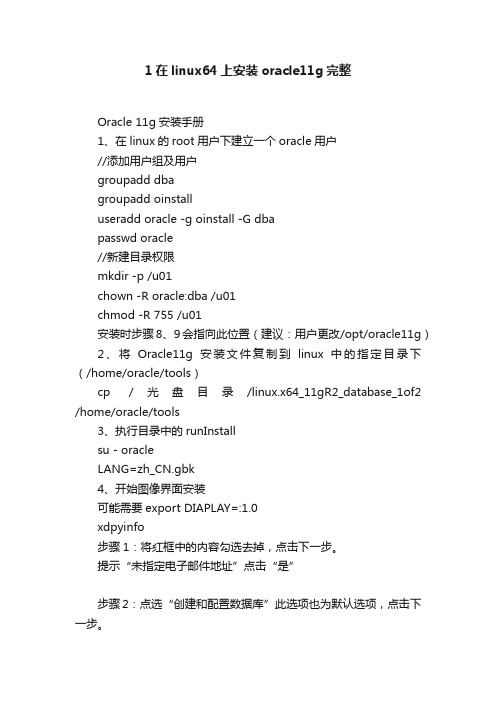
Oracle 11g安装手册
1、在linux的root用户下建立一个oracle用户
//添加用户组及用户
groupadd dba
groupadd oinstall
useradd oracle -g oinstall -G dba
passwd oracle
//新建目录权限
mkdir -p /u01
chown -R oracle:dba /u01
chmod -R 755 /u01
安装时步骤8、9会指向此位置(建议:用户更改/opt/oracle11g)
2、将Oracle11g安装文件复制到linux中的指定目录下(/home/oracle/tools)
cp /光盘目录/linux.x64_11gR2_database_1of2 /home/oracle/tools
3、执行目录中的runInstall
su - oracle
LANG=zh_CN.gbk
4、开始图像界面安装
可能需要export DIAPLAY=:1.0
xdpyinfo
步骤1:将红框中的内容勾选去掉,点击下一步。
提示“未指定电子邮件地址”点击“是”
步骤2:点选“创建和配置数据库”此选项也为默认选项,点击下一步。
步骤3:点击选中“服务器类”,点击“下一步”
步骤4:点击选中“单实例数据库安装”,点击下一步。
步骤5:点击选中“高级安装”,点击“下一步”
步骤6:选择需要的语言,点击“下一步”,此处客户确认是否需要增加其他语言。
oracle11g安装教程 linux
oracle11g安装教程 linuxOracle 11g是一个用于企业级数据库的软件,它提供了强大的功能和性能。
在Linux系统上安装Oracle 11g需要一些基本的步骤,下面是详细的安装教程。
首先,确保你的Linux系统满足Oracle 11g的安装要求。
具体要求可以参考Oracle官方文档。
你需要一台满足硬件要求的Linux服务器,并且已经安装了合适的操作系统版本。
接下来,下载Oracle 11g的安装文件。
你可以在Oracle官方网站上找到合适的下载链接。
确保你选择了适用于Linux系统的安装文件。
下载完成后,将安装文件保存到你的Linux服务器上的合适位置。
然后,解压缩安装文件。
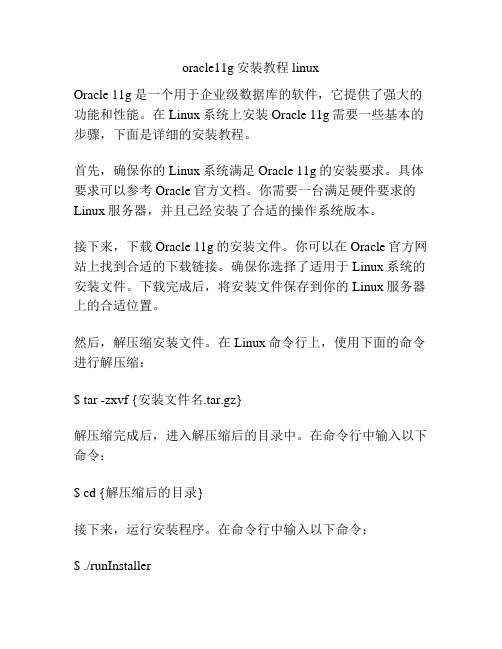
在Linux命令行上,使用下面的命令进行解压缩:$ tar -zxvf {安装文件名.tar.gz}解压缩完成后,进入解压缩后的目录中。
在命令行中输入以下命令:$ cd {解压缩后的目录}接下来,运行安装程序。
在命令行中输入以下命令:$ ./runInstaller运行安装程序后,会弹出一个图形界面的安装向导。
按照向导的指示进行安装配置。
你需要选择安装类型、指定安装目录、设置管理密码等。
确保你提供了正确的配置信息,并且确认无误后,点击“安装”按钮开始安装过程。
安装过程可能需要一些时间,取决于你的服务器性能和数据量的大小。
在安装过程中,可能会有一些额外的配置提示,请按照提示进行操作。
安装完成后,你可以通过命令行或图形界面来管理Oracle数据库。
你可以通过运行以下命令来启动数据库:$ sqlplus / as sysdba$ startup其他管理操作,比如创建用户、创建表等,可以通过运行相应的命令来完成。
最后,你可以通过访问Oracle数据库的客户端工具来连接到你的数据库,并进行数据的增删改查等操作。
以上就是Oracle 11g在Linux系统上的安装教程。
记得按照文档和提示的要求进行安装,并保持与Oracle官方网站的联系以获取最新的更新和资源。
linux下安装oracle11g64位最简客户端(转)
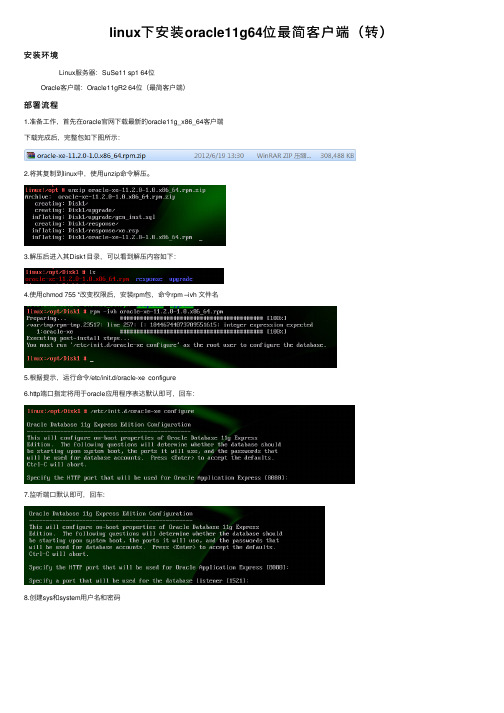
linux下安装oracle11g64位最简客户端(转)安装环境Linux服务器:SuSe11 sp1 64位Oracle客户端:Oracle11gR2 64位(最简客户端)部署流程1.准备⼯作,⾸先在oracle官⽹下载最新的oracle11g_x86_64客户端下载完成后,完整包如下图所⽰:2.将其复制到linux中,使⽤unzip命令解压。
3.解压后进⼊其Disk1⽬录,可以看到解压内容如下:4.使⽤chmod 755 *改变权限后,安装rpm包,命令rpm –ivh ⽂件名5.根据提⽰,运⾏命令/etc/init.d/oracle-xe configure6.http端⼝指定将⽤于oracle应⽤程序表达默认即可,回车:7.监听端⼝默认即可,回车:8.创建sys和system⽤户名和密码9.是否加载到开机启动项,选择y回车10.等待⼀会,看到如下界⾯,就说明64位oracle11g最简客户端安装完成,下⾯就需要配置了。
11. 下来配置oracle环境变量 oracle默认安装到12. 增加⼀个oracle.profile⽂件,⽤来验证oracle是可以联通oracle服务器。
输⼊:vi oracle.profile增加以下内容:13. 编辑好后,source刚刚编辑好的⽂件,然后我们采⽤直连的⽅式来检验是否安装成功检验命令:sqlplus ⽤户名/密码@oracle服务器IP/服务器实例名如下图就是验证成功。
下章介绍如果让iServer6R来使⽤oracle数据源,如果未使⽤iServer6R⼯具,那么安装oracle客户端到此为⽌。
利⽤刚刚安装好的64位oracle客户端,连接oracle服务器配合linux版本64位iServer6R发布数据库类型的⼯作空间和数据源。
1.配置oracle客户端的本地⽹络服务名,其具体所在⽬录如下:(注意:在Windows中,由于需要使⽤Deskpro或来配图,当oracle服务器为64位时,需要在Windows本地安装32位oracle客户端才能使⽤桌⾯⼯具配图。
Oracle+11g+for+Linux安装
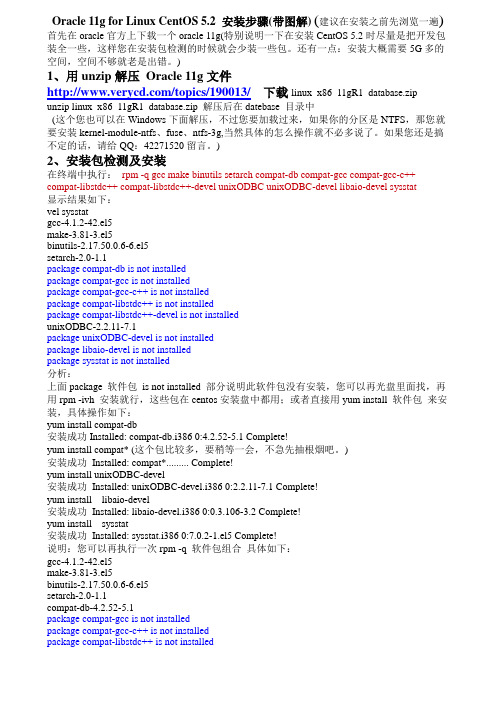
Oracle 11g for Linux CentOS 5.2 安装步骤(带图解)(建议在安装之前先浏览一遍) 首先在oracle官方上下载一个oracle 11g(特别说明一下在安装CentOS 5.2时尽量是把开发包装全一些,这样您在安装包检测的时候就会少装一些包。
还有一点:安装大概需要5G多的空间,空间不够就老是出错。
)1、用unzip解压Oracle 11g文件/topics/190013/下载linux_x86_11gR1_database.zipunzip linux_x86_11gR1_database.zip 解压后在datebase 目录中(这个您也可以在Windows下面解压,不过您要加载过来,如果你的分区是NTFS,那您就要安装kernel-module-ntfs、fuse、ntfs-3g,当然具体的怎么操作就不必多说了。
如果您还是搞不定的话,请给QQ:42271520留言。
)2、安装包检测及安装在终端中执行:rpm -q gcc make binutils setarch compat-db compat-gcc compat-gcc-c++ compat-libstdc++ compat-libstdc++-devel unixODBC unixODBC-devel libaio-devel sysstat显示结果如下:vel sysstatgcc-4.1.2-42.el5make-3.81-3.el5binutils-2.17.50.0.6-6.el5setarch-2.0-1.1package compat-db is not installedpackage compat-gcc is not installedpackage compat-gcc-c++ is not installedpackage compat-libstdc++ is not installedpackage compat-libstdc++-devel is not installedunixODBC-2.2.11-7.1package unixODBC-devel is not installedpackage libaio-devel is not installedpackage sysstat is not installed分析:上面package 软件包is not installed 部分说明此软件包没有安装,您可以再光盘里面找,再用rpm -ivh 安装就行,这些包在centos安装盘中都用;或者直接用yum install 软件包来安装,具体操作如下:yum install compat-db安装成功Installed: compat-db.i386 0:4.2.52-5.1 Complete!yum install compat* (这个包比较多,要稍等一会,不急先抽根烟吧。
Linux系统(X64)安装Oracle11g完整安装图文教程另附基本操作_oracle_脚本之家

Linux系统(X64)安装Oracle11g完整安装图⽂教程另附基本操作_oracle_脚本之家装到这⼀步,可以看到,可以查看到有很多的rpm包没有,我们可以从安装linux的光盘或ISO中(或去D:\linux_oracle11g_Package)查找所缺的包,使⽤ftp上传到linux中,然后使⽤rpm –ivh xxx.rpm --nodeps –force 来进⾏安装(其中加上--nodeps -- force 代表强制安装,是在直接使⽤rpm –ivh xxx.rpm安装不成功的情况下⽤的)等到把包全部都安装好的情况下,再次在oracle图形界⾯中,执⾏安装过程2,下来在环境检查过程中,就通过了。
安装过程中86%可能会遇到报错如出错问题(error in invoking target 'mkldflags ntcontab.o nnfgt.o' of makefile)按照如下步骤顺序执⾏。
上传安装镜像rhel-server-6.1-x86_64-dvd.iso,然后将镜像⽂件挂,如/mnt三、数据库建库1)还是在oracle⽤户的图形界⾯oracle⽤户中,新开启⼀个终端,直接输⼊命令dbca会弹出如下界⾯。
我们这⾥采⽤定制数据库。
经过漫长的等待,当看到此界⾯,说明oracle建库完成四、配置监听及本地⽹络服务1)在oracle⽤户的图形界⾯oracle⽤户中,新开启⼀个终端,输⼊命令netca 会弹出如下界⾯。
2)创建监听服务(充当oracle服务器,让别的oracle客户端连接本oracle服务器)3)配置本地⽹络服务名(充当oracle客户端,连接别的oracle服务器)输⼊连接的oracle服务器的数据库的实例名输⼊oracle服务器的ip地址选中YES测试点击change Login 输⼊所连接oracle服务器的其中某⼀个⽤户名和密码(⽤户名oracle和设置的密码),点击OK看到此界⾯说明测试成功(如果不成功,请查看⽹络是否畅通,所连接的oracle服务器是否启动,监听是否启动等原因)为你所设置的本地⽹络服务名起个名字。
Oracle11g在Linux上的安装步骤

[L INUX系统安装O RACLE数据库]操作手册精选文库文件修订历史目录1.安装前准备 (4)1.1环境及文件准备 (4)1.2创建ORACLE用户组和用户 (4)1.3修改系统参数 (5)1.3.1修改内核参数 (5)1.3.2修改用户限制 (6)1.3.3修改用户验证选项 (6)1.3.4修改用户配置文件 (7)1.3.5修改oracle环境变量 (7)1.4安装vncserver (8)2.安装 (11)2.1设置Oracle图形界面 (11)2.2Oracle软件安装 (11)2.3创建监听 (30)2.4创建数据库实例 (33)2.5配置监听 (47)2.6检查ORACLE的PATH设置 (50)3.验证 (51)3.1本地验证 (51)3.2PL/SQL Develop验证 (52)本文档是Linux(redhat6.x、centos6.x、redhat7.x) 64位操作系统安装Oracle 11g(Oracle Database 11g Enterprise Edition Release 11.2.0.4.0 - 64bit Production),本文基于各种网络资料精心整理而成,共享给有需要的朋友。
如有问题可联系:QQ:527446862,或邮件:527446862@1.安装前准备1.1环境及文件准备操作系统:64位Linux (redhat6.x、centos6.x、redhat7.x)内存:2G及以上硬盘:挂载根目录剩于空间至少7G以上文件准备:下载好了的压缩包linux.x64_11gR2_database_1of2.zip,或Oracle 11g R2(Linux x86-64)/technetwork/database/enterprise-edition/downloads/index.html附:Oracle 10g下载址:/wenlg/archive/2010/05/19/1738893.htmllinux.x64_11gR2_database_2of2.zip压缩包目录:/install创建目录:/app/oracle将两个压缩包解压至/ install/database1.2创建ORACLE用户组和用户创建两个oracle用户组:oinstall、dba创建一个oracle用户:oracle将oracle用户加入到oinstall和dba两个用户组修改oracle用户密码:1.3修改系统参数准备安装oracle前,先把相关参数设置好1.3.1修改内核参数修改sysctl.conf:内容如下:修改内核参数的值使其生效:1.3.2修改用户限制修改limits.conf末尾增加以下内容:1.3.3修改用户验证选项修改/etc/pam.d/login增加以下内容:1.3.4修改用户配置文件修改/etc/profile增加以下内容:使其生效:1.3.5修改oracle环境变量切换到oracle用户跳转到oracle的home目录修改oracle用户的环境变量内容如下:内容说明:ORACLE_SID请跟据实际情况填写ORACLE_HOME请跟据实例情况填写,11.2.0是指oracle版本号使其生效:1.4安装vncserver由于安装oracle需要可视界面需先安装vncserver,方便windows远程到Linux上切换到root用户然后启动vncserver,:1表示启动第一个vnc端口,回车提示输入密码,输入123456然后windows输入 IP:1如下:精选文库2.安装2.1设置Oracle图形界面root用户下:修改hosts文件,增加IP配置增加一行:左边是Linux的IP,右边是linux的机器名设置Linux的图形显示:提示access control disabled, clients can connect from any host,表示成功,这样就可以在windows 上的SSH上执行命令,SVN窗口里会自动弹出oracle安装界面了为防止oracle安装界面乱码,临时设置语言为:2.2O racle软件安装切换到oracle用户,跳转到/install/database/,执行oracle安装命令SVN窗口里弹出了oracle界面,去掉“I wish…”的勾然后next,点击yes选择“Skip software updates”,下一步将简体中文添加右边窗口,next如果不存在/app/oracle目录,则创建,创建后更改/app的权限为777next,group name选择dba,修改Inventory:/app/oracle/oraInventory点击yesnextwarning可忽略,Failed不能忽略,是由于用户ada和root有相同的UID号,需解决,root用户下,[root@SZB-L0004047 ~]# vi /etc/passwd找到ada,然后将ada:x:0:0::/home/ada:/bin/bash改为ada:x:100:100::/home/ada:/bin/bash 保存。
Linux下安装oracle11g文档

软、硬件要求Oracle 11g数据库是一套商业软件,它对服务器的物理内存、硬盘空间、CPU频率等硬件配置均有所要求。
此外,如果要在Red Hat Enterprise Linux 5.5上安装Oracle 11g还需要先安装必要的软件包。
具体的软硬件要求如下所述。
1.硬件要求安装Oracle 11g数据库的主机硬件配置应能满足如下要求。
● 物理内存不少于1GB。
● 硬盘可用空间不少于5GB。
● Swap分区的空间不小于2GB。
● 支持256色以上的图形显示卡。
● CPU主频不小于550MHz。
2.软件包要求在安装Oracle 11g前,需要先安装以下版本(或更高版本)的软件包。
compat-libstdc++-33-3.2.3-61 //compat-libstdc软件包elfutils-libelf-0.125-3.el5 //与elfutils-libelf相关的软件包elfutils-libelf-devel-0.125-3.el5glibc-2.5-12 //与glibc相关的软件包glibc-devel-2.5-12glibc-common-2.5-12gcc-4.1.1-52.el5 //与gcc相关的软件包gcc-c++-4.1.1-52.el5libgcc-4.1.1-52.el5libaio-0.3.106-3.2 //与libaio相关的软件包libaio-devel-0.3.106-3.2libstdc++-4.1.1-52.el5libstdc++-devel-4.1.1-52.el5unixODBC-2.2.11-7.1 //与unixODBC相关的软件包unixODBC-devel-2.2.11-7.1sysstat-7.0.0-3.el5 //sysstat软件包binutils-2.17.50.0.6-2.el5 //binutils软件包make-3.81-1.1 //make软件包这些软件包都可以通过Red Hat enterprise Linux 5.2的安装光盘获得,用户可以执行如下命令检查系统中是否已经安装上述的软件包。
Linux系统最全Oracle 11g安装文档
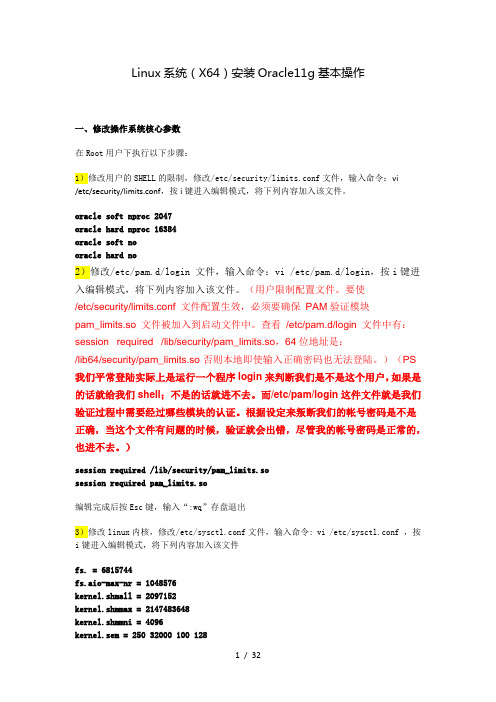
Linux系统(X64)安装Oracle11g基本操作一、修改操作系统核心参数在Root用户下执行以下步骤:1)修改用户的SHELL的限制,修改/etc/security/limits.conf文件,输入命令:vi/etc/security/limits.conf,按i键进入编辑模式,将下列内容加入该文件。
oracle soft nproc 2047oracle hard nproc 16384oracle soft nooracle hard no2)修改/etc/pam.d/login 文件,输入命令:vi /etc/pam.d/login,按i键进入编辑模式,将下列内容加入该文件。
(用户限制配置文件。
要使/etc/security/limits.conf 文件配置生效,必须要确保PAM验证模块pam_limits.so 文件被加入到启动文件中。
查看/etc/pam.d/login 文件中有:session required /lib/security/pam_limits.so,64位地址是:/lib64/security/pam_limits.so 否则本地即使输入正确密码也无法登陆。
)(PS 我们平常登陆实际上是运行一个程序login来判断我们是不是这个用户,如果是的话就给我们shell;不是的话就进不去。
而/etc/pam/login这件文件就是我们验证过程中需要经过哪些模块的认证。
根据设定来叛断我们的帐号密码是不是正确,当这个文件有问题的时候,验证就会出错,尽管我的帐号密码是正常的,也进不去。
)session required /lib/security/pam_limits.sosession required pam_limits.so编辑完成后按Esc键,输入“:wq”存盘退出3)修改linux内核,修改/etc/sysctl.conf文件,输入命令: vi /etc/sysctl.conf ,按i键进入编辑模式,将下列内容加入该文件fs. = 6815744fs.aio-max-nr = 1048576kernel.shmall = 2097152kernel.shmmax = 2147483648kernel.shmmni = 4096kernel.sem = 250 32000 100 128net.ipv4.ip_local_port_range = 9000 65500net.core.rmem_default = 4194304net.core.rmem_max = 4194304net.core.wmem_default = 262144net.core.wmem_max = 10485764)要使 /etc/sysctl.conf 更改立即生效,执行以下命令。
Linux下安装Oracle11g步骤详解 参照oracle官方文档

LINUX 下安装Oracle11g release2步骤---田征第一步:安装前的准备工作1、安装Linux操作系统,推荐使用Oracle Linux 5U4、CentOS5.4+、RHEL5.4+.(在/technology/documentation下载安装手册)仔细阅读其中的安装手册本安装在Oracle Linux 5U4上进行,在oracle11g支持的其他发行版Linux上同样适用,CentOS5.4+、RHEL5.4+下已经测试通过2、建立Oracle用户组及用户[root@linux ~]# groupadd oinstall[root@linux ~]# groupadd dba[root@linux ~]# cd /[root@linux /]# mkdir -p /u01/oracle[root@linux /]# useradd -g oinstall -G dba -d /u01/oracle oracle [root@linux /]# passwd oracle ----为Oracle用户设置密码3、上传Oracle11g安装文件到Linux 的/home目录下或是挂载安装盘 mount /dev/cdrom /mnt/cdrom[root@linux home]# unzip linux_11gR2_database_2of2.zip[root@linux home]# unzip linux_11gR2_database_1of2.zip----解压完之后就在/home下得到了database目录----将database目录移到/u01/oracle目录下[root@linux oracle]# ls -l总计 16drwxr-xr-x 8 root root 4096 2009-08-19 databasedrwxr-xr-x 2 oracle dba 4096 11-10 10:42 Desktop----修改database的所有者[root@linux oracle]# chown -R oracle:dba database/[root@linux oracle]# ls -l总计 16drwxr-xr-x 8 oracle dba 4096 2009-08-19 databasedrwxr-xr-x 2 oracle dba 4096 11-10 10:42 Desktop---11-10为系统当前日期4、检测并安装oracle11g的依赖包·使用rpm –qa | grep “包名” ------检测包是否存在·如不存在 使用命令 rpm –ivh “包名”------安装未安装的依赖包·Oracle11g安装的依赖包列表如下:binutils-2.17.50.0.6compat-libstdc++-33-3.2.3elfutils-libelf-0.125elfutils-libelf-devel-0.125elfutils-libelf-devel-static-0.125gcc-4.1.2gcc-c++-4.1.2glibc-2.5-24glibc-common-2.5glibc-devel-2.5glibc-headers-2.5kernel-headers-2.6.18ksh-20060214libaio-0.3.106libaio-devel-0.3.106libgcc-4.1.2libgomp-4.1.2libstdc++-4.1.2libstdc++-devel-4.1.2make-3.81numactl-devel-0.9.8.i386sysstat-7.0.2unixODBC-2.2.11unixODBC-devel-2.2.115、系统参数的修改1.配置oracle安装者自己的shell限制使用编辑器(vi)将以上提到的文件按提示修改保存·并且:在/etc/profile脚本中加入以下代码:if [ $USER = "oracle" ];thenif [ $SHELL = "/bin/ksh" ]; thenulimit -p 16384ulimit -n 65536elseulimit -u 16384 -n 65536fifi2、配置内核参数If the current value for any parameter is greater than the value listed in this table, then the Fixup scripts do not change the value of that parameter.在上表中,如果系统中现有参数值比给出的建议值大的话,则Fixup脚本不会修改这些参数的值·列出并修改内核参数值:在命令行下,打印出下表中参数的值并按上表建议值修改·使用文本编辑器(vi)编辑/etc/sysctl.conf文件,增添或编辑参数值如下:fs.aio-max-nr = 1048576fs.file-max = 6815744kernel.shmall = 2097152kernel.shmmax = 536870912kernel.shmmni = 4096kernel.sem = 250 32000 100 128net.ipv4.ip_local_port_range = 9000 65500net.core.rmem_default = 262144net.core.rmem_max = 4194304net.core.wmem_default = 262144net.core.wmem_max = 1048586net.ipv4.tcp_wmem = 262144 262144 262144net.ipv4.tcp_rmem = 4194304 4194304 41943046、设置oracle的环境变量首先是切换到oracle用户下#su oracle编辑oracle用户根目录下的.bash_profile文件,在该文件中加入如下内容ORACLE_BASE=/u01ORACLE_HOME=$ORACLE_BASE/oracleORACLE_SID=orclPATH=$ORACLE_HOME/bin:$PATHexport ORACLE_BASE ORACLE_HOME ORACLE_SID PATH保存退出oracle用户,然后再进入oracle用户执行下列命令检测环境变量:[root@linux /]# su - oracle[oracle@linux ~]$ env | grep ORACLEORACLE_SID=orclORACLE_BASE=/u01ORACLE_HOME=/u01/oracle7、reboot Linux系统第二步:图形界面下安装oracle11g以oracle用户登录系统并切换到database目录下[oracle@linux ~]$ cd database/[oracle@linux database]$ ls -l总计 72drwxr-xr-x 12 oracle dba 4096 2009-08-17 docdrwxr-xr-x 4 oracle dba 4096 2009-08-14 installdrwxrwxr-x 2 oracle dba 4096 2009-08-14 responsedrwxr-xr-x 2 oracle dba 4096 2009-08-14 rpm-rwxr-xr-x 1 oracle dba 4352 2009-08-14 runInstallerdrwxrwxr-x 2 oracle dba 4096 2009-08-14 sshsetupdrwxr-xr-x 14 oracle dba 4096 2009-08-14 stage-rw-r--r-- 1 oracle dba 5400 2009-08-18 welcome.html脚本runInstaller为图形模式下安装文件切换到install目录下:[oracle@linux database]$ cd install/[oracle@linux install]$ ls -l总计 224-rwxr-xr-x 1 oracle dba 28 2009-08-14 addLangs.sh-rwxr-xr-x 1 oracle dba 127 2009-08-14 addNode.sh-rwxr-xr-x 1 oracle dba 275 2009-08-14 attachHome.sh-rwxr-xr-x 1 oracle dba 182 2009-08-14 detachHome.sh… … …drwxr-xr-x 2 oracle dba 4096 2009-08-14 resource-rwxr-xr-x 1 oracle dba 22033 2009-08-14 runSSHSetup.sh-rwxr-xr-x 1 oracle dba 101448 2009-08-14 unzip进入Linux的图形界面:在命令行窗口中运行./runInstaller[oracle@linux database]$./runInstaller 启动检测如下:稍后弹出如下安装欢迎画面:安装开始:然后按步骤安装……剩下的安装步骤与windows下安装相似,不再做赘述。
Linux下Oracle11g安装手册范本
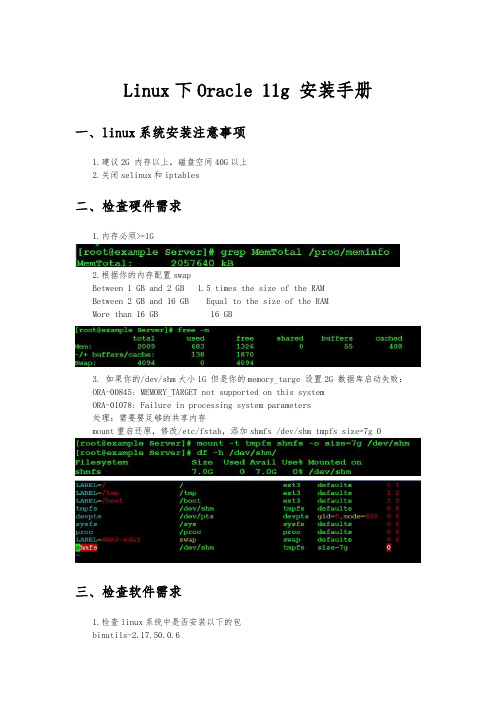
Linux下Oracle 11g 安装手册一、linux系统安装注意事项1.建议2G 内存以上,磁盘空间40G以上2.关闭selinux和iptables二、检查硬件需求1.内存必须>=1G2.根据你的内存配置swapBetween 1 GB and 2 GB 1.5 times the size of the RAMBetween 2 GB and 16 GB Equal to the size of the RAMMore than 16 GB 16 GB3. 如果你的/dev/shm大小1G 但是你的memory_targe 设置2G 数据库启动失败:ORA-00845: MEMORY_TARGET not supported on this systemORA-01078: Failure in processing system parameters处理:需要要足够的共享内存mount重启还原,修改/etc/fstab,添加shmfs /dev/shm tmpfs size=7g 0三、检查软件需求1.检查linux系统中是否安装以下的包binutils-2.17.50.0.6compat-libstdc++-33-3.2.3compat-libstdc++-33-3.2.3 (32 bit)elfutils-libelf-0.125elfutils-libelf-devel-0.125gcc-4.1.2gcc-c++-4.1.2glibc-2.5-24glibc-2.5-24 (32 bit)glibc-common-2.5glibc-devel-2.5glibc-devel-2.5 (32 bit)glibc-headers-2.5ksh-20060214libaio-0.3.106libaio-0.3.106 (32 bit)libaio-devel-0.3.106libaio-devel-0.3.106 (32 bit)libgcc-4.1.2libgcc-4.1.2 (32 bit)libstdc++-4.1.2libstdc++-4.1.2 (32 bit)libstdc++-devel 4.1.2make-3.81sysstat-7.0.2用pm -qa |grep package_name检查是否安装,如果没有安装,插入光盘,挂载 #mount /dev/cdrom /mnt,安装#rpm -q package_name2.额外的软件需求-unixODBC,由于安装unixODBC有包的依赖关系,所以最好用yum 安装,#vim / etc/yum.repos.d/rhel-debuginfo.repo,添加[server]name=oraclebaseurl=file:///mnt/Serverenabled=1gpgcheck=0配置后:#yum clean all#yum list开始安装#yum -y install unixODBC unix0DBC-devel 检查#rpm -qa |grep unixODBC四、建立组和用户1. 建立组#grep oinstall /etc/group#/usr/sbin/groupadd oinstall#/usr/sbin/groupadd -g 502 dba#/usr/sbin/groupadd -g 503 oper#/usr/sbin/groupadd -g 504 asmadmin#/usr/sbin/groupadd -g 506 asmdba#/usr/sbin/groupadd -g 505 asmoper2.建立用户#id oracle#/usr/sbin/useradd -u 502 -g oinstall -G dba,asmdba,oper oracle 设置oracle密码 passwd oracle#id grid#/usr/sbin/useradd -u 503 -g oinstall -G asmadmin,asmdba,asmoper,dba grid 设置grid密码 #passwd grid3.对oracle软件建立用户进行限制#vim /etc/security/limits.conf4. 检查内核参数#vim /etc/sysctl.conf立即生效:#/sbin/sysctl –p5. 开始创建安装软件需要的目录#mkdir -p /u01/app/oracle#mkdir -p /u01/app/grid#chown -R grid:oinstall /u01#chown -R oracle:oinstall /u01/app/oracle#chmod -R 775 /u016.配置用户环境#vim /home/oralce/.bash_profile# vim /home/grid/.bash_profile五、配置Oracle自动存储管理oracle建议我们使用asm作为存储解决方案,如果使用ASM 则必须先装grid,再装数据库软件,最后建库数据文件或者恢复文件存储到asm,需要配置磁盘组+DATA 磁盘组存储数据文件 3块+FRA 磁盘组恢复文件 1块1.关闭虚拟机,添加4块硬盘,每块20G2. 安装asmlib# uname -rm 查出内核版本根据内核去官网下载相应的包/technetwork/topics/linux/asmlib/index-101839.html利用FileZilla工具把包传到服务器去安装安装:#rpm -ivh oracleasm*检查:# rpm -qa |grep oracleasm3. 运行oracleasm的初始化脚本与配置选项# /etc/init.d/oracleasm configure依次输入grid,asmadmin,y,y4. 配置磁盘查看磁盘,并依次对4块磁盘进行分区# /sbin/fdisk –l# fdisk /dev/sdb n—p—1—回车—回车—w # fdisk /dev/sdc n—p—1—回车—回车—w # fdisk /dev/sdd n—p—1—回车—回车—w # fdisk /dev/sde n—p—1—回车—回车—w使用partprobe命令重新读取分区表#partprobe创建ASM磁盘# /etc/init.d/oracleasm createdisk DISK1 /dev/sdb1# /etc/init.d/oracleasm createdisk DISK2 /dev/sdc1# /etc/init.d/oracleasm createdisk DISK3 /dev/sdd1# /etc/init.d/oracleasm createdisk DISK4 /dev/sde15.安装grid# mkdir /disk# chmod 777 -R /disk/利用FileZilla工具把grid包传到服务器去安装解压#unzip linux.x64_11gR2_grid.zip切换到grid用户#su – grid打开xmanger --->双击Xmanager – Passive #export DISPLAY=192.168.17.1:0.0#xhost +#cd /disk/grid/# ./runInstaller安装页面选择第二项,安装和配置独立的服务器选择默认语言,英语,下一步选择最高的冗余,将DISK1,DISK2,DISK3勾上,下一步选择相同的密码,下一步不做改变,下一步不做改变,下一步把Inventory Directory改为/u01/app/oracle/oraInventory,下一步完成,开始安装。
oracle 11g for linux 64 安装文档
Oracle® DatabaseQuick Installation Guide11g Release 2 (11.2)for Linux x86-64E16768-06June 2011This guide describes how to quickly install Oracle Database 11g Release 2 (11.2) onLinux x86-64 systems. It includes information about the following:■Reviewing Information About This Guide■Logging In to the System as root■Checking the Hardware Requirements■Checking the Software Requirements■Creating Required Operating System Groups and Users■Configuring Kernel Parameters■Creating Required Directories■Configuring the oracle User’s Environment■Mounting the Product Disc■Installing Oracle Database■Installing Oracle Database Examples■What to Do Next?■Additional Information■Documentation Accessibility1Reviewing Information About This GuideThis guide describes how to install Oracle Database by using the default installationoptions.Tasks Described in This GuideThe procedures in this guide describe how to:■Configure your system to support Oracle Database■Install Oracle Database on a local file system by using the Typical Installationoption■Configure a general-purpose Oracle Database installation that uses the local filesystem for database file storageResults of a Successful InstallationAfter you successfully install Oracle Database:■The database that you created and the default Oracle Net listener process run on the system.■Oracle Enterprise Manager Database Control run on the system and can be accessed by using a Web browser.Tasks Not Described in This GuideThis guide covers the Typical Installation scenario and does not describe how to complete the following tasks:■Using the Advanced Installation option to install the software■Installing the software on a system that has an existing Oracle software installation ■Installing Oracle Clusterware and Oracle Real Application Clusters on a cluster■Enabling Enterprise Manager e-mail notifications or automated backups■Enabling core file creation■Verifying UDP and TCP kernel parameters■Using alternative storage options such as Oracle Automatic Storage Management ■Installing and configuring Oracle Grid InfrastructureWhere to Get Additional Installation InformationFor more information about installing Oracle Database, including information about the tasks not described in this guide, refer to one of the following guides:■If you want to install the software on a single system, then refer to Oracle Database Installation Guide for Linux.■If you want to install Oracle Grid Infrastructure for a standalone server, then refer to the "Oracle Grid Infrastructure" chapter in Oracle Database Installation Guide for Linux.■If you want to perform an Oracle Real Application Clusters installation, then refer to Oracle Grid Infrastructure Installation Guide for Linux and Oracle Real Application Clusters Installation Guide for Linux and UNIX. These guides describe how to install Oracle Clusterware and Oracle Real Application Clusters. Oracle Clusterware is a prerequisite for Oracle Real Application Clusters installations.All these guides are available on the product disc. To access them, use a Web browser to open the welcome.htm file located in the top-level directory of the media. Platform-specific documentation is available in PDF and HTML formats in the Documentation section..2Logging In to the System as rootBefore you install the Oracle software, you must complete several tasks as the root user. To log in as the root user, complete one of the following procedures:Note:You must install the software from an X Window Systemworkstation, an X terminal, or a PC or other system with X serversoftware installed■Following are the steps for installing the software from an X Window System workstation or X terminal:1.Start a local terminal session, for example, an X terminal (xterm ).2.If you are not installing the software on the local system, then enter thefollowing command to enable the remote host to display X applications on thelocal X server:$ xhost fully_qualified_remote_host_nameFor example:$ xhost 3.If you are not installing the software on the local system, then use the ssh ,rlogin , or telnet command to connect to the system where you want toinstall the software:$ telnet fully_qualified_remote_host_name4.If you are not logged in as the root user, then enter the following commandto switch user to root :$ sudo shpassword:#■Following are the steps for installing the software from a PC or other system with X server software:1.Start the X server software.2.Configure the security settings of the X server software to permit remote hosts to display X applications on the local system.3.Connect to the remote system where you want to install the software and start a terminal session on that system, for example, an X terminal (xterm ).4.If you are not logged in as the root user on the remote system, then enter thefollowing command to switch user to root :$ sudo shpassword:#3Checking the Hardware RequirementsThe system must meet the following minimum hardware requirements:■Memory Requirements ■System Architecture ■Disk Space RequirementsNote:If necessary, refer to your X server documentation for moreinformation about completing this procedure. Depending on the Xserver software that you are using, you may need to complete the tasksin a different order.3.1Memory RequirementsThe following are the memory requirements for installing Oracle Database 11g Release 2 (11.2):■Minimum : 1 GB of RAMRecommended : 2 GB of RAM or moreTo determine the RAM size, enter the following command:# grep MemTotal /proc/meminfoIf the size of the RAM is less than the required size, then you must install more memory before continuing.■The following table describes the relationship between installed RAM and the configured swap space recommendation:■To determine whether the system architecture can run the software, enter the following command:# uname -mTo determine the size of the configured swap space, enter the following command:# grep SwapTotal /proc/meminfoIf necessary, refer to the operating system documentation for information about how to configure additional swap space.To determine the available RAM and swap space, enter the following command:# freeNote:On Linux, the HugePages feature allocates non-swappablememory for large page tables using memory-mapped files. If youenable HugePages, then you should deduct the memory allocated toHugePages from the available RAM before calculating swap space.Available RAMSwap Space Required Between 1 GB and 2 GB1.5 times the size of the RAM Between 2 GB and 16 GBEqual to the size of the RAM More than 16 GB16 GB Note:This command displays the processor type. Verify that theprocessor architecture matches the Oracle software release that youwant to install. If you do not see the expected output, then you cannotinstall the software on this system.Automatic Memory ManagementStarting with Oracle Database 11g , the Automatic Memory Management featurerequires more shared memory (/dev/shm)and file descriptors. The shared memory should be sized to be at least the greater of MEMORY_MAX_TARGET and MEMORY_TARGET for each Oracle instance on that computer.To determine the amount of shared memory available, enter the following command:# df -h /dev/shm/3.2System ArchitectureTo determine whether the system architecture can run the software, enter the following command:# uname -m3.3Disk Space RequirementsThe following are the disk space requirements for installing Oracle Database 11g Release 2 (11.2):■At least 1 GB of disk space in the /tmp directoryTo determine the amount of disk space available in the /tmp directory, enter the following command:# df -h /tmpIf there is less than 1 GB of free disk space available in the /tmp directory, then complete one of the following steps:■Delete unnecessary files from the /tmp directory to meet the disk space requirement.IMPORTANT:■Oracle recommends that you take multiple values for the available RAM and swap space before finalizing a value. This is because theavailable RAM and swap space keep changing depending on theuser interactions with the computer.■Contact your operating system vendor for swap space allocation guidance for your server. The vendor guidelines supersede theswap space requirements listed in this guide.Note:MEMORY_MAX_TARGET and MEMORY_TARGET cannot be usedwhen LOCK_SGA is enabled or with HugePages on Linux.Note:This command displays the processor type. Verify that theprocessor architecture matches the Oracle software release that youwant to install. If you do not see the expected output, then you cannotinstall the software on this system.■Set the TMP and TMPDIR environment variables when setting the oracle user’s environment.■Extend the file system that contains the /tmp directory. If necessary, contact the system administrator for information about extending file systems.■To determine the amount of free disk space on the system, enter the following command:# df -h■The following tables describe the disk space requirements for software files, and data files for each installation type on Linux x86-64:Additional disk space, either on a file system or on an Oracle Automatic StorageManagement disk group is required for the fast recovery area if you choose toconfigure automated backups.4Checking the Software RequirementsDepending on the products that you intend to install, verify that the followingsoftwares are installed on the system.■Operating System Requirements ■Kernel Requirements ■Package Requirements ■Compiler Requirements ■Additional Software Requirements4.1Operating System RequirementsThe following or later versions of the operating system are required for OracleDatabase 11g Release 2 (11.2):See Also:"Configuring the oracle User’s Environment" for moreinformation about setting TMP and TMPDIR Installation Type Requirement for Software Files (GB)Enterprise Edition 4.35Standard Edition3.73Installation TypeRequirement for Data Files (GB)Enterprise Edition1.68Standard Edition 1.48Note:Oracle Universal Installer performs checks on the system toverify that it meets the listed requirements. To ensure that these checkspass, verify the requirements before you start Oracle UniversalInstaller.■Asianux Server 3 SP2■Oracle Linux 4 Update 7■Oracle Linux 5 Update 2■Oracle Linux 5 Update 5 (only if using Oracle Unbreakable Enterprise Kernel)■Red Hat Enterprise Linux 4 Update 7■Red Hat Enterprise Linux 5 Update 2■Red Hat Enterprise Linux 5 Update 5 (only if using Oracle Unbreakable Enterprise Kernel)■SUSE Linux Enterprise Server 10 SP2■SUSE Linux Enterprise Server 11Starting with Oracle Database 11g Release 2 (11.2), the Security Enhanced Linux (SE Linux) feature is supported for Oracle Linux 4, Red Hat Enterprise Linux 4, Oracle Linux 5, and Red Hat Enterprise Linux 5.To determine the distribution and version of Linux installed, enter the followingcommand:# cat /proc/version4.2Kernel RequirementsThe following are the kernel requirements for Oracle Database 11g Release 2 (11.2):■On Oracle Linux 4 and Red Hat Enterprise Linux 42.6.9 or later■On Oracle Linux 5 Update 5 with the Unbreakable Enterprise Kernel for Linux Note:For Asianux Server, Oracle Linux, and Red Hat EnterpriseLinux, system requirements are identical by kernel version.Specifically:■Oracle Linux 4 and Red Hat Enterprise Linux 4 requirements are the same.■Asianux Server 3, Oracle Linux 5, and Red Hat Enterprise Linux 5 requirements are the same.■Oracle Unbreakable Enterprise Kernel for Linux 5 Update 5 (2.6.32), available for x86-64 systems, contains several additionalfeatures and performance enhancements not available either withOracle Linux or with other supported Linux distributions. Thiskernel can be installed on either Oracle Linux or Red HatEnterprise Linux distributions. Before installing the UnbreakableEnterprise Kernel, you must have Oracle Linux 5 Update 5 orRHEL5 Update 5 installed on an x86-64 server.Note:Only the distributions and versions listed in the earlier list aresupported. Do not install the software on other versions of Linux.2.6.32-100.0.19 or laterSee Also: "About Oracle Unbreakable Enterprise Kernel for Linux" section inOracle Database Installation Guide for Linux■On Red Hat Enterprise Linux 5 Update 5 with the Unbreakable Enterprise Kernel for Linux2.6.32 or laterSee Also: "About Oracle Unbreakable Enterprise Kernel for Linux" section inOracle Database Installation Guide for Linux■On Oracle Linux 5 Update 22.6.18 or later (compatible with Red Hat Enterprise kernel)■On Asianux Server 3, Oracle Linux 5 Update 2, and Red Hat Enterprise Linux 5 Update 22.6.18 or later■On SUSE Linux Enterprise Server 102.6.16.21 or later■On SUSE Linux Enterprise Server 112.6.27.19 or laterTo determine whether the required kernel is installed, enter the following command:# uname -rThe following is a sample output displayed by running this command on an Oracle Linux 5.0 system:2.6.18-128.el5PAEIn this example, the output shows the kernel version (2.6.18) and errata level(-128.el5PAE) on the system.If the kernel version does not meet the requirement specified earlier in this section, then contact the operating system vendor for information about obtaining and installing kernel updates.4.3Package RequirementsThe following are the list of packages required for Oracle Database 11g Release 2 (11.2):■The following or later version of packages for Oracle Linux 4 and Red Hat Enterprise Linux 4 should be installed:binutils-2.15.92.0.2compat-libstdc++-33-3.2.3compat-libstdc++-33-3.2.3 (32 bit)elfutils-libelf-0.97elfutils-libelf-devel-0.97expat-1.95.7gcc-3.4.6gcc-c++-3.4.6glibc-2.3.4-2.41glibc-2.3.4-2.41 (32 bit)glibc-common-2.3.4glibc-devel-2.3.4glibc-headers-2.3.4libaio-0.3.105libaio-0.3.105 (32 bit)libaio-devel-0.3.105libaio-devel-0.3.105 (32 bit)libgcc-3.4.6Note:■Oracle recommends that you install your Linux operating system with the default software packages (RPMs), unless youspecifically intend to perform a minimal installation, and follow the directions for performing such an installation to ensure that you have all required packages for Oracle software.■Oracle recommends that you do not customize RPMs during a default operating system installation. A default installationincludes most required packages, and will help you to limitmanual checks of package dependencies.■If you did not perform a default Linux installation, you intend to use LDAP , and you want to use the scripts odisrvreg , oidca , or schemasync , then install the Korn shell RPM for your Linuxdistribution.■You must install the packages (or later versions) listed in the following table. Also, ensure that the list of RPMs and all theprerequisites for these RPMs are installed.■If you are using Oracle Unbreakable Enterprise Kernel, then all required kernel packages are installed as part of the OracleUnbreakable Enterprise Kernel installation.IMPORTANT:Starting with Oracle Database 11g Release 2 (11.2.0.2),all the 32-bit packages, except for gcc-32bit-4.3, listed in the following table are no longer required for installing a database on Linux x86-64. Only the 64-bit packages are required. However, for any Oracle Database 11g release prior to 11.2.0.2, both the 32-bit and 64-bit packages listed in the following table arerequired.libgcc-3.4.6 (32-bit)libstdc++-3.4.6libstdc++-3.4.6 (32 bit)libstdc++-devel 3.4.6make-3.80numactl-0.6.4.x86_64pdksh-5.2.14sysstat-5.0.5■The following or later version of packages for Asianux 3, Oracle Linux 5, and Red Hat Enterprise Linux 5 should be installed:binutils-2.17.50.0.6compat-libstdc++-33-3.2.3compat-libstdc++-33-3.2.3 (32 bit)elfutils-libelf-0.125elfutils-libelf-devel-0.125gcc-4.1.2gcc-c++-4.1.2glibc-2.5-24glibc-2.5-24 (32 bit)glibc-common-2.5glibc-devel-2.5glibc-devel-2.5 (32 bit)glibc-headers-2.5ksh-20060214libaio-0.3.106libaio-0.3.106 (32 bit)libaio-devel-0.3.106libaio-devel-0.3.106 (32 bit)libgcc-4.1.2libgcc-4.1.2 (32 bit)libstdc++-4.1.2libstdc++-4.1.2 (32 bit)libstdc++-devel 4.1.2make-3.81numactl-devel-0.9.8.x86_64sysstat-7.0.2■The following or later version of packages for SUSE Linux Enterprise Server 10 should be installed:binutils-2.16.91.0.5compat-libstdc++-5.0.7gcc-4.1.0gcc-c++-4.1.2glibc-2.4-31.63glibc-devel-2.4-31.63glibc-devel-32bit-2.4-31.63ksh-93r-12.9libaio-0.3.104libaio-32bit-0.3.104libaio-devel-0.3.104libaio-devel-32bit-0.3.104libelf-0.8.5libgcc-4.1.2libstdc++-4.1.2libstdc++-devel-4.1.2make-3.80numactl-0.9.6.x86_64sysstat-8.0.4■The following or later version of packages for SUSE Linux Enterprise Server 11 should be installed:binutils-2.19gcc-4.3gcc-32bit-4.3gcc-c++-4.3glibc-2.9glibc-32bit-2.9glibc-devel-2.9glibc-devel-32bit-2.9ksh-93tlibaio-0.3.104libaio-32bit-0.3.104libaio-devel-0.3.104libaio-devel-32bit-0.3.104libstdc++33-3.3.3libstdc++33-32bit-3.3.3libstdc++43-4.3.3_20081022libstdc++43-32bit-4.3.3_20081022libstdc++43-devel-4.3.3_20081022libstdc++43-devel-32bit-4.3.3_20081022libgcc43-4.3.3_20081022libstdc++-devel-4.3make-3.81sysstat-8.1.5To determine whether the required packages are installed, enter commands similar to the following:# rpm -q package_nameIf a package is not installed, then install it from the Linux distribution media or download the required package version from the Linux vendor’s Web site.4.4Compiler RequirementsIntel C++ Compiler 10.1 or later and the version of GNU C and C++ compilers listed under "Package Requirements" are supported with these products.4.5Additional Software RequirementsDepending on the components you want to use, you must ensure that the following software are installed:■Oracle ODBC Drivers ■Oracle JDBC/OCI DriversNote:Intel Compiler v10.1 can be used only with the standardtemplate libraries of the gcc versions mentioned in the Package Requirements section, to build Oracle C++ Call Interface (OCCI) applications.Oracle XML Developer's Kit is supported with the same compilers as OCCI.■Linux-PAM Library■Oracle Messaging Gateway■Programming Languages■Browser Requirements4.5.1Oracle ODBC DriversYou should install ODBC Driver Manager for UNIX. You can download and install the Driver Manager from the following URL:To use ODBC, you must also install the following additional ODBC RPMs, depending on your operating sytem:■On Oracle Linux 4 and Red Hat Enterprise Linux 4:-unixODBC-2.2.11 (32-bit) or later-unixODBC-devel-2.2.11 (64-bit) or later-unixODBC-2.2.11 (64-bit) or later■On Asianux Server 3, Oracle Linux 5, and Red Hat Enterprise Linux 5: -unixODBC-2.2.11 (32-bit) or later-unixODBC-devel-2.2.11 (64-bit) or later-unixODBC-2.2.11 (64-bit) or later■On SUSE 10:-unixODBC-32 bit-2.2.11 (32-bit) or later-unixODBC-2.2.11 (64-bit) or later-unixODBC-devel-2.2.11 (64-bit) or later■On SUSE 11:-unixODBC-2.2.12 or later-unixODBC-devel-2.2.12 or later-unixODBC-32bit-2.2.12 (32-bit) or later4.5.2Oracle JDBC/OCI DriversUse JDK 6 (Java SE Development Kit 1.6.0_21) or JDK 5 (1.5.0_24) with the JNDI extension with the Oracle Java Database Connectivity and Oracle Call Interface drivers. However, these are not mandatory for the database installation. Note that IBM JDK 1.5 is installed with this release.4.5.3Linux-PAM LibraryInstall the latest Linux-PAM (Pluggable Authentication Modules for Linux) library to enable the system administrator to choose how applications authenticate users.4.5.4Oracle Messaging GatewayOracle Messaging Gateway supports the integration of Oracle Streams Advanced Queuing (AQ) with the following software:■IBM WebSphere MQ V6.0, client and server, with corrective service diskette 5 (CSD05) or later:MQSeriesClientMQSeriesServerMQSeriesRuntime■TIBCO Rendezvous 7.3If you require a CSD for WebSphere MQ, then refer to the following Web site for download and installation information:/support/entry/portal/Downloads/Software/W ebSphere/WebSphere_MQ4.5.5Programming LanguagesThe following products are certified for use with:■Pro* COBOLMicro Focus Server Express 5.14.5.6Browser RequirementsWeb browsers must support Java Script, and the HTML 4.0 and CSS 1.0 standards. The following Web browsers are supported for Oracle Enterprise Manager Database Control:■Netscape Navigator 8.1■Netscape Navigator 9.0■Microsoft Internet Explorer 6.0 SP2■Microsoft Internet Explorer 7.0 SP1■Microsoft Internet Explorer 8.0■Firefox 2.0■Firefox 3.0.7■Firefox 3.5■Firefox 3.6■Safari 3.0.4■Safari 3.1■Safari 3.2■Safari 4.0.x■Google Chrome 3.0■Google Chrome 4.0See Also:Chapter 2, "Oracle Application Express InstallationRequirements" and "Recommended Pre-installation Tasks" in OracleApplication Express Installation Guide5Creating Required Operating System Groups and UsersThe following local operating system groups and users are required if you are installing Oracle Database:■The Oracle Inventory group (typically, oinstall)■The OSDBA group (typically, dba)■The Oracle software owner (typically, oracle)■The OSOPER group (optional. Typically, oper)To determine whether these groups and users already exist, and if necessary, to create them, follow these steps:1.To determine whether the oinstall group exists, enter the following command:# more /etc/oraInst.locIf the output of this command shows the oinstall group name, then the group already exists.If the oraInst.loc file exists, then the output from this command is similar to the following:inventory_loc=/u01/app/oraInventoryinst_group=oinstallThe inst_group parameter shows the name of the Oracle Inventory group,oinstall.2.To determine whether the dba group exists, enter the following command:# grep dba /etc/groupIf the output from this commands shows the dba group name, then the group already exists.3.If necessary, enter the following commands to create the oinstall and dbagroups:# /usr/sbin/groupadd oinstall# /usr/sbin/groupadd dba4.To determine whether the oracle user exists and belongs to the correct groups,enter the following command:# id oracleIf the oracle user exists, then this command displays information about thegroups to which the user belongs. The output should be similar to the following, indicating that oinstall is the primary group and dba is a secondary group: uid=440(oracle) gid=200(oinstall) groups=201(dba),202(oper)5.If necessary, complete one of the following actions:■If the oracle user exists, but its primary group is not oinstall or it is not a member of the dba group, then enter the following command:# /usr/sbin/usermod -g oinstall -G dba oracle■If the oracle user does not exist, enter the following command to create it:# /usr/sbin/useradd -g oinstall -G dba oracleThis command creates the oracle user and specifies oinstall as theprimary group and dba as the secondary group.6.Enter the following command to set the password of the oracle user:# passwd oracle6Configuring Kernel ParametersVerify that the kernel parameters shown in the following table are set to values greater than or equal to the minimum value shown. The procedure following the table describes how to verify and set the values.Note:The kernel parameter and shell limit values in this section areminimum values only. For production database systems, Oraclerecommends that you tune these values to optimize the performanceof the system. Refer to your operating system documentation for moreinformation about tuning kernel parameters.Parameter Minimum Value Filesemmsl semmns semopm semmni 25032000100128/proc/sys/kernel/semshmall2097152/proc/sys/kernel/shmall shmmax A maximum value of halfthe size of physical memory(in bytes).Default: 536870912See My Oracle Support Note567506.1 for additionalinformation aboutconfiguring shmmax./proc/sys/kernel/shmmaxshmmni4096/proc/sys/kernel/shmmni file-max6815744/proc/sys/fs/file-maxip_local_ port_range Minimum: 9000Maximum: 65500/proc/sys/net/ipv4/ip_local_port_rangermem_ default 262144/proc/sys/net/core/rmem_defaultrmem_max4194304/proc/sys/net/core/rmem_maxwmem_ default 262144/proc/sys/net/core/wmem_defaultwmem_max1048576/proc/sys/net/core/wmem_maxTo view the current value specified for these kernel parameters, and to change them if necessary:■Enter commands similar to the following to view the current values of the kernel parameters:■If the value of any kernel parameter is different from the recommended value, then complete the following steps:1.Using any text editor, create or edit the /etc/sysctl.conf file, and add or edit lines similar to the following:fs.aio-max-nr = 1048576aio-max-nrMaximum: 1048576Note : This value limits concurrent outstanding requests and should be set to avoid I/O subsystem failures./proc/sys/fs/aio-max-nrNote:If the current value of any parameter is higher than the valuelisted in this table, then do not change the value of that parameter.Note:Make a note of the current values and identify any values thatyou must change.Parameter Commandsemmsl , semmns , semopm , and semmni# /sbin/sysctl -a | grep semThis command displays the value of the semaphore parameters in the order listed.shmall , shmmax , and shmmni # /sbin/sysctl -a | grep shm file-max # /sbin/sysctl -a | grep file-max ip_local_port_range# /sbin/sysctl -a | grep ip_local_port_rangermem_default # /sbin/sysctl -a | grep rmem_default rmem_max # /sbin/sysctl -a | grep rmem_max wmem_default # /sbin/sysctl -a | grep wmem_default wmem_max# /sbin/sysctl -a | grep wmem_maxNote:Include lines only for the kernel parameter values that you wantto change. For the semaphore parameters (kernel.sem ), you must specify all four values. However, if any of the current values are larger than the minimum value, then specify the larger value.Parameter Minimum Value Filefs.file-max = 6815744kernel.shmall = 2097152kernel.shmmax = 536870912kernel.shmmni = 4096kernel.sem = 250 32000 100 128net.ipv4.ip_local_port_range = 9000 65500net.core.rmem_default = 262144net.core.rmem_max = 4194304net.core.wmem_default = 262144net.core.wmem_max = 1048586Note:The minimum value required for shmmax is 0.5 GB. However,Oracle recommends that you set the value of shmmax to 2.0 GB foroptimum performance of the system.By specifying the values in the /etc/sysctl.conf file, they persist when you restart the system. However, on SUSE Linux Enterprise Server systems, enter the following command to ensure that the system reads the/etc/sysctl.conf file when it restarts:# /sbin/chkconfig boot.sysctl on2.Enter the following command to change the current values of the kernelparameters:# /sbin/sysctl -pReview the output from this command to verify that the values are correct. If the values are incorrect, edit the /etc/sysctl.conf file, then enter this command again.3.Enter the command /sbin/sysctl -a to confirm that the values are setcorrectly.4.On SUSE systems only, enter the following command to cause the system toread the /etc/sysctl.conf file when it restarts:# /sbin/chkconfig boot.sysctl on5.On SUSE systems only, you must enter the GID of the oinstall group as thevalue for the parameter /proc/sys/vm/hugetlb_shm_group. Doing this grants members of oinstall a group permission to create shared memorysegments.For example, where the oinstall group GID is 501:# echo 501 > /proc/sys/vm/hugetlb_shm_groupAfter running this command, use vi to add the following text to/etc/sysctl.conf, and enable the boot.sysctl script to run on system restart:vm.hugetlb_shm_group=501。
Oracle11g在Linux上的安装步骤

[L INUX系统安装O RACLE数据库]操作手册文件修订历史目录1.安装前准备 (4)1.1环境及文件准备 (4)1.2创建ORACLE用户组和用户 (4)1.3修改系统参数 (5)1.3.1修改内核参数 (5)1.3.2修改用户限制 (6)1.3.3修改用户验证选项 (6)1.3.4修改用户配置文件 (7)1.3.5修改oracle环境变量 (7)1.4安装vncserver (8)2.安装 (10)2.1设置Oracle图形界面 (10)2.2Oracle软件安装 (10)2.3创建监听 (29)2.4创建数据库实例 (32)2.5配置监听 (46)2.6检查ORACLE的PATH设置 (49)3.验证 (50)3.1本地验证 (50)3.2PL/SQL Develop验证 (51)本文档是Linux(redhat6.x、centos6.x、redhat7.x) 64位操作系统安装Oracle 11g(Oracle Database 11g Enterprise Edition Release 11.2.0.4.0 - 64bit Production),本文基于各种网络资料精心整理而成,共享给有需要的朋友。
如有问题可联系:QQ:527446862,或邮件:****************1.安装前准备1.1环境及文件准备操作系统:64位Linux (redhat6.x、centos6.x、redhat7.x)内存:2G及以上硬盘:挂载根目录剩于空间至少7G以上文件准备:下载好了的压缩包linux.x64_11gR2_database_1of2.zip,或Oracle 11g R2(Linux x86-64)/technetwork/database/enterprise-edition/downloads/index.html附:Oracle 10g下载址:/wenlg/archive/2010/05/19/1738893.htmllinux.x64_11gR2_database_2of2.zip压缩包目录:/install创建目录:/app/oracle将两个压缩包解压至/ install/database1.2创建ORACLE用户组和用户创建两个oracle用户组:oinstall、dba创建一个oracle用户:oracle将oracle用户加入到oinstall和dba两个用户组修改oracle用户密码:1.3修改系统参数准备安装oracle前,先把相关参数设置好1.3.1修改内核参数修改sysctl.conf:内容如下:修改内核参数的值使其生效:1.3.2修改用户限制修改limits.conf末尾增加以下内容:1.3.3修改用户验证选项修改/etc/pam.d/login增加以下内容:1.3.4修改用户配置文件修改/etc/profile增加以下内容:使其生效:1.3.5修改oracle环境变量切换到oracle用户跳转到oracle的home目录修改oracle用户的环境变量内容如下:内容说明:ORACLE_SID请跟据实际情况填写ORACLE_HOME请跟据实例情况填写,11.2.0是指oracle版本号使其生效:1.4安装vncserver由于安装oracle需要可视界面需先安装vncserver,方便windows远程到Linux上切换到root用户然后启动vncserver,:1表示启动第一个vnc端口,回车提示输入密码,输入123456然后windows输入 IP:1如下:2.安装2.1设置Oracle图形界面root用户下:修改hosts文件,增加IP配置增加一行:左边是Linux的IP,右边是linux的机器名设置Linux的图形显示:提示access control disabled, clients can connect from any host,表示成功,这样就可以在windows 上的SSH上执行命令,SVN窗口里会自动弹出oracle安装界面了为防止oracle安装界面乱码,临时设置语言为:2.2O racle软件安装切换到oracle用户,跳转到/install/database/,执行oracle安装命令SVN窗口里弹出了oracle界面,去掉“I wish…”的勾然后next,点击yes选择“Skip software updates”,下一步将简体中文添加右边窗口,next如果不存在/app/oracle目录,则创建,创建后更改/app的权限为777next,group name选择dba,修改Inventory:/app/oracle/oraInventory点击yesnextwarning可忽略,Failed不能忽略,是由于用户ada和root有相同的UID号,需解决,root用户下,[root@SZB-L0004047 ~]# vi /etc/passwd找到ada,然后将ada:x:0:0::/home/ada:/bin/bash改为ada:x:100:100::/home/ada:/bin/bash 保存。
- 1、下载文档前请自行甄别文档内容的完整性,平台不提供额外的编辑、内容补充、找答案等附加服务。
- 2、"仅部分预览"的文档,不可在线预览部分如存在完整性等问题,可反馈申请退款(可完整预览的文档不适用该条件!)。
- 3、如文档侵犯您的权益,请联系客服反馈,我们会尽快为您处理(人工客服工作时间:9:00-18:30)。
oracle11g client for linux x64 安装文档
1、以root用户登录服务器,新建oinstall组和oracle用户,并为oracle用户设置密码.
#groupadd -g 1000 oinstall
#useradd -u 1000 -g 1000 -s /bin/csh -d /opt/oracle oracle
2、将客户端安装包linux.x64_11gR1_client.zip上传至服务器剩余空间较大的目录下,解压后的目录为
client,通过root用户授予oracle读取此文件夹的权限。
3、修改服务器配置,以便xmanager登陆.
a)用户rcxdm命令查看xdmcp状态是否running
# rcxdm status
b)编辑“/etc/opt/kde3/share/config/kdm/kdmrc”文件:
在[XDMCP]节中,将“Enable=false”改为“Enable=true”;并且将“port=177”前的屏蔽取消。
c)编辑文件“/etc/sysconfig/displaymanager”:
将DISPLAYMANAGER_REMOTE_ACCESS=“no”
改为DISPLAYMANAGER_REMOTE_ACCESS=“yes”;
d)在suse8中需要新建文件/etc/rc.config,在文件中添加一行:
ROOT_LOGIN_REMOTE="yes"
e)而在suse9中,编辑文件“/etc/sysconfig/displaymanager”:
将DISPLAYMANAGER_ROOT_LOGIN_REMOTE=“no”
改为DISPLAYMANAGER_ROOT_LOGIN_REMOTE=“yes”
f)重新启动xdmcp服务
#rcxdm restart
g)需要注意:更改登录的上面4、5两条不一样。
4、修改oracle用户环境变量
export ORACLE_BASE=/opt/oracle
export ORACLE_HOME=$ORACLE_BASE/product/11g
export ORACLE_SID=icd
export LD_LIBRARY_PATH=$ORACLE_HOME/lib:$ORACLE_HOME/rdbms/lib:/lib:/usr/lib
export
PATH=$PATH:/bin:/usr/sbin:/sbin:/usr/X11R6/bin:/usr/lib/java/bin:/usr/local/bin/:$ORACLE_HOME/bin:$ORACL E_HOME/OPatch
export TNS_ADMIN=$ORACLE_HOME/network/admin
export ORA_CRS_HOME=$ORACLE_HOME/crs
export CLASSPATH=$ORACLE_HOME/jlib:$ORACLE_HOME/rdbms/jlib:$ORACLE_HOME/network/jlib
export NLS_LANG="SIMPLIFIED CHINESE_CHINA.ZHS16GBK"
export LANG=en_US
export DISPLAY=远程xmanager运行主机:0.0
5、以oracle通过xmanager登陆服务器,进入client安装目录
<10 mdsp >ls
doc install response runInstaller stage welcome.html
执行runInstaller
<11 mdsp >./runInstaller
6、弹出如下对话框:
7、下一步,安装程序自动读取oracle用户环境变量中设置的目录和用户组;
8、下一步,选择”Administrator(1.29GB)”安装类型
9、点击“product languages”,双击”Simplified Chinese”将其加入右侧框中;
10、下一步,设置oracle base目录等;
11、下一步,安装程序进行系统参数检查,没有通过的可以手动点击复选框来人为确认;
12、下一步,列出安装概要;
13、下一步,进行程序安装;
14、下一步,进行监听配置及本地服务名配置;
15、下一步
16、下一步,以root用户执行提示的两个脚本;
17、根据提示以root用户登录服务器执行提示的两条命令
# /opt/oracle/oraInventory/orainstRoot.sh
Changing permissions of /opt/oracle/oraInventory to 770.
Changing groupname of /opt/oracle/oraInventory to dba.
The execution of the script is complete
# /opt/oracle/oracle/product/11.1.0/root.sh
Running Oracle 11g root.sh script...
The following environment variables are set as:
ORACLE_OWNER= oracle
ORACLE_HOME= /opt/oracle/oracle/product/11.1.0
Enter the full pathname of the local bin directory: [/usr/local/bin]: [直接回车即可]
Copying dbhome to /usr/local/bin ...
Copying oraenv to /usr/local/bin ...
Copying coraenv to /usr/local/bin ...
Creating /etc/oratab file...
Entries will be added to the /etc/oratab needed by
Database Configuration Assistant when a database is created
Finished running generic part of root.sh script.
Now product-specific root actions will be performed.
18、点击ok
19、点击exit完成安装
20、确定退出
21、使用sqlplus命令连接远程数据库,以验证安装是否成功.。
