printronix-sl-t4m操作手册
Sato CL4NX Guide Printer Set Up说明书
Reference GuideContentsPrinter Setup 3 Ribbons 5 Printer 6 Optimized Encoding Settings For Omni-Id Labels 8 Software Setup10 Print 13 Encoding Troubleshooting 13 Label Orientation14 Encoding Standards151. Load label spool and lock in place with the Guide Arm .The following photographs will help you to load labelrolls in the printer correctly.Guide Arm2. Slide Guide 2to the rightmost position and then move it back left to secure the label.Guide 2move to the right most position Guide 2move to secure media2. Locate the Gap Sensorto a position where it is able to detect the start and end of the RFID label.I-Mark sensor Gap sensor4. Feed the labels under the Print HeadPressue dial (start low and increase)Head pressure dials are located on top of the print head; these should be adjusted so that the print quality is consistent without applying excessive pressure.5. Final resultThe routing path of the media is as shown on the right figureWhen loading the media, make sure that the print side faces upFace-in mediaFace-out mediaManufacturer Product TypeSATOY70110200720Full resin carbon ribbonRibbonsOmni-ID has validated ribbon compatibility with:Load the ribbon into the printer so that the matt surface is visible to the human eye from the front of the printer.The matt surface is the printing side and correct positioning will ensure correct printing onto the media.The routing path of the media is as shown on the left figureFace-in media Face-out mediaPrinter settingsThis section provides specific details and guidelines associated with encoding Omni-ID labels.1. Setup RFID functionality of the printer, using the main control panel.Printer must be calibrated for each label correctlyGap sensing: Gap sensing must be used at all times; this will use theleading edge of the frame label to align the print with the commandssent from your software. Calibration of the Gap levels is required each time a different label type is used. This can be found under advanced printer settings, Gap Levels.Important SettingsDarkness: Darkness should be adjusted to achieve optimal print quality. Slowest speed: The slowest print speed that is available should be used to print Compound labels: This is typically 2 inches per second.Advanced printer adjustments: Pitch and offset should be set to 0mm.Print Mode: Print Mode should be set to continues, with No Back feed. This is to avoid causing damage to the printer. The thicker IQ labels can damage the RFID antenna bracket if the off mode is used. This is due to the labels catching on the bracket as they back feed.Printer AntennaSato CL4NX offers two antennas for RFID encoding:Standard and Short. Only one antenna can be usedfor encoding, not both at the same time. For encodingOmni-ID labels the Short antenna is recommended.PrioritizeThe printer settings can be prioritized to override thecommand settings and we do recommend you dothis to avoid any erroneous settings in the commandreaching the printer.Command settings are those created in the labeldesign software and the default setting on the printer.On the printer menu screen:•Printing•Advanced• Prioritize•Settings•when completeOptimized Encoding Settings For Omni-Id LabelsT o achieve the best performance when encoding, the power should be set to the certified level. This level has been validated to ensure that adjacent labels are not programmed in error*.*due to the size of the small IQ Label tags the sensor in the print head can sometimes detect the information from the tag behind, so it is necessary to change the sensor pitch to read the right tag and print the associated information.The maximum pitch offset on the Sato CL4NX printer menu system is -3.75mm so if the pitch offset is more than that, you must set it in the NiceLabel software:• Print Mode • Backfeed • Pitch offsetAdjusting the Print PositionSet the Pitch in the Printing > Advanced > Adjustments menu to adjust the print positionNote: The above base reference point (print position) will be the stop position when the sensor type is set to Gap sensor.The table below provides the optimal settings for all variants of Omni-ID IQ Label tags:Software setupRecommended software for Sato CL4NX is NiceLabel Pro, Please Refer to NiceLabel Designer Pro user guide for detailed instructions (link is on Page 2)Insert labeldimemsionsCheck all boxes in ‘Print Setting’Use print settingsfrom the printerTo enable RFIDencoding, choosethe RFID settingsThe ‘Feed without print’ box is checkedby default. Please uncheck this box. If box is checked, the printer will not print and onlyencode the labels.Partial print on one side Head pressure Re-balancePrint blurring Too much ink Reduce darknessPrint too light Too little ink Increase darknessSlow print speedIncrease head pressure both sides Encoding TroubleshootingIssue Possible cause SolutionMulti tag error Reading more than one tag Turn the read power downTag not found Cannot read or write the ag Adjust the read and/or write power Read only error Calibration is wrong Turn the write power upEncoding adjacent label The distance between labels istoo smallAdjust Tag offsetPrinter missing tag between eachprinted tagGap Levels Incorrec Re calibrate Gap LevelsPrint without RFID encoding‘Write data to RFID tag’deselectedSelect ‘write data to RFID tag’ in s/wWRITE TAG ERROR displayed on label and RFID tag error code # 1018 displayed Encoding data type is set to ASCIIstringSelect HEX encoded string in data type menuLabel OrientationOmni-ID IQ Label tags are supplied on the roll with the media facing out and the antenna facing up. This is the position the labels should be retained in for successful encoding and printing.If in any instance you unroll the labels (i.e. to split a large roll into a smaller roll), you must ensure to re-roll them in the correct orientation.The images below show the antenna exposed and in the correct orientation:IQ 150 in printer – media facing out, antenna facing up IQ 600 in printer – media facing out, antenna facing upIQ 350 in printer – media facing outEncoding StandardsOmni-ID tags can be encoded with any hexadecimal code, however GS1 have interoperability standards which can be used to help in situations where multiple organizations need to read the tag.Examples of such standards include: SGTIN-96, GIAI-96 and GID-96It is the Users responsibility to define the code if Omni-ID is providing service bureau.See “Omni-ID Standard Service Bureau reference guide” for assistance with sequencing complianceExample of GID-96bit scheme:HeaderThis is a static binary number (which is converted into hexadecimal) that identifies that the coding system being used is GID-96bit.General Manager NumberThis is a number which identifies the Company which is responsible for allocating the object class and the serial number, this is assigned by GS1/ EPC global.Object ClassThis number defines the type of item that is being tagged, this might be a type of hardware, or a component in a larger assembly.Serial NumberThis is the unique number used to identify the specific item, typically this is the part of the EPC number that this serialized.USA Office:UK Office: Asia Office: *******************************************************India Office:。
联想万全慧眼IV高级版用户指南V1.0
6.3
配置设置....................................................................................................................... 36
6.3.1 配置网络设置....................................................................................................... 36
5.4
远程控制台状态行....................................................................................................... 27
6 联想万全慧眼高级版 Web 控制台选项.................................................................................... 28
2 联想万全慧眼远程管理模块概述................................................................................................. 7
2.1
联想万全慧眼高级版特性............................................................................................. 7
联想万全慧眼 IV 高级版远程管理模块用户指南 V1.0
修订版 1.0 2009年4月
Printronix SL4M SL5000r MP2 Standard Pitch 和 SL4M
Printronix Guide SpecificationRFID Label860-960MHz EPC Class 1, Gen 2Alien 9640/9740 Squiggle AntennaApplicable Printer ModelsSL4M/SL5000r MP2 Standard Pitch and SL4M Short PitchDisclaimerNotwithstanding anything to the contrary in this document, the guidelines, suggestions and other information included in this document or otherwise provided to the recipient, including the guidelines and suggestions for developing converted RFID labels, are provided by Printronix on an "as is" basis and without warranty of any kind whatsoever, expressed or implied. In particular, Printronix disclaims any implied warranty of merchantability or fitness for a particular purpose. Printronix will not be liable under any circumstances for any damages or losses related in any way to use of the guidelines, specifications or other information, including damages, which may be incurred as a result of labels not working properly in a specific application. All specifications are subject to change without notice. Testing of the converted labels in the printer is recommended prior to production quantities.9/25/2012ScopeThis document provides guide specifications for constructing UHF Class 1, Gen 2, RFID labels with an Alien 9640 or 9740 Squiggle RFID Gen2 Antenna for use with Printronix RFID SL4M, SL5000r MP2 Standard Pitch and SL4M Short Pitch printers.RequirementsInlay CharacteristicsInlay: Alien 9640 Squiggle. Silicon Type: Alien Higgs 3. TID: E2003412.Alien 9740 Squiggle. Silicon Type: Alien Higgs 4. TID: E2003414.Nominal operating frequency: 860-960 MHz.EPC Memory: Alien 9640 Squiggle: 96 up to 256 bitsAlien 9740 Squiggle: 128 bits.User Memory: Alien 9640 Squiggle: 320 up to 512 bits (set automatically basedon EPC memory setting).Alien 9740 Squiggle: 128 bits.EPC Protocol: UHF Class 1, Gen 2Printer SetupSL4M/SL5r MP2 Std Pitch & SL4M Short Pitch Coupler Position: OrangeSL4M/SL5r MP2 Std Pitch & SL4M Short Pitch RFID menu Tag Type: “Alien9640 Squig”SL4M/SL5r MP2 Std Pitch & SL4M Short Pitch RFID menu Tag Type: “Alien9740 Squig”SL4M/SL5r MP2 Std Pitch RFID menu (Interim Tag Type: “Alien9640 Squig”).SL4M Short Pitch RFID menu (Interim Tag Type: “Alien9640 Squig”).SL4M MP2 Std Pitch RFID menu Tag Position: 0.0 inchesSL4M Short Pitch RFID menu Tag Position: -0.3 inchesInterim Tag Type selection works with 96 bit EPC only. Printer firmware updateis required to work with full memory.Contact InformationFor comments or questions, please contact Andy Edwards at*********************** or 714-368-2548.Leading Edge of LabelLabel Perf(Centered in Gap)LabelLinerBlack Mark1.00Label Direction Through PrinterPrintronix RFID Label Requirements for SL4M/SL5r MP2Standard Pitch Gen 2 Alien 9640/9740 Squiggle InlayNot to ScaleAll Dimensions in InchesSept 25, 2012 Revision 1.0Inlay Outline 2.125 minLabel Side ViewFigure 1. Label LayoutLabel DirectionThrough PrinterPrintronix RFID Label Requirements for SL4M “Short Pitch”Alien 9640/9740 Squiggle InlayNot to ScaleAll Dimensions in Inches Sept 25, 2012 Revision 1.0Label Side ViewFigure 2. Label Layout。
浪潮英信服务器NF5280M4用户手册V1.0
4 BMC 设置 ........................................................................................................................ 50 4.1 简介................................................................................................................... 50 4.2 功能模块............................................................................................................ 51 4.3 Web 界面介绍 ................................................................................................... 52 4.4 远程控制............................................................................................................ 56 4.5 电源和散热 ........................................................................................................ 57 4.6 BMC 设置.......................................................................................................... 59 4.7 日志................................................................................................................... 62 4.8 故障诊断............................................................................................................ 64 4.9 系统维护............................................................................................................ 65 4.10 命令行功能介绍............................................................................................... 66 4.11 时区表 ............................................................................................................. 71
联想 ThinkPad T440s 用户指南

用户指南ThinkPad T440s注:在使用本资料及其支持的产品之前,请务必先阅读和了解以下信息:•《安全、保修和设置指南》•第iv页“重要安全信息”•第141页附录E“声明”可在Lenovo支持Web站点上获得最新的《安全、保修和设置指南》,网址为:/ThinkPadUserGuides第一版(2013年7月)©Copyright Lenovo2013.有限权利声明:如果数据或软件依照通用服务管理(GSA)合同提供,则其使用、复制或披露将受到GS-35F-05925号合同的约束。
目录首先阅读 (iii)重要安全信息 (iv)需要立即采取措施的情况 (iv)安全准则 (v)第1章产品概述 (1)查找计算机控件、接口和指示灯 (1)前视图 (1)右视图 (3)左视图 (5)底视图 (6)状态指示灯 (7)查找重要产品信息 (8)机器类型和型号信息 (8)FCC标识和IC认证信息 (8)真品证书信息 (9)Microsoft正版标签 (9)功能部件 (10)规格 (11)操作环境 (11)Lenovo程序 (12)在Windows7操作系统中访问各种Lenovo程序 (12)在Windows8操作系统中访问各种Lenovo程序 (14)Lenovo程序概述 (14)第2章使用计算机 (17)注册计算机 (17)常见问题 (17)使用多点触控式屏幕 (18)特殊键 (22)功能键和功能组合键 (22)Windows键 (23)使用ThinkPad指点设备 (23)电源管理 (25)检查电池状态 (25)使用交流电源适配器 (26)给电池充电 (26)最大限度地延长电池寿命 (26)管理电池电量 (27)节能方式 (27)连接网络 (28)以太网连接 (28)无线连接 (28)演示和多媒体 (31)更改显示设置 (31)连接投影仪或外接显示器 (31)设置演示方案 (33)使用双显示屏 (33)使用音频功能部件 (34)使用摄像头 (35)使用闪存介质卡 (35)第3章您与计算机 (37)辅助功能和舒适性 (37)人机工程学信息 (37)舒适 (38)辅助功能选项信息 (38)携带计算机旅行 (39)旅行提示 (39)旅行必备附件 (39)第4章安全性 (41)使用密码 (41)输入密码 (41)开机密码 (41)超级用户密码 (42)硬盘密码 (43)硬盘安全 (45)设置安全芯片 (45)使用指纹读取器 (46)有关从硬盘驱动器或固态驱动器删除数据的注意事项 (49)使用防火墙 (50)保护数据不被病毒攻击 (50)第5章恢复概述 (51)Windows7操作系统恢复概述 (51)制作和使用恢复盘 (51)执行备份和恢复操作 (52)使用Rescue and Recovery工作空间 (53)制作和使用挽救介质 (54)重新安装预装的程序和设备驱动程序 (54)解决恢复问题 (55)Windows8操作系统恢复概述 (55)恢复计算机 (56)将计算机重置为出厂缺省设置。
PRINTRONIX普印力行打简易使用手册簿

PRINTRONIX行式打印机简易使用手册印邦科技2005年11月8日二、安装。
1、电源要求1.1打印机使用单独的交流电源插头,电压在220V,电流为5安培,频率50或60HZ。
1.2工作习惯,打印之前开机,下班关机,中途不用关机。
1.3打印中有异味或异样响动,请关机联系服务工程师。
2、色带的安装2.1、将打印纸厚度控制杆抬起到最大位置,然后按住右边的卡子上的插销,将色带轴套到右卡子上,色带经过右边色带导向器,进入掩膜和挡片中间(打印头前2片银色铁片),再途径左色带导向器,最后左边和右边上色带轴相同(参照机盖上的图)2.2安装中应当注意色带一定要夹2铁片中间,途径左右导向器时色带一定要上在轨道里面。
图1图2 图33、装纸3.1、在脱机模式或者关机情况下,将纸厚度控制器调到最大,送纸器2边盖打开,清除打印机上剩余的纸,然后在下面纸槽处送入打印纸(建议叠一下送入,增加纸硬度),当纸送出高于打印头位置可以移出一只手去拉出打印纸,再放入送纸器的拖纸链上的齿轮上对齐2边,关上送纸器盖。
图4 图5图63.2、在脱机模式下,连续快速按几次换页键将打印纸页缝对齐拖纸器盖上中间位置的箭头,再按定页端,机器会自动对齐打印初始位置。
图7⑶、纸厚度控制器上分别有A、B、C三个字母,相对代表打印纸厚度分别是1、3、5层标准纸的打印纸厚度,由于建行普遍是新机器,打印锤磨耗小,所以建议在调节纸厚度时稍微调大一些,单层A-B之间。
多层B或者B-C之间。
当然这以打印效果为准,以最佳效果为标准,根据具体情况进行调节。
图83.4、柜式打印机改变门所开方向P5206H的机器前后门都可以改变打开的方向,在机柜上前后分别有8颗螺丝固定前后门,只需要取下螺丝把原来固定零件固定在另外一边就可以改变打开方向了。
3.5、打印机面板操作打印机面板上分别有联机/清除、换页、察看/归位、删除、确认、选业/质量、配置打印、定页端、前项、后项、向上和向下共12个键。
变色龙工作站使用说明书
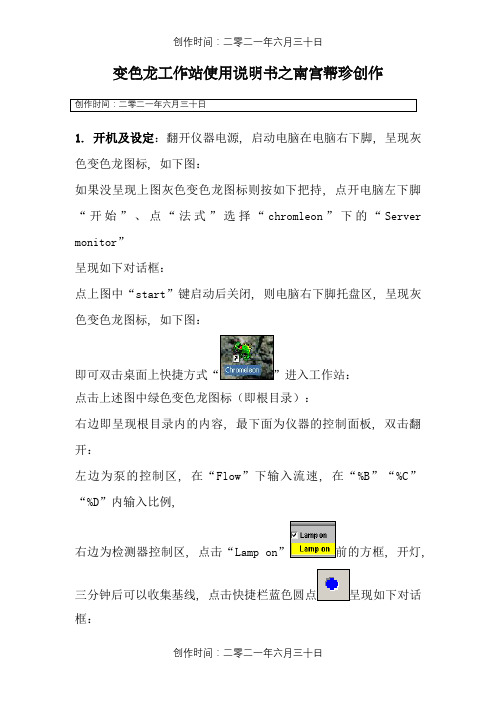
变色龙工作站使用说明书之南宫帮珍创作创作时间:二零二一年六月三十日1. 开机及设定:翻开仪器电源, 启动电脑在电脑右下脚, 呈现灰色变色龙图标, 如下图:如果没呈现上图灰色变色龙图标则按如下把持, 点开电脑左下脚“开始”、点“法式”选择“chromleon”下的“Server monitor”呈现如下对话框:点上图中“start”键启动后关闭, 则电脑右下脚托盘区, 呈现灰色变色龙图标, 如下图:即可双击桌面上快捷方式“”进入工作站:点击上述图中绿色变色龙图标(即根目录):右边即呈现根目录内的内容, 最下面为仪器的控制面板, 双击翻开:左边为泵的控制区, 在“Flow”下输入流速, 在“%B”“%C”“%D”内输入比例,右边为检测器控制区, 点击“Lamp on”前的方框, 开灯,三分钟后可以收集基线, 点击快捷栏蓝色圆点呈现如下对话框:在需要收集的通道前打勾, 分别点“UV_VIS_1”、“UV_VIS_2”、“UV_VIS_3”、“UV_VIS_4”在“Wavelength”内输入波长:即可收集.2.单针进样:待基线平稳后, 点停止收集, 点击快捷栏内的,输入进样体积, “OK”, 再点击收集, 进样即可, 待所有峰出完后, 在再点击如果需要保管, 在“Save to sequence”前打勾, 选择保管路径保管.3.批进样:a.新建文件夹:点击快捷栏内的“Browser”, 回到根目录, 点击绿色根目录,点“File”选择“New directory”:输入文件夹名称, 如为“XXX”.注:可输中文.“OK”.B.新建法式文件:左击文件夹“XXX”,点“File”选择“New”:呈现如下对话框:选择“Program File”,“OK”:“下一步”,分别输入A、B、C、D的比例和总的流速.“下一步”,设定收集时间和所需收集的信号通道, “下一步”,输入波长, “下一步”, “下一步”, 分别输入波长, 直至:下一步,完成:在此可以更改各项参数, 然后点右键, 选择“Check”,确定, 后点快捷键保管:选择路径“XXX”, 输入名称, 如:“XXX”保管后关闭, C.建方法文件:左击文件夹“XXX”,点“File”选择“New”:呈现如下对话框:选择“Method File”,“OK”,点“File”, 点“Save As”:呈现如下对话框:选择路径“XXX”, 输入名称, 如:“XXX”保管后关闭, D.建进样序列:左击文件夹“XXX”,点“File”选择“New”:呈现如下对话框:选择“Sequence (using wizard)”,“OK”,下一步,下一步,未知样品设定, 如果没有未知样品如下图, 选择“No unknows”然后只能“下一步”, 有则选“Use template(用模板)”,在“Template for Sample Name:”下输入样品名, 如“测试”, 后缀进样序号“#n”、样品位置“#p”、每个样品重复进样次数“#r”, 以下依次是“样品数量”、“每个样品进样次数”、“开始位置”、“进样体积”, 点“Apply”, 下一步,标准样品设定同未知样品, 下一步,由上至下点击“Browse...”:找到文件夹, 双击, 如“XXX”, 如下:选择法式文件, 如“XXX”, “Open”,下一个“Browse...”,选择方法文件, 如“XXX”, “Open”,下一步,在“Seqence Name”下输入名称如“测试”, 点“Browse...”选择保管路径.下一步, Done点击快捷,用“Remove”移去不需要执行的序列, 用“Add”添加需要执行的序列“Seqence”,选择需要执行的序列, “Open”,“Start”, 依次第列顺序进样.4.定量方法编纂待进样结束后, 双击“Seqence”内部上方的方法文件如“”进入如下界面,点下方“Detection”如上图红色箭头, 在上方表格区域, 设定积分参数, 通常使用参数如上图, “”下是时间, 及积分参数生效时间, “”下是参数名称, 可选择积分参数, 可点红色区下拉选择, 如图:也可双击红色区, 如下图, 呈现右边对话框:可在绿色区选择积分参数后“OK”, 如需更多参数, 可在表格区点右键, 如图:点“Line”, 选择“Insert Line”(在该行前增加一行), 点“Append Line”(在最后增加一行), “Delete Line”(删除该行), 增加一行后, 参数选择同上.“Detection”设定结束后, 点“Peak Table”如图:点右键, 如下图,选择“Autogenerate Peak Table”, 呈现:“OK”,“确定”在黑色箭头区输入“”如果年夜于0.1不用改, 双击红色箭头区, 呈现上图对话框, 由上至下, 分别是“External(外标法)”、“Internal(内标法)”、“External/ Internal(内外标法)”、“Use this peak as Internal Standard(确定内标峰)”, 若是外标法, 选“External”“OK”即可, 若是内标法, 先在对应内标峰栏内选“Use this peak as Internal Standard”, 后再在主峰栏内选择“Internal”“OK”即可,双击箭头区,呈现上述对话框, 通经常使用峰面积计算, 选择“Area”, “OK”双击箭头区, 呈现右边对话框, 单点校正选择“Linear(LIN)过零点”, 多点校正选择“Linear with Offset(LOFF)有截距”, “OK”.点下图红色箭头区“Amount Table”, 点右键, 选择“Columns”选择“Edit Amount Column...”呈现下面对话框,点红色箭头位置下拉菜单,选择黑色箭头“Name”, 点红色箭头, “Auto-Generate”选择第一行“Generate a separate amount column for EACH standard”后点“Apply”,“OK”.在红色区输入对比品浓度, 点红色箭头保管.点黑色箭头“Browser”回到根目录,在红色区域输入未知样品称样量, 在黑色区域输入未知样品稀释倍数.双击任何一个样品看结果:红色区域自左至右依次是:积分结果、校正曲线结果、峰分析结果(即系统适用性)、“Summary”为综合结果.点红色箭头区打印陈说:红色区为各类陈说.。
T4 系列使用手册说明书
I T4 系列使用手册
Ver:1.0
5.2.4 测试打印...........................................................................................44 5.2.5 内存...................................................................................................44 5.2.6 表格...................................................................................................44 5.2.7 警告讯息...........................................................................................45 5.2.8 打印机状态.......................................................................................46 6. 故障排除 ................................................................................................................47 6.1 液晶屏幕错误讯息......................................................................................47 7. 規格 ........................................................................................................................48 7.1 T4+系列規格................................................................................................48 7.2 通用序列总线(USB)接脚图.......................................................................50 7.3 串行端口脚位图..........................................................................................51 7.4 以太网络脚位图..........................................................................................51
IFIX连西门子PLC以太网驱动SL4的配置
IFIX连西门子PLC以太网驱动SL4的配置一、支持西门子的PLC类型如下:西门子S5 PLC:模块: 115U, 135U, 155U 使用CP143或CP1430通讯模块。
西门子S7 PLC:模块:S7 300使用CP343-1通讯模块或S7 400使用CP443-1EX02通讯模块等。
西门子TI PLC:模块: 545, 555, 560, 565使用CP1430TF通讯模块。
二、支持的数据协议如下:支持S7数据的数据类型:内存变量类型描述范围长度默认数据类型例如I Input 0 - 32767 220 Byte I:1DB Data Block dbnr: 0-32767,0-32767 220 Byte DB:2:30M Memory 0 - 32767 220 Byte M:3Q Output 0 - 32767 220 Byte Q:80T Timer 0 - 32767 220 Byte T:2C Counter 0 - 32767 220 Byte C:3支持S5数据的数据类型:内存变量类型描述范围长度默认数据类型例如CB Counter Block 0 - 32767 2048 Word (16bit) CB:1DB Data Block dbnr: 1-255,0-32767 2048 Word DB:3:2FY Function Block 0-32767 4096 Byte FY:20TB Timer Block 0-32767 2048 Word TB:5RS 0-32767 2048 Word RS:10 AS 0-32767 2048 Word AS:3 DX dbnr: 1-255,0-32767 2048 Word DX:10西门子TI PLC较少用,这里不介绍了。
三、安装内核驱动程序内核驱动程序安装步骤如下(以SL4最新版为例):(1)开始->设置->拨号和网络连接。
T4产品使用说明书v4.0
欢迎使用感谢您选购E人E本!T4采用全新的处理器,使用时更加流畅。
8寸IPS屏幕带来更生动、更绚丽的画面效果。
独家原笔迹手写技术,即写即识,真实还原纸上手写感受。
重新设计的记事本、邮件、日程、名片薄等应用带给您耳目一新的使用体验。
欢迎访问E人E本官方网站,获取丰富的在线增值服务和实时的产品升级信息。
由于产品功能不断升级,部分操作或界面效果可能与本说明书中的描述和演示有所不同。
E人E本保留对本说明书中印刷错误、不准确或遗漏信息进行修订与更新的权利,恕不另行通知,敬请见谅!2011年10月第二版目录概览 (1)配件清单 (1)T4概览 (1)安装3G卡 (2)为电池充电 (3)电磁笔 (3)使用入门 (4)开机和关机 (4)睡眠模式 (4)状态与通知 (4)通知面板 (4)首页 (5)自定义T4 (6)连接到计算机 (6)连接U盘 (7)查看本机信息 (7)连接到网络 (7)连接到WLAN网络 (7)连接到3G网络 (8)连接到有线网络 (8)激活与个人中心 (9)激活 (9)个人中心 (9)记事本 (10)新增记事本 (10)添加记事 (11)查看记事 (12)搜索记事 (12)识别、保存或分享记事 (13)为记事本加密 (13)备份或还原记事本 (13)日程 (14)预览近期日程 (14)新增日程 (14)查看名片详情 (16)扫描名片 (16)搜索名片 (16)整理分组 (17)删除名片 (17)备份或还原名片 (17)邮件 (18)设置邮件帐户 (18)查收和阅读邮件 (18)撰写邮件 (19)回复或转发邮件 (20)批注邮件 (20)删除邮件 (20)管理邮件帐户 (20)文档 (21)创建文档 (21)签批文档 (21)文档管理器 (21)浏览器 (23)浏览器总览 (23)浏览网页 (23)新增标签 (24)搜索 (24)原笔迹网摘 (24)我的收藏 (25)历史记录 (25)应用 (26)查看已安装应用 (26)下载和安装应用 (26)管理应用 (26)阅读 (27)下载或购买书刊 (27)导入书刊 (27)删除书刊 (27)阅读书刊 (27)股票 (28)查看股票信息 (28)热线服务 (29)终端服务 (29)产品规格及注意事项 (30)产品规格 (30)安全和清洁 (30)有毒有害物质表 (32)概览配件清单机器皮套电磁笔电源适配器USB数据线快速操作指南、使用说明书,保修卡T4概览正面背面指纹感应器返回键菜单键上翻页键主页键下翻页键3G卡槽顶部底部安装3G 卡为避免损坏您的3G 卡,插入或取出3G 卡前请先关机!插入3G 卡WCDMA 机型请插入联通USIM 卡,EVDO 机型请插入电信UIM 卡。
IGP PGL Printronix 图形语言程序员参考手册说明书
IGP/PGL 命令标准 .................................................................................. 25 特定功能控制代码 (SFCC) ............................................................... 25 分号 (;)..............................................................................................25 大写 .................................................................................................. 25 排队命令 ........................................................................................... 26 行结束符 ........................................................................................... 26 可打印字符 ....................................................................................... 26 空格 .................................................................................................. 26 命令参数 ........................................................................................... 27 表格名称 ........................................................................................... 27 提示符 ..............................................................................................27 数值 .................................................................................................. 27 命令行中的注释 ................................................................................ 28 存储数据 ........................................................................................... 28 非压缩和填充位压缩 ......................................................................... 28 字符位置 . 点位置 (CP.DP) 格式 ....................................................... 29
T4 T4X 用户手册说明书
T 4Serial numbers from :A001547 -except A001563 et A001564uSERMANUALV1.22thank you for purchasing an innled product « Dedicated to supporting a French industrial ecosystem, this product was developed and assembled by our team in our Montpellier workshop.Because we attach special importance to the feedback of our customers, we invite you to contact us for any comment or suggestion. In order for us to continue to enlighten your ideas in the best possible way....» L’équipe INNLEDmanual mode P19remotecontrollingP22ba tteryP23maintenance andcleaningP2531Précautions d'emploiWARNING !Read the precautions in this manual before installing, switching on, using or maintaining this product.The following symbols are used to identify important security information of the product.Warning! Risk Group 1 product according to EN 62471.Avoid directly looking into the beam source and do not observe the beam source with an optical instrument or any device that would concentrate the light.This product is for professional use only. It is not intended for home use.It presents risks of serious injury by burns, fire, electric shock and fall from heights if the precautions for use are not followed.Do not install, use, or service this product unless scrupulously following the instructions given in this manual, you could otherwise be creating a security risk and damage that would not be not covered by the warranty.Follow the warnings listed below and respect all warnings printed in this manual.Keep this manual for future use.4For updates of the documentation and any information relative to this product and the rest of the INNLED range, visit our website:www.innled.frFor any questions about the safe handling of this product, contact your INNLED dealer or call for technical assistance from Monday to Friday from9am to 6pm: +33 9500 508 78.Respect all local standards and regulations during the installation, when switching the product on for the first time.Protection AGAINST ELECTRIC SHOCKSDo not use the product in the rain, do not immerse in water> Turn off the device before proceeding with installation or maintenance> Disconnect the power supply from the mains before proceeding to the installation or maintenance.The power outlet or external power cut that powers the device must be located nearby and easily accessible in order to disconnect it from the mains.Immediately isolate the mast from the mains if the mains plug, a gasket,a cable or any other component is visibly damaged, defective, deformed,wet or seems to be overheated.Do not power the system until all repairs have been completed.Before using the device, check that the equipment and cables are in perfect condition and certified for the electrical needs of connected devices.5Protection AGAINST BURNS AND FIRESDo not use the product if the ambient temperature (Ta) exceeds 40 ° C (104 ° F). The surface of the device can reach 65 ° C during use.Keep combustible and / or flammable materials away from the product.Do not stick filters, masks or any other material on the optical components.The Li-Ion battery pack should always be handled with care. In case of shock, check that there is no unwanted heating.Protection AGAINST EYE DAMAGEDo not look directly into the light beam. Do not look into the beam with magnifying optical instruments (telescope, binocular glasses or equivalent instruments) that could concentrate the beam. Make sure that individuals can not look directly into the beam from the front of the spotlights when the product lights up suddenly.This can occur when the power is turned on, when the system receivesa DMX signal or when menu items are enabled. To minimize the risk ofirritation or eye injury, disconnect the device from the mains or battery when it is no longer used and provide adequate illumination during work periods so that the eye pupils of people working nearby are naturally reduced.Protection AGAINST INJURYThe device should not be moved during use or when assembled, the modules could fall.In case of a malfunction, immediately switch off the mast and disconnect it from the mains or battery. Do not try to repair a device that has been visibly damaged. Do not modify the unit if it is not described in this manual. Refer any service operation not described to a qualified technician.62certifica tE OF CONFORMITY78The T4 is a battery-powered lighting mast, which includes 3 LEDs per spot and a choice of color temperatures : 3000K 4000K CCT Tunable whiteRGBIt is packaged by a sets of 2 or 3 - depending on the presence or not of extra extension tubes - in a case equipped with integrated chargers. You can remote control the T4 with :before using this product for the first time Carefully read the precautions on page 4 before the installation, switching on, using or maintaining of the device.Unpack the device and make sure that no transport incident has damaged it. Never attempt to repair a damaged device.Before starting up the mains, make sure the sector voltage and frequency correspond to the needs of the device.Visit the Download page on our website (www.innled.fr) for the latest updates of the documentation and al technical information.3Introduction and overview 12349Li-IonBatteryModule(980mm)Hermalink®IntermediateModule(850mm)OpenBaseoverview T 4 - st andard configura tion10The T4 is now proposed with 2 extra extension tubes (200mm and 500mm) as well as an extra ballast.Until 2022, the T4 + extensions + ballast was referenced as . The extensions and the ballast are now options of the T4 but the functionnalities and configuration possibilities are identical to the .Li-ionbatterymodule(980mm) Hermalink®+Head with 4spotlights Hermatwist®Extensiontube(850mm)OpenBaseoverview T 4 + extensions (old )11These two additional extensions allow 4 possible configurations :STRAIGHTINCLINED1m602m152m302m801m662m212m362m86Any other configuration, in particular >280 cm is STRICTLY PROHIBITEDAny other configuration, in particular >280 cm is STRICTLY PROHIBITED12y3 or 3 Heads with4 spotlights 2 or 3 ba ttery modules 2 or 3 850mm ext. tubes2 ou3 open bases2 or3 ChargersThe transportation cases can contain either :> 2 x (T4 + 500mm ext. tube + 200mm ext. tube + ballast)OR> 3 x (Standard T4 = without ext. tubes or ballast)bab a13content of the case12145open base headThe modular assembly of the T4 offers not only a straight or an inclined position but also a choice of 4 possible height configurations .The orientation of some modules (head + extension) changes, depending on the configuration you desire.Carefully read the instructions to turn your T4 around.ba ttery module CHARGERS83414T4 cases have been designed to assemble one mast after another, taking them out in a logical order facilitating the operations.REMINDER The transportation cases can contain either :> 2 x (T4 + 500mm ext. tube + 200mm ext. tube + ballast)OR> 3 x (Standard T4 = without ext. tubes or ballast)MAST N °1MAST N °2content case - T4T4T BAR R2m80 assembl Y (WITH OPTION OF EXT. TUBES)15162m30 assembl Y (st © INNLED 2019Remember to turn the head module around 180° to obtain a straight mast.17The 2.15m T4 can be mounted in low ceiling spaces in which the 2.30m T4 does not fit.headBa ttery module200mm ext. tube500mm ext. tubeopen baseRemember to turn the head module around 180° to obtain a straight mast.Remember to turn the first module around 180° to obtain a straight mast.18GE 20195manual mode : head overviewRF controllerheadSpotlightPower button and MENU (1)This button is the unique interface with your product in Manual mode20MANUAL MODEusing your mast for the first time1. A short press on the button switches the mast on.A chase will then start on the spotlights indicating astandard test of the LEDs.> If a remote control or RF transmitter is detected theproduct will automatically connect to the RF frequencyand can now be remote controlled from a distance.The RF detection only operates during the switch on ofthe mast.> if no transmitter or remote control is detected thenthe product will switch on directly after the chase on the spotlights.2.Once the product is switched on, each press on thebutton will change the light intensity (25%, 50%, 75%,100%)3. A quick double press allows you to enter BoostMode.> 5 successive flashes will indicate you have entered intoBoost Mode.> Any new press on the button will exit the Boost Modeand return into the Light Intensity Mode.Beware, no action on the button for 30 seconds will lockthe mast and no other action is possible - this is to avoidany inadvertent handling of the product.From this point on, only a long press on the buttonallows you to switch off the mast.MANUAL MODEchanging the base colour of your mastThe Base Colour is the colour temperature on which yourmast switches on. This parameter is memorised in the masteven if the mast is not switched on or if the battery is notconnected.1. A long press on the button until the spotlights quicklyflash allows you to enter directly into the Modification of theBase Colour Mode.2. From that point on, each press on the button changesthe Base Colour.> Once the desired colour is obtained, wait for thememorization of the Base colour, indicated by a serie offlashes. The mast switches back on to the desired colour.the masts can be remote controlled in two w a ys :1. With LAKO, the DMX remote control.LAKO allows you to control from one and only device - the DMX HF transmitter is integrated to the remote control. Effects, colors and intensity are adaptable.For more information, please refer to the LA’KO user guide.2. From a console + HF transmitter (ref TA51)Note on TA51 transmitter.TA51 transmitters assign the DMX addresses of the T4 lighting masts via the ASSIGN menu.The T4 lighting masts have 5 DMX channels, the TA51 transmitter manages 512 DMX channels per universe. The TA51 transmitter offers 31 DMX universes and 21 frequencies.For instructions on TA51, please refer to its user guide.6remote controllingLA'KOConsole +(TA51) RF transmitterDMX channel12345Dimmer Dimmer Strobe Strobe 3000K Red 4000K Green 5000KBlueCCTRGBba tteryThe battery module is equipped with4 LEDs that indicate the chargingstatus of the batteries in real time.The LEDs give different types ofinformation.There are 2 modes:In useCharging7vued'ensemblebutton> with LEDs for indicationof the battery statusjackLEDS and st a te of charge1. ACTIVE MODE :When the T4 is operating, it is possible to know the battery charging status.To do so, press the button, the LEDs will show you thestatus of the batteries according to the following diagram :< 5%Flashing LEDsBattery dischargedBetween 5 and 25%Between 50 and 75%Between 75 and 100%Battery charged2. CHARGing Mode :When the T4 is charging, all LEDs light up automatically.8maintenance et nettoy ageRead the Precautions on page 4 before servicing.Refer any maintenance operation not described in this manual to a qualified service technician.Disconnect the product from the mains before cleaning.Perform maintenance in an area where the risk of falling components, tools or any other material is discarded.Excess dust, smoke and particle aggregates degrade performance andcause overheating that can damage the device. The damages caused bya hazardous cleaning or insufficient maintenance are not covered by thewarranty of the product.1. rep airThere are no components inside the unit which can be repaired or serviced by the user.Do not open the different modules of the product.Do not try to repair the device yourself, this could create a risk for safetyor damage that would not be covered by the INNLED warranty. Any otherintervention must be carried out by the INNLED After Sales Service.2. CleaningThe cleaning of the optical components must be carried out regularly tooptimize the light output.Do not use strong pressure for cleaningWork in a clean and well-lit area.Do not use products containing solvents or abrasives, they could damagethe surfaces.To clean the device:Check that the device is turned off.Clean the surfaces with a microfiber cloth soaked in cleaning window solution. Rub gently.Clean the lenses of the LEDs softly with a clean cloth soaked ina mild detergent solution.Do not rub the surfaces too hard. Dry with a soft and clean cloth,or low pressure compressed air. Remove any remaining particles with a wipe. Check that the unit is completely dry before switching on.innledtechnical after sales serviceFrom Monday to Fridayfrom 9am to 6pm360 Avenue des Compagnons34170 Castelnau-le-lez+339 500 508 78*************Recycling of productsINNLED products are supplied in compliance with Directive 20012/19 / EC ofEuropean Parliament and the Council of the European Union on the Reprocessing ofElectrical and Electronic Equipment (WEEE) when applicable.Help safeguard the environment by ensuring that this product will be recycled!Contact us to learn more about the local recycling provisions of our products.revealing senseswww.innled.fr360 avenue des Compagnons 34170 Castelnau-le-LezFRANCE*****************。
T4M
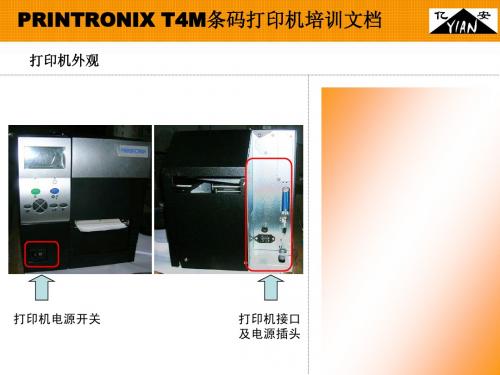
次定位器
PRINTRONIX T4M 条码打印机培训文档
介质安装方法---标签纸的安装 介质安装方法 标签纸的安装 3
主定位器
次定位器
PRINTRONIX T4M 条码打印机培训文档
走纸传感器---1 走纸传感器
走纸传感器功能:走纸传感器 是检测标签间隙位置的装置, 通过这个装置可以检测标签间 隙、标记等介质。
PRINTRONIX T4M 条码打印机培训文档
主选单说明---仿真控制 主选单说明 仿真控制
仿真控制
该项主要是对PRINTRONIX T系列仿真及 其他厂家的仿真进行切换及控制
T4M条码打印机培训文档 PRINTRONIX T4M条码打印机培训文档
主选单说明---仿真控制 仿真切换 主选单说明 仿真控制---仿真切换 仿真控制
T4M条码打印机培训文档 PRINTRONIX T4M条码打印机培训文档
主选单说明----介质控制 宽度设置 主选单说明 介质控制---宽度设置 介质控制
宽度设置
对标签宽度的手动设置
PRINTRONIX T4M 条码打印机培训文档
主选单说明----介质控制 高度设置 主选单说明 介质控制---高度设置 介质控制
PRINTRONIX T4M 条码打印机培训文档
主选单说明---介质间隙控制 主选单说明 介质间隙控制
介质间隙控制:
该项主要对标签传感对介质中间隙 的控制,及对介质间隙的选择。
PRINTRONIX T4M 条码打印机培训文档
主选单说明---介质间隙控制 间隙选择 主选单说明 介质间隙控制---间隙选择 介质间隙控制
间隙选择:
1、GAP:间隙纸 2、MARK:黑标纸 操作步骤: 1、按“ONLINE” 2、同时按“向下键”和“确认键” 解锁 3、按“主程序键”一下到“MEDIA SETUP” 4、按“向下键”,到Gap/Mark Sensor 5、按“向左键”或“向下键”选择参数 6、按“确认”键 7、到“SAVE SONFIG”中保存
argox iX4 打印机用户手册说明书
iX4 印表機 使用手冊iX4-240, iX4-250, iX4-350 *****************版次:1.5日期:2022年2月17日專屬聲明本手冊包含立象科技股份有限公司擁有之專屬資訊。
這些資訊僅供負責操作及維護手冊中所述之設備的相關人士參考及使用。
未經過立象科技股份有限公司書面同意,不論任何情況下均不得對此類專屬資訊進行使用、再製,或揭露給任何第三方。
產品改良持續改良產品是立象科技股份有限公司奉行的原則之一。
所有的規格及符號得隨時變更,恕不事先通知。
FCC 相容聲明本設備經過測試並判定符合FCC 條例第15 篇對 A 級數位設備之限制。
該限制是為了提供合理保護,避免在住宅內使用時引起有害干擾而設計的使用條件。
本設備會產生、使用並發射無線電頻率能量,若未按指示進行安裝與使用,可能會對無線電通訊造成有害干擾。
然而,我們不保證某些特定的安裝方式不會發生干擾。
如果本設備對收音機或電視接收造成干擾(可經由打開或關閉本設備而確認),則使用者可嘗試利用下列方式進行調整:•移動接收天線的角度或位置。
•增加設備與接收器之間的距離。
•將設備連接到不同電路上的其他插座。
•如需協助,請洽詢經銷商或專業的收音機/電視技術人員。
本產品的週邊裝置均經過屏蔽傳輸線測試。
本產品必須使用屏蔽傳輸線,以確保符合相關規範。
未經立象科技股份有限公司明確許可的情況下,對設備進行的任何變更或修改都可能導致使用者喪失操作本設備之權利。
賠償聲明立象科技股份有限公司已採取必要步驟,確保本公司所發行之設計規格及手冊的正確性;但這些出版品仍可能存在錯誤。
立象科技股份有限公司將保留修改任何此類錯誤之權利,並聲明免除任何相關的賠償責任。
不論任何情況下,立象科技股份有限公司或與隨附產品(包含軟硬體) 的製作、生產或運送程序相關之人士,均不對因使用本產品,或因無法使用本產品所導致的任何損害(包括但不限於商機損失、業務中斷、商業資訊損失或,其他金錢損失所造成的任何損害) 負賠償責任,不論立象科技股份有限公司是否已被告知此等情事。
蓝代斯克肿瘤医院系统操作培训手册

事件流程
事件申请界面
事件-选择用户
部门和用户支持模糊查询
事件-选择用户
选择部门后,只显示该部门用户
事件-详细信息
红色为必填项
事件-类别
类别,也叫做服务目录,为事件进行分 类便于统计及分配给相应的工程师。
事件-紧急性
高:该事件对用户业务有影响较大,需尽快解决。 中:该事件对用户业务影响一般,可稍后解决。 低:该事件对用户业务影响较小,不急于解决。
变更-批准实施
变更经理查看测试反馈,决定是否进行实施及指定实施分析师
变更-实施反馈
分析师进行实施并反馈结果
变更-变更审核
变更经理对变更结果进行审核,决定变更是否成功完成
Q&A
事件-计时与信息
剩余响应时间:事件打开至分析师响应的时间(规定为30分钟) 剩余解决时间:事件打开至分析师解决的时间。 停表时间:分析师处理事件时,由于不可控因素不应占用解决 时间,需要停表。
事件-其他信息
该与事所该件选类用的别户升分资相级配产关记相的录关事的件事件
事件-添加注释和附件
事件-分析师接受任务
IT 服务台操作说明
云南省肿瘤医院IT服务台
系统角色
角色 帮助台 分析师
事件和变更经理
普通用户
事件流程 创建、分配 创建、分配、解决
所有权限
无
问题流程 所有权限 所有权限
所有权限
无
变更流程
申请
申请、测试、实 施 所有权限
报告 帮助台报告 分析师报告
所有报告
无
查自己的看事件
处理报告
登录系统
通过OA精灵可快速的登录系统。
事件-停表与解决
事件-事件经理审批
南天打印机设置
南天打印机设置南天打印机设置说明南天打印机支持OKI,IBM,LQ,Olivetti等多种仿真模式,其中OKI速度快兼容好,推荐使用OKI仿真。
PR2 PR2EWin XP 、Win 7 32位、Win 8 32位及Win 10 64位建议用OKI 仿真Win 7 64位建议使用LQ 仿真仿真设置方法参照压缩包内的:PR2E打印机修改并口仿真.mp4 【PR2打印参数设置方法】在关机状态下,同时按住STA TION1和STA TION2键开机,等待打印机完成初始化,放入一张A4纸,会打印出操作说明。
按下LOCAL键,机器进入设置状态,会打印出菜单项。
STA TION1键是确认,STA TION2键是切换,LOCAL键是保存配置。
在“配置模式”中选择“仿真方式”选“南天-OKI”即可,OKI 配置项里面不需要设置。
【PR2E打印参数设置方法】在关机状态下,同时按住STA TION1和STA TION2键开机,等待打印机完成初始化,放入一张A4纸,会打印出操作说明。
按下LOCAL键,机器进入设置状态,会打印出菜单项。
STA TION1键是确认,STA TION2键是切换,LOCAL键是保存配置。
在“配置模式”中,【接口】- 选择【并口】;【并口仿真】-选择【南天-OKI】在“OKI配置”中使用默认配置即可。
【PR9打印参数设置方法】1. 开启PR9打印机,等待打印机完成自检。
同时按下“用户2”+“压缩”键进入脱机状态。
屏幕显示“菜单参数设置”2. “压缩”键是往下,“进/退纸”键是往上,“停机”键是确认,“用户2”键是返回上一级菜单。
3. 在【配置模式】中,【接口】选择为【并口】,【并口仿真】选择【南天-OKI】即可设置为OKI仿真模式,【OKI配置】中使用默认配置即可。
小森印刷机L40 PQC控制台使用说明书中文版

4. 內容概要 本印刷機供印刷紙張的續紙是由採用偏心擺動送紙至印筒的連續飛連裝置進行,印刷後堆積在收紙臺上。本印刷 機在既實現印刷準備時間短、操作簡單又確保優質印刷方面獨具創意;在保證安全方面也予以足夠的重視。
5. 有關產品規格更改的通告 本公司將不斷對技術進行改良和提高,本印刷機以及附屬設備的外形、機械原理和附件將會有所變更。因此本公 司將對規格等予以變動,恕不另行通知。
1. 在本使用說明書中的安全注意事項 有關安全操作的注意事項記載在每頁的右上方以及正文中並標記有 安全地操作和保養印刷機。
符號以提醒安全。請務必遵守這些注意事項,
2. 人員的防範 1) 衣服上的鬆弛物品、戒指、懸掛的裝飾品、抹布、工具或長髮等均易被纏繞到運轉的機器內。為避免造成嚴重 的人員傷害,切勿穿寬鬆的衣服、露出襯衣下擺、過長的領帶等寬鬆的服飾進行操作。為了操作的安全,應穿 戴適合操作的合體服飾。應摘下所有的裝飾品並遠離機器加以保管。 當使用抹布進行擦拭時要特別小心不要碰到機器的運轉部位。當不使用工具時要將其遠離機器保管好。如果長 髮不扎束好或遮蓋住是極其危險的。切勿戴手套或在手上纏繞抹布進行操作。
2) 嚴禁拆卸下防護裝置或旁接回避裝置及聯鎖開關。無視安全注意事項、不確認安全信號、閥門和開關或有意旁 接回避安全裝置將有對您以及不知道這一危險的共同作業人員造成嚴重傷害的危險。拆卸或改裝任何防護裝置 或安全裝置均會使其喪失正常技能或導致故障發生。
T4M编程中文讲解
T4M是什么?为什么要用它?它是一个地形(Terrain)工具。
它是一个Unity地形的替代工具,用于所有被3D开发工具(Maya,EarthSculpto,3DS Max,Blender等)创建的几何体。
最初,它只用于移动设备,但是更多的人发现了其他的一些益处:T4M是允许用户导入几何体到Unity作为地形(Terrain)的一种工具。
T4M for Web和for mobile在编译时体积是非常小的,仅有一个draw call,快速的加载速度和强大的性能(旧设备也一样)。
所以,我决定针对所有平台并且提出了一整套解决方案(比如:Elevation tool yet)。
对于每个导入的几何体,T4M包括纹理绘制,绘制树和草,并且有一个细节(LOD)系统和广告牌。
T4M还可以把Unity Terrain转换成包括混合纹理(blend texture),4倍数纹理(一种增强纹理性能和存储移除的透明度贴图)(the first four splat textures)的几何体,并且使用它的所有优点比一个导入几何体+T4M系统。
所有特性兼容Unity Free和Pro版。
特性:Shader Model 1,2,3 (iPhone,iPad,Andoid,Web,PC,MAC,Flash Naci)转换地形到T4M,保持所有纹理和混合纹理(它使用4倍数纹理)转换你自己导入的Mesh(你可以自由的用其他3D软件制作地形)绘制和放置任何你想要的对象,在新的绘制系统下集成细节(LOD)系统集成广告牌系统直接用物质材质绘制最佳刷新预览兼容Unity地形Shaders,你可以使用自己的Shader返回或重置已经绘操作添加自己的画刷(64*64)兼容实时阴影,光照贴图和Directional光照贴图事先声明本教程使用的是T4M v2.41版本,Unity为4.6.3 Pro版,请尽可能保证相同,以免有所出入一个好的开始,需要遵循以下步骤:1:添加26,27,28,29,30层,如下图所示:2:通过菜单Window->T4M Source Codes打开T4M的主界面:上边的Tab小按钮按照顺序功能如下:1:转换器2:优化3:我的T4M4:画刷5:植物6:LOD细节7:广告牌右边的按钮:激活/反激活控制器转换功能:添加一个gameobject,如下所示:给该对象挂上脚本选择这个游戏对象,此时应该显示下图界面。
- 1、下载文档前请自行甄别文档内容的完整性,平台不提供额外的编辑、内容补充、找答案等附加服务。
- 2、"仅部分预览"的文档,不可在线预览部分如存在完整性等问题,可反馈申请退款(可完整预览的文档不适用该条件!)。
- 3、如文档侵犯您的权益,请联系客服反馈,我们会尽快为您处理(人工客服工作时间:9:00-18:30)。
字体:Montype Imaging(Agfa Monotype)-Lerrer Gothic Bold,Courier Bold,CGTriumvirate
Bols Condensed,OCR-A,OCR-B,CG Times,CG Triumvirate,CG TriumvirateBols, (additional fonts available)
1、碳带和纸张的安装............................................................................................... 10 2、面板按键操作 ...................................................................................................... 11 3、印字头的拆装 ...................................................................................................... 15 4、滚轴的拆装 ......................................................................................................... 16 5、印字头压力的调整............................................................................................... 16 6、印字点的调试 ...................................................................................................... 17
2
一:机器简介
1、产品优势
普印力工业及商用条形码打印机: 出色表现,价格合宜 两倍内存,高于同类产品 世界级的服务和支持 图形式操作界面 安装简单,操作方便 打印机远程控制功能 现场 RFID 可升能性能
条码打印机操作说明书
2、机器简介
T4M 热敏打印机
4〞热转印或热敏打印机,
工业级和商业级,
RFID 可升级
二、机器性能参数 .............................................................................................................. 6
三、机器操作 ..................................................................................................................... 9
存储容量:32MB 内存 8MB 闪存 打印速度:10ips@203dpi(254mm/sec@8/dpmm)/10ips@305dpi(254mm/sec@12/dpmm) 打印方式:热转印或热敏 清晰度:203dpi(8/dpmm);可选 305dpi(12/dpmm) 打印宽度:4.1〞max(104mm)
普印力打印机T4M中文设置手册
上海兴途电子科技有限公司 400-756-2769
条码打印机操作说明书
Printronix SL/T4M 中文使用手册
1
目录
条码打印机操作说明书
一、机器简介 ..................................................................................................................... 3
介质感测方式:透射(间隙、凹口、洞孔),反射(黑点),不感测(连续纸)
介质处理方式
撕拉方式,剥离方式,切断方式,连续方式 *需要 PrintNet 10/100Base-T 以太网卡 **仅限美国,加拿大以及欧盟 打印协议支持 ZPL,TEC,IPL,Sata 和 DPL, RFID 指令仅支持 ZPL 和 Sato
四、可选配件 ................................................................................................................... 18
五、机器使用软件 ............................................................................................................ 19
6
介质处理选项
条码打印机操作说明书
整卷回转:整卷标签回转 回卷底纸的剥离器:剥离标签,回卷底纸至 8〞(203mm)卷 筒 不回卷底纸的剥离器:剥离标签,不回卷底纸 切刀组件:打印规定数目的标签后切断标签
编程语言
标准:Printronix 图形语言(PGL) Zebra 图形语言(ZGL) TEC 图形语言(TGL) Intermec 图形语言(IGL) SATO 图形语言(STGL) Datamax 图形语言(DGL) XML
三、机器操作
机器结构图
条码打印机操作说明书
9
1、碳带和纸张的安装
(1)碳带的安装
条码打印机操作说明书
注意:此普印力打印机可以内外碳兼用。 (2)纸张安装:
10
条码打印机操作说明书 (3)测纸
Printronix SL/4M 机器的纸张感测器分上下两个,也是可以移动的。 此机器是自 动测纸的,可以设置在电源开启、印字头合上的时候或者在机器的 参数设定里进行 纸张校正。
PrintNet 远程管理*
可选件
插拔式易换的打印头 打印计数器
碳带寿命显示器
PrinNet 10、100Base-T 以太岗连接 超高频 FRID 升级包 无线 802.11b/g** 不回卷底纸的剥离器 回卷底纸的剥离器 纸张回卷器 切刀 内存卡 DBCS 字库卡 时钟卡 RFID 现场升级工具包 T4M 条形码打印机可通过加装普印力行业 领先的 MP2 RFID 智能编码装置, 现场升级为 RFID 打印机 -Gen2 硬件认证的超高频 RFID 编码器 配置为认可的全坏频率标准 支持 EPCglobal Class 1,Gen2 标准 -多频段射频耦合器、先进的打印编码程序
介质性能
介质类型:卷状中折垒的纸质、覆膜或合成,标签的热转印/热敏标签,电子标签 介质容量:卷状-3〞内径 8〞直径,(76mm 内径 203mm 直径) 介质和底纸宽度介质和衬垫宽度:0〞至 5.15〞(22mm 至 127mm) 标签厚度:0.0023〞至 0.010〞(06mm0.254mm) 标准长度(min/max):0.25〞至 99〞(6mm 至 2,514.6mm) 热转印碳带:碳带宽度(min/max)55〞至 5.0〞( 39.5mm 至 127mm) 最大碳带长度:450M 碳带芯直径:1.0〞(25.4mm) 碳带外径(max):3.3〞(85mm)
字符集:带有 Ture Type 字体支持的 Unicode 字符集
7
图形处理和驱动程序
图形格式:PCX 和 TIFF 文件格式 Windows 驱动:Microsoft Windows2000/XP/2003 server
条码打印机操作说明书
电源要求
电源:自适应 90-264VAC(45-62HZ)PFC 规范认证:FCC-B,ICES-003,EN55022,EN55024,EN61000-3-2,EN61000-3-3, EN60950,cMETus,CE,BSMI,CCC,C-Tick,GOST-R,MIC,Argentian S mark
标准配置
32MB 内
存
8MB
闪存
坚固的金属结构
打印机设置向导
宽大的图形用户界
面
彩色的编码用
户提示
可调传感
器
反射传感器
自动校准
USB 2.0、串口、并口
内置打印机语言支持
(Printronix,Zebra,TEC,Sato,Intemec,Datamax)
标签设计软件
XML 激活打印方式
基本 XML 的 PXML 远程 控制
1、产品优势 ............................................................................................................... 3 2、机器简介 ............................................................................................................... 3
六、机器保养 ................................................................................................................... 20
1、机器清洁规范 ...................................................................................................... 20 2、使用注意规范 ...................................................................................................... 21
