Cisco 3750 堆叠配置手册
cisco3750三层交换机配置说明

三层交换机可以通过Telnet方式或超级终端方式连上,第一次使用的三层交换机需要进行配置,具体步骤如下:1)、用Cisco 3750三层交换机自带的一条串行电缆将其Console口与1台维护笔记本的串口(需要知道是Com1还是Com2)相连。
2)在维护笔记本上执行以下操作:“开始→程序→附件→通讯→超级终端”,在“连接描述”对话框的名称一栏中输入“cisco3750”(此名字没有实际意义,可以随便输入),创建一个叫做"cisco3750"的新连接,点击"确定",缺省的使用COM1(根据维护计算机连接的端口选择),在"串口设置"中将波特率改为9600波特,其他参数不变,点击"确定"就可以得到三层交换机的控制台。
3)、设置结束,打开三层交换机电源,就会出现三层交换机的启动信息。
这时就可以像在终端一样对三层交换机进行操作了。
此时不要进行任何操作,以免破坏三层交换机的启动进程,直到三层交换机出现了:“Copyright (c) 1986-2006 by Cisco Systems, Inc.Compiled Fri 28-Jul-06 08:46 by yenanh”回车,提示“Would you like to terminate autoinstall? [yes]:”是否要终止自动安装,输入N,进入配置页面:“--- System Configuration Dialog ---Would you like to enter the initial configuration dialog? [yes/no]:”输入N,选择不需要,提示“Switch>00:14:58: %LINK-5-CHANGED: Interface Vlan1, changed state to administratively down”,出现“switch>”就可以输入命令进行配置。
CISCO3750交换机堆叠原理

Cisco交换机堆叠连接方式及原理在与读者朋友的一些交流中,发现有许多读者对Cisco交换机中的堆叠连接及两种连接方式还是搞不清,特别是它们的连接原理,所以在此把我在《Cisco/H3C交换机配置与管理完全手册》(第二版)中介绍的最新Cisco 交换机堆叠技术摘选如下:7.2.2 IOS交换机堆叠电缆的选择与连接在可堆叠的IOS交换机中,可选择0.5米、1米和3米这三种规格的StackWise堆叠电缆,用于不同堆叠类型的交换机连接。
如图7-3所示的是一条0.5米的StackWise堆叠电缆,如图7-4所示的是堆叠电缆与交换机上StackWise端口的连接示意图。
图7-3 StackWise堆叠电缆图7-4 堆叠电缆与堆叠端口的连接示意图Cisco之所以要准备三种不同长度规格的堆叠电缆,就是为了满足不同堆叠连接方式中不同连接距离的需求。
图7-5是使用0.5米规格StackWise 堆叠专用电缆的一种建议连接方式。
在这种连接方式中,电缆连接的是两台交换机的相同序号(STACK 1—STACK 1,STACK 2--STACK2)SATCK接口(除了最下面两台的连接外),而且每两台连接的交换机中间是间隔了一台交换机的(除了第一台和第二台之间,以及最后两台之间),但它通过两组连接(从一个堆叠端口出发,依自向下连接即可画出两组连接)就实现了所有交换机的堆叠连接,并最终形成一个封闭的连接环路,实现连接的冗余性。
在在这种堆叠连接中全部是使用0.5米规格的堆叠电缆的。
图7-6是使用0.5米和3米两种规格StackWise堆叠电缆进行的两种堆叠连接方式。
左右两种连接方式都提供了一个封闭的环形连接,实现连接的冗余性。
左边连接方式的环是这样形成的(0.5米电缆连接的都是不同交换机上相同序号的堆叠接口,3米的电缆连接的是上、下级交换机中不同序号的STACK接口):首先从最上面那台交换机的STACK 2接口用一条0.5米的堆叠电缆连接到第二台交换机上的STACK 2接口,然后从第二台交换机的STACK 1接口用一条0.5米的堆叠电缆连接到第三台交换机上的STACK 1接口,再从第三台交换机的STACK 2接口用一条0.5米的堆叠电缆连接到第四台交换机上的STACK 2接口,依此类推,直到最后一台,用一条3米的堆叠电缆从STACK 2接口连接到最上面第一台交换机的STACK 1接口,实现一个全封闭的连接环,实现连接的冗余性。
S3750 全千兆智能路由交换机用户手册
TiNet S3750 全千兆智能路由交换机用户手册命令行参考手册1. 访问交换机命令2. 端口配置命令3. VLAN配置命令4. IP接口配置命令5. ARP配置命令6. DHCP功能配置命令7. 本地IP地址池配置命令8. 静态路由配置命令9. RIP配置命令10. OSPF配置命令11. 组播协议配置命令12. ACL配置命令13. QOS配置命令14. STP配置命令15. 802.1x配置16. SNTP客户端配置命令17. Syslog配置命令18. SSH配置命令19. 交换机管理和维护命令目录第1章访问交换机命令................................................................................. 1-11.1 访问交换机命令..................................................................................... 1-11.1.1 cls ................................................................................................ 1-11.1.2 configure terminal ........................................................................ 1-21.1.3 enable .......................................................................................... 1-21.1.4 end ............................................................................................... 1-31.1.5 exit ............................................................................................... 1-41.1.6 help .............................................................................................. 1-41.1.7 hostname ..................................................................................... 1-51.1.8 interface ....................................................................................... 1-61.1.9 interface range............................................................................. 1-61.1.10 muser ......................................................................................... 1-71.1.11 quit ............................................................................................. 1-81.1.12 show muser ............................................................................... 1-81.1.13 show username ......................................................................... 1-91.1.14 stop ............................................................................................ 1-91.1.15 terminal language .................................................................... 1-101.1.16 timeout ..................................................................................... 1-101.1.17 username username privilege ................................................. 1-111.1.18 username change-password ................................................... 1-12第2章端口配置命令 .................................................................................... 2-12.1 以太网端口配置命令 ............................................................................. 2-12.1.1 clear interface .............................................................................. 2-22.1.2 description ................................................................................... 2-22.1.3 duplex .......................................................................................... 2-32.1.4 flow-control .................................................................................. 2-42.1.5 ingress acceptable-frame ............................................................ 2-52.1.6 ingress filtering ............................................................................ 2-62.1.7 priority .......................................................................................... 2-62.1.8 show description .......................................................................... 2-72.1.9 show interface ............................................................................. 2-82.1.10 show statistics interface ............................................................ 2-82.1.11 shutdown ................................................................................... 2-92.1.12 speed ....................................................................................... 2-102.1.13 switchport access .................................................................... 2-112.1.14 switchport mode ...................................................................... 2-112.1.15 switchport trunk allowed vlan .................................................. 2-122.1.16 switchport trunk native vlan ..................................................... 2-132.1.17 tag ............................................................................................ 2-142.1.18 show statistics dynamic interface ............................................ 2-152.1.19 show utilization interface ......................................................... 2-15 2.2 端口镜像配置命令 ............................................................................... 2-162.2.1 mirror destination-interface ........................................................ 2-162.2.2 mirror source-interface .............................................................. 2-172.2.3 show mirror ................................................................................ 2-17 2.3 端口CAR配置命令............................................................................. 2-182.3.1 port-car ...................................................................................... 2-182.3.2 port-car-open-time ..................................................................... 2-192.3.3 port-car-rate ............................................................................... 2-202.3.4 show port-car ............................................................................. 2-20 2.4 端口LACP汇聚配置命令.................................................................... 2-212.4.1 channel-group............................................................................ 2-212.4.2 channel-group mode ................................................................. 2-222.4.3 channel-group load-balance ...................................................... 2-232.4.4 lacp system-priority ................................................................... 2-232.4.5 lacp port-priority ......................................................................... 2-242.4.6 show lacp sys-id ........................................................................ 2-252.4.7 show lacp internal ...................................................................... 2-252.4.8 show lacp neighbor ................................................................... 2-262.5 端口利用率告警配置命令 .................................................................... 2-262.5.1 alarm all-packets ....................................................................... 2-272.5.2 alarm all-packets threshold ....................................................... 2-272.5.3 show alarm all-packets .............................................................. 2-282.5.4 show alarm all-packets interface ............................................... 2-29第3章VLAN配置命令................................................................................. 3-13.1 VLAN 配置命令 ..................................................................................... 3-13.1.1 description ................................................................................... 3-13.1.2 show vlan ..................................................................................... 3-23.1.3 switchport .................................................................................... 3-23.1.4 vlan .............................................................................................. 3-33.2 GVRP配置命令 ..................................................................................... 3-43.2.1 gvrp .............................................................................................. 3-53.2.2 show gvrp .................................................................................... 3-53.2.3 show gvrp interface ..................................................................... 3-6第4章IP 接口配置命令............................................................................... 4-14.1 IP 接口配置命令.................................................................................... 4-14.1.1 arp-proxy ..................................................................................... 4-14.1.2 interface vlan-interface ................................................................ 4-24.1.3 interface supervlan-interface ....................................................... 4-24.1.4 ip address .................................................................................... 4-34.1.5 ip address primary ....................................................................... 4-44.1.6 ip def cpu ..................................................................................... 4-44.1.7 show ip interface supervlan-interface .......................................... 4-54.1.8 show ip interface vlan-interface ................................................... 4-54.1.9 subvlan ........................................................................................ 4-6第5章ARP配置命令 ................................................................................... 5-15.1 ARP配置命令 ........................................................................................ 5-15.1.1 arp ............................................................................................... 5-15.1.2 arp aging ...................................................................................... 5-25.1.3 show arp ...................................................................................... 5-35.1.4 show arp aging ............................................................................ 5-4第6章DHCP功能配置命令......................................................................... 6-56.1 DHCP功能配置命令.............................................................................. 6-56.1.1 dhcp-relay .................................................................................... 6-56.1.2 dhcp-relay hide server-ip ............................................................. 6-66.1.3 dhcp-server.................................................................................. 6-66.1.4 show dhcp-relay .......................................................................... 6-86.1.5 show dhcp-relay hide server-ip ................................................... 6-86.1.6 show dhcp-server ........................................................................ 6-86.1.7 show dhcp-server inerface .......................................................... 6-9第7章本地IP地址池配置命令.................................................................... 7-17.1 本地IP地址池配置命令 ........................................................................ 7-17.1.1 dns primary-ip .............................................................................. 7-17.1.2 dns second-ip .............................................................................. 7-27.1.3 dns suffix ..................................................................................... 7-37.1.4 gateway ....................................................................................... 7-37.1.5 ip .................................................................................................. 7-47.1.6 ip pool .......................................................................................... 7-47.1.7 lease ............................................................................................ 7-57.1.8 section ......................................................................................... 7-57.1.9 show ip pool................................................................................. 7-67.1.10 wins primary-ip .......................................................................... 7-77.1.11 wins second-ip ........................................................................... 7-7第8章静态路由配置命令............................................................................. 8-18.1 静态路由配置命令 ................................................................................. 8-18.1.1 ip route ......................................................................................... 8-18.1.2 show ip route ............................................................................... 8-2第9章RIP配置命令..................................................................................... 9-19.1 RIP 配置命令......................................................................................... 9-19.1.1 auto-summary.............................................................................. 9-19.1.2 host-route .................................................................................... 9-29.1.3 ip rip authentication ..................................................................... 9-29.1.4 ip rip input .................................................................................... 9-39.1.5 ip rip metricin ............................................................................... 9-49.1.6 ip rip metricout ............................................................................. 9-49.1.7 ip rip output .................................................................................. 9-59.1.8 ip rip split ..................................................................................... 9-59.1.9 ip rip version ................................................................................ 9-69.1.10 ip rip work .................................................................................. 9-79.1.11 network ...................................................................................... 9-89.1.12 router rip .................................................................................... 9-89.1.13 show ip rip ................................................................................. 9-99.1.14 show ip rip interface .................................................................. 9-9第10章OSPF配置命令.............................................................................10-110.1 OSPF配置命令.................................................................................. 10-110.1.1 area authentication .................................................................. 10-210.1.2 area default-cost ...................................................................... 10-310.1.3 area range ............................................................................... 10-410.1.4 area stub .................................................................................. 10-510.1.5 area virtual-link ........................................................................ 10-610.1.6 default-information originate .................................................... 10-810.1.7 default redistribute metric ........................................................ 10-910.1.8 default redistribute type ......................................................... 10-1010.1.9 ip ospf authentication-key ...................................................... 10-1110.1.10 ip ospf cost .......................................................................... 10-1110.1.11 ip ospf dead-interval ............................................................ 10-1210.1.12 ip ospf hello-interval ............................................................ 10-1310.1.13 ip ospf message-digest-key ................................................. 10-1410.1.14 ip ospf network .................................................................... 10-1510.1.15 ip ospf priority ...................................................................... 10-1610.1.16 ip ospf retransmit-interval .................................................... 10-1710.1.17 ip ospf transmit-delay .......................................................... 10-1810.1.18 network area ........................................................................ 10-1910.1.19 redistribute ........................................................................... 10-2010.1.20 router id ............................................................................... 10-2110.1.21 router ospf ........................................................................... 10-2210.1.22 show ip ospf ......................................................................... 10-2310.1.23 show ip ospf border-routers ................................................. 10-2310.1.24 show ip ospf cumulative ...................................................... 10-2410.1.25 show ip ospf database ......................................................... 10-2410.1.26 show ip ospf error ................................................................ 10-2510.1.27 show ip ospf interface .......................................................... 10-2510.1.28 show ip ospf neighbor ......................................................... 10-2610.1.29 show ip ospf request-list ...................................................... 10-2610.1.30 show ip ospf retrans-list ....................................................... 10-2710.1.31 show ip ospf virtual-link ....................................................... 10-2710.1.32 show ip route ospf ............................................................... 10-2810.1.33 show router id ...................................................................... 10-28第11章组播协议配置命令 ......................................................................... 11-111.1 静态组播配置命令 ............................................................................. 11-111.1.1 multicast mac-address ............................................................. 11-111.1.2 multicast mac-address vlan interface ...................................... 11-211.1.3 show multicast ......................................................................... 11-311.2 IGMP snooping和GMRP配置命令................................................... 11-311.2.1 gmrp ......................................................................................... 11-411.2.2 igmp-snooping ......................................................................... 11-411.2.3 show gmrp ............................................................................... 11-511.2.4 show gmrp interface ................................................................ 11-511.2.5 show igmp-snooping ................................................................ 11-611.3 IGMP配置命令................................................................................... 11-711.3.1 igmp-proxy ............................................................................... 11-711.3.2 ip igmp ..................................................................................... 11-811.3.3 ip igmp access-group............................................................... 11-911.3.4 ip igmp last-member-query-interval ....................................... 11-1011.3.5 ip igmp query-interval ............................................................ 11-1111.3.6 ip igmp query-max-response-time ......................................... 11-1211.3.7 ip igmp static-group ............................................................... 11-1311.3.8 ip igmp version ....................................................................... 11-1411.3.9 ip multicast-routing................................................................. 11-1411.3.10 show igmp-proxy.................................................................. 11-1511.3.11 show ip igmp groups ............................................................ 11-1611.3.12 show ip igmp interface ......................................................... 11-16第12章ACL配置命令 ...............................................................................12-112.1 ACL 配置命令列表............................................................................. 12-112.1.1 absolute ................................................................................... 12-212.1.2 access-group ........................................................................... 12-312.1.3 access-list ................................................................................ 12-412.1.4 access-list extended ................................................................ 12-812.1.5 access-list link ....................................................................... 12-1012.1.6 access-list match-order ......................................................... 12-1112.1.7 access-list standard ............................................................... 12-1212.1.8 access-list user ...................................................................... 12-1412.1.9 { permit | deny } ..................................................................... 12-1512.1.10 periodic ................................................................................ 12-1912.1.11 port-isolation ........................................................................ 12-2212.1.12 show access-list config ........................................................ 12-2212.1.13 show access-list config statistic ........................................... 12-2312.1.14 show access-list runtime ..................................................... 12-2412.1.15 show access-list runtime statistic ........................................ 12-2512.1.16 show port-isolation .............................................................. 12-2612.1.17 show time-range .................................................................. 12-2612.1.18 time-range ........................................................................... 12-27第13章QOS配置命令 ..............................................................................13-113.1 QoS 配置命令 ................................................................................... 13-113.1.1 clear traffic-statistic .................................................................. 13-213.1.2 line-rate .................................................................................... 13-313.1.3 mirrored-to ............................................................................... 13-413.1.4 queue-scheduler ...................................................................... 13-513.1.5 queue-scheduler cos-map ....................................................... 13-613.1.6 rate-limit ................................................................................... 13-713.1.7 show qos-info all ...................................................................... 13-913.1.8 show qos-info mirrored-to ...................................................... 13-1013.1.9 show qos-info statistic ........................................................... 13-1113.1.10 show qos-info traffic-copy-to-cpu ........................................ 13-1313.1.11 show qos-info traffic-priority ................................................. 13-1413.1.12 show qos-info traffic-redirect ............................................... 13-1513.1.13 show qos-info traffic-statistic ............................................... 13-1613.1.14 show qos-interface all .......................................................... 13-1713.1.15 show qos-interface line-rate ................................................ 13-1813.1.16 show qos-interface rate-limit ............................................... 13-1813.1.17 show qos-interface statistic ................................................. 13-1913.1.18 show queue-scheduler ........................................................ 13-2013.1.19 show queue-scheduler cos-map ......................................... 13-2013.1.20 storm-control........................................................................ 13-2113.1.21 traffic-copy-to-cpu ................................................................ 13-2113.1.22 traffic-priority ........................................................................ 13-2313.1.23 traffic-redirect ....................................................................... 13-2513.1.24 traffic-statistic ....................................................................... 13-26第14章STP配置命令 ...............................................................................14-114.1 STP配置命令 .................................................................................... 14-114.1.1 show spanning-tree interface .................................................. 14-114.1.2 TCN: 0, RST: 1, Config BPDU: 0spanning-tree ....................... 14-214.1.3 spanning-tree cost ................................................................... 14-314.1.4 spanning-tree forward-time ..................................................... 14-414.1.5 spanning-tree hello-time .......................................................... 14-414.1.6 spanning-tree max-age ........................................................... 14-514.1.7 spanning-tree port-priority ....................................................... 14-614.1.8 spanning-tree mcheck ............................................................. 14-714.1.9 spanning-tree point-to-point .................................................... 14-714.1.10 spanning-tree portfast............................................................ 14-814.1.11 spanning-tree transit-limit ...................................................... 14-914.1.12 spanning-tree priority ............................................................. 14-914.1.13 spanning-tree mode ............................................................ 14-1014.1.14 spanning-tree remote-loop-detect ....................................... 14-1114.1.15 clear spanning-tree .............................................................. 14-11第15章802.1X配置命令...........................................................................15-115.1 域配置命令........................................................................................ 15-115.1.1 aaa ........................................................................................... 15-115.1.2 access-limit .............................................................................. 15-215.1.3 default domain-name enbale ................................................... 15-215.1.4 domain ..................................................................................... 15-315.1.5 show domain ........................................................................... 15-415.1.6 radius host binding .................................................................. 15-515.1.7 state ......................................................................................... 15-5 15.2 RADIUS服务器配置命令................................................................... 15-615.2.1 primary-ip ................................................................................. 15-715.2.2 radius host ............................................................................... 15-715.2.3 realtime-account ...................................................................... 15-815.2.4 second-ip ................................................................................. 15-915.2.5 secret-key .............................................................................. 15-1015.2.6 show radius host ................................................................... 15-1115.2.7 username-format ................................................................... 15-11 15.3 802.1X配置相关命令....................................................................... 15-1215.3.1 dot1x ...................................................................................... 15-1315.3.2 dot1x daemon ........................................................................ 15-1315.3.3 dot1x eap-finish ..................................................................... 15-1515.3.4 dot1x eap-transfer ................................................................. 15-1515.3.5 dot1x max-user ...................................................................... 15-1615.3.6 dot1x port-control .................................................................. 15-1715.3.7 dot1x re-authenticate ............................................................. 15-1915.3.8 dot1x re-authentication .......................................................... 15-1915.3.9 dot1x timeout re-authperiod .................................................. 15-2015.3.10 dot1x user cut ...................................................................... 15-2115.3.11 show dot1x ........................................................................... 15-2215.3.12 show dot1x daemon ............................................................ 15-2215.3.13 show dot1x interface ........................................................... 15-2315.3.14 show dot1x session ............................................................. 15-23。
思科3750标准配置手册

3750交换机标准配置维护手册目录说明 (3)产品特性 (3)配置端口 (4)配置一组端口 (4)配置二层端口 (6)配置端口速率及双工模式 (6)端口描述 (7)配置三层口 (8)监控及维护端口 (10)监控端口和控制器的状态 (10)刷新、重置端口及计数器 (12)关闭和打开端口 (13)配置VLAN (14)理解VLAN (14)可支持的VLAN (15)配置正常范围的VLAN (15)生成、修改以太网VLAN (15)删除VLAN (17)将端口分配给一个VLAN (18)配置VLAN Trunks (19)使用STP实现负载均衡 (22)说明本手册只包括日常使用的有关命令及特性,其它未涉及的命令及特性请参考英文的详细配置手册。
产品特性3750EMI是支持二层、三层功能(EMI)的交换机支持VLAN•到1005 个VLAN•支持VLAN ID从1到4094(IEEE 802.1Q 标准)•支持ISL及IEEE 802.1Q封装安全•支持IOS标准的密码保护•静态MAC地址映射•标准及扩展的访问列表支持,对于路由端口支持入出双向的访问列表,对于二层端口支持入的访问列表•支持基于VLAN的访问列表3层支持(需要多层交换的IOS)•HSRP•IP路由协议o RIP versions 1 and 2o OSPFo IGRP及EIGRPo BGP Version 4监视•交换机LED指示端口状态•SPAN及远端SPAN (RSPAN) 可以监视任何端口或VLAN的流量•内置支持四组的RMON监控功能(历史、统计、告警及事件)•Syslog功能其它功能:支持以下的GBIC模块:•1000BASE-T GBIC: 铜线最长100 m•1000BASE-SX GBIC: 光纤最长1804 feet (550 m)•1000BASE-LX/LH GBIC: 光纤最长32,808 feet (6 miles or 10 km)•1000BASE-ZX GBIC: 光纤最长328,084 feet (62 miles or 100 km) 配置端口配置一组端口当使用interface range命令时有如下的规则:•有效的组范围:o vlan从1 到4094o fastethernet槽位/{first port} - {last port}, 槽位为0o gigabitethernet槽位/{first port} - {last port},槽位为0o port-channel port-channel-number - port-channel-number, port-channel号从1到64•端口号之间需要加入空格,如:interface range fastethernet 0/1 – 5是有效的,而interface range fastethernet 0/1-5是无效的.•interface range命令只能配置已经存在的interface vlan•所有在同一组的端口必须是相同类别的。
思科Catalyst 3750X快速EqualLogic配置系列实施指南说明书

Cisco Catalyst 3750和3750-E交换机混合类型系统说明说明书
Warranty
The ExtremeAccess Platform hardware is covered under Extreme's 1-year warranty policy. For details, please visit: /support/policies. Please note that the warranty is for the hardware only. Software services are bundled and provided as part of the Fabric Connect VPN (FCVPN) order code.
The FCVPN license is also available in two (2) bandwidth tiers to address varying WAN throughput needs:
• Supports both L2 and L3 virtualization
Specific Fabric Connect features supported on the ExtremeAccess Platform with the Fabric Connect VPN software include: L2 Virtual Service Networks (VSNs), Layer 3 Virtual Service Networks, Inter-VSN Routing, IPv4 Shortcuts, and Fabric Extend Tunneling.
Advanced Layer 3 Services
The ExtremeAccess Platform 1400 with Fabric Connect VPN software also supports Layer 3 services. This enables it to address IP routing requirements, in addition to its fabricbased services. Layer 3 services include IPv4 dynamic and static routing, as well as Border Gateway Protocol with support for RIPv1/2, OSPFv2, BGPv4 and VRF.
cisco 3750堆叠配置
在这里再次感谢上海WOLF的李天乐老师和马姐的鼎力帮助~十分感谢他们给于解答~也希望能帮助到大家~1、3750堆叠,如何设置固定的主\从交换机.2、以及如何通过一条命令可以让堆叠中的交换机任意端口同过指示灯的闪烁来确定是堆叠里的几号机或那个端口~主要是客户提出要明眼识别堆叠中的任意机器或端口~3570的堆叠技术,使用专用的堆叠线缆配置时显示的是一台交换机,slot号不同如sw1和sw2堆叠显示的端口信息interface GigabitEthernet0/1~24(SW1)interface GigabitEthernet1/1~24(SW2)interface GigabitEthernet2/1~24(SW3)堆叠最多可以达到9台设备通过StackWise端口连接,只能有一个master交换机。
切记,连接堆叠交换机时候设备处于断电状态。
master选举:1,当前的堆叠master优先2,如果没有当前的master,那么选择具有最高堆叠优先级的成员;3,比较ios软件的版本高低,越是先进的ios的设备越优先;比如EMI的ios就优于SMI的;4,运行时间越长的设备越优先5,mac地址可以使用全局命令switch 5 renumber 4来更改设备在堆叠中的编号(这个就是把5号改为4号了)默认的编号是1更改优先级命令switch 1 priority 2 (1号设备的优先改为2) 默认优先级是1更改优先级步骤:switch 1 priority 2 (1号设备的优先改为2)endreload slot 1 (调用配置变更)show switch 1 (察看1号设备的成员信息)察看当前堆叠状态:show platform stack-manager all 显示所有交换堆叠的信息show switch 显示堆叠交换机的汇总信息show switch 1 显示一号交换机的信息show switch detail 显示堆叠成员明细的信息show switch neighbors 显示堆叠邻居的完整信息show switch stack-ports 显示堆叠交换机的完整端口信息至于第2个问题,我认为是无法实现的,比如8个交换机堆叠,无论如何也不能看交换机外表就能判断哪台是主哪台是从,就好比我们无法看看指示灯就能判断哪个交换机是根桥一样。
思科Catalyst3750交换机规格说明
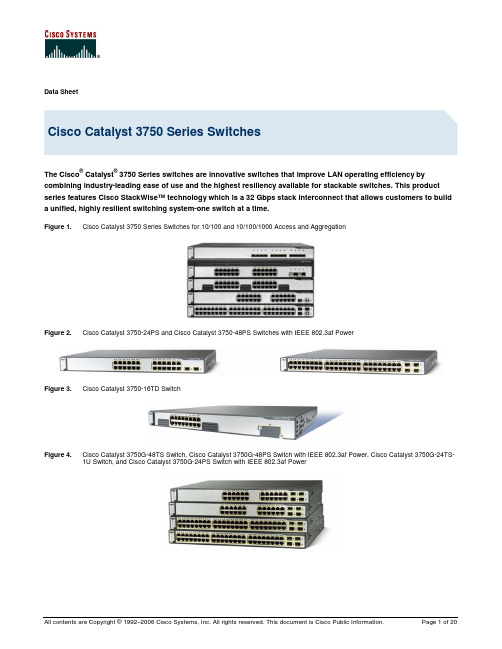
Data SheetCisco Catalyst 3750 Series SwitchesThe Cisco® Catalyst® 3750 Series switches are innovative switches that improve LAN operating efficiency by combining industry-leading ease of use and the highest resiliency available for stackable switches. This product series features Cisco StackWise™ technology which is a 32 Gbps stack interconnect that allows customers to build a unified, highly resilient switching system-one switch at a time.Figure 1. Cisco Catalyst 3750 Series Switches for 10/100 and 10/100/1000 Access and AggregationFigure 2. Cisco Catalyst 3750-24PS and Cisco Catalyst 3750-48PS Switches with IEEE 802.3af PowerFigure 3. Cisco Catalyst 3750-16TD SwitchFigure 4. Cisco Catalyst 3750G-48TS Switch, Cisco Catalyst 3750G-48PS Switch with IEEE 802.3af Power, Cisco Catalyst 3750G-24TS-1U Switch, and Cisco Catalyst 3750G-24PS Switch with IEEE 802.3af PowerPRODUCT OVERVIEWFor midsized organizations and enterprise branch offices, the Cisco Catalyst 3750 Series eases deployment of converged applications and adapts to changing business needs by providing configuration flexibility, support for converged network patterns, and automation of intelligent network-services configurations. In addition, the Cisco Catalyst 3750 Series is optimized for high-density Gigabit Ethernet deployments and includes a diverse range of switches that meet access, aggregation, or small-network backbone-connectivity requirements.CONFIGURATIONSThe Cisco Catalyst 3750 Series includes the following configurations:Cisco Catalyst 3750G-24TS-24 Ethernet 10/100/1000 ports and 4 Small Form-Factor Pluggable (SFP) uplinksCisco Catalyst 3750G-24T-24 Ethernet 10/100/1000 portsCisco Catalyst 3750G-12S-12 Gigabit Ethernet SFP portsCisco Catalyst 3750-48TS-48 Ethernet 10/100 ports and 4 SFP uplinksCisco Catalyst 3750-24TS-24 Ethernet 10/100 ports and 2 SFP uplinksCisco Catalyst 3750-48PS-48 Ethernet 10/100 ports with IEEE 802.3af and Cisco prestandard Power over Ethernet (PoE)and 4 SFP uplinksCisco Catalyst 3750-24PS-24 Ethernet 10/100 ports with IEEE 802.3af and Cisco prestandard PoE and 2 SFP uplinksCisco Catalyst 3750-24FS-24 100BASE-FX Ethernet ports and 2 SFP uplinksCisco Catalyst 3750G-16TD-16 Gigabit Ethernet 10/100/1000 ports and one 10 Gigabit Ethernet XENPAK uplinkCisco Catalyst 3750G-24TS-1U-24 Ethernet 10/100/1000 ports and 4 SFP uplinks, 1-rack unit (RU) heightCisco Catalyst 3750G-24PS-24 Ethernet 10/100/1000 ports with IEEE 802.3af and Cisco prestandard PoE and 4 SFP uplinks Cisco Catalyst 3750G-48TS-48 Ethernet 10/100/1000 ports and 4 SFP uplinksCisco Catalyst 3750G-48PS-48 Ethernet 10/100/1000 ports with IEEE 802.3af and Cisco prestandard PoE and 4 SFP uplinks Cisco Catalyst 3750G-24WS-24 Ethernet 10/100/1000 ports with 2 SFP uplinks and in Integrated Wireless LAN ControllerCisco Catalyst 3750 Series is available with either the IP Base Image or the IP Services Image. The IP Base Image feature set includes advanced quality of service (QoS), rate-limiting, access control lists (ACLs), and basic static and Routing Information Protocol (RIP) routing capability. The IP Services Image provides a richer set of enterprise-class features including advanced hardware-based IP unicast and multicast routing.An additional Advanced IP Services license is also available. This license is required for IPv6 routing (layer 3 switching).Cisco StackWise Technology-A New Standard in Stackable ResiliencyCisco StackWise technology is a premium stacking architecture optimized for Gigabit Ethernet. This technology is designed to respond to additions, deletions, and redeployment while maintaining constant performance. Cisco StackWise technology unites up to nine individual Cisco Catalyst 3750 switches into a single logical unit, using special stack-interconnect cables and stacking software. The stack behaves as a single switching unit that is managed by a master switch elected from one of the member switches. The master switch automatically creates and updates all the switching and optional routing tables. A working stack can accept new members or delete old ones without service interruption.KEY FEATURES AND BENEFITSEase of Use-”Plug-and-Play” ConfigurationA working stack is self-managing and self-configuring. When switches are added or removed, the master switch automatically loads the Cisco IOS® Software version running on the stack to the new switch, loads the global configuration parameters, and updates all the routing tables to reflect changes. Upgrades are applied universally and simultaneously to all members of the stack.The Cisco Catalyst 3750 Series stacks up to nine switches as a single logical unit for a total of 468 Ethernet or PoE 10/100 ports, or 468 Ethernet 10/100/1000 ports or PoE 10/100/1000 ports, or nine 10 Gigabit Ethernet ports. Individual 10/100, 10/100/1000, and 10 Gigabit Ethernet units may be joined in any combination to evolve with network needs.Return on Investment through Lower Operations CostsThe automatic Cisco IOS Software version checking and loading of the global configuration parameters provide the first level of operational time saving. The second level is added during the event of an outage. When you remove a troubled switch from an existing stack of switches, and replace it with another switch, the master switch will recognize this as a maintenance outage and automatically reload the port-level configuration that was on the previous switch without user intervention. This allows IT managers to have local personnel in remote locations perform maintenance tasks instead of sending costly technicians out for a few minutes of work, thus saving thousands of dollars in operational costs.Mix-and-Match Switch Types-Pay as You Expand Your NetworkStacks can be created with any combination of Cisco Catalyst 3750 switches. Customers who need a mixture of 10/100 and 10/100/1000 ports, PoE, and wiring-closet aggregation capability can incrementally develop the access environment, paying only for what they need. When uplink capacity needs to be increased, you can easily upgrade your bandwidth by adding a 10 Gigabit Ethernet version to the stack and upgrade your 1 Gigabit Ethernet links with 10 Gigabit Ethernet on the existing fiber.Integrated Wireless LAN ControllerThe Cisco® Catalyst® 3750G Integrated Wireless LAN Controller integrates wireless LAN controller functions into the Cisco Catalyst 3750G Series Switches and delivers improved operating efficiency and WLAN security, mobility and ease of use for business-critical wireless LANs. The Cisco Catalyst 3750G Integrated Wireless LAN Controller delivers centralized security policies, wireless intrusion prevention system (IPS) capabilities, award-winning RF management, QoS, and Layer 3 fast secure roaming for WLANs. As a core component of the Cisco Unified Wireless Network, the Cisco Catalyst 3750G Integrated Wireless LAN Controller provides the control, security, redundancy, and reliability that network managers need to scale and manage their wireless networks as easily as they scale and manage their traditional wired networks.Availability-Uninterrupted Performance at Layer 2 and Layer 3The Cisco Catalyst 3750 Series increases availability for stackable switches. Each switch can operate both as master controller and forwarding processor. Each switch in the stack can serve as a master, creating a 1:N availability scheme for network control. In the unlikely event of a single unit failure, all other units continue to forward traffic and maintain operation.Smart Multicast-A New Level of Efficiency for Converged NetworksWith Cisco StackWise technology, the Cisco Catalyst 3750 Series offers greater efficiency for multicast applications such as video. Each data packet is put onto the backplane only once, which provides more effective support for more data streams.Superior Quality of Service-Across the Stack and at Wire SpeedThe Cisco Catalyst 3750 Series offers Gigabit Ethernet speed with intelligent services that keep everything flowing smoothly—even at 10 times the normal network speed. Industry-leading mechanisms for marking, classification, and scheduling deliver best-in-class performance for data, voice, and video traffic-all at wire speed.Network Security-Granular Control for the Access EnvironmentThe Cisco Catalyst 3750 Series supports a comprehensive set of security features for connectivity and access control, including ACLs, authentication, port-level security, and identity-based network services with 802.1x and extensions. This set of comprehensive features not only helps prevent external attacks, but defends the network against “man-in-the-middle” attacks, a primary concern in today’s business environment.Single IP Management-Many Switches, One AddressEach Cisco Catalyst 3750 Series stack is managed as a single object and has a single IP address. Single IP management is supported for activities such as fault detection, VLAN creation and modification, network security, and QoS controls.Jumbo Frames-Support for High-Demand ApplicationsThe Cisco Catalyst 3750 Series supports jumbo frames on the 10/100/1000 configurations for advanced data and video applications requiring very large frames.IPv6 SupportThe Catalyst 3750 Series supports IPv6 routing in hardware for maximum performance. As network devices grow and the need for larger addressing and higher security become critical, the Catalyst 3750 Series will be ready to meet the requirement.Standard PoE Support-Graceful Addition of IP CommunicationsThe Cisco Catalyst 3750 and 3750G PoE models support Cisco IP phones and Cisco Aironet® wireless LAN (WLAN) access points, as well as any IEEE 802.3af-compliant end device. The Catalyst 3750 and 3750G 24-port versions can support 24 simultaneous full-powered PoE ports at 15.4 watts (W) for maximum powered device support. The 48-port versions can deliver the necessary power to support 24 ports at 15.4W, 48 ports at 7.7W, or any combination in between.10 Gigabit Ethernet Support-Increase Uplink Bandwidth for Gigabit Ethernet DeploymentsThe Cisco Catalyst 3750 Series allows network managers to incrementally add IEEE 802.3ae compliant 10 Gigabit Ethernet connectivity in their wiring closets or GRID clusters, further facilitating and enhancing Gigabit Ethernet networks. This provides investment protection to customers who wish to use their existing fiber plant, add uplink bandwidth capacity to their switching stacks, and who want to provide higher performance to applications and users.Management OptionsThe Cisco Catalyst 3750 Series (Figure 5) offers both a superior command-line interface (CLI) for detailed configuration and Cisco Network Assistant Software, a Web-based tool for quick configuration based on preset templates. In addition, CiscoWorks supports the Catalyst 3750 Series for network wide management. Table 1 lists the features and benefits of the Catalyst 3750 Series.Figure 5. Cisco Catalyst 3750 Series SwitchesTable 1. Features and BenefitsFeature BenefitEase of Use and Deployment Autoconfiguration of new stack units eliminates reconfiguration.Dynamic Host Configuration Protocol (DHCP) autoconfiguration of multiple switches through a boot server easesswitch deployment.Automatic Cisco IOS Software version checking and updating helps ensure that all stack members have the samesoftware version.Automatic QoS (AutoQoS) simplifies QoS configuration in voice over IP (VoIP) networks by issuing interface andglobal switch commands to detect Cisco IP phones, classify traffic, and help enable egress queue configuration.Master configuration management helps ensure that all switches are automatically upgraded when the master switchreceives a new software version.Autosensing on each non-SFP port detects the speed of the attached device and automatically configures the port for10-, 100-, or 1000-Mbps operation, easing switch deployment in mixed 10, 100, and 1000BASE-T environments.Autonegotiating on all ports automatically selects half- or full-duplex transmission mode to optimize bandwidth.Dynamic Trunking Protocol (DTP) facilitates dynamic trunk configuration across all switch ports.Port Aggregation Protocol (PAgP) automates the creation of Cisco Fast EtherChannel® groups or GigabitEtherChannel groups to link to another switch, router, or server.Link Aggregation Control Protocol (LACP) allows the creation of Ethernet channeling with devices that conform toIEEE 802.3ad. This feature is similar to Cisco EtherChannel technology and PAgP.DHCP Relay allows a DHCP relay agent to broadcast DHCP requests to the network DHCP server.IEEE 802.3z-compliant 1000BASE-SX, 1000BASE-LX/LH, 1000BASE-ZX, 1000BASE-T, and CWDM physical-interface support through a field-replaceable SFP module provides unprecedented flexibility in switch deployment.To help ensure that the switch can be quickly connected to the network and can pass traffic with minimal userintervention, there is a default configuration stored in Flash memory.Automatic media-dependent interface crossover (MDIX) automatically adjusts transmit and receive pairs if an incorrectcable type (cross-over or straight-through) is installed.Availability and ScalabilitySuperior Redundancy for Fault Backup 1:N master redundancy allows each stack member to serve as a master, providing the highest reliability for forwarding. Cisco CrossStack UplinkFast (CSUF) technology provides increased redundancy and network resiliency through fast spanning-tree convergence (less than 2 seconds) across a switch stack with Cisco StackWise technology.Cross-Stack EtherChannel provides the ability to configure Cisco EtherChannel technology across different members of the stack for high resiliency.IEEE 802.1w Rapid Spanning Tree Protocol (RSTP) provides rapid spanning-tree convergence independent of spanning-tree timers and also offers the benefit of distributed processing.Stacked units behave as a single spanning-tree node.Per-VLAN Rapid Spanning Tree (PVRST+) allows rapid spanning-tree reconvergence on a per-VLAN spanning-tree basis, without requiring the implementation of spanning-tree instances.Cisco Hot Standby Router Protocol (HSRP) is supported to create redundant, failsafe routing topologies.Unidirectional Link Detection Protocol (UDLD) and Aggressive UDLD allow unidirectional links caused by incorrect fiber-optic wiring or port faults to be detected and disabled on fiber-optic interfaces.Switch-port autorecovery (errdisable) automatically attempts to reactivate a link that is disabled because of a network error.Cisco RPS 675 Redundant Power System support provides superior power-source redundancy for up to 6 Cisco networking devices, resulting in improved fault tolerance and network uptime.Equal-cost routing for load balancing and redundancy.Bandwidth aggregation up to 16 Gbps through 10 Gigabit EtherChannel technology, 8 Gbps through GigabitFeature BenefitEtherChannel technology, and up to 800 Mbps through Fast EtherChannel technology enhances fault toleranceand offers higher-speed aggregated bandwidth between switches and to routers and individual servers.Uplink bandwidth can be easily upgraded by adding a 10 Gigabit Ethernet version to a wiring-closet stack andreplacing the 1 Gigabit Ethernet uplinks with 10 Gigabit Ethernet without having to change fiber pairs.High-Performance IP Routing Cisco Express Forwarding hardware routing architecture delivers extremely high-performance IP routing.Basic IP unicast routing protocols (static, Routing Information Protocol Version 1 [RIPv1], and RIPv2) are supported forsmall-network routing applications.IPv6 routing support in hardware for maximum performance. The Advanced IP Services License is required.Advanced IP unicast routing protocols (Open Shortest Path First [OSPF], Interior Gateway Routing Protocol [IGRP],Enhanced IGRP [EIGRP], and Border Gateway Protocol Version 4 [BGPv4]) are supported for load balancing andconstructing scalable LANs. The IP Services Image is required.Policy-based routing (PBR) allows superior control by facilitating flow redirection regardless of the routing protocolconfigured. The IP Services Image is required.HSRP provides dynamic load balancing and failover for routed links, up to 32 HSRP links supported per unit or stack.Inter-VLAN IP routing for full Layer 3 routing between 2 or more VLANs.Protocol Independent Multicast (PIM) for IP multicast routing is supported, including PIM sparse mode (PIM-SM), PIMdense mode (PIM-DM), and PIM sparse-dense mode. The IP Services Image is required.Distance Vector Multicast Routing Protocol (DVMRP) tunneling interconnects 2 multicast-enabled networks acrossnonmulticast networks. The IP Services Image is required.Fallback bridging forwards non-IP traffic between 2 or more VLANs. The IP Services Image is required.Routing is possible across the stack.128 switch virtual interfaces (SVIs) are recommended. Maximum of 1000 are supported (depending on the number ofroutes and multicast entries). 468 routed ports are supported per stack.Integrated Cisco IOS Software Features for Bandwidth Optimization Per-port broadcast, multicast, and unicast storm control prevents faulty end stations from degrading overall systems performance.IEEE 802.1d Spanning Tree Protocol support for redundant backbone connections and loop-free networks simplifies network configuration and improves fault tolerance.PVST+ allows for Layer 2 load sharing on redundant links to efficiently use the extra capacity inherent in a redundant design.IEEE 802.1s Multiple Spanning Tree Protocol allows a spanning-tree instance per VLAN, for Layer 2 load sharing on redundant links.Equal-cost routing facilitates Layer 3 load balancing and redundancy across the stack. The IP Services Image is required.Local Proxy Address Resolution Protocol (ARP) works in conjunction with Private VLAN Edge to minimize broadcasts and maximize available bandwidth.VLAN1 minimization allows VLAN1 to be disabled on any individual VLAN trunk link.VLAN Trunking Protocol (VTP) pruning limits bandwidth consumption on VTP trunks by flooding broadcast traffic only on trunk links required to reach the destination devices.Internet Group Management Protocol (IGMP) snooping provides fast client joins and leaves of multicast streams and limits bandwidth-intensive video traffic to only the requestors.Multicast VLAN Registration (MVR) continuously sends multicast streams in a multicast VLAN while isolating the streams from subscriber VLANs for bandwidth and security reasons.Up to 48 EtherChannel groups are supported per stack.Scalable Stacking Cisco StackWise stacking creates a 32 Gbps switch interconnection. Stacking does not require user ports. Up to 9units can be stacked together for a maximum of 468 10/100 ports, 468 10/100/1000 ports, 108 optical aggregationports, nine 10 Gigabit Ethernet ports, or any mix thereof.QoS and ControlAdvanced QoS Cross-stack QoS allows QoS to be configured across the entire stack.802.1p class of service (CoS) and differentiated services code point (DSCP) field classification are provided, usingmarking and reclassification on a per-packet basis by source and destination IP address, source and destination MACaddress, or Layer 4 Transmission Control Protocol/User Datagram Protocol (TCP/UDP) port number.Cisco control-plane and data-plane QoS ACLs on all ports help ensure proper marking on a per-packet basis.4 egress queues per port help enable differentiated management of up to 4 traffic types across the stack.Shaped Round Robin (SRR) scheduling helps ensure differential prioritization of packet flows by intelligently servicingthe ingress queues and egress queues.Weighted Tail Drop (WTD) provides congestion avoidance at the ingress and egress queues before a disruptionoccurs.Strict priority queuing helps ensure that the highest-priority packets are serviced ahead of all other traffic.There is no performance penalty for highly granular QoS capability.Granular Rate Limiting Cisco committed information rate (CIR) function provides bandwidth in increments as low as 8 Kbps.Feature BenefitRate limiting is provided based on source and destination IP address, source and destination MAC address, Layer 4TCP/UDP information, or any combination of these fields, using QoS ACLs (IP ACLs or MAC ACLs), class maps, andpolicy maps.Asynchronous data flows upstream and downstream from the end station or on the uplink are easily managed usingingress policing and egress shaping.Up to 64 aggregate or individual policers are available per Fast Ethernet or Gigabit Ethernet port.Network SecurityNetworkwide Security Features IEEE 802.1x allows dynamic, port-based security, providing user authentication.IEEE 802.1x with VLAN assignment allows a dynamic VLAN assignment for a specific user regardless of wherethe user is connected.IEEE 802.1x with voice VLAN permits an IP phone to access the voice VLAN irrespective of the authorized or unauthorized state of the port.IEEE 802.1x and port security are provided to authenticate the port and manage network access for all MAC addresses, including that of the client.IEEE 802.1x with an ACL assignment allows for specific identity-based security policies regardless of where the user is connected.IEEE 802.1x with guest VLAN allows guests without 802.1x clients to have limited network access on the guest VLAN. Cisco security VLAN ACLs on all VLANs prevent unauthorized data flows from being bridged within VLANs.Cisco standard and extended IP security router ACLs define security policies on routed interfaces for control-plane and data-plane traffic.Port-based ACLs for Layer 2 interfaces allow security policies to be applied on individual switch ports.Secure Shell (SSH) Protocol, Kerberos, and Simple Network Management Protocol Version 3 (SNMPv3) provide network security by encrypting administrator traffic during Telnet and SNMP sessions. SSH Protocol, Kerberos,and the cryptographic version of SNMPv3 require a special cryptographic software image because of U.S. export restrictions.Private VLAN Edge provides security and isolation between switch ports, which helps ensure that users cannot snoop on other users’ traffic.Dynamic ARP Inspection helps ensure user integrity by preventing malicious users from exploiting the insecure nature of the ARP protocol.DHCP Snooping prevents malicious users from spoofing a DHCP server and sending out bogus addresses. This feature is used by other primary security features to prevent a number of other attacks such as ARP poisoning.IP source guard prevents a malicious user from spoofing or taking over another user’s IP address by creating a binding table between client’s IP and MAC address, port, and VLAN.Bidirectional data support on the Switched Port Analyzer (SPAN) port allows Cisco Intrusion Detection System (IDS) to take action when an intruder is detected.TACACS+ and RADIUS authentication facilitate centralized control of the switch and restrict unauthorized users from altering the configuration.MAC address notification allows administrators to be notified of users added to or removed from the network.DHCP Snooping helps administrators with consistent mapping of IP to MAC addresses. This can be used to prevent attacks that attempt to poison the DHCP binding database, and to rate-limit the amount of DHCP traffic that enters a switch port.Port security secures the access to an access or trunk port based on MAC address.After a specific timeframe, the aging feature removes the MAC address from the switch to allow another device to connect to the same port.Trusted boundary provides the ability to trust the QoS priority settings if an IP phone is present and to disable the trust setting in the event that the IP phone is removed, thereby preventing a malicious user from overriding prioritization policies in the network.Multilevel security on console access prevents unauthorized users from altering the switch configuration.The user-selectable address-learning mode simplifies configuration and enhances security.Bridge protocol data unit (BPDU) guard shuts down Spanning Tree PortFast-enabled interfaces when BPDUs are received to avoid accidental topology loops.Spanning Tree Root Guard (STRG) prevents edge devices not in the network administrator’s control from becoming Spanning Tree Protocol root nodes.IGMP filtering provides multicast authentication by filtering out nonsubscribers and limits the number of concurrent multicast streams available per port.Dynamic VLAN assignment is supported through implementation of VLAN Membership Policy Server client capability to provide flexibility in assigning ports to VLANs. Dynamic VLAN facilitates the fast assignment of IP addresses.Cisco CMS Software security wizards ease the deployment of security features for restricting user access to a server as well as to a portion or all of the network.1000 access control entries (ACEs) are supported.ManageabilityFeature BenefitSuperior Manageability Cisco IOS CLI support provides common user interface and command set with all Cisco routers and Cisco Catalystdesktop switches.Switching Database Manager templates for access, routing, and VLAN deployment allow the administrator to easilymaximize memory allocation to the desired features based on deployment-specific requirements.VLAN trunks can be created from any port, using either standards-based 802.1Q tagging or the Cisco Inter-SwitchLink (ISL) VLAN architecture.Up to 1005 VLANs per switch or stack and up to 128 Spanning-Tree instances per switch are supported.4000 VLAN IDs are supported.Voice VLAN simplifies telephony installations by keeping voice traffic on a separate VLAN for easier administrationand troubleshooting.Cisco VLAN Trunking Protocol (VTP) supports dynamic VLANs and dynamic trunk configuration across all switches.Cisco Group Management Protocol server functions allow a switch to serve as the Cisco Group Management Protocolrouter for client switches. The IP Services Image is required.IGMP snooping provides fast client joins and leaves of multicast streams and limits bandwidth-intensive video traffic toonly the requestors.Remote Switch Port Analyzer (RSPAN) allows administrators to remotely monitor ports in a Layer 2 switch networkfrom any other switch in the same network.For enhanced traffic management, monitoring, and analysis, the Embedded Remote Monitoring (RMON) softwareagent supports 4 RMON groups (history, statistics, alarms, and events).Layer 2 traceroute eases troubleshooting by identifying the physical path that a packet takes from source todestination.All 9 RMON groups are supported through a SPAN port, which permits traffic monitoring of a single port, a groupof ports, or the entire stack from a single network analyzer or RMON probe.Domain Name System (DNS) provides IP-address resolution with user-defined device names.Trivial File Transfer Protocol (TFTP) reduces the cost of administering software upgrades by downloading froma centralized location.Network Timing Protocol (NTP) provides an accurate and consistent timestamp to all intranet switches.Multifunction LEDs per port for port status; half-duplex and full-duplex mode; and 10BASE-T, 100BASE-TX, and1000BASE-T indication as well as switch-level status LEDs for system, redundant-power supply, and bandwidthutilization provide a comprehensive and convenient visual management system.SPAN works across all the ports in a stack.Cisco Network Assistant Software Cisco Network Assistant Software provides an easy-to-use, Web-based management interface through a standard Web browser.Simplified port configuration via Cisco Smartports.Cisco AVVID (Architecture for Voice, Video and Integrated Data) wizards need just a few user inputs to automatically configure the switch to optimally manage different types of traffic: voice, video, multicast, and high-priority data.A security wizard is provided to restrict unauthorized access to applications, servers, and networks.Cisco Network Assistant Software allows management of up to 16 interconnected Cisco Catalyst 3750, Catalyst 3550, Catalyst 3500 XL, Catalyst 2950, Catalyst 2950 LRE, Catalyst 2900 XL, Catalyst 2900 LRE XL, and Catalyst 1900 series switches through a single IP address, without the limitation of being physically located in the same wiring closet. Full backward compatibility helps ensure any combination of these switches can be managed with a Cisco Catalyst 3750 Series Switch.The cluster software upgrade feature allows 1-click software upgrade across an entire cluster of Cisco Catalyst 3750, Catalyst 3550, Catalyst 2950, Catalyst 2950 LRE, Catalyst 3500 XL, Catalyst 2900 XL, Catalyst 2900 LRE XL, and Catalyst 1900 series switches. Configuration cloning facilitates rapid deployment of networks. The master switch automatically upgrades each stack.Cisco Network Assistant Software has been extended to include multilayer feature configurations such as routing protocols, ACLs, and QoS parameters.Cisco clustering now supports member discovery and cluster creation across a single Cisco Catalyst 3750 Series switch routed hop, allowing the entire LAN to be managed through a single Web interface (and with a single IP address, if desired).Cisco Network Assistant Software Guide Mode assists in the configuration of powerful advanced features by providing step-by-step instructions.Cisco Network Assistant Software provides enhanced online help for context-sensitive assistance.The easy-to-use graphical interface provides both a topology map and front-panel view of the cluster and stacks.Multidevice and multiport configuration capabilities allow administrators to save time by configuring features across multiple switches and ports simultaneously.Web-based management for a Cisco Aironet wireless access point is launched by clicking the relevant icon in the topology map.The user-personalized interface allows modification of polling intervals, table views, and other settings within Cisco CMS Software and retains these settings.Alarm notification provides automated e-mail notification of network errors and alarm thresholds.。
3750交换机配置手册

3750交换机(EMI)简明配置维护手册3750交换机简明配置维护手册天图科技2004-12-103750交换机(EMI)简明配置维护手册目录说明 (3)产品特性 (3)配置端口 (6)配置一组端口 (6)配置二层端口 (8)配置端口速率及双工模式 (8)端口描述 (9)配置三层口 (10)监控及维护端口 (12)监控端口和控制器的状态 (12)刷新、重置端口及计数器 (14)关闭和打开端口 (15)配置VLAN (16)理解VLAN (16)可支持的VLAN (17)配置正常范围的VLAN (17)生成、修改以太网VLAN (18)删除VLAN (19)将端口分配给一个VLAN (20)配置VLAN Trunks (21)使用STP实现负载均衡 (24)3750交换机(EMI)简明配置维护手册说明本手册只包括日常使用的有关命令及特性产品特性Cisco Catalyst 3750系列交换机产品概述思科新推出的Cisco Catalyst 3750系列交换机是一个创新的产品系列,它结合业界领先的易用性和最高的冗余性,里程碑地提升了堆叠式交换机在局域网中的工作效率。
这个新的产品系列采用了最新的思科StackWise技术,不但实现高达32Gbps的堆叠互联,还从物理上到逻辑上使若干独立交换机在堆叠时集成在一起,便于用户建立一个统一、高度灵活的交换系统--就好像是一整台交换机一样。
这代表了堆叠式交换机新的工业技术水平和标准。
对于中型组织和企业分支机构而言,Cisco Catalyst 3750系列可以通过提供配置灵活性,支持融合网络模式,已经自动配置智能化网络服务,降低融合应用的部署难度,适应不断变化的业务需求。
此外,Cisco Catalyst 3750系列针对高密度千兆位以太网部署进行了专门的优化,其中包含多种可以满足接入、汇聚或者小型网络骨干网连接需求的交换机。
图1 Cisco Catalyst 3750系列交换机配置●Cisco Catalyst 3750G-24TS--24个以太网10/100/1000端口和4条SFP上行链路●Cisco Catalyst 3750G-24T--24个以太网10/100/1000端口●Cisco Catalyst 3750-48TS--48个以太网10/100端口和4条SFP上行链路●Cisco Catalyst 3750-24TS--24个以太网10/100端口和2条小型可插拔(SFP)上行链路3750交换机(EMI)简明配置维护手册Cisco Catalyst 3750系列可以使用标准多层软件镜像(SMI)或者增强多层软件镜像(EMI)。
Cisco 3750交换机VLan配置
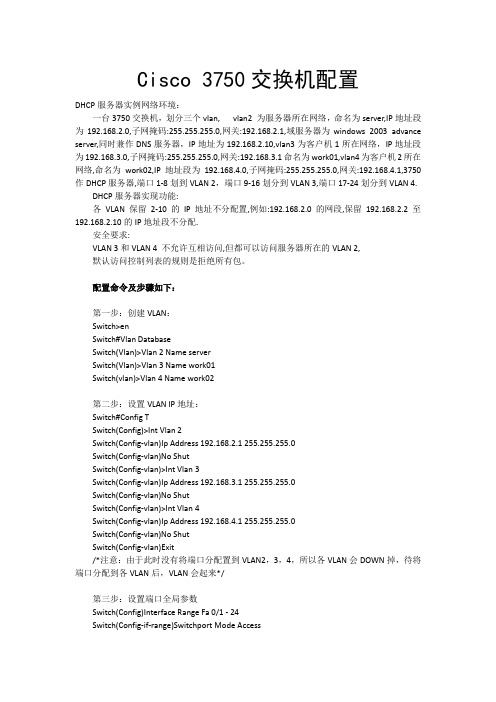
Cisco 3750交换机配置DHCP服务器实例网络环境:一台3750交换机,划分三个vlan, vlan2 为服务器所在网络,命名为server,IP地址段为192.168.2.0,子网掩码:255.255.255.0,网关:192.168.2.1,域服务器为windows 2003 advance server,同时兼作DNS服务器,IP地址为192.168.2.10,vlan3为客户机1所在网络,IP地址段为192.168.3.0,子网掩码:255.255.255.0,网关:192.168.3.1命名为work01,vlan4为客户机2所在网络,命名为work02,IP地址段为192.168.4.0,子网掩码:255.255.255.0,网关:192.168.4.1,3750作DHCP服务器,端口1-8划到VLAN 2,端口9-16划分到VLAN 3,端口17-24划分到VLAN 4.DHCP服务器实现功能:各VLAN保留2-10的IP地址不分配置,例如:192.168.2.0的网段,保留192.168.2.2至192.168.2.10的IP地址段不分配.安全要求:VLAN 3和VLAN 4 不允许互相访问,但都可以访问服务器所在的VLAN 2,默认访问控制列表的规则是拒绝所有包。
配置命令及步骤如下:第一步:创建VLAN:Switch>enSwitch#Vlan DatabaseSwitch(Vlan)>Vlan 2 Name serverSwitch(Vlan)>Vlan 3 Name work01Switch(vlan)>Vlan 4 Name work02第二步:设置VLAN IP地址:Switch#Config TSwitch(Config)>Int Vlan 2Switch(Config-vlan)Ip Address 192.168.2.1 255.255.255.0Switch(Config-vlan)No ShutSwitch(Config-vlan)>Int Vlan 3Switch(Config-vlan)Ip Address 192.168.3.1 255.255.255.0Switch(Config-vlan)No ShutSwitch(Config-vlan)>Int Vlan 4Switch(Config-vlan)Ip Address 192.168.4.1 255.255.255.0Switch(Config-vlan)No ShutSwitch(Config-vlan)Exit/*注意:由于此时没有将端口分配置到VLAN2,3,4,所以各VLAN会DOWN掉,待将端口分配到各VLAN后,VLAN会起来*/第三步:设置端口全局参数Switch(Config)Interface Range Fa 0/1 - 24Switch(Config-if-range)Switchport Mode AccessSwitch(Config-if-range)Spanning-tree Portfast第四步:将端口添加到VLAN2,3,4中/*将端口1-8添加到VLAN 2*/Switch(Config)Interface Range Fa 0/1 - 8Switch(Config-if-range)Switchport Access Vlan 2/*将端口9-16添加到VLAN 3*/Switch(Config)Interface Range Fa 0/9 - 16Switch(Config-if-range)Switchport Access Vlan 3/*将端口17-24添加到VLAN 4*/Switch(Config)Interface Range Fa 0/17 - 24Switch(Config-if-range)Switchport Access Vlan 4Switch(Config-if-range)Exit/*经过这一步后,各VLAN会起来*/第五步:配置3750作为DHCP服务器/*VLAN 2可用地址池和相应参数的配置,有几个VLAN要设几个地址池*/ Switch(Config)Ip Dhcp Pool Test01/*设置可分配的子网*/Switch(Config-pool)Network 192.168.2.0 255.255.255.0/*设置DNS服务器*/Switch(Config-pool)Dns-server 192.168.2.10/*设置该子网的网关*/Switch(Config-pool)Default-router 192.168.2.1/*配置VLAN 3所用的地址池和相应参数*/Switch(Config)Ip Dhcp Pool Test02Switch(Config-pool)Network 192.168.3.0 255.255.255.0Switch(Config-pool)Dns-server 192.168.2.10Switch(Config-pool)Default-router 192.168.3.1/*配置VLAN 4所用的地址池和相应参数*/Switch(Config)Ip Dhcp Pool Test03Switch(Config-pool)Network 192.168.4.0 255.255.255.0Switch(Config-pool)Dns-server 192.168.2.10Switch(Config-pool)Default-router 192.168.4.1第六步:设置DHCP保留不分配的地址Switch(Config)Ip Dhcp Excluded-address 192.168.2.2 192.168.2.10Switch(Config)Ip Dhcp Excluded-address 192.168.3.2 192.168.3.10Switch(Config)Ip Dhcp Excluded-address 192.168.4.2 192.168.4.10第七步:启用路由/*路由启用后,各VLAN间主机可互相访问*/Switch(Config)Ip Routing第八步:配置访问控制列表Switch(Config)access-list 103 permit ip 192.168.2.0 0.0.0.255 192.168.3.0 0.0.0.255 Switch(Config)access-list 103 permit ip 192.168.3.0 0.0.0.255 192.168.2.0 0.0.0.255 Switch(Config)access-list 103 permit udp any any eq bootpcSwitch(Config)access-list 103 permit udp any any eq tftpSwitch(Config)access-list 103 permit udp any eq bootpc anySwitch(Config)access-list 103 permit udp any eq tftp anySwitch(Config)access-list 104 permit ip 192.168.2.0 0.0.0.255 192.168.4.0 0.0.0.255 Switch(Config)access-list 104 permit ip 192.168.4.0 0.0.0.255 192.168.2.0 0.0.0.255 Switch(Config)access-list 104 permit udp any eq tftp anySwitch(Config)access-list 104 permit udp any eq bootpc anySwitch(Config)access-list 104 permit udp any eq bootpc anySwitch(Config)access-list 104 permit udp any eq tftp any第九步:应用访问控制列表/*将访问控制列表应用到VLAN 3和VLAN 4,VLAN 2不需要*/Switch(Config)Int Vlan 3Switch(Config-vlan)ip access-group 103 outSwitch(Config-vlan)Int Vlan 4Switch(Config-vlan)ip access-group 104 out第十步:结束并保存配置Switch(Config-vlan)EndSwitch#write memory。
思科3750交换机堆叠技术配置向导
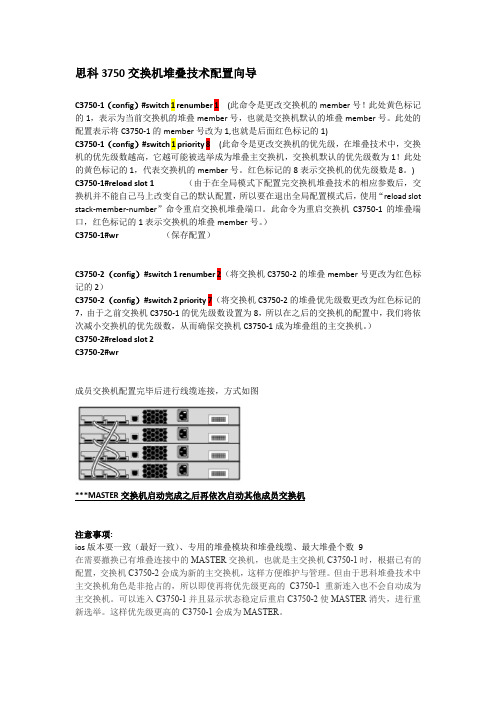
思科3750交换机堆叠技术配置向导C3750-1(config)#switch 1 renumber 1(此命令是更改交换机的member号!此处黄色标记的1,表示为当前交换机的堆叠member号,也就是交换机默认的堆叠member号。
此处的配置表示将C3750-1的member号改为1,也就是后面红色标记的1)C3750-1(config)#switch 1 priority 8 (此命令是更改交换机的优先级,在堆叠技术中,交换机的优先级数越高,它越可能被选举成为堆叠主交换机,交换机默认的优先级数为1!此处的黄色标记的1,代表交换机的member号。
红色标记的8表示交换机的优先级数是8。
) C3750-1#reload slot 1(由于在全局模式下配置完交换机堆叠技术的相应参数后,交换机并不能自己马上改变自己的默认配置,所以要在退出全局配置模式后,使用“reload slot stack-member-number”命令重启交换机堆叠端口。
此命令为重启交换机C3750-1的堆叠端口,红色标记的1表示交换机的堆叠member号。
)C3750-1#wr (保存配置)C3750-2(config)#switch 1 renumber 2(将交换机C3750-2的堆叠member号更改为红色标记的2)C3750-2(config)#switch 2 priority 7(将交换机C3750-2的堆叠优先级数更改为红色标记的7,由于之前交换机C3750-1的优先级数设置为8,所以在之后的交换机的配置中,我们将依次减小交换机的优先级数,从而确保交换机C3750-1成为堆叠组的主交换机。
)C3750-2#reload slot 2C3750-2#wr成员交换机配置完毕后进行线缆连接,方式如图***MASTER交换机启动完成之后再依次启动其他成员交换机注意事项:ios版本要一致(最好一致)、专用的堆叠模块和堆叠线缆、最大堆叠个数9在需要撤换已有堆叠连接中的MASTER交换机,也就是主交换机C3750-1时,根据已有的配置,交换机C3750-2会成为新的主交换机,这样方便维护与管理。
3750x交换机堆叠
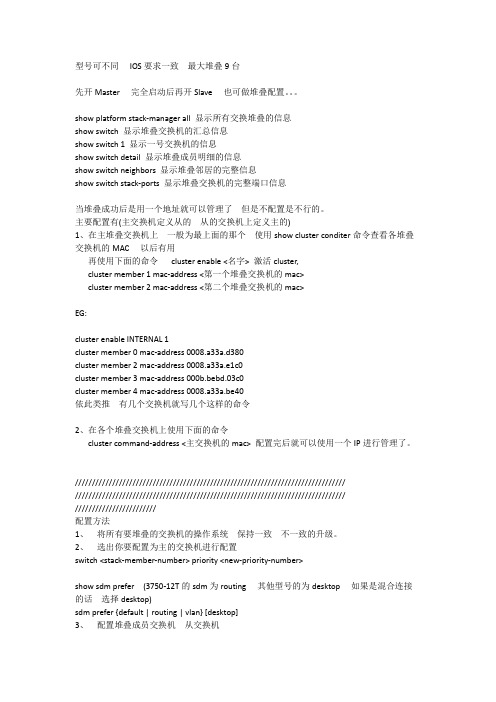
IOS9台先开Master Slaveshow platform stack-manager all 显示所有交换堆叠的信息show switch 显示堆叠交换机的汇总信息show switch 1 显示一号交换机的信息show switch detail 显示堆叠成员明细的信息show switch neighbors 显示堆叠邻居的完整信息show switch stack-ports 显示堆叠交换机的完整端口信息主要配置有()1show cluster conditer命令查看各堆叠交换机的MACcluster enable <名字> 激活cluster,cluster member 1 mac-address <第一个堆叠交换机的mac>cluster member 2 mac-address <第二个堆叠交换机的mac>EG:cluster enable INTERNAL 1cluster member 0 mac-address 0008.a33a.d380cluster member 2 mac-address 0008.a33a.e1c0cluster member 3 mac-address 000b.bebd.03c0cluster member 4 mac-address 0008.a33a.be40这样的命令2cluster command-address <主交换机的mac> 配置完后就可以使用一个IP进行管理了。
////////////////////////////////////////////////////////////////////////////////////////////////////////////////////////////////////////////////////////////////////////////////////////1、2、选出你要配置为主的交换机进行配置switch <stack-member-number> priority <new-priority-number>show sdm prefer (3750-12T的sdm为routing desktopdesktop)sdm prefer {default | routing | vlan} [desktop]3、堆叠成员号码1到9之间选择show switch 一般从2往后排switch stack-member-number provision type show ver 4、copy running-config startup-config //wr5、启6、按照第5交换机一ws-c3750g-12t交换机二ws-c3750g-24ts交换机二ws-c3750g-48ts交换机一做为主交换switch 1 provision ws-c3750g-12t //指定成员交换机型号switch 2 provision ws-c3750g-24tsswitch 3 provision ws-c3750g-48tsswitch 1 priority 15 //指定成员交换机优先级switch 2 priority 14switch 3 priority 13sdm prefer default desktopcopy running-config startup-config (保存配置在这里不要用wr)。
3750配置
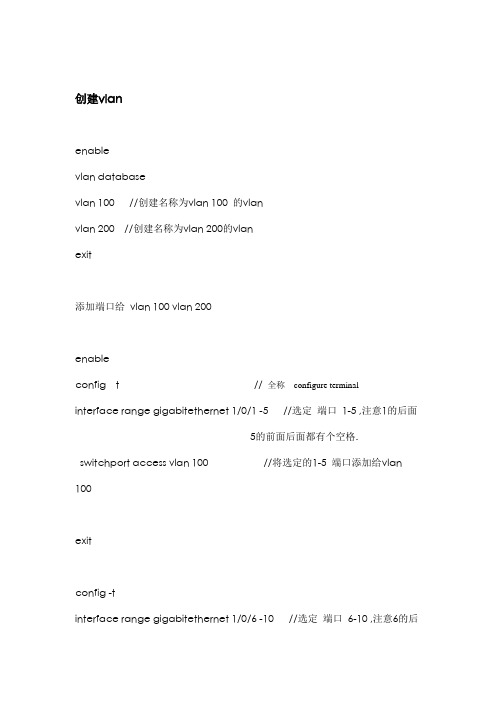
创建vlanenablevlan databasevlan 100 //创建名称为vlan 100 的vlanvlan 200 //创建名称为vlan 200的vlanexit添加端口给vlan 100 vlan 200enableconfig t //全称configure terminalinterface range gigabitethernet 1/0/1 -5 //选定端口1-5 ,注意1的后面5的前面后面都有个空格. switchport access vlan 100 //将选定的1-5 端口添加给vlan 100exitconfig -tinterface range gigabitethernet 1/0/6 -10 //选定端口6-10 ,注意6的后面10的前面后面都有个空格. switchport access vlan 100 //将选定的6-10 端口添加给vlan 200保存配置:write //保存配置好的VLAN给vlan 分配IP 地址:(config ) : interface vlan 100(config -if ): ip address 192.168.0.1 255.255.255.0 // 给vlan 100设定的IP地址.(config-if):no shut down //激活端口(config ) : interface vlan 200(config -if ): ip address 192.168.1.1 255.255.255.0 //给vlan 200设定的IP 地址.(config-if):no shutdown //激活端口给vlan 分配dhcp地址:(config ) : interface vlan 100(config -if ): ip address dhcp 255.255.255.0 // 给vlan 100设定的dhcp 地址.(config-if):no shut down //激活端口(config) :no ip address //当前vlan 无IP 地址删除VLANenableconfig tno vlan (lan号)备注:如果端口1-5 属于vlan 100 .如果将vlan 100 删除.则在默认的vlan 中是看不到端口1-5 的.我们需要将端口1-5 添加到默认的vlan 中才能显示出来.方法同上.设置主机名:EnableConfig thostname cisco配置密码:EnableConfig tpassword cisco //cisco 是密码去除密码:EnableNo password配置enable密码EanbleConfig tEnable pwssword cisco //cisco 是密码端口绑定:eanbleconfig terminalinterface range gigabitethernet 1/0/17 -24 //端口1、2 channel-group 1 mo active //将端口1、2添加到同一个组里这个组名字是1no shutdownendwr删除端口绑定:config terminalinterface range gigabitethernet 1/0/1 - 2 //进入端口1、2no channel-group 1 mo acno shutdownendwr网段跨路由设置:show ip route //查看路由ip routingswitch: ;ROM状态,路由器是rommon>hostname> ;用户模式hostname# ;特权模式hostname(config)# ;全局配置模式hostname(config-if)# ;接口状态switch>enable ;进入特权模式switch#config terminal ;进入全局配置模式switch(config)#hostname ;设置交换机的主机名switch(config)#enable secret xxx ;设置特权加密口令switch(config)#enable password xxa ;设置特权非密口令switch(config)#line console 0 ;进入控制台口switch(config-line)#line vty 0 4 ;进入虚拟终端switch(config-line)#login ;允许登录switch(config-line)#password xx ;设置登录口令xxswitch#exit ;返回命令交换机VLAN设置:switch#vlan database ;进入VLAN设置switch(vlan)#vlan 2 ;建VLAN 2switch(vlan)#no vlan 2 ;删vlan 2switch(config)#int f0/1 ;进入端口1switch(config-if)#switchport access vlan 2 ;当前端口加入vlan 2switch(config-if)#switchport mode trunk ;设置为干线switch(config-if)#switchport trunk allowed vlan 1,2 ;设置允许的vlanswitch(config-if)#switchport trunk encap dot1q ;设置vlan 中继switch(config)#vtp domain ;设置发vtp域名switch(config)#vtp password ;设置发vtp密码switch(config)#vtp mode server ;设置发vtp模式switch(config)#vtp mode client ;设置发vtp模式交换机设置IP地址:switch(config)#interface vlan 1 ;进入vlan 1 switch(config-if)#ip address ;设置IP地址switch(config)#ip default-gateway ;设置默认网关switch#dir flash: ;查看闪存交换机显示命令:switch#write ;保存配置信息switch#show vtp ;查看vtp配置信息switch#show run ;查看当前配置信息switch#show vlan ;查看vlan配置信息switch#show interface ;查看端口信息switch#show int f0/0 ;查看指定端口信息2. 路由器支持的命令:路由器显示命令:router#show run ;显示配置信息router#show interface ;显示接口信息router#show ip route ;显示路由信息router#show cdp nei ;显示邻居信息router#reload ;重新起动路由器口令设置:router>enable ;进入特权模式router#config terminal ;进入全局配置模式router(config)#hostname ;设置交换机的主机名router(config)#enable secret xxx ;设置特权加密口令router(config)#enable password xxb ;设置特权非密口令router(config)#line console 0 ;进入控制台口router(config-line)#line vty 0 4 ;进入虚拟终端router(config-line)#login ;要求口令验证router(config-line)#password xx ;设置登录口令xxrouter(config)#(Ctrl+z) ;返回特权模式router#exit ;返回命令路由器配置:router(config)#int s0/0 ;进入Serail接口router(config-if)#no shutdown ;激活当前接口router(config-if)#clock rate 64000 ;设置同步时钟router(config-if)#ip address ;设置IP地址router(config-if)#ip address second ;设置第二个IP router(config-if)#int f0/0.1 ;进入子接口router(config-subif.1)#ip address ;设置子接口IProuter(config-subif.1)#encapsulation dot1q ;绑定vlan中继协议router(config)#config-register 0×2142 ;跳过配置文件router(config)#config-register 0×2102 ;正常使用配置文件router#reload ;重新引导路由器文件操作:router#copy running-config startup-config ;保存配置router#copy running-config tftp ;保存配置到tftprouter#copy startup-config tftp ;开机配置存到tftp router#copy tftp flash: ;下传文件到flashrouter#copy tftp startup-config;下载配置文件ROM状态:Ctrl+Break ;进入ROM监控状态rommon>confreg 0×2142 ;跳过配置文件rommon>confreg 0×2102 ;恢复配置文件rommon>reset ;重新引导rommon>copy xmodem: flash: ;从console传输文件rommon>IP_ADDRESS=10.65.1.2 ;设置路由器IPrommon>IP_SUBNET_MASK=255.255.0.0 ;设置路由器掩码rommon>TFTP_SERVER=10.65.1.1 ;指定TFTP服务器IP rommon>TFTP_FILE=c2600.bin ;指定下载的文件rommon>tftpdnld ;从tftp下载rommon>dir flash: ;查看闪存内容rommon>boot ;引导IOS静态路由:ip route;命令格式router(config)#ip route 2.0.0.0 255.0.0.0 1.1.1.2 ;静态路由举例router(config)#ip route 0.0.0.0 0.0.0.0 1.1.1.2 ;默认路由举例动态路由:router(co。
思科3750交换机中文配置手册
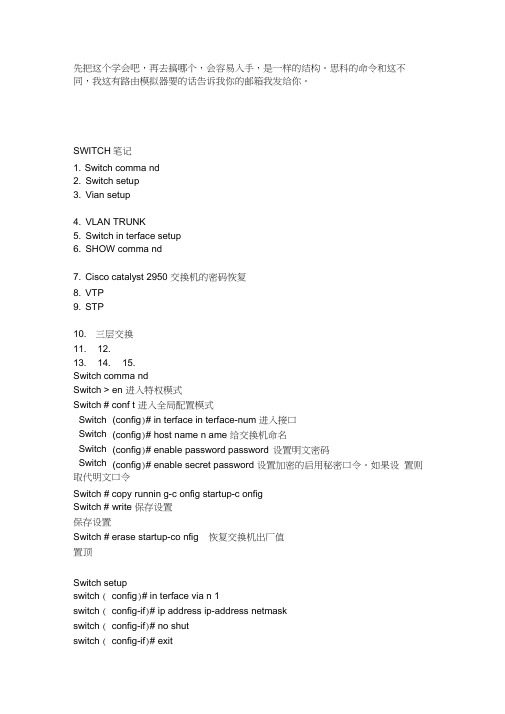
先把这个学会吧,再去搞哪个,会容易入手,是一样的结构。
思科的命令和这不 同,我这有路由模拟器要的话告诉我你的邮箱我发给你。
SWITCH 笔记1. Switch comma nd2. Switch setup3. Vian setup4. VLAN TRUNK5. Switch in terface setup6. SHOW comma nd7. Cisco catalyst 2950 交换机的密码恢复8. VTP9. STP10. 三层交换11. 12.13. 14. 15.Switch comma ndSwitch > en 进入特权模式Switch # conf t 进入全局配置模式(config )# in terface in terface-num 进入接口(config )# host name n ame 给交换机命名(config )# enable password password 设置明文密码(config )# enable secret password 设置加密的启用秘密口令。
如果设置则取代明文口令Switch # copy runnin g-c onfig startup-c onfigSwitch # write 保存设置保存设置Switch # erase startup-co nfig 恢复交换机出厂值置顶Switch setupswitch ( config )# in terface via n 1switch ( config-if )# ip address ip-address netmaskswitch ( config-if )# no shutswitch ( config-if )# exit Switch Switch Switch Switchswitch ( config)# ip default-gateway ip-addressswitch (config ) # ip domain-name domain-nameswitch (config ) # ip name-server IP-address 交换机上设置远程访问,用于交换机管理配置IP地址开起端口退出设置缺省网关域名服务(自身用)域名服务地址(自身用)文档顶端Vian setupSwitch # via n databaseswitch ( vian) # vian vian-id name vian-nameswitch ( vian) # exitswitch # config teriminai 创建VLAN (全局配置模式下)仓U建vian推出启用switch # config tswitch (config ) # vian vian-idswitch (con fig-via n ) # n ame via n-n ameswitch (config-vian ) # exit 创建VLAN (VLAN 数据库中)命名推出生效Switch # config teriminaiswitch (config ) # in terface in terface-numswitch (config-if) # switchport mode accessswitch (config-if) # switchport access vian vian-idswitch (config-if) # endswitch # show runnin g-c onfig in terface in ter-idswitch # show in terface in ter-id switch port 给VLAN 添加端口进入要分配的端口定义二层端口把端口分配给某一VLAN退出验证端口的VLAN号验证端口的管理模式和VLAN情况switch#c onfig terimi naiswitch (config ) #interface range fO/1 - 10switch (config-if) #switchport access vian vian-idswitch (config-if) #endswitch#show via n briefswitch#show vlan vian-id 添加多个端口到一个VLAN选择多个端口加入VLAN查看验证VLAN查看指定VLANSwitch # config tswitch (config ) # no vian vian-idswitch (config ) # end 删除VLANswitch ( config)# ip http sever 启用HTTP 访问文档顶端VLAN TRUNKswitch ( config)# in terface in terface mod/portswitch ( config-if)# switchport mode trunkswitch (config-if)# switchport trunk encapsulation {isl|dotlq|} 酉己置VLAN 中继线switch ( config)# in terface in terface-idswitch ( config-if)# switchport mode dynamic desirable/auto 进入端口设置设置接口为中继动态协商模式,desirable或autoswitch(config-if)#switchport trunk allowed vlan none 阻止所有VLAN 通过switch(config-if)#switchport trunk allowed vlan remove vlan-listswitch (config-if)# switchport trunk allowed vlan add vlan-list 从TRUNK 中删除VLAN,阻止通过在TRUNK中添加VLAN,允许通过文档顶端Switch in terface setupSwitch # config tSwitch ( config)# in terface in ter-idswitch ( config-if)# duplex {auto|full|half}switch (config-if)# speed{10|100|auto} 交换机上设置端口速度switch ( config-if)# description description-string 交换机的端口描述文档顶端SHOW comma ndSwitch # show versi onSwitch # show runnin g-c onfig 列出当前运行配置信息Switch # show startup-c onfigSwitch # show in terface in terface-num 产看借口信息Switch # show cdp n eighborswitch # show cdp n eighbor detailswitch # show cdp trafficswitch # show cdp in terface in terface-numswitch # show cdp entry 显示直连的相邻设备及其详细信息显示IP地址和IOS版本和类型,并且包括show cdp neighbor命令显示的所有信息显示设备发送和接收的CDP分组数以及任何出错信息显示接口的CDP配置信息显示所有入口项的细节Switch # show in terface vlan 1 查看交换机有关IP协议的配置信息Switch # show mac-address-table aging-time 查看MAC 地址表超时时间Switch # show mac-address-table 查看整个MAC 地址表Switch # show in terface f0/0 switchport 查看端口模式Switch # show vlan brief 查看VLAN 信息Switch # show vtp status 查看VTP 状态信息Switch # show spa nnin g-treee 查看生成树信息Switch # show spanning-treee vlan vlan-id detail 查看某个VLAN 的生成书详细信息Switch # show ip cef 产看FIB 表Switch # show adjace ncy detail 产看邻接关系表文档顶端Cisco catalyst 2950 交换机的密码恢复1. 拔下交换机的电源线。
Cisco Catalyst 3750 v2系列交换机 说明书
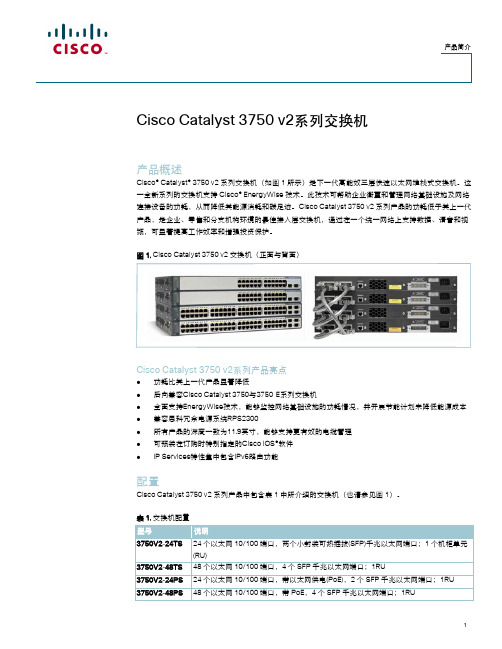
关。 z 带有语音VLAN功能的IEEE 802.1x支持使用IP电话接入语音VLAN,而不考虑端口是否经过授权。 z IEEE 802.1x和端口安全性用于对端口进行认证,并管理所有MAC地址的网络访问情况,包括客户
增强的安全性
凭借 Cisco Catalyst 3750 v2 系列产品提供的广泛安全特性,如访问控制列表(ACL)、身份认证、端口级 安全性、基于身份的网络服务(IBNS)、以及 IEEE 802.1x 和相关扩展等,企业可保护重要信息,防止未授 权人员接入网络,确保私密性及维持不间断运行。这些安全特性包括:
如需了解有关 Cisco EnergyWise 的更多信息,请访问 /go/energywise。
以太网供电
Cisco Catalyst 3750 v2 系列可为包含思科 IP 电话、Cisco Aironet®无线局域网(WLAN)接入点或者任何 符合 IEEE 802.3af 标准的终端设备的部署,提供更低总体拥有成本(TCO)以太网供电(TCO)免除了为每个 PoE 设备提供墙壁电源插座的需要,并大幅减少了 IP 电话和 WLAN 部署所需的额外电缆成本。Cisco Catalyst 3750 v2 系列带 PoE 的 24 端口交换机能够同时在所有 24 个端口上支持 Class 3 PoE 或 15.4W 的全功率 PoE 端口。凭借 Cisco Catalyst 智能电源管理,Cisco Catalyst 3750 v2 系列带 PoE 的 48 端口 配置能够提供支持 24 个 15.4W 端口、48 个 7.7W 端口或其任意组合所需的必要功率。Cisco Catalyst 3750 v2 系列交换机结合了旨在避免内部电源故障的思科冗余电源系统 2300 (RPS 2300)、以及旨在防御 电源中断的不间断电源(UPS)系统,确保能够为融合的语音和数据网络带来最大的电源可用性。
CISCO3750交换机配置导出导入设置教程
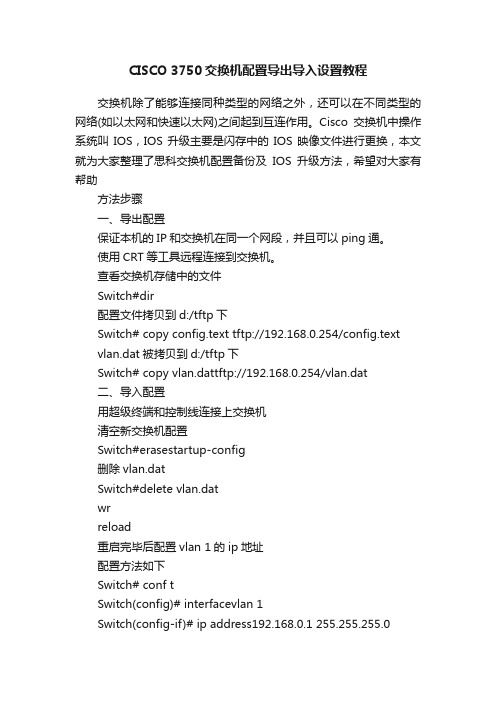
CISCO 3750交换机配置导出导入设置教程交换机除了能够连接同种类型的网络之外,还可以在不同类型的网络(如以太网和快速以太网)之间起到互连作用。
Cisco交换机中操作系统叫IOS,IOS升级主要是闪存中的IOS映像文件进行更换,本文就为大家整理了思科交换机配置备份及IOS升级方法,希望对大家有帮助方法步骤一、导出配置保证本机的IP和交换机在同一个网段,并且可以ping通。
使用CRT等工具远程连接到交换机。
查看交换机存储中的文件Switch#dir配置文件拷贝到d:/tftp下Switch# copy config.text tftp://192.168.0.254/config.textvlan.dat被拷贝到d:/tftp下Switch# copy vlan.dattftp://192.168.0.254/vlan.dat二、导入配置用超级终端和控制线连接上交换机清空新交换机配置Switch#erasestartup-config删除vlan.datSwitch#delete vlan.datwrreload重启完毕后配置vlan 1的ip地址配置方法如下Switch# conf tSwitch(config)# interfacevlan 1Switch(config-if)# ip address192.168.0.1 255.255.255.0Switch(config-if)# noshutdownSwitch(config-if)# exit然后用网线把交换机和电脑连接起来ping是否通Switch#ping 192.168.0.254如果能ping通则可以开始导入配置Switch#copytftp://192.168.0.254/vlan.dat flash:Switch#copytftp://192.168.0.254/config.textrunning-config 保存配置Switch# wr重启下Switch# reload如果需要对交换机系统进行升级则可以按如下操作:1.备份交换机IOS文件:在特权模式下拷贝IOS文件到tftp主机上。
思科3750超级交换机之堆叠技术
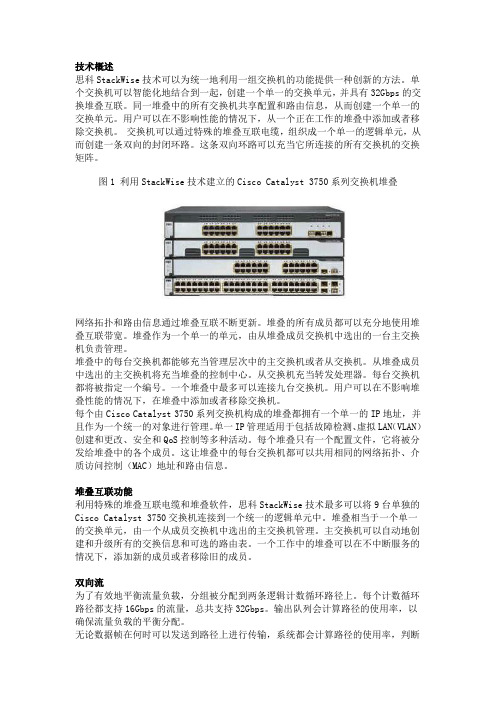
技术概述思科StackWise技术可以为统一地利用一组交换机的功能提供一种创新的方法。
单个交换机可以智能化地结合到一起,创建一个单一的交换单元,并具有32Gbps的交换堆叠互联。
同一堆叠中的所有交换机共享配置和路由信息,从而创建一个单一的交换单元。
用户可以在不影响性能的情况下,从一个正在工作的堆叠中添加或者移除交换机。
交换机可以通过特殊的堆叠互联电缆,组织成一个单一的逻辑单元,从而创建一条双向的封闭环路。
这条双向环路可以充当它所连接的所有交换机的交换矩阵。
图1 利用StackWise技术建立的Cisco Catalyst 3750系列交换机堆叠网络拓扑和路由信息通过堆叠互联不断更新。
堆叠的所有成员都可以充分地使用堆叠互联带宽。
堆叠作为一个单一的单元,由从堆叠成员交换机中选出的一台主交换机负责管理。
堆叠中的每台交换机都能够充当管理层次中的主交换机或者从交换机。
从堆叠成员中选出的主交换机将充当堆叠的控制中心。
从交换机充当转发处理器。
每台交换机都将被指定一个编号。
一个堆叠中最多可以连接九台交换机。
用户可以在不影响堆叠性能的情况下,在堆叠中添加或者移除交换机。
每个由Cisco Catalyst 3750系列交换机构成的堆叠都拥有一个单一的IP地址,并且作为一个统一的对象进行管理。
单一IP管理适用于包括故障检测、虚拟LAN(VLAN)创建和更改、安全和QoS控制等多种活动。
每个堆叠只有一个配置文件,它将被分发给堆叠中的各个成员。
这让堆叠中的每台交换机都可以共用相同的网络拓扑、介质访问控制(MAC)地址和路由信息。
堆叠互联功能利用特殊的堆叠互联电缆和堆叠软件,思科StackWise技术最多可以将9台单独的Cisco Catalyst 3750交换机连接到一个统一的逻辑单元中。
堆叠相当于一个单一的交换单元,由一个从成员交换机中选出的主交换机管理。
主交换机可以自动地创建和升级所有的交换信息和可选的路由表。
一个工作中的堆叠可以在不中断服务的情况下,添加新的成员或者移除旧的成员。
- 1、下载文档前请自行甄别文档内容的完整性,平台不提供额外的编辑、内容补充、找答案等附加服务。
- 2、"仅部分预览"的文档,不可在线预览部分如存在完整性等问题,可反馈申请退款(可完整预览的文档不适用该条件!)。
- 3、如文档侵犯您的权益,请联系客服反馈,我们会尽快为您处理(人工客服工作时间:9:00-18:30)。
3750堆叠区别于3550,3750是真正的堆叠,Catalyst 3750系列使用StackWise技术,它是一种创新性的堆叠架构,提供了一个32Gbps的堆叠互联,连接多达9台交换机,并将它们整合为一个统一的、逻辑的、针对融合而优化的设备,从而让客户可以更加放心地部署语音、视频和数据应用。
3750做堆叠需要专用堆叠线缆,产品自带0.5米堆叠线缆。
基本要求
系统版本相同
系统版本推荐EMI (cryptographic EMI for Cisco IOS Release 12.1(19)EA1 or later)
系统版本推荐加密版本的
最多9个堆叠
通过一个地址管理堆叠
3750采用的是背板堆叠的方式,机器本身有堆叠口需专门的堆叠线可以达到32G带宽。
交换机堆叠后,从逻辑上来说,它们属于同一个设备。
这样,如果你想对这几台交换机进行设置,只要连接到任何一台设备上,就可看到堆叠中的其他交换机。
如果堆叠设备型号相同,只需按图将交换机堆叠上即可,不需要配置
a:物理连接好堆叠线缆,连接方法为master的stack1连接到slave的stack2上面。
b:开master,不作任何的配置。
等完全启动后。
c:开slave的机器。
d:不作任何的配置。
如果型号不同,请按照如下方法操作即可。
IOS升级方法
1、建立ftp站点
Ip ftp enable
Ip ftp username <文件主机ftp站点用户名>
Ip ftp password <文件主机ftp站点密码>
2、命令格式
archive download-sw /overwrite /reload ftp:[[//username[:password]@location]/filename.tar]红色字体部分为可选项
连接方式
关闭所有要堆叠交换机的电源
Default Switch Stack Configuration
配置方法
1、将所有要堆叠的交换机的操作系统,保持一致。
不一致的升级。
2、选出你要配置为主的交换机进行配置
switch current-stack-member-number renumber new-stack-member-number
switch stack-member-number priority new-priority-number
reload slot stack-member-number
show sdm prefer (3750-12T的sdm为routing,其他型号的为desktop,如果是混合连接的话,选择desktop) sdm prefer {default | routing | vlan}[desktop]
3、配置堆叠成员交换机
堆叠成员号码1到9之间选择show switch 一般从2往后排
switch stack-member-number provision type(堆叠成员交换机型号show ver)
4、copy running-config startup-config(在这里保存不要用wr)
5、堆叠组主交换配置完毕后,先按照连接方式将要堆叠的交换机连接的到一起。
然后开启主
交换机,待主交换正常启动后,再开启从交换的电源。
6、按照第5步的做法,从交换机不用做任何的配置。
堆叠信息显示
show platform stack-manager all 显示所有交换堆叠的信息
show switch 显示堆叠交换机的汇总信息
show switch 1 显示一号交换机的信息
show switch detail 显示堆叠成员明细的信息
show switch neighbors 显示堆叠邻居的完整信息
show switch stack-ports 显示堆叠交换机的完整端口信息
配置范例
以三个交换机堆叠为例。
交换机一ws-c3750g-12s
交换机二ws-c3750g-24ts
交换机二ws-c3750g-48ts
交换机一做为主交换配置如下
switch 1 provision ws-c3750g-12s
switch 1 priority 15
switch 2 provision ws-c3750g-24ts
switch 2 priority 14
switch 3 provision ws-c3750g-48ts
switch 3 priority 13
sdm prefer desktop
copy running-config startup-config (保存配置在这里不要用wr)。
