高清摄像笔使用说明书(修正版)系统时间可修改
高清网络摄像机产品说明书

目录 1 概述..............................................1
1.1 介绍............................................................... 1 1.2 功能说明....................................................... 1 1.3 产品规格....................................................... 2
场景选择等 � 支持昼夜模式切换,最低照度彩色 0.3Lux @ F1.2 ,黑白 0.01Lux @ F1.2 � 支持 CS 口镜头,机械式红外滤光片控制 � 支持 DC12V、POE 供电
1.3 产品规格
指标 视频 视频采集 压缩 接口 音频 报警输入
报警输出
其他接口 网络 有线接口 协议 其它
和设置管理 � 支持远程系统升级功能 � 支持 PPPoE 拨号 � 支持多种网络协议: HTTP、TCP/IP、UDP、SMTP、DDNS、DNS、SNTP、
BOOTP、DHCP、FTP、SNMP、RTP、UPNP � 支持双向语音对讲 � 提供 RS485 串口和内置各种解码器协议
1
概述
� 异常自动恢复功能,网络中断自动连接功能 � 支持图像参数动态调整,如图像翻转、亮度、对比度、色度、饱和度、AE/ME、
9
操作设置
3.3.3 RS-485接口端子
可通过RS-485接口控制外部云台,或者与其他支持RS-485接口的报警设备连接。
4 操作设置
4.1 检索设备及修改网络参数
使用 Search DEV 软件,进行跨网段检索设备及其修改网络参 数。
高清摄像笔录音笔中英文说明书

User Manual Before operating the unit,pleasereadthismanualcarefullyand understandthoroughly. Retain it for future use1 / 152 / 15Product FeaturesSuper image sensor for low illumination video recording. Auto focus, quick light response Full HD 1080P up to 30fps,720P up to 60fps H.264 compressionBuilt-in micro SD card,support up to 32GB Only one button, easy operationultra-integrated pen type design, suitable formeeting recording, evidence recording, andoutdoor sports scenes, etc.Easy download to PC/MAC with USB plugProduct OverviewLens MicrophoneLens Cover SliderReset Hole LED Indicator USB PlugFunction ButtonBasicOperations1.T urning The UnitOn/ Video Recording Press and hold the Function button tillthe blue indicatorturns on,release the button, the green indicator will blink and then turn off, the unitstarts videorecording.Click the Function button again, will stop recording, the blue indicator turns on and the unit ison standby mode.When the video clip lengthis over10 minutes,the unit will save the current clip file, and then restart video recording automatically.Note: Be sure to open the lens cover before recording.2.P hotoShootingEnter Photo Mode:When the unit ison standby mode(the blue indicator keeps on),doubleclick the Function button,the blue and green indicators will blink alternately, the unit entered Photo Mode.3 / 15.Click the Function button once to take a photo, the blue indicator blinks rapidly.Quit the Photo mode:Double click the Function button, the unit will back to Standby Mode, the blue indicator keeps on.3.T urning The Unit OffWhen the unit is on, press and hold the Function button for about 3 seconds,the unit will shut down. Auto power off function:The unit will shut down automatically in following conditions:(1). The battery power is low. The blueindicatorwill blink for seconds, and then the unit will shut down.(2). The memory is full. The blue and greenindicatorswill blinkfor seconds, and then the unit will shut down.(3).If no operation for one minute in Standby Mode, the unit will shut down to save power.4.C harging The Battery4 / 15The unit has an internal, rechargeable battery.The battery can be charged byfollowing ways:1). Plug the unit into your computer USB port.2). Plug the unit to DC5Vbattery charger.During charging, the blue indicator will blink, when the battery power is full, the blue indicator keeps on.5.R eset FunctionWhen the unit works abnormal for illegal operation or other unknown reasons, it needs to bereset.Use a thin stick (e.g. toothpick) to press the Reset button inside the Reset hole. Restart the unit, it will work normally again.6.S etting The UnitPlug the unit into the computer USB port, a new removable disk will appear on the computer screen. Open the removable disk, you will find the file setup.exe under the root directory, double-click the file to run it, following window will appear:5 / 15You can set date/time, frame size, image quality, audiovolume, etc.When thesetting is completed, click the button on the lower left to save the settings.To make the settings take effect, disconnect the unit with computer, and turn the unit on.6 / 157 / 15upgrade and update. Please base on real object.)Caution:Your device is a product of superior design and craftsmanship and should be treated with care. The following suggestions will help you protect your warrantycoverage.Keep the device dry. Precipitation, humidity, and all types of liquids or moisturecan contain minerals that will corrode electronic circuits. If your device doesget wet,allow it to dry completely.The unit may become fairly hot during recording –this is normal. To ensure proper cooling do not block the flow of air to the cover of the unit.Do not drop, knock, or shake the device. Rough handling can break internalcircuit boards and fine mechanics.Do not use harsh chemicals, cleaning solvents, or strong detergents to clean thedevice.*Please follow State′s law. Do not use the unit8 / 15illegally.使用说明书使用时请详细阅读本说明书,以免因不熟悉或不对操作,导致未达成使用目的。
高分辨率视频摄像头和迷你摄像头的使用说明说明书

I. V IDEO & F RAME CAPTURE P ROCEDURES :Place rats individually in cubicles (21 x 10.5 x 9 cm high), with two walls of transparent Plexiglas ® and twoopaque side walls (to encourage rats to face either forward or backward). Place two digital video cameras immediately outside both Plexiglas walls to maximize opportunity for clear head shots. Higher-resolution color video is highly recommended (e.g., 1920 x 1080, Sony High Definition Handycam ® Camcorder)Digitally videotape rats during habituation phase, prior to administration of noxious stimulus (i.e., baseline/”no pain” video). This habituation period should not exceed 30 min, as animals generally fall asleep by this time, and sleeping photos should not be coded. At the appropriate time point after noxious stimulation (i.e., “pain” video), place rats back into cubicle and film for appropriate time; this time will depend on the assay being used.Using Windows Media Player ® or its equivalent, review “no pain” video and capture frames at 3 minute intervals, when a clear, unobstructed head shot is observed. On a 30 minute video, this method would yield 10 baseline photos per animal. (*Note: In Windows Media Player Version 9.0 or less, “Ctrl -I ” can be used to grab a frame and save it in JPG [or equivalent, e.g., TIF] format). For “pain” videos, if pain is associated with an overt behavioral response, frames should be grabbed during the exhibition of such behavior, unless it involves purposeful head movement (e.g., licking of the hind paw). For assays which are not associated with any behavioral response, use the same frame capture method as for “no pain” videos, grabbing frames at regular intervals. The grabbed frame should include, primarily the head with most AU visible (i.e., nose, cheek, whiskers, eyes and ears)The resultant JPG files can be copied into PowerPoint, one photo per slide. A macro can be obtained from the web (/powerpoint/randomslideshow/index.htm ) in order to randomize slide order.R AT G RIMACE S CALE (RGS): T HE M ANUALII.C ODING P ROCEDURES:Hide photo identifications (for example by placing them in the Notes panel within PowerPoint) during coding to ensure that coding is performed blind. Coders should always use the computer when coding, as photographs may lose resolution with printing. Before beginning the coding process the coder should view and familiarize oneself with baseline photos provided to determine the specific rat features present.All faces are to be coded for the presence and intensity of the following specific facial Action Units (AU), relative to the status of the region of the baseline prototype.A.I NTENSITY R ATINGS:Intensity ratings are coded for each AU.AU is no t present = 0AU moderately visible = 1AU pronounced = 2An RGS score for each photograph is calculated by averaging intensity ratings for each AU. An RGS difference score (relative to baseline/”no pain”) can then be calculated for each subject, a nd averaged across a group. These calculations are described in detail at the end of the document.NOTE: If an action unit is not present in the photo, a score of “NA” (Not Applicable) should be used.B.A CTION U NITS:1.Orbital TighteningRats in pain display a narrowing of the orbital area, a tightly closed eyelid, or an eye squeeze. An eye squeeze is defined as the orbital muscles around the eyes being contracted. The nictitating membrane may be visible around the eye and becomes more pronounced as the pain intensifies. As a guideline, any eye closure that reduces the eye size by more than half should be coded as a “2”. *Note that sleeping rats display closed eyes, but of a relaxed nature, whereas a rat in pain may display a closed eye with tight orbital muscles. Photographs of sleeping rats should not be taken and/or coded.“0” “1” “2”2.Nose/Cheek FlatteningRats in pain display a lack of bulge on top of the nose (i.e., a flattening of the nose). In the “no pain” condition a clear bulge is present at the bridge of the nose. The whisker pads are also rounded and slightly puffed out, leaving a clear crease between the pads and the cheek. When in pain, the bridge of the nose flattens and elongates, causing the whisker pads to flatten. At this time the crease between the pads and the cheek is no longer present. In frontal headshots, the nose may appear narrower and longer.“0”“1”“2”3.Ear Changes (Position, Orientation, Shape)The ears of rats in pain may be curled and pointed more than in the baseline position. In the baseline position ears are roughly perpendicular to the head, face forward, and are angled slightly backward. Importantly, the ears also have a rounded shape. In pain, the ears tend to fold, curl inwards and are angled forward. Th is curling of the ears tends to result in a “pointed” shape of the ears. In pronounced pain states, the ears are angled outward and are held close to 45° away from both the perpendicular axis and the nose. As a result, the space between the ears may appear wider relative to baseline.“0” “1” “2”4.Whisker ChangeRats in pain have whiskers that have moved from the baseline position and orientation. Whiskers startrelaxed and drooping slightly downwards and, as pain progresses, tension in the pads increases and they become angled back along the head. In pain, the whisker pad is contracted causing the whiskers to bunch and be directed outwards away from the face. This gives the appearance of the whiskers as “standing on end”. As follicles become tense, whiskers are closer together and are less distinct.“0” “1”“2”III.C ALCULATING RGS S CORES:1. Average all AUs for each photograph to give RGS score. Most of these preliminary calculations are easily2.After unblinding, sort data by subject (e.g., “Rat”) then by condition. Note that “no pain” photographs arealmost always baseline photographs taken prior to noxious stimulation:3.Calculate mean R GS score for all “no pain” and all “pain” photographs for each subject and subtract themean for the “no pain” photographs from the mean for the “pain” photographs to give an RGS difference score for each subject:4.Difference scores can then be averaged across subjects to give a mean difference score, which can beanalyzed for significance using a one-sample Student’s t-test compared to 0.IV.A TTRIBUTION:For all uses of the RGS, please attribute our companion publication as follows:Sotocinal, S.G., Sorge, R.E., Zaloum, A., Tuttle, A.H., Martin, L.J., Wieskopf, J.S., Mapplebeck, J.C.S., Wei, P., Zhan, S., Zhang, S., McDougall, J.J., King, O.D., and Mogil, J.S. The Rat Grimace Scale: a partially automated method for quantifying pain in the laboratory rat via facial expressions. Mol. Pain, in press.*********************************************************************.Good luck!。
录像笔的使用方法
录像笔的使用方法1. 录像笔的使用方法之一:打开录像笔开关,按下录像按钮即可开始录像。
在录像过程中,请注意保持笔的稳定,以确保录像画面清晰。
2. 使用方法二:连接笔到电脑或移动设备,可以实时查看录像、下载、编辑或分享录像文件。
3. 录像笔的使用方法还包括:确保笔内置存储空间足够,以确保能够完整存储录像内容。
4. 使用方法四:调整录像笔的分辨率和画质,以根据不同的拍摄需求选择合适的参数。
5. 使用方法五:保持适当的光线环境,以获得高质量的录像效果。
6. 使用方法六:录像过程中,注意观察录像笔屏幕上的指示灯,以确保录像状态正常。
7. 使用方法七:为了保护隐私,遵守当地法律法规,避免未经允许的录像行为。
8. 使用方法八:在录像前清理镜头,以确保录像画面清晰、无污点。
9. 录像笔的使用方法之一:了解录像笔的存储容量和电池续航能力,以便合理安排拍摄时间和内容。
10. 使用方法十:学会使用录像笔的变焦功能,以适应不同拍摄场景的需要。
11. 使用方法十一:在录像过程中,保持笔的对焦稳定,避免出现模糊或晃动的画面。
12. 使用方法十二:了解录像笔的特殊功能,例如夜视、运动模式等,以便在特定环境下得到最佳的录像效果。
13. 使用方法十三:在录像结束后,及时保存和备份录像文件,以免意外丢失重要内容。
14. 使用方法十四:学会使用录像笔的快捷功能,如快速启动录像、暂停录像等,以方便操作。
15. 使用方法十五:定期清理录像笔的表面和接口,以保持良好的使用状态。
16. 使用方法十六:了解录像笔的音频记录功能,并在需要时进行相关设置,以确保录像内容的完整性。
17. 使用方法十七:避免在低温或高温环境下长时间使用录像笔,以防对设备造成损坏。
18. 使用方法十八:了解录像笔的存储格式和文件类型,以便在后期编辑和处理时选择合适的软件和工具。
19. 使用方法十九:结合使用手机或平板等设备,通过应用程序实现远程控制、实时查看和分享录像文件。
4G高清摄像笔使用说明书

摄像笔使用说明书一、总览1、麦克风2、摄像头3、电源开关4、指示灯5、复位孔6、模式转换开关(左边摄像,右边拍照)7、USB二、产品简介本产品是世界上首款采用内置存储器的摄像笔,不仅能用于文字书写,也能用于录像或拍照,使用十分方便,是现代科技与传统文具的完美结合。
产品操作简便,小巧精致,美观实用,便于携带,是商务、教育、安防、媒体、司法、旅游、医疗、生活等领域必备的实用工具,受到广大用户的青睐。
三、操作说明1.开机、摄像或拍照:在关机状态(指示灯全灭)下,短按按钮,先是黄灯亮一段时间(大概5秒左右)到蓝灯亮即开机。
注意:开机时若模式开关已经拨到录像模式(蓝灯亮),则直接进入录像模式立即开始录像;开机时若模式开关已经拨到拍照模式,则直接进入拍照模式(蓝灯亮)。
每次重新开机,都会进入初始化状态,在此期间,系统处于忙碌状态,请勿进行其他操作,如多次按按钮,连接计算机等;初始化时间会因存储器容量不同而略有区别。
2.摄像停止操作:在录像模式下,短按按钮,则停止当前的录像,并保存录像内容,蓝灯灭,橙灯亮,机器进入待机状态。
注意:a. 工作状态中,如果电量不足,摄像机会自动保存所摄影像并自动关机,请充电后再使用;b. 持续录像时,每过90分钟,摄像机将自动保存一次文件,并继续摄影,直至电池耗尽、手动停止;c. 每一次开始摄像和停止摄像的循环操作,都将生成一个新的视频文件;d. 文件存盘需要一定的时间,请勿在指示灯由蓝变橙的过程中进行其他操作,如:多次按按钮、连接计算机等,这样将会导致刚刚录制的视频文件无法顺利保存甚至导致摄像机停止响应。
e. 请在有充足照明的环境下,保持摄像机机身的竖直与稳定,并与被摄景物保持30cm以上的距离,以得到方向正确、色彩自然、图像清晰、画面稳定的影像;3.模式切换操作:A.在录像模式或待机状态下,将模式选择开关拨到拍照模式(右边),则进入到拍照模式。
B.在拍照模式下,将模式选择开关拨到录像模式(左边),则进入到录像模式,并立即开始录像。
HD-100A2 全高清HD HDMI摄像头操作指南说明书
FULL HD HDMI Camera OPER ATION GUIDE HD-100ATo prevent damage which may result in fire or electric shock hazard, do not expose this appliance to rain or moisture.1. Be sure to use only the standard adapter that is specified in the specification sheet. Using any other adapter could cause fire, electrical shock, or damage to the product.2. Incorrectly connecting the power supply or replacing battery may cause explosion,cause excessive heat or fire3. Securely plug the power cord into the power receptacle. Insecure connection may cause fire.4. Do not place conductive objects (e.g. screw drivers, coins, metal items, etc.) or containers filled with water on top of the camera. Doing so may cause personal injury due to fire, electric shock, or falling objects.WARNINGThis symbol indicates that dangerousvoltage consisting a risk of electric shockis present within this unit.PRECAUTION This exclamation point symbol is intended to alert the user to the presence of important operating and maintenance (servicing) instructions in the literature accompanying the appliance.5. Do not install the unit in humid, dusty, or sooty locations. Doing so may cause fire or electric shock6. If any unusual smells or smoke come from the unit, stop using the product. Immediately disconnect the power sourceand contact the service center. Continued use in such a condition may cause fire or electric shock.7. If this product fails to operate normally, contact the nearest service center. Never disassemble or modify this product in any way.8. When cleaning, do not spray water directly onto parts of the product. Doing so may cause fire or electric shock.Please read this Operation Guide before installing and using the camera & retain this copy for your reference.1. Always follow the instructions in the operations guide when applying power. Fire and equipment damage can occur if power isapplied incorrectly. For the correct power supply,refer to the specifications page.2. Do not use camera if fumes, smoke or a strange odor is emitted from the camera, or if it seems not functional correctly.Disconnect the power source immediately and consult with your supplier.3. Do not use the camera in extreme environments where high temperatures or high humidity exists. Use the camera underconditions where temperatures are between 32°F ~ 104°F, and humidity is below 90%.4. If installed close to a TV, radio transmitter, magnet, electric motor transformer or audio speakers the magnetic field generatedmay interfere with or distort the image.5. Try to avoid fluorescent light reflections, unstable light conditions, direct pointing toward the sun. Use caution when operating the camerain the vicinity of spotlights or other bright lights and light reflecting objects.6. To prevent damage, do not drop the camera or subject it to strong shock or vibration.L- Left | R- Right | U- Up | D- Down | - Select• 4K UHD 1/3” Progressive Scan CMOS sensor capable of 4K (4096 x 2160) captures sharp and vivid images even under very low light conditions.• Powered by a back-illuminated pixel technology.• Advanced digital imaging processor provides vivid and detailed images by utilizing Dynamic Range, Auto White Balance, and Noise Reduction.• Superb motion-compensated temporal noise reduction filter for motion video without blurring.• OSD control breakout cable with two audio inputs and RS-485 for remote communication.• Flawlessly relays multi-channel embedded audio via HDMI 1.3a.• Perfectly suited for broadcast, pro audio/video, and security.• Versatile, compact, and rugged design.1. Move the Cursor Up/Down to Choose Menu To move from item to item in the menu, move the joystick to the Up/Down.2. Change the Value To change the value of the selected item, move the joystick to the Left/Right.3.Shift to the Sub Menu of the Chosen Menu To go into sub menu, press SEL key. The menu items with > always have its sub menu.OSD MENU MAIN MENU*WB CONTROLAE CONTROLDAY /NIGHTAUDIOIMAGE CONTROLSPECIALSETUPRESETEXITAWB - Auto white balance mode will adjust white balance within 3,000˜K ~ 8,000˜K temperature.ATW - Auto trace white mode will adjust white balance within 1,900˜K ~ 11,000˜K temperature.ONE PUSH - One push mode is used if AWB or ATW cannot produce the proper white balance. Place a white paper in front of the camera when using the one pushmode to self adapt.INDOOR - Indoor mode will adjust white balance to indoor lighting conditions.OUTDOOR - Outdoor mode will adjust white balance to outdoor lighting conditions.MANUAL - Manual mode will adjust white balance manually.BLUE - 0 ~ 100 ( Select blue gain within the range of 0 to 100 )RED - 0 ~ 100 ( Select Red gain within the range of 0 to 100 )WHITE BALANCE*MODE ATWPUSHBLUEREDRETURNSHUT FIXSHUT FIX mode provides more detailed shutter speed option. All other controls are tuned for the selected shutter speed.AGC FIX mode provides more detailed gain option. All other controls are tuned for the selected gain value. • SHUTTER : AUTO, 1/30 ~ 1/10,000 ( Shutter speed can be set ) • AGC MAX : OFF, LOW, MIDDLE, HIGH, DMIN, DMID, DMAX • AGC : AUTO, 0dB ~ 27dB, d2X ~ d9X ( Gain level can be set )• AGC MAX : OFF, LOW, MIDDLE, HIGH, DMIN, DMID, DMAX “AGC MAX” sets the maximum gain value to control the video noise caused by Auto Gain Control.• AE BRIGHT : 0~10 Auto Exposure brightness level can be adjusted.AE CONTROL*AE MODE SHUTTERSHUTTER 1/30IRISAGCAGC MAX 13*AE MODE AGC FIXSHUTTERIRISAGC 9dBAGC MAXSENS UPAE BRIGHT 6FLK CONTROL OFFLENS MODE MANUALRETURN• IRIS SPEED : 0 ~ 5 Electronic Iris speed can be controlled. ( DC Iris lens only )• LENS MODE : INDOOR, OUTDOOR, MANUAL Lens setting will be optimized for the selected environment. ( DC Iris lens only )• FLK CONTROL : AUTO, ON, OFF “FLK CONTROL” mode provides a proper image sensor frequency to match the• MODE : DAY(COLOR), NIGHT(B&W) Set camera to either color mode or B&W mode.• NIGHT COLOR : ON, OFF When “NIGHT COLOR” is turned ON, camera stays on color mode even“NIGHT(B&W)” is selected from the MODE.• COLOR BURST : ON, OFFColor burst signal ON or OFF can be set for CVBS signal. ( Not applicable )AE CONTROL*AE MODE AUTOSHUTTERIRISAGCAGC MAX*MODE DAY (COLOR)NIGHT COLOR OFFCOLOR BURST OFFRETURNMODE : OFF, LINE, MIC Select the proper audio mode from this menu.AUDIO LEVEL : -12dB ~ 48dB Audio level can be manually adjusted from this menu.MIC ATTENUATOR : ON, OFFAudio input attenuation can be controlled from this menu to minimize the audio noise level.AGC LIMIT: -0dB ~ 58dBAudio gain level can be adjusted from this menu when MIC attenuation is enabled.SAMPLE BITS : 16, 20, 24, 32 ( Audio sample bit rate can be adjusted from this menu )AUDIO*MODE LINEAUDIO LEVEL 0 dBMIC ATTENUATOR OFFAGC LIMITSAMPLE BITS 24BITSRETURNCamera image control can be adjusted from EFFECT menu.• DNR MODE : OFF, 2D, 3D, 2D+3D Digital noise reduction can be applied from this menu.• DNR LEVEL : AUTO, LOW, MIDDLE, HIGHNoise reduction level can be adjusted from this menu.• DNR APERTURE : 0 ~ 4 ( Motion artifacts tightness can be adjusted )• CONTRAST : 0 ~ 20 ( Contrast level can be adjusted )• BRIGHTNESS : 0 ~ 20 ( Brightness level can be adjusted )• SATURATION : 0 ~ 20 ( Saturation level can be adjusted )• HUE : 0 ~ 20 ( Hue level can be adjusted )• EDGE ENHANCE : 0 ~ 20 ( Image sharpness level can be adjusted )• AUTO SATURATE : OFF, LOW, MIDDLE, HIGH Decrease saturation automatically when noisy scene is detected.• AUTO EDGE : ON, OFF Decrease edge enhancement (sharpness) automatically when noisy scene is detected.• DEFAULT : See Effects menu to default value.• LENS SHADING : ON, OFF Optical vignetting issue can be corrected from this menu.•BLACK LEVEL : -64 ~ 64 ( Gamma level can be adjusted )• GAMMA CORRECT : DEFAULT, 0.4 ~ 1.0 ( Gamma level can be adjusted )• DNR : Camera noise level can be adjusted from this menu.* 0= Most Ghost Artifact | 4= Most Ghost ArtifactIMAGE CONTROLBRIGHTNESS 11SATURATION 10EDGE ENHANCE 5AUTO SATURATE MIDDLEAUTO EDGE ONBLACK WHITE LVGAMMA CORRECT DEFAULTDNRRETURN IMAGE CONTROLLENS SHADING OFFBRIGHTNESS 11SATURATION 10EDGE ENHANCE 5AUTO EDGE ONBLACK WHITE LVGAMMA CORRECT DEFAULTDNRRETURND ZOOM : ON, OFFDigital Zoom and PIP function can be enabled from this menu.• ZOOM CONTROL : RATIO, POSITION, RETURN Adjust the digital zoom ratio and position.Use LEFT / RIGHT button to adjust the ratio, then press select.USE LEFT / RIGHT/ UP / DOWN button to adjust the image position, then press select. Press select to exit.• PIP : ON, OFFTurn ON or OFF the PIP window.• PIP SIZE : 1/16, 1/25Change the size of PIP window.• PIP POSITION : POSITION, RETURN Adjust the PIP window location.USE LEFT / RIGHT/ UP / DOWN button to adjust the image position,then press select.Press select to exit.• DEFAULT : Set privacy zone to default value.Camera special functions can be adjusted from SPECIAL menu. SPECIAL*DZOOM OFFDEFOG OFF DIS OFF BACKLIGHT OFFBINNING OFF DEFECT PIXEL ON DISP . FUNCTIONWDR OFFFLICKER DETECT OFF PRIVACYHDMI MODE RGB444.709 RETURND-ZOOM*ZOOM CONTROLPIP OFF PIP SIZE 1/16 PIP POSITIONDZOOM SAVE DEFAULT RETURNDEFOG : ON, OFF, AUTO“DEFOG” menu improves foggy image.DWDR : ON, OFFWide Dynamic range can be adjusted from the sub menu.MOTION DETECT : ON, OFFCamera can detect a motion within the selected areas.• STRENGTH : 0 ~ 16Change defog strength.• THRESHOLD : 0 ~ 3Threshold value sets minimum sensitivity value for automatic defog control. Higher value makes defog-on control reluctant.• AUTO LEVEL : LOW, MID, HIGHAuto level value sets maximum strength value for automatic defog control. Higher value makes defog effect to be stronger.BACK-LIGHT : OFF, BLC, HLM ( Camera back-light compensation can be adjusted ) BLC : OFF, ON ( BLC enables back light compensation)• SIZE/POSITION : SIZE, POSITION, RETURN Adjust BLC area window size.• LEVEL : Back-light level compensation level can be adjusted from this menu. Higher level will compensate more from the selected area.• DISPLAY : OFF, ONBLC area display can be turned ON or OFF.• DEFAULT : Set BLC menu to default value.DEFOG SETUP*STRENGTH 4 THRESHOLD AUTO LEVEL RETURNBACKLIGHT - BLC*BLC ON SIZE/POSITIONLEVEL 128 DISPLAY ON DEFAULT RETURNHLM : OFF, ON HLM can be adjusted. • AREA DISPLAY : ON, OFFHLM AREA DISPLAY can be turned ON or OFF.• SIZE/POSITION : SIZE, POSITION, RETURN • Adjust BLC area window size.• LEVEL : 0 ~ 20Amount of masking area can be adjusted.• BLACK MASK : OFF, ONMasking area highlight can be turned ON or OFF.• DEFAULT : Set HLM menu to default value.BACKLIGHT - HLMAREA ON *AREA DISPLAY ON SIZE/POSITIONLEVEL 3 BLACK MASK ON DEFAULT RETURNDISPLAY FUNCTION : OFF, ONAdjust image display features from this menu. • FREEZE : OFF, ONImage freeze can be turned ON or OFF.• MIRROR : OFF, MIRROR, V-FLIP, BOTH(H/V) Image mirror or flip can be operated.• IMAGE EFFECT : OFF, NEGATIVE, GREY MODE, REDDISH-1 ~ 4, BLUISH-1 ~ 4, GREENISH-1 ~ 4.ROTATION : OFF, ROT_L 1:1 Several color effects can be applied.• ROTATION : OFF, ROT_L FULL, ROT_L 1:1, ROT_R Full, ROT_R 1:1 Image can be rotated either left or right side.• PICTURE STYLE : OFF, STANDARD, VIVID, CLEAR, VIVID CLEAR, NEUTRAL Different types of picture style can be applied.FLICKER DETECT : OFF, ON“FLICKER DETECT” mode provides a proper image sensor frequency to match the power frequency in order to minimize video flicker.DISPLAY FUNCITON*FREEZE OFFMIRROR OFF IMAGE EFFECT OFF ROTATION OFFPICTURE STYLE OFF PIC CONTRAST ON PIC SATURATION PIC EDGE RETURNMODE : ON, OFFEnable “PRIVACY ZONE” ON or OFF. TYPE : SQUARE, POLYGONPrivacy zone can be setup from this menu.PRIVACY MASK*MODE ONTYPE SQUARE MASK NO. MASK 1 DISPLAY ONCOLOR BLACKCamera setup can be adjusted from this menu.CAM TITLE : OFF, ONCamera title can be turned ON or OFF.COMMUNICATION : ON, OFF, AUTO ( VISCA communication control can be adjusted )• CAM ID : 0 ~ 7 ( Camera ID can be setup )MODE : FACTORY, USERCamera will reset to factory default or user saved value.RESET :Reset the camera to the selected mode.SAVE AS USER :Save the user desired setting from the menu. Mode must be set to User.SETUP*CAM TITLE OFFCOMMNUCATION SYSTEM INFO OUTPUT FORMAT 1080P30 RETURNRESET*MODE FACTORY RESET SYSTEM INFO SAVE AS USER RETURNVIDEOImage Sensor 1/3 inch Progressive CMOSSensor Size Diagonal 7.2mmEffective Pixels Horizontal: 1920, Vertical: 1080Pixel Size 2.75 µm x 2.75 µmResolution 1080p & 1080i: 1920 x 1080, 720p & 720i: 1280 x 720 Resolution/Rate 1080 60p/59.94p/50p/30p/29.97p/25p/24p1080 60i/59.94i/50i720 60p/59.94p/50pOutput HDMI 1.3aColor Space 4:2:2 (YCbCr) 10bitMin. Illumination 0.2Lux (Day), 0.1Lux (Night), 0.005Lux(Slow Shutter ON)White Balance Auto & Manual (9,000 K - 11,000 K) LENSLens C/CS Mount (Default 4mm HD Lens)AUDIO INPUTInput 3.5mm TRS StereoMic-in & Line in over I/O CableSample Rate 16/24/32 BitsPHYSICALCamera Control RS-485 VISCA, OSD ButtonOperation Temp 32° F - 104° FDimension 39mm x 39mm x 50.50mm / 1.53” x 1.53” x 1.99”(With default 4mm Lens)Weight 180g / 0.39lbs (With default 4mm Lens)Power 6W at 12VDC (+9 - +15VDC)*Specification are subject to change without notice.Visit us:/supportE-mail us:***********************Give us a Call:Toll Free: 844.631.8367 | Tel: 909.333.7421 Operating Hours: Mon-Fri | 8:00am – 5:00pm PST。
Aiptek 720p高清摄像机说明书

Aiptek 720p Hd Instruction ManualAiptek 720p Hd Instruction ManualAiptek Camcorder User Manuals Download - ManualsLib. Camera manuals and free ... Aiptek A-HD 720P User Manual & Instructions - 483 |. Manual ... Camera ...Aiptek A-HD+ 1080p User Manual & Instructions - 489 Manual Library Hd camcorder aiptek eBay HD 720P AIPTEK Mini DV Camcorder Digital Video Camera: ...Aiptek HD-1 720P User Manual Instructions - 356 Manual. HD Wearable Video Camera 1080p - Midland Radio. : Midland XTC-200VP3 720p High .... Products 1 - 9 of 9 — Read PDF Aiptek 720p Hd Camcorder. Manual. Aiptek 720p Hd Camcorder Manual. If you ally infatuation such a referred aiptek 720p hd.. Products 1 - 9 of 9 — Merely said, the aiptek 720p hd camcorder manual is universally compatible ... Aiptek A-HD 720P User Manual & Instructions - 483 | Manual .NEW AIPTEK ACTION SILVER HIGH-DEF 1080P 720P . and the owners manual thats .. Aiptek A-HD Pro User Manual . Aiptek Action HD Description.. Aiptek A-HD 720P User Manual Instructions - 483 Manual. Aiptek Manual Pdf Viewer - Video Camera Pdf Viewer. Topic: Action camcorder hd 720p manual .... Feb 4, 2021 — Specs: 1gb Internal Memory, HD 1280x720, Mp3 Player, 8 Aiptek 720p Hd Camcorder Manual browserquest.mozilla. Make Offer - AIPTEK P-HD+ ...AIPTEK PDF user manuals, service Page 2/8 Online Library Aiptek 720p Hd Camcorder Manual manuals, operating guides Camcorder, Digital Camera user .... Feb 4, 2021 — Aiptek HD-1 720P V5T6 or V5T2 Cameras Downloads Manual. Free AIPTEK User Manuals . User Manual. 21 pgs 445.06 .... AIPTEK PENCAM TRIO HD USER MANUAL Pdf Download ManualsLib We ... Pencam Software - everiphone Aiptek PenCam Trio HD Camcorder 720p HD with .... Products 1 - 9 of 9 — Aiptek - High-Definition Digital Camcorder with 2.4" Color LCD Screen - Blue. $149.99Your Write a review The aiptek A-HD 720p camcorder is a .... You can store up to two hours of hd 1080p video on a 4gb memory card. Pdf for aiptek camcorders hd 1 manual. Aiptek v5vp hd high definition camcorder 720p .... Aiptek HD Camcorder / Camera V5VP w/ Charger Tested. Aiptek a-hd 720p user manual - 483. download or read online this user guide and instruction pdf about ... 8d69782dd3En vivoFerencvarosi TC vs FC Barcelona | Ferencvarosi TC vs FC Barcelona en lГnea Link 6PinoyLittleGirl:Klein,******************************************Penny the preteen cutie, cutie (25) @iMGSRC.RUDatei herunterladen 20-10-02.GT50.ODC.part2.rar (100,00 Mb) In free mode | Modelgirl21-Floor,*****************Du Sel Sur La Peau 1984 Full DownloadBoyМальчикиморейигор(ez),**************Hyperbolic trig identities cheat sheetCandidtightass35,************************orphanage-abuse-stories。
_高清摄像笔使用说明书_内置存储_2010102701
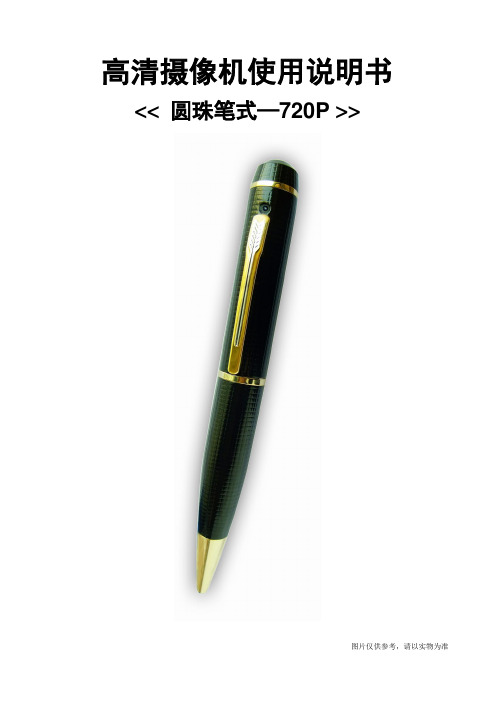
高清摄像机使用说明书<< 圆珠笔式—720P >>图片仅供参考,请以实物为准一、 产品简介感谢您选购本产品,作为一款数码摄录一体机,它有多种实用的功能,时尚精致的外观,稳定卓越的品质,广泛多样的用途,将给您带去全新难忘的使用体验,是您身边不可缺少的实用工具。
本机有的功能为:高清摄像、高清拍照、优质录音、电脑摄像头、可移动磁盘。
本产品具有的特点为:多功能、多用途、外观时尚酷炫、摄录效果卓越、小巧便携、易于使用、稳定可靠、响应快速等。
本产品适用于:记者采访、精彩抓拍、突发事件记录、生活片段记录、娱乐休闲记录、体育运动记录、教学辅助记录、家庭安防监控、执法刑侦取证、旅行人文风景记录、户外探险记录、辅助记忆,等等。
二、 结构概述编号名称 描述 1操作键 它是一个多功能按键,在不同模式以及状态下具有不同功能,包括:开机、关机、开始摄像、停止摄像、拍照、开始录音、停止录音。
2摄像头 用于拾取图像信号。
3麦克风 用于拾取音频信号。
4状态指示灯孔 内置红绿蓝三色指示灯,3种颜色的灯通过不同的组合方式指示产品的不同工作状态。
5模式开关 通过拨动模式开关,改变设备当前工作模式 6 Standard 4 Pin USB 接口 连接数据线、电源线的接口。
三、 操作说明1. 开关机:1.1 开机A. 长按操作键(部件1)2秒钟,再松开按键。
图片仅供参考,请以实物为准B. 产品电源被打开,绿灯亮起,进入产品的初始化状态。
C. 初始化完成,绿灯熄灭。
D. 开机后,设备进入默认的摄像功能待机状态,红灯亮起。
E. 完成开机。
注意:本产品的开机类似于电脑的启动,有一个启动过程,在此期间,请勿进行任何操作,直到开机动作完成。
开机初始化的时间长短,视存储容量大小而异。
1.2 关机A. 长按操作键(部件1)2秒钟,再松开按键。
B. 状态指示灯全部熄灭,完成关机。
注意:如果您的产品正在工作中,关机时,产品会自动为您保存正在录制的文件。
T1高清1080摄像笔操作说明书
T1高清摄像笔使用说明1、充电本机内置可充电锂电池,初次使用本机时,请进行充电建议:前三次使用时,请将电池电量用完后,再进行饱和充电,充电时长约3-4小时,以便将电池寿命达到最长本机可通过以下方式进行充电:l 连接计算机充电,将USB线与计算机连接,即可进行充电l 用本机随机携带的充电器充电,将数据线与充电器连接,将充电器插入电插座,连接机器,即可进行充电充电时,指示灯红灯长亮,表示在充电中,红灯熄灭,表示电量充满。
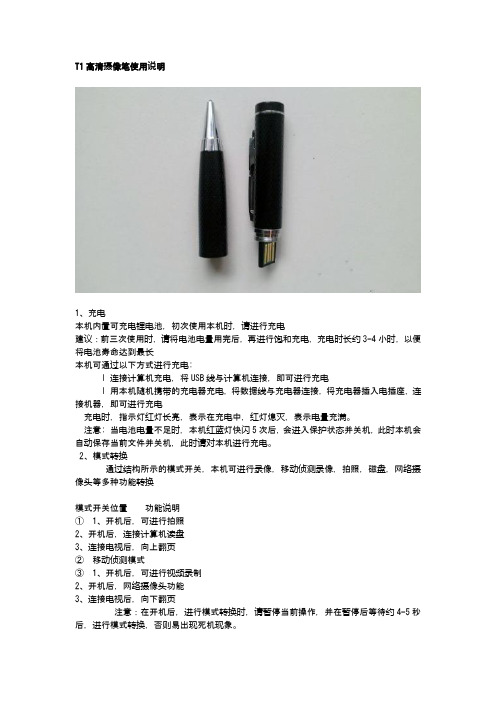
注意: 当电池电量不足时, 本机红蓝灯快闪5次后,会进入保护状态并关机,此时本机会自动保存当前文件并关机,此时请对本机进行充电。
2、模式转换通过结构所示的模式开关,本机可进行录像,移动侦测录像,拍照,磁盘,网络摄像头等多种功能转换模式开关位置功能说明①1、开机后,可进行拍照2、开机后,连接计算机读盘3、连接电视后,向上翻页②移动侦测模式③1、开机后,可进行视频录制2、开机后,网络摄像头功能3、连接电视后,向下翻页注意:在开机后,进行模式转换时,请暂停当前操作,并在暂停后等待约4-5秒后,进行模式转换,否则易出现死机现象。
3、开机/关机l 开机:当机器处于关闭状态时,长按开机键,此时指示灯亮起,表示本机已完成开机。
l 关机:保存当前文档后,长按关机键,此时指示灯完全灭掉,表示本机已完成关机。
4、录制影像将模式开关拨至结构说明所示③的位置,本机开机后,此时黄灯长亮,点按顶部按键,此时黄灯闪烁,进入录像状态,再次点按顶部按键,暂停录像,本机保存当前文档,此时黄灯恢复长亮,并处于待机状态。
注意:为确保文件不会丢失,每5分钟自动保存一个视频文件本机属于高端方案,高清技术,为确保视频效果及使用顺畅,请使用CLASS 6 以上原装正版存储卡,否则易出现死机,不放不流畅等现象。
5、移动侦测将模式开关拨至结构说明所示②的位置,本机开机后,此时蓝灯长亮,当侦测到移动物体时,自动启动录像,此时蓝灯闪烁;当侦测不到移动物体10秒后,自动停止录像并保存文件,处于待机状态。
V7 录像笔 说明书
V7 录像笔使用说明书功能特征:l WAV 格式录音:内置麦克风。
l播放录音文件.l拍照(照片格式:JPG)及录像(录像格式:AVI).l可作 USB 移动硬盘存储文件, WindowsME 以上无需驱动程序,即插即用。
l可连接电脑作网络视频聊天.l内置可充电电池.l USB 2.0l用电脑 USB 插口(作为电源可以拍照及录像)供电。
注意事项l为了保持良好性能,请避免在下列场所放置或使用本机。
1. 浴室或其他受潮的地方。
2. 阳光暴晒或靠近加热设备等高温环境下。
3. 温度过低的地方。
4. 多尘的地方。
镜头可以用擦镜纸或眼镜布轻轻擦拭,保持洁净。
l请勿自行对本机进行拆修或变更。
l对于非法使用本机所引起的纠纷或因维修及使用中信息丢失或损坏,本公司概不负责,请用户遵照说 明书进行规范操作。
l请在有充足的光源环境下使用,请勿将摄像头直接对着太阳等超强光源,以免光学器件受到损伤。
l请勿在粉尘密度过大的环境下使用,以免镜头以及其他部件沾染粉尘,影响摄像效果。
镜头可以用擦 镜纸或眼镜布轻轻擦拭,保持洁净。
l该产品属于精密电子产品,请勿使其受到强烈冲击、震动;请勿在强磁场、强电场下使用。
l本公司保留改进产品的权利,产品规格及设计如有变更,恕不另行通知!目录外观图及各部分名称.........................................................一、 开机与关机[PLAY/STOP]:……………………………………………….二、 播放录音文件[PLAY/STOP]:……………………………………………三、 录音[REC/STOP]:…………………………………………………………四、 拍照[PLAY/STOP]:…………………………………………………………五、 录像[REC/STOP]:…………………………………………………………六、 连接电脑 PC:…………………………………………………………………………..七、 充电:……………………………………………………………………………………八、 复位:…………………………………………………………………………………….九、 相关说明:………………………………………………………………….十、 参数规格:………………………………………………………………….十一、录像文件创建时间设置………………………………………………….外观图及各部件名称1、 MODE 模式开关2、 LED 双色工作指示灯3、 PLAY/STOP 播放/开关机/拍照4、 REC/STOP 录音/录像5、 RESET 复位键6、 USB USB 插头7、 EARPHONE 耳机插孔按键及操作说明:一、 开机与关机[PLAY/STOP]:开机:长按[PLAY/STOP]键约 4 秒开机,开机后“LED 红灯”长亮进入待机状态。
3G-SDI HDMI FULL HD 摄像头用户操作指南说明书

3G-SDI/HDMI FULL HD Gen-lock Camera OPER ATION GUIDE GEN3G-200To prevent damage which may result in fire or electric shock hazard, do not expose this appliance to rain or moisture.1. Be sure to use only the standard adapter that is specified in the specification sheet. Using any other adapter could cause fire,electrical shock, or damage to the product.2. Incorrectly connecting the power supply or replacing battery may cause explosion,cause excessive heat or fire3. Do not connect multiple cameras to a single adapter. Exceeding the capacity may cause excessive heat or fire.4. Securely plug the power cord into the power receptacle. Insecure connection may cause fire.5. When installing the camera, fasten it securely and firmly. A falling camera may cause personal injury.WARNINGThis symbol indicates that dangerousvoltage consisting a risk of electric shockis present within this unit.PRECAUTION This exclamation point symbol is intended to alert the user to the presence of important operating and maintenance (servicing) instructions in the literature accompanying the appliance.cause personal injury due to fire, electric shock, or falling objects.7. Do not install the unit in humid, dusty, or sooty locations. Doing so may cause fire or electric shock.8. If any unusual smells or smoke come from the unit, stop using the product. Immediately disconnect the power source and contact the servicecenter. Continued use in such a condition may cause fire or electric shock.9. . If this product fails to operate normally, contact the nearest service center. Never disassemble or modify this product in any way.Please read this Operation Guide before installing and using the camera & retain this copy for your reference.1. Always follow the instructions in the operations guide when applying power. Fire and equipment damage can occur if power isapplied incorrectly. For the correct power supply,refer to the specifications page.2. Do not use camera if fumes, smoke or a strange odor is emitted from the camera, or if it seems not functional correctly.Disconnect the power source immediately and consult with your supplier.3. Do not use the camera in extreme environments where high temperatures or high humidity exists. Use the camera underconditions where temperatures are between 32°F ~ 104°F, and humidity is below 90%.4. If installed close to a TV, radio transmitter, magnet, electric motor transformer or audio speakers the magnetic field generatedmay interfere with or distort the image.5. Try to avoid fluorescent light reflections, unstable light conditions, direct pointing toward the sun. Use caution when operating the camerain the vicinity of spotlights or other bright lights and light reflecting objects.6. To prevent damage, do not drop the camera or subject it to strong shock or vibration.L- Left | R- Right | U- Up | D- Down |- Select • 2.1 Megapixel CMOS progressive sensor provides superb image quality and excellent color reproduction.• SMPTE 292M & 424M standard high definition video format including 59.94Hz.• ‘Self-Adaptive’ resolution and frame rate feature allows camera to self-adopt to the external reference sync signal.• Highly compatible with Tri Level reference.• Versatile, compact and rugged design.• Built in OSD control button & control via SONY VISCA protocol.• Embedded audio via SDI & HDMI.• Wide range of white balance.• High Dynamic Range & Noise Reduction.• Simultaneous SDI and HDMI Output.1. Move the Cursor Up/Down to Choose Menu To move from item to item in the menu, move the joystick to the Up/Down.2. Change the Value To change the value of the selected item, move the joystick to the Left/Right.3. Shift to the Sub Menu of the Chosen MenuTo go into sub menu, press SEL key. The menu items with always have its sub menu.MAIN MENU*WB CONTROLAE CONTROLDAY /NIGHTAUDIOIMAGE CONTROL SPECIALSETUPRESET EXITLENS DC IRIS MANUAL IRIS WHITE BALANCE AUTO ATW PUSH MANUAL EXPOSURE AUTO SHUTTER PRI. FLICKER-LESS MANUAL BLACK-LIGHT SPOT HDR BLC OFF ACEDAY/NIGHTCOLOR NIGHTAUDIO MICMIC LINE OFFGEN-LOCKMODE, OUTPUT EN, H-SYNC, PHASE SETIMAGE CONTROLCONTRAST, SATURATION, MIRROR, FLIP, D-ZOOMNOISE REDUCTION, GAMMA, FRAME RATESETTINGSOFTWARE VERSION, CAM ID, BAUDRATE, LANGUAGE, DEFECT DETRESETSPOT HDR BLC OFFEXITMENU*LENS DC IRISWB CONTROL ATWEXPOSURE AUTOBACKLIGHTDAY/NIGHT COLORAUDIO OFFGENLOCKIMAGE CONTROLSPECIALRESETEXITLENS DC IRIS Select “DC IRIS” when using the DC Iris lens (CS/C Mount). Iris will be controlled by the camera.• AUTO : Camera will automatically adjust the white balance if the color temperature falls within 3,000°K ~ 8,000°K.• ATW : Wider range of color temperature than “AUTO” mode. Camera will automatically adjust the white balance if the color temperature falls within 1,900°K ~ 11,000°K.• PUSH :Push mode is used if “AUTO” or “ATW” cannot produce the proper white balance.Place a white paper in front of the camera when using the “PUSH” mode to self-adopt.• MANUAL : Manual mode has “COLOR TEMP”, “RED GAIN”, and “BLUE GAIN” options for user preferred settings.* Adjust white balance using “AUTO” and “ATW” modes before using “PUSH” or “MANUAL” modes. White balance may not work properly if the camera is facing toward a light source.MENU*LENS MANUAL IRISWB CONTROL ATWEXPOSURE AUTOBACKLIGHTDAY/NIGHT COLOREXPOSURE Camera exposure level can be adjusted using four different modes.AUTO Auto mode will adjust the exposure level automatically.Detailed fine tuning options are available under this menu.MENULENS MANUAL IRISWB CONTROL ATW*EXPOSURE AUTOBACKLIGHTDAY/NIGHT COLOREXPOSURE SHUTTER PRI.Shutter priority mode provides more detailed shutter speed option. All other controls are tuned for the selected shutter speed.MENULENS MANUAL IRISWB CONTROL ATW*EXPOSURE SHUTTER PRIBACKLIGHTDAY/NIGHT COLOREXPOSURE FLICKER-LESS Flicker-less mode provides a proper image sensor frequency to match the power frequency in order to minimize video flicker. • EXP. COMPENSATION : 0~20 ( Exposure level can be adjusted by the light meter )MENULENS MANUAL IRISWB CONTROL ATW*EXPOSURE FLICKERBACKLIGHTDAY/NIGHT COLOREXPOSUREMANUALFlicker-less mode provides a proper image sensor frequency to match the power frequency in order to minimize video flicker. • GAIN : AUTO, -3dB ~ +30dBMENULENS MANUAL IRIS WB CONTROL ATW *EXPOSURE MANUAL BACKLIGHTDAY/NIGHT COLORSPOTBACK-LIGHTCamera provides multiple options for BACK-LIGHT requirements.MENULENS MANUAL IRIS WB CONTROL ATWMIC: Camera will receive MIC level audio input by selecting “MIC” mode.• AUDIO LEVEL : -12dB ~ +59dBAudio level can be manually adjusted from this menu.• MIC ATTENUATION : ON, OFFAudio input attenuation can be controlled from this menu to minimize the audio noise level.• SAMPLE RATE : 16, 20, 24, 32AUDIOCamera supports external analog audio input (3.5mm). Audio will be embedded to both SDI and HDMI outputs.MENULENS MANUAL IRIS WB CONTROL ATW EXPOSURE MANUAL BACKLIGHTDAY/NIGHT COLOR *AUDIO MIC GENLOCK IMAGE CONTROL SETTING RESET EXITGEN-LOCKCamera is equipped with an external Tri-Level reference signal input for seamless switching. Up to 3G-SDI reference signal can be accepted and camera will self-adjust to both resolution and frame rate based on the reference signal.• MODEEnable or Disable the external reference signal.• OUTPUT ENEnable or Disable the reference signal loop out.• H-SYNC PHASEAdjust H-Sync pixel offset for a fine tuning.MENULENS MANUAL IRIS WB CONTROL ATW EXPOSURE MANUAL BACKLIGHTDAY/NIGHT COLOR AUDIO MIC *GENLOCK IMAGE CONTROL SETTING RESET EXITIMAGE CONTROLCamera provides multiple options to adjust image quality.• CONTRAST : 0 ~ 64“CONTRAST” controls the range between dark and bright areas.•SATURATION : 0 ~ 20“SATURATION” sets the level of color vividness.• SHARPNESS : 0 ~ 20Image outline or edges will be clearer and pronounced.• MIRROR : ON, OFFImage is rotated horizontally.• FLIP : ON, OFF/ 29.97 / 30 / 50 / 59.94 / 60 1080i50 / 59.94 / 60 720p25 / 30 / 50 / 59.94 / 60MENULENS MANUAL IRIS WB CONTROL ATW EXPOSURE MANUAL BACKLIGHTDAY/NIGHT COLOR AUDIO MIC GENLOCK *IMAGE CONTROL SETTING RESET EXITSETTINGCamera software and remote control information is under this menu. You can remotely access the features via RS485. • SOFTWARE VERSION Camera software information.• CAM ID : 0~255Set camera ID for remote camera control access. Camera supports SONY VISCA and PELCO protocols.• BAUDRATE : 2,400 ~ 115,200Set baud rate for remote camera control access.• LANGUAGE :MENULENS MANUAL IRIS WB CONTROL ATW EXPOSURE MANUAL BACKLIGHTDAY/NIGHT COLOR AUDIO MIC GENLOCK IMAGE CONTROL *SETTING RESET EXITRESETCamera setting can be defaulted to the “FACTORY” er can also save the desired setting as the “USER” setting.CHANGEBefore defaulting the camera setting, make sure to select the desired setting. • FACTORYSelect “FACTORY” if factory default setting is needed. • USER : Select “USER” if user saved setting is needed.• SAVE : To save a user desired setting, Select “USER” from above menu and “SAVE”.* “FRAME RATE”, “CAM ID”, “BAUDRATE” will not change.MENULENS MANUAL IRIS WB CONTROL ATW EXPOSURE MANUAL BACKLIGHTDAY/NIGHT COLOR AUDIO MIC GENLOCK IMAGE CONTROL SETTING *RESET EXITVIDEOImage Sensor 1/3” inch Progressive CMOSSensor Size 5.346mm x 3.003mm (16:9) Effective Pixels Horizontal: 1920, Vertical: 1080Pixel Size 2.75 µm x 2.75 µmResolution 1080p & 1080i: 1920 x 1080720p & 720i: 1280 x 720Resolution Rate 1080 60p/59.94p/50p/30p/29.97p/ 25p 1080 60i/59.94i/50i720 60p/59.94p/50p/30p/25pOutput HD-SDI/3G-SDI (1 BNC) / HDMI 1.3a Color Space 4:2:2 (YCbCr) 10bitMin. Illumination 0.2Lux (Day), 0.1Lux (Night),0.005Lux (Slow Shutter ON)White Balance Auto & Manual (9,000 K - 11,000 K)LENSLens CS Mount ( Default 4mm HD Lens )AUDIO INPUTInput 3.5mm Analog Audio Input through I/O Cable Sample Rate 16/24/32 BitsSTANDARDSMPTE SMPTE 292M, SMPTE 424MSYNCHRONIZATIONGen-lock External Tri-Level InputPHYSICALCamera Control RS-485 VISCA, OSD ButtonOperation Temp 32° F - 104° FDimension 49mm x 49m x 71mm / 1.92” x 1.92” x 2.79”(With default 4mm Lens)Weight 180g / 0.39lbs (With default 4mm Lens)Power 6W at 12VDC (+9 - +15VDC)*Specification are subject to change without notice.Visit us:/supportE-mail us:***********************Give us a Call:Toll Free: 844.631.8367 | Tel: 909.333.7421 Operating Hours: Mon-Fri | 8:00am – 5:00pm PST。
锐力摄像笔使用说明书
锐力摄像笔使用说明书一、产品介绍锐力摄像笔是一款集录像、拍照、音频录制等功能于一体的便携式数码设备。
它采用先进的图像处理技术和高清晰度摄像镜头,能够实现高质量的影像录制和拍摄。
同时,它还具备方便携带、简单操作的特点,是记录生活中美好瞬间的理想选择。
二、功能及操作说明1. 录像功能锐力摄像笔支持高清晰度录像,可记录动态画面。
使用者只需按下录像按钮,即可开始录制。
在录像过程中,摄像笔会自动保存文件,当存储空间不足时,可通过连接电脑进行文件传输和删除。
2. 拍照功能锐力摄像笔还具备拍照功能,用户只需按下拍照按钮,即可捕捉精彩瞬间。
摄像笔配备的高清摄像镜头能够拍摄清晰、细腻的静态图片,记录生活的点滴。
3. 音频录制功能锐力摄像笔还支持音频录制功能,用户只需按下录音按钮,即可进行语音录制。
此功能适用于会议记录、记忆笔记等场景,方便快捷。
4. 存储空间锐力摄像笔内置大容量存储芯片,可存储大量影像和音频文件。
当存储空间不足时,可通过连接电脑进行文件传输和删除,以释放更多的存储空间。
5. 电池寿命锐力摄像笔内置高性能锂电池,可提供长时间的使用。
在电池电量不足时,可通过连接电脑或充电器进行充电,保证持续的使用时间。
6. 操作指南使用锐力摄像笔时,用户只需按下相应的功能按钮即可进行录像、拍照或录音。
同时,摄像笔配备了触摸屏,用户可以通过触摸屏进行设置和浏览文件。
具体的操作指南可参考附带的用户手册。
三、使用注意事项1. 请勿将摄像笔暴露在高温、潮湿或极端环境下,避免影响其性能和寿命。
2. 使用时请避免将摄像笔与尖锐物体接触,以免刮伤或损坏外壳。
3. 在进行文件传输、充电等操作时,请使用配套的数据线和充电器,以保证设备的稳定性和安全性。
4. 请勿将摄像笔用于非法活动或侵犯他人隐私的行为,以免触犯法律法规。
5. 使用摄像笔时,请尽量选择合适的环境光线条件,以获得更好的影像和照片效果。
6. 当摄像笔出现异常情况或故障时,请勿自行拆解或修理,应及时联系厂家或售后服务中心进行维修。
高清摄像笔使用说明书

高清摄像笔使用说明书图片由【微型数码商城】仅供参考,请以实物为准一、 结构示意图二、 产品简介 本产品是具有高清影音拍摄功能的数码笔,可以拍摄和存储高画质有声视频。
具有操作简便,小巧精致,美观实用,便于携带的特点,是商务、教育、安防、媒体、司法、旅游、医疗,生活等领域必备的实用工具,深受广大用户青睐。
三、 操作说明1. 开关机:长按按钮2秒钟,完成开机,进入待机状态,此时摄像机指示灯绿灯长亮;在有指示灯点亮的任意状态下,长按开关键,摄像机将自动保存当前摄录文件并关机。
2. 录制视频:摄像机进入摄像等待状态,此时绿灯长亮,长按按钮,绿灯闪烁三下,开始录像;再次短按按钮,停止录像,保存文件,此时红绿恢复长亮;为了保证拍摄文图片仅供参考,请以实物为准 开关指示灯复位键 摄像头 麦克风插卡处USB 接口件的大小和安全,系统将每隔50分钟自动保存一次文件,并继续录像。
3.拍照:开机后,摄像机进入摄像等待状态,此时绿灯长亮,短按按钮,绿灯闪烁一下,开始拍照并保存;再按一次,绿灯闪烁一下,开始拍照并保存;周而复始。
4.PC摄像头:在任意模式的开机状态下,连接电脑USB接口,即可进入PC Camera (网络摄像头)模式,在该模式下,你可以将摄像机作为电脑摄像头使用,与好友网上视频聊天,拍摄大头贴,等等。
5.连接电脑:在关机状态或者待机状态时,可以连接电脑,此时,电脑将会弹出可移动磁盘标识,影像文件保存目录为:*盘\ _REC\100MEDIA;当摄像机与电脑交换数据时,绿灯会快速闪烁;需要卸载摄像机时,请点击任务栏右下角的可移动设备管理图标,在里面卸载该可移动存储设备,待系统确认可以安全拔出硬件后,再断开摄像机与电脑的连接。
6.充电:连接电脑USB接口或充电器,即可对摄像机进行充电,当电池处于充电状态时,红灯将慢速闪烁,当电池充满电后,红灯变为长亮;7.设置时间:摄像机提供了在视频文件中显示录像时间的功能,你可以根据实际需要设置时间的值;时间显示格式为:“年.月.日时:分:秒”,设置时间方法如下:a.关闭摄像机——》连接电脑——》打开摄像机可移动磁盘——》在摄像机根目录下面空白处单击鼠标右键——》把鼠标移至弹出菜单的“新建”选项上方——》选择“文本文档”——》给该文本文档取名为“time”,需要注意它的扩展名为“.txt”——》时间设置文件建成;你也可以按照上述步骤在电脑桌面、其他磁盘分区、其他文件夹下建好后再拷贝到可移动磁盘的根目录。
720P超高清录像笔使用说明
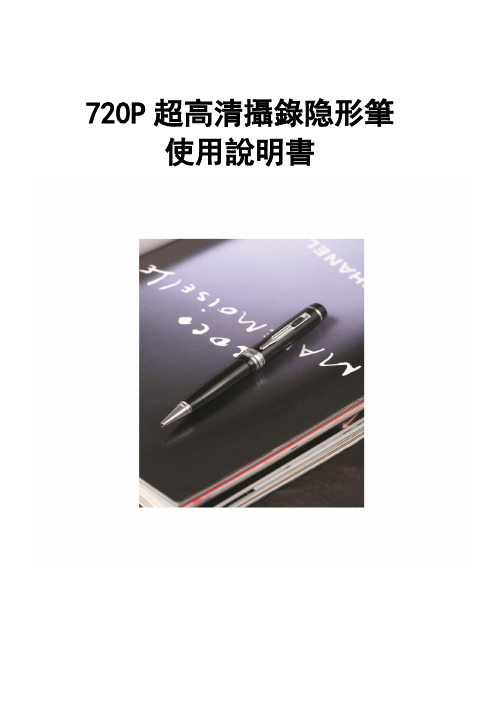
720P超高清攝錄隐形筆使用說明書一、產品簡介感謝您選擇本產品,本產品是全球首款真正具備高清攝錄、外置存儲功能的數碼筆,支持大容量Micro TF卡;它有多種實用的功能,時尚精緻的外觀,穩定卓越的品質,廣泛多樣的用途,將給您帶去全新難忘的使用體驗,是您身邊不可缺少的實用工具。
本機主要功能為:高解析錄影、高解析拍照、優質錄音、WEBCAM、隨身磁盤。
本產品具有的特點為:多功能、多用途、外觀時尚酷炫、錄影效果卓越、小巧便攜、方便使用、穩定可靠、反應快速等。
本產品適用於:記者採訪、突發事件記錄、生活片段記錄、娛樂休閒記錄、體育運動記錄、教學輔助記錄、家庭安防監控、執法刑偵取證、旅行人文風景記錄、戶外探險記錄、輔助記憶,等等。
二、結構概述編號名稱描述1 操作鍵它是一個多功能按鍵,在不同模式以及狀態下具有不同功能,包括:開始錄影、停止錄影、拍照、開始錄音、停止錄音。
2 鏡頭用於抓取影像訊號。
3 麥克風用於抓取聲音訊號。
4 狀態指示燈孔內建紅藍兩色指示燈,2種顏色的燈通過不同的組合方式指示產品的不同工作狀態。
5 模式開關“①”關機、復位模式“②”開機、拍照、錄像模式“③”錄音模式6 USB 介面連接資料線、電源線的介面。
7 Micro TF插口存儲卡插入位置三、操作說明1.開關機:1.1 開機A. 模式轉換開關由①撥到②。
B. 產品電源被打開,紅藍燈亮起,進入產品的初始化狀態。
C. 初始化完成,紅燈熄滅。
D. 開機後,設備進入預設的是拍攝功能待機狀態,藍燈長亮。
E. 完成開機。
注意:本產品的開機類似於電腦的啟動,有一個啟動過程,在此期間,請勿進行任何操作,直到開機動作完成。
1.2 關機A. 在攝錄工作完成保存的情況下,模式轉換開關由②撥到①。
B. 狀態指示燈全部熄滅,完成關機。
注意:如果您的產品正在工作中,關機時,需提前保存,否則可能會導致文件丟失或無法讀取。
2.拍照:A. 模式開關由①撥到②,開機完成後,預設進入拍攝待機模式。
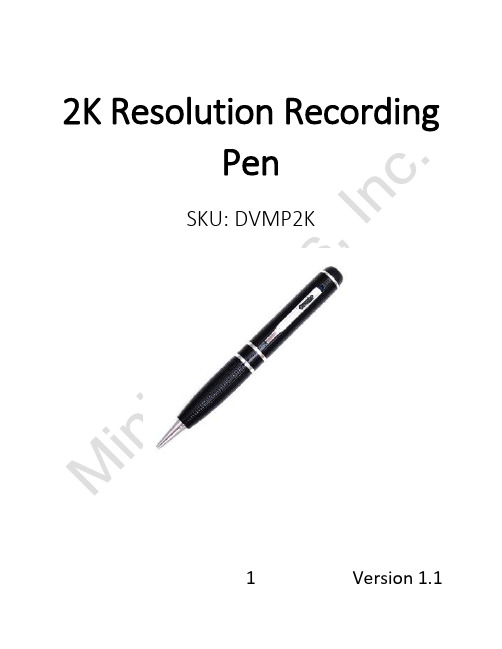
2K分辨率录像笔用户手册说明书
2K Resolution RecordingPenSKU: DVMP2K1 Version 1.12 Version 1.1 THANK YOU FOR PURCHASING THE 2K RESOLUTION RECORDING PENPlease read this manual before operating the camera and keep it handy.Your purchase should include:∙1 x Recording Pen∙ 1 x Manual3 Version 1.1GET FAMILIAR WITH YOUR DVMP2KHOW TO CHARGE THE CAMERATo charge the pen you can:1.Plug the camera into the USB port of yourcomputer.2.Plug the camera into a DC 5V adapter (notprovided).If the blue light is flashing while plugged in, this means that the pen is charging. When the blue light stays on continuously, the camera is fully charged. OPERATING THE CAMERAHOW TO TURN ON THE CAMERA1.Press and hold the function button on thetop of the pen until the blue indicator lightturns on.4 Version 1.12.After a few seconds, the blue light will turnoff, and a green light will flash several timesthen turn off. The camera is now recordingvideo.HOW TO ENTER STANDBY MODE1.The camera begins recording whenpowered on.2.If you press the top function button whilethe pen is recording, the current recordingwill be stopped, and the pen will enterstandby mode.HOW TO TAKE PICTURES1.While the pen is in standby mode, doubleclick the top function button quickly.2.The camera will enter photo mode, and theblue and green light will blink alternatively.3.Press the top button once to take a picture,and the blue light will blink twice.5 Version 1.14.To leave photo mode, double click thefunction button, and the blue light willcome on steady indicating that the unit hasreturned to standby mode.HOW TO MAKE AUDIO ONLY RECORDINGS1.While the pen is in standby mode, click thetop function button 3 times quickly.2.The camera will enter audio mode, and theblue light will blink several times then turnoff. The pen is now recording audio.3.To leave audio mode, click the functionbutton 1 time, and the blue light will comeon steady indicating that the unit hasreturned to standby mode.HOW TO RECORD MOTION DETECTION1.While the pen is in standby mode, click thetop function button 4 times quickly.6 Version 1.12.The camera will enter motion detectionrecording mode, and the green light willblink. The pen is now in motion detectionmode.3.To pause motion mode, press the functionbutton 1 time, and the green light will stayon. To resume press 1 more time.4.To quit motion mode, click the top button 4times, and the blue light will come onsteady indicating that the unit has returnedto standby mode.AUTO POWER OFF1.When the battery is low, the light will blinkseveral times, and the unit will power off.2.If no action is chosen when in standbymode, the camera will power off after 2minutes.7 Version 1.1CHANGING YOUR DEVICE SETTINGS (INCLUDING THE DATE/TIME STAMP) Your device comes with a Windows application for changing various settings including the date/time stamp. To access these settings:unch the “Powercam Setup” programin the root of the device’s internalmemory.2.Once the application starts you canadjust the following:a.Video qualityb.Video Resolution (1296p@30fps,1080p@30fps, 720p@60fps, and720p@30fps)c.Turn the date/time stamp on oroffd.Optical source freqe.Color mode3.When done, click the “CreateConfiguration File” button.8 Version 1.14.If you are on a mac and need to editthese settings, you will need to do thefollowing:a.Open Finderb.Go to the Applications folderc.Open TextEditd.Copy the following informationinto the window:VideoSize=0VideoQuality=0RecordWithAudio=0EV=6VideoClipTime=5Color=0AutoPowerOff=1Flicker=0TimeStamp=1MotionSensitivity=3TimeStampLogoTXT=Logo9 Version 1.1DateTime=2017/03/07-16:35:51delete=1e.The following settings can beedited. Do not alter any othersettings:i.VideoSize1.0 = 1296p@30fps2. 1 = 1080p@30fps3. 2 = 720p@30fps4. 3 = 720p@60fpsii.VideoQuality1.0 = SuperFine2. 1 = Fineiii.RecordWithAudio1.0 = Audiorecording on2. 1 = Audiorecording off10 Version 1.1iv.VideoClipTime1.Enter any numberbetween 1-10.This will be thenumber ofminutes the unitrecords beforestarting a newfile.v.TimeStamp1. 1 = on2. 3 = offvi.DateTime1.You may modifythis to correct thedate time stamp.Keep the formatexactly as it islisted or thesetting will fail.11 Version 1.1f.When done save the file as aplain text file called usercfg.txt.g.Eject the device from yourcomputer and do a testrecording to confirm thesettings.RETRIEVE THE FILES TO YOUR PC1.Plug the device into your computer’sUSB port.2.Locate “Removable Disk” inside the(My) Computer folder.AutoPlay Removable Disk > Openfolder to view files12 Version 1.1Or…Go to Start > Computer > Removable Disk13 Version 1.13.Open the Removable Disk drive.4.Open the appropriate folder.5.Double click the file you want to view.∙VLC Player is recommended forwatching videos. TROUBLESHOOTINGTHE DEVICE WON’T TURN ON∙Make sure the device is fully charged. THE DEVICE HAS CRASHED/FROZEN∙Press the reset button one time.14 Version 1.1DEVICE CONTINUALLY RECORDS IN MOTION MODE∙Motion detection is measured bychanging pixels during recording. Anykind of motion, including shiftingshadows or changing lighting conditions,can set off motion detection.OTHER PROBLEMS∙Call our technical support at 770–694–692315 Version 1.116 Version 1.1。
(2021年整理)高清网络摄像机使用说明书
(完整)高清网络摄像机使用说明书编辑整理:尊敬的读者朋友们:这里是精品文档编辑中心,本文档内容是由我和我的同事精心编辑整理后发布的,发布之前我们对文中内容进行仔细校对,但是难免会有疏漏的地方,但是任然希望((完整)高清网络摄像机使用说明书)的内容能够给您的工作和学习带来便利。
同时也真诚的希望收到您的建议和反馈,这将是我们进步的源泉,前进的动力。
本文可编辑可修改,如果觉得对您有帮助请收藏以便随时查阅,最后祝您生活愉快业绩进步,以下为(完整)高清网络摄像机使用说明书的全部内容。
高清网络摄像机使用手册声明本手册可能在某些技术细节方面描述不够准确或存在印刷错误,假如您在使用过程中按照使用手册无法解决问题时,请致电我公司技术部垂询相关操作方法。
本手册的内容将做不定期的更新,恕不另行通知。
1、✋远离高温的热源和环境;避免阳光直接照射;✋为确保摄像机的正常散热,应避开通风不良的场所,注意防水,防潮,防雷。
如需安装到户外,则需要安置防水箱,将摄像机固定其中;✋本机应水平安装或壁挂安装,避免安装在会剧烈震动的场所,勿将其它设备放于本机上。
2、避免电击和失火✋切记勿用湿手触摸电源和摄像机;✋勿将液体溅落在摄像机上,以免造成机器内部短路或失火;✋勿将其它设备直接放置于本摄像机上部;✋非专业人员请勿自行拆开机壳,避免损坏和电击;3、运输与搬运✋本机的包装经过抗震设计和实验,确保在运输过程中摄像机不会受到意外损坏,所以在搬运本机时,最好使用原来的包装材料和纸箱;✋避免在过冷、过热的场所间相互搬动摄像机,以免机器内部产生结露,影响机器的使用寿命;✋严禁带电搬动本机,否则会损坏主板;目录1 产品简介 (5)1。
1产品简介 (5)1。
2功能简介 (5)1。
3技术规格 (5)2 外观与说明 (6)3 设备与安装 (7)3.1 运行环境 (7)3。
2 设备安装 (8)4 IE 版客户端 (8)4.1 准备工作 (8)4.2 开始登陆 (8)4。
录像笔使用说明书-中文

录像笔使⽤说明书-中⽂总览Structure:1、开关2、摄像头3、麦克风4、指⽰灯5、复位孔6、USB7、笔头1, button 2, camera, 3 microphone 4, indicator light5, reset 6, USB 7, pen head产品简介:1.世界上最⼩的微型DVR,隐藏在钢笔⾥⾯!带有录像录声⾳的微型DVR,是世界上第⼀台钢笔型带录像录声⾳的微型DVR2.⾼灵敏度的麦克风,在15平⽅⽶之内都可清晰的把声⾳录下来;⾼清晰的摄像效果,为公安部门、法庭取证等提供有⼒的证据。
Brief Introduction:1. Hidden inside a pen, it is the world's smallest micro-DVR as well as the world's first pen-based video recorder with voice.2. It features with high sensitivity of the microphone: within 15 square meters, the clear voice can be recorded. With high-definition camera, it is helpful to provide strong evidence for the public security departments and court.3.精美的外观,流畅的圆珠笔书写功能,可替换的标准笔芯,耐⽤环保。
4.适⽤于任何带USB接⼝的计算机及其它电⼦设备。
5.USB2.0标准接⼝,⽆需驱动器,⽆需外接电源。
6.⽀持WINDOWS98/98SE/ME/2000/XP/MAS OS/ LINUX并⾃动识别操作系统,安装相应的驱动程序,⽆需⼿动安装(WINDOWS98除外)。
7.录象格式为CIF 的352*288的AVI格式8.数据读写速度快:900K/700K字节/秒(与主机速度有关)3. Exquisite looking, smooth ball-point pen to write. The replacable cartridge isdurable and environment-friendly.4. Apply to any computer with USB and other electronic equipment.5. USB2.0 standard interface. No need drive or external power supply.6. Support WINDOWS 98/98SE/ME/2000/XP/MAS OS / LINUX operatingsystems. It may automatic identify the system to install the driver. (ExcpetWINDOWS 98 ).7. 352 x288 CIF file in A VI format8. High reading & writing speed: 900 K/700K bytes / sec (depends on theconnected computer)Applications:A. Police to take recordB. Lawyer to take evidenceC. Reporter to record in the interviewD. stealth monitorWarning: It is forbidden to use for illegal purpose.录像笔应⽤场合:A.公安执法过程记录B.律师取证C.记者特殊场合采访D.隐形监控录像注:严禁⽤于(偷拍等)⾮法⽬的。
摄像笔使用说明书
攝像筆使用說明書一、總覽1、麥克風2、攝像頭3、電源開關4、指示燈5、復位孔6、樣式轉換開關7、USB二、產品簡介本產品是世界上首款採用內建存儲器的攝像筆,不僅能用於文字書寫,也能用於錄影或拍照,使用十分方便,是現代科技與傳統文具的完美結合。
產品動作簡便,小巧精致,美觀實用,便於攜帶,是商務、教育、安防、媒體、司法、旅遊、醫療、生活等領域必備的實用工具,受到廣大使用者的青睞。
三、動作說明1.開機動作:在關機狀態(指示燈全滅)下,短按按鈕,先是黃燈亮一段時間(大概5秒左右)到藍燈亮即開機。
注意:開機時若樣式開關已經撥到錄影樣式(藍燈亮),則直接進入錄影樣式立即開始錄影;開機時若樣式開關已經撥到拍照樣式,則直接進入拍照樣式(藍燈亮)。
2.攝像開始動作:開機後,將樣式選擇開關撥到錄影樣式,則進入錄影樣式,立即開始錄影。
注意:每一次開機後的第一次攝像都會有一段系統準備時間,在此期間,系統處於忙碌狀態,請勿進行其它動作,如多次按按鈕,連線電腦等;準備時間與存儲器大小有關,存儲器容量越大,準備時間會越長。
3.攝像停止動作:在錄影樣式下,短按按鈕,則停止目前的錄影,並儲存錄影內容,藍燈滅,黃燈亮,機器進入待機狀態。
注意:待機狀態指的是錄影停止後,攝像頭不工作的狀態,此時藍燈滅,黃燈亮。
4.樣式切換動作:A.在錄影樣式或待機狀態下,將樣式選擇開關撥到拍照樣式,則進入到拍照樣式。
B.在拍照樣式下,將樣式選擇開關撥到錄影樣式,則進入到錄影樣式,並立即開始錄影。
注意:從錄影樣式切換到拍照樣式時,機器會自動先儲存錄影內容,再進入到拍照樣式。
5.拍照動作:在拍照樣式下,短按按鈕一次,則拍攝一張照片,黃燈閃亮一次,表明一張照片已拍攝並儲存,機器繼續處於拍照樣式。
6.繼續攝像:在待機狀態下,短按按鈕,藍燈亮,黃燈滅,立刻又開始攝像。
注意:a. 為節省電力,在待機狀態下,一分鐘左右無任何動作,系統將自動關機。
b. 正在錄影時,如果此時電量不足,機器會先儲存錄影內容,然後自動關機,此時需要給機器充電。
- 1、下载文档前请自行甄别文档内容的完整性,平台不提供额外的编辑、内容补充、找答案等附加服务。
- 2、"仅部分预览"的文档,不可在线预览部分如存在完整性等问题,可反馈申请退款(可完整预览的文档不适用该条件!)。
- 3、如文档侵犯您的权益,请联系客服反馈,我们会尽快为您处理(人工客服工作时间:9:00-18:30)。
高清摄像笔使用说明书
本产品是具有高清影音拍摄功能的数码笔,可以拍摄和存储高画质有声视频。
具有操作简便,小巧精致,美观实用,便于携带的特点,是商务、教育、安防、媒体、司法、旅游、医疗,生活等领域必备的实用工具
1.开关机:长按按钮2秒钟,完成开机,进入待机状态,此时摄像机指示灯绿灯长亮;
在有指示灯点亮的任意状态下,长按开关键,摄像机将自动保存当前摄录文件并关机。
2.录制视频:摄像机进入摄像等待状态,此时绿灯长亮,长按按钮,绿灯闪烁三下,开
始录像;再次短按按钮,停止录像,保存文件,此时红绿恢复长亮;为了保证拍摄文件的大小和安全,系统将每隔50分钟自动保存一次文件,并继续录像。
3.拍照:开机后,摄像机进入摄像等待状态,此时绿灯长亮,短按按钮,绿灯闪烁一下,
开始拍照并保存;再按一次,绿灯闪烁一下,开始拍照并保存;周而复始。
4.PC摄像头:在任意模式的开机状态下,连接电脑USB接口,即可进入PC Camera (网
络摄像头)模式,在该模式下,你可以将摄像机作为电脑摄像头使用,与好友网上视频聊天,拍摄大头贴,等等。
5.连接电脑:在关机状态或者待机状态时,可以连接电脑,此时,电脑将会弹出可移动
磁盘标识,影像文件保存目录为:*盘\ _REC\100MEDIA;当摄像机与电脑交换数据时,绿灯会快速闪烁;需要卸载摄像机时,请点击任务栏右下角的可移动设备管理图标,在里面卸载该可移动存储设备,待系统确认可以安全拔出硬件后,再断开摄像机
与电脑的连接。
6.充电:连接电脑USB接口或充电器,即可对摄像机进行充电,当电池处于充电状态时,
红灯将慢速闪烁,当电池充满电后,红灯变为长亮;
7.设置时间:摄像机提供了在视频文件中显示录像时间的功能,你可以根据实际需要设
置时间的值;时间显示格式为:“年.月.日时:分:秒”,设置时间方法如下:
a.关闭摄像机——》连接电脑——》打开摄像机可移动磁盘——》在摄像机根目录
下面空白处单击鼠标右键——》把鼠标移至弹出菜单的“新建”选项上方——》选择“文本文档”——》给该文本文档取名为“time”,需要注意它的扩展名为“.txt”——》时间设置文件建成;你也可以按照上述步骤在电脑桌面、其他磁盘分区、其他文件夹下建好后再拷贝到可移动磁盘的根目录。
b. 打开“time”文本文档,在里面输入时间设置字符串,字符串由“年月日时分秒”
几个部分组成,要设置时间,请按以下格式设置:
2013.08.10 18:20:59 Y
上述格式中的时间字符串部分为你想设置的时间值,注意年月日与时分秒中的空格。
c.确认时间设置文件已经拷贝到根目录之后,卸载硬件,开机,时间设置完成。
d. 设置好的时间将保存到摄像机里面。
异常处理:
摄像机存储空间不足时,将在绿灯和红灯同时闪烁约5秒后,自动保存当前影像文件并关机。
如果你要继续使用摄像机,请在电脑上备份重要的影像文件,并删除存储器内的旧文件,以腾出足够存储空间;
摄像机电池余量不足时,将在绿灯和红灯交替闪烁约5秒后,自动保存当前影像
文件并关机。
如果你要继续使用摄像机,请先充电;
摄像机因偶然的不当操作或其他特殊原因停止响应时,可以用牙签等非金属细棍伸入复位孔进行复位。
一、相关参数
项目相关参数
视频格式AVI
视频编码M-JPEG
视频分辨率1280*960 VGA
视频帧率30fps±1fps
播放软件操作系统自带或主流影音播放软件
影像比例4:3
支持系统Windows me/2000/xp/2003/vista
充电电压DC-5V
接口类型Mini USB接口
存储支持TF 卡
电池类型高容量聚合物锂电。
