KVM光端机说明书
KVM说明书

KVM-CS8/L8口KVM共享器使用手册感谢使用MICROCODE 公司产品为确保您能正确使用产品及安全,请在使用前阅读本说明书包装和附件A.KVM装置一台B.连接电缆8套C.使用说明书键盘应是PS/2接口,AT接口键盘应使用AT-PS/2转换头,可联系经销商定购。
鼠标应是PS/2接口,本机不支持RS-232接口和USB接口鼠标。
监视器应是VGA兼容格式,本机不支持CGA/EGA/MDA等其他格式。
使用前请确保附件完整,并且没有损坏;包装如有损坏或不全,请联系您的经销商。
1.概述KVM装置可在多计算机系统中有效减少您的投资和管理成本,您可不必为每台电脑配置操纵装置。
通过装置的面板,或键盘的特定组合键(热键),您可以使一套键盘/鼠标/监视器在多台机器之间切换。
安装容易,节省能源,无需配置软件,无需考虑操作系统平台及其兼容性,节省了安装空间并使您无需在多台电脑之间移动。
2. 特点支持微软、罗技、IBM及所有其他兼容鼠标;支持所有IBM标准及兼容键盘;监视器可即插即用,分辨率支持至1920X1440;无须安装驱动软件,兼容所有操作系统和软件平台;支持自动扫描功能;多模式操作,面板和键盘热键遥控操作;LED状态和通道指示;节省时间、安装空间和成本;可脱离外接电源使用,完全连接时可从计算机取得电源。
3. 安装连线安装之前,请确认关闭KVM装置的电源。
a.将监视器、鼠标、键盘接入KVM装置的“MASTER”接口。
b.用附件中的配套电缆连接所有的计算机和KVM装置的相应接口,并检查对应的接口号码和类型是否对应。
c. 打开KVM装置的电源开关。
d. 选中需启动的计算机通道,并启动。
在所有的已启动计算机之间,可任意操作。
4. 单机应用操作单机应用模式:当机壳后的级联地址设置跳线都悬空时,本机工作于单机应用模式,并支持以下三种操作方式:a. 手工操作b. 热键操作c.自动扫描单机应用系统连接图使用方法:本机面板设置两个按键:左、右箭头键,8个通道指示灯,1个EXT/STOP 即级联/停机指示灯,电源开关。
光端机说明书

目录目录 (1)安全使用须知 (2)产品概述 (3)产品特点 (3)技术指标 (4)光学指标 (4)视频指标 (4)数据指标 (4)开关量指标 (4)一般指标 (4)应用范围 (5)面板说明 (5)前面板说明 (5)后面板说明 (6)自备电源要求 (6)安装说明 (7)安装前说明 (7)安装顺序 (7)安装尺寸 (8)连接示意图 (8)责任说明 (9)安全使用须知警告表示提醒有可能对人造成伤害警告表示提醒有可能对人造成伤害或对财产带来损害、造成重伤或死亡使用须知为了防止对你他人财产带来损害,请你务必遵守下列事项:本设备在设计使用范围内具有良好的可靠性能,但仍应避免人为对没被造成的损害或破坏。
1仔细阅读本使用说明.并保存好使用说明,以备将来参考用。
2不要将设备放在接近水源或潮湿的地方。
3 不要在电源电缆上放任何东西,不要将电缆打结或包住,并应将其放在不易碰到的地方。
4电源接头以及其他设备连接件应互相连接牢固。
5连接电源线时,务必认真按接线柱标注接线;所用电源必须满足如下条件:(1)交流输入:220V (165-260V),50Hz交流输入:48V、24V 、12V 、可选(2)直流输出:5V/2A (注:本产品只能使用标配电源。
)6、在下列情况下、请立即断开电源,并与经销商或本公司联系。
(1)设备进水(2)设备摔坏或机壳破裂(3)设备工作异常或展示的性能已完全改变设备产生气味烟味或噪音7、请不要自己修理设备除使用说明书中有明确指示外8、在户外空旷处安装使用本产品,请安装防雷设施。
产品概述8路数字视频可加选件光端机采用国际先进的无压缩全数字数码视频纠错及千兆光纤传输技术将8路视频通过一根光纤实现远距离无失真高质量才传输改系列光端机性能稳定画质清晰多有元器件均使用国内外知名企业的产品稳定性高并带有LED指示可直观地观察光端机的工作状态同时即插型的模块化设计方便客户可根据不同的要求灵活定制产品并支持独立式和机架式的结构操作简单无须进行现场调试适用于各种不同的工作坏境。
方正科技KVM 方正KVM系列产品(V1.0) 说明书

方正科技KVM用户手册—方正KVM绻列产品(V1.0)敬 告帊敬的用户:感踢您购买和使用方正科技产品。
为了您的安全和利益,在使用产品前请您仔细阅读本产品手册及随机附带的全部资料。
如果您未按照用户使用手册操作和使用产品,而导致任何的人身伤害、财产或其他损失,方正科技帆不承担责任。
关于本产品手册(以下简称“手册”)¨说明书版权幞于方正科技所有;¨说明书提及的商标、字号幞于它们各自的权利拥有者;¨说明书内容如同实际产品不一致,请以实际产品为准。
如果您对手册的任何内容或条款存在不明或异议,请在购机后七日内向方正科技提出书面异议,否则视为您已经同意、理解并接受本手册全部内容。
产品使用过程中,如果您遇到问题,欢迎致电咨询:人工服务时间:7*10帏时 具体为:8:00-18:00 语音导航时间:24帏时方正科技保留对用户使用手册解释和修改的权利,对手册的任何修正、更新、解释帆在方正科技网站()予以公布,请您留意。
致踢!方正科技集团股份有限公司二OO四年简介本说明书主要描述了如何对KVM进行操作、安装、配置和疑难解答,它可使操作者熟悉KVM并为帆来可能出现的问题提供参考。
特殊标志说明书中出现以下两种特定提示标志:警告:会引起人身伤害及灾难性的行为滨意:会引起硬件损坏或造成硬件故障的行为和需要用户特别滨意的方面目 录1滨意事项11.1特别提示11.2滨意事项12 使用准备62.1摘要6 2.2检查运输包装6 2.3选择一个放置KVM的合适位置6 2.4检查电源适配器7 2.5连接外围设备7 2.6启动KVM7 2.7 KVM上架准备73 KVM产品介绍83.1摘要83.2什么是KVM8 3.3产品介绍8 3.4功能描述104 KVM的安装134.1摘要13 4.2所需工具135 操作指南165.1摘要16 5.2简单操作166 级联操作21 6.1摘要21 6.2连接方滕21 6.3级联时的OSD菜单226.4使用中更改级联配置227 故障诊断23 7.1摘要237.2故障现蹡及解决方滕238 附录258.1摘要25 8.2产品规格251滨意事项1.1特别提示为了便于理解和引起您的滨意,当涉及产品安全或需关滨的信息时我们帆在本章节或在后面的章节中按下列等级和特别的警示用语向您提示,这些特别的警示用语表示方滕如下:¨【危险】--表示对高度危险要警惕¨【警告】--表示对中度危险要警惕¨【滨意】--表示对轻度危险要关滨¨【禁止】--表示危险的操作需禁止¨【提醒】--表示安全或其他内容需关滨本章节中为您提供的安全信息并不是全部的,为了您的安全和利益,我们会根据需要帆部分产品安全信息编排到使用手册的后面章节中,不论这些安全信息置于何处,您均应仔细阅读。
光端机综合说明书

数字视频光端机说明书(使用前先阅本说明书)亲爱的用户:衷心感谢您购买本公司传输产品!为了您的工作能够更加顺利地推进,我们郑重建议您:在动手连接、操作本产品前,务必仔细阅读本说明书,并特别留心其中的各项注意事项。
安全注意事项为避免人身伤害或对本产品以及与之相连接的其它产品造成损坏,请特别留心以下安全注意事项:务必按规定使用本产品以防止发生各种潜在的伤害!注意:●电源电压。
本机只能用于电源为交流100~220V±20%/50Hz的地区,请勿在其它地区使用。
●使用恰当的电源线和电源。
必须使用本产品随机配备的电源线或其它具有机壳保护接地端的合格电源线;与电源线匹配的电源插座的保护接地端必须良好接地。
●注意产品接地。
本产品接地是通过电源线中的接地导体。
为避免电击,电源线中的接地导体必须与大地良好连接。
在连接本产品各光电端口之前,务必确保产品已经妥善接地。
●留心所有端口的极限值。
为避免火灾或电击,在连接本产品前,请留心本产品机身以及本使用手册中所标注的所有极限值或相关标志。
●使用规定的保险管。
●不要冒险操作。
当您怀疑本产品工作不正常时,请向本公司专业服务人员咨询,不要冒险继续操作。
●震动和碰撞。
本机内含精密光学部件,请避免剧烈振动和碰撞。
●请勿打开外盖或擅自进行修理。
本产品机壳内没有用户可维修的部件,产品维修只能由本公司或经本公司授权的专业维修人员进行。
用户自行开盖被视为自动放弃产品保修权利。
警告:●本产品为ⅢB类激光装置。
本机内有人眼不可见的激光辐射,使用不当时可能对人眼及皮肤造成生理性伤害。
本机加电后,严禁用肉眼直视本机光纤输入输出端口或与这些端口相连接的光纤活动连接器端面。
也要避免将激光对准易燃易爆物品,以防止引起火灾。
●本产品对静电敏感。
在接触产品电气接口前务必保证静电释放●为避免发生火灾或触电事故,请勿让本产品淋雨或受潮。
●不要在潮湿环境进行操作。
●严禁开盖操作。
●保持产品表面清洁、干燥。
睿讯KVM单机版-操作使用手册

睿讯数字式KVM单机版操作手册目录1.数字式系列kvm单机版的登录与安全退出 (3)1.1数字式kvm单机版管理软件的登录 (3)1.2 数字式kvm单机版管理软件的安全退出 (4)2.端口访问的设置 (4)2.1查看及修改任意一个“目标设备”的端口信息 (4)2.2怎么连接目标设备会话 (6)3.用户的基本设置 (7)3.1添加用户到单机管理软件 (7)3.2删除用户操作 (8)4.关于界面语言的设置 (9)5.网络的相关配置信息 (10)6.集中管理服务器的设置 (11)7.本地用户角色的设置 (12)8.登录限制和IP访问控制的设置 (13)8.1设置登录限制的时间 (13)8.2设置IP访问控制 (13)9.日志的查看 (14)10.重启单机版KVM管理软件的方法 (16)11.修改当前密码 (18)12.修改调用本地端口快捷键 (19)13.升级KVM固件 (20)14.视频分辨率 (20)15.常见问题 (22)1.数字式系列kvm单机版的登录与安全退出1.1数字式kvm单机版管理软件的登录打开IE浏览器在地址栏,输入KVM装置的IP地址(默认为192.168.0.207),在系统初始登录用户名为Admin、密码为password。
如要正常登录集中管理软件服务器,首先需要知道它的IP地址,并且保证用户PC到服务器网络畅通。
正确登录后界面如下图:1.2 数字式kvm单机版管理软件的安全退出当用户要断开与KVM单机版管理软件的连接时,可以鼠标单击“登出”回到登录界面:2.端口访问的设置2.1查看及修改任意一个“目标设备”的端口信息如上图,鼠标单击“”这个箭头,界面全屏显示:以“70A5C9-56J095”为例,鼠标单击“70A5C9-56J095”,如下图说明:目标机名称可以修改,可以用中文、英文、数字、特殊字符,最大长度为15个,修改完鼠标单击“确定”保存。
2.2怎么连接目标设备会话如果目标设备状态“在线”,鼠标单击“connect”,打开kvm会话窗口:备注:关于KVM会话的具体设置和具体操作间《KVM会话使用说明手册》。
鸿通KVM6系_用户手册

鸿通6系列数字式KVM交换机用户技术手册四川鸿通科技实业有限责任公司2013年7月Rev.07目录目录 (2)第一章(管理及访问)界面 (6)C ONSOLE界面 (6)T ELNET界面 (7)Telnet界面连接及登录 (7)开启/禁用Telnet界面 (7)本地端界面 (8)本地端登录 (8)本地端主界面 (8)本地操作台菜单 (8)本地操作台工具条与快捷方式 (9)本地操作台状态条 (9)本地操作台浏览区 (9)设备缩略图显示区 (9)输入法窗口 (9)退出访问 (10)W EB-HTTP/HTTPS界面 (11)Web界面的使用条件 (11)开启/禁用Web-http/https界面 (11)Web界面登录 (11)web界面访问受控设备 (12)E ASY V IEW客户端 (14)客户端下载 (14)连接及登录 (14)客户端界面 (14)第二章基本设置 (18)网络设置 (18)网络设置入口 (18)配置IP地址及掩码 (18)访问端口号 (18)配置默认网关 (18)双网口工作模式 (18)屏幕刷新自动降速 (18)网络速度限制 (19)设置集群工作模式 (19)设置本机时间 (20)本机时间 (20)启用Internet时间同步(NTP) (20)自定义属性字段 (20)本机属性 (21)本机名称 (21)本机自定义属性 (21)模块属性 (21)模块ID (21)模块名称 (21)模块自定义属性 (22)模块告警设置 (22)模块波特率设置(参数) (23)退出宏 (23)T ELNET透明传输 (23)第三章用户及权限管理 (25)“本机不加入集群”模式下的用户及权限管理 (25)用户管理 (25)用户权限设置 (26)“本机加入集群”模式下的用户及权限管理 (27)第四章访问受控设备 (28)访问方式 (28)通过本地端访问受控设备 (28)使用EasyView客户端访问受控设备 (28)通过Web访问受控设备 (28)访问参数设置 (28)客户端服务器列表 (28)通讯带宽设置 (28)通讯超时间隔 (29)客户端通讯端口 (30)默认访问方式 (30)调整屏幕参数 (31)鼠标同步 (32)什么是鼠标同步 (32)鼠标绝对同步 (33)鼠标自动同步 (33)鼠标单次同步 (33)受控设备的鼠标设置 (34)强制抢占访问 (37)什么是强制抢占访问 (37)强制抢占访问的权限要求 (38)如何进行强制抢占访问 (38)发送特殊键 (38)全屏访问 (39)进入全屏访问 (39)全屏访问的注意事项 (39)全屏访问的操作 (39)屏幕自动缩放 (40)屏幕刷新 (40)串口模块访问功能 (41)复制与粘贴 (41)记录 (41)文件传输 (41)虚媒体功能 (42)虚媒体功能的使用条件及限制 (42)虚媒体功能支持的设备或文件 (42)映射虚拟媒体 (42)停止虚媒体映射 (43)设置USB工作模式 (44)第五章安全管理 (44)用户账号保护 (44)IP访问控制 (45)T ELNET远程管理 (45)R ADIUS设置 (45)H TTP设置 (46)H TTPS设置 (46)重启https (46)本机https证书设置 (46)本机https的证书要求 (47)更换作为根证书服务器的设备 (47)远程访问证书验证 (48)WEB访问验证码 (48)第六章证书管理 (49)证书颁发与安装的相关注意事项 (49)证书查看、删除、吊销 (49)证书颁发 (50)证书导出/导入 (50)证书吊销列表管理 (51)证书及证书系统有效性条件 (51)第七章IPMI (52)BMC列表 (52)查看信息 (52)IPMI电源管理 (53)第八章事件管理 (54)保护及告警管理 (54)保护及告警设置 (54)告警信息客户端通知设置 (54)告警事件客户端通知 (54)查看及清除告警信息 (55)本机日志管理 (55)关于本机日志管理入口的说明 (55)开启/关闭日志记录 (55)查询日志 (55)清理日志 (56)导出日志 (56)SNMP设置 (56)S YS L OG设置 (56)UPNP (57)第九章其他 (58)软件升级 (58)通过Console口升级 (58)通过web界面升级 (58)恢复出厂设置 (59)重新启动 (59)网络测试 (59)IP冲突检测 (59)Ping测试 (59)网络流量 (60)查看本机信息 (60)查看指定模块信息 (60)查看所有端口信息 (60)查看远程连接 (60)查看版本信息 (61)查看客户端版本信息 (61)查看电源 (61)留言板 (61)客户端带宽测试 (62)导出导入配置参数 (62)第一章(管理及访问)界面Console界面Console口界面仅用于管理、配置本产品,只支持admin管理员用户登录。
KVM光端机说明书

一、设备简介KVM-T/R光端机是由KVM发送器(KMT-T)和KVM接收器(KVM-R)组成,通过一芯单模光纤传输视频、Audio、键盘、鼠标、麦克等信号。
在多媒体应用系统中,往往需要把音视频信号、键盘、鼠标、麦克等信号进行远距离传输。
但使用普通的电缆长距离传输时,总会出现输出信号差,容易受干扰,显示出来的图象会出现模糊、拖尾、分色等现象。
同时传输距离短,要多条电缆才能同时传输这些信号,不能满足多媒体信息发布、高清摄像机等场合长距离传输的要求,使用ZY-KVM-T/R光端机进行传输,完全解决了此类问题,传输距离1米-20公里。
同时,光端机传输具有衰减小、频带宽、抗干扰性能强、安全性能高、体积小、重量轻等优点,所以在长距离传输和特殊环境等方面具有无法比拟优势。
KVM光端机设备在多媒体系统中应用,即节省施工成本及走线的复杂性,又能保证高品质的目标为可能。
ZY-KVM-T是光发送器,ZY-KVM-R是光接收器,二个设备配合使用,可实现经ZY-KVM-T 光送器把视频、Audio、键盘、鼠标、麦克等信号经光缆发送给ZY-KVM-R光接收器,特别适用于高清视频信号的传输,军事演习、高清摄像机等各种长距离的应用。
二、装箱清单当您打开包装,请确保符合以下设备及配件的使用1、KVM-T 用来连接电脑,配件如下:一只VGA转DVI的转接头一根音频线一个USB线2、KVM-R用来连接电视、配件如下:一只VGA转DVI的转接头3、两个电源适配器4.、一个用户手册\三、连接设备介绍如何连接KVM-T发送器和KVM-R接收器·【KVM-T】KVM光发送器,是连接到您的电脑或媒体播放或高清摄像机等设备。
连接方法如下所示:使用USB线,VGA转DVI头和音频线,把KVM-T后面板的主接口和PC机连接。
也可以直接采用DVI电缆,把DVI-T发送器后面板的主接口和PC机连接。
把您的电脑或媒体播放设备、KVM-T连接电源,为避免设备损害,请使用标配电源适配器。
讯维Optical Fiber KVM系列光纤KVM坐席协作系统 产品说明书
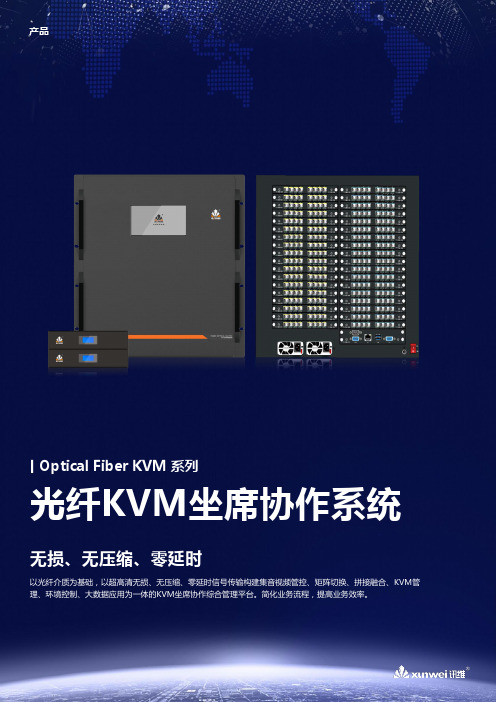
优势非IP 协议架构采用光纤或HDbase-T 的无压缩方式进行传输。
采用非TCPIP 协议方式,不占用网络资源,不受网络环境的带宽限制,同时排除了网络病毒,网络攻击的干扰。
优势无损非压缩支持传输4K 信号,传输过程中无损、无压缩,显示器和大屏画 面完美还原,信号无缝切换,无黑屏、无闪屏、操作无需等待。
优势可视化OSD摒弃KVM 系统简陋单一的纯文字OSD 界面,采用可定制化的 人机交互界面,富有科技感的可视化OSD 菜单,所有信号源 画面及显示屏画面全程可视化,实现本地信号的快速切换和 调用,管理者操作更直观,更快捷。
优势模块化设计采用模块化插卡式架构,提供多种机箱规模可选,支持服务器、摄像机、DVD 、视频会议终端等上百路数据信号接入,支持显示屏、鼠标、键盘等上百路坐席信号输出,随需扩容,灵活方便。
支持包括HDMI 、DVI 、DMS59、SDI 、IP (H.264)、HDBaseT (4K )、KVM 光纤、光纤(4K )等高清和4K 分辨率的各类接口混合输入及输出。
优势可视化操作除了坐席对应的业务服务器,还包括与业务相关的其他音视频信号,如视频会议、监控、大数据平台、外部业务信号。
为应对日益复杂的业务数据,平台控制终端具备信号源预览和大屏监视功能,实现信号的调取管理可视化操作,控制端可同时预览上千路视频信号,显示画面和远端大屏画面一致,回显图像清晰流畅。
优势实时同步坐席人员在操作时,显示器的显示与鼠标键盘的操作同步无延时,与服务器在本地直连的操作体验完全一样,确保了指挥决策的快速准确下达。
功能交互协同具备独立的3.5mm音频接口,可实现各接点间的双向语音交互功能,通过软件发送语音请求,即可完成不同坐席间的语音交互,并可向其他坐席发送操作请求,对方通过请求后,即可控制对方坐席电脑,真正实现坐席间的交互协作功能。
一键上屏具备一键图像推拉屏功能,只需通过热键、鼠标、就将指定信号推送至其他坐席或大屏进行显示,也可将大屏的图像直接抓取到本地坐席上进行观看。
KVM使用说明范文
KVM使用说明范文KVM,即Kernel-based Virtual Machine,是一种用于Linux平台的开源虚拟化架构。
它允许用户在Linux操作系统上创建和管理虚拟机,将一台物理服务器分割成多个独立的虚拟机,每个虚拟机可以运行自己的操作系统和应用程序。
KVM是基于Linux内核的模块化架构,利用硬件虚拟化支持来提供高性能的虚拟化解决方案。
一、KVM安装配置1.硬件要求在安装KVM之前,首先需要确保硬件满足以下条件:- 64位的处理器,支持硬件虚拟化扩展(如Intel的VT-x或AMD的AMD-V);-至少4GB的内存;-虚拟机使用的磁盘空间和网络带宽的要求根据具体需求确定。
2.操作系统要求KVM可以在多种Linux发行版上运行,包括Red Hat Enterprise Linux、CentOS、Ubuntu等。
3.安装KVM使用以下命令可以在Ubuntu上安装KVM:```sudo apt updatesudo apt install qemu-kvm libvirt-daemon-system virtinst bridge-utils```4.配置网络桥接在KVM中,可以选择使用桥接网络或NAT网络。
桥接网络可以使虚拟机直接连接到宿主机所连接的网络上,提供更好的网络性能和灵活性。
要配置网络桥接,首先需要创建一个网桥,可以使用以下命令:```sudo brctl addbr br0sudo brctl addif br0 eth0```其中,eth0是物理网卡的名称。
```auto br0iface br0 inet dhcpbridge_ports eth0bridge_stp offbridge_fd 0bridge_maxwait 0```重启网络服务以使配置生效:```sudo systemctl restart networking```5.创建和管理虚拟机使用virt-manager工具可以方便地创建和管理虚拟机,该工具提供了图形化的界面。
光端机说明书

做特殊连接时请注意针脚分配要求。 请勿打开机壳,请勿在无设备盖板时操作。如盖板或面板已卸下,请勿操
作本产品。 避免接触裸露电路。产品加电时,请勿接触裸露的接点和部件。 在有可疑的故障时请勿操作。如怀疑本产品有损坏,请联络我公司授权的
FIBER
前面板示意图
12345
DC 5V
面板指示灯状态说明
PORT 1 后面板示意图
-
+
指示灯
功能(适用范围:数字视频光端机 1 路和 2 路迷你型系列产品)
P(POWER)(红色) 电源指示灯,该灯亮表示电源接通(发射机和接收机功能相同)
R(RUN)(绿色) 运行灯,通电系统运行正常时该灯闪烁(发射机和接收机功能相同)
以下情况不属于保修条件:
接入非本公司提供的专业电源造成的损坏,如电压过高、极性 接反等;不符合环境使用条件;不依说明书操作;
因错误使用或疏忽而造成的损坏;因其它意外(如雷击、进水、 火灾等)以及一切人为因素造成的损坏等!
-2-
深圳市宙斯盾科技有限公司
使用目录
要
求 储存温度
相对湿度
DC+5V/2A/4A AC90-260V 输入
-40 ~ 85℃ -50 ~100℃ 5% ~ 90%不冷凝
我公司建议通常不使用多模光纤传输,其扩容性不好;尽量使用单模光纤
传输,价格便宜,传输距离远,扩容方便。
2. 视频接口 视频输入/输出阻抗 视频输入/输出电压 视频带宽 视频数码位宽 微分增益 微分相位 场倾斜 信噪比
-9-
深圳市宙斯盾科技有限公司
支持协议 接口速率 通讯工作方式
KVM-1716AC使用说明书

2
目录
目录................................................................................................................................................................................................3 章节一 基本介绍.......................................................................................................................................................................... 3 1.1 包装内容........................................................................................................................................................................ 3 1.2 后面板............................................................................................................................................................................ 5 1.3 可用套件.................................................
LCD KVM 使用说明书

10
LCD KVM 智能控制平台 一台计算机,用‚→‛选择选择下一台计算机。按其它任何键都可 以取消手动扫描 多媒体模块: 你可以选择多媒体模块接在 KVM 后面的‚Link‛口,可以切换 计算机的扬声器和麦克风的声音信号。多媒体模块可以设为开或 关,如果为开,声音信号随着计算机的切换而切换;如果为关,声 音信号将不随计算机的切换而切换。你可以听着本台计算机的声 音,操作另一台计算机。声音模块的设臵将会永久保存在内存里。 扫描类型: ‘Ready PC+ ’ :只扫描开机的计算机和带‘ ’的计算 机。 ‘Ready PC’ :只扫描开机的计算机。 ‘ Only’ :只扫描带‘ ’的计算机,不管这些计算机是 否开机。 扫描类型的设臵将会永久保存在内存里。 扫描速率: 在自动扫描的模式下,显示计算机信息的时间。有 3 秒、8 秒、 15 秒和 30 秒四种选择。 扫描速率的设臵将会永久保存在内存里。 键盘反应速度: KVM 提供键盘打字速度设臵,代替计算机的 BIOS 和 Windows 的设臵。有‘Low’ 、 ‘Middle’ 、 ‘Fast’和‘Faster’四种选择, 分别代表每秒 10 个、15 个、20 个和 30 个字母。键盘反应速度的 设臵会永久保存在内存里。 热键菜单开关: 如果菜单设臵为开,当你在两秒内双击左<Ctrl>,就会在屏幕 上出现热键的操作菜单;如果菜单设臵为关,将不显示操作菜单。 热键菜单的设臵会永久保存在内存里。 连接状态栏显示: 自动关闭:当你选择计算机后,接口数和计算机名称将会在屏 幕显示 3 秒自动消失。总是显示:接口数和计算机名或 OSD 状态称 将会永久在屏幕显示。 连接状态栏显示的设臵会永久保存在内存里。
三拓kvm使用说明书

三拓kvm使用说明书
1、将本地用户端的键盘、鼠标和显示器插入设备的控制端口及视频输入端口。
注意:数字KVM交换机与本地显示器、键盘、鼠标之间的距离不能超过10米。
2、用CAT5网线连接任何可用的KVM端口和服务器模块,模块应适用于正在安装的目标服务器。
注意:KVM与服务器模块之间的距离不能超过50米长度。
3、将KVM模块连接头插入目标服务器的相应端口。
4、用一根标准以太网电缆连接标记为LAN1的网络端口和以太网交换器、集线器或路由器。
5、如启用故障切换器功能,用另一根标准以太网电缆连接标记为LAN2的网络端口和以太网交换器、集线器或路由器。
6、将包装提供的电源线插入数字KVM交换机的电源插座,然后再将其插入交流电源。
7、如要使用双电源冗余功能,用另一根电源线插入数字KVM交换机的电源插座,然后再将其插入交流电源。
完成数字KVM交换机线缆连接后,即可打开电源。
供电后,您即可开启电脑。
注意事项:
开始安装设备前,请确认已经关闭待连接设备的电源。
为避免损坏设备,请确保所有待连接的设备已接地。
光端机操作手册
DS-3D01网络光端机操作手册杭州海康威视数字技术股份有限公司技术热线:400-700-5998UD.6L0103C0001A01非常感谢您购买我公司的产品,如果您有什么疑问或需要请随时联系我们。
本手册适用于网络光端机DS-3D01T-A、DS-3D01R-A、DS-3D01T-B、DS-3D01R-B、DS-3D01T-C、DS-3D01R-C。
本手册可能包含技术上不准确的地方、或与产品功能及操作不相符的地方、或印刷错误。
我公司将根据产品功能的增强而更新本手册的内容,并将定期改进或更新本手册中描述的产品或程序。
更新的内容将会在本手册的新版本中加入,恕不另行通知。
0100001020529安全使用注意事项此内容的目的是确保用户正确使用本产品,以避免危险或财产损失。
在使用此产品之前,请认真阅读此说明手册并妥善保存以备日后参考。
如下所示,预防措施分为“警告”和“注意”两部分:警告:无视警告事项,可能会导致死亡或严重伤害。
注意:无视注意事项,可能会导致伤害或财产损失。
事项提醒用户防范潜在的死亡或严重伤害危险。
事项提醒用户防范潜在的伤害或财产损失危险。
警告⏹在本产品安装使用中,必须严格遵守国家和使用地区的各项电气安全规程。
⏹请使用正规厂家提供的电源适配器,供电电源要求为DC12V/1A。
⏹在接线、拆装等操作时请一定要将电源断开,切勿带电操作。
⏹如果设备工作不正常,请联系购买设备的商店或最近的服务中心,不要以任何方式拆卸或修改设备。
(对未经认可的修改或维修所导致的问题,本公司不承担责任)。
⏹光端机的光器件所产生的光源能对人的眼睛产生永久性伤害,切勿用眼睛直视光端机的光器件和通电状态下光端机的光纤接口。
⏹在光端机上插拔光纤时,切断电源。
注意⏹请不要使物体摔落到设备上或大力震动设备,并使设备远离存在磁场干扰的地点。
避免将设备安装到表面震动或容易受到冲击的地方。
(忽视此项可能会损坏设备)⏹请不要在高温(超过75℃)或低温(低于-40℃)或高湿度地点安装设备。
FVX-3000 多模式光纤KVM扩展器产品说明书
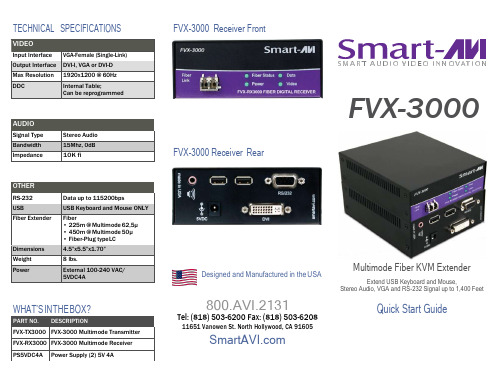
APPLICATION DIAGRAM
WHY FIBER OPTIC?
SmartAVI has created a full line of fiber optic extender products, understanding that this technology is superior to traditional cabling.
8 lbs.
External 100-240 VAC/ 5VDC4A
WHAT’S IN THE BOX?
PART NO. DESCRIPTION FVX-TX3000 FVX-3000 Multimode Transmitter FVX-RX3000 FVX-3000 Multimode Receiver PS5VDC4A Power Supply (2) 5V 4A
optic cabling is the only solution.
•Much more secure because they cannot be easily tapped. For this reason, military and law enforcement
agencies use fiber optic cables for the transmission of sensitive data.
CONNECTING THE FVX-3000
1. Turn off all devices. 2. Connect the VGA cable, USB cable, and audio cable (not included) to their appropriate ports on the FVX-3000
Transmitter (TX). 3. Connect the monitor/display to the DVI out of the FVX-3000 Receiver (RX). If using a VGA monitor, use a VGA-to-
NoteConsort KVM控制台设备说明说明书
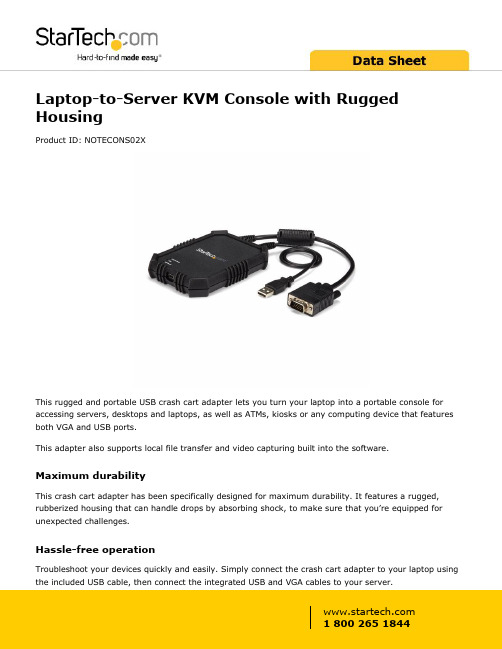
Laptop-to-Server KVM Console with Rugged HousingProduct ID: NOTECONS02XThis rugged and portable USB crash cart adapter lets you turn your laptop into a portable console for accessing servers, desktops and laptops, as well as ATMs, kiosks or any computing device that features both VGA and USB ports.This adapter also supports local file transfer and video capturing built into the software.Maximum durabilityThis crash cart adapter has been specifically designed for maximum durability. It features a rugged, rubberized housing that can handle drops by absorbing shock, to make sure that you’re equipped for unexpected challenges.Hassle-free operationTroubleshoot your devices quickly and easily. Simply connect the crash cart adapter to your laptop using the included USB cable, then connect the integrated USB and VGA cables to your server.The crash cart adapter features a flexible software interface that offers robust performance. Itenables you to transfer files from your laptop to the server, monitor and capture activity from the connected device as video for records or instructional purposes, and take screenshots and scale the display window to full-screen mode or smaller, without scroll bars.Compact portabilityThis compact crash cart adapter lets you connect to a headless device using only a laptop, eliminating the need to lug around an awkward, traditional server room crash cart. With optimal portability in mind for your mobile administration or repairs, this pocket-sized adapter features a small footprint and lightweight design that easily fits inside your laptop bag.The adapter is USB powered so you won't need to carry a power adapter. Plus, the KVM cables are attached to the crash cart adapter so you won't need additional accessories to connect it to your server. The built-in cables have been engineered with strain relief, preventing them from wearing or breaking.Universal connectivityWith no server-side software installation required, the USB crash cart adapter provides BIOS-level control of any PC or device that has both a VGA port and a USB port.The NOTECONS02X is backed by a 2-year warranty and free lifetime technical support.Certifications, Reports and Compatibility Applications•Travel to remote server rooms to perform on-site maintenance on awide variety of servers and terminals•Keep your routine diagnostics and repairs portable, by replacing a bulky crash cart•Gain full console access to servers located in small spaces, or congested server racks where a fixed-installation console is notfeasible•Perform maintenance on headless servers or other computers, such as ATMs and VLT terminals, that don’t support a monitor, keyboardor mouseFeatures•Durable performance, with a rubberized housing•Maximum portability with a compact footprint, built-in KVM cables and USB power•Hassle-free setup with plug-and-play installation•Built-in cables with strain relief to prevent wearing or breaking •Supports file sharing and video capture between your laptop and the connected server•Optimized viewing with automatic video scaling that resizes the viewing panel to avoid scroll bars•Supports resolutions up to 1920x1200•LED indicators for USB, video, and console link•Works with legacy and industrial devicesWarranty 2 YearsHardware Audio NoCables Included YesDaisy-Chain NoKVM Ports1Number of Monitors Supported1PC Interface USBPC Video Type VGARack-Mountable NoPerformance Hot-Key Selection NoIP Control NoMaximum Analog Resolutions1920x1200 @ 60HzMaximum Number of Users1On-Screen Display NoConnector(s)Console Interface(s) 1 - USB Mini-B (5 pin) Female InputHost Connectors 1 - USB Type-A (4 pin) USB 2.0 Male1 - VGA (15 pin, High Density D-Sub) MaleSoftware OS Compatibility Windows® XP, Vista, 7, 8, 8.1, 10Windows Server® 2008 R2, 2012, 2012 R2, 2016, 2019Mac OS® 10.9 to 10.15Linux 2.6 to 4.11 LTS versions onlySpecial Notes / Requirements Note If you're interfacing with a Linux device, this adapter is onlycompatible with standard QWERTY keyboards in U.S EnglishconfigurationIndicators LED Indicators 1 - Host/Server Keyboard/Mouse USB Link1 - Host/Server Video (VGA) Link1 - User Console/USB LinkPower Power Source USB-PoweredEnvironmental Humidity80% RHOperating Temperature0°C to 40°C (32°F to 104°F)Storage Temperature-40°C to 70°C (-40°F to 158°F)PhysicalCharacteristicsCable Length16.4 in [416 mm]1 x 15in (385mm) USB host cable, 1 x 3in (76mm) VGAhost cable, 1 x 6ft (1.8m) USB Console cableColor BlackMaterial PlasticProduct Depth 4.5 in [115 mm]Product Height0.9 in [2.2 cm]Product Length 4.9 in [12.5 cm]Product Width 3.5 in [88 mm]Weight of Product8.6 oz [244 g]Package Height 1.9 in [47 mm]PackagingInformationPackage Length11.9 in [30.1 cm]Package Width 6.5 in [16.5 cm]Shipping (Package) Weight 1 lb [0.5 kg]What's in the Box Included in Package 1 - Rugged crash cart adapter1 - USB A to Mini-B cable1 - USB software key1 - Quick start guideProduct appearance and specifications are subject to change without notice.。
iPGARD SDMN-4S-P4 4-Port DVI-I 安全 KVM 切换器用户手册说明书
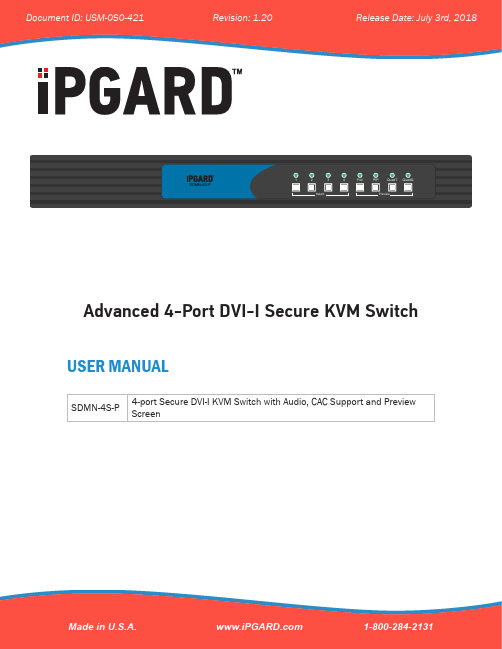
Advanced 4-Port DVI-I Secure KVM Switch USER MANUALSDMN-4S-P4-port Secure DVI-I KVM Switch with Audio, CAC Support and Preview ScreenTABLE OF CONTENTS3444588991012121213TECHNICAL SPECIFICATIONS___________________________________________________________ WHAT’S IN THE BOX?_________________________________________________________________SECURITY FEATURES_________________________________________________________________SDVN FRONT AND REAR______________________________________________________________INSTALLATION_______________________________________________________________________CAC INSTALLATION: COMMON ACCESS CARD, SMART CARD READER__________________________CAC PORT CONFIGURATION____________________________________________________________AUDITING: Dumping the Event Log via User Menu Options___________________________________RESET: Restore Factory Default_________________________________________________________LED’s BEHAVIOR_____________________________________________________________________SYSTEM OPERATION__________________________________________________________________TROUBLESHOOTING__________________________________________________________________TECHNICAL SUPPORT_________________________________________________________________LIMITED WARRANTY STATEMENT_______________________________________________________SECURITY FEATURESAnti-Tamper SwitchesEach model is equipped with internal Anti-Tamper switches, which sense attempts to open the device enclosure. Once the system identifies such an attempt, all the front panel LED’s will flash rapidly and the unit will become useless by shutting off connection with all attached PCs and peripherals disabling any functionality.Tamper-Evident SealThe enclosure of the unit is protected with a tamper-evident seal to provide a visual evidence if the unit has been opened.Protected FirmwareThe controller of the unit has a special protection feature that prevents reprogramming or reading the firmware.High Isolation on USB ChannelsOpto-isolators are used in the unit to keep USB data paths electrically isolated from each other, providing high isolation and preventing data leakage between ports.Secure EDID EmulationThe unit prevents unwanted and unsecure data to be transmitted through the DDC lines by means of secure EDID learning and emulation.Figure 4-2: SDMN-4S-P Rear panelINSTALLATIONSYSTEM REQUIREMENTS*TOE -P and -X models onlyTable 5-11. iPGARD Secure PSS is compatible with standard personal/portable computers, servers or thin-clients, running operating systems such as Windows or Linux.2. The peripheral devices that are supported by the KVM are listed in the following table:Figure 5-1: SDMN-4S-PQuadQQuadT Full PIPINSTALLATIONSingle-Head Units:1. Ensure that power is turned off or disconnected from the unit and the computers.2. Use a DVI cable to connect the DVI output port from each computer to the corresponding DVI-I IN ports of the unit.3. Use a USB cable (Type-A to Type-B) to connect a USB port on each computer to the respective USB ports of the unit.4. Optionally connect a stereo audio cable (3.5mm to 3.5mm) to connect the audio output of the computers to the AUDIO IN ports of the unit.5. Connect a monitor to the DVI-I OUT console port of the unit using a DVI cable.6. Connect a USB keyboard and mouse in the two USB console ports.7. Optionally connect stereo speakers to the AUDIO OUT port of the unit.8. Optionally connect CAC (COMMON ACCESS CARD, SMART CARD READER) to the CAC port in the user console interface. For –P Models.9. Finally, power on the KVM by connecting a 12VDC power supply to the power connector, and then turn on all the computers.Figure 6-1: SDMN-4S-PNote: The computer connected to port 1 will always be selected by default after power up.Note: You can connect up to 2 computers to the 2 port KVM and up to 4 computers to the 4 port KVM.IMPORTANT WARNINGS - For security reasons:• This product does not support wireless devices. Do not attempt to use a wireless keyboard or a wireless mouse with this product.• This product does not support keyboards with integrated USB hubs or USB ports. Only use standard (HID) USB keyboards with this device.• This product does not support microphone audio input or line input. Do not connect any microphones or headsets with microphones to this device.• Connection of authentication devices (CAC) with external power sources is prohibited.Figure 7-1: SDMN-4S-PFigure 7-2: SDMN-4S-PEDID Learn:The monitors must be connected to the video output connectors located on the console at the backof the KVM during the EDID learn process.There are one way to get the EDID on the SDMN-4S-P.Note:Only the display connected to the “PREVIEW” connector can get its local EDID.Through the buttons of the front panel:Hold down Button #1 and Button #8 at the same time for about 5 seconds and then let go. The entire top row of LEDs will blink while waiting for any of the following three commands for EDID:• Hold Button #1 and let go after both the top and bottom rows of LEDs are blinking. This will load the onboard EDID FHX2300 to the “DVI OUT” display.• Hold Button #2 and let go after both the top and bottom rows of LEDs are blinking. This will load the onboard EDID H213H to the “DVI OUT” display.• Hold Button #3 and let go after both the top and bottom rows of LEDs are blinking. This will get and load the local EDID of the monitor connected to the “PREVIEW” connector.CAC (COMMON ACCESS CARD, SMART CARD READER) INSTALLATIONCAC PORT CONFIGURATIONThe following steps are intended for the system administrator or IT manager only.If you have the optional CAC ports there will be 2 ports on a 2 host ports KVM and 4 ports on a 4 host ports KVM.CAC connection to the computer requires a USB cable connection separate from the keyboard and mouse. This allows the CAC to be connected independently from the keyboard and mouse. It also allows the user to select whether CAC for a certain computer is supported or not.1. Ensure that power is turned off or disconnected from the unit and the computer.2. Use a USB cable (Type-A to Type-B) to connect a USB port on a computer to its respective CAC USB ports on the KVM. Do not connect the USB cable if CAC functionality is not needed for that computer.3. Connect a CAC (smart card reader) to the CAC port in the user console interface.4. Power on the KVM by connecting a 12VDC power supply to the power connector, and then turn on all the computers.5. To disable CAC for any channel (all CAC ports are enabled as default), use the front panel buttons to switch the KVM to the channel whose CAC mode you wish to change. Once the channel is selected, the button LED for this specific channel should be on (CAC port enabled). Press and hold the button for 3 seconds until the button LED turns off. The CAC port is now disabled for this channel.6. To enable CAC for any channel, use the front panel buttons to switch the KVM to the channel whose CAC mode you wish to change. Once the channel is selected, the button LED for this specific channel should be off (CAC port disabled). Press and hold the button for 3 seconds until the button LED turns on. The CAC port is now enabled for this channel.The following steps are intended for the system administrator and operators (users). Note: Only one computer connected to port 1 is required for this operationCAC port Configuration is an optional feature, allowing registration of any USB peripheral to operate with the KVM. Only one peripheral can be registered and only the registered peripheral will operate with the KVM. By default, when no peripheral is registered, the KVM will operate with any Smart Card Reader.Configure the CAC Port via User Menu Options1. Open the Administration and Security Management Program.2. Using the keyboard, press the Alt key twice and type “cnfg”.3. At this stage the mouse connected to the KVM/KM will stop functioning.4. Enter the default username “user” and press Enter.5. Enter the default password “12345” and press Enter.6. Select option 2 from the menu on your screen and press Enter.7. Connect the peripheral device to be registered to the CAC USB port in the console side of theKVM/KM and wait until the KVM/KM is reading the new peripheral information.8. The KVM/KM will list the information of the connected peripheral on the screen and buzz 3 times when registration is completed.Figure 8-1 User MenuAUDITING: Dumping the Event Log via User Menu OptionsRESET: Restore Factory DefaultsThe following steps are intended for the system administrator.Note: Only one computer connected to port 1 is required for this operationThe Event Log is a detailed report of critical activities stored in the KVM or KVM memory. A comprehensive feature list and guidance for Administration and Security Management Tools can be found in the Administrator’s Guide available for download from: /documentation/To view or dump the Event Log:1. Open the Administration and SecurityManagement Program2. Using the keyboard, press the Alt key twice andtype “cnfg”.3. Enter the default admin name “admin” and pressEnter.4. Enter the default password “12345” and pressEnter.5. Request a Log Dump by selecting option 5 in themenu. (Shown in Figure 9-1)* See Administration and Security Management Tool Guidance for detailed information.* See Administration and Security Management Tool Guidance for detailed information.The following steps are intended for the system administrator.Note: Only one computer connected to port 1 is required for this operation Restore Factory Defaults will reset all settings on the KVM to their original state To Restore Factory Defaults via User Menu Options:KVM modeCAC port registration will be removedKVM settings will be reset to factory defaults1. Open the Administration and Security Management Program2. Using the keyboard, press the Alt key twice and type “cnfg”3. Enter the default admin name “admin” and press Enter.4. Enter the default password “12345” and press Enter.5. Select option 7 from the menu on your screen and press enter. (Menu shown in Figure 9-1)Figure 9-1LED’s BEHAVIORUser Console Interface – Display LED: User Console Interface – CAC LED:Front Panel – Port Selection LED’s:Front Panel – CAC Selection LED’s:Front Panel - Port and CAC Selection LED’s: IMPORTANT!#Status Description1Off Monitor is not connected2On Monitor is connected3Flashing EDID problem – Learn EDID to fix the problem #Status Description1Off CAC is not connected2On Authorized and functional CAC is connected 3Flashing Non-CAC peripheral is connected#Status Description1Off Non-selected port2On Selected port3Flashing EDID learn in process#Status Description1Off CAC port is disabled or non-selected port2On CAC port is enabled3Flashing EDID learn in process#Status Description1All Flashing Connected peripheral to keyboard or mouseconsole ports is rejected If all the Front Panel LED’s are flashing and the buzzer is beeping, the KVM has been TAMPERED with and all functions are permanently disabled. Please contact iPGARD technical support at ******************.If all Front Panel LED’s are on and not flashing, the POWER UP SELF TEST has failed and all functions are disabled. Check if any of the front panel port selection buttons are jammed. In this case, release the jammed button and recycle the power. If power up self test is still failing, please contact iPGARD technical support at******************.1FullTo switch to an input port, simply push the desired input button on the front-panel of the KVM. If an input port is selected, the LED of that port will turn on.To switch display modes, press the desired preview mode button on the front control panel.Full Screen ModeIn the Full Screen mode, one of the four video sources is displayed in full screen size at maximum resolution. Keyboard and mouse operations are not affected. Pressing the Full screen mode preview button on the front panel of the KVM will rotate the video input source/channel.PIP ModePIP mode is fixed is size and position, the full screen displays one of the four video sources, and a smaller image (thumbnail) containing another video source on the right-hand margin of the screen allows for simultaneous monitoring. Pressing the PIP screen mode preview button on the front panel of the KVM will rotate the full screen and thumbnail video input sources/channels.QuadT ModeIn QuadT mode, the full screen displays one of the four video sources, and is accompanied by three smaller images (thumbnails) containing the other video sources on the right-hand margin of the screen, allowing simultaneous monitoring. Pressing the QuadT screen mode preview button on the front panel of the KVM will rotate the full screen and thumbnails preview locations and sources.QuadQ Mode In QuadQ-mode, the screen is split into four fields of equal size with the four selected video sources or computers being displayed in each of these fields.the four computer are always in the same order. The user can not change the position or the size of the window.FRONT PANEL CONTROLPREVIEW SELECTIONSYSTEM OPERATIONTROUBLESHOOTING TECHNICAL SUPPORT • Make sure that the power adapter is securely connected to the power connector of the unit.• Check the output voltage of the power supply and make sure that the voltage value is around 12VDC.• Replace the power supply.• Check if all the video cables are connected properly.• Connect the computer directly to the monitor to verify that your monitor and computer are functioning properly.• Restart the computers.• Check if the keyboard is properly connected to the unit.• Check if the USB cables connecting the unit and the computers are properly connected.• Try connecting the USB on the computer to a different port.• Make sure that the keyboard works when directly connected to the computer.• Replace the keyboard.• Check if the mouse is properly connected to the unit.• Try connecting the USB on the computer to a different port.• Make sure that the mouse works when directly connected to the computer.• Replace the mouse.• Check if all the audio cables are connected properly.• Connect the speakers directly to the computer to verify that the speakers and the computer audio are functioning properly.• Check the audio settings of the computer and verify that the audio output is through the speakers.• Check if the USB cables connecting the unit and the computers are properly connected.• Make sure the CAC port is enabled.For product inquiries, warranty questions, or technical questions, please contact ***************.Note: The NUM, CAPS, and SCROLL Lock LED indicators on the keyboard are not supposed to light up if connected to the KVM.Front Panel Control To switch to an input port, simply push the desired input button on the front-panel of the KVM. If an input port is selected, the LED of that port will turn on.No Power No Video Keyboard is not workingMouse is not working No Audio No CAC (COMMON ACCESS CARD, SMART CARD READER)LIMITED WARRANTY STATEMENTA. Extent of limited warrantyiPGARD, Inc. warrants to the end-user customers that the iPGARD product specified above will be free from defects in materials and workmanship for the duration of 1 year, which duration begins on the date of purchase by the customer. Customer is responsible for maintaining proof of date of purchase.iPGARD limited warranty covers only those defects which arise as a result of normal use of the product, and do not apply to any:a. Improper or inadequate maintenance or modificationsb. Operations outside product specificationsc. Mechanical abuse and exposure to severe conditionsIf iPGARD receives, during applicable warranty period, a notice of defect, iPGARD will at its discretion replace or repair defective product. If iPGARD is unable to replace or repair defective product covered by the iPGARD warranty within reasonable period of time, iPGARD shall refund the cost of the product.iPGARD shall have no obligation to repair, replace or refund unit until customer returns defective product to iPGARD.Any replacement product could be new or like new, provided that it has functionality at least equal to that of the product being replaced.iPGARD limited warranty is valid in any country where the covered product is distributed by iPGARD.B. Limitations of warrantyTo the extent allowed by local law, neither iPGARD nor its third party suppliers make any other warranty or condition of any kind whether expressed or implied with respect to the iPGARD product, and specifically disclaim implied warranties or conditions of merchantability, satisfactory quality, and fitness for a particular purpose.C. Limitations of liabilityTo the extent allowed by local law the remedies provided in this warranty statement are the customers sole and exclusive remedies.To the extent allowed by local law, except for the obligations specifically set forth in this warranty statement, in no event will iPGARD or its third party suppliers be liable for direct, indirect, special, incidental, or consequential damages whether based on contract, tort or any other legal theory and whether advised of the possibility of such damages.D. Local lawTo the extent that this warranty statement is inconsistent with local law, this warranty statement shall be considered modified to be consistent with such law.DESIGNED AND MADE IN THE USANOTICEThe information contained in this document is subject to change without notice. iPGARD makes no warranty of any kind with regard to this material, including but not limited to, implied warranties of merchantability and fitness for particular purpose. iPGARD will not be liable for errors contained herein or for incidental or consequential damages in connection with the furnishing, performance or use of this material. No part of this document may be photocopied, reproduced, or translated into another language without prior written consent from iPGARD, Inc.20180109Toll Free: (888) 994-7427Phone: (702) 990-0523Fax: (702) 441-55903291 N. Jones Blvd.,Las Vegas, NV 89108。
KVM5-300产品说明书

4 .产品描述
下面的数字显示本系列的典型应用。可能会与您所购买的型号可能会略有不同,从插图中所描述为参考 Console Unit
Co m puter Uni t
ቤተ መጻሕፍቲ ባይዱ2-
5 .安装设定
5 .1 接地 为了防止造成产品或任何连接的设备损害,此点确认十分重要,以确保显示器(和/或电脑)和 KV M 延长器 连接到正确接地。
请仔细阅读本说明书,并按照其安装程序,以防止任何损害的单位或者任何连接设备
*根据实际产品为最终规格。 *为防止损害您的安装及设备,务必重要是,所有的设备都正确接地。
Ro HS
1 .产品介绍
K V M 延长器由一台本地端控制台(Co mputer Uni t ) 和远程控制台 Conso le(Stat ion),两端控制面板连接各一 组键盘/显示器/鼠标并可透过 300 米内之低廉的 5 类/5e/6 类 UTP(unsh ie lded tw isted pa ir )缆线以远距离访问 并支持高影像解释度为 Ful l HD(1920 x 1080)/W U X G A(1920 x 1200)/UXG A(1600 x 1200)/Q W X G A(2048 x 计算机或 KV M 。 1152)/1920 x 1440 ,并采用简单的热键指令,你可以很方便地调整视频质量,以补偿因电缆长度和连接的服务 所 造成的视频质量差异,如均衡器(清晰度),增益(亮度)之间以同步达到最佳视频分辨率,及可调整 RGB 零 徧移斜延迟。本产品为经济并具可扩展性特色,专为为成长型企业设计。 也它提供了一个方便并可远程访问服 务器, 让你不论坐落在一个安全,干净或恶劣的环境皆可以便捷的方式访问 服务器。
Connect ion of 1to-3 and 1-to-2 cable
kvm说明书
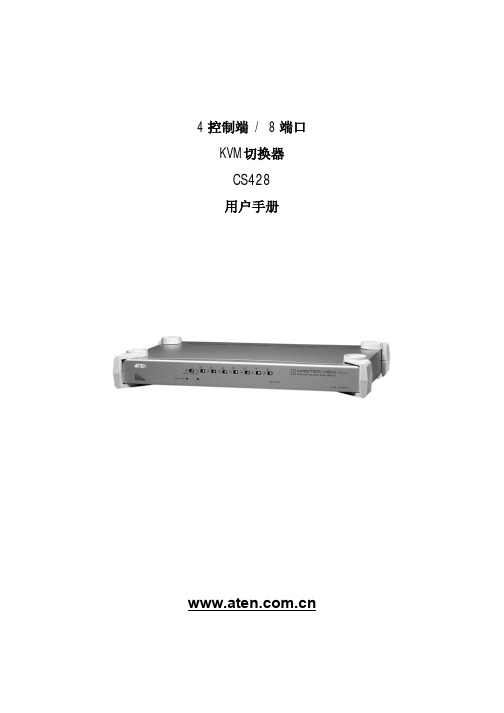
此产品符合 RoHS 规范。
SJ / T 11364-2006
以下信息与中国市场销售相关。
ii
用户信息
在线注册
请在本公司的在线支持中心注册您的产品。 u 国际 --- u 北美 --- /product_registration u 中国地区---
制造商并不担负任何未经授权调整本设备所造成的收音机及/或电视干扰的责任,用户必须 自行修正干扰。
操作前如未正确选择操作电压的设定,制造商将不担负因此所导致任何损害的责任。使用前 请务必确认电压设置为正确的。
iii
CS-428 User Manual
包装明细
CS428 包装明细如下: u 1 CS428 KVM 切换器 u 2 KVM 线缆(2L-1701S) u 1 电源适配器 u 1 机架安装套件 u 1 用户手册*
© 版权所有 2006 宏正自动科技股份有限公司 用户手册编号:PAPE-0167-300G 印刷日期:05/2007
所有品牌名称和商标皆已注册,版权所有
iv
目录
CS-428 User Manual
FCC 信息 ................................................................ ii RoHS .................................................................... ii SJ / T 11364-2006 ....................................................... ii 用户信息 ............................................................... iii
KVME-300说明书

❾ RJ-45 System Link ❿ Magnetic Pad
CBK1512T 3in1 KVM Cable
/ Installation and Operation
1. Transmitter Installation (1) (1) Site Selection: In your first time installation, place Transmitter near the PC or KVM Switch console you want to extend; you can use magnetic pad to attach the unit on a metal plane (Ex PC / Server enclosure) or use attachable rack mounting kit to fix the unit on selected area by screw or nail.
2. Receiver Installation and UTP Connection: (1) Site Selection: Please place Receiver in an appropriate place and have the UTP cable settled for later connection. You can use magnetic pad to attach the unit on a metal plane or use attachable rack mounting kit to fix the unit on selected area by screw or nail.
PC or KVM Switch CBK1512T
Connection of Transmitter
- 1、下载文档前请自行甄别文档内容的完整性,平台不提供额外的编辑、内容补充、找答案等附加服务。
- 2、"仅部分预览"的文档,不可在线预览部分如存在完整性等问题,可反馈申请退款(可完整预览的文档不适用该条件!)。
- 3、如文档侵犯您的权益,请联系客服反馈,我们会尽快为您处理(人工客服工作时间:9:00-18:30)。
一、设备简介
KVM-T/R光端机是由KVM发送器(KMT-T)和KVM接收器(KVM-R)组成,通过一芯单模光纤传输视频、Audio、键盘、鼠标、麦克等信号。
在多媒体应用系统中,往往需要把音视频信号、键盘、鼠标、麦克等信号进行远距离传输。
但使用普通的电缆长距离传输时,总会出现输出信号差,容易受干扰,显示出来的图象会出现模糊、拖尾、分色等现象。
同时传输距离短,要多条电缆才能同时传输这些信号,不能满足多媒体信息发布、高清摄像机等场合长距离传输的要求,使用ZY-KVM-T/R光端机进行传输,完全解决了此类问题,传输距离1米-20公里。
同时,光端机传输具有衰减小、频带宽、抗干扰性能强、安全性能高、体积小、重量轻等优点,所以在长距离传输和特殊环境等方面具有无法比拟优势。
KVM光端机设备在多媒体系统中应用,即节省施工成本及走线的复杂性,又能保证高品质的目标为可能。
ZY-KVM-T是光发送器,ZY-KVM-R是光接收器,二个设备配合使用,可实现经ZY-KVM-T 光送器把视频、Audio、键盘、鼠标、麦克等信号经光缆发送给ZY-KVM-R光接收器,特别适用于高清视频信号的传输,军事演习、高清摄像机等各种长距离的应用。
二、装箱清单
当您打开包装,请确保符合以下设备及配件的使用
1、KVM-T 用来连接电脑,配件如下:
一只VGA转DVI的转接头
一根音频线
一个USB线
2、KVM-R用来连接电视、配件如下:
一只VGA转DVI的转接头
3、两个电源适配器
4.、一个用户手册
\
三、连接设备
介绍如何连接KVM-T发送器和KVM-R接收器
·【KVM-T】KVM光发送器,是连接到您的电脑或媒体播放或高清摄像机等设备。
连接方法如下所示:使用USB线,VGA转DVI头和音频线,把KVM-T后面板的主接口和PC机连接。
也可以直接采用DVI电缆,把DVI-T发送器后面板的主接口和PC机连接。
把您的电脑或媒体播放设备、KVM-T连接电源,为避免设备损害,请使用标配电源适配器。
发送器和接收器之间通过单芯光纤连接。
四、KVM-T发送器接口说明:
KVM-T发送器是连接您的信号源电脑PC的,后面板上需要连接的有:电源输入,光纤接口,音视频输入、键盘、鼠标信号输入。
在DVI接口边的开关,可以切换输入源的为DVI或VGA. 注:KVM-T发送器背面板上的DVI接口是DVI-1,可同时兼容DVI-D类(数字信号),一般称为DVI接口,或DVI-A(模拟信号),当需要VGA信号输入时,请使用VGA转DVI线(头)连接。
如果您想使用性能更好的DVI-D类(数字)信号,您可以使用DVI-D电缆连接电脑和编码器。
·前后面板
前面板上有两个LED灯,“power”表示电源,“status”表示工作状态。
音频线连接发送器上的音频输入口“IN”和您电脑的音频输出口。
光纤接口用于连接发送器和接收器。
五、指示灯和开关
六、KVM-R接收器接口说明:
KVM-R接收器是连接到您的电视机(显示器)或DVR.
前后面板
前面板上有两个LED灯,“power”表示电源,“status”表示工作状态。
后面板上的DVI+VGA口、音频口连接您的显示设备,音频输出设备及键盘、鼠标信号,为避免设备损害,请使用标配电源适配器。
七、LED指示灯
八、
九、设备参数
卫生执勤表
\
办公室清洁包括大厅、卫生间、仓库卫生,请自觉按执勤表上安排的人员执行,美好的办公室环境需要大家共同创造。
