Mule+ESB+Studio +v3.3安装使用手册
MuleESB使用手册

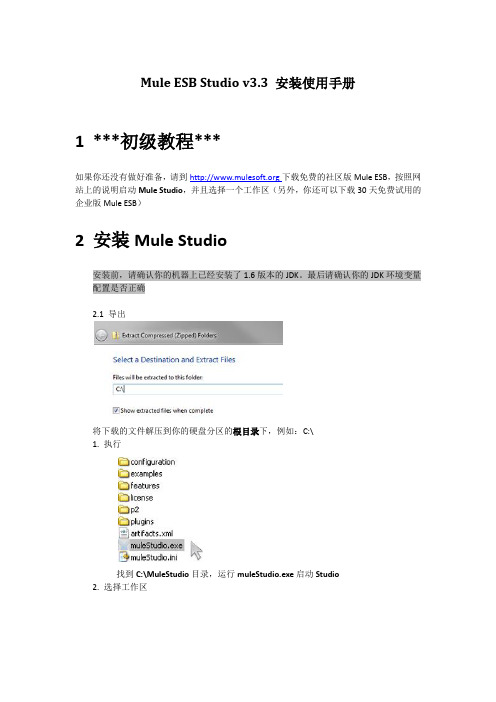
Mule ESB Studiov3.3 安装使用手册1***初级教程***如果你还没有做好准备,请到http://www.mulesof 下载免费的社区版MuleESB,按照网站上的说明启动Mule Studio,并且选择一个工作区(另外,你还可以下载30天免费试用的企业版Mu le ESB)2安装Mule Studio安装前,请确认你的机器上已经安装了1.6版本的JDK。
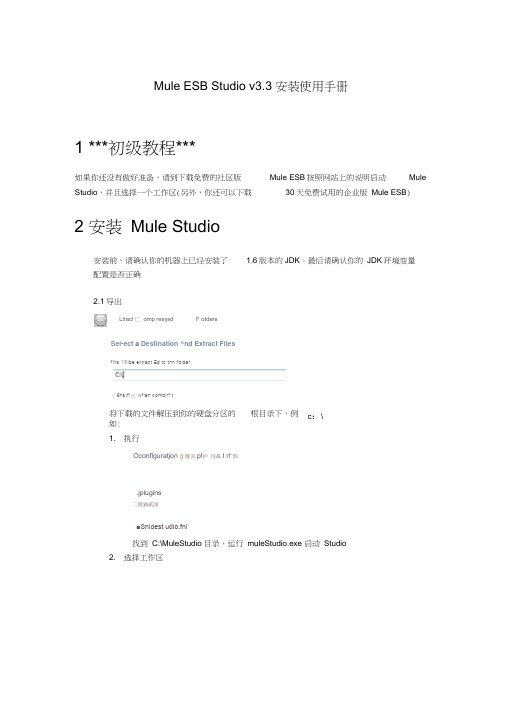
最后请确认你的J DK环境变量配置是否正确2.1 导出将下载的文件解压到你的硬盘分区的根目录下,例如:C:\1. 执行找到C:\MuleStu dio目录,运行muleStudio.exe启动St udio2. 选择工作区点击OK使用默认的工作区3使用Studio模板1. 点击File菜单,选择New > Mule Project2. 出现New Mule Project面板后,为你的项目输入名称和一个简短的说明,如图:3. 在Server Runtime选项上选择你将要使用的M ule运行时版本,如图:4. 点击旁边的复选框,根据现有的模板创建项目,单击项目,选择你想要使用的模板创建项目,如图:5. 点击Finis h按钮,Mule Studio会创建并打开一个新的项目,完成预创建和预配置的流程6. 在Mule Studio的Package Explore r栏中,右键点击mule-config.mflow文件,选择RunAs > Mule Applica tion7. 停止运行该项目,请在MuleStudio控制台点击红色的T erminate按钮,如图:4运行独立的例子1. 到Mule ESB Standal one目录下,找到Examples目录下你想运行的例子2. 拷贝.zip文件的例子到$MULE_HO ME/apps目录下,例如:运行Flight Reserva tionexample的例子,拷贝mule-e xample-flight-reserva tion-3.3.0.zip到$MULE_HO ME/apps 目录下,如图:3. 启动Mule,运行这个例子5启动Mule Studio如果你在安装过程中启动了M ule Studio,并且已经在运行了,请跳过本节的其余部分,直接进行:创建新项目如果当前Mule Studio没有启动,通过完成下面的步骤启动应用程序1. 找到Mule Studio安装目录2. 执行muleStudio.exe3. 点击OK使用默认的工作区6创建新项目1. 如果你看到是各种控制组件的应用程序窗口(右下图),请直接进入第2节。
MuleESB 3.0 中文教程(繁体)
MuleESB 3.0 中文教程(繁體)什麼是Mule ESB?Mule ESB是一種基於java的、羽量級的企業服務匯流排和集成平臺,她允許開發者快速的、簡單的連接應用,並能夠實現資料的轉換。
從2005年發表1.0版本以來,Mule吸引了越來越多的關注者,成為開源ESB中的一支獨秀。
目前許多公司都使用了Mule,比如沃爾瑪,惠普,索尼,Deutsche Bank 以及CitiBank 等公司。
Mule官方網站:/Mule ESB的主要功能如下:●服務的創建與管理(Service creation and hosting):用Mule ESB作為一個羽量級的服務容器來暴露和管理可重用的服務。
●服務調解(Service mediation):隱藏服務消息的格式和協定,將業務邏輯從消息中獨立出來,並可以實現本地獨立的服務調用。
●消息路由(Message routing):基於內容和規則的消息路由、消息過濾、消息合併和消息的重新排序。
資料轉換(Data transformation):在不同的格式和傳輸協定中進行轉換資料。
Mule3Mule近期推出了Mule3,Mule3的新增特點-雲連接(Cloud Connect)。
雲連接提供了可以用簡單安全的方式為企業提供基於雲技術的資料和服務。
它的核心是IBeans,一個羽量級、可重用的介面,用於Web技術的連接擴展和資料服務。
Mule雲包括以下內容1、Integration Beans (合成bean):他們是可重用的雲介面,可以注入到元件中,可以接受外部的服務,比如說亞馬遜、推特、Facebook等,並且是一種簡單的接收服務、管理安全機制的方法。
請求驗證、資料傳輸、錯誤掛起等也可以通過這種方法來實現。
2、Rest / JAX-RS:(REST協議:即REST(Representational State Transfer表述性狀態轉移)是一種針對網路應用的設計和開發方式,可以降低開發的複雜性,提高系統的可伸縮性。
Mule ESB使用手册
Mule ESB Studio v3.3 安装使用手册1***初级教程***如果你还没有做好准备,请到下载免费的社区版Mule ESB,按照网站上的说明启动Mule Studio,并且选择一个工作区(另外,你还可以下载30天免费试用的企业版Mule ESB)2安装Mule Studio安装前,请确认你的机器上已经安装了1.6版本的JDK。
最后请确认你的JDK环境变量配置是否正确2.1 导出将下载的文件解压到你的硬盘分区的根目录下,例如:C:\1. 执行找到C:\MuleStudio目录,运行muleStudio.exe启动Studio2. 选择工作区点击OK使用默认的工作区3使用Studio模板1. 点击File菜单,选择New > Mule Project2. 出现New Mule Project面板后,为你的项目输入名称和一个简短的说明,如图:3. 在Server Runtime选项上选择你将要使用的Mule运行时版本,如图:4. 点击旁边的复选框,根据现有的模板创建项目,单击项目,选择你想要使用的模板创建项目,如图:5. 点击Finish按钮,Mule Studio会创建并打开一个新的项目,完成预创建和预配置的流程6. 在Mule Studio的Package Explorer栏中,右键点击mule-config.mflow文件,选择RunAs > Mule Application7. 停止运行该项目,请在Mule Studio控制台点击红色的Terminate按钮,如图:4运行独立的例子1. 到Mule ESB Standalone目录下,找到Examples目录下你想运行的例子2. 拷贝.zip文件的例子到$MULE_HOME/apps目录下,例如:运行Flight Reservationexample的例子,拷贝mule-example-flight-reservation-3.3.0.zip到$MULE_HOME/apps 目录下,如图:3. 启动Mule,运行这个例子5启动Mule Studio如果你在安装过程中启动了Mule Studio,并且已经在运行了,请跳过本节的其余部分,直接进行:创建新项目如果当前Mule Studio没有启动,通过完成下面的步骤启动应用程序1. 找到Mule Studio安装目录2. 执行muleStudio.exe3. 点击OK使用默认的工作区6创建新项目1. 如果你看到是各种控制组件的应用程序窗口(右下图),请直接进入第2节。
Mule 用户手册

Mule 用户手册1. 开始使用Mule Studio1) 介绍欢迎阅读Mule Studio 入门手册!本手册将引领你下载并启动Mule Studio,然后创建和执行简单的例子。
阅读这个手册后,你将学会:• 安装Mule Studio;• 学会快速创建、编辑和运行Mule ESB 流程。
2) Mule Studio是什么?Mule Studio 是一个功能强大、用户界面友好的基于Eclipse 的开发工具。
你不需要深入了解Mule 的XML 配置语法,就可以在几分钟内轻松的创建、编辑、测试Mule ESB 流程。
• 对于非Mule 开发人员或者Mule 新手开发人员,Mule Studio 其中一个最大的好处是用图形化的方式创建Mule ESB流程;• 对于有经验的Mule 开发人员也可以得益于Mule Studio 这个功能强大的工具,通过Mule Studio 可以在图形界面和XML 编辑界面中来回切换编辑,而且通过对图形界面生成的XML 配置文件能够更好的理解Mule ESB 的配置。
当前Mule Studio有什么限制?Mule Studio 的目标是支持Mule ESB 的全部功能。
在初始发布版本已经可以支持大部分的功能,其他功能还在开发中。
对于剩余功能的开发,Mule Studio 有一个发布的路线图。
尽管当前有些连接器暂时未支持,开发人员仍然可以通过手工编辑XML 配置文件的方式实现。
Mule Studio将支持Mule什么版本?Mule Studio 将会支持3.1.1 以后的Mule 社区版和Mule 企业版。
Mule Studio 的流程编排功能只有在3.X 版本以后才能支持。
Mule Studio 支持最新的流程编排功能,服务功能暂时未能支持。
3) 安装Mule Studio这个章节说明如何下载和安装Mule Studio,包括:Windows, Linux and Mac OS X 各个版本。
Eclipse3.3 安装及插件配置

四、优化优化的目的是为了让eclipse运行更稳定更流畅更快!首先:内存优化eclipse安装后,在安装目录有个eclipse.ini文件,内容如下:-vmargs-Xms40m-Xmx256m这个文件用来配置eclipse启动时候的内存分配方案,Xms是初始化内存大小,Xmx是最大可使用内存大小,这个默认的配置是eclipse资源消耗最小化的配置。
如果你的项目比较大,这个配置必须改,一般适当调整为128,384即可,若项目更大一些则调整的再大一些,根据实际情况决定。
这个参数配置的大小很关键,太小,eclipse垃圾回收会过于频繁导致很慢,或者内存堆栈溢出而崩溃。
太大,eclipse会吃掉大量内存,垃圾回收周期变长,但每次回收会很慢,影响使用。
所以你在配置的时候需要权衡,尝试!其次:插件优化当你安装了多个插件的时候,会消耗很大的内存资源,为此你只需要将不用的插件配置文件从links目录移除,注意了,不是删除,你可以在links目录里面新建一个_useless,将不用的配置文件移放到其中,用的时候再移放回来。
五、常见问题解决1、eclipse语言包或者其他插件没有安装上原因:是你可能运行过了英文版的eclipse之后才装语言包的。
解决办法:删掉configuration中除了config.ini以外的所有文件和文件夹,确保插件安装配置正确。
2、eclipse启动不了原因:没有正确安装jdk,或者没有配置jdk,一般情况下安装jdk后需要配置,但当你装过多次jdk 或者用以前系统中遗留下载的已经安装过的jdk的时候,需要配置jdk,同时还要注意eclipse对jdk的版本的要求。
解决办法:配置JDK。
也就是配置系统变量JAVA_HOME、CLASSPATH、PATH,必要时候还要重装jdk。
如果还不能解决,也许就是你的eclipse文件有损坏或丢失,或者你的硬盘有坏道了,怎么办就很清楚了,呵呵。
3、想要重新配置工作空间原因:你默认了工作空间,很郁闷,每次都是那个。
lomboz eclipse 3.3的安装和连接oracle 11g(图解详细教程)

lomboz eclipse 3.3的安装和连接oracle 11g(图解详细教程)这几天一直在研究这个lomboz,真是让我很头痛。
虽然走了很多弯路,好在最好结果还是好的。
首先说一下安装,网上说的lomboz安装方法有挺多种的,我看了一下太麻烦了,咱就先简单的来吧。
我下载的是lomboz eclipse 3.3-all-in-one(下载地址/project/show files.php?group_id=97&release_id=2204),先开始我用的是eclipse3.5,怎么弄都不行,后来下了一个eclipse-sdk 3.3(下载地址/detail/27/263801.shtml#down),重新配置了一下,唉这下好了,安装上了。
我使用的设links安装方法,非常简单。
详细配置如下:首先将下载好的lomboz解压出来(注意:解压时使用“解压到当前文件”,解压出来的应该是一个eclipse文件),然后新建一个文件夹命名为lomboz(其实什么名字都可以,只要与后边p ath想同意就行),将刚才解压下来的文件移到新建的lomboz文件中,接着把lomboz文件复制到eclipse 3.3安装目录下(网上说可以不用复制进去,只要路径弄对就可以了,我个人觉得这样好管理)。
接着在eclipse 3.3安装目录下新建一个文件命名为links,进入links文件夹新建一个记事本命名为lomboz.start(这里我还弄明白,不知道能不能改,但是按着来准没错),打开lomboz.sta rt输入path=lomboz(这里的lomboz就是前边装解压好的lomboz eclipse 3.3的那个文件名),然后保存。
重新启动eclipse,点击window—>show view—>other查看一下看有一项connectiv ity(或者点击file—>new—>other中有一项EJB),表示安装成功,否则失败(安装失败的话,将你原先的eclipse删除,重新弄一个eclipse,只要将你的workspace和原先的设成一样的,eclips e里边的项目选项不会丢)。
ESB解决方案-mule分享

一、引言信息化的发展在给企业带来难得机遇的同时,也给企业带来了新的挑战。
巨大的投资为企业建立了众多的信息系统,以帮助企业进行内外部业务的处理和管理工作。
但是这些信息系统可能由不同的品牌导入实施,只关注于各自领域内的数据与业务处理,由于缺少相应的接口标准和规范,它们各自为政,相互之间无法进行信息共享与业务集成,从而形成“信息孤岛”。
随着企业规模的不断扩大,应用系统不断增加,对信息共享、系统互操作性和软件重用方面的要求越来越高,这些相对独立、标准各异的“烟囱”式系统已经不能满足业务的需要,暴露出的弊端越来越多,对企业提出了诸多的挑战。
由于缺少统筹规划,企业内部遗留的IT基础架构庞大且管理起来极其复杂,这些基础架构具有严格的操作要求,分阶段改造非常困难,这样必然会影响企业对客户需求的响应能力以及新增加和改进后的服务的部署。
一个个的“信息孤岛”常常分属于不同的管理职能部门。
由于这些系统没有进行互联,导致难于信息共享,即不同软件提供商的应用程序之间无法互操作。
在多个系统共存的情况下,同一个客户的信息或者企业的信息,通常在多个系统中同时存在,但是各个系统统计出的数据常常不一致,为企业领导层进行正确决策增加了难度。
面对这样的挑战,系统整合成为企业迫在眉睫的问题。
企业迫切需要一种集成方法,将各种旧的应用系统和新的应用系统集成起来,这使得企业应用集成(Enterprise Application Integration,EAI)技术产生与发展起来。
传统的EAI往往使用如CORBA和COM等组件化技术进行分布式、跨平台的程序交互,系统整体的拓扑结构较复杂,组件的连接协议是私有的、非标准的。
其存在着诸如系统灵活性差、投入成本巨大、新系统无法快速部署等问题,不能很好的满足企业集成的需求。
在这种背景下,业内近年来提出了SOA(面向服务的架构)模型,将应用系统抽象成一个个粗粒度的服务,标准化服务接口,松耦合服务架构。
使用面向服务的ESB平台集成遗留IT系统,将系统服务化,通过服务组合的方式复用企业IT资产,对于新开发的信息系统,采用插接方式进行快速部署,缩短了投资回报周期,提高了系统的适应性、灵活性和扩展性。
Mule入门篇
2021/5/9
- 14
Mule配置文件
2021/5/9
- 15
Mule配置文件(2)
2021/5/9
- 16
FAQ
2021/5/9
- 17
结束
2021/5/9
- 18
● 服务端点 EndPoint
端点的功能相当于网关,或者说是连接服务组件到外部 消息的通道,它可以位于本地也可以位于网络上,如图所示, Mule可以被配置为在端点上拦截消息,如果需要,然后将消息 进行转换,转换后再传递给服务组件。
● 消息路由 Router
消息路由控制组件如何接收消息,以及在处理后应该发送到何 处去,入站路由控制服务如何处理入站消息(如,有选择地允许 那些符合特定标准的消息),出站路由控制服务处理完消息后该 将其发往何处(如,将其发送到接收者的列表,或将消息拆分, 然后发送到不同的端点),如图5所示。路由是和过滤器结合工 作的,过滤器指定限制条件,只有符合条件的消息才能被路由到 服务,并包括一个表达式从当前消息中提取信息。
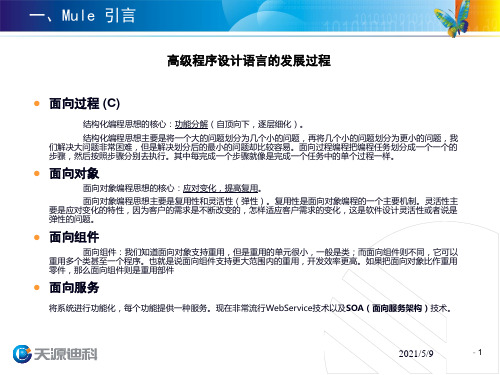
● 面向服务
将系统进行功能化,每个功能提供一种服务。现在非常流行WebService技术以及SOA(面向服务架构)技术。
2021/5/9
-1
一、Mule 引言
SOA(Service-Oriented Architecture) 面向服务架构
概念: SOA是一个组件模型,它将不同应用程序的功能单元(称为服务)通过这些服务之间定义良好的接口和契约联 系起来。接口是采用中立的方式进行定义的,它独立于实现服务的硬件平台、操作系统和 编程语言。这使得 构建在各种这样的系统中的服务可以一种统一和通用的方式进行交互。
Mule基于Java平台,是一个轻量级的消息框架,可让您快速,轻松地连接您的应用程序
Endeca Developer Studio安装指南说明书

Chapter 3: Uninstalling Developer Studio..............................................17
About this guide............................................................................................................................................7 Who should use this guide............................................................................................................................7 Conventions used in this guide.....................................................................................................................7 Contacting Endeca Customer Support.....................................................................................................stallation Guide
Molysis使用说明v3

君达高科高速运动分析Molysis软件V3.0使用说明书合肥君达高科信息技术有限公司2014.6.26目录1.软件简介: (2)2.软件安装 (2)2.1.硬件要求 (2)2.2.软件要求 (2)2.3.安装 (2)3.菜单栏: (3)3.1.文件菜单: (3)3.2.编辑菜单: (4)3.3.Video菜单: (5)3.4.跟踪菜单: (5)3.5.坐标系菜单: (6)3.6.视图菜单: (6)3.7.帮助菜单: (6)3.8.工具栏: (6)4.使用Molysis (7)4.1.运动点跟踪 (7)4.2.导出分析数据 (12)4.3.质点轨迹的表示 (12)5.创建矢量: (12)6.创建RGB区域追踪 (15)7.测量工具 (16)8.视频预处理 (18)8.1.基线(baseline) (18)8.2.brightness (19)8.3.Ghost (20)8.4.radial distortion: (21)1.软件简介:Molysis是君达高科开发的专用于分析高速摄像机所拍摄的运动视频的软件。
功能包括运动目标轨迹自动跟踪、速度和加速度计算以及其他运动参数计算和图表输出、具有多种形式的轨迹表达方式.软件还具有背景去除、亮度对比度调节、畸变调整等视频预处理功能, 支持多种格式的视频输入.2.软件安装2.1.硬件要求兼容IBM x86的计算机, CPU频率2.0GHz以上, 内存2GB以上.2.2.软件要求1. 操作系统: Windows XP或更新的操作系统2. Java虚拟机: JRE 1.6或更高版本(32位)2.3.安装双击安装文件Molysis-installer.exe,按照提示安装,安装完成之后需要安JRE1.6或更高版本,否则不能运行, 请从/en/download/manual.jsp下载并安装JRE.3. 菜单栏3.1. 文件菜单图 1 文件菜单1. New Tab 新建一个标签页,在新标签页中可以打开新的视频,进行独立的操作2. Open File Open URL 打开一个文件,如视频AVI,MP4,MOV 等,或者Molysis 自定义类型文件3. Open Recent 打开一个近期使用过的文件4. Open library Browser 从这里可以打开一个您私有的库或者别人共享的库里面的文件5. Export Molysis ZIP 导出为.trz 文件6. CLose Tab Close All Tabs 关闭标签或关闭所有标签7. Save Tab Save Tab AS … Save Tabset As … 保存为.trk 文件,以便以后查看或共享8. Import 导入一个视频或者Molysis file9. Export 导出视频,Molysis file 或者分析后的数据等 10. Properties 显示当前打开的文件的基本信息 11. Print 打印 12. Exit 退出图 2 编辑菜单图 3 背景区域1. Undo撤消更改或者用快捷键CTRL+Z2. Redo重做或者快捷键CTRL+Y3. Copy Data Copy Image Copy Object复制当前标签中的数据,图片或者对你,可以在另一个标签中粘贴进去,如果复制的是图片,可以在画图程序中粘贴4. Paste ****5. 对应Copy Data Copy Image Copy Object 菜单6. Delete删除7. Mat Size背景区域大小,如4白色区域所示8. Language软件的语言,可以设置为中文9. Preferences设置首先项图4 视频菜单1.Replace替换当前视频2.Close关闭当前视频3.Paste Image将剪贴板中图片粘贴到视频窗口中4.visible选中可见,取消不可见5.play all Steps选择之后会逐帧播放6.Smooth play使帧切换速度相近,不让人产生抖动感7.Filters滤镜功能,如亮度对比度调节,底线显示,阴影显示等8.Frame Duration每一帧的显示时间,不可编辑9.Properties显示当前文件和基本信息,不可编辑3.4.跟踪菜单图5 跟踪菜单此菜单主要是建立各种跟踪目标,在下一章详细介绍.图6坐标系菜单1.Angle Units 角度单位2.Locked 选中之后不能移动坐标系3.Fixed Origin Fixed Angle Fixed Scale 固定原点,固定角度,固定比例4.Reference Frame 只有一个默认选项“default”3.6.视图菜单打开或者关闭各个视图3.7.帮助菜单打开介绍Molysis软件功能和使用方法的帮助文档.3.8.工具栏:图7工具栏从左往右,依次为1.打开,打开一个视频或者Molysis文件2.保存,保存当前标签下的视频或者Molysis文件3.打开库浏览器,库浏览器中可以打开网上共享的视频Molysis文件等4.导出ZIP文件5.播放设置,设置播放起始位置,步长等6.比例尺设置7.坐标系设置8.创建跟踪目标9.跟踪控制窗口(隐藏或者显示)10.放大缩小11.轨迹,可以查看所有轨迹或者最近轨迹12.分类,打开或者关闭所有分类13.路径,打开或者关闭所有路径14.位置,打开或者关闭所有质点位置15.速度,打开或关闭所有质点速度向量16.加速度,打开或关闭所有质点加速度向量17.伸展,拉伸向量18.自动,自动根据块计算所有向量乘积19.Notes 小编辑器,用户输入自己留意的信息,供自己阅读20.文档21.自动刷新数据和视图4.使用Molysis4.1.运动点跟踪1. 创建质点模型:(创建质点模型的目的在于研究图像中要追踪的点或者块的运动规律,例如观察测量要追踪块的位置变化,计算速度,或者加速度等参数)第一步:打开一个视频文件第二步:选择下图中的按键, 设置坐标轴和比例尺, 右边按键是选择坐标轴,左边按键是选择比例尺.图8坐标轴和比例尺工具栏按键图9 比例尺和坐标轴坐标轴和比例尺设置好之后可以隐藏起来, 右击取消选中visible属性.图10第三步:设置要跟踪的质点在工具栏上点create|point mass,默认块跟踪图标是菱形的, 弹出以下菜单:图11 Track Control第四步:选中mass A,然后按住SHIFT键鼠标点击要跟踪的点的位置图12设置point mass第四步:设置自动跟踪按住CTRL+SHIFT然后鼠标点击要跟踪的点, 弹出设置对话框, 如下图所示.图13设置自动跟踪区域其中红色虚线框是搜索该点的范围,会自动更新,小圆代表要跟踪的块所在的区域,可以调整大小. 当一切设置好之后,点击search,然后自动跟踪该点,如果该点跟踪丢失则出弹出两个选择按键, 如下图所示.图15 丢失目标点击Accept,程序仍会更新目标特征, 然后用新特征继续跟踪;点击Skip,则跳过该帧,不更新特征,在下一帧跟踪时仍用上上一帧更新之后的特征来搜索目标;按SHIFT加左键,则重新手动选择跟踪目标.跟踪完成之后会自动将结果绘制显示在plot view中,如下图所示.图16 图表视图如果想改变坐标轴类型,可以点击图15中的x或者t字符, 弹出坐标轴类型选择菜单,如下图所示.图17 坐标轴选择菜单如查看速度与时间的关系,可以选择横坐标为t,纵坐标为v; 如要查看X方向速度与时间的关系,可以选择横坐标为t,纵坐标为xv4.2.导出分析数据点击菜单栏 FILE|EXPORT|data file,如下图所示, 点击SAVE AS,选择文件保存后缀名为.txt 或者.xlsx都可以.图18 导出结果4.3.质点轨迹的表示运动目标的在每一帧图像中的位置可以用多种形式表示, 不仅可以借此区分不同目标的轨迹, 同时可以方便计算分析, 具体有菱形、三角形、圆、竖线、水平线、矢量、点、粗菱形、粗三角形、粗竖线、粗水平线等.例如, 用竖线标记运动目标的位置, 可以很方便的看到目标在水平方向运动; 相反, 用水平线标记运动目标的位置, 可以清楚的看到目标在竖直方向的运动, 如下图所示.图295.创建矢量如果图像上有矢量的话,则用该软件可以对图片上的矢量进行定量精确的分析. 点击”创建/矢量”菜单(见下图), 再按Ctrl+shift创建矢量.图32 矢量菜单图33创建矢量上图最上面显示的是创建矢量的参数:X代表矢量的横轴值,Y代表矢量的纵轴值,mag表示的是矢量本身的长度值,theta表示的是矢量的角度。
Mule3.0开发图解教程
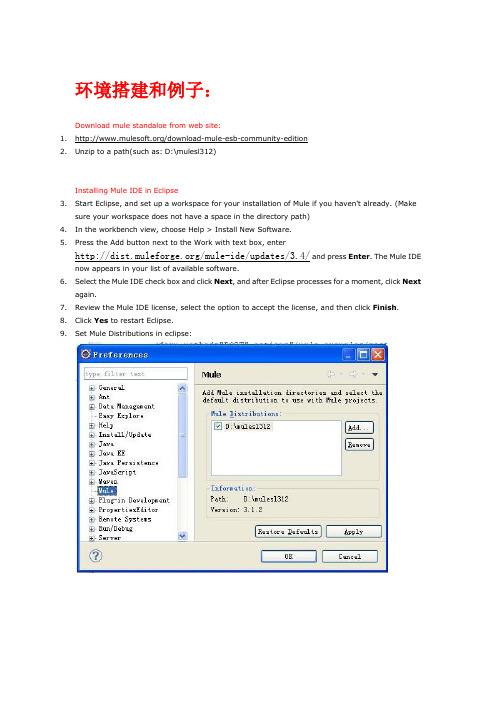
环境搭建和例子:Download mule standaloe from web site:1./download-mule-esb-community-edition2.Unzip to a path(such as:D:\mulesl312)Installing Mule IDE in Eclipse3.Start Eclipse, and set up a workspace for your installation of Mule if you haven't already. (Makesure your workspace does not have a space in the directory path)4.In the workbench view, choose Help > Install New Software.5.Press the Add button next to the Work with text box, enter/mule-ide/updates/3.4/ and press Enter. The Mule IDE now appears in your list of available software.6.Select the Mule IDE check box and click Next, and after Eclipse processes for a moment, click Nextagain.7.Review the Mule IDE license, select the option to accept the license, and then click Finish.8.Click Yes to restart Eclipse.9.Set Mule Distributions in eclipse:You are now ready to configure the Mule distribution as described in the next section.Config MULE_HOME and add bin to path:10.MULE_HOME: D:\mulesl31211.Path:%Path%; %MULE_HOME%\binCreate a new Mule project:How to Import a existing project to Mule project and run it:there is some ecamples in example folder of MULE,wecanimport themWe neeed to add Mule classpath lib to the projectThen we can run the project on Mule runtime like as:So server starts:NFO 2011-06-22 11:38:01,125 [main]org.mule.module.management.agent.JmxAgent: Registered Endpoint Service with name:Mule.04cd6ac8-9c81-11e0-95b7-8bd1ea0dc252:type=Endpoint,service="Hell oWorld",connector=connector.http.mule.default,name="endpoint.http.loca lhost.8888"INFO 2011-06-22 11:38:01,125 [main]org.mule.module.management.agent.JmxAgent: Registered Connector Service with nameMule.04cd6ac8-9c81-11e0-95b7-8bd1ea0dc252:type=Connector,name="connec tor.servlet.mule.default.1"INFO 2011-06-22 11:38:01,125 [main]org.mule.module.management.agent.JmxAgent: Registered Connector Service with nameMule.04cd6ac8-9c81-11e0-95b7-8bd1ea0dc252:type=Connector,name="connec tor.stdio.mule.default.1"INFO 2011-06-22 11:38:01,125 [main]org.mule.module.management.agent.JmxAgent: Registered Connector Service with nameMule.04cd6ac8-9c81-11e0-95b7-8bd1ea0dc252:type=Connector,name="connec tor.VM.mule.default.1"INFO 2011-06-22 11:38:01,125 [main]org.mule.module.management.agent.JmxAgent: Registered Connector Service with nameMule.04cd6ac8-9c81-11e0-95b7-8bd1ea0dc252:type=Connector,name="connec tor.http.mule.default.1"INFO 2011-06-22 11:38:01,140 [main] org.mule.DefaultMuleContext:********************************************************************* ** Mule ESB and Integration Platform ** Version: 3.1.2 Build: 21975 ** MuleSoft, Inc. ** For more information go to * * ** Server started: 11-6-22 上午11:38 ** Server ID: 04cd6ac8-9c81-11e0-95b7-8bd1ea0dc252 * * JDK: 1.6.0_10-rc2 (mixed mode, sharing) ** OS encoding: UTF-8, Mule encoding: UTF-8 ** OS: Windows XP - Service Pack 3 (5.1, x86) ** Host: PC-201103071221 (192.168.40.61) ** Mode: Development ** ** Agents Running: ** JMX Agent ********************************************************************** *mule-config.xml:<inbound-endpoint address="http://localhost:8888"transformer-refs="HttpRequestToNameString"exchange-pattern="request-response"><not-filter><wildcard-filter pattern="/favicon.ico"/></not-filter></inbound-endpoint>//所有的转换器都在此,就我理解所有的转换过程其实都要自己写,可以自己定义通用的转换器重用并扩展。
ubuntu下安装sqlite3(转)
Ubuntu下安装SQLite3 (转)1.介绍:sqlite3是linux上的小巧的数据库,一个文件就是一个数据库。
2.安装:要安装sqlite3,可以在终端提示符后运行下列命令: sudo apt-get install sqlite3 检查版本sqlite3 -version3.测试当前目录下建立test.db测试数据库文件sqlite3 test.db 查询信息.database 退出.exit4.图形界面可以选择sqlitebrowser程式(qt3)sudo apt-get install sqlitebrowser 启动图形界面可以在终端提示符后输入sqlitebrowser5.编程PHP:sudo apt-get install php5-sqlite Python:sudo apt-get install python-pysqlite2 Ruby:sudo apt-get install libsqlite3-ruby比较有用的命令:.tables 显示数据库中所有的表..schema 显示所有的表的创建语句..schema tableX 显示表tableX的创建语句..quit 退出SQLite库包含一个名字叫做sqlite3的命令行,它可以让用户手工输入并执行面向SQLite数据库的SQL命令。
本文档提供一个样使用sqlite3的简要说明。
开始启动sqlite3程序,仅仅需要敲入带有SQLite数据库名字的"sqlite3"命令即可。
如果文件不存在,则创建一个新的(数据库)文件。
然后sqlite3程序将提示你输入SQL。
敲入SQL语句(以分号“;”结束),敲回车键之后,SQL语句就会执行。
例如,创建一个包含一个表"tb11"名字为"ex1"的SQLite数据库,你可以这样做:$sqlite3 ex1SQLite version 3.3.17Enter ".help" for instructionssqlite> create table tbl1(one varchar(10), two smallint);sqlite> insert into tbl1 values('hello!', 10);sqlite> insert into tbl1 values('goodbye', 20);sqlite> select * fromtbl1;hello!|10goodbye|20sqlite> 你可以通过敲你所用系统的文件结束符(通常是Ctrl + D)或者中断字符(通常是Ctrl + C)。
MounRiver Studio 帮助手册说明书

MounRiver Studio 帮助手册1MounRiver Studio 帮助手册V1.40目录一、概述............................................................................ 2二、计算机配置要求.................................................................. 22.1 最低配置.................................................................... 22.2 推荐配置.................................................................... 2三、MounRiver Studio安装 ........................................................... 2四、MounRiver Studio 环境........................................................... 44.1 菜单栏...................................................................... 44.2 快捷工具栏.................................................................. 94.3 工程目录窗口.............................................................. 104.4 其他显示窗口.............................................................. 11五、MounRiver Studio 工程......................................................... 115.1 新建工程.................................................................. 115.2 打开工程.................................................................. 125.3 导入KEIL工程............................................................. 125.4 编译...................................................................... 145.5 调试...................................................................... 235.6下载...................................................................... 255.7工程导出为模板............................................................ 285.8 工程模板管理.............................................................. 28六、快速问答...................................................................... 29七、更新......................................................................... 327.1在线更新.................................................................. 327.2离线更新.................................................................. 32八、联系我们...................................................................... 33注:WCH-LINK使用方法详见WCH-Link使用说明-V1.1.Pdf(文件位置:MRS安装路径\MounRiver\MounRiver_Studio\ExTool)MounRiver Studio 帮助手册2一、概述MounRiver Studio是一款针对嵌入式开发的集成开发环境。
Mule ESB总线讲解

SOA面向服务架构-系统通信现状
8
2014-11-8
现有很多系统架构:
系统A 系统B
系统C
系统D
系统交互性太多,系统依赖太多,当一个系统down掉,所有系统都可能受到影响
Surveillance solutions & services
SOA面向服务架构-ESB通信优势
2014-11-8
ESB系统通信结构:
23
选择Mule的理由
2014-11-8 Surveillance solutions & services
24
Mule的主要功能
服务的创建与管理(Service creation and hosting): 用Mule ESB作为一个轻量级的服务容器来暴露和管理可重用的服务。 服务调解(Service mediation) 隐藏服务消息的格式和协议,将业务逻辑从消息中独立出来, 并可以实现本地独立的服务调用。 消息路由(Message routing) 基于内容和规则的消息路由、消息过滤、消息合并和消息的重新排序。 数据转换(Data transformation)
3. 初步接触Mule ESB
4. 参考DEMO
ESB企业服务总线
11
2014-11-8 Surveillance solutions & services
1. 简介 2. ESB架构
3. ESB功能
4. 现有Байду номын сангаасESB产品
ESB企业服务总线-简介
企业服务总线(Enterprise Service Bus,ESB)的概念是从面向服务体系架构(Service
14
2014-11-8 Surveillance solutions & services
Momentus 安装指南说明书

Momentus Installation GuideST94011A, ST94811A, ST92011A, and ST92811AATA Interface Disc DrivesPublication Number: 100271723, Rev. B, April 2004The easiest way to install your driveMany of today’s mobile computers have been designed to make it possible for the end user to replace the hard drive. Refer to your system’s user man-ual for the location of the hard drive compartment and the specific instruc-tions regarding replacement.Some mobile systems are sealed and require specialized tools to gain access to the hard drive.Caution.Special training or tools may be needed to service some mobile computers. In some cases, opening the case may void your war-ranty. Consult your system documentation.Seagate recommends taking your system to an authorized service techni-cian to replace your hard drive.Refer to your system manufacturer’s support website for the most up-to-date information. Read and follow all instructions regarding the proper steps to be taken when replacing the systems hard drive.What you need• A Phillips screwdriver•Existing drive mounting screws (reuse)•Existing drive mounting framework, cage or tray (reuse)•A TA interface adapter (built into notebook and laptop systems) Handling precautions/electrostatic discharge protection •Disc drives are fragile. Do not drop or jar the drive. Handle the drive only by the edges or frame. Keep the drive in the electrostatic discharge (ESD) bag until you are ready to install it to minimize handling damage.•Drive electronics are extremely sensitive to static electricity. While installing the drive, wear a wrist strap and cable connected to ground.•T urn off the power to the host system during installation.•Do not disassemble the drive. Doing so voids the warranty. See the war-ranty information on page 2.•Do not apply pressure or attach labels to the circuit board or to the top of the drive.Drive characteristicsST94011A ST92011A Formatted capacity 40 Gbytes20 GbytesT otal number of sectors* 78,140,16039,070,080Cache size 2 Mbytes 2 MbytesST94811A ST92811A Formatted capacity 40 Gbytes20 GbytesT otal number of sectors* 78,140,16039,070,080Cache size8 Mbytes8 Mbytes*One sector equals 512 bytes.Replacing the existing hard driveEach system has its own unique hard drive compartment. Refer to your system manual to locate the hard drive compartment and for instructions on removing and replacing the hard drive.Warning.T urn off the computer. If you have a notebook or laptop com-puter, disconnect the power charger/adapter and remove thebattery before you open the case or touch any internal compo-nents.Note.This drive is designed for a host computer that supplies interface signals and +5V power through a single 44-pin connector. Most mobile computers have a fixed connector that attaches directly to the drive.Setting the jumpersRefer to the jumper settings in Figure 1 or on your drive label to configure the drive for your system. Jumper settings can also be accessed online from our web site at .Master or single drive: Use the options jumper block shown in Figure 1 to configure the drive for operation. This jumper block is the 4-pin header adjacent to pins 1 and 2 of the I/O signal pins.Note.For mobile system operation, use cable select (default) or master. Figure 1.Yfour screws in the bottom-mounting holes. See Figure 2 for drive mounting dimensions. Follow these important mounting precautions when mounting the drive:•Allow a minimum clearance of 0.030 inches (0.76 mm) around the entire perimeter of the drive for cooling.•Use only M3 UNC mounting screws. (Reusing the existing screws may be acceptable provided the maximum screw penetration depth of 0.098 inches is not exceeded.)•Gently tighten the mounting screws (maximum torque: 4.0 in-lb).•Four (4) threads (0.080 inches) minimum screw engagement recom-mended.Figure 2.Mounting dimensions—end, top, side, and bottom views Configuring the BIOSAfter completing the drive installation, restart your computer. Y our com-puter may automatically detect your new drive. If your computer does not automatically detect your new drive, follow the steps below.1.Restart your computer. While the computer restarts, run the systemsetup program (sometimes called BIOS or CMOS setup). This is usu-ally done by pressing a special key, such as DELETE, ESC, or F1 dur-ing the startup process.2.Within the system setup program, instruct the system to auto detectyour new drive.3.Save the settings and exit the setup program.When your computer restarts, it should recognize your new drive. If your system still doesn’t recognize your new drive, see the troubleshootingsection on this sheet.System manufacturer’s operating system restore CDRefer to your mobile system documentation for specific instructions on restoring the operating system on your newly installed hard drive. Many computers require the use of an operating system restore CD, originally shipped with the system, to reload the operating system on the hard drive. Microsoft operating system installation instructionsFor detailed information about installing a Microsoft operating system on your new Seagate drive, refer to the Microsoft Knowledgebase article refer-ences below. To locate an article, go to and enter the article number in any search box on the Microsoft web site. For example, to view the Knowledgebase article for installing Windows XP on your new Seagate drive:1.Open your browser.2.Go to .3.Enter 313348 in the Microsoft web site search box.4.Press Enter.The article is displayed on your screen.Operating system Microsoft Knowledgebase article numbers Windows XP313348Windows 2000/NT308209 (see also: 175761)Windows Me/98/95255867 (see also: 166172)Preparing the drive using DiscWizardWe recommend using DiscWizard Starter Edition to automatically partition and format your drive. DiscWizard software is available at and is free. T o run DiscWizard:1.Insert your bootable DiscWizard Starter Edition diskette or CD and fol-low the instructions. DiscWizard will guide you through the installation process.2.Boot your computer from the Windows operating system CD-ROM orfrom your system startup diskette with the Windows CD loaded. Follow the instructions provided on your screen.TroubleshootingIf your drive is not working properly, these troubleshooting tips may help solve the problem.1.Does the drive spin up? A spinning drive produces a faint whine andclicking noise. If your drive does not spin, check that the power con-nector and interface cable are securely attached.2.Does the computer recognize the drive? Verify that the drive isenabled in the system CMOS or setup program. If not, select the auto detect option and enable it. If your drive has a problem, it may not be recognized by the system. If the operating system does not recognize the drive, you need to load your host adapter drivers.3.Does FDISK detect the drive? Run the FDISK program located onyour Windows startup diskette. Type fdisk/status to verify that your hard drive is present and recognized by the system.4.I’m running Windows 98 and FDISK is not reporting the fullcapacity of my drive. Why? Y ou need to upgrade your version of FDISK if you are using the diskettes or CD that came with your original Windows 95 or 98 operating system. Microsoft provides a free down-loadable FDISK upgrade. See Microsoft Knowledgebase article num-ber: 263044 located at .5.Does ScanDisk find the drive defect-free? ScanDisk is a utilitylocated on your Windows startup diskette that scans the drive for defects. If defects are detected, this may be an indication of a problem.6.Why does my computer hang on startup? Verify that your system isA TA compatible. Y ou need either an A TA-compatible motherboard con-nector or AT A host adapter to use this drive.Note.If these tips do not answer your question or solve the problem, con-tact your dealer or visit to download SeaTools™ disc diagnostics software and more troubleshooting advice.Seagate support servicesFor online information about Seagate products, visit or e-mail your **************************************.If you need help installing your drive, consult your dealer first. If you need additional help, call a Seagate technical support specialist. Before calling, note your system configuration and drive model number.Africa+1-405-324-4714Netherlands00 800-47324283 Australia1800-14-7201New Zealand0800-443988Austria0 800-20 12 90Norway00 800-47324283 Belgium00 800-47324283Poland00 800-311 12 38 China*800-810-9668Spain00 800-47324283 Denmark00 800-47324283Sweden00 800-47324283 France00 800-47324283Switzerland00 800-47324283 Germany00 800-47324283Singapore800-1101-150Hong Kong800-90-0474Taiwan*00-800-0830-1730 Hong Kong†001-800-0830-1730Thailand001-800-11-0032165 India1-600-33-1104Turkey00 800-31 92 91 40 Indonesia001-803-1-003-2165United Kingdom00 800-47324283 Ireland00 800-47324283USA/Canada/1-800 SEAGATE or Italy00 800-47324283Latin America+1-405-324-4700 Japan0034 800 400 554Other EuropeanMalaysia1-800-80-2335countries+1-405-324-4714 Middle East+1-405-324-4714*Mandarin†CantoneseWarranty.T o determine the warranty status of your Seagate disc drive, contact your place of purchase or visit our web site at for more information. Return Merchandise Authorization (RMA). Run SeaT ools to diagnose your drive before requesting a return authorization. In addition, please verify that your drive is defective by following the troubleshooting checklist in this guide. Seagate offers com-prehensive customer support for all Seagate drives worldwide. Seagate customer service centers are the only facilities authorized to service Seagate drives. Drive return procedures vary depending on geographical location and are subject to current international trade regulations.Shipping the driveCaution.Back up the data before shipping. Seagate assumes no responsibility for data lost during shipping or service.Shipping drive in an unapproved container voids the warranty. Pack the drive with original box and packing materials. Use no other materials. This prevents electrical and physical damage in transit.Electromagnetic compliance for the European Union. This model complies with the European Union requirements of the Electromagnetic Compatibility Directive 89/ 336/EEC of 03 May 1989 as amended by Directive 92/31/EEC of 28 April 1992 and Directive 93/68/EEC of 22 July 1993. Compliance of this drive, as a system compo-nent, was confirmed with a test system. We cannot guarantee that your system will comply. The drive is not meant for external use (without properly designed enclosure, shielded I/O cable, etc.).Sicherheitsanleitung 1. Das Gerrät ist ein Einbaugerät, das für eine maximale Umgebungstempeatur von 60°C vorgesehen ist. 2. Zur Befestigung des Lufwerks werden 4 Schrauben 6-32 UNC-2A benötigt. Bei seitlicher Befestigung darf die maxi-male Länge der Schrauben im Chassis nicht merh als 3,3 mm und bei Befestigung an der Unterseite nicht mehr als 5,08 mm betragen. 3. Als Versorgungsspannugen wer-den benötigt: +5V +/- 5% 0,74A; +12V +/- 5% 2,8A 4. Die Versorgungsspannung muss SELV entsprechen. 5. Alle Arbeiten auf dem Festplattte dürfen nur von Ausgebi-letem Serciepersonal durchgeführt werden. Bitte entfernen Sie nicht die Aufschriften-schilder des Laufwerkes. 6. Der Einbau des Laufwerkes muss den Anforderungen gemäss DIN IEC 950 VDE 0805/05.90 entspreche.© 2003, 2004 Seagate Technology LLC. All rights reservedPublication number: 100271723, Rev. B, April 2004, Printed in U.S.A.Seagate, Seagate Technology, and the Seagate logo are registered trademarks or trademarks of Seagate Technology LLC. DiscWizard, Momentus, and SeaTools are trademarks of Seagate Technology LLC. Other product names are registered trade-marks or trademarks of their owners. Seagate reserves the right to change, without notice, product offerings or specifications.。
Mule开源ESB资料整理
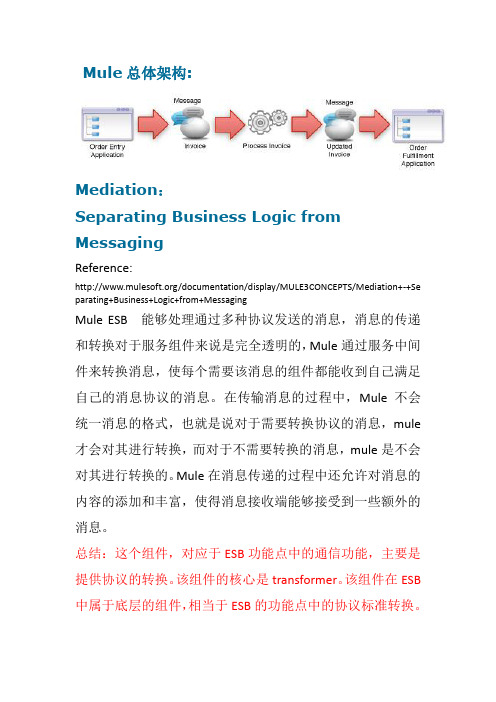
Mule总体架构:Mediation:SeparatingBusiness Logic from MessagingReference:/documentation/display/MULE3CONCEPTS/ Mediation+-+Separating+Business+Logic+from+MessagingMule ESB 能够处理通过多种协议发送的消息,消息的传递和转换对于服务组件来说是完全透明的,Mule通过服务中间件来转换消息,使每个需要该消息的组件都能收到自己满足自己的消息协议的消息。
在传输消息的过程中,Mule 不会统一消息的格式,也就是说对于需要转换协议的消息,mule才会对其进行转换,而对于不需要转换的消息,mule是不会对其进行转换的。
Mule在消息传递的过程中还允许对消息的内容的添加和丰富,使得消息接收端能够接受到一些额外的消息。
总结:这个组件,对应于ESB功能点中的通信功能,主要是提供协议的转换。
该组件的核心是transformer。
该组件在ESB 中属于底层的组件,相当于ESB的功能点中的协议标准转换。
Orchestration:Routing Messages Between Components Reference:/documentation/display/MULE3CONC EPTS/Orchestration+-+Routing+Messages+Between+Service+Co mponents该组件的主要作用是负责服务组件之间的消息路由,它并不关心消息是如何接受和发送的。
组件关系的是数据本身的处理,包括数据的过滤,转化,路由。
在消息的处理上,Mule提供了三种方法:1.Flows,它是Mule3新加的方法。
是最强大的也是最灵活的处理方式。
你能够自主的选择Mule提供的全部的消息处理器,包括过滤器,转换器,路由器,组件和其他来创建满足你需要的处理逻辑。
MuleESB使用手册
Mule ESB Studio v3.3 安装使用手册1 ***初级教程***如果你还没有做好准备,请到下载免费的社区版 Studio ,并且选择一个工作区(另外,你还可以下载Mule ESB 按照网站上的说明启动 Mule30天免费试用的企业版 Mule ESB )2 安装 Mule Studio安装前,请确认你的机器上已经安装了 1.6版本的JDK 。
最后请确认你的 JDK 环境变量配置是否正确 2.1导出将下载的文件解压到你的硬盘分区的 根目录下,例如: 1. 执行Oconflguratjon g 酥卯p!护 饨鼻t IT 鹊.jplugins二甜猶貳丽■Snidest udio.fni找到 C:\MuleStudio 目录,运行 muleStudio.exe 启动 Studio 2. 选择工作区c :\Llracl 匚 omp resysdF otdersSel-ect a Destination ^nd Extract Filesfilrs 'Mllbe extract Ed tc thn folder/ $hs)fi 血 wfien compirf tS a.wtiiM LMB如id* rtrxiK 'g^rxjr pn^tcts n ■ SldT竄Hd ■直口r%sg»c童Chocsa A WOFkipdi:* Ihtdlri! bo dM fcxli¥fl SM&CMT:VVlX^tpKt ” UK-^LJd O.MHkspKE;U H W^S jrtTfw<f«f*Jfc »fld do «nx 皿ig*n点击OK使用默认的工作区3使用Studio模板1. 点击File 菜单,选择New > Mule Project2. 出现New Mule Project面板后,为你的项目输入名称和一个简短的说明,如图:3. 在Server Runtime 选项上选择你将要使用的Mule 运行时版本,如图:Server Settirgs:Server Runtinn电:^ule Server 3r3.O EE4. 点击旁边的复选框,根据现有的模板创建项目,单击项目,选择你想要使用的模板创建项目,如图:Templates available in 阳u俺ESB Gommunity EditionTempi ales:J Create project on on existi ng Tempi at 巴Name DescriptionEcho Echo trample included in Mule distribution.O r d«r Diacojnter Processes orders^ £;ppl tiered discQunu,and adds TwitlerOrder FulfilInnent Process XML orders p split i nto items and route "for fufillnnent-Mobile App Oe mo Mobile AppLegacy Modcrniiatior*Th is 海a simple Mule Studio project tliat i'lust rates 孔L^^acy System hror^ach Example An txarripk slio-wing th电of the rowa£li tleintirttHello Exam pk H^llo ExampleSeri口ting Eximp e Seri口ting ExampleStock Quotes Stock Quotes EJcamplerlight Reservst on Flight ResErvdtion Example5•点击Finish 按钮,Mule Studio 会创建并打开一个新的项冃,完成预创建和预配置的 流程 6. 在 Mule Studio 的 Package Explorer 栏中,右键点击 mule-config.mflow 文件,选择 Run As > Mule Applicatio n7. 停止运行该项目,请在Mule Studio 控制台点击红色的Terminate 按钮,如图:1! FrobiernfS® uvddoc 丄2r ; Daw i/^pp og El Console 枫■ 口t 吐fedtrzv 皂」a"riit E *pli 匚;itic:训'S/stem ;Library JJ avajavaVirt JS .I^ichi 1 d k !Cantlfc;/H o m e b njjav-j :扎闿 13, 2D1J il:G2 17r re -r ? r ■匸■ V -M ■ *w ■ - ■ ■M* i ■ |. IV ■ M 1 b . " *1 ・ ■・・日■ ■・ t■ ■■■■■■!■■■▼ w ■■■■xr ■■■■■■■・■ !■■■■) ・r 薯i ■ s rr i w p ■■ ■ ■11 .K; rftrqvcl QacntJ-QQnncctflr 1http 1mlcHC?Ffl^^rctci r vcr.&C^ Qra , nulcn tr-qnspqrlhit p :2/1 oca L fios t : 95 9 5/r c s a^i c n s -Hit pMa s o Race i ver {thi s-5933CCG Z . r ce rKcy ht t p ■ //1 oca 1 hos t : 3555/r http://l oc«l 帕售t 、&7t ?/pop讥CJ tt sMe ■ sog e Ret c.71^(lek receive 1*:ey=ht acolhos t:87*7Fpcp LI ! hitp :2/ll&caL*icisi : M !94J/r e A a 11 e n s -Ht t pMc a s*g c Rece t ver { khi s -lb 8 a c F0 7 p r c cc fw c : rKcy - hit p : /? 1 o I hos i. i SSKJC/r ht ocsa I ho%t -關诵 1#wervot ion 、-Hi t P ^H '*事制r tece i 腌「{tht s dee?S . r^cei^e 广Kty -htt P : //Ioco 1 ho61: 80S 1 h4运行独立的例子1. 到Mule ESB Standalone 目录下,找到 Examples 目录下你想运行的例子2. 拷贝.zip 文件的例子到$MULE_HOME/apps 目录下,例如:运行 Flight Reservation example 的例子,拷贝 mule-example-flight-reservation-330.zip 到 $MULE_HOME/apps 目录下,如图:3. 启动Mule ,运行这个例子5 启动 Mule StudioMule Studio ,并且已经在运行了,请跳过本节的其余部分,Mule Studio 没有启动,通过完成下面的步骤启动应用程序1. 找到Mule Studio 安装目录2. 执行 muleStudio.exe3. 点击OK 使用默认的工作区国 All My F les 感曲1简£諦,Ulw PicturesDEVICESN buEiiiartH |j aiTlulr-pxdrvfih-h[- rBuPivaTinn-i 1 □ ?ipN echo'pdrUuXmljKkfbg 乜一桂百皀ENXiati *RiLADMEtxT_佃「“训.卵囂神M 皿1■ hdK>copy filer如果你在安装过程中启动了 直接进行:创建新项目」如果当前 rAVORITFSapfls bin LOflifLICENCE m_ ^cnptiinQ■ 1魯RLRbvt.ijcirstock 口 u □诧_ Workspace Launcher SS Select a workspaceMule Studio storeiyour projects in a folder calkd a worksp»ce rChoose a workspace folder to u» forthis s«^icn r6创建新项目1. 如果你看到是各种控制组件的应用程序窗口(右下图),请直接进入第2节。
modelStudio V3.1.2用户指南说明书
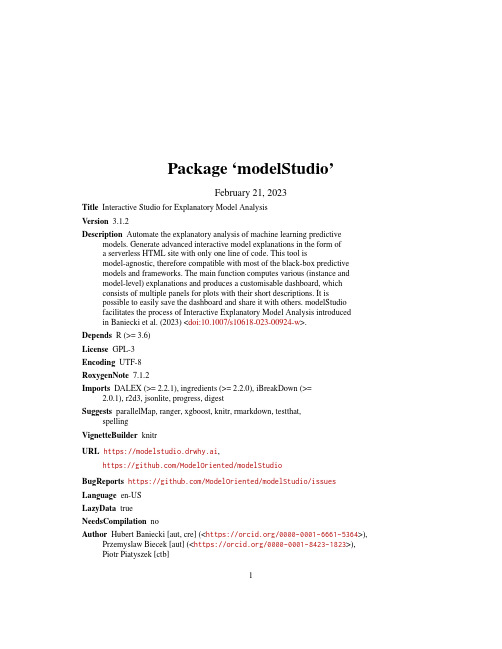
Package‘modelStudio’February21,2023Title Interactive Studio for Explanatory Model AnalysisVersion3.1.2Description Automate the explanatory analysis of machine learning predictive models.Generate advanced interactive model explanations in the form ofa serverless HTML site with only one line of code.This tool ismodel-agnostic,therefore compatible with most of the black-box predictivemodels and frameworks.The main function computes various(instance andmodel-level)explanations and produces a customisable dashboard,whichconsists of multiple panels for plots with their short descriptions.It ispossible to easily save the dashboard and share it with others.modelStudiofacilitates the process of Interactive Explanatory Model Analysis introducedin Baniecki et al.(2023)<doi:10.1007/s10618-023-00924-w>.Depends R(>=3.6)License GPL-3Encoding UTF-8RoxygenNote7.1.2Imports DALEX(>=2.2.1),ingredients(>=2.2.0),iBreakDown(>=2.0.1),r2d3,jsonlite,progress,digestSuggests parallelMap,ranger,xgboost,knitr,rmarkdown,testthat,spellingVignetteBuilder knitrURL https://modelstudio.drwhy.ai,https:///ModelOriented/modelStudioBugReports https:///ModelOriented/modelStudio/issues Language en-USLazyData trueNeedsCompilation noAuthor Hubert Baniecki[aut,cre](<https:///0000-0001-6661-5364>), Przemyslaw Biecek[aut](<https:///0000-0001-8423-1823>),Piotr Piatyszek[ctb]12happiness_trainMaintainer Hubert Baniecki<*******************>Repository CRANDate/Publication2023-02-2023:20:02UTCR topics documented:happiness_train (2)modelStudio (3)ms_merge_observations (7)ms_options (8)ms_update_observations (10)ms_update_options (12)Index15 happiness_train World Happiness ReportDescriptionDatasets happiness_train and happiness_test are real data from the World Happiness Reports.Happiness is scored according to economic production,social support,etc.happiness_train accumulates the data from years2015-2018,while happiness_test is the data from the year2019, which imitates the out-of-time validation.Usagedata(happiness_train);data(happiness_test)Formathappiness_train:a data frame with625rows and7columns,happiness_test:a data frame with156rows and7columnsDetailsSource:World Happiness Report at The following columns:GDP per Capita,Social Support,Life Expectancy,Freedom,Generosity, Corruption describe the extent to which these factors contribute in evaluating the happiness in each country.Variables:•score-target variable,continuous value between0and10(regression)•gdp_per_capita•social_support•healthy_life_expectancy•freedom_life_choices•generosity•perceptions_of_corruptionmodelStudio Interactive Studio for Explanatory Model AnalysisDescriptionThis function computes various(instance and dataset level)model explanations and produces a customisable dashboard,which consists of multiple panels for plots with their short descriptions.Easily save the dashboard and share it with others.Tools for Explanatory Model Analysis unite with tools for Exploratory Data Analysis to give a broad overview of the model behavior.The extensive documentation covers:•Function parameters description-perks and features•Framework and model compatibility-R&Python examples•Theoretical introduction to the plots-Explanatory Model Analysis:Explore,Explain,and Examine Predictive ModelsDisplayed variable can be changed by clicking on the bars of plots or with thefirst dropdown list, and observation can be changed with the second dropdown list.The dashboard gathers useful,but not sensitive,information about how it is being used(putation length,package version, dashboard dimensions).This is for the development purposes only and can be blocked by setting telemetry to FALSE.UsagemodelStudio(explainer,...)##S3method for class explainermodelStudio(explainer,new_observation=NULL,new_observation_y=NULL,new_observation_n=3,facet_dim=c(2,2),time=500,max_features=10,max_features_fi=NULL,N=300,N_fi=N*10,N_sv=N*3,B=10,B_fi=B,eda=TRUE,open_plots=c("fi"),show_info=TRUE,parallel=FALSE,options=ms_options(),viewer="external",widget_id=NULL,license=NULL,telemetry=TRUE,max_vars=NULL,verbose=NULL,...)Argumentsexplainer An explainer created with DALEX::explain()....Other parameters.new_observationNew observations with columns that correspond to variables used in the model.new_observation_yTrue label for new_observation(optional).new_observation_nNumber of observations to be taken from the explainer$data if new_observation=NULL.See vignettefacet_dim Dimensions of the grid.Default is c(2,2).time Time in ms.Set the animation length.Default is500.max_features Maximum number of features to be included in BD,SV,and FI plots.Default is10.max_features_fiMaximum number of features to be included in FI plot.Default is max_features.N Number of observations used for the calculation of PD and AD.Default is300.See vignetteN_fi Number of observations used for the calculation of FI.Default is10*N.N_sv Number of observations used for the calculation of SV.Default is3*N.B Number of permutation rounds used for calculation of SV.Default is10.SeevignetteB_fi Number of permutation rounds used for calculation of FI.Default is B.eda Compute EDA plots and Residuals vs Feature plot,which adds the data to thedashboard.Default is TRUE.open_plots A vector listing plots to be initially opened(and on which positions).Default isc("fi").show_info Verbose a progress on the console.Default is TRUE.parallel Speed up the computation using parallelMap::parallelMap().See vignette.This might interfere with showing progress using show_info.options Customize modelStudio.See ms_options and vignette.viewer Default is external to display in an external RStudio e browser todisplay in an external browser or internal to use the RStudio internal viewerpane for output.widget_id Use an explicit element ID for the widget(rather than an automatically generatedone).Useful e.g.when using modelStudio with Shiny.See vignette.license Path to thefile containing the license(con parameter passed to readLines()).It can be used e.g.to include the license for explainer$data as a comment inthe source of.html outputfile.telemetry The dashboard gathers useful,but not sensitive,information about how it isbeing used(putation length,package version,dashboard dimensions).This is for the development purposes only and can be blocked by setting telemetryto FALSE.max_vars An alias for max_features.If provided,it will override the value.verbose An alias for show_info.If provided,it will override the value.ValueAn object of the r2d3,htmlwidget,modelStudio class.References•The input object is implemented in DALEX•Feature Importance,Ceteris Paribus,Partial Dependence and Accumulated Dependence ex-planations are implemented in ingredients•Break Down and Shapley Values explanations are implemented in iBreakDownSee AlsoVignettes:modelStudio-R&Python examples and modelStudio-perks and features Exampleslibrary("DALEX")library("modelStudio")#:#ex1classification on titanic data#fit a modelmodel_titanic<-glm(survived~.,data=titanic_imputed,family="binomial")#create an explainer for the modelexplainer_titanic<-explain(model_titanic,data=titanic_imputed,y=titanic_imputed$survived,label="Titanic GLM")#pick observationsnew_observations<-titanic_imputed[1:2,]rownames(new_observations)<-c("Lucas","James")#make a studio for the modelmodelStudio(explainer_titanic,new_observations,N=200,B=5)#faster example#:#ex2regression on apartments dataif(requireNamespace("ranger",quietly=TRUE)){library("ranger")model_apartments<-ranger(m2.price~.,data=apartments)explainer_apartments<-explain(model_apartments,data=apartments,y=apartments$m2.price)new_apartments<-apartments[1:2,]rownames(new_apartments)<-c("ap1","ap2")#change dashboard dimensions and animation lengthmodelStudio(explainer_apartments,new_apartments,facet_dim=c(2,3),time=800)#add information about true labelsmodelStudio(explainer_apartments,new_apartments,new_observation_y=new_apartments$m2.price)#don t compute EDA plotsmodelStudio(explainer_apartments,eda=FALSE)}#:#ex3xgboost model on HR datasetif(requireNamespace("xgboost",quietly=TRUE)){library("xgboost")HR_matrix<-model.matrix(status=="fired"~.-1,HR)#fit a modelxgb_matrix<-xgb.DMatrix(HR_matrix,label=HR$status=="fired")params<-list(max_depth=3,objective="binary:logistic",eval_metric="auc") model_HR<-xgb.train(params,xgb_matrix,nrounds=300)#create an explainer for the modelexplainer_HR<-explain(model_HR,data=HR_matrix,y=HR$status=="fired",type="classification",label="xgboost")ms_merge_observations7 #pick observationsnew_observation<-HR_matrix[1:2,,drop=FALSE]rownames(new_observation)<-c("id1","id2")#make a studio for the modelmodelStudio(explainer_HR,new_observation)}ms_merge_observations Merge the observations of modelStudio objectsDescriptionThis function merges local explanations from multiple modelStudio objects into one.Usagems_merge_observations(...)Arguments...modelStudio objects created with modelStudio().ValueAn object of the r2d3,htmlwidget,modelStudio class.References•The input object is implemented in DALEX•Feature Importance,Ceteris Paribus,Partial Dependence and Accumulated Dependence ex-planations are implemented in ingredients•Break Down and Shapley Values explanations are implemented in iBreakDownSee AlsoVignettes:modelStudio-R&Python examples and modelStudio-perks and featuresExampleslibrary("DALEX")library("modelStudio")#fit a modelmodel_happiness<-glm(score~.,data=happiness_train)#create an explainer for the modelexplainer_happiness<-explain(model_happiness,data=happiness_test,y=happiness_test$score)#make studios for the modelms1<-modelStudio(explainer_happiness,N=200,B=5)ms2<-modelStudio(explainer_happiness,new_observation=head(happiness_test,3),N=200,B=5)#mergems<-ms_merge_observations(ms1,ms2)msms_options Modify default options and pass them to modelStudioDescriptionThis function returns default options for modelStudio.It is possible to modify values of this list and pass it to the options parameter in the main function.W ARNING:Editing default options may cause unintended behavior.Usagems_options(...)Arguments...Options to change in the form option_name=value.Valuelist of options for modelStudio.OptionsMain options::scale_plot TRUE Makes every plot the same height,ignores bar_width.show_boxplot TRUE Display boxplots in Feature Importance and Shapley Values plots.show_subtitle TRUE Should the subtitle be displayed?subtitle label parameter from explainer.ms_title Title of the dashboard.ms_subtitle Subtitle of the dashboard(makes space between the title and line).ms_margin_*Dashboard margins.Change margin_top for more ms_subtitle space.margin_*Plot margins.Change margin_left for longer/shorter axis labels.w420in px.Inner plot width.h280in px.Inner plot height.bar_width16in px.Default width of bars for all plots,ignored when scale_plot=TRUE.line_size2in px.Default width of lines for all plots.point_size3in px.Default point radius for all plots.[bar,line,point_color][#46bac2,#46bac2,#371ea3]positive_color#8bdcbe for Break Down and Shapley Values bars.negative_color#f05a71for Break Down and Shapley Values bars.default_color#371ea3for Break Down bar and highlighted line.Plot-specific options::**is a two letter code unique to each plot,might be one of[bd,sv,cp,fi,pd,ad,rv,fd,tv,at].**_title Plot-specific title.Default varies.**_subtitle Plot-specific subtitle.Default is subtitle.**_axis_title Plot-specific axis title.Default varies.**_bar_width Plot-specific width of bars.Default is bar_width,ignored when scale_plot=TRUE.**_line_size Plot-specific width of lines.Default is line_size.**_point_size Plot-specific point radius.Default is point_size.**_*_color Plot-specific[bar,line,point]color.Default is[bar,line,point]_color.References•The input object is implemented in DALEX•Feature Importance,Ceteris Paribus,Partial Dependence and Accumulated Dependence ex-planations are implemented in ingredients•Break Down and Shapley Values explanations are implemented in iBreakDownSee AlsoVignettes:modelStudio-R&Python examples and modelStudio-perks and features10ms_update_observationsExampleslibrary("DALEX")library("modelStudio")#fit a modelmodel_apartments<-glm(m2.price~.,data=apartments)#create an explainer for the modelexplainer_apartments<-explain(model_apartments,data=apartments,y=apartments$m2.price)#pick observationsnew_observation<-apartments[1:2,]rownames(new_observation)<-c("ap1","ap2")#modify default optionsnew_options<-ms_options(show_subtitle=TRUE,bd_subtitle="Hello World",line_size=5,point_size=9,line_color="pink",point_color="purple",bd_positive_color="yellow",bd_negative_color="orange")#make a studio for the modelmodelStudio(explainer_apartments,new_observation,options=new_options,N=200,B=5)#faster examplems_update_observationsUpdate the observations of a modelStudio objectDescriptionThis function calculates local explanations on new observations and adds them to the modelStudio object.Usagems_update_observations(object,explainer,ms_update_observations11 new_observation=NULL,new_observation_y=NULL,max_features=10,B=10,show_info=TRUE,parallel=FALSE,widget_id=NULL,overwrite=FALSE,...)Argumentsobject A modelStudio created with modelStudio().explainer An explainer created with DALEX::explain().new_observationNew observations with columns that correspond to variables used in the model.new_observation_yTrue label for new_observation(optional).max_features Maximum number of features to be included in BD and SV plots.Default is10.B Number of permutation rounds used for calculation of SV and FI.Default is10.See vignetteshow_info Verbose a progress on the console.Default is TRUE.parallel Speed up the computation using parallelMap::parallelMap().See vignette.This might interfere with showing progress using show_info.widget_id Use an explicit element ID for the widget(rather than an automatically generated one).Useful e.g.when using modelStudio with Shiny.See vignette.overwrite Overwrite existing observations and their explanations.Default is FALSE which means add new observations to the existing ones....Other parameters.ValueAn object of the r2d3,htmlwidget,modelStudio class.References•The input object is implemented in DALEX•Feature Importance,Ceteris Paribus,Partial Dependence and Accumulated Dependence ex-planations are implemented in ingredients•Break Down and Shapley Values explanations are implemented in iBreakDownSee AlsoVignettes:modelStudio-R&Python examples and modelStudio-perks and featuresExampleslibrary("DALEX")library("modelStudio")#fit a modelmodel_titanic<-glm(survived~.,data=titanic_imputed,family="binomial")#create an explainer for the modelexplainer_titanic<-explain(model_titanic,data=titanic_imputed,y=titanic_imputed$survived)#make a studio for the modelms<-modelStudio(explainer_titanic,N=200,B=5)#faster example#add new observationsms<-ms_update_observations(ms,explainer_titanic,new_observation=titanic_imputed[100:101,],new_observation_y=titanic_imputed$survived[100:101]) ms#overwrite the observations with new onesms<-ms_update_observations(ms,explainer_titanic,new_observation=titanic_imputed[100:101,],overwrite=TRUE)msms_update_options Update the options of a modelStudio objectDescriptionThis function updates the options of a modelStudio object.W ARNING:Editing default options may cause unintended behavior.Usagems_update_options(object,...)Argumentsobject A modelStudio created with modelStudio()....Options to change in the form option_name=value,e.g.time=0,facet_dim=c(1,2).ValueAn object of the r2d3,htmlwidget,modelStudio class.OptionsMain options::scale_plot TRUE Makes every plot the same height,ignores bar_width.show_boxplot TRUE Display boxplots in Feature Importance and Shapley Values plots.show_subtitle TRUE Should the subtitle be displayed?subtitle label parameter from explainer.ms_title Title of the dashboard.ms_subtitle Subtitle of the dashboard(makes space between the title and line).ms_margin_*Dashboard margins.Change margin_top for more ms_subtitle space.margin_*Plot margins.Change margin_left for longer/shorter axis labels.w420in px.Inner plot width.h280in px.Inner plot height.bar_width16in px.Default width of bars for all plots,ignored when scale_plot=TRUE.line_size2in px.Default width of lines for all plots.point_size3in px.Default point radius for all plots.[bar,line,point_color][#46bac2,#46bac2,#371ea3]positive_color#8bdcbe for Break Down and Shapley Values bars.negative_color#f05a71for Break Down and Shapley Values bars.default_color#371ea3for Break Down bar and highlighted line.Plot-specific options::**is a two letter code unique to each plot,might be one of[bd,sv,cp,fi,pd,ad,rv,fd,tv,at].**_title Plot-specific title.Default varies.**_subtitle Plot-specific subtitle.Default is subtitle.**_axis_title Plot-specific axis title.Default varies.**_bar_width Plot-specific width of bars.Default is bar_width,ignored when scale_plot=TRUE.**_line_size Plot-specific width of lines.Default is line_size.**_point_size Plot-specific point radius.Default is point_size.**_*_color Plot-specific[bar,line,point]color.Default is[bar,line,point]_color.References•The input object is implemented in DALEX•Feature Importance,Ceteris Paribus,Partial Dependence and Accumulated Dependence ex-planations are implemented in ingredients•Break Down and Shapley Values explanations are implemented in iBreakDownSee AlsoVignettes:modelStudio-R&Python examples and modelStudio-perks and featuresExampleslibrary("DALEX")library("modelStudio")#fit a modelmodel_titanic<-glm(survived~.,data=titanic_imputed,family="binomial")#create an explainer for the modelexplainer_titanic<-explain(model_titanic,data=titanic_imputed,y=titanic_imputed$survived)#make a studio for the modelms<-modelStudio(explainer_titanic,N=200,B=5)#faster example#update the optionsnew_ms<-ms_update_options(ms,time=0,facet_dim=c(1,2),margin_left=150)new_msIndexhappiness_test(happiness_train),2 happiness_train,2modelStudio,3,8,12ms_merge_observations,7ms_options,4,8ms_update_observations,10ms_update_options,1215。
Tube MP Studio V3 用户手册说明书
The ARTTUBE MP STUDIO V3™TABLE OF CONTENTSIntroduction (2)Installation (3)AC Power Hookup (3)Audio Connections (3)Safety Precautions (3)Controls and Indicators (4)Input Control (4)+20 dB Gain Switch (4)Phantom Power +48V Switch (4)Phase Reverse Switch (5)OPL™ (Peak Limiter) Switch (6)Power/Clip/Limit LED (6)VU Meter (6)Output Control (7)Connections (8)¼” Input Jack (8)XLR Input Jack (8)XLR Output Jack (8)¼” Output Jack (9)Power Jack (9)Operation (10)Warranty Information (12)Service (13)Tube MP Studio Specifications (14)Thank you for purchasing the Tube MP Studio V3™ - and congratulations: You now own one of the most versatile preamplifiers available. Offering a superb level of sound quality, the Tube MP Studio’s hybrid solid state and tube circuit design combined with a straightforward user interface quickly and easily gives you access to all of its features.The original ART Tube MP put professional-caliber tube preamplification into the hands of thousands of musicians and recordists that wanted great tube tone in a compact and flexible package.The Tube MP Studio V3™ extends the range of applications by adding V3™ (Variable Valve Voicing) technology with an output protection limiter (OPL™) to precisely control output peaks, and analog VU metering to aid in setting and maintaining proper signal levels.The Tube MP Studio V3™ can be used in a wide variety of applications including recording, project and home studios, where its metering functionality and OPL™ circuitry really shines. It also functions as a direct box, with impedance matching and preamplification for i n strument or line-level sources.FEATURES:• Built-in analog VU metering• V3™ (Variable Valve Voicing) with OPL™ (switch selectable)• Up to 70dB of gain• Hand selected 12AX7A dual triode tube• Balanced XLR inputs and outputs• ¼” High impedance Instrument input and ¼” line level output• +48V Phantom power (switch selectable)• Phase Reverse Switch• Gain (+20dB) Switch• Input Gain Control• Output Level Control• Multifunction, dual color LED Power/Clip/Limit indicator• Fully shielded all steel chassis• Designed and developed in the USAThe Tube MP Studio V3™ may be used in a wide variety of applications and environments. Self-contained in an all-steel enclosure, the Tube MP Studio V3™ is designed for continuous professional use. Because the unit is compact and lightweight, mounting location is not critical. However, for greater reliability we recommend that you not place the Tube MP Studio V3™ on top of power amps or other sources of heat. The tube circuitry needs about a minute to “warm up” from a cold power up.AC POWER HOOKUPThe Tube MP Studio has an external power supply designed to ************************************************ outside the United States of America have been modified to comply with the required electrical specifications. Only use the adapter that came with the Tube MP Studio V3™. If the adapter becomes lost or damaged, contact ART Customer Service for replacement. If you need to purchase one locally, just make sure that you specify 9 Volt AC (not DC), at 800 ma.AUDIO CONNECTIONSAudio connections to and from the Tube MP Studio V3™ are balanced XLR (Pin 2 = Hot (+), Pin 3 = Cold (-), Pin 1 = Ground) and unbalanced ¼” (Tip = Hot (+), Sleeve = Ground). We recommend that you switch off the +48V Phantom Power whenever changing connections to the XLR input.SAFETY PRECAUTIONSWarning: To avoid the risk of shock or fire, do not expose this unit to moisture. Refer all servicing to qualified personnel. Do not remove the metal cover; there are no user-serviceable parts inside. Only use the power adapter that came with this unit or one obtained from Arts Customer Service Department.CONTROLS & INDICATORSINPUT CONTROLThe Input Control sets the amount of input gain of the Tube MP Studio V3™. Turn the control clockwise to increase gain and counterclockwise to decrease gain. You may control two ranges of gain with this control, +26 to +60dB and +6 to +40dB. Selection of the gain range is made with the +20dB gain switch.+20DB GAIN SWITCHUse the +20dB Gain Switch to set the gain range of the input control.When the switch is out, the Tube MP Studio V3™ operates in Normal mode. Depressing the switch adds 20dB of gain. This mode is indicated by the labeling in red and corresponds directly to the input control’s red gain range labeling. For microphone applications, where more gain is needed, push the switch in. For hot line level inputs, set the switch in the out position.PHANTOM POWER +48V SWITCHThe Tube MP Studio V3™ can power any microphone needing +48 volts DC Phantom power. Phantom power is supplied to pins 2 and 3 of the XLR Input jack when this switch is depressed. The Tube MP Studio V3™ slowly applies and removes the +48volts, to prevent damage to microphones.Be sure to turn down or mute the output of the Tube MP Studio V3™ when engaging or disengaging Phantom power. Additionally, when disengaging, allow 30 to 45 seconds for the power to completely discharge. Most microphones will make a sound like air leaking from a tire when Phantom power is disconnected, but some can make some very nasty low rumbles and whines as well.Dynamic microphones should not be affected or damaged if they are plugged into a line where Phantom power is present. However, if the mic doesn't need it, do not use it. Some things are best left untested!PHASE REVERSE SWITCHThe Phase Reverse switch is provided to reverse the phase of the signal. This switch works on Pins 2 and 3 of the XLR output jack and also reverses the polarity of the ¼” output jack. In the Normal position, the signal is in-phase. In the Reverse (or “in”) position, Pins 2 and 3 are reversed and the signal is changed to 180 degrees out of phase.In multiple microphone applications, mic placement can affect the phase of the signals. If two microphones pick up the same signal from different locations, the result can be a hollow or frequency “shifted”sound. In some cases it may sound as if an instrument disappears if it happens to be 180 degrees out of phase. Depressing the Phase switch can remedy this. In general, if your sound is “thin” or “out of position”, try reversing the phase to correct the problem.V3™ – VARIABLE VALVE VOICING™ CONTROLThis Tube MP Studio V3™ features ART’s proprietary V3™technology. V3™ (which stands for Variable Valve Voicing), provides optimized reference points to begin the recording process for guitars, bass guitars, synths, acoustic instruments, percussion and more.ART engineers ran our preamplification circuit through a battery of tests and real life studio conditions. Our goal was to create a processor that would allow a user to have presets that were optimized for specific recording applications. We set out to create a preamp that would be nimble enough to handle both violins and kick drums, and nearly everything in between.We wanted to take the guessing out of the equation – and that is how we developed V3™. It’s simple, easy and it works really well.For example, if you are recording an acoustic guitar, V3™ has a preset that has been optimized for that instrument. Once the preset is chosen, the user can even fine tune the signal – which shows the true power of V3™ technology…it’s tweakable. V3™ even features a multi setting, which is useful for a wide variety of applications – like overhead micing, broadcast and field recording.This means that it is now quicker and easier than ever to make great recordings! Musicians want to play, not spend hours adjusting knobs.No other microphone preamp is as user-friendly as the Tube MP Studio V3™.POWER/CLIP/LIMIT LEDThe bi-color Power/Clip/Limit LED lights green after power is applied and with lower level signals. If OPL™ is not being used, then the LED will serve as a signal clip indicator. It will light red whenever the signal at the tube’s output is about to clip. If the LED is constantly lit, reduce the signal level with the Input gain control, or Activate the OPL™ circuitry.When the OPL™ circuit is engaged, the LED will turn red whenever the output signal peaks exceed the limiter's threshold, at which point the limiter will reduce gain automatically, to prevent output clipping.VU METERThe VU Meter gives an analog representation of the Tube MP Studio V3™’s output signal level. “0dB” on the meter represents +6dBu at the ¼” output jack and +12dBu at the XLR o utput jack. Besides showing the average analog level, it is sensitive to attack transients. When not using OPL™, the VU Meter is a great indicator of how hard you are running the tube. It also helps in setting a consistent level as you change mics and instrument sources.The VU Meter also reflects the impact of the OPL™ circuitry on the signal. For example, if the signal is “in the red” on the meter, the meter will reflect the attenuation of the signal when the OPL™ is activated, and the signal is brought out of the “red”.OUTPUT CONTROLThe Output Control sets the output level of the Tube MP Studio V3™.When the control is fully counterclockwise, there is no output. Turning the control clockwise increases the level of the output signal. When setting the Output level control, refer to the VU Meter for an accurate level leaving the Tube MP Studio V3™.CONNECTIONSDespite the Tube MP Studio V3™’s sophistication, it is easy to interface the unit with a wide variety of equipment. All inputs and outputs, are located on the rear panel. Standard ¼” and XLR inputs and outputs make patching simple.¼” INPUT JACKThe ¼” Input jack is for instrument and line level inputs. It has a high input impedance to minimize any loading effects on instrument pickups. It can also handle up to +22 dBu signals for line level signals.Though not normally suggested, both input jacks can be used simultaneously, in a pinch, to sum two signals. The signal present at the XLR jack will tend to attenuate the signal of the ¼” input.XLR INPUT JACKThe XLR Input jack is primarily intended for microphone input, and as such can furnish Phantom Power when needed. It can handle up to +14 dBu signals, which is the hottest signal you would get out of any microphone. For even hotter input signals, you should use the ¼” input jack. The XLR Input jacks medium input impedance is extremely flat over a wide frequency range, which allows it to be musically neutral to virtually any microphone (one of the Tube MP Studio V3™'s lesser known secrets).XLR OUTPUT JACKThe XLR Output jack of the Tube MP Studio V3™ is active balanced.You may use it in an unbalanced configuration without harm to the output circuitry. The XLR output can provide a hefty signal level (+28dBu) at a low impedance, so make sure that you do not overdrive equipment with sensitive inputs. When using it on the front end of amixer, go into the mixer’s line in or insert inputs and not necessarily into the mixer’s microphone input, unless the mixer can pad that input’s level.¼” OUTPUT JACKThe ¼” Output jack is unbalanced and should be used for sending signals to amps, processors, or other unbalanced configurations.Both balanced and unbalanced output connections may be used simultaneously. This is particularly useful when using the Tube MP Studio V3™ as a direct box for instruments or line level signals. Make sure that both pieces of equipment connected to the Tube MP Studio V3™’s outputs are connected to the same earth ground, beforehand, to avoid electrical shock.If you experience a grounding hum when using both output connectors (one to a console, one to an instrument amp) simultaneously, a ground loop may be the problem. To remedy this problem, disconnect the ground wire (pin 1) from the XLR cable plugged into the Tube MP Studio V3™’s output. This interrupts the ground path and therefore breaks the loop.POWER JACKAn external 9 Volt AC adapter powers the Tube MP Studio V3™. Plug the adapter into the PWR jack and then into a power outlet. Only use the adapter that came with the T ube MP Studio. If the adapter ever becomes damaged, immediately discontinue use. They can be purchased locally or directly from ART. Just make sure that you specify9 Volt AC (not DC), at 800 ma..OPERATIONThe main application of the Tube MP Studio V3™ is a microphone preamplifier. Plug any microphone directly into either input and set the input and output controls to provide an appropriate level into the next stage of your system.Use the Tube MP Studio V3™ as an acoustic or piezo pickup preamplifier to run directly into a console, amp, processor, recorder, or sound card.The Tube MP Studio V3™ is ideal for use as a DI box. Plug the instrument into either input and use the XLR or ¼” (or both) outputs to connect to your recorder, board or PA system.Because of its low noise and excellent tonal qualities, the Tube MP Studio V3™ is ideal for running mixes through before recording to DAT or cassette. Used as a mastering device, the Tube MP Studio V3™ is capable of adding warmth and gentle tube compression to the signal.Variable Input and Output level controls make the Tube MP Studio V3™ ideal for level matching material in postproduction situations.Fill in the following information for your reference:Date of purchase ___________________Purchased from ___________________SERIAL NUMBER ___________________V3™ Settings and their applications when processing:When observing the V3™ dial from a clockwise perspective, the following settings are:Neutral Settings:These are useful for uncolored, natural reproduction of sound.6:00 - Neutral Flat6:45 – Neutral Vocal (Microphone)7:30 – Neutral Guitar Amplifier8:15 – Neutral Bass GuitarWarm Settings:These are useful when warming a signal is desired.9:00 – Warm Electronic Keyboard9:45 – Warm Electric Guitar10:30 – Warm Vocal Microphone11:15 – Warm ValveWarm Settings with OPL™:These are useful with high sound pressure levels, close proximity micing, and spiky transients, as well as warming the signal.12:00 – Warm OPL™ Multiple Applications12:45 – Warm OPL™ Vocal1:30 – Warm OPL™ Acoustic Guitar2:15 – Warm OPL™ PianoNeutral Settings with OPL™:These are useful with high spl’s, close micing and spiky transients, as well as maintaining clarity.3:00 – Neutral OPL™ Bass Guitar3:45 – Neutral OPL™ Acoustic Guitar4:30 – Neutral OPL™ Percussion5:15 – Neutral OPL™ LimitWARRANTY INFORMATIONLimited WarrantyApplied Research and Technology will provide warranty and service for this unit in accordance with the following warrants:Applied Research and Technology, (A R T) warrants to the original purchaser that this product and the components thereof will be free from defects in workmanship and materials for a period of one year from the date of purchase. Applied Research and Technology will, without charge, repair or replace, at its option, defective product or component parts upon prepaid delivery to the factory service department or authorized service center, accompanied by proof of purchase date in the form of a valid sales receipt.Exclusions:This warranty does not apply in the event of misuse or abuse of the product or as a result of unauthorized alterations or repairs. This warranty is void if the serial number is altered, defaced, or removed.A R T reserves the right to make changes in design or make additions to or improvements upon this product without any obligation to install the same on products previously manufactured.A R T shall not be liable for any consequential damages, including without limitation damages resulting from loss of use. Some states do not allow limitations of incidental or consequential damages, so the above limitation or exclusion may not apply to you. This warranty gives you specific rights and you may have other rights, which vary, from state to state.For units purchased outside the United States, an authorized distributor of Applied Research and Technology will provide service.SERVICEThe following information is provided in the unlikely event that your unit requires service.1) Be sure that the unit is the cause of the problem. Check to make sure the unit has the proper power supplied, all cables are connected correctly, and the cables themselves are in working condition.2) If you find the unit to be at fault, write down a complete description of the problem, including how and when the problem occurs. Please write down a description of your complete setup before calling Customer Service.3) Contact our Customer Service Department at (585) 436-2720 for your Return Authoriz ation number or questions regarding technical assistance or repairs. Customer Service hours are 9:00 AM to 5:30 PM Eastern Time, Monday through Friday.4) Pack the unit in its original carton or a reasonable substitute. The packing box is not recommended as a shipping carton. Put the packaged unit in another box for shipping. Print the RA number clearly on the outside of the shipping box. Print your return shipping address on the outside of the box.5) Include with your unit: a return shipping address (we cannot ship to a P.O. Box), a copy of your purchase receipt, a daytime phone number, and a description of the problem.6) Ship only your unit and its power supply (keep your manual!) to:APPLIED RESEARCH AND TECHNOLOGY215 TREMONT STREETROCHESTER, NEW YORK 14608RA# ____________________TUBE MP STUDIO V3™ SPECIFICATIONS Dimensions 5.0”H x 5.5” W x 2.0”HWeight 1.5 lbs.Input Connections XLR (balanced), ¼”TSOutput Connections XLR (balanced), ¼”TSInput Impedance XLR, ¼”2K ohms, 840k ohmsOutput Impedance XLR, ¼”600 ohms, 300ohmsMaximum Input Level, XLR +14dBuMaximum Input Level, ¼”+22dBuMaximum Output Level, XLR +28dBuMaximum Output Level, ¼”+22dBuCMRR >75dB (typical @ 1kHz)Frequency Response 10Hz to 30kHz, +/-.5dBDynamic Range >100dB (20-20kHz) typicalTotal Harmonic Distortion (THD) <0.1% (typical)Maximum GainXLR to XLR 70dB (typical)¼” to ¼”54dB (typical)XLR to ¼”64dB (typical)¼” to XLR60dB (typical)Equivalent Input Noise (EIN)XLR to XLR -129dBu (A weighted)¼” to ¼”-105dBu (A weighted)Tube Type 12AX7A, Dual Triode, Hand SelectedPower Requirements USA–*********(typ.)Exportunitsconfigured for country of destinationART maintains a policy of constant product improvement. ART reserves the right to make changes in design or make additions to or improvements upon this product without any obligation to install same on products previously manufactured. Therefore, specifications are subject to change without notice.Applied Research & Technology215 Tremont StreetRochester, NY 14608 USA(585) 436-2720(585) 436-3942 (FAX)© 2002 Applied Research & Technology。
MuleStudio用户手册

Mule Studio用户手册Ver BetaMuleSoft (翻译:eFuture Inc.) 2011-07-26目录1. 开始使用 Mule Studio ...................................... 错误!未定义书签。
1)介绍................................................... 错误!未定义书签。
2) Mule Studio是什么..................................... 错误!未定义书签。
3) 安装Mule Studio ....................................... 错误!未定义书签。
4) 创建首个Mule项目...................................... 错误!未定义书签。
5) 创建一个信息流程....................................... 错误!未定义书签。
6) 创建订单处理例子....................................... 错误!未定义书签。
7) 保存项目............................................... 错误!未定义书签。
8) 运行例子............................................... 错误!未定义书签。
9) 停止运行例子........................................... 错误!未定义书签。
10) 基于例子模板创建新Mule项目 .......................... 错误!未定义书签。
2. Mule Studio基本概念...................................... 错误!未定义书签。
- 1、下载文档前请自行甄别文档内容的完整性,平台不提供额外的编辑、内容补充、找答案等附加服务。
- 2、"仅部分预览"的文档,不可在线预览部分如存在完整性等问题,可反馈申请退款(可完整预览的文档不适用该条件!)。
- 3、如文档侵犯您的权益,请联系客服反馈,我们会尽快为您处理(人工客服工作时间:9:00-18:30)。
Mule ESB Studio v3.3 安装使用手册1***初级教程***如果你还没有做好准备,请到下载免费的社区版Mule ESB,按照网站上的说明启动Mule Studio,并且选择一个工作区(另外,你还可以下载30天免费试用的企业版Mule ESB)2安装Mule Studio安装前,请确认你的机器上已经安装了1.6版本的JDK。
最后请确认你的JDK环境变量配置是否正确2.1 导出将下载的文件解压到你的硬盘分区的根目录下,例如:C:\1. 执行找到C:\MuleStudio目录,运行muleStudio.exe启动Studio2. 选择工作区点击OK使用默认的工作区3使用Studio模板1. 点击File菜单,选择New > Mule Project2. 出现New Mule Project面板后,为你的项目输入名称和一个简短的说明,如图:3. 在Server Runtime选项上选择你将要使用的Mule运行时版本,如图:4. 点击旁边的复选框,根据现有的模板创建项目,单击项目,选择你想要使用的模板创建项目,如图:5. 点击Finish按钮,Mule Studio会创建并打开一个新的项目,完成预创建和预配置的流程6. 在Mule Studio的Package Explorer栏中,右键点击mule-config.mflow文件,选择RunAs > Mule Application7. 停止运行该项目,请在Mule Studio控制台点击红色的Terminate按钮,如图:4运行独立的例子1. 到Mule ESB Standalone目录下,找到Examples目录下你想运行的例子2. 拷贝.zip文件的例子到$MULE_HOME/apps目录下,例如:运行Flight Reservationexample的例子,拷贝mule-example-flight-reservation-3.3.0.zip到$MULE_HOME/apps 目录下,如图:3. 启动Mule,运行这个例子5启动Mule Studio如果你在安装过程中启动了Mule Studio,并且已经在运行了,请跳过本节的其余部分,直接进行:创建新项目如果当前Mule Studio没有启动,通过完成下面的步骤启动应用程序1. 找到Mule Studio安装目录2. 执行muleStudio.exe3. 点击OK使用默认的工作区6创建新项目1. 如果你看到是各种控制组件的应用程序窗口(右下图),请直接进入第2节。
相反(左下图),这是你第一次运行Studio。
单击Go to Mule Studio,然后进入第2节2. 点击File > New > Mule Project3. 在弹出的New Mule Project窗口中输入你的项目名称4. 点击描述文本框中的任意位置,然后键入与项目有关的描述,需要注意的是Server Settings显示的是Mule Server3.2.1社区版5. 点击Next所有项目都包含至少一个消息流程,由于是一个简单的项目,所以只有一个消息流程。
我们将把应用程序的名称用作流程的名称,所以请在New Mule Flow面板中输入名称:“Spell Checker”,然后点击描述文本框中的任意位置。
注意,Studio会自动将大写字母转换为小写,使用“_”字符替换单词之间的空格,并在结尾追加“. mflow”。
结果显示在File name字段中。
当你建立Spell Checker应用程序的拖放和拖放界面时,. mflow文件会一直跟踪你的工作。
在Description中输入任意描述,点击Finish完成创建7文件夹设置Spell Checker应用程序需要一对特殊的文件夹,方便数据的输入和输出。
可以通过完成以下步骤来创建它们:1.找到Studio菜单> File > Open File >2.然后在Open File的窗口中找到你的Studio安装目录,例如:C:\MuleStudio > Examples >Spell Checker3.在该目录下创建两个分别以InXML和OutXML命名的文件夹8关于Mule流程在我们的例子中(如下图),Web客户端发送HTTP消息的Inbound Endpoint设置为“request-response”的交换模式。
换句话说,用户期望应用程序能够响应他们的请求。
过滤器判断收到的消息是否有效,然后决定丢弃或者传递给流程中的下一个模块(将HTTP 请求按照JMS规范进行转换)接着,用Java编写的一个业务逻辑组件的消息进行处理,然后生成一个回答,传递到另一个转换器,将回答从JMS转回HTTP响应,然后把响应返回给正在等待的Web客户端。
9模块部署你可以从右侧组件栏中拖拽组件到画板上,从而创建一个Mule 流程,组件栏中一共包含七个类别的组件:Endpoints、Scopes、Components、Transformers、Filters、Flow Control、和Cloud Connectors10创建Spell Checker流程1.在Endpoints类组件栏中找到File,单击并拖放到左侧画板中相应的位置2.单击并拖动HTTP,也放在Endpoints组中,但要确保你把它放到File图标的右侧,因此,它会出现在用虚线表示的边框内3.松开鼠标按钮后,会有一条箭头线从File组件指向HTTP组件4.添加另一个File组件,将Endpoints类组件栏中的File组件拖放到HTTP组件的右侧,必须确保它也出现在用虚线表示的边框内5.最后,拖放Ehco组件,将它放到第一个File组件和HTTP组件中间,你的画板展示了一个完整的流程,如下图:11配置流程组件几乎所有的Mule组件提供的配置选项,你都可以通过对话框设置,无需编写XML12File入站端1.双击流程中最左侧的File组件,会弹出一个Endpoint Properties对话框,默认显示General选项卡,需要注意的是,Mule自动识别这个文件组件为入站端点(Inbound Endpoint)。
2.在Display Name输入框中,你必须输入一个具有很强描述性的名字,比如:“Incommingdata File”3.在Path Information面板中,在Path字段输入InXML所在项目的路径,整体路径看起来像这样:C:\MuleStudio\Examples\SpellChecker\InXML4.点击OK,完成Incoming Endpoint的配置并返回画板13Echo组件应用启动时,在Studio控制台输出消息的组件,无需特殊配置1.你也可以在General选项卡的Display Name字段输入名字,在Documentation选项卡的descriptive comments字段输入一些描述信息,当你的鼠标移到该组件上面,会展示出这些信息2.点击OK,完成Echo组件的配置并返回画板14HTTP Endpoint这个出站端从后台检索信息(这例子中的后台是Google Spell Checker API)1.双击HTTP组件,在General选项卡中完成配置在Host字段输入/tbproxy/spell?lang=en在Port字段输入Google Spell Checker Server使用的端口:80在Method字段输入Google Spell Checker Server使用的方法类型:POST2.点击OK完成配置如果你打算在公司防火墙后面运行本教程中的应用程序,需要另外配置:双击HTTP Endpoint,点击References选项卡点击Connector Reference选项卡右边的"+"图标点击Proxy Settings,进行如下图配置:15File 出站端1.双击配置流程右边的File组件2.在Path Information的Path字段输入OutXML所在项目的路径,整体路径看起来像这样:C:\MuleStudio\Examples\SpellChecker\OutXML3.在Output pattern栏中配置以下输出格式:#[function:datestamp:dd-MM-yy]_#[function:systime].xml这会让Mule在OutXML目录下以时间戳的格式给生成数据的文件命名4.点击OK完成配置祝贺你!你已经完成了你的第一个Mule ESB应用可选:点击控制台下方的Configuration XML选项卡切换到XML视图,你可以看到XML格式的流程信息,你可以直接修改这些XML内容,只要切回流程视图,你的修改会很快体现在视图中,在XML视图中你应该看到如下内容:16运行Spell Checker在Package Explorer栏中,鼠标右键spell_checker.mflow,在弹出的菜单中点击Run As > Mule Application如果你没有保存该应用,在弹出的Save and launch对话框中点击OK,Mule会保存并自动运行该应用随后控制台会打印出Started app 'spell_checker'等信息17测试Spell Checker你的项目正在运行,Mule正在检查InXML目录下的XML文件,如果要启动一个流程,你需要拷贝一个XML文件到这个目录下1.到Spell Checker 目录下(例如:C:\MuleStudio\Examples\SpellChecker)2.找到spellcheck.xml文件,这个文件中包含一些拼写错误的内容:"Creeating mi fiirst MulleStudio aplication!"3.将这个文件拷贝到InXML目录下,请注意,你只需要做这一步Studio控制台会输出一些信息,最后的内容是:"Writing file to..."随后spellcheck.xml文件不再保留在InXML目录下一个新的文件在OutXML目录下产生这个新产生的文件名字包含我们在File出站端指定的时间戳格式,如:21-01-12_1327187012641.xml新产生的文件中包含拼写错误的单词的更正Spell Checker应用会一直运行,等待处理新的文件下面是你拷贝到InXML目录下的spellcheck.xml文件内容:下面是Google API返回的修改建议,这部分内容保存在以时间戳格式命名的文件中,放在OutXML目录下18 ***中级教程*** 初级教程演示了如何创建简单的拼写检查的应用程序。