ASTM B-733-97 金属表面化学镀镍磷层规范标准
化学镀镍相关标准与规范
化学镀镍相关标准与规范化学镀镍过程的标准和规范有许多,几乎各国都有自己的标准,这些标准和规范是由许多学科的专业人员共同制定的,为了方便我国技术人员参考,现将其中比较重要的一些标准名称列出:国际标准:ISO 4527(1987),ISO/TC107 自催化镍磷镀层-规范和试验方法(Autocatalyticnickel-phosphoruscoatings-specification and test methods)中国:自催化镍-磷镀层技术要求和试验方法 GB/T 13913-92美国:ASTM B733-97 金属上自催化镍磷镀层标准规范(Standard Specification for Autocatalytic(Electroless) Nickel-Phosphorous Coatings on Metal)ASTMB656-91 工程用金属自催化镍磷沉积标准(Standard Guide for Autocatalytic (Electroless)Nickel-Phosphorus on Metals for Engineering Use)ASTM B656-79 金属上工程用自催化镀镍标准实施办法(该标准于2000年废止)MILC 26074B-军用规范,化学镀镍层的技术要求(Coatings,Electroless Nickel Requirements for Military)AMS 2404A-航空材料规范化学镀镍(Electroless Nickel Plating)AMS 2405-航空材料规范化学镀镍,低磷(Electroless Nickel Plating,Low Phosphrous) NACE T-6A-54 美国腐蚀工程师学会文件化学镀镍层英国:DEE STD 03-5/1 材料的化学镀镍层(Electroless Nickel Coatings of Material)法国:NFA 91-105 化学镀镍层特性和测试方法(Dépôt Chimique s de Nickel-Propciétés Caractéristiques atMéthodes Déssais德国:DIN 50966(1987) 功能化学镀镍层RAL-RG 660(第二部分)(1984)硬铬和化学镀镍层的质量保证苏联标准:ΓOCT 9.305-84奥地利:ÖNOrm c2550(1987) 化学镀镍磷镀层-技术要求和测试日本标准:JISH 8654-89 金属上自催化镍磷镀层H8645-99 ??解ンツケル?りんめフき11.1 国际标准ISO4527该国际标准于1987年发布,论述了含磷2~15wt%的化学镀镍,并阐述了实际的沉积和预处理步骤。
镀镍技术条件
化学镀镍技术条件1. 镀镍层厚度:0.050mm±0.005,材料:化学镀镍区域材料为低合金钢。
2. 工艺流程:(1)应力消除(如有必要)(2)除油(3)掩蔽(见图纸要求)(4)吹砂处理(建议做,对最终的镀层质量影响较大)(6)电解净化(如有必要)(7)表面活化(8)镀镍(供应商应该提供镀镍工艺,以及槽液成分,并获得批准)(9)除氢:要提高镀层的附着力并将氢排空,应在喷镀后四小时内按照下列条件进行:钢:180-200°C,2小时,空冷(10)热处理(如有必要)若在喷镀后四小时内实施了热处理,则不要求进行脱氢10.1 时效处理(硬度最大化)钢:390-410°C,4小时,空冷10.2 扩散(与基材冶金结合)钢:温度高于550°C,保温时间大于2小时,真空处理,空气冷却如果为调质钢,扩散温度应至少为30°C,低于钢的回火温度。
备注:如果厂家化学镀镍后的镀层性能满足性能测试实验(见3条),化学镀镍的工序和槽液允许按厂家的具体条件进行调整,红色字体部分不强制做。
3.首件质检(FPQ)3.1 目视检查在100%的镀层表面上进行。
喷镀表面应光滑、连续、均匀,无结疤、砂眼、剥落部位和任何其它不利于其使用的缺陷。
斑点类的缺陷在最差部位被镀面积5个/dm2内,可以接受。
允许使用食道镜检查内腔。
预先存在的基材不规则造成的镀镍缺陷不能成为镀镍不合格的缘由。
3.2气孔检验对于目视检查出的缺陷影响部位,使用下列方法进行气孔检验:钢铁锈法(ASTM B 733 § 9.6.1)铝合金茜素(ASTM B 733 § 9.6.4)不允许存在贯穿镀层的气孔。
3.3 表面光洁度镀层表面光洁度应符合工件图纸的要求。
3.4 厚度镀层厚度应符合工件图纸的要求。
供应商应对工件及试样的厚度进行测量和确认,并将方法提交给公司待批准。
如果使用磁法涡流,则应在脱氢前测量。
由于该方法会受到镀层中磷含量的影响,因此还有必要预先设定试样上的测量装置,试样上的镀层厚度使用破坏性方法确定(即按照要求进行显微检查)。
镀涂层检验标准

镀涂层检验标准一、目的:规范作业检验标准,保证产品质量。
二、本用范围:本规范适用于各种机箱、机柜等结构件表面镀层以及外购件镀层的检验、验收标准。
三、引用标准:GB12334-90金属和其他无机覆盖层关于厚度测量的定义和一般规则。
GB9797-88金属覆盖镍+铬和铜+镍+铬电镀层。
GB/T13744-92磁性和非磁性金属基本体上镍电镀层厚度的测量。
GB5267-85螺纹坚固件电镀层。
GB/T6739-1996涂膜硬度铅笔测定法金属覆盖层醋酸盐试验(ASS试验)标准:ISO2409涂料和清漆交叉切割试验。
四、检验标准4.1、检验项目;A、外观质量;B、密合性(附着力);C、硬度;D、抗化学腐蚀性;E、抗螺丝冲击性能;F、厚度。
4.2、检验方法及判定标准。
4.2.1、外观检验:按《外观检验规范》(WE.ZD.10-04)的规定进行检验。
4.2.2、密合性(附着力)4.2.2.1、锌镀层附着力划痕法:在被检验的锌镀层表面用钢针划4-6条横竖平行纵线,间距1mm,深达基体金属。
A、磨擦抛光试验:在面积小于6平方厘米镀锌表面上,以一根直径6毫米,顶端加工成平滑半球形的钢条作抛光工具,磨擦15S,所加压力应在每一行程中足以擦光覆盖层,但不应削去覆盖层。
B、判定标准:交叉处或磨擦处不能有起皮脱落现象。
4.2.2.1、镍镀层附着力:A、弯曲法:将受检验的试件用钳子夹紧,反复弯曲180度(向两面各弯曲90度)直到断裂。
B、也可用划痕法,磨擦抛光法,等检验方法。
C、判定标准:基体断裂处,镀层不应与基体分离。
4.2.3、硬度A、检验工具铅笔—中华牌5H型。
小推车—用于支撑铅笔B、方法削掉铅笔前端木料,露出约3mm的圆柱笔芯,然后在400#的磨砂纸上垂直地磨平笔尖,使其边缘尖利。
铅笔与镀层表面保持45度,在其镀层表面上向前划去。
a)铅笔移动量(位移),约10mm,铅笔移动速度:0.5mm/Sb)变换不同的检验点,做5次检验。
astm b733 电镀标准
astm b733 电镀标准ASTM B733是一种针对电镀的标准。
这个标准已被多个电镀技术协会和其他专业组织采用,是美国国家标准协会(ANSI)的测试方法。
下面就为大家分步骤阐述ASTM B733电镀标准。
首先,ASTM B733标准明确了电镀的目的和适用范围,其目的在于表面处理,增加特定的物理、化学或电学性质,例如耐磨、耐腐蚀、导电等,可应用于金属制品、塑料制品等表面的处理。
其次,ASTM B733制定了适用条件和限制。
例如,电镀材料会影响电缆和其他电气设备的机械和电学性能,因此根据镀层的厚度和铜和钢之间的接触面积的大小,限制了电镀铜的类型和华氏硬度。
第三,ASTM B733标准定义了标准工作程序。
这些程序包括与准备物表面相关的一些步骤,如清洗、脱脂、去污和磷化处理。
此外,ASTM B733还指明了如何制备电镀材料的混合物、如何选择电镀的类型和如何控制电流密度等。
第四,在ASTM B733标准文件的支持下,制定了可使记录持一致的标准测试方法。
例如,通过X射线荧光光谱仪(XRF)检测铜和其他合金元素的含量。
通过检测合金混合物中的重金属离子和离子浓度时,采用XRF进行导电性和生成属性测量。
接着,值得一提的是,质量控制联合会(MIL-QC)是电镀制造商和供应商部门的视察机构,以确保官方印记的镀层通过了最少一组ASTM B733测试,并符合MIL-QC的标准(MIL-QC-9858A)。
最后,ASTM B733标准将其标准工作程序强制执行。
例如,镀层涂覆铁、钢、铜-铝及铜-钢表面时,涂层应属于电解沉积铜层的两种类型之一。
在标准中还明确规定镀层的厚度范围,并针对需要相关测试进行了明确说明。
总之,ASTM B733是一个有着非常重要的电镀标准,它保证了电镀工艺和研究在执行和评价过程中的客观性和一致性,并为制造商,供应商及质量控制单位提供了重要的参考依据。
ASTM B733 标准

Designation:B733–97Standard Specification forAutocatalytic(Electroless)Nickel-Phosphorus Coatings on Metal1This standard is issued under thefixed designation B733;the number immediately following the designation indicates the year of original adoption or,in the case of revision,the year of last revision.A number in parentheses indicates the year of last reapproval.A superscript epsilon(e)indicates an editorial change since the last revision or reapproval.This standard has been approved for use by agencies of the Department of Defense.1.Scope1.1This specification covers requirements for autocatalytic (electroless)nickel-phosphorus coatings applied from aqueous solutions to metallic products for engineering(functional)uses.1.2The coatings are alloys of nickel and phosphorus pro-duced by autocatalytic chemical reduction with hypophosphite. Because the deposited nickel alloy is a catalyst for the reaction, the process is self-sustaining.The chemical and physical properties of the deposit vary primarily with its phosphorus content and subsequent heat treatment.The chemical makeup of the plating solution and the use of the solution can affect the porosity and corrosion resistance of the deposit.For more details,see ASTM STP265(1)2and Refs(2)(3)(4)and(5) also refer to Figs.X1.1,Figs.X1.2,and Figs.X1.3in the Appendix of Guide B656.1.3The coatings are generally deposited from acidic solu-tions operating at elevated temperatures.1.4The process produces coatings of uniform thickness on irregularly shaped parts,provided the plating solution circu-lates freely over their surfaces.1.5The coatings have multifunctional properties,such as hardness,heat hardenability,abrasion,wear and corrosion resistance,magnetics,electrical conductivity provide diffusion barrier,and solderability.They are also used for the salvage of worn or mismachined parts.1.6The low phosphorus(2to4%P)coatings are microc-rystalline and possess high as-plated hardness(620to750HK 100).These coatings are used in applications requiring abra-sion and wear resistance.1.7Lower phosphorus deposits in the range between1and 3%phosphorus are also microcrystalline.These coatings are used in electronic applications providing solderability,bond-ability,increased electrical conductivity,and resistance to strong alkali solutions.1.8The medium phosphorous coatings(5to9%P)are most widely used to meet the general purpose requirements of wear and corrosion resistance.1.9The high phosphorous(more than10%P)coatings have superior salt-spray and acid resistance in a wide range of applications.They are used on beryllium and titanium parts for low stress properties.Coatings with phosphorus contents greater than11.2%P are not considered to be ferromagnetic.1.10The values stated in SI units are to be regarded as standard.1.11The following precautionary statement pertains only to the test method portion,Section9,of this specification.This standard does not purport to address all of the safety concerns, if any,associated with its use.It is the responsibility of the user of this standard to establish appropriate safety and health practices and determine the applicability of regulatory limita-tions prior to use.2.Referenced Documents2.1ASTM Standards:B368Test Method for Copper-Accelerated Acetic Acid-Salt Spray(Fog)Testing(CASS Testing)3B374Terminology Relating to Electroplating3B380Test Method of Corrosion by the Corrodkote Proce-dure3B487Test Method for Measurement of Metal and Oxide Coating Thicknesses by Microscopical Examination of a Cross Section3B499Test Method for Measurement of Coating Thick-nesses by the Magnetic Method:Nonmagnetic Coatings on Magnetic Basis Metals3B504Test Method for Measurement of Thickness of Me-tallic Coatings by the Coulometric Method3B537Practice for Rating of Electroplated Panels Subjected to Atmospheric Exposure3B567Method for Measurement of Coating Thickness by the Beta Backscatter Method3B568Method for Measurement of Coating Thickness by X-Ray Spectrometry31This specification is under the jurisdiction of ASTM Committee B-08on MetalPowders and Metal Powder Products and is the direct responsibility of Subcom-mittee B08.08.01on Engineering Coatings.Current edition approved July10,1997.Published October1997.Originallypublished as B733–st previous edition B733–90(1994).2The boldface numbers given in parentheses refer to a list of references at theend of the text.3Annual Book of ASTM Standards,V ol02.05.1Copyright©ASTM International,100Barr Harbor Drive,PO Box C700,West Conshohocken,PA19428-2959,United States.B571Test Methods for Adhesion of Metallic Coatings3B578Test Method for Microhardness of Electroplated Coatings3B602Test Method for Attribute Sampling of Metallic and Inorganic Coating3B656Guide for Autocatalytic Nickel-Phosphorus Deposi-tion on Metals for Engineering Use3B667Practice for Construction and Use of a Probe for Measuring Electrical Contact Resistance4B678Test Method for Solderability of Metallic-Coated Products3B697Guide for Selection of Sampling Plans for Inspection of Electrodeposited Metallic and Inorganic Coatings3B762Method for Variable Sampling of Metallic and Inor-ganic Coatings3B849Specification for Pre-Treatment of Iron or Steel for Reducing the Risk of Hydrogen Embrittlement3B850Specification for Post-Coating Treatments of Iron orSteel for Reducing the Risk of Hydrogen Embrittlement3 B851Specification for Automated Controlled Shot Peening of Metallic Articles Prior to Nickel,Autocatalytic Nickel, Chromium,or As A Final Finish3D1193Specification for Reagent Water5D2670Method for Measuring Wear Properties of Fluid Lubricants(Falex Method)6D2714Method for Calibration and Operation of an Alpha LFW-1Friction and Wear Testing Machine6D3951Practice for Commercial Packaging7D4060Test Method for Abrasion Resistance of Organic Coatings by the Taber Abraser8E60Practice for Photometric Methods for Chemical Analy-sis of Metals9E156Test Method for Determination of Phosphorus in High-Phosphorus Brazing Alloys(Photometric Method)10 E352Test Methods for Chemical Analysis of Tool Steels and Other Similar Medium-and High-Alloy Steel9F519Test Method for Mechanical Hydrogen Embrittle-ment11G5Practice for Standard Reference Method for Making Potentiostatic and Potentiodynamic Anodic Polarization Measurements12G31Practice for Laboratory Immersion Corrosion Testing of Metals12G59Practice for Conducting Potentiodynamic Polarization Resistance Measurements12G85Practice for Modified Salt Spray(Fog)Testing122.2Military Standards:MIL-R-81841Rotary Flap Peening of Metal Parts13MIL-S-13165Shot Peening of Metal Parts13MIL-STD-105Sampling Procedures and Tables for Inspec-tion by Attribute132.3ISO Standards:ISO4527Autocatalytic Nickel-Phosphorus Coatings—Specification and Test Methods143.Terminology3.1Definition:3.1.1significant surfaces—those substrate surfaces which the coating must protect from corrosion or wear,or both,and that are essential to the performance.3.2Other Definitions—Terminology B374defines most of the technical terms used in this specification.4.Coating Classification4.1The coating classification system provides for a scheme to select an electroless nickel coating to meet specific perfor-mance requirements based on alloy composition,thickness and hardness.4.1.1TYPE describes the general composition of the de-posit with respect to the phosphorus content and is divided into five categories which establish deposit properties(see Table1). N OTE1—Due to the precision of some phosphorus analysis methods a deviation of0.5%has been designed into this classification scheme. Rounding of the test results due to the precision of the limits provides for an effective limit of4.5and9.5%respectively.For example,coating with a test result for phosphorus of9.7%would have a classification of TYPE V,see Appendix X4,Alloy TYPEs.4.2Service Condition Based on Thickness:4.2.1Service condition numbers are based on the severity of the exposure in which the coating is intended to perform and minimum coating thickness to provide satisfactory perfor-mance(see Table2).4.2.2SC0Minimum Service,0.1µm—This is defined by a minimum coating thickness to provide specific material prop-erties and extend the life of a part or its function.Applications4Annual Book of ASTM Standards,V ol03.04.5Annual Book of ASTM Standards,V ol11.01.6Annual Book of ASTM Standards,V ol05.02.7Annual Book of ASTM Standards,V ol09.02.8Annual Book of ASTM Standards,V ol06.01.9Annual Book of ASTM Standards,V ol03.05.10Discontinued;see1992Annual Book of ASTM Standards,V ol03.05. 11Annual Book of ASTM Standards,V ol15.03.12Annual Book of ASTM Standards,V ol03.02.13Available from Standardization Documents Order Desk,Bldg.4Section D, 700Robbins Ave.,Philadelphia,PA19111-5094,Attn:NPODS.14Available from American National Standards Institute,11W.42nd St.,13th Floor,New York,NY10036.TABLE1Deposit Alloy TypesType Phosphorus%wtI No Requirement for PhosphorusII1to3III2to4IV5to9V10and aboveTABLE2Service ConditionsCoating Thickness RequirementsService ConditionMinimum CoatingThicknessSpecificationµm in.(mm)SC0Minimun Thickness0.10.000004()SC1Light Service50.0002()SC2Mild Service130.0005()SC3Moderate Service250.001()SC4Severe Service750.003()include requirements for diffusion barrier,undercoat,electrical conductivity and wear and corrosion protection in specialized environments.4.2.3SC1Light Service ,5µm—This is defined by a minimum coating thickness of 5µm for extending the life of the part.Typical environments include light-load lubricated wear,indoor corrosion protection to prevent rusting,and for soldering and mild abrasive wear.4.2.4SC2Mild Service ,13µm—This is defined by mild corrosion and wear environments.It is characterized by indus-trial atmosphere exposure on steel substrates in dry or oiled environments.4.2.5SC3Moderate Service ,25µm—This is defined by moderate environments such as non marine outdoor exposure,alkali salts at elevated temperature,and moderate wear.4.2.6SC4Severe Service ,75µm—This is defined by a very aggressive environment.Typical environments would include acid solutions,elevated temperature and pressure,hydrogen sulfide and carbon dioxide oil service,high-temperature chlo-ride systems,very severe wear,and marine immersion.N OTE 2—The performance of the autocatalytic nickel coating depends to a large extent on the surface finish of the article to be plated and how it was pretreated.Rough,non uniform surfaces require thicker coatings than smooth surfaces to achieve maximum corrosion resistance and minimum porosity.4.3Post Heat Treatment Class —The nickel-phosphorus coatings shall be classified by heat treatment after plating to increase coating adhesion and or hardness (see Table 3).4.3.1Class 1—As-deposited,no heat treatment.4.3.2Class 2—Heat treatment at 260to 400°C to produce a minimum hardness of 850HK100.4.3.3Class 3—Heat treatment at 180to 200°C for 2to 4h to improve coating adhesion on steel and to provide for hydrogen embrittlement relief (see section 6.6).4.3.4Class 4—Heat treatment at 120to 130°C for at least 1h to increase adhesion of heat-treatable (age-hardened)alumi-num alloys and carburized steel (see Note 3).4.3.5Class 5—Heat treatment at 140to 150°C for at least 1h to improve coating adhesion for aluminum,non age-hardened aluminum alloys,copper,copper alloys and beryl-lium.4.3.6Class 6—Heat treatment at 300to 320°C for at least 1h to improve coating adhesion for titanium alloys.N OTE 3—Heat-treatable aluminum alloys such as Type 7075can undergo microstructural changes and lose strength when heated to over 130°C.5.Ordering Information5.1The following information shall be supplied by the purchaser in either the purchase order or on the engineering drawing of the part to be plated:5.1.1Title,ASTM designation number,and year of issue of this specification.5.1.2Classification of the deposit by type,service condi-tion,class,(see 4.1,4.2and 4.3).5.1.3Specify maximum dimension and tolerance require-ments,if any.5.1.4Peening,if required (see6.5).5.1.5Stress relief heat treatment before plating,(see6.3).5.1.6Hydrogen Embrittlement Relief after plating,(see 6.6).5.1.7Significant surfaces and surfaces not to be plated must be indicated on drawings or sample.5.1.8Supplemental or Special Government Requirements such as,specific phosphorus content,abrasion wear or corro-sion resistance of the coating,solderability,contact resistance and packaging selected from Supplemental Requirements.5.1.9Requirement for a vacuum,inert or reducing atmo-sphere for heat treatment above 260°C to prevent surface oxidation of the coating (see S3).5.1.10Test methods for coating adhesion,composition,thickness,porosity,wear and corrosion resistance,if required,selected from those found in Section 9and Supplemental Requirements.5.1.11Requirements for sampling (see Section 8).N OTE 4—The purchaser should furnish separate test specimens or coupons of the basis metal for test purposes to be plated concurrently with the articles to be plated (see 8.4).6.Materials and Manufacture6.1Substrate —Defects in the surface of the basis metal such as scratches,porosity,pits,inclusions,roll and die marks,laps,cracks,burrs,cold shuts,and roughness may adversely affect the appearance and performance of the deposit,despite the observance of the best plating practice.Any such defects on significant surfaces shall be brought to the attention of the purchaser before plating.The producer shall not be responsible for coatings defects resulting from surface conditions of the metal,if these conditions have been brought to the attention of the purchaser.6.2Pretreatment —Parts to be autocatalytic nickel plated may be pretreated in accordance with Guide B 656.A suitable method shall activate the surface and remove oxide and foreign materials,which may cause poor adhesion and coating poros-ity.N OTE 5—Heat treatment of the base material may effect its metallur-gical properties.An example is leaded steel which may exhibit liquid or solid embrittlement after heat treatment.Careful selection of the pre and post heat treatments are recommended.TABLE 3Classification of Post Heat TreatmentCLASS DescriptionTemperature(°C)Time (h)1No Heat Treatment,As Plated2Heat Treatment for Maximum Hardness TYPE I260202851632084001TYPE II 350to 3801TYPE III 360to 3901TYPE IV 365to 4001TYPE V375to 40013Hydrogen Embrittlement and Adhesion on Steel180to 2002to 44Adhesion,Carburized Steel and Age Hardened Aluminum 120to 1301to 65Adhesion on Beryllium and Aluminum140to 1501to 26Adhesion on Titanium300–3201–46.3Stress Relief:6.3.1Pretreatment of Iron and Steel for Reducing the Risk of Hydrogen Embrittlement—Parts that are made of steel with ultimate tensile strength of greater than1000Mpa(hardness of 31HRC or greater),that have been machined,ground,cold formed,or cold straightened subsequent to heat treatment,shall require stress relief heat treatment when specified by the purchaser,the tensile strength to be supplied by the purchaser, Specification B849may be consulted for a list of pre-treatments that are widely used.6.3.2Peening—Peening prior to plating may be required on high-strength steel parts to induce residual compressive stresses in the surface,which can reduce loss of fatigue strength and improve stress corrosion resistance after plating. (See Supplementary Requirements).6.3.3Steel parts which are designed for unlimited life under dynamic loads shall be shot peened or rotaryflap peened.N OTE6—Controlled shot peening is the preferred method because there are geometry’s where rotaryflap peening is not effective.See S11.2. 6.3.3.1Unless otherwise specified,the shot peening shall be accomplished on all surfaces for which the coating is required and all immediate adjacent surfaces when they contain notches,fillets,or other abrupt changes of section size where stresses will be concentrated.6.4Racking—Parts should be positioned so as to minimize trapping of hydrogen gas in cavities and holes,allowing free circulation of solution over all surfaces to obtain uniform coating thickness.The location of rack or wire marks in the coating shall be agreed upon between the producer and purchaser.6.5Plating Process:6.5.1To obtain consistent coating properties,the bath must be monitored periodically for pH,temperature,nickel and hypophosphite.Replenishments to the plating solution should be as frequent as required to maintain the concentration of the nickel and hypophosphite between90and100%of set point. The use of a statistical regimen to establish the control limits and frequency of analysis may be employed to ensure quality deposits are produced.6.5.2Mechanical movement of parts and agitation of the bath is recommended to increase coating smoothness and uniformity and prevent pitting or streaking due to hydrogen bubbles.6.6Post Coating Treatment for Iron and Steel for Reducing the Risk of Hydrogen Embrittlement—Parts that are made of steel with ultimate tensile strengths of1000Mpa(hardness of 31HRC or greater),as well as surface hardened parts,shall require post coating hydrogen embrittlement relief baking when specified by the purchaser,the tensile strength to be supplied by the purchaser.Specification B850may be con-sulted for a list of post treatments that are widely used.6.6.1Heat treatment shall be performed preferably within1h but not more than3h of plating on plated after plating of steel parts to reduce the risk of hydrogen embrittlement.In all cases,the duration of the heat treatment shall commence from the time at which the whole of each part attains the specified temperature.6.6.2High-strength steel parts with actual tensile strengths greater than1000MPa(corresponding hardness values300 HV10,303HB or31HRC)and surface hardened parts shall be processed after coating in accordance with Specification B850.6.7Heat Treatment After Plating to Improve Adhesion—To improve the adhesion of the coating to various substrates,the heat treatments in Table3should be performed as soon as practical after plating(see4.3).6.8Heat Treatment After Plating to Increase Hardness: 6.8.1To increase the hardness of the coating a heat treat-ment of over260°C is required.Table3describes the heat treatment for maximum hardness.6.8.2See Appendixes3and4and Guide B656;Figs.X1.2 and Figs.X1.3.6.8.3A heat treatment at260°C for greater than20h should be used to reduce the loss of surface hardness and strength of some ferrous basis metals.Avoid rapid heating and cooling of plated parts.Sufficient time must be allowed for large parts to reach oven temperature.N OTE7—The length of time to reach maximum hardness varies with the phosphorus content of the deposit.High phosphorus deposits may require longer time or a higher temperature,or both.Individual alloys should be tested for maximum hardness attainable,especially for condi-tions of lower temperatures and longer times.N OTE8—Inert or reducing atmosphere or vacuum sufficient to prevent oxidation is recommended for heat treatment above260°C.Do not use gas containing hydrogen with high-strength steel parts.7.Requirements7.1Process—The coating shall be produced from an aque-ous solution through chemical reduction reaction.7.2Acceptance Requirements—These requirements are placed on each lot or batch and can be evaluated by testing the plated part.7.2.1Appearance:7.2.1.1The coating surface shall have a uniform,metallic appearance without visible defects such as blisters,pits, pimples,and cracks(see9.2).7.2.1.2Imperfections that arise from surface conditions of the substrate which the producer is unable to remove using conventional pretreatment techniques and that persist in the coating shall not be cause for rejection(see 6.1).Also, discoloration due to heat treatment shall not be cause for rejection unless special heat treatment atmosphere is specified (see section5.1.9).7.2.2Thickness—The thickness of the coating shall exceed the minimum requirements in Table2as specified by the service condition agreed to prior to plating(see9.3).After coating and if specified,the part shall not exceed maximum dimension on significant surface(see section5.1.3).N OTE9—The thickness of the coating cannot be controlled in blind or small diameter deep holes or where solution circulation is restricted. 7.2.3Adhesion—The coating shall have sufficient adhesion to the basis metal to pass the specified adhesion test(see9.4 and Test Methods B571).7.2.4Porosity—The coatings shall be essentially pore free when tested according to one of the methods of9.6.The test method,the duration of the test,and number of allowable spots per unit area shall be specified(see section5.1.10and9.6).7.3Qualification Requirements—These requirements are placed on the deposit and process and are performed on specimens to qualify the deposit and plating process.The tests for these qualification requirements shall be performed monthly or more frequently.7.3.1Composition—Type II,III,IV,V deposits shall be analyzed for alloy composition by testing for phosphorus(see 9.1).The weight percent of phosphorus shall be in the range designated by type classification(see4.1).7.3.2Microhardness—The microhardness of Class2depos-its shall be determined by Test Method B578(Knoop).For Class2coatings,the microhardness shall equal or exceed a minimum of850(HK100(or equivalent Vickers)(see4.3and 9.5).The conversion of Vickers to Knoop using Tables E140 is not recommended.7.3.3Hydrogen Embrittlement—The process used to de-posit a coating onto high strength steels shall be evaluated for hydrogen embrittlement by Test Method F519.8.Sampling8.1The purchaser and producer are urged to employ statis-tical process control in the coating process.Properly performed this will ensure coated products of satisfactory quality and will reduce the amount of acceptance inspection.8.1.1Sampling plans can only screen out unsatisfactory products without assurance that none of them will be accepted.(7)8.2The sampling plan used for the inspection of a quantity of coated parts(lot)shall be Test Method B602unless otherwise specified by purchaser in the purchase order or contract(see section5.1.11and S.11.1).N OTE10—Usually,when a collection of coated parts(the inspection lot8.2)is examined for compliance with the requirements placed on the partsa relatively small number of parts,the sample,is selected at random and inspected.The inspection lot is then classified as complying or not complying with the requirements based on the results of the inspection sample.The size of the sample and the criteria of compliance are determined by the application of statistics.The procedure is known as sampling inspection.Three standards Test Method B602,Guide B697, and Test Method B762contain sampling plans that are designed for the sampling inspection of coatings.Test Method B602contains four sampling plans,three for use with tests that are nondestructive and one for use with tests that are destructive.The purchaser and producer may agree on the plan(s)to be used.If they do not, Test Method B602identifies the plan to be used.Guide B697provides a large number of plans and also gives guidance on the selection of a plan.When Guide B697is specified,the purchaser and producer need to agree on the plan to be used.Test Method B762can be used only for coating requirements that have a numerical limit,such as coating thickness.The last must yield a numerical value and certain statistical requirements must be met.Test Method B762contains several plans and also gives instructions for calculating plans to meet special needs.The purchaser and producer may agree on the plan(s)to be used.If they do not,Test Method B762 identifies the plan to be used.An inspection lot shall be defined as a collection of coated parts which are of the same kind,that have been produced to the same specification, that have been coated by a single producer at one time or approximately the same time under essentially identical conditions,and that are submit-ted for acceptance or rejection as a group.8.3All specimens used in the sampling plan for acceptance tests shall be made of the same basis material and in the same metallurgical condition as articles being plated to this specifi-cation.8.4All specimens shall be provided by the purchaser unless otherwise agreed to by the producer.N OTE11—The autocatalytic nickel process is dynamic and a daily sampling is recommended.For Coatings requiring alloy analysis and corrosion testing weekly sampling should be considered as an option. 9.Test Methods9.1Deposit Analysis for Phosphorus:9.1.1Phosphorus Determination—Determine mass% phosphorus content according to Practice E60,Test Methods E352,or Test Method E156on known weight of deposit dissolved in warm concentrated nitric acid.9.1.2Composition can be determined by atomic absorption, emission or X-rayfluorescence spectrometry.N OTE12—Inductively coupled plasma techniques can determine the alloy to within0.5%.The following analysis wavelength lines have been used with minimum interference to determine the alloy.Ni216.10nm Cd214.44nm Fe238.20nmP215.40nm Co238.34nm Pb283.30nmP213.62nm Cr284.32nm Sn198.94nmAl202.55nm Cu324.75nm Zn206.20nm9.2Appearance—Examine the coating visually for compli-ance with the requirements of7.2.1.9.3Thickness:N OTE13—Eddy-current type instruments give erratic measurements due to variations in conductivity of the coatings with changes in phosphorus content.9.3.1Microscopical Method—Measure the coating thick-ness of a cross section according to Test Method B487.N OTE14—To protect the edges,electroplate the specimens with a minimum of5µm of nickel or copper prior to cross sectioning.9.3.2Magnetic Induction Instrument Method—Test Method B499is applicable to magnetic substrates plated with auto-catalytic nickel deposits,that contain more than11mass% phosphorus(not ferromagnetic)and that have not been heat-treated.The instrument shall be calibrated with deposits plated in the same solution under the same conditions on magnetic steel.9.3.3Beta Backscatter Method—Test Method B567is only applicable to coatings on aluminum,beryllium,magnesium, and titanium.The instrument must be calibrated with standards having the same composition as the coating.N OTE15—The density of the coating varies with its mass%phospho-rus content(See Appendix X2).9.3.4Micrometer Method—Measure the part,test coupon, or pin in a specific spot before and after plating using a suitable micrometer.Make sure that the surfaces measured are smooth, clean,and dry.9.3.5Weigh,Plate,Weigh Method—Using a similar sub-strate material of known surface area,weigh to the nearest milligram before and after plating making sure that the part or coupon is dry and at room temperature for eachmeasurement.Calculate the thickness from the increase in weight,specific gravity,and area as follows:coating thickness,µm510W/~A3D!(1) where:W=weight gain in milligrams,A=total surface area in square centimetres,andD=grams per cubic centimetres(see Appendix X2).9.3.6Coulometric Method—Measure the coating thickness in accordance with Test Method B504.The solution to be used shall be in accordance with manufacturer’s recommendations. The surface of the coating shall be cleaned prior to testing(see Note14).9.3.6.1Calibrate standard thickness specimens with depos-its plated in the same solution under the same conditions. 9.3.7X-Ray Spectrometry—Measure the coating thickness in accordance with Test Method B568.The instrument must be calibrated with standards having the same composition as the coating.N OTE16—This method is only recommended for deposits in the as-plated condition.The phosphorus content of the coating must be known to calculate the thickness of the deposit.Matrix effect due to the distribution of phosphorus in layers of the coating also effect the measurement accuracy and require that calibration standards be made under the same conditions as the production process.9.4Adhesion:9.4.1Bend Test(Test Methods B571)—A sample specimen is bent180°over a mandrel diameter43the thickness(10mm minimum)of the specimen and examined at43power magnification forflaking or separation at the interface.Fine cracks in the coating on the tension side of the bend are not an indication of poor adhesion.Insertion of a sharp probe at the interface of the coating and basis metal to determine the adhesion is suggested.N OTE17—Appropriate test specimens are strips approximately25to50 mm wide,200to300mm long and3to6mm thick.9.4.2Impact Test—A spring-loaded center punch with a point having2to3mm radius is used to test adhesion of the coating on nonsignificant surfaces of the plated part.Make three closely spaced indentations and examine under103 magnification forflaking or blistering of the coating,which is cause for rejection.9.4.3Thermal Shock—The coated part is heated to200°C in an oven and then quenched in room temperature water.The coating is examined for blistering or other evidence of poor adhesion at43magnification.9.5Microhardness—The microhardness of the coating can be measured by Test Method B578using Knoop indenter and is reported in Knoop Hardness Number(HK).It will vary depending on loads,type of indenter,and operator.A100g load is recommended.The rhombic Knoop indenter gives higher hardness readings than the square-base pyramidal Vickers diamond indenter for100to300g loads,see Ref(6).For maximum accuracy,a minimum coating thickness of75µm is recommended.Conversions of Vickers or Knoop hardness number to Rockwell C is not recommended.N OTE18—On thick(75µm+)coatings on steel a surface microhardness determination is permissible.9.6Porosity—There is no universally accepted test for porosity.When required,one of the following tests can be used on the plated part or specimen.9.6.1Ferroxyl Test for Iron Base Substrates—Prepare the test solution by dissolving25g of potassium ferricyanide and 15g of sodium chloride in1L of distilled water.After cleaning,immerse the part for30s in the test solution at25°C. After rinsing and air drying,examine the part for blue spots, which form at pore sites.9.6.2Boiling Water Test for Iron-Base Substrates—Completely immerse the part to be treated in a vesselfilled with aerated water at room temperature.Apply heat to the beaker at such a rate that the water begins to boil in not less than15min,nor more than20min after the initial application of heat.Continue to boil the water for30min.Then remove the part,air dry,and examine for rust spots,which indicate pores. N OTE19—Aerated water is prepared by bubbling clean compressed air through distilled water by means of a glass diffusion disk at room temperature for12h.The pH of the aerated water should be6.7+0.5.9.6.3Aerated Water Test for Iron-Base Substrates—Immerse the part for4h in vigorously aerated Type IV or better water(see Specification D1193)at2562°C temperature and then examine the part for rust spots.9.6.4Alizarin Test for Aluminum Alloys—Wipe the plated part or specimen with10mass%sodium hydroxide solution. After3min contact,rinse,and apply a solution of alizarin sulfonate prepared by dissolving1.5g of methyl cellulose in90 mL of boiling water to which,after cooling,0.1g sodium alizarin sulfonate,dissolved in5mL of ethanol is added.After 4min contact,apply glacial acetic acid until the violet color disappears.Any red spots remaining indicate pores.9.6.5Porosity Test for Copper Substrates—Wipe the plated part or specimen with glacial acetic acid.After3min,apply a solution of potassium ferrocyanide prepared by dissolving1g of potassium ferrocyanide and1.5g methyl cellulose in90mL of boiling distilled water.The appearance of brown spots after 2min indicate pores.9.7Other Test Methods—Test methods which have been developed that are equal to or better than these may be substituted.The precision and bias requirements will vary for each type of test.If an alternate test is specified it shall be agreed upon between the producer and the purchaser.10.Rejection and Rehearing10.1Part(s)that fail to conform to the requirements of this standard may be rejected.Rejection shall be reported to the producer promptly in writing.In the case of dissatisfaction occurs with the results of a test,the producer may make a claim for a hearing.Coatings that show imperfections may be rejected.11.Certification11.1When specified in the purchase order or contract,the purchaser shall be furnished certification that the samples representing each lot have been processed,tested and inspected as directed in this specification and the requirements havebeen。
化学银及化学镍电镀标准
修改内容
修改依据
签名及日期
核准
审核
制作
外观要求
2. 化
产品类型
电镀后无变形,划伤.发黄,起泡,露底,颗粒等现象. 表面化学镀材质及膜厚
五金类
化学镍
见电镀图
可靠性测试
1.盐雾48H不能发黄,起泡等现象. 2.焊锡性能良好. 3.附着力测试不可脱皮. 4.需符合ROHS环保要求
外观要求 电镀后无变形,划伤.发黄,起泡,露底,颗粒等现象.
修改记号
文件编号
版本/版次
A.0
化学银及化学镍标准
一 :
生效日期
页码
1/1
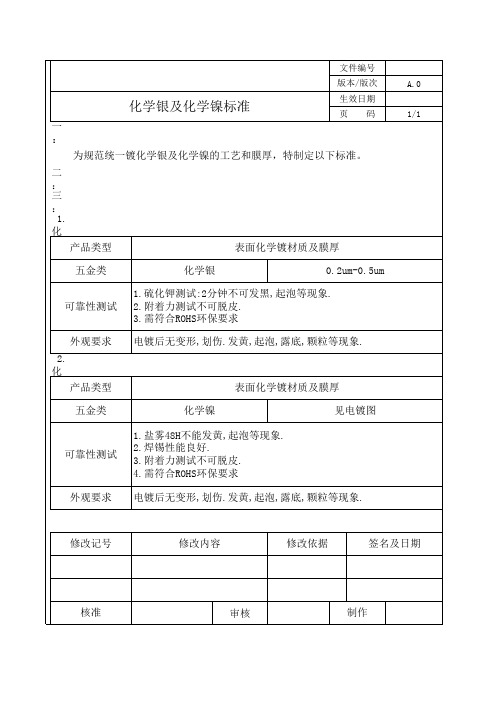
为规范统一镀化学银及化学镍的工艺和膜厚,特制定以下标准。
二 : 三 :
1. 化
产品类型
表面化学镀材质及膜厚
五金类
化学银
0.2um-0.5um
可靠性测试
1.硫化钾测试:2分钟不可发黑,起泡等现象. 2.附着力测试不可脱皮. 3.需符合ROHS环保要求
化学镀镍综述

化学镀镍综述化学镀镍,又称为无电解镀镍,是在金属盐和还原剂共同存在的溶液中靠自催化的化学反应而在金属表面沉积了金属镀层的新的成膜技术。
电镀是利用外电流将电镀液中的金属离子在阴极上还原成金属的过程。
而化学镀是不外加电流,在金属表面的催化作用下经控制化学还原法进行的金属沉积过程。
因不用外电源直译为无电镀或不通电镀。
由于反应必须在具有自催化性的材料表面进行,美国材料试验协会(ASTMB-347)推荐用自催化镀一词(Autocatalytic plating)。
对化学镀镍而言,我国1992年颁布的国家标准(GB/T13913-92)则称为自催化镍-磷镀层(Autocatalytic Nickel Phosphorus Coating),其意义与美国材料试验协会的名称相同。
由于金属的沉积过程是纯化学反应(催化作用当然是重要的),所以将这种金属沉积工艺称为“化学镀”最为恰当,这样它才能充分反映该工艺过程的本质。
从语言学角度看Chemical,Non electrolytic,Electroless三个词主是一个意义了,直译为无电镀一词是不确切的。
“化学镀”这个术语目前在国内外已被大家认同和采用。
化学镀镍所镀出的镀层为镍磷合金,按其磷含量的不同可分为低磷、中磷、高磷三大类:·磷含量低于3%的称为低磷;·磷含量在3-10%的为中磷;·磷含量高于10%的为高磷;其中中磷的跨度比较大,一般我们常见的中磷镀层为6-9%的磷含量。
当然,本站主要介绍的是化学镀镍磷合金,有时为了方便我们简称化学镀了,而且EN也是化学镀镍简称。
但化学镀不仅此一种镀种,比较成熟的还有化学镀铜,化学镀金,化学镀锡,还有一种复合镀层。
其它镀种的市场占有量不足总量的1%,本站不做重点介绍。
化学镀层的物理性质与化学性质密度:镍的密度在20℃时为。
含磷量1%-4%时为;含磷量7%-9%时为;含磷量10%-12%时为。
酸性镀液中磷含量与密度关系极为紧密。
中磷镍和高磷镍的标准
中磷镍和高磷镍的标准
中磷镍和高磷镍是两种常见的镍电镀涂层,它们在工业应用中具有不同的特点和用途。
为了确保电镀涂层质量、提高产品的性能和可靠性,制定了相关的标准来规范中磷镍和高磷镍的镀层。
关于中磷镍的标准,根据具体的国家和地区,会有相应的规定和要求。
一般而言,中磷镍涂层的主要特点是镀层厚度在5-20um之间,镀层中的磷含量在8-15%。
具体的标准要求会规定对
镀层的厚度、磷含量、硬度、耐蚀性以及其他特性进行测试和评估。
根据应用的不同,中磷镍的标准也可能存在一些变化。
相比之下,高磷镍的标准会更加严格和具体。
高磷镍涂层的主要特点是镀层厚度大于20um,
且镀层中的磷含量超过15%。
高磷镍涂层具有更高的耐腐蚀性和耐磨性,广泛应用于化工、汽车、航空航天等领域。
相关标准会对镀层的成分、厚度、硬度、结晶性、耐蚀性以及其他特性进行详细的规定。
此外,对高磷镍涂层的起镀性能、镀液配方、工艺条件等也有详细的要求。
为了确保中磷镍和高磷镍镀层的质量,常见的标准测试方法包括:镀层厚度测量、磷含量测定、硬度测试、耐蚀性测试等。
这些测试方法都有相应的标准规范,以确保测试结果的准确性和可重复性。
此外,对于中磷镍和高磷镍涂层的镀液配方和工艺条件,也需要进行标准规范,以确保镀层的质量和性能能够稳定可靠地实现。
总之,中磷镍和高磷镍的标准是为了确保电镀涂层的质量和性能,规范镀层厚度、成分、硬度、耐蚀性等方面的要求。
通过遵循这些标准,可以保证中磷镍和高磷镍镀层具有稳定的质量和可靠的性能,满足各种工业应用的需求。
化学镍镀层的厚度要求
化学镍镀层的厚度要求
镀层的厚度及其均匀性是衡量镀层质量的重要指标之一。
化学镍镀层厚度直
接影响到工件的耐蚀性、耐磨性、孔隙率和导电性等性能,从而在很大程度上影
响产品的可靠性和使用性能。
镀层的厚度取决于沉积速度、沉积时间与镀液的老
化程度,理论上可得到任意厚度的镀层。
化学镀镍层的一个主要优点是沉积金属
的厚度在整个基底表面是均匀的,几乎与它的几何形状无关。
并且在全部被溶液
浸润以及镀液流动有自由通道的条件下,可获得非常均匀的镀层。
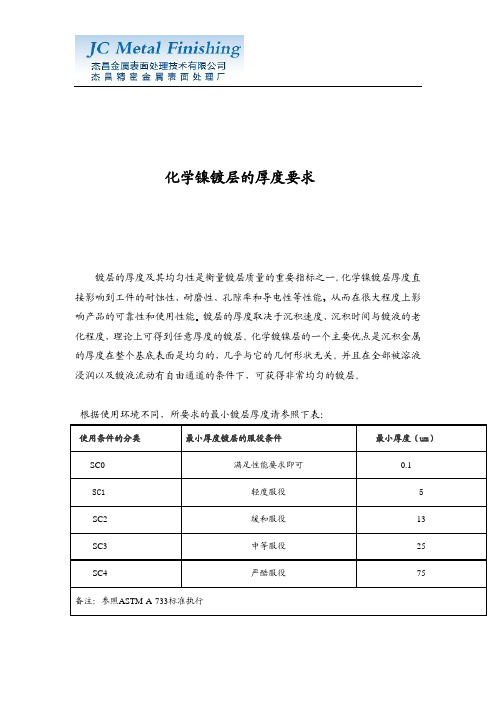
根据使用环境不同,所要求的最小镀层厚度请参照下表:
使用条件的分类最小厚度镀层的服役条件最小厚度(um)
SC0 满足性能要求即可 0.1
SC1 轻度服役 5
SC2 缓和服役 13 SC3 中等服役 25 SC4 严酷服役 75 备注:参照ASTM-A-733标准执行
杰昌金属表面处理技术有限公司提供。
紧固件表面镀层标准

紧固件表面镀层标准作为紧固件制造中重要的环节,表面镀层的质量标准直接关系到紧固件的性能和运用寿命。
以下分别从分类及标准两个方面进行介绍。
分类按照装饰性质,可以将表面镀层分为镀铜、镀铬、镀镍、镀锌、电镀金、电镀银等几种。
其中,镀铜可增强紧固件的防腐性,镀铬和镀镍可提高紧固件的装饰效果和耐腐蚀性,镀锌常用于螺丝、螺母等含碳钢材料,是一种常用和经济的镀层方式。
按照应用领域,表面镀层可以分为汽车紧固件、机械紧固件、建筑紧固件、电子紧固件等。
各个领域对表面镀层的需求不同,要求的性能指标也不同。
如汽车紧固件对耐腐蚀性和抗氢脆性的要求比较高,机械紧固件对装饰效果不敏感,要求的是强度和耐用性。
标准为了保证紧固件表面镀层的质量和标准化水平,国家和国际上制定了一系列的标准进行统一管理。
以下是常见的标准:1. GB/T 10125:“盐雾腐蚀试验”标准。
通过模拟海洋气候条件进行测试,评估紧固件的耐腐蚀性能,适用于各种表面镀层。
2. GB/T 3190:“紧固件表面质量检验标准”。
通过视觉检测、光波分析等方式,评估表面镀层的外观质量、光泽度、色泽等性能,以及是否存在气泡、缺陷、脱落等情况。
3. GB/T 26756:“机械紧固件的电镀层和有机涂层检验规范”。
该标准详细规定了不同类型镀层的检测方法,如硬度、漆膜厚度、耐磨性等。
4. ASTM B633:“电镀锌、无机和有机涂层、钒合金和镍钴合金镀层标准规范”。
主要适用于建筑、机械和电子工业中的紧固件。
总结紧固件表面镀层虽是细小的零件,却是紧固件制造中不可或缺的重要一环。
各种表面镀层在不同领域中均有广泛的应用,而标准化管理则能为紧固件制造行业提供保障,确保每一颗紧固件都符合要求。
电镀规范标准

关于电镀层是铜镍铬和电镀层是镍铬的规范标准1.范围1.1 这个规范包含了几种类型和几种等级的电镀层的要求,镀在钢铁上的电镀层是由铜,镍,铬组成的,或者是由镍,铬组成,镀在铜或者是铜合金上的电镀层是由镍,铬组成,镀在锌合金上的电镀层是由由铜,镍,铬组成的,这些电镀层是为了保护底层的STEP金属不受腐蚀,所以说在表层面或者内部面镀上电镀层是非常重要的。
提供五种等级的电镀层来满足不同状态下的要求,这些电镀层在很大程度上能够表现出令人满意的性能,即使是破坏已经达到:非常非常严重的,非常严重的,严重的,中度的,轻微的。
关于这些状态的定义和典型的事例在附录XI中可以找到。
1.2如下警告仅仅适用于在附录X2,X3,X4中关于这一规范的测试方法:这个标准并不是涉及到了所有相关的安全用法。
要建立一个合理的规则和在使用之前决定这个规则限制的实用性是标准使用者的职责。
提示1—ISO标准中的1456和1457并不是一种要求,但是可以作为其他消息的参考。
2.参考文档2.1 ASTM标准B117 是关于盐水喷雾测试器械的操作规则B183 是关于电镀中低碳合金镀层的准备工作的规则B242 是关于电镀中高碳合金镀层的准备工作的规则B252 是关于电镀和镀层转换中锌合金拉模铸造的准备工作的指导性建议B253 是关于电镀中铝合金镀层准备工作的指导性建议B254 是关于不锈钢上电镀层准备工作的规则B281 是关于电镀和镀层转换中铜和铜合金准备工作的规则B287 是关于醋酸盐水喷雾测试的方法B320 是关于电镀中铁铸造准备工作的规则B368 是关于加速铜化的醋酸盐水喷雾测试的方法B380 是关于通过(corrodkote)程序来进行电镀装饰层的腐蚀测试的方法B487 是关于通过使用显微镜来检验金属以及镀层横断面来判断氧化物厚度的测试方法B499 是关于通过磁力效应来检测电镀层厚度的测试方法,这种磁力效应是:有磁力的底层金属上镀有没有磁力的镀层。
镀镍镀层标准

镀镍镀层标准《镀镍镀层标准》前言嘿,朋友!你知道吗?在我们的生活和工业生产中,镀镍可是个挺常见的事儿呢。
不管是那些亮晶晶的小饰品,还是工业设备里的一些零件,镀镍都起着非常重要的作用。
它可以让东西变得更加美观,还能提高耐腐蚀性能等。
但是呢,为了确保镀镍的质量达到一定的要求,我们就得有个标准呀,这就好比大家都按照同一个规则来玩游戏,这样才能保证公平,也能保证产品的质量稳定可靠。
今天呀,咱们就来好好唠唠这个镀镍镀层标准。
适用范围这个镀镍镀层标准适用的场景可不少呢。
比如说在装饰性行业,那些我们日常佩戴的项链、手链、耳环等首饰,如果镀镍层不符合标准,可能戴着戴着就掉色了,变得很难看。
再比如在汽车制造业,很多汽车零部件为了防止生锈腐蚀,也会进行镀镍处理。
像发动机的一些小零件,要是镀镍没做好,在汽车运行过程中,就容易因为腐蚀而出现故障。
在电子工业里也同样适用,一些电子元件镀镍后可以提高导电性和焊接性,如果镀镍层不达标,可能会影响整个电子设备的性能。
简单来说,只要是涉及到需要镀镍来提高外观、抗腐蚀、导电性等性能的产品或者零件,这个标准都适用。
术语定义1. 镀镍层说白了,就是通过电镀的方法在物体表面形成的一层镍金属层。
就像给物体穿上了一层镍做的衣服。
这层“衣服”的厚度、均匀性等都有一定的要求。
2. 基体材料这个呢,就是被镀镍的那个东西本身。
比如说要给一个铁制的小零件镀镍,这个铁制零件就是基体材料。
它的材质、表面状态等都会影响镀镍的效果。
3. 附着力你可以想象一下,镀镍层就像贴在基体材料上的贴纸,如果贴纸很容易就掉下来,那肯定不行。
附着力就是指镀镍层与基体材料结合的牢固程度。
如果附着力不好,镀镍层就容易脱落,那镀镍也就失去意义了。
正文1. 化学成分- 镍含量在镀镍层中,镍的含量是一个重要的指标。
一般来说,纯镍镀镍层中镍的含量应该在99%以上。
这就好比我们做蛋糕,面粉是主要原料,那在镀镍这个“蛋糕”里,镍就是主要成分。
紧固件表面镀层标准

紧固件表面镀层标准紧固件表面镀层是指为了提高紧固件的耐腐蚀性、耐磨性和美观度而在其表面涂覆一层特殊涂层。
根据国际标准和行业规范,紧固件表面镀层需要符合一定的标准要求。
紧固件表面镀层的厚度应符合标准。
根据不同的紧固件类型和用途,镀层厚度的要求也有所不同。
一般来说,镀层的厚度应在一定的范围内,既不能过薄导致镀层容易剥落和腐蚀,也不能过厚导致紧固件的尺寸变化过大。
在实际应用中,可以通过测量镀层厚度来验证是否符合标准要求。
紧固件表面镀层的耐腐蚀性是一个重要的指标。
紧固件在使用过程中常常会受到各种腐蚀介质的侵蚀,例如水、酸、碱等。
为了保证紧固件长时间使用不发生腐蚀,需要对其表面进行镀层处理。
镀层应具有良好的耐腐蚀性,能够在腐蚀介质的作用下保持紧固件的完整性和性能。
常见的紧固件表面镀层材料有镀锌、镀铬、镀镍等,这些材料具有较好的耐腐蚀性能。
紧固件表面镀层还需要具备一定的耐磨性。
紧固件在装配和使用过程中可能会受到摩擦和磨损,因此表面镀层需要具有一定的耐磨性能,能够保护紧固件的表面免受磨损和划伤。
常见的耐磨性好的表面镀层材料有硬铬、电镀合金等。
紧固件表面镀层的外观要求也很重要。
紧固件作为机械装配中的一种重要零部件,其外观质量直接关系到整个产品的美观度和质量感。
因此,紧固件表面镀层的外观要求通常包括表面光洁度、颜色一致性和无明显缺陷等。
表面光洁度要求镀层表面平整光滑,无明显的凹凸、气孔和皱纹等缺陷;颜色一致性要求镀层的颜色均匀、饱满,没有明显的色差和斑点;无明显缺陷要求镀层表面无明显的划痕、气泡、杂质等。
紧固件表面镀层的环保性也是一个重要的考虑因素。
随着环境保护意识的提升,对于镀层材料的选择也越来越注重环保性。
一些传统的镀层材料,如六价铬、镍等,由于其对环境和人体健康的危害,已经被逐渐淘汰。
取而代之的是一些环保型镀层材料,如三价铬、无铬等。
这些环保型镀层材料具有较好的性能,并且对环境和人体健康的危害较低。
紧固件表面镀层的标准要求涉及到镀层厚度、耐腐蚀性、耐磨性、外观要求和环保性等方面。
化学镀镍的质量检测与相关标准
化学镀镍的质量检测与相关标准一、化学镀镍的质量检测:※外观按主要表面的外观可为光亮、半光亮或无光泽。
除另有规定,当用目视检查,表面应均匀,不应有麻点、裂纹、起泡、分层或结瘤等缺陷。
※表面粗糙度如果需方规定了粗糙度,应按GB 3505的规定进行测定。
镀层的表面粗糙度一般不会优于镀前基体的表面粗糙度。
※厚度主要表面镀覆的自催化镍-磷合金和底层的最小厚度及测量方法应由需方规定。
※弯曲试验将试样沿直径最小为12mm的或试样厚度4倍的心轴绕180°用4倍的放大镜检查,有无脱皮,起泡。
※硬度如果需方要求硬度值,应按GB 9790规定的方法,在热处理后测量,其结果应在需方规定的硬度值的±10%以内。
※镀层的耐蚀性参照ASTM-B-117进行, 如果需要,需方应规定镀层的耐蚀性及其试验和评价方法。
二. 化学镀镍的相关标准: 序号 标准号 标准名1 GB/T13913—92 自催化镍-磷镀层技术要求和试验方法2 ISO 4527—1987 自催化镍磷镀层——规范和试验方法3 ASTM B656—79 金属上工程用自催化镀镍标准实施方法4 MIL-C -26074—B 美国 军用规范 化学镀镍层技术要求5 AMS- 2404—A航空材料规范 化学镀镍7 NACE T—6A—54美国 腐蚀工程师学会文件 化学镀镍层8 DEF STD 03-5/1 英国 材料的化学镀镍9 NFA-91—105 法国 化学镀镍层特性和测试方法10 DIN50966—1987 德国 功能用化学镀镍11 RAL-RG660 德国 硬铬和化学镀镍层的质量保证12 ONORMC2550—1987 化学镀镍磷镀层—技术要求杰昌金属表面处理技术有限公司提供。
表面处理之化学镀镍规范及制程讲解

Print Date: 22-Nov-19
Foxsemicon Integrated Technology Inc.
CONFIDENTIAL
Presenter:
4
化學鎳配方及反應方程式
Quality Assurance
主成份: • (1)硫酸鎳 (2)次磷酸二氫鈉 (3)絡合劑 (4)pH調整劑(氨水、氫氧化鈉)
Print Date: 22-Nov-19
Foxsemicon Integrated Technology Inc.
CONFIDENTIAL
Presenter:
8
鍍鎳
Quality Assurance
如圖所示,經過兩次鋅置換,在化鎳與之反應瞬間(起鍍前幾分鐘),化鎳可以說是 用快速結合方式去包圍鋅置換,因此才產生優良附著力, 起鍍第一層化鎳時﹐鎳層 立即包圍鋅置換顆粒﹐鋅置換層已經瞬間改變成化鎳層﹐所以說看不出鋅的置換 層換
Outgassing: Analysis of adsorbed organic compounds on coupon surface by automated thermal desorption (ATD) and GCMS.
Adhesion:依照ASTM B571中熱沖擊的方法測試COUPON
自然氧化物則用鹼咬去除------TL-252,但同產生新的氧化物,在ENP制程中,鹼 咬加長時間有助於將表面氧化層及材料雜質咬除及咬鬆
新的氧化物則用酸咬去除------HF/HNO3,去除Si,在ENP制程中,此步驟可以
加長時間,有助於將Si-Mg固熔體(雜質)徹底去除
MgO, CuO,Feo 新的氧化物則用酸洗去除------HNO3,得到近乎純Al表面
化学镀镍相关标准与规范

化学镀镍相关标准与规范化学镀镍过程的标准和规范有许多,几乎各国都有自己的标准,这些标准和规范是由许多学科的专业人员共同制定的,为了方便我国技术人员参考,现将其中比较重要的一些标准名称列出:国际标准:ISO 4527(1987),ISO/TC107 自催化镍磷镀层-规范和试验方法(Autocatalyticnickel-phosphoruscoatings-specification and test methods)中国:自催化镍-磷镀层技术要求和试验方法 GB/T 13913-92美国:ASTM B733-97 金属上自催化镍磷镀层标准规范(Standard Specification for Autocatalytic(Electroless) Nickel-Phosphorous Coatings on Metal)ASTMB656-91 工程用金属自催化镍磷沉积标准(Standard Guide for Autocatalytic (Electroless)Nickel-Phosphorus on Metals for Engineering Use)ASTM B656-79 金属上工程用自催化镀镍标准实施办法(该标准于2000年废止)MILC 26074B-军用规范,化学镀镍层的技术要求(Coatings,Electroless Nickel Requirements for Military)AMS 2404A-航空材料规范化学镀镍(Electroless Nickel Plating)AMS 2405-航空材料规范化学镀镍,低磷(Electroless Nickel Plating,Low Phosphrous) NACE T-6A-54 美国腐蚀工程师学会文件化学镀镍层英国:DEE STD 03-5/1 材料的化学镀镍层(Electroless Nickel Coatings of Material)法国:NFA 91-105 化学镀镍层特性和测试方法(Dépôt Chimique s de Nickel-Propciétés Caractéristiques atMéthodes Déssais德国:DIN 50966(1987) 功能化学镀镍层RAL-RG 660(第二部分)(1984)硬铬和化学镀镍层的质量保证苏联标准:ΓOCT 9.305-84奥地利:ÖNOrm c2550(1987) 化学镀镍磷镀层-技术要求和测试日本标准:JISH 8654-89 金属上自催化镍磷镀层H8645-99 ??解ンツケル?りんめフき11.1 国际标准ISO4527该国际标准于1987年发布,论述了含磷2~15wt%的化学镀镍,并阐述了实际的沉积和预处理步骤。
金属磷化处理检验标准
金属磷化处理检验标准
金属磷化处理检验标准
1、目的
规范检验操作,发现、控制不良品,防止批不良品输入下道工序。
同时给检验工作提供检验标准。
2、范围
适用于进料、外协制品回厂、成品的检验接收及顾客退货的挑选检验。
3、定义
磷化处理是使金属与磷酸或磷酸盐化学反应,在其表面形成一层稳定磷酸盐膜的处理方法。
4、职责
4.1 质量部负责不合格的发现、记录和标识,组织处理不合格品。
4.2采购部负责进料中不合格品与供应商的联络。
5、工作程序及标准要求
5.1外观检验
肉眼观察磷化膜应是均匀、连续、致密的晶体结构。
表面不应有未磷化的残余空白或锈渍。
由于前处理的方法及效果的不同,允许出现色泽不一的磷化膜,但不允许出现褐色(喷绘类产品的外观检验可参照样件)。
5.2表面粗糙度应达到设计要求的表面粗糙度值。
5.3耐蚀性检查
5.3.1浸入法
将磷化后的样板浸入3﹪的氯化钠溶液中,经两小时后取出,表面无锈渍为合格。
出现锈渍时间越长,说明磷化膜的耐蚀性越好。
5.3.2点滴法
室温下,将蓝点试剂滴在磷化膜上,观察其变色时间。
磷化膜厚度不同,变色时间不同。
厚膜﹥5分钟,中等膜﹥2分钟,薄膜﹥1分钟。
钢铁镀镍磷
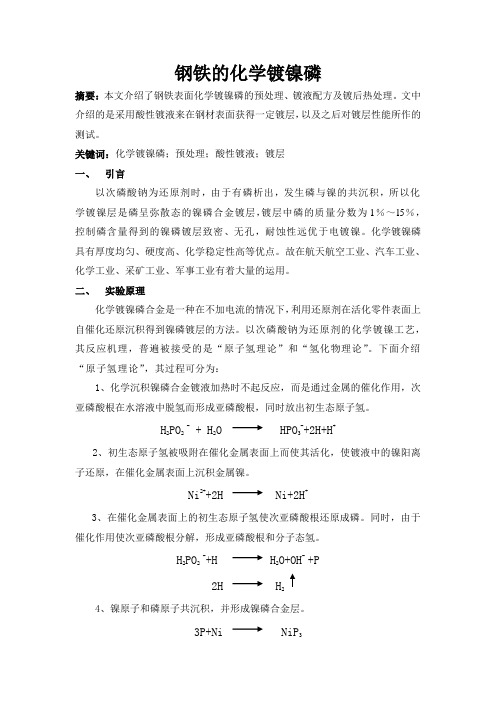
钢铁的化学镀镍磷摘要:本文介绍了钢铁表面化学镀镍磷的预处理、镀液配方及镀后热处理。
文中介绍的是采用酸性镀液来在钢材表面获得一定镀层,以及之后对镀层性能所作的测试。
关键词:化学镀镍磷;预处理;酸性镀液;镀层一、引言以次磷酸钠为还原剂时,由于有磷析出,发生磷与镍的共沉积,所以化学镀镍层是磷呈弥散态的镍磷合金镀层,镀层中磷的质量分数为1%~l5%,控制磷含量得到的镍磷镀层致密、无孔,耐蚀性远优于电镀镍。
化学镀镍磷具有厚度均匀、硬度高、化学稳定性高等优点。
故在航天航空工业、汽车工业、化学工业、采矿工业、军事工业有着大量的运用。
二、实验原理化学镀镍磷合金是一种在不加电流的情况下,利用还原剂在活化零件表面上自催化还原沉积得到镍磷镀层的方法。
以次磷酸钠为还原剂的化学镀镍工艺,其反应机理,普遍被接受的是“原子氢理论”和“氢化物理论”。
下面介绍“原子氢理论”,其过程可分为:1、化学沉积镍磷合金镀液加热时不起反应,而是通过金属的催化作用,次亚磷酸根在水溶液中脱氢而形成亚磷酸根,同时放出初生态原子氢。
H2PO2 - + H2O HPO3-+2H+H+2、初生态原子氢被吸附在催化金属表面上而使其活化,使镀液中的镍阳离子还原,在催化金属表面上沉积金属镍。
Ni2++2H Ni+2H+3、在催化金属表面上的初生态原子氢使次亚磷酸根还原成磷。
同时,由于催化作用使次亚磷酸根分解,形成亚磷酸根和分子态氢。
H2PO2 -+H H2O+OH- +P2H H24、镍原子和磷原子共沉积,并形成镍磷合金层。
3P+Ni NiP3三、工艺及配方化学脱脂(碱性除油)→热水洗→冷水洗→酸洗→冷水洗→化学镀→冷水洗→滴上酒精溶液→干燥→检测1、碱性除油碱性化学除油溶液配方及参数2、酸洗将钢材浸入5%的稀硫酸溶液中0.5-1min。
3、化学镀镍磷溶液化学镀镍磷溶液的配方及参数镀液的配置过程如下:(1)用分析天平称取12.623g硫酸镍,9.986g次磷酸钠,12.548g乳酸,5.125g 硼酸,分别用少量的蒸馏水溶解;(2)将已完全溶解硫酸镍溶液,在不断搅拌下倒入有硼酸与乳酸组成的溶液中;(3)将完全溶解的次磷酸钠溶液,在强烈搅拌下倒入前面已配好的溶液中;(4)用蒸馏水稀释至500mL;(5)用稀硫酸或氢氧化钠稀液调整pH值;(6)将配好的溶液放入水浴炉中加热至实验要求温度。
- 1、下载文档前请自行甄别文档内容的完整性,平台不提供额外的编辑、内容补充、找答案等附加服务。
- 2、"仅部分预览"的文档,不可在线预览部分如存在完整性等问题,可反馈申请退款(可完整预览的文档不适用该条件!)。
- 3、如文档侵犯您的权益,请联系客服反馈,我们会尽快为您处理(人工客服工作时间:9:00-18:30)。
Designation:B733–97Standard Specification forAutocatalytic(Electroless)Nickel-Phosphorus Coatings on Metal1This standard is issued under thefixed designation B733;the number immediately following the designation indicates the year of original adoption or,in the case of revision,the year of last revision.A number in parentheses indicates the year of last reapproval.A superscript epsilon(e)indicates an editorial change since the last revision or reapproval.This standard has been approved for use by agencies of the Department of Defense.1.Scope1.1This specification covers requirements for autocatalytic (electroless)nickel-phosphorus coatings applied from aqueous solutions to metallic products for engineering(functional)uses.1.2The coatings are alloys of nickel and phosphorus pro-duced by autocatalytic chemical reduction with hypophosphite. Because the deposited nickel alloy is a catalyst for the reaction, the process is self-sustaining.The chemical and physical properties of the deposit vary primarily with its phosphorus content and subsequent heat treatment.The chemical makeup of the plating solution and the use of the solution can affect the porosity and corrosion resistance of the deposit.For more details,see ASTM STP265(1)2and Refs(2)(3)(4)and(5) also refer to Figs.X1.1,Figs.X1.2,and Figs.X1.3in the Appendix of Guide B656.1.3The coatings are generally deposited from acidic solu-tions operating at elevated temperatures.1.4The process produces coatings of uniform thickness on irregularly shaped parts,provided the plating solution circu-lates freely over their surfaces.1.5The coatings have multifunctional properties,such as hardness,heat hardenability,abrasion,wear and corrosion resistance,magnetics,electrical conductivity provide diffusion barrier,and solderability.They are also used for the salvage of worn or mismachined parts.1.6The low phosphorus(2to4%P)coatings are microc-rystalline and possess high as-plated hardness(620to750HK 100).These coatings are used in applications requiring abra-sion and wear resistance.1.7Lower phosphorus deposits in the range between1and 3%phosphorus are also microcrystalline.These coatings are used in electronic applications providing solderability,bond-ability,increased electrical conductivity,and resistance to strong alkali solutions.1.8The medium phosphorous coatings(5to9%P)are most widely used to meet the general purpose requirements of wear and corrosion resistance.1.9The high phosphorous(more than10%P)coatings have superior salt-spray and acid resistance in a wide range of applications.They are used on beryllium and titanium parts for low stress properties.Coatings with phosphorus contents greater than11.2%P are not considered to be ferromagnetic.1.10The values stated in SI units are to be regarded as standard.1.11The following precautionary statement pertains only to the test method portion,Section9,of this specification.This standard does not purport to address all of the safety concerns, if any,associated with its use.It is the responsibility of the user of this standard to establish appropriate safety and health practices and determine the applicability of regulatory limita-tions prior to use.2.Referenced Documents2.1ASTM Standards:B368Test Method for Copper-Accelerated Acetic Acid-Salt Spray(Fog)Testing(CASS Testing)3B374Terminology Relating to Electroplating3B380Test Method of Corrosion by the Corrodkote Proce-dure3B487Test Method for Measurement of Metal and Oxide Coating Thicknesses by Microscopical Examination of a Cross Section3B499Test Method for Measurement of Coating Thick-nesses by the Magnetic Method:Nonmagnetic Coatings on Magnetic Basis Metals3B504Test Method for Measurement of Thickness of Me-tallic Coatings by the Coulometric Method3B537Practice for Rating of Electroplated Panels Subjected to Atmospheric Exposure3B567Method for Measurement of Coating Thickness by the Beta Backscatter Method3B568Method for Measurement of Coating Thickness by X-Ray Spectrometry31This specification is under the jurisdiction of ASTM Committee B-08on MetalPowders and Metal Powder Products and is the direct responsibility of Subcom-mittee B08.08.01on Engineering Coatings.Current edition approved July10,1997.Published October1997.Originallypublished as B733–st previous edition B733–90(1994).2The boldface numbers given in parentheses refer to a list of references at theend of the text.3Annual Book of ASTM Standards,V ol02.05.1Copyright©ASTM International,100Barr Harbor Drive,PO Box C700,West Conshohocken,PA19428-2959,United States.B571Test Methods for Adhesion of Metallic Coatings3B578Test Method for Microhardness of Electroplated Coatings3B602Test Method for Attribute Sampling of Metallic and Inorganic Coating3B656Guide for Autocatalytic Nickel-Phosphorus Deposi-tion on Metals for Engineering Use3B667Practice for Construction and Use of a Probe for Measuring Electrical Contact Resistance4B678Test Method for Solderability of Metallic-Coated Products3B697Guide for Selection of Sampling Plans for Inspection of Electrodeposited Metallic and Inorganic Coatings3B762Method for Variable Sampling of Metallic and Inor-ganic Coatings3B849Specification for Pre-Treatment of Iron or Steel for Reducing the Risk of Hydrogen Embrittlement3B850Specification for Post-Coating Treatments of Iron orSteel for Reducing the Risk of Hydrogen Embrittlement3 B851Specification for Automated Controlled Shot Peening of Metallic Articles Prior to Nickel,Autocatalytic Nickel, Chromium,or As A Final Finish3D1193Specification for Reagent Water5D2670Method for Measuring Wear Properties of Fluid Lubricants(Falex Method)6D2714Method for Calibration and Operation of an Alpha LFW-1Friction and Wear Testing Machine6D3951Practice for Commercial Packaging7D4060Test Method for Abrasion Resistance of Organic Coatings by the Taber Abraser8E60Practice for Photometric Methods for Chemical Analy-sis of Metals9E156Test Method for Determination of Phosphorus in High-Phosphorus Brazing Alloys(Photometric Method)10 E352Test Methods for Chemical Analysis of Tool Steels and Other Similar Medium-and High-Alloy Steel9F519Test Method for Mechanical Hydrogen Embrittle-ment11G5Practice for Standard Reference Method for Making Potentiostatic and Potentiodynamic Anodic Polarization Measurements12G31Practice for Laboratory Immersion Corrosion Testing of Metals12G59Practice for Conducting Potentiodynamic Polarization Resistance Measurements12G85Practice for Modified Salt Spray(Fog)Testing122.2Military Standards:MIL-R-81841Rotary Flap Peening of Metal Parts13MIL-S-13165Shot Peening of Metal Parts13MIL-STD-105Sampling Procedures and Tables for Inspec-tion by Attribute132.3ISO Standards:ISO4527Autocatalytic Nickel-Phosphorus Coatings—Specification and Test Methods143.Terminology3.1Definition:3.1.1significant surfaces—those substrate surfaces which the coating must protect from corrosion or wear,or both,and that are essential to the performance.3.2Other Definitions—Terminology B374defines most of the technical terms used in this specification.4.Coating Classification4.1The coating classification system provides for a scheme to select an electroless nickel coating to meet specific perfor-mance requirements based on alloy composition,thickness and hardness.4.1.1TYPE describes the general composition of the de-posit with respect to the phosphorus content and is divided into five categories which establish deposit properties(see Table1). N OTE1—Due to the precision of some phosphorus analysis methods a deviation of0.5%has been designed into this classification scheme. Rounding of the test results due to the precision of the limits provides for an effective limit of4.5and9.5%respectively.For example,coating with a test result for phosphorus of9.7%would have a classification of TYPE V,see Appendix X4,Alloy TYPEs.4.2Service Condition Based on Thickness:4.2.1Service condition numbers are based on the severity of the exposure in which the coating is intended to perform and minimum coating thickness to provide satisfactory perfor-mance(see Table2).4.2.2SC0Minimum Service,0.1µm—This is defined by a minimum coating thickness to provide specific material prop-erties and extend the life of a part or its function.Applications4Annual Book of ASTM Standards,V ol03.04.5Annual Book of ASTM Standards,V ol11.01.6Annual Book of ASTM Standards,V ol05.02.7Annual Book of ASTM Standards,V ol09.02.8Annual Book of ASTM Standards,V ol06.01.9Annual Book of ASTM Standards,V ol03.05.10Discontinued;see1992Annual Book of ASTM Standards,V ol03.05. 11Annual Book of ASTM Standards,V ol15.03.12Annual Book of ASTM Standards,V ol03.02.13Available from Standardization Documents Order Desk,Bldg.4Section D, 700Robbins Ave.,Philadelphia,PA19111-5094,Attn:NPODS.14Available from American National Standards Institute,11W.42nd St.,13th Floor,New York,NY10036.TABLE1Deposit Alloy TypesType Phosphorus%wtI No Requirement for PhosphorusII1to3III2to4IV5to9V10and aboveTABLE2Service ConditionsCoating Thickness RequirementsService ConditionMinimum CoatingThicknessSpecificationµm in.(mm)SC0Minimun Thickness0.10.000004()SC1Light Service50.0002()SC2Mild Service130.0005()SC3Moderate Service250.001()SC4Severe Service750.003()include requirements for diffusion barrier,undercoat,electrical conductivity and wear and corrosion protection in specialized environments.4.2.3SC1Light Service ,5µm—This is defined by a minimum coating thickness of 5µm for extending the life of the part.Typical environments include light-load lubricated wear,indoor corrosion protection to prevent rusting,and for soldering and mild abrasive wear.4.2.4SC2Mild Service ,13µm—This is defined by mild corrosion and wear environments.It is characterized by indus-trial atmosphere exposure on steel substrates in dry or oiled environments.4.2.5SC3Moderate Service ,25µm—This is defined by moderate environments such as non marine outdoor exposure,alkali salts at elevated temperature,and moderate wear.4.2.6SC4Severe Service ,75µm—This is defined by a very aggressive environment.Typical environments would include acid solutions,elevated temperature and pressure,hydrogen sulfide and carbon dioxide oil service,high-temperature chlo-ride systems,very severe wear,and marine immersion.N OTE 2—The performance of the autocatalytic nickel coating depends to a large extent on the surface finish of the article to be plated and how it was pretreated.Rough,non uniform surfaces require thicker coatings than smooth surfaces to achieve maximum corrosion resistance and minimum porosity.4.3Post Heat Treatment Class —The nickel-phosphorus coatings shall be classified by heat treatment after plating to increase coating adhesion and or hardness (see Table 3).4.3.1Class 1—As-deposited,no heat treatment.4.3.2Class 2—Heat treatment at 260to 400°C to produce a minimum hardness of 850HK100.4.3.3Class 3—Heat treatment at 180to 200°C for 2to 4h to improve coating adhesion on steel and to provide for hydrogen embrittlement relief (see section 6.6).4.3.4Class 4—Heat treatment at 120to 130°C for at least 1h to increase adhesion of heat-treatable (age-hardened)alumi-num alloys and carburized steel (see Note 3).4.3.5Class 5—Heat treatment at 140to 150°C for at least 1h to improve coating adhesion for aluminum,non age-hardened aluminum alloys,copper,copper alloys and beryl-lium.4.3.6Class 6—Heat treatment at 300to 320°C for at least 1h to improve coating adhesion for titanium alloys.N OTE 3—Heat-treatable aluminum alloys such as Type 7075can undergo microstructural changes and lose strength when heated to over 130°C.5.Ordering Information5.1The following information shall be supplied by the purchaser in either the purchase order or on the engineering drawing of the part to be plated:5.1.1Title,ASTM designation number,and year of issue of this specification.5.1.2Classification of the deposit by type,service condi-tion,class,(see 4.1,4.2and 4.3).5.1.3Specify maximum dimension and tolerance require-ments,if any.5.1.4Peening,if required (see6.5).5.1.5Stress relief heat treatment before plating,(see6.3).5.1.6Hydrogen Embrittlement Relief after plating,(see 6.6).5.1.7Significant surfaces and surfaces not to be plated must be indicated on drawings or sample.5.1.8Supplemental or Special Government Requirements such as,specific phosphorus content,abrasion wear or corro-sion resistance of the coating,solderability,contact resistance and packaging selected from Supplemental Requirements.5.1.9Requirement for a vacuum,inert or reducing atmo-sphere for heat treatment above 260°C to prevent surface oxidation of the coating (see S3).5.1.10Test methods for coating adhesion,composition,thickness,porosity,wear and corrosion resistance,if required,selected from those found in Section 9and Supplemental Requirements.5.1.11Requirements for sampling (see Section 8).N OTE 4—The purchaser should furnish separate test specimens or coupons of the basis metal for test purposes to be plated concurrently with the articles to be plated (see 8.4).6.Materials and Manufacture6.1Substrate —Defects in the surface of the basis metal such as scratches,porosity,pits,inclusions,roll and die marks,laps,cracks,burrs,cold shuts,and roughness may adversely affect the appearance and performance of the deposit,despite the observance of the best plating practice.Any such defects on significant surfaces shall be brought to the attention of the purchaser before plating.The producer shall not be responsible for coatings defects resulting from surface conditions of the metal,if these conditions have been brought to the attention of the purchaser.6.2Pretreatment —Parts to be autocatalytic nickel plated may be pretreated in accordance with Guide B 656.A suitable method shall activate the surface and remove oxide and foreign materials,which may cause poor adhesion and coating poros-ity.N OTE 5—Heat treatment of the base material may effect its metallur-gical properties.An example is leaded steel which may exhibit liquid or solid embrittlement after heat treatment.Careful selection of the pre and post heat treatments are recommended.TABLE 3Classification of Post Heat TreatmentCLASS DescriptionTemperature(°C)Time (h)1No Heat Treatment,As Plated2Heat Treatment for Maximum Hardness TYPE I260202851632084001TYPE II 350to 3801TYPE III 360to 3901TYPE IV 365to 4001TYPE V375to 40013Hydrogen Embrittlement and Adhesion on Steel180to 2002to 44Adhesion,Carburized Steel and Age Hardened Aluminum 120to 1301to 65Adhesion on Beryllium and Aluminum140to 1501to 26Adhesion on Titanium300–3201–46.3Stress Relief:6.3.1Pretreatment of Iron and Steel for Reducing the Risk of Hydrogen Embrittlement—Parts that are made of steel with ultimate tensile strength of greater than1000Mpa(hardness of 31HRC or greater),that have been machined,ground,cold formed,or cold straightened subsequent to heat treatment,shall require stress relief heat treatment when specified by the purchaser,the tensile strength to be supplied by the purchaser, Specification B849may be consulted for a list of pre-treatments that are widely used.6.3.2Peening—Peening prior to plating may be required on high-strength steel parts to induce residual compressive stresses in the surface,which can reduce loss of fatigue strength and improve stress corrosion resistance after plating. (See Supplementary Requirements).6.3.3Steel parts which are designed for unlimited life under dynamic loads shall be shot peened or rotaryflap peened.N OTE6—Controlled shot peening is the preferred method because there are geometry’s where rotaryflap peening is not effective.See S11.2. 6.3.3.1Unless otherwise specified,the shot peening shall be accomplished on all surfaces for which the coating is required and all immediate adjacent surfaces when they contain notches,fillets,or other abrupt changes of section size where stresses will be concentrated.6.4Racking—Parts should be positioned so as to minimize trapping of hydrogen gas in cavities and holes,allowing free circulation of solution over all surfaces to obtain uniform coating thickness.The location of rack or wire marks in the coating shall be agreed upon between the producer and purchaser.6.5Plating Process:6.5.1To obtain consistent coating properties,the bath must be monitored periodically for pH,temperature,nickel and hypophosphite.Replenishments to the plating solution should be as frequent as required to maintain the concentration of the nickel and hypophosphite between90and100%of set point. The use of a statistical regimen to establish the control limits and frequency of analysis may be employed to ensure quality deposits are produced.6.5.2Mechanical movement of parts and agitation of the bath is recommended to increase coating smoothness and uniformity and prevent pitting or streaking due to hydrogen bubbles.6.6Post Coating Treatment for Iron and Steel for Reducing the Risk of Hydrogen Embrittlement—Parts that are made of steel with ultimate tensile strengths of1000Mpa(hardness of 31HRC or greater),as well as surface hardened parts,shall require post coating hydrogen embrittlement relief baking when specified by the purchaser,the tensile strength to be supplied by the purchaser.Specification B850may be con-sulted for a list of post treatments that are widely used.6.6.1Heat treatment shall be performed preferably within1h but not more than3h of plating on plated after plating of steel parts to reduce the risk of hydrogen embrittlement.In all cases,the duration of the heat treatment shall commence from the time at which the whole of each part attains the specified temperature.6.6.2High-strength steel parts with actual tensile strengths greater than1000MPa(corresponding hardness values300 HV10,303HB or31HRC)and surface hardened parts shall be processed after coating in accordance with Specification B850.6.7Heat Treatment After Plating to Improve Adhesion—To improve the adhesion of the coating to various substrates,the heat treatments in Table3should be performed as soon as practical after plating(see4.3).6.8Heat Treatment After Plating to Increase Hardness: 6.8.1To increase the hardness of the coating a heat treat-ment of over260°C is required.Table3describes the heat treatment for maximum hardness.6.8.2See Appendixes3and4and Guide B656;Figs.X1.2 and Figs.X1.3.6.8.3A heat treatment at260°C for greater than20h should be used to reduce the loss of surface hardness and strength of some ferrous basis metals.Avoid rapid heating and cooling of plated parts.Sufficient time must be allowed for large parts to reach oven temperature.N OTE7—The length of time to reach maximum hardness varies with the phosphorus content of the deposit.High phosphorus deposits may require longer time or a higher temperature,or both.Individual alloys should be tested for maximum hardness attainable,especially for condi-tions of lower temperatures and longer times.N OTE8—Inert or reducing atmosphere or vacuum sufficient to prevent oxidation is recommended for heat treatment above260°C.Do not use gas containing hydrogen with high-strength steel parts.7.Requirements7.1Process—The coating shall be produced from an aque-ous solution through chemical reduction reaction.7.2Acceptance Requirements—These requirements are placed on each lot or batch and can be evaluated by testing the plated part.7.2.1Appearance:7.2.1.1The coating surface shall have a uniform,metallic appearance without visible defects such as blisters,pits, pimples,and cracks(see9.2).7.2.1.2Imperfections that arise from surface conditions of the substrate which the producer is unable to remove using conventional pretreatment techniques and that persist in the coating shall not be cause for rejection(see 6.1).Also, discoloration due to heat treatment shall not be cause for rejection unless special heat treatment atmosphere is specified (see section5.1.9).7.2.2Thickness—The thickness of the coating shall exceed the minimum requirements in Table2as specified by the service condition agreed to prior to plating(see9.3).After coating and if specified,the part shall not exceed maximum dimension on significant surface(see section5.1.3).N OTE9—The thickness of the coating cannot be controlled in blind or small diameter deep holes or where solution circulation is restricted. 7.2.3Adhesion—The coating shall have sufficient adhesion to the basis metal to pass the specified adhesion test(see9.4 and Test Methods B571).7.2.4Porosity—The coatings shall be essentially pore free when tested according to one of the methods of9.6.The test method,the duration of the test,and number of allowable spots per unit area shall be specified(see section5.1.10and9.6).7.3Qualification Requirements—These requirements are placed on the deposit and process and are performed on specimens to qualify the deposit and plating process.The tests for these qualification requirements shall be performed monthly or more frequently.7.3.1Composition—Type II,III,IV,V deposits shall be analyzed for alloy composition by testing for phosphorus(see 9.1).The weight percent of phosphorus shall be in the range designated by type classification(see4.1).7.3.2Microhardness—The microhardness of Class2depos-its shall be determined by Test Method B578(Knoop).For Class2coatings,the microhardness shall equal or exceed a minimum of850(HK100(or equivalent Vickers)(see4.3and 9.5).The conversion of Vickers to Knoop using Tables E140 is not recommended.7.3.3Hydrogen Embrittlement—The process used to de-posit a coating onto high strength steels shall be evaluated for hydrogen embrittlement by Test Method F519.8.Sampling8.1The purchaser and producer are urged to employ statis-tical process control in the coating process.Properly performed this will ensure coated products of satisfactory quality and will reduce the amount of acceptance inspection.8.1.1Sampling plans can only screen out unsatisfactory products without assurance that none of them will be accepted.(7)8.2The sampling plan used for the inspection of a quantity of coated parts(lot)shall be Test Method B602unless otherwise specified by purchaser in the purchase order or contract(see section5.1.11and S.11.1).N OTE10—Usually,when a collection of coated parts(the inspection lot8.2)is examined for compliance with the requirements placed on the partsa relatively small number of parts,the sample,is selected at random and inspected.The inspection lot is then classified as complying or not complying with the requirements based on the results of the inspection sample.The size of the sample and the criteria of compliance are determined by the application of statistics.The procedure is known as sampling inspection.Three standards Test Method B602,Guide B697, and Test Method B762contain sampling plans that are designed for the sampling inspection of coatings.Test Method B602contains four sampling plans,three for use with tests that are nondestructive and one for use with tests that are destructive.The purchaser and producer may agree on the plan(s)to be used.If they do not, Test Method B602identifies the plan to be used.Guide B697provides a large number of plans and also gives guidance on the selection of a plan.When Guide B697is specified,the purchaser and producer need to agree on the plan to be used.Test Method B762can be used only for coating requirements that have a numerical limit,such as coating thickness.The last must yield a numerical value and certain statistical requirements must be met.Test Method B762contains several plans and also gives instructions for calculating plans to meet special needs.The purchaser and producer may agree on the plan(s)to be used.If they do not,Test Method B762 identifies the plan to be used.An inspection lot shall be defined as a collection of coated parts which are of the same kind,that have been produced to the same specification, that have been coated by a single producer at one time or approximately the same time under essentially identical conditions,and that are submit-ted for acceptance or rejection as a group.8.3All specimens used in the sampling plan for acceptance tests shall be made of the same basis material and in the same metallurgical condition as articles being plated to this specifi-cation.8.4All specimens shall be provided by the purchaser unless otherwise agreed to by the producer.N OTE11—The autocatalytic nickel process is dynamic and a daily sampling is recommended.For Coatings requiring alloy analysis and corrosion testing weekly sampling should be considered as an option. 9.Test Methods9.1Deposit Analysis for Phosphorus:9.1.1Phosphorus Determination—Determine mass% phosphorus content according to Practice E60,Test Methods E352,or Test Method E156on known weight of deposit dissolved in warm concentrated nitric acid.9.1.2Composition can be determined by atomic absorption, emission or X-rayfluorescence spectrometry.N OTE12—Inductively coupled plasma techniques can determine the alloy to within0.5%.The following analysis wavelength lines have been used with minimum interference to determine the alloy.Ni216.10nm Cd214.44nm Fe238.20nmP215.40nm Co238.34nm Pb283.30nmP213.62nm Cr284.32nm Sn198.94nmAl202.55nm Cu324.75nm Zn206.20nm9.2Appearance—Examine the coating visually for compli-ance with the requirements of7.2.1.9.3Thickness:N OTE13—Eddy-current type instruments give erratic measurements due to variations in conductivity of the coatings with changes in phosphorus content.9.3.1Microscopical Method—Measure the coating thick-ness of a cross section according to Test Method B487.N OTE14—To protect the edges,electroplate the specimens with a minimum of5µm of nickel or copper prior to cross sectioning.9.3.2Magnetic Induction Instrument Method—Test Method B499is applicable to magnetic substrates plated with auto-catalytic nickel deposits,that contain more than11mass% phosphorus(not ferromagnetic)and that have not been heat-treated.The instrument shall be calibrated with deposits plated in the same solution under the same conditions on magnetic steel.9.3.3Beta Backscatter Method—Test Method B567is only applicable to coatings on aluminum,beryllium,magnesium, and titanium.The instrument must be calibrated with standards having the same composition as the coating.N OTE15—The density of the coating varies with its mass%phospho-rus content(See Appendix X2).9.3.4Micrometer Method—Measure the part,test coupon, or pin in a specific spot before and after plating using a suitable micrometer.Make sure that the surfaces measured are smooth, clean,and dry.9.3.5Weigh,Plate,Weigh Method—Using a similar sub-strate material of known surface area,weigh to the nearest milligram before and after plating making sure that the part or coupon is dry and at room temperature for eachmeasurement.Calculate the thickness from the increase in weight,specific gravity,and area as follows:coating thickness,µm510W/~A3D!(1) where:W=weight gain in milligrams,A=total surface area in square centimetres,andD=grams per cubic centimetres(see Appendix X2).9.3.6Coulometric Method—Measure the coating thickness in accordance with Test Method B504.The solution to be used shall be in accordance with manufacturer’s recommendations. The surface of the coating shall be cleaned prior to testing(see Note14).9.3.6.1Calibrate standard thickness specimens with depos-its plated in the same solution under the same conditions. 9.3.7X-Ray Spectrometry—Measure the coating thickness in accordance with Test Method B568.The instrument must be calibrated with standards having the same composition as the coating.N OTE16—This method is only recommended for deposits in the as-plated condition.The phosphorus content of the coating must be known to calculate the thickness of the deposit.Matrix effect due to the distribution of phosphorus in layers of the coating also effect the measurement accuracy and require that calibration standards be made under the same conditions as the production process.9.4Adhesion:9.4.1Bend Test(Test Methods B571)—A sample specimen is bent180°over a mandrel diameter43the thickness(10mm minimum)of the specimen and examined at43power magnification forflaking or separation at the interface.Fine cracks in the coating on the tension side of the bend are not an indication of poor adhesion.Insertion of a sharp probe at the interface of the coating and basis metal to determine the adhesion is suggested.N OTE17—Appropriate test specimens are strips approximately25to50 mm wide,200to300mm long and3to6mm thick.9.4.2Impact Test—A spring-loaded center punch with a point having2to3mm radius is used to test adhesion of the coating on nonsignificant surfaces of the plated part.Make three closely spaced indentations and examine under103 magnification forflaking or blistering of the coating,which is cause for rejection.9.4.3Thermal Shock—The coated part is heated to200°C in an oven and then quenched in room temperature water.The coating is examined for blistering or other evidence of poor adhesion at43magnification.9.5Microhardness—The microhardness of the coating can be measured by Test Method B578using Knoop indenter and is reported in Knoop Hardness Number(HK).It will vary depending on loads,type of indenter,and operator.A100g load is recommended.The rhombic Knoop indenter gives higher hardness readings than the square-base pyramidal Vickers diamond indenter for100to300g loads,see Ref(6).For maximum accuracy,a minimum coating thickness of75µm is recommended.Conversions of Vickers or Knoop hardness number to Rockwell C is not recommended.N OTE18—On thick(75µm+)coatings on steel a surface microhardness determination is permissible.9.6Porosity—There is no universally accepted test for porosity.When required,one of the following tests can be used on the plated part or specimen.9.6.1Ferroxyl Test for Iron Base Substrates—Prepare the test solution by dissolving25g of potassium ferricyanide and 15g of sodium chloride in1L of distilled water.After cleaning,immerse the part for30s in the test solution at25°C. After rinsing and air drying,examine the part for blue spots, which form at pore sites.9.6.2Boiling Water Test for Iron-Base Substrates—Completely immerse the part to be treated in a vesselfilled with aerated water at room temperature.Apply heat to the beaker at such a rate that the water begins to boil in not less than15min,nor more than20min after the initial application of heat.Continue to boil the water for30min.Then remove the part,air dry,and examine for rust spots,which indicate pores. N OTE19—Aerated water is prepared by bubbling clean compressed air through distilled water by means of a glass diffusion disk at room temperature for12h.The pH of the aerated water should be6.7+0.5.9.6.3Aerated Water Test for Iron-Base Substrates—Immerse the part for4h in vigorously aerated Type IV or better water(see Specification D1193)at2562°C temperature and then examine the part for rust spots.9.6.4Alizarin Test for Aluminum Alloys—Wipe the plated part or specimen with10mass%sodium hydroxide solution. After3min contact,rinse,and apply a solution of alizarin sulfonate prepared by dissolving1.5g of methyl cellulose in90 mL of boiling water to which,after cooling,0.1g sodium alizarin sulfonate,dissolved in5mL of ethanol is added.After 4min contact,apply glacial acetic acid until the violet color disappears.Any red spots remaining indicate pores.9.6.5Porosity Test for Copper Substrates—Wipe the plated part or specimen with glacial acetic acid.After3min,apply a solution of potassium ferrocyanide prepared by dissolving1g of potassium ferrocyanide and1.5g methyl cellulose in90mL of boiling distilled water.The appearance of brown spots after 2min indicate pores.9.7Other Test Methods—Test methods which have been developed that are equal to or better than these may be substituted.The precision and bias requirements will vary for each type of test.If an alternate test is specified it shall be agreed upon between the producer and the purchaser.10.Rejection and Rehearing10.1Part(s)that fail to conform to the requirements of this standard may be rejected.Rejection shall be reported to the producer promptly in writing.In the case of dissatisfaction occurs with the results of a test,the producer may make a claim for a hearing.Coatings that show imperfections may be rejected.11.Certification11.1When specified in the purchase order or contract,the purchaser shall be furnished certification that the samples representing each lot have been processed,tested and inspected as directed in this specification and the requirements havebeen。
