MTSW软件安装指南
MTSS系统软件手册

MTSS 系统软件
使用手册
USER GUIDE
V1.3.0
0773-5837209
桂林奥峰电器制造有限公司
目录
目录
目录......................................................................................................................................................................... 1
1
WGL 微机控制拉力试验机
1 准备
MTSS 系统试验软件
1.1 系统运行的计算机环境
硬件环境: CPU: Intel 奔腾双核 2.4GHz 或更高。 内存: 1G 或更大。 显示器: 17’彩显(分辨率不低于 1280x960)。 硬盘: 40G 或更大。 串口: 必须要有串行通信口。有些电脑没有串口,比如大部分笔记本电脑,可以 加一条 USB 转串口线,并装好驱动程序。 打印机:Windows XP 支持的打印机。 软件环境: Windows XP。 安装好打印机驱动。
4 试验机检测/校准.......................................................................................................................................... 11 4.1 窗口介绍 .............................................................................................................................................. 11 4.2 操作 ...................................................................................................................................................... 12 4.2.1 负荷测量 ...................................................................................................................................... 12 4.2.2 电机控制 ...................................................................................................................................... 12 4.2.3 气动夹具控制 .............................................................................................................................. 12 4.2.4 双移动头间距测量(选配件) .................................................................................................. 12 4.2.5 日常检查 ...................................................................................................................................... 13
博世平台对接环境搭建手册

博世MTSW平台对接属于软件(大华平台)对软件对接(博世MTSW平台)依次需要完成(MTSW平台 user ADMIN psw ADMIN)1 将报警主机连接到指定MTSW平台将主机通过网线连接到PC机,并在博世键盘上输入以下内容BN420-CN编程:编程模式下:9876#04019 10# (只用1个BN42-CN)4020 41# (使用网络模块是必须为41)3025 30# (通讯方式为IP)3026 00# (使用几个BN420-CN模块)3033 *20 *08 01 66#(PC机IP为192,.具体IP地址详见IP7400说明书4.2.5) 3031 10# (使用报警中心确认)3027 0041# (通讯间隔设定)3029 0009# (网络通讯等待确认时间)3429 1000# (4位数用户编码)3331 1*5# (布防报告代码)3332 1*5# (撤防报告代码)(不用按空格每输入一行,按*退出当前地址。
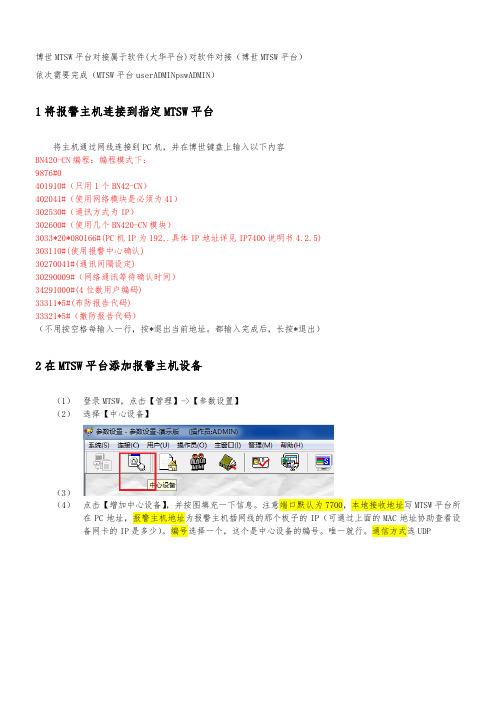
都输入完成后,长按*退出)2 在MTSW平台添加报警主机设备(1)登录MTSW,点击【管理】->【参数设置】(2)选择【中心设备】(3)(4)点击【增加中心设备】,并按图填充一下信息。
注意端口默认为7700,本地接收地址写MTSW平台所在PC地址,报警主机地址为报警主机插网线的那个板子的IP(可通过上面的MAC地址协助查看设备网卡的IP是多少)。
编号选择一个,这个是中心设备的编号。
唯一就行。
通信方式选UDP(5)3 在MTSW平台添加要转发消息的其他平台(这里为大华平台)(1)步骤入上面,添加中心设备。
(2)按照下图填写平台信息。
类型选择数据传递通信方式 UDP 本地接收地址填写MTSW所在PC IP 本地接收端口自定义。
远程工作站地址填写大华平台MCD服务IP,远程工作站端口与 MCD的配置文件中的[MTSW]#对接UDP端口UDP_Port=12345 一致编号选一个唯一就好。
博世MTSW 平台对接 环境搭建手册
博世MTSW平台对接属于软件(大华平台)对软件对接(博世MTSW平台)依次需要完成(MTSW平台userADMINpswADMIN)1将报警主机连接到指定MTSW平台将主机通过网线连接到PC机,并在博世键盘上输入以下内容BN420-CN编程:编程模式下:9876#0401910#(只用1个BN42-CN)402041#302530#302600#303110#(33321*5#2在(1(2(3(4平台所(53在(1(2本地接4在(1)(2)(3)先为该用户添加终端设备。
选择【终端设备信息】tab页,点选【增加】。
在“终端设备地址”处选择浏览,应该会看到刚才添加的报警主机中心设备,选择根节点。
在依次填写如下信息选择【防区】tab页。
点选【增加】。
按照下图配置防区信息选择【基本信息】tab页。
信息填写如下5在MTSW平台配置报警联动信息输出(需配置信息联动消息模板、信息联动输出设备\平台(这里是大华平台))(1)选择【参数设置】页面中的【管理】->【操作设置】(2)在弹出的界面先【创建】一个操作命令,【选择命令类型】中选择“数据传递或控制”,并点击【新命令】(3)在【新命令】界面,设备地址点击【浏览】,选择设备为之前添加的“数据传递”类型的中心设备。
模板输出中选择“报警信息打印模板”。
确定并保存退出。
(4(5(6)6(1)确认有MCD有MTS对应的dll。
(2)查看MCD_ALARM文件夹下,查看MCD.xml,是否存在<SDKtype="ALARM"id="1103"model="BOSCH_MTSW">AC_MTSW_SDK</SDK>这一项。
在文件夹中是否存在AC_MTSW_SDK.dll文件配置AC_SDK.ini在配置文件中,填写[MTSW]#对接UDP端口UDP_Port=12345(这里要和之前添加的数据交换类型的中心设备的远程端口一致)(3)在Web添加MTSW设备(4)【设备管理】->【报警主机】->【添加】IP填写MTSW平台所在PCIP。
报警主机IP7400XI和通信模块B420联调指导手册
报警主机IP7400XI和通信模块B420联调指导手册苏州科达科技股份有限公司Suzhou Keda Technology Co., Ltd目录1硬件连接介绍 (2)2软件安装和设置 (2)2.1设置网络模块B420 (2)2.2报警主机编程 (5)2.3在MTSW软件中添加IP7400 (7)2.4添加用户 (8)3配置完成 (10)1硬件连接介绍IP7400报警主机、B420通信模块和键盘的总体连接图如下:需要注意的地方如下:1.切记全部连接完之前,请勿通电2.16.5v交流电是变压器的输出电压3.接线完之后请务必再检查一下再通电4.最后用直通网线把B420的网口和计算机连接即完成硬件的连接2软件安装和设置安装博世MSTW1.3软件软件安装一直选择下一步,安装完成即可。
2.1设置网络模块B4201.注意需要把B420拨盘拨到7,地址是132.登录MSTW软件,用户名:ADMIN 密码:ADMIN3.进入参数设置界面,如下图4.打开B420模块的配置界面,如下图5.在软件中查询B420模块,如下图(注意B420模块和电脑主机必须在同一个网段)6.设置B420模块1)在web浏览器输入上面搜到的IP地址2)登录B420模块(密码:B42V2)3)在Basic Network Setting界面设置IP地址,如下图4)在加密设置里面把加密Disable掉,如下图5)保存设置2.2报警主机编程1.IP7400进入编程按[9][8][7][6][#][0]进入编程界面2.IP7400的编程项特别注意:1.中心IP即是要把告警上传到的目的主机调试的时候设置为安装MSTW软件的主机IP即可2.中心IP地址要以16进制格式编程输入转换表格如下:(具体转换表,请参照简易说明书P68)十进制十六进制键盘输入0 0 001 1 012 2 023 3 034 4 045 5 056 6 067 7 078 8 089 9 0910 A 0*011 B 0*112 C 0*213 D 0*314 E 0*415 F 0*52.3在MTSW软件中添加IP74001.同样登录MTSW软件,进入参数设置界面2.添加IP7400中心设备,如下图注意:本地接收地址:即安装MSTW软件的主机IP,需要和编程里面的保持一致报警主机地址:即B420模块上设置的IP地址3.保存更改点击“退出”后,需要点击保存按钮。
IP7400XI遥控布撤防
4)在加密设置里面把加密 Disable 掉,如下图
4
5) 保存设置
报警主机 IP7400XI 远程遥控布防撤防
3. 登录 MSTW 软件,用户名:ADMIN 密码:ADMIN 4. 进入参数设置界面,如下图
4 布撤防操作
打开设备状态树,先时间同步一下 打开设备状态树,查询分区状态,如下图
布防:如查询分区状态显示撤防,打开设备状态树,选布防-发送命令-分区 1-发送命令, 如下图
13
报警主机 IP7400XI 远程遥控布防撤防
撤防:如查询分区状态显示布防,打开设备状态树,选撤防-发送命令-分区 1-发送命令, 如下图
5. 打开 B426N 模块的配置界面,如下图
5
报警主机 IP7400XI 远程遥控布防撤防
6. 在软件中查询 B426N 模块,如下图(注意 B426N 模块和电脑主机必须在同一个网段)
注:如果软件查询不到 B426N 模块没关系,只要用电脑能 Ping 通模块地址就行
6
报警主机 IP7400XI 远程遥控布防撤防
2
报警主机 IP7400XI 远程遥控布防撤防
1 硬件连接Байду номын сангаас绍
IP7400 报警主机、B426N 通信模块和键盘的总体连接图如下:
需要注意的地方如下: 1. 电脑一定安装 2 块有线网卡 2. 切记全部连接完之前,请勿通电 3. 16.5v 交流电是变压器的输出电压 4. 接线完之后请务必再检查一下再通电 5. 最后用直通网线把 B426N 的网口和交换机连接,计算机 2 块网卡与交换机连接即完
MTSW管理中心软件 报警中心管理软件

中心设备是指与 MTSW 连接的,向 MTSW 发送数据的硬件设备,当前支持的中心设备包括 MTS 中心 设备 MTR,BOSCH-VDP 可视对讲管理员机或 D6600/6100 系列接收机。
1.7 操作
操作是指由操作员自己设定的带有名字的一系列菜单命令或外部应用程序的集合,执行该操作实际上就 是按顺序或选择执行这些菜单命令或外部应用程序。操作中的菜单命令或外部应用程序的顺序可由操作 员自由设定。 操作可以用于设定主界面上操作按钮以及联动处理时执行的命令。
P/N 4998122872E
1
1 1 1 1 1 1 1 2 2 2 2 2 2 2 3 3 3
4
4 4 6 7
8
8 8 8 8 8 11 11 12 13 15 16 16 16
Page i
3.3.3 修改用户组
16
3.3.4 删除用户组
17
3.3.5 设置地图
17
3.3.6 修改用户组位置
17
61
5.1.4 导出查询结果
76
61
5.2 查询终端事件
76
62
5.2.1 终端事件查询
76
62
5.2.2 终端事件详细信息
76
62
5.3 用户查询
76
62
5.3.1 用户资料查询
76
63
5.3.2 周界信息查询
77
63
5.3.3 信息统计
77
63
5.4 数据传递查询
78
64
5.4.1 转发数据
78
70
50
4.11.5 MTSW 查询工具
71
51
4.11.6 MTSW 系统维护工具
电法工作站软件操作说明--运行和安装(一)

系统安装和运行 软件操作说明中国地质科学院地球物理地球化学勘查研究所2009年4月安装和运行一、软件安装(一)安装要求1. 软件及其附件(1)电法工作站WEM2.5软件光盘;(2)免驱动USB接口加密锁;(3)软件操作说明。
2. 系统要求操作系统:Windows XPCPU:Intel Pentium 处理器内存:64M以上语言支持:简体中文(二)安装与卸载步骤1.安装(1)将本软件配套的光盘插入光盘驱动器;(2)打开光盘驱动器,在“电法工作站WEM2.5”目录中找到安装程序Setup.exe;(3)运行Setup.exe会进入电法工作站WEM2.5软件系统的自动安装过程; (4)请按照提示选择安装选项指导安装结束。
如果您不想改变安装软件的设置,只须按照提示点击“下一步”和“确定”按钮即可。
软件安装完成后,您可在“开始”菜单的“程序组”中找到“电法工作站WEM2.5”软件系统,在该程序组中有本软件系统的所有功能模块程序,但运行这些程序需要与软件配套的软件狗。
2.卸载电法勘探工作站软件提供了自动卸载的功能,使您可以方便地卸载本软件的所有文件、程序组、快捷方式和设置。
方法一:第一步、启动计算机并进入Windows XP;第二步、依次进入“开始/程序/电法勘探工作站(WEM2.5)”,选择“卸载电法勘探工作站”即自动卸载。
方法二:第一步、启动计算机并进入Windows XP;第二步、打开控制面板,双击"添加/删除程序";第三步、在"目前安装的程序"属性页中选中 "电法勘探工作站",然后点击"添加/删除"按钮,即可自动卸载。
二、系统运行电法工作站系统包括常规电阻率/激电法、阵列大地电磁法、可控源音频大地电磁法、磁性源瞬变电磁法和幅相激电法五个方法子系统,各个子系统可以单所示。
独运行,系统主界面如图1-1所对应的图标,即可运行相应的子系统。
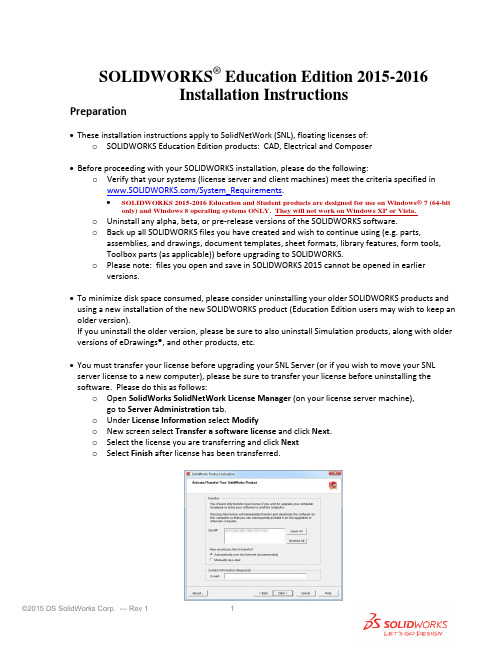
SOLIDWORKS Education Edition 2015 -2016 安装说明书
SOLIDWORKS® Education Edition 2015-2016Installation InstructionsPreparation•These installation instructions apply to SolidNetWork (SNL), floating licenses of:o SOLIDWORKS Education Edition products: CAD, Electrical and Composer•Before proceeding with your SOLIDWORKS installation, please do the following:o Verify that your systems (license server and client machines) meet the criteria specified in /System_Requirements.•SOLIDWORKS 2015-2016 Education and Student products are designed for use on Windows® 7 (64-bit only) and Windows 8 operating systems ONLY. They will not work on Windows XP or Vista.o Uninstall any alpha, beta, or pre-release versions of the SOLIDWORKS software.o Back up all SOLIDWORKS files you have created and wish to continue using (e.g. parts, assemblies, and drawings, document templates, sheet formats, library features, form tools,Toolbox parts (as applicable)) before upgrading to SOLIDWORKS.o Please note: files you open and save in SOLIDWORKS 2015 cannot be opened in earlier versions.•To minimize disk space consumed, please consider uninstalling your older SOLIDWORKS products and using a new installation of the new SOLIDWORKS product (Education Edition users may wish to keep an older version).If you uninstall the older version, please be sure to also uninstall Simulation products, along with older versions of eDrawings®, and other products, etc.•You must transfer your license before upgrading your SNL Server (or if you wish to move your SNL server license to a new computer), please be sure to transfer your license before uninstalling the software. Please do this as follows:o Open SolidWorks SolidNetWork License Manager (on your license server machine), go to Server Administration tab.o Under License Information select Modifyo New screen select Transfer a software license and click Next.o Select the license you are transferring and click Nexto Select Finish after license has been transferred.Installation• Locate your Serial Number(s) from your product package or email from DS-SOLIDWORKS or yourschool. If you cannot find or you have misplaced your number, contact your local educational reseller to obtain one.• Serial numbers vary by product type:o SOLIDWORKS Education Edition, the number typically begins with 9710 (Network)Installation and Licensing ProcessYou are ready to begin your installation of theSOLIDWORKS ® Education Edition! Network Users OnlySection 2Section 1 Ver. 1Steps for Section 1: NETWORK INSTALLATION1.Remove previous SolidNetWork (SNL) License Managers(be sure to transfer your server license first, as noted above)2.Remove previous SOLIDWORKS software3.Install 2015 SolidNetWork (SNL) License Manager4.Activate your 2015 SNL Manager5.Install SOLIDWORKS software on individual clientsSection 1 | SOLIDWORKS® Education Edition SNL Manager Installation (Network)Note:If you are installing SOLIDWORKS on a Network with Restricted Rights, please go to the Customer Portal for additional documentation or contact your local reseller for assistance.This step is only for users who are on NETWORK. If you purchased a Standalone license, please proceed to Section 2 of the installation process.Note:•All previous SOLIDWORKS License Managers must be removed from your computer before beginning the installation of the new SOLIDWORKS License Manager (i.e. 2014 must be removed before installing 2015).•The SOLIDWORKS License Manager must be installed on the machine that will be used to distribute SOLIDWORKS licenses on your network.•The SOLIDWORKS License Manager for 2015 will license all SOLIDWORKS EDU Edition applications, including SOLIDWORKS Simulation, SOLIDWORKS Sustainability, eDrawings and PhotoView 360, etc.Remove previous SolidNetWork License Managers (SNL) Please note, the 2015 SNL Manager is required to run SOLIDWORKS 2015 software. It can be used to manage older versions of SOLIDWORKS. For a complete list of requirements for SOLIDWORKS SNL and SOLIDWORKS Electrical Servers, please visit: /systemrequirements1.Stop the Licensing Service on the hostmachine using Windows Task Manager asfollows:With the SolidNetWork license managerrunning, open the Windows TaskManager.On the Applications tab, browse to theSolidNetWork license manager then right-mouse-click and select Go to Process.Then select End Process to stop theprocess(see image for Windows 7).unch Add/Remove Programs and uninstall the previous version of the SolidWorks SolidNetWork LicenseManager.Access Add/Removeprograms from Start >Control Panel > Add/RemovePrograms. Locate theSOLIDWORKS SolidNetWorkLicense Manager and selectRemove.-Once the remove option isselected you will beprompted to confirm theproducts to uninstall.-The product will thenuninstall. A progress only boxwill appear.-After the product uninstall is complete, close the Add/Remove programs window and launch Windows Explorer.Locate the folder where the licensemanager was previously installed anddelete it.By default the license manager isinstalled to: C:\ProgramFiles\SOLIDWORKS SolidNetWorkLicense Manager.Remove previous SOLIDWORKS Software from client machines1.If required, uninstall SOLIDWORKS using Add/Remove Programs.2.If required, delete SOLIDWORKS folders located in C:\Program Files\SolidWorks CorpBegin 2015 SolidNetWork License (SNL) Manager Install1.Insert your 2015 SOLIDWORKS DVD in your local DVD Drive to begin the software installation process. If SOLIDWORKS Master Setup does not come up automatically, select My Computer and double click the DVD drive, this is generally your D: drive. You may also launch the Installation Manager downloaded from the SOLIDWORKS Customer Portal by browsing to your download and select “setup.exe”.Note: Once DVD is placed in your local DVD Drive, the SOLIDWORKS 2015 Installation Manager will appear. Select Server products and then select “Install SolidNetWork License Manager (distributed licensing) on this computer.”Select Next.2.The next screen will prompt you for your SOLIDWORKS and associated products serial number. Enteryour product serial number. Select Next.3.Confirm the Summary page and click “Install Now”.Note: Server Installation Progress will appear. Once done checking for Updates, the SOLIDWORKS SolidNetWork License Manager Setup will appear. Click Next.4.After the installation is complete there will be a confirmation of the successful install. Oncecompleted the Installation Manager confirms the product(s) are installed correctly.5.Select Finish and close the Installation Manager.This completes the installation of the SOLIDWORKS SolidNetWork License Manager. Please tell us your installation experience, the following Survey will be displayed in your Internet Browser. Thank you for your feedback.Activate 2015 SolidNetWork (SNL) LicenseBeginning with SOLIDWORKS 2010 release, a new licensing method has been introduced for network licenses. The new process will require internet connectivity to ‘activate’ the license on the SOLIDWORKS server.What does this mean for the user? The end user will no longer need a license file or existing dongle. The dongle must be returned to your value added reseller.1.To activate the newly installed software go to: Start > All programs > SOLIDWORKS 2015 > SOLIDWORKSLicense Manager > SolidNetWork License Manger.A server information dialog will appear that will allow you to choose the license server port(s) and applyan options file if desired. It is recommended that you select the option for firewall in use on this server.Select Next to continue.Note: You will need to add exceptions in your firewall software, example shown is Windows® 7 Firewall settings on the next page. For Windows 7, go to Windows 7 settings.For Windows® 7 Firewall1.Add program exceptions to the Windows 7 Firewall.In SNL Server setup, change image to show that the Windows firewall option is selected.2.Please go to Control Panel and select System and Security3.Allow programs through the firewall.4.Click “allow another program”And Browse to the folder where you installed the SOLIDWORKS SolidNetWork License Manager.Add both executables: Lmgrde.exe and sw_d.exeWhen lmgrd.exe is added successful to the exceptions list, it will appear as ‘Acresso Software Inc.’ in the list of Allowed programs and features:For Windows 7 FirewallWhen sw_d is allowed successfully, it will as sw_dn in the allowed programs list.SolidNetWork License (SNL) InstallThe SOLIDWORKS Product Activation window willappear and you will be required to provide an email to associate to the activation. Enter an email address and select Next.Note: If you do not have internet access (or email),please contact your Value Added Reseller.The product will now activate via internet.After a successful activation there will be a succeeded message which will show all the products associatedwith your serial number.Select Finish, completing activation. The license managerwill appear and you can close it out to complete the activation process.SolidNetWork License (SNL) Install is complete.NOTE: You have now finished installing the SOLIDWORKS License Manager.•You must now go to your client computers and proceed as follows on steps.•Before beginning the installation process, please be sure to close out of all SOLIDWORKS programs currently open on your computer.•You can also install SOLIDWORKS on your server machine. Follow the instructions in the next section.Section 2 | SOLIDWORKS® Education Edition Installation(Client installation)Note: for SOLIDWORKS Network installations, the software does not get installed on the network machine (License Server) by default. Normally SOLIDWORKS should be installed on the user machines (Client). Before beginning the installation process, please be sure to close out of all SOLIDWORKS programs currently open on your computer.1.On the CLIENT Machine Insert DVD or launch the Installation Manager downloaded from the SOLIDWORKSCustomer Portal. Select Individual (on this computer). Click Next in lower right corner.2.For new installation enter your serial number below (24 digits). Click Next.Note: the message in the center of the window under the green bar, “Connecting to SOLIDWORKS” will appear. You may see a screen stating that a newer version is available, ALWAYS select continue installing from DVD and click Next.3.After you have clicked Next, the SOLIDWORKS 2015 Installation Manager will guide you through theinstallation. Accept Defaults on the screen (DO NOT change anything) Click Install Now to continueinstallation.Optional: if you have purchased a license for a SOLIDWORKS Electrical products and have entered a serial number (separate Serial Number for Student products only) you will also see the following information (default selections shown).Expand the ‘Electrical Options’ as desired to check values and setting (default values shown below).Return ‘Back to Summary’ then select “Next” to start the installation.Note: For the client installation of a network license, you will be asked for your license server name as below. Please enter your license server and the port number that you specified in the server setup steps. The default******************************************************“OK”4. Installation is Complete! Confirm if you would like to tell us your installation experience in a survey or participate in the Customer Experience program, then click Finish.Note: Depending upon your computer configuration you may or may not need to restart your computer.For client installation of a network license, your SOLIDWORKS is ready now since your network license server has been activated in Section 1 and your client SOLIDWORKS is connected with your license server.====================================================================================For STANDALONE license installation, when you start SOLIDWORKS Education Edition for the first time, the SOLIDWORKS Product Activation dialog will appear to guide you through the activation process. Click Next, to continue with activation. (Please refer to the separate SOLIDWORKS Education Edition Standalone license installations for more detail.To activate you SOLIDWORKS product you must enter a serial number from SOLIDWORKS. The SOLIDWORKS Product Activation will help you collect the information necessary to activate your product.Choose which method for how you would like to activate. Enter your email address and then click Next.Now you are done registering your SOLIDWORKS Education Edition. Click Finish.You can now run your SOLIDWORKS® Education Edition license!。
mts用户手册

目录MTS使用环境与安装说明 (8)一、概述 (9)1.1 MTS软件介绍 (9)1.2 操作界面说明 (11)1.3 约定 (14)二.通用功能 (17)2.1工程文件操作 (17)2.1.1新建 (17)2.1.2打开和关闭 (19)2.1.3保存和另保存 (19)2.1.4输出屏幕DXF、输出三维DXF和输出屏幕BMP (20)2.1.5升级工程 (20)2.1.6打印、打印预览及打印设置 (20)2.2工程设定 (22)2.2.1楼面表 (22)2.2.2轴线表 (23)2.2.3构件组及优化与调整功能 (24)2.2.4设置当前单位 (26)2.2.5设置当前参数 (27)2.3视图功能 (29)2.3.1整体视图、选中视图、轴线视图及楼面视图 (29)2.3.2轴线网格 (29)2.3.3显示网格点 (30)2.3.4显示轴线编号和显示轴线间距 (30)2.3.5前图和后图功能 (30)2.3.6平面视图变换 (30)2.3.7三维视图变换 (31)2.3.8通用工具栏及建模、楼面、轴线和视图工具条 (31)2.3.9开关功能 (32)2.3.10标注方式 (33)2.3.11杆件、墙体自动打断 (35)2.3.12中点、垂足捕捉功能 (35)2.3.13显示功能 (36)2.3.14显示荷载 (36)2.3.15楼层快速切换功能 (36)2.4选择功能 (38)2.4.1选择结点 (38)2.4.2选择杆件和选择次梁 (38)2.4.3选择房间 (39)2.4.4选择墙体 (39)2.4.5选择构件 (40)2.4.6选择平面 (40)2.4.7选择轴线 (41)2.4.8属性选择 (41)2.4.9杆件过滤 (41)2.4.10编号选择 (41)2.5查询功能 (43)2.5.1工程查询 (43)2.5.2结点查询 (44)2.5.3杆件查询 (46)2.5.4房间查询 (50)2.5.5墙体查询 (51)2.5.6双击杆件查询 (51)2.6工具 (52)2.6.1测量两点距离 (52)2.6.2测量房间面积 (52)2.6.3测量楼面面积 (52)2.6.4测量建筑面积 (52)2.6.5测量结构重量 (53)2.6.6结点、杆件、墙梁、墙肢的编号重排 (53)三.建模功能 (54)3.1轴线功能 (54)3.1.1轴线表 (54)3.1.2 定义直轴线 (55)3.1.3 定义弧轴线 (56)3.1.4 定义多义轴线 (56)3.1.5 编辑轴线属性 (57)3.1.6轴线删除 (57)3.1.7 平行复制轴线 (58)3.1.8 旋转复制轴线 (58)3.1.9 镜向复制轴线 (59)3.1.10 规则轴线快速输入 (59)3.2网格功能 (60)3.3建模功能 (62)3.3.1定义孤立节点 (62)3.3.2删除孤立节点 (62)3.3.3结点坐标调整 (62)3.3.4去除多余节点 (63)3.3.5梁柱输入 (63)3.3.6支撑输入 (64)3.3.7平面布柱 (65)3.3.8 杆件拆分 (65)3.3.9 杆件合并 (66)3.3.10杆件打断 (67)3.3.11定义墙体 (67)3.3.12钢板剪力墙定义 (68)3.3.13洞口定义 (68)3.3.14修改洞口 (69)3.3.15洞口复制 (69)3.3.16修改墙厚 (70)3.3.17墙体打断 (70)3.3.18墙体拆分 (70)3.3.19墙体合并 (71)3.3.20轴向复制 (71)3.3.21弧向复制 (72)3.3.22镜向复制 (74)3.3.23空间平移 (75)3.3.24空间复制 (75)3.3.25楼层快速复制 (76)3.3.26框架快速输入 (77)3.3.27支撑快捷输入 (78)3.3.28门式刚架快速生成 (79)3.3.29 屋架快速输入 (81)3.3.30快捷添加弧型构件 (84)3.3.31撤销和重做 (85)3.4材料库 (86)3.5工程截面库功能 (88)3.5.1布置截面功能及工程截面库概述 (88)3.5.2工程截面库使用说明 (93)3.6属性设计 (104)3.6.1结点类型设定 (104)3.6.2杆件类型设定 (104)3.6.3主次梁模式设定 (104)3.6.4变截面放置参数 (104)3.6.5杆件体型系数定义 (105)3.6.6构件对齐方式设定 (105)3.6.7檐口设定 (106)3.6.8女儿墙设定 (106)3.6.9梁位置类型设定、梁位置自动设定 (106)3.6.10定义支座 (107)3.6.11定义方位 (108)3.6.12定义释放、定义刚臂和定义偏心 (109)3.7楼面操作工具 (112)3.7.1次梁布置 (112)3.7.2次梁复制 (114)3.7.3次梁删除 (114)3.7.4定义导荷模式 (114)3.7.5房间楼板厚度 (116)3.7.6房间全开洞 (117)3.7.7房间局部开洞 (117)3.7.8房间洞口复制 (118)3.7.9房间洞口取消 (118)3.7.10局刚定义(房间方式) (118)3.7.11局刚定义(结点方式) (119)3.7.12取消已定义局刚 (119)3.8荷载布置 (120)3.8.1恒载和活载布置 (120)3.8.2风载布置 (122)3.8.3地震作用定义 (127)3.8.4吊车荷载作用定义 (128)3.8.5温度荷载作用定义 (131)四.计算分析功能 (132)4.1模型检查 (132)4.2结构计算 (133)4.3读入结果文件 (134)4.4弹性时程分析 (135)4.5二阶弹性分析 (138)4.6罕遇地震验算 (139)五.后处理功能 (140)5.1公共功能 (140)5.1.1自振特性回显 (140)5.1.2内力位移回显 (141)5.1.3荷载组合 (142)5.1.4杆件类型设定 (145)5.1.5杆件计算长度设定 (146)5.1.6抗火验算 (146)5.2多高层后处理功能 (148)5.2.1柱位置类型设定 (148)5.2.2主次梁模式设定 (148)5.2.3组合梁栓钉设定 (148)5.2.4主梁内力调整设定 (149)5.2.5次梁规范验算 (150)5.2.6杆件规范验算 (150)5.2.7构件配筋设计 (153)5.2.8组合梁栓钉删除 (153)5.2.9组合梁栓钉设计 (154)5.2.10组合梁施工阶段验算 (154)5.2.11简支组合梁独立设计 (155)5.2.12工程楼板库 (155)5.2.13楼板快速复制 (157)5.2.14楼板设计 (159)5.2.15楼板验算 (160)5.2.16计算书输出 (160)5.2.17自振特性报告 (162)5.2.18层抗侧刚度比报告 (163)5.2.19层受剪承载力报告 (163)5.2.20楼层地震剪压比报告 (164)5.2.21最大层间位移报告 (164)5.2.22质心层间位移报告 (165)5.2.23多塔质心层间位移报告 (166)5.2.24墙体配筋报告 (166)5.2.25等效荷载报告 (167)5.2.26总体概算报告 (167)5.2.27详细概算报告 (168)5.3厂房后处理功能 (169)5.3.1缀板缀条布置功能 (169)5.3.2杆件规范验算 (170)5.3.3变形验算 (173)5.3.4吊车梁设计 (173)5.3.5轻钢檩条设计 (176)5.3.6轻钢墙梁设计 (178)5.3.7抗风柱设计 (181)5.3.8屋面支撑设计 (182)5.3.9柱间支撑设计 (185)5.3.10工程计算书输出 (187)5.3.11自振特性报告 (188)5.3.12总体概算报告 (188)六节点设计模块 (189)6.1节点自动识别 (189)6.2节点模块开关 (189)6.3选择设计的节点形式 (189)6.4选择节点的连接形式 (190)6.5设计和自动设计功能 (191)6.6新建连接组、编辑、删除和选中节点组 (191)6.7 预览功能 (191)6.8 计算书输出 (191)6.9节点组定义 (192)6.10重置 (192)6.11刷新杆端力 (192)6.12节点设计方法 (192)6.13抗震设计 (193)七.基础设计模块 (194)7.1桩布置 (194)7.1.1桩基定义 (194)7.1.2桩基布置 (194)7.1.3桩基复制 (194)7.2桩群承载力计算 (195)7.3桩群中心调整 (195)7.4底层信息查询 (196)7.4.1底层信息查询 (196)7.4.2合力查询 (196)7.4.3桩信息查询 (197)7.4.4独立基础查询 (197)7.4.5基础梁查询 (197)7.5独立基础设计 (198)7.5.1基础组添加 (198)7.5.2基础尺寸确定、基础配筋设计 (199)7.6基础梁设计 (201)7.6.1基础梁定义 (201)7.6.2基础梁设计 (201)7.7条形基础设计 (202)7.7.1条形基础定义 (202)7.7.2条形基础设计 (202)7.8出图 (205)八.自动出图模块 (206)8.1多高层结构布置图 (206)8.2楼板图 (210)8.3多高层剪力墙布置图 (211)8.4节点图 (212)8.5基础图 (213)8.6结果简图 (214)8.7厂房布置图 (215)8.8构件图 (220)附录1:分析准备文件—C AL目录下C OMMON.DAT (221)附录2:自定义地震波数据文件 (225)附录3:MTS程序文件 (226)附录4:MTS程序的配筋文本及简图格式 (227)1.配筋信息文本文件 (227)2.各层配筋简图 (227)附录5:空间结构输出计算书格式 (229)MTS使用环境与安装说明MTS使用环境:●操作系统:中文Windows 98/Me/2000Pro/2000Srv/XP(注:如果使用其它语言的Windows版本,请外挂中文平台);●机型至少为P166,建议使用PII266以上机型;●内存至少32M,建议使用64M或128M内存;●至少100兆以上的硬盘空间;●建议安装软件:Microsoft Office、AutoCAD。
MTS 中文安装手册

MTS磁栅尺安装手册上海微敏自控技术有限公司(北京) 地址:北京市海淀区学清路16号学知轩大厦1601室邮编:100083电话:86-10-82755785 传真:86-10-827557871.预防注意安装磁栅尺之前请先详细的阅读安装手册。
z仔细阅读安装手册,尤其是有关机械安装的注意点和电气注意点。
z安装过程中请清理阻碍滑块自由运动的杂物,例如:废屑、粉沫等。
建议使用保护盖以防外部的意外损害。
确认用于安装磁栅尺的工具都是无磁性的。
2.MP*00 磁栅尺磁带安装为了系统有更好的精度,磁栅尺磁带长度必须大于机械有效测量长度80mm(两端各40mm)L = 有效测量长度+ 80mm. 保证磁带中心和测量行程的中心一致。
磁栅尺磁带可以安装在各种无磁场的机台表面。
为了更好的保护磁带不受(废屑、切削液、喷洒液体、粉沫等)污染,要求使用保护钢带CV103(自带双面胶)。
或者用铝槽SP202来固定磁带,SP202无需双面胶(见下图)。
最佳的粘贴磁带的温度是20-30°C,避免在低于10°C的温度下安装磁带。
如果磁栅尺磁带的储存温度低于机台安装面的温度,建议等待几个小时后再粘贴磁带。
粘贴至少48个小时以后,磁带会达到最佳的粘贴效果。
磁栅尺磁带安装步骤:清理安装机台的表面(油、油脂、污垢等)。
撕开磁带部分双面胶,放置好磁带,轻按起头粘贴部分。
继续粘贴磁带,一边去除双面胶,一边粘贴磁带。
尽量用一致的力量轻按磁带,如果有可能请用小的滚轮压。
安装完磁带以后,再粘贴保护钢带到磁带上。
保护钢带要比磁带长一些,在两端可以用铆钉固定,这样防止磁带脱落。
铝槽SP202来固定磁带使用铝槽固定磁带,无需双面胶。
使用铝槽固定磁带,无法再贴保护钢带CV103.MP100无法再贴任何保护层。
2.1) 隔离化学制剂z低等危害制剂(LOW-INPACT AGENTS)蚁酸(Formic acid)、乳酸(lactic acid), 甲醛(formaldehyde 40%)、 gliceryne 93°C 乙烷(hexane)、辛烷(iso-octane)、亚麻油(linseed oil)、棉油(cotton oil)、大豆油(soybean oil)、矿石油(mineral oil)z中等危害制剂(MEDIUM-IMPACT AGENTS)乙炔(Acetylene)、丙酮(acetone)、醋酸(acetic acid)、oleic acid、 stearic acid 70°C、海水(seawater)、氨水(ammonia)、汽油(gasoline)、ether isopropilic、石油(etroleum)、水蒸气(vapor)z高等危害制剂(STRONG-IMPACT AGENTS)氮酸(Nitric acid)、苯(benzene)、二甲苯(dimethylbenzene)、四乙基呋喃(tetraethyl furan)、硝基苯(nitrobenzene)、solvent、甲苯(toluene)、carbon tetrachloride, turpentine, trichlorethylene.保护磁带不受外部磁场的破坏。
维亚维技术 Viavi MTS T-BERD 5800v1 软件更新指南说明书
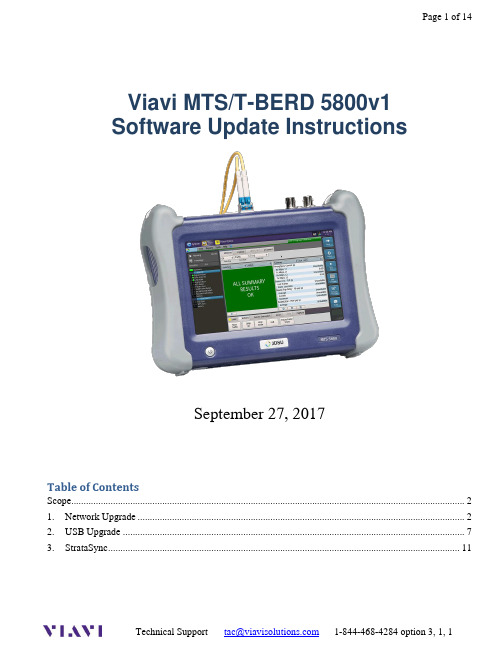
Viavi MTS/T-BERD 5800v1Software Update InstructionsSeptember 27, 2017Table of ContentsScope (2)work Upgrade (2)B Upgrade (7)3.StrataSync (11)ScopeThere are three methods to update T-BERD 5800v1 software:work upgrade - Use this method to update your T-BERD via an Internet connection.B upgrade - Use this method to update your T-BERD with a USB thumb drive.3.StrataSync upgrade - Use this method if your T-BERD 5800v1 is managed using Viavi’s StrataSyncAsset Management system.The T-BERD must be connected to AC Power, regardless of update method.work UpgradeStep Action Details1.Power On Press and hold the ON/OFF button o turn on the T-BERD 5800v1.2.AC Power Connect the AC power adapter to thepower connector on the top of theT-BERD 5800v1.N Connection Connect the Ethernet ManagementPort on the side of T-BERD 5800v1to a network connection with internetaccess, using CAT 5E or better cable.4.System Press the System icon, , at the top of the start-up screen, to display theSystem Menu.work Settings Press the Network icon,, to display LAN Settings. Set IP Mode to“DHCP” for automatic IP address assignment or “Static” for manual input.After configuring LAN settings, press the System icon, , to redisplaythe System Menu.6. Upgrade Press the Upgrade icon,, to display upgrade methods.Page 4 of 14Page 5 of 14 work Upgrade Press to display upgradesettings. Ensure that Server Address= “”8.Connect Press to showthe upgrade versions available at .9.Start Upgrade Press , and press to initiate the upgrade.Page 6 of 14B UpgradeStep Action Details Using an internet browser on your PC or laptop, go to /2.5800v2 Click on theto display the T-BERD 5800v1 upgrade portal.3.Download Click on the US/Canadian Flag, , and click to downloadthe current software revision from the North American download server.Save it to your desktop.B Stick Insert a USB thumb drive into the USB port on your PC or laptop.5.Extract Open and run the downloaded file, enter the path of the USB stick, and pressto extract files.6.Eject Safely eject the USB drive from your PC or Laptop7.Power on T-BERD Press and hold the ON/OFF button to turn on the T-BERD 5800v1.8.AC Power Connect the AC power adapter to thepower connector on the top of theT-BERD 5800v1.B Connect the USB Thumb Drive to oneof the USB ports on the side of theT-BERD 5800v1. An 8GB or smallerdrive is recommended.Page 9 of 14 10.System Press the System icon, , at the top of the start-up screen, to display theSystem Menu.11.Upgrade Press the Upgrade icon,, to display upgrade methods.Page 10 of 14 B Upgrade Press to display upgrade versionsavailable on the USB stick.13.Start Upgrade Press . Press to initiate the upgrade.3.StrataSyncStep Action Details1.Power On Press and hold the ON/OFF button to turn on the T-BERD 5800v1.2.AC Power Connect the AC power adapter to thepower connector on the top of theT-BERD 5800v1.N Connection Connect the Ethernet ManagementPort on the side of T-BERD 5800v1to a network connection with internetaccess, using CAT 5E or better cable.4.System Press the System icon, , at the top of the start-up screen, to display theSystem Menu.work Settings Press the Network icon,, to display LAN Settings. Set IP Mode to“DHCP”for automatic IP address assignment or “Static” for manual input.After configuring LAN settings, press the System icon, , to redisplaythe System Menu.6.StrataSync Press the StrataSync icon,, to display StrataSync Settings. Ensurethat Account ID and Technician ID match those of your StrataSync account.7.Sync Press to sync your T-BERD 5800v1 and initiate upgradesauthorized by your StrataSync System Administrator. If an upgrade has beenassigned you will receive a message box telling you that an upgrade isavailable and prompting you to OK or Cancel. If you were expecting anupgrade notification and did not receive one during your sync to Stratasync,contact your company’s St ratasync Admin.。
APSSureShotTMMWD配套软件使用说明

APS SureShot TM MWD配套软件使用说明APS SureShot TMMWD 配套软件使用说明渠淼2011年2月目录1 .MWD Master Interface1.1 软件介绍---------------------------------------------3 1.2 MWD Master Interface主界面 -----------------------3 1.3 MWD System Configuration界面 ---------------------6 1.4 管的固件升级----------------------------------9 1.5 编辑探管配置--------------------------------11 1.6 探管内存管理--------------------------------191.7 旋转测试--------------------------------------20202 .SIU Interface Admin2.1 软件介绍-----------------------------------------25 2.2 软件界面-----------------------------------------25 2.3 配置SIU-----------------------------------------29MWD Master Interface1.1 软件介绍 MWD Master Interface 主要用于对探管编程、升级探管固件(Firmware Firmware))时使用。
并可在地面简单测试当前所使用的探管是否工作正常。
时使用。
并可在地面简单测试当前所使用的探管是否工作正常。
注意:在使用该软件时确保工具串、SIU 、编码箱之间已正确连接,并使编码箱及SIU 的电源处于打开位置。
下图为MWD Master Interface 软件图标:软件图标:图1:MWD Master Interface 软件的图标软件的图标1.2 MWD Master Interface 主界面双击图标进入软件,等待几秒后就会显示该软件的主界面。
TRSWCM7.0用户安装手册
内容协作平台Array TRS WCM用户安装手册V 7.0北京拓尔思信息技术股份有限公司Beijing TRS Information Technology Co., Ltd.版权说明本手册由北京拓尔思信息技术股份有限公司(以下简称TRS公司)出版,版权属TRS公司所有。
未经出版者正式书面许可,不得以任何方式复制本文档的部分或全部内容。
©北京拓尔思信息技术股份有限公司版权所有。
保留所有权利。
是北京拓尔思信息技术股份有限公司的注册商标。
关于本手册本手册旨在指导TRS WCM V7.0用户完成在各个平台上的安装、部署和配置。
读者对象本手册读者对象为使用TRS WCM V7.0的使用者。
用户反馈TRS公司感谢您使用TRS 产品。
如果您发现本手册中有错误或者产品运行不正确,或者您对本手册有任何意见和建议,请及时与TRS公司联系。
您的意见将是我们做版本修订时的重要依据。
目录第1章系统安装要求 (1)1.1 硬件配置要求 (1)1.2 软件系统要求 (1)1.2.1 操作系统要求 (1)1.2.2 客户端浏览器要求 (1)1.2.3 Java运行环境要求 (1)1.2.4 应用服务器要求 (1)1.2.5 数据库服务器要求 (1)第2章系统安装步骤 (3)2.1 获取安装介质 (3)2.2 运行安装程序 (3)2.2.1 Windows平台 (3)2.2.2 Linux、Unix平台 (3)2.3 图形界面安装 (4)2.3.1 选择安装语言 (4)2.3.2 阅读简介 (4)2.3.3 接受许可协议 (5)2.3.4 选择安装类型 (5)2.3.5 选择安装方式(标准安装) (6)2.3.6 产品注册 (7)2.3.7 选择安装路径 (8)2.3.8 选择WCMData安装路径 (9)2.3.9 设置节点IP(集群安装) (10)2.3.10 外部访问设置(集群安装) (11)2.3.11 选择应用服务器 (12)2.3.12 配置关系数据库 (13)2.3.13 设置WCM访问地址 (19)2.3.14 创建快捷方式 (20)2.3.15 查看预安装摘要并安装 (20)2.3.16 安装完成 (21)2.4 命令行安装 (22)2.4.1 运行安装程序 (22)2.4.2 选择安装语言 (22)2.4.3 阅读简介 (22)2.4.4 阅读并接受许可协议 (23)2.4.5 选择安装类型 (23)2.4.6 选择是否开启信息反馈 (25)2.4.7 选择安装方式(标准安装) (25)2.4.8 产品注册 (25)2.4.9 选择安装路径 (26)2.4.10 选择WCMData安装路径 (27)2.4.11 设置节点IP(集群安装) (27)2.4.12 外部访问设置(集群安装) (28)2.4.13 选择应用服务器 (28)2.4.14 配置关系数据库 (29)2.4.15 设置WCM访问地址 (32)2.4.16 创建快捷方式 (32)2.4.17 查看预安装摘要并安装 (32)2.4.18 安装完成 (33)第3章安装后的配置 (34)3.1 Tomcat相关配置 (34)3.2 Weblogic手动部署应用 (34)3.2.1 登录到Weblogic控制台 (34)3.2.2 部署web应用 (35)3.3 WebSphere手动部署应用 (38)3.3.1 登录到WebSphere控制台 (39)3.3.2 部署Web应用 (39)3.3.3 部署后的配置 (43)3.4 其他应用服务器手工部署 (44)3.5 与TRS IDS集成的配置说明 (44)3.5.1 部署IDS的Agent (45)3.5.2 配置trsids-agent.properties文件 (45)3.5.3 部署TRS WCM V7.0和TRS IDS的协同模块 (45)3.5.4 屏蔽掉WCM自身的全局登录验证 (46)3.5.5 配置Web.xml 文件 (46)3.5.6 配置集中授权 (48)3.5.7 启动WCM应用 (48)3.6 访问WCM系统 (48)第4章选件部署 (49)4.1 政府信息公开系统的部署 (49)4.1.1 政府信息公开系统的部署 (49)4.1.2 重建政府信息公开系统的部署 (53)4.2 视频库选件的部署 (53)4.3 图片库选件的部署 (54)第5章卸载产品 (55)第6章常见问题 (56)6.1 安装TRS WCM提示No Java virtual machine could be found (56)6.2 如何确定ear包部署到WebSphere后的位置 (56)6.3 部署到Weblogic后出现乱码问题 (57)6.4 Weblogic11g更新应用文件后,为何需要重新部署才能生效? (58)6.5 JDBC驱动缺少或版本不对,导致系统不能正确连接数据库 (58)6.6 Unix安装WCM过程中出现“too many open files”错误 (58)6.7 关于soap安全的设置 (58)6.8 在Weblogic10上部署时可能出现的问题 (59)6.9 如何连接Oracle RAC (60)6.10 Oracle RAC连接异常 (60)6.11 TRS WCM安装到DB2数据库后,应用无法启动,提示连接数据库异常 (61)6.12 MySQL数据库的编码问题 (61)6.13 部署政府信息公开,出现“创建政府信息公开的视图失败” (61)6.14 Tomcat更换为64位jdk (62)6.15 视频库的重新抓取缩略图功能不生效? (62)6.16 专题初始化时,所用的母板、资源和风格的原始数据在哪个目录? (62)6.17 修改WCMData路径以后,如何同步修改WCM中WCMData的配置? (63)第1章系统安装要求1.1 硬件配置要求安装TRS WCM V7.0的主机硬件要求如下:●CPU:主频不低于3.0GHz●内存:不低于1G●硬盘:不低于10G1.2 软件系统要求1.2.1 操作系统要求安装TRS WCM V7.0的主机操作系统要求为下列之一:●Windows 2000/2003 Server或以上版本●Linux(内核版本不低于2.4.x)●Sun Solaris 8 或以上版本●IBM AIX 5.1 或以上版本1.2.2 客户端浏览器要求访问TRS WCM V7.0的客户端浏览器要求为:●Microsoft Internet Explorer 6.0 及以上●Firefox、Chrome1.2.3 Java运行环境要求安装TRS WCM V7.0的主机Java环境要求如下:●Sun JDK 1.5.0及以上1.2.4 应用服务器要求安装TRS WCM V7.0的应用服务器要求为下列之一:●Apache Tomcat 5.0及以上●IBM WebSphere 6.0及以上●BEA Weblogic 8.1 SP5及以上其它服务器请参考相关资料。
MASS-VIEW

使用说明书MASS-VIEW®系列文档号:9.17.0511日期:2022年7月26日注意事项安装使用仪器前,请仔细阅读操作手册。
如未按照操作手册操作,很可能造成人身伤害和/或设备损坏。
本手册编制与出版期间,我司谨慎、严谨,尽管如此,我司仍不对于本手册存在的任何不准确、错误、不当陈述或任何其他性质错误承担法律或其他责任。
本手册仅供参考,今后可能发生更改。
如有更改,恕不另行通知。
简易操作手册电源模块输出RS232/Modbus递增左右下中心=确认目录使用说明书 (1)安装使用仪器前,请仔细阅读操作手册。
如未按照操作手册操作,很可能造成人身伤害和/或设备损坏。
(1)简易操作手册 (3)目录 (4)1......................................................................................................................................一般产品信息61.1引言 (6)1.2预期用途 (6)1.3符号 (6)1.4产品支持参考文档 (6)1.5保修条款 (7)1.6情况概述 (7)1.7外壳 (7)1.8传感器原理 (9)1.9针阀原理 (9)1.10恒流控制器原理 (9)1.11电子设备、显示器和4向键 (11)1.12软件工具 (12)2设备安装 (13)2.1开箱及检查 (13)2.2拆除和退货说明 (13)2.3安装 (14)2.4串联过滤器 (14)2.5流体连接 (14)2.6管道 (14)2.7电气连接件 (14)2.8试验压力 (15)2.9供应压力 (16)2.10系统清洗 (16)2.11密封 (16)2.12设备仓储 (16)2.13电磁兼容性 (16)3操作 (17)3.1一般规定 (17)3.2电源和预热 (17)3.3设置仪器 (17)3.4用户界面、菜单结构和仪器功能 (18)3.4.1读数界面 (18)3.4.2修改读数界面 (18)3.4.3菜单结构 (19)3.4.4睡眠状态 (20)3.4.5计数器 (20)3.4.6报警器 (20)3.4.7报警器输出 (21)3.4.8用户标记 (21)3.4.9报警触点 (21)3.5其他气体 (23)3.6校零步骤 (23)4维护 (24)4.1一般规定 (24)4.2针阀 (24)5故障排除 (25)5.1一般规定 (25)5.2故障排除总结 (25)5.3服务和维修 (25)1一般产品信息1.1引言MASS-VIEW®仪器可精确测量与控制气体质量流量。
Management Station 软件版本 7.3 安装指南说明书
Management Station Software Version 7.3 Installation GuideNotes, Cautions, and WarningsNOTE: A NOTE indicates important information that helps you make better use of your computer.CAUTION: A CAUTION indicates either potential damage to hardware or loss of data and tells you how to avoid the problem.WARNING: A WARNING indicates a potential for property damage, personal injury, or death.Copyright© 2013 Dell Inc. All Rights Reserved.Trademarks used in this text: Dell™, the Dell logo, Dell Boomi™, Dell Precision™ , OptiPlex™ Latitude™, PowerEdge™, PowerVault™, PowerConnect™, OpenManage™, EqualLogic™, Compellent™, KACE™, FlexAddress™, Force10™ and Vostro™ are trademarks of Dell Inc. Intel®, Pentium®, Xeon®, Core® and Celeron® are registered trademarks of Intel Corporation in the U.S. and other countries. AMD®is a registered trademark and AMD Opteron™, AMD Phenom™ and AMD Sempron™ are trademarks of Advanced Micro Devices, Inc. Microsoft®, Windows®, Windows Server®, MS-DOS®, Windows Vista®, and Active Directory® are either trademarks or registered trademarks of Microsoft Corporation in the United States and/or other countries. Red Hat Enterprise Linux® and Enterprise Linux® are registered trademarks of Red Hat, Inc. in the United States and/or other countries. Novell® is a registered trademark and SUSE™ is a trademark of Novell Inc. in the United States and other countries. Oracle® is a registered trademark of Oracle Corporation and/or its affiliates. Citrix®, Xen®, XenServer® and XenMotion® are either registered trademarks or trademarks of Citrix Systems, Inc. in the United States and/or other countries. VMware®, Virtual SMP®, vMotion®, vCenter® and vSphere® are registered trademarks or trademarks of VMware, Inc. in the United States or other countries. IBM® is a registered trademark of International Business Machines Corporation.2013 - 06Rev. A00Contents1 About (5)Systems Management Software DVDs (5)Managed System And Management Station (5)Systems Management Tools And Documentation DVD (5)Managed System Software (5)Management Station Software (6)2 Installing Management Station Software On Windows (9)Installing Management Station Software On Microsoft Windows Server 2008 Core And Hyper-V Server (9)Installing Management Station Software In CLI Mode (9)Uninstalling Management Station Software In CLI Mode (10)3 Installing Management Station Software On Supported Red Hat Enterprise Linux, SUSE Linux Enterprise Server, And VMware ESX Server (11)41 AboutThe Management Station Software Installation Guide provides an overview of the management station software and installation instructions for the same. For information on installing Server Administrator, see the Server Administrator Installation Guide on the Systems Management Tools and Documentation DVD.Systems Management Software DVDsThe systems management software comprises three DVDs, and they are:•Systems Management Tools and Documentation DVD•Server Updates DVD•Management Console DVDFor information on the systems that support systems management software, the operating systems supported by these systems, and the components that you can install on these systems, see the Systems Software Support Matrix. Managed System And Management StationDepending on the way you use the systems management tools, you can classify the systems as:•Managed SystemA managed system is any system that is monitored and managed using Server Administrator (one of the systemsmanagement tools on the Systems Management Tools and Documentation DVD) or Management Console. You can manage systems running Server Administrator locally or remotely through a supported web browser. For more information on Server Administrator, see the Server Administrator User's Guide on the SystemsManagement Tools and Documentation DVD.•Management StationA management station is a laptop, desktop, or server that you use to remotely manage one or more managedsystems from a central location using tools such as Intelligent Platform Management Interface (IPMI) Utilities, Remote Access Controller (RAC) tools, Dell OpenManage Essentials or Server Administrator Web Server. Systems Management Tools And Documentation DVDThe Systems Management Tools and Documentation DVD contains the systems management software. The systems management software helps you to manage the systems by monitoring the system components, diagnosing issues, notifying through alerts, and troubleshooting remotely. Systems management software is classified into managed system software and management station software.Managed System SoftwareThe following applications comprise the managed system software:5•Server AdministratorServer Administrator provides easy-to-use management and administration of local and remote systems througha comprehensive set of integrated management services. Server Administrator is the sole installation on themanaged system and is accessible both locally and remotely.•Local Remote Access ControllerLocal Remote Access Controller enables the system to receive e-mail alerts for warnings or errors related tovoltage, temperature, and fan speed. Remote Access Controller also logs event data and the most recent crash screen (available only on systems running Microsoft Windows operating system) to help you diagnose theprobable cause of a system crash.Management Station SoftwareThe following applications comprise the management station software that you can install using the Systems Management Tools and Documentation DVD:•Active Directory Snap-InThe Active Directory (AD) Snap-In utility provides an extension snap-in to the Microsoft Active Directory tomanage AD objects specific to products on this DVD.NOTE: Both 32–bit and 64–bit installers are available. When Active Directory Snap-In is invoked fromautorun, it launches the installer corresponding to the operating system architecture.•BMC/IPMI UtilitiesBMC Management Utility (BMU) is a utility that provides remote management and configuration of systemsequipped with a Baseboard Management Controller (BMC) or iDRAC using the IPMI protocol. For moreinformation on BMU, see the Baseboard Management Controller Utilities User's GuideNOTE: Only 32–bit installer is available.•RAC ToolsThe RAC console is a management station software designed to provide remote management capabilities for the systems. You can remotely connect to the RAC hardware and access the RAC features either by using a web browser or the RACADM Command Line Interface (CLI). RACADM CLI is the command line user interface to the RAC.You can install RAC either on the managed system or on the management station.For information on installing RAC on the managed system, see the Server Administrator Installation Guide. For information on installing on the management station, see Installing Management Station Software on Windows.For more information on RAC, see the Remote Access Controller User's Guide.NOTE: Both 32–bit and 64–bit installers are available. When RAC tools is invoked from autorun, it launchesthe installer corresponding to the operating system architecture.•Systems Build and Update Utility (SBUU)You can use the SBUU to:–Update the system firmware.–Install an operating system.–Update the firmware and BIOS on multiple systems in a pre-operating system environment.–Configure the system hardware.–Customize the Server Update Utility (SUU) and use it to update the system.For information on performing these tasks and details on the SBUU, see the Systems Build and Update UtilityUser's Guide.6•IT AssistantStarting Systems Management 7.2, the availability of IT Assistant on the SMTD DVD is removed. Contact service provider to download the web version of IT Assistant associated to Systems Management 7.2 release. ITAssistant will not be available in releases following 7.2.We recommend to use Dell OpenManage Essentials as replacement for ITA. Dell OpenManage Essentials provides improved capabilities such as:–Discovering and inventoring the systems.–Monitoring systems’ health.–Viewing and managing system alerts.–Performing system updates.–Viewing hardware inventory and compliance reports.For more information regarding Dell OpenManage Essentials, contact service provider.782 Installing Management Station Software On Windows1.Log on with administrator privileges to the system on which you want to install the management stationapplications.2.Insert the Systems Management Tools and Documentation DVD into the DVD drive or contact your service providerfor information to download the web installer.3.Run autorun.exe.NOTE: If you are using the DVD to install, select the management station application that you want to install,and then click Install.4.Follow the instructions in the Install Wizard.NOTE: You cannot install remote RAC (RAC installed on the management station) and local RAC (RAC installed on the managed system) on the same system.Installing Management Station Software On Microsoft Windows Server 2008 Core And Hyper-V ServerWindows Server 2008 Core or Hyper-V Server operating system does not support a graphical user interface (GUI) based installation of the software components. Install the software in CLI mode on Server Core. For more information on Server Core, see the Microsoft website.NOTE: Log in as a built-in Administrator to install systems management software on Windows Server 2008 and Windows Vista. For more information on built-in Administrator account, see the Windows Server 2008 Help.Installing Management Station Software In CLI ModeTo install the RAC Tools, launch the MSI file using the command:•For 32–bit: msiexec /i RACTools.msi•For 64–bit: msiexec /i RACTools_x64.msiNOTE: On the Systems Management Tools and Documentation DVD:•The RACTools.msi file is located at SYSMGMT\ManagementStation\windows\DRAC•The RACTools_x64.msi file is located at SYSMGMT\ManagementStation\windows\DRACx64To install BMU, launch the MSI file using the command:msiexec /i BMC.msiNOTE: Only 32–bit installer is available.NOTE: The BMC.msi file is located at SYSMGMT\ManagementStation\windows\BMC on the Systems Management Tools and Documentation DVD.To install Active Directory Snap-In, launch the MSI file using the command:9•For 32–bit: msiexec /i ADSnapIn.msi•For 64–bit: msiexec /i ADSnapIn_x64.msiNOTE: On the Systems Management Tools and Documentation DVD:•The ADSnapIn.msi file is located at SYSMGMT\ManagementStation\windows\ADSnapIn•The ADSnapIn_x64.msi file is located at SYSMGMT\ManagementStation\windows\ADSnapInx64 To install the localized version of the management station software, at the command prompt type the following: msiexec / I <management_station_software>.msi TRANSFORMS=<languauge_transform>.mstNOTE: Replace <language_transform>.mst with the appropriate language file:•1031.mst (German)•1034.mst (Spanish)•1036.mst (French)•1041.mst (Japanese)•2052.mst (Simplified Chinese)Uninstalling Management Station Software In CLI ModeTo uninstall management station software, run the commands as listed in the table below.Table 1. Commands to Uninstall Management Station Software103 Installing Management Station Software On Supported Red Hat Enterprise Linux, SUSE Linux Enterprise Server, And VMware ESX ServerOnly RAC tools and BMU are supported on the Red Hat Enterprise Linux, SUSE Linux Enterprise Server, and VMware ESX Server operating systems.On systems running Red Hat Enterprise Linux 5 operating system, DVDs are auto-mounted with the -noexec mount option. This option does not allow you to run any executable from the DVD. You must mount the DVD-ROM manually and then run the executables.To install BMU, navigate to the SYSMGMT/ManagementStation/linux/bmc directory and install the BMU RPM specific to the operating system as follows:•For systems running Red Hat Enterprise Linux, type rpm -ivh osabmcutil*-RHEL-*.rpm•For systems running SUSE Linux Enterprise Server, type rpm -ivh osabmcutil*-SUSE-*.rpmTo install the latest version of RAC Tools:1.Uninstall the existing IPMI tool:a.Query the existing IPMI tool: rpm -qa | grep ipmitoolIf the IPMI tool is already installed, the query returns ipmitool-x.x.xx-x.x.xx.b.To uninstall the IPMI tool:*On systems running SUSE Linux Enterprise Server and VMware ESX Server, type rpm -e ipmitool-x.x.xx-x.x.xx*On systems running Red Hat Enterprise Linux 5.x, type rpm –e OpenIPMI-tools*On systems running Red Hat Enterprise Linux 6.x, type rpm –e ipmitoolNOTE: The settings made by the existing IPMITOOL is retained.2.Navigate to the SYSMGMT/ManagementStation/linux/rac/<OS> directory and then type rpm -ivh *.rpm11。
Silk Test 13.6 Silk4NET Web Edition安装指南说明书
Installation GuideMicro Focus575 Anton Blvd., Suite 510Costa Mesa, CA 92626Copyright © Micro Focus 2013. All rights reserved. Portions Copyright © 1992-2009 BorlandSoftware Corporation (a Micro Focus company).MICRO FOCUS, the Micro Focus logo, and Micro Focus product names are trademarks orregistered trademarks of Micro Focus IP Development Limited or its subsidiaries or affiliatedcompanies in the United States, United Kingdom, and other countries.BORLAND, the Borland logo, and Borland product names are trademarks or registeredtrademarks of Borland Software Corporation or its subsidiaries or affiliated companies in theUnited States, United Kingdom, and other countries.All other marks are the property of their respective owners.2013-02-05iiContentsIntroduction (4)System Requirements and Prerequisites (4)Hardware Requirements (4)Platform Support (4)Adobe Flex Support (5)Administrator Privileges (5)Items Included with Silk4NET Web Edition (5)Licensing Information (6)Installing Silk Test (7)Installation Prerequisites (7)Resetting the TEMP Environment Variable (7)Installing Silk4NET Web Edition (7)Installing the Silk4NET Visual Studio Plug-in Manually (9)Uninstalling Silk Test (9)Contents | 3IntroductionThis Help provides all the information you need to install and uninstall Silk Test. It describes hardware andsoftware requirements and details the various setup options.System Requirements and PrerequisitesThe following section identifies the system requirements for installing and running Silk Test.Hardware RequirementsWe recommend the following hardware requirements:Platform SupportPlatformsSilk Test 13.6 is designed to run on the following platforms:•Microsoft Windows XP SP3•Microsoft Windows Vista SP2•Microsoft Windows 7•Microsoft Windows 7 SP1•Microsoft Windows 8Technology Domains and BrowsersSilk Test 13.6 supports applications that use the following browsers or are developed in:Note: You can only test Adobe Flex applications with Silk4NET if you have a Web plus Flex licensefor Silk4NET. For additional information on the licensing modes, see Licensing Information.* Indicates a rapid release version of a browser. Such versions have a short product life-cycle and arefrequently replaced by newer versions. Silk Test supports rapid release versions as long as the issuingvendor supports them. This means that the next Silk Test version will probably not continue to support theindicated versions, but might support newer versions.4 | IntroductionVisual Studio EnvironmentYou can integrate Silk4NET in Visual Studio 2010 Professional or later.Adobe Flex SupportNote: You can only test Adobe Flex applications with Silk4NET if you have a Web plus Flex licensefor Silk4NET. For additional information on the licensing modes, see Licensing Information.Note: Silk Test does not support testing child domain technologies, including Adobe Flex, for Webapplications running in Google Chrome.Silk Test supports Adobe Flash Player 10 or later.Administrator PrivilegesYou must have local administrator privileges to install Silk Test. Once Silk Test is properly installed, youmust also have administrator privileges in order to run Silk Test.Items Included with Silk4NET Web EditionWhen you install Silk4NET, the following items are available:•Silk4NET•Product Notification Service - This application resides in the system tray and will check for updates at a configurable interval.•Online Help topicsAccess the help from within each product from the Help menu.•Release NotesFor information about new features, supported platforms and versions, known issues, and work-arounds, refer to the Silk Test Release Notes, available from /productdoc.aspx.•Online tutorials from /productdoc.aspxYou must have Adobe Acrobat Reader™ to view PDF documents.•Sample applications that you can access online•Adobe Flex sample applicationsAccess Flex sample applications at /flex/SilkTest13.6/index.html.•Insurance Company Web applicationYou can access the Web application at: /InsuranceWebExtJS/.Introduction | 5Licensing InformationUnless you are using a trial version, Silk Test requires a license.The licensing model is based on the client that you are using and the applications that you want to able totest. The available licensing modes support the following application types:Note: To use a Full or a Premium license, you require a different setup package. The information inthis document applies only to the Web Edition of Silk4NET. For a detailed overview of the capabilitiesof the Full and Premium offering, see Release Notes.6 | Licensing InformationInstalling Silk TestThis section explains the setup options that are available when installing Silk Test.Installation PrerequisitesBefore installing Silk Test, verify the following information:•Your user account possesses local administrator privileges.Resetting the TEMP Environment VariableIf your Windows TEMP environment variable does not point to a valid directory, an error message isdisplayed. To successfully install Silk Test, your TEMP environment variable must point to a valid directory.1.Choose Start > Settings > Control Panel.2.Double-click System.3.Click the Advanced tab, and then click Environment Variables.4.Under User Variables or System Variables, double-click the TEMP variable.5.Enter a valid directory, and then click OK.6.Restart the Silk Test installation by double-clicking the EXE file.Installing Silk4NET Web EditionThe Silk4NET Visual Studio plug-in enables you to create or C# test scripts directly in VisualStudio. When you install Silk4NET, Silk Test Recorder and the Open Agent are also installed. Silk TestRecorder enables you to record tests rather than manually coding them. The Open Agent is required to runSilk4NET and Silk Test Recorder.1.Locate and double-click the Silk Test executable file.If you have a Silk Test CD, insert your CD. If the setup program does not start automatically, manuallystart the Silk Test setup program by choosing Start > Run and entering <cddrive>:\setup.exe.Note: If your Windows TEMP environment variable does not point to a valid directory, an errormessage is displayed. To successfully install Silk Test, your TEMP environment variable mustpoint to a valid directory.The InstallAnywhere wizard opens.2.If you previously installed a version of Silk Test, click Uninstall and then click Next to remove allinstalled features.You must uninstall any earlier versions before you install a new version.3.Click Next.The License Agreement opens.4.Read the license agreement carefully. If you accept the terms of the agreement, click I accept theterms of the License Agreement.5.Click Next.The Choose Install Folder page opens.6.To change the default installation directory, perform the following steps:a)Click Choose. The Browse For Folder dialog box opens.Installing Silk Test | 7b)Specify the folder in which you want to install Silk Test, and then click OK to return to the ChooseInstall Folder page.The location displays in the Where Would You Like to Install? text box.7.Click Next.8.Specify whether you want to create Windows firewall exceptions.Note: This step is only available for Windows XP, Windows Vista, Windows 7, and WindowsServer 2008.a)Click one of the following option buttons:•Yes – To have setup create firewall exceptions for all Silk Test executable files. As a result, you are not prompted to block or allow the executable files when you launch them.•No – To be prompted when you launch the Silk Test executable file.b)Click Next.9.Review the provided information and perform one of the following steps:•To change any settings, click Previous to return to the appropriate page.•If you are satisfied with the settings, click Install to start the installation process.Tip: If a message appears stating that there is not enough space while files are copying, redefine the TEMP area to a drive that contains more space. The installer uses the TEMP area forunzipping files. For example, if your TEMP area is d:\temp and you are installing to e:\SilkTest, the E drive may contain enough space for the installation, but the D drive is thelimiting factor.The status bar provides information about the installation process. Upon completion, the Choose Licensing Mode page opens.10.Click one of the following option buttons:•Evaluation version Installs an evaluation version of Silk Test, which grants you full product functionality for 30 days. To upgrade to a full version at a later point in time, contact your salesrepresentative.•Full version – Installs an unrestricted version of Silk Test, which requires a license.11.To install the license file, perform the following steps:a)Click Configure your license server and then click Next.The license utility checks your local system for the existence of SilkMeter license serverconfiguration files. If the files are found, the configuration and type of license server are displayed and used for licensing. If no configuration data is found, the Select SilkMeter License Server page is displayed with the default settings.b)From the Application list box, select Silk Test as the application you are licensing.c)Click one of the following option buttons:Using local or remote server In the License Server Host text box, type the name of the computer on which SilkMeter is installed. Do not change the default port number, 5461, unless your network administrator has defined a different port. Click Apply to generate your license server configuration. Click Test Connection to verify that a SilkMeter server is accessible on the specified host and port. Testing the connection to the license server might fail during installation as required system libraries, which are installed later with the software package, might not yet be available.Note: In some cases, specifying the simple name of the license server inthe License Server Host text box, such as licenseserver, might notwork. A message box stating there is no license serverrunning on the hostname you specified opens. To resolve this8 | Installing Silk Testissue, specify the hostname by using a fully qualified name, such as .Not using server (standalone)Runs SilkMeter standalone. You are prompted to import a SilkMeter license file. Click Yes and specify the location of your license file.d)Click Close.Fastpath: A working network connection is required when running Silk Test with a remoteSilkMeter license server. If you need to verify that the network is working, choose Start > Run,and then type ping localhost or ping <license server name>, or open a commandprompt and type either of those commands.The Install Complete page opens.12.Click Done.13.Restart Visual Studio if it was running when you performed the Silk4NET installation.When installation completes, a menu option appears for Silk4NET and the Silk4NET project is availablefrom the Installed Templates list.Installing the Silk4NET Visual Studio Plug-in Manually The Silk4NET Visual Studio plug-in enables you to create Visual Basic or C# test scripts directly in VisualStudio. You can install the Silk4NET Visual Studio plug-in when you install Silk Test using the Silk Testinstallation wizard.Use this procedure:•If you upgrade your version of Visual Studio after you install the Silk4NET plug-in.1.Execute the file MicroFocus.SilkTest.Silk4NET.vsix in the folder <Silk Testinstallation directory>\ng\Silk4NET.By default the location is C:\Program Files\Silk\Silk Test\ng\Silk4NET.2.In Visual Studio, verify that the menu option for Silk4NET appears and that the Silk4NET project isavailable from the Installed Templates list.Uninstalling Silk TestWhen you install a new version of Silk Test, the wizard prompts you to uninstall any existing versions ofSilk Test. You can also uninstall Silk Test from the programs menu at any time.1.Click Start > Programs > Silk > Silk Test > Administration > Silk Test Uninstall. TheInstallAnywhere wizard opens the Uninstall Silk Test <version> page.2.To remove all files from the installation directory, check the Remove all files check box.If you check this check box, the following items or folders are removed:•The Access database and samples•The contents of [AppDATA]/Silk/Silk TestFor example, on Windows 7 this directory is located at: C:\Users\[username]\AppData\Roaming\Silk\Silk Test•The contents of [commonAppData]/Silk/Silk TestFor example, on Windows 7 this directory is located at: C:\ProgramData\Silk TestInstalling Silk Test | 9•The contents of [commonAppData]/Silk/Silk Test WorkbenchFor example, on Windows 7 this directory is located at: C:\ProgramData\Silk TestWorkbench3.Click Uninstall. If any files were not removed, a list of the files is provided.4.Click Done.10 | Installing Silk TestIndexAadministrator privileges 5GGreen Mountain Outpost (GMO) application location 5Iinstallingoverview 4process overview 7Silk4NET 7, 9Insurance Company Web applicationlocation 5Llicensingavailable license types 6Ooverviewinstalling 4items installed 5Ssample applicationslocation 5Silk4NETinstalling 7installing manually 9TTEMP environment variable 7UuninstallingSilkTest 9VVisual Studio plug-ininstalling 7Index | 11。
MTR安装编程指南
预设置为:1234 预设置为:1234
2.2.4 Enable Input Commands (使用输入指令)
2.2.5 Buzzer (蜂鸣器)
2.2.6 CPU Programmable Output1 (CPU 可编程输出 1)
2.2.7 CPU Programmable Output2 (CPU 可编程输出 2) 2.2.8 CPU Programmable Input1 (CPU 可编程输入 1) 2.2.9 CPU Programmable Input2 (CPU 可编程输入 2) 2.2.10 Receiver Number (接收机编号) 2.2.11 External Parallel Printer (外置并口打印机)
MTR 中心接收机
安装编程指南
1.0
概述
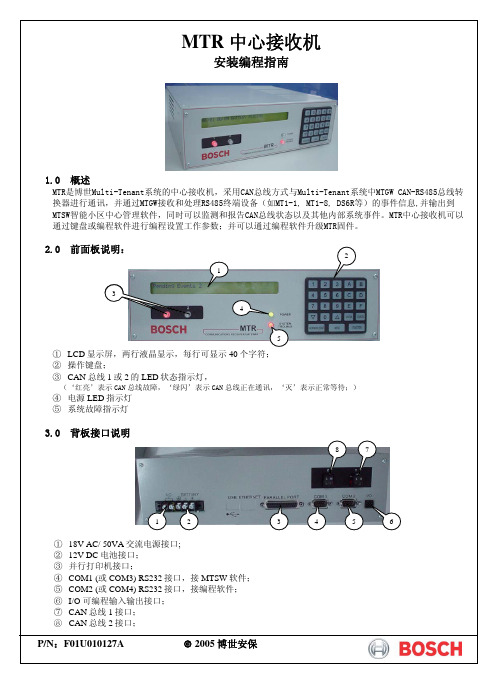
MTR是博世Multi-Tenant系统的中心接收机,采用CAN总线方式与Multi-Tenant系统中MTGW CAN-RS485总线转 换器进行通讯,并通过MTGW接收和处理RS485终端设备(如MT1-1, MT1-8, DS6R等)的事件信息,并输出到 MTSW智能小区中心管理软件,同时可以监测和报告CAN总线状态以及其他内部系统事件。MTR中心接收机可以 通过键盘或编程软件进行编程设置工作参数;并可以通过编程软件升级MTR固件。
6.3 以下为编程选项:
菜单 1 EVENT DATABASE (事件数据库) 1.1 Display Sort By Time/Date (按时间/日期显示) 1.2 Display Current System Troubles (显示当前系统故障) 2 MTR CONFIGURATIONS (MRT 主机设置) 2.1 Change Passwords (更改密码) 2.1.1 Manager Password (管理员密码) 2.1.2 Supervisor Password 1 (监察员密码 1) 2.1.3 Supervisor Password 2 (监察员密码 2) 2.1.4 Operator Password 1 (操作员密码 1)
- 1、下载文档前请自行甄别文档内容的完整性,平台不提供额外的编辑、内容补充、找答案等附加服务。
- 2、"仅部分预览"的文档,不可在线预览部分如存在完整性等问题,可反馈申请退款(可完整预览的文档不适用该条件!)。
- 3、如文档侵犯您的权益,请联系客服反馈,我们会尽快为您处理(人工客服工作时间:9:00-18:30)。
MTSW软件安装指南1. MTSW软件简介MTSW是应用于博世MTS小区管理系统、D6600/D6100报警中心系统、DS7400系列控制主机和博世VDP可视对讲系统的中心管理软件,可以与MTS中心设备MTR,D6600/6100系列接收机、DS7400系列控制主机以及博世可视对讲管理员机连接。
通过MTSW软件可以设置用户与设备信息,处理用户报警或向连接的设备发送控制命令,并提供多层的导航地图,发送报警通知,短消息以及实现联动其它报警设备等功能。
2. MTSW软件系统配置要求CPU – Intel PIII 1.5GHz或更高主频硬盘 - 30G以上可用空间内存 – 256M RAM,建议使用更多鼠标 - 与 WINDOWS 兼容的鼠标声卡 - SOUND BLASTER 16显示器 - 标准VGA打印机 - EPSON LQ-300K或 EPSON LQ-1600K操作系统 - Windows XP,或Windows 7 (32/64bit)3. MTSW安装光盘中的内容1)MTSW软件安装程序;2)MTSW软件用户指南;3)MTRAM远程编程工具,用以对MTR和MTGW软件升级,或对MTR参数编程。
4. MTSW软件安装1)将MTSW软件自启动安装光盘放入计算机的CDROM中,若光盘无法启动,请双击光盘根目录下的“menu.hta”文件启动安装菜单界面。
2)在菜单界面上选择安装MTSW系统软件,启动MTSW软件安装程序。
如果计算机上存在MTSW V1.22以前版本或安装有CAS6000软件,则系统会自动对原有软件进行升级并更新数据(CAS6000v1.0接收机原始数据除外)。
3)在MTSW软件安装程序启动界面上直接选择[Next]按钮。
4)在选择安装目录界面上选择软件的安装目录后按[Next]按钮;如果是Windows 7 用户,如无法完成自动安装,必须通过安装目录运行安装程序, 请直接通过右击安装盘\MTSW目录下的Setup.exe,再点击Run as administrator进行安装;5)在语言选择界面中选择软件的语言版本后按[Next]按钮,本软件有简体中文,繁体中文和英文三个版本,为保证软件界面的正常显示,选择语言版本应与操作系统匹配。
6)确保前面选择的内容正确后在准备安装界面上按[Install]按钮开始安装软件。
7)软件正常安装完成后安装程序会显示安装成功界面,按[Finish]按钮完成MTSW软件安装,并且检测是否已经安装了软件狗驱动程序,如果发现没有安装,则会自动安装软件狗驱动程序;如果是Window 7用户, 如无法完成自动安装,必须在MTSW安装完成后, 请直接通过点击目录\MTSW\RainBowkey下的InstRainbowKey.exe程序手动安装软件狗驱动程序。
8)返回启动界面。
如果使用MT系统,可以进行MTRAM安装;如果是Windows 7 用户,也可直接通过右击安装盘\MTRAM目录下的MTRAM.exe,再点击Run as administrator进行安装。
MTSW軟體安裝指南1. MTSW軟體簡介MTSW是應用於博世MTS社區管理系統、D6600/D6100報警中心系統、DS7400系列控制主機和博世VDP可視對講系統的中心管理軟體,可以與MTS中心設備MTR,D6600/6100系列接收機、DS7400系列控制主機以及博世可視對講管理員機連接。
通過MTSW軟體可以設置用戶與設備資訊,處理用戶報警或向連接的設備發送控制命令,並提供多層的導航地圖,發送報警通知,短消息以及實現聯動其他報警設備等功能。
2. MTSW軟體系統配置要求CPU – Intel P111 1.5GHz或更高主頻硬碟 - 30G以上可用空間記憶體 – 256M RAM,建議使用更多滑鼠 - 與 WINDOWS 相容的滑鼠音效卡 - SOUND BLASTER 16顯示器 - 標準VGA印表機 - EPSON LQ-300K或 EPSON LQ-1600K作業系統 - Windows XP,或Windows 7 (32/64bit)3. MTSW安裝光碟中的內容1) MTSW軟體安裝程式;2)MTSW軟體用戶指南;3)MTRAM遠端編程工具,用以對MTR和MTGW軟體升級,或對MTR參數編程。
4. MTSW軟體安裝1)將MTSW軟體自啟動安裝光碟放入電腦的CDROM中,若光碟無法啟動,請雙擊光碟根目錄下的“menu.hta"檔啟動安裝功能表介面。
2)在功能表介面上選擇安裝MTSW系統軟體,啟動MTSW軟體安裝程式。
如果電腦上存在MTSW V1.22以前版本或安裝有CAS6000軟體,則系統會自動對原有軟體進行升級並更新資料(CAS6000v1.0接收機原始資料除外)。
3)在MTSW軟體安裝程式啟動介面上直接選擇[Next]按鈕。
4)在選擇安裝目錄介面上選擇軟體的安裝目錄後按[Next]按鈕;如果是Windows 7 用戶,如無法完成自動安裝,必須通過安裝目錄運行安裝程式, 請直接通過右擊安裝盤\MTSW目錄下的Setup.exe,再點擊Run as administrator進行安裝;5)在語言選擇介面中選擇軟體的語言版本後按[Next]按鈕,本軟體有簡體中文,繁體中文和英文三個版本,為保證軟體介面的正常顯示,選擇語言版本應與作業系統匹配。
6)確保前面選擇的內容正確後在準備安裝介面上按[Install]按鈕開始安裝軟體。
7)軟體正常安裝完成後安裝程式會顯示安裝成功介面,按[Finish]按鈕完成MTSW軟體安裝,並且檢測是否已經安裝了軟體狗驅動程式,如果發現沒有安裝,則會自動安裝軟體狗驅動程式;如果是Window 7用戶, 如無法完成自動安裝,必須在MTSW安裝完成後, 請直接通過點擊目錄\MTSW\RainBowkey下的InstRainbowKey.exe程式手動安裝軟體狗驅動程式。
8)返回啟動介面。
如果使用MT系統,可以進行MTRAM安裝;如果是Windows 7 用戶,也可直接通過右擊安裝盤\MTRAM目錄下的MTRAM.exe,再點擊Run as administrator進行安裝。
MTSW Installation Guide1. MTSW OverviewMTSW central Management Software is for Bosch Multi-Tenant System,D6600/D6100 receivers, DS7400 series control panels and Bosch-VDP system.It could communicate with MTR, D6600/6100 series receiver, DS7400 series control panels and Bosch-VDP. In MTSW, the client and device information could be updated and displayed in real time; the alarm or system event could be dispatched; the control command could be sent from center to device. The multi-level navigation map is also provided. It could send SMS message toclient when an alarm report is received, and control other alarming devicesduring the time.2. MTSW System RequirementCPU – Intel PIII 1.5GHz or higherHard disk - 30G or moreMemory – 256M RAM,higher is preferableMouse – Windows compatible mouseSound Card - SOUND BLASTER 16Monitor – Standard VGAPrinter - EPSON LQ-300K or EPSON LQ-1600KOS - Windows XP or Windows 7(32/64bit)3. Installation CD Content1)MTSW Installation Program2)MTSW User Manual3)MTRAM Installation Program. The software is used to upgrade MTR orMTGW software and remote program MTR parameters.4. MTSW Setup1)Insert MTSW installation CD into CDROM. If CD can not auto run, doubleclick the menu.hta file in CD root directory, the installation interface will be shown.2)Click [Install MTSW] to startup MTSW installation program; If an earlierversion of MTSW V1.22 or CAS6000 was previously installed, the systemauto upgrades the software and updates data (exemption: CAS6000v1.0receiver original data).3)Click [Next] button on the first setup interface.4)Select the installation directory and then click [Next] button;In Windows 7, you can also right click the Setup.exe in the \MTSW directory, and click [Run as administrator] to install the MTSW manually.5)Select MTSW interface language and then click [Next] button. There are 3language versions, Simplified Chinese, Traditional Chinese and English.Please select the language compatible with OS to ensure the software could be shown normally;6)If the options before selected are right, click [install] button to install MTSWsoftware;7)After the software is successfully installed, the finish interface will be shown,click finish button to complete the installation. If the Sentinel System Key driver was not installed, the installation starts the installation of the driver automatically;In Windows 7, you can also click InstRainbowKey.exe in the directory\MTSW\RainBowkey to starts the installation manually.8)Return to installation interface. If you have the MT system, you may selectMTRAM installation.In Windows 7, you can also right click the MTRAM.exe in the \MTRAMdirectory, and click [Run as administrator] to install the MTRAM manually.。
