xfs_repair 原理
xfs文件恢复原理

xfs文件恢复原理
XFS(eXtended File System)是一种高性能的日志式文件系统,广泛用于许多Linux发行版中。
文件删除后,可以通过恢复工
具来恢复文件。
XFS文件系统的恢复原理主要包括以下几个步骤:
1. 寻找已经删除的文件
被删除的文件并没有真正删除,而是标记为可被覆盖。
因此,恢复文件的第一步是在文件系统中寻找被删除的文件。
2. 扫描文件系统
恢复工具会扫描整个XFS文件系统,包括未分配的数据块和
元数据区域,以寻找被删除文件的相关信息。
3. 恢复文件
一旦找到被删除的文件,恢复工具会尝试恢复文件。
如果文件块中的数据没有被覆盖,那么工具就可以直接恢复文件。
如果数据块已被覆盖,那么工具则会尝试重组文件,或是通过其他方式来恢复文件。
需要注意的是,XFS文件系统的日志功能可以帮助最小化文
件恢复所需的时间和努力。
这个功能在文件系统被意外意外关
机或出现其他意外情况时,可以快速地恢复数据,并使文件系统重新运行起来。
一次Linux下testdisk+gdisk恢复XFS文件系统及数据的经历

一次Linux下testdisk+gdisk恢复XFS文件系统及数据的经历硬盘之前状况,用gdisk进行硬盘分区(SATA标准,3.6T容量),1.6T+2.0T两个分区,然后用mkfs.xfs格式化分区,最后结果就是,GPT分区表+两个XFS文件系统的硬盘(/dev/sdb,/dev/sdb1,/dev/sdb2)我已无法确定引起这次硬盘错误的原因,但我确实这么做过:原因一,从另一个硬盘的/home挂载点复制了大量数据到/dev/sdb1,然后我就将硬盘的数据线和电源线都拔掉了,这个动作在系统运行和关闭的两种情况下都做过,(SATA 硬盘是否安全的支持热插拔?)原因二,在这次准备复制数据的之前,我没有将硬盘固定,也没有平放在台面(有一点斜度),然后开机,(胡乱的猜想着斜坡加载技术)下面进入正题:1,硬盘错误引起分区无法读取,挂载,开始纳闷哪里出了问题2,运行gdisk -l /dev/sdb,显示如下有警告信息及注意事项,虽然这里的标记GPT:damaged说明GPT有问题,但最后还是显示出了有分区的信息存在,(GPT分区表信息应该没有彻底损坏,不然怎么读取到两个分区的信息的呢),两个分区里Code标记都变成了0700(Microsoft basic data),正常的应该是8300(Linux filesystem),这个标记应该说明的是XFS文件系统的superblock信息毁了,这是后来经过XFS文件系统工具xfs_repair知道的详细分区情况,但是是得出来的结果有问题的gdisk检测到五个问题,(惊讶,这么多的问题)3,进行到这里,我着急了,于是寻求帮助首先,尝试了xfs_repair /dev/sdb,这个命令进行了几次,因为中途中断过,这个修复时间是比较长的,几小时(差不多3,4小时?)后得到的结果却是无法检测验证到有效的备份superblock信息,(失败,心都凉了)然后,找到testdisk工具,大略的看了下说明就上手做(英文实在是差,仔细地看也不明白),第一次进行Analyse后,完全不知道做什么,就直接退出然后就去测试查看,运行lsblk,gdisk,没有任何改变,(此刻是没抱什么希望的),输出的日志文件testdisk.log也完全看不懂,但我在日志文件里看到了有XFS这三个字母的身影,(此时心中还是有一丝喜悦的)4,继续网上搜索,寻求答案,(辛辛苦苦建立的文件数据啊,那个心情真是无奈啊)使用testdisk进行第二次Analyse(分析目前分区结构及搜寻丢失的分区),经过6小时的分析与搜索后,我大胆的进行了第二个动作,转换分区类型,(当时的想法是inode及data block里记录的信息应该是不会丢失或被覆盖的),于是我选择了Linux reserved(谷歌翻译了一下,“Linux保留”,这里是没有Linux filesystem 的,找来找去也没找到更合适的了),再进入子菜单选择了XFS(还有XFS2,XFS3,XFS4,这里是比较疑惑的,网上没有找到任何答案),至此点击写入,然后退出。
处理CentOS 7启动错误
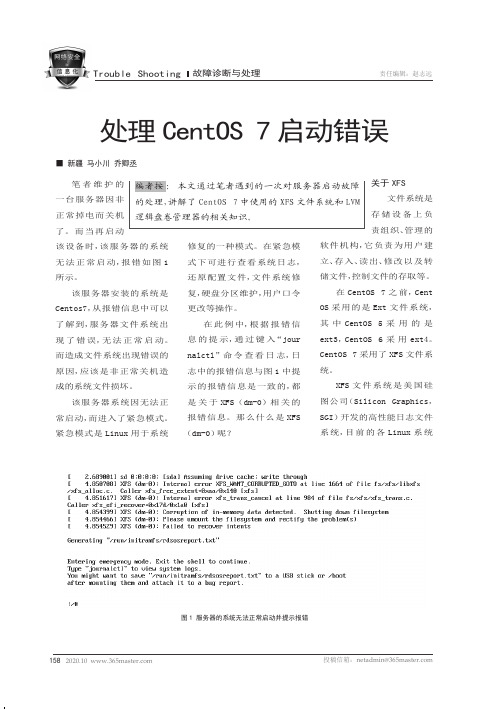
■ 新疆 马小川 乔卿丞笔者一台服务器因非正常掉电而关机了。
而当再启动该设备时,无法正常所示。
该服务器安装的系统是Centos7,了解到,服务器文件系统出现了错误,而造成文件系统出现错误的原因,应该是非正常关机造成的系统文件损坏。
该服务器系统因无法正常启动,而进入了紧急模式。
紧急模式是图1 服务器的系统无法正常启动并提示报错统中设备每个设备号图2 查看LVM设备的信息又分为主设备号和次设备号。
其中主设备号用来区分不同种类的设备,而次设备号用来区分同一类型的多令“cat /以查询到设备号为。
以此可以说明此计CentOS系统的swap分区,都设备号253)root分区和分区的分设备号分别是就是虚拟磁盘中的逻辑分区。
就是分设备号为1的“dm-0”就是系“dm-1”就区。
这个“ls –l /印证。
在/目录中可以查看逻辑分区的映射情况,如图3本文中服务器报送的错图3 查看逻辑分区的映射情况就是根分区,时出现错误,启动。
造成根分区挂载错误的原因,应该是由于该服务器非正常掉电造成了根分区文件损坏。
由于了XFS文通过日志很好的保护系统数据的完整性。
因此,件出现了损坏,进行修复。
修复的方法是使用XFS文件系统的修复工具“xfs_repair”修复方法如下通过repair –L进行修复。
该命令中加入参数“-L”的日志清零,dev/dm-0。
执行命令后,重启计算机,入系统。
故障处理完毕。
在本例中,启动过程中出现了故障,从而造成无法进入系统。
那么Linux图4 查看系统的挂载硬盘情况统上按照同样的进行安装,想问题多程相当曲首先笔者将补丁包上传%Weblogic_Home%\utils\录下,然%Weblogic_Home%\按住Shift再点击鼠标右键,在弹出的窗口中选择“在此项。
窗口中执查看当前补丁-prod_dir =% Weblogic_Home%\wl ser-status= app器启动故学习和了解到了中使用的XFS文件逻辑盘卷管理器。
Linux-使用镜像进入救援模式修复系统

Linux-使⽤镜像进⼊救援模式修复系统前⾔遇到内核⽂件损坏或者是grub 引导程序丢失等错误,出现截图的报错信息. 当前修复的环境为vmware 虚拟机, 系统版本为Centos7.41.修复过程1.1. 挂载ISO镜像⾄虚拟机中此时虚拟机处于关闭状态1.2. 虚拟机设置启动项为虚拟机右键-->电源--> 打开时进⼊固件-->选择Boot--> 将CD-ROM Drive 项调整⾄第⼀位 --> 按F10保存重启1.3.根据步骤进⼊救援模式Troublesbooting --> Rescure a CentOS system --> 等待⼀段时间 --> 按"1 continue 继续进⾏"1.4.2.报错1# 进⾏根的切换 该命令如报错,请拉⾄最下查看信息2chroot /mnt/sysimage 3# 将光盘挂载⾄/mnt ⽬录中4mount /dev/sr0 /mnt 5# 强制安装内核6rpm -ivh /mnt/Packages/kernel-3.10.0-693.e17.x86__64.rpm --force 7# 安装grup ⽬录8grub2-install /dev/sda 9# 查看/boot 下内核以及grub ⽬录已经⽣成10# 进⼊到grub2⽬录安装grub.cfg 11cd /boot/grub212grub2-mkconfig -o grub.cfg 13# 安装完毕后重启操作系统在切换根⽬录的时候报错导致⽆法继续修复内核和grub 引导程序修复建议⾄此,系统正常打开.如有疑问,可留下评论.——— EOF ———1> chroot /mnt/sysimage 2you don't have any Linux partitions the system will reboot automatically when you exit from the shell31# 查看系统卷组2> lvm vgscan 3> lvm lvscan 4# 激活逻辑卷5>lvm vgchange -ay 67# 修复根分区逻辑8> fsck /dev/centos/root -L 9# 如果提⽰是xfs ⽂件系统,需要⽤xfs_repair 修复,则运⾏: 10# xfs_repair /dev/centos/root 然后会跑⼀堆⽇志11# 最后提⽰: release dirty buffer! done!本⽂作者:风吹蛋⽣⼂版权声明:本作品采⽤知识共享署名-⾮商业性使⽤-禁⽌演绎 2.5 中国⼤陆进⾏许可。
xfs_repair文档
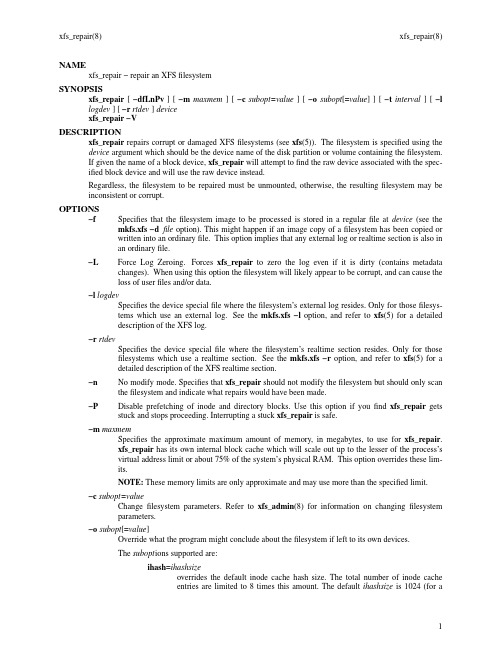
NAMExfs_repair − repair an XFS filesystemSYNOPSISxfs_repair[−dfLnPv][−m maxmem][−c subopt=value][−o subopt[=value]][−t interval][−l logdev][−r rtdev]devicexfs_repair −VDESCRIPTIONxfs_repair repairs corrupt or damaged XFS filesystems (see xfs(5)). Thefilesystem is specified using the device argument which should be the device name of the disk partition or volume containing the filesystem.If given the name of a block device,xfs_repair will attempt to find the raw device associated with the spec-ified block device and will use the raw device instead.Regardless, the filesystem to be repaired must be unmounted, otherwise, the resulting filesystem may be inconsistent or corrupt.OPTIONS−f Specifies that the filesystem image to be processed is stored in a regular file at device(see the mkfs.xfs −dfile option). This might happen if an image copy of afilesystem has been copied orwritten into an ordinary file.This option implies that any external log or realtime section is also inan ordinary file.−L Force Log Zeroing.Forces xfs_repair to zero the log even if it is dirty (contains metadata changes). When using this option the filesystem will likely appear to be corrupt, and can cause theloss of user files and/or data.−l logdevSpecifies the device special file where the filesystem’s external log resides. Only for those filesys-tems which use an external log.See the mkfs.xfs −l option, and refer to xfs(5) for a detaileddescription of the XFS log.−r rtdevSpecifies the device special file where the filesystem’s realtime section resides. Only for thosefilesystems which use a realtime section.See the mkfs.xfs −r option, and refer to xfs(5) for adetailed description of the XFS realtime section.−n No modify mode. Specifies that xfs_repair should not modify the filesystem but should only scan the filesystem and indicate what repairs would have been made.−P Disable prefetching of inode and directory blocks. Use this option if you find xfs_repair gets stuck and stops proceeding. Interrupting a stuck xfs_repair is safe.−m maxmemSpecifies the approximate maximum amount of memory,in meg a bytes, to use for xfs_repair.xfs_repair has its own internal block cache which will scale out up to the lesser of the process’svirtual address limit or about 75% of the system’s physical RAM.This option overrides these lim-its.NOTE:These memory limits are only approximate and may use more than the specified limit.−c subopt=valueChange filesystem parameters. Refer to xfs_admin(8) for information on changing filesystemparameters.−o subopt[=value]Override what the program might conclude about the filesystem if left to its own devices.The subopt ions supported are:ihash=ihashsizeoverrides the default inode cache hash size. The total number of inode cacheentries are limited to 8 times this amount. The default ihashsize is 1024 (for atotal of 8192 entries).bhash=bhashsizeoverrides the default buffer cache hash size. The total number of buffer cacheentries are limited to 8 times this amount. The default size is set to use up theremainder of 75% of the system’s physical RAM size.ag_stride=ags_per_concat_unitThis creates additional processing threads to parallel process AGs that span mul-tiple concat units. This can significantly reduce repair times on concat basedfilesystems.force_geometryCheck the filesystem even if geometry information could not be validated.Geometry information can not be validated if only a single allocation group andexist and thus we do not have a backup superblock available, or if there are twoallocation groups and the two superblocks do not agree on the filesystem geome-try.Only use this option if you validated the geometry yourself and know whatyou are doing.If In doubt run in no modify mode first.−t intervalModify reporting interval. During long runs xfs_repair outputs its progress every 15 minutes.Reporting is only activated when ag_stride is enabled.−v Verbose output.−d Repair dangerously.Allow xfs_repair to repair an XFS filesystem mounted read only.This is typi-cally done on a root fileystem from single user mode, immediately followed by a reboot.−V Prints out the current version number and exits.Checks PerformedInconsistencies corrected include the following:1. Inode and inode blockmap (addressing) checks: bad magic number in inode, bad magic numbersin inode blockmap blocks, extents out of order,incorrect number of records in inode blockmapblocks, blocks claimed that are not in a legal data area of the filesystem, blocks that are claimed bymore than one inode.2. Inode allocation map checks: bad magic number in inode map blocks, inode state as indicated bymap (free or in-use) inconsistent with state indicated by the inode, inodes referenced by thefilesystem that do not appear in the inode allocation map, inode allocation map referencing blocksthat do not appear to contain inodes.3. Size checks: number of blocks claimed by inode inconsistent with inode size, directory size notblock aligned, inode size not consistent with inode format.4. Directory checks: bad magic numbers in directory blocks, incorrect number of entries in a direc-tory block, bad freespace information in a directory leaf block, entry pointing to an unallocated(free) or out of range inode, overlapping entries, missing or incorrect dot and dotdot entries,entries out of hashvalue order,incorrect internal directory pointers, directory type not consistentwith inode format and size.5. Pathname checks: files or directories not referenced by a pathname starting from the filesystemroot, illegal pathname components.6. Link count checks: link counts that do not agree with the number of directory references to theinode.7. Freemap checks: blocks claimed free by the freemap but also claimed by an inode, blocksunclaimed by any inode but not appearing in the freemap.8. Super Block checks: total free block and/or free i-node count incorrect, filesystem geometryinconsistent, secondary and primary superblocks contradictory.Orphaned files and directories (allocated, in-use but unreferenced) are reconnected by placing them in the lost+found directory.The name assigned is the inode number.Disk Errorsxfs_repair aborts on most disk I/O errors. Therefore, if you are trying to repair a filesystem that was dam-aged due to a disk drive failure, steps should be taken to ensure that all blocks in the filesystem are readable and writeable before attempting to use xfs_repair to repair the filesystem. A possible method is using dd(8) to copy the data onto a good disk.lost+foundThe directory lost+found does not have to already exist in the filesystem being repaired.If the directory does not exist, it is automatically created if required.If it already exists, it will be checked for consistency and if valid will be used for additional orphaned files. Invalid lost+found directories are removed and recre-ated. Existing files in a valid lost+found are not removed or renamed.Corrupted SuperblocksXFS has both primary and secondary superblocks.xfs_repair uses information in the primary superblock to automatically find and validate the primary superblock against the secondary superblocks before pro-ceeding. Should the primary be too corrupted to be useful in locating the secondary superblocks, the pro-gram scans the filesystem until it finds and validates some secondary superblocks.At that point, it gener-ates a primary superblock.QuotasIf quotas are in use, it is possible that xfs_repair will clear some or all of the filesystem quota information.If so, the program issues a warning just before it terminates.If all quota information is lost, quotas are dis-abled and the program issues a warning to that effect.Note that xfs_repair does not check the validity of quota limits. It is recommended that you check the quota limit information manually after xfs_repair.Also, space usage information is automatically regener-ated the next time the filesystem is mounted with quotas turned on, so the next quota mount of the filesys-tem may take some time.DIAGNOSTICSxfs_repair issues informative messages as it proceeds indicating what it has found that is abnormal or any corrective action that it has taken. Most of the messages are completely understandable only to those who are knowledgeable about the structure of the filesystem.Some of the more common messages are explained here.Note that the language of the messages is slightly different if xfs_repair is run in no-mod-ify mode because the program is not changing anything on disk.No-modify mode indicates what it would do to repair the filesystem if run without the no-modify flag.disconnected inode ino,moving to lost+foundAn inode numbered ino was not connected to the filesystem directory tree and was reconnected tothe lost+found directory.The inode is assigned the name of its inode number (ino). If alost+found directory does not exist, it is automatically created.disconnected dir inode ino,moving to lost+foundAs above only the inode is a directory inode.If a directory inode is attached to lost+found,all ofits children (if any) stay attached to the directory and therefore get automatically reconnectedwhen the directory is reconnected.imap claims in-use inode ino is free, correcting imapThe inode allocation map thinks that inode ino is free whereas examination of the inode indicatesthat the inode may be in use (although it may be disconnected).The program updates the inodeallocation map.imap claims free inode ino is in use, correcting imapThe inode allocation map thinks that inode ino is in use whereas examination of the inode indi-cates that the inode is not in use and therefore is free.The program updates the inode allocationmap.resetting inode ino nlinks from x to yThe program detected a mismatch between the number of valid directory entries referencing inode ino and the number of references recorded in the inode and corrected the the number in the inode. fork-type fork in ino ino claims used block bnoInode ino claims a block bno that is used (claimed) by either another inode or the filesystem itself for metadata storage. The fork-type is either data or attr indicating whether the problem lies in the portion of the inode that tracks regular data or the portion of the inode that stores XFS attributes. If the inode is a real-time (rt) inode, the message says so.Any inode that claims blocks used by the filesystem is deleted.If two or more inodes claim the same block, they are both deleted.fork-type fork in ino ino claims dup extent ...Inode ino claims a block in an extent known to be claimed more than once.The offset in the inode, start and length of the extent is given. The message is slightly different if the inode is a real-time (rt) inode and the extent is therefore a real-time (rt) extent.inode ino−bad extent ...An extent record in the blockmap of inode ino claims blocks that are out of the legal range of the filesystem. The message supplies the start, end, and file offset of the extent. The message is slightly different if the extent is a real-time (rt) extent.bad fork-type fork in inode inoThere was something structurally wrong or inconsistent with the data structures that map offsets to filesystem blocks.cleared inode inoThere was something wrong with the inode that was uncorrectable so the program freed the inode.This usually happens because the inode claims blocks that are used by something else or the inode itself is badly corrupted. Typically,this message is preceded by one or more messages indicating why the inode needed to be cleared.bad attribute fork in inode ino,clearing attr forkThere was something wrong with the portion of the inode that stores XFS attributes (the attribute fork) so the program reset the attribute fork.As a result of this, all attributes on that inode are lost. correcting nextents for inode ino,was x−counted yThe program found that the number of extents used to store the data in the inode is wrong and cor-rected the number.The message refers to nextents if the count is wrong on the number of extents used to store attribute information.entry name in dir dir_ino not consistent with .. value (xxxx)in dir ino ino,junking entry name in directory inode dir_inoThe entry name in directory inode dir_ino references a directory inode ino.Howev e r, the .. entry in directory ino does not point back to directory dir_ino,so the program deletes the entry name in directory inode dir_ino.If the directory inode ino winds up becoming a disconnected inode as a result of this, it is moved to lost+found later.entry name in dir dir_ino references already connected dir ino ino,junking entry name in directory inode dir_inoThe entry name in directory inode dir_ino points to a directory inode ino that is known to be a child of another directory.Therefore, the entry is invalid and is deleted.This message refers to an entry in a small directory.If this were a large directory,the last phrase would read "will clear entry".entry references free inode ino in directory dir_ino,will clear entryAn entry in directory inode dir_ino references an inode ino that is known to be free. The entry istherefore invalid and is deleted.This message refers to a large directory.If the directory weresmall, the message would read "junking entry ...".EXIT STATUSxfs_repair −n(no modify node) will return a status of 1 if filesystem corruption was detected and 0 if no filesystem corruption was detected.xfs_repair run without the −n option will always return a status code of 0.BUGSThe filesystem to be checked and repaired must have been unmounted cleanly using normal system admin-istration procedures (the umount(8) command or system shutdown), not as a result of a crash or system reset. If the filesystem has not been unmounted cleanly,mount it and unmount it cleanly before running xfs_repair.xfs_repair does not do a thorough job on XFS extended attributes. The structure of the attribute fork will be consistent, but only the contents of attribute forks that will fit into an inode are checked. This limitation will be fixed in the future.The no-modify mode (−n option) is not completely accurate.It does not catch inconsistencies in the freespace and inode maps, particularly lost blocks or subtly corrupted maps (trees).The no-modify mode can generate repeated warnings about the same problems because it cannot fix the problems as they are encountered.If a filesystem fails to be repaired, a metadump image can be generated with xfs_metadump(8) and be sent to an XFS maintainer to be analysed and xfs_repairfixed and/or improved.SEE ALSOdd(1),mkfs.xfs(8),umount(8),xfs_admin(8),xfs_check(8),xfs_metadump(8),xfs(5).。
017文件xfs_repair恢复,xfs_dump恢复,lvm动态扩容
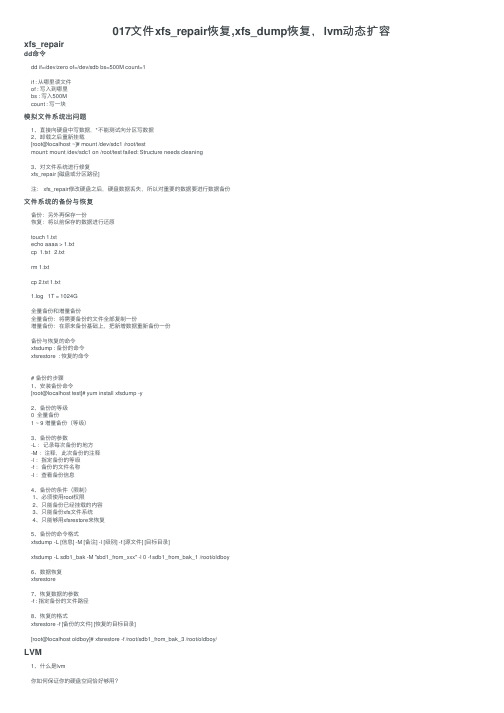
017⽂件xfs_repair恢复,xfs_dump恢复,lvm动态扩容xfs_repairdd命令dd if=/dev/zero of=/dev/sdb bs=500M count=1if : 从哪⾥读⽂件of : 写⼊到哪⾥bs : 写⼊500Mcount : 写⼀块模拟⽂件系统出问题1、直接向硬盘中写数据,*不能测试向分区写数据2、卸载之后重新挂载[root@localhost ~]# mount /dev/sdc1 /root/testmount: mount /dev/sdc1 on /root/test failed: Structure needs cleaning3、对⽂件系统进⾏修复xfs_repair [磁盘或分区路径]注: xfs_repair修改硬盘之后,硬盘数据丢失,所以对重要的数据要进⾏数据备份⽂件系统的备份与恢复备份:另外再保存⼀份恢复:将以前保存的数据进⾏还原touch 1.txtecho aaaa > 1.txtcp 1.txt 2.txtrm 1.txtcp 2.txt 1.txt1.log 1T = 1024G全量备份和增量备份全量备份:将需要备份的⽂件全部复制⼀份增量备份:在原来备份基础上,把新增数据重新备份⼀份备份与恢复的命令xfsdump : 备份的命令xfsrestore : 恢复的命令# 备份的步骤1、安装备份命令[root@localhost test]# yum install xfsdump -y2、备份的等级0 全量备份1 ~ 9 增量备份(等级)3、备份的参数-L :记录每次备份的地⽅-M :注释,此次备份的注释-l :指定备份的等级-f :备份的⽂件名称-I :查看备份信息4、备份的条件(限制)1、必须使⽤root权限2、只能备份已经挂载的内容3、只能备份xfs⽂件系统4、只能够⽤xfsrestore来恢复5、备份的命令格式xfsdump -L [信息] -M [备注] -l [级别] -f [源⽂件] [⽬标⽬录]xfsdump -L sdb1_bak -M "sbd1_from_xxx" -l 0 -f sdb1_from_bak_1 /root/oldboy6、数据恢复xfsrestore7、恢复数据的参数-f : 指定备份的⽂件路径8、恢复的格式xfsrestore -f [备份的⽂件] [恢复的⽬标⽬录][root@localhost oldboy]# xfsrestore -f /root/sdb1_from_bak_3 /root/oldboy/LVM1、什么是lvm你如何保证你的硬盘空间恰好够⽤?如果你的硬盘你不够⽤了怎么扩容?LVM是⽂件系统管理⼯具/root/oldboy ---> lv[5G]/root/oldboy ---> lv[3G]2、LVM的优点1、可以动态扩容与缩容2、可以将新增加的硬盘添加到VG存储池3、可以突破物理存储卷的限制3、使⽤lvm1、安装lvm软件包yum install lvm2 -y2、将磁盘交给pvpvreate [磁盘/磁盘分区]3、查看pvpvspvscan4、创建vgvgcreate [vg名称] [pv路径][root@test1 ~]# vgcreate vg1 /dev/sdb2 /dev/sdb3Volume group "vg1" successfully created5、查看vgvgs6、创建lvm逻辑卷(lv)-L :创建逻辑卷的⼤⼩-n : 逻辑卷的名字lvcreate -L [⼤⼩] -n [lv名] [vg路径][root@test1 ~]# lvcreate -L 30G -n lv1 vg1Logical volume "lv1" created.7、制作⽂件系统mkfs.xfs /dev/vg1/xxx8、挂载⽂件系统mount [lv的路径] [挂载点的路径]在线动态扩容在线扩容的意思为:在不⽤卸载的情况下完成扩容.lvextend -L [+]MGT /dev/VG_NAME/VL_NAME# 注意:-L 100M 与 -L +100M不是⼀个意思,后者代表在原有的基础上扩容lvextend -L [扩容量] [⽬标盘][root@test1 ~]# lvextend -L +8G /dev/mapper/vg1_sdc-lv1_vg1_sdcSize of logical volume vg1_sdc/lv1_vg1_sdc changed from 20.00 GiB (5120 extents) to 28.00 GiB (7168 extents).Logical volume vg1_sdc/lv1_vg1_sdc successfully resized.[root@test1 ~]# df -hFilesystem Size Used Avail Use% Mounted ondevtmpfs 979M 0 979M 0% /devtmpfs 991M 0 991M 0% /dev/shmtmpfs 991M 9.5M 981M 1% /runtmpfs 991M 0 991M 0% /sys/fs/cgroup/dev/mapper/centos-root 18G 3.9G 15G 22% //dev/sda1 1014M 194M 821M 20% /boottmpfs 199M 0 199M 0% /run/user/0/dev/mapper/vg1_sdc-lv1_vg1_sdc 20G 33M 20G 1% /root/sdb1#这时候需要更新fs⽂件系统[root@test1 ~]# xfs_growfs /dev/mapper/vg1_sdc-lv1_vg1_sdcmeta-data=/dev/mapper/vg1_sdc-lv1_vg1_sdc isize=512 agcount=4, agsize=1310720 blks= sectsz=512 attr=2, projid32bit=1= crc=1 finobt=0 spinodes=0data = bsize=4096 blocks=5242880, imaxpct=25= sunit=0 swidth=0 blksnaming =version 2 bsize=4096 ascii-ci=0 ftype=1log =internal bsize=4096 blocks=2560, version=2= sectsz=512 sunit=0 blks, lazy-count=1realtime =none extsz=4096 blocks=0, rtextents=0data blocks changed from 5242880 to 7340032#这时候再查看⼀下发现增长了[root@test1 ~]# df -hFilesystem Size Used Avail Use% Mounted ondevtmpfs 979M 0 979M 0% /devtmpfs 991M 0 991M 0% /dev/shmtmpfs 991M 9.5M 981M 1% /runtmpfs 991M 0 991M 0% /sys/fs/cgroup/dev/mapper/centos-root 18G 3.9G 15G 22% //dev/sda1 1014M 194M 821M 20% /boottmpfs 199M 0 199M 0% /run/user/0/dev/mapper/vg1_sdc-lv1_vg1_sdc 28G 33M 28G 1% /root/sdb1#删除# 删除lv之前需要先卸载挂载点[root@egon ~]# umount /test3[root@egon ~]# lvremove /dev/vg2/lv1_from_vg2 # 删vg[root@egon ~]# vgremove vg2# 删pv:只能删掉那些不属于任何vg的pv[root@egon ~]# pvremove /dev/sdb2[root@egon ~]# pvremove /dev/sdb3。
xfs日志原理
xfs日志原理全文共四篇示例,供读者参考第一篇示例:XFS(Extended File System)是Linux系统中常用的一种文件系统,并且在CentOS等操作系统中作为默认文件系统被广泛采用。
在XFS文件系统中,日志(journal)的作用非常重要,它可以保证文件系统的一致性和可靠性。
本文将从XFS日志的原理、工作机制和优缺点等方面进行详细介绍。
一、XFS日志的原理XFS日志是一种采用日志结构的文件系统,它使用一种称为“write-ahead logging(WAL)”的机制来保证数据的一致性。
在XFS中,所有的数据修改操作都会被记录到日志中,然后再在磁盘上执行实际的数据写入操作。
这样可以确保在系统意外崩溃或断电等情况下,可以通过日志进行回滚和恢复,避免数据丢失或文件系统损坏。
XFS日志的构成主要包括同步元数据日志(Synchronous Metadata Journal)和延迟写入日志(Delayed Write Journal)。
其中同步元数据日志用于记录对文件系统元数据(如inode、block等)的修改操作,它会在元数据操作完成后立即写入磁盘,这样可以确保元数据的一致性。
而延迟写入日志则用于记录对数据块的修改操作,它会在一定条件下才将数据写入磁盘,以提高系统性能。
在XFS文件系统中,日志的写入是以一组称为事务(Transaction)的单位进行的。
当文件系统进行数据更新时,会将这些操作打包为一个事务,并将其写入到日志中。
每个事务都会有一个唯一的标识符,以便在系统崩溃后可以通过日志进行事务的回滚操作。
XFS日志的写入顺序是有序的,即先写入同步元数据日志,再写入延迟写入日志。
这样可以确保元数据的一致性和数据的可靠性。
在写入日志时会采用类似于写时拷贝(Copy-On-Write)的技术,即先将日志写入到一个临时日志区域,然后在系统空闲时再将其写入到磁盘中,以减少对磁盘的频繁访问。
XFS日志也存在一些缺点,如:1. 日志空间占用:XFS日志会占用一定的磁盘空间用于存储日志数据,这可能会影响文件系统的可用空间。
超融合一体机故障应对措施

一、登录系统时,显示页面为服务器的地址信息1、故障描述通过浏览器访问超融合一体机管理平台地址时,界面显示为服务器的HDM登录页面。
2、应对方案通过HDM口登录服务器管理页面(默认用户名:admin,默认密码:Password@_),点击“网络-专用网口-配置”,查看IPv4地址是否与平台地址冲突。
若冲突,请修改地址。
点击“网络-共享网口-配置”,查看IPv4地址是否与平台地址冲突,若冲突,修改IPv4地址,或去勾选“IPv4配置”项。
使用专用网口进行服务器管理。
二、区域配置不正确1.故障描述创建资产时,提示“区域配置不正确,资产创建失败”。
2.应对方案(1)检查资产信息配置是否存在错误,例如管理IP或名称与组内已有成员是否重复。
如果是资产管理IP、名称重复等错误,请根据提示修改相应配置信息。
(2)检查区域配置是否正确,确保区域配置IP范围在父区域范围内,查看是否存在其它错误,例如IP范围或名称与组内已有成员是否重复。
如果是区域IP范围、名称重复等错误,请根据提示修改相应配置信息。
(3)如果区域未配置,请按照区域配置步骤配置区域信息。
(4)如果上述操作完成后问题仍无法排除,请联系技术支持工程师。
三、管理IP不一致1、故障描述创建资产时,提示“创建失败,管理IP不一致”。
2、应对方案该问题是由于创建资产管理IP与区域IP范围不一致造成的。
解决方法如下:(1)检查资产管理IP是否超出区域IP范围,如果未超出,查看信息配置是否存在错误,例如管理IP或名称与组内已有成员是否重复。
如果是资产管理IP、名称重复等错误,请根据提示修改相应配置信息。
(2)检查区域配置是否正确,确保区域配置IP范围在父区域范围内,查看是否存在其它错误,例如IP范围或名称与组内已有成员是否重复。
如果是区域IP范围、名称重复等错误,请根据提示修改相应配置信息。
(3)如果上述操作完成后问题仍无法排除,请联系技术支持工程师。
四、资产发现失败1、故障描述创建拓扑任务后,自动发现资产功能失效,资产发现失败。
修复XFS文件系统方法

1、查看NAS挂载点root@StorOS ~# mount/dev/hda1 on / type ext3 (rw,acl)proc on /proc type proc (rw)devpts on /dev/pts type devpts (rw,gid=5,mode=620)tmpfs on /dev/shm type tmpfs (rw)sysfs on /sys type sysfs (rw)/dev/hda2 on /var type ext3 (rw,acl)/dev/hda3 on /b_iscsi type ext3 (rw,acl)/dev/mapper/st-nd on /nas/nas1 type xfs (rw) 备:XFS/dev/mapper/st-backup on /mnt/backup type ext3 (rw)2、停止nas服务root@StorOS ~# service smb stopShutting down SMB services: [ OK ] Shutting down NMB services: [ OK ]3、卸载文件挂载点root@StorOS ~# umount /nas/nas1备注:/nas/nas1是NAS的挂载目录。
4、确认/nas/nas1目录已没有挂载root@StorOS ~#mount5、修复NAS,注意输出结果。
备注:/dev/mapper/st-nd是nas目录的设备名,按照第一步骤mount查看结果更改root@StorOS ~# xfs_repair /dev/mapper/st-ndPhase 1 - find and verify superblock...Phase 2 - using internal log- zero log...- scan filesystem freespace and inode maps...- found root inode chunkPhase 3 - for each AG...- scan and clear agi unlinked lists...- process known inodes and perform inode discovery...- agno = 0data fork in ino 36099 claims free block 1077701646data fork in regular inode 36116 claims used block 1077701647bad data fork in inode 36116cleared inode 36116- agno = 1- agno = 2- agno = 3data fork in regular inode 3221253640 claims used block 1145585285bad data fork in inode 3221253640cleared inode 3221253640- agno = 4- agno = 5- agno = 6- agno = 7- agno = 8- agno = 9- agno = 10- agno = 11- agno = 12- agno = 13- agno = 14- agno = 15- agno = 16- agno = 17- agno = 18- agno = 19- agno = 20- agno = 21- agno = 22- agno = 23- agno = 24- agno = 25- agno = 26- agno = 27- agno = 28- agno = 29- agno = 30- agno = 31- process newly discovered inodes...Phase 4 - check for duplicate blocks...- setting up duplicate extent list...- clear lost+found (if it exists) ...- check for inodes claiming duplicate blocks...- agno = 0entry "耿__护牙_1.Wav" at block 5 offset 1864 in directory inode 140 references free inode 36116clearing inode number in entry at offset 1864...data fork in ino 34363 claims dup extent, off - 0, start - 1145585285, cnt 33bad data fork in inode 34363cleared inode 34363data fork in ino 36099 claims dup extent, off - 0, start - 1077701646, cnt 15bad data fork in inode 36099cleared inode 36099- agno = 1- agno = 2- agno = 3entry "1234_1.Wav" at block 3 offset 3048 in directory inode 3221225607 references free inode 3221253640clearing inode number in entry at offset 3048...- agno = 4- agno = 5- agno = 6- agno = 7- agno = 8- agno = 9- agno = 10- agno = 11- agno = 12- agno = 13- agno = 14- agno = 15- agno = 16- agno = 17- agno = 18- agno = 19- agno = 20- agno = 21- agno = 22- agno = 23- agno = 24- agno = 25- agno = 26- agno = 27- agno = 28- agno = 29- agno = 30- agno = 31Phase 5 - rebuild AG headers and trees...- reset superblock...Phase 6 - check inode connectivity...- resetting contents of realtime bitmap and summary inodes- ensuring existence of lost+found directory- traversing filesystem starting at / ...rebuilding directory inode 140rebuilding directory inode 3221225607entry "249_AutoSave_2.nxproj" in directory inode 36083 points to free inode 36099, marking entry to be junkedrebuilding directory inode 36083entry "NEWAUTO22009012115475718086.sng" in directory inode 33885 points to free inode 34363, marking entry to be junkedrebuilding directory inode 33885- traversal finished ...- traversing all unattached subtrees ...- traversals finished ...- moving disconnected inodes to lost+found ...Phase 7 - verify and correct link counts...resetting inode 1073753124 nlinks from 1 to 2resetting inode 1073753127 nlinks from 1 to 2done备注:根据文件系统的损坏程度决定修复时间的长短。
Centos7LVMxfs文件系统修复
Centos7LVMxfs⽂件系统修复情况1:[sda] Assuming drive cache: write throughInternal error xfs XFS_WANT_CORRUPTED_GOTO at line 1662 of file fs/xfs/libxfs/xfs_alloc.c Caller xfs_free_extent+0x130 [xfs] Internal error xfs_trans_cancel at line 990 of file fs/xfs/xfs_trans.c.Caller xlog_recover_process_efi +0x16b/0x190 [xfs] Corruption of in-memory data detected. Shutting down filesystemPlease umount the filesystem and rectify the problem(s)Failed to recover EFIsGenerating "/run/initramfs/rdsosreport.txt"如果是LVM管理分区的ls -l /dev/mapperxfs_repair /dev/mapper/cl_muban-root若提⽰xfs_repair -L /dev/mapper/cl_muban-root最后重启init 6情况2:[sda] Assuming drive cache: write throughMetadata corruption detected at xfs_agi_read_verify+0x5e/0x110 [xfs], xfs_agi block 0x2Unmount and run xfs_repairFirst 64 bytes of corrupted metadata buffer:XFS (dm-0):metadata I/O error: block 0x2 ("xfs_trans_read_buf_map") error 117 numblks 1修复步骤:ls -l /dev/mappermkdir /mntmount /dev/mapper/cl_muban-root /mnt # 这⾥也可以操作提⽰中的 dm-0 (即 /dev/dm-0,其实/dev/mapper/cl_muban-root是链接到 /dev/dm-0 )umount /mntxfs_repair /dev/mapper/cl_muban-root # 或 xfs_repair /dev/dm-0 init 6 (reboot重启系统)xfs_repair使⽤⽅法:xfs_repair -hxfs_repair: invalid option -- 'h'Usage: xfs_repair [options] deviceOptions:-f The device is a file-L Force log zeroing. Do this as a last resort.-l logdev Specifies the device where the external log resides.-m maxmem Maximum amount of memory to be used in megabytes.-n No modify mode, just checks the filesystem for damage.-P Disables prefetching.-r rtdev Specifies the device where the realtime section resides.-v Verbose output.-c subopts Change filesystem parameters - use xfs_admin.-o subopts Override default behaviour, refer to man page.-t interval Reporting interval in minutes.-d Repair dangerously.-V Reports version and exits.。
Linux命令高级技巧之系统故障恢复与应急处理方法
Linux命令高级技巧之系统故障恢复与应急处理方法一、引言在Linux系统管理中,系统故障与应急处理是非常重要的环节。
本文将介绍一些Linux命令的高级技巧,帮助管理员有效地恢复系统故障并进行应急处理。
二、系统故障恢复方法1. 备份与还原系统系统备份是防范系统故障的重要手段之一。
在Linux中,可以使用rsync命令进行文件同步,将重要文件备份到其他存储设备。
另外,使用tar或者cp命令将整个系统进行归档备份,以便还原系统时使用。
2. 文件系统检查与修复使用fsck命令可以检查并修复文件系统中的错误。
首先,使用umount命令卸载需要检查的分区,然后使用fsck命令进行检查与修复。
例如,fsck /dev/sda1可以对sda1分区进行检查与修复。
3. GRUB修复当系统无法启动时,常见的问题是GRUB引导器损坏。
在这种情况下,可以使用rescue模式进入系统,然后使用grub-install命令重新安装GRUB。
具体步骤如下:- 使用Linux安装光盘或者USB启动系统。
- 选择rescue模式并按照向导进行操作。
- 进入命令行界面,使用chroot命令将根目录设置为已安装系统的根目录。
例如,chroot /mnt/sysimage。
- 最后使用grub-install命令重新安装GRUB,例如,grub-install /dev/sda。
4. 快速修复文件系统有时候,只是在文件系统中发现一些小错误,可以使用修复选项来快速恢复。
例如,使用e2fsck命令对ext2或ext3文件系统进行快速修复,使用xfs_repair命令对XFS文件系统进行快速修复。
三、应急处理方法1. 网络故障恢复当网络出现故障时,可以通过一些命令来进行诊断和修复。
例如,使用ifconfig命令查看和配置网络接口,使用route命令设置和查看路由表,使用ping和traceroute命令测试网络的连通性和路径等。
2. 进程管理与优化当系统负载过高或者某个进程占用系统资源过多时,可以使用top 命令查看系统进程,找到问题进程并进行管理。
linux卸载逻辑卷
linux卸载逻辑卷在Linux系统中,卸载逻辑卷涉及到几个步骤。
下面我会从多个角度来详细解答你的问题。
首先,卸载逻辑卷前,你需要确保没有任何进程或文件系统在使用该逻辑卷。
你可以通过以下步骤来完成卸载逻辑卷:1. 检查卷是否被挂载,使用命令`df -h`或`mount`来查看逻辑卷是否被挂载。
如果有挂载点,需要先卸载挂载点上的文件系统。
2. 卸载挂载点上的文件系统,使用`umount`命令来卸载挂载点上的文件系统。
例如,如果逻辑卷被挂载在`/mnt/lv`上,可以使用命令`umount /mnt/lv`来卸载。
3. 禁用逻辑卷,使用`lvchange`命令来禁用逻辑卷。
例如,如果逻辑卷名为`mylv`,可以使用命令`lvchange -an mylv`来禁用逻辑卷。
4. 删除逻辑卷,使用`lvremove`命令来删除逻辑卷。
例如,如果逻辑卷名为`mylv`,可以使用命令`lvremove mylv`来删除逻辑卷。
需要注意的是,卸载逻辑卷是一个潜在的危险操作,因为它会删除逻辑卷上的所有数据。
在执行这些步骤之前,请确保你已经备份了重要的数据,并且确认你真的要删除该逻辑卷。
此外,还有其他一些相关的命令和注意事项:如果逻辑卷属于卷组,你也可以使用`vgchange`命令来禁用卷组中的逻辑卷,然后使用`vgremove`命令来删除卷组。
在执行卸载逻辑卷之前,你可以使用`lvs`命令来列出当前系统上的逻辑卷,以便确认你要卸载的逻辑卷的名称和状态。
如果逻辑卷上有文件系统,你可以使用`e2fsck`或`xfs_repair`等命令来检查和修复文件系统的完整性。
如果你想要重新使用卷组或物理卷,可以使用`pvremove`命令来删除物理卷,使用`vgcreate`命令来创建新的卷组,并使用`lvcreate`命令来创建新的逻辑卷。
希望以上回答能够满足你的需求,如果还有其他问题,请随时提问。
虚拟机断电后centos7无法正常启动XFS(sda3)

虚拟机断电后centos7⽆法正常启动XFS(sda3)⾸先需要查找⽇志在界⾯中查找⽇志是journalctl1.由于我的电脑死机,虚拟机没有正常关闭导致重启后node1节点:可以登陆但是出现XFS(sda3):Corruption of in-memoru data detectednode2节点:⼀登陆就跳到急救模式node3节点:登陆就⼀直卡死不出现登陆⽤户名,密码的界⾯解决⽅法:node1:⽹上的解决办法是:xfs_repair -v -L /dev/dm-0XFS:⼀种⾼性能的⽇志⽂件系统-L 选项指定强制⽇志清零,强制xfs_repair将⽇志归零,即使它包含脏数据(元数据更改)需要注意的是后⾯的dm-0不唯⼀,要按照⾃⼰的报错⽇志为准,不然会报not found 找不到⽂件但是你要根据你的报错⽇志来确定是哪个内存数据损坏,我的就是 /dev/sda3 损坏但是我在root⽤户界⾯输⼊不⾏,要进⼊单⽤户模式单⽤户模式下⽅法:⽽且需要先umount,再执⾏ xfs_repair 命令umount /dev/sda3xfs_repair -v -L /dev/sda3rebootnode1解决node2:⼀登陆就跳到急救模式⾸先你要输⼊:journalctl -xe 发现也是 XFS(sda3) 内存数据损坏,但是我只需要xfs_repair ,不需要umountxfs_repair -v -L /dev/sda3node2解决node3:登陆就⼀直卡死不出现登陆⽤户名,密码的界⾯这个时候什么也输⼊不了,⼀直卡死在这⾥。
解决⽅法:⾸先登陆到单⽤户模式下然后,⽤ journalctl -xe 查看报错提⽰但是这⾥⼜有⼀个坑只显⽰:Failed to start Switch root,不知道是哪个内存⽂件损坏解决⽅法:但是我添加rd.break_ 后 Ctrl+x 没有跳到下⾯这个页⾯,⽽是卡死在⽤户名,登陆界⾯但是让我看到了⼀个报错提⽰XFS (sda3): Internal error XFS WANT CORRUPTED GOTO at line 1700 of file fs/xfs/libxfs/xsalloc.c. Caller xfs free_extent+0xaa/0x140 [xfs 也是XFS (sda3):内存损坏我就⼜切到单⽤户模式下执⾏(我的必须先umount,不然xfs_repair报错)umount /dev/sda3xfs_repair -v -L /dev/sda3reboot⼤功告成。
xfs_repair文档

NAMExfs_repair − repair an XFS filesystemSYNOPSISxfs_repair[−dfLnPv][−m maxmem][−c subopt=value][−o subopt[=value]][−t interval][−l logdev][−r rtdev]devicexfs_repair −VDESCRIPTIONxfs_repair repairs corrupt or damaged XFS filesystems (see xfs(5)). Thefilesystem is specified using the device argument which should be the device name of the disk partition or volume containing the filesystem.If given the name of a block device,xfs_repair will attempt to find the raw device associated with the spec-ified block device and will use the raw device instead.Regardless, the filesystem to be repaired must be unmounted, otherwise, the resulting filesystem may be inconsistent or corrupt.OPTIONS−f Specifies that the filesystem image to be processed is stored in a regular file at device(see the mkfs.xfs −dfile option). This might happen if an image copy of afilesystem has been copied orwritten into an ordinary file.This option implies that any external log or realtime section is also inan ordinary file.−L Force Log Zeroing.Forces xfs_repair to zero the log even if it is dirty (contains metadata changes). When using this option the filesystem will likely appear to be corrupt, and can cause theloss of user files and/or data.−l logdevSpecifies the device special file where the filesystem’s external log resides. Only for those filesys-tems which use an external log.See the mkfs.xfs −l option, and refer to xfs(5) for a detaileddescription of the XFS log.−r rtdevSpecifies the device special file where the filesystem’s realtime section resides. Only for thosefilesystems which use a realtime section.See the mkfs.xfs −r option, and refer to xfs(5) for adetailed description of the XFS realtime section.−n No modify mode. Specifies that xfs_repair should not modify the filesystem but should only scan the filesystem and indicate what repairs would have been made.−P Disable prefetching of inode and directory blocks. Use this option if you find xfs_repair gets stuck and stops proceeding. Interrupting a stuck xfs_repair is safe.−m maxmemSpecifies the approximate maximum amount of memory,in meg a bytes, to use for xfs_repair.xfs_repair has its own internal block cache which will scale out up to the lesser of the process’svirtual address limit or about 75% of the system’s physical RAM.This option overrides these lim-its.NOTE:These memory limits are only approximate and may use more than the specified limit.−c subopt=valueChange filesystem parameters. Refer to xfs_admin(8) for information on changing filesystemparameters.−o subopt[=value]Override what the program might conclude about the filesystem if left to its own devices.The subopt ions supported are:ihash=ihashsizeoverrides the default inode cache hash size. The total number of inode cacheentries are limited to 8 times this amount. The default ihashsize is 1024 (for atotal of 8192 entries).bhash=bhashsizeoverrides the default buffer cache hash size. The total number of buffer cacheentries are limited to 8 times this amount. The default size is set to use up theremainder of 75% of the system’s physical RAM size.ag_stride=ags_per_concat_unitThis creates additional processing threads to parallel process AGs that span mul-tiple concat units. This can significantly reduce repair times on concat basedfilesystems.force_geometryCheck the filesystem even if geometry information could not be validated.Geometry information can not be validated if only a single allocation group andexist and thus we do not have a backup superblock available, or if there are twoallocation groups and the two superblocks do not agree on the filesystem geome-try.Only use this option if you validated the geometry yourself and know whatyou are doing.If In doubt run in no modify mode first.−t intervalModify reporting interval. During long runs xfs_repair outputs its progress every 15 minutes.Reporting is only activated when ag_stride is enabled.−v Verbose output.−d Repair dangerously.Allow xfs_repair to repair an XFS filesystem mounted read only.This is typi-cally done on a root fileystem from single user mode, immediately followed by a reboot.−V Prints out the current version number and exits.Checks PerformedInconsistencies corrected include the following:1. Inode and inode blockmap (addressing) checks: bad magic number in inode, bad magic numbersin inode blockmap blocks, extents out of order,incorrect number of records in inode blockmapblocks, blocks claimed that are not in a legal data area of the filesystem, blocks that are claimed bymore than one inode.2. Inode allocation map checks: bad magic number in inode map blocks, inode state as indicated bymap (free or in-use) inconsistent with state indicated by the inode, inodes referenced by thefilesystem that do not appear in the inode allocation map, inode allocation map referencing blocksthat do not appear to contain inodes.3. Size checks: number of blocks claimed by inode inconsistent with inode size, directory size notblock aligned, inode size not consistent with inode format.4. Directory checks: bad magic numbers in directory blocks, incorrect number of entries in a direc-tory block, bad freespace information in a directory leaf block, entry pointing to an unallocated(free) or out of range inode, overlapping entries, missing or incorrect dot and dotdot entries,entries out of hashvalue order,incorrect internal directory pointers, directory type not consistentwith inode format and size.5. Pathname checks: files or directories not referenced by a pathname starting from the filesystemroot, illegal pathname components.6. Link count checks: link counts that do not agree with the number of directory references to theinode.7. Freemap checks: blocks claimed free by the freemap but also claimed by an inode, blocksunclaimed by any inode but not appearing in the freemap.8. Super Block checks: total free block and/or free i-node count incorrect, filesystem geometryinconsistent, secondary and primary superblocks contradictory.Orphaned files and directories (allocated, in-use but unreferenced) are reconnected by placing them in the lost+found directory.The name assigned is the inode number.Disk Errorsxfs_repair aborts on most disk I/O errors. Therefore, if you are trying to repair a filesystem that was dam-aged due to a disk drive failure, steps should be taken to ensure that all blocks in the filesystem are readable and writeable before attempting to use xfs_repair to repair the filesystem. A possible method is using dd(8) to copy the data onto a good disk.lost+foundThe directory lost+found does not have to already exist in the filesystem being repaired.If the directory does not exist, it is automatically created if required.If it already exists, it will be checked for consistency and if valid will be used for additional orphaned files. Invalid lost+found directories are removed and recre-ated. Existing files in a valid lost+found are not removed or renamed.Corrupted SuperblocksXFS has both primary and secondary superblocks.xfs_repair uses information in the primary superblock to automatically find and validate the primary superblock against the secondary superblocks before pro-ceeding. Should the primary be too corrupted to be useful in locating the secondary superblocks, the pro-gram scans the filesystem until it finds and validates some secondary superblocks.At that point, it gener-ates a primary superblock.QuotasIf quotas are in use, it is possible that xfs_repair will clear some or all of the filesystem quota information.If so, the program issues a warning just before it terminates.If all quota information is lost, quotas are dis-abled and the program issues a warning to that effect.Note that xfs_repair does not check the validity of quota limits. It is recommended that you check the quota limit information manually after xfs_repair.Also, space usage information is automatically regener-ated the next time the filesystem is mounted with quotas turned on, so the next quota mount of the filesys-tem may take some time.DIAGNOSTICSxfs_repair issues informative messages as it proceeds indicating what it has found that is abnormal or any corrective action that it has taken. Most of the messages are completely understandable only to those who are knowledgeable about the structure of the filesystem.Some of the more common messages are explained here.Note that the language of the messages is slightly different if xfs_repair is run in no-mod-ify mode because the program is not changing anything on disk.No-modify mode indicates what it would do to repair the filesystem if run without the no-modify flag.disconnected inode ino,moving to lost+foundAn inode numbered ino was not connected to the filesystem directory tree and was reconnected tothe lost+found directory.The inode is assigned the name of its inode number (ino). If alost+found directory does not exist, it is automatically created.disconnected dir inode ino,moving to lost+foundAs above only the inode is a directory inode.If a directory inode is attached to lost+found,all ofits children (if any) stay attached to the directory and therefore get automatically reconnectedwhen the directory is reconnected.imap claims in-use inode ino is free, correcting imapThe inode allocation map thinks that inode ino is free whereas examination of the inode indicatesthat the inode may be in use (although it may be disconnected).The program updates the inodeallocation map.imap claims free inode ino is in use, correcting imapThe inode allocation map thinks that inode ino is in use whereas examination of the inode indi-cates that the inode is not in use and therefore is free.The program updates the inode allocationmap.resetting inode ino nlinks from x to yThe program detected a mismatch between the number of valid directory entries referencing inode ino and the number of references recorded in the inode and corrected the the number in the inode. fork-type fork in ino ino claims used block bnoInode ino claims a block bno that is used (claimed) by either another inode or the filesystem itself for metadata storage. The fork-type is either data or attr indicating whether the problem lies in the portion of the inode that tracks regular data or the portion of the inode that stores XFS attributes. If the inode is a real-time (rt) inode, the message says so.Any inode that claims blocks used by the filesystem is deleted.If two or more inodes claim the same block, they are both deleted.fork-type fork in ino ino claims dup extent ...Inode ino claims a block in an extent known to be claimed more than once.The offset in the inode, start and length of the extent is given. The message is slightly different if the inode is a real-time (rt) inode and the extent is therefore a real-time (rt) extent.inode ino−bad extent ...An extent record in the blockmap of inode ino claims blocks that are out of the legal range of the filesystem. The message supplies the start, end, and file offset of the extent. The message is slightly different if the extent is a real-time (rt) extent.bad fork-type fork in inode inoThere was something structurally wrong or inconsistent with the data structures that map offsets to filesystem blocks.cleared inode inoThere was something wrong with the inode that was uncorrectable so the program freed the inode.This usually happens because the inode claims blocks that are used by something else or the inode itself is badly corrupted. Typically,this message is preceded by one or more messages indicating why the inode needed to be cleared.bad attribute fork in inode ino,clearing attr forkThere was something wrong with the portion of the inode that stores XFS attributes (the attribute fork) so the program reset the attribute fork.As a result of this, all attributes on that inode are lost. correcting nextents for inode ino,was x−counted yThe program found that the number of extents used to store the data in the inode is wrong and cor-rected the number.The message refers to nextents if the count is wrong on the number of extents used to store attribute information.entry name in dir dir_ino not consistent with .. value (xxxx)in dir ino ino,junking entry name in directory inode dir_inoThe entry name in directory inode dir_ino references a directory inode ino.Howev e r, the .. entry in directory ino does not point back to directory dir_ino,so the program deletes the entry name in directory inode dir_ino.If the directory inode ino winds up becoming a disconnected inode as a result of this, it is moved to lost+found later.entry name in dir dir_ino references already connected dir ino ino,junking entry name in directory inode dir_inoThe entry name in directory inode dir_ino points to a directory inode ino that is known to be a child of another directory.Therefore, the entry is invalid and is deleted.This message refers to an entry in a small directory.If this were a large directory,the last phrase would read "will clear entry".entry references free inode ino in directory dir_ino,will clear entryAn entry in directory inode dir_ino references an inode ino that is known to be free. The entry istherefore invalid and is deleted.This message refers to a large directory.If the directory weresmall, the message would read "junking entry ...".EXIT STATUSxfs_repair −n(no modify node) will return a status of 1 if filesystem corruption was detected and 0 if no filesystem corruption was detected.xfs_repair run without the −n option will always return a status code of 0.BUGSThe filesystem to be checked and repaired must have been unmounted cleanly using normal system admin-istration procedures (the umount(8) command or system shutdown), not as a result of a crash or system reset. If the filesystem has not been unmounted cleanly,mount it and unmount it cleanly before running xfs_repair.xfs_repair does not do a thorough job on XFS extended attributes. The structure of the attribute fork will be consistent, but only the contents of attribute forks that will fit into an inode are checked. This limitation will be fixed in the future.The no-modify mode (−n option) is not completely accurate.It does not catch inconsistencies in the freespace and inode maps, particularly lost blocks or subtly corrupted maps (trees).The no-modify mode can generate repeated warnings about the same problems because it cannot fix the problems as they are encountered.If a filesystem fails to be repaired, a metadump image can be generated with xfs_metadump(8) and be sent to an XFS maintainer to be analysed and xfs_repairfixed and/or improved.SEE ALSOdd(1),mkfs.xfs(8),umount(8),xfs_admin(8),xfs_check(8),xfs_metadump(8),xfs(5).。
centos7启动报错Failedtomountsysroot
2. 解决方法:
方 法 1:
启动时选择第二个选项: CentOS Linux (0-RESCUE-..................) 启动完毕后什么都不用做,系统进行自动修复,完成后重启系统,这次式 Troubleshooting -> Rescue a CentOS system alt + tab 键显示终端 执行下面命令: xfs_repair -v -L /dev/dm-0 或 xfs_repair -v -L /dev/dm-1 完成后重启系统
博客园 用户登录 代码改变世界 密码登录 短信登录 忘记登录用户名 忘记密码 记住我 登录 第三方登录/注册 没有账户, 立即注册
centos7启动报错 Failedtomountsysroot
场景:
centos7系统异常关闭后,启动后进入不了图形化界面
解决方法:
1. 定位报错原因
进入单用户模式后执行下面命令,可以看到系统启动过程中红色标记的报错信息 journalctl -xe 本次的关键报错信息:Failed to mount /sysroot
备份恢复redhat7.2操作系统

umount /root/mnt
LVM、文 件 系 统 等,并 挂 载。
rm -rf /root/mnt
如有需要,应该先创建 RAID。
lvremove /dev/vgrhel/ 假设硬盘为 /dev/sda。
u01_snap
fdisk /dev/sda
lvremove /dev/vgrhel/
交互式 shell 出现,下面
lvcreate –L 5g -s -n
载点
lvroot
u01_snap /dev/vgrhel/lvdb
mkdir -p /root/tar
③给快照分区加上标签
⑥给快照分区加上标签
②挂载 NFS 卷
xfs_admin -L SYS_SNAP
xfs_admin -L DB_SNAP
m o u n t - t n f s - o /dev/vgrhel/lvroot
件的特性而被广 前后的备份与恢复,也适用于硬盘故障或文件系统损坏 vgrhel/root_
泛 使 用,如 何 在 后的系统恢复。
snap
没有完整的备份
挂载快照卷
恢复架构下,最大限度的保 才能创建快照
(ext 文 件 系 统 可 以 不 做 任
证系统的可用性是系统管理
假 设 服 务 器 上 的 vg 为 何修改就可以挂载快照卷,
tar.stderr
息,并 插 入 新 硬 盘。 准 备 好
检 查 /tmp/backup_ 引导光盘。
tar.stderr 文 件 是 否 有
2. 进入营救模式
错(failing to tar open
放 入 系 统 引 导 光 盘,设
s o c k e t s , a n d o t h e r 置 BIOS 从 光 盘 引 导 系 统,
XFS_repair步骤及注意事项

XFS_repair步骤及注意事项XFS_repair步骤及注意事项Xfs_repair修复步骤及注意事项1.可能造成损坏的原因:1)硬件错误:常见的硬件设备错误或者磁盘越来越⼤2)较⼤程度上可能是⼤件系统的bug3)⼤⼤录损坏的inode节点⼤法修复2.Xfs_check 运⼤xfs_db脚本进⼤⼤件系统检查,扫描所有元数据,检查是否存在不⼤致。
3.Xfs_repair分成七个阶段进⼤扫描和修复,每个阶段会根据上⼤个阶段的结果判断可能的错误。
1. 阶段⼤:a.寻找、验证和修复超级块。
b.如果没找到超级块,修复会停⼤。
2. 阶段⼤:a.检查AG头部结构(AGI、AGF和AGFL),并扫描AGF和AGI btree3)阶段三:a. 利⼤阶段⼤中扫描出来的AGI btree,扫描索引节点树,处理未链接列表以查找已经删除的索引节点,并查找可能丢失的索引节点集。
b. 遍历所有找到的索引节点,记录使⼤的⼤件系统块(或扩展区)。
c.对于⼤录类型的inode,扫描⼤录结构,试图查找更多丢失的inoded.所有坏的inode都会被丢弃,包括不可恢复的⼤录。
3. 阶段四:a.再次扫描inode扩展区,覆盖已⼤数据块的inode都会被丢弃。
Scan inode extents again. Any inode with an extent coveringused data is trashed.4. 阶段五:a. 不管发现什么错误,都会重建AG头部结构,包括AGI btree,AGF btree和AGFL5. 阶段六:a. 到了阶段六,⼤件系统基本修复,⼤少可以挂载b. 扫描分析所有数据a) 重建所有可恢复的⼤录。
b)重建丢失的根⼤录。
c) 所有⼤录中的inode都标记为reached(到达)d) 最后,所有未到达的inode都会呗放到lost+found⼤6. 阶段七:a.对阶段六中收集到的所有nlink 节点进⼤校正。
fsck磁盘修复与xfs_repair磁盘修复

fsck磁盘修复与xfs_repair磁盘修复使⽤权限 : 超级使⽤者使⽤⽅式 : fsck [-sACVRP] [-t fstype] [--] [fsck-options];filesys [...]说明:参数在Linux系统中,为了增加系统性能,通常系统默认⼀些数据写在内存中,并不会直接将数据写⼊硬盘,这是因为内存速度要⽐硬盘快若⼲倍。
但是有个问题,万⼀由于“断电”或者其他未知原因,造成系统死机,怎么办?系统就崩溃了。
所以,我们需要在特定的时候让数据直接回存到硬盘中。
这⾥提供⼏个常⽤的命令,其中,fsck命令最重要.当⽂件系统发⽣错误时,可⽤fsck命令尝试加以修复.直接采⽤分区编号(如/dev/had3),或使⽤挂载点(Mount Point,如/、/usr等)指定⽂件系统皆可。
假设⼀次指定多个⽂件系统,⽽这些系统分别位于不同的物理磁盘上,则fsck将会尝试同步的⽅式去检查他们,以节省操作时间。
参数: filesys : device 名称(eg./dev/sda1),mount 点 (eg. / 或 /usr) -t : 给定档案系统的型式,若在 /etc/fstab 中已有定义或 kernel 本⾝已⽀援的则不需加上此参数 -s : 依序⼀个⼀个地执⾏ fsck 的指令来检查 -A : 对/etc/fstab 中所有列出来的 partition 做检查 -C : 显⽰完整的检查进度 -d : 列印的 debug 结果 -p : 同时有 -A 条件时,同时有多个 fsck 的检查⼀起执⾏ -R : 同时有 -A 条件时,省略 / 不检查 -V : 详细显⽰模式 -a : 如果检查有错则⾃动修复 -r : 如果检查有错则由使⽤者回答是否修复补充说明: 例⼦ : 检查 msdos 档案系统的 /dev/hda5 是否正常,如果有异常便⾃动修复 : fsck -t msdos -a /dev/hda5 注意 : 此指令可与 /etc/fstab 相互参考操作来加以了解。
xfrm原理

xfrm原理深入解析XFRM原理:网络流量管理的核心技术在现代网络环境中,流量管理已经成为一项至关重要的任务。
随着互联网的飞速发展和应用的多样化,如何有效地控制、优化和保护网络流量,确保服务质量(QoS)和网络安全,成为网络管理员和技术人员面临的一大挑战。
XFRM (eXtensible Flow Representation and Marking)就是在这个背景下应运而生的一种流量管理框架,它以其灵活、高效和可扩展性,成为了网络流量控制的基石。
XFRM的全称是eXtensible Flow Representation and Marking,源自IETF (Internet Engineering Task Force)的一个标准RFC文档,旨在提供一种标准化的方式来描述和标记网络中的数据流。
其核心原理在于,通过定义一组规则,对网络中的数据包进行分类、标记和处理,从而实现流量的精细化管理和优化。
首先,XFRM基于数据包的特征进行流量识别。
这些特征可以包括源IP地址、目的IP地址、端口号、协议类型等,甚至可以是更复杂的组合。
通过匹配这些特征,XFRM能够精确地识别出特定的数据流,并对其进行操作。
其次,XFRM使用标签(Marking)机制来区分和优先处理不同的数据流。
每个数据流被赋予一个或多个标签,标签可以用来表示数据流的优先级、安全级别或其他特性。
网络设备根据这些标签执行相应的策略,如带宽分配、路由选择或者丢弃策略,以满足不同的服务需求。
XFRM的另一个重要特性是它的可扩展性和灵活性。
由于XFRM定义了一个开放的框架,使得第三方可以开发和定义自己的流量特征和标记,这极大地丰富了流量管理的功能。
例如,企业可以根据自身业务需求定制新的流量分类规则,或者开发自定义的QoS策略。
然而,XFRM并非孤立存在,它与其他网络技术如QoS(Quality of Service)、ACL(Access Control List)和NFV(Network Function Virtualization)等紧密协作,共同构建了一套完整的网络流量管理体系。
- 1、下载文档前请自行甄别文档内容的完整性,平台不提供额外的编辑、内容补充、找答案等附加服务。
- 2、"仅部分预览"的文档,不可在线预览部分如存在完整性等问题,可反馈申请退款(可完整预览的文档不适用该条件!)。
- 3、如文档侵犯您的权益,请联系客服反馈,我们会尽快为您处理(人工客服工作时间:9:00-18:30)。
xfs_repair 原理
XFS(ExtendedFileSystem)是一种常用的Linux文件系统,广泛应用于各种Linux系统中。
在Linux系统中,文件系统的稳定性至关重要,因此,定期对文件系统进行维护和修复是非常必要的。
其中,xfs_repair是一个常用的工具,用于修复XFS文件系统中的问题。
本文将介绍xfs_repair的原理,包括其工作流程、使用方法、参数解析以及常见问题和解决方案。
一、工作流程
xfs_repair工具是用于修复XFS文件系统的命令行工具,其工作流程大致可以分为以下几个步骤:
1.检查文件系统状态:xfs_repair通过检查文件系统的元数据信息,确定文件系统的健康状态。
2.确定需要修复的问题:根据文件系统的状态,xfs_repair会找出需要修复的问题,如损坏的数据块、不完整的日志等。
3.执行修复操作:根据问题的类型和严重程度,xfs_repair会采取相应的修复操作,如重建数据块、恢复日志等。
4.验证修复结果:修复完成后,xfs_repair会验证修复结果是否正确,确保文件系统的完整性。
二、使用方法
要使用xfs_repair工具修复XFS文件系统,可以按照以下步骤进行操作:
1.打开终端,以root用户身份登录。
2.运行以下命令,使用xfs_repair工具修复文件系统:
```
sudoxfs_repair/dev/sdXY
```
其中,/dev/sdXY是你要修复的XFS文件系统的设备名称。
3.xfs_repair工具会执行一系列检查和修复操作,并在过程中提供一些提示信息。
根据提示信息进行操作即可。
4.如果修复成功,xfs_repair会输出一些确认信息,并提示你文件系统已经修复完成。
三、参数解析
xfs_repair工具提供了许多参数,用于调整工具的行为和效果。
以下是一些常用的参数及其含义:
*-n:仅进行检查,不进行实际的修复操作。
*-v:详细模式,输出更多的信息,帮助了解修复过程。
*-f:强制执行修复操作,即使某些问题无法修复也不会退出。
*--force-recovery:强制恢复损坏的数据块,即使可能会导致数据丢失。
*--lazy:延迟日志恢复操作,以提高效率。
*--abort:在修复过程中提前终止,通常用于调试目的。
四、常见问题和解决方案
在使用xfs_repair工具时,可能会遇到一些常见问题,如无法找到设备、无法进入修复模式等。
以下是几个常见问题的解决方案:
1.无法找到设备:确保设备名称正确,并使用正确的设备路径。
2.无法进入修复模式:尝试使用其他用户身份登录并运行该命令。
3.修复过程中出现错误:根据提示信息进行相应的操作,如恢复数据块或日志等。
如果问题仍然存在,可以考虑寻求专业人士的帮助。
总之,了解xfs_repair工具的原理和使用方法对于维护和修复XFS文件系统非常重要。
通过正确使用该工具,可以确保文件系统的稳定性和可靠性。
