猫眼电子门铃MY-1操作说明
智能门铃WiFi视频通信门铃说明书
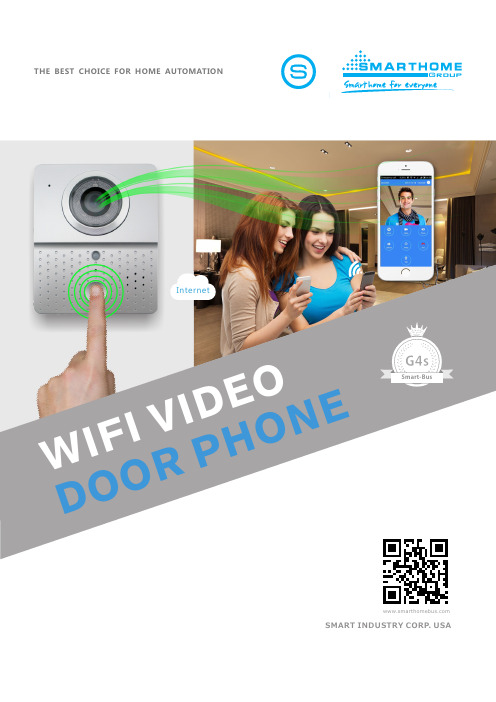
SMART INDUSTRY CORP. USAW I F I V I D E O DO O R P H O N E InternetSmart-BusThe visitors in the evening. AC/DC power supply , eliminate the troubles of frequenty replacing battery .2.4G wifi transmission systems , real-time video transmission , audio and video data transmission band up to 100M band at most ,Support Android OS and Iphone OS.One doorbell can connect with multi cell phone at the same time . which Make you and your family can monitor home outdoor surroundings from anywhere .Pass CE , RoHS certification.Introduction Of ProductWifi visual intercom doorbell is a doorbell working with wifi . it connects with home wifi or wired LAN to achieve two-way intercom between doorbell and cell phone .When visitors press the doorbell ,doorbell sounds and meanwhile camera will start to working sending real-time picture and call to smart phone . users who receive the call and see the video to check who is outside ,can intercom with visitors and remotely unlock door etc .Wifi visual intercom doorbell have alarm and remote control functions , make your home security has more powerful barrier .Advance infrared light design make users can distinguishProduct Size Packing SizeInternetHi BabyFeaturesMotion Sensor Sends Alert Even If Visitor Doesn't Press Button On-Demand AccessAccess Camera FeedFrom The AppSilent ModeTurn Off Home DoorbellChime From AppNight VisionSee Visitor At NightWithout Them NoticingNo Batteries Direct Power Means No Need To Worry AboutChanging BatteriesMultiple UsersSend Calls To MultipleUsers And Mobile DevicesRuggedOnly Smart Bell OperatesFrom - 40 To 150 Degrees fSecureAdvanced SecurityProtects Your Video FeedEasy InstallationReplace Your CurrentDoorbell With Smart Bell AndSync To AppInstallation Diagram1. Switch Four Screws In The Top Part AndBottom Part . Open The Cover From MiddlePosition ,Connect 12v/1a Power Wire .2. Fix The Doorbell And 86Ox With Screws.3. Cover Up The Cover JustOpened , And Install The 4Screws To Finish .Port DefinationRear ViewFront ViewMicrophonePhotoresistanceInfrared LightFixed The ScrewCamera LensPIR SensorWork Indicator LEDSpeakerCall ButtonRj45 PortPower SocketReset SwitchLED Light Open Surface Shell From Middle PositionFor The First Time Using The Operating Step1. According To The Installation Diagram And The Wiring Diagram To Install Good Products, Good Locks And Turning On The Power Supply Connection.2. Wait For About 1 Minute, When The Product Send Out "system Startup Success, Welcome To Use" Is For Product Starts Successfully, Can Be Normal Use.4. Open The Software Into The Interface Must Be Registered Account First, After The Success Of The Registration With The Registered Account Password To Log In.3. Download And Install The Phone Software: Android Mobile Phones Can Scan Color Box On The Side Of The Android Qr Code Or Application In The Android Market Search "wifi Bell" Download Installation;apple Mobile Phone System Can Scan Color Box OnThe Side Of The Ios Qr Code Or In The App Store Search Download And Install.Doorbell SettingAdd The Doorbell3.When Searching Through The Lan, Make Sure The Phone With The Device In The Same Lan, And Then Select The Target Device.Under Normal Circumstances, The Name Of The Target Device For Bell (Please Observe The Id Number)1.On The Main Screen, Click Add2. Can Choose To ManuallyInput, Qr Code Scanning, Or Local Area Network Search TocompleteTo Add New Equipment1.Adding Users Will Default To The First Administrator Password Is Blank, After Configuring The Network Is Successful, Please Set The Administrator Password, If A Non-administrator Login, Please Enter The Correct User Name And Password2.If Access To TheWired Network ToSelect No, If The User(non-administrator)Select No3.If You Access TheWireless NetworkInterface Prompts ToSelect Yes By a Step ByStep Tips Down Operation4.If The Device To StartAfter Successful DirectClick Next, If The DeviceIs Not Plugged In, PleaseWait For The DevicePlugged Starts1.Press And Hold The Doorbell Button For 5 Seconds To Let Go, The Equipment Issue "System Has The Configuration Mode ......"2.Android Phone WillAutomatically ConnectThe Device And JumpTo The Next Hot SpotInterface3.Select Need ToConfigure The WifiHotspot Strike It4.Please Enter The WifiPassword Click Finish1.Editable Current User Information Or Network Wifi2.Under The Doorbell Wifi Settings Screen,Click Settings3.Go To Settings Screen,Click Settings Wifi4. The Device Will List The Current Effective Route, Select The Destination Routing (SSID), Click On ItsWIFI SettingDoorbell Setting1.Voice Prompt Switch : Turn On Or Turn Off . Turn On By Factory Settings.2.Configuration Mode Switch: Turn On Or Turn Off .Turn On By Factory Settings.3.Monitoring The Maximum Length Of Time : Range From 10 To 300 S.4.Call Maximum Length Of Time: Range From 10 To 300 S.5.Call Waiting The Maximum Length Of Time : Range From 10 To 30 S.Apple's System Can Be Set Arbitrarily Within 10-60 Seconds Long.1.Administrator Can Add And Delete Other Cellphone User .Common Cellphone User Only Can Modify Own Password .same User Log In Different Cell Phone Is Not2.Add New Cellphone User3.Modify User PasswordWhite List SettingsAlarm SettingsWhen Alarm Turn Off (Disarm )Any Alarms Are Not Notified To Cellphone 1.When Alarm Turn On(Arming) User Can Set Up Other Parameters Further A. Alarm Type : Motion Detection ,Pir And So On B. 1-5C. Alarm DelayD. Alarm EClock SettingInterface SettingsUsed To Define Extended IO Control , As Well As The Linkage FunctionLock Control Settings1.Click Settings2.Enter The Lock Control Settings3.Modify The User PasswordFeaturesCall IntercomProactive Monitoring1.Presses The Doorbell To Call2.Click On The Red Hang Up The Green Answer3.After Answering A Cell Phone To Any OtherPhone Will Automatically Hang Up. In The Course Of Conversation, You Can Remotely Lock. Press And Hold The Voice Icon, You Can Send Word To The Doorbell. Delay Button, You Can Extend This Talk Time. End The Call, Press (Hang Up) Button1.In The Main Interface, Click TheDoorbell Device Directly (Online), You Can Proactively Monitor2.In The Surveillance Video Interface / Camera,Calls Can Be Remote UnlockingReal-Time Alarm1.When An Alarm Occurs, All The Added Phone WillImmediately Be Notified. Click On The Green Answer Key,You Can Turn On The Device For Real-time Monitoring. Slide The Red Hang Up Button, You Can Hang Up. Central Interface Displays An Alarm Occurs The Instant Photo2.Alarm Monitoring, But Not Remote UnlockingalarmMonitoring, But Not Remote UnlockingPlayback1.Click On The Video Option,Select The Target Device2.Video File List, Select The Target File3.Video Playback, Using ThePhone Installed Video Player For Video Playback, We Recommend Installing Storm4.During A Call, You Can Make VideoLocal Photos1.Selection Indication Doorbell DeviceVisitors Alarm Recording1.Click The Recording Options, Choose The Target Device Selection, Visitors Call History, Alarms Will Be Saved2.Glance3.See Related Pictures 2.Grouped According ToTime Sorting3.Click To View The Big PictureAbout1. Click On Options2. Set The Doorbell Ringing: Custom Doorbell Ringing3. Set The Alarm Tones: Custom Alarm Ringtone4. About Software: Click To View The Software Version Number5. Exit The Software: Click To Completely Exit6. Running In The Background: Click To Complete The BackgroundSpecificationsModel WIFI601Camera1/4”/F2.4/110°Distinguishability420lineIllumination2LUXLight source6pcs lnfeared lightPower Standbay;DC 12V 1APower dissipation Stanbay;working;3.8WDimensions120*96*34mmComponents In Cluded1.Outdoor Camera2.Screws(standard)er Manual4.Power Supply5.The Interface Line6.Ios App And Android App For Mobile。
萤石 猫眼门铃 智能门铃-HTQP5系列 CS-HTQP5-V100-WK 使用说明书

用户指南使用产品前请仔细阅读用户指南目录装箱清单产品参数售后服务支持版权声明040506081.实时预览141516171803FAQ 1.选择安装位置09091011安装设备添加至“萤石云视频”连接线缆下载“萤石云视频”规范使用视频产品的倡议配置流程概览外观介绍071212132.设置2.拆卸前面板3.安装门铃门铃(x1)打开产品包装后,请您确认门铃是否完好,确认配件是否齐全。
用户指南×1螺丝配件×1装箱清单外观介绍前视图后视图底视图含义解释*指示灯红灯常亮:启动中红灯慢闪:网络异常红灯快闪:设备异常蓝灯常亮:正常工作/客户端访问门铃*门铃按键短按一次:响铃*RESET孔用孔针(需自备)插入孔中,短按一次,设备恢复出厂设置。
用孔针(需自备)插入孔中,长按4-8秒,设备强制重启。
*PoE接口需要配合PoE交换机使用配置流程概览下载“萤石云视频”扫描二维码下载“萤石云视频”客户端如果您使用的是手机/Pad扫描下面的二维码,下载并安装客户端。
请在电视应用商城搜索“萤石云视频”客户端并下载。
如果您使用的是TV···如应用商城暂未上架,您可以到萤石官网下载安装包,通过U盘或其他传输工具在TV端安装使用。
TV端不支持用户注册和设备添加。
目前,仅主流品牌的TV支持下载“萤石云视频”客户端。
连接线缆路由器门铃扫描二维码扫描二维码根据客户端的界面提示完成门铃的添加。
添加至“萤石云视频”扫一扫/添加设备安装设备|选择门铃安装位置选择门铃安装位置为什么推荐这样的一个安装高度?这个高度下,结合镜头视场角和人体高度镜头成像比较完 整,能最大程度的避免出现半身人的情况。
这个高度可以满足绝大多数人按门铃的需求,太高太低 都会影响按门铃的体验,弯腰按门铃和够不到门铃都是 非常不好的体验。
推荐安装位置:门外的墙面(靠近门把手的一边,如下图所示)推荐安装高度:1.2米-1.5米。
萤石 猫眼门铃 智能猫眼-DP2系列 CS-DP2-6E2WPFBSL 使用说明书

注意事项外观介绍选择安装位置启动设备安装猫眼将手机连上您的Wi-Fi网络,点击下方的 ,查看设备的安装指导视频。
主机子机底座配件如果您不方便看视频,可以根据以下步骤安装设备。
长按Home键3~5秒,设备开机。
1根据设备界面提示完成Wi-Fi连接。
2用手机或Pad扫描主机界面或者用户指南封面的二维码,根据界面提示完成设备添加。
3登录“萤石云视频”客户端,根据提示完成用户注册。
1选择添加设备,进入扫描二维码的界面。
2添加到“萤石云视频”请勿将猫眼放在高温、高湿或大量灰尘、盐雾等恶劣环境,也不要暴露在雨淋的地方。
否则可能会引起机器损坏。
请勿将子机镜头朝下放置,以免磨损镜头。
请勿用力挤压门外子机的镜头和顶部突出的黑色圆球,否则可能会造成硬件损坏。
在安装过程中,务必小心操作,不要用力拉扯子机的连接线,也要防止连接线刮伤或者割裂(因操作不当,导致连接线损坏不属于保修范围)。
如果门上没有猫眼孔,建议在门上距离地面145cm左右的位置打孔,钻孔直径建议范围16.5~45mm。
如果门上有猫眼孔并已经装有猫眼,请拆除原有的猫眼进行安装。
.. . .连接线门铃按键传感器(请勿遮挡)镜头传感器(请勿遮挡)传感器(请勿遮挡)扬声器麦克风连接线接口装箱清单用户指南电源线电源适配器卡扣螺钉配件子机主机底座配件螺钉孔挂钩凹槽底座槽口充电宝挂钩USB充电接口Micro SD卡槽(用于连接子机连接线)连接接口显示屏Home键Home键(即开关机键)**扬声器长按3~5秒:开机/关机短按:亮屏/息屏撕掉子机背面3M胶表面的离型纸将子机拿到门外,将螺钉和连接线穿过猫眼孔(如果门比较厚,可将白纸卷成筒状,将连接线通过纸筒穿过门洞)56后用力按压子机,确保与门的表面贴合将连接线接口按图示插入底座槽口3498抽出拧紧两颗螺钉固定底座,使底座贴紧门面不晃动即可10整理连接线,将连接线折入底座7将螺钉按图示穿过底座螺钉孔,使底座挂在螺钉上13将主机底部的连接接口对准底座上的连接线接口,把主机插到底座上,插入到位后会听到“咔哒”一声底座开口处并扣紧安装完成14入底座上方的挂钩凹槽丈量门的厚度,选择合适的螺钉1当门厚在35~60mm时,选短钉当门厚在60~85mm时,选中钉当门厚在85~105mm时,选长钉将选好的两颗螺钉拧入子机(固定住即可,无需拧紧)2充电日常维护如果您使用的是TV,请在手机或Pad端完成用户注册和设备添加后,在TV端进行实时预览等操作。
因特 智能锁 V6-智能猫眼款 用户手册 说明书
2
⼆、如何开通微信提醒
4
1. 点击“开通提醒”进⼊设置⻚⾯,如未登录,请先登录;“开通提醒”,如下图即为开通成功;
.当智能锁发⽣开锁或远程开锁等事件时,微信实时提醒。
2 . 远程开锁操作
远程开锁需在锁上按⻔铃键发出请求,“客⼈请求,主⼈开锁”,⽤收到开锁请求,或点击播放进视频对讲,或直接输⼊安全密码开锁
五、如何备注⻔锁⽤⼾
. 进⼊⻔锁界⾯,点击右上⻆“更多−⽤⼾列表”,进⼊⽤⼾列表界
⾯,如下图;
.点击⽤⼾,直接备注⽤⼾名称如下图。
3. ⽤⼾备注好后,就清楚地知道是谁开了锁,关⼼家⼈。
四、如何分享设备
侧边栏,选择“家庭管理”−点击
输⼊要添加的⽤⼾⼿机号码和称谓。
注意该
⽤⼾必须提前关注此公众号并注册。
6。
猫眼操作简易说明-利高拿科技
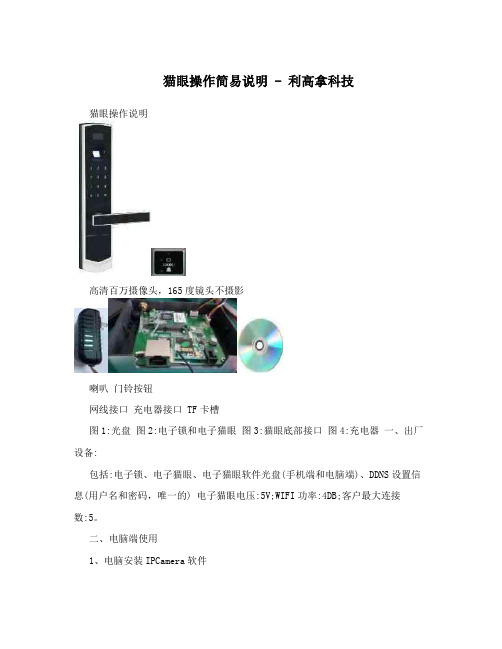
猫眼操作简易说明 - 利高拿科技猫眼操作说明高清百万摄像头,165度镜头不摄影喇叭门铃按钮网线接口充电器接口 TF卡槽图1:光盘图2:电子锁和电子猫眼图3:猫眼底部接口图4:充电器一、出厂设备:包括:电子锁、电子猫眼、电子猫眼软件光盘(手机端和电脑端)、DDNS设置信息(用户名和密码,唯一的) 电子猫眼电压:5V;WIFI功率:4DB;客户最大连接数:5。
二、电脑端使用1、电脑安装IPCamera软件打开光盘,安装;按提示完成安装。
安装好后,桌面出现图标。
或登陆中山市利高拿股份有限公司官网下载进行下载并安装。
2、连接猫眼(以笔记本为例)2.1 笔记本先搜索并连接WIFI,或通过网线连接到路由器的LAN端口。
2.2 猫眼插上网线:一端连接猫眼的后主机板底部的接口,另一端连接路由器LAN端口,插上猫眼充电器。
2.3 约45秒左右整个系统启动完毕,打开软件“IPCamera”,系统自动获取猫眼信息(不同的网络接入会弹出不同的IP地址)如下图:第 1 页共 7 页2.4双击该链接,输入用户名:admin,密码为空(出厂状态)。
(若“360杀毒软件”正在后台运行,请先完全退出“360杀毒软件”;若双击该链接后还是没有弹出界面的,请点击一下输入网址上右端的“兼容”)如图所示。
2.5首次登陆,提示下载插件,安装完毕后选择“插件模式”进入,可看到猫眼实时的图像。
(注:若弹出控件加载框应点击运行加载项)如图所示。
3、内网测试模式(注:供用户测试猫眼)3.1打开IPCamera——双击链接——点击一下界面外空白处(如图1)——点击插件模式——点击左上角的设备管理——网络设置——无线设置——无线网络模式选择AP——用笔记录SSID和共享密钥(此时可供手机安装了“高利智能”进行测试,若没有安装可以跳过以下步骤,如图2)——拔开网线。
图1第 2 页共 7 页图23.2打开手机上的WIFI搜索到与SSID一致的WIFI热点——输入步骤(3.1)的共享密钥——连接。
绿米Aqara星耀全自动智能猫眼锁用户手册说明书

保修说明
本产品售后服务严格依据《中华人民共和国消费者权益保护法》、《中华人民 共和国产品质量法》实行售后三包服务,服务内容如下:
保修期限 自您签收次日起7日内,本产品出现《产品性能故障表》所列性能故障的情况, 经由售后服务中心检测确定,可免费享受退货或换货服务; 自您签收次日起8日-15日内,本产品出现《产品性能故障表》所列性能故障的情 况,经由售后服务中心检测确定,可免费享受换货或者维修服务; 自您签收次日起3年内,本产品出现《产品性能故障表》所列性能故障的情况, 经由售后服务中心检测确定,根据保修类型可在对应时长内免费享受维修服务。
微功率设备声明
(一) 本产品使用的 Zigbee 技术符合“微功率短距离无线电发射设备目录和 技术要求” 中通用微功率设备F类设备的技术要求,NFC技术符合“微功率短 距离无线电发射设备目录和技术要求” 中通用微功率设备C类设备,用于数据 传输应用。采用一体化天线,控制、调整及开关等使用方法请参考产品说明书 中相关内容; (二)不得擅自改变使用场景或使用条件、扩大发射频率范围、加大发射功率 (包括额外加装射频功率放大器),不得擅自更改发射天线; (三)不得对其他合法的无线电台(站)产生有害干扰,也不得提出免受有害 干扰保护; (四)应当承受辐射射频能量的工业、科学及医疗(ISM)应用设备的干扰或 其他合法的无线电台(站)干扰; (五)如对其他合法的无线电台(站)产生有害干扰时,应立即停止使用,并 采取措施消除干扰后方可继续使用; (六)在航空器内和依据法律法规、国家有关规定、标准划设的射电天文台、 气象雷达站、卫星地球站(含测控、测距、接收、导航站)等军民用无线电台 (站)、机场等的电磁环境保护区域内使用微功率设备,应当遵守电磁环境保 护及相关行业主管部门的规定; (七)禁止在以机场跑道中心点为圆心、半径5000米的区域内使用各类模型遥 控器; (八)微功率设备使用温度为-10~55℃,供电锂电池(7.4V 2A)、Type-C应 急充电(5V 2A)。
电子门铃系列说明书

For more information, call 1-800-888-4784 (4STI) or visit KEY FEATUrESGeneral Information· All chimes are compatible with each other.· Up to 500’ operating range.· Ideal for the home, store or office.· One year limited warranty. Construction· U L/cUL Listed, FCC and IC Certified. Installation· Quick and easy to install – no wiring needed.· receiver plugs into 120 VAC outlet. Ele ctronics· r eceiver has a low and high volume adjustment.· Supervised low battery alert. Options· 10 sound options with the push of a button on the sensor (excludes STI-3331).· S TI-3300 can distinguish between a front and back door by adding another sensor. The first doorbell will play “ding-dong” and the second will play “dong.”Wireless Chime (STI-3350)Mount the wireless button next to your door, plug the receiver into any 120 VAC indoor electrical outlet and the chime is ready to operate. Entry Alert ® Chime (STI-3360)Mount the small transmitter and magnet to any door and plug the remote receiver unit into any electrical outlet. That’s it. No wiring required. When a monitored door opens, the Entry Alert Chime sends a signal to the receiver announcing the entrance with one of ten selectable melodies or alarm.Wireless Motion-Activated Chime (STI-3610)Mount the motion sensor and plug chime receiver into any electrical outlet within operating range. Alerts when someone enters the transmitter’s detection zone. The weather sealed transmitter has 140° x 40 ft. detection zone. Includes adjustable mounting bracket.Wireless Doorbell Extender (STI-3300)This doorbell chime connects to your existing traditional hard wired doorbell system and extends a new chime to hard-to-hear areas. Once the unit is wired into existing system, the included receiver can be plugged into any standard electrical outlet. This allows you to hear when someone is at your front door when in remote areas. Normally open switch, 16 VAC.STI WIrELESSCHIMESSTI-3350STI-3610STI-3300STI-3360PrOdUCT OVErVIEWSTI Wireless Chimes greet your visitors with a pleasant chime and lets you know when the door opens or a person enters the detection zone. All chimes are compatible with each other. distinguish between front and back doors by adding sensors and selecting a different chime on each. Transmitters have up to 500’ operating range.HOW IT WOrKSTel: 248-673-9898Taylor House09/15Subject to change without notice.APPrOVALS & WArrANTYTESTINGIt has been tested and approved or listed by: · UL/cUL Listed No. S7255 · FCC and IC CompliantWARRANTYOne year limited warranty within normal use.SPECIFICATIONSFrequency: 433 MHzPower Source: receiver plugs into 120 VAC outlet (minimum 110 VAC)Sensors include:STI-3301Wireless Doorbell Chime Sensor One CR2032 batterySTI-3551 Wireless Entry Alert®SensorOne AAA battery STI-3601Wireless Motion-Activated Sensor One Lithium CR123 batterySTI-3331 Wireless Doorbell Extender Sensor n/aSTI Wireless Chimesdimensions and Technical InformationMOdELS AVAILAbLESTI-3350 Wireless doorbell Chime with receiver STI-3360 Wireless Entry Alert ® Chime with receiverSTI-3610 Wireless Motion-Activated Chime with receiver STI-3300 Wireless doorbell Extender with receiverAccessories STI-3301 Wireless doorbell Chime Sensor STI-3551 Wireless Entry Alert ® SensorSTI-3601 Wireless Motion-Activated Sensor STI-3331 Wireless doorbell Extender Sensor STI-3353Wireless Chime receiverSelectable Soundsding dongding-dongWestminster – 4 note Westminster – 8 note Knock Knock Jingle bells barking dogs bicycle bell buzzer“Jingle Bells”door Entry “Westminster Chime”doorbell“Ding Dong”doorbell Extender “Ding”Motion detectorAll accessories work together!Make each a different sound and know the exact transmitting source.。
WIFI门铃说明书
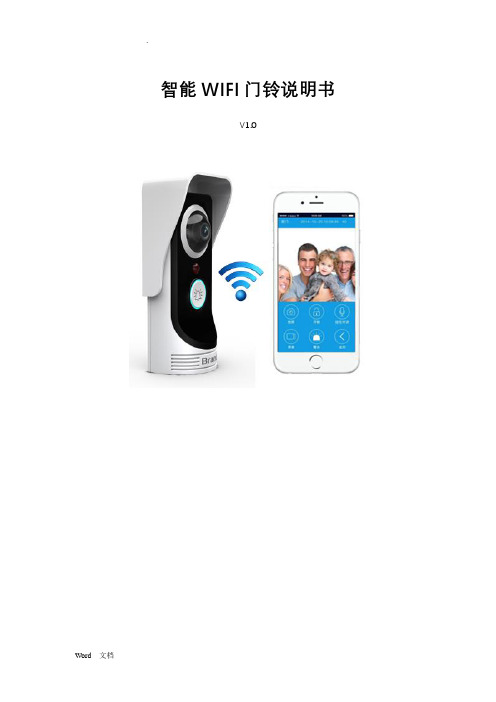
智能WIFI门铃说明书V1.01.产品功能图示2.安装示意图3.参数规格表产品WIFI门铃输入电压DC12V 2A接线外接12V的输入电源线,开锁信号线到电子锁视频传输解析度VGA 720P摄像头CMOS OV7725WIFI连接方式WIFI B/G/N移动侦测PIR热感应感应器光强度传感器LED 四颗夜视补光灯可视范围140度音频 1.2W喇叭和高灵敏麦克风工作环境-10°C~+40°C产品体积65(W)*150(H)*40(D)4.操作说明1).产品通电,等待初始化20S,等到机器发出“欢迎光临”提示音后,再等待10S2).按住门铃键约5S后松开,机器会提示说“已经进入网络配置模式,请在3分钟内配置”3). 打开手机WIFI设置菜单,搜索机器发出的热点,连接,输入初始密码:“123456789”4).手机端打开对应的智能门铃APP软件,点击“添加门铃”,在弹出菜单下发点击“搜索”,APP 会搜索到连接的门铃序列号,点击看到的门铃序列号,再点击APP右上方的“完成”,就完成手机和门铃的配对,这个时候APP就会提示说刚配对的门铃在线5).门铃在线的状态下,点击右边的设置图标,进入菜单,在菜单下面点击“WIFI 设置”进入WIFI设置菜单,选择家庭的WIFI热点,输入密码,然后点击右上角“完成”,机器会进行重启,等待重启完成后,就可以通过网络使用智能WIFI门铃(重点提示:经常会有用户反馈机器连接不上网络,经常是这个步骤WIFI热点的密码输入错误,如果发现机器连接不上网络,请重复一边该步骤,最好在输入密码的时候选择“显示密码”,这样能有效避免错误)6).添加用户点击在线门铃“设置”,弹出菜单中点击“添加用户”,输入用户名,密码,点击右上角“完成”,即完成用户配置,建议最多配置八个用户,其他用户可以在同一个WIFI热点下,打开软件,点击搜索门铃,选择对应的门铃ID,输入用户名和密码,其他用户就可以进行使用。
可视对讲人脸识别终端 用户手册Ⅰ

可视对讲人脸识别终端用户手册Ⅰ资料版本:V1.06感谢您购买我们的产品。
使用时若遇到任何问题,请您及时和销售人员联系。
声明未经本公司书面许可,任何单位和个人不得擅自摘抄、复制本手册内容的部分或全部,并不得以任何形式传播。
为浙江宇视科技有限公司的商标。
本手册中出现的其它所有商标、产品标识及商品名称,由各自权利人拥有。
由于产品版本升级或其他原因,本手册内容会不定期进行更新。
本手册仅作为使用指导,本手册中的所有陈述、信息和建议不构成任何明示或暗示的担保。
宇视科技对使用本手册或使用本公司产品导致的任何特殊、附带、偶然或间接的损害不承担责任,包括但不限于商业利润损失、数据或文档丢失产生的损失,因遭受网络攻击、黑客攻击、病毒感染等造成的产品工作异常、信息泄露。
安全须知注意:本产品的默认密码仅供首次登录使用,为保证安全,请您确保在首次登录后修改默认密码。
强烈建议您将密码设置为强密码,字符不小于8位。
在操作前,请务必认真阅读和执行产品手册规定的安全规范。
∙截取的界面图仅当说明示例,各版本界面存在差异,请以实际界面为准。
∙本手册能作为多个型号产品的使用指导,但不一一列举每个产品的使用情况,请您根据实际产品自行对照。
∙本公司保留在没有任何通知或者提示的情况下对本手册的内容进行修改的权利,但并不确保手册内容完全没有错误。
∙由于物理环境等不确定因素,部分数据的实际值可能与手册中提供的参考值存在偏差,如有任何疑问或争议,请以本公司最终解释为准。
∙您使用产品过程中,请遵守本手册操作说明。
对于未按说明而引起的问题,我司恕不负责,感谢您的配合。
环境保护本产品符合关于环境保护方面的设计要求,产品的存放、使用和弃置应遵照相关国家法律、法规要求进行。
本书约定∙本手册中的图形、图表或照片等仅用于说明示例,可能与实际产品有差异,请以实物为准。
∙本手册可作为多个型号产品的使用指导,恕不一一列举每个产品的使用情况,请您根据实际产品对照使用。
萤石 猫眼门铃 智能门铃-CP3系列 CS-CP3-V100-2D3WPB-GR 使用说明书

正面顶部反面侧面外观介绍装箱清单132门铃开机无线接收器上电添加至“萤石云视频”指示灯(门铃)门铃侧面关机状态下长按2秒:指示灯蓝色常亮3秒后熄灭,且语音提示设备已开机,表明门铃开机成功。
开机状态下长按5秒:语音提示设备即将关机,且指示灯红色闪烁3次后熄灭,表明门铃关机成功。
电源键*下载“萤石云视频”扫描二维码下载“萤石云视频”客户端请在电视应用商城搜索“萤石云视频”客户端并下载。
如果您使用的是TV扫描下面的二维码,下载并安装客户端。
如果您使用的是手机/Pad···如应用商城暂未上架,您可以到萤石官网下载安装包,通过U盘或其他传输工具在TV端安装使用。
TV端不支持用户注册和设备添加。
目前,仅主流品牌的TV支持下载“萤石云视频”客户端。
安装贴纸(x1)扫描用户指南封面或者无线接收器机身上的二维码。
根据客户端的界面提示完成无线接收器的网络配置和添加。
登录“萤石云视频”客户端,选择“首页”页签,点击页面右上方的 -> 扫一扫/添加设备,进入扫描二维码的界面。
请长按门铃电源键2秒,直到听到“设备已开机”的提示,表示门铃开机完成。
1门铃开机完成后,将自动关联到无线接收器。
2将无线接收器连接室内电源,当指示灯呈现蓝色快闪,且语音提示:请使用“萤石云视频”客户端进行Wi-Fi配置,表示已进入配网模式。
请用“萤石云视频”客户端进行配网(详见->添加至“萤石云视频”章节)。
门铃背板(x1)电源线(x1)用户指南(x1)安装背胶(x1)门铃(x1)无线接收器(x1)*指示灯(无线接收器)长按5秒:无线接收器运行时,长按5秒,指示灯红色常亮,表示无线接收器开始重启并恢复出厂设置短按一次:无线接收器响铃时,短按按键,可恢复静音。
RESET键*红色慢闪:网络断开***RESET键指示灯Micro SD卡槽天线扬声器无线接收器螺丝配件(x1)室内电源插座扫描设备二维码2、请按门铃按键检查门铃与无线接收器关联是否成功。
2.4GHz 全数字 无线猫眼可视对讲门铃 说明书
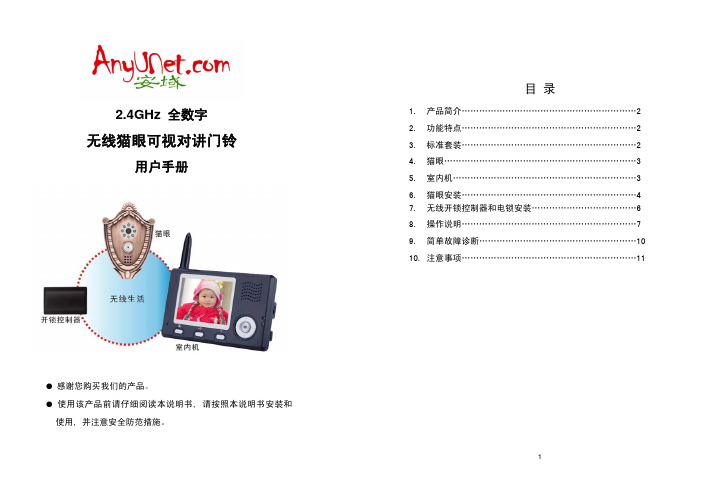
2.4GHz 全数字无线猫眼可视对讲门铃用户手册● 感谢您购买我们的产品。
● 使用该产品前请仔细阅读本说明书, 请按照本说明书安装和使用, 并注意安全防范措施。
目 录1. 产品简介............................................................2 2. 功能特点 (2)3. 标准套装............................................................2 4. 猫眼..................................................................3 5. 室内机...............................................................3 6. 猫眼安装............................................................4 7. 无线开锁控制器和电锁安装....................................6 8. 操作说明............................................................7 9. 简单故障诊断......................................................10 10. 注意事项 (11)1. 产品简介该产品广泛用于单元家庭, 酒店, 别墅, 办公室等场所,由猫眼、室内 机、无线开锁控制器三个单元组成。
猫眼在结构上设计独特,可以安装在各类门上(门厚度35~110mm, 猫眼孔径14~38mm),室内机设计精巧,可手持,可放置在桌面上,可挂在墙壁上;无线开锁控制器设计灵活,与电锁连接简单, 三者之间均是无线连接,安装简单,不需布线;使用方便,轻松完成可视对讲,一键开锁。
门禁一体机操作说明

门禁一体机操作说明GNDPUSHLOCKOPENOPENBELL注意:1、 电锁一般应人专用电源控制器接出。
2、 通过J1的跳线可选择PUSH 的常开常闭。
3、 通过J2的跳线可改变PUSH 的输出电平。
4、 上电前必须确认电源电压(12V )和电源的方向。
具体操作: 一、 门禁一体机编程方法:A 、 常用操作的简单流程:1、 授权用户卡:#五位编程密码(出厂前为12345) 41# 连续感应需要授权的卡 # *2、 设置开门密码:# 五位编程密码(出厂前为12345) 2 四位开门密码 *3、 删除用户卡:# 五位编程密码(出厂前为12345) 61# 连续感应需要删除的用户卡# *4、 修改编程密码:# 五位编程密码(出厂前为12345) 1 五位新编程密码 *B 、 详细操作说明:1、“#”键:功能键,进入编程模式(1)按“#”字键,红灯、绿灯、橙灯一齐闪亮。
(2)、输入五位系统密码(初使密码为12345),蜂鸣器鸣响一声,红灯和橙灯亮、绿灯熄灭,门禁一体机进入系统编程状态。
+12VDC DOOR 12V 电源+ 12V 电源— 接电锁信号线 或接电锁信号负极 接电锁正极 接开门按钮 接开门按钮 接门铃 接门铃2.“1”键,修改系统密码:(1)、按“1”字键,橙灯亮、红灯和绿灯熄灭。
(2)、用户输入五位数字密码(如88888),输入完毕,蜂鸣器短鸣响一声,绿灯闪亮一次熄灭,橙灯和红灯闪亮,密码修改成功。
注意:该用户密码需要妥善保存,再次进入系统编程模式时需要输入该密码,如果忘记密码,请执行初始化操作流程,将系统管理密码初始为出厂默认密码12345。
3、“2”键,增加(修改)用户开门密码(此密码为公共密码)按“2”输入四位用户开门密码(如8888)。
4、设置开门方式:按“300”:只允许卡开门;按“301”:卡或密码开门;按“302”:卡加密码开门。
5、授权用户卡:注:卡号是指ID卡上丝印的10位卡号的后面10位(前面为零的可以省略)(1)手动加入:单张加入:按40+# 键入8位数卡号+ #,可连续输入,按#结束)批量加入:按50+#键入8位数起始卡号#,再键入欲增加卡的张数(三位数)+#(此项功能仅限于用户卡号可连续)(2)读卡加入:单张加入:按41+# 读要授权的卡+#(可连续读卡,按#结束)批量加入:按51+# 读卡(起始卡),键入欲增加的卡张数(三位数)+#6、删除用户卡(1)、手动删除:单张删除:按60+# 键入8位数卡号+#(可连续输入,按#结束)批量删除:按70+#键入8位数起始卡号+#,再键入欲增加卡的张数(三位数)+#读卡删除:单张删除:按61+# 读要删除的卡+#(可连续读卡,按#结束)批量删除:按71+#读卡(起始卡),键入欲删除的卡的张数(三位数)+#注:若作整批卡片增加或删除时,所键入增加或者删除的卡片张数(三位数),不含起始卡片或者8位数的起始卡号,因此实际卡片的张数应为3位数+17、删除所有用户卡:按“888#”,蜂鸣器长鸣一声,绿灯闪亮一次熄灭,橙灯和红灯亮,所有用户数据删除成功。
门铃说明书

别墅型WiFi远程可视门铃快速安装指南尊敬的用户,欢迎您选用本产品,在使用本品之前,请务必详细阅读操作指南,并保存此操作指南以备后续参考说明:产品图片具体以实物为准,我们将根据产品功能的增加或升级,定期更新本说明书,更新内容将在本说明的新版本中印刷,恕不另行通知。
产品介绍采用Ti/Hisilicon方案,H264压缩格式,高清(130万)、标清D1、流畅(VGA)可选支持Onvif协议,能对别主流厂家NVR采用军工级3.6mm,130度广角进口镜头,带五颗LED智能夜视灯多录像模式可选,报警录像、定时录像、手动录像支持802.11b/g/n协议,标配WiFi功能,独创空中发包专利技术设置WiFi学习型433频率无线报警器接入,可推送报警信息到邮箱、手机,并可一键布防/撤防支持远程遥控开启智能锁(选配)集成智能门铃按键,夜间按键灯自动开启(门铃需联网)内置ECM麦克风与高频扬声器,采用3D降噪与回音消除技术,保证双向语音对讲纯真效果自带TF卡插口,最大支持64G/TF卡不间断录像,并可远程通过手机高清流畅回放一台设备最多可与8部手机/PAD/智能终端视频对讲可分别设置管理者与访问者密码,用户安全更有保障1包装清单打开产品包装后,请确认可视门铃是否完好(以下简称“设备”),同时检查列表中物品是否齐全,如发现有缺失,请及时与销售商取得联系。
附:出厂默认配置POE电源适配器。
如需AC100-220V供电,另购电源适配器。
您可以通过工程具体布线施工情况选择合适的供电方式。
供电描述说明AC220V供电门铃可无线连接家庭路由器,当路由器信号较弱无法覆盖到安装地点时请选择POE有线供电,或者选购居得安大功率路由器(可覆盖空旷800米周边范围)DC12V供电门铃可无线连接家庭路由器POE供电(推荐)POE供电方式是通过一条网线同时解决门铃供电和数据传输的一种低成本施工方式。
(需选用8芯线,4芯进行数据传输,4芯用于供电)3软件安装1、若您使用手机客户端手机/apad/ipad用户可扫描包装盒二维码下载。
萤石智能门铃用户手册说明书

Smart Doorbell User Manual1. Smart Doorbell Overview1.2 Smart Doorbell SpecificationsPacking List: • Smart Doorbell • Sync Module • Screw pack for mounting • User Manual •Warranty CardLensAmbient Light Sensor Mic PIR SensorMicro USB Slot and Battery Compartment (Removable)Power Button Red (Link) LEDUSB Plug SpeakerGreen (Power) LED Reset Button1.1 Sync ModuleMain Button Reset Button White and Blue Breathing LEDSpeaker *Note: Rechargeable batteries not included.AC/DC Power Connectors Security Screw HoleRed (Charging) LED2. Getting Started with Your Smart Doorbell2.1 Powering On, Off and RechargingTurn On: Press the power button for 2 seconds until you hear “Power up”, then release, your Smart Doorbell is on. You can also press the main button to turn it on. During the boot process, the speaker of the doorbell will sound and the blue LED light will rotate clockwise.*Note: The main button does not support shutdown.*Note: The first time the Smart Doorbell is turned on, its camera will automatically scan for a connection, indicated by a flashing white LED light and a sound will play “Scan QR code”. Please use the VPai Home app to configure the Smart Doorbell network. For details, refer to section 2.2 “Using Your Smart Doorbell with a Phone”.Turn Off: Press and hold the power button for 2 seconds until hearing “Power down”, then release.Charge the Battery: If the Smart Doorbell’s batteries are low on power, the battery icon on the VPai Home app screen will flash. To charge the Smart Doorbell’s batteries, insert the provided Micro USB to USB charging cable to a 5V/1.5A adapter and your Smart Doorbell, or use a 12~24V AC/DC power supply to charge the Smart Doorbell. When charging, the red LED light will turn on. When it is fully charged, the red LED light will turn off.*Note: When the batteries are too low, a sound will play “Low battery, system will shut down” after about 15 seconds. If not charged, the doorbell will be shut down automatically.Smart Doorbell supports Android and iPhone. It can easily connects to a home Wi-Fi network and enables quick and easy setup with its user-friendly mobile app.2.2 Using Your Smart Doorbell with a PhoneThe Smart Doorbell connects with Android phones and iPhones. In order to use your Smart Doorbell, the official VPai Home app must be installed. You can scan the QR code below to download and install the VPai Home app. The Android app can also be found on the VPai website ( /en/apps/ ), Google Play Store, Baidu App assistant, Tencent mobile assistant, Peasecod platform and on other similar platforms.*Note: Android 5.0 and iOS 9.0 above is required.The Smart Doorbell must be connected to a Sync Module.The Sync Module is the central hub of the Smart Doorbell with loud speaker. This connects to your Wi-Fi network and to your Smart Doorbell.Connect Sync Module to Wireless Router: Once the VPai Home app has been installed on your phone, open the app and choose to log in with either your Email, WeChat, Facebook or LINE account.Tap the add device “+” button on the app and select “Sync Module” in “Choose Device” interface. The screen prompts will show as follows:*Note: It takes around 20 seconds before the sound will play “Pairing mode” and the red LED light starts flashing.Tap the “Go To Connect Sync Module Wi-Fi” button and select the Wi-Fi hotspot named VPaiHome_xxxx. The password is: 12345678. After the connection is established, the “Config Current Sync Module” button becomes clickable when you return to “Config Sync Module” interface. The screen prompts will show as follows:Connect the Sync Module to the power supply. Tap “Start Config” button after hearing the sound “Pairing mode” and whenthe red LED light on the sync module starts flashing.Once connected to the Sync Module, tap “Config Current Sync Module” button to access the next page. You can change the Wi-Fi name and password by clicking “Change name and password”. Tap “Configure the Wi-Fi connection to the Sync Module” to connect the Sync Module to the Internet.Tap “Change name and password” button, enter a name and password, and then tap “Next” to complete the setup. After that, you need to reconnect to the Sync Module’s Wi-Fi you just set up. Change the name and password settings as shown below:In the “Config Sync Module” interface, you can tap “Configure the Wi-Fi connection to the Sync Module” to connect your Sync Module to the Internet. Tap the Wi-Fi name drop-down ar-row (iPhones require manual input), select the Wi-Fi hotspot and enter the password. The Sync M odule will restart after you tap “Next”. When the Sync Module is connected to the Internet, the red LED light will stop flashing.*Note: 5G network is not supported.*Note: To reset the Sync Module, press the reset button on the module for 8 seconds until the red LED light flashes fast.The Sync Module’s Wi-Fi can be used as a normal wireless network after the Internet configuration of the Sync Module is complete. You can connect the Smart Doorbell to the Internet through the Sync Module.Connect Smart Doorbell to Sync Module’s Wi-Fi: Tap the add device “+” button on the app screen to enter the “Choose Device” interface. The screen prompts will show as follows:Select “Doorbell” to enter the “Config Doorbell” interface, and then tap the “Start Config” button when the white LED flashes to enter the “Config Wi-Fi” interface.Tap the Wi-Fi name drop-down arrow and select the sync module’s Wi-Fi (iPhone require manual input), and enter the Wi-Fi password. The Wi-Fi configuration will show as follows:Tap “Next” and then use your Smart Doorbell’s camera to scan the QR code on the app. Aim the camera to the QR code from a distance of about 15 to 25cm for a few seconds. Please follow the on-screen instruction as shown below.*Note: When rebinding to the device, you have to press the Power button twice to start scanning the QR code.*Note: After the QR code has been successfully scanned, you will hear “Scan finished” and the Smart Doorbell will start to connect to the Sync Module. The white LED light below the main button will flash until the Wi-Fi connection is established. You will hear “Wi-Fi connected” when the connection is successful. The Wi-Fi connection information will be automatically saved. The next time the Smart Doorbell is switched on, the Wi-Fi will connect automatically. If the Wi-Fi disconnects, a white LED light below the main button will flash.After the Smart Doorbell has been successfully added to the VPai Home app, you can modify its name. Tap “OK” to return to the app home page. The modified name will be displayed on the home page. Tap the Smart Doorbell’s camera preview to enter the camera operation interface. You can view the camera’s real-time image, take photos, record videos, send voicemessages and etc. The Smart Doorbell operation interface will show as follows:*Note: To wake up the device, tap on the camera preview screen.For full app instructions please visit the official website. Instructions for Android: www.vpai360. com/en/apps/home/android/; Instructions for iOS: /en/apps/home/ apple/.You can update the Smart Doorbell firmware by either manual update or auto update. For manual update, you can check the latest firmware in the Device Settings page of VPai Home app. For auto update, when you connect your Smart Doorbell to your phone through the VPai Home app, it will automatically detect the latest firmware and prompt you when a new firm-ware update is available. If you choose to accept the update, the white LED light will keep turning and the device will simultaneously play “Upgrading”. When the firmware update is complete, the white LED light will stop turning and the device will play “Upgrading finished”. The device will restart after the update has finished.*Note: Make sure that your Smart Doorbell is fully charged or connected to a power supply before upgrading the firmware. Do not turn off the device during the update.3. Smart Doorbell Firmware Update4. Precautions and Warnings• Check the user agreement before using the device.• The camera supports a USB charging adapter with an output power of 5V/1.5A. It can also be charged with an AC/DC power supply with an output voltage of 12~24V.• Do not drop or beat your device, so as not to damage the device or scratch the camera lenses.• During operation the device will become a little hot, this is normal behavior.智能门铃用户使用说明1. 智能门铃产品概况1.2 产品规格包装清单: • 智能门铃(含安装支架)• 接收盒• 螺丝包• 用户使用说明•保修卡镜头环境光传感器麦克风远红外传感器Micro USB 接口和电池盖(可拆卸)电源键LED红灯USB接口扬声器LED绿灯复位按钮1.1 接收盒主按钮复位键白色&蓝色 LED灯扬声器*注意:包装清单中不包含电池,需另行购买。
说明书+视频-智能门铃中文
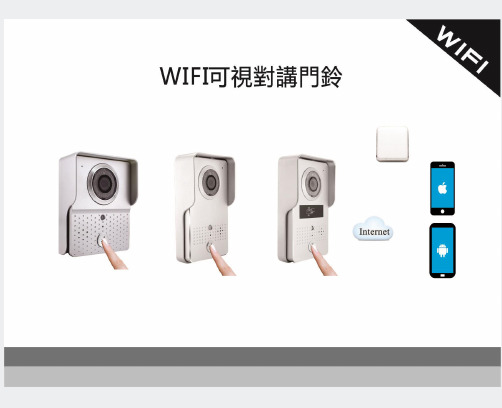
目录POE接线图 (6)安卓配置网络..............................................................................................................................................7-9 苹果配置网络...........................................................................................................................................10-14 编辑用户信息 (15)系统设置 (16)白名单设置 (17)报警设置 (18)时钟设置 (19)接口设置 (19)更新固件 (20)锁控设置 (21)功能简介 (22)主动监视 (22)通话对讲 (23)实时报警 (24)规格描述 (25)产品简介WIFI可视门铃是一款具备WIFI功能的门铃,通过连接家中的WIFI,实现手机和门铃之间的双向对讲,当访客按下门铃开始呼叫时,摄像头会触发启动并向智能手机发送实时图片和通话请求,用户接通后可以马上查看来访是谁,并决定是否与其通话,开启门锁等。
WIFI可视门铃具有报警和远程监控等功能,使家居安防多了一道有力的屏障;先进的红外补光设计,令你在晚上也能辨别来访者,采用直流电源供电,无需为电池不耐用而担忧。
2.4G WIFI传输系统,视频拍摄实时传输,最高可支持100M音频数据传输宽带,支持Android操作系统和IOS操作系统。
一个门铃可同时配置多个手机用户,让您和家人在任何地方都可以监视到室外环境。
本产品通过CE和ROHS认证。
感谢客户对本产品的支持,您的满意是我们的宗旨!话筒 光敏电阻 红外灯 螺丝孔 镜头传感器 工作指示喇叭按键LAN 口螺丝孔LED 灯 复位开关 接线口 背面接线口示意图安装步骤: 1.扭开外壳顶部和底部的四颗螺丝,从中间位置用力揭开面壳,接好12V/1A 的电源线。
萤石可视门铃操作方法

萤石可视门铃操作方法
萤石可视门铃是一种智能门铃产品,可以通过手机或平板电脑远程查看门口的情况,并与访客进行语音对话。
以下是萤石可视门铃的基本操作方法:
1. 下载并安装萤石云APP:在手机应用商店搜索“萤石云”,下载并安装该应用程序。
2. 注册并登录账号:打开萤石云APP,按照提示进行注册和登录。
3. 添加设备:登录后,点击“设备”菜单栏,然后点击右上角的“+”按钮,选择“设备添加”,按照提示完成门铃设备的添加。
4. 查看门铃视频:在设备列表中找到已添加的门铃设备,点击进入设备详情页,然后点击“监控”按钮,即可实时查看门铃视频。
5. 与访客对话:当有人按下门铃时,您将接收到手机推送通知。
点击通知即可进入视频对话界面,通过手机与访客进行语音对话。
6. 设置门铃功能:在设备详情页中,点击“设置”按钮,可以根据需要配置门铃的各种功能,如移动侦测、录像存储、推送通知等。
请注意,使用萤石可视门铃需要确保设备连接了稳定的网络,并且手机处于联网
状态。
操作过程中如有问题,建议参考萤石云APP的具体说明或联系售后技术支持。