centos6.5+mhvtl+gui+iscsi-tgt虚拟磁带库的安装与应用
CentOS6.5系统下安装和配置NFS服务

CentOS6.5系统下安装和配置NFS服务CentOS 6.3下安裝配置NFS4服務安装 NFS 服务器所需的软件包:# yum install nfs-utils這會將所需要的關聯軟件包一並安裝完成。
注意,NFS4不同於NFS3,不再需要安裝portmap,網上很多文章都還寫著要安裝portmap,完全是瞎扯蛋。
配置 NFS 共享編輯/etc/exports文件,此文件初始狀態下什麼內容都沒有,自己加吧。
# vi /etc/exports/home/exp 192.168.0.10(rw,sync,fsid=0) 192.168.0.11(rw,sync,fsid=0)192.168.0.10 和192.168.0.11兩台機器可以掛載NFS服務器上的/home/exp目錄到自己的文件系統中。
rw表示可讀可寫;sync表示同步寫內存和磁盤,fsid=0表示將/home/exp這個導出文件夾包裝成起始根目錄。
啟動nfs服務:先開啟rpcbind和nfs隨機自啟動:#chkconfig rpcbind on# chkconfig nfs on然後分別啟動rpcbind和nfs服務:#service rpcbind start#service nfs start確認nfs服務啟動成功:# rpcinfo -pprogram vers proto port100000 2 tcp 111 portmapper100000 2 udp 111 portmapper100003 2 udp 2049 nfs100003 3 udp 2049 nfs100003 4 udp 2049 nfs...100005 3 tcp 750 mountd检查 NFS 服务器是否输出我们想共享的目录 /home/exp:# exportfs/home/exp 192.168.0.10/home/exp 192.168.0.11NFSv4已經不使用portmap了,而是rpcbind,這一點要注意。
centos6.5+mhvtl+gui+iscsi-tgt虚拟磁带库的安装与应用

一.Mhvtl+mhvtl gui+iscsi1.安装:yum install lsscsi mt-st mtx zlib-devel sg3_utils zlib lzo-devel kernel-devel kernel-headers gcc接着创建vtl用户:#useradd vtl#passwd vtl#mkdir /opt/mhvtl# mkdir /etc/mhvtl# chown -Rf vtl:vtl /opt/mhvtl#chown -Rf vtl:vtl /etc/mhvtl(/etc/mhvtl为配置文件路径/opt/mhvtl为虚拟带库存储路径)2. 编译安装 MHVLT# tar -zxvf mhvtl-2013-03-22.tgz[rootcentos001 tool]# cd mhvtl-1.4[rootcentos001 mhvtl-1.4]# cd kernel[rootcentos001 kernel]# make;make install[rootcentos001 mhvtl-1.4]# make;make install如果未安装lzo和lzo-devel开发环境将收到如下报错:Note: Since mhvtl-1.3, both lzo and zlib are required to build vtltapeTypical error (missing lzo devel package) looks like:cc -Wall -Wshadow -g -O2 -D_LARGEFILE64_SOURCE -I../kernel -DMHVTL_VERSION=\"1.4.0\" -DMHVTL_DEBUG -DUSR=\"vtl\" -DMHVTL_HOME_PATH=\"/opt/mhvtl\" -DMHVTL_CONFIG_PATH=\"/etc/mhvtl\" -c -o vtltape.o vtltape.cvtltape.c:92 lzo/lzoconf.h: No such file or directoryvtltape.c:93:23: lzo/lzo1x.h: No such file or directoryvtltape.c: In function 'uncompress_lzo_block'[rootcentos001 mhvtl-1.4]# service mhvtl statusCould not locate library config file: /etc/mhvtl/library_contents.10Creating a default onePlease stop mhvtl & edit /etc/mhvtl/library_contents.10 to suit your requirementsCould not locate library config file: /etc/mhvtl/library_contents.30Creating a default onePlease stop mhvtl & edit /etc/mhvtl/library_contents.30 to suit your requirementsUsage: /etc/init.d/mhvtl {start|stop|shutdown}[rootcentos001 mhvtl-1.4]# service mhvtl startvtllibrary process PID is 1729vtllibrary process PID is 1733查看虚拟带库状态信息[rootcentos001 mhvtl-1.4]# lsscsi -g[1:0:0:0] cd/dvd NECVMWar VMware IDE CDR10 1.00 /dev/sr0 /dev/sg0 [2:0:0:0] disk VMware, VMware Virtual S 1.0 /dev/sda /dev/sg1 [3:0:0:0] mediumx STK L700 0104 /dev/sch0 /dev/sg10 [3:0:1:0] tape IBM ULT3580-TD5 0104 /dev/st0 /dev/sg2 [3:0:2:0] tape IBM ULT3580-TD5 0104 /dev/st1 /dev/sg3 [3:0:3:0] tape IBM ULT3580-TD4 0104 /dev/st2 /dev/sg4 [3:0:4:0] tape IBM ULT3580-TD4 0104 /dev/st3 /dev/sg5 [3:0:8:0] mediumx STK L80 0104 /dev/sch1 /dev/sg11 [3:0:9:0] tape STK T10000B 0104 /dev/st4 /dev/sg6 [3:0:10:0] tape STK T10000B 0104 /dev/st5 /dev/sg7 [3:0:11:0] tape STK T10000B 0104 /dev/st6 /dev/sg8 [3:0:12:0] tape STK T10000B 0104 /dev/st7 /dev/sg9 [rootcentos001 mhvtl-1.4]# lsscsi -l[1:0:0:0] cd/dvd NECVMWar VMware IDE CDR10 1.00 /dev/sr0state=running queue_depth=1 scsi_level=6 type=5 device_blocked=0 timeout=30 [2:0:0:0] disk VMware, VMware Virtual S 1.0 /dev/sdastate=running queue_depth=32 scsi_level=3 type=0 device_blocked=0 timeout=30 [3:0:0:0] mediumx STK L700 0104 /dev/sch0state=running queue_depth=32 scsi_level=6 type=8 device_blocked=0 timeout=0 [3:0:1:0] tape IBM ULT3580-TD5 0104 /dev/st0state=running queue_depth=32 scsi_level=6 type=1 device_blocked=0 timeout=900 [3:0:2:0] tape IBM ULT3580-TD5 0104 /dev/st1state=running queue_depth=32 scsi_level=6 type=1 device_blocked=0 timeout=900 [3:0:3:0] tape IBM ULT3580-TD4 0104 /dev/st2state=running queue_depth=32 scsi_level=6 type=1 device_blocked=0 timeout=900 [3:0:4:0] tape IBM ULT3580-TD4 0104 /dev/st3state=running queue_depth=32 scsi_level=6 type=1 device_blocked=0 timeout=900 [3:0:8:0] mediumx STK L80 0104 /dev/sch1state=running queue_depth=32 scsi_level=6 type=8 device_blocked=0 timeout=0 [3:0:9:0] tape STK T10000B 0104 /dev/st4state=running queue_depth=32 scsi_level=0 type=1 device_blocked=0 timeout=900 [3:0:10:0] tape STK T10000B 0104 /dev/st5state=running queue_depth=32 scsi_level=0 type=1 device_blocked=0 timeout=900 [3:0:11:0] tape STK T10000B 0104 /dev/st6state=running queue_depth=32 scsi_level=0 type=1 device_blocked=0 timeout=900 [3:0:12:0] tape STK T10000B 0104 /dev/st7state=running queue_depth=32 scsi_level=0 type=1 device_blocked=0 timeout=900 这里的/dev/sg10和/dev/sg11是机械手。
本地安装Centos6.5虚拟机步骤

VirtualBox-4.3.12-93733-Win + CentOS-6.5-i386-bin-DVD1+Red Hat (32 bit)什么是Virtualbox?VirtualBox 是一款开源虚拟机软件(注:跟vmware差不多)。
VirtualBox 是由德国Innotek 公司开发,由Sun Microsystems公司出品的软件,使用Qt编写,在Sun 被Oracle 收购后正式更名成Oracle VM VirtualBox。
Innotek 以GNU General Public License (GPL) 释出VirtualBox,并提供二进制版本及OSE 版本的代码。
使用者可以在VirtualBox上安装并且执行Solaris、Windows、DOS、Linux、OS/2 Warp、BSD等系统作为客户端操作系统。
这里我使用Virtualbox虚拟机最新版本(以下简称VBOX,版本号4.3.12)。
什么是CentOS?CentOS(Community Enterprise Operating System,中文意思是:社区企业操作系统)是Linux发行版之一,它是来自于Red Hat Enterprise Linux依照开放源代码规定释出的源代码所编译而成。
由于出自同样的源代码,因此有些要求高度稳定性的服务器以CentOS替代商业版的Red Hat Enterprise Linux使用。
两者的不同,在于CentOS并不包含封闭源代码软件。
CentOS6.5是2013-12-01发行的。
1、首先下载VBox并且安装VBox官网:https:///VBox 的安装比较简单,根据提示下一步就行。
2、打开VBox,并且创建CentOS 6.5 64位环境。
a)新建虚拟机环境,由于VBox环境没有CentOS的选项,所以可以选择Red Hat Linux(32Bit)b )动态分配硬盘大小所以你可以选择大一点的硬盘空间(不用的话不会占用的,但是C 盘性能上没固定的好)创建完成!3、下载CentOS 6.5系统CentOS系统官网:4、安装CentOSa)在VBOX主界面,选择刚刚新建的CentOS65,点击启动。
CentOS6.5 安装说明

CentOS 6.5 安装说明书CenOS 6.5系统安装1.系统版本:CentOS release 6.5 (Final) 64位2.选择“Install system with basic video driver”,点击Enter。
如图:3.选择“Skip”,跳过检查。
按“Tab”键,可以在“Ok”“Skip”之间切换。
点击Enter。
如图4.点击“next”。
如图:5.选择简体中文,点击“Next”。
如图:6.选择“美国英语”,点击“下一步”。
如图:7.选择“基础存储设备”,点击“下一步”。
如图:8.选择“是忽略所有数据”,点击“下一步”,如图:9.输入主机名,例如“Hadoop1”,点击“下一步”,如图注意:在大数据集群中,要把其中一台主机名命名为master,其他机器主机名命名为slave1、slave2、、、10.选择时区,点击“下一步”,如图11.输入根账号密码,点击“下一步”,如图12.如出现下图,请根据提示选择,如图13.选择“创建自定义布局”,点击“下一步”,如图。
14.以下是创建分区。
sda为硬盘名称。
如果系统自动对硬盘进行了分区、布局,请先删除,然后按照以下流程重新创建。
创建/boot分区,大小为200M。
创建swap分区,配置为2048M即可。
创建/分区,把系统磁盘剩余空间全部分给/ 分区。
15.分完区之后点击下一步:会有下面提示,点击格式化,然后点击下一步。
点击“将修改写入磁盘”,格式化完成后点击“下一步”。
16.请确保“引导装载程序”安装在正确的硬盘上。
点击“更换设备”可以选择“引导装载程序”的安装位置。
如下图:图表 1修改步骤:点击“更换设备”后,刚开始看到的或许是这样,请选择“主引导记录(MBR)”:进入“BIOS驱动器顺序”,第一BIOS驱动器选择硬盘这时“主引导记录MBR”变成了下面:点击确定“更换设备”完成。
17.选择“现在自定义”,点击“下一步”。
18.左栏里有“Web服务”,“可扩展文件系统支持”,“基本系统”,“应用程序”,“开发”,“弹性存储”,“数据库”,“服务器”,“桌面”,“系统管理”,“虚拟化”,“语言支持”,“负载平衡器”,“高可用性”14个选项,请按照以下进行选择:(1)“Web服务”,“可扩展文件系统支持”,“基本系统”,“应用程序”,“开发”,“弹性存储”,“服务器”,“桌面”,“系统管理”,“虚拟化”,“负载平衡器”,“高可用性”这几项,分别在其对应的右栏里面的每一项右键点击“选择所有的可选软件包”。
CentOS6.5的安装详解(图文详解)
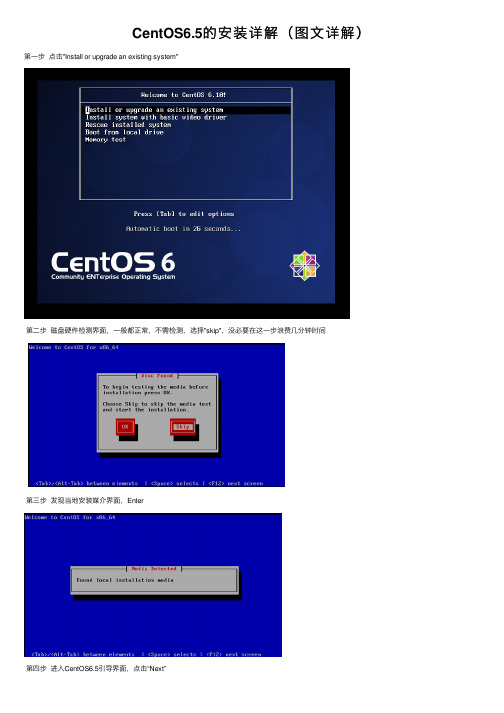
CentOS6.5的安装详解(图⽂详解)第⼀步点击"Install or upgrade an existing system"
第⼆步磁盘硬件检测界⾯,⼀般都正常,不需检测,选择"skip",没必要在这⼀步浪费⼏分钟时间
第三步发现当地安装媒介界⾯,Enter
第四步进⼊CentOS6.5引导界⾯,点击“Next”
第五步安装语⾔选择界⾯,最好是选择"English(English)",点击“Next”。
当然你也可以选择中⽂,但是,博主我,强烈建议你选英⽂,既然你搞⼤数据,就要顺应⼤众
第六步键盘语⾔选择界⾯,选择“U.S English”,点击“Next”
第七步安装哪种设备类型选择界⾯,选择“Basic Storage Devices”,点击“Next”
第⼋步存储设备警告界⾯,选择“Yes,discard any data”,点击"Next"。
这个好⽐我们在安装windows⼀样,安装系统把C盘给格式化。
第九步
第⼗步选择对应的时区,这⾥我们选择上海,系统时间选择UTC
第⼗⼀步输⼊root密码,两次⼀样,然后next下⼀步
第⼗⼆步选择创建⾃定义布局,你也可以使⽤所有空间,这个看需求
然后创建分区
再建⽴⼀个swap分区,建议⼤⼩是你主机内存1.5倍,然后OK,next
最后建⽴根分区 / 使⽤磁盘剩余所有空间
分区完毕后,检查看下是否按我们的要求分配,选择next
将要对分区进⾏格式化操作,选择格式化
警告我们所有数据将会丢失,选择将改写写⼊磁盘
开始安装系统
最后,系统安装结束,reboot重启,登录系统。
虚拟机安装centos6.5
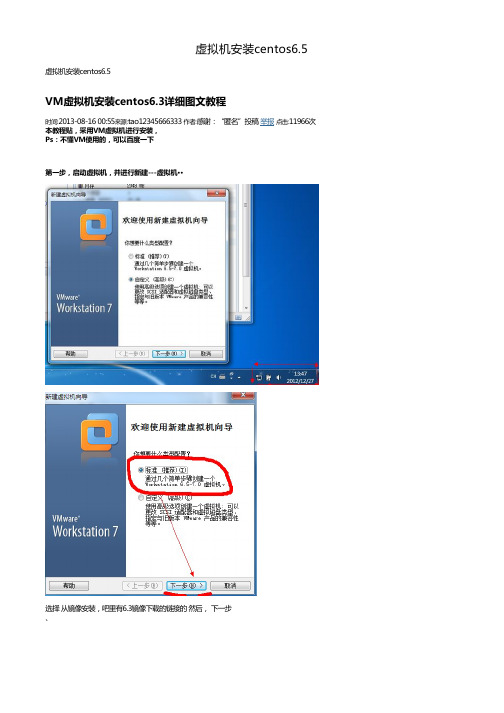
选择 从镜像安装,吧里有6.3镜像下载的链接的 然后, 下一步、
选择客户机版本然后下一步
命名以及更改客户机占用空间的位置,建议是更改至空间较大的位置
设置分配空间的大小
如果对客户机硬件有需求的,可以进行定制硬件,如果没有,可以直接下一步
开始安装centos,以及对客户机的设置。
依照个人需要设置,注意,将光驱中载入下载好的光盘镜像
开始安装
选择跳过检测
选择下一步
为你的客户机命名
设置root密码···
点击下一步····然后选择自定义布局
现在开始创建分区
这里要注意,分区的规划。
例如,我这里有10G,然后我/分6G swap 分2G(因为内存在2G以下就选择内存的2倍,如果在2G就2G 吧)。
我这里再专门分一个区/data 用来存放数据
直接下一步
如果是新手初次使用,建议使用Desktop .如果是做服务器,建议是Minimal (最小)。
我以Desk 为例
接下来就是一段时间的等待
安装完成之后,重新引导。
CentOS6.5下载和安装详细步骤
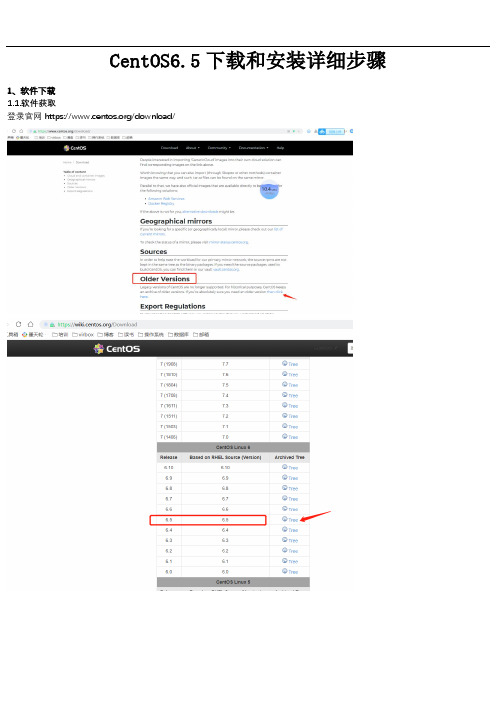
CentOS6.5下载和安装详细步骤1、软件下载1.1.软件获取登录官网https:///download/建议复制网址通过迅雷客户端下载,网页下载速度较慢1.2.软件下载2、CentOS6.5安装2.1 查看配置创建虚拟机前,检查【管理】-【全局设定】:1. 编辑-首选项-工作区-虚拟机的默认位置:指向空间充足的磁盘分区下专用目录2. 编辑-虚拟网络编辑器-仅主机网卡VMnet1 设置配置仅主机网卡VMnet1 对应192.168.235.0/255.255.255.0 此时默认会给宿主机windows 系统分配IP:192.168.235.1/255.255.255.02.2 新建虚拟机mysql22.2.1 Oracle Linux 64 位2.2.2 磁盘大小50G2.2.3 自定义硬件2.2.4 内存2G2.2.5 处理器数量12.2.6 使用ISO 映像文件2.2.7 网络适配器-VMnet1(仅主机模式)2.2.8 完成2.2.9 描述os:centos6.5 x86_64 ip:192.168.235.101 hostname:mysql2 root/mysql2:mysql22.3 启动虚拟机安装2.3.1 启动虚拟机2.3.2 默认第一项按回车进入图形化安装界面2.3.3 Skip 跳过安装介质检测2.3.4 OK2.3.5 Next2.3.6 安装语言默认English2.3.7 键盘布局默认U.S.English2.3.8 默认第一项基本存储设备Next2.3.9 Yes,discard any data丢弃数据2.3.10配置网络主机名:mysql2默认是DHCP 修改手动设置Manual 配置静态ip Applyclose -Next2.3.11选择Asia/ShanghaiUTC:linux 下特种表示时间的方法,系统中两种时间: 一种是BIOS clock,格林威治时间GMT,时间偏移量0,即bios 中是英国伦敦时间。
图解CentOS6.5桌面版安装
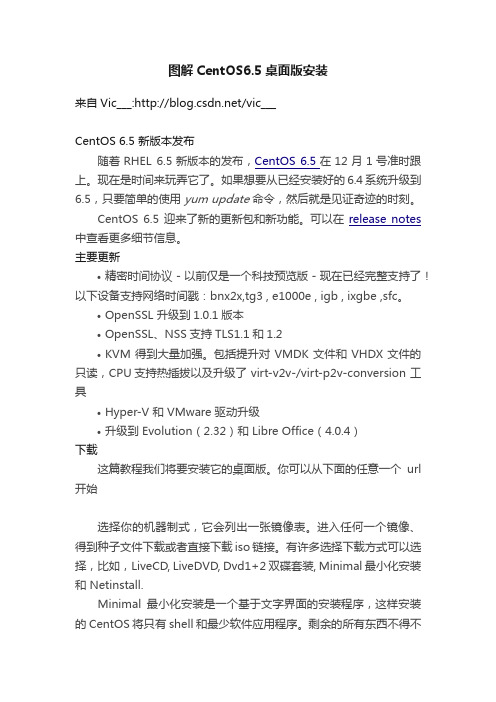
图解CentOS6.5桌面版安装来自Vic___:/vic___CentOS 6.5 新版本发布随着RHEL 6.5新版本的发布,CentOS 6.5在12月1号准时跟上。
现在是时间来玩弄它了。
如果想要从已经安装好的6.4系统升级到6.5,只要简单的使用 yum update 命令,然后就是见证奇迹的时刻。
CentOS 6.5 迎来了新的更新包和新功能。
可以在release notes 中查看更多细节信息。
主要更新•精密时间协议 - 以前仅是一个科技预览版 - 现在已经完整支持了!以下设备支持网络时间戳:bnx2x,tg3 , e1000e , igb , ixgbe ,sfc。
•OpenSSL 升级到1.0.1版本•OpenSSL、NSS支持TLS1.1和1.2•KVM得到大量加强。
包括提升对VMDK文件和VHDX文件的只读,CPU支持热插拔以及升级了 virt-v2v-/virt-p2v-conversion 工具•Hyper-V 和 VMware 驱动升级•升级到 Evolution(2.32)和 Libre Office(4.0.4)下载这篇教程我们将要安装它的桌面版。
你可以从下面的任意一个url 开始选择你的机器制式,它会列出一张镜像表。
进入任何一个镜像、得到种子文件下载或者直接下载iso链接。
有许多选择下载方式可以选择,比如,LiveCD, LiveDVD, Dvd1+2双碟套装, Minimal最小化安装和 Netinstall.Minimal最小化安装是一个基于文字界面的安装程序,这样安装的CentOS将只有shell和最少软件应用程序。
剩余的所有东西不得不你自己通过yum安装。
LiveCD/LiveDVD提供桌面版和GUI安装程序,可以安装CentOS 系统但是不提供任何可选择的软件包。
DvD1+2双碟套装给有需求的人提供完整的应用程序集合netinstall 事实上会先下载安装镜像然后再安装这篇文章我们将使用LiveCD。
mhtvl虚拟磁带库的GUI+iscsi详细配置

MHVTL虚拟磁带库安装解读mhvtl.docx1.在安装mhvtl之前,先安装如下软件包:2.接着创建vtl用户:3.解压mhvtl-2010-09-01.tgz软件包:4.编译mhvtl:5.安装完成后启动mhvtl:# /etc/init.d/mhvtl start6.如果没有配置文件,会生成默认的配置。
用lsscsi –g查看:这里的/dev/sg10和/dev/sg11是机械手。
这个默认的容量是500MB,这个可以查看mhvtl的配置文件mhvtl.conf:# cat /etc/mhvtl/mhvtl.confcapacity=500就是指默认容量为500MB。
7.简单应用:查看机械手状态:将磁带从1号槽位装入driver 0:# mtx -f /dev/sg10 load 1 0# mtx -f /dev/sg10 status查看磁带状态:# mt –f /dev/st0 status使用tar命令测试下,能否写入文件:# tar -cvvf /dev/st4 /boot写入成功了,测试是否能读取呢:# tar -tvvf /dev/st4OK,读取成功。
接下来测试倒带:#mt -f /dev/st4 rewind卸载磁带:#mtx -f /dev/sg10 unload 1 0OK,卸载成功。
8.自定义磁带库和drive的品牌或者型号,修改虚拟磁带库的/etc/mhvtl/device.conf文件vi /etc/mhvtl/device.confmhvtl 默认定义的磁带库和drive自定义的磁带库和drivemhvtl GUI安装1.安装Apache和Apache所需要的一些依赖包yum –y install curl curl-devel zlib-devel openssl-devel perl cpio expat-devel gettext-devel安装phpyum –y install httpd php-commom php-devel php-gd php-mcrypt php-mbstring php-pear php-bcmath php-dba php-mhash php-mysql php-mx2.下载mhvtl GUI安装,并进行安装3.解压安装niadev67-mhvtl-gui-1.5.0-5-g6d4187f.tar.gz,将mhvtl-gui程序拷贝到/var/www/html/mhvtl4.检查/var/www/html/mhvtl文件夹内的内容root@localhost mhvtl#ls5.修改/etc/httpd/conf/httpd.conf文件,在文件最后面添加以下内容Alias /mhvtl "/var/www/html/mhvtl"<Directory "/var/www/html/mhvtl">Options NoneAllowOverride NoneOrder allow,denyAllow from all</Directory>6.修改/etc/sudoer文件chmod 777 /etc/sudoervi /etc/sudoer7.修改/etc/sudoer文件的权限,改回440,要不然不能正常访问,重启Apache服务chmod 440 /etc/sudoersudoer service httpd start8.通过浏览器访问mhvtl GUI访问地址为:http://mhvtl server ip/mhvtl,登录的密码为:mhvtlhttp://192.168.0.1/mhvtl虚拟磁带库和drive的共享如果我想将linux mhvtl虚拟带库共享出去,给windows。
VMware v12下安装Centos6.5系统详细教程

VMware12下安装centos6.5详细教程前言:很多童鞋想学习以下Linux系统的操作,但又不想安装Linux系统(操作不习惯),这时就可以考虑将系统装在虚拟上,既不影响主系统的使用,又可以方便地进行Linux系统的学习和测试。
本教程就带大家熟悉一下在VMware上安装CentOS6.5的操作,虚拟机选择VMware是因为它是比较常用的主流虚拟机,使用也比较方便,其他的像Virtual Box自然也是可以的,具体看个人使用习惯;至于Linux系统选择CentOS,一方面是因为CentOS商用比较多,学习比较贴近实际,另一方面选择6.5版本也是因为市场上比较主流,所以学习比较有实用性。
关于教程,我尽量想写的稍微详细一点,对完全的小白比较友好一点,但对于已有经验的人可能稍显哆嗦,大家可以根据自己的情况有选择地参考,有些细节方面限于篇幅和主题,也没有展开说明,有需要的可以自行去了解和补充,如有错误和不足希望大家多多指正,那么简单介绍完就开始一起学习吧!步骤1、工具准备物理计算机一台配置要求:操作系统:win7/win8/10-64位硬盘建议可用容量10G+内存建议4G+虚拟机安装包产品:VMware® Workstation 12 Pro版本:12.5.7 build-5813279大小:404MB●安装包获取:这里就不介绍了,网上一搜一大把,找不到的自己去撞棉花吧。
注:这里不一定要用12版本的,10和11版本的都可以用。
Centos6.5系统镜像产品:CentOS6.5版本:CentOS-6.5-x86_64.iso大小:4.2GB●镜像获取:建议从官网下载,比较安全,当然其它一些第三方网站也可以官网为英文,有些童鞋可能不太熟悉,这里介绍一下官网下载流程:①.首先进入CentOS官方网站https://,首页如下:②.点击页面中的”Get CentOS Now”按钮获取CentOS,进入下载页面,主界面上有三个不同的镜像文件类型的CentOS,分别为DVD ISO、Everything ISO、Minimal ISO,如下图所示:下面简单介绍一下这三种类型镜像文件的区别:DVD ISO:此镜像类型为普通光盘安装版,可离线安装到计算机硬盘上,包含大量的常用软件,一般选择这种镜像类型即可。
Centos 6.5 安装脚本

Centos 6.5 安装脚本vi anhou#!/bin/bash#安装setupyum provides */bin/setupyum -y install setuptoolyum -y install ntsysv system-config-firewall-tui system-config-network-tui-y#安装make,不然,呵呵,你安装其它程序后,无法编译安装yum install make -yyum install gcc gcc-c++ autoconf automake -y#安装wget,这个下载的命令实在非常方便,必备精品yum -y install wget#安装vim,默认自带的是vi。
所以yum -y install vim#安装解压缩软件yum -y install gzip unzip#安装vsftpd#yum remove vsftpd //卸载vsftpdyum -y install vsftpd/etc/init.d/vsftpd startchkconfig vsftpd on#安装定时任务yum install crontabs -y/sbin/service crond startchkconfig crond on#关闭不必要开机自启动服务chkconfig auditd offchkconfig blk-availability offchkconfig ip6tables offchkconfig lvm2-monitor off chkconfig udev-post off#删除不必要的系统用户userdel admuserdel lpuserdel shutdownuserdel haltuserdel uucpuserdel operatoruserdel gamesuserdel gopheruseradd hruseradd -m -s /sbin/nologin public useradd -m -s /sbin/nologin zcx useradd -m -s /sbin/nologin cyjecho "87654321" | passwd --stdin public echo "zcx321" | passwd --stdin zcx echo "cyj321" | passwd --stdin cyj:wq #保存退出#使脚本文件anhou变为可执行文件chmod +x anhou#执行脚本文件anhou./anhou关闭防火墙1)临时生效,重启后复原开启:service iptables start关闭:service iptables stop2)永久性生效,重启后不会复原开启:chkconfig iptables on关闭:chkconfig iptables off#/etc/init.d/vsftpd restart关闭SELinuxvim /etc/selinux/config文件中的SELINUX=enforcing 注释掉,并增加:SELINUX=disabled然后重启reboot#使配置立即暂时生效setenforce 0wget -c /lnmp/lnmp1.1-full.tar.gz && tar zxf lnmp1.1-full.tar.gz && cd lnmp1.1-full && ./centos.sh 输入mysql登录密码回车然后选择是否用InnoDB引擎(注seafile 软件要选y)添加新用户#useradd 用户名#passwd 用户名useradd hrpasswd hr#创建不能本地登录的用户,我用于ftp用户useradd -m -s /sbin/nologin publicpasswd public#vi /etc/passwd#给CentOS添加sudo用户suvisudo -f /etc/sudoers在root ALL=(ALL) ALL 之后增加用户名如:hr ALL=(ALL) ALLvim /etc/vsftpd/vsftpd.conf#禁用户离开主目录(增加)chroot_local_user=YESservice vsftpd restart使匿名ftp帐户可写,及修改默认匿名用户目录/var/ftpmkdir /home/ftpmkdir /home/ftp/pubchown ftp.ftp -R /home/ftp/pubchmod 744 /home/ftp/pubvim /etc/vsftpd/vsftpd.conf#保持默认anonymous_enable=YES#去掉注释符#anon_upload_enable=YES#去掉注释符#anon_mkdir_write_enable=YES#增加,设置上传后的文件能被直接下载anon_umask=073#增加,匿名用户登录时不询问口令no_anon_password=YES#增加,修改匿名用户目录anon_root=/home/ftp:wqservice vsftpd restartdos文件格式转换成unix格式:(一般在windows机器上编写好了文件传到unix下就可能会出现这样的情况.)vi /etc/vsftpd/vsftpd.conf:set fileformat=unix:wq#换源。
CentOS-6.5系统安装配置图解教程(详细图文)

CentOS 6.5系统安装配置图解教程(详细图文)点评:截止目前CentOS 6.x最新版本为CentOS 6.5,下面介绍CentOS 6.5的具体安装配置过程,需要的朋友可以参考下。
说明:截止目前CentOS 6.x最新版本为CentOS 6.5,下面介绍CentOS 6.5的具体安装配置过程服务器相关设置如下:操作系统:CentOS 6.5 64位IP地址:192.168.21.129网关:192.168.21.2DNS:8.8.8.8 8.8.4.4备注:CentOS 6.5系统镜像有32位和64位两个版本,生产服务器如果是大存(4G以上存)建议安装64位版本CentOS-6.5-x86_64-bin-DVD1.iso附:CentOS 6.5下载地址32位:/centos/6.5/isos/i386/CentOS-6.5-i386-bin-DVD1to2.torrent64位:/centos/6.5/isos/x86_64/CentOS-6.5-x86_64-bin-DVD1to2.torrent1、CentOS 6.5系统镜像有两个,安装系统只用到第一个镜,即CentOS-6.5-i386-bin-DVD1.iso(32位)或者CentOS-6.5-x86_64-bin-DVD1.iso(64位),第二个镜像是系统自带软件安装包;2、安装CentOS 6.5系统的计算机存必须等于或者大于628M(最小存628M),才能启用图形安装模式;3、CentOS 6.5文本安装模式不支持自定义分区,建议使用图形安装模式安装;4、CentOS 6.5的系统安装方式分为:图形安装模式和文本安装模式;5、CentOS 6.5的系统运行方式分为:带图形界面、可以用鼠标操作的图形化方式和不带图形界面、直接用命令行操作的文本方式(具体的系统运行方式,可以在系统安装的过程中自定义选择);一、安装CentOS 6.5用光盘成功引导系统,会出现下面的界面界面说明:Install or upgrade an existing system 安装或升级现有的系统install system with basic video driver 安装过程中采用基本的显卡驱动Rescue installed system 进入系统修复模式Boot from local drive 退出安装从硬盘启动Memory test 存检测这里选择第一项,安装或升级现有的系统,回车。
CentOS 6.5系统安装配置KVM虚拟机
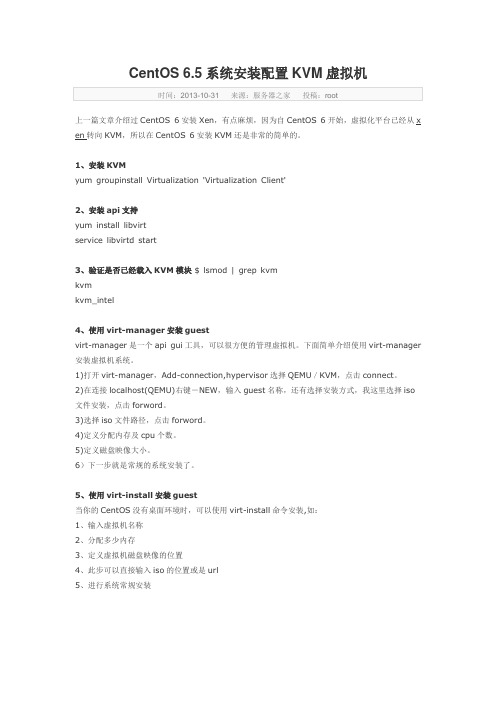
CentOS 6.5系统安装配置KVM虚拟机时间:2013-10-31 来源:服务器之家投稿:root上一篇文章介绍过CentOS 6安装Xen,有点麻烦,因为自CentOS 6开始,虚拟化平台已经从x en转向KVM,所以在CentOS 6安装KVM还是非常的简单的。
1、安装KVMyum groupinstall Virtualization 'Virtualization Client'2、安装api支持yum install libvirtservice libvirtd start3、验证是否已经载入KVM模块 $ lsmod | grep kvmkvmkvm_intel4、使用virt-manager安装guestvirt-manager是一个api gui工具,可以很方便的管理虚拟机。
下面简单介绍使用virt-manager 安装虚拟机系统。
1)打开virt-manager,Add-connection,hypervisor选择QEMU/KVM,点击connect。
2)在连接localhost(QEMU)右键-NEW,输入guest名称,还有选择安装方式,我这里选择iso 文件安装,点击forword。
3)选择iso文件路径,点击forword。
4)定义分配内存及cpu个数。
5)定义磁盘映像大小。
6)下一步就是常规的系统安装了。
5、使用virt-install安装guest当你的CentOS没有桌面环境时,可以使用virt-install命令安装,如:1、输入虚拟机名称2、分配多少内存3、定义虚拟机磁盘映像的位置4、此步可以直接输入iso的位置或是url5、进行系统常规安装。
搭建开源虚拟磁带库mhvtl[精彩]
![搭建开源虚拟磁带库mhvtl[精彩]](https://img.taocdn.com/s3/m/90d7df6600f69e3143323968011ca300a6c3f6b6.png)
搭建开源虚拟带库mhvtl1需要用的安装包:\\192.168.16.122\f$\软件安装包\其他工具\mhvtl虚拟磁带库软件2需要的环境:用公司的rehat5.5 64bit系统安装包。
Redhat4是装不了mhvtl的,据说mhvtl 对redhat的系统版本要求至少要2.6.18。
刚好5.5是2.6.183系统的组件要求,在网上看了要求装gcc,kernel-devel这些组件,这些组件系统都有的,在安装包里面都可以找到rpm包来装的,至于什么rpm,google咯。
这里顺便介绍下入门级的安装rpm组件。
首先把系统iso包放到驱动器里,然后挂载这个系统包(作用是可以读取里面的文件啦)比如它要求你是否装了gcc这个组件,你可以先这样查询从上面看是已经装好了的如果没装,你可以在/mnt搜索gcc 这个rpm包,用find命令[root@localhost ~]# find /mnt -name *gcc*然后安装rpm –ivh /mnt/Server/gcc-4.1.2-48.el5.x86_64.rpm可能有提示缺少依赖的组件,那你就先装其他组件啦,rpm要学的话,自己googl e吧不过你如果不想这么麻烦,在安装系统的时候,把开发组件也勾选然后装进去,在安装步骤过程中,勾选”development tools”,这样就不用再去装组件了。
所以你在安装系统过程中把开发组件装上了,就不用去装gcc这些了。
4另外装两个工具lsscsi和mtx,这两个都可以来操作磁带库的。
mtx是磁带操作工具,lsscsi 是scsi设备管理工具。
Lsscsi 是系统自带的,不过默认没安装,你可以在安装包里面找得到的rpm。
mtx可以在8.0安装包找得到。
5装完上面的组件后,我们就开始装mhvtl啦。
首先配置下环境,创建下用户[root@a ~]# useradd vtl[root@a ~]# passwd vtl创建目录:[root@a ~]# mkdir /opt/mhvtl[root@a ~]# mkdir /etc/mhvtl[root@a ~]# chown -Rf vtl:vtl /opt/mhvtl/[root@a ~]# chown -Rf vtl:vtl /etc/mhvtl/之后解压mhvtl文件tar -xvf 704299_1283778672.zip安装:cd mhvtl-0.18/cd kernel/makemake installcd ..makemake install至此mhvtl就安装完了之后启动mhvtl就行了/etc/init.d/mhvtl start若有报错,先stop,再启动就可以了。
Linux介绍+配置虚拟机+安装CentOS6.5+基本命令+使用VIVIM+rpm的安装和卸载
Linux介绍+配置虚拟机+安装CentOS6.5+基本命令+使⽤VIVIM+rpm的安装和卸载⼀.Linux的发展史1.Linux的发展史在第2次世界⼤战刚刚结束(以抗⽇战争胜利作为标记),也就是19世纪的40年代末西⽅国家的通⽤电⽓,⿇省理⼯⼤学和贝尔⼯作室倡导了⼀个超级计算机的开发计划,这计划被称为Multics⼯程计划,这个计划最终是以失败告终。
但这个计划的失败为后⼈对计算机操作系统的研究和开发的宝贵经验,肯•汤谱森和丹尼斯•⾥奇总结了失败的经验在19世纪的60年代末(苏美冷战时代)发明了举世闻名的Unix操纵系统,由于肯•汤谱森和丹尼斯•⾥奇不局限于计算机科学只⽤于军事和国防领域,使得计算机科学得到了迅速的发展。
今天⼈们常说的苹果,安卓和Linux操纵系统都是从Unix发展⽽来的,所以计算机科学其实是站在巨⼈的肩膀上发展起来的⼀个领域。
Linux是林纳斯•托⽡茨在Uninx的基础上开发和改良的操作系统,在理查德•马修•斯托曼的帮助下Linux进⾏了开源发布,发展到了今天产⽣了各种以Linux为核⼼的操作系统,⼈们习惯上把以Linux作为核⼼发展起来的操作系统统称为Linux的分⽀,在科学的应⽤领域,主要也是使⽤Linux 的分⽀为主。
2.红帽⼦公司的CentOS其中以Red Hat(红帽⼦)系列的分⽀最为出名,⽽该公司开发其中⼀款产品CentOS被世界上⼤多数公司⽤于作为服务器的操作系统底层,⽬前国内版本以CentOS6为主导,其中CentOS6.5和CentOS6.8运⽤最为⼴泛,阿⾥云的服务器产品当中就可以选择CentOS6.8这个操作系统,CentOS6.5和CentOS6.8的功能是⼀模⼀样的,然⽽CentOS6.8的CA证书需要提交相关的专业认证⽅式,我们⼀般做不到所以我们⽆法正常使⽤CentOS6.8,但阿⾥云公司帮⽤户实现了这个专业认证,所以在阿⾥云上我们可以使⽤CentOS6.8在学习时我们⼀般选择安装CentOS6.5来进⾏学习就可以了3.CentOS的特点1.简单易⽤,安全性⾼,且⽀持图形操作界⾯2.其安装步骤⽀持全图形操作,且有中⽂包补丁3.能够免费实现在线安装服务(yum命令)4.被誉为世界上最适合作为服务器的底层的Linux操作系统,其性能⼗分稳定5.有32位和64位两种操作系统安装镜像6.多任务,多⽤户的操作系统安装CentOS6.5⼆.⼆.安装1.什么是虚拟机?虚拟机实际上是⼀个虚拟PC的软件,它可以在现有的操作系统上虚拟出⼀个新的硬件环境,相当于虚拟了⼀台新的计算机,从⽽实现了⼀台机器独⽴运⾏两个或者两个以上的操作系统。
在Linux上进行虚拟磁带库安装
在Linux上进行虚拟磁带库安装由于条件所限,没有磁带机硬件供自己练习,于是想到用软件模拟代替。
所幸网络上已经有了很多这样的例子:mhvtl 提供虚拟磁带库的功能,比虚拟一个单纯的磁带机更进一步。
以下是安装和实验的实地记录:一、安装 mhvtl:安装 mhvtl 之前,需要安装一些组件供使用:安装gcc:[root@fullcent ~]# yum install gcc安装mtx:[root@fullcent ~]# yum install mtx安装mt-st :[root@fullcent ~]# yum install mt-st安装 zlib-devel:[root@fullcent ~]# yum install zlib-devel安装 sg3 相关软件:[root@fullcent ~]# yum install sg3*……Running TransactionInstalling : sg3_utils-libs 1/5Installing : sg3_utils-libs 2/5Installing : sg3_utils 3/5Installing : sg3_utils-devel 4/5Installing : sg3_utils-devel 5/5Installed:sg3_utils.x86_64 0:1.25-5.el5 sg3_utils-devel.i386 0:1.25-5.el5sg3_utils-devel.x86_64 0:1.25-5.el5 sg3_utils-libs.i386 0:1.25-5.el5sg3_utils-libs.x86_64 0:1.25-5.el5Complete![root@fullcent ~]#安装 lsscsi :[root@fullcent ~]# yum install lsscsi安装lzo :[root@fullcent soft]# wget /opensource/lzo/download/lzo-2.06.tar.gz[root@fullcent soft]# tar -zxvf lzo-2.06.tar.gz[root@fullcent soft]# cd lzo-2.06[root@fullcent lzo-2.06]# ./configure[root@fullcent lzo-2.06]# make && make install安装 linux kernel :[root@fullcent ~]# yum install kernel-devel创建名为 vtl 的用户:[root@fullcent ~]# useradd vtl[root@fullcent ~]# passwd vtlChanging password for user vtl.New UNIX password:BAD PASSWORD: it is WAY too shortRetype new UNIX password:passwd: all authentication tokens updated successfully.[root@fullcent ~]#创建用于 mhvtl 的目录:[root@fullcent ~]# mkdir /opt/mhvtl[root@fullcent ~]# mkdir /etc/mhvtl[root@fullcent ~]# chown -Rf vtl:vtl /opt/mhvtl[root@fullcent ~]# chown -Rf vtl:vtl /etc/mhvtl[root@fullcent ~]#然后,开始下载 mhvtl 安装包:用如下的地址:https:///site/linuxvtl2/home#mhvtl-download进行解压缩:[root@fullcent soft]# tar -zxvf mhvtl-2013-01-31.tgz进入解压后的目录,进行安装:[root@fullcent mhvtl-1.4]# make distclean[root@fullcent mhvtl-1.4]# cd kernel[root@fullcent kernel]# make[root@fullcent kernel]# make install[root@fullcent mhvtl-1.4]# cd ../[root@fullcent mhvtl-1.4]# pwd/soft/mhvtl-1.4[root@fullcent mhvtl-1.4]# make[root@fullcent mhvtl-1.4]# make install二、使用 mhvtl服务:安装完毕,启动服务:[root@fullcent mhvtl-1.4]# service mhvtlCould not locate library config file: /etc/mhvtl/library_contents.10Creating a default onePlease stop mhvtl & edit /etc/mhvtl/library_contents.10 to suit your requirementsCould not locate library config file: /etc/mhvtl/library_contents.30Creating a default onePlease stop mhvtl & edit /etc/mhvtl/library_contents.30 to suit your requirementsUsage: /etc/init.d/mhvtl {start|stop|shutdown}可以看到,已经建立了两个配置文件: library_contents.10 和 library_contents.30[root@fullcent mhvtl-1.4]# service mhvtl startvtllibrary process PID is 3827vtllibrary process PID is 3830[root@fullcent mhvtl-1.4]# ps -ef | grep 3827vtl 3827 1 0 10:58 ? 00:00:00 vtllibrary -q 10 -vroot 4320 2944 0 10:58 pts/1 00:00:00 grep 3827[root@fullcent mhvtl-1.4]# ps -ef | grep 3830vtl 3830 1 0 10:58 ? 00:00:00 vtllibrary -q 30 -vroot 4322 2944 0 10:58 pts/1 00:00:00 grep 3830[root@fullcent mhvtl-1.4]#对文件状况进行查看:[root@fullcent /]# ls /etc/mhvtl/device.conf library_contents.10 library_contents.30 mhvtl.conf[root@fullcent /]# ls /opt/mhvtl/CLN101L4 E01007L4 E01016L4 F01034L5 G03004TA G03013TA G03022TA G03031TACLN102L5 E01008L4 E01017L4 F01035L5 G03005TA G03014TA G03023TA G03032TACLN303TA E01009L4 E01018L4 F01036L5 G03006TA G03015TA G03024TA G03033TAE01001L4 E01010L4 E01019L4 F01037L5 G03007TA G03016TA G03025TA G03034TAE01002L4 E01011L4 E01020L4 F01038L5 G03008TA G03017TA G03026TA G03035TAE01003L4 E01012L4 F01030L5 F01039L5 G03009TA G03018TA G03027TA G03036TAE01004L4 E01013L4 F01031L5 G03001TA G03010TA G03019TA G03028TA G03037TAE01005L4 E01014L4 F01032L5 G03002TA G03011TA G03020TA G03029TA G03038TAE01006L4 E01015L4 F01033L5 G03003TA G03012TA G03021TA G03030TA G03039TA[root@fullcent /]#基本上,/etc/mhvtl 是放置配置文件的地方,/opt/mhvtl 是放置模拟磁带的文件的地方[root@fullcent /]# cat /etc/mhvtl/mhvtl.conf# Home directory for config file(s)MHVTL_CONFIG_PATH=/etc/mhvtl# Default media capacity (500 M)CAPACITY=500# Set default verbosity [0|1|2|3]VERBOSE=1# Set kernel module debuging [0|1]VTL_DEBUG=0[root@fullcent /]#用 lsscsi 命令查看 scsi 设备的状态:并且对比一下,mhvtl 服务启动前后,lsscsi的结果:这是磁带库启动中的状态:[root@fullcent /]# lsscsi -g[0:0:0:0] disk ATA VBOX HARDDISK 1.0 /dev/sda /dev/sg0[1:0:0:0] mediumx STK L700 0104 - /dev/sg9[1:0:1:0] tape IBM ULT3580-TD5 0104 /dev/st0 /dev/sg1[1:0:2:0] tape IBM ULT3580-TD5 0104 /dev/st1 /dev/sg2[1:0:3:0] tape IBM ULT3580-TD4 0104 /dev/st2 /dev/sg3[1:0:4:0] tape IBM ULT3580-TD4 0104 /dev/st3 /dev/sg4[1:0:8:0] mediumx STK L80 0104 - /dev/sg10[1:0:9:0] tape STK T10000B 0104 /dev/st4 /dev/sg5[1:0:10:0] tape STK T10000B 0104 /dev/st5 /dev/sg6[1:0:11:0] tape STK T10000B 0104 /dev/st6 /dev/sg7[1:0:12:0] tape STK T10000B 0104 /dev/st7 /dev/sg8[root@fullcent /]#[root@fullcent /]# lsscsi -l[0:0:0:0] disk ATA VBOX HARDDISK 1.0 /dev/sdastate=running queue_depth=31 scsi_level=6 type=0 device_blocked=0 timeout=60[1:0:0:0] mediumx STK L700 0104 -state=running queue_depth=32 scsi_level=6 type=8 device_blocked=0 timeout=0[1:0:1:0] tape IBM ULT3580-TD5 0104 /dev/st0state=running queue_depth=32 scsi_level=6 type=1 device_blocked=0 timeout=900[1:0:2:0] tape IBM ULT3580-TD5 0104 /dev/st1state=running queue_depth=32 scsi_level=6 type=1 device_blocked=0 timeout=900[1:0:3:0] tape IBM ULT3580-TD4 0104 /dev/st2state=running queue_depth=32 scsi_level=6 type=1 device_blocked=0 timeout=900[1:0:4:0] tape IBM ULT3580-TD4 0104 /dev/st3state=running queue_depth=32 scsi_level=6 type=1 device_blocked=0 timeout=900[1:0:8:0] mediumx STK L80 0104 -state=running queue_depth=32 scsi_level=6 type=8 device_blocked=0 timeout=0 [1:0:9:0] tape STK T10000B 0104 /dev/st4state=running queue_depth=32 scsi_level=6 type=1 device_blocked=0 timeout=900 [1:0:10:0] tape STK T10000B 0104 /dev/st5state=running queue_depth=32 scsi_level=6 type=1 device_blocked=0 timeout=900 [1:0:11:0] tape STK T10000B 0104 /dev/st6state=running queue_depth=32 scsi_level=6 type=1 device_blocked=0 timeout=900 [1:0:12:0] tape STK T10000B 0104 /dev/st7state=running queue_depth=32 scsi_level=6 type=1 device_blocked=0 timeout=900 [root@fullcent /]#这是停止 mhvtl 后的状态:[root@fullcent mhvtl]# service mhvtl stopshutdown of mhvtlSending exit to 11Sending exit to 12Sending exit to 13Sending exit to 14Sending exit to 31Sending exit to 32Sending exit to 33Sending exit to 34Sending exit to 10Sending exit to 30[root@fullcent mhvtl]#[root@fullcent mhvtl]# lsscsi[0:0:0:0] disk ATA VBOX HARDDISK 1.0 /dev/sda[root@fullcent mhvtl]# lsscsi -g[0:0:0:0] disk ATA VBOX HARDDISK 1.0 /dev/sda /dev/sg0[root@fullcent mhvtl]# lsscsi -l[0:0:0:0] disk ATA VBOX HARDDISK 1.0 /dev/sdastate=running queue_depth=31 scsi_level=6 type=0 device_blocked=0 timeout=60[root@fullcent mhvtl]#由上面可以看到:/dev/sg1 - /dev/sg10 均由 mhvtl 模拟出来。
mhvtl使用手册

mhvtl使用手册1. 介绍MHVTLMHVTL(Media and Host Virtual Tape Library)是一款虚拟磁带库软件,它能够模拟磁带设备,提供高效的数据备份和恢复功能。
本手册将为用户提供详细的MHVTL使用方法和操作指南。
2. 安装和配置2.1 硬件要求在安装MHVTL之前,确保您的计算机系统满足以下最低配置要求:- CPU:双核或以上- 内存:至少4GB- 存储:至少100GB可用空间2.2 软件安装首先下载MHVTL的安装包,并按照安装向导的提示进行安装。
安装完成后,您需要对MHVTL进行配置,包括指定存储路径和设置管理员账户等。
3. 创建虚拟磁带库在MHVTL中,虚拟磁带库是数据备份和恢复的基本单位。
下面是创建虚拟磁带库的步骤:3.1 打开MHVTL管理界面在您的浏览器中输入MHVTL的IP地址,并以管理员身份登录管理界面。
3.2 添加虚拟磁带库在管理界面中,点击“添加库”按钮,在弹出的窗口中填写相关信息,包括磁带库名称、容量、存储路径等。
确认无误后,点击“添加”按钮完成创建。
4. 管理虚拟磁带在MHVTL中,您可以对虚拟磁带进行各种管理操作,包括创建、删除、格式化、加载和卸载等。
4.1 创建虚拟磁带在管理界面中,选择所需的虚拟磁带库,点击“创建磁带”按钮,输入磁带名称和容量等信息,点击“创建”按钮完成创建。
4.2 删除虚拟磁带选中要删除的虚拟磁带,在操作菜单中选择“删除”,确认删除操作后,虚拟磁带将被永久删除。
4.3 格式化虚拟磁带选中要格式化的虚拟磁带,在操作菜单中选择“格式化”,确认格式化操作后,虚拟磁带将被清空并重置为初始状态。
4.4 加载和卸载虚拟磁带在操作菜单中选择“加载”,MHVTL将模拟加载虚拟磁带设备并将其显示为可用设备。
同样,在操作菜单中选择“卸载”将模拟卸载设备。
5. 数据备份与恢复5.1 数据备份在备份软件中选择MHVTL作为备份目标,选择要备份的文件或文件夹,设置备份策略并启动备份任务。
- 1、下载文档前请自行甄别文档内容的完整性,平台不提供额外的编辑、内容补充、找答案等附加服务。
- 2、"仅部分预览"的文档,不可在线预览部分如存在完整性等问题,可反馈申请退款(可完整预览的文档不适用该条件!)。
- 3、如文档侵犯您的权益,请联系客服反馈,我们会尽快为您处理(人工客服工作时间:9:00-18:30)。
一.Mhvtl+mhvtl gui+iscsi1.安装:yum install lsscsi mt-st mtx zlib-devel sg3_utils zlib lzo-devel kernel-devel kernel-headers gcc接着创建vtl用户:#useradd vtl#passwd vtl#mkdir /opt/mhvtl# mkdir /etc/mhvtl# chown -Rf vtl:vtl /opt/mhvtl#chown -Rf vtl:vtl /etc/mhvtl(/etc/mhvtl为配置文件路径/opt/mhvtl为虚拟带库存储路径)2. 编译安装 MHVLT# tar -zxvf mhvtl-2013-03-22.tgz[rootcentos001 tool]# cd mhvtl-1.4[rootcentos001 mhvtl-1.4]# cd kernel[rootcentos001 kernel]# make;make install[rootcentos001 mhvtl-1.4]# make;make install如果未安装lzo和lzo-devel开发环境将收到如下报错:Note: Since mhvtl-1.3, both lzo and zlib are required to build vtltapeTypical error (missing lzo devel package) looks like:cc -Wall -Wshadow -g -O2 -D_LARGEFILE64_SOURCE -I../kernel -DMHVTL_VERSION=\"1.4.0\" -DMHVTL_DEBUG -DUSR=\"vtl\" -DMHVTL_HOME_PATH=\"/opt/mhvtl\" -DMHVTL_CONFIG_PATH=\"/etc/mhvtl\" -c -o vtltape.o vtltape.cvtltape.c:92 lzo/lzoconf.h: No such file or directoryvtltape.c:93:23: lzo/lzo1x.h: No such file or directoryvtltape.c: In function 'uncompress_lzo_block'[rootcentos001 mhvtl-1.4]# service mhvtl statusCould not locate library config file: /etc/mhvtl/library_contents.10Creating a default onePlease stop mhvtl & edit /etc/mhvtl/library_contents.10 to suit your requirementsCould not locate library config file: /etc/mhvtl/library_contents.30Creating a default onePlease stop mhvtl & edit /etc/mhvtl/library_contents.30 to suit your requirementsUsage: /etc/init.d/mhvtl {start|stop|shutdown}[rootcentos001 mhvtl-1.4]# service mhvtl startvtllibrary process PID is 1729vtllibrary process PID is 1733查看虚拟带库状态信息[rootcentos001 mhvtl-1.4]# lsscsi -g[1:0:0:0] cd/dvd NECVMWar VMware IDE CDR10 1.00 /dev/sr0 /dev/sg0 [2:0:0:0] disk VMware, VMware Virtual S 1.0 /dev/sda /dev/sg1 [3:0:0:0] mediumx STK L700 0104 /dev/sch0 /dev/sg10 [3:0:1:0] tape IBM ULT3580-TD5 0104 /dev/st0 /dev/sg2 [3:0:2:0] tape IBM ULT3580-TD5 0104 /dev/st1 /dev/sg3 [3:0:3:0] tape IBM ULT3580-TD4 0104 /dev/st2 /dev/sg4 [3:0:4:0] tape IBM ULT3580-TD4 0104 /dev/st3 /dev/sg5 [3:0:8:0] mediumx STK L80 0104 /dev/sch1 /dev/sg11 [3:0:9:0] tape STK T10000B 0104 /dev/st4 /dev/sg6 [3:0:10:0] tape STK T10000B 0104 /dev/st5 /dev/sg7 [3:0:11:0] tape STK T10000B 0104 /dev/st6 /dev/sg8 [3:0:12:0] tape STK T10000B 0104 /dev/st7 /dev/sg9 [rootcentos001 mhvtl-1.4]# lsscsi -l[1:0:0:0] cd/dvd NECVMWar VMware IDE CDR10 1.00 /dev/sr0state=running queue_depth=1 scsi_level=6 type=5 device_blocked=0 timeout=30 [2:0:0:0] disk VMware, VMware Virtual S 1.0 /dev/sdastate=running queue_depth=32 scsi_level=3 type=0 device_blocked=0 timeout=30 [3:0:0:0] mediumx STK L700 0104 /dev/sch0state=running queue_depth=32 scsi_level=6 type=8 device_blocked=0 timeout=0 [3:0:1:0] tape IBM ULT3580-TD5 0104 /dev/st0state=running queue_depth=32 scsi_level=6 type=1 device_blocked=0 timeout=900 [3:0:2:0] tape IBM ULT3580-TD5 0104 /dev/st1state=running queue_depth=32 scsi_level=6 type=1 device_blocked=0 timeout=900 [3:0:3:0] tape IBM ULT3580-TD4 0104 /dev/st2state=running queue_depth=32 scsi_level=6 type=1 device_blocked=0 timeout=900 [3:0:4:0] tape IBM ULT3580-TD4 0104 /dev/st3state=running queue_depth=32 scsi_level=6 type=1 device_blocked=0 timeout=900 [3:0:8:0] mediumx STK L80 0104 /dev/sch1state=running queue_depth=32 scsi_level=6 type=8 device_blocked=0 timeout=0 [3:0:9:0] tape STK T10000B 0104 /dev/st4state=running queue_depth=32 scsi_level=0 type=1 device_blocked=0 timeout=900 [3:0:10:0] tape STK T10000B 0104 /dev/st5state=running queue_depth=32 scsi_level=0 type=1 device_blocked=0 timeout=900 [3:0:11:0] tape STK T10000B 0104 /dev/st6state=running queue_depth=32 scsi_level=0 type=1 device_blocked=0 timeout=900 [3:0:12:0] tape STK T10000B 0104 /dev/st7state=running queue_depth=32 scsi_level=0 type=1 device_blocked=0 timeout=900 这里的/dev/sg10和/dev/sg11是机械手。
这个默认的容量是500MB,这个可以查看mhvtl的配置文件mhvtl.conf: [rootcentos001 mhvtl-1.4]# cat /etc/mhvtl/mhvtl.conf# Home directory for config file(s)MHVTL_CONFIG_PATH=/etc/mhvtl# Default media capacity (500 M)CAPACITY=500# Set default verbosity [0|1|2|3]VERBOSE=1# Set kernel module debuging [0|1]VTL_DEBUG=0capacity=500就是指默认容量为500MB。
3.简单应用:查看机械手状态:[rootcentos001 mhvtl-1.4]# mtx -f /dev/sg10 statusStorage Changer /dev/sg10:4 Drives, 43 Slots ( 4 Import/Export ) Data Transfer Element 0:EmptyData Transfer Element 1:EmptyData Transfer Element 2:EmptyData Transfer Element 3:EmptyStorage Element 1:Full :VolumeTag=E01001L4Storage Element 2:Full :VolumeTag=E01002L4Storage Element 3:Full :VolumeTag=E01003L4Storage Element 4:Full :VolumeTag=E01004L4Storage Element 5:Full :VolumeTag=E01005L4Storage Element 6:Full :VolumeTag=E01006L4Storage Element 7:Full :VolumeTag=E01007L4Storage Element 8:Full :VolumeTag=E01008L4Storage Element 9:Full :VolumeTag=E01009L4Storage Element 10:Full :VolumeTag=E01010L4Storage Element 11:Full :VolumeTag=E01011L4Storage Element 12:Full :VolumeTag=E01012L4Storage Element 13:Full :VolumeTag=E01013L4Storage Element 14:Full :VolumeTag=E01014L4Storage Element 15:Full :VolumeTag=E01015L4Storage Element 16:Full :VolumeTag=E01016L4Storage Element 17:Full :VolumeTag=E01017L4Storage Element 18:Full :VolumeTag=E01018L4Storage Element 19:Full :VolumeTag=E01019L4Storage Element 20:Full :VolumeTag=E01020L4Storage Element 21:EmptyStorage Element 22:Full :VolumeTag=CLN101L4Storage Element 23:Full :VolumeTag=CLN102L5Storage Element 24:EmptyStorage Element 25:EmptyStorage Element 26:EmptyStorage Element 27:EmptyStorage Element 28:EmptyStorage Element 29:EmptyStorage Element 30:Full :VolumeTag=F01030L5Storage Element 31:Full :VolumeTag=F01031L5Storage Element 33:Full :VolumeTag=F01033L5Storage Element 34:Full :VolumeTag=F01034L5Storage Element 35:Full :VolumeTag=F01035L5Storage Element 36:Full :VolumeTag=F01036L5Storage Element 37:Full :VolumeTag=F01037L5Storage Element 38:Full :VolumeTag=F01038L5Storage Element 39:Full :VolumeTag=F01039L5Storage Element 40 IMPORT/EXPORT:EmptyStorage Element 41 IMPORT/EXPORT:EmptyStorage Element 42 IMPORT/EXPORT:EmptyStorage Element 43 IMPORT/EXPORT:Empty [rootcentos001 mhvtl-1.4]# mtx -f /dev/sg11 statusStorage Changer /dev/sg11:4 Drives, 44 Slots ( 4 Import/Export ) Data Transfer Element 0:EmptyData Transfer Element 1:EmptyData Transfer Element 2:EmptyData Transfer Element 3:EmptyStorage Element 1:Full :VolumeTag=G03001TAStorage Element 2:Full :VolumeTag=G03002TAStorage Element 3:Full :VolumeTag=G03003TAStorage Element 4:Full :VolumeTag=G03004TAStorage Element 5:Full :VolumeTag=G03005TAStorage Element 6:Full :VolumeTag=G03006TAStorage Element 7:Full :VolumeTag=G03007TAStorage Element 8:Full :VolumeTag=G03008TAStorage Element 9:Full :VolumeTag=G03009TAStorage Element 10:Full :VolumeTag=G03010TAStorage Element 11:Full :VolumeTag=G03011TAStorage Element 12:Full :VolumeTag=G03012TAStorage Element 13:Full :VolumeTag=G03013TAStorage Element 14:Full :VolumeTag=G03014TAStorage Element 15:Full :VolumeTag=G03015TAStorage Element 16:Full :VolumeTag=G03016TAStorage Element 17:Full :VolumeTag=G03017TAStorage Element 18:Full :VolumeTag=G03018TAStorage Element 19:Full :VolumeTag=G03019TAStorage Element 20:Full :VolumeTag=G03020TAStorage Element 21:Full :VolumeTag=G03021TAStorage Element 22:Full :VolumeTag=G03022TAStorage Element 23:Full :VolumeTag=G03023TAStorage Element 24:Full :VolumeTag=G03024TAStorage Element 25:Full :VolumeTag=G03025TAStorage Element 26:Full :VolumeTag=G03026TAStorage Element 28:Full :VolumeTag=G03028TAStorage Element 29:Full :VolumeTag=G03029TAStorage Element 30:Full :VolumeTag=G03030TAStorage Element 31:Full :VolumeTag=G03031TAStorage Element 32:Full :VolumeTag=G03032TAStorage Element 33:Full :VolumeTag=G03033TAStorage Element 34:Full :VolumeTag=G03034TAStorage Element 35:Full :VolumeTag=G03035TAStorage Element 36:Full :VolumeTag=G03036TAStorage Element 37:Full :VolumeTag=G03037TAStorage Element 38:Full :VolumeTag=G03038TAStorage Element 39:Full :VolumeTag=G03039TAStorage Element 40:Full :VolumeTag=CLN303TAStorage Element 41 IMPORT/EXPORT:EmptyStorage Element 42 IMPORT/EXPORT:EmptyStorage Element 43 IMPORT/EXPORT:EmptyStorage Element 44 IMPORT/EXPORT:Empty将磁带从1号槽位装入driver 0:[rootcentos001 mhvtl-1.4]# mtx -f /dev/sg10 load 1 0sLoading media from Storage Element 1 into drive 0...done[rootcentos001 mhvtl-1.4]# mtx -f /dev/sg10 statusStorage Changer /dev/sg10:4 Drives, 43 Slots ( 4 Import/Export )Data Transfer Element 0:Full (Storage Element 1 Loaded):VolumeTag = E01001L4Data Transfer Element 1:EmptyData Transfer Element 2:EmptyData Transfer Element 3:EmptyStorage Element 1:EmptyStorage Element 2:Full :VolumeTag=E01002L4Storage Element 3:Full :VolumeTag=E01003L4查看磁带状态:[rootcentos001 mhvtl-1.4]# mt -f /dev/st0 statusSCSI 2 tape drive:File number=0, block number=0, partition=0.Tape block size 0 bytes. Density code 0x46 (LTO-4).Soft error count since last status=0General status bits on (41010000):BOT ONLINE IM_REP_EN使用tar命令测试下,能否写入文件:[rootcentos001 mhvtl-1.4]# tar -cvvf /dev/st1 /boottar: Removing leading `/' from member namesdr-xr-xr-x root/root 0 2014-09-11 16:58 /boot/-rw-r--r-- root/root 2519609 2014-07-25 17:00 /boot/System.map-2.6.32-431.20.5.el6.x86_64 drwxr-xr-x root/root 0 2013-11-13 18:04 /boot/efi/drwxr-xr-x root/root 0 2013-11-13 18:04 /boot/efi/EFI/drwxr-xr-x root/root 0 2014-07-30 14:55 /boot/efi/EFI/redhat/-rwxr-xr-x root/root 252990 2014-07-25 20:08 /boot/efi/EFI/redhat/grub.efi-rw-r--r-- root/root 105200 2014-09-10 06:02 /boot/config-2.6.32-431.29.2.el6.x86_64-rw-r--r-- root/root 193945 2014-09-10 06:02 /boot/symvers-2.6.32-431.29.2.el6.x86_64.gz drwxr-xr-x root/root 0 2014-09-10 15:45 /boot/grub/-rw-r--r-- root/root 13268 2013-11-13 18:09 /boot/grub/jfs_stage1_5-rw-r--r-- root/root 12620 2013-11-13 18:09 /boot/grub/fat_stage1_5-rw-r--r-- root/root 13380 2013-11-13 18:09 /boot/grub/e2fs_stage1_5-rw-r--r-- root/root 512 2013-11-13 18:09 /boot/grub/stage1-rw-r--r-- root/root 13964 2013-11-13 18:09 /boot/grub/xfs_stage1_5-rw-r--r-- root/root 11748 2013-11-13 18:09 /boot/grub/ffs_stage1_5-rw-r--r-- root/root 11364 2013-11-13 18:09 /boot/grub/vstafs_stage1_5-rw-r--r-- root/root 14412 2013-11-13 18:09 /boot/grub/reiserfs_stage1_5-rw-r--r-- root/root 11756 2013-11-13 18:09 /boot/grub/iso9660_stage1_5lrwxrwxrwx root/root 0 2013-11-13 18:09 /boot/grub/menu.lst -> ./grub.conf写入成功了,测试是否能读取呢:[rootcentos001 mhvtl-1.4]# tar -tvvf /dev/st1dr-xr-xr-x root/root 0 2014-09-11 16:58 boot/-rw-r--r-- root/root 2519609 2014-07-25 17:00 boot/System.map-2.6.32-431.20.5.el6.x86_64 drwxr-xr-x root/root 0 2013-11-13 18:04 boot/efi/drwxr-xr-x root/root 0 2013-11-13 18:04 boot/efi/EFI/drwxr-xr-x root/root 0 2014-07-30 14:55 boot/efi/EFI/redhat/-rwxr-xr-x root/root 252990 2014-07-25 20:08 boot/efi/EFI/redhat/grub.efi-rw-r--r-- root/root 105200 2014-09-10 06:02 boot/config-2.6.32-431.29.2.el6.x86_64-rw-r--r-- root/root 193945 2014-09-10 06:02 boot/symvers-2.6.32-431.29.2.el6.x86_64.gz查看磁带位置:[rootcentos001 mhvtl-1.4]# cd /opt/mhvtl[rootcentos001 mhvtl]# du -sm *1 CLN101L41 CLN102L51 CLN303TA1 E01001L4141 E01002L4接下来测试倒带:[rootcentos001 mhvtl-1.4]# mt -f /dev/st1 rewind[rootcentos001 mhvtl-1.4]#卸载磁带:[rootcentos001 mhvtl-1.4]# mtx -f /dev/sg10 unload 1 0Unloading drive 0 into Storage Element 1...done[rootcentos001 mhvtl-1.4]#4.配置linux iscsi发起端,使用tgtd,安装tgtd(tgtd:iscsi服务器端进程),安装iSCSI taget 安装iSCSI taget 前先安装perl-Config-General-2.52-1.el6.noarch.rpm,然后安装scsi-target-utils-1.0.24-12.el6_5.x86_64.rpm[rootcentos001 mhvtl]# yum install scsi-target-utils--> Running transaction check---> Package scsi-target-utils.x86_64 0:1.0.24-12.el6_5 will be installed--> Processing Dependency: perl(Config::General) for package: scsi-target-utils-1.0.24-12.el6_5.x86_64 --> Running transaction check---> Package perl-Config-General.noarch 0:2.52-1.el6 will be installed--> Finished Dependency ResolutionDependencies Resolved================================================================================ Package Arch Version Repository Size================================================================================ Installing:scsi-target-utils x86_64 1.0.24-12.el6_5 updates 175 kInstalling for dependencies:perl-Config-General noarch 2.52-1.el6 base 72 k Transaction Summary================================================================================ Install 2 Package(s)Total download size: 247 kInstalled size: 623 kIs this ok [y/N]: yDownloading Packages:(1/2): perl-Config-General-2.52-1.el6.noarch.rpm | 72 kB 00:00(2/2): scsi-target-utils-1.0.24-12.el6_5.x86_64.rpm | 175 kB 00:00--------------------------------------------------------------------------------Total 950 kB/s | 247 kB 00:00Running rpm_check_debugRunning Transaction TestTransaction Test SucceededRunning TransactionInstalling : perl-Config-General-2.52-1.el6.noarch 1/2Installing : scsi-target-utils-1.0.24-12.el6_5.x86_64 2/2Verifying : perl-Config-General-2.52-1.el6.noarch 1/2Verifying : scsi-target-utils-1.0.24-12.el6_5.x86_64 2/2启动tgtd服务[rootcentos001 mhvtl]# service tgtd start把带库映射给iscsi[rootcentos001 mhvtl]# lsscsi -g[1:0:0:0] cd/dvd NECVMWar VMware IDE CDR10 1.00 /dev/sr0 /dev/sg0[2:0:0:0] disk VMware, VMware Virtual S 1.0 /dev/sda /dev/sg1[3:0:0:0] mediumx STK L700 0104 /dev/sch0 /dev/sg10[3:0:1:0] tape IBM ULT3580-TD5 0104 /dev/st0 /dev/sg2[3:0:2:0] tape IBM ULT3580-TD5 0104 /dev/st1 /dev/sg3[3:0:3:0] tape IBM ULT3580-TD4 0104 /dev/st2 /dev/sg4[3:0:4:0] tape IBM ULT3580-TD4 0104 /dev/st3 /dev/sg5 [3:0:8:0] mediumx STK L80 0104 /dev/sch1 /dev/sg11 [3:0:9:0] tape STK T10000B 0104 /dev/st4 /dev/sg6 [3:0:10:0] tape STK T10000B 0104 /dev/st5 /dev/sg7 [3:0:11:0] tape STK T10000B 0104 /dev/st6 /dev/sg8 [3:0:12:0] tape STK T10000B 0104 /dev/st7 /dev/sg9 [rootcentos001 mhvtl]# vim /etc/tgt/targets.conf添加<target iqn.2014-09..example:server.targetmhvtl>backing-store /dev/sg10backing-store /dev/sg2backing-store /dev/sg3backing-store /dev/sg4backing-store /dev/sg5backing-store /dev/sg11backing-store /dev/sg6backing-store /dev/sg7backing-store /dev/sg8backing-store /dev/sg9device-type ptbs-type sg</target>initiator-address ALL[rootcentos001 mhvtl]# service tgtd restartStopping SCSI target daemon: [ OK ] Starting SCSI target daemon: [ OK ]可以查询一下映射的带库[rootcentos001 mhvtl]# tgtadm --lld iscsi --op show --mode targetTarget 1: iqn.2014-09..example:server.targetmhvtlSystem information:Driver: iscsiState: readyI_T nexus information:LUN information:LUN: 0Type: controllerSCSI ID: IET 00010000SCSI SN: beaf10Size: 0 MB, Block size: 1Online: YesRemovable media: NoPrevent removal: NoReadonly: NoBacking store type: nullBacking store flags:LUN: 1Type: passthroughSCSI ID: IET 00010001SCSI SN: beaf11Size: 0 MB, Block size: 1Online: YesRemovable media: NoPrevent removal: NoReadonly: NoBacking store type: sgBacking store path: /dev/sg10Backing store flags:LUN: 2Type: passthroughSCSI ID: IET 00010002SCSI SN: beaf12Size: 0 MB, Block size: 1Online: YesRemovable media: NoPrevent removal: NoReadonly: NoBacking store type: sgBacking store path: /dev/sg11Backing store flags:LUN: 3Type: passthroughSCSI ID: IET 00010003SCSI SN: beaf13Size: 0 MB, Block size: 1Online: YesRemovable media: NoPrevent removal: NoReadonly: NoBacking store type: sgBacking store path: /dev/sg2Backing store flags:LUN: 4Type: passthroughSCSI ID: IET 00010004SCSI SN: beaf14Size: 0 MB, Block size: 1Online: YesPrevent removal: NoReadonly: NoBacking store type: sgBacking store path: /dev/sg3Backing store flags:LUN: 5Type: passthroughSCSI ID: IET 00010005SCSI SN: beaf15Size: 0 MB, Block size: 1Online: YesRemovable media: NoPrevent removal: NoReadonly: NoBacking store type: sgBacking store path: /dev/sg4Backing store flags:LUN: 6Type: passthroughSCSI ID: IET 00010006SCSI SN: beaf16Size: 0 MB, Block size: 1Online: YesRemovable media: NoPrevent removal: NoReadonly: NoBacking store type: sgBacking store path: /dev/sg5Backing store flags:LUN: 7Type: passthroughSCSI ID: IET 00010007SCSI SN: beaf17Size: 0 MB, Block size: 1Online: YesRemovable media: NoPrevent removal: NoReadonly: NoBacking store type: sgBacking store path: /dev/sg6Backing store flags:LUN: 8Type: passthroughSCSI ID: IET 00010008SCSI SN: beaf18Size: 0 MB, Block size: 1Online: YesRemovable media: NoPrevent removal: NoReadonly: NoBacking store type: sgBacking store path: /dev/sg7Backing store flags:LUN: 9Type: passthroughSCSI ID: IET 00010009SCSI SN: beaf19Size: 0 MB, Block size: 1Online: YesRemovable media: NoPrevent removal: NoReadonly: NoBacking store type: sgBacking store path: /dev/sg8Backing store flags:LUN: 10Type: passthroughSCSI ID: IET 0001000aSCSI SN: beaf110Size: 0 MB, Block size: 1Online: YesRemovable media: NoPrevent removal: NoReadonly: NoBacking store type: sgBacking store path: /dev/sg9Backing store flags:Account information:ACL information:ALL为了方便操作和定义带库型号如果需要图形界面可以安装apache和mhvtl gui[rootcentos001 tool]# tar -zxvfniadev67-mhvtl-gui-1.5.0-5-g6d4187f.tar.gz [rootcentos001 tool]# mkdir /var//html/mhvtl[rootcentos001 niadev67-mhvtl-gui-6d4187f]# cp -af * /var//html/mhvtl 修改/etc/httpd/conf/httpd.conf文件,添加Alias /mhvtl "/var//html/mhvtl"<Directory "/var//html/mhvtl">Options NoneAllowOverride NoneOrder allow,denyAllow from all</Directory>修改/etc/sudoers文件注释#Defaults requiretty添加apache ALL=(ALL) NOPASSWD:ALL重启httpd服务[rootcentos001 etc]# service httpd restart输入地址192.168.228.146/mhvtl/,密码mhvtl如果要更改密码,可以到[rootcentos001 etc]# ls -ltr /var//html/mhvtl/go.php if ( $password == "mhvtl" ) { //Replace with your password服务器端用到的服务:service mhvtl status service tgtd status service httpd status二.客户端安装Win:安装Microsoft iSCSI Initiator安装成功后产生程序组Microsoft iSCSI Initiator, 桌面也有相应图标。
