在Linux平台上安装基于Postfix、Courier-imap、Extmail的邮件系统
如何在Linux系统中安装邮件服务器
如何在Linux系统中安装邮件服务器Linux是一种常用的操作系统,具有稳定性和安全性高的特点,因此在企业和个人用户中广泛使用。
在Linux系统中,安装邮件服务器是很常见的需求之一。
本文将介绍如何在Linux系统中安装邮件服务器。
一、安装邮件服务器的前提条件在开始安装邮件服务器之前,需要确保满足以下条件:1. Linux系统已安装并正常运行。
2. 确保具备管理员权限,以执行安装和配置操作。
3. 确保已安装必要的依赖软件包,如邮件传输代理(MTA)、邮件接收代理(MRA)等。
二、选择合适的邮件服务器软件在Linux系统中,有多种邮件服务器软件可供选择,例如Postfix、Sendmail、Exim等。
本文以Postfix为例进行讲解。
Postfix是一种功能强大且易于配置的邮件服务器软件,被广泛应用于各种Linux发行版。
三、安装Postfix1. 打开终端,并使用管理员权限登录到系统。
2. 输入以下命令来安装Postfix:```sudo apt-get install postfix```3. 系统会提示安装过程中需要进行一些配置选择,根据实际需求进行选择。
如果不确定,可以选择默认选项。
安装完成后,Postfix将自动启动。
四、配置Postfix1. 打开Postfix配置文件,在终端中输入以下命令:```sudo nano /etc/postfix/main.cf```2. 在配置文件中,可以设置多项参数来满足特定的需求。
以下是一些常见的设置:- myhostname:设置邮件服务器主机名。
- mydomain:设置邮件服务器域名。
- myorigin:设置发件人地址的域名。
- mydestination:设置邮件接收的目标域名。
五、重启Postfix完成Postfix的配置后,需要重新启动服务以使配置生效。
在终端中输入以下命令:```sudo service postfix restart```六、测试邮件服务器安装和配置完成后,可以进行一些测试以验证是否成功搭建了邮件服务器。
linux Postfix邮件服务器安装配置
:Postfix邮件服务器的安装与配置一、先安装配置Apache、DNS1.挂载光盘镜像;Mount /dev/cdrom /mntCd /mnt/Server2.安装Apacherpm -ivh httpd-2.2.3-43.el5.i386.rpm apr-1.2.7-11.el5_3.1.i386.rpm apr-util-1.2.7-11.el5.i386.rpm postgresql-libs-8.1.18-2.el5_4.1.i386.rpm查看有否安装:[root@localhost Server]# rpm -qa | grep httphttpd-2.2.3-43.el5启动Apache:Service httpd start3.安装DNS用rpm分别安装以下包:bind-9.3.6-4.P1.el5_4.2.i386.rpmbind-chroot-9.3.6-4.P1.el5_4.2.i386.rpmbind-devel-9.3.6-4.P1.el5_4.2.i386.rpmbind-libbind-devel-9.3.6-4.P1.el5_4.2.i386.rpmbind-libs-9.3.6-4.P1.el5_4.2.i386.rpmbind-sdb-9.3.6-4.P1.el5_4.2.i386.rpmbind-utils-9.3.6-4.P1.el5_4.2.i386.rpmDNS有两个配置文件:主配置文件:/var/named/chroot/etc/named.conf 用来设置DNS全局命令的DocumentRoot “/var/www/html”:定义网页文件存放的目录数据库文件:.zone记录哪个域名IP是多少的。
装完后启动DNSService named start编辑DNS主配置文件(默认是空的)如下:命令:vim /var/named/chroot/etc/named.conf从模版拷贝一个DNS配置文件的zone文件cp /usr/share/doc/bind-9.3.6/sample/var/named/localdomain.zone /var/named/chroot/var/named/.zone编辑.zone文件:重启DNS服务:service named restart清空DNS缓存文件:echo “” > /etc/resolv.conf验证DNS解析:host has address 192.168.18.72二、安装PostfixRed Hat Enterprise Linux提供了sendmail和postfix两种STMP邮件服务软件,安装程序默认安装了sendmail,如果使用postfix,就必须先将sendmail服务停止,然后再安装postfix 服务,具体步骤如下:1)、检查sendmail服务是否已经开启Netstat –nutlp | grep :25[root@localhost ~]# netstat -nutlp | grep :25tcp 0 0 127.0.0.1:25 0.0.0.0:* LISTEN 3783/sendmail: ace2)、关闭sendmail服务及开机时自动启动3)、在Red Hat Enterprise Linux 5中,提供了更加方便的E-mail服务器切换方法,它提供了一个图形界面的切换工具system-switch-mail。
Linux网络服务配置-Postfix邮件系统(二)

查询、收取新邮件
17/28
其他扩展设置2-1
通过别名设置邮件组
一般使用 /etc/aliases 文件 aliases文件的记录格式
• 别名: 地址1, 地址2, 地址3, ……
执行newaliases命令,以更新别名设置 1.指定查询表存放位置
[root@mail ~]# vi /etc/postfix/main.cf …… alias_maps = hash:/etc/aliases [root@mail ~] # postfix reload 2.配置别名查询表 [root@mail ~]# vi /etc/aliases postfix/postfix-script: refreshing the Postfix mail system …… student:zhangsan, lisi, mike, john teacher:vicky, tsengyia 3.更新别名数据库 [root@mail ~]# newaliases
8/28
测试SMTP发信认证2-2
测试SMTP发信认证——Outlook2007
通过”工具”“账户设置” “发送服务器”,勾选“我 的发送服务器(SMTP)要求验证”
使用SMTP认证
未使用SMTP认证
9/28
小结
请思考:
如何启用Postfix的SMTP认证功能? 配置参数smtpd_recipient_restrictions的功能是什么?
22/28
实验案例:配置Postfix扩展功能3-2
学员练习1
创建SASL配置文件,并启动saslauthd服务 添加Postfix对SMTP认证的支持,并测试
Cent OS 5.5下postfix+extmail+mysql邮件服务器
Cent OS 5.5 下Postfix + extmail + mysql邮件系统安装与配置一.安装mysql数据库首先卸载系统自带的mysql# rpm -e mysql --nodeps# tar zxvf BAK/mysql-5.1.43.tar.gz# cd mysql-5.1.43/# ./configure --prefix=/usr/local/mysql --enable-thread-safe-client --enable-shared --enable-stati c --enable-local-infile --with-extra-charsets=all --with-pthread --with-unix-socket-path=/tmp/my sql.socket --with-mysqld-ldflags=-all-static --with-client-ldflags=-all-static --with-big-tables --wit h-embedded-server --with-embedded-privilege-control --enable-assembler# make -j 4# make install# useradd mysql -s /sbin/nologin -d /dev/null# cp support-files/f /etc/f# vi /etc/f在[mysqld]添加: bind-address = localhost# cp support-files/mysql.server /etc/init.d/mysqld# chkconfig --add mysqld# chkconfig --level 2345 mysqld on# chmod 755 /etc/init.d/mysqld# chown -R mysql.mysql /usr/local/mysql/# /usr/local/mysql/bin/mysql_install_db --user=mysql# service mysqld start# /usr/local/mysql/bin/mysqladmin -u root password 'izptecmail'# mysql -uroot -p# echo "/usr/local/mysql/lib/mysql" >> /etc/ld.so.conf# ldconfig# ldconfig -v二.安装apache web服务(需要编译suexec)# tar zxvf BAK/httpd-2.2.14.tar.gz# cd httpd-2.2.14/# ./configure --prefix=/usr/local/apache --enable-modules=all --enable-mods-shared=all --enabl e-cache --enable-disk-cache --enable-mem-cache --enable-substitute --enable-expires --enable-headers --enable-proxy --enable-proxy-http --enable-ssl --with-ssl=/usr/local/ssl --enable-http --enable-vhost-alias --with-zlib --enable-suexec --with-suexec-caller=vmail --with-suexec-docroot =/var/www/html/ --enable-rewrite --enable-so --with-mpm=worker# mkdir -p /var/www/html/# groupadd -g 1000 vmail# useradd -g vmail -u 1000 -s /sbin/nologin -M vmail# make# make install# echo "/usr/local/apache/bin/apachectl start" >> /etc/rc.local# vi /usr/local/apache/conf/httpd.conf修改apache配置文件;# /usr/local/apache/bin/apachectl start三.安装php首先安装php程序所需要的依赖包# yum install freetype* glib* jpegsrc* libart_lgpl* libpng* libxml* libjpeg* zlib* libmcrypt* gd*# tar zxvf BAK/php-5.2.6.tar.gz# cd php-5.2.6/# ./configure --prefix=/usr/local/php --enable-exif --with-gd --enable-gd-native-ttf --enable-gd-ji s-conv --with-jpeg-dir --with-png-dir --with-zlib-dir --with-freetype-dir --enable-mbstring --with-m ysql=/usr/local/mysql --with-mysql-sock=/tmp/mysql.socket --enable-embedded-mysqli --enabl e-shmop --enable-soap --enable-sockets --enable-sqlite-utf8 --enable-sysvmsg --enable-sysvse m --enable-sysvshm --enable-wddx --enable-zip --with-pcre-dir --enable-maintainer-zts --enable-zend-multibyte --with-apxs2=/usr/local/apache/bin/apxs --with-config-file-path=/usr/local/php/et c/ --with-mysqli=/usr/local/mysql/bin/mysql_config --with-gettext --with-mcrypt# make# make install# cp php.ini-dist /usr/local/php/etc/php.ini# vi /usr/local/php/etc/php.ini---------------------------------------;include_path = ".:/php/includes" 改为include_path = ".:/usr/local/php/lib/php"---------------------------------------四.安装courier-authlib库(验证登陆)# tar jxvf BAK/courier-authlib-0.63.0.tar.bz2# cd courier-authlib-0.63.0/# CFLAGS="-march=i686 -O2 -fexpensive-optimizations" CXXFLAGS="-march=i686 -O2 -fexpe nsive-optimizations"# ./configure --prefix=/usr/local/courier-authlib --sysconfdir=/etc --without-authpam --without-a uthldap --without-authpwd --without-authshadow --without-authvchkpw --without-authpgsql --wi th-authmysql --with-mysql-libs=/usr/local/mysql/lib/mysql --with-mysql-includes=/usr/local/mys ql/include/mysql --with-redhat --with-authmysqlrc=/etc/authmysqlrc --with-authdaemonrc=/etc/ authdaemonrc# make# make install# chmod 755 /usr/local/courier-authlib/var/spool/authdaemon# cp /etc/authdaemonrc.dist /etc/authdaemonrc# vi /etc/authdaemonrc修改为以下配置:authmodulelist="authmysql"authmodulelistorig="authmysql"daemons=15authdaemonvar=/usr/local/courier-authlib/var/spool/authdaemonDEBUG_LOGIN=0DEFAULTOPTIONS=""LOGGEROPTS=""--------------------------------------------------------------# cp /etc/authmysqlrc.dist /etc/authmysqlrc# vi /etc/authmysqlrc修改为以下配置:MYSQL_SERVER localhostMYSQL_USERNAME rootMYSQL_PASSWORD izptecmailMYSQL_SOCKET /tmp/mysql.socketMYSQL_PORT 3306MYSQL_OPT 0MYSQL_DATABASE extmailMYSQL_USER_TABLE mailboxMYSQL_CRYPT_PWFIELD passwordMYSQL_UID_FIELD 1000MYSQL_GID_FIELD 1000MYSQL_LOGIN_FIELD usernameMYSQL_HOME_FIELD homedirMYSQL_NAME_FIELD nameMYSQL_MAILDIR_FIELD maildirMYSQL_QUOTA_FIELD quotaMYSQL_SELECT_CLAUSE SELECT username,password,"",uidnumber,gidnumber,\CONCAT('/home/domains/',homedir), \CONCAT('/home/domains/',maildir), \quota, \name \FROM mailbox \WHERE username = '$(local_part)@$(domain)'--------------------------------------------------------------# cp courier-authlib.sysvinit /etc/init.d/courier-authlib# chmod 755 /etc/init.d/courier-authlib# chkconfig --add courier-authlib# chkconfig --level 2345 courier-authlib on# pstree | grep authdaemond显示init-+-courierlogger---authdaemond---15*[authdaemond] 表示安装成功;五.安装courier-imap (提供pop3服务)# tar jxvf BAK/courier-imap-4.0.3.tar.bz2# cd courier-imap-4.0.3/# ./configure --prefix=/usr/local/courier-imap --with-redhat --enable-unicode --disable-root-chec k --with-trashquota --without-ipv6 CPPFLAGS='-I/usr/include/openssl -I/usr/local/courier-authlib/i nclude' LDFLAGS='-L/usr/local/courier-authlib/lib/courier-authlib' COURIERAUTHCONFIG='/usr/lo cal/courier-authlib/bin/courierauthconfig'# make# make install# cp /usr/local/courier-imap/etc/imapd.dist /usr/local/courier-imap/etc/imapd# cp /usr/local/courier-imap/etc/imapd-ssl.dist /usr/local/courier-imap/etc/imapd-ssl# cp /usr/local/courier-imap/etc/pop3d.dist /usr/local/courier-imap/etc/pop3d# cp /usr/local/courier-imap/etc/pop3d-ssl.dist /usr/local/courier-imap/etc/pop3d-ssl# vi /usr/local/courier-imap/etc/pop3d修改POP3DSTART字段,改为YES;如果需要提供imapd服务,编译/usr/local/courier-imap/etc/imoa pd的IMAPDSTART字段;# mkdir -p /home/domains/# chown -R vmail.vmail /home/domains/# chmod 755 /etc/init.d/courier-imapd# chkconfig --add courier-imapd# chkconfig --level 2345 courier-imapd on# netstat -tupln查看110端口是否开启,如开启则pop3服务正常;六.安装Cyrus-sasl (认证)# tar jxvf BAK/cyrus-sasl-2.1.22.tar.bz2# cd cyrus-sasl-2.1.22/# ./configure --prefix=/usr/local/sasl2 --disable-gssapi --disable-anon --disable-sample --disable-digest --enable-plain --enable-login --enable-sql --with-mysql=/usr/local/mysql --with-mysql-incl udes=/usr/local/mysql/include/mysql --with-mysql-libs=/usr/local/mysql/lib/mysql--with-authdae mond=/usr/local/courier-authlib/var/spool/authdaemon/socket# make# make install# chkconfig --level 2345 saslauthd off# cd /usr/lib******# mv libsasl2.a libsasl2.a.OFF# mv libsasl2.so.2.0.22 libsasl2.so.2.0.22.OFF# mv sasl2 sasl2.OFF# rm libsasl2.so libsasl2.so.2# ln -sv /usr/local/sasl2/lib/* .******进入/usr/lib64 同上修改sasl库链接关系;进入/usr/local/lib/库链接关系;同时链接头文件到/usr/loca/include;# ln -sv /usr/local/sasl2/include/sasl /usr/local/include/sasl# mkdir -pv /var/state/saslauthd# /usr/local/sasl2/sbin/saslauthd -a shadow pam -d输出:saslauthd[20634] :main : num_procs : 5saslauthd[20634] :main : mech_option: NULLsaslauthd[20634] :main : run_path : /var/state/saslauthdsaslauthd[20634] :main : auth_mech : shadowsaslauthd[20634] :ipc_init : using accept lock file: /var/state/saslauthd/mux.accept saslauthd[20634] :detach_tty : master pid is: 0saslauthd[20634] :ipc_init : listening on socket: /var/state/saslauthd/muxsaslauthd[20634] :main : using process modelsaslauthd[20635] :get_accept_lock : acquired accept locksaslauthd[20634] :have_baby : forked child: 20635saslauthd[20634] :have_baby : forked child: 20636saslauthd[20634] :have_baby : forked child: 20637saslauthd[20634] :have_baby : forked child: 20638表示正常,Ctrl+c 结束;# /usr/local/sasl2/sbin/saslauthd -a shadow pam# pstree | grep saslauthd显示|-saslauthd---4*[saslauthd],表示程序启动;# /usr/local/sasl2/sbin/testsaslauthd -u root -p (root 用户密码)显示0: OK "Success." 测试成功# echo “/usr/local/sasl2/lib” >> /etc/ld.so.conf# echo “/usr/local/sasl2/lib/sasl2” >> /etc/ld.so.conf# ldconfig -v# echo “/usr/local/sasl2/sbin/saslauthd -a shadow pam” >> /etc/rc.local# vi /usr/local/sasl2/lib/sasl2/smtpd.conf------------------------------------------------------------pwcheck_method: authdaemondlog_level: 3mech_list: PLAIN LOGINauthdaemond_path: /usr/local/courier-authlib/var/spool/authdaemon/socket------------------------------------------------------------# vi /etc/init.d/saslauthd------------------------------------------------------------修改为:SOCKETDIR=/var/state/saslauthdMECH="shadow pam"注释:#if test -x ${path}.${MECH} ; then# path=/usr/sbin/saslauthd.$MECH#fi------------------------------------------------------------# vi /etc/sysconfig/saslauthd------------------------------------------------------------SOCKETDIR=/var/state/saslauthdMECH="shadow pam"------------------------------------------------------------# chkconfig --level 2345 saslauthd on七.安装配置postfix# rpm -e sendmail --nodeps# tar zxvf BAK/postfix-2.6.5.tar.gz# cd postfix-2.6.5/# groupadd postdrop# useradd -M -s /sbin/nologin postfix# make makefiles 'CCARGS=-DHAS_MYSQL -I/usr/local/mysql/include/mysql -DUSE_SASL_AUTH -DUSE_CYRUS_SASL -I/usr/local/sasl2/include/sasl -DUSE_TLS -I/usr/include/openssl' 'AUXLIBS=-L/usr/local/mysql/lib/mysql -lmysqlclient -lz -lm -L/usr/local/sasl2/lib -lsasl2 -L/usr/local/ssl/lib -lss l -lcrypto'# make# make install# /usr/bin/newaliases# vi /etc/postfix/main.cf------------------------------------------------------------#####################BASE#########################queue_directory = /var/spool/postfixcommand_directory = /usr/sbindaemon_directory = /usr/libexec/postfixdata_directory = /var/lib/postfixmail_owner = postfixunknown_local_recipient_reject_code = 550debug_peer_level = 2debugger_command =PATH=/bin:/usr/bin:/usr/local/bin:/usr/X11R6/binddd $daemon_directory/$process_name $process_id & sleep 5sendmail_path = /usr/sbin/sendmailnewaliases_path = /usr/bin/newaliasesmailq_path = /usr/bin/mailqsetgid_group = postdrophtml_directory = nomanpage_directory = /usr/local/mansample_directory = /etc/postfixreadme_directory = nomyhostname = mydomain = myorigin = $mydomaininet_interfaces = allmynetworks = 127.0.0.0/8------------------------------------------------------------测试postfix 发信功能# telnet localhost 25Trying 127.0.0.1...Connected to localhost.Escape character is '^]'.220 ESMTP Postfixhelo 250 mail from:root@250 2.1.0 Okrcpt to:hanyongming@250 2.1.5 Okdata354 End data with <CR><LF>.<CR><LF>from:root Test <root@>to:hanyongming@subject:Mail Test.Mail Test Date 2011-03-13..250 2.0.0 Ok: queued as DEF0D330054quit221 2.0.0 ByeConnection closed by foreign host.# /usr/sbin/postconf -a显示cyrusdovecot则表示postfix支持cyrus-sasl认证# vi /etc/postfix/main.cf------------------------------------------------------------添加以下内容:#####################CYRUS-SASL######################### broken_sasl_auth_clients = yessmtpd_recipient_restrictions = permit_mynetworks,permit_sasl_authenticated,reject_invalid_hostname,reject_non_fqdn_hostname,reject_unknown_sender_domain,reject_non_fqdn_sender,reject_non_fqdn_recipient,reject_unknown_recipient_domain,reject_unauth_pipelining,reject_unauth_destinationsmtpd_sasl_auth_enable = yessmtpd_sasl_authenticated_header = yessmtpd_sasl_local_domain = $myhostnamesmtpd_sasl_security_options = noanonymoussmtpd_sasl_path = smtpdsmtpd_banner = Welcome to our $myhostname ESMTP,Warning: Version not Available! --------------------------------------------------------------------# /usr/sbin/postfix reload验证认证是否生效# telnet localhost 25显示以下内容:Trying 127.0.0.1...Connected to localhost.Escape character is '^]'.220 Welcome to our ESMTP,Warning: Version not Available!ehlo 250-PIPELINING250-SIZE 10240000250-VRFY250-ETRN250-AUTH LOGIN PLAIN250-AUTH=LOGIN PLAIN250-ENHANCEDSTATUSCODES250-8BITMIME250 DSN^]telnet> qConnection closed.表示postfix验证生效;# vi /etc/postfix/main.cf---------------------------------------------------------------------添加虚拟域配置文件:#####################Virtual Mailbox Settings##################### virtual_mailbox_base = /home/doaminsvirtual_mailbox_maps = mysql:/etc/postfix/mysql_virtual_mailbox_maps.cfvirtual_mailbox_domains = mysql:/etc/postfix/mysql_virtual_domains_maps.cf#virtual_alias_domains =virtual_alias_maps = mysql:/etc/postfix/mysql_virtual_alias_maps.cfvirtual_minimum_uid = 1000virtual_uid_maps = static:1000virtual_gid_maps = static:1000virtual_transport = maildropmaildrop_destination_recipient_limit = 1maildrop_destination_concurrency_limit = 1#####################QUOTA Settings######################## message_size_limit = 14336000virtual_mailbox_limit = 20971520virtual_create_maildirsize = yesvirtual_mailbox_extended = yesvirtual_mailbox_limit_maps = mysql:/etc/postfix/mysql_virtual_limit_maps.cfvirtual_mailbox_limit_override = yesvirtual_maildir_limit_message = Sorry, the user's maildir has overdrawn his diskspace quota, pl ease Tidy your mailbox and try again later.virtual_overquota_bounce = yes----------------------------------------------------------------------八.安装extmail extman# tar zxvf BAK/extmail-1.2.tar.gz# cp -a extmail-1.2 /var/www/html/extmail# tar zxvf BAK/extman-1.1.tar.gz# cp -a extman-1.1 /var/www/html/extman# cd /var/www/html# cp extmail/webmail.cf.default extmail/webmail.cf# vi extmail/webmail.cf----------------------------------------------------------------------修改extmail的配置项:SYS_CONFIG = /var/www/html/extmail/SYS_LANGDIR = /var/www/html/extmail/langSYS_TEMPLDIR = /var/www/html/extmail/htmlSYS_USER_LANG = zh_CNSYS_MYSQL_USER = rootSYS_MYSQL_PASS = izptecmailSYS_MYSQL_DB = extmailSYS_MYSQL_HOST = localhostSYS_MYSQL_SOCKET = /tmp/mysql.socketSYS_AUTHLIB_SOCKET = /usr/local/courier-authlib/var/spool/authdaemon/socket SYS_G_ABOOK_FILE_PATH = /var/www/html/extmail/globabook.cf-----------------------------------------------------------------------# cp extman/webman.cf.default extman/webman.cf# vi extman/webman.cf-----------------------------------------------------------------------修改extman的配置项:SYS_CONFIG = /var/www/html/extman/SYS_LANGDIR = /var/www/html/extman/langSYS_TEMPLDIR = /var/www/html/extman/htmlSYS_MYSQL_USER = rootSYS_MYSQL_PASS = izptecmailSYS_MYSQL_DB = extmailSYS_MYSQL_HOST = localhostSYS_MYSQL_SOCKET = /tmp/mysql.socket安装数据库链接的perl模块:# tar zxvf BAK/Unix-Syslog-1.1.tar.gz# cd Unix-Syslog-1.1/# make# make install# tar zxvf BAK/DBI-1.604.tar.gz# cd DBI-1.604/# perl Makefile.PL# make# make install# tar zxvf BAK/DBD-mysql-4.006.tar.gz# cd DBD-mysql-4.006/# perl Makefile.PL --mysql_config=/usr/local/mysql/bin/mysql_config# tar zxvf BAK/GD-2.45.tar.gz# cd GD-2.45/# perl Makefile.PL# make# make install# cd /var/www/html/extman/docs/# /usr/local/mysql/bin/mysql -uroot -p <extmail.sql# /usr/local/mysql/bin/mysql -uroot -p <init.sql# cp mysql_virtual_alias_maps.cf /etc/postfix/# cp mysql_virtual_domains_maps.cf /etc/postfix/# cp mysql_virtual_limit_maps.cf /etc/postfix/# cp mysql_virtual_mailbox_maps.cf /etc/postfix/修改虚拟域配置文件内链接mysql数据库的用户名,密码;# vi /usr/local/apache/conf/httpd.conf----------------------------------------------------------修改apache配置文件User vmailGroup vmail<Directory />Options FollowSymLinksAllowOverride NoneOrder deny,allowAllow from all</Directory><VirtualHost *:80>ServerName DocumentRoot /var/www/html/extmail/html/ScriptAlias /extmail/cgi/ /var/www/html/extmail/cgi/Alias /extmail /var/www/html/extmail/html/ScriptAlias /extman/cgi/ /var/www/html/extman/cgi/Alias /extman /var/www/html/extman/html/SuexecUserGroup vmail vmail</VirtualHost>----------------------------------------------------------# chown -R vmail.vmail /var/www/html# mkdir -pv /tmp/extman# chown -R vmail.vmail /tmp/extman/# /usr/local/apache/bin/apachectl stop# /usr/local/apache/bin/apachectl startweb方式访问登录邮箱管理登录名:root@ 密码:extmail*123*新建域,新建邮箱账户;九.安装maildrop邮件投递# tar zxvf BAK/pcre-8.10.tar.gz# cd pcre-8.10/# ./configure --enable-utf8 --enable-unicode-properties --enable-newline-is-any --enable-pcregr ep-libz --enable-pcregrep-libbz2# make# make install# tar jxvf BAK/maildrop-2.0.4.tar.bz2# cd maildrop-2.0.4/# ln -sv /usr/local/courier-authlib/bin/courierauthconfig /usr/bin# ln -sv /usr/local/courier-authlib/include/* /usr/include# ./configure --enable-sendmail=/usr/sbin/sendmail --enable-trusted-users='root vmail' --enabl e-syslog=1 --enable-maildirquota --enable-maildrop-uid=1000 --enable-maildrop-gid=1000 --wi th-trashquota --with-dirsync# make# make install# vi /etc/maildroprc---------------------------------------------------------添加以下内容:logfile "/var/log/maildrop.log"---------------------------------------------------------# touch /var/log/maildrop.log# chown -R vmail.vmail /var/log/maildrop.log# vi /etc/postfix/master.cf---------------------------------------------------------添加以下内容:maildrop unix - n n - - pipeflags=DRhu user=vmail argv=/usr/local/bin/maildrop -d ${recipient}---------------------------------------------------------# service courier-authlib restart# service courier-imapd restart# service saslauthd restart# /usr/sbin/postfix reload# /usr/local/apache/bin/apachectl restart建立邮箱收发邮件测试!。
如何在Linux系统上搭建邮件代理服务器
如何在Linux系统上搭建邮件代理服务器随着互联网的发展,电子邮件已经成为我们日常生活和工作中不可或缺的一部分。
为了更好地管理和保护我们的电子邮件,搭建邮件代理服务器是非常有必要的。
在本文中,我将介绍如何在Linux系统上搭建邮件代理服务器,并提供一些实用的技巧和建议。
一、选择适合的邮件代理服务器软件在搭建邮件代理服务器之前,首先需要选择适合的邮件代理服务器软件。
常见的邮件代理服务器软件有Postfix、Sendmail和Exim等。
在选择之前,我们需要考虑以下几个方面:1.稳定性和安全性:选择一个稳定且有良好安全记录的邮件代理服务器软件是非常重要的,以确保您的电子邮件安全。
2.易于配置和管理:选择一个易于配置和管理的邮件代理服务器软件将帮助您节省时间和精力。
3.可扩展性:选择一个具有良好扩展性的邮件代理服务器软件,以便您可以根据需要进行功能扩展和定制。
基于以上几个方面的考虑,我推荐使用Postfix作为邮件代理服务器软件。
Postfix是一款稳定、安全且易于配置的邮件代理服务器软件,广泛应用于各种Linux发行版中。
二、安装和配置Postfix1.安装Postfix在Linux系统上安装Postfix非常简单。
首先,打开终端并以root用户身份运行以下命令来安装Postfix:```sudo apt-get install postfix```根据系统提示进行配置,一般选择“Internet Site”选项,并输入您的域名。
2.配置PostfixPostfix的配置文件位于/etc/postfix/main.cf。
您可以使用任何文本编辑器打开该文件并进行必要的配置。
以下是几个常见的配置选项:- myhostname:设置您的邮件代理服务器的主机名。
- mydomain:设置您的邮件代理服务器的域名。
- mydestination:设置邮件将被投递的目的地域名。
根据您的实际需求进行配置,并保存文件。
linux环境下postfix+dovecot+webmail安装配置详解
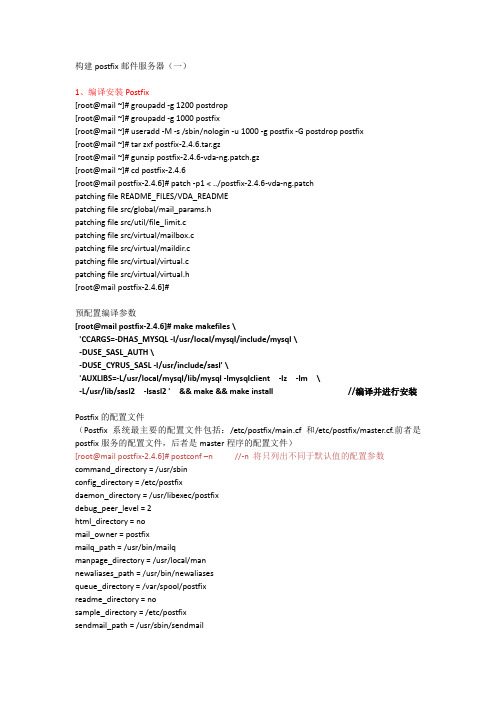
构建postfix邮件服务器(一)1、编译安装Postfix[root@mail ~]# groupadd -g 1200 postdrop[root@mail ~]# groupadd -g 1000 postfix[root@mail ~]# useradd -M -s /sbin/nologin -u 1000 -g postfix -G postdrop postfix[root@mail ~]# tar zxf postfix-2.4.6.tar.gz[root@mail ~]# gunzip postfix-2.4.6-vda-ng.patch.gz[root@mail ~]# cd postfix-2.4.6[root@mail postfix-2.4.6]# patch -p1 < ../postfix-2.4.6-vda-ng.patchpatching file README_FILES/VDA_READMEpatching file src/global/mail_params.hpatching file src/util/file_limit.cpatching file src/virtual/mailbox.cpatching file src/virtual/maildir.cpatching file src/virtual/virtual.cpatching file src/virtual/virtual.h[root@mail postfix-2.4.6]#预配置编译参数[root@mail postfix-2.4.6]# make makefiles \'CCARGS=-DHAS_MYSQL -I/usr/local/mysql/include/mysql \-DUSE_SASL_AUTH \-DUSE_CYRUS_SASL -I/usr/include/sasl' \'AUXLIBS=-L/usr/local/mysql/lib/mysql -lmysqlclient -lz -lm \-L/usr/lib/sasl2 -lsasl2 ' && make && make install //编译并进行安装Postfix的配置文件(Postfix系统最主要的配置文件包括:/etc/postfix/main.cf 和/etc/postfix/master.cf.前者是postfix服务的配置文件,后者是master程序的配置文件)[root@mail postfix-2.4.6]# postconf –n //-n 将只列出不同于默认值的配置参数command_directory = /usr/sbinconfig_directory = /etc/postfixdaemon_directory = /usr/libexec/postfixdebug_peer_level = 2html_directory = nomail_owner = postfixmailq_path = /usr/bin/mailqmanpage_directory = /usr/local/mannewaliases_path = /usr/bin/newaliasesqueue_directory = /var/spool/postfixreadme_directory = nosample_directory = /etc/postfixsendmail_path = /usr/sbin/sendmailsetgid_group = postdropunknown_local_recipient_reject_code = 550[root@mail postfix-2.4.6]#[root@mail postfix-2.4.6]# cd /etc/postfix/[root@mail postfix]# postconf -n > main2.cf[root@mail postfix]# mv main.cf main.cf.bak[root@mail postfix]# mv main2.cf main.cfPostfix的启动控制[root@mail postfix]# postfix startpostfix/postfix-script: starting the Postfix mail system[root@mail postfix]# netstat -anpt | grep :25tcp 0 0 0.0.0.0:25 0.0.0.0:* LISTEN 1995/master[root@mail postfix]# postfix check //若配置无误,不会反馈任何信息[root@mail postfix]# postfix reload //重新载入配置信息,而不需要重启Postfix服务postfix/postfix-script: refreshing the Postfix mail system[root@mail postfix]# postfix stoppostfix/postfix-script: stopping the Postfix mail system[root@mail postfix]#配置基于Postfix构建简单电子邮件系统:1、编辑main.cf文件,调整运行Postfix的基本参数[root@mail postfix]#vi main.cfinet_interfaces=192.168.1.199, 127.0.0.1 //设置postfix服务监听的IP地址,缺省为allmyhostname= //设置postfix服务器使用的主机名mydomain= //设置postfix服务器使用的邮件域myorigin=$mydomain //设置外发邮件时发件人地址中的邮件域名mydestination=$mydomain,$myhostname //设置可接收的邮件地址中的域名home_mailbox=Maildir/ //设置邮件存储位置和格式2、添加邮件用户的帐号[root@mail postfix]# groupadd mailusers[root@mail postfix]# useradd -g mailusers -s /sbin/nologin xiaowu[root@mail postfix]# useradd -g mailusers -s /sbin/nologin juncai[root@mail postfix]# passwd xiaowuChanging password for user xiaowu.New UNIX password:BAD PASSWORD: it is based on a dictionary wordRetype new UNIX password:passwd: all authentication tokens updated successfully.[root@mail postfix]# passwd juncaiChanging password for user juncai.New UNIX password:BAD PASSWORD: it is based on a dictionary wordRetype new UNIX password:passwd: all authentication tokens updated successfully.[root@mail postfix]##echo 12345 | passwd --stdin xiaowu //或这样赋予密码Changing password for user xiaowu.passwd: all authentication tokens updated successfully.3、SMTP发送邮件测试[root@mail postfix]# telnet localhost 25Trying 127.0.0.1...Connected to localhost.localdomain (127.0.0.1).Escape character is '^]'.220 ESMTP Postfixehlo 250 250-PIPELINING250-SIZE 10240000250-VRFY250-ETRN250-ENHANCEDSTATUSCODES250-8BITMIME250 DSNmail from:xiaowu@250 2.1.0 Okrcpt to:juncai@250 2.1.5 Okdata354 End data with <CR><LF>.<CR><LF>subject: A TEST MAILHELLO!This is a test mail !!!.250 2.0.0 Ok: queued as 229784E100quit221 2.0.0 ByeConnection closed by foreign host.#grep 229784E100 /var/log/messages //查找发信状态[root@mail postfix]# cat ~juncai/Maildir/new/Return-Path: <xiaowu@>X-Original-To: juncai@Delivered-To: juncai@Received: from localhost (localhost.localdomain [127.0.0.1])by (Postfix) with SMTP id 229784E100for <juncai@>; Thu, 17 Mar 2011 03:02:45 +0800 (CST)subject: A TEST MAILMessage-Id: <20110316190254.229784E100@>Date: Thu, 17 Mar 2011 03:02:45 +0800 (CST)From: xiaowu@To: undisclosed-recipients:;HELLO!This is a test mail !!![root@mail postfix]#构建Dovecot服务器1、编译安装Dovecot软件包[root@mail ~]#useradd –M –s /sbin/nologin dovecot[root@mail ~]#tar zxvf dovecot-1.1.4.tar.gz[root@mail ~]#cd dovecot-1.1.4[root@mail dovecot-1.1.4]# ./configure --sysconfdir=/etc --with-mysql && make && make install2、配置Dovecot的运行参数(1)建立dovecot.conf配置文件并进行简单设置[root@mail dovecot-1.1.4]# cp /etc/dovecot-example.conf /etc/dovecot.conf[root@mail dovecot-1.1.4]#vi /etc/dovecot.confssl_disable = yesprotocols = imap pop3disable_plaintext_auth = nomail_location = maildir:~/Maildir(2)创建PAM认证文件[root@mail dovecot-1.1.4]# vi /etc/pam.d/dovecotauth required pam_nologin.soauth include system-authaccount include system-authsession include system-auth3、启动Dovecot服务[root@mail ~]# /usr/local/sbin/dovecot -c /etc/dovecot.conf[root@mail ~]# netstat -anpt | grep dovecottcp 0 0 0.0.0.0:110 0.0.0.0:* LISTEN 3713/dovecottcp 0 0 0.0.0.0:143 0.0.0.0:* LISTEN 3713/dovecot[root@mail ~]#4、POP3接收邮件测试[root@mail ~]# telnet localhost 110Trying 127.0.0.1...Connected to localhost.localdomain (127.0.0.1).Escape character is '^]'.+OK Dovecot ready.user juncai+OKpass juncai+OK Logged in.list+OK 1 messages:1 511.retr 1+OK 511 octetsReturn-Path: <xiaowu@>X-Original-To: juncai@Delivered-To: juncai@Received: from localhost (localhost.localdomain [127.0.0.1])by (Postfix) with SMTP id 229784E100for <juncai@>; Thu, 17 Mar 2011 03:02:45 +0800 (CST) subject: A TEST MAILMessage-Id: <20110316190254.229784E100@>Date: Thu, 17 Mar 2011 03:02:45 +0800 (CST)From: xiaowu@To: undisclosed-recipients:;HELLO!This is a test mail !!!.quit+OK Logging out.Connection closed by foreign host.[root@mail ~]#WEBMAIL邮件界面SquirrelMail的工作流程1、依次安装squirrelmail程序包、中文语言包[root@mail ~]# tar jxvf squirrelmail-1.4.13.tar.bz2 -C /usr/local/apache2/htdocs /webmail[root@mail ~]# cd /usr/local/apache2/htdocs/webmail/[root@mail webmail]# tar jxvf ~/zh_CN-1.4.13-20071220.tar.bz22、创建及调整数据目录、附件目录[root@mail webmail]# mkdir -p attach data[root@mail webmail]# chown -R daemon:daemon attach/ data/ [root@mail webmail]# chmod 730 attach/3、建立config.php配置文件[root@mail webmail]# cp config/config_default.php config/config.php [root@mail webmail]# vi config/config.php$squirrelmail_default_language = 'zh_CN';'en_US' $default_charset = 'zh_CN.UTF-8'; 'iso-8859-1' $domain = '';$smtpServerAddress = 'localhost';$smtpPort = 25;$imapPort = 143;$imap_server_type = 'dovecot';$data_dir = '/usr/local/apache2/htdocs/webmail/data/'; $attachment_dir = '/usr/local/apache2/htdocs/webmail/attach/';4、重新启动httpd服务,并在浏览器中登录squirrelmail系统[root@mail webmail]# ../../bin/apachectl restart在该界面中可以完成发信、收信等电子邮件服务的基本操作。
Arch Linux 下 Postfix + Extmail 邮件系统解决方案

Arch Linux 下 Postfix + Extmail 邮件系统解决方案2010-11-03 01:45 — techlive说明:1.本文采用 Arch Linux 包管理工具pacman的前端yaourt进行软件包的安装操作。
它不但集成了pacman的全部功能,还提供从 AUR 下载 PKGBUILD 进行本地编译的自动化流程,使用起来相当方便。
文中所须的大部分软件包可在 Arch Linux 的仓库或者 AUR 中找到,无法找到的软件包,本文会提供相关的 PKGBUILD。
2.本文所有 Bash 命令默认采用 root 用户执行。
若是普通用户,则需要使用sudo命令为前缀。
3.本文依据作者的实践过程以及 Extmail Wiki 的extmail_solution_for_linux -- ExtMail Project整理,难免缪误之处,恳请指正。
4.由于 Arch Linux 在程序的安装位置等设定上与其他发行版(如 RedHat、Cento 及 Debian 等)不尽相同,因此在一些配置文件中要尤为注意相关路径的设置。
我们首先大概了解 Postfix + Extmail 这套邮件服务器解决方案的系统结构。
图一是论坛 @marion 所做的一副结构图1,但其表达并不是很清晰准确,我于是重新根据本文的结构做了一副结构图,即图二。
图一图二一、软件环境功能工具描述操作系统Arch LinuxWeb 服务器Apache Web功能工具描述Server数据库/目录服务MySQL-------- ------------ ------------------邮件传输代理 (MTA) postfix 使用最新版本2.6.2邮件投递代理 (MDA) courier-maildrop 支持过滤和强大功能POP3、IMAP 支持courier-imapWebMan 管理后台ExtMan 支持无限域名、无限用户,日志分析WebMail 邮件系统ExtMail 支持多语言、全部模板化,功能基本齐全-------- ------------ ------------------SMTP 认证库Cyrus SASL 标准的 SASL 实现库,可以支持 courier-authlib 数据库认证库courier-authlib 负责 courier-imap、courier-maildrop 的认证-------- ------------ ------------------内容过滤器amavisd-new Content-Filter 软件,支持与 Camav/SA 的挂接功能工具描述防病毒软件ClamAV 最热门的开源杀毒软件智能高效的反垃圾邮件工具Dspam 高精确度的、智能的过滤功能SMTP行为的反垃圾邮件工具SpamLocker基于 SMTP 行为识别的 Antispam 软件,大量可选插件内容分析的反垃圾邮件工具SpamAssassin 著名的 SA,可以支持大量规则二、安装配置 LAMP (Linux+Apache+MySQL+Perl)关于如何安装配置基本的 LAMP 环境不属于本文范畴,请读者自行查阅相关资料。
linux下安装postfix邮件系统(二)

linux下安装postfix邮件系统(二)5.安装postfix 2.2.3如果你的系统上原来有sendmail,先将其停止并将其文件改名:# /etc/init.d/sendmail stop# chkconfig --level 0123456 sendmail off# mv /usr/bin/newaliases /usr/bin/newaliases.orig# mv /usr/bin/mailq /usr/bin/mailq.orig# mv /usr/sbin/sendmail /usr/sbin/sendmail.orig开始安装# groupadd -g 12345 postfix# useradd -u 12345 -g 12345 -c postfix -d/dev/null -s/bin/false postfix# groupadd -g 54321 postdrop# wget ftp:///postfix/official/postfix-2.2.3.tar.gz# tar -zxvf postfix-2.2.3.tar.gz# cd postfix-2.2.3(Building Postfix with SASL authentication and mysql support) # make -f Makefile.init makefiles \'CCARGS=-DHAS_MYSQL -I/usr/local/mysql/include/mysql -DUSE_SASL_AUTH -I/usr/local/include/sasl' \'AUXLIBS=-L/usr/local/mysql/lib/mysql -lmysqlclient -lz -lm -L/usr/local/lib -lsasl2'# make install如果/etc/aliases文件不存在,请用如下命令创建:# echo postfix: root >> /etc/aliases# /usr/bin/newaliases注意:本例中Mysql安装在/usr/lcoal/mysql,sasl2安装在/usr/lib/sasl2。
Linux下的Postfix邮件服务器
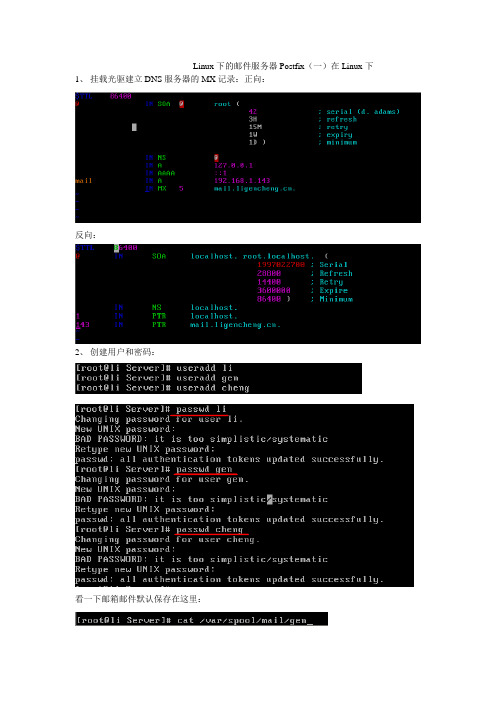
Linux下的邮件服务器Postfix(一)在Linux下1、挂载光驱建立DNS服务器的MX记录:正向:反向:2、创建用户和密码:看一下邮箱邮件默认保存在这里:3、安装Postfix包,开启Postfix服务:4、关闭sendmail服务:5、编辑/etc/postfix/main.cf文件找到这几项修改其余不改:myhostname = 邮件主机的完整名称mydomain = 邮件主机域名myorigin = $mydomain(表示所有)设置发件人邮件地址的网域名inet_interfaces = all (表示监听所有端口)监听端口【把下面的inet_interfaces=localhost注释掉】mydestination = $myhostname, $mydomain(表示所有)指定接收邮件时收件人的域名mynetworks = 192.168.1.0/24, 127.0.0.0/8(192.168.1.0/24表示这个网段,127.0.0.0/8表示本地)设置可以为其转发邮件的网络relay_domains = $mydestination(表示所有)设置可以为其转发邮件的域名6、重新启动服务:7、验证:发信:#telnet 25 telnet到邮件服务器的25号端口helo 用helo或ehlo介绍自己(可以不写)mail from:li@ 发信人地址rcpt to:gen@ 收件人地址data 表示开始输入邮件正文Hello! 邮件正文.新起一行以“.”表示正文结束quit 退出telnet收信:Linux下的邮件服务器Postfix(二)windows下第三方软件在(一)的基础上作:1、安装软件包dovecot、perl-DBI和mysql:2、修改主配置文件/etc/dovecot.conf3、开启服务重启服务器:4、将windows的首选DNS指向写成DNS服务器IP:5、验证:安装一个收发邮件的软件,然后在用windows自带的邮件收发软件(开始---程序---Outlook Express)互相测试:Windows自带的:工具-----账户-----添加-----邮件------软件安装完后:开始----程序-----找到刚安装的收发邮件的软件Windows Live Mail点开发一封邮件试一下(抄送是同时发给谁):这里有可能被认为是垃圾邮件:再用另一种软件(pine)测试一下:在windows中安装这个软件(这个软件可以在Linux里用但要依赖很多包所以这里只在windows里试一下):再选几个OK或是就进入:点回车:选择S项:选中前四一项一项调(选中后双击可调,回车确定):到li中查看一下:设置Postfix服务器邮件转发和用户的别名在(一)(二)的基础上(这个大致写一下):1、编辑配置文件/etc/aliases文件的记录格式(在最下面添加)用户的别名(假名):用户的真名admin: root 邮件的别名(发给admin也就是发给root)group: user1,user2邮件的群发(发给group也就是发给user1、user2….. user1:root@邮件转发(将发给user1的邮件发给root用户)2、修改aliases文件后更新aliases.db文件postalias hash:/etc/aliases3、刷新服务器。
在Linux下安装邮件服务器
在Linux下安装邮件服务器(RHAS3+Qmail+Apache+PHP+smtp-auth+Vpopmail+MySQL+Igenus+ezmlm+autores pond+qmailadmin)版本:2.7最后更新日期: 2004年11月11日功能列表SMTP服务器:SMTP-AUTH认证(Plain,Login,CRAM-MD5),TLS(SSL)支持POP3服务器:CRAM-MD5,APOP,和SSL支持IMAP服务器:TLS(SSL)支持病毒和垃圾邮件检测自动回复邮件列表Web管理通过Web显示统计信息WebMailMRTG--------------------------------------------------------------------------------安装准备安装环境这个安装过程基本上你只需要复制粘贴就可以完成.我在RedHat上安装成功,其他系统还没试过.为了方便安装我在安装Redhat3.0时选了apache、php、mysql,注意mysql-devel 和mysql-server开发包一定要装上.另外大家在安装LINUX时一定要装上软件开发和内核开发两个软件组,这样可以避免不必要的由于编译环境的问题而导致的安装问题,这点对于LINUX新手犹为重要。
安装系统后,一般另需安装php-mysql 这个包,在安装光碟第三张。
AS3.0安装后,并没有mysql-server软件包,需自行下载安装,为方便大家,mysql-server软件包我已经与所有软件放在一个包中。
要确认下面的软件是否已经安装:rpm -q httpdrpm -q phprpm -q php-mysqlrpm -q mysqlrpm -q mysql-serverrpm -q mysql-develrpm -q gdbmrpm -q gdbm-develrpm -q opensslrpm -q openssl-develrpm -q stunnelrpm -q krb5-devel如果你还没有安装, 请先安装它们. 你可以到安装光盘或是在这里找到它们的RPM包 .启动mysql server:# /etc/rc.d/init.d/mysqld start设置mysql root口令:# mysqladmin -u root password ‘xukixu’(设置你的密码)mysql的头文件和库文件分别在/usr/include/mysql和/usr/lib/mysql。
如何在Linux系统上搭建邮件服务器
如何在Linux系统上搭建邮件服务器在Linux系统上搭建邮件服务器是一个复杂但值得探索的任务。
邮件服务器允许您发送和接收电子邮件,使您能够有效地管理和组织您的通信。
在本文中,我们将介绍如何在Linux系统上搭建邮件服务器的步骤和方法。
步骤一:选择邮件服务器软件在搭建邮件服务器之前,您需要选择适合您需求的邮件服务器软件。
在Linux系统上,常用的邮件服务器软件包括Postfix、Exim、Sendmail等。
这些软件都有各自的优势和特点,您可以根据自己的需要选择合适的软件。
步骤二:安装和配置邮件服务器软件安装所选择的邮件服务器软件后,您需要进行一系列的配置。
首先,您需要配置主机名和域名。
通过编辑主机名和域名的配置文件,将您的主机名和域名与邮件服务器关联起来。
接下来,您需要配置邮件服务器的邮件转发和邮件传输代理设置。
邮件转发和邮件传输代理是邮件服务器的核心功能,您需要根据您的网络环境和需求设置这些参数。
步骤三:配置用户和邮件存储在邮件服务器上,您需要配置用户帐户和邮件存储。
首先,您可以创建邮件服务所需的用户帐户,包括系统管理员、邮件管理员和普通用户。
这些用户帐户将用于管理和访问邮件服务器的各项功能。
然后,您需要配置邮件存储。
邮件服务器将电子邮件存储在特定的目录中,您可以设置邮件存储的路径和格式。
一般而言,邮件服务器使用Maildir格式或者Mbox格式进行邮件存储。
步骤四:配置安全性和防垃圾邮件功能邮件服务器的安全性和防垃圾邮件功能非常重要。
您可以配置邮件服务器的安全设置,比如限制用户的访问权限、启用SSL/TLS加密等。
此外,您还可以配置防垃圾邮件功能,通过添加黑名单、白名单等方式来过滤垃圾邮件。
步骤五:测试和维护在完成邮件服务器的配置后,您需要进行测试和维护工作。
您可以发送测试邮件来验证您的邮件服务器是否正常工作。
同时,您还可以定期备份和更新您的邮件服务器,以确保数据的安全性和可靠性。
总结搭建邮件服务器可能需要一些技术知识和经验,但通过按照上述步骤和方法进行操作,您可以在Linux系统上成功地搭建自己的邮件服务器。
Linux中postfix邮件系统部署

一、准备工作1做地址映射2修改主机名3postfix需要支持SASL认证需要安装cyrus-sasl包)查看是否安装如果没有安装就需要安装一下4postfix还需要db4-devel-的依赖关系查看由没有安装没有就安装二编译安装及服务控制1创建运行组、用户2解压包3配置文件postfix的配置文件是make makefiles 然后为编译器提供额外的扩展参数4然后编译make5然后编译配置make install接下来会交互式安装一直回车保持默认就可以了6安装成功7查看支持认证8启动postfix服务9查看服务状态10查看监听进程实际监听进程的不是postfix而是master11可以用check对postfix的配置文件进行语法检查如果没有问及就不报错12postconf辅助工具12.1postconf查看当前启动的所有配置文件12.2postconf -n参数是只列出使用非默认值得配置12.3postconf -d参数是查看默认配置13建立配置文件为了简单我们配置非默认值得配置利用postconf工具过滤重定向,然后将原有的配置文件做备份,把过滤出的文件做主配置文件。
14跟踪日志变化日志在/var/log/maillog/15过滤查看日志变化三、配置SMTP发信服务1设置mail.cf配置文件并启动服务2重新加载服务3添加邮箱账户4SMTP发送邮件测试用telnet4.1发送外网邮件测试4.2去外网邮箱做验证因为126是做认证的所以邮件会在垃圾邮件中4.2在做内部用户之间通信验证测试和上面一样只不过把yuu480用户换成lisi4.2去/home/lisi/Maildir/new中查看四配置POP/IMAP收件服务(安装Dovecot服务器软件)下载地址 1 预先创建运行用户2解压缩包3配置文件完成后如下4编译5编译安装6添加系统服务7建立配置文档8建立PAM认证文件9调整主配置文件10启动dovecot服务11查看dovecot的监听端口12测试接收邮件五在xp客户机上用office 2007中outlook测试收发邮件1配置outlook2配置完成登陆看到有xiaoqi发来的邮件3配置xiaoqi的outlook互发邮件和配置lisi一样4用lisi给xiaoqi一份邮件在lisi自己抄送一份5lisi收到抄送邮件6xiaoqi收到lisi发来的邮件六启用SMTP发信认证1设置cyrus SASL函数库建立SMTP认证配置文件2启动saslauthdfuwu3修改main.cf配置文件,添加SMTP认证配置4重新加载配置文件postfix5测试验证SMTP发信认证5.1测试SMTP发信认证telnet方式5.1.1验证不使用SMTP认证情况内网发信不受影响5.1.2使用OpenSSL工具生成加密用户和加密用户密码5.1.3使用认证用户发信测试5.1.4去外网做验证5.2用outlook测试SMTP认证5.2.1outlook默认是不支持SMTP认证的发送邮件5.2.2收到管理员的信不能发出5.2.3使用SMTP认证发信。
Linux怎么安装配置Postfix

Linux怎么安装配置PostfixPostfix是一款用法灵活的电子邮件应用程序,那么大家知道Linux怎么安装配置Postfix吗?今天店铺与大家分享下Linux安装配置Postfix的具体操作步骤,有需要的朋友不妨了解下。
Linux安装配置Postfix方法postfix的产生是为了替代传统的sendmail.相较于sendmail,postfix在速度,性能和稳定性上都更胜一筹。
现在目前非常多的主流邮件服务其实都在采用postfix. 当我们需要一个轻量级的的邮件服务器是,postfix不失为一种选择。
1. postfix是免费的:postfix想要作用的范围是广大的Internet用户,试图影响大多数的Internet上的电子邮件系统,因此它是免费的。
2. 更快:postfix在性能上大约比sendmail快三倍。
一部运行postfix的台式PC每天可以收发上百万封邮件。
3. 兼容性好:postfix是sendmail兼容的,从而使sendmail用户可以很方便地迁移到postfix。
Postfix支持/var[/spool]/mail、/etc/aliases、NIS、和 ~/.forward 文件。
4. 更健壮:postfix被设计成在重负荷之下仍然可以正常工作。
当系统运行超出了可用的内存或磁盘空间时,postfix会自动减少运行进程的数目。
当处理的邮件数目增长时,postfix运行的进程不会跟着增加。
5. 更灵活:postfix是由超过一打的小程序组成的,每个程序完成特定的功能。
你可以通过配置文件设置每个程序的运行参数。
6. 安全性postfix具有多层防御结构,可以有效地抵御恶意入侵者。
如大多数的postfix程序可以运行在较低的权限之下,不可以通过网络访问安全性相关的本地投递程序等等。
下面来介绍linux上如何搭建和配置postfix服务:1.关掉sendmail相关的所有服务,最好是直接卸载sendmail.# service sendmail stop# chkconfig sendmail off#rpm -qa | grep sendmail | xargs rpm -e2.安装postfix.redhat6.0以上版本应该是默认集成了postfix服务的,假如没有安装的话,可以手动安装。
Linux1 邮件服务器 Postfix的配置
Linux1 邮件服务器Postfix的配置Red Hat Enterprise Linux 5.4中的Postfix与Sendmail一样,默认只监听本地127.0.0.1端口的邮件收发。
但如果要对整个Internet开放的话,就需要学会对Postfix 进行配置。
然而,几乎所有的设置都可以通过/etc/postfix/main.cf文件搞定。
对于这个文件的内容需要注意以下几点:●“#”符号表示注释。
●所有设置值以类似变量的设置方式来处理。
例如myhostname =,其中等号两边要有空格,且第一个字符不可以是空白,也就是要从行首写起。
●可以使用“$”来扩展使用变量设置,例如myorigin = $myhostname,其等价于myorigin = 。
●如果该变量支持2个以上的数据,则需要使用空格符分隔,不过建议使用“,”加空格来处理。
例如myorigin = $myhostname, $mydomain,表示myorigin支持2个数据内容。
●可使用多行来表示同一个设置值,只要在第1行最后有“,”,且第2行开头为空格,即可将数据延伸到第2行继续书写。
●若重复设置某一项目,则以最后一次设置为准。
虽然该配置文件的内容比较多,但其中大部分内容都是注释(以“#”号开头的行),真正需要自行定义的参数并不多,而且这些参数就算不去定义,按照默认值也可以正常运行。
下面我们一起来看一看这些基本的postfix参数。
需要注意的是,一旦更改了main.cf文件的内容,则必须运行postfix reload命令使其生效。
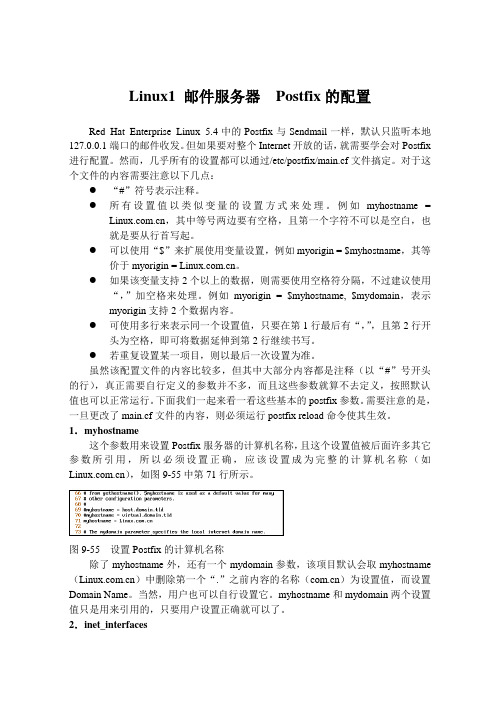
1.myhostname这个参数用来设置Postfix服务器的计算机名称,且这个设置值被后面许多其它参数所引用,所以必须设置正确,应该设置成为完整的计算机名称(如),如图9-55中第71行所示。
图9-55 设置Postfix的计算机名称除了myhostname外,还有一个mydomain参数,该项目默认会取myhostname ()中删除第一个“.”之前内容的名称()为设置值,而设置Domain Name。
linux搭建内网邮件服务器
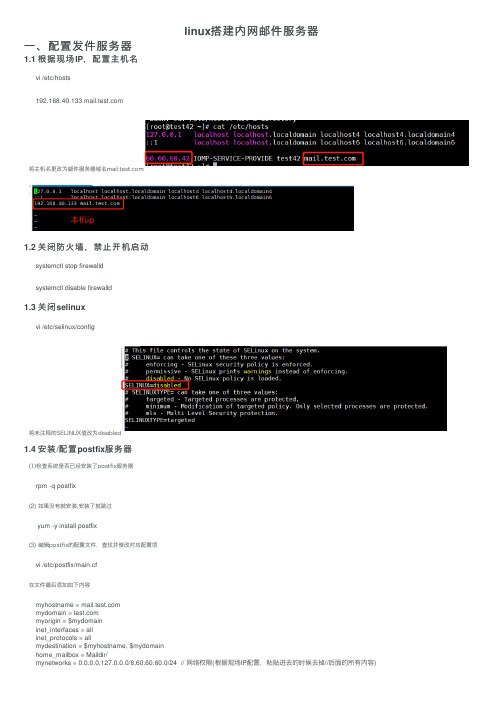
linux搭建内⽹邮件服务器⼀、配置发件服务器1.1 根据现场IP,配置主机名vi /etc/hosts192.168.40.133 将主机名更改为邮件服务器域名1.2 关闭防⽕墙,禁⽌开机启动systemctl stop firewalldsystemctl disable firewalld1.3 关闭selinuxvi /etc/selinux/config将未注释的SELINUX值改为disabled1.4 安装/配置postfix服务器(1)检查系统是否已经安装了postfix服务器rpm -q postfix(2) 如果没有就安装,安装了就跳过yum -y install postfix(3) 编辑postfix的配置⽂件,查找并修改对应配置项vi /etc/postfix/main.cf在⽂件最后添加如下内容myhostname = mydomain = myorigin = $mydomaininet_interfaces = allinet_protocols = allmydestination = $myhostname, $mydomainhome_mailbox = Maildir/mynetworks = 0.0.0.0,127.0.0.0/8,60.60.60.0/24 // ⽹络权限(根据现场IP配置,粘贴进去的时候去掉//后⾯的所有内容)(4) 检查配置⽂件是否有语法错误postfix check(5) 重新启动postfix服务器systemctl restart postfix1.5 发件测试(1) 添加邮件账号组groupadd mailusers(2)添加邮箱账号useradd -g mailusers -s /sbin/nologin dkycspasswd dkycsuseradd -g mailusers -s /sbin/nologin dfcpasswd dfc(3) 安装远程登录插件yum install -y telnet(4) 远程登录25端⼝,如报错连接不上,重启postfixtelnet 25(确认现场25端⼝是否开放)(5)测试邮件发送[root@localhost new]# telnet 25 // Trying 192.168.40.133...Connected to .Escape character is '^]'.220 ESMTP Postfix#显⽰上⾯表⽰telnet连接成功mail from:<shaokang@>#邮件发送者250 2.1.0 Okrcpt to:dfc@#邮件接收者250 2.1.5 Okdata#data加回车开始编写邮件354 End data with <CR><LF>.<CR><LF>Subject:test mail#邮件主题hello serva 3D_city_wprl^Hhello serva 3FDhello 3D!thanks!#邮件内容.#.表⽰编写结束发送邮件250 2.0.0 Ok: queued as 21C5340F1992#发送成功quit#退出telnet221 2.0.0 ByeConnection closed by foreign host.如果报错就修改下列⽂件:vi /etc/postfix/main.cfmynetworks = allsystemctl restart postfix(6)接收查看邮件内容cd /home/收件⼈/Maildir/new⽬录下,所有新收的邮件都在这个下⾯:⼆、配置收件服务器2.1 安装dovecotyum -y install dovecot安装完,查看版本:dovecot --version2.2 修改配置⽂件(1)执⾏vi /etc/dovecot/dovecot.conf修改如下:protocols = imap pop3listen = *, ::login_trusted_networks = 0.0.0.0,127.0.0.0/8,60.60.60.0/24 (根据现场配置填写)!include conf.d/*.conf!include_try local.conf(2)执⾏vi /etc/dovecot/conf.d/10-ssl.conf修改如下:ssl = no(3)执⾏vi /etc/dovecot/conf.d/10-auth.conf修改如下:disable_plaintext_auth = noauth_mechanisms = plain login!include auth-system.conf.ext(4)执⾏vi /etc/dovecot/conf.d/10-logging.conf修改如下:info_log_path = /var/log/dovecot_info.logdebug_log_path = /var/log/dovecot_debug.log(5)执⾏vi /etc/dovecot/conf.d/10-mail.conf修改如下:mail_location = maildir:~/Maildir2.3 启动服务systemctl start dovecotsystemctl enable dovecot2.3 查看服务状态systemctl status dovecot查看端⼝:yum -y install net-toolsnetstat -tlnp |grep dovecot三、配置DNS安装:yum install rng-tools -yservice rngd start安装/配置:yum install bind-utils -yyum install dnsmasq -yvi /etc/hosts 添加 127.0.0.1 vi /etc/dnsmasq.conf添加 address=//127.0.0.1, 添加 listen-address=127.0.0.1,192.168.40.133(本机ip)service dnsmasq start测试 nslookupServer: 127.0.0.1Address: 127.0.0.1#53Name: Address: 60.60.60.42Name: Address: 127.0.0.1四、配置Foxmail客户端账号配置:。
Linux下Posfix邮件配置
redhat9+postfix+cyrus-sasl+mysql+postfixadmin+courier-imap+courier-maildrop+s quirrelmail(courier-sqwebmail openwebmail)+clamav+spamassassin+amavisd-new 2005年5月5日加入Cyrus SASL with MySQL Encrypted Passwords2005年5月3日更新防病毒及防垃圾2005年4月12日加入mysql日志管理2005年4月10日至13日加入openwebmail2005年4月8日加入apache自启动脚本2004年10左右成稿1.mysql2.apache3.php4.cyrus-sasl5.postfix6.postfixadmin7.courier-authlib8.courier-imap9.courier-maildrop10.webmail10.1.sqwebmai10.2.squirrelmail10.3.openwebmail11.clamav12.spamassassin13.amavisd-new14.后记加一点说明15.附:启动脚本下载1.安装mysql 4.1.11groupadd mysqluseradd -g mysql mysqlwget/get/Downloads/MySQL-4.1/mysql-4.1.11.tar.gz/from/http://mysql.new /tar -zxvf mysql-4.1.11.tar.gzcd mysql-4.1.11./configure --prefix=/usr/local/mysql --with-charset=gbkmakemake installcp support-files/f /etc/f设置自启动cp support-files/mysql.server /etc/rc.d/init.d/mysqldchmod 700 /etc/rc.d/init.d/mysqldchkconfig --add mysqld安装完以后要初始化数据库,要是升级安装的请跳过# cd /usr/local/mysql# /usr/local/mysql/bin/mysql_install_db --user=mysql# chown -R root .# chown -R mysql var# chgrp -R mysql .# /usr/local/mysql/bin/mysqld_safe --user=mysql &好了,至此mysql安装完毕,你可以这样起动你的mysql服务# /etc/rc.d/init.d/mysqld start# ln -s /usr/local/mysql/bin/mysql /sbin/mysql# ln -s /usr/local/mysql/bin/mysqladmin /sbin/mysqladmin为了能让系统找到mysql,请运行如下命令# PATH=$PATH:/usr/local/mysql/bin# export PATH# echo "/usr/local/mysql/lib/mysql" >;>; /etc/ld.so.conf# ldconfig日志管理开启错误日志(在[safe_mysqld]项下添加)# vi /etc/f[safe_mysqld]err-log=/var/log/mysqld/err.log开启常规日志和更新日志 (在[mysqld]项下添加)# vi /etc/f[mysqld]log=/var/log/mysqld/log.loglog-update=/var/log/mysqld/update.log创建日志文件并设置权限# mkdir /var/log/mysqld# touch /var/log/mysqld/err.log /var/log/mysqld/log.log /var/log/mysqld/update.log# chown -R mysql.mysql /var/log/mysqld# service mysqld restart说明:错误日志包含了服务器写入标准错误输出设备的所有消息,同时还包括了mysql服务的启动和关闭事件常规日志用来记录有关mysql服务器运行的常规信息,包括用户的连接、查询及其他各种时间更新日志用来记录修改数据库的查询信息,包括所有涉及数据库修改的SQl语句的查询记录建议调试结束后关闭日志2.安装apache 2.0.54# wget /httpd/httpd-2.0.54.tar.bz2# tar jxvf httpd-2.0.54.tar.bz2# cd httpd-2.0.54# ./configure --prefix=/usr/local/apache# make# make install设置自启动# cp support/apachectl /etc/init.d/httpd修改/etc/init.d/httpd# vi /etc/init.d/httpd(在第两行之后添加如下内容)#!/bin/sh## Startup script for the Apache Web Server# chkconfig: - 85 15# description: Apache is a World Wide Web server. It is used to serve \# HTML files and CGI.# processname: httpd# pidfile: /usr/local/apache/log/httpd.pid# config: /usr/local/apache/conf/httpd.conf# chkconfig --add httpd# chmod 755 /etc/init.d/httpd# chkconfig httpd on创建网页根目录# mkdir /var/www# vi /usr/local/apache/conf/httpd.conf//存放网页的目录,原来为DocumentRoot "",改成:DocumentRoot "/var/www"//这句应该和DocumentRoot 的目录保持一致,原来为<Directory "">;,改成:<Directory "/var/www">;//Indexes:当在目录中找不到DirectoryIndex列表中指定的文件就生成当前目录的文件列表//FollowSymlinks:允许符号链接跟随,访问不在本目录下的文件Options Indexes FollowSymLinks//禁止读取.htaccess配置文件的内容AllowOverride None//指定先执行Allow(允许)访问规则,再执行Deny(拒绝)访问规则Order allow,deny//设置Allow(允许)访问规则,允许所有连接Allow from all</Directory>;启动服务:# /usr/local/apache/bin/apachectl start或# service httpd start3.安装php4.3.11# wget /get/php-4.3.11.tar.bz2/from//mirror# tar -jxvf php-4.3.11.tar.bz2# cd php-4.3.11# ./configure \--prefix=/usr/local/php \--with-mysql=/usr/local/mysql \--with-apxs2=/usr/local/apache/bin/apxs# make# make install# cp php.ini-dist /usr/local/php/lib/php.ini# vi /usr/local/php/lib/php.ini;default_charset = "iso-8859-1"在这行下面加一行default_charset = "gbk"# vi /usr/local/apache/conf/httpd.conf找到#AddType application/x-tar .tgz 这行,在下面加两行。
Linux环境搭建邮件服务器

Linux 5.x平台搭建extmail邮件服务器作者:洪卓辉文档编辑于2011年8月Linux5.x平台搭建extmail邮件服务器二操作系统安装1RedHat系统所需组件:本文档支持RedHat Enterprise-5.x及CentOS-5.x版本。
要注意的是安装系统时,只安装如下的组件:MYSQL数据库:注意必须选中php-mysql模块,否则extmail将无法连接mysqlVIM编辑器:建议安装vim软件包,它支持main.cf彩色高亮语法分析。
其余的Xwindows,打印,KDE/Gnore,服务器配置工具,网络工具,开发包等都不是必选组件。
安装完毕进入操作系统后,为增加系统安全性,建议禁止root直接登陆,并增加一个非root 帐户,例如sysadmin。
这样无法以root账户直接登陆系统,必须先以sysadmin身份登陆再su到root执行。
2安装操作系统的时候把mysql数据库的php-mysql-5*这个包安装了!必须的!并且设置关闭防火墙和SELinux3配置SSH:以root身份登进系统后,增加一个非root帐户,名称为sysadmin,密码按您的需求设置一个即可。
接下来我们要禁止root直接登陆。
shell#vim/etc/ssh/sshd_config修改以下配置为:PermitRootLogin no然后重新启动sshd,这样禁止了root直接登陆。
shell#service sshd restart三创建yum源1下载EMOS软件包整个系统的安装全过程都要求以root身份执行,如果机器没有访问外部网络的能力,则事先下载好EMOS光盘映像,并上传到服务器。
备注:如果要在CentOS 5.x上面进行配置,请下载EMOS-1.5.ISO,配置方法不变;2制作本地yum仓库使用EMOS-1.5.ISO光盘制作本地yum仓库;此外,我们假设本次安装默认域是,主机名为:安装CentOS-5.3光盘中createrepo工具shell#rpm-ivh createrepo-0.4.11-3.el5.noarch.rpm加载EMOS-1.5的光盘,请把emos的光盘放到光驱中shell#mkdir/mnt/EMOS#mount/dev/cdrom/mnt/EMOS#cd/mnt#createrepo.3、创建客户端yum的定义文件:shell#cd/etc/yum.repos.d#mkdir backup#mv*.repo./backup#vi EMOS.repo加入以下内容:[EMOS]name=EMOSbaseurl=file:///mnt/enabled=1gpgcheck=0重新获取最新的仓库信息:shell#yum clean all#yum list四配置MTA-postfix1、安装postfix安装postfixshell#yum install postfix#rpm-e sendmail2、配置postfixshell#postconf-n>/etc/postfix/main2.cf#mv/etc/postfix/main.cf/etc/postfix/main.cf.old #mv/etc/postfix/main2.cf/etc/postfix/main.cf编辑main.cf:shell#vi/etc/postfix/main.cf增加如下内容:#hostnamemynetworks=127.0.0.1myhostname= mydestination=$mynetworks$myhostname#bannermail_name=Postfix-by smtpd_banner=$myhostname ESMTP$mail_name#response immediatelysmtpd_error_sleep_time=0s#Message and return code controlmessage_size_limit=5242880mailbox_size_limit=5242880show_user_unknown_table_name=no#Queue lifetime controlbounce_queue_lifetime=1dmaximal_queue_lifetime=1d设置postfix开机自启:shell#chkconfig postfix on五配置courier-authlib1、安装Courier-Authlib安装以下软件包:shell#yum install courier-authlib#yum install courier-authlib-mysql编辑/etc/authlib/authmysqlrc文件:shell#vim/etc/authlib/authmysqlrc并将其内容清空(dG),然后增加如下内容:MYSQL_SERVER localhostMYSQL_USERNAME extmailMYSQL_PASSWORD extmailMYSQL_SOCKET/var/lib/mysql/mysql.sock MYSQL_PORT3306MYSQL_OPT0MYSQL_DATABASE extmailMYSQL_USER_TABLE mailboxMYSQL_CRYPT_PWFIELD passwordMYSQL_UID_FIELD uidnumberMYSQL_GID_FIELD gidnumberMYSQL_LOGIN_FIELD usernameMYSQL_HOME_FIELD homedirMYSQL_NAME_FIELD nameMYSQL_MAILDIR_FIELD maildirMYSQL_QUOTA_FIELD quotaMYSQL_SELECT_CLAUSE SELECTusername,password,"",uidnumber,gidnumber,\ CONCAT('/home/domains/',homedir),\CONCAT('/home/domains/',maildir),\quota,\name\FROM mailbox\WHERE username='$(local_part)@$(domain)'注意:此处添加之后,要把文件内容对齐,否则数据库导入导出可能出错!修改authdaemonrc文件shell#vi/etc/authlib/authdaemonrc修改如下内容:authmodulelist="authmysql"authmodulelistorig="authmysql"2、启动courier-authlib:shell#service courier-authlib start如一切正常,命令行将返回如下信息:Starting Courier authentication services:authdaemond修改authdaemon socket目录权限如果该目录权限不正确修改,maildrop及postfix等将无法正确获取用户的信息及密码认证:shell#chmod755/var/spool/authdaemon/六配置maildrop1、安装maildropshell#yum install maildrop配置master.cf为了使Postfix支持Maildrop,必须修改/etc/postfix/master.cf文件,注释掉原来的maildrop的配置内容,并改为:maildrop unix-n n--pipeflags=DRhu user=vuser argv=maildrop-w90-d ${user}@${nexthop}${recipient}${user}${extension} {nexthop}注意:flags前面有“两个空格”配置main.cf由于maildrop不支持一次接收多个收件人,因此必须在main.cf里增加如下参数:maildrop_destination_recipient_limit=12、测试maildrop对authlib支持shell#maildrop-v看是否出现以下内容:maildrop2.1.0Copyright1998-2005Double Precision,Inc. GDBM/DB extensions enabled.Courier Authentication Library extension enabled.Maildir quota extension enabled.This program is distributed under the terms of the GNU GeneralPublicLicense.See COPYING for additional information.注意事项:1、如需重新编译Maildrop软件包,必须先获得其源码rpm包,并且必须先行安装courier-authlib及其devel软件包,否则编译后的maildrop将无法打开authlib支持。
linux下源码搭建postfix

linux下源码搭建postfixPostfix简介Postfix是一个由IBM资助下由Wietse Venema负责开发的自由软件工程的一个产物,其目的是为用户提供除sendmail之外的邮件服务器选择。
Postfix力图做到快速、易于管理、提供尽可能的安全性,同时尽量做到和sendmail邮件服务器保持兼容性以满足用户的使用习惯。
起初,Postfix是以VMailer这个名字发布的,后来由于商标上的原因改名为Postfix。
Postfix设计中采用了web服务器的的设计技巧以减少进程创建开销,并且采用了其他的一些文件访问优化技术以提高效率,但同时保证了软件的可靠性。
Postfix的设计目标就是成为Sendmail的替代者。
拓扑图一、安装前的准备工作1.vim /etc/sysconfig/network //修改主机名字文件内容修改:HOSTNAME=2.vim /etc/resolv.conf //dns指向文件内容修改:namedserver 192.168.145.1003.安装dns服务测试:root@mail ~]# dig -s mx Invalid option: -sUsage: dig [@global-server] [domain] [q-type] [q-class] {q-opt}{global-d-opt} host [@local-server] {local-d-opt}[ host [@local-server] {local-d-opt} [...]]Use "dig -h" (or "dig -h | more") for complete list of options[root@mail ~]# dig -t mx ; <<>> DiG 9.3.4-P1 <<>> -t mx ;; global options: printcmd;; Got answer:;; ->>HEADER<<- opcode: QUERY, status: NOERROR, id: 34385;; flags: qr aa rd ra; QUERY: 1, ANSWER: 1, AUTHORITY: 1, ADDITIONAL: 2;; QUESTION SECTION:;. IN MX;; ANSWER SECTION:. 86400 IN MX 10 .;; AUTHORITY SECTION:. 86400 IN NS .;; ADDITIONAL SECTION:. 86400 IN A 192.168.145.100. 86400 IN A 192.168.145.100;; Query time: 4 msec;; SERVER: 192.168.145.100#53(192.168.145.100);; WHEN: Tue Aug 21 16:59:45 2012;; MSG SIZE rcvd: 934.安装所需的rpm包,这包括以下这些:[root@mail ~]# yum install httpd php php-mysql mysql mysql-server mysql-devel openssl-devel dovecot perl-DBD-MySQL tcl tcl-devel libart_lgpl libart_lgpl-devel libtool-ltdl libtool-ltdl-devel expect5.关闭sendmail,并将它的随系统自动启动功能关闭:[root@mail ~]# service sendmail stop[root@mail ~]# chkconfig sendmail off6.安装以下源码开发所用到的rpm包组:[root@mail ~]# yum grouplistDevelopment Libraries //管理工具Development Tools //开发工具Legacy Software Development //传统的软件开发X Software Development //图形界面软件开发方法:[root@mail ~]# yum groupinstall "packge_group_name"7.启动mysql数据库,并给mysql的root用户设置密码:[root@mail ~]# service mysqld start[root@mail ~]# chkconfig mysqld on授权本地用户:[root@mail ~]# mysqlmysql> SET PASSWORD FOR root@'localhost'=PASSWORD('redhat');mysql> SET PASSWORD FOR root@'127.0.0.1'=PASSWORD('redhat');mysql> FLUSH PRIVILEGES; //刷新数据库授权远程用户:mysql> GRANT ALL PRIVILEGES ON *.* TO root@'%' IDENTIFIED BY 'redhat';mysql> FLUSH PRIVILEGES;mysql> \q //退出数据库8.启动saslauthd服务,并将其加入到自动启动队列:[root@mail ~]# service saslauthd start[root@mail ~]# chkconfig saslauthd on二、安装配置postfix1.安装过程[root@mail ~]# tar -zxvf postfix-2.8.2.tar.gz -C /usr/local/src[root@mail postfix-2.8.2]# groupadd -g 2525 postfix[root@mail postfix-2.8.2]# useradd -g postfix -u 2525 -s /sbin/nologin -M postfix[root@mail postfix-2.8.2]# groupadd -g 2526 postdrop[root@mail postfix-2.8.2]# useradd -g postdrop -u 2526 -s /bin/false -M postdrop生成makefil文件:[root@mail postfix-2.8.2]#make makefiles 'CCARGS=-DHAS_MYSQL -I/usr/include/mysql -DUSE_SASL_AUTH -DUSE_CYRUS_SASL -I/usr/include/sasl -DUSE_TLS ' 'AUXLIBS=-L/usr/lib/mysql -lmysqlclient -lz -lm -L/usr/lib/sasl2 -lsasl2 -lssl -lcrypto'命令参数说明:CCARGS:变量-DHAS_MYSQL:调用mysql-I:include 头文件AUXLIBS:辅助的库文件[root@mail postfix-2.8.2]# make //编译[root@mail postfix-2.8.2]# make install //放入相应文档按照以下的提示输入相关的路径([]号中的是缺省值,”]”后的是输入值,省略的表示采用默认值)install_root: [/] /tempdir: [/usr/local/src/ postfix-2.6.5] /tmp //临时目录config_directory: [/etc/postfix] /etc/postfix //配置目录daemon_directory: [/usr/libexec/postfix] //守护进程command_directory: [/usr/sbin] //命令目录queue_directory: [/var/spool/postfix]sendmail_path: [/usr/sbin/sendmail]newaliases_path: [/usr/bin/newaliases]mailq_path: [/usr/bin/mailq] //邮件队列mail_owner: [postfix]setgid_group: [postdrop]html_directory: [no]manpages: [/usr/local/man] //man手册readme_directory: [no]安装完毕生成别名二进制文件,这个步骤如果忽略,会造成postfix效率极低:[root@mail postfix-2.8.2]# newaliases[root@mail postfix-2.8.2]# postfix start //启动postfix[root@mail postfix-2.8.2]# netstat -tupln |grep 25tcp 0 0 0.0.0.0:25 0.0.0.0:* LISTEN 11778/master[root@mail postfix-2.8.2]# postconf -m //查看模块mysql //增加了mysql服务[root@mail postfix-2.8.2]# postconf -acyrus //支持验证安装启动脚本[root@mail postfix-2.8.2]# mkdir /tmp/abc[root@mail postfix-2.8.2]# cd /tmp/abc[root@mail abc]# cp /mnt/cdrom/Server/postfix-2.3.3-2.1.el5_2.i386.rpm ./ //展开rpm包[root@mail abc]# rpm2cpio postfix-2.3.3-2.1.el5_2.i386.rpm |cpio -id //-id表示建立相应目录[root@mail abc]# cd etc/rc.d/init.d/[root@mail init.d]# ll总计4-rwxr-xr-x 1 root root 2404 08-21 18:26 postfix[root@mail init.d]# cp postfix /etc/init.d/ //拷贝控制脚本[root@mail init.d]# service postfix stop[root@mail init.d]# service postfix start[root@mail init.d]# netstat -tupln |grep 25tcp 0 0 0.0.0.0:25 0.0.0.0:* LISTEN 11778/master[root@mail init.d]# chkconfig --add postfix[root@mail init.d]# chkconfig --list |grep postfix[root@mail ~]# useradd user1[root@mail ~]# passwd user12.进行一些基本配置,测试启动postfix并进行发信[root@mail ~]#vim /etc/postfix/main.cf修改以下几项为您需要的配置75 myhostname = 83 mydomain = 98 myorigin = $mydomain112 inet_interfaces = all160 mydestination = $myhostname, localhost.$mydomain, localhost, $mydomain259 mynetworks = 127.0.0.0/8说明:myorigin参数用来指明发件人所在的域名;mydestination参数指定postfix接收邮件时收件人的域名,即您的postfix系统要接收到哪个域名的邮件;myhostname 参数指定运行postfix邮件系统的主机的主机名,默认情况下,其值被设定为本地机器名;mydomain参数指定您的域名,默认情况下,postfix将myhostname的第一部分删除而作为mydomain的值;mynetworks 参数指定你所在的网络的网络地址,postfix系统根据其值来区别用户是远程的还是本地的,如果是本地网络用户则允许其访问;inet_interfaces 参数指定postfix系统监听的网络接口;注意:1、在postfix的配置文件中,参数行和注释行是不能处在同一行中的;2、任何一个参数的值都不需要加引号,否则,引号将会被当作参数值的一部分来使用;3、每修改参数及其值后执行postfix reload 即可令其生效;但若修改了inet_interfaces,则需重新启动postfix;4、如果一个参数的值有多个,可以将它们放在不同的行中,只需要在其后的每个行前多置一个空格即可;postfix会把第一个字符为空格或tab的文本行视为上一行的延续;重新启动postfix[root@mail init.d]# service postfix restart测试:[root@mail ~]# telnet 127.0.0.1 25helo 250 mail from:root@localhost250 2.1.0 Okrcpt to:user1@localhost250 2.1.5 Okdata354 End data with <CR><LF>.<CR><LF>hello.250 2.0.0 Ok: queued as 210ED7804Dquit三、为postfix开启基于cyrus-sasl的认证功能1.使用以下命令验证postfix是否支持cyrus风格的sasl认证,如果您的输出为以下结果,则是支持的:[root@mail init.d]# /usr/local/postfix/sbin/postconf -acyrusdovecot2.[root@mail init.d]#vim /etc/postfix/main.cf添加以下内容:############################CYRUS-SASL############################broken_sasl_auth_clients = yessmtpd_recipient_restrictions=permit_mynetworks,permit_sasl_authenticated,reject_invalid_hostn ame,reject_non_fqdn_hostname,reject_unknown_sender_domain,reject_non_fqdn_sender,reject_n on_fqdn_recipient,reject_unknown_recipient_domain,reject_unauth_pipelining,reject_unauth_des tinationsmtpd_sasl_auth_enable = yessmtpd_sasl_local_domain = $myhostnamesmtpd_sasl_security_options = noanonymoussmtpd_banner = Welcome to our $myhostname ESMTP,Warning: Version not Available!3.[root@mail ~]# vim /usr/lib/sasl2/smtpd.conf添加如下内容:pwcheck_method: saslauthd //借助于sasl实现身份验证mech_list: PLAIN LOGIN //验证机制4.启动sasl服务,并让postfix重新加载配置文件[root@mail ~]# service saslauthd start[root@mail ~]# chkconfig saslauthd on[root@mail ~]# service postfix restart5.测试[root@mail ~]# telnet 127.0.0.1 25Trying 127.0.0.1...Connected to localhost.localdomain (127.0.0.1).Escape character is '^]'.220 ESMTP Postfixehlo 250-PIPELINING250-SIZE 10240000250-VRFY250-ETRN250-AUTH PLAIN LOGIN250-AUTH=PLAIN LOGIN (请确保您的输出以类似两行,说明验证功能已经打开)250-ENHANCEDSTATUSCODES250-8BITMIME250 DSN四、安装Courier authentication library1.安装过程[root@mail ~]# tar -jxvf courier-authlib-0.63.0.tar.bz2 -C /usr/local/src[root@mail src]# cd courier-authlib-0.63.0/[root@mail courier-authlib-0.63.0]#./configure --prefix=/usr/local/courier-authlib --sysconfdir=/etc --with-authmysql --with-mysql-libs=/usr/lib/mysql --with-mysql-includes=/usr/include/mysql --with-redhat --with-authmysqlrc=/etc/authmysqlrc --with-authdaemonrc=/etc/authdaemonrc --with-ltdl-lib=/usr/lib --with-ltdl-include=/usr/include 命令参数说明:--with-redhat:针对rehat操作系统进行优化[root@mail courier-authlib-0.63.0]# make[root@mail courier-authlib-0.63.0]# make install[root@mail courier-authlib-0.63.0]# chmod 755 /usr/local/courier-authlib/var/spool/authdaemon [root@mail courier-authlib-0.63.0]# cp /etc/authdaemonrc.dist /etc/authdaemonrc //验证调用模块[root@mail courier-authlib-0.63.0]# cp /etc/authmysqlrc.dist /etc/authmysqlrc2.编辑文件vim /etc/authdaemonrc文件内容修改:27 authmodulelist="authmysql"34 authmodulelistorig="authmysql"53 daemons=10 //进程数量vim /etc/authmysqlrc26 MYSQL_SERVER localhost27 MYSQL_USERNAME exmail //这时为后文要用的数据库的所有者的用户名28 MYSQL_PASSWORD exmail //密码49 MYSQL_SOCKET /var/lib/mysql/mysql.sock56 MYSQL_PORT 3306 //指定你的mysql监听的端口,这里使用默认的330668 MYSQL_DATABASE extmail83 MYSQL_USER_TABLE mailbox92 MYSQL_CRYPT_PWFIELD password113 MYSQL_UID_FIELD 2525 // postfix 用户的UID119 MYSQL_GID_FIELD 2525 // postfix 用户的UID128 MYSQL_LOGIN_FIELD username133 MYSQL_HOME_FIELD concat('/var/mailbox/',homedir) \\/虚拟帐号主目录139 MYSQL_NAME_FIELD name150 MYSQL_MAILDIR_FIELD concat('/var/mailbox/',maildir)3.安装启动控制脚本[root@mail courier-authlib-0.63.0]# cp courier-authlib.sysvinit /etc/init.d/courier-authlib控制脚本要具备可执行权限[root@mail courier-authlib-0.63.0]# chmod 755 /etc/init.d/courier-authlib[root@mail courier-authlib-0.63.0]# service courier-authlib start //启动服务[root@mail courier-authlib-0.63.0]# chkconfig --add courier-authlib[root@mail courier-authlib-0.63.0]# chkconfig courier-authlib on[root@mail courier-authlib-0.63.0]# echo "/usr/local/courier-authlib/lib/courier-authlib" >> /etc/ld.so.conf.d/courier-authlib.conf[root@mail courier-authlib-0.63.0]# ldconfig -v[root@mail courier-authlib-0.63.0]# service courier-authlib restart //重新启动服务4.新建虚拟用户邮箱所在的目录,并将其权限赋予postfix用户:[root@mail courier-authlib-0.63.0]#mkdir -pv /var/mailbox[root@mail courier-authlib-0.63.0]#chown -R postfix /var/mailbox5.重新配置SMTP 认证vim /usr/lib/sasl2/smtpd.conf文件内容:pwcheck_method: authdaemond //形成的守护进程mech_list:PLAIN LOGINauthdaemond_path:/usr/local/courier-authlib/var/spool/authdaemon/socket[root@mail courier-authlib-0.63.0]# service saslauthd restart[root@mail courier-authlib-0.63.0]# service courier-authlib restart五、让postfix支持虚拟域和虚拟用户1.vim /etc/postfix/main.cf添加如下内容:########################Virtual Mailbox Settings########################virtual_mailbox_base = /var/mailboxvirtual_mailbox_maps = mysql:/etc/postfix/mysql_virtual_mailbox_maps.cf //虚拟帐号映射virtual_mailbox_domains = mysql:/etc/postfix/mysql_virtual_domains_maps.cf //虚拟域映射virtual_alias_domains =virtual_alias_maps = mysql:/etc/postfix/mysql_virtual_alias_maps.cfvirtual_uid_maps = static:2525 //虚拟帐号映射为真实帐号virtual_gid_maps = static:2525virtual_transport = virtualmaildrop_destination_recipient_limit = 1maildrop_destination_concurrency_limit = 1##########################QUOTA Settings######################## //配额限定message_size_limit = 14336000 //信件大小限制virtual_mailbox_limit = 20971520virtual_create_maildirsize = yesvirtual_mailbox_extended = yesvirtual_mailbox_limit_maps = mysql:/etc/postfix/mysql_virtual_mailbox_limit_maps.cfvirtual_mailbox_limit_override = yesvirtual_maildir_limit_message = Sorry, the user's maildir has overdrawn his diskspace quota, please Tidy your mailbox and try again later.virtual_overquota_bounce = yes2.使用extman源码目录下docs目录中的extmail.sql和init.sql建立数据库:[root@mail ~]# tar zxvf extman-1.1.tar.gz //不需要安装[root@mail ~]# cd extman-1.1/docs[root@mail docs]# mysql -u root -p <extmail.sql //导入数据库[root@mail docs]# mysql -u root -p <init.sql //初始化[root@mail docs]# mysql -u root -p 进行验证mysql> show databases;+--------------------+| Database |+--------------------+| information_schema || extmail || mysql || test |+--------------------+[root@mail docs]# cp mysql* /etc/postfix/ //拷贝映射文件3.授予用户extmail访问extmail数据库的权限mysql> GRANT all privileges on extmail.* TO extmail@localhost IDENTIFIED BY 'extmail'; mysql> GRANT all privileges on extmail.* TO extmail@127.0.0.1 IDENTIFIED BY 'extmail'; mysql>FLUSH PRIVILEGES; //刷新,让设置的内容生效[root@mail docs]#cp mysql_virtual_* /etc/postfix/[root@mail docs]# service postfix restart说明:启用虚拟域以后,需要取消中心域,即注释掉myhostname, mydestination, mydomain, myorigin几个指令;当然,你也可以把mydestionation的值改为你自己需要的。
linux环境下postfix+dovecot+extmail安装配置详解(二)
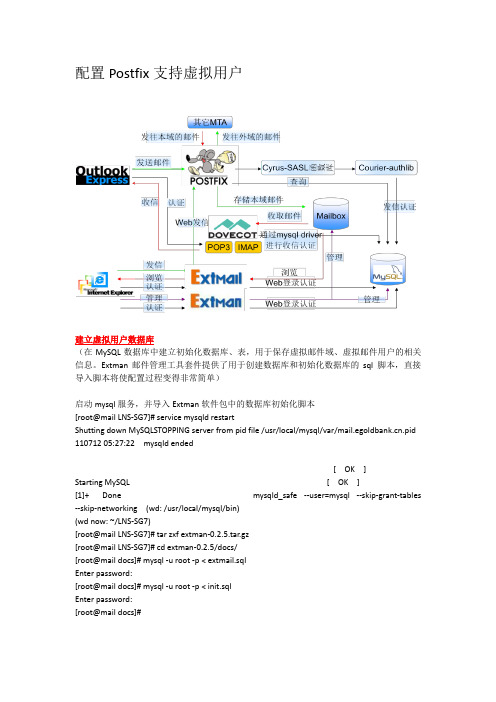
配置Postfix支持虚拟用户建立虚拟用户数据库(在MySQL数据库中建立初始化数据库、表,用于保存虚拟邮件域、虚拟邮件用户的相关信息。
Extman邮件管理工具套件提供了用于创建数据库和初始化数据库的sql 脚本,直接导入脚本将使配置过程变得非常简单)启动mysql服务,并导入Extman软件包中的数据库初始化脚本[root@mail LNS-SG7]# service mysqld restartShutting down MySQLSTOPPING server from pid file /usr/local/mysql/var/.pid 110712 05:27:22 mysqld ended[ OK ]Starting MySQL [ OK ][1]+ Done mysqld_safe --user=mysql --skip-grant-tables --skip-networking (wd: /usr/local/mysql/bin)(wd now: ~/LNS-SG7)[root@mail LNS-SG7]# tar zxf extman-0.2.5.tar.gz[root@mail LNS-SG7]# cd extman-0.2.5/docs/[root@mail docs]# mysql -u root -p < extmail.sqlEnter password:[root@mail docs]# mysql -u root -p < init.sqlEnter password:[root@mail docs]#修改Postfix的配置使用虚拟邮件域时,其中的邮件域名、邮件用户名、密码及邮件别名等信息都存储在MySQL数据库中。
当Postfix接收到一封新的邮件时,首先检查是不是发往本地域的邮件,如果不是则转向数据库中查询是否发往虚拟域的邮件,确认收件人是否存在、用户邮箱的位置等信息。
- 1、下载文档前请自行甄别文档内容的完整性,平台不提供额外的编辑、内容补充、找答案等附加服务。
- 2、"仅部分预览"的文档,不可在线预览部分如存在完整性等问题,可反馈申请退款(可完整预览的文档不适用该条件!)。
- 3、如文档侵犯您的权益,请联系客服反馈,我们会尽快为您处理(人工客服工作时间:9:00-18:30)。
cp support-files/mysql.server /etc/rc.d/init.d/mysql
chmod +x /etc/rc.d/init.d/mysql
chkconfig --add mysql
设置MySQL的默认字符集为GB2312,并且只绑定在127.0.0.1这个IP地址上,增强其安全性:
*************************************************************************************
1、安装操作系统
首先请准备好CentOS 4.2安装光盘的第一张和第二张,在“Installation Type"中选择“Custom”。在“Disk Partitioning Setup”时选择“Manually partition with Disk Druid”,因为我们要将邮件保存在“/home/mail”目录中,所以请为其保留足够的硬盘空间。在“Firewall Configuration”中选择“No firewall”,这样便于调试,你可以在邮件系统工作正常之后根据实际情况设置Firewall策略。在“Package Group Selection”中选择“Text-based Internet”、“Development Tools”和“Administration Tools”三项。关于语言的选项你可以选择默认值,这样总的安装文件大小为“1218MB”。安装完成后可以设置Crontab,让邮件服务器每天1点和时间服务器同步时间:
注:为了安全请立即修改MySQL管理员的密码。
3、安装Web服务器
从下面的URL下载Apache 2.0.55的源代码:/dist/httpd/
增加Apache运行所需的用户和组:
groupadd httpd
useradd httpd -g httpd -c "Apache user" -d /nonexistent -s /sbin/nologin
crontab -e
0 1 * * * /usr/bin/rdate -s
2、安装MySQL
你可以根据服务器的CPU类型,下载适合你所用CPU的MySQL发行包。据MySQL官方网站()的报道,使用icc 8.1编译的MySQL在Intel CPU上面的性能与gcc相比有20%的上升,如果你使用Intel的CPU可以选择icc编译的MySQL发行包,我不知道为什么最新的4.1.15和5.0.15没有提供i386的icc编译版本,所以你只能使用4.1.14。
mv /usr/sbin/sendmail /usr/sbin/sendmail.OFF
mv /usr/bin/newaliases /usr/bin/newaliases.OFF
mv /usr/bin/mailq /usr/bin/mailq.OFF
--with-mpm=worker --enable-rewrite --enable-suexec --with-suexec-caller=httpd \
CFLAGS="-march=i686 -O2 -fexpensive-optimizations" CXXFLAGS="-march=i686 -O2 -fexpensive-optimizations"
cd /usr/local/mysql
scripts/mysql_install_db --user=mysql
chown -R root .
chown -R mysql data
chgrp -R mysql .
cp support-files/f /etc/f
在Linux平台上安装基于Postfix、Courier-imap、Extmail的邮件系统 V 0.2
很久之前就计划写一个Postfix在Linux平台上面的安装文档,把自己安装Postfix的过程总结一下,但由于工作的关系直到现在才动手。和个人的习惯有关,在安装过程中我使用了很多源代码,这对一个新手可能有些难度,但是我认为在Linux下面如何从源代码安装软件应当是每个系统管理都必须掌握的知识。我使用了CFLAGS="-march=i686 -O2 -fexpensive-optimizations" 作为gcc 3.4.4在686 CPU上面的优化参数,我不知道这样作是否妥当。这个版本修正了上个版本中出现的一些错误,在此对hzqbbc对我的帮助致以最诚挚的谢意。
安装MySQL软件,MySQL将被安装到“/usr/local/mysql”目录下:
tar zvxf mysql-max-4.1.14-pc-linux-gnu-i686-icc-glibc23.tar.gz
mv mysql-max-4.1.14-pc-linux-gnu-i686-icc-glibc23 /usr/local/mysql
修改MySQL的配置文件(/etc/f),将MySQL服务器和客户端的默认socket由“/tmp/mysql.sock”修改为“/var/lib/mysql/mysql.sock”,并建立相应的目录:
mkdir /var/lib/mysql
chown mysql /var/lib/mysql
make
make install
修改apache的配置文件(/usr/local/httpd/conf/httpd.conf),配置apache的默认语言、运行用户等参数:
DefaultLanguage zh_CN
User httpd
Group httpd
<IfModule worker.c>
将mysql和mysqladmin两个命令连接到/usr/local/bin/目录下以方便使用:
ln -s /usr/local/mysql/bin/mysql /usr/local/bin/
ln -s /usr/local/mysql/bin/mysqladmin /usr/local/bin/
StartServers 10
MaxClients 1024
MinSpareThreads 100
MaxSpareThreads 800
ThreadsPerChild 64
MaxRequestsPerChild 0
</IfModule>
设置Apache开机自动运行,在/etc/rc.local中增加:
增加“AddType application/x-httpd-php .php .phtml”
修改“DirectoryIndex index.html index.html.var”为“DirectoryIndex index.html index.htm index.php index.cgi”
tar jvxf php-4.4.0.tar.bz2
cd php-4.4.0
./configure --prefix=/usr/local/php --with-apxs2=/usr/local/httpd/bin/apxs \
--enable-track-vars --with-config-file-path=/usr/local/php/lib --with-mysql=/usr \
安装MySQL的开发包:
rpm -ivh MySQL-devel-standard-4.1.14-0.rhel4.i386.rpm
rpm -ivh MySQL-shared-standard-4.1.14-0.rhel4.i386.rpm
安装PHP 4.4.0,PHP将被安装在“/usr/local/php”目录下,PHP的配置文件(php.ini)放在“/usr/local/php/t --enable-ftp --with-openssl=/usr --with-gettext --with-zlib
make
make install
cp php.ini-dist /usr/local/php/lib/php.ini
修改Apache的配置,增加对PHP的支持:
5、安装Postfix
从下面的URL下载Postfix 2.2.5的源代码:
从下面的URL下载Postfix 2.2.5的VDA补丁程序:.br/nadal/
删除系统自带的Sendmail:
mv /etc/rc.d/init.d/sendmail /etc/rc.d/init.d/sendmail.OFF
验证PHP是否安装成功:
echo '<? phpinfo(); ?>' >/usr/local/httpd/htdocs/info.php
重新启动Apache,在浏览器的地址栏中输入“http://服务器IP地址/info.php”,你应当可以看到关于PHP的详细信息,确认在MySQL章节中的“Client API version”版本是4.1.14。
下载并安装icc8.1的RPM包:
/downloads/os-linux.html intel-icc8-libs-8.1-0.i386.rpm
/centos/4/os/i386/CentOS/RPMS/ compat-libstdc++-33-3.2.3-47.3.i386.rpm
安装Apache软件,Apache将被安装在“/usr/local/httpd”目录下:
tar jvxf httpd-2.0.55.tar.bz2
cd httpd-2.0.55
./configure --prefix=/usr/local/httpd --enable-so --enable-ssl \
