七彩闹钟说明书
LED电子钟使用说明书(ZXSJ-05L)
LED电子钟使用说明书(ZXSJ-05L)一、功能简介1、时分、月日、温度单项显示或三项交替显示。
2、12/24小时制可设定。
3、八组闹钟功能。
4、整点提醒功能。
5、停电继续走时。
6、亮度自动调整(22:00~7:00亮度减半)。
7、自动闰年调整(2000-2099年)。
8、自动测量温度(-9~50℃)。
二、操作说明1、按键名称:RESET(复位)、(设置/移动)、▲(上调)、▼(下调)、END(结束/止闹)。
2、开关名称:ALTER ON/OFF(交替显示开/关)、ALARM ON/OFF(闹铃开/关)。
3、指示灯名称:AM(上午)、PM(下午。
4、年月日小时分钟(日期和时间)设置:按设置键四位年份闪烁,按上调键或下调键修改年(年份四位数平时不显示或者说隐藏显示,只有在首次按设置键时借用四位数码闪烁显示,例如闪烁显示2009,表示2009年,此时按上调键或下调键可修改年份);再按设置键月闪烁,按上调键或下调键修改月;再按设置键日闪烁,按上调键或下调键修改日;再按设置键小时位闪烁,按上调键或下调键修改小时;再按设置键分钟位闪烁,按上调键或下调键修改分钟;按结束键回到正常显示状态。
5、12/24小时制设置:在正常显示状态下,按住上调键三秒,则可进行12小时制与24小时制的互相切换,12小时制有上午(AM)、下午(PM)指示灯指示。
6、整点提醒设置:在正常显示状态下,按一下上调键可以开启/关闭7:00~21:00整点提醒功能(整点指示灯亮/灭),22:00~6:00整点都不提醒。
7、定闹时间设置:在正常显示状态下,按定闹键进入闹铃时间查询(每组闹铃有不同音乐提示,若在时分位显示―∶――表示该组闹铃时间无效,否则有效,可按上调键切换成有效或无效),若要调整则按设置键音乐停止,再按设置键,小时位闪烁,按上调键或下调键修改小时,再按设置键分钟位闪烁,按上调键或下调键修改分钟;再按定闹键进入第二组闹铃时间查询和调整,方法与第一组相同;用同样方法可完成第三组至第八组闹铃时间的查询和调整;按结束键返回正常显示状态;若八组闹铃时间都无效,则闹铃指示灯不亮,否则闹铃指示灯亮。
闹钟的说明书
闹钟的说明书闹钟的说明书1. 产品概述闹钟是一种用于提醒用户按时起床或做其他重要事情的电子设备。
它通常由时钟、闹铃和显示部分组成。
闹钟具有简单易用、可靠性高的特点,广泛应用于家庭、学校、办公室等场所。
2. 功能特点2.1 时钟功能闹钟具有准确显示当前时间的功能。
它采用数字显示方式,可显示小时和分钟。
通过简明直观的界面,用户可以轻松地读取当前的时间。
2.2 闹铃功能闹钟配备了强而清晰的闹铃,可在设定的时间发出提醒音。
用户可以根据需要自由设定闹铃时间。
闹钟的音量可以根据用户的要求进行调节,保证在不同环境下都能清楚地听到。
2.3 延时报警功能为了避免用户轻易关闭闹钟并继续睡觉,闹钟还具有延时报警功能。
在用户设定的时间后,如未进行其他操作,闹钟将会进行循环提醒,直到用户主动关闭闹铃。
2.4 LED背光显示为了方便用户在夜间观察时间,闹钟具有LED背光显示功能。
用户只需按动特定按钮即可打开或关闭背光,确保时间在低光照环境下也能清晰可见。
2.5 电池供电闹钟采用电池供电,无需外接电源。
这使得闹钟可以方便地放置在不同位置,无需担心电源插座的位置。
3. 使用说明3.1 设置时间1. 按下“设置”按钮,时间显示区域开始闪烁,进入设置模式。
2. 通过“增加”和“减少”按钮调整小时数,按下“确认”按钮进行确认。
3. 重复步骤2,设置分钟数。
4. 按下“设置”按钮退出设置模式,时间开始正常显示。
3.2 设置闹铃时间1. 按下“闹钟设置”按钮,闹钟时间显示区域开始闪烁,进入闹钟设置模式。
2. 通过“增加”和“减少”按钮调整闹钟小时数,按下“确认”按钮进行确认。
3. 重复步骤2,设置闹钟分钟数。
4. 按下“闹钟设置”按钮退出闹钟设置模式,闹钟时间开始正常显示。
3.3 开启延时报警1. 在闹钟响起时,按下“延时”按钮,闹钟停止响铃。
2. 闹钟将在设定的延时时间后再次响铃,直到用户关闭闹钟。
3.4 开启LED背光显示1. 按下“背光”按钮,闹钟的LED背光亮起。
闹钟功能说明文档

一、功能描述本工程包括矩阵键盘和数码管显示模块,共同实现一个带有闹钟功能、可以设置时间的数字时钟。
具体功能如下:1.数码管可以显示时十位、时个位、分十位、分个位、秒十位、秒个位。
2.上电后,数码管显示000000,并开始每秒计时。
3.按下按键0进入时间设置状态。
再按下按键0退出时间设置状态,继续计时。
4.在时间设置状态,通过按键1来选择设置的时间位,在0~5之间循环选择。
5.在时间设置状态,通过按键2来对当前选择的时间位进行加1。
6.在计时状态下,按下按键14,进入闹钟时间点设置状态。
再按下按健15,退出闹钟设置状态。
7.在闹钟设置状态,按下按键13选择设置的时间位,此时可以按下所需要的按键序号设置对应闹钟时间。
8.当前时间与所设置的时间点匹配上了,蜂鸣器响应5秒。
二、平台效果图三、实现过程首先根据所需要的功能,列出工程顶层的输入输出信号列表。
我们把工程分成四个模块,分别是数码管显示模块,矩阵键盘扫描模块,时钟计数模块,闹钟设定模块。
1.数码管显示模块本模块实现了将时钟数据或者闹钟数据显示到七段译码器上的功能。
七段译码器引脚图:根据七段译码器的型号共阴极或者共阳极,给予信号0或1点亮对应的led灯,一个八段数码管称为一位,多个数码管并列在一起可构成多位数码管,它们的段选(a,b,c,d,e,f,g,dp)连在一起,而各自的公共端称为位选线。
显示时,都从段选线送入字符编码,而选中哪个位选线,那个数码管便会被点亮。
数码管的8段,对应一个字节的8位,a对应最低位,dp 对应最高位。
所以如果想让数码管显示数字0,那么共阴数码管的字符编码为00111111,即;共阳数码管的字符编码为11000000。
在轮流显示过程中,每位数码管的点亮时间为1~2ms,由于人的视觉暂留现象及发光二极管的余辉效应,尽管实际上各位数码管并非同时点亮,但只要扫描的速度足够快,给人的印象就是一组稳定的显示数据,不会有闪烁感,动态显示的效果和静态显示是一样的,能够节省大量的I/O端口,而且功耗更低。
七彩闹钟使用方法

七彩闹钟使用方法七彩闹钟是一种多功能的电子产品,具有时间显示、闹钟、温湿度检测、日历等功能。
下面我将详细介绍七彩闹钟的使用方法。
1. 时间设置:首次启动或电源中断后,七彩闹钟会自动显示系统当前时间。
按下“设置”按钮,小时闪烁,通过“加”和“减”按钮设置小时数。
然后按下“设置”按钮,分钟闪烁,通过“加”和“减”按钮设置分钟数。
最后按下“设置”按钮,闹钟设置完成,时钟进入正常显示状态。
2. 闹钟设置:按下“设置”按钮,七彩闹钟进入闹钟设置模式。
按下“加”或“减”按钮,可以增加或减少闹钟小时数。
再次按下“设置”按钮,分钟闪烁,通过“加”和“减”按钮设置分钟数。
最后按下“设置”按钮,闹钟设置完成,时钟进入正常显示状态。
3. 温湿度检测:七彩闹钟的液晶屏上会显示当前的温度和湿度。
温度显示在左上角,湿度显示在右上角。
这些数据是通过内置的传感器测量得到的。
用户无需操作,系统会自动更新。
4. 日历功能:七彩闹钟还具有日历功能,可以显示当前日期和星期。
日期显示在屏幕的中间部分,星期显示在右下角。
在时钟正常显示状态下,按下“设置”按钮,七彩闹钟进入日历设置模式。
按下“加”或“减”按钮,可以设置年份。
再次按下“设置”按钮,月份闪烁,通过“加”和“减”按钮设置月份。
最后按下“设置”按钮,日期设置完成,时钟进入正常显示状态。
5. 其他功能:七彩闹钟还具有其他一些实用功能。
比如,它可以设定定时关机的时间,使其在指定的时间自动关闭。
另外,还可以设置屏幕亮度和音量大小等参数。
这些设置可以在设置模式下找到,并通过“加”和“减”按钮进行调整。
总结:以上是七彩闹钟的使用方法。
用户可以根据需要,通过按下不同的按钮进入不同的设置模式,进行时间、闹钟、温湿度和日历等方面的设置。
此外,七彩闹钟还具有其他一些附加功能,如定时关机、屏幕亮度和音量调整等。
请用户仔细阅读使用说明书,并按照说明进行操作,以便更好地使用七彩闹钟。
数字闹钟说明书

说明书一、主程序、子模块流程图电子闹钟主流程图:调时、调日期、调星期流程图:倒计时结束流程图:音乐播放流程图:闹铃功能流程图:二、功能介绍:有计时,计日期,计星期,调时、调日期、调星期、闹钟、调闹钟、音乐闹铃、秒表、99秒倒计时、60秒倒计时、5秒倒计时、倒计时结束播放提醒音乐、直接按键播放音乐共计15个小的功能,分为四个功能模块,用四个按键来实现1.调时,查看日期以及调日期,查看星期以及调星期按键1进入该模块后,显示该模块的界面“1234”,分别代表在该界面中要用到的按键编号。
此时按1即进入调时界面,显示当前时间,按1秒加1,按2分加1,按3时加1,按4退出该界面而回到模块界面。
此时按2即进入查看日期以及调日期的界面,显示当前日期,按1天加1,按2月加1,按3年加1,按4退出该界面而回到模块界面。
此时按3即进入查看星期以及调星期的界面,显示当前星期,按1星期加1,按4退出该界面而回到模块界面。
此时按4则退出功能模块1而回到主界面。
2.调闹钟进入该模块时,显示闹钟时间,按1秒加1,按2分加1,按3时加1,按4退出调闹钟模块而回到主界面3.秒表,倒计时进入该模块后,显示界面“12 4”,分别代表在该界面中要用到的按键编号。
此时按1进入秒表计时状态,按4退出,回到模块界面。
此时按2进入99秒倒计时状态,按1切换到60秒倒计时,按1切换到5秒倒计时,在倒计时进行中,按4可以回到模块界面。
此时按4,可以回到主界面4.音乐进入该界面后,显示界面“00-00-00”,按1播放歌曲1,按2播放歌曲2,按3播放歌曲3,按4播放歌曲4,在播放歌曲时,按4可以结束播放音乐并且回到主界面。
【最新2018】闹钟说明书-范文模板 (10页)

2.2 电子时钟的基本特点 ............................................................................................... 4
闹铃→Zz贪睡→OFF
★ 当闹钟到达设定时间,响闹1分钟;当贪睡时间到达响闹,按SET键取消响闹或按任意键停止响闹。
★ 贪睡的间隔延续时间范围设定:1-60分钟。
★ 当闹铃及贪睡的标志未开启时,即闹铃和贪睡同时关闭,只有在闹铃标志开启时,重按UP,贪睡功能才有效。
⑶、温度转换
在正常状态,按DOWN键可以进行摄氏l华氏温度间的相互转换。
时→分→年→月→日→正常显示
★ 设置范围:时为1-12或0-23,分为0-59,年为201X-2099.月为1-12.日为1-31;在日期设置的同时,星期由MON 3=. SUN相应的自动改变。
★ 在设置状态,也可按AL键或无按键1分钟退出设置,并显示当前所设置的时间。 ★ 在正常状态,按UP键进行12和24小时转换。
本文部分内容来自网络整理,本司不为其真实性负责,如有异议或侵权请及时联系,本司将立即删除!
== 本文为word格式,下载后可方便编辑和修改! ==
闹钟说明书
篇一:七彩闹钟说明书
七彩时钟使用说明书
本产品融合了万年历之时间、日期、星期、温度的显示,特别适合居家办公使用。
一、功能简介
★ 正常时间功能:显示时间、日期(从201X年至2099年)、星期、温度,并可实现12/24小时制的转换。
闹钟说明书
夜灯多功能万年历
语音报时钟
使用说明书
功能键
★MODE 模式显示转换
★SET 功能设置/温度转换
★△UP 数值增加/日期显示
★▽DOWN 数值减少/电池背光灯
★BEDLAMP 插电夜光灯
★TALKING 语音报时/贪睡
功能设置
★正常状态
在设定所有功能后,按一次“①”或一分钟后自动返回正常状态。
★设定时间和日期
在正常状态时,按“②”两秒,然后用“②”“③”“④”分别设定年、月、日,小时和分钟。
年份范围由2000-2099.按一次①返回正常状态。
★贪睡功能
在正常显示状态时,当进入闹钟状态时“⑥(TALKING)”时进入贪睡状态,再按任何键一次取消贪睡(“⑤”键除外)。
★设定闹钟
在正常状态时,按一次“①”,通过“④”选择组闹模式,共三组“A1”“A2”“A3”,通过“③”键选择闹钟音乐,然后用“②”“③”“④”分别设定该组闹铃开关。
(ON\OF).
及设置小时和分钟。
通过按“①”返回正常状态。
每组闹铃默认设置A1上午6:00/OF;
A2下午1:00/OF; A3下午5:00/OF.
★语音报时在正常状态时,按一次“⑥”键语音报出当前时间。
★温度计在正常状态时,按一次“②”键可以转换显示:摄氏和华氏。
★整点报时在正常状态时,按“③”键两秒可以,可以进行整点报时设置和取消。
★年份显示在正常状态时,按“③”键可以显示年份。
★夜灯开关插入市电按“⑤”键开关夜灯。
齐全的闹钟使用手册

齐全的闹钟使用手册随着社会的发展和生活的节奏加快,人们对时间的管理越来越重视。
闹钟作为人们重要的时间管理工具之一,应运而生。
然而,许多人对闹钟的使用仅限于简单的设置闹铃时间和关闭闹钟,这样使用不仅无法发挥闹钟的全部功能,而且可能会丧失了部分效果,甚至可能会打乱原本规律的作息。
因此,本文将介绍一个齐全的闹钟使用手册,详细介绍闹钟的各种功能和调节,帮助人们更好地利用闹钟管理时间。
1.选择适合自己的闹钟现在市场上的闹钟品类繁多,大多数人会有一台电子闹钟。
但是如果你睡眠质量较差、需要安静的环境入睡,或者是初学者,那么机械闹钟可能是更好的选择。
机械闹钟靠着弹簧的力量,发出清脆的闹铃声,音量更大,容易提醒起床;而电子闹钟通过电路发声,能够设置多组时间和自定义铃声,更加灵活性。
2.设置闹钟时间设置闹钟时间可能是最基础的操作,但是您可以根据自己的作息习惯设置多个闹钟时间。
此外,现在许多闹钟的时间设置可以精确到分钟或者秒,可以更好的满足自己的时间管理需求。
3.选择闹钟铃声闹钟的铃声一般有电子音和机械铃声两种类型。
我们可以根据自己的喜好选择不同种类的铃声,以达到不同的视觉或听觉效果。
4.设置睡眠模式现在许多闹钟都有睡眠模式,可以帮助你更好地管理睡眠。
Sleep mode一般会在你入睡后的一段时间内安静,然后在早晨开始逐渐响起闹铃,给你更平稳的起床体验。
5.设置冗余闹钟如果您拥有冗余时间,可以设置多组闹钟以防止某次它扰乱您的作息。
有些闹钟甚至可以帮你设置周期性的铃声,例如周一到周五工作日的叫醒闹铃,周末静音等等。
6.使用夜光功能夜晚如果你在闹钟不工作时需要查看时间,那么夜光功能是好的选择。
大多数闹钟都会内置一个暗淡的发光机,通过轻按的方式,或者是处于Dark/Light档可以启用夜光功能。
7.主动关掉闹钟早晨醒来后,需要主动关闭闹钟,有些时候我们只需要快速的关掉闹钟,但这并不是一个很好习惯。
很多人都有惯性翻身继续睡觉的想法,这时候你需要主动保持清醒,并依靠自己的身体条件判断,有充沛的精力就可以起床了!总之,在使用闹钟过程中,我们需要根据个人的作息习惯选择适合自己的闹钟,并经常性地了解、尝试各种闹钟功能。
Timex T035彩色变换闹钟说明书

For additional information, onlineregistration, and exclusive specialoffers please visit our website:Model T035Color ChangingAlarm ClockIntroductionThank you for selecting this Timex Model T035 Color Changing Alarm Clock with Soothing Sounds. This model includes:• A large LCD display with momentary Indiglo® color changing back light.• A programmable Auto-Snooze alarm.• Wake to one of 4 Soothing Sounds or a buzzer alarm.• Sleep to Soothing Sounds with auto-shutoff.• A 24-hour reminder/nap timer.Please take the time to review this manual completely and carefully to insure that you are getting the maximum benefit from all of the unique features included in this Timex product.Once again, thank you for selecting Timex.Table of ContentsControls And Indicators (1)Main Display (2)Installing the Batteries (2)Operating Instructions............................................................................................................................................... 3-6 Limited 90-day Warranty Information. (7)Maintenance• Place the unit on a level surface away from sources of direct sunlight or excessive heat.• Protect your furniture when placing your unit on a natural wood and lacquered finish. A cloth or other protective material should be placed between it and the furniture.• Clean your unit with a soft cloth moistened only with mild soap and water. Stronger cleaning agents, such as Benzene, thinner or similar materials can damage the surface of the unit.Warning: Changes or modifications to this unit not expressly approved by the party responsible for compliance could void the user’s authority to operate the equipment.NOTE: This equipment has been tested and found to comply with the limits for a Class B digital device, pursuant to Part 15 of the FCC Rules. These limits are designed to provide reasonable protection against harmful interference in a residential installation. This equipment generates, uses and can radiate radio frequency energy and , if not installed and used in accordance with the instructions, may cause harmful interference to radio communications. However, there is no guarantee that interference will not occur in a particular installation. If this equipment does cause harmful interference to radio or television reception, which can be determined by turning the equipment off and on, the user is encouraged to try to correct the interference by one or more of the following measures:• Reorient or relocate the receiving antenna.• Increase the separation between the equipment and receiver.• Connect the equipment into an outlet on a circuit different from that to which the receiver is connected.• Consult the dealer or an experienced radio/TV technician for help.This Class B digital apparatus complies with Canadian ICES-003.Cet appareil numérique de la classe B est conforme à la norme NMB-003 du Canada.This device complies with Part 15 of the FCC Rules, operation is subject to thefollowing two conditions: (1) This device may not cause harmful interference, and(2) this device must accept any interference received, including interference thatmay cause undesired operation.For models that require more than one battery• Do not mix with used or other battery types/brands• Replace all batteries at the same time• Do not open batteries• Do not dispose of in fire • Do not heat above 75ºC (167ºF) • Do not expose contents to water • Do not charge or recharge • Do not install backwardsControls and IndicatorsFront PanelTIMER ButtonSOUND Button TIME ButtonSET ButtonMain DisplayCurrent Time IndicatorAlarm Time IndicatorTIMER Indicator Alarm ‘ON’ Indicator Snooze ‘ON’ IndicatorAM/PM IndicatorsTime and Alarm Time DisplayMonth/Date DisplayDay Indicator Indoor Temperature Display Installing the Batteries• P ress down on the battery door locking tab and remove the door.• I nstall 3 fresh alkaline “AAA” batteries in the compartment. Be sure tofollow the polarity (+ / - ) markings engraved in the battery compartment.If the batteries are inserted incorrectly the unit will not work.• Replace the battery door.When the batteries are installed for the first time the clock will 'beep' once and the display will appear as shown below:"Operating InstructionsSetting The Clock To The Correct Time of Daysymbol in the upper left corner of the display indicates that the display is showing the wake-up time. Pressing the MODE button cycles the display between the current time and wake-up time.1.2.adjust the hour. Be sure to set correctly for AM or PM.3. Press the SET button again. The minutes begin to flash. Press the UP or DOWN buttons to adjust the minutes.4. Press the SET button again. The Year begins to flash at 2011. Press the UP button to adjust the year if necessary.5. Press the SET button again. The Month display begins to flash. Press the UP or DOWN buttons to adjust the month (1 =January, 2 = February, etc)6. Press the SET button again. The Date display begins to flash. Press the UP or DOWN buttons to adjust the date. TheDAY indicator changes automatically to match the Year, Month, and Date display.When you are finished with the above settings you can press the SET button again to exit the setting mode and start the clock running. Or, after 60 seconds the clock automatically exits the setting mode and begins to run. Note: The flashing colon between the hour and minute digits acts as a seconds counter.Indoor Temperature DisplayThis clock includes a built in temperature sensor and indoor temperature display. The indoor temperature can be displayed in Centigrade (C°) or Fahrenheit (F°). The initial default setting when the batteries are installed is Centigrade. To switch the display between Centigrade and Fahrenheit press the DOWN button. Note: If you place this clock on a windowsill or similar location where it may be exposed to direct sunlight or cold winter temperatures you will not get an accurate room temperature reading.12/24-Hour Time DisplayThis clock can display the time in 12-hour format with AM/PM indicators, or in 24-hour format, often referred to as ‘military time’. To switch the display between 12 and 24-hour time formats, press the UP button.Momentary Lighting SystemEach time you press any front panel button to make adjustment the lighting will turn on for approximately 5 seconds and the shut off automatically to extend the battery life.Setting the Wake-up Time, Auto Snooze Time, and Wake-up SoundThis clock features a programmable Snooze/ Repeat Alarm that you may turn ‘On’ or ‘Off’. If the Snooze function is turned‘On’ the alarm will automatically enter the Snooze mode and shut ‘Off’ after two minutes, and then turn ‘On’ again one minute later. You may adjust the amount of Snooze time between one minute and 60 minutes. The initial default setting is one minute.You may also choose which of the 4 soothing sounds or the electronic buzzer alarm you want to turn on at the wake-up time.1. Press the MODE button to change the display from current time mode to wake-up time mode. The bell symbolappears in the display. The initial alarm setting is 12:00 AM.2. Press the SET button. The wake-up hour digits begin to flash. Press the UP or DOWN buttons to adjust the wake-uphour. Be sure to set correctly for AM or PM.3. Press the SET button again. The wake-up minutes begin to flash. Press the UP or DOWN to adjust the wake up minutes.4. Press the SET button again. The Snooze Indicator and Snooze time display (01) begin to flash. Press the UP or DOWNbutton to select the desired amount of Snooze time. For example, if you select 5 minutes of Snooze time, the alarm will automatically turn on again in 5 minutes.5. Press the SET button again. The number ”1” begins flashing in the Time display. Press the UP or DOWN buttons to hearand select from among the 4 soothing sounds or the electronic buzzer as your wake-up alarm sound.6. Press the SET button once more and the clock will return to the wake-up time mode, then press the MODE button tochange to current time mode, or if you do not press any button for 1 minute the clock will return to the current time display automatically.Activating the Alarm and the Auto Snooze TimeAfter you have set the desired wake-up time, Snooze time, and wake-up sound as described in Steps 1 through 6 above you must still activate the alarm and snooze functions as follows:1. If the display is showing current time press the MODE button to change the display to your desired wake-up time.2. While the wake-up time is showing on the display press the DOWN button once to activate the alarm. The alarm indicatorappears in the display to confirm that the alarm is activated.3. While the wake-up time is showing on the display press the DOWN button once more to activate the snooze function.The snooze indicator appears in the display to confirm that the snooze function is activated.4. To deactivate the alarm and the auto-snooze functions press the DOWN button once more. Both the alarm indicatorsand the snooze indicators disappear from the display.At the selected wake-up time if only the alarm is activated the alarm will turn on to the selected soothing sound or buzzer alarm. The alarm sound starts softly and gradually increases in volume. The alarm will continue for 2 minutes and then shutoff and reset itself for the following day. To stop the alarm sooner press any of the front panel buttons except the SOUND button.At the selected wake-up time if both the alarm and the auto-snooze functions are activated the alarm will turn on for 2 minutes and then enter the auto snooze mode. The alarm will turn off for the number of snooze minutes that you selected above and then turn on again for 2 minutes. During snooze operation the snooze indicator flashes in the display. The alarm/snooze cycle can be repeated a total of 3 times, but after the third time the alarm resets for the following day and the snooze indicator stops flashing. When the alarm turns on you may press any button on the front panel (except the SET button) to stop the alarm sooner and begin the auto snooze cycle immediately. The alarm will turn on again in 2 minutes.If both the alarm indicator and the snooze indicators appear in the display the alarm will turn on for 2 minutes and then the alarm will reset for the same time the following day.Sleep to Soothing Sounds with Auto-ShutoffYou may program the soothing sounds to play for up to 60 minutes and then shut off automatically.1. Press the TIME button. The display will show “0:10” which is the initial default Sleep Timer setting. Continue to press theTIME button to increase the Sleep Timer setting as follows: 0:10 -> 0:20 -> 0:30 -> 0:40 -> 0:50 -> 1:00 -> 0:10 -> etc. 2. When the display is showing the desired amount of Sleep Time Press the SOUND button to begin playback of thesoothing sound. To change to a different soothing sound press the SOUND button once to stop playing the current sound and press again to begin playing the next sound. Repeat this process until you hear the desired sound. The number of the selected sound will appear in place of the Date indicator.3. Press the UP or DOWN button to adjust the volume level of the soothing sound.4. The display will begin counting down from the time you selected. The remaining minutes and seconds will appear in thedisplay. As the soothing sounds are playing the color of the display and inside the cabinet will change every 5 seconds.To pause the soothing sounds press the SOUND button once. To resume playback of the soothing sound Press the SOUND button again.5. When the display counts down to “0:00” the soothing sounds shut off automatically. To shut off the soothing soundbefore the display counts down to 0:00, press the MODE button. The soothing sound stops and the display returns to current time.Countdown / Reminder / Nap TimerThis clock includes a countdown timer that can be used to remind you of an appointment, meeting, or any other event, or when taking a nap, without disturbing your normal wake-up alarm setting. The countdown timer can be set for up to 24 hours in advance. When the timer counts down to “00” the alarm turns on for one minute.To program the countdown timer:1. Press the TIMER button. The display will show 23 Hours, 59 Minutes, and 59 Seconds which is the initial default settingfor the timer. The TIMER indicator also appears.2. Press the SET button. The Hour display begins to flash. Press the UP or DOWN buttons to set the number of hoursbefore the alarm turns ‘On’.3. Press the SET button again. The Minute display begins to flash. Press the UP or DOWN buttons to set the number ofminutes before the alarm turns ‘On’.4. Press the SET button again. The Seconds display begins to flash. Press the UP or DOWN buttons to set the number ofseconds before the alarm turns ‘On’.5. When the display is showing the desired Hours, Minutes, and Seconds, press the TIMER button once to enter the newtimer setting in the memory, and once more to start the countdown timer. The display will begin counting down. Note: If you want to pause the countdown at any time press the TIMER button again. Press the TIMER button once more to resume the countdown.6. When the countdown has started you can press the MODE button to change the display back to the current time, orafter 60 seconds the display will change back to the current time automatically. To review the amount of countdown time remaining, press the TIMER button at any time, and then press the MODE button to return to current time.7. When the timer counts down to “00” the alarm will turn on and continue for one minute. To stop the alarm sooner, pressany button on the front panel.NOTES:• When you change the timer from the 23:59:59 default setting to a new setting, the new setting becomes the new default.For example, if you program the alarm to turn on after 90 minutes, this becomes the new default setting. The next time you press the TIMER button the new default setting on the display will be 90 minutes.• When the timer begins counting down the display and cabinet lighting will remain ‘On’ for 5 seconds and then shut off automatically to extend the battery life.Replacing the BatteriesWhen the display becomes dim and begins to fade and the volume of the sounds becomes weak you should replace the batteries as soon as possible. If weak or exhausted batteries are left in the battery compartment they will eventually leak and cause damage to the unit and possible damage to the surface below the unit as well.Always replace all 3 batteries at the same time and do not mix different types of batteries.IMPORTANT: Make sure you have the 3 new batteries removed from their package and ready to install before you remove the old batteries from the unit. If you can replace the batteries within one minute you will not need to reset the clock. But if there are no batteries in the battery compartment for more than one minute it will be necessary to reset all clock functions after the new batteries are installed.Limited 90-Day Warranty InformationTimex Audio Products, a division of SDI Technologies Inc. (hereafter referred to as SDI Technologies), warrants this product to be free from defects in workmanship and materials, under normal use and conditions, for a period of 90 days from the date of original purchase.Should service be required by reason of any defect or malfunction during the warranty period, SDI Technologies will repair or, at its discretion, replace this product without charge (except for a $2.00 charge for handling, packing, return UPS/postage, and insurance). This decision is subject to verification of the defect or malfunction upon delivery of this product to the Factory Service Center listed below. The product must include proof of purchase, including date of purchase. The fee for service after the warranty period or without proof of purchase is $4.00.Before returning this product for service, please first replace the batteries (if applicable) with fresh ones, as exhausted or defective batteries are the most common cause of problems encountered.If service is still required:1. Remove batteries (if applicable) and pack the unit in a well-padded, heavy corrugated box.2. Enclose a photocopy of your sales receipt, credit card statement, or other proof of the date of purchase.3. Enclose a check or money order payable to the order of SDI Technologies, Inc. for the sum of $2.00 (or $4.00 if after thewarranty period or without proof of purchase).4. Send the unit prepaid to the Factory Service Center listed below:Consumer Repair DepartmentSDI Technologies Inc.Timex Audio Products Division1330 Goodyear DriveEl Paso TX 79936-6420NOTE: This warranty is valid only if the product is used for the purpose for which it was designed. It does not cover (i) products which have been damaged by negligence, misuse or accident, or which have been modified or repaired by unauthorized persons; (ii) cracked or broken cabinets, or units damaged by excessive heat; (iii) damage to tape cassettes (if applicable); (iv) the cost of shipping this product to the Factory Service Center and its return to the owner.This warranty is valid only in the United States of America and does not extend to owners of the product subsequent to the original purchaser. Any applicable implied warranties are also limited to 90 days, and SDI Technologies will not be liable for consequential damages. (Some states do not allow limitations on implied warranties or exclusion of consequential damages, so these restrictions may not apply to you.) This warranty gives you specific legal rights, and you may also have other rights which vary from state to state.© 2011 SDI Technologies, Inc. All rights reservedTIMEX is a registered trademark of Timex Corporation the United States and other countriesT035-061611-A Printed in China。
七彩闹钟使用说明
(要把扭扣电子仓的塑料隔电片,抽掉才会有时间显示的哦)
■分为OFF、ON二种作业模式:
1.选择 OFF模式: 在此模式下,灯光关闭并处于待机状态,只要轻轻按压「极光炫彩桌钟」就会散发5秒的随机彩色灯光
设置范围:时为1-12或0-23、分为0-59,年为2000-2099、月为1-12、日为1-31
在日期设置的同时,星期由MON至SUN相应的自动改变.
在设置状态,也可按AL键或无按键1分钟退出设置,并显示当前所设置的时间。
在正常状态,按UP键进行12和24小时转换。
2、闹钟和贪睡设置
在正常状态,按AL键一次次使用请拉去纽扣电池绝缘条,以便LCD显示屏通电运行。
1、时间日期设置
上电后显示正常状态。按SET键进入时间、日期的设置,并以下列顺序分别设置
小时、分钟、年、月、日、星期等,通过UP/DOWN键配合来完成设置。
我们发货前每一个七彩钟发货前全部测试检查过的,我们保证都是完全正常全新的物品,
使用普通的7号电池就可以了。(如1元/4节,2元/4节的电池)
特别提醒:
此物品下方有一个小的纽扣电子仓 和一个放电池的电池仓
此物品的屏幕时间显示,是由后面的两节纽扣电子,控制的,
此物品的七彩灯光,是由后面的4节7号电池,控制的,
2(黄)—刺激脑部,令脑筋灵活.
3(绿)—平伏高涨之情绪,放松心情,令脑神精得到平衡.
4(蓝)—增进智慧及想像力,控制情绪,平息愤怒.
5(浅蓝)—缓和兴奋的情绪,使之平静下来,刺激脑部,令脑筋灵活.
6(紫)—治疗心灵上的痛苦.
7(深紫)—舒缓压力.
*可选择使用变压器,电池两种电力供应方式。(变压器需自配)
数字闹钟说明书
说明书一、主程序、子模块流程图电子闹钟主流程图:调时、调日期、调星期流程图:倒计时结束流程图:音乐播放流程图:闹铃功能流程图:二、功能介绍:有计时,计日期,计星期,调时、调日期、调星期、闹钟、调闹钟、音乐闹铃、秒表、99秒倒计时、60秒倒计时、5秒倒计时、倒计时结束播放提醒音乐、直接按键播放音乐共计15个小的功能,分为四个功能模块,用四个按键来实现1.调时,查看日期以及调日期,查看星期以及调星期按键1进入该模块后,显示该模块的界面“1234”,分别代表在该界面中要用到的按键编号。
此时按1即进入调时界面,显示当前时间,按1秒加1,按2分加1,按3时加1,按4退出该界面而回到模块界面。
此时按2即进入查看日期以及调日期的界面,显示当前日期,按1天加1,按2月加1,按3年加1,按4退出该界面而回到模块界面。
此时按3即进入查看星期以及调星期的界面,显示当前星期,按1星期加1,按4退出该界面而回到模块界面。
此时按4则退出功能模块1而回到主界面。
2.调闹钟进入该模块时,显示闹钟时间,按1秒加1,按2分加1,按3时加1,按4退出调闹钟模块而回到主界面3.秒表,倒计时进入该模块后,显示界面“12 4”,分别代表在该界面中要用到的按键编号。
此时按1进入秒表计时状态,按4退出,回到模块界面。
此时按2进入99秒倒计时状态,按1切换到60秒倒计时,按1切换到5秒倒计时,在倒计时进行中,按4可以回到模块界面。
此时按4,可以回到主界面4.音乐进入该界面后,显示界面“00-00-00”,按1播放歌曲1,按2播放歌曲2,按3播放歌曲3,按4播放歌曲4,在播放歌曲时,按4可以结束播放音乐并且回到主界面。
2023年智能闹钟使用手册
2023年智能闹钟使用手册智能闹钟是一种智能家居设备,它不仅能显示时间,还能提供多种实用功能。
2023年的智能闹钟新升级了一系列功能,为用户带来更便捷的生活体验。
本使用手册将详细介绍2023年智能闹钟的功能和使用方法,帮助用户快速上手并充分发挥智能闹钟的潜力。
1. 基本设置在使用智能闹钟之前,首先需要进行基本设置。
请按照以下步骤进行:1.1 插电源:将智能闹钟插入电源插座,确保正常供电。
1.2 连接网络:智能闹钟支持Wi-Fi连接,通过设置菜单中的网络选项,输入Wi-Fi密码即可连接。
1.3 时间调整:智能闹钟将自动与网络同步时间,若需手动调整,请进入设置菜单进行修改。
2. 闹钟功能智能闹钟最常用的功能之一就是闹钟功能。
为了更好地使用闹钟功能,请按照以下步骤进行操作:2.1 设置闹钟时间:点击主屏幕上的“闹钟”图标,进入闹钟设置界面,选择添加新闹钟并设置闹钟时间。
2.2 闹铃音调:选择合适的闹铃音调,可通过预设音调或者自定义音乐作为闹铃声音。
2.3 重复设置:根据个人需求,设置是否重复闹钟。
可以选择按天、工作日、周末或特定日期重复。
2.4 其他设置:根据需求,可以进一步设置闹钟振动、渐增音量等功能。
3. 语音助手2023年智能闹钟升级了全新的语音助手,使用户能够通过语音与闹钟进行交互。
以下是一些常用的语音指令示例:3.1 设置闹钟:用户可以通过语音命令告诉智能闹钟设定指定时间的闹钟,例如:“设置明天早上7点的闹钟”。
3.2 查询天气:用户可以通过语音命令获取当日或未来几天的天气情况,例如:“今天天气怎么样?”。
3.3 播放音乐:用户可以通过语音命令让智能闹钟为其播放喜欢的音乐,例如:“播放一首轻音乐”。
4. 应用推送智能闹钟还支持应用推送功能,将手机上的应用推送至闹钟显示屏幕上,提供更便捷的信息查看。
以下是如何使用应用推送的步骤:4.1 连接手机:通过智能闹钟的设置菜单中的“添加手机”选项,将手机与闹钟绑定,确保连接成功。
七彩变色闹钟说明书
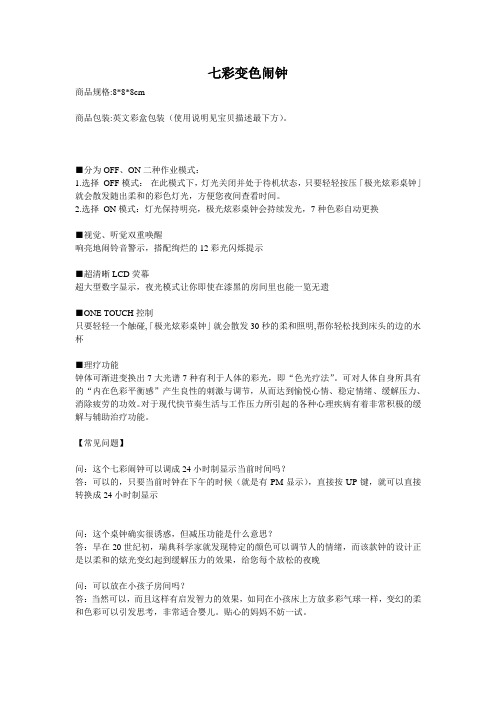
七彩变色闹钟商品规格:8*8*8cm商品包装:英文彩盒包装(使用说明见宝贝描述最下方)。
■分为OFF、ON二种作业模式:1.选择OFF模式:在此模式下,灯光关闭并处于待机状态,只要轻轻按压「极光炫彩桌钟」就会散发随出柔和的彩色灯光,方便您夜间查看时间。
2.选择ON模式:灯光保持明亮,极光炫彩桌钟会持续发光,7种色彩自动更换■视觉、听觉双重唤醒响亮地闹铃音警示,搭配绚烂的12彩光闪烁提示■超清晰LCD荧幕超大型数字显示,夜光模式让你即使在漆黑的房间里也能一览无遗■ONE TOUCH控制只要轻轻一个触碰,「极光炫彩桌钟」就会散发30秒的柔和照明,帮你轻松找到床头的边的水杯■理疗功能钟体可渐进变换出7大光谱7种有利于人体的彩光,即“色光疗法”。
可对人体自身所具有的“内在色彩平衡感”产生良性的刺激与调节,从而达到愉悦心情、稳定情绪、缓解压力、消除疲劳的功效。
对于现代快节奏生活与工作压力所引起的各种心理疾病有着非常积极的缓解与辅助治疗功能。
【常见问题】问:这个七彩闹钟可以调成24小时制显示当前时间吗?答:可以的,只要当前时钟在下午的时候(就是有PM显示),直接按UP键,就可以直接转换成24小时制显示问:这个桌钟确实很诱惑,但减压功能是什么意思?答:早在20世纪初,瑞典科学家就发现特定的颜色可以调节人的情绪,而该款钟的设计正是以柔和的炫光变幻起到缓解压力的效果,给您每个放松的夜晚问:可以放在小孩子房间吗?答:当然可以,而且这样有启发智力的效果,如同在小孩床上方放多彩气球一样,变幻的柔和色彩可以引发思考,非常适合婴儿。
贴心的妈妈不妨一试。
问:什么是one-touch功能?答:当您半夜醒来要看时间(在没有开启炫光的时候),只需轻轻一压,就会发出30秒柔和的炫光,不必起来开灯了。
问:可以外接电源吗?答:考七彩变色心情闹钟特别设计了支持外接电源的插口,在任何商店可以购买到的4.5-6v 变压器接上就可以了(都是通用的,价格在8元左右)。
七彩闹钟使用说明
七彩闹钟使用说明:首次使用请拉去纽扣电池绝缘条,以便LCD显示屏通电运行。
1、时间日期设置上电后显示正常状态。
按S ET键进入时间、日期的设置,并以下列顺序分别设置小时、分钟、年、月、日、星期等,通过UP/DOWN键配合来完成设置。
设置范围:时为1-12或0-23、分为0-59,年为2000-2099、月为1-12、日为1-31在日期设置的同时,星期由MON至SUN相应的自动改变.在设置状态,也可按AL键或无按键1分钟退出设置,并显示当前所设置的时间。
在正常状态,按UP键进行12和24小时转换。
2、闹钟和贪睡设置在正常状态,按AL键一次进入闹钟模式。
在闹钟状态,按SET键进入闹铃设定状态,以下列顺序分别设置小时、分钟、贪睡音乐,通过UP/DOWN键配合来完成其设置。
在设置状态,如果无按键1分钟或按MODE键退出设置,并显示当前所设置的时间。
在闹钟状态,通过UP键开启闹铃样的标志,按第二次UP键开启贪睡功能。
当闹钟到达设定时间,响闹1分钟;当贪睡时间到达响闹,按SET键取消响闹贪睡的间隔延续时间范围设定:1-60分钟。
当闹铃及贪睡的标志未开启时,即闹铃和贪睡同时关闭,只有在闹铃标志开启时,重按UP,贪睡功能才有效。
3、温度转换在正常状态,按Dow n键可以进行摄氏/华氏温度间的相互转换。
4、把开关置ON或DEMO位置开启七彩灯。
7种治疗色光:1(红)—使身体充满活力,刺激生理机能,加促新陈代谢.2(黄)—刺激脑部,令脑筋灵活.3(绿)—平伏高涨之情绪,放松心情,令脑神精得到平衡.4(蓝)—增进智慧及想像力,控制情绪,平息愤怒.5(浅蓝)—缓和兴奋的情绪,使之平静下来,刺激脑部,令脑筋灵活.6(紫)—治疗心灵上的痛苦.7(深紫)—舒缓压力.*可选择使用变压器,电池两种电力供应方式。
闹钟说明书
夜灯多功能万年历
语音报时钟
使用说明书
功能键
★MODE 模式显示转换
★SET 功能设置/温度转换
★△UP 数值增加/日期显示
★▽DOWN 数值减少/电池背光灯
★BEDLAMP 插电夜光灯
★TALKING 语音报时/贪睡
功能设置
★正常状态
在设定所有功能后,按一次“①”或一分钟后自动返回正常状态。
★设定时间和日期
在正常状态时,按“②”两秒,然后用“②”“③”“④”分别设定年、月、日,小时和分钟。
年份范围由2000-2099.按一次①返回正常状态。
★贪睡功能
在正常显示状态时,当进入闹钟状态时“⑥(TALKING)”时进入贪睡状态,再按任何键一次取消贪睡(“⑤”键除外)。
★设定闹钟
在正常状态时,按一次“①”,通过“④”选择组闹模式,共三组“A1”“A2”“A3”,通过“③”键选择闹钟音乐,然后用“②”“③”“④”分别设定该组闹铃开关。
(ON\OF).
及设置小时和分钟。
通过按“①”返回正常状态。
每组闹铃默认设置A1上午6:00/OF;
A2下午1:00/OF; A3下午5:00/OF.
★语音报时在正常状态时,按一次“⑥”键语音报出当前时间。
★温度计在正常状态时,按一次“②”键可以转换显示:摄氏和华氏。
★整点报时在正常状态时,按“③”键两秒可以,可以进行整点报时设置和取消。
★年份显示在正常状态时,按“③”键可以显示年份。
★夜灯开关插入市电按“⑤”键开关夜灯。
木头闹钟说明书

木头闹钟说明书产品功能●同屏显示年、月、日、时、分、星期功能:●闹钟及贪睡功能:贪睡功能开启后,闹钟可以6次闹响,每次闹响间隔5分钟。
没有开启贪睡功能,闹响1分钟后,闹钟功能自动关闭;●时间记忆功能:不使用AC / DC适配器时,LED屏不显示,但时钟内部会继续正常计时,当连接上适配器时,时钟会自动显示当前正常的时间,无需重新设置;● 1/4小时制转换功能;●省电模式:每天下午6点至第二天早上7点,LED显示亮度会自动降低,使人的视觉感到舒适。
使用方法走时及闹铃设置●将AC / DC适配器插上电源,把6V直流电压插头接入时钟6V接口,LED数字屏即发亮显示;●按住SET键3秒进入设定模式,再按动SET键,每按动一次,年、月、日、时、分将依次闪烁。
要设置年、月、日、时、分,只要改变在闪烁的数字即可,按动UP和DOWN 键均可调节,设置结束按SET键,时钟回到正常的走时状态。
星期的设定是全自动的, 它会随着时间的设置而自动改变。
●设置闹铃时间,按动DOWN键显示屏出现AL:- -或AL:on ,每按动DOWN键一次即会转换一次。
按住DOWN键3秒,时的数字在闪烁时,即可通过UP和DOWN键进行调节,要调节分的数字,先按动SET键切换到分的闪烁,同样用UP和DOWN键进行调节,设置结束按SET键,时钟回到正常的走时状态。
闹铃闹响时,按下SET或UP键,闹铃闹响停止,并且关闭闹钟功能,如果闹铃闹响时,按下DOWN 键闹响停止,则贪睡功能自动开启,闹铃会每隔5分钟闹响一次,可连续6次。
若贪睡闹响未达到第6次,在任何一次闹响时,按下SET或UP键,不但闹响停止,同时自动关闭贪睡功能,如果是按下DOWN键,每隔分钟会再闹响一次,直至达到6次闹响为止;●在设定模式下,15秒内不按任何键,时钟将恢复时间显示。
12/24小时制设置正常时间显示下,每按一次UP键,可以实现1/4小时制的转换。
在12小时制式下,数字走到12,这时在时钟的左上角将会出现亮点,表示这时已是下午时间。
SNOOZE闹钟使用方法
SNOOZE闹钟使用方法
1.用四粒七号电池;
2.装好电池后先按下旋转键与闹钟键;
3.装电池后调当时准确的时间,请按字母t一下,再按字母h与m,分别可以调小时
与分钟,调好后按t一下确定;
4.设定闹钟闹的时间请按字母a一下,再按字母h与m,分别可以调小时与分钟,
调好后按a一下确定;
5.按字母t两下可以调闹钟相隔多长时间闹,单位是分钟;
6.闹钟第一次闹时是不会跑动的,这时按下长方形按键,会停止不闹,等到下一次
闹时才会跑动;
7.从第二次起闹钟又闹又跑动时,按一下长方形按键会暂停,等到间隔时间到时,
才会又跑又闹,长方形按键还有按亮显示屏的功能;
8.如不让闹钟跑动与闹,请按旋转键与闹钟键,闹钟会停止. 两个大轮子一到时间就会发动,英文名字hide and seek,意思是不抓住它就也
会无影无踪的。
SAMPO PY-Z907PL闹钟 说明书

秒後自動回到正常時間顯示。
鬧鈴開啟/關閉設置:在正常時間顯示下,按“S"鍵三次後按“△"鍵可關閉或開啟鬧鈴功能,同時出現鬧鈴符號“ ”,當鬧鈴開啟後,鬧鈴
ห้องสมุดไป่ตู้
時間達到所設定的時間會播放當前選擇的音樂鈴聲,播放時間持續一分鐘,當音樂播放到最後一秒時會播報當前時間一次,
按“▽"鍵或“△"鍵可中斷鬧鈴。
整點報時設置: 在正常時間顯示下,按“S"鍵三次後按“▽"鍵可選擇“ "每一整點報時或“
注意事項
整點時,會播報當前時間及溫度。
本機正常情況下如鬧鈴音弱、沙啞、時間顯示暗淡不滿,請即時更換電池,重新調整時間。
"從早上7點到晚上9點整點報時,時間到
本產品如有異常時,請將電池拔起,並立刻洽詢經銷商或售後服務專線,絕對不要自行拆開外殼進行修理。
符號說明 “ ”表示鬧鈴功能 “ ”表示每一整點報時 “ ”表示從早上7點到晚上9點整點報時 “ PM ”表示12小時制下午時間
設置說明
時間設置: 在正常時間顯示下,按“S”鍵一次進入當前時間設置,此時按“▽"鍵調整小時,按“△"鍵調整分鐘,調好後不按按鍵十來秒後
自動回到正常時間顯示。
鬧鈴時間設置:在正常時間顯示下,按“S"鍵二次進入鬧鈴時間設置,此時按“▽"鍵調整小時,按“△"鍵調整分鐘,調好後不按按鍵十來
112g 三顆4號AAA電池
各部名稱
TAL鍵 螢幕 MODE-LOCK開關 △鍵 S鍵 ▽鍵 喇叭孔 RESET鍵 電池蓋
W 810 x H 840 x D290 (mm)
聲寶造型小鬧鐘使用說明書
PY-Z907PL
主要功能
時間溫度顯示:可顯示時、分及周圍環境溫度 語音播報功能:可播報當前時間及溫度 七彩背光功能:背景七彩燈自動變色並持續20秒 整點報時:可設置每一整點報時或從早上7點至晚上9點整點報時 鬧鈴報時:可開啟/關閉鬧鈴報時功能
- 1、下载文档前请自行甄别文档内容的完整性,平台不提供额外的编辑、内容补充、找答案等附加服务。
- 2、"仅部分预览"的文档,不可在线预览部分如存在完整性等问题,可反馈申请退款(可完整预览的文档不适用该条件!)。
- 3、如文档侵犯您的权益,请联系客服反馈,我们会尽快为您处理(人工客服工作时间:9:00-18:30)。
七彩时钟使用说明书
本产品融合了万年历之时间、日期、星期、温度的显示,特别适合居家办公使用。
一、功能简介
★正常时间功能:显示时间、日期(从2000年至2099年)、星期、温度,并可实现12/24小时制的转换。
★闹钟和贪睡功能:每日闹铃,闹铃音乐有8首可选,同时可开启贪睡功能。
★环境温度显示功能:温度测量00C-500C或320F-1220F并可进行摄氏/华氏温度转换。
★七彩灯功能:可发出七种颜色的光,循环变色。
二、功能操作
⑴.时间日期设置
★上电后显示正常状态.按SET键进入时间、日期的设置,并以下列顺序分别设置小时分钟、年、月、日、星期等,通过UP/DOWN键配合来完成设置。
时→分→年→月→日→正常显示
★设置范围:时为1-12或0-23,分为0-59,年为2000-2099.月为1-12.日为1-31;在日期设置的同时,星期由MON 3=. SUN相应的自动改变。
★在设置状态,也可按AL键或无按键1分钟退出设置,并显示当前所设置的时间。
★在正常状态,按UP键进行12和24小时转换。
⑵、闹钟和贪睡设置
★在正常状态,按AL键一次进入闹钟模式。
★在闹钟状态,按SET键进入闹铃设定状态,以下列顺序分别设置小时、分钟、贪睡、音乐,通过UP/DOWN键配合来完成其设置。
时→分→贪睡→音乐→退出
★在设置状态,如果无按键1分钟或按MODE键退出设置,并显示当前所设置的时间。
★在闹钟状态,通过UP键开启闹铃的标志,按第二次UP键开启贪睡功能。
闹铃→Zz贪睡→OFF
★当闹钟到达设定时间,响闹1分钟;当贪睡时间到达响闹,按SET键取消响闹或按任意键停止响闹。
★贪睡的间隔延续时间范围设定:1-60分钟。
★当闹铃及贪睡的标志未开启时,即闹铃和贪睡同时关闭,只有在闹铃标志开启时,重按UP,贪睡功能才有效。
⑶、温度转换
在正常状态,按DOWN键可以进行摄氏l华氏温度间的相互转换。
⑷、按TAP可开启夜灯,5秒钟自动熄灭。
⑸、把开关置ON或DEMO位置开启七彩灯。
⑹、可使用外接直流电源:4.5V 100MA的变压器。
三、注意事项:
1、避免猛烈冲击、跌落。
2、勿置阳光直射、高温、潮湿的地方。
3、避免使用带有腐蚀性化学成份的液体和硬布来抹擦本产品表面。
4、当屏幕显示混乱时,拔出钮扣电池,重新装上恢复原始状态,使显示恢复正常。
5、切勿新旧电池混在一起使用,在屏幕显示不清楚时请及时更换新电池。
6、如长时间不使用时钟时,请将电池取出,以免电池漏液损坏本机。
7、请勿随意拆开产品调整内部元件参数。