复印机芯片级维修资料
夏普复印机全系列维修手册
夏普复印机全系列维修手册夏普全系列维修手册进入维修代码方式进入工厂代码方式SF1118/1025/AR161/AR200C 插入 0 插入 C Ca 0 CAR275/AR255# 插入 C 插入 # 插入 0 CM350/M450P * C * P * 0 CAR158C 浓度 C 浓度 C 浓度 C 倍率AR2818 m160 m205 m276# 插入 C 插入 * 插入 CA 插入夏普便携复印机鼓计数清零方法1、按曝光开机,现在除准备灯外所以指示灯都会点亮2、按住曝光约十秒钟直到三个灯同时点亮,松开曝光3、重新开机故障代码U(主板电池电压低) L(原稿台未回到规定位置) H(热辊定影器故障) F(暴光灯或定影灯温度保险断掉) 维修方式:按清除键-重复键-加法键-减法键进入 1 解除故障 2 读出主计数器内容 3 读出总计数器内容 4读出维修计数器内容 5 维修计数器复位`夏普模拟复印机维修代码维进:C-插入- 0-插入或清除键-插入键-0键-插入键-清除键厂进:C- Ca - 0- C 纸盒键按4秒进用户模式 1-01:反光镜动作检测1-02:光学系统传感器检查(缺纸灯、卡纸灯) 1-03:镜头动作检查1-04:镜头动作老化检查2-01:ADF进行原稿输送动作2-02:ADF传感器检查2-03:ADF单独装纸动作检查(给纸电机反向旋转) 2-04:ADF单独装纸动作检查(给纸电机正向旋转) 2-05:ADF单独装纸动作检查(输纸电机正向旋转) 2-06:ADF单独装纸动作检查(输纸电机反向旋转) 2-07:ADF单独装纸动作检查(原稿限位器电磁阀接通) 2-08:ADF单独装纸动作检查(送纸限位器) 2-10:ADF单独装纸动作检查3-02:分页器传感器检查3-03:分页器单独装纸动作检查(输纸电机) 3-04:分页器单独装纸动作检查(纸库电机) 3-05:分页器单独装纸动作检查(蜂鸣器)3-06:分页器单独装纸动作检查(直线马达)(只适用于SF-S54) 3-07:分页器单独装纸动作检查(钳夹马达)(只适用于SF-S54) 5-01:操作面板显示检查(LED灯全亮5秒)5-02:加热灯检查(以0.5秒间隔亮灭加热灯) 5-03:复印灯点亮检查5-04:DL 光度检查(放电灯亮30秒)5-05:BL 光度检查(消电灯以5秒间隔亮灭) 6-01:输纸系统装纸动作(离合器/ 电磁阀)通断30次 6-02:给纸电机动作检查(仅SP-2118)6-10:主纸盒半圆辊动作7-01:预热时间显示和老化预热计时并显示(秒) 7-04:预热省略7-06:间歇老化7-08:预热时间显示8-01:显影偏压输出(30秒)8-02:主 / 转印充电输出 / 栅极检查(ME) 8-03:主 / 转印充电输出 / 栅极检查(PE) 8-04:主 / 转印充电输出 / 栅极检查(T / S) 8-07:分离充电器输出(30秒)9-02 ADU传感器检查测试指令9-05 门电磁铁启动10 : 色粉电机转动14 : 故障消除(除U2故障外)15 废色粉装满(小人灯闪亮)取消 16 U2 故障取消17 消除PF故障20-01 保养计数器(小人灯亮)清零21-01 保养周期设定 0=50000张 1=2500张 2=5000张 3=10000张4=25000张 5=关闭21-02 显影器小修设置 0=80000张 1=5000张 2=10000张21-03 彩色显影器小修设置 0=10000张 1=5000张 22-01:保养计数器显示22-02:保养预置计数器显示22-03:卡纸存储器显示22-04:总卡纸存储器显示22-05:总计数器显示22-06:DV 计数器显示22-07:DV 预置计数器显示(载体更换周期)22-08:ADF 送纸数显示22-10:装订计数显示22-15:故障记忆显示(显示最近20个错误代码) 24-01:卡纸存储器 / 总卡纸计数器清零24-02:故障记忆清除24-04:ADF 计数器清零24-05:装订计数清零24-06:显影剂调整时间清零24-07:鼓调整时间清零24-06:纸盒计数器清零25-01:主驱动系统检查25-02:自动显影剂调整(更换载体后执行)(厂代中80-2调浓度与漏粉)26-01:选购件设定(输入选购件所表数值之和) 26-05:计数器方式设定( 0 A3计数 3 A4计数 ) 26-06:目的地设定(设为10)26-07:转鼓灵敏度设定校正复印灯电压(1-3 初始为2) 26-10:AE 原稿浓度设定(1低浓度原稿 2正常浓度原稿) 26-13:预热方式设定(0 正常 1主电机转至预热结束) 26-20:后缘空白设定(0 有空白 1无空白)26-29:交流电压调整(0 100V 1 200V)30-01:复印机传感器检查(纸检测 )42-01:清除小太阳符号换载体后43-01:定影温度设定(倍率键选择)44-01:成像控制动作设定(输入校正方式代码总和,栅压校正+1 光学尘埃校正+2 鼓磨损校正+4)44-05:栅极电压较正(显示图介浓度传感器A/D输入值) 44-06:栅极电压较正强行执行44-07:图像浓度 / 转鼓标记传感器动作试(验F-J 中0表示鼓标不能检测,1表示能检到)44-08:成像控制数据显示44-09:成像控制数据显示(最新值)44-10:栅极电压较正(转鼓表面 / 斑纹)数据显示44-11:初级栅极偏压设定44-12:中央控制处理器关闭时对复印功能进行检测主代码子代码内容46-01:曝光调整47 : AE 传感器增益自动调整(先在稿台上放几张A3白纸) 48-01:前 / 后(垂直)放大倍率调整(A值调100% B调200% C调50%)48-02:输纸方向放大倍率调整(反光镜速度校正) 50-01:复印件前缘调整50-02:前缘调整(简单型)(C值为245 显示为A45)51-02:阻力量调整(A 托盘阻力 B手动给纸) 53-01:ADF 停止位置调整值(普通纸)设定 53-03:ADF 停止位置调整值(薄纸)设定 53-04:ADF 阻力传感器、宽度传感器调整 53-05:ADF出纸传感器调整53-06:ADF 时间传感器调整54-03:除去蜂鸣装置57 删边量调整58 -1 纸头调整 58-2 空白区调整 60 原稿尺寸检测97 补粉夏普模拟复印机故障代码L1-00:反光镜进给故障(传感器坏、主板坏、反光镜传动索缺油)L3-00:反光镜返回故障L4-01:主电机故障L5-00:镜头初始误差检测L5-02:镜头故障L5-03 第4/5反光镜电机故障L5-04 第4/5反光镜电机MHPS故障 L5-05 镜头电机故障L5-06 镜头原位检测出错L5-8 镜头原位传感器故障L6 加粉电机故障L8-01:零交叉脉冲故障L8-03:AE传感器故障(执行47时,AE输入无变化) L9 分页器故障H2-00:定影热敏电阻开路故障(热敏电阻输入超过3.81V) H3-00:定影高温故障(定影温达240度,热敏电阻输入在0.36V下)H4-00:定影低温故障U1 存储器电池电压底于2.2V,指令“13”,复位 U2-01:后备储存器故障U3-8 镜架驱动电机检测异常U3-10 镜架原位传感器故障U3-20 反光镜电机锁定U3-21 反光镜原始位置出错U3-40 时钟脉冲故障U4-02 ADU对位板操作错误检测U4-04 ADU后端板故障U5-00:ADF通信错误U5-01:A马达错误检测U5-03 时序传感器故障U5-04 空传感器故障U5-11:给纸电机故障U5-12:输纸电机故障U6-00:机架通信错误U6-01:1纸盒电机错误U6-02:2纸盒电机错误U6-03:3纸盒电机错误U6-08:机架24V线路出错 U6-10:机架送纸电机错误 U6-09:机架LCC电机过电流检测 F1-00:分页器通信错误F1-02:输纸电机故障F1-04:纸库上限/下限故障 F1-05:纸库原位传感器故障 F1-06:纸库电机故障F1-14:输纸电势故障F2-02:色粉粉斗电机错误 F2-31:图象浓度传感器故障(传感器脏、删边灯脏、鼓处插线坏)F2-32:鼓标记传感器故障 F2-35:栅级电压校正故障 F3-12 上纸盒升起电机故障 F3-22 下纸盒升起电机故障 C2 高压发生器故障电极丝短路或断路CC 原稿尺寸传感器误检测EE-EU:色粉不足EE-EL:色粉过多CH: 亮是盖打开闪烁是显影组件安装不到位夏普数码复印机维修代码1-1 确认反射镜装置动作1-2 确认光学系传感器动作1-6 反光镜扫描连续动作2-1 SPF连续动作2-2 确认SPF传感器动作2-3 确认SPF电动机正转方向动人2-4 确认SPF电动机逆转方向动作2-8 确认SPF进纸电磁阀动作2-9 RSPF翻转电磁铁动作检查2-10 RSPF出纸门电磁铁动作检查2-11 确认SPF PS释放电磁阀动作3-2 确认移动分离传感器动作3-3 确认分页器移动动人3-4 确认分离板动作(检测是否正常转动) 3-11 确认配页器原位动作5-1 确认扣作部显示(面板LED灯全亮秒) 5-2 确认加热灯亮(定影灯50秒间隔亮5次) 5-3 确认复印机灯亮(10秒浓度键改亮度)6-1 确认进纸电磁阀动作(50秒间隔驱动20次)6-10 驱动主盒半圆辊7-1 预热时间表示有JAM老化7-4 预热省略7-6 间歇老化有纸7-8 预热时间表示8-1 复印模式的显影偏压输出8-2 复印模式的主充电器栅极电压(High状态高)输出 8-3 复印模式的主充电器栅极电压(Low状态低)输出 8-6 转印电压输出8-10 打印模式的显影偏压以及控制回路的动作确认和调整 8-11 打印模式的主充电器栅极电压(High状态)以及控制回路的动作确认8-12 打印模式的主充电器栅极电压(Low状态)以及控制回路的动作确认8-13 FAX模式的显影偏压以及控制回路的动作确认和调整 8-14 FAX模式的主充电器栅极电压(High状态)以及控制回路的动作确认8-15 FAX模式的主充电器栅极电压(Low状态)以及控制回路的动作确认9-1 双面器负载(马达)正转测试9-2 双面器负载(马达)反转测试9-4 双面器马达的转速调整 9-5 双面器马达的把向转换时间调整 10 确认墨粉电动机动作14 解除U2以外的故障16 解除U2故障20-1 清除保养计数21-1 保养循环的设定(0=2500张 1=5000张 2=15000张 3=30000张 4=150000张 5=999999张)22-1 保养计数器的显示22-2 保养预置值显示(SIM20-1设定值) 22-3 卡纸储存的显示(最近30次卡纸) 22-4 总卡纸计数显示22-5 总计数显示22-6 显影计数器显示22-8 SPF计数器显示22-9 进纸计数器显示22-12 光鼓计数器显示22-13 CRUM类型显示22-14 FLASH ROM的版本22-15 故障储存器显示(最近15次故障) 22-16 双面打印计数显示22-17 复印计数器显示22-18 打印计数器显示22-19 电子分类计数器显示22-21 扫描计数器显示22-22 SPF卡纸计数器显示24-1 卡纸储存器清除24-2 故障储存器清除24-4 SPF计数器清除24-5 双面打印计数清除24-6 进纸计数器清除24-7 光鼓计数器清除24-8 复印计数器清除24-9 印刷计数器清除24-10 电子类计数器清除24-13 扫描计数器清除24-14 SPF卡纸计数清除24-15 扫描模式计数器清除25-1 确认主电机机劝作(30秒)25-10 确认LSU多面镜电动机动作(30秒) 26-1 选件开关的显示(选购件对应灯亮) 26-3 部门管理器的设定(0:计数模式 1:投币模式 )26-4 本机双面动作设置(0:无双面 1:有双面功能) 26-5 计数器方式设定(0:双面计数 1:单面计数)26-6 发送地设定(5:中国 6:台湾)26-7 直接显示CPM旋转速度26-10 网络扫描的试用设定26-18 节粉方式(0:节粉关闭 1打开)26-22 语言设定(打印卡面板语言)(0:日语 1:英语……) 26-30 CE标记对应控制设定(0:CE标记OFF 1:ON) 26-32 风扇旋转状况变化26-36 (0:保养计数到停机 1:不停)26-37 (0:载体计数到停机 1:不停)26-38 光鼓超寿命停止设定(0停机 1不停机) 26-39 内存容量检测(16:16M内存 32:32M内存) 26-42 转印时间调整(R系列:1:240MS 3:260MS 9:320MS)(M系列机子取值1-99 默认值50)26-43 上下端空白设置(自动灯表下端,手动灯表上端) 26-50 黑白转换功能设定(0:可转 1:不可转) 26-51 复印机暂停功能设定(0:不停 1:停) 26-60 未装载FAX时,设定FAX模式键是否有效27-1 设定有元PC,调制解调器的通信故障 27-5 输入机器的机号30-1 确认本体传感器动作30-2 确认给纸部的传感、检测器及相关回路的动作 40-1 确认手动托盘的纸张尺寸检测器及相关回路的动作41-2 调整OC原稿检测传感器41-3 原稿检测传感器受光电平显示41-4 OC盖板20度时的检测电平调整 42-1 载体记数清除43-1 定影温度设定(倍率键调)43-10 明信片纸张进纸周期设置(取值1-99) 43-11 明信片纸定影温度设置43-12 待机模式定影风扇转动设置(0:低速 1:高速) 43-13 定影纸张间隙控制(0:禁止 1:允许) 44-34 转印电流设定44-40 墨粉补充前转动时间设置(取值1-99) 46-1 复印浓度300dpi电平调整46-2 复印曝光600dpi浓度等级调整46-7 分别调整复印曝光浓度等级(超级照片) 46-9 复印浓度等级单独调整手动300dpi等级(文字) 46-10 复印浓度等级单独调整手动600dpi(文字,照片) 46-11 复印浓度等级单独调整(照片) 46-18 复印对比度调整 300dpi 46-19 曝光时的图像质量调整46-20 SPF的曝光浓度校正46-29 复印对比度调整 600dpi46-30 进行AE设定(取值0-30)46-31 图像锐度调整(0:黑白校正 2:清晰) 46-39 调整传真模式对比度46-45 调整传真模式的图像浓度48-1 主(前后)扫描方向倍率调整 48-2 复印时OC方式副扫描方向倍率调整48-3 自动调整前端(副扫描倍率 48-5 复印时SPF方式副扫描方向倍率调整 49-1 FLASH ROM程序写入模式 50-1 复印画像位置调整(左右方向,值加减1移动0.127MM)50-5 调整图像先端位置50-6 调整复印模式SPF,RSPF原稿图像位置 50-10 用纸中心偏移调整(上下方向) 50-12 调整复印模式原稿图像中心位置 50-13 OC方式原稿中心偏50-16 SPF方式原稿中心偏听偏信移调整 50-18 双面复印时反面图像位置调整50-19 双面复印时后端空白调整51-02 对位量调整51-8 设定禁止感光鼓分离爪动作 53-8 SPF扫描位置调整56-1 传送MFP控制器数据61-1 检测LSU的动作61-2 调复印模式激光功率(绝对值) 61-3 六棱镜电机检测62-1 格式化硬盘62-3 检测硬盘读写操作62-8 格式化硬盘(除系统数据区域) 62-10 删除完成作业列表(同时删除作业日志) 63-1 确认黑白校正数据63-2 执行黑白校正63-7 自动调整SPF白校正开始的像素位置 64-1 自我打印功能65-5 进行操作面板的检测66-22 调传真听筒音量66-23 下载传真程序66-24 清除传真数据内存66-39 设定发货地规格66-60 设定ACR数据67-11 用于设定“select-in“信号67-14 进行flash programs写入,比较检测 67-17 进行NVROM的清除67-18 清除FLASH ROM 的Network Scanner Application(网络扫描应用软件)用数据区域67-20 装载网络扫描组件时,检测网络连接夏普数码复印机故障代码H2 00 热敏电阻断开(电阻到MCU板的连接、SIM14清) H3 00 定影部高温故障(温超240度、SIM5-2灯闪时:查接线。
复印机维修资料大全

第一、复印机出现故障后的检查与维修步骤:复印机出现故障后,总有一种是主要的故障,抓住这个主要的故障进行分析,即可找到故障原因和排除的方法,我们一般可通过以下几条途径来查出故障的原因并排除之。
检修时应遵循先易后难的原则并逐步缩小范围,最后集中于某一点上。
一、了解情况维修机器前首先应认真询问操作者有关情况,如机器使用了多久,上次维修(保养)是在什么时间,维修(保养)效果如何,此次是什么情况下出现的故障。
还要认真翻阅机器有关维修记录,注意近期更换过哪些部件和消耗材料,有哪些到了使用期限而仍未更换过的零部件。
二、检查机器情况了解清楚以后,即可对机器进行全面检查,除了机内短路、打火等故障外,都可接通机器电源,复印几张,以便根据其效果进行进一步分析。
对于操作者提供的故障现象应特别注意,并在试机时细心观察。
三、准备工具在对机器进行检查的基础上,一般可对故障现象有个大致的了解,即可知道维修时需要哪些常用的专用工具,准备好将要使用的工具和材料后即可进行检查维修工作。
四、机器故障自检目前绝大多数复印机都装有彩色液晶显示面板,并设有卡纸等故障自检功能,一旦机器某一部件失灵或损坏,都能以字母数字告诉操作者。
比较常见的是故障代码,如NP系列复印机的故障代码为“E0~E8等,理光系列则以”U“加数字为代码,这些代码一出现分别表示印刷电路板,传感器、开关、接插件等工作状态异常,需要进行调整或更换。
作为机器的使用者,见到这些故障代码,应立即停机,关掉电源,请维修人员进行检修。
如果是自己修理,则必须找到与所使用机器型号相同的维修手册或维修说明书,在书中查到故障代码所表示的内容,再检查相应的零部件、电路板或电子元件。
第二、常见“共性”故障的检修由于复印机的种类和型号繁多,各制造厂生产的复印机各不相同,即使是同一个生产厂家生产的不同型号复印机也不完全一样。
因而在使用中所出现的故障现象还是有一些差别,这里仅对共性的、一般常见的故障及其成因和排除方法加以介绍。
某品牌打印机维修资料
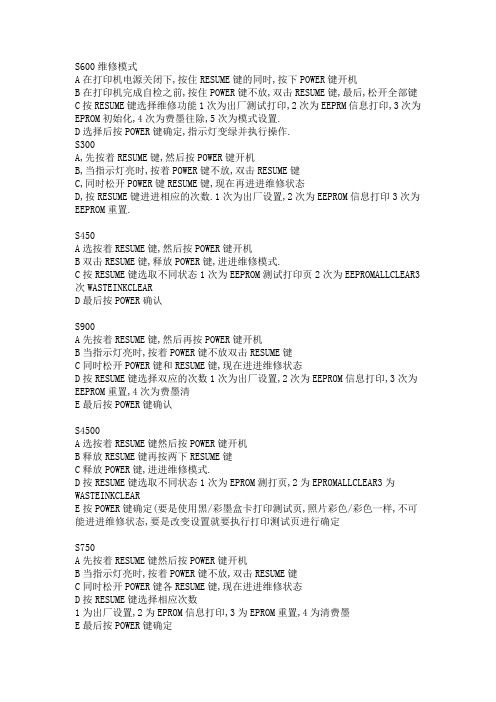
S600维修模式A在打印机电源关闭下,按住RESUME键的同时,按下POWER键开机B在打印机完成自检之前,按住POWER键不放,双击RESUME键,最后,松开全部键C按RESUME键选择维修功能1次为出厂测试打印,2次为EEPRM信息打印,3次为EPROM初始化,4次为费墨往除,5次为模式设置.D选择后按POWER键确定,指示灯变绿并执行操作.S300A,先按着RESUME键,然后按POWER键开机B,当指示灯亮时,按着POWER键不放,双击RESUME键C,同时松开POWER键RESUME键,现在再进进维修状态D,按RESUME键进进相应的次数.1次为出厂设置,2次为EEPROM信息打印3次为EEPROM重置.S450A选按着RESUME键,然后按POWER键开机B双击RESUME键,释放POWER键,进进维修模式.C按RESUME键选取不同状态1次为EEPROM测试打印页2次为EEPROMALLCLEAR3次WASTEINKCLEARD最后按POWER确认S900A先按着RESUME键,然后再按POWER键开机B当指示灯亮时,按着POWER键不放双击RESUME键C同时松开POWER键和RESUME键,现在进进维修状态D按RESUME键选择双应的次数1次为出厂设置,2次为EEPROM信息打印,3次为EEPROM重置,4次为费墨清E最后按POWER键确认S4500A选按着RESUME键然后按POWER键开机B释放RESUME键再按两下RESUME键C释放POWER键,进进维修模式.D按RESUME键选取不同状态1次为EPROM测打页,2为EPROMALLCLEAR3为WASTEINKCLEARE按POWER键确定(要是使用黑/彩墨盒卡打印测试页,照片彩色/彩色一样,不可能进进维修状态,要是改变设置就要执行打印测试页进行确定S750A先按着RESUME键然后按POWER键开机B当指示灯亮时,按着POWER键不放,双击RESUME键C同时松开POWER键各RESUME键,现在进进维修状态D按RESUME键选择相应次数1为出厂设置,2为EPROM信息打印,3为EPROM重置,4为清费墨E最后按POWER键确定S820S520A选按着RESUME键,然后按POWER开机B当指示器亮时,按着POWER键不放,双击RESUME键C当时松开POWER键和RESUME键现在进进维修状态D按RESUME选择相应次数.1为出厂设置2,为EPROM信息打印3,为EPROM重置,4为费墨设置E最后按POWER键确定.BJC1000SPEPROM往除A不安装墨盒按RESUME键插AC适配器.B释放RESUME键5秒重按一次松手,小车自动走到中间停住,C按住RESUME键2秒或2秒以上后释放他D完成设置后,要拔电源才能再打印打印测试页A不安装墨盒按RESUME键插AC适配器.B释放RESUME键5秒重按一次松手,小车自动走到中间停住,C翻开前盖安装墨盒D关上前门双击RESUME键,打印机开始测打E完成设置后,要拔电源才能再打印BJC-3000A按RESUME键的同时按下POWER键不放手B释放RESUME键再按两下RESUME键C释放POWER键,选取不同状态,1次为EPROM测打2为EPROM重置,3为费墨水重置E按POWER确认佳能2000/2000SP/2100SPEPROM重置A不安装墨盒按RESET键通电源B释放RESET键5秒内重安一次C再按RESET键,超过2秒D按RESET键击重置EPROME,选断电F打印EPROM测试页EPROM检测A不安装墨盒按RESET键通电,B释放RESET键,5秒内重按一次C翻开前盖,安装黑色墨盒D关上前门,双击RESET键,打印机开始测试打印E完成测试后再拔电源才能再次打印佳能S100SP(EPROM重置)A不安装墨盒,按RESET接通电源B释放RESET键,5秒内重按一次,C按RESET键,超2秒或2秒以上D再按RESET键超过2秒或2秒以上即重置EPROM和出厂默认E关机EPROM检测A不安装墨盒按RESET通电源B释放RESET键5秒内重按C翻开前盖安装黑色墨盒D关上前门双击RESET,打印机开始测试打印E完成测试后再拔电源才能再次打印,按RESET键,听到喊喊2声以上时松开手关机佳能S400打印机(EEPROM)重置A按住RESUM键,按POWER键开B释放RESUME键后,再按两下RESUMC然后放开POWER键,进进维修模式D按RESUME选取不同的状态1为EPROM测试打印页2为EPROM重置3为墨水计数器重置再按POWER键确认佳能打印机维修资料大全佳能机子资料集中区JC-4650清零方法1按POWER、RESUME和CARTRIDGE键插进AC适配器后释放全部。
分享复印机维修资料(Share copier maintenance materials)

分享复印机维修资料(Share copier maintenance materials)Share copier maintenance materialsAnalysis of common troubles in copying machine1 fault fault phenomenon: a Ricoh FT-4495 copier toner, recently because, replace the toner, soon no powder lights still bright, suggesting that toner is not enough, the main motor idling stop, can not copy.Fault analysis and Troubleshooting: according to the fault phenomenon, it is estimated that the toner cartridge is not installed in place, resulting in reloading toner cartridges, and check the toner amount is correct, the boot to try again, the failure is still. Open the front cover and observe the transmission of the powder feeding mechanism. It is found that the rotating powder feeding roller gear can drive the driving wheel and the stirring gear to rotate, indicating that the fault appears on the driving part of the stirring gear to the toner box. Remove the toner cartridge, toner cartridge between found gear broken and powder stirring gear, resulting in the toner powder stirring roller does not rotate, the toner cartridge for powder, the machine does not work, no powder toner cartridge to retrieve the original, will pour into the original toner cartridge, ink cartridge reloading, troubleshooting.Summary: when you change the toner cartridge, you must first gently shake the new box, so that toner distribution evenly, and turn the powder roller, so that it is flexible rotation, no dead center, you can install. Otherwise, will cause a stir roller gear broken phenomenon, causing unnecessary losses. Theworking process of the copierThe working process of the copier mainly consists of the following parts: (in the order of copying)Charging parts (high voltage generator, electrode rack, motor wire)Bring a uniform charge onto the surface of the drum.Exposure unit (scanning exposure lamp, reflector, lens)A reversal potential image is formed on the surface of the photosensitive drum according to the original image. (the previous chapter has already explained)Developing parts (developing device, high voltage generator)The latent latent image of the drum surface is converted into a toner image. (the previous chapter has already explained)Feeding parts (motors, paper wheels)The motor drives the paper wheel to feed the copy paper into the machine and prepares the ink transfer on the surface of the drum to the paper for the next step.Transfer parts (high voltage generator, electrode rack, motor wire)By transferring the electrode, the surface of the copy paperis uniformly charged with the charge of the toner, and the toner image on the photosensitive drum is transferred to the copy paper.Separation unit (high voltage generator, electrode rack, motor wire)Because the surface of the copy paper and the photosensitive drum are all charged and the polarity is reversed, the copy paper is difficult to separate from the photosensitive drum during the copying process. Therefore, separate measures should be taken to separate the copy paper from the drum. Earlier copiers were mechanically separated but easy to jam; current copiers were electrically separated. The separation current contains high frequency AC and fixed DC components.Cleaning parts (cleaner)Clean the residual toner on the surface of the sensitive drum and prepare for the next copy. It is impossible for all copiers to transfer the toner on the drum surface to the copy paper by transfer. Therefore, the drum surface has residual toner, not clean, it will affect the quality of the copy later.Fixing parts (fixing heat sticks, pressure bars, heaters)The toner image on the copy paper is fixed on the copy paper by fixing,So as to keep it. If the image is not touched, the image on the copy paper falls off. (so fixing requires a certain amount oftemperature and pressure.)The process of copying also involves many auxiliary processes:Power out unit (full exposure light)Remove the residual potential on the surface of the photosensitive drum and prepare for subsequent copying. Otherwise, the copy will contain a residual image or bottom ash.Edge deleting parts (such as inter image side lights)The copy has the front, front and rear sides, back ends, or narrow portions of the blank, so the surface potential of the unnecessary photosensitive drum needs to be removed by using an image like edge elimination lamp.Copier daily usage skillsDigital copier, compound machine office in small and medium-sized enterprises, are used frequently, and sometimes need to purchase the machine or buy supplies, which is a problem we procurement staff, how to choose the suitable company machine, how to buy genuine supplies and so on. Today, I give you the whole is a more comprehensive information, there are daily use skills, but also how to buy supplies and machines of some experts point of view inside. We hope to have some help to the daily office.Troubleshooting and analysis troubleshooting experience for copiersCopier occasional jam is not a fault, but if the frequent jam, you need to check and repair. First of all, it should be clear where the paper jam is for paper parts, paper parts, or fixing parts, of course, the three parts such as parts are obviously damaged, can be replaced. But in many cases, the entire transmission mechanism without any obvious damage to the parts, but also without any obstacles, but frequently jam paper, not only affect the efficiency of work, but also affect the working mood of the operator. For maintenance personnel, sometimes several factors are often intertwined to influence diagnosis.Copier1., paper for paper jam: this part of the cardboard, involving many aspects, first of all should check whether the used paper is standard (such as paper weight, size, dry degree), test machine use standard paper. Cartons are irregular and cause paper jams. You can try to put only a few sheets of paper box, then paper, if not rub or not in place, it can determine a paper rubbing wheel or a paper rubbing clutch problem; if a paper rubbing paper in place, but can't move on, it is estimated on roll sliding or para clutch failure caused by. For some models, the paper appears askew and may be caused by unequal clamping forces on both sides of the carton. In addition, many operators in the carton box, the force is too large, resulting in a few cartons of paper from the claws, it will inevitably cause cardboard.The 2. part: such as cardboard paper in this area often jams and should aid in the door switch plate (a tool), carefullyobserve the site operation, excluding factors are in round conveyor belt and guide, should check the separation mechanism. Because of the different types of copiers, the separation methods should be differentiated. At present, there are three kinds of separation models in China, such as vacuum separation, separation, separation and charge separation. Specific inspection and maintenance methods will not be repeated here.3. fixing parts cardboard: when the fixing roller separation claw for a long time after use,The end of its blunt or small spring fatigue failure, will cause cardboard. For some models, the paper feed roller after a long time to use serious wear and tear, will also frequently jam. As for the fixing roll, the jam caused by serious scaling is common in the general machine type.Buy Copiers how to strengthen the authenticity of supplies?Don't pay attention to the price to buy the copier, some informal copier dealers, in order to earn greater profits, even the machine modification or replacement of fake supplies, this not only affects the service life of the copier, copier will also increase the failure rate. Now we will provide you with several items to buy Copiers attention:First, see if the copier has been opened or sealed, and the original machines are sealed by single channel.Second, the original copier toner cartridges are wrapped in zinc skin, the packaging is neat.Third, buy fake toner copier, copy effect, black and white depth and ordinary copiers, the effect is much worse.Fourth, the use of false toner, there will be a special smell.Fifth copier copy number, and technical parameters are different, this is the customer is not easy to note, but also the most important way of identification.Several problems should be paid attention to when buying copiersNowadays, there are many kinds of brands in the copier market, and the functions are more and more. What brand of copiers should a small and medium-sized enterprise choose?This is also from several points of view: first, according to the use of customers, divided into low, medium, high-speed copiers. Each month load capacity is different, generally 10 thousand within the choice of low speed machine; 2--5 million to select medium speed copier, even if the user dosage is larger, also can meet the needs. 5-10 must buy high-speed machines. Second, function, choose a copier, must look at the copier function is not able to meet your use, such as now can add, print, scan, fax and other functions. Copier life expectancy of 5-8 years on average, but also consider the future increase in workload can meet, or provincial level and so on. Third, the copier consumables are satisfactory to you? Some copiers exist machines, cheap, but the latter use cost is amazing, this is generally based on the actual use of customers.About customer service service these big brands are similar, Canon, SHARP, Toshiba Ricoh, is a year of free home repair, but KYOCERA copier is three years free on-site maintenance, so once again remind you, buy Copiers to ask the copier warranty time.Method for resetting special fault code of SHARP copierSpecial fault code 700/800 series of SHARP copiers are mainly HX (H1 H8, heat roller fixing device fault), Lx (L1-L6, micro switch / photoelectric switch fault, Ux (U1U2), low battery voltage or data transmission fault) and Pl (exposure lamp temperature fuse abnormal). Among them, U1 used the command "13" reset, other special instructions for fault code "14" reset.SHARP 1000/2000 series copier special fault code, mainly HX (H2-H4, hot roller fuser fault) and U2 (memory read and write failure), which U2 with instructions "16" reset,Other special fault codes are reset by instruction 14.SHARP 7000/8000 series copier special fault code, mainly HX (H3, H4, hot roller fuser fault) and U1 (battery voltage is low). The U1 is reset by the instruction "13", and the H3 H4 is reset by instruction "14". The sequence of the reset operation is shown in the figureIn addition, a special fault code for SHARP Z60 copier with U (motherboard battery low), L (micro switch fault) and H (failure of hot roll fuser (F), fixing the lamp or temperaturefuse) said, with "1" reset command. Reset, in order to press the clear key, duplicate keys, (addend key), (digital subtraction key) key "1" and the copy button:(1) the key should be pressed within 5 seconds:(2) SHARP, 750, 770, 771, 780, 781, 825 and other copiers press duplicate keys, other copiers press the pause button;(3) at this time all the display on the operating board disappears, the main motor stops rotating, the copier is ready to receive instructions (when the main motor rotates, copy)The machine does not accept instructions;(4) SHARP 1000/2000 series 1016, 1020, SHARP copier includes 1025, 1116, 2014, 2020, 2022, 2027, 2040, 2114, 2214 SHARP 7000/8000 series copiers copiers; including SHARP 7320, 7370, 7700, 7750, 7800, 7850, 8570, 8870 copiers.Inspection and maintenance of paper jam in copierIt is believed that every person who has used the copier will experience the problem of paper jam. It should be said that the occasional paper jam is unavoidable in the process of copying, but if the paper is often jammed, it shows that the machine is out of order and needs to be repaired. Factors causing jamA lot of, mainly has following several factors;1. carton cardboard: (1) carton (2) paper rubbed parts2. paper road paperboard: (1) aligning roll; (2) separating mechanism; (3) paper path sensor; (4) separating claw; (5) fixing roller;3. automatic pagination causes jamThe 4. scan component causes jam5. machine short circuit causes jam6. improper handling, resulting in cardboardInspection and maintenance of concrete jam:The L. card in the transmission fault causes and elimination methods in the paper:(1) the paper feed clutch is out of control. Adjust and change the paper feed clutch;(2) there is a foreign matter in the feeder. Foreign body removal;(3) the paper is partial to block cold. Clear the blocked paper;2. cards in reason and elimination method of fault separator:(1) separation, loosening, falling or breaking, or air suction and separation, and insufficient suction force, so that the paper sticks on the drum or enters the cleaning box, and theseparation belt is replaced. Adjust the air quantity and position;(2) the paper goes astray. Trouble out of paper offset.3. causes and troubleshooting of frequently jammed paper cleaner:Some contact with the cleaner copier drum part is provided with a grid, it is made of plastics, and prevent the copy paper into the role of cleaner, normal copy, even if there are cards in this part, the paper is also very easy to remove,But the gate is damaged, the paper will enter the cleaner, tight to remove. The cleaner shall then be removed from the photosensitive drum and removed from the machine as necessary and removed from the cardboard for repair or replacement of the grid bar,Ability to continue.Laser printer maintenance manualThe widespread application of laser printers in enterprises and companies is accompanied by the maintenance problems of printers when they are in trouble. This paper mainly aims at the common faults of EPSON laser printers. Including maintenance essentials, common models of the fault code, specific printer failures, etc., hoping to maintain the laser printer when you help.Quick laser printer maintenance and fault codeLaser printer is a kind of highly automatic computer output equipment integrating light, machine and electricity. It is mainly composed of laser scanning system, mechanical drive system and imaging medium with the toner and cartridge, as well as the circuit part, the conversion part and heating part. Its working principle is the first charging unit inside the machine to the cartridge plus negative charge, then the board according to the laser laser emission from the host signal transmitted over the control, the laser shines on the cartridge surface will leave an electrostatic image in the toner in the toner chamber surface, the toner is adsorbed to the toner image formed on the surface of the electrostatic toner image, when the toner cartridge the surface and send the paper contact image transfer to the paper, by the end of the paper is heated so that the image permanently stored in paper. The printing process can be divided into 7 steps: charging, exposure, imaging, transfer, separation, fixing and cleaning.When a fault occurs, to the exclusion of other improper operation and material is not suitable for the problem, do not rush to the dismantling of printer, first turn off the power switch, such as printer temperature down after a reboot, to observe whether the fault is cleared if the fault phenomenon still into maintenance. Also note that many components of the laser printer, such as the drum assembly, the fixing assembly, and the paper rubbing wheel, are part of the consumer and need to be replaced regularly.Laser printer repair failure: no electricity output, output,cardboard, blank black, pale and output when writing vertical stripes, Liby printing paper, printing paper on the black side repeated dirt1, laser printer preheating more than 2min or amorphous, text fall off.One is to consider whether the indoor temperature above 20 degrees celsius;The two is to check if the thermistor is out of contact or invalid;Three is to see whether the voltage reaches 220V;Four is to see the paper, toner is too dampWet, etc..2, cardboardFirst, check the size of the paper is appropriate, the paper is too thick, too thin, paper wet or volumeSong, will produce jam phenomenon;Two is coated paper can not be used for ordinary laser printers;The three is to check the separation of the laser printer claw is worn, need to change.3, such as printed on the part or all of the word is not clear, toner uneven uneven and so on.The reason for this failure is the amount of toner cartridge is insufficient, need to supplement.4, appear on the print black or underworld, and change paper still appear in the same position.The cause of the malfunction is the damage of the OPC drum.5. If there is a horizontal stripe on the print, it will appear in the same position after changing paper,It shows the need to change the squeegee6. If there is a longitudinal stripe on the print, it will appear in the same position after changing the paper,The magnetic roller on the powder storage box is damaged and needs to be replaced.7, in the printing piece, the big character has the zigzag shape, the writing appears a straight line, lacks the pen to delimit,Note that the six corner mirror or F theta objective has dust to be cleaned(this problem should be dealt with by professional and technical personnel).Note 8, replacement of toner:First, the powder feeding bin and powder storage bin should be cleaned;Two, after the toner, the powder in the toner warehouse parallel shake, clockwise rotation of the teeth by handThe number of rings, so that toner evenly attached to the magnetic roller, to ensure uniform toner.9, if the replacement toner after writing ink irregularity or powder leakage phenomenon, print a few after theBarrier or unresolved, at this time we must first consider whether the wet toner, followed by considering powder deliveryIs the toner in the bin too full?.10, laser printer in the process of hair sample, if the host's monitor appears "laser printer"When the word "power off" and "peripheral equipment is not ready" is mainly connected from the signal lineFind solution.11, if the laser printer self-test, the pattern is all black, no self-test lines. HostThe monitor appears "IACK", which indicates that the videointerface card is out of order.EPSON laser printer maintenance EssentialsFault diagnosis program EPSON laser printer will be built according to different types of machine fault code is displayed in a different way when a fault occurs, the maintenance engineer can estimate the fault code meaning of fault location, refer to the corresponding solution models according to the maintenance manual manual maintenance.EPSON laser printer fault code display is divided into the following 3 types:1. screen display type, its fault code through the printer control panel on the LCD screen display. Representative models are EPL-N1610, EPL-N2120 and so on;The 2. indicator display type, its fault code, is displayed by the indicator light on the printer control panel or different combinations of flashes or lights. Representative models are: EPL-5900, EPL-6100 and so on;3. computer screen display type, when the fault occurs, by pressing the key combination on the keyboard, the fault code will be displayed on the computer screen associated with the printer. Representative models are: EPL-6100L, EPL-1220 and so on.Printer stepping motor maintenanceThe manufacturing accuracy of printer stepping motor is higher, and the main fault is non feed. The following methods can be used to judge whether the motor is damaged or not.(1) measure the resistance according to the resistance value on the step motor. The stepper motor is divided into two winding, two winding structure is the same as that of the other end of each winding center symmetric resistance are equal, and consistent with the marked resistance, different order of different motor wire.When measuring the first use of multimeter will be divided into two groups (each lead wire connected to a group), and then find out the method to measure the resistance center tap end of each group, the center end to the other ends of resistance and resistance value consistent annotation. If the resistance is asymmetric or different from the indicated resistance, the motor may be damaged.(2) test the power supply voltage on the stepper motor (or the working voltage of the motor in the circuit). If the motor is not marked, start using a lower voltage,Then gradually increase the voltage to test. One end of the power supply (both positive and negative) connected to a winding center end, the other end of the power supply at both ends of the winding alternately touching (note the touch time not too long), the step motor step by step rotation, and each step should be equally powerful, or that the motor is damaged. Inspection should be noted that if the stepper motor winding serious short-circuit test must not be, otherwise it will burnout power.(3) some stepper motors have two identical windings, but there is no center tap end. When measuring, you can measure whether the two winding resistance is equal, and should be consistent with the motor tagging, and then use the power supply test. During the test, the power poles are alternately touching each end of each winding. At this point, the stepper motor should be rotated step by step and equally powerful, otherwise the motor will be damaged. It should be pointed out that when the stepper motor is damaged, the stepper motor drive circuit should be checked for damage.。
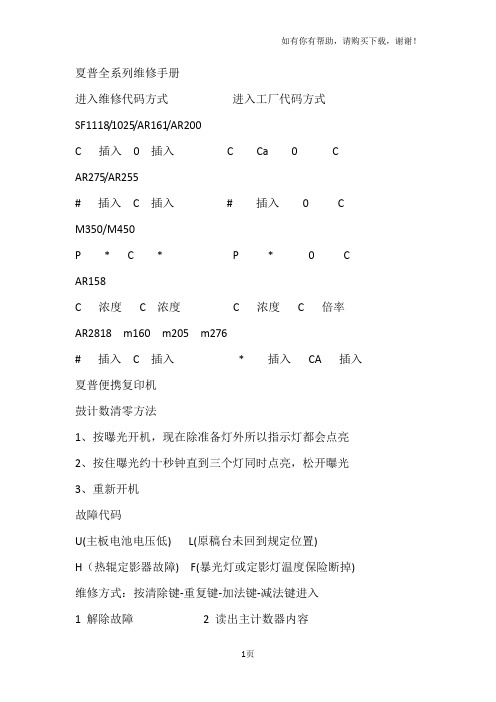
夏普复印机维修手册

夏普复印机维修手册(总12页)--本页仅作为文档封面,使用时请直接删除即可----内页可以根据需求调整合适字体及大小--进入工厂代码方式SF1118/1025/AR161/AR200进入维修代码方式C-插入-0-插入进入工厂代码方式C-Ca-0-C AR275/AR255进入维修代码方式#-插入-C-插入进入工厂代码方式#-插入-0-CM350/M450进入维修代码方式P-*-C-* 进入工厂代码方式P-*-0-CAR158进入维修代码方式C-浓度-C-浓度进入工厂代码方式C-浓度-C-倍率AR2818 M160 M205 M276进入维修代码方式#-插入-C-插入进入工厂代码方式*-插入-CA-插入数码复印机故障代码H2 00 热敏电阻断开(电阻到MCU板的连接、SIM14清)H3 00 定影部高温故障(温超240度、SIM5-2灯闪时:查接线。
常亮:查电源板、MCU板、灯控板)H4 00 定影部低温故障(温不足140度)(恒温器等)H5 01 连续5次T10D(T20D)未检测到卡纸(定影卡纸,安装等) 02 定影热敏电阴的检测异常CC 原稿检测传感器错误U2 04 EEPROM通信出错(ROM安装到位否) 11 计数器校正出错 12 调整值校正出错 20 机器速度代码数据出错(SIM26-57设的机种类型对否) 40 CRUM芯片通信出错(显影组件接触不良)U3 29 反射镜原始位置错误U7 00 RIC 板与本机连接U9 00 MCU-OPE间通信故障(接线、接地) 80 操作控制电路板故障(协议) 81 操作控制电路板故障(奇偶) 82 操作控制电路板故障(溢出) 84 操作控制电路板故障(框架) 88 操作控制电路板故障(超时) 99 操作面板语言出错U95 面板连接错误造成面板单独显示F5 02 复印灯点灯异常(灯或线路坏、反光镜上经常有水蒸汽、标准白板脏或变形、白板上面的三条黑线被抹掉,执行63-1 值不在B0左右,要调整CCD的高低或水平位置了。
夏普复印机全系列维修手册

夏普全系列维修手册进入维修代码方式进入工厂代码方式SF1118/1025/AR161/AR200C 插入0 插入 C Ca 0 CAR275/AR255# 插入 C 插入# 插入0 CM350/M450P * C * P * 0 CAR158C 浓度 C 浓度 C 浓度 C 倍率AR2818 m160 m205 m276# 插入 C 插入* 插入CA 插入夏普便携复印机鼓计数清零方法1、按曝光开机,现在除准备灯外所以指示灯都会点亮2、按住曝光约十秒钟直到三个灯同时点亮,松开曝光3、重新开机故障代码U(主板电池电压低) L(原稿台未回到规定位置)H(热辊定影器故障) F(暴光灯或定影灯温度保险断掉)维修方式:按清除键-重复键-加法键-减法键进入1 解除故障2 读出主计数器内容3 读出总计数器内容4读出维修计数器内容5 维修计数器复位`夏普模拟复印机维修代码维进:C-插入- 0-插入或清除键-插入键-0键-插入键-清除键厂进:C- Ca - 0- C 纸盒键按4秒进用户模式1-01:反光镜动作检测1-02:光学系统传感器检查(缺纸灯、卡纸灯)1-03:镜头动作检查1-04:镜头动作老化检查2-01:ADF进行原稿输送动作2-02:ADF传感器检查2-03:ADF单独装纸动作检查(给纸电机反向旋转)2-04:ADF单独装纸动作检查(给纸电机正向旋转)2-05:ADF单独装纸动作检查(输纸电机正向旋转)2-06:ADF单独装纸动作检查(输纸电机反向旋转)2-07:ADF单独装纸动作检查(原稿限位器电磁阀接通)2-08:ADF单独装纸动作检查(送纸限位器)2-10:ADF单独装纸动作检查3-02:分页器传感器检查3-03:分页器单独装纸动作检查(输纸电机)3-04:分页器单独装纸动作检查(纸库电机)3-05:分页器单独装纸动作检查(蜂鸣器)3-06:分页器单独装纸动作检查(直线马达)(只适用于SF-S54)3-07:分页器单独装纸动作检查(钳夹马达)(只适用于SF-S54)5-01:操作面板显示检查(LED灯全亮5秒)5-02:加热灯检查(以0.5秒间隔亮灭加热灯)5-03:复印灯点亮检查5-04:DL 光度检查(放电灯亮30秒)5-05:BL 光度检查(消电灯以5秒间隔亮灭)6-01:输纸系统装纸动作(离合器/ 电磁阀)通断30次6-02:给纸电机动作检查(仅SP-2118)6-10:主纸盒半圆辊动作7-01:预热时间显示和老化预热计时并显示(秒)7-04:预热省略7-06:间歇老化7-08:预热时间显示8-01:显影偏压输出(30秒)8-02:主/ 转印充电输出/ 栅极检查(ME)8-03:主/ 转印充电输出/ 栅极检查(PE)8-04:主/ 转印充电输出/ 栅极检查(T / S)8-07:分离充电器输出(30秒)9-02 ADU传感器检查测试指令9-05 门电磁铁启动10 :色粉电机转动14 :故障消除(除U2故障外)15 废色粉装满(小人灯闪亮)取消16 U2 故障取消17 消除PF故障20-01 保养计数器(小人灯亮)清零21-01 保养周期设定0=50000张1=2500张2=5000张3=10000张4=25000张5=关闭21-02 显影器小修设置0=80000张1=5000张2=10000张21-03 彩色显影器小修设置0=10000张1=5000张22-01:保养计数器显示22-02:保养预置计数器显示22-03:卡纸存储器显示22-04:总卡纸存储器显示22-05:总计数器显示22-06:DV 计数器显示22-07:DV 预置计数器显示(载体更换周期)22-08:ADF 送纸数显示22-10:装订计数显示22-15:故障记忆显示(显示最近20个错误代码)24-01:卡纸存储器/ 总卡纸计数器清零24-02:故障记忆清除24-04:ADF 计数器清零24-05:装订计数清零24-06:显影剂调整时间清零24-07:鼓调整时间清零24-06:纸盒计数器清零25-01:主驱动系统检查25-02:自动显影剂调整(更换载体后执行)(厂代中80-2调浓度与漏粉)26-01:选购件设定(输入选购件所表数值之和)26-05:计数器方式设定( 0 A3计数 3 A4计数)26-06:目的地设定(设为10)26-07:转鼓灵敏度设定校正复印灯电压(1-3 初始为2)26-10:AE 原稿浓度设定(1低浓度原稿2正常浓度原稿)26-13:预热方式设定(0 正常1主电机转至预热结束)26-20:后缘空白设定(0 有空白1无空白)26-29:交流电压调整(0 100V 1 200V)30-01:复印机传感器检查(纸检测)42-01:清除小太阳符号换载体后43-01:定影温度设定(倍率键选择)44-01:成像控制动作设定(输入校正方式代码总和,栅压校正+1 光学尘埃校正+2 鼓磨损校正+4)44-05:栅极电压较正(显示图介浓度传感器A/D输入值)44-06:栅极电压较正强行执行44-07:图像浓度/ 转鼓标记传感器动作试验(F-J中0表示鼓标不能检测,1表示能检到)44-08:成像控制数据显示44-09:成像控制数据显示(最新值)44-10:栅极电压较正(转鼓表面/ 斑纹)数据显示44-11:初级栅极偏压设定44-12:中央控制处理器关闭时对复印功能进行检测主代码子代码内容46-01:曝光调整47 :AE 传感器增益自动调整(先在稿台上放几张A3白纸)48-01:前/ 后(垂直)放大倍率调整(A值调100% B调200% C调50%)48-02:输纸方向放大倍率调整(反光镜速度校正)50-01:复印件前缘调整50-02:前缘调整(简单型)(C值为245 显示为A45)51-02:阻力量调整(A 托盘阻力B手动给纸)53-01:ADF 停止位置调整值(普通纸)设定53-03:ADF 停止位置调整值(薄纸)设定53-04:ADF 阻力传感器、宽度传感器调整53-05:ADF出纸传感器调整53-06:ADF 时间传感器调整54-03:除去蜂鸣装置57 删边量调整58 -1 纸头调整58-2 空白区调整60 原稿尺寸检测97 补粉夏普模拟复印机故障代码L1-00:反光镜进给故障(传感器坏、主板坏、反光镜传动索缺油)L3-00:反光镜返回故障L4-01:主电机故障L5-00:镜头初始误差检测L5-02:镜头故障L5-03 第4/5反光镜电机故障L5-04 第4/5反光镜电机MHPS故障L5-05 镜头电机故障L5-06 镜头原位检测出错L5-8 镜头原位传感器故障L6 加粉电机故障L8-01:零交叉脉冲故障L8-03:AE传感器故障(执行47时,AE输入无变化)L9 分页器故障H2-00:定影热敏电阻开路故障(热敏电阻输入超过3.81V)H3-00:定影高温故障(定影温达240度,热敏电阻输入在0.36V下) H4-00:定影低温故障U1 存储器电池电压底于2.2V,指令“13”,复位U2-01:后备储存器故障U3-8 镜架驱动电机检测异常U3-10 镜架原位传感器故障U3-20 反光镜电机锁定U3-21 反光镜原始位置出错U3-40 时钟脉冲故障U4-02 ADU对位板操作错误检测U4-04 ADU后端板故障U5-00:ADF通信错误U5-01:A马达错误检测U5-03 时序传感器故障U5-04 空传感器故障U5-11:给纸电机故障U5-12:输纸电机故障U6-00:机架通信错误U6-01:1纸盒电机错误U6-02:2纸盒电机错误U6-03:3纸盒电机错误U6-08:机架24V线路出错U6-10:机架送纸电机错误U6-09:机架LCC电机过电流检测F1-00:分页器通信错误F1-02:输纸电机故障F1-04:纸库上限/下限故障F1-05:纸库原位传感器故障F1-06:纸库电机故障F1-14:输纸电势故障F2-02:色粉粉斗电机错误F2-31:图象浓度传感器故障(传感器脏、删边灯脏、鼓处插线坏)F2-32:鼓标记传感器故障F2-35:栅级电压校正故障F3-12 上纸盒升起电机故障F3-22 下纸盒升起电机故障C2 高压发生器故障电极丝短路或断路CC 原稿尺寸传感器误检测EE-EU:色粉不足EE-EL:色粉过多CH:亮是盖打开闪烁是显影组件安装不到位夏普数码复印机维修代码1-1 确认反射镜装置动作1-2 确认光学系传感器动作1-6 反光镜扫描连续动作2-1 SPF连续动作2-2 确认SPF传感器动作2-3 确认SPF电动机正转方向动人2-4 确认SPF电动机逆转方向动作2-8 确认SPF进纸电磁阀动作2-9 RSPF翻转电磁铁动作检查2-10 RSPF出纸门电磁铁动作检查2-11 确认SPF PS释放电磁阀动作3-2 确认移动分离传感器动作3-3 确认分页器移动动人3-4 确认分离板动作(检测是否正常转动)3-11 确认配页器原位动作5-1 确认扣作部显示(面板LED灯全亮秒)5-2 确认加热灯亮(定影灯50秒间隔亮5次)5-3 确认复印机灯亮(10秒浓度键改亮度)6-1 确认进纸电磁阀动作(50秒间隔驱动20次)6-10 驱动主盒半圆辊7-1 预热时间表示有JAM老化7-4 预热省略7-6 间歇老化有纸7-8 预热时间表示8-1 复印模式的显影偏压输出8-2 复印模式的主充电器栅极电压(High状态高)输出8-3 复印模式的主充电器栅极电压(Low状态低)输出8-6 转印电压输出8-10 打印模式的显影偏压以及控制回路的动作确认和调整8-11 打印模式的主充电器栅极电压(High状态)以及控制回路的动作确认8-12 打印模式的主充电器栅极电压(Low状态)以及控制回路的动作确认8-13 FAX模式的显影偏压以及控制回路的动作确认和调整8-14 FAX模式的主充电器栅极电压(High状态)以及控制回路的动作确认8-15 FAX模式的主充电器栅极电压(Low状态)以及控制回路的动作确认9-1 双面器负载(马达)正转测试9-2 双面器负载(马达)反转测试9-4 双面器马达的转速调整9-5 双面器马达的把向转换时间调整10 确认墨粉电动机动作14 解除U2以外的故障16 解除U2故障20-1 清除保养计数21-1 保养循环的设定(0=2500张1=5000张2=15000张3=30000张4=150000张5=999999张)22-1 保养计数器的显示22-2 保养预置值显示(SIM20-1设定值)22-3 卡纸储存的显示(最近30次卡纸)22-4 总卡纸计数显示22-5 总计数显示22-6 显影计数器显示22-8 SPF计数器显示22-9 进纸计数器显示22-12 光鼓计数器显示22-13 CRUM类型显示22-14 FLASH ROM的版本22-15 故障储存器显示(最近15次故障)22-16 双面打印计数显示22-17 复印计数器显示22-18 打印计数器显示22-19 电子分类计数器显示22-21 扫描计数器显示22-22 SPF卡纸计数器显示24-1 卡纸储存器清除24-2 故障储存器清除24-4 SPF计数器清除24-5 双面打印计数清除24-6 进纸计数器清除24-7 光鼓计数器清除24-8 复印计数器清除24-9 印刷计数器清除24-10 电子类计数器清除24-13 扫描计数器清除24-14 SPF卡纸计数清除24-15 扫描模式计数器清除25-1 确认主电机机劝作(30秒)25-10 确认LSU多面镜电动机动作(30秒)26-1 选件开关的显示(选购件对应灯亮)26-3 部门管理器的设定(0:计数模式1:投币模式) 26-4 本机双面动作设置(0:无双面1:有双面功能) 26-5 计数器方式设定(0:双面计数1:单面计数)26-6 发送地设定(5:中国6:台湾)26-7 直接显示CPM旋转速度26-10 网络扫描的试用设定26-18 节粉方式(0:节粉关闭1打开)26-22 语言设定(打印卡面板语言)(0:日语1:英语……)26-30 CE标记对应控制设定(0:CE标记OFF 1:ON)26-32 风扇旋转状况变化26-36 (0:保养计数到停机1:不停)26-37 (0:载体计数到停机1:不停)26-38 光鼓超寿命停止设定(0停机1不停机)26-39 内存容量检测(16:16M内存32:32M内存)26-42 转印时间调整(R系列:1:240MS 3:260MS 9:320MS)(M系列机子取值1-99 默认值50)26-43 上下端空白设置(自动灯表下端,手动灯表上端)26-50 黑白转换功能设定(0:可转1:不可转)26-51 复印机暂停功能设定(0:不停1:停)26-60 未装载FAX时,设定FAX模式键是否有效27-1 设定有元PC/调制解调器的通信故障27-5 输入机器的机号30-1 确认本体传感器动作30-2 确认给纸部的传感、检测器及相关回路的动作40-1 确认手动托盘的纸张尺寸检测器及相关回路的动作41-2 调整OC原稿检测传感器41-3 原稿检测传感器受光电平显示41-4 OC盖板20度时的检测电平调整42-1 载体记数清除43-1 定影温度设定(倍率键调)43-10 明信片纸张进纸周期设置(取值1-99)43-11 明信片纸定影温度设置43-12 待机模式定影风扇转动设置(0:低速1:高速)43-13 定影纸张间隙控制(0:禁止1:允许)44-34 转印电流设定44-40 墨粉补充前转动时间设置(取值1-99)46-1 复印浓度300dpi电平调整46-2 复印曝光600dpi浓度等级调整46-7 分别调整复印曝光浓度等级(超级照片)46-9 复印浓度等级单独调整手动300dpi等级(文字)46-10 复印浓度等级单独调整手动600dpi(文字/照片)46-11 复印浓度等级单独调整(照片)46-18 复印对比度调整300dpi46-19 曝光时的图像质量调整46-20 SPF的曝光浓度校正46-29 复印对比度调整600dpi46-30 进行AE设定(取值0-30)46-31 图像锐度调整(0:黑白校正2:清晰)46-39 调整传真模式对比度46-45 调整传真模式的图像浓度48-1 主(前后)扫描方向倍率调整48-2 复印时OC方式副扫描方向倍率调整48-3 自动调整前端.副扫描倍率48-5 复印时SPF方式副扫描方向倍率调整49-1 FLASH ROM程序写入模式50-1 复印画像位置调整(左右方向,值加减1移动0.127MM)50-5 调整图像先端位置50-6 调整复印模式SPF/RSPF原稿图像位置50-10 用纸中心偏移调整(上下方向)50-12 调整复印模式原稿图像中心位置50-13 OC方式原稿中心偏50-16 SPF方式原稿中心偏听偏信移调整50-18 双面复印时反面图像位置调整50-19 双面复印时后端空白调整51-02 对位量调整51-8 设定禁止感光鼓分离爪动作53-8 SPF扫描位置调整56-1 传送MFP控制器数据61-1 检测LSU的动作61-2 调复印模式激光功率(绝对值)61-3 六棱镜电机检测62-1 格式化硬盘62-3 检测硬盘读写操作62-8 格式化硬盘(除系统数据区域)62-10 删除完成作业列表(同时删除作业日志)63-1 确认黑白校正数据63-2 执行黑白校正63-7 自动调整SPF白校正开始的像素位置64-1 自我打印功能65-5 进行操作面板的检测66-22 调传真听筒音量66-23 下载传真程序66-24 清除传真数据内存66-39 设定发货地规格66-60 设定ACR数据67-11 用于设定“select-in“信号67-14 进行flash programs写入/比较检测67-17 进行NVROM的清除67-18 清除FLASH ROM 的Network Scanner Application(网络扫描应用软件)用数据区域67-20 装载网络扫描组件时,检测网络连接夏普数码复印机故障代码H2 00 热敏电阻断开(电阻到MCU板的连接、SIM14清)H3 00 定影部高温故障(温超240度、SIM5-2灯闪时:查接线。
理光复印机维修手册大全
3.更换热敏电阻。
4.更换BCU。
SC471
转印带原位出错
转印带接触电机开启后,转印带原位传感器没有从高改变到低(原位)或反之亦然。
·转印带单元放置不当
·转印带HP传感器和/或转印带放置传感器不良
·转印带接触电机不良
·转印带单元有问题
1.关开主开关。
2.复位转印带单元。
3.清洁或更换转印带原位传感器和/或转印带放置传感器。
2.检查LD定位电机上传感器执行器的位置。
3.更换LD定位电机。
4.更换LD原位传感器。
5.检查和或更换PSU。
SC号
项 目
定 义
可能的原因
相关SC
故障诊断程序
类型
SC285
线位置的调整(MUSIC)出错
线位置调整连续3次失败。
·由于用于调整的图形的图像浓度不够导致图形取样出错。
·由于图形上灰尘、OPC损坏、掉落到转印带上的色粉、脏的或不良ID传感器,线位置取样调整不一致。
·高电压提供板不良(T/PA/CL)
·转印带损坏
·转印单元
·高压提供板电缆损坏
·BCU和高电压提供板之间电缆损坏
·BCU不良
1.关开主开关。
2.检测转印单元,若发现有任何东西坏了,更换皮带和/或转印单元。
3.更换高电压提供板(T/PA/CL)。
4.检查和/或更换高压提供电缆。
5.检查和/或更换BCT和高电压提供板之间的dc电缆。
1.产开庆开在。
2.检查和解决导致低图像浓度的问题。
3.清洁或更换转印带和或ID传感器。
4.更换PCU或清洁导致色粉掉落到转印带的显影单元。
SC370
TD传感器
复印机维修技术资料(全面)

第一章复印机的工作原理一、复印机的种类1.根据复印机工作原理的不同,复印机可分为模拟复印机和数码复印机两种。
2.根据复印的速度不同,复印机可分为低速、中速和高速三种(每分钟复印A4幅面的张数来决定)。
复印机每分钟可复印A4幅面的文件10-30份,中速复印机每分钟可复印30-60份,高速复印机每分钟可复印60份以上。
3.根据复印的幅面不同,复印机可分为普及型和工程复印机两种。
一般我们在普通的办公场所看到的复印机均为普及型,也就是复印的幅面大小为A3-A5。
如果需要复印更大幅面的文档(如:工程图纸等),则需使用工程复印机进行复印机,这些工程复印机复印的幅面大小为A2-A0,甚至更大,不过其价格也非常昂贵。
4.根据复印机使用纸张,复印机可分为特殊纸复印机及普通纸复印机。
特殊纸一般指可感光的感光纸,而普通纸是指普遍使用的复印机。
5.根据复印机显影方式不同,复印机可分为单组份和双组份两种。
6.根据复印机复印的颜色不同,复印机可分为单色、多色及彩色复印机三种一、根据复印机工作原理的不同,复印机可分为模拟复印机和数码复印机两种。
1、模拟复印机的工作原理模拟复印机的工作原理是:通过曝光、扫描方式将原稿的光学模拟图像通过光学系统(如:镜头、镜子)直接投射到已被充电的感光鼓上,产生静电潜像,再经过显影、转印、定影等步骤,完成整个复印过程。
2、数码复印机的工作原理首先通过CCD(电荷耦合器件)传感器对通过曝光、扫描产生的原稿的光学模拟图像信号进行光电转换,然后将经过数字技术处理的图像数码信号输入到激光调制器,调制后的激光束对被充电的感光鼓进行扫描,在感光鼓上产生静电潜像,图像处理设备(存储器)对诸如图像模式、放大、图像重迭等作数码处理后,再经过显影、转印、定影等步骤,完成整个复印过程。
数码复印机基本上相当于把扫描仪和激光打印机的功能融合在一起了。
复印机的工作原理主要包括以下三个基本的原理:静电原理电荷有正负两种极性,所谓静电原理是指同性电荷相互排斥;异性电荷相互吸引。
复印机维修资料
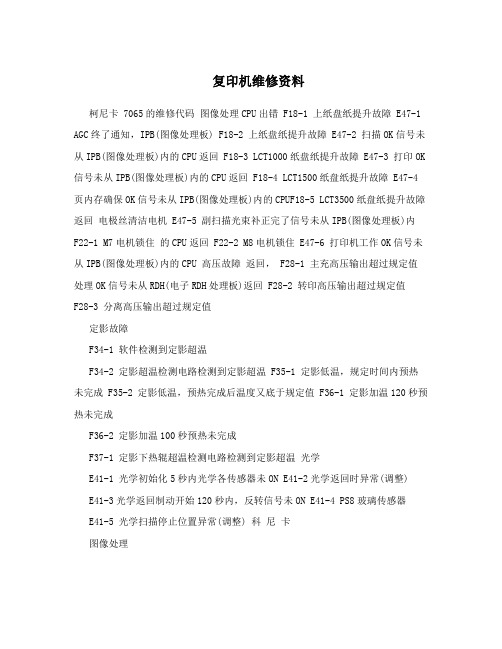
复印机维修资料柯尼卡 7065的维修代码图像处理CPU出错 F18-1 上纸盘纸提升故障 E47-1 AGC终了通知,IPB(图像处理板) F18-2 上纸盘纸提升故障 E47-2 扫描OK信号未从IPB(图像处理板)内的CPU返回 F18-3 LCT1000纸盘纸提升故障 E47-3 打印OK 信号未从IPB(图像处理板)内的CPU返回 F18-4 LCT1500纸盘纸提升故障 E47-4 页内存确保OK信号未从IPB(图像处理板)内的CPUF18-5 LCT3500纸盘纸提升故障返回电极丝清洁电机 E47-5 副扫描光束补正完了信号未从IPB(图像处理板)内F22-1 M7电机锁住的CPU返回 F22-2 M8电机锁住 E47-6 打印机工作OK信号未从IPB(图像处理板)内的CPU 高压故障返回, F28-1 主充高压输出超过规定值处理OK信号未从RDH(电子RDH处理板)返回 F28-2 转印高压输出超过规定值F28-3 分离高压输出超过规定值定影故障F34-1 软件检测到定影超温F34-2 定影超温检测电路检测到定影超温 F35-1 定影低温,规定时间内预热未完成 F35-2 定影低温,预热完成后温度又底于规定值 F36-1 定影加温120秒预热未完成F36-2 定影加温100秒预热未完成F37-1 定影下热辊超温检测电路检测到定影超温光学E41-1 光学初始化5秒内光学各传感器未ON E41-2光学返回时异常(调整) E41-3光学返回制动开始120秒内,反转信号未ON E41-4 PS8玻璃传感器E41-5 光学扫描停止位置异常(调整) 科尼卡图像处理E46-0 检测到激光自动功率控制(APC)出错 E46-2 E-RDH(电子RDH处理板)内FIFO出错 E46-3 E-RDH(电子RDH处理板)板内FIFO出错 E46-5 激光驱动板,检索传感器板E46-6 E-RDH(电子RDH处理板)板内的伸长出错1 E46-7 E-RDH(电子RDH处理板)板内的伸长出错2 E46-8 检索传感器板(INDXSB)出错E46-9 E-RDH(电子RDH处理板)压缩IC出错 E46-10 E-RDH(电子RDH处理板)FIFO出错 E46-11 E-RDH(电子RDH处理板)参数出错 E46-12 E-RDH(电子RDH 处理板)压缩未结束出错 E46-15 VV检查出错1E46-16 VV检查出错2E46-17 滤波计数计算出错E46-20 页内存确保出错E46-24 曝光灯L1曝光出错E46-25 曝光灯L2曝光出错美能达1611的维修资料1 2-173.2 效用模式设定步骤 Di1611/Di2011 现场维修 Ver.1.0 Mar. 2004 调整/ 设定 < 步骤>4. 技术维修模式1. 按效用键。
分享复印机维修资料(Share copy machine maintenance information)
分享复印机维修资料(Share copy machine maintenanceinformation)Share copy machine maintenance informationCommon failure analysis of copierFailure 1 failure phenomenon: a ricoh FT - 4495 copier, recently because of toner used up, replace the toner, use soon no powder light is still shining, prompt toner is not enough, main motor idling, can't be photocopied.Failure analysis and troubleshooting: according to the fault phenomenon, it is estimated that the ink cartridge is not installed in place, refill the cartridge, and check the toner amount of the cartridge, and then start the test again, the fault is still. Open the front cover, transmission observation for powder mechanism for powder found turning roller gear drives the driving wheel and the mixed powder gears, that failure occurs in the mixed powder gears in the transmission of the ink cartridges. Take out the ink cartridges, found between the ink cartridges and mixed powder gear meshing gear twist off, causing the ink cartridges, mixing powder inside the roller cannot turn ink cartridges can't for the powder, the machine will not work, get back the original powder, ink cartridges, will back into the original ink cartridges, toner reinstall ink cartridges, troubleshooting.Summary: when replacing the cartridge, you must first gently shake the new box, make the ink powder evenly distributed, and rotate the roller to make it flexible and free of dead points.Otherwise, it will cause the grinding roller meshing gear to break the phenomenon, causing unnecessary loss. The working process of the copierThe working process of photocopiers mainly includes the following parts: (in order of reproduction)Charging components (high voltage generator, electrode holder, motor wire)The surface of the sensitive drum is charged.Exposure component (scanning exposure lamp, reflector, lens)The surface of the light-sensitive drum is based on the original image and the inverted potential image of the image is formed. (the previous chapter has been explained)Developing components (developer, high voltage generator)The potential latent image of the surface of the sensitive drum is transformed into a toner image. (the previous chapter has been explained)Paper parts (motor, paper wheel)The motor drives the paper wheel to transfer the copy paper into the machine to prepare the next step to transfer the toner image of the drum surface to the paper.Transfer parts (high voltage generator, electrode holder,motor wire)By the transfer of the electrode, the surface of the copier paper is evenly distributed with the charge of the opposite of the toner charge, and the ink image on the photosensitive drum is transferred to the copy paper.Separation components (high voltage generator, electrode holder, motor wire)Since the surface of the photocopier paper and thelight-sensitive drum is charged, and the polarity is opposite, the copy paper is not easy to separate from the light-sensitive drum during the photocopying process. Therefore, it is necessary to take separate measures to separate the photocopying paper from the drum. Earlier copiers were mechanically separated, but easy to paper; Current photocopiers are separated by current. The separation current contains high frequency ac and fixed dc components.Cleaning parts (cleaner)Clean the residual toner powder on the surface of the sensitive drum and prepare for the next photocopy. It is impossible for all copiers to transfer the ink from the surface of the sensitive drum to the copy paper by transfer. Therefore, the surface of the drum has residual toner, not cleaning, which will affect the quality of the reproduction.Fixing parts (fixing heat rod, pressure rod, heater)The toner image on the copy paper is fixed on the copy paper.In order to preserve. If the image is not fixed, the image on the copy paper will fall off. (so the fixing requires certain temperature and pressure)The process of photocopiers also includes many auxiliary processes, mainly including:Electrical components (full exposure lamp)Remove residual potential from the surface of the sensitive drum and prepare for subsequent photocopying. Otherwise the copy will have residual images or ashes.Remove edge parts (such as side-down lights)The photocopy has a front end, front and back end, or a reduced part of the blank. Therefore, it is necessary to remove the surface potential of the light-sensitive drum which is not required by the electric light bulb.The daily use of copierDigital duplicator, composite machine in small andmedium-sized enterprise office, is often used to, and sometimes need to purchase machine or buy consumables, etc., these are our procurement staff a problem, how to choose the suitable machine company, how to buy authentic materials, and so on. Today, the author gives you a comprehensive and comprehensive information, with daily use skills, and some expert views onhow to purchase consumables and machines. I hope I can help you in your daily work.Troubleshooting and troubleshooting of photocopiersThe copier is accidentally jammed with paper, not broken, but if it is frequently jammed, it needs to be checked and repaired. First of all, should make clear which part of the paper, is for the paper part, the paper part, or the fixing part? Of course, if there are any obvious damage to the three parts, it can be replaced. But in many cases, the whole transmission mechanism has no obvious damage to any parts and no obstacles, but it is frequently jammed, affecting both work efficiency and operating emotions. For maintenance personnel, sometimes several factors are intertwined, affecting the diagnosis.The photocopier1. For the paper parts of the paper: paper jam at this site, which involves many aspects, should first check the paper up to standard, such as paper, weight, size, drying degree), ma chine to use standard paper. The paper box is not the rule, it is also the cause of the paper. It can be tried in this way, only put a few pieces of paper in the carton, and then take the paper. If it is not in or out of the paper, it can be judged to be the problem of rubbing paper wheel or rubbing paper clutch. If the paper is in place, but the paper cannot continue to advance, it is estimated that it is caused by the failure of the roller slip or the counterpoint clutch. For some models, the rubbing paper appears skewed, which may be caused by the difference between the clamping force on both sides of thecarton. In addition, a lot of operators in the box, too hard, causing the paper box to pull the paper out of the claw, also must cause the card paper.: 2. Paper feed part paper, such as in this site often have a paper jam, should with the aid of the door switch plate (a vehicle), observe the workings of the parts, the ruled out direct, conveyor belt is round, should check the separation mechanism. Because of different types of copiers, they are separated in different ways and should be treated differently. At present, several types of domestic popular models are divided into three kinds: negative pressure separation, separation band separation and charge separation. Specific inspection, maintenance methods, no longer detailed here.3. Card paper of the fixing part: when the fixing roller has been used for a long time,The cutting edge of the blunt or small spring fatigue can result in the paper. For some models, the long time to use the paper roll of the paper roller is used for serious wear, and the paper will be jammed frequently. As for the fixing roll of serious fouling, the paper, on the general model is a common situation.How to buy a photocopier for firm consumptionNowadays to buy copiers don't pay attention to the price, some of the irregular copier dealers, in order to earn more profits, unexpectedly the machine modification or replacement of false consumables, such not only affects the use fixed number of year of copy machine, also can increase the failure rate of thecopier. Here are a few things to note about buying copiers:The first is whether the copier is open and the original machine is a single seal.The ink cartridges of the second original photocopier are packed in zinc and packed neatly.Third, the photocopier of fake toner, the effect of black and white is much worse than that of ordinary photocopier.In the use of the fourth fake toner, there will be a special odor.The number of photocopying of the fifth copier is not the same as the technical parameters, which is not easy for customers to notice, and also the most important way to identify.Buying a photocopier is one of the few things to pay attention toThere are many kinds of photocopier market brands, and there are many functions. What kind of copier should a small and medium sized enterprise choose?This should be seen from several angles: first, according to the usage of customers, it is divided into low, medium and high-speed photocopier. The load capacity of each month is different, usually 10,000 CARDS to choose the low speed machine;2 -- 50,000 selected medium-speed copiers, even if the user is large enough to meet the needs. 5-10 pieces must be bought athigh speed. Second, the function of choosing a copy machine must see that the function of the photocopier can be satisfied with your use, such as now can be added, printing, scanning, facsimile and other functions. The average life of a photocopier is between five and eight years, and it is also important to consider whether it can be met, or at the provincial level, at a later time. Third, does the consumables of the photocopier make you happy? Some photocopiers are cheap to use on machines, but the cost of later use is simply amazing, which is generally based on the actual usage of the customer.About after-sales service on this a few big brands are about the same, Canon, sharp, ricoh, Toshiba is one year free service, but the kyocera copiers is three years free on-site maintenance, so, again, ask when buying a copier copier maintenance time.Reset method of special fault code for sharp copierSharp 700/800 series duplicator special fault code mainly include HX (H1 H8, hot roll fixing device failure), Lx (L1 - L6, micro switch/photoelectric switch failure), Ux (U1U2, low battery voltage or data transmission failure) and Pl (exposure lamp temperature fuse exception). Among them, the U1 with instruction "13" reset, other special fault code "14" reset with instructions.The special fault code of sharp 1000/2000 series copier is mainly HX (h2-h4, hot roller fixator failure) and U2 (memory literacy failure).Other special fault codes are reset by instruction "14".The special fault code of sharp 7000/8000 series copier mainly has HX (H3, H4, hot roller fixator failure) and U1 (battery power down). U1 USES instruction "13", reset, H3 H4 to reset the "14". The sequence of reset operation is shown in the attached figureIn addition, the sharp type z60 copier special fault code with U (motherboard battery low voltage), L (micro switch failure), H (hot roll fixing device failure), F (fixing light or temperature fuse problem), said in a "1" reset instruction. When reset, press clear key, repeat key, (add number key), (minus key) digital key "1" and copy key.(1) the key should be pressed in 5 seconds:(2) sharp 750, 770, 771, 780, 781, 825 etc.(3) when all the display on the operating panel disappears, the main motor stops rotating, and the copy machine is ready to accept the instruction (the main motor turns and copiesThe machine does not accept instructions);(4) sharp 1000/2000 series copiers include sharp 1016, 1020, 1025, 1116, 2014, 2020, 2022, 2027, 2040, 2114, 2214, etc. The sharp 7000/8000 series copier includes sharp 7320, 7370, 7700, 7750, 7800, 7850, 8570, 8870, etc.Inspection and maintenance of machine card failureBelieve that each person used photocopiers will have paper jam this trouble, it should be said that in the process of copying accidentally paperboard is inevitable, but if a paper jam, often is the malfunction with the machine, need to repair. The factor that causes the card paperMany, mainly include the following factors;1. Carton card: (1) paper box (2) rubbing paper parts2. Paper card paper: (1) counter roll; (2) separation mechanism;(3) paper road sensor; (4) separating claw; (5) the upper fuser roller3. Automatic pager causes the card paper4. The scanning part caused the card paper5. The internal short circuit caused the card paper6. Improper operation caused the paperInspection and maintenance of specific card failure:L. Reasons and exclusions for failure of paper card in the paper channel:(1) the paper clutch is out of control. Adjustment and replacement of paper clutch;(2) there is foreign body in the paper channel. Remove foreignobjects;(3) the paper is blocking the cold. Remove the card paper;2. Reasons and exclusions of paper CARDS at the separator:(1) separation belt loose, drop, break, or air suction separation, insufficient suction paper, make the paper stick on the drum or into the clean box; Remove the belt. Adjust the air intake and air position;(2) paper deviation. Troubleshoot paper deviation.3. Reasons and exclusions for frequent card failure of cleaner:Some copier cleaner parts in contact with the photosensitive drum is equipped with a grating, it made from plastic, function and prevent copy paper into the cleaner, normal copy, even if there is paper card in this part, the paper is also easy to take out,But when the grille is damaged, the paper goes into the cleaner, which is hard to take out. When necessary, remove the cleaner from the machine, remove the card and repair or replace the grid.It just keeps going.Laser printer maintenance manualLaser printers, the company is widely used in enterprises, itfollowed the printer when encountering the maintenance problems, and this article is mainly on the common faults of the epson laser printer list. Including maintenance essentials, common machine failure codes, specific printer failures, etc.I hope to be able to help you to repair laser printers.Laser printer maintenance and troubleshooting codeThe laser printer is a highly automated and highly automated computer output device. It is mainly composed of laser scanning system, mechanical transmission system and toner and toner, as well as part of circuit, part and heating parts. Its working principle is the first machine in the charging unit to the drum unit with negative charge, and then the mainboard according to coming from host transmits the signal control of laser laser, laser shines on the drum surface will be left in selenium drum surface electrostatic images, the carbon powder storehouse powder will be adsorbed to the surface of the drum unit electrostatic toner image is formed on the image, when the drum surface and sent the paper to contact image transfer to the paper, finally through the paper heating forever the image on the paper. The printing process can be divided into charging, exposure, imaging, transfer, separation, fixing and cleaning 7 steps.When printer malfunction, must first rule out other improper operation and material is not suitable for the problem, do not be eager to disassemble printer, shut off the main power switch, such as temperature drop down after restart the printer, to see if fault can be cleared, if malfunction phenomenon still for maintenance. It is also important to note that many parts ofthe laser printer, such as the cartridges, the fixing components, and the rolling paper wheel are the consumable parts, which need to be replaced regularly.Laser printer maintenance maintenance fault: no electricity, paperboard, output gap, output black, handwriting slants thin, erect white stripes, the output of the printing paper on unilateral black, repeated dirty mark on the paper1. The laser printer is preheated over 2min or in a fixed shape, and the text falls off.Whether one is considering indoor temperature 20 ℃ above;The second is to check whether the thermistor has any bad contact or failure;The third is to see if the voltage reaches 220V;Four is to see paper, toner is too dampWet, etc.2, paperboard,One is to check whether the paper is suitable, the paper is too thick, too thin, the paper is wet or rolledThe paper will produce the card phenomenon.Second, the paper cannot be used for ordinary laser printers;The third is to check if the separation of the laser printer is needed.3. If local or full characters appear on the printed parts, ink powder is not uniform.The reason for this failure is that the powder cartridge is insufficient and needs to be replenished.4. Black dots or black lines appear on the print, and they appear in the same position after changing the paper.The fault is caused by the damage of the OPC.5. If horizontal stripes appear on the print parts, and they appear in the same position after changing the paper,The need to replace the scraper plate6. If the vertical stripe appears on the printed piece, it will appear in the same position after changing the paper.The magnetic roller on the powder bin is damaged and needs to be replaced.Then gradually increase the voltage to the test. One end of the power supply (both positive and negative) to the center of a winding end, on the other side of the power to touch the other ends of the winding alternately (note the touch time shoulds not be too long), turn the stepper motor should be step by step,and each step should be the same strong, otherwise the motor is damaged. The test should be noted that if the stepping motor winding has a serious short circuit, do not test, otherwise it will burn the power supply.(3) some stepper motor has two identical windings, but no central tap end. When measuring, the resistance of the two windings can be measured first, and should be consistent with the motor mark, and then the power test will be used. In the experiment, the two ends of each winding are touched by the two poles of the power supply, and the stepping motor should be moved by step by step, and the motor will be damaged. It should be noted that when the stepping motor is damaged, it should check whether the driving circuit of the stepping motor is damaged.。
夏普复印机全系列维修手册
夏普全系列维修手册进入维修代码方式进入工厂代码方式SF1118/1025/AR161/AR200C 插入0 插入 C Ca 0 C AR275/AR255# 插入 C 插入# 插入0 CM350/M450P * C * P * 0 C AR158C 浓度 C 浓度 C 浓度 C 倍率AR2818 m160 m205 m276# 插入 C 插入* 插入CA 插入夏普便携复印机鼓计数清零方法1、按曝光开机,现在除准备灯外所以指示灯都会点亮2、按住曝光约十秒钟直到三个灯同时点亮,松开曝光3、重新开机故障代码U(主板电池电压低) L(原稿台未回到规定位置)H(热辊定影器故障) F(暴光灯或定影灯温度保险断掉) 维修方式:按清除键-重复键-加法键-减法键进入1 解除故障2 读出主计数器内容3 读出总计数器内容4读出维修计数器内容5 维修计数器复位`夏普模拟复印机维修代码维进:C-插入- 0-插入或清除键-插入键-0键-插入键-清除键厂进:C- Ca - 0- C 纸盒键按4秒进用户模式1-01:反光镜动作检测1-02:光学系统传感器检查(缺纸灯、卡纸灯)1-03:镜头动作检查1-04:镜头动作老化检查2-01:ADF进行原稿输送动作2-02:ADF传感器检查2-03:ADF单独装纸动作检查(给纸电机反向旋转)2-04:ADF单独装纸动作检查(给纸电机正向旋转)2-05:ADF单独装纸动作检查(输纸电机正向旋转)2-06:ADF单独装纸动作检查(输纸电机反向旋转)2-07:ADF单独装纸动作检查(原稿限位器电磁阀接通)2-08:ADF单独装纸动作检查(送纸限位器)2-10:ADF单独装纸动作检查3-02:分页器传感器检查3-03:分页器单独装纸动作检查(输纸电机)3-04:分页器单独装纸动作检查(纸库电机)3-05:分页器单独装纸动作检查(蜂鸣器)3-06:分页器单独装纸动作检查(直线马达)(只适用于SF-S54)3-07:分页器单独装纸动作检查(钳夹马达)(只适用于SF-S54)5-01:操作面板显示检查(LED灯全亮5秒)5-02:加热灯检查(以0.5秒间隔亮灭加热灯)5-03:复印灯点亮检查5-04:DL 光度检查(放电灯亮30秒)5-05:BL 光度检查(消电灯以5秒间隔亮灭)6-01:输纸系统装纸动作(离合器/ 电磁阀)通断30次6-02:给纸电机动作检查(仅SP-2118)6-10:主纸盒半圆辊动作7-01:预热时间显示和老化预热计时并显示(秒)7-04:预热省略7-06:间歇老化7-08:预热时间显示8-01:显影偏压输出(30秒)8-02:主/ 转印充电输出/ 栅极检查(ME)8-03:主/ 转印充电输出/ 栅极检查(PE)8-04:主/ 转印充电输出/ 栅极检查(T / S)8-07:分离充电器输出(30秒)9-02 ADU传感器检查测试指令9-05 门电磁铁启动10 :色粉电机转动14 :故障消除(除U2故障外)15 废色粉装满(小人灯闪亮)取消16 U2 故障取消17 消除PF故障20-01 保养计数器(小人灯亮)清零21-01 保养周期设定0=50000张1=2500张2=5000张3=10000张4=25000张5=关闭21-02 显影器小修设置0=80000张1=5000张2=10000张21-03 彩色显影器小修设置0=10000张1=5000张22-01:保养计数器显示22-02:保养预置计数器显示22-03:卡纸存储器显示22-04:总卡纸存储器显示22-05:总计数器显示22-06:DV 计数器显示22-07:DV 预置计数器显示(载体更换周期)22-08:ADF 送纸数显示22-10:装订计数显示22-15:故障记忆显示(显示最近20个错误代码)24-01:卡纸存储器/ 总卡纸计数器清零24-02:故障记忆清除24-04:ADF 计数器清零24-05:装订计数清零24-06:显影剂调整时间清零24-07:鼓调整时间清零24-06:纸盒计数器清零25-01:主驱动系统检查25-02:自动显影剂调整(更换载体后执行)(厂代中80-2调浓度与漏粉)26-01:选购件设定(输入选购件所表数值之和)26-05:计数器方式设定( 0 A3计数 3 A4计数)26-06:目的地设定(设为10)26-07:转鼓灵敏度设定校正复印灯电压(1-3 初始为2)26-10:AE 原稿浓度设定(1低浓度原稿2正常浓度原稿)26-13:预热方式设定(0 正常1主电机转至预热结束)26-20:后缘空白设定(0 有空白1无空白)26-29:交流电压调整(0 100V 1 200V)30-01:复印机传感器检查(纸检测)42-01:清除小太阳符号换载体后43-01:定影温度设定(倍率键选择)44-01:成像控制动作设定(输入校正方式代码总和,栅压校正+1 光学尘埃校正+2 鼓磨损校正+4)44-05:栅极电压较正(显示图介浓度传感器A/D输入值)44-06:栅极电压较正强行执行44-07:图像浓度/ 转鼓标记传感器动作试验(F-J中0表示鼓标不能检测,1表示能检到)44-08:成像控制数据显示44-09:成像控制数据显示(最新值)44-10:栅极电压较正(转鼓表面/ 斑纹)数据显示44-11:初级栅极偏压设定44-12:中央控制处理器关闭时对复印功能进行检测主代码子代码内容46-01:曝光调整47 :AE 传感器增益自动调整(先在稿台上放几张A3白纸)48-01:前/ 后(垂直)放大倍率调整(A值调100% B调200% C调50%)48-02:输纸方向放大倍率调整(反光镜速度校正)50-01:复印件前缘调整50-02:前缘调整(简单型)(C值为245 显示为A45)51-02:阻力量调整(A 托盘阻力B手动给纸)53-01:ADF 停止位置调整值(普通纸)设定53-03:ADF 停止位置调整值(薄纸)设定53-04:ADF 阻力传感器、宽度传感器调整53-05:ADF出纸传感器调整53-06:ADF 时间传感器调整54-03:除去蜂鸣装置57 删边量调整58 -1 纸头调整58-2 空白区调整60 原稿尺寸检测97 补粉夏普模拟复印机故障代码L1-00:反光镜进给故障(传感器坏、主板坏、反光镜传动索缺油)L3-00:反光镜返回故障L4-01:主电机故障L5-00:镜头初始误差检测L5-02:镜头故障L5-03 第4/5反光镜电机故障L5-04 第4/5反光镜电机MHPS故障L5-05 镜头电机故障L5-06 镜头原位检测出错L5-8 镜头原位传感器故障L6 加粉电机故障L8-01:零交叉脉冲故障L8-03:AE传感器故障(执行47时,AE输入无变化)L9 分页器故障H2-00:定影热敏电阻开路故障(热敏电阻输入超过3.81V)H3-00:定影高温故障(定影温达240度,热敏电阻输入在0.36V下)H4-00:定影低温故障U1 存储器电池电压底于2.2V,指令“13”,复位U2-01:后备储存器故障U3-8 镜架驱动电机检测异常U3-10 镜架原位传感器故障U3-20 反光镜电机锁定U3-21 反光镜原始位置出错U3-40 时钟脉冲故障U4-02 ADU对位板操作错误检测U4-04 ADU后端板故障U5-00:ADF通信错误U5-01:A马达错误检测U5-03 时序传感器故障U5-04 空传感器故障U5-11:给纸电机故障U5-12:输纸电机故障U6-00:机架通信错误U6-01:1纸盒电机错误U6-02:2纸盒电机错误U6-03:3纸盒电机错误U6-08:机架24V线路出错U6-10:机架送纸电机错误U6-09:机架LCC电机过电流检测F1-00:分页器通信错误F1-02:输纸电机故障F1-04:纸库上限/下限故障F1-05:纸库原位传感器故障F1-06:纸库电机故障F1-14:输纸电势故障F2-02:色粉粉斗电机错误F2-31:图象浓度传感器故障(传感器脏、删边灯脏、鼓处插线坏)F2-32:鼓标记传感器故障F2-35:栅级电压校正故障F3-12 上纸盒升起电机故障F3-22 下纸盒升起电机故障C2 高压发生器故障电极丝短路或断路CC 原稿尺寸传感器误检测EE-EU:色粉不足EE-EL:色粉过多CH:亮是盖打开闪烁是显影组件安装不到位夏普数码复印机维修代码1-1 确认反射镜装置动作1-2 确认光学系传感器动作1-6 反光镜扫描连续动作2-1 SPF连续动作2-2 确认SPF传感器动作2-3 确认SPF电动机正转方向动人2-4 确认SPF电动机逆转方向动作2-8 确认SPF进纸电磁阀动作2-9 RSPF翻转电磁铁动作检查2-10 RSPF出纸门电磁铁动作检查2-11 确认SPF PS释放电磁阀动作3-2 确认移动分离传感器动作3-3 确认分页器移动动人3-4 确认分离板动作(检测是否正常转动)3-11 确认配页器原位动作5-1 确认扣作部显示(面板LED灯全亮秒)5-2 确认加热灯亮(定影灯50秒间隔亮5次)5-3 确认复印机灯亮(10秒浓度键改亮度)6-1 确认进纸电磁阀动作(50秒间隔驱动20次)6-10 驱动主盒半圆辊7-1 预热时间表示有JAM老化7-4 预热省略7-6 间歇老化有纸7-8 预热时间表示8-1 复印模式的显影偏压输出8-2 复印模式的主充电器栅极电压(High状态高)输出8-3 复印模式的主充电器栅极电压(Low状态低)输出8-6 转印电压输出8-10 打印模式的显影偏压以及控制回路的动作确认和调整8-11 打印模式的主充电器栅极电压(High状态)以及控制回路的动作确认8-12 打印模式的主充电器栅极电压(Low状态)以及控制回路的动作确认8-13 FAX模式的显影偏压以及控制回路的动作确认和调整8-14 FAX模式的主充电器栅极电压(High状态)以及控制回路的动作确认8-15 FAX模式的主充电器栅极电压(Low状态)以及控制回路的动作确认9-1 双面器负载(马达)正转测试9-2 双面器负载(马达)反转测试9-4 双面器马达的转速调整9-5 双面器马达的把向转换时间调整10 确认墨粉电动机动作14 解除U2以外的故障16 解除U2故障20-1 清除保养计数21-1 保养循环的设定(0=2500张1=5000张2=15000张3=30000张4=150000张5=999999张)22-1 保养计数器的显示22-2 保养预置值显示(SIM20-1设定值)22-3 卡纸储存的显示(最近30次卡纸)22-4 总卡纸计数显示22-5 总计数显示22-6 显影计数器显示22-8 SPF计数器显示22-9 进纸计数器显示22-12 光鼓计数器显示22-13 CRUM类型显示22-14 FLASH ROM的版本22-15 故障储存器显示(最近15次故障)22-16 双面打印计数显示22-17 复印计数器显示22-18 打印计数器显示22-19 电子分类计数器显示22-21 扫描计数器显示22-22 SPF卡纸计数器显示24-1 卡纸储存器清除24-2 故障储存器清除24-4 SPF计数器清除24-5 双面打印计数清除24-6 进纸计数器清除24-7 光鼓计数器清除24-8 复印计数器清除24-9 印刷计数器清除24-10 电子类计数器清除24-13 扫描计数器清除24-14 SPF卡纸计数清除24-15 扫描模式计数器清除25-1 确认主电机机劝作(30秒)25-10 确认LSU多面镜电动机动作(30秒)26-1 选件开关的显示(选购件对应灯亮)26-3 部门管理器的设定(0:计数模式1:投币模式)26-4 本机双面动作设置(0:无双面1:有双面功能)26-5 计数器方式设定(0:双面计数1:单面计数)26-6 发送地设定(5:中国6:台湾)26-7 直接显示CPM旋转速度26-10 网络扫描的试用设定26-18 节粉方式(0:节粉关闭1打开)26-22 语言设定(打印卡面板语言)(0:日语1:英语……) 26-30 CE标记对应控制设定(0:CE标记OFF 1:ON)26-32 风扇旋转状况变化26-36 (0:保养计数到停机1:不停)26-37 (0:载体计数到停机1:不停)26-38 光鼓超寿命停止设定(0停机1不停机)26-39 内存容量检测(16:16M内存32:32M内存)26-42 转印时间调整(R系列:1:240MS 3:260MS 9:320MS)(M系列机子取值1-99 默认值50)26-43 上下端空白设置(自动灯表下端,手动灯表上端)26-50 黑白转换功能设定(0:可转1:不可转)26-51 复印机暂停功能设定(0:不停1:停)26-60 未装载FAX时,设定FAX模式键是否有效27-1 设定有元PC/调制解调器的通信故障27-5 输入机器的机号30-1 确认本体传感器动作30-2 确认给纸部的传感、检测器及相关回路的动作40-1 确认手动托盘的纸张尺寸检测器及相关回路的动作41-2 调整OC原稿检测传感器41-3 原稿检测传感器受光电平显示41-4 OC盖板20度时的检测电平调整42-1 载体记数清除43-1 定影温度设定(倍率键调)43-10 明信片纸张进纸周期设置(取值1-99)43-11 明信片纸定影温度设置43-12 待机模式定影风扇转动设置(0:低速1:高速)43-13 定影纸张间隙控制(0:禁止1:允许)44-34 转印电流设定44-40 墨粉补充前转动时间设置(取值1-99)46-1 复印浓度300dpi电平调整46-2 复印曝光600dpi浓度等级调整46-7 分别调整复印曝光浓度等级(超级照片)46-9 复印浓度等级单独调整手动300dpi等级(文字)46-10 复印浓度等级单独调整手动600dpi(文字/照片)46-11 复印浓度等级单独调整(照片)46-18 复印对比度调整300dpi46-19 曝光时的图像质量调整46-20 SPF的曝光浓度校正46-29 复印对比度调整600dpi46-30 进行AE设定(取值0-30)46-31 图像锐度调整(0:黑白校正2:清晰)46-39 调整传真模式对比度46-45 调整传真模式的图像浓度48-1 主(前后)扫描方向倍率调整48-2 复印时OC方式副扫描方向倍率调整48-3 自动调整前端.副扫描倍率48-5 复印时SPF方式副扫描方向倍率调整49-1 FLASH ROM程序写入模式50-1 复印画像位置调整(左右方向,值加减1移动0.127MM)50-5 调整图像先端位置50-6 调整复印模式SPF/RSPF原稿图像位置50-10 用纸中心偏移调整(上下方向)50-12 调整复印模式原稿图像中心位置50-13 OC方式原稿中心偏50-16 SPF方式原稿中心偏听偏信移调整50-18 双面复印时反面图像位置调整50-19 双面复印时后端空白调整51-02 对位量调整51-8 设定禁止感光鼓分离爪动作53-8 SPF扫描位置调整56-1 传送MFP控制器数据61-1 检测LSU的动作61-2 调复印模式激光功率(绝对值)61-3 六棱镜电机检测62-1 格式化硬盘62-3 检测硬盘读写操作62-8 格式化硬盘(除系统数据区域)62-10 删除完成作业列表(同时删除作业日志)63-1 确认黑白校正数据63-2 执行黑白校正63-7 自动调整SPF白校正开始的像素位置64-1 自我打印功能65-5 进行操作面板的检测66-22 调传真听筒音量66-23 下载传真程序66-24 清除传真数据内存66-39 设定发货地规格66-60 设定ACR数据67-11 用于设定“select-in“信号67-14 进行flash programs写入/比较检测67-17 进行NVROM的清除67-18 清除FLASH ROM 的Network Scanner Application(网络扫描应用软件)用数据区域67-20 装载网络扫描组件时,检测网络连接夏普数码复印机故障代码H2 00 热敏电阻断开(电阻到MCU板的连接、SIM14清)H3 00 定影部高温故障(温超240度、SIM5-2灯闪时:查接线。
针式打印机主板的芯片级维修资料
针式打印机主板的芯片级维修资料
针式打印机主板的芯片级维修资料
一般主板导致的问题有这些:有电和没有电
1.有电情况:不联机.乱码.字车问题.走纸问题.缺针.多针.灯闪无反应(正常闪)灯闪无反应(不正常闪)
当一块针式打印机主板在你面前时,首先是测试5V电路与地线的阻值。
是否短路。
还有高压(36-42)V。
电路短路了你还测试就会很严重了。
重着烧主板。
打印头(打字头),轻着没事。
讲到这里又要说怎么找5V低压和高压了,一般主板都有标识没有的话看电源的5V 到主板线路了。
在就是观察表面有没有物理损伤,也是比较重要的,有的芯片表面有个洞,线路断了.......等等。
不联机.乱码:从接口电路到(门正)主芯片的电容,电阻,接口电路,及主芯片(门正),还有一个那就是字库了。
(次芯片(CPU))
字车问题:从字车驱动到门正的电路了,也要注意线路,电容,电阻,这些和门正芯片了。
走纸问题:从走纸驱动到门正的电路了,也要注意线路,电容,电阻,这些和门正芯片了。
缺针.多针:从针驱动到门正的电路了,也要注意线路,电容,电阻,这些和门正芯片了。
灯闪的问题就比较麻烦了,还是得一步步来,CPU到字库的电路会造成这些问题,门正,CPU.......
这些原理适用于所有的针式打印机的原理。
Epson.映美.得实.star.PR2.PR2E联想........................ 经验是非常重要的
2.没有电的情况:。
打印机夏普复印机维修资料

,但送稿器上的原稿仍没有停,也在扫描,这时复印出来的复印品也会全白。
这种情况就检查扫描架道轨是否有异物卡住。
如果没有可能是CCD坏了,需更换掉。
关于AR-161/200易出F5、F1-06、U2-40维修方法一、F5的解决方法AR-161/200出现F5一般为光学部分脏污,首先取下稿台玻璃,将反光镜和曝光灯清洁干净,如果标尺下的白板脏污,也同时清洁干净,盖上稿台玻璃应该就不会再出现F5了,出现这种情况在平常不使用机器时用布将机器罩住,但清洁后仍然出现就更换CCD组件试试。
二、F1-06解决方法出现F1-06一般为分隔板电机部分出现异常,引起开机对隔离板上下不到位,出现异响把机器分页器电机取下,调整电机上的原位传感器,调整完后上可能应该没有问题了,但要记住上还原后,将分离电机移动杆位置是否正常,如不在原位就会引起卡纸故障。
三、U2-40故障解决方法一般是由于粉盒上的芯片故障,如有可能是机器在检测粉盒时出错,用SP-16消除就好了,如果无法消除,就换一盒新粉,问题就自然解决了。
在安装粉盒的时候一定要按说明将粉搅匀。
AR275双面复印卡纸解决方案对应机型:AR275、AR255、ARM276 故障现象:由于用户频繁使用双面复印,故造成复印机双面复印时卡纸。
解决方案一:在最近的维修工作中,经常遇到夏普AR275系列档次的机器出现双面复印卡纸的问题。
具体问题是机器复印效果正常,且进行单面复印时无任何严重的卡纸现象。
只要进行双面复印,或几张或几十张过后,必定出现轻微打齿轮的声响,而后机器卡纸,无法使用。
首先,拆卸机器后盖,进行双面复印观察,发现机器出纸部分随纸张的来回运动而左右摆动,因此给机器出纸部分安装了一个铁支架加以固定,出纸部分摆动状况减弱但仍要出现双面卡纸。
而后又发现连接出纸部分与定影部分驱动的一块带有三个齿轮轴的双面驱动板有变形,三个齿轮轴有轻度的不平行,故更换后机器可正常使用。
但一个月后用户又反映双面卡纸。
数码复印机电源故障芯片级维修一例

办公自动化杂志一、故障现象一台佳能iR2120S 数码复印机断续供电,面板显示时有时无。
二、分析与检修佳能iR2120S 是一款经济型的数码复印机,具有打印、扫描、复印、大容量存储等诸多功能于一体,而且因为运行费用低,在国内低端市场的占有率很高,特别适合于SOHO 一族使用。
一般说来,作为一种机电一体化多功能办公设备,数码复印机与微型计算机的部分功能相似,它也支持远程开机和睡眠唤醒功能,这就意味着它的直流电源分为两大部分:一部分是待机电源;一部分是受控电源。
待机电源主要用于对处理器和存储设备供电,容量较小;受控电源则是复印机正常工作时的供电电源。
它主要为功率部件(如电动机等)提供电流,容量较大。
受控电源是否工作受来自主板的逻辑信号控制,信号为高电平时,受控电源关闭,系统处于低功耗的休眠状态。
如果信号为低电平时,受控电源开始工作,系统唤醒,正常工作。
针对出现的故障,首先检查复印机的市电供电电源,在确认了供电没有问题后,打开机壳,取出电源板,测量电源板的输出。
经测量,J10的4、5端子之间有3.3V 电压,9、10端子间有5V 电压,而且很稳定。
这说明机器内的开关电源已经开始工作。
接下来的工作是对电源板电路作进一步研究。
图1直流电源二次侧电气原理图(局部)图1是根据实物绘制整理出的直流电源二次侧的电气原理图,T101是高频变压器,图中仅画出了其二次侧绕组。
整个电源电路分成三个部分:待机电源、控制电路和受控电源三个部分。
整个电源以V+作为主输出,以V+的电数码复印机电源故障芯片级维修一例曲延昌(山东工业职业学院电气工程系淄博255046)摘要:简单介绍了数码复印机这种设备电源工作的基本逻辑,基于根据实物绘制出的电气原理图,分析了有关电路的基本工作原理,给出了一种芯片级故障维修的思路。
关键词:故障维修;电源;芯片级中图分类号:TS951.47;TM930.7文献标识码:A 文章编号:7264An Example of Troubleshooting on the Chip Level aboutthe Power Unit in Digital CopierQU Yanchang(Electrical Engineering Dept.,Shangdong Vocational College of IndustryZibo255046)Abstract :The basic logic control in a digital copier about the powering is introduced.Based on the schematic diagram come from the real PCB,this principle is analysed,and a thought of troubleshooting on the chip level is given.Keywords :Troubleshooting;Power unit;Chip level(基金项目淄博市校城融合发展计划项目2018ZBXC061)**2020年2月15日总第417期Exchange63··办公自动化杂志(上接第62页)总之,在使用色彩进行广告设计、网站设计、室内装饰等应用时,一定要从色彩的冷暖感、轻重感、软硬感、进退感、缩扩感等方面进行考虑。
复印机维修手册
复印机维修手册一、简介复印机是现代办公环境中不可或缺的设备之一。
然而,由于长时间使用、操作不当或其他因素,复印机可能会出现各种故障。
本手册旨在帮助用户解决常见的复印机问题,提供维修指导和技巧,使用户能够快速恢复复印机的正常工作。
二、安全操作指南1. 打开复印机之前,确保已经断开电源,并等待复印机完全停止运转。
2. 使用打印机时,请遵循厂家提供的使用说明书,并使用推荐的耗材和配件。
3. 避免将复印机暴露在潮湿、有尘土或温度异常高低的环境中。
三、常见故障及解决方法1. 打印质量不佳- 检查墨盒或墨粉是否用尽,适时更换。
- 清洁打印机的喷头、滚筒和感光鼓,确保其表面清洁。
- 调整打印质量设置,如打印速度、分辨率等。
2. 纸卡纸或多张纸同时进纸- 检查进纸托盘,确保纸张摆放整齐、不过满。
- 清理进纸路径中的灰尘和残留物,保持畅通。
- 轻轻抖动纸张堆,以防纸张粘连。
3. 复印机出现错误代码- 根据错误代码查询说明书,了解其具体含义和解决方法。
- 尝试重新启动复印机,有时候只需简单的重启即可解决问题。
- 如有必要,联系复印机厂家或售后服务,获取专业技术支持。
4. 复印机无法正常开机或关机- 检查电源插头是否松动或电源线是否损坏。
- 确保电源插座正常工作,尝试连接到其他插座测试。
- 如果问题仍然存在,务必请专业技术人员检查和修复。
5. 复印机产生噪音或异味- 检查复印机周围是否有堆积的灰尘和纸屑,进行清理。
- 确保耗材的正常使用,特别是墨盒或墨粉的质量是否合格。
- 如果噪音或异味问题仍然存在,应及时终止使用并联系维修人员。
四、预防措施1. 定期清理和保养复印机,包括清理外部表面、喷头、滚筒等。
2. 使用符合厂家要求的纸张,避免使用损坏或过度湿润的纸张。
3. 遵循复印机的操作规程,防止任意操作或不当使用。
4. 定期更新复印机的驱动程序和软件,以确保其稳定运行和优化性能。
五、注意事项- 在每次使用复印机之前,仔细阅读使用说明书,并根据指导操作。
夏普复印机维修资料

夏普复印机维修资料1.调整代码2.检测代码3.故障诊断代码一调整代码的维修方式1.夏普复印机维修进入维修方式(模拟机)(1)依次按:清除键――重复键――递加键----递减键----数字键(代码)---复印键(确认)适用机型:X60/X66(2)依次按:清除键---插入键---0键---插入键适用机型:SF1116/SF1118/AR201/AR206/AR163(3)依次按:清除键---0键---0键---清除键适用机型:SF2114/SF2014/SF2414(4)清除键---插入键---0键---插入键---全清适用机型:SF2116/SF2118/SF2022/SF2027(5)依次按:清除键---暂停键---0键---暂停键---代码---复印键(确认)适用机型:SF7700/SF7750/SF7800/SF8570/SF88702. 夏普复印机进入维修方式(数码机)(1)依次按:#键---插入键---0键---插入键适用机型:AR160/AR225/AR275(2)依次按:P键---米键---C键---米键适用机型:M350/M450/M451(3)依次按:#键---米键---C键---米键适用机型:AR158F(4)依次按:C键---曝光键(浓度模式)---C键---曝光键(浓度模式)(三秒内完成)适用机型:AR158/AR158S/AR158X/AR1240夏普X60/X66故障代码U---备用电池故障或电压下降超过规定值2---稿台不能返回原位H---定影加热故障F---曝光灯或定影灯故障一夏普(模拟机SF1116/1020/1025等)1.L4---01(按复印键,显示子代码)主电机异常 3.H2---热敏电阻断开(断路,烧坏)2.L5---03五分之四反光镜电机异常H3---异常高温检测04五分之四反光镜原始状态检测异常H4---异常低温检测05镜头电机异常 5. EE---EL---自动显影调整异常(过显影检测)06镜头原始状态检测异常EE---EU---显影粉不足4. U2---计数器检测异常 6. F2---02---加粉电机异常U3---20---反光镜电机异常21---反光镜原始状态检测异常? 进入维修状态输入代码“14”按复印键清除H2.H3.H4故障代码? 进入维修状态输入代码“16”按复印键清除U2故障代码夏普(数码机)1. H2---00---热敏电阻断开F7---04---CCD白电平故障H3---00---定影温度异常(高温检测)05---CCC黑电平故障H4---00---定影温度异常(低温检测)12---校正故障CC---原稿检测传感器错误03---激光装置故障F5---02---曝光灯断开U3---29---反光镜原始位置故障L1---00—反光镜进给故障L3---00—反光镜返回故障L4---01---主电机故障L6---10—多面镜电机故障进入维修方式输入代码“14”按复印键清除H2.H3.H4故障代码其它的用关机或代码“16”清除Panasonic(松下复印机的维修方式)(1)同时按下用户键+原稿尺寸A3键+数字3键,机器进入“F1”状态,用数字键选择“F1---F9”模式,然后按复印键确认,显示“00”然后输入功能代码,按复印键确认调整同时按用户键+清除键退出模式适用机型:7718/7728/7735/1810/1810P(2)同时按下纸盒/规格+数字3键+清除/停止同时按纸盒/规格+清除/停止退出模式适用机型:FP1680/FP1780/FP2680(3)同时按下纸盒键+DOWN键+数字1键同时按纸盒+清除退出模式适用机型:FP7713/FP7715松下复印机常见的故障代码E1---光学复元错误E1---20 镜头移动异常E1---21 反光镜移动异常E1---01 光学单元扫描架故障E1---40 光学风扇马达异常E2 供纸单元错误(1)E1---41 曝光键(浓度模式)E2---01 提升马达转动(1)异常(上层托盘)E2---02 提升马达转动(1)异常(上层托盘)E3 显影单元和漏电错误E3---01 加粉电机转动异常E3---03 碳粉浓度传感器异常E3---10 高压电源漏电E3---20 主马达异常故障E3---22 排气风扇马达转动异常E3---50 转印清洁器异常E4 定影单元错误E4---01 定影预热异常E4---10/11/12排气风扇马达转动异常U14 废粉满U13 加碳粉U16 显影没装好适用机型:7718/7728/7735E101 光学部份传感器/驱动板故障E121 光学传感器/马达/光学驱动故障E122 反射镜传感器/驱动马达异常E140/141 光学冷却风扇故障E220 手送纸传感器故障E303 碳粉浓度传感器故障E310 高压漏电E320 主马达故障E401 定影故障E410 定影排风扇故障E535 主按板信号故障U13 碳粉不足U16 载体不足适用机型:7713/7715/1810/1820Xerox施乐维修方式? 按“零”键开机施乐的故障代码C1--3“1”纸盒送纸故障C2--3“2”纸盒送纸故障C3---3“3”纸盒送纸故障C9---3手送送纸故障E1---6/11/12/13/14:纸路卡纸E3---6/31/32/333/34:出纸口卡纸J1---色粉不足J9---更换废粉盒U2---1/2/3/4:扫描架故障U3---1:镜头脱离原位U4---1:定影热敏电阻开路U4---2:定影预热故障U4—3/4/6:定影过热U8---1/2/3/4/5/6:曝光控制故障RICOH(理光复印机的维修方式)? 打开面板左上角的盖板把SW1和SW8开关同时打开,输入代码,按#键确认适用机型:4000/5000系列/4490? 依次按全清/复位---数字107键---清除键(按三秒以上)进入后,计数器显“1”在闪动,同时自动图像浓度灯闪动,输入代码,用?? 自动图像浓度键确认。
复印机维修手册全集
复印机维修手册全集目录1.基础知识–复印机的工作原理–复印机的分类–复印机的组成部分–复印机的常见故障2.维修工具与设备–常用维修工具介绍–维修设备的选择和使用–安全使用维修工具的注意事项3.维修流程–维修前的准备工作–维修的常见步骤–维修后的测试与验证4.常见故障排除–复印机无法开机–打印质量不佳–纸张卡住或无法进纸–噪音过大或异味–其他常见故障解决方法5.维护与保养–日常维护注意事项–常用耗材的更换与保养–定期维护的步骤与注意事项6.安全与风险防范–维修过程中的安全注意事项–防止电击和火灾的措施–紧急情况处理方法1. 基础知识复印机的工作原理复印机是一种通过光学和电子技术来实现纸质文件的复制的设备。
它的工作原理主要包括以下几个步骤: 1. 扫描原稿:使用光学传感器将原稿的图像分解为光和暗的像素点,生成数字信号。
2. 图像处理:通过电子模块对原稿图像进行处理,包括增强、调整亮度等。
3. 感光鼓充电:使用高压电场将感光鼓表面充电,准备接收图像信息。
4. 曝光:通过激光或闪光灯等光源将扫描得到的数字信号转化为光信号,并照射在感光鼓上。
5. 显影:在感光鼓上涂上感光粉,光信号照射后,感光粉会被吸附在光和暗的像素点上。
6. 转印:感光鼓表面的感光粉转移到纸张上,生成复制品。
7. 定影:通过热或压力将感光粉固定在纸张上。
8. 清洁:清除感光鼓上的残留粉末,准备进行下一轮的复印。
复印机的分类根据使用的技术和原理不同,复印机主要可以分为以下几类: 1. 平板式复印机:将原稿放在平板上,通过扫描原稿和打印的方式来完成复制。
2. 单面扫描复印机:通过单面扫描原稿的方式来完成复制。
3. 双面扫描复印机:通过双面扫描原稿的方式来完成复制,可一次性完成双面复制。
4. 针式复印机:通过针头打印的方式来完成复制。
5. 激光复印机:通过激光和静电原理来完成复制。
复印机的组成部分一台复印机通常由以下几个主要部件组成: 1. 控制系统:负责控制复印机的工作流程和各个部件的协调工作。
- 1、下载文档前请自行甄别文档内容的完整性,平台不提供额外的编辑、内容补充、找答案等附加服务。
- 2、"仅部分预览"的文档,不可在线预览部分如存在完整性等问题,可反馈申请退款(可完整预览的文档不适用该条件!)。
- 3、如文档侵犯您的权益,请联系客服反馈,我们会尽快为您处理(人工客服工作时间:9:00-18:30)。
5. 不进纸 故障原因与排除方法: (1) 输纸电机不工作;检查并排除线路及电机故障; (2) 搓纸轮没与纸表面接触;调整搓纸轮的压力; (3) 搓纸轮老或磨损。调换搓 纸轮。
6. 纸盒不能供纸
东方维修培训版权所有
技术支持:010-62102513
复印机芯片级维修教材
编辑:毛泽云
故障原因与排除方法: 复印机的搓纸轮大多数靠电磁线圈的动作来控制。检查时需使机器处于有纸状态,可用 透明胶纸将检测有无纸盒的开关粘住,使无纸信号不出现,将一小块纸放在检测纸盒的光电 传感器上,按下开始复印键后,大约 1 ̄2 秒钟后,控制搓纸轮的电磁线圈的衔铁应有吸台动 作,如果无此动作,则应检查电磁线圈与线路板间的连线接触是否良好。如果有此动作,则 应考虑搓纸离合器内的弹簧是否损坏;生锈,必要时应更换离合器。
鼓。 (5) 墨粉颗粒太大,显影图像表面粗糙,造成分辨率下降。如出现由于图像发黑而造
成不清 晰,应考虑可能是显影器下墨粉太多。
13. 复印件图像浓度不均匀 复印件复印出的图像不均匀分两种情况:一种是有规则的不均匀;另一种是无规则的
不均匀。 (1) 出现有规则的不均匀故障原因与排除方法: ① 电极丝与感光鼓不平行,造成转印电晕不均匀。 ② 曝光窄缝两边不平行,造成曝光量不均匀。 ③ 机内有乱反射光的干扰。 ④ 显影辊与感光鼓表面不平行;液干法显影中挤料辊与感光鼓不平行;显影间隙两
端不等, 均会造成上述的不均匀。
(2) 出现无规则的不均匀故障原因与排除方法: ① 复印纸局部受潮。 ② 曝光灯管、稿台玻璃等光学部件受污染,影响光反射和透射的均匀。 ③ 充电和转印电极丝污染,造成放电的不均匀。为防止此种情况,应经常保持电极
清洁使放 电均匀。 ④ 采用热辊定影的机器,由于加热辊表面橡胶老化脱落、有划痕,或定影清洁刮板
4. 复印后复印件出现底灰 复印件上有深度不等的底灰,是静电复印机中一种常见的现象,而且是一个难于解决的
问题,复印件上有无底灰存在是鉴别其质量好坏的重要标志之一。 故障原因及排除方法: (1) 曝光不足,原因包括曝光灯老化,照度下降;光蓬开得太小,曝光量小。调整曝光
电压、光缝或更换曝光灯; (2) 原稿反差太小; (3) 复印纸受潮; (4) 显影偏压过低或无显影偏压;调整显影偏压、检修显影偏压电路。 (5) 第二供纸行程开关是否良好,位置是否合适,有否积粉脏污; (6) 第二供纸离合器是否良好; (7) 扫描台行程开关中的对位起始微动开关或传感器是否失效; (8) 纸路当中是否脏污、有异物等。
4.2 常见“共性”故障的检修
由于复印机的种类和型号繁多,各制造厂生产的复印机各不相同,即使是同一个生产厂 家生产的不同型号复印机也不完全一样。因而在使用中所出现的故障现象还是有一些差别, 这里仅对共性的、一般常见的故障及其成因和排除方法加以介绍。
本节中所列举的故障,对于各种复印机并非一律如此,即使同一故障在不同的类型的机 器中,其成因可能并不相同。因此,这里更重要的是提供方法和思路。(有些故障只要找到 成因即知排除方法,因此这些故障的排除方法就不再赘述。)
⑨ 复印绿键按下后,第一步供纸不良 故障原因及排除方法: 首先观察搓纸是否转?如果转动良好而不能搓纸,则检查:
a. 搓纸轮是否脏污、老化、摩擦力下降,如果脏污,可用浓酒精擦洗;如果磨秃老化, 可更
换新搓纸轮。也可采用土办法:剪一段橡胶指套,套在搓纸轮上,实践证明,这是解 决搓纸轮摩擦力的有效方法。 b. 顶纸板弹簧顶力是否下降,如果下降,就进行调整。
东方维修培训版权所有
技术支持:010-62102513
复印机芯片级维修教材
编辑:毛泽云
⑥ 清洁不良,毛刷时转时不转。毛刷板结或脱毛;刮板有缺口或压力不足;检修毛 刷箱;调
整梳松毛刷或调换毛刷;调换刮目相看板或增加压力; ⑦ 集尘袋子积粉太多。清扫和调换集尘袋。
(3) 感光鼓划伤 故障原因:
① 充电电压太高或电晕丝离鼓太近造成火花击穿; ② 刮目相看板(毛刷板结)划伤; ③ 安装不小心划伤(或不正确); ④ 操作不小心或不当而划伤;
⑤ 有硬物,如曲嘿针被带入复印机。 排除方法:
调整充电电压或充电电晕丝与鼓的距离;调换刮板或毛刷;按要求细心进行安装; 按要
求细心进行操作;停机观察如有硬物取出硬物,更换感光鼓。 (4) 定影不运转 故障原因:
鼓表面。清除异物。反光镜太脏或损坏,以及反光角度改变,光线偏高,无法使感光鼓曝光, 清洁或更换反光镜,调整反光角度。
(4) 充电部件故障:二次充电部件故障(仅限 NP 复印法),检查充电电极的绝缘端是 否被放电击穿,电极与金属屏蔽罩连通(有烧焦痕迹),造成漏电。
2. 复印件全白 复印件全白故障分为感光鼓上有图像和感光鼓上无图像两种情况。 (1) 光鼓上有图像 故障原因与故障排除: ① 消电电极击穿 ② 转印电极丝接触不良;重新接通。 ③ 转印电极丝断路;更换电极丝。 ④ 转印电极高压发生器损坏或高压线接触不良;检修更换高压发生器或重新接通高
缺损使辊 上局部沾上污物,形成污迹。 ⑤ 搓纸辊上受墨粉污染,搓纸造成污迹。 ⑥ 显影器中黑粉漏出洒落在纸上或感光鼓上。
14. 复印件图像上有污迹 故障原因与排除方法: (1) 感光鼓上的感光层划伤。 (2) 造成感光鼓(鼓或板)污染 故障原因与排除方法: ① 感光鼓疲劳。感光鼓严重疲劳则应更换感光鼓; ② 消电电极电压不够或消电灯照度不足。调整电压或调换灯炮; ③ 消电电压过低。将电晕丝向鼓面稍移近; ④ 显影箱内墨粉过多。调整显影箱内载体,墨粉比例; ⑤ 载体疲劳。调换载体;
10. 磁刷显影器不转 故障原因与排除方法: (1) 载体过多。调整载体量; (2) 显影器齿轮磨损。更换齿轮; (3) 离合器失控。检修显影离合器。
11. 显影质量低下(磁刷) 故障原因与排除方法: (1) 磁穗不正。调整显影磁穗; (2) 自动供粉失控。调整可变电阻和检测器; (3) 显影托架小轮不转。调换小轮。检修和调换遮板; (4) 显影遮板失效,造成鼓面污染。 (5) 偏压过高或过低。调整显影偏压至正常值; (6) 显影检测装置失灵。干法——检查载体与墨粉比例的检测装置;湿法——检查显
7. 多张进纸 故障原因与排除方法: (1) 纸张毛边粘连。反复搓动纸张、重装; (2) 纸张与纸盒的磨擦力太小。增加纸盒两侧磨擦力; (3) 纸装反。调整纸的反正面; (4) 纸的抗静电能力太差; (5) 纸的裁切宽度比纸盒标准尺寸窄的多,压纸脚没有起到作用; (7) 纸盒压纸脚角度不好。调整纸盒压纸角度。
维修机器前首先应认真询问操作者有关情况,如机器使用了多久,上次维修(保养)是在 什么时间,维修(保养)效果如何,此次是什么情况下出现的故障。还要认真翻阅机器有关 维修记录,注意近期更换过哪些部件和消耗材料,有哪些到了使用期限而仍未更换过的零部 件。
2. 检查机器 情况了解清楚以后,即可对机器进行全面检查,除了机内短路、打火等故障外,都可接
影剂的 浓度检测装置。
东方维修培训版权所有
技术支持:010-62102513
复印机芯片级维修教材
编辑:毛泽云
12. 补粉器失灵 故障原因与排除方法: (1) 补粉电机失控。检测补粉电极和控制电路。 (2) 补粉盒未装好。重新安装补粉盒。 (3) 补粉器内有载体使撤粉辊不运转。取补粉器清除载体。 (4) 硒感光鼓工作时间过长表面污染残留墨粉过多或产生氧化膜。清洁或更换感光
故障原因与排除方法: (1) 曝光灯管损坏:首先观察曝光灯是否发光,不发光时可检查灯脚接触是否良好。是
否为曝光灯管损坏、断线或灯脚与灯座接触不良等原因。 (2) 曝光灯控制电路故障:曝光灯控制电路出现故障,检查各处电压是否正常,无电压
时应检查控制曝光灯的电路是否有故障,必要时更换此电路板。 (3) 光学系统故障:复印机的光学系统被异物遮住,使曝光灯发出的光线无法到达感光
东方维修培训版权所有
技术支持:010-62102513
复印机芯片级维修教材
编辑:毛泽云
4.2.1 影响复印件质量故障的原因与排除
复印件质量不好是复印机最常出现的故障,此种故障可占总故障率的 60%以上,以下是 具体故障的检修与排除。 1. 复印机复印出的复印件全黑(经过复印后,复印件上全黑没有图像)
复印机芯片级维修教材
编辑:毛泽云
第四章 复印机维修思路及维修方法
4.1 复印机维修思路
复印机出现故障后,总有一种是主要的故障,抓住这个主要的故障进行分析,即可找到 故障原因和排除的方法,我们一般可通过以下几条途径来查出故障的原因并排除之。检修时 应遵循先易后难的原则并逐步缩小范围,最后集中于某一点上,找到问题部件更换修复故障。 1. 了解情况
压线。 ⑤ 输入电压过低。调整电压达到要求; ⑥ 高压发生器烧坏。调换高压发生器; ⑦ 输入、输出线的接点不牢;插牢各接点; ⑧ 点插错。正确插好接点。 故障原因与排除方法:
不论是采用直流消电或交流消电的机器,都会发生此种故障,特别是充电电压过高,空 气湿度过大时,故障更为频繁 。
拔出此电极,可见其一端或两端的绝缘端块内有烧焦的痕迹。此处即是漏电的所在,应 更换击穿的绝缘端块。如果烧焦的面积小,可用砂纸;小刀等打磨去焦糊的一层,并用透明 胶纸贴上,仍可继续作用。
通机器电源,复印几张,以便根据其效果进行进一步分析。对于操作者提供的故障现象应特 别注意,并在试机时细心观察。
3. 准备工具 在对机器进行检查的基础上,一般可对故障现象有个大致的了解,即可知道维修时需要
哪些常用的专用工具,准备好将要使用的工具和材料后即可进行检查维修工作。
4. 机器故障自检 目前绝大多数复印机都装有彩色液晶显示面板,并设有卡纸等故障自检功能,一旦机器
8. 连续进纸 故障原因与排除方法: (1) 份数控制钮失灵。检查或调整份数控制钮; (2) 计数开关失灵。检修或调换; (3) 输纸离合器失控。检修输纸离合器和控制线路。