Nissin 日清 Di866闪光灯 Nikon 说明书
尼康闪光灯使用技巧

尼康闪光灯使用技巧尼康SB800闪光灯使用经验与技巧用灯的误区,常常听到如下说法和做法:1、是业余的人或者不入流的新闻记者才用的东西,一个真正的摄影者,从来只用现场光,不用闪光灯2、闪光灯自动功能越强的越好,尤为重要的是各种Advanced TTL 功能3、闪光灯总是处于正面照射的状态,总是处于x-ttl 的状态,总是配合P档,或者A档 4、盲目相信TTL测光,从来不计算,也不做曝光补偿FEC 5、从来不使用改变光质的附件,包括柔光箱/罩;肥皂盒,反光板,反光卡,滤色片6、认为闪光灯只能当作辅助光源,或者只能当作暗环境的照明光源7、认为闪光灯只有用来照亮主体的功能 8、从来不使用处于手动档的灯,从来不离机用灯 9、从来没有考虑过闪光灯的指标---色温,只考虑了自动功能和功率 10、无论拍摄什么片子,从来同时只是用一只闪光灯,而不是多只同时工作。
与如上错误现象相对应,是用闪光灯应该出于这个状态:1、什么时候都应该考虑使用闪光灯,除了极个别情况自然光源已经非常完美之外。
这个完美,包括光照,光质,光比,色温,色调,造型等等各个方面。
事实上自然光照条件很难达到完全令人满意。
所以闪光灯的使用其实是非常频繁的。
2、闪光灯应该有一定的TTL测光的功能,这样使用起来比较方便,让我们的补偿计算可以从一个相对值而不是绝对值开始,省力,准确。
但是不一定需要各种高级的TTL功能,事实上这些功能不但准确性提高有限而且限制了灯的摇头转头,因辞害义。
所以,一盏有稳定的TTL功能的灯即可,各种不同的 ttl 功能,在熟悉其性能之后,都可以做出准确的补偿。
想完全不补偿从原理上讲是不可实现的,跟数码相机的测光系统完全脱离曝光补偿是不现实的一样。
如果让我选择,我宁可要一个功率够大,色温稳定,可以摇头的灯;也不要一个拥有高级TTL功能,我什么都无法控制的灯(典型的例子就是佳能220EX)3、闪光灯应该极少处于正面对着主体打光的状态,也因此很少处于各种高级的TTL状态。
市面上所有闪光灯参数对比表格
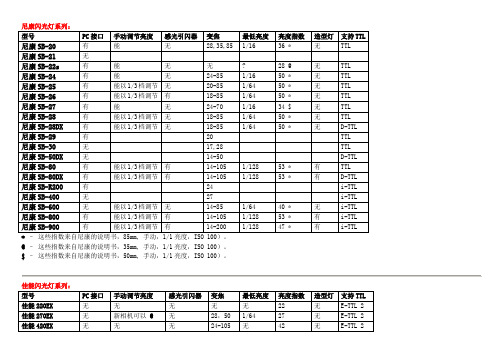
尼康闪光灯系列:型号PC接口手动调节亮度感光引闪器变焦最低亮度亮度指数造型灯支持TTL 尼康SB-20 有能无28,35,85 1/16 36 * 无TTL尼康SB-21 无尼康SB-22s 有能无无? 28 @ 无TTL尼康SB-24有能无24-85 1/16 50 * 无TTL尼康SB-25 有能以1/3档调节无20-85 1/64 50 * 无TTL尼康SB-26有能以1/3档调节有18-85 1/64 50 * 无TTL尼康SB-27 有能无24-70 1/16 34 $ 无TTL尼康SB-28 有能以1/3档调节无18-85 1/64 50 * 无TTL尼康SB-28DX 有能以1/3档调节无18-85 1/64 50 * 无D-TTL 尼康SB-29 有20 TTL尼康SB-30 无17,28 TTL尼康SB-50DX 无14-50 D-TTL 尼康SB-80 有能以1/3档调节有14-105 1/128 53 * 有TTL尼康SB-80DX 有能以1/3档调节有14-105 1/128 53 * 有D-TTL 尼康SB-R200 有24 i-TTL 尼康SB-400 无27 i-TTL 尼康SB-600 无能以1/3档调节无14-85 1/64 40 * 无i-TTL 尼康SB-800 有能以1/3档调节有14-105 1/128 53 * 有i-TTL 尼康SB-900 有能以1/3档调节有14-200 1/128 47 * 有i-TTL * –这些指数来自尼康的说明书,85mm, 手动,1/1亮度,ISO 100)。
@ –这些指数来自尼康的说明书,35mm, 手动,1/1亮度,ISO 100)。
$ –这些指数来自尼康的说明书,50mm, 手动,1/1亮度,ISO 100)。
佳能闪光灯系列:型号PC接口手动调节亮度感光引闪器变焦最低亮度亮度指数造型灯支持TTL 佳能220EX无无无无无22 无E-TTL 2 佳能270EX无新相机可以 @无28,50 1/64 27 无E-TTL 2 佳能420EX无无无24-105 无42 无E-TTL 2佳能430EZ无能无24-80 1/32 43 无TTL佳能430EX无能无14-105 1/64 43 有*E-TTL 2佳能430EX-II无能无14-105 1/64 43 有*E-TTL 2佳能540EZ无能无18-105 1/128 54 无TTL佳能550EX无能无17-105 1/128 55 有*TTL佳能580EX无能以1/3档调节无14-105 1/128 58 有*E-TTL 2佳能580EX-II有能以1/3档调节无14-105 1/128 58 有*E-TTL 2@–佳能270EX没有按钮,如果想手动调节亮度,只能从相机软件的菜单里面调节,佳能的最新相机才有这个闪光灯菜单:佳能1000D、佳能450D、佳能500D、佳能40D、佳能50D、佳能5D Mark II、佳能7D、所有 Mark III 和 Mark IV 相机。
尼康电子闪光灯系统说明书
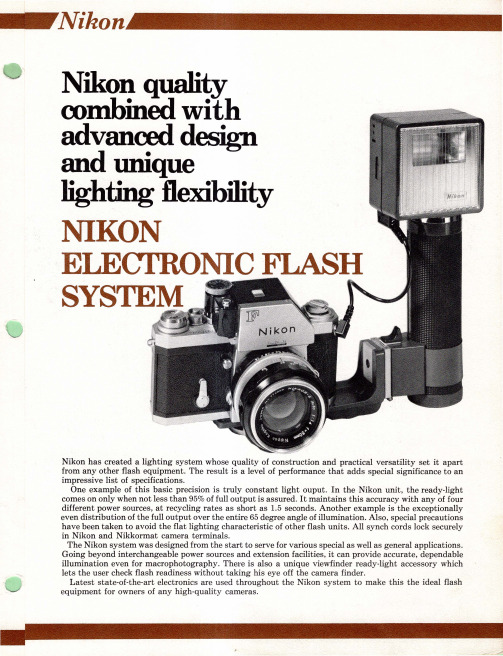
·See Accessories section for Viewfinder Ready -lite Eyepiece Attachment
Specifications
Power sources
Nickel-cad battery
AC
6 'D' cells 510-Volt
100-240 Volt alkaline battery
2.AC using AC attachment which also serves for charging nickelcad battery (simultaneously, if desired). Adjustable for 100 to 240 volts. Recycling time: about 5 seconds. Supplied as standard equipment.
NikonlllJ
ห้องสมุดไป่ตู้
Always reliable light output
Ready-light does not come on until capacitor charge reaches 95%. Thereafter, a unique monitor circuit maintains charge at not less than 98% of capacity. This output constancy assures uniform exposure with every flash.
闪光灯人像入门教程详解
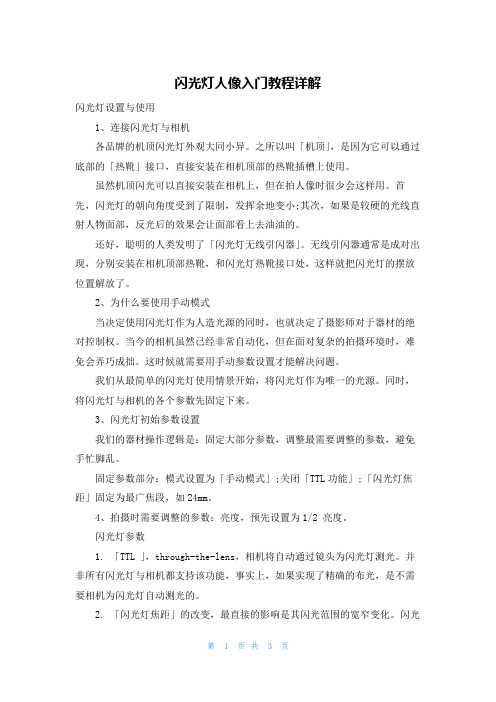
闪光灯人像入门教程详解闪光灯设置与使用1、连接闪光灯与相机各品牌的机顶闪光灯外观大同小异。
之所以叫「机顶」,是因为它可以通过底部的「热靴」接口,直接安装在相机顶部的热靴插槽上使用。
虽然机顶闪光可以直接安装在相机上,但在拍人像时很少会这样用。
首先,闪光灯的朝向角度受到了限制,发挥余地变小;其次,如果是较硬的光线直射人物面部,反光后的效果会让面部看上去油油的。
还好,聪明的人类发明了「闪光灯无线引闪器」。
无线引闪器通常是成对出现,分别安装在相机顶部热靴,和闪光灯热靴接口处,这样就把闪光灯的摆放位置解放了。
2、为什么要使用手动模式当决定使用闪光灯作为人造光源的同时,也就决定了摄影师对于器材的绝对控制权。
当今的相机虽然已经非常自动化,但在面对复杂的拍摄环境时,难免会弄巧成拙。
这时候就需要用手动参数设置才能解决问题。
我们从最简单的闪光灯使用情景开始,将闪光灯作为唯一的光源。
同时,将闪光灯与相机的各个参数先固定下来。
3、闪光灯初始参数设置我们的器材操作逻辑是:固定大部分参数,调整最需要调整的参数,避免手忙脚乱。
固定参数部分:模式设置为「手动模式」;关闭「TTL功能」;「闪光灯焦距」固定为最广焦段,如24mm。
4、拍摄时需要调整的参数:亮度,预先设置为1/2 亮度。
闪光灯参数1. 「TTL 」,through-the-lens,相机将自动通过镜头为闪光灯测光。
并非所有闪光灯与相机都支持该功能,事实上,如果实现了精确的布光,是不需要相机为闪光灯自动测光的。
2. 「闪光灯焦距」的改变,最直接的影响是其闪光范围的宽窄变化。
闪光灯焦距越广(数值越小),闪光范围也会越广阔,反之,闪光灯焦距越长(数值越大),闪光范围则越集中。
在本文中,由于是在空间有限的室内拍摄人像,我们这里可以调整到闪光范围最大,即闪光灯焦距最广,并保持不变。
相机初始参数设置固定参数部分:相机操作模式设置为「手动档」,即 M 档;「快门速度」固定为 1/200 s;「感光度ISO」固定为 200;「图片格式」设置为RAW 格式。
尼康说明书NikonD5100

可以一次拍摄一张照片或快速连续拍摄一系列照片吗? 如何使用自拍或遥控器进行拍摄? 在安静的环境中可以降低快门音量吗?
i 对焦
可以选择照相机的对焦方式吗? 可以选择对焦点吗?
i 图像品质和尺寸
如何拍摄适合以大尺寸打印的照片? 如何在存储卡中保存更多照片?
i 曝光
可以使照片更亮或更暗吗? 如何保留暗部和亮部中的细节?
A 该图标表示注意,提醒您应该在使用本照相机前阅读这些信息。
0 该图标表示本说明书中的其它参考页码。
照相机设定 本说明书将使用默认设定进行解说。
帮助 使用照相机的即时帮助功能,您可获取有关菜单项目和其它主题的帮助信息。有关详细信 息,请参阅第 11 页内容。
A 安全须知 初次使用本照相机之前,请先阅读 “安全须知”(0 x-xvii)中的安全使用说明。
简介
1
开始了解照相机 ......................Байду номын сангаас........................................................................................1
照相机机身....................................................................................................................... 1 模式拨盘 ........................................................................................................................... 3 显示屏................................................................................................................................ 4 信息显示 ........................................................................................................................... 5 指令拨盘 ........................................................................................................................... 7 取景器 .............................................................................................................................. 10
尼康专业摄影装备说明书 Nikon Pro 04.11 07

nikon pro 04.1107che garantisce la sicurezza delle gallerie, segnalando la presenza di eventuali incrinature o altri danneggiamenti strutturali. L’azione congiunta dei due sistemi facilita l’ispezione e l’analisi non solo delle gallerie, ma anche di ponti, sottopassaggi, pali, pareti, rami e vari altri ostacoli che potrebbero impedire il passaggio del treno.Il sistema viene montato sulla testa di un particolare treno diagnostico e utilizza cinque fotocamere speciali ad alta velocità e dieci obiettivi NIKKOR non modificati (cinque AF DX Fisheye-NIKKOR 10,5 mm f/2.8G ED e cinque AF NIKKOR 28 mm f/2.8D), che acquisiscono immagini mentre il treno è in corsa. Mermec ha scelto specificamente gli obiettivi NIKKOR per la loro qualità ottica estremamente elevata e la loro capacità di rispondere bene ai requisiti ottici necessari, decisamente particolari. Il T-Sight 5000 genera grandi quantità di dati: vengono infatti misurati 4 milioni di punti al secondo e le fotocamere sono in grado di acquisire immagini dati da 80 megapixel. Grazie a un sistema a infrarossi (per non interferire con la visuale del conducente), le riprese delle fotocamere vengono riflesse Non c’è da sorprendersi che, data la conformazione rocciosa del terreno svizzero, il sistema ferroviario nazionale comprenda numerose gallerie. La rete, lunga 3.011 km, ne conta 307, per un totale di 259 km. In passato, ispezionare lo stato interno di queste gallerie era un lavoro lungo e faticoso. I dati venivano raccolti mediante strumenti di misurazione manuali a ritmi lentissimi, tenendo occupate tratte che avrebbero potuto essere utilizzate dai convogli passeggeri. Sulle linee occupate con alti picchi di traffico, effettuare queste ispezioni in sicurezza e senza interruzioni era una continua sfida. Oggi, invece, in parte grazie agli obiettivi NIKKOR, questo è diventato di gran lunga più facile.Mermec, azienda italiana specializzata in soluzioni tecnologiche per la manutenzione delle reti ferroviarie, ha sviluppato il T-Sight 5000 High Performance Clearance Gauge and Tunnel Walls Inspection System, attualmente utilizzato, tra gli altri, dalle Ferrovie Federali Svizzere. Il sistema utilizza la tecnologia laser e ha due funzioni: la misurazione della sagoma limite, per assicurare il libero passaggio dei treni nelle gallerie, e l’ispezione delle pareti, GALLERIA CON VISTA MENTRE I PRODOTTI NIKON CONquISTANO uNA POSIzIONE DI SEMPRE MAGGIOR RILIEvO NELLE APPLICAzIONI INDuSTRIALI, GLI ObIETTIvI NIKKOR FuNGONO DA APRIPISTA PER LE FERROvIE SvIzzERE Sinistra: il sistema T-Sight5000, con funzioni dimisurazione della sagomalimite ad alte prestazionie di ispezione delle paretidelle gallerie, montato sullatesta dello speciale trenodiagnostico. Si riesconoa vedere gli obiettivi AFDX Fisheye-NIKKOR 10,5mm f/2.8G ED, mentregli AF Nikkor 28 mmf/2.8D sono nascosti.Destra: il sistema èin grado di catturareun’immagine ogni 7 cmquando il treno viaggia a200 km/h, generando unmodello reticolare in 3D.Prima foto a destra: ilT-Sight 5000 in azioneper la rete delle FerrovieFederali Svizzere. articoli di attualitålateralmente di 90° tramite cinque specchi montati sul rovescio della calotta frontale. Le immagini di tutte e cinque le fotocamere vengono quindi montate insieme per formare una vista a 360° della struttura circostante. In aggiunta a ciò, l’altro gruppo di obiettivi genera un modello reticolare in 3D che viene registrato insieme alle immagini. Fotocamere e obiettivi lavorano a velocità incredibili e sono in grado di catturare un’immagine ogni 7 cm quando il treno viaggia a 200 km/h. Ciò significa che il fastidio per i passeggeri è minimo e che la società ferroviaria non perde profitti con la sostituzione di treni che generano ricavi. Si prevede che questo sistema rivoluzionerà la diagnostica dei trasporti su rotaia, a vantaggio soprattutto dei sistemi metropolitani urbani e sotterranei. Per saperne di più sul sistema T-Sight 5000, visitare il sito Per ulteriori informazioni sugli obiettivi NIKKOR, visitare il sito 。
尼康摄影配件箱说明书

COMPARTMENT CASES
(Nikon) NIPPON KOGAKU K. K.
COMPARTMENT CASES
High quality products require high, guality accommodating cases for protecting them against hard knocks of travelling. This is why Nikon compartment cases have been specially designed for holding Nikon camera (s), Nikkor lenses and a selective range of their accessories. Six models of Nikon compartment cases; FB5, FB6, FB7, FB8, FB9 and a Foam-Rubber type, are available. This wide variety to choose from gives the photographer the freedom of selecting a proper one for his need. At the same time, each model sufficiently allows making most of the Nikon system versatility and facilitates progressive photographing activities. The accommodation list shown in the back part of this brochure acts as a guide in making your selection.
图解尼康SB800闪光灯使用
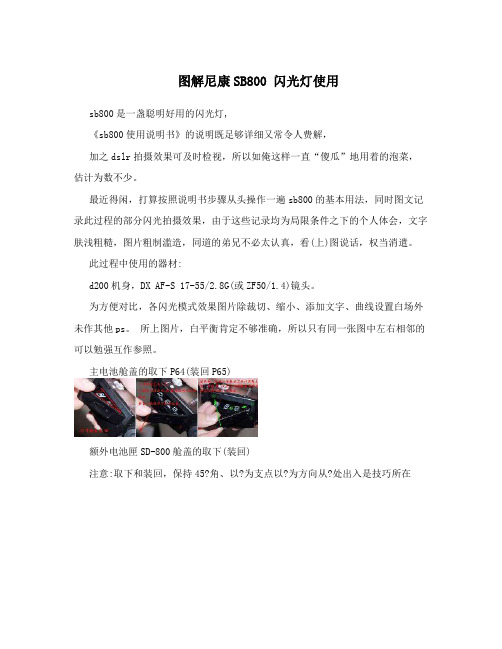
图解尼康SB800 闪光灯使用sb800是一盏聪明好用的闪光灯,《sb800使用说明书》的说明既足够详细又常令人费解,加之dslr拍摄效果可及时检视,所以如俺这样一直“傻瓜”地用着的泡菜,估计为数不少。
最近得闲,打算按照说明书步骤从头操作一遍sb800的基本用法,同时图文记录此过程的部分闪光拍摄效果,由于这些记录均为局限条件之下的个人体会,文字肤浅粗糙,图片粗制滥造,同道的弟兄不必太认真,看(上)图说话,权当消遣。
此过程中使用的器材:d200机身,DX AF-S 17-55/2.8G(或ZF50/1.4)镜头。
为方便对比,各闪光模式效果图片除裁切、缩小、添加文字、曲线设置白场外未作其他ps。
所上图片,白平衡肯定不够准确,所以只有同一张图中左右相邻的可以勉强互作参照。
主电池舱盖的取下P64(装回P65)额外电池匣SD-800舱盖的取下(装回)注意:取下和装回,保持45?角、以?为支点以?为方向从?处出入是技巧所在LCD屏色彩的色彩为什么不一样1、TTL BL(自动均衡补充)闪光P37俺理解,这是均衡TTL傻瓜模式,闪光灯设定为TTL BL模式,在监察预闪标志出现的情况下,就稀里糊涂拍吧,疑似不会犯什么大错。
注:TTL,through the lens,通过镜头……被摄体距背景约0.3ma.在浅色背景下b.在深色背景下2、标准TTL闪光P37这是标准TTL傻瓜模式,闪光灯设定为TTL模式,在监察预闪标志出现的情况下,稀里糊涂拍疑似犯不了什么大错。
3、AA(预设光圈)闪光P38该模式通过闪光灯测光窗(非TTL)感受被摄主体反射的光线来控制闪光输出量,测光窗的“瞳孔大小”只能通过相机(d200)设定。
“瞳孔”由机身设定成F5.6的效果4、A(预设光圈)闪光P40此模式类同AA,只不过测光窗的“瞳孔大小”必须通过set和,、,钮设定,镜头的光圈值应按测光窗的“瞳孔大小”来设置。
“瞳孔”由set和,、,钮设定为F5.6的效果5、手动闪光a. GN(距离先决)方式P44b. M方式P46而之后的拍摄再也不用口算了。
NIKON SU4引闪器使用手册

No reproduction in any form of this manual, in whole or in pa critical articles or reviews), may be made without written authorization from NIKON CORPORATION. Alle Rechte, auch die des auszugsweisen Nachdrucks (mit Ausnahme kurzer Zitate in technischen Besprechungen), ohne schriftliche Genehmigung durch NIKON CORPORATION bleiben ausdrücklich vorbehalten.
Wireless Slave Flash Controller Drahtlose Steuereinheit für sekundäre Blitzeinheiten
SU-4
Instruction Manual Bedienungsanleitung
NIKON CORPORA TION
FUJI BLDG., 2-3, MARUNOUCHI 3-CHOME, CHIYODA-KU, TOKYO 100-8331, JAPAN
En De Fr Es
English Foreword
Thank you for purchasing the Nikon Wireless Slave Flash Controller SU-4. To get the most out of your new SU-4, read this manual thoroughly before use and keep it handy, so that you can refer to it whenever necessary. For details on the appropriate Nikon Speedlights and cameras to be used in combination with the SU-4, read each product’s instruction manual.
尼康照相机使用说明

尼康照相机1、照片效果=像素+解像力2、1024768分辨率=每条水平线上都有1024个像素,共768条水平线+76.8万像素3、对焦点是数码单反摄影中最为重要的技术之一,对焦点多,覆盖的取景区域就更为密集;拍摄运用的景物有优势;4、点测联动,测光点可以跟随对焦点移动,对焦位置既是测光位置5、尼康出众的感光度适合拍摄夜景6、佳能相机拍出的照片色彩更为浓烟,尼康则是清新、淡雅;7、尼康数码单反相机分三个系列1高性价比的入门机型D3000、D3100、D5000、D5100、D90、D7000等;相机机身多采用强化塑料的材质,重量相对较轻,各项功能的最高品质不足,例如入门级单反相机的ISO感光度最高可扩展为12800,而当前最高的ISO感光度已经达到20万以上;机身塑料耐用度不够,手感稍差;连拍速度、最多可连拍张数、最高像素数、画质、画面视角等都不够完美;2强大的准专业机型 D300S告诉连拍功能,适合拍摄运动及体育类器材、D700全画幅机型的典范;一般为金属机身,较比顶级机型缩减了某些功能或降低了某些成本;3顶级的专业机型D3X高达2450万像素、D3S超过10万的感光度顶级机型属于超前产品,一般情况下在若干年内不会被低端机型超越;8、镜头上A与M为自从对焦和手动对焦的调节按钮;A为自动;有些机身配有马达,需将机身上的马达开关也设定到“自动”开的状态,才能实现自动对焦机身上的AF、M9、尼康的三中对焦模式1AF-C连续对焦适用于拍摄运动对象;2AF-S单次对焦适用于拍摄静止对象;3AF-A自动伺服自动调节对焦模式;运动时自动调节至AF-C,静止时自动调节至AF-S;对焦模式调节方式:按住相机身上的“AF模式”按钮,然后转动主拨轮,即可在这3种模式间转换;10、超焦距泛焦技法:在拍摄大场面的风光画面时,大多数情况下要求画面有更大一些的景深,使远处与最近处拉进附近的景物都能清晰地表现出来;这种情况下,只能设定很小的光圈,才有可能实现则个要求,但有时却无法实现,因为再小的光圈也不可能保证所有距离内的景物都非常清晰;例如,假设用24-70mm这款镜头,以一篇草丛或岩石为前景,拍摄大场面的风光,对焦点在无限远处或较远处的某个景物上,因为要获得最大景深,我们设定这款镜头的最小光圈F22,但这时会发现前景的草丛或岩石仍然是模糊的,超出了景深范围;这段模糊的距离范围,就是“超焦距”,如果将对焦位置放在超焦距距离处,则可以发现画面中所有的景物都变得非常清晰,这便是“泛焦”,也成为“超焦距法”;正常来说我们在拍摄时没有必要严格执行超焦距法,如果发现超焦距内的模糊前景影响到画面的效果,那么可以稍微往近一点的位置对焦,只要能够保证所拍摄的画面内景物都非常清晰即可;11、追踪对焦技法:要表现主体运动的效果,可以使用追踪对焦法进行拍摄;拍摄时,要使运动的主体时刻保持在取景范围内,并且对主体连续对焦,相机视角就必须追随着主体转动,这时运动的主题对相机来说如同静止一般,而实际上静止的背景对于相机来说则变为运动状态;根据主体运动的速度而设定中慢快门,则最终拍摄的画面中,运动主体是清晰的,但背景却因为相机的转动而变为运动模糊状态;12、光圈的两个作用:1通过进光量的多少来控制摄影时的曝光程度;2通过改变光圈大小来调节拍摄照片的清晰与虚化效果;13、光圈大小的选择:一般情况下风光题材的照片要求画面中远处与近处的景物都非常清晰,需要景深较深,应使用F7.1以上的中小光圈;对于人像、微距等题材,要求人物非常清晰,而背景要虚化,因此可使用F5.6以下的大光圈拍摄,获得较浅景深的效果;此外,夜晚或光线微弱时,可使用较大光圈使更多的光进入相机;14、最佳光圈:最大光圈与最小光圈都无法表现出最好的画面效果,而使用最佳光圈却能够将镜头的性能发挥到极致,表现出细腻、出色的画质;最佳光圈是针对镜头而言的,是指使用某只镜头时能够表现出最佳的光圈;一般情况下,对于变焦镜头来说,最佳光圈范围是F8.0~F11.0,要注意,所谓的画质最佳,是针对焦点周围的画面区域而言;由最佳光圈的数值可以看到,使用最佳光圈时,既无法表现出足够大的虚化效果,也无法获得很大的景深效果,所以使用最佳光圈要选对时机,不能仅仅因为对焦点周围画质出众而盲目使用;15、测算光圈值:光圈数值有F1.2、F1.4、F4.5、F6.3等,那么为什么没有F2.1、F3.1、F5.1等光圈数值呢最初镜头生产厂商定义了10个级别的光圈,分别为F1.4、F2.0、F2.8、F4.0、F5.6、F8.0、F11.0、F16、F22.0、F32.0,并且后一个级别的光圈孔径大小是前一个级别光圈孔径大小的一半,即F2.0的光圈实际孔径大小是1.4的一半,依次类推,F32.0的光圈大小是F22.0的一半;在计算这些光圈数值时,可以假设光圈空面积为π/2,由圆面积公式π/2=πRr的二次方可知,孔半径变为r=1/根号2=1/1.414,约为1/1.4,此时定义光圈为F1.4;将光圈孔面积减少一半为π/4,则孔半径变为1/2,定义光圈为2.0,然后以此类推,即可得到正级数组;由此可见,光圈数值其实是光圈孔半径的倒数;这也就不难理解为什么F 后面的数值越大,光圈越小了;16、光圈大小之间的联系:F5.6一下的光圈为大光圈,F6.3~F9.0的光圈为中等光圈;F10.0以上为小光圈;17、恒定与非恒定光圈:恒定光圈与非恒定光圈是衡量镜头性能的指标;先看两款镜头上的光圈标注;一般情况下,恒定光圈镜头档次较高,价格也相对较高,尼康的金圈镜头大多为恒定光圈,即摄影者所称的“牛头”;非恒定光圈镜头档次较低,成像质量稍差,当然售价也比较低廉,也就是许多摄影者所称的“狗头”;镜头上标志为1:2.8,镜头下标志为1:3.5—5.6,这分别表示镜头的最大光圈为F2.8和F3.5—F5.6,左图的定值2.8即表示该镜头的最大光圈为恒定光圈,无论镜头焦距怎样变化,最大光圈始终为F2.8;右图表示该镜头的最大光圈为非恒定光圈,随着焦距的变化,最大光圈会在F3.5~F5.6之间发生变化;18、景深预览功能:在拍摄照片是,单纯靠想象无法对景深大小有一个直观的认识,可以使用景深预览功能来提前看一下最终拍摄画面中景深的大小;拍摄时,设定好参数,通过取景器观察拍摄的画面,此时按相机正面的“景深预览”功能按钮,即可看到要拍摄画面的景深效果;在设定的光圈很大时,往往无法从取景器中看到景深预览的效果,只有在设定的光圈较小时,才能看出景深预览的效果;19、影响景深的3个因素;光圈、焦距和物距对于景深的影响可以用以下三句话来概括:光圈越大,景深越浅,光圈越小,景深越深;焦距越大,景深越浅,焦距越小,景深越深;物距越大,景深越深,物距越小,景深越浅;20、ISO感光度与画质的关系噪点是怎样产生的,曝光时,ISO感光度的数值不同,最终拍摄画面的画质也不相同;ISO感光度发生变化,即改变感光元件CCD/CMOS对于光线的敏感程度,具体原理是在原感光能力的基础上进行增益如乘以一个系数,增强或降低所成像的亮度,使原来曝光不足偏暗的画面变亮,或使原来曝光正常的画面变暗;终究会造成另外一个问题,在增加图像亮度时,同时会放大感光元件中的杂志噪点,这些噪点会影响画面的效果,并且ISO感光度数值越高放大声读越高,噪点越明显,画质就越粗糙;如果ISO感光度数值较小,则噪点就会变得很弱,此时的画质也比较细腻出色;例,为获得较快的快门速度,设定高ISO 感光度拍摄,但这样画面中不可避免会产生噪点,且ISO越高,噪点越多;21、包围曝光,包围曝光是一种非常实用的曝光技巧,也成为阶梯曝光法;在对曝光没有把握或所处的光源环境比较复杂时,以及相机不易正确测光的场合,采用包围曝光法可以较好地解决这个问题,以确保得到正确的影像;实用包围曝光法时,先按照测光值曝光一张照片,然后在其基础上增加和减少一定的曝光值后各曝光一张照片,即拍摄3张等差曝光量的照片,一般是以+0.5EV或者-0.5EV的包围程度来设定,也可以按照级差1/3EV、1EV等来调节曝光量,每张照片的曝光量均不相同,这样在拍摄结束后,就可以从一系列的照片中挑选出一张最令人满意的照片;包围曝光主要适用于程序或版程序控制的模式,如光圈优先A、快门优先S,自动模式P等;情境模式及手动模式M没有包围曝光功能;22、曝光锁定AE—LAuto Exposure Lock拍摄时,对拍摄主题进行测光后,然后会移动相机视角,以便构图形式更为完美;但这样曝光数据会发生变化,主题曝光就不再准确了,在这种情况下,可以使用锁定曝光的功能;首先要明白一点,锁定曝光锁针对的主要模式为点测光及中央重点测光;具体操作为,对要曝光的部分进行点测光,半按快门后确定对焦,同时相机会进行测光,然后按下相机上的曝光锁定键进行曝光锁定,它的功能是锁定拍摄主题的测光数据,将测光值暂时记忆下来,避免重新构图时收到新的光线的干扰,造成曝光值变化;无论画面的其他部分如何,只要锁定了之前测光得到的曝光数据,被拍摄主题的曝光是不会发生变化的;最后按下快门完成拍摄;按钮于取景框旁边23、相机内部自带的拍摄信息直方图,直方图表现的是一幅图像中所有像素的亮度分布图;以横坐标X表示像素的亮度;纵坐标Y表示相同亮度的像素数量;这样就能完整地表示出一幅图像的亮度统计图,图中左侧表示纯黑部位,右侧表示纯白部位;通过控制画面纯黑与纯白位置像素的数量,鸡可控制画面的明暗,也就是曝光的程度;直方图也叫色阶分布图; 24、尼康的三中测光模式1矩阵测光:矩阵测光为尼康的专用称呼,在其他品牌的机型中可能被称为平均测光、评价测光等;在这种测光模式下,相机会将取景画面分割为若干个测光区域,每个区域各自独立测光后,所得的曝光值在相机内进行平均处理,得出一个总的平均值,这样既可以达到整个画面正确曝光的目的;可见矩阵测光是对画面整体光影效果的一种测量,对各种环境有很强的适应性,因此用这种方式在一般环境中均能够得到曝光比较准确的照片;使用矩阵测光模式不必考虑测光问题,基本上都能得到曝光准确的画面2中央点测光,当画面出现高反差或色彩迥异的情况时,相机会对多个区域进行测光,并根据拍摄者的需要对某个区域进行重点测光,然后进行加权平均,这样,所获得的图像会很少有某个区域欠曝,或过曝的问题出现,但对于一些重点主体部位,图像却能很清晰地进行反应,因此,中央重点测光模式适合拍摄主体位于画面中间的照片,所以在拍摄人像照片时使用最多,另外,在风光、微距、舞台中也较为常用;3点测光,点测光模式是一种非常准确的测光方式,是指针对拍摄画面中极小甚至为点的区域进行测光,测光面积约占画面负面的2.5%,在这一区域内的测光和曝光数值非常准确;25、是否所有测光模式都需要寻找测光点在了解了尼康的三中测光模式之后会明白,无论怎样选择测光点,使用矩阵测光模式在拍摄时,画面明暗程度是不会受影响的,因为矩阵测光是对画面的整体进行曝光后取平均值;而其他两种测光模式,只有测光点位置的曝光时最准确的,如果要同时保证其他位置的曝光也准确,那么需要选择能够代表画面整体明暗情况的位置进行测光;26、怎样寻找测光点其实测光点的选择比较简单,只要寻找环境中反射率接近测光标准的18%反射率的位置即可;一般情况下,在都市内拍摄时,水泥墙体、发灰的马路表面、绿色植物的叶片反射率均接近18¥,可以作为测光点使用;外出拍摄风光时,绿色植物的叶片是很好的测光点,如果环境中没有其他反射率接近18%的景物,也可以伸出自己的手臂,对手背测光,这虽然是一种无奈的应急之举,但却会获得较好的结果;27、为何要“白加黑减”所谓“白加黑减”主要是针对曝光补偿的应用而言的;即使使用评价测光的模式,有时也会发现拍摄出来的照片比实际偏亮或偏暗,曝光不是非常准确;这是因为在进行曝光时,相机的测光是以环境反射率为18%为基准的,那么拍摄出来的照片整体明暗度会靠近普通的正常环境,即雪白的环境会变得偏暗一些,呈现出灰色,而纯黑的环境会变得偏亮一些,也会呈现出发灰的色调;要应对这两种情况,拍摄雪白的环境时为了不使画面发灰,就要增加一定量的曝光补偿值,称为“白加”;拍摄纯黑的环境时为了不使画面发灰,就要减少一定量的曝光补偿值,成为“黑减”;28、使用灰卡测光;29、色温:在摄影领域,早晨或傍晚拍摄的照片通常泛淡淡的红色,其他时段拍摄的照片可能会呈现出其他颜色,这就是因为各时段测温不同造成的;30、色温与白平衡的关系:白平衡模式与色温是一一对应的关系,即表示各种白平衡模式是在不同现场实际色问下测试得到的,并被定位了相机的日光白平衡标准;31、尼康相机白平衡模式的使用①自动白平衡由相机根据现场光线进行白平衡设置,适用范围很广,在一些都市夜景灯光下比较准确;②晴天白平衡约5200K色温适用于晴天室外的光线③背阴白平衡约7000K 黎明、黄昏等环境④阴天白平衡约6000K 适用于阴天或多云的户外环境⑤白炽灯白平衡越3200K 适用于室内白炽灯光线⑥荧光灯白平衡越4000K 适用于室内荧光灯光线⑦闪光灯白平衡使用闪光灯时可以设定这种模式32、设定较高色温的白平衡拍摄黑白照片,拍摄的画面也会偏红。
尼康自动对焦与测光系统实用指南
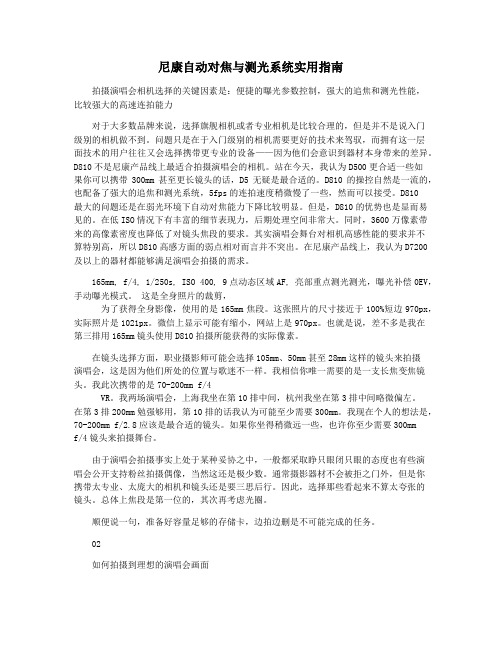
尼康自动对焦与测光系统实用指南拍摄演唱会相机选择的关键因素是:便捷的曝光参数控制,强大的追焦和测光性能,比较强大的高速连拍能力对于大多数品牌来说,选择旗舰相机或者专业相机是比较合理的,但是并不是说入门级别的相机做不到。
问题只是在于入门级别的相机需要更好的技术来驾驭,而拥有这一层面技术的用户往往又会选择携带更专业的设备——因为他们会意识到器材本身带来的差异。
D810不是尼康产品线上最适合拍摄演唱会的相机。
站在今天,我认为D500更合适一些如果你可以携带300mm甚至更长镜头的话,D5无疑是最合适的。
D810的操控自然是一流的,也配备了强大的追焦和测光系统,5fps的连拍速度稍微慢了一些,然而可以接受。
D810最大的问题还是在弱光环境下自动对焦能力下降比较明显。
但是,D810的优势也是显而易见的。
在低ISO情况下有丰富的细节表现力,后期处理空间非常大。
同时,3600万像素带来的高像素密度也降低了对镜头焦段的要求。
其实演唱会舞台对相机高感性能的要求并不算特别高,所以D810高感方面的弱点相对而言并不突出。
在尼康产品线上,我认为D7200及以上的器材都能够满足演唱会拍摄的需求。
165mm, f/4, 1/250s, ISO 400, 9点动态区域AF, 亮部重点测光测光,曝光补偿0EV,手动曝光模式。
这是全身照片的裁剪,为了获得全身影像,使用的是165mm焦段。
这张照片的尺寸接近于100%短边970px,实际照片是1021px。
微信上显示可能有缩小,网站上是970px。
也就是说,差不多是我在第三排用165mm镜头使用D810拍摄所能获得的实际像素。
在镜头选择方面,职业摄影师可能会选择105mm、50mm甚至28mm这样的镜头来拍摄演唱会,这是因为他们所处的位置与歌迷不一样。
我相信你唯一需要的是一支长焦变焦镜头。
我此次携带的是70-200mm f/4VR。
我两场演唱会,上海我坐在第10排中间,杭州我坐在第3排中间略微偏左。
闪光灯使用技巧
闪光灯使用技巧许多得过大奖的摄影师对闪光灯使用还比较陌生,因为大部分摄影师对闪光灯的作用未曾重视,也因此而错失更多拍摄机会,今天的闪光灯技术突飞猛进,但是由于部分摄影师对闪光灯了解不足,依旧拍出大平光的照片。
以尼康的SB-910闪光灯为例,该闪光灯有六个工作模式,比起相机并不逊色。
下面就让店铺带大家一起了解下吧。
一、首先需要明白什么是闪光灯的预闪i-TTLTTL是英文“Through The Lens”的缩写,即是通过镜头的意思。
佳能称之为E-TTL,尼康有i-TTL。
这种功能相当于把测光表放进了相机内部,通过镜头的入射光来分析场景里的明度、颜色、光比等等。
本文均以尼康相机为例,尼康的i-TTL是智能的闪光模式,该模式下相机和闪光灯有着完美的配合,相机的曝光量的决定是通过闪光灯预闪(该闪光灯预闪输出的闪光量EV可以在1-1/128之间选择,人眼无法察觉到是正常的)被摄体反射光进入相机的光线,并参考镜头光圈、感光度、距离、测光模式进行分析和计算,得出正确输出闪光量来控制曝光的,而且每次闪光灯的发光时间都只有千分之一到千分之零点五之间,因此闪光灯可以看着一个高速的快门,许多人用闪光来拍摄告诉运动物体能得到清晰的照片就是利用了这个原理。
尼康、佳能等闪光灯都是依据这样预闪测光的原理来工作的,因此闪光灯照亮被摄体的亮度和相机的需求自动发生关联,能自动地调整到曝光正常。
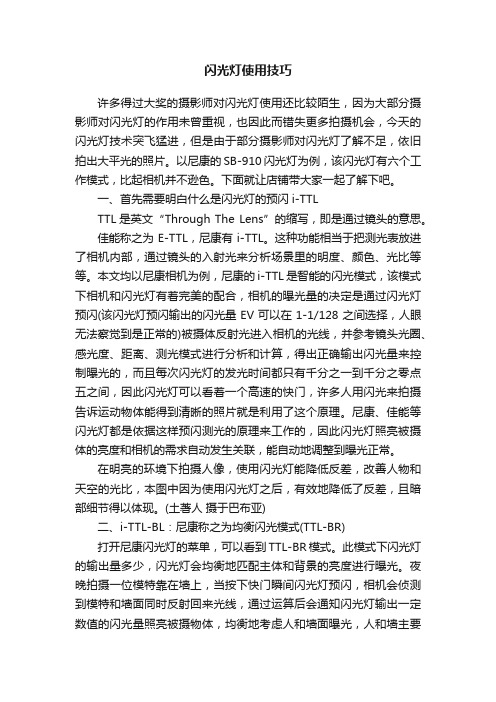
在明亮的环境下拍摄人像,使用闪光灯能降低反差,改善人物和天空的光比,本图中因为使用闪光灯之后,有效地降低了反差,且暗部细节得以体现。
(土著人摄于巴布亚)二、i-TTL-BL:尼康称之为均衡闪光模式(TTL-BR)打开尼康闪光灯的菜单,可以看到TTL-BR模式。
此模式下闪光灯的输出量多少,闪光灯会均衡地匹配主体和背景的亮度进行曝光。
夜晚拍摄一位模特靠在墙上,当按下快门瞬间闪光灯预闪,相机会侦测到模特和墙面同时反射回来光线,通过运算后会通知闪光灯输出一定数值的闪光量照亮被摄物体,均衡地考虑人和墙面曝光,人和墙主要是被闪光灯所照亮。
使用离机闪光灯让人像照片更绚丽

使用离机闪光灯让人像照片更绚丽来源:sioe编辑:李靖伟发布时间:11-06-08为什么在家中拍到的人像总是平淡无奇?是模特的问题还是摄影技术不够?其实只需要一台离机闪光灯来改变光效与光位,即刻就能得到自然但更出彩的效果!搞定离机闪必须知道的三点:TTL虽简单,但要更好地控制画面效果,最好的方式还是利用全手动M挡。
1.快门控制背景亮度闪光灯的发光时间都很短,背景光源一般为持续长时间的照明。
而闪光灯又有一定的照射范围,因此不管快门是1/125秒或1/30秒,闪光灯瞬间所发出的光亮对远处背景的亮度不会有太大的影响。
所以,背景的明暗受环境光线影响,由快门速度来控制曝光。
那我们应该用多快的快门呢?技巧是只要用比现场光下测得的快门速度高一挡的快门速度,便可以既保留到背景的气氛,又避免手震影响。
2.闪灯输出量控制主体亮度因为闪光灯的照射范围有限,主体的曝光只受闪光灯影响。
虽然闪光灯的TTL模式十分智能,但是当拍摄环境复杂的场景,或者希望有更好的效果时,还是用手动挡能更快的完成设置。
开启M挡开启M挡后,1为闪光输出量全开;1/2为闪光输出量减半,两者相差1EV,依此类推。
3.光圈、感光度与闪光距离互相作用在手动闪光摄影时,以感光度100为基准,光圈=闪光指数÷摄影距离。
例如,已知闪光指数为GN.24、摄影距离为3米,根据上述公式即可求出适当的光圈应为F8。
闪光灯的闪光指数越大,在相同的摄影距离时,允许采用的光圈也就越小,这样,被摄体可以获得的景深也就越大。
感光度与闪光距离的关系遵循“闪光距离法则”,即距离乘2,感光度乘4。
例如,假设闪光灯在感光度100时的有效距离为5米,如果你需要闪光距离达到10米,则需要使用ISO400的感光度。
假设输出光量保持不变,就会出现距离越远受光量越弱的情况,2倍距离就会变成1/2x1/2=1/4受光量,3倍距离就会变成1/3X1/3=1/9受光量,以此类推...离机闪改变光效实现聚光效果:闪光灯不仅能用做补光,只要闪光灯指数够强劲,即使在家中也能拍出舞台聚光效果。
尼康新高速电焦距镜头说明书

The PC-Nikkor 35mm f2 .8 has a fast maxi-
mum aperture for brighter focusing and an f32
minimum lens opening for greater depth-of-field
control Total covering power of 78° assures
9 elements in 8 groups 74° 92°
PC-Nikkor 35mm f2.8 7 elements in 7 groups
62° 78°
0 .3m (1 ft.)
f3 .5-f22
Manual preset type
Special mount enables up to 11mm off-axis for perspective control; shift adjustments via milled knob at side of lens; scale provided with graduations in 1mm intervals.
Lens Rotation
Filter Size Dimensions (Diam .xLength)
Weight Product No. Note: Specifications subject to change without notice. April , 1981
PC-Nikkor 28mm f 3.5
0.3m (1 ft .) f 2.8-f 32
Lens optics rotate 360° for perspective control in any direction ; click-stops at each 30° of rotation ; maximum permissible shift values engraved at each click-stop position.
让光线变得可控——尼康创意闪光系统(CLS)使用方法

让光线变得可控——尼康创意闪光系统(CLS)使⽤⽅法温馨提⽰:本⽂篇幅较长,对于⼩型闪光灯的介绍相对⽐较全⾯,看累了先收藏着也⾏摄影是⽤光作画,但在拍摄时常常会遇到现场光线不理想,尤其⾃然环境光线的不可控性,这时如果我们使⽤闪光灯,就可以在⼀定范围内对光线进⾏控制,从⽽拍出理想效果的相⽚来。
出门常备5盏灯尼康闪光灯的种类尼康闪光灯⼤致分为两种内置闪光灯外接热靴闪光灯▲内置闪光灯▲内置闪光灯的功能选项⼤部分时候设置为TTL就⾏内置闪光灯功率较低并且位置固定⽤来补光效果有限应个急还⾏但可以作为指令灯来控制离机外置闪光灯▲外接热靴闪光灯▲尼康外接热靴闪光灯的种类本篇重点介绍的是尼康闪光灯的使⽤如果你⼿中有外接闪光灯现在请将闪光灯插在机⾝热靴上如果没有外接闪光灯请将内置闪光灯弹出⾸先是机⾝上关于闪光灯的两项长期设置▲这个设置的是在A档和P档使⽤闪光灯(前帘同步)拍摄时的快门最低速度建议⽤1/60,防⽌⼿抖造成画⾯模糊▲这个设置是快门速度超过1/320秒时,闪光灯将使⽤⾃动⾼速同步,建议越⾼越好这两项是长期设置,设置好以后基本不⽤再调整了闪光灯模式▲按住闪光灯模式按钮同时拨动相机主拨轮就可以调整闪光灯模式闪光灯模式状态可以在相机肩屏上看到▲闪光灯模式图标闪光灯的闪光模式⼤致分为以下⼏种部分机型稍有不同当前闪光模式图标可与在相机机⾝肩屏上看到没有肩屏的看相机背⾯显⽰屏前帘同步:闪光灯在快门刚打开时闪光。
这个模式在⼤部分时候推荐使⽤,特别是抢拍时,使⽤外置闪光灯时最⾼可达到1/8000秒的同步速度。
后帘同步:闪光灯在快门即将关闭时闪光。
拍夜间⾏驶中的汽车之类建议⽤这个模式,可以拍出光条在车⾝后的效果,从画⾯上让⼈感觉车在前⾏。
防红眼:闪光灯在进⾏正式闪光前点亮约1秒,使拍摄对象瞳孔收缩,可以减少有时由闪光造成的“红眼”现象。
使⽤这个模式拍摄时,每次正式闪光前都会点亮约1秒,抢拍和连拍时不推荐,我在拍摄时⼏乎不⽤防红眼模式。
Nissin Air 10s (Fujifilm) 无线闪光灯控制器用户手册说明书
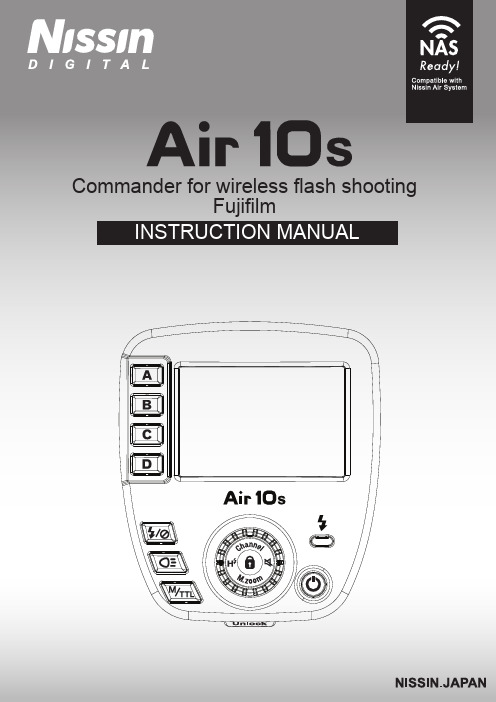
Changes or modifications not expressly approved by the party responsible for compliance could void the user's authority to operate the equipment.This device complies with Part 15 of the FCC Rules. Operation is subject to the following two conditions: (1) this device may not cause harmful interference, and (2) this device must accept any interference received, including interference that may cause undesired operation.Thank you for purchasing a Nissin productBefore using this commander unit, please read this instruction manual and refer to the manual of camera owner carefully to get a better understanding of the proper operation to enjoy flash photography.The commander Nissin Air 10s (Fujifilm) is an advanced commander for wireless flash shooting.It controls up to 8 groups of NAS (Nissin Air System) flash (Fujifilm) that have a wireless multiple flash shooting function using NAS (radio transmission). Please note that Nissin Air 10s (Fujifilm) are not usable with other branded cameras for TTL operation.Please refer to Nissin’s compatibility chart shown here:/download.htmlNissin Air System (NAS) is a Nissin wirelessly remote control flash light system, designed by Nissin. It consists of a Nissin radio commander (NAS commander) and the Nissin wireless flash (NAS flash) and Nissin radio receiver (NAS receiver) as remote slave units.Insert Air 10s on the camera hot shoe as a NAS commander.The signal of Air 10s is transmitted by using 2.4 GHz transmission.Transmission distance is approx. 100m (330 ft.)(Metal/ Wire/ Wall/ another 2.4 GHz radio frequency may cause areduction in the NAS transmission distance)These safety instructions refer to important information on how to use this product safely and properly. Please read the following instructions before using the product.This sign refers to conditions which may cause damage or defect.Do not touch the inside parts from the opening when the unit was dropped or broken.Place the batteries correctly in position. Placing the batteries in wrong polarity maycause leakage, exothermic heat or explosion.Do not leave or store the commander unit in the temperature over 40ºC/ 104ºF, such as in the automobile.The commander unit is not water resistance. Keep the unit away from rain, snow and humidity.Do not use benzene, thinner or other alcoholic agents to clean the unit.Do not use this commander unit with cameras which are not recommended in thecompatibility list at official website, otherwise it may damage the camera’s circuitry(*).Remove the batteries when not in use for a longer period of time.Do not use the Nissin Air 10s to pick up whole camera system when it installed on your camera. To pick up the whole camera system, you should hold the handle of camera body or the lens..* Please refer Nissin’s compatibility chart shown here:/download.htmlGroup selection buttonGroup on/off buttonModeling light button(Basic/Advanced Groups button)Shutter cable socket (2.5mm)M/TTL Mode Button123456LCD panelSelect dial with buttonsChannel buttonHSS buttonBuzzer buttonM.Zoom buttonPanel Lock/Unlock button (hold 1sec.)789101112131415(1) The AF-assist lamp supports digital system cameras measuring autofocus in the center of the image field only. It does not support other camera brands, other types of Fujifilm cameras or camera models without our compatibility test.(2) The strap hole made for carrying the Air 10s around the neck.Pilot button (Test flash button)Power On/Off button Unlock button Micro SD card slot(for firmware update)Strap hole (2) (strap is not included)Battery compartment door AF-assist light (1)Hotshoe contactsInserting batteries1. Open the battery compartment door andinsert 2 x size AAA batteries as shown in the picture.2. Make sure the + and - battery contacts arecorrectly inserted in the battery compartment.3. Close the battery compartment door andslide it back in place.It is recommended to use 2 batteries of the same brand and type, and replace them all at the same time.Wrong insertion of each battery would not make electric contact.(*) Air 10s has an energy saving power off functionTo save battery energy, the screen of Air 10s display dims in about 30 seconds and turns off in about 2 minutes automatically after the setting job is terminated. While Air 10s is in the stand-by mode, a blinking signal will be shown on the Pilot Button. To turn on Air 10s again, press any button on the Commander. In case of not in use for over 60 minutes, Air 10s will be turned off completely. To turn on Air 10s again, press Power button on the Commander.Press power on to activate Nissin Air 10s,hold the Pilot button for 5 seconds to reset to factory default setting Default setting:1. TTL mode: +/- 0EV2. M Manual mode: 1/2563. Zoom setting: Manual, 24mm4. Channel Setting: no. 25. HSS mode: off6. Buzzer: off7. Group Mode: Basic Groups8. Group status: all onDo not use the Air 10s as a holder to pick up the whole camera system.Mounting Air 10s on the cameraRemoving Air 10s from the cameraTurn off Air 10s.Turn off Air 10s.Insert the mounting foot of Air 10s into thehotshoe of the camera.1.2.Make sure that the mounting foot will lock(with a “click”) when it has been insertedcompletely.3.Hold the unlock button andslide the mounting foot of Air 10s off the hotshoe of camera.1.2.Pairing SettingStep 1: Switch all flash and Commander offTo perform wireless shooting, set the Nissin Air 10s commander andNAS slave unit with the following procedure. After pairing is completed, both of them will memorize the data and there will be no need to pair again after the units are switched on and off.1. Hold the "Set" and Power “ON/OFF” buttons for 3 seconds at the same time.3. Nissin Di700A will automatically be changed to wireless slave modeafter Pairing completed.Nissin flash Di700A2. “Beep” sound persists until the Pairing signal from commander is received. When the "beep" sound stops, the pairing is complete.1. Switch on your Nissin i60A, hold the "Channel" button for 2 seconds to check and make sure the channel setting in the display is in the "A" Auto channel mode.2. Turn off the Nissin i60A.4. “Beep” sound persists until the Pairing signal from commander is received. When the "beep" sound stops, the pairing is complete.Nissin flash i60A3. Hold the Panel Lock key and the “On & Off” button of Nissin i60Aat the same time for 3 seconds..1. Rotate the "Ch" channel dial to "Auto" auto channel mode.3. “Beep” sound persists until the Pairing signal from commander is received. When the "beep" sound stops, the pairing is complete.Nissin flash MG102. Hold the "Open" button and the power button for 3 seconds.Nissin Air R Receiver1. Rotate the "Ch" channel dial to "Auto" auto channel mode.2. Hold the power button for 3 seconds3. “Beep” sound persists until the Pairing signal from commander is received. When the "beep" sound stops, the pairing is complete.Step 2: Pairing on Nissin Air 10s commander1. Start the Pairing mode of all slave units and the "beep" sound are constantly heard.2. Turn off Nissin Air 10s then hold the Panel Lock key andthe power “On/Off” button for 3 seconds at the same time.The Pilot LED will blink about ten seconds (the display will not light up while pairing). When Nissin Air 10s Pairing mode has stopped, slave units around the commander will also complete the pairing process one by one, and stop the "beep" sound.3. To check the pairing between Nissin Air 10s and slave units,press the “Pilot LED” button on Nissin Air 10s for test and let NAS flash andthe flash on NAS receiver emit a weak output test flash.(*) Nissin Di700A, i60A ash and Nissin Air R receiver do not support the Channel 1 in Nissin Air 10s. Please use Channel 2 to 8 to pair with those 3 NAS slave unit models.The default channel setting is no. 2.If you want to change this setting then press the channel button for 2 second.Press channel button 2 second to exit setting.CAUTIONSIf strobes still have "beep" sound constantly after finishing the pairing process, this means the pairing process is not complete. Please move your Air 10s towards the Beeping strobes, then turn off the Air 10s and re-do the pairing process by holding Panel Lock key and the “On/Off” button again for 3 seconds.The NAS system is using an independent identity (ID) function to access strobes, the NAS strobes will not be affected by other commanders when-ever they are using the same channel in the same location. A slave unit of Nissin flash or Nissin receiver can only be controlled by one and only one NAS commander with pairing in default setting.Air 10s offers “Open Mode” ,a new function (only works with MG10), on the pairing setting. Open Mode can let two or more camera using same set MG10 in one place.1. Hold the button of Nissin Air 10s for 1 seconds,lights up on lower left corner means Open Mode is on.Now hold the for 1 seconds again to turn off.There are basic groups and advance groups for controlling the Nissin Air10s. They allow the user to pair an unlimited amount of slave units. They mainly divided into two kinds of groups:Both basic and advance groups can beoperate in the Air 10s commander. Usercan switch between these two groupswhenever they want.Example:Use the i60A in basic group A on manual,use two MG10 in advance group A & D in TTL and manual mode.M modeM/TTL modeTTL mode1. Power on Nissin Di700A and switch to wireless slave mode, press “Set ” several times until the (Group mode in the display),Air 10s, provides individual control of 4 groups (strobes), you can set these 4 groups in different settings. Before shooting, you have to set each strobes to be one of these 4 groups.A B C //A B C //1. Use Mode Dial to chang group . 1. Use Mode Dial to chang group .A B C //1. Use Mode Dial to chang group .In testing or changing the flash effect of different slave units group,you can turn on or turn off any group.will be appeared on the right side of the group. When the group is switched off, only "---" is shown.2. Press the “Group Selection” button when finish setting.For exampleA & C: on,B & D: off A & C: off, B & D: onWhen the NAS flash is set to the wireless mode, all exposure settingfunctions will be controlled by the NAS commander.In Basic groups mode: Press the button.In Advanced groups mode:To set different exposure in each group:1. Press the Group Selection button. When the letter “A” blinks,press M / TTL mode button to change the exposure(the same procedure works with groups B, C, and D).2. After completing the exposure setting,press the Group Selection button again to stop the blinking.1. Press the Group Selection button, the group letters blink.2. Rotate the Operation Dial to increase or decrease the TTL flash exposure compensation.The settings of TTL auto exposure compensation on Nissin Air 10s startsfrom -2EV to + 2EV and controlled by 1 / 3EV step interval.3. When the exposure compensation setting is completed,press the group selection button again.Switching Air 10s from TTL mode to M mode, the last flash power settingwill be saved in TTL control. Flash power value will also remain unchanged in M mode.If you do not press any group selection button which means all group letters in the display do not blink, rotate the Operation Dial to increase/ decrease the power of all groups. For example, A: 0EV, B: + 0.6EV, C: + 1EV, D: -1EV, do not select anygroup then turn the Operation Dial clockwise in 2 click intervals, will cause to A:+ 0.6EV, B: + 1.3EV, C: 1.6EV, D: -0.3EV.1. Press the Group Selection button, the group letter blinks.2. Rotate the Operation Dial to increase or decrease the flash power of the group selected.The setting of M mode on Air 10s starts from 1/256 (minimum) to 1/1 (Full), andcontrolled by 1/3 step intervals. The value digi displayed next to the grouponly shows the integer step value (*).If you do not press any group selection button which means all group letters in the display do not blink, rotate the Operation Dial to increase/ decrease the power of all groups. For example, A: 1/256, B: 1/8 + 0.6EV, C: 1/4, D: 1/2, do not select anygroup then rotate the Operation Dial clockwise with 2 intervals, it becomesA: 1/256 + 0.6EV , B: 1/4 + 0.3EV, C: 1/4 + 0.6EV, D: 1/2 + 0.6EV.Nissin Air 10s offers "A" auto zoom mode and manual zoom mode.1. Hold the for 2 seconds.2. Press the group selection button until the the desired letter(s) blink.Rotate the Operation Dial to change the Zoom head position setting.The focal length is representing the flash angle. Rotate the Operation Dialin anti-clockwise direction to decrease the value of the focal length of zoom head.Keep rotating anti-clockwise to change the "A" automatic zoom mode at the end.Rotate the Operation Dial in a clockwise direction to leave.The “A” auto zoom mode will increase the value of the focal length value of zoom head. Coverage range supports 24mm, 28mm, 35mm, 50mm, 70mm, 85mm,105mm, 135mm and 200mm focal length lenses.3. Press the group selection button again after completion of the zoom setting.Hold for 2 seconds again when all groups zoom settings are completed.If you do not press any group selection button, which means all group letters in the display do not blink, rotating the Operation Dial to increase or decrease the flashzoom head focal length will affect all groups; A, B, C and D.Normal flashguns have a very short flash duration. In order to estimate and control the flash more efficiently, the modeling light on slave unit can be used. It is a constant light for the user to estimate and preview the lightbefore shooting(flash emitting).(*) Modeling light is a new feature of the NAS system.Nissin Di700A, i60A, i40 flash and other discontinuedmodels do not support this feature.1. Press the Group Selection button(s), the group letter(s) blink.2. Press to switch the group’s modeling on/off.3. Press the Group Selection button again when setup completed.1. Press on Air 10s for 1 second to switch to theadvanced groups.2. Press to change to M mode.2. Press to turn on modeling light.If you do not press any group selection button, which means all group letter in the display do not blink, pressing the modeling light button will invert the modeling on/off setting of all groups. For example, A & C: On and B & D: off, press the modelinglight button without selecting any group, will cause to A & C: Off, and B & D: On.Flashgun supports shutter speed limitation on X-Sync (maximum speed synchronizeto flash) on SLR / DSLR /Mirrorless Cameras in general. If it does not supportHSS function of the camera, faster shutter speed settings than the maximum synchronize speed will block the flash gun. With faster shutter speeds than the maximum sync speed some part(s) of the image area would be shaded by the moving shutter leaves withinthe flash duration. As a result the image is only partially exposed by the flash light.”. HSS allows flashgun works under high speed shutter (max 1/8000s).1. Insert Air 10s to camera shoe.2. Switch on both Air 10s and Camera3. Menu Flash setting Flash function setting Sync. mode Auto FP(HSS)The flash emitting operation in HSS mode is different from the normal flash mode.With the HSS function, users can get a faster shutter speed which will result ina lower guide number. This is equivalent to a lower flash output. The flash of HSScannot be measured by an external light meter. When HSS is on,the exposure compensation setting of TTL mode offers the same -2EV to +2EV ofbasic mode. Using the power control of "M" Manual mode under HSS,the Air 10s offers 1/32 to 1/1 power range only. If power is set from 1/256 to 1/64+0.3EV, “M” manual power setting will automatically change to 1/32 in HSS mode.All settings of strobes are controlled by the commander wirelessly after the pairing is completed. If the strobes buzzer is on, a “Beep” sound will be heard when the Strobe is charging and not ready to flash. The “Beep” sound will be heard everytime when there is any change made through the commander.Hold button to switch the buzzer (on strobes) on or off.When “no buzzer” logo is displayed in LCD, it means that the beep sound is off.When the “no buzzer” logo disappears, then the buzzer function is turned on.To start the firmware update procedure, you need to have:The computer (Windows or Mac) connected to the InternetA Micro SD/SDHC card (recommend 4GB-32GB) and Micro SD card reader.Air 10s with 2pcs of full re-charged AAA batteries.1. Download the Firmware file(s). Click here to download firmware files:http: ///firmware.html2. Insert Micro SD/SDHC card to the card reader and connect to the computer.3. Format Micro SD/SDHC card under FAT32 format (Please backup before format).4. Copy all Firmware file(s) to Micro SD/SDHC card.5. Eject the Micro SD/SDHC and remove from the card reader.6. Insert AAA batteries into Air10s and switch on it.7. Then switch off the Air 10s.8. Remove the Micro SD/SDHC cover of Air 10s, insert the Micro SD/SDHC whichcontains the latest firmware update files into the Air 10s.9. Switch on the Air 10s. A LED light inside the Micro SD card slot of Air 10s will blink, it will blink and the light will change orange to red and stop blinking oncethe update is finished.10. The green light will emit when the firmware update procedure is completed.Remove the batteries and remove the Micro SD/SDHC.11. Insert the batteries again and switch on the Air 10s.button for 5 seconds. LCD display will show 2 differentfirmware versions. Release the Power button about 2seconds, firmware version page will disappear andreturns to the front operation page.(1) This is a testing result record, it may be affected by equipment and environmental factors.(2) This is a new feature which supports a coming new NAS flash.TypeWireless systemRadio specificationsChannelFlash GroupsTransmission distanceRemote flash control systemWireless flash exposure mode Supporting TTL Exposure control Flash sync mode Zoom mode (Flash coverage area)Special features AF-assist beam effective range Display Firmware update Power supply Continuous flash speed Battery Life Hot shoe Size Weight Accessories includedFujifilm NAS 2.4GHz ISM band (to obtain technical standards certification)8 channels (channel setting in Air 10s)8 groups (2) : A , B , C , D & Ȧ ,Ḃ , Ċ ,Ḋ100 meters (1)TTL automatic flash exposure mode with +/-2EV compensation and in 1 / 3EV step intervals;M manual flash output mode, offers 1/256 to 1/1control with 1/3 step intervalsTTL, Manual and Manual zoom1st curtain & 2nd curtain sync., red-eye reductionHSS (up to 1 / 8000s ), slow shutter sync.Auto Zoom, 24mm, 28mm, 35mm, 50mm,70mm, 85mm, 105mm, 135mm and 200mmModelling light on remote flash (2) , Advancedgroups (2) , TTL memory0.7 to 5 meters (1)LCD color displayMicro SD / SDHC (up to 32GB) (Not included)2 x AAA (not included)Up to 10 shots per secondApprox. 3,000 shots (using alkaline batteries)(1)Metal shoe with quick release lockApprox. 65(W) x 60(H) x 60(D) mm73g / 2.6 oz (without battery)Protection case, 2 shutter release cablesWarrantyIn case of the following reason of the defect, it may void the warranty.1. The product is not used in accordance with the instruction of the owner’s manual.2. The product is repaired or modified by the one who is not an authorized repair service.3. When the product is used with the cameras not applicable, lens, adaptors or such accessories produced by the third party.4. Fault or defect caused by fire, earthquake, flood, public pollution and such natural accident.5. In case that the product is stored in dust, moisture, extremely high temperature or such poor condition.6. Scratch, blemish, crush or worn out by a violent use or treatment.7. Guarantee card without name of place purchased or date of purchase stamped, or no guarantee card.Please refer the respective warranty condition for details which depends on the country of purchase and contact our official distributors who distributed this product for the warranty arrangement details.Nissin Japan Ltd., Tokyo Nissin Marketing Ltd., Hong Kong 。
日清闪光灯使用说明书

日清闪光灯使用说明书
一、产品简介
日清闪光灯是一款功能强大的摄影辅助设备,能够为您的拍摄带来更加专业的效果。
本产品采用高品质材料制作,结构坚固,性能稳定,是您拍摄过程中的得力助手。
二、使用步骤
1. 安装电池:请按照说明书指示正确安装电池,确保电池正负极正确。
2. 开启开关:按下开关按钮,指示灯亮起,表示闪光灯已开启。
3. 调整模式:通过模式旋钮选择适合的拍摄模式,以获得最佳的拍摄效果。
4. 连接相机:将闪光灯与相机进行连接,确保稳定可靠。
5. 开始拍摄:在相机设置正确的前提下,按下快门即可进行拍摄。
三、注意事项
1. 请勿在高温或潮湿的环境中使用本产品,以免造成损坏。
2. 请勿在闪光灯未完全冷却之前重复使用,以免影响使用寿命。
3. 请勿随意拆卸、修理或改装本产品,以免引起意外事故。
4. 在使用过程中,请勿将手指或其他物体伸入闪光灯内部,以免造成损坏。
5. 在使用过程中,请勿将本产品暴露在强磁场或强电场中,以
免影响性能。
6. 请妥善保管本产品,避免重压、撞击或划伤表面。
尼康 Speedlights 产品参数与特点说明书
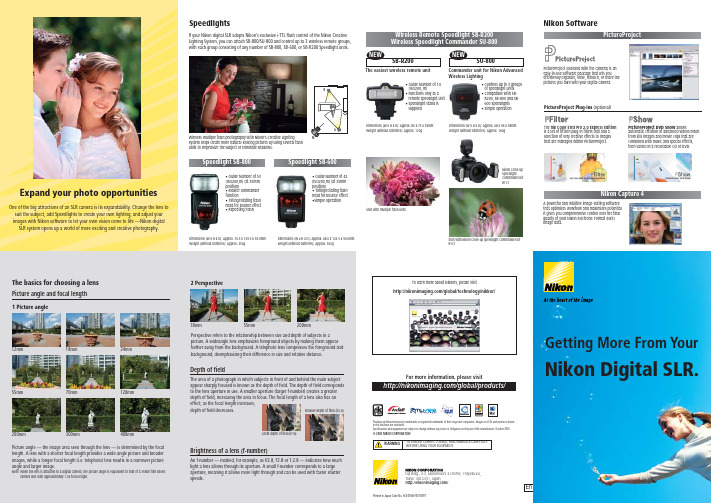
EnWireless Remote Speedlight SB-R200Wireless Speedlight Commander SU-800Nikon SoftwarePictureProject (bundled with the camera) is an easy-to-use software package that lets you effortlessly organize, view, retouch, or share the pictures you take with your digital camera./global/products/The easiest wireless remote unitCommander unit for Nikon Advanced Wireless Lighting• Guide Number of 14[ISO200, m]• Functions only as a remote Speedlight unit • Speedlight stand is suppliedDimensions (W x H x D): Approx. 80 x 75 x 55mm Weight (without batteries): Approx. 120g Dimensions (W x H x D): Approx. 68 x 96 x 58mm Weight (without batteries): Approx. 160g/Fuji Bldg., 2-3, Marunouchi 3-chome, Chiyoda-ku, T okyo 100-8331, JapanProducts and brand names are trademarks or registered trademarks of their respective companies. Images on LCDs and monitors shownin this brochure are simulated.Specifications and equipment are subject to change without any notice or obligation on the part of the manufacturer. October 2005© 2005 NIKON CORPORATIONPrinted in Japan Code No. 6CE41660(0510/B)TPictureProjectFor more information, please visit18mm 55mm 200mmGreat depth of field (f/16)Shallow depth of field (f/2.8)12mm 18mm 24mm55mm 70mm 120mm200mm 300mm 400mmThe nik Color Efex Pro 2.0 Express Edition is a set of fifteen plug-in filters that add a selection of very creative effects to images that are managed within PictureProject.PictureProject DVD Show allowsautomatic creation of advanced videos made from still images and movie clips that are combined with music and special effects,then saved on a recordable CD or DVD.A powerful and intuitive image-editing software that optimizes workflow and maximizes potential.It gives you comprehensive control over the final quality of your Nikon Electronic Format (NEF)image data.Nikon Capture 4To learn more about Nikkors, please visit/global/technology/nikkor/Shot with multiple flash unitsShot with Nikon Close-up Speedlight Commander Kit R1C1Nikon Close-up Speedlight Commander Kit R1C1• Controls up to 3 groups of Speedlight units • Compatible with SB-R200, SB-800 and SB-600 Speedlights • Simple operationYour next choices —lenses that prepare you for anything.More specialized choices — lenses that make you more creative.AF Zoom-Nikkor 28-200mmf/3.5-5.6G IF-ED (7.1x)AF Zoom-Nikkor 70-300mmf/4-5.6D ED (4.3x)•7.1x zoom to cover various shooting situations•Great traveling companionDimensions: Approx. 69.5 x 71mm, Weight: 360g•Easy to shoot super-telephoto pictures•Compact and lightweightDimensions: Approx. 74 x 116mm, Weight: 505gAF DX Fisheye-Nikkor 10.5mmf/2.8G ED•Reproduces distorted images with exaggerated perspective•180°picture angle captures everything in front of you.Dimensions: Approx. 63 x 62.5mm, Weight: 305gAF Micro-Nikkor 60mmf/2.8D•Lets you shoot as close as 22cm for intimate close-up shots.•Compact and lightweightDimensions: Approx. 70 x 74.5mm, Weight: 440gCompatible LensesAF-S DX Zoom-Nikkor 55-200mmf/4-5.6G ED (3.6x)•Great companion for your AF-S DX Zoom-Nikkor 18-55mm f/3.5-5.6G ED•Compact and lightweightDimensions: Approx. 68 x 79mm, Weight: 255gPortable telephoto zoom to bring your subjects closerFisheye lens to give you unique perspectiveMicro Nikkor for dramatic close-upsUltra-compact,high-power standard zoom for those on the goSuper-telephoto zoom to bring the world up-close•Captures great vistas in one frame•Useful for shooting group shots in confined spacesDimensions: Approx. 82.5 x 90mm, Weight: 465gAF-S DX Zoom-Nikkor 12-24mmf/4G IF-ED (2.0x)Ultra-wideangle zoom to capture great landscapesAF VR Zoom-Nikkor 80-400mmf/4.5-5.6D ED (5.0x)•VR enables handheld supertelephoto shooting•Useful for candid shotsDimensions: Approx. 91 x 171mm, Weight: 1,360gAF-S Nikkor 300mmf/4D IF-ED + TC-14E I I•SWM for fast and accurate autofocusing•You can easily capture supertelephoto images with the TC-14E I IDimensions: Approx. 90 x 222.5mm, Weight: 1,440gSupertelephoto zoom with VR (Vibration Reduction) systemSupertelephoto for creative opportunities•Bright standard lens for professional-looking portraits•Ultracompact and lightweightDimensions: Approx. 63.5 x 39mm, Weight: 155gPortable standard lens — great for portraitsNote: Available colors may differ by country or area.AF Nikkor 50mmf/1.8DAF-S DX VR Zoom-Nikkor 18-200mmf/3.5-5.6G IF-ED (11.1x)•Improved VR II minimizes image blur caused by camera shake•11.1x zoom covers most shooting situationsDimensions: Approx. 77 x 96.5mm, Weight: 560gHigh-power zoom with VR (Vibration Reduction) system•High-speed telephoto for professional-looking portraits•Compact and lightweightDimensions: Approx. 71.5 x 58.5mm, Weight: 380gPortable medium telephoto —for intimate portraitAF Nikkor 85mmf/1.8DNEW。
- 1、下载文档前请自行甄别文档内容的完整性,平台不提供额外的编辑、内容补充、找答案等附加服务。
- 2、"仅部分预览"的文档,不可在线预览部分如存在完整性等问题,可反馈申请退款(可完整预览的文档不适用该条件!)。
- 3、如文档侵犯您的权益,请联系客服反馈,我们会尽快为您处理(人工客服工作时间:9:00-18:30)。
在弱光环境下正对镜头的人或动物的眼睛会出现红眼现象,可通或在画面中的比例较小时,可通过预先闪光记忆锁定闪光曝光量。
慢速同步闪光
在弱光下使用较低的快门速度配合闪光,让主体和背景获得曝光平衡。
基本操作
安装电池 可以使用以下类型电池—碱性电池,锂电池,镍氢电池。
TTL闪光曝光补偿的默认值是0.0Ev。
TTL闪光曝光补偿值从-3.0---0---+3.0Ev共19级可调,以0.3Ev分档。
按下 键选择所需的闪光补偿值,然后按 确定。 需保存此补偿值,请按一下电源开关按钮锁定(解除锁定请再按一次 开关按钮)。 这时便可以进行闪光摄影了。请注意观察主体上闪光的效果,视实际 需要进行曝光补偿的修正设置以便达到最佳的效果。 在有些相机上可直接进行TTL闪光曝光补偿设置。 当闪光灯设置了闪光曝光补偿值之后,在相机上进行的闪光曝光补偿值仍然有效。
子闪灯输出强度有以下4级可供选择。
子闪灯输出强度 全功率
ISO100时的GN值
子闪灯只有在进行反射式闪光 摄影时才能使用。因此,将主 灯灯头倾斜到反射位置时, SUB符号会在闪灯液晶屏上出 现。而主灯头回到正常闪光照 明位置时,此符号会消失。
闪灯背部的彩色液晶屏此时只显示闪光灯的闪光曝光补偿值。
设置好相机的拍摄模式,选择闪光曝光补偿值即可进行闪光摄影了。 闪光灯会根据您所设置的闪光补偿值持续增加或减弱闪光。 几乎所有的控制都由相机完成,因此您只需要从相机上进行操作即可。
高级自定义设置 自定义设置使您能够享受更多创意摄影的乐趣。
要得到更高级闪光功能,可以进行下面两种重要附加功能的设置。
某些化学品或特殊物质以及某些仪器设备在特定情况下可能对闪光灯发出的瞬间强光敏感,有 可能导致火灾或电磁干扰。在这些场合下请注意有关警告标识。 请不要将本产品放置在汽车内会被阳光直射的地方,这些地方的温度会超过40摄氏度,有可 能会对元器件造成损坏。 本产品不能防水,在雨中及空气湿度高的场合下请小心使用。 在有可燃性气体的地方请勿使用闪光灯,否则有可能导致燃气爆炸。
当您改变镜头焦距时,闪灯灯头会自动同步进行变焦,让闪灯照射的范围与镜头的视角一 致。
您镜头的当前焦距数值会以近似值显示在闪光灯的彩色液晶屏上。
日清Di866闪光灯能够自动适应相当于24-105mm焦距的镜头视角范围(135全画幅尺寸 影像传感器)。
设置好相机模式与焦距即可开始使用Di866进行闪光摄影了。
当Di866安装在胶片相机或非兼容相机上使用时,从属模式仍能有效使用。
Di866由相机上进行设定的其它功能—闪灯完全从相机上进行控制
高速快门同步
可在高于相机本身闪光同步速度的更高速快门下实现闪光同步。
后帘同步
在相机快门关闭前再闪光,让动体的阴影更自然。
闪光包围曝光
连续使用不同的闪光曝光量拍摄数张,以便能从中挑选出效果最佳的。
这样就完成了对闪灯的操作设置。 当闪光灯完成充电,指示灯变成绿色时,便可半按快门开始对焦。 快门速度,光圈值与闪灯符号会出现在相机取景器的液晶显示屏内。 按下快门时Di866会发出闪光,闪光拍摄的结果可以立刻在相机的LCD上回放查看。 闪灯通过相机的测光系统完全控制闪光输出强度,确保获得准确的闪光曝光。
高级功能
Di866在相机的某些操作模式上可实现高级功能及设定-在闪灯上进 行设置
高级功能
操作模式
子闪灯 手动变焦 从属模式 光圈设定 感光度设定
TTL程序模式 TTL程序模式 手动设定模式 手动设定模式 *1 手动设定模式 *2
手动设定模式 手动设定模式
当Di866安装在胶片相机或非兼容相机上使用时,手动模式与从属模式仍能有效使用。
子闪灯功能 Di866在主灯的下方还有一个小型的子闪灯。当主灯在进行反射式闪光时,子灯会发出辅 助的闪光补光,能消除主灯造成的阴影。
在TTL功能显示时,保持按住 键2秒。 这时会出现TTL Advance(高级设置)界面。
按 选择子闪灯开启,并按 键选择闪光输出强度,按
键
确定。若8秒内不按键进行确定,将会自动返回到TTL功能设置界面。
安全注意事项
为了避免本产品对使用中或在使用中可能会他人带来危害,造成身体或财产 上的损失,请仔细阅读此部分说明。
警告 表示由于操作不当可能引起的对身体的伤害,危害人身安全。
由于本产品内有高电压元件,切勿自行拆解。在需要修理时请送往专业维修站。 由于挤压、跌落本产品,造成外壳破裂后请勿继续使用,以免接触到内部电子元件造成电击 伤害。 请勿在近距离将闪光头正对人眼闪光(特别是婴幼儿的眼睛),可能会在短时间内造成视力 障碍。请勿在1米内使用闪光灯直接拍摄婴幼儿,可能会对其视力造成伤害。
注意 请使用4枚相同品牌和型号的新电池,请不要混合使用不同型号和不同新旧 程度的电池使用。更换电池时,请同时更换4枚。 若电池极性安装错误,闪光灯将不会工作。
把Di866安装到相机上
确定相机和闪光灯的电源已经被关闭。
按照箭头所示方向松开闪灯脚上的锁定 环。
滑动闪光灯脚使其完全插入相机的热靴 内。
按照箭头所示方向旋转锁定环,确保闪 光灯被可靠地固定在相机上。
TTL闪光曝光补偿
Di866具备最新的TTL闪光控制系统,通过相机上的测光系统自动 控制闪光输出强度以得到最合适的闪光曝光。如果希望闪光更弱更 柔和,或者希望不改变背景曝光亮度的前提下主体上的闪光更强烈 些,通过TTL闪光曝光补偿功能,Di866都能为您快速地实现。
在相机上可使用此功能的曝光模式:
按下状态指示灯可随时进行闪光测试。 在需要关闭闪光灯电源时,保持按住电源开关2秒即可。
Di866具备两种自动关闭电源的节电功能
相机30秒内没有任何操作的话Di866会自动进入休眠状态。为节 省电能,你可以在用户自定义里选择“关闭显示屏”,这样的 话,显示屏8秒没有任何操作将自动关闭。
当Di866在休眠状态时,显示屏自动关闭,状态显示灯会每隔2秒 闪亮一次,表示闪灯进入休眠状态。要再启动Di866,请半按相 机的快门键或按闪光灯的任意键。
30分钟内没有对Di866进行任何操作时,闪光灯会自动完全关 闭。要再次启动Di866,请重按闪光灯的电源开关。
使用Di866的离机模式(无线TTL模式或从属闪光模式)时,建议 取消自动关机或把自动关机时间设置为60分钟。取消自动关机或 定时在用户自定义里设置。请参考第30页。 重新启动Di866时,闪灯的模式和各种数据与关机前的设置是一 致的。
按照箭头指示方向取出电池夹,装 入4节AA(5号)电池。
请注意电池是向同一方向(极性) 安装的。此设计是为了提高安装电 池的速度和效率。
电池的正负极性方向在电池夹上有 明显的标识。
按照箭头指示方向将安装好电池的 电池夹装回闪灯内。
在闪光后若单次闪光充电的时间长 于20秒时表示电池电力衰竭,请更 换新电池或为充电电池进行充电后 再继续使用闪光灯。
请勿将闪灯电池的正负极性反接,引起电池短路的燃烧或爆炸。
注意 表示由于操作不当可能引起的对产品的损坏。
使用中电池异常发热请立刻停止使用并检查原因。
普通干电池(非充电电池)请勿充电后继续使用。
在拥挤、激烈的拍摄场合,请避免碰撞闪光灯以免造成跌落及损坏。 请勿使用含有有机溶剂或挥发性的清洁剂擦拭闪光灯,特别是灯头和前面的红色感应窗口可能 会因此造成腐蚀,影响正常使用。 长时间不使用时请将电池取出,将本产品放置在干燥的地方。 小心使用闪光灯,避免过度撞击。 使用外置电源向闪灯供电时,请仔细阅读安全使用说明。
手动设定模式
手动模式—手动设定闪光曝光的输出量。 光圈预设模式—根据您所预设选定的光圈值,闪灯自动控制输出量。
频闪模式
在同一个画面中实现可调次数的多次闪光,闪光次数可任意设定。
无线闪光模式
在离机状态上实现多灯闪光,同时可实现无线的TTL闪光控制。
用户自定义设置
多种闪灯的用户自定义功能设置,定制专属您的闪光灯功能。
设置模式与功能
全自动闪光控制
在相机上可设置的曝光模式
全自动
光圈先决
还包括:
夜景
肖像,
程序
快门先决
手动
微距
运动
儿童
风景
Di866闪光灯在上述模式下都完全支持iTTL自动闪光控制系统。
把Di866安装到相机热靴上并打开闪灯和相机的电源。
闪灯背部的彩色液晶屏自动显示 A ,即全自动闪光模式。
Di866此时便已经设置为相机的自动闪光控制系统下的全自动操作。 按下电源开关键可锁定闪灯当前的设置(再次按下则可解除锁定)。
数码TTL电子变焦闪光灯
使用说明书
感谢您购买日清产品!
在把日清Di866闪光灯安装到您的照相机上正式使用之前,请您阅读本说明 书,以便能够发挥闪光灯和照相机的全部功能。
把日清Di866安装到数码单镜头反光相机上时,几乎所有的自动闪光控制功 能都可以在相机上进行设置。您也可以手动控制闪光灯,建议在您对闪光灯 的功能有所了解后再投入正式拍摄。
6个主要功能图形化显示,令闪灯的操作 和设置更为简便。
简易操作 把日清Di866安装到相机上,基本的闪光曝光操作可由相机完全实现自动控 制。日清可以像相机本身的内置闪光灯那样进行非常简单的操作便可获得满 意的闪光摄影效果。
高级功能 日清Di866提供了相当多的高级闪光摄影功能,包括无线离机TTL闪光控制功 能,高速闪光同步功能,频闪功能,由闪灯实现的外部光圈优先自动闪光功 能等。
日清Di866尼康型支持尼康数码单反以及热靴型相机,它有最先进的TTL闪灯 控制系统和日清首创的自动旋转彩色液晶屏,令操作变得更容易。
日清Di866闪光灯(尼康接口)全面兼容尼康i-TTL自动闪光控制系统。与其 它品牌的自动闪光控制系统可能会出现不兼容的情况。
独有功能
闪灯上的彩色液晶显示屏在水平和垂直拍 摄的90度角上会整体自动旋转,保持与 您的视线水平一致。
