使用Qt Creator进行ARM开发
ARM9的QT开发平台的建立
ARM9的QT开发平台的建立第一次建立ARM9的QT开发平台,必须先编译开发ARM9功能所需的核心程式。
一开始先将s3c2410_kernel2.4.18_r1.1_webcam.tar.bz2档放至个人/root 资料夹中,然后开启终端机模式,切换到个人/root 资料夹输入解压缩指令root@ashou :~/#tar xvfj s3c2410_kernel2.4.18_r1.1_webcam.tar.bz2解压缩完毕后,在个人/root 资料夹中产生s3c2410_kernel2.4.18_r1.1_change的目录,此目录存放的是更改后的核心程式s3c2410_kernel2.4.18_r1.1。
与原来核心程式版本的差异在于旧核心程式版本只支援到PWC-8.6;更改后的核心程式版本支援至PWC-8.8 。
目的在于让2410能支援我们所买的webcam,型号为logitech quickcam 4000 pro 。
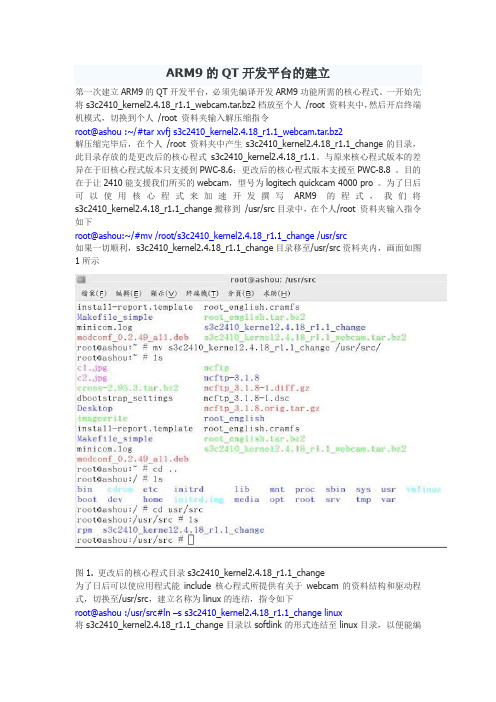
为了日后可以使用核心程式来加速开发撰写ARM9的程式,我们将s3c2410_kernel2.4.18_r1.1_change搬移到/usr/src目录中,在个人/root 资料夹输入指令如下root@ashou:~/#mv /root/s3c2410_kernel2.4.18_r1.1_change /usr/src如果一切顺利,s3c2410_kernel2.4.18_r1.1_change目录移至/usr/src资料夹内,画面如图1所示图1. 更改后的核心程式目录s3c2410_kernel2.4.18_r1.1_change为了日后可以使应用程式能include核心程式所提供有关于webcam的资料结构和驱动程式,切换至/usr/src,建立名称为linux的连结,指令如下root@ashou :/usr/src#ln –s s3c2410_kernel2.4.18_r1.1_change linux将s3c2410_kernel2.4.18_r1.1_change目录以softlink的形式连结至linux目录,以便能编译ARM9核心程式以及使用此更改后的核心程式来开发应用程式。
QT程序,如何在ARM板上运行
QT程序,如何在ARM板上运行QT程序,如何在ARM板上运行写这篇文章,主要是为了说明怎么让PC机下编译好的QT程序移植到板子上运行。
在说明之前,我们要了解一个事情,就是QT。
QT是一个跨平台的开发工具,具有很好的移植性,它所依赖的库文件在PC机上和在ARM上是不一样的,那么我要怎么做呢?很简单,就是重新编译已经写好的QT程序。
为什么需要重新编译,第一,ARM的CPU的指令集和PC的CPU指令集肯定是不一样的,也就是需要交叉编译。
第二:由于QT所依赖的库文件不一样,在不同的指令集得CPU里,库是需要移植的。
我这里假设ARM板的文件系统里已经移植好了QT相关的库文件(具体怎么移植,我会再写一篇文章),移植好后,在开发板上就可以移植QT程序了。
那么,具体我要怎么编译呢?我们都知道,编译好的QT的程序,一般会有几个.CPP\\.h文件,这么多的文件我们要怎么样编译。
首先,我们需要安装QT版本的库,一定要注意,这个库文件一定和开发板上的是同一个库。
我们假设这个库名字叫qtembed450-arm。
以下步骤一定要注意:1.安装目录一定要在“/usr/local/”下;2.安装成功后,这步非常关键,一定要设置环境变量,而且,我们要设置三个环境变量,这样做有三个目的:①可以在任何路径下用库里的命令②编译时候可以指定编译规则为arm-linux-g++③编译时候可以指定到所需要的库文件。
那么安装后,输入一下命令:gedit /root/.bashrc.这个命令执行后就进入到设置环境变量的地方,我们要加入以下三个环境变量的设置:export PATH=$PATH:/usr/local/qtembed450-arm/binexportLD_LIBRARY_PATH=$LD_LTBRARY_PATH:/usr/local/qtembed 450-arm/lib export QMAKESPEC=/usr/local/qtembed450-arm/mkspecs/default以上设置非常的重要,非常的关键。
arm qt编译步骤
arm qt编译步骤【原创实用版】目录1.ARM QT 编译器的概念2.ARM QT 编译器的安装3.ARM QT 编译器的基本使用方法4.ARM QT 编译器的进阶使用方法5.总结正文一、ARM QT 编译器的概念ARM QT 编译器是一款针对 ARM 嵌入式系统的 Qt 编译工具,它能够将 Qt 应用程序编译成适合 ARM 嵌入式系统的二进制代码。
这款编译器集成了 Qt 的库和开发工具,使得开发者可以更加方便地编写和编译Qt 应用程序。
二、ARM QT 编译器的安装安装 ARM QT 编译器需要先安装 Qt Creator,Qt Creator 是 Qt 的官方集成开发环境,支持多种编程语言,包括 C++、Python 等。
在安装 Qt Creator 时,需要选择适合 ARM 嵌入式系统的版本,并且需要安装对应的 ARM 开发板驱动程序。
安装完 Qt Creator 后,可以通过其内置的工具链进行 ARM QT 编译器的安装。
具体步骤为:打开 Qt Creator,选择“工具”->“选项”,在“构建与运行”选项卡中选择“编译器”,然后选择适合 ARM 嵌入式系统的编译器。
三、ARM QT 编译器的基本使用方法ARM QT 编译器的基本使用方法与 Qt Creator 中的其他编译器相同。
首先,需要创建一个 Qt 项目,然后在项目中编写代码。
编写完成后,可以通过 Qt Creator 的“构建”选项进行编译。
编译完成后,可执行文件将会生成在项目目录下的“build”文件夹中。
四、ARM QT 编译器的进阶使用方法ARM QT 编译器还提供了一些进阶功能,如代码优化、调试等。
这些功能可以通过 Qt Creator 的选项卡进行设置。
例如,可以选择“优化”选项卡,打开“优化”对话框,勾选需要优化的项,然后点击“应用”按钮进行优化。
五、总结ARM QT 编译器是 Qt 针对 ARM 嵌入式系统的一款编译工具,它集成了 Qt 的库和开发工具,使得开发者可以更加方便地编写和编译 Qt 应用程序。
Qt Creator的配置和开发初步测试
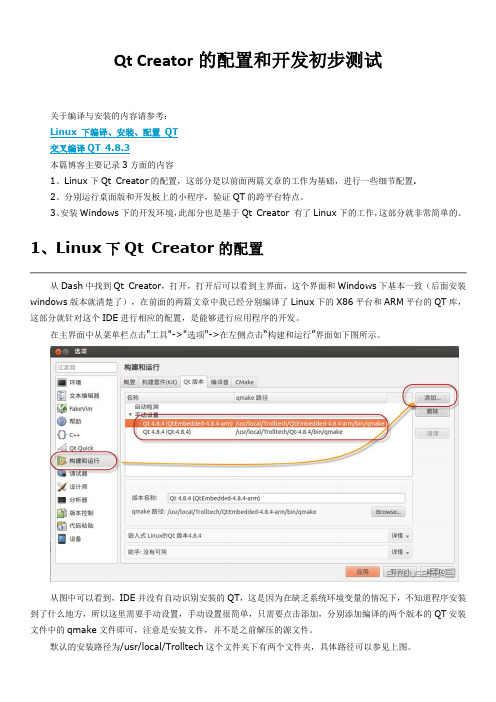
Qt Creator的配置和开发初步测试在主界面中从菜单栏点击"工具"->"选项"->在左侧点击“构建和运行”界面如下图所示。
到这里就告诉IDE 安装QT的位置了,由于需要进行编译开发,接下来还需要指定编译器,点击“编译器”选项卡,如下图所示。
如图中所示,Qt Creator已经检测到X86的GCC,而我们要是做arm平台开发的话还需要指定用于arm 开发的交叉工具链,我的安装路径为/usr/local/arm/4.3.2/bin/需要指定g++文件,如图中所示。
配置完成后,点击“应用”。
QT和编译器指定完成后就需要进行下一步配置了,就是对这些工具进行组合,点击“构建套件(kit)”选项卡,如下图所示。
如上图所示,这里所做的设置也很简单,相当于是设定几种方案,指定设备类型、所用的编译器版本以及QT 版本,我这里配置桌面和ARM两项,分别对应在PC和开发板两个平台。
到这里,基本配置就完成了。
下面新建一个项目,点击菜单”文件“->”新建“,如下图所示,选择应用程序-QtGui应用工程新建完成后就可以看到工程目录即文件了,如下图所示。
我这里拖了几个作为示意,这部分弄好后,点击左下角的直接运行,构建完成后就会弹出刚刚设计的界面,如下图所示。
可以看到实际运行效果和编辑的情况由于字体等因素略有差异。
接下来就要生成一个能够在开发板上运行的程序了,由于刚刚在新建项目的时候构建套件选择的是桌面,所以首先要对这点进行更改。
如下图所示,点击”项目“--”添加构建套件“下方就会弹出我刚刚设定的ARM,在arm的构建设置中可以使用默认配置,其他相关选项可以参考桌面选项更改。
需要说明的是在ARM的运行项目中,需要部署到远程运行,这里没有部署,因此在剪辑编辑进行构建的时候,就不能改直接运行了,点击锤子图标,进行构建,构建完成后可以在工程文件夹下,如下图所示,那么在ARM开发板上运行的程序就在test1-build-ARM-_____Debug文件夹下。
Fedora9 下搭建Qt Creator的ARM开发环境并移植Qt4.6.3-books到mini2440

到/downloads-cn下载最新版的软件包,当前是:
1、用于 Linux/X11 32位 的 Qt Creator 2.0.0 二进制软件包Qt SDK for Linux/X11 32-bit** (371 MB)( /qtsdk/qt-sdk-linux-x86-opensource-2010.04.bin)
-no-opengl \
-no-cups \
-no-glib \
-no-xcursor -no-xfixes -no-xrandr -no-xrender \
-no-separate-debug-info \
-nomake examples -nomake tools -nomake docs \
# make
# make install
我下载的包解压后没有configure文件,需要运行autogen.sh后才能生成。
9、进入qt-everywhere-opensource-src-4.6.3-arm目录编译安装
首先先配置:
注:必须加上“-prefix /usr/local/Trolltech/QtEmbedded-4.6.3-arm ”参数, 不然安装后不在QtEmbedded-4.6.3-arm文件夹下,而是覆盖了QtEmbedded-4.6.3。
1234 dev lib opt sbin usr
Settings etc linuxrc proc sys var
bin home mnt root tmp www
5. 编译 PC 版:
进入pc目录
#./configure
# gmake
# gmake install
基于ARM的Linux系统下Qt串口助手的设计
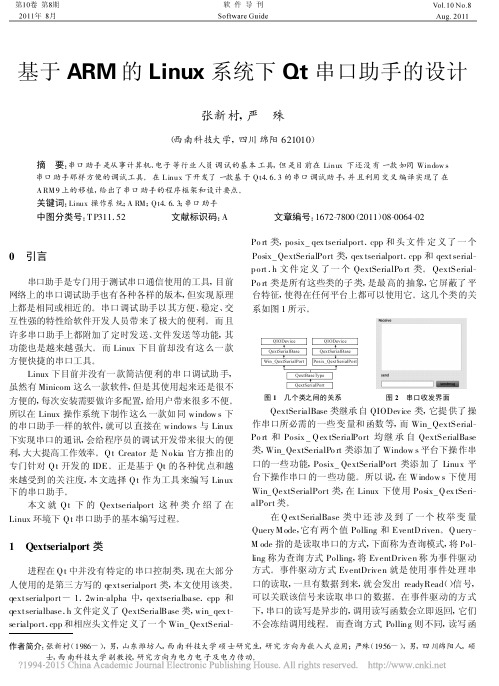
基于ARM 的Linux 系统下Qt 串口助手的设计张新村,严 殊(西南科技大学,四川绵阳621010)摘 要:串口助手是从事计算机、电子等行业人员调试的基本工具,但是目前在Linux 下还没有一款如同Window s串口助手那样方便的调试工具。
在L inux 下开发了一款基于Q t4.6.3的串口调试助手,并且利用交叉编译实现了在A RM 9上的移植,给出了串口助手的程序框架和设计要点。
关键词:Linux 操作系统;A RM ;Q t4.6.3;串口助手中图分类号:T P311.52 文献标识码:A 文章编号:1672-7800(2011)08-0064-02作者简介:张新村(1986-),男,山东潍坊人,西南科技大学硕士研究生,研究方向为嵌入式应用;严殊(1956-),男,四川绵阳人,硕士,西南科技大学副教授,研究方向为电力电子及电力传动。
0 引言串口助手是专门用于测试串口通信使用的工具,目前网络上的串口调试助手也有各种各样的版本,但实现原理上都是相同或相近的。
串口调试助手以其方便、稳定、交互性强的特性给软件开发人员带来了极大的便利。
而且许多串口助手上都附加了定时发送、文件发送等功能,其功能也是越来越强大。
而Linux 下目前却没有这么一款方便快捷的串口工具。
Linux 下目前并没有一款简洁便利的串口调试助手,虽然有Minicom 这么一款软件,但是其使用起来还是很不方便的,每次安装需要做许多配置,给用户带来很多不便。
所以在Linux 操作系统下制作这么一款如同window s 下的串口助手一样的软件,就可以直接在windows 与Linux 下实现串口的通讯,会给程序员的调试开发带来很大的便利,大大提高工作效率。
Q t Creator 是N okia 官方推出的专门针对Q t 开发的IDE 。
正是基于Qt 的各种优点和越来越受到的关注度,本文选择Q t 作为工具来编写Linux 下的串口助手。
基于linux-ARM的QT环境搭建
ARM开发之QT平台搭建---基于Linux系统的ARM平台QT移植第一部分:移植前述现在ARM行业如火如荼,使用linux作为操作系统的也较多,本文只针对ARM和linux平台下的QT移植和程序测试做一翻详解,对于wince等系统不涉及。
ARM开发的话必须具备以下硬件或平台条件:1.ARM硬件开发板,现在处理器用的多是ARM9或者ARM112.针对嵌入式行业的Linux系统内核,以及PC机上的Linux系统开发环境,比如Ubuntu,Redhat,CentOs等3.ARM软件开发环境,这个比较复杂多样。
ARM开发无非是底层驱动移植和开发,以及顶层的应用程序开发,还有相对应的各种调试。
不管是开发还是调试,都要用到相对应的工具或软件。
驱动开发的领域本文不涉及,而顶层应用程序开发的一个重要环节就是面向客户的图形界面开发,而图形界面开发嵌入式领域用的比较多的是QT。
Qt是诺基亚开发的一个跨平台的C++图形用户界面应用程序框架。
它提供给应用程序开发者建立艺术级的图形用户界面所需的所用功能。
Qt是完全面向对象的,很容易扩展,并且允许真正地组件编程。
4.应用程序在pc机上开发,完成后希望在ARM板上调试,以确认程序的正确性和完整性等,这时应该如何办呢?这里面涉及的知识比较多,有:开发板引导启动文件Uboot;Linux内核镜像的烧写;交叉编译;搭建QT开发环境;开发板与PC机Linux系统的NFS挂载连接;再就是QT 程序在线测试等。
上述中交叉编译之前的所有操作本文不涉及,读者如有不明之处请另找资料,本文意在构建一个QT开发环境,和使用开发板通过NFS挂载后的QT应用程序测试环境。
第二部分:QT移植具备条件ftp:///qt/source/1.交叉编译器:版本较多,现在常用的是arm-linux-gcc-4.3.2.或者arm-linux-gcc-4.1.22. QT版本:qt-embedded-linux-opensource-src-4.5.3.tar.gz和qt-x11-opensource-src-4.5.3.tar.gz,可以从QT官网上下载各种版本(注:开发QT的公司已被诺基亚公司收购)官网地址:/2.触摸屏支持tslib3.Linux系统上的一些编译工具或者库说明:(1)交叉编译工具是在QT库安装时要用到它来编译,然后QT应用程序调试时需要要到它编译成ARM板上能运行的代码。
ARM-linux嵌入式开发环境安装参考手册
基础是你已经安装了Ubuntu,以及相关软件:超级终端minicom 及C/C++ compiler environment. 在Ubuntu上可使用下面终端命令安装minicoom和编译环境。
#sudo apt—get install minicom#sudo apt-get install build—essentialStep 1:将光盘 Linux 目录中的 arm—linux—gcc-4。
5.1—v6—vfp—20101103。
tgz 复制到 Lubuntu的当前目录下,执行解压命令:#sudo tar xvzf arm-linux-gcc-4.5.1-v6-vfp—20101103。
tgz –C /注意:C 后面有个空格,并且C 是大写的,它是英文单词“Change”的第一个字母,在此是改变目录的意思.这样 arm—linux-gcc 的相关文件就Copy到root用户的Opt目录中Step 2:把编译器路径加入系统环境变量,运行命令#sudo gedit ~/.bashrc编辑~/.bashrc 文件,注意“ bashrc ” 前面有一个“ . ”,修改最后一行为export PATH=$PATH:/opt/FriendlyARM/toolschain/4.5。
1/bin注意路径一定要写对,否则将不会有效。
如图,保存退出。
输入arm—linux—gcc –v,会出现如下信息,这说明交叉编译环境已经成功安装。
Step 3:编译链接 arm-qte-4。
7。
01) 解压包到自己制定的目录,例如 arm-qte-4.7。
02) 终端中运行。
/build-all(首先,注意不能双击运行,必须在终端中运行;其次,不使用 sudo)大约要安装2个小时当运行到出现如下提示后:cd src/tools/bootstrap/ && make -f Makefile installmake[1]:正在进入目录`/home/administrator/arm-qte-4.7。
qt程序移植到arm开发板
qt程序移植到arm开发板1、安装交叉编译⼯具链arm-linux-gcc●复制arm-linux-gcc-4.4.3.tar.gz到/home/tools⽂件夹⾥●解压命令tar xvzf arm-linux-gcc-4.4.3.tar.gz -C / (解压⽂件到根⽬录下)注意以上命令必须要有-C⽽且是⼤写,后边有个空格也要注意。
注意查看解压的路径,将解压⽣成的⽂件移动到usr/local/arm⽬录下●vi /etc/profile●在⽂件的末尾加上PATH=/usr/local/arm/4.4.3/bin:$PATH●输⼊命令:source /etc/profile(使刚修改的⽂件⽴即⽣效)●查看arm-linux-gcc版本arm-linux-gcc -v注意:此⽅法只对当前登录⽤户有效,更换⽤户后修改当前登录⽤户/etc/profile即可2、tslib编译与安装tslib是电阻式触摸屏⽤于校准的⼀个软件库,是⼀个开源的程序,能够为触摸屏驱动获得的采样提供诸如滤波、去抖、校准等功能,通常作为触摸屏驱动的适配层,为上层的应⽤提供了⼀个统⼀的接⼝。
因此这⾥先编译安装tslib,这样在后⾯编译Qt的时候才能打包编译进去。
●需要检查⼀下软件是否安装sudo apt-get install automakesudo apt-get install autogensudo apt-get install autoconf●确定以上⼯具都已经安装后,复制tslib-1.4.tar到/home/tools⽂件夹⾥tar -zxvf tslib-1.4.tar.gzcd tslib./autogen.sh./configure --host=arm-linux ac_cv_func_malloc_0_nonnull=yes --cache-file=arm-linux.cache -prefix=/usr/local/tslibmakemake install-prefix=/usr/local/tslib是指定安装路径,其实包括下⽂的安装配置,路径都可以不指定,默认就是安装到/usr/local/⽬录下若出现错误:configure.ac:25: error: possibly undefined macro: AC_DISABLE_STAT ICIf this token and others are legitimate, please use m4_pattern_al low.See the Autoconf documentation.configure.ac:26: error: possibly undefined macro: AC_ENABLE_SHARE Dconfigure.ac:27: error: possibly undefined macro: AC_LIBTOOL_DLOP ENconfigure.ac:28: error: possibly undefined macro: AC_PROG_LIBTOOL autoreconf: /usr/bin/autoconf failed with exit status: 1解决⽅法:apt-get install libtool3、Qt的交叉编译与安装和PC平台下的编译类似,通过运⾏./configure进⾏配置⽣成makefile⽂件,然后编译安装,只是因为是针对嵌⼊式平台需要进⾏⼀些针对性配置,这⾥⽣成⼀个⾃动配置⽂件,可以通过修改⽂件来⽅便的更改配置。
基于arm的嵌入式qt图形界面开发信号发生器设计

业设计说明书(毕业论文)
2.4.2 制作带 Qtopia 的文件系统映像 .................................................. 27 2.5 设计所用 Linux 工具及其基本指令 .......................................................... 28 第三章 Qt 界面开发 ................................................................................................... 31 3.1 Qt 概述 ......................................................................................................... 31 3.2 Linux 下 Qt 开发环境搭建 ....................................................................... 31 3.2.1 安装工具的准备及安装原则 ........................................................ 31 3.2.2 安装过程 ........................................................................................ 31 3.3 简易信号发生器界面开发 .......................................................................... 33 3.3.1 Qt/Embedded 开发演练 ................................................................. 33 3.3.2 简易信号发生器界面实现 ............................................................ 34 第四章 结论 ................................................................................................................ 48 参考文献 ...................................................................................................................... 49 附录 A:电路图 ........................................................................................................... 50 附录 B:程序 ............................................................................................................... 51 致谢 .............................................................................................................................. 57
移植Qt5.5到arm开发板(全世界的问题我一个人碰完了)
移植Qt5.5到arm开发板(全世界的问题我一个人碰完了)展开全文https:///qq_41399894/article/details/8647547 2前面安装Qt的步骤就不说了,下载好一路next就可以了,接下来一、首先要移植Qt必须要用到Qt的源码,在这里也是用Qt5的源码来移植。
源码可以在/archive/qt/下载,选择文件qt-everywhere-opensource-src-5.5.0.tar.gz下载。
2、把下载好的文件放在ubutun的/myTools/Qt/目录下,执行命令 tar zxvf qt-everywhere-opensource-src-5.5.0.tar.gz 来解压,解压完成后就会看到 qt-everywhere-opensource-src-5.5.0 目录。
3、接着就是开始进行编译的工作了。
首先进去目录/myTools/Qt/qt-everywhere-opensource-src-5.5.0/qtbase/mkspecs/linux-arm-gnueabi-g++ ,在这个目录下回看到qmake.conf文件,我们需要修改这个文件。
vim qmake.conf#qmake configuration for building with arm-linux-gnueabi-g++#MAKEFILE_GENERATOR = UNIXCONFIG += incrementalQMAKE_INCREMENTAL_STYLE = sublibQT_QPA_DEFAULT_PLATFORM = linuxQMAKE_CFLAGS_RELEASE += -O2 -march=armv7-a // march是处理器架构,我的是armv7-aQMAKE_CXXFLAGS_RELEASE += -O2 -march=armv7-ainclude(../common/linux.conf)include(../common/gcc-base-unix.conf)include(../common/g++-unix.conf)#modifications to g++.confQMAKE_CC = arm-none-linux-gnueabi-gccQMAKE_CXX = arm-none-linux-gnueabi-g++QMAKE_LINK = arm-none-linux-gnueabi-g++QMAKE_LINK_SHLIB =arm-none-linux-gnueabi-g++# modifications to linux.confQMAKE_AR = arm-none-linux-gnueabi-ar cqsQMAKE_OBJCOPY =arm-none-linux-gnueabi-objcopy QMAKE_NM = arm-none-linux-gnueabi-nm -PQMAKE_STRIP = arm-none-linux-gnueabi-stripload(qt_config)如果这里.对芯片的指令集没有选择好QT_QPA_DEFAULT_PLATFORM = linuxQMAKE_CFLAGS_RELEASE += -O2 -march=armv7-aQMAKE_CXXFLAGS_RELEASE += -O2 -march=armv7-a在开发板运行过程中,运行有提示:Illegal instruction (非法指令)这里要注意,每个人的交叉编译器的前缀都是不一样的,我的就是arm-none-linux-gnueabi-,需要注意还有就是如果你有多个交叉编译器,那么这里你要设置为绝对路径然后去解压目录下,即是/myTools/Qt/qt-everywhere-opensource-src-5.5.0/,每个人存放的目录都不要,这里我是直接运行./configure -prefix /opt/qt-5.5 -release -opensource -xplatform linux-arm-gnueabi-g++ -no-opengl这里你会发现,在运行结束后,会提示你需要你添加一句qreal float的意思,xplatform linux-arm-gnueabi-g++ -no-opengl -qreal float 我加上了之后,重新运行,提示我们make和make install,我make了之后Project ERROR: Unknown module(s) in QT: quickMakefile:47: recipe for target 'sub-textureandlight-make_first' failedmake[4]: *** [sub-textureandlight-make_first] Error 3make[4]: Leaving directory '/home/jay/qt-x11/qtcanvas3d/examples/canvas3d/canvas3d'Makefile:42: recipe for target 'sub-canvas3d-make_first' failedmake[3]: *** [sub-canvas3d-make_first] Error 2make[3]: Leaving directory '/home/jay/qt-x11/qtcanvas3d/examples/canvas3d'Makefile:42: recipe for target 'sub-canvas3d-make_first' failedmake[2]: *** [sub-canvas3d-make_first] Error 2make[2]: Leaving directory '/home/jay/qt-x11/qtcanvas3d/examples'Makefile:69: recipe for target 'sub-examples-make_first' failedmake[1]: *** [sub-examples-make_first] Error 2make[1]: Leaving directory '/home/jay/qt-x11/qtcanvas3d' Makefile:349: recipe for target 'module-qtcanvas3d-make_first' failedmake: *** [module-qtcanvas3d-make_first] Error 2这里的错误现象是百度复制过来的的,因为我编译成功了,不想卸了重装,但是问题大概就是这样,这个解决方法:你可以忽略它所找不到的,在后面加上xplatform linux-arm-gnueabi-g++ -no-opengl -skip qt3d -skip qtcanvas3d -nomake examples -skip qtdeclarative -no-icon 看到这个 -no-iconv,如果没有设置它,当你运行qt程序的时候,会出现QIconvCodec::convertFromUnicode: using Latin-1 for conversion, iconv_open failedQIconvCodec::convertToUnicode: using Latin-1 for conversion, iconv_open failed所以一定要加上,如果你忘了添加,就(1) 下载链接:/gnu/libiconv/(2) 配置并安装安装./configure --prefix=/home/chy/out --host=arm-none-linux-gnueabi-gccmakemake install(3) 复制preloadable_libiconv.so到开发板的/lib目录,并配置在/etc/profile添加export LD_PRELOAD=/lib/preloadable_libiconv.so先make clean,清除之前生成的,再make,后面会出现就会出现../../include/QtCore/../../src/corelib/tools/qbytearray.h:98:19: note: the mangling of 'va_list' has changed in GCC 4.4 make[3]: *** [.obj/qpdf.o] 错误 1make[3]: *** 正在等待未完成的任务....make[3]:正在离开目录`/myTools/Qt/qt-everywhere-opensource-src-5.5.1/qtbase/src/gui'make[2]: *** [sub-gui-make_first] 错误 2make[2]:正在离开目录`/myTools/Qt/qt-everywhere-opensource-src-5.5.1/qtbase/src'make[1]: *** [sub-src-make_first] 错误 2make[1]:正在离开目录`/myTools/Qt/qt-everywhere-opensource-src-5.5.1/qtbase'make: *** [module-qtbase-make_first] 错误 2这里是因为前面提示我们添加-qreal float,而添加了之后就出现了这个问题相对文件是Qt源代码。
(VR虚拟现实)最具体的QT移植ARM开发板方法最全版
(VR虚拟现实)最具体的QT移植ARM开发板方法QT4移植到ARM9开发板1编译qte1.从下载源代码,选择开源版本(非商业版本),选择Qtlibraries4.5forembeddedlinux(128M)2.在源代码目录下执行:3../configure–embeddedarm-xplatformqws/linux-arm-g++-no-qt3support-qt-mouse-linuxtp4.在redhat9.0环境需要作一些修改才能编译通过:5.ln-s/usr/kerberos/include/_err.h/usr/include/6.ln-s/usr/kerberos/include/profile.h/usr/include/7.ln-s/usr/kerberos/include/krb5.h/usr/include/8.visrc/gui/text/qfontengine_ft.cpp,注释掉710行9.make(时间4个小时左右)10.makeinstall2编译busybox1.13.4从http:///article/1454969.html在主机/root目录下面新建一个文件#geditqte_env,添加如下内容exportQTDIR=/mnt/nfs/qtcore434exportPATH=$QTDIR/bin:$PATHexportLD_LIBRARY_PATH=$QTDIR/lib:$LD_LIBRARY_PATH需要交叉编译的时候,重新开一个终端,在/root目录下(主机上为了方便,我一直采用root用户登陆),先ls一下,看文件在不在,然后#.qte_env/***注意.后面有一个空格*****/这样即设定好了qteforarm的库路径,在此终端下面,进入要编译的工程文件路径下;#cd/mnt/nfs/qtcore434/demoes/wwjwedm#makeclean#qmake–project#qmake#make如果没出错即可以生成一个wwjwedm的二进制可执行文件#ls拷贝这个wwjwedm到开发板上去,不过我使用的是qt4的库太大,不能移植到开发板,我使用nfs挂载的方式,可以参考其他文章,如何建立交叉编译环境。
Qt应用程序移植到ARM开发板的步骤
推荐Qt应用程序移植到ARM开发板的步骤一、交叉编译写好的应用程序进入到/opt/FriendlyARM/Nano2410V2/arm-qtopia目录中,建立一个文件夹,把应用程序的源代码放在此文件夹目录下。
然后按以下步骤交叉编译程序:progen–n***–o***.protmake***.pro–oMakefileviMakefile(修改Makefile文件:LINK=arm-linux-g++;还有看SOURCES、OBJECTS项是否有重复的;还有编译规则中是否也有重复的规则,有则删除)make二、复制可执行文件到QPEDIR/bin目录下将步骤一生成的可执行二进制文件复制到/opt/FriendlyARM/Nano2410V2/root_qtopia_mouse/opt/qtopia/bin目录下。
三、自定义应用程序的桌面文件(.desktop)桌面文件内容包括:应用程序的说明、执行程序、程序图标、类型和名称。
例如,文件内容格式如下:[DesktopEntry]Comment=ASimplyApplicationProgramExec=Icon=Type=Name=将创建的应用程序的桌面文件代码.desktop保存到/opt/FriendlyARM/Nano2410V2/root_qtopia_mouse/opt/qtopia/apps/Applications 目录下。
四、为应用程序添加图标选择一个图片作为应用程序的图标,然后把此图标复制到/opt/FriendlyARM/Nano2410V2/root_qtopia_mouse/opt/qtopia/pics目录下。
五、制作包含应用程序的文件系统映像使用mkyaffsimage命令将加入应用程序的文件系统/opt/FriendlyARM/Nano2410V2/root_qtopia_mouse制作成文件系统映像,命令如下:mkyaffsimage/opt/FriendlyARM/Nano2410V2/root_qtopia_mouse***.img六、使用U盘将文件系统映像复制到PC机挂载U盘mount/dev/sda1/mnt/usb复制步骤五中的文件系统映像cp/opt/FriendlyARM/Nano2410V2/root_qtopia_mouse/***.img/mnt/usb 卸载U盘umount/dev/sda1/mnt/usb(注:卸载之前一定不要进入/mnt/usb目录,否则卸载不成功,也就不能复制成功)七、使用DNW工具将文件系统映像烧写到NandFlash中。
Qt-WinCE 在arm平台上搭建及程序自启动
Qt-WinCE 在armv4i平台上搭建及程序自启动全解编译步骤●Qt 嵌入式环境的搭建的准备1.首先,下载Qt的嵌入式开发包qt-embedded-wince-opensource-src-4.4.0.zip2.然后,下载VS2005和vs补丁VS80sp1-KB926604-X86-CHS.exe。
3.最后,下载一个嵌入式开发的SDK,如STANDARD_SDK.msi(可以根据自己平台的SDk,进行安装,如up_tech.pxa270.sdk.msi 2410mini_SDK.msi)4.还有一个是同步的软件 Microsoft ActiveSync4.5中文简体版,win7貌似需要6.0以上。
5.具体也可以看Qt 文档提供的Qt for Windows CE Requirements●编译安装1.首先安装VS2005,很简单,按照向导来,在自定义安装中务必选择“智能设备开发”。
2.关于Microsoft ActiveSync4.5的安装更是简单。
在此不再多说!3.然后,安装Windows Mobile或是其它版本的SDK,可以用自定义的SDK!简单,这里我们采用up_tech.pxa270.sdk.msi4.接下来的就是qt-embedded-wince的安装。
具体也而已看qt-embedded-wince软件解压后里面的安装文档INSTALL,这里面都集体了介绍安装的步骤,其实很简单的。
5.参照下面的步骤:解压,将解压后的文件夹放到一个不含空格的路径中,如我的:D:\Qt_WinCE即为此文件夹。
Pxa270开发板参照下面的步骤:解压,将解压后的文件夹放到一个不含空格的路径中,如我的:D:\Qt_WinCE,Qt_WinCE即为此文件夹。
在D:\Qt_WinCE\mkspecs ,下面,新建一个文件夹,名字改为wince50pxa270-armv4i-msvc2005将wince50standard-armv4i-msvc2005下面的文件复制到文件夹wince50pxa270-armv4i-msvc2005下,同时修改qmake.conf文件,将CE_SDK = STANDARDSDK_500CE_ARCH = ARMV4I改为CE_SDK = pxa270CE_ARCH = ARMV4I设置环境变量:右键“我的电脑”->“属性”->点“高级”标签->“环境变量”选项set PATH= D:\qt-everywhere-opensource-src-4.6.3\binset QMAKESPEC = win32-msvc2005set QTDIR= D:\qt-everywhere-opensource-src-4.6.3接下来就是开始执行configure 的命令,在“开始”->“程序”->Microsoft visual studio ->Microsoft visual stdio tools->Microsoft visual studio 命令行工作区,进去qt的解压目录D:\Qt_WinCE\。
Qt for MCUs 程序开发指南说明书
Copyright 2023 © Embedded Artists ABQt for MCUs -Program DevelopmentGet Up-and-Running Quickly andStart Developing Your Application On Day 1!Embedded Artists ABRundelsgatan 14211 36 MalmöSwedenhttps://Copyright 2023 © Embedded Artists AB. All rights reserved.No part of this publication may be reproduced, transmitted, transcribed, stored in a retrieval system, or translated into any language or computer language, in any form or by any means, electronic, mechanical, magnetic, optical, chemical, manual or otherwise, without the prior written permission of Embedded Artists AB.DisclaimerEmbedded Artists AB makes no representation or warranties with respect to the contents hereof and specifically disclaim any implied warranties or merchantability or fitness for any particular purpose. Information in this publication is subject to change without notice and does not represent a commitment on the part of Embedded Artists AB.FeedbackWe appreciate any feedback you may have for improvements on this document. Please send your comments to ***************************.TrademarksAll brand and product names mentioned herein are trademarks, services marks, registered trademarks, or registered service marks of their respective owners and should be treated as such.Table of Contents1Document Revision History4 2Intro5 2.1Download and install Qt for MCUs5 2.2Add support for Embedded Artists iMX RT Developer’s Kit7 2.3Downloading the SDK7 2.4NXP MCUXpresso IDE8 2.5Setting up Qt Creator8 3Select Display/Resolution to use12 4Build Examples/Demos in Qt Creator13 5Create a New Project 16 6More Information 18 7Known Issues 19 7.1HDMI Resolution X is not Working 19 7.2Touch is not Working 19 7.3Example/Demo X is not Working 20 8Troubleshooting 21 9Disclaimers22 9.1Definition of Document Status231 Document Revision History2 IntroQt for MCUs is a complete graphics framework and toolkit with everything you need to design, develop, and deploy GUIs on embedded MCUs. Run your application on bare metal or a real-time operating system. Read more about it here: https://www.qt.io/product/develop-software-microcontrollers-mcuTo start program development, you need the following things, all of them:1.Qt Installer– The installer can be downloaded from https://www.qt.io/download after filling in aform for an evaluation license2.The board support package– This is a zip file containing all the needed platform specific files towork with the iMX RT Developer’s Kit. The zip-file can be downloaded from.3.The patched SDK– This is zip file containing the latest version of the NXP SDK patched to workwith the iMX RT Developer’s Kit. The zip-file can be downloaded from.4.NXP MCUXpresso– This is needed to flash the software5.And of course, the iMX RT Developer's Kit!2.1 Download and install Qt for MCUsDownload the installer from https://www.qt.io/download (need to fill out a registration form to start the evaluation). Start the installer, enter your credentials, and press Next.Now make sure that Custom installation is selected and click Next to continue to the next page.There are three things that must be selected on this page –Common Files, the NXP i.MX RT1170 EVK and the ARM GCC 10.3 compiler.After selecting them, press Next and on that page read and accept the License Agreement. Continue clicking through the guide to complete the installation.There is an option on the last page of the installation wizard to launch QtCreator. Make sure to unselect it as there are some additional patching to do before launching QtCreator for the first time.2.2 Add support for Embedded Artists iMX RT Developer’s KitThe iMX RT Developer’s Kit was (at the time of writing this document) not included in the installer an d must be installed separately. Start by downloading the platform-bsp archive from . It will have a name like this:qtformcus-platform-bsp-eaimxrt1176-freertos-2.5.0-<date>.7zBefore unpacking the archive, make sure that this folder exists on your computer: c:\Qt\QtMCUs\2.5.0\, it will be referred to as <QT_DIR> later in this document. If that folder does not exist, then abort the patching and look in section 2.1 for instructions on how to install the correct version.Open the archive and extract all files into <QT_DIR>. A couple of files in the installation will be overwritten –please accept it when prompted during the extraction.2.3 Downloading the SDKEmbedded Artists has published a version of the NXP SDK that has already been patched to work with the iMX RT Developer’s Kit. The file can be downloaded from and will have a filename likeea<cpu>_sdk_<version>_<date>.zipPick version 2.13.1 or later.Unpack the archive somewhere with a short path. One suggestion is to create a folder with the same name as the archive in the root of the C:\ drive – e.g., for the iMX RT1176 D eveloper’s Kit it could be c:\ eaimxrt1176_sdk_2_13_1\. This folder will be referred to as <SDK_DIR> later in this document.2.4 NXP MCUXpresso IDEQt for MCUs rely on an installation of NXP’s MCUXpresso IDE for flashing the software onto the hardware. Download and install /mcuxpresso/ide . After completing the installation, use Windows Explorer to find the location of the installation. If you made no changes during the installation, it should be under c:\nxp – for example version 11.7 installs under c:\nxp\MCUXpressoIDE_11.7.1_9221\. Remember this location, it will be referred to as <MCUX_DIR> later in this document.2.5 Setting up Qt CreatorStart Qt Creator and select the Tools->Options menu. Select Kits group in the left side and if there are any kits in the list with EAIMXRT1176 in the name (one is shown here) then select it/them and click the Remove button.When all EAIMXRT1176 kits have been removed switch to the Devices group in the left side.Start by selecting the EAIMXRT1176 target from the dropdown list – you can select either the ARMGCC or IAR. That should fill in the fields for the GNU Arm Embedded Toolchain but if it does not then browse to thelocation as shown in the image below. The warning about the path can be ignored.Press the Apply button to save the changes so far and then the Create Kit button to create the actual kit. After that go back to the Kits group in the left side where there will be an EAIMXRT1176 entry for the new kit like this:Select the kit to bring up more settings:Click the Change button for the Cmake Configuration to bring up this dialog:The three configuration flags above must be present – if they are not then add them. The values for the three options are the same as was used earlier in the Devices dialog: <MCUX_DIR>,<SDK_DIR>/rtos/freertos/freertos_kernel, <SDK_DIR>.Close this dialog with the OK button and then do the same for the main Options window. The configurationof Qt should now be completed.3 Select Display/Resolution to useThe iMX RT Developer’s Kit supports several display options. The Qt for MCUs environment has been prepared for a number of these options but only one can be active at a time. To select which option to use, go to <QT_DIR>\lib\ and double click select_display.bat to bring up this menu (content may be different):Enter a number to change to that display or press q to exit without making any changes.The two displays at the top are NXP’s 5.5 inch MIPI-DSI displays with touch support (I2C).All the HDMI resolutions should work on most HDMI displays. The USB touch support has been tested on these two displays (as of 2023-06-21 the USB touch support has been disabled): •Embedded Artists 7 inch HDMI Display Kit (EAD00363):https:///products/7-inch-hdmi-display-kit/•NewHaven NHD-7.0-HDMI-N-RSXN-CTU:https:///nhd70hdminrsxnctu-p-9552.htmlIf you are using another HDMI display with USB touch then you will have to update the driver to support it, see section 7.24 Build Examples/Demos in Qt CreatorQt Creator separates Demos and Examples, but both can be found in Qt Creator by clicking on the Welcome button and then Examples. From there you can use the dropdown menu to switch between the two.Start by clicking the Qt Quick Ultralite Motor Cluster demo. It will bring up a dialog with information about what the demo does, its files and other useful information but for now we focus on the main window.Select the Kit that you created during installation, it has EAIMXRT1176 in the name, and then press the Configure Project button. This brings up the Edit view.Ignore the errors. The project will compile anyway.Now it is time to prepare and turn on the hardware. Follow the instructions here: https:///getting-started/When the hardware is turned on, press the Run button to build and flash the demo.The display should now show something like this:5 C reate a New ProjectTo create a new project in Qt Creator, start from the welcome screen and select Create Project.Select Application (Qt for MCUs) in the dialogSelect a name and location of the projectSelect which Kit the project is for (use the EAIMXRT1176 one).flash the program onto the hardware.6 M ore InformationThis document is just a quick guide to get you started but it does not cover any of the details and possibilities of the complete Qt for MCUs framework.We suggest visiting https://doc.qt.io/QtForMCUs/index.html for the most up-to-date information and having a look at the installed documentation found under c:\Qt\QtMCUs\2.5.0\docs\quickultralite\index.html (or<QT_DIR>\docs\quickultralite\index.html if not installed in the default location).7 K nown Issues7.1 HDMI Resolution X is not WorkingWe have tested the HDMI resolutions available to the Qt for MCUs port (seen in section 3 above) on a number of different HDMI displays and the only resolution that we have found not to work is 800x480 on EAD00363 (7 inch HDMI Display kit from Embedded Artists) but there are likely other displays out there with other problems. It is impossible to test for all combinations.7.2 Touch is not WorkingIn 2.5.0 release of 2023-06-21 we disabled the support for USB touch as it did not work.At the time of writing this document we had implemented USB touch (single finger) for two different displays: (seen in section 3 above). Adding support for more fingers or more displays is a huge task.What we have done is left two hooks into the USB driver, allowing you to decode your own touch display. To do this first add this block to the main cpp file to declare the functions and get the skeleton code:extern "C" {typedef bool (* VidPidFunction_t)( uint16_t vid, uint16_t pid );typedef bool (* ExtractFunction_t)( uint32_t vidpid,const uint8_t* buff, uint32_t len, uint16_t* x,uint16_t* y, bool* pressed );void BOARD_RegisterUSBTouchCallbacks(VidPidFunction_t vp, ExtractFunction_t e);bool my_extractor(uint32_t vidpid, const uint8_t* buff,uint32_t len, uint16_t* x,uint16_t* y, bool* pressed){Qul::PlatformInterface::log("in my_extractor\r\n");return false;}bool my_acceptor(uint16_t vid, uint16_t pid){Qul::PlatformInterface::log("in my_acceptor\r\n");return false;}}And then add this line to main() to register the two callback functions:int main(){BOARD_RegisterUSBTouchCallbacks(my_acceptor, my_extractor);...}Compile and run your program and you should only see the “in my_acceptor” printout as it prevents all touch displays by returning false.Change the implementation of my_acceptor to this to allow your VID/PID (assuming VID=0x1234 andPID=0x5678):bool my_acceptor(uint16_t vid, uint16_t pid){return (vid==0x1234 && pid==0x5678);}Compile and run your program and you should now see the “in my_extractor” printout as you touch the display. However, the coordinates are not reported to Qt for MCUs yet. To do that, modify the my_extractor function. The following assumes that a HID report from the display is 5 bytes long, first byte indicates a press followed by two bytes for the x coordinate and two bytes for the y coordinate.bool my_extractor(uint32_t vidpid, const uint8_t* buff,uint32_t len, uint16_t* x,uint16_t* y, bool* pressed){if (len == 5) {*pressed = buff[0];uint32_t x_tmp = buff[1] + (buff[2]<<8);uint32_t y_tmp = buff[3] + (buff[4]<<8);/* Scale to fit display size. Assumes that touchscreen reports in 10000x10000 resolution andthe display is 1024x768 */*x = (uint16_t)((1024*x_tmp)/10000);*y = (uint16_t)((768*y_tmp)/10000);Qul::PlatformInterface::log("x=%u y=%u\r\n", *x, *y);return true;}return false;}Returning true tells the driver to pass the values on to Qt for MCUs.7.3 Example/Demo X is not WorkingSome of the examples or demos will not work. At the time of writing these examples/demos were not working:•Camera – The program will start and show a welcome screen but when the Start Camera button is pressed a black screen will appear instead of the camera image. This is because the connection to the camera hardware has not been ported for the iMX RT117x MCUs.•Interrupt Handler – Shows nothing on the display and nothing in the terminal. This program has not been ported for the iMX RT117x MCUs.In general, if you have problems with a demo/example, look at the archive with prebuilt binaries and the accompanying document. Test to flash one of those binaries to see if you get a different result or if that document has any updated status information.8 T roubleshootingIf you experience problems with flashing or debugging have a look at the troubleshooting suggestions in iMX RT Developer’s Kit Program Development Guide9 DisclaimersEmbedded Artists reserves the right to make changes to information published in this document, including, without limitation, specifications and product descriptions, at any time and without notice. This document supersedes and replaces all information supplied prior to the publication hereof. Customer is responsible for the design and operation of their applications and products using Embedded Artists’ products, and Embedded Artists accepts no liability for any assistance with applications or customer prod uct design. It is customer’s sole responsibility to determine whether the Embedded Artists’ product is suitable and fit for the customer’s applications and products planned, as well as for the planned application and use of customer’s third party customer(s). Customers should provide appropriate design and operating safeguards to minimize the risks associated with their applications and products. Customer is required to have expertise in electrical engineering and computer engineering for the installation a nd use of Embedded Artists’ products.Embedded Artists does not accept any liability related to any default, damage, costs or problem which is based on any weakness or default in the customer’s applications or products, or the application or use by custome r’s third party customer(s). Customer is responsible for doing all necessary testing for the customer’s applications and products using Embedded Artists’ products in order to avoid a default of the applications and the products or of the application or use by customer’s third party customer(s). Embedded Artists does not accept any liability in this respect.Embedded Artists does not accept any liability for errata on individual components. Customer is responsible to make sure all errata published by the manufacturer of each component are taken note of. The manufacturer's advice should be followed.Embedded Artists does not accept any liability and no warranty is given for any unexpected software behavior due to deficient components.Customer is required to take note of manufacturer's specification of used components, for example MCU, SDRAM and FLASH. Such specifications, if applicable, contains additional information that must be taken note of for the safe and reliable operation. These documents are stored on Embedded Artists' product support page.All Embedded Artists’ products are sold pursuant to Embedded Artists’ terms and conditions of sale: /sites/default/files/docs/General_Terms_and_Conditions.pdfNo license, express or implied, by estoppel or otherwise, to any intellectual property rights is granted under this document. If any part of this document refers to any third party products or services it shall not be deemed a license grant by Embedded Artists for the use of such third party products or services, or any intellectual property contained therein or considered as a warranty covering the use in any manner whatsoever of such third party products or services or any intellectual property contained therein.UNLESS OTHERWISE SET FORTH IN EMBEDDED ARTISTS’ TERMS AND CONDITIONS OF SALE EMBEDDED ARTISTS DISCLAIMS ANY EXPRESS OR IMPLIED WARRANTY WITH RESPECT TO THE USE AND/OR SALE OF EMBEDDED ARTISTS PRODUCTS INCLUDING WITHOUT LIMITATION IMPLIED WARRANTIES OF MERCHANTABILITY, FITNESS FOR A PARTICULAR PURPOSE (AND THEIR EQUIVALENTS UNDER THE LAWS OF ANY JURISDICTION), OR INFRINGEMENT OF ANY PATENT, COPYRIGHT OR OTHER INTELLECTUAL PROPERTY RIGHT. UNLESS EXPRESSLY APPROVED IN WRITING BY THE CEO OF EMBEDDED ARTISTS, PRODUCTS ARE NOT RECOMMENDED, AUTHORIZED OR WARRANTED FOR USE IN MILITARY, AIR CRAFT, SPACE, NUCLEAR, LIFE SAVING, OR LIFE SUSTAINING APPLICATIONS, NOR IN PRODUCTS OR SYSTEMS WHERE FAILURE OR MALFUNCTION MAY RESULT IN PERSONAL INJURY, DEATH, OR SEVERE PROPERTY OR ENVIRONMENTAL DAMAGE.Resale of Embedded Artists’ products with provisions different from the statements and/or technical features set forth in this document shall immediately void any warranty granted by Embedded Artistsfor the Embedded Artists’ product or service described herein and shall not create or extend in any manner whatsoever, any liability of Embedded Artists.This document as well as the item(s) described herein may be subject to export control regulations. Export might require a prior authorization from national authorities.9.1 Definition of Document StatusPreliminary– The document is a draft version only. The content is still under internal review and subject to formal approval, which may result in modifications or additions. Embedded Artists does not give any representations or warranties as to the accuracy or completeness of information included herein and shall have no liability for the consequences of use of such information. The document is in this state until the product has passed Embedded Artists product qualification tests.Approved– The information and data provided define the specification of the product as agreed between Embedded Artists and its customer, unless Embedded Artists and customer have explicitly agreed otherwise in writing.。
QT_designer开发ARM-Linux人机界面流程
ARM Linux人机界面开发流程蒋旭东吏继斌目录一.建立Linux开发环境 (3)1.1图解安装Fedora9.0 (3)1.2建立交叉编译环境 (18)1.3解压安装源代码及其他工具 (20)1.3.1解压安装源代码 (20)(1)准备好Linux源代码包 (21)(2)解压安装Linux内核源代码 (21)(3)解压安装嵌入式图形系统qtopia源代码 (21)(4)解压安装busybox源代码 (22)(5)解压安装Linux示例程序 (22)(6)解压安装vboot源代码 (22)(7)解压安装其他其他开源bootloader源代码 (22)1.3.2解压创建目标文件系统 (23)1.3.3解压安装必要实用工具 (23)(1)目标文件系统映象制作工具mkyaffs2image (23)(2)解压安装LogoMaker (24)1.4配置网络文件系统NFS服务 (26)1.4.1设置共享目录 (26)1.4.2启动NFS服务 (26)(1)通过命令启动和停止nfs服务 (27)(2)通过图形界面启动NFS服务 (27)二.目标板上安装Linux系统 (29)2.1安装USB下载驱动 (29)2.2安装Linux系统 (35)2.2.1分区 (35)2.2.2安装bootloader (36)2.2.3安装Linux内核 (38)2.2.4安装根文件系统 (40)三.嵌入式Linux的GUI程序开发 (43)3.1编译ARM平台的Qtopia-2.2.0 (43)3.2利用QT designer开发GUI程序 (44)1、进入arm-qtopia (44)2、设置开发环境 (44)3、生成工程文件hi.pro (44)4、开始设计GUI。
(44)5、修改.pro文件 (49)6、生成Makefile和可执行文件 (50)7、生成.desktop文件。
(50)8、在终端输入命令 (50)9、将hi下载到目标板并运行 (51)10、将所设计的GUI程序设为系统的人机界面 (54)四.附录 (56)备注:本流程中目标板下载的是默认的Linux内核及根文件系统,位于光盘的images/linux/目录下,开发的人机界面作为应用程序添加到目标板上的Qtopia系统下,可设置成启动项使开机即可显示该人机界面。
QtCreator动态编译jsoncpp完美支持x86和arm平台
QtCreator动态编译jsoncpp完美支持x86和arm平台如果是做嵌入式开发。
在Qt下支持JSon最好的办法,可能不是采用qjson这个库。
QJson 这个库的实例只提供了x86环境下的编译方法。
按照上面的办法,的确10分钟就可以搞定x86环境的Linux 程序了。
但是,如果要把这个库移植到arm环境下,花了好几个小时都没有任何进展。
相信很多朋友也有类似的感觉。
经过实验,终于找到一个非常简单的办法了。
可以很好的把JSon 和QtCreator集成在一起了。
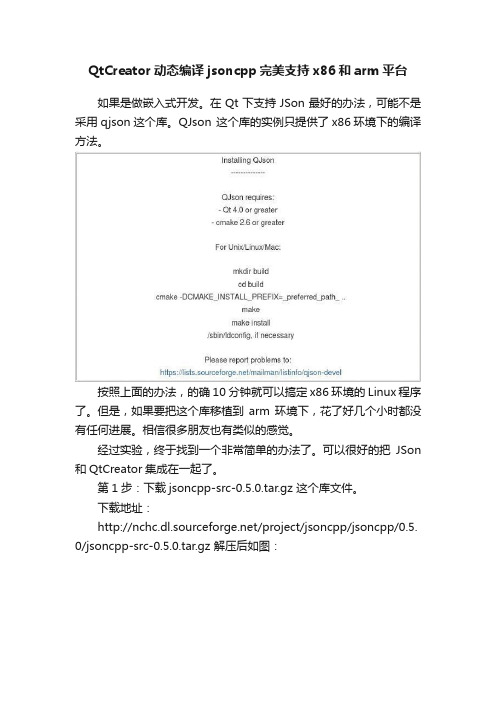
第1步:下载jsoncpp-src-0.5.0.tar.gz 这个库文件。
下载地址:/project/jsoncpp/jsoncpp/0.5. 0/jsoncpp-src-0.5.0.tar.gz 解压后如图:不要被这一堆文件吓到哦。
第2步:把我们要的东西从代码堆里整理出来。
(1) 随便找个地方建一个空文件夹叫json(2)将include\json里面所有文件复制到刚刚新建的json文件夹里(共8个文件,全部是.h的头文件)(3)将src/lib_json里面的所有文件全部复制到json文件里,共8个文件通过复制这些文件,就组成了我们所要的JSON库的全部源代码了。
完整的文件清单见下面:第3步:打开QtCreator集成开发环境,新建一个新项目。
然后把我们刚刚准备好的JSON库,复制到你新建项目的同一目录下。
最后回到QtCreator开发环境,鼠标右键点击“添加现有文件”打开JSON目录,选中全部文件。
点击“打开”。
至此JSON库的所有代码添加完毕。
对比哈,你的代码结构,和我一致吗?如果一致,恭喜你!第4步:编辑测试代码在可视化界面上,添加一个“按钮”建立好信号槽。
按钮代码如下:void Widget::on_btnTestJson_clicked(){using namespace std;std::string strValue = "{\"学号\":\"20120207001\",\"姓名\":\"张无忌\",\"性别\":\"男\"}";Json::Reader reader;Json::Value value;if (reader.parse(strValue, value)){std::string out = value["学号"].asString();std::cout << out << std::endl;out = value["姓名"].asString();std::cout << out << std::endl;out = value["性别"].asString();std::cout << out << std::endl;}}运行效果如下:更多JSON-CPP库的用法,请参考json-cpp 的使用手册。
- 1、下载文档前请自行甄别文档内容的完整性,平台不提供额外的编辑、内容补充、找答案等附加服务。
- 2、"仅部分预览"的文档,不可在线预览部分如存在完整性等问题,可反馈申请退款(可完整预览的文档不适用该条件!)。
- 3、如文档侵犯您的权益,请联系客服反馈,我们会尽快为您处理(人工客服工作时间:9:00-18:30)。
使用Qt Creator进行ARM开发
10-04-29 12:20 发表于:《南京嵌入式开发圈》分类:未分类
我用的是opensource-linuxx11-2009.03.1.bin版本,安装完以后
qtcreator是1.2.1版本。
1、使用qtcreator开发gui界面,主要是file->new->qt gui project。
然后就可以跟vc一样拖拉控件和编程了,我一直就希望有这样的ide可
以搞嵌入式(vs除外:) ),爽!
工程文件主要有mainwindow.cpp mainwindow.ui 等
2、这里假设你也编译完qtembedded4.5.2了,因为上面那个版本也是基
于4.5.2了。
假设你的qtembedded目录是/home/qtembedded4.5.2,那么现在需要
qmake重新构建一下工程就可以了。
3、按如下步骤:
make distclean //把x86的配置干掉
/home/qtembedded4.5.2/bin/qmake -project //构建arm的工程
/home/qtembedded4.5.2/bin/qmake //产生新的makefile
make
现在,应该可以看到你的qt工程重新编译完了,还不拿到arm下试试?。
