FB LaunchPad软件安装和配置说明
launchpad说明
玩Launchpad必然少了编译环境,什么编译软件适合初学者呢?在我个人认为,也是众多友友的想法,CCS(Code Composer Studio)不及IAR(IAR Embedded Workbench IDE )使用方便,但CCS作为TI DSP的官方软件,其功能确实很强大!各取所长,下面就详细说下用IAR 为Launchpad开发C语言吧!操作系统:Windows 7开发环境:IAR FOR MSP430 V5.30.1第一步:驱动安装IAR FOR MSP430 V5.30.1软件已集成Launchpad驱动,安装好IAR再将Launchpad与电脑箱连接,等待驱动安装完毕就可以了,一般成功安装是没问题的!如果不成功,检查下电脑与板子连接是否完好。
IAR FOR MSP430 V5.30.1下载地址在下面附上。
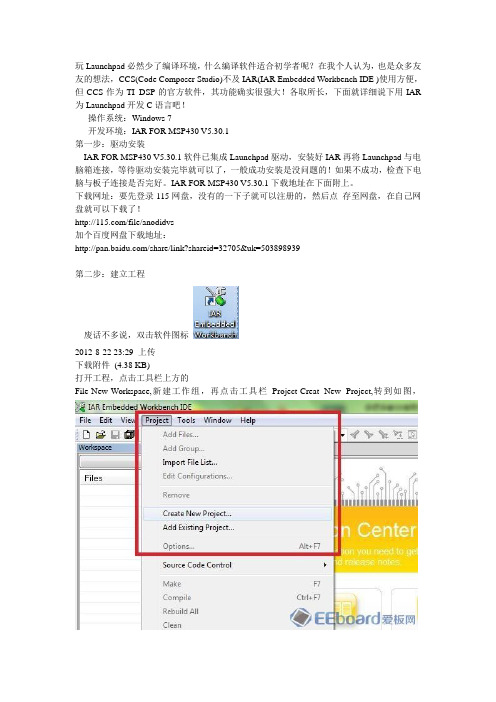
下载网址:要先登录115网盘,没有的一下子就可以注册的,然后点存至网盘,在自己网盘就可以下载了!/file/anodidvs加个百度网盘下载地址:/share/link?shareid=32705&uk=503898939第二步:建立工程废话不多说,双击软件图标2012-8-22 23:29 上传下载附件(4.38 KB)打开工程,点击工具栏上方的File-New-Workspace,新建工作组,再点击工具栏Project-Creat New Project,转到如图,下载附件(44.98 KB)接着点击如图所示,2012-8-22 22:51 上传下载附件(28.69 KB)接着会提示你保存工程文件,存在事先建好的文件夹内.下载附件(59.97 KB)选择 C - main,这里也可以选择Empty project,但选择 C -main的话,它会自己帮你新建一个main.c文件,并且把它加入到工程中。
给指定一个文件,并且把它加入到工程中。
给指定的工程名称msp430中。
【LaunchPad】开发板介绍

LaunchPad开发板介绍前言大家都拿到了超级便宜的LaunchPad的开发板,这些开发板有的朋友是拿来学习的,有的只是看着便宜先入手一个。
无论大家是出于什么目的都无所谓,现在板子到手了,咱们就要把他利用起来。
咱们EE论坛这次展开LaunchPad的千人大学习,我算是抛砖引玉发出此贴,希望大家一起来编写LaunchPad的中文教材,打造中国最全面的LaunchPad中文教材。
闲话不说了,介绍我挑重点的说,尽量少说废话。
开始了!开发板介绍首先,LaunchPad是一个完整的开发板。
板上包括仿真器和目标芯片,通过仿真器我们可以在线控制CPU的运行以及查看硬件寄存器;目标芯片就是我们编写的代码要下载到的芯片。
在图1所示的开发板照片中,照片中用黄色方框框出来的是仿真器,蓝色方框框出来的是目标板,也就是我们编写的代码最终要运行的地方。
套件内容LaunchPad的开发板包括以下内容:1、LaunchPad开发板2、MinUSB电缆3、两块MSP430G系列芯片– MSP430G2231: 低功耗16位单片机,片上拥有10位8通道的ADC、2K容量的Flash和128bytes 的RAM– MSP430G2211: 低功耗16位单片机,包括一个片上比较器以及2K容量的Flash和128bytes的SRAM4、2排10针的排针和2排10针的插座5、一只32.768-kHz的晶体仿真器介绍大家拿到开发板的时候可以看到在仿真器中最大的那块芯片也是一款1xx系列的MSP430单片机,但我们的代码并不是在这块单片机上运行的,这块单片机其实是充当了仿真器的功能,代码真正还是在目标板上的目标芯片上运行。
在初学阶段的话不需要再仿真器上花时间,仅仅把它当做工具使用即可。
通过图片可以看到,仿真器和目标板之间是通过跳线连接的。
其实这暗示着LaunchPad 上的仿真器不止可以调试下载Gxxx系列的芯片,它还可以调试下载eZ430-RF2500T开发板、eZ430-F2012T/F2013T开发板以及eZ430-Chronos手表。
Launchy 教程

Launchy 教程Launchy 教程Posted on 2010/11/27, 22:13, by Terry Chen, under 软件教程.快速启动工具,是以便捷方式快速启动常用程序及文档的工具。
善用快速启动工具,可以提高使用计算机的效率。
Launchy 是一款简单易用的快速启动工具,下面我们一起来了解如何使用Launchy。
1. Launchy 基本使用Launchy 是开源软件,除官方版本之外,还有中文修改版,中文修改版在官方版本的基础上增加了以下两项功能:支持设置双击某键作为快捷键,如双击Ctrl 启动Launchy。
支持中文快捷方式的索引,如“淘宝旺旺”,可以输入“tbww” 或“taobaowangwang” 进行搜索搜索。
请自主选择所需版本下载:Launchy 中文修改版下载地址Launchy 官方版本下载地址下载Launchy 之后开始安装,Launchy 的安装过程非常简单,在此不再赘述。
安装完毕Launchy 将自动启动,任务栏将出现Launchy 的图标,按下Alt + Space 快捷键组合,就可以呼出Launchy 界面:Launchy 默认自动对开始菜单的所有快捷方式建立索引,直接键入程序名称即可启动程序。
由于Launchy 具有智能匹配的功能,往往不需输入程序全称就可找到想要启动的程序。
值得一提的是,Windows 7 开始菜单中画图、计算器等快捷方式,实际上是英文快捷方式。
你可以在Launchy尝试一下,输入“计算器”,Launchy 并不能搜索到计算器,但是键入“calc”就可以。
如果输入后智能匹配的第一项不是所需要的程序,稍候片刻Launchy 会弹出列表以供选择。
Launchy 会根据使用历史自动调整列表项目的顺序,随着使用时间的增长,Launchy 的智能调整会让它越来越符合你的使用习惯。
以上所述便是Launchy 的基本使用方法。
但工欲善其事,必先利其器,下面我们一起来对Launchy 进行一些配置。
软件安装与调试操作手册

软件安装与调试操作手册第1章软件概述与准备工作 (3)1.1 软件简介 (3)1.2 系统要求 (3)1.3 安装前的准备工作 (4)第2章软件安装流程 (4)2.1 安装步骤 (4)2.1.1 软件 (4)2.1.2 解压安装包 (4)2.1.3 启动安装程序 (4)2.1.4 阅读并同意许可协议 (4)2.1.5 选择安装路径 (4)2.1.6 配置安装选项(见2.2节) (4)2.1.7 开始安装 (4)2.1.8 完成安装 (5)2.2 安装选项说明 (5)2.2.1 典型安装 (5)2.2.2 定制安装 (5)2.2.3 卸载旧版本 (5)2.2.4 创建桌面快捷方式 (5)2.2.5 添加到PATH环境变量 (5)2.3 首次运行配置 (5)2.3.1 启动软件 (5)2.3.2 语言选择 (5)2.3.3 登录账户 (5)2.3.4 配置软件选项 (5)2.3.5 完成配置 (5)第3章环境变量设置 (6)3.1 环境变量概述 (6)3.2 设置环境变量 (6)3.2.1 操作系统环境变量 (6)3.2.2 软件依赖环境变量 (6)3.3 常见问题解决 (7)3.3.1 环境变量不生效 (7)3.3.2 路径问题 (7)3.3.3 权限问题 (7)3.3.4 软件依赖环境变量缺失 (7)第4章软件功能模块介绍 (7)4.1 模块概述 (7)4.1.1 模块划分原则 (7)4.1.2 模块功能简述 (7)4.2 模块功能详细介绍 (8)4.2.2 数据处理模块 (8)4.2.3 业务逻辑模块 (8)4.2.4 系统管理模块 (8)4.2.5 接口模块 (9)4.3 模块间关联关系 (9)第5章软件基本操作 (9)5.1 界面布局与功能 (9)5.1.1 界面布局 (9)5.1.2 功能概述 (10)5.2 常用操作指南 (10)5.2.1 文件操作 (10)5.2.2 编辑操作 (10)5.2.3 视图控制 (10)5.3 快捷键说明 (11)第6章调试工具与技巧 (11)6.1 调试概述 (11)6.2 调试工具的使用 (11)6.2.1 通用调试工具 (11)6.2.2 专用调试工具 (12)6.3 常见问题定位与解决 (12)6.3.1 编译错误 (12)6.3.2 运行时错误 (12)6.3.3 功能问题 (12)6.3.4 网络问题 (12)第7章软件配置与优化 (13)7.1 软件配置文件 (13)7.1.1 配置文件概述 (13)7.1.2 配置文件类型 (13)7.1.3 配置文件位置 (13)7.2 参数设置与调整 (13)7.2.1 参数设置原则 (13)7.2.2 常用参数设置 (13)7.3 功能优化建议 (14)7.3.1 系统层面优化 (14)7.3.2 软件层面优化 (14)7.3.3 网络层面优化 (14)第8章数据备份与恢复 (14)8.1 备份概述 (14)8.2 备份操作步骤 (14)8.3 恢复操作步骤 (15)第9章软件更新与升级 (15)9.1 更新概述 (15)9.2 手动更新操作 (16)9.2.2 更新 (16)9.2.3 安装更新 (16)9.3 自动更新设置 (16)9.3.1 打开自动更新设置 (16)9.3.2 设置自动更新参数 (16)9.3.3 保存设置 (16)第10章售后服务与支持 (17)10.1 技术支持渠道 (17)10.1.1 在线客服支持 (17)10.1.2 邮件支持 (17)10.1.3 电话支持 (17)10.1.4 远程协助 (17)10.2 常见问题解答 (17)10.2.1 软件安装问题 (17)10.2.2 软件运行问题 (17)10.2.3 功能使用问题 (18)10.3 软件更新与维护策略 (18)10.3.1 软件更新 (18)10.3.2 软件维护 (18)第1章软件概述与准备工作1.1 软件简介本章主要对即将安装和调试的软件进行概述。
LM4F120 LaunchPad下的驱动安装
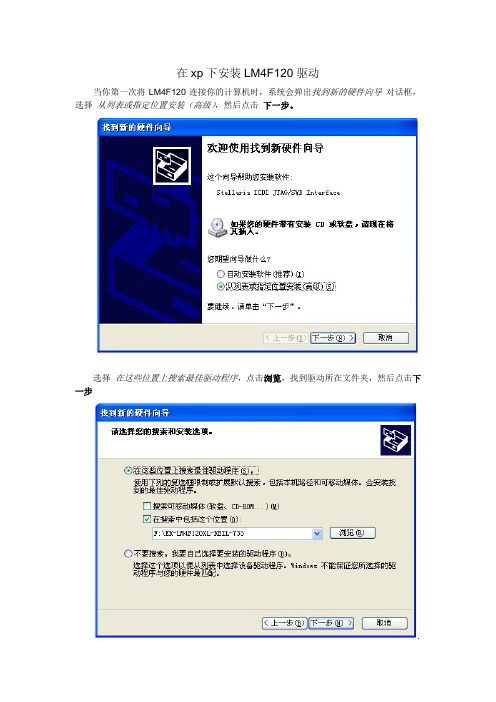
在xp下安装LM4F120驱动当你第一次将LM4F120连接你的计算机时,系统会弹出找到新的硬件向导对话框,选择从列表或指定位置安装(高级),然后点击下一步。
选择在这些位置上搜索最佳驱动程序,点击浏览,找到驱动所在文件夹,然后点击下一步.系统会弹出一个警告窗口,提示该驱动可能不匹配,点击 仍然继续,你将看到 向导正在安装软件,请稍后,这时,系统将会安装你需要的驱动。
至此,接下来,找到新的硬件向导 将会提示你安装Stellaris ICDI DFU Device 驱动StellarisStellaris ICDI JTAG/SWD Interface 驱动已完成安装,点击完成退出窗口。
Virtual Serial Port 驱动,重复以上步骤以完成剩下两个驱动的安装。
获取更多高能瓦斯?猛戳 /在win7下安装LM4F120XL 驱动Stellaris 系列开发板内嵌In-Circuit Debug Interface(ICDI),使用它,你可以下载和仿真板上的LM4F 系列微控制器。
在使用LM4F120XL 前,需要安装以下三个驱动:·Stellaris Virtual Serial Port ·Stellaris ICDI JTAG/SWD ·Stellaris ICDI DFU这些驱动使得的仿真器得以访JTAG/SWD 接口,同时提供虚拟串口(Virtual COM Port )。
当你第一次将LM4F120XL 连接你的计算机时,系统会自动搜索驱动,若没有搜索到合适的驱动,计算机将会出现图1所示提示,这时,需要手动安装驱动。
>> 设备管理器,在 其他设备 中你将看到三个带黄色感叹号的设备,右击需要安装驱动的设备,选择 更新驱动程序软件,如图2所示:图 1.第一步:右击 我的电脑 >>属性第二步:这时进入到图3所示界面,选择浏览计算机以查找驱动程序软件第四步:点击浏览,找到驱动文件所在文件夹,然后点击下一步图 4.第五步:系统将出现图5所示警告,选择安装此驱动程序软件始终图 5.安装完成后,系统会提示图6所示界面,点击关闭完成安装。
LaunchPad使用说明
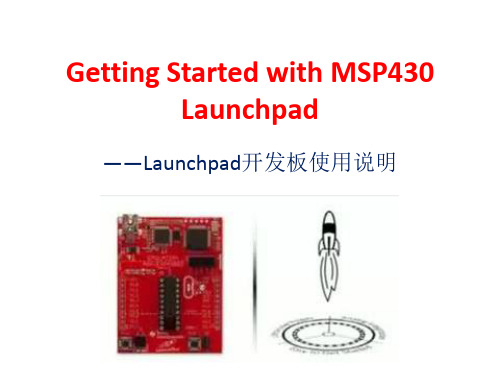
• 提供的API库函数省去逐位操作寄存器,大大简化了开发难度 • 程序的可读性也提高了
用熟悉的环境来设计
• 作为CCS5.1的一个插件安装 • 在TI Resource Explorer中可以简单的向CCS导入例程,也可以阅读相关设计文 档,还包含了图形化的编程工具(Grace)、射频及USB软件资源,以及新的 超低功耗设计向导(ULP Advisor)
LaunchPad支持的MSP430器件
详细的参考Launchpad用户指南.pdf
操作规程平板电脑的应用安装
操作规程平板电脑的应用安装操作规程:平板电脑的应用安装一、前言在现代科技发展的浪潮中,平板电脑已经成为了生活和工作中不可或缺的一部分。
为了更好地利用平板电脑的功能,我们需要学会正确安装应用程序。
本文将为您介绍平板电脑的应用安装操作规程。
二、应用市场的选择1. 应用市场的作用应用市场是我们下载和安装应用程序的主要来源。
通过应用市场,我们可以轻松搜索并找到我们所需的应用程序。
2. 针对平板电脑的应用市场市场上存在许多不同的应用市场,面向不同的操作系统和平台。
对于平板电脑,我们需要选择针对特定操作系统的应用市场,如苹果应用商店(App Store)和安卓应用商店(Google Play Store)。
三、应用搜索和选择1. 了解需求在进行应用搜索之前,我们首先需要明确我们所需的应用程序的功能和用途。
比如,我们可能需要一个文档编辑应用、一个阅读器或一个游戏应用等。
2. 搜索应用通过打开应用市场并使用搜索功能,我们可以输入应用程序的名称或相关关键词来搜索所需的应用。
在搜索结果中,我们可以根据评分、评论和下载量等指标来评估并选择适合自己的应用。
四、应用下载和安装1. 下载应用点击所选应用的图标或名称,进入应用详情页。
在详情页中,我们可以查看应用的介绍、评分和评论等信息,以便更好地了解应用。
2. 安装应用在详情页中,我们可以找到“下载”或“安装”按钮。
点击该按钮后,系统会自动下载并安装应用程序。
在安装过程中,请确保网络连接稳定。
五、应用权限管理1. 应用权限的重要性安装应用程序时,我们需要在系统的权限管理页面查看和管理应用所需要的访问权限。
这些权限可能包括但不限于相机、联系人、定位等敏感信息的访问权限。
合理管理权限是保护个人隐私和信息安全的重要环节。
2. 查看和管理权限在系统的设置菜单中,我们可以找到“应用”或“应用管理”选项。
在该选项中,我们可以查看已安装应用的权限情况并进行相应的管理操作,如关闭或允许访问权限。
keil4.72和stellarisware-launchpad的安装使用方法
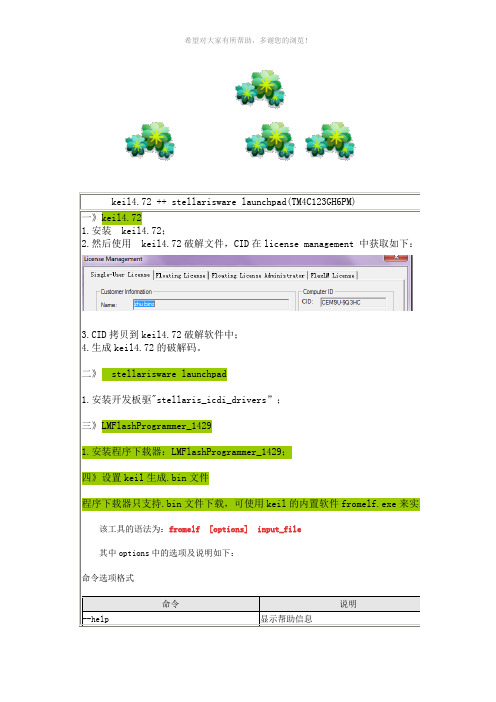
1.安装开发板驱"stellaris_icdi_drivers”;
三》LMFlashProgrammer_1429
1.安装程序下载器:LMFlashProgrammer_1429;
四》设置keil生成.bin文件
程序下载器只支持.bin文件下载,可使用keil的内置软件fromelf.exe来实现。
在生成的映像文件中不包含段的信息
二进制输出格式
选项
说明
--bin
输出plain binary格式的文件
--m32
生成Motorola 32位十六进制格式的文件
--i32
生成Intel 32位的十六进制格式的文件
--vhx
面向字节的位十六进制格式的文件
--base addr
设置m32,i32格式文件的基地址
--text
显示文本信息,文本信息标志如下:
-v 打印详细信息
-a 打印数据地址(针对带调试信息的映
像)
-d 打印数据段的内容
-e 打印表达式表
-f 打印消除虚函数的信息
-g 打印调试表
-r 印重定位信息
-s 打印字符表
-t 打印字符串表
-y 打印动态段的内容
-z 打印代码和数据大小信息
讲完了工具的语法,下面就讲如何在Keil中运用该自带的工具,以使在工程编译后能生成.bin格式的文件:
5. 点击OK确定,然后再重新编译则会按照上图中的配置路径生成.bin格式的文件了:
OK,打完收工…………希望对大家有点帮助!
(注:可编辑下载,若有不当之处,请指正,谢谢!)
该工具的语法为:fromelf [options] input_file
LaunchPad入门指南

Introduction As applications continue to advance, 8-bit mi-crocontrollers are struggling to meet the growing demand for higher performance and ultra-low power to support evolving product designs. Texas Instruments introduced the affordable 16-bit MSP430™ MCU Value Line to meet the changing market dynamics and requirements faced by typical low-cost 8-bit MCU develop-ers. Taking the next step in providing a low-cost solution to the shortcomings of 8-bit MCUs, TI created the MSP430 MCU Value Line LaunchPad development kit to jump start application designs and provide a low-cost tool for developers of all experience levels. This overview will provide an introduction to the features and functionality of LaunchPad as well as everything included in the $4.30 kit. MSP430 Value Line LaunchPad Development KitAs the number of competitors grow and the time for taking products to market shrinks, the microcontroller (MCU) industry is being stretched by two opposing, but equally strong vectors. The growing demand for higher performance and ultra-low power functionality is matched only by an aggressive need for lower and lower price points. This is especially clear in low-cost applications that utilize 8-bit MCUs. To increase performance without breaking the bank, developers of low-cost 8-bit MCUs must migrate to higher performance 16-bit MCUs that are available at affordable price points.In high volume and quick turnover markets such as consumer and personal electronics, the need for a highly differentiated MCU, while maintaining aggressive price points, is a constant struggle. For instance, the market for 3D glasses has exploded in the recent months, both on the big and small screen. As this market trend moves up and to the right, developers are hard at work in creating technological solutions that provide a unique and immersive experience while remaining affordable. By providing more affordable solutions, developers hope to minimize the risks and barriers associated with new and fast moving markets.For many, this barrier to success is prohibited by a limited MCU core. Many developersof 8-bit MCUs have completely exhausted the full capabilities of their MCU due to limited data throughput and inefficient interfacing with higher resolution analog and digital peripherals. To enable increased functionality and improve feature sets of existing projects, developers must migrate to higher performance 16-bit MCUs.The MSP430 MCU Value Line series provides a migration path for many of these constrained 8-bit MCU developers. At no additional cost, the affordable MSP430 MCU Value Line devices offer a 16-bit architecture, higher precision timers and improved peripheral integration and interfacing, enabling improved performance and lower power consumption. The implementation of 16-bit MCUs enable up to 10 times improved performance and10 times lower power when compared to many low-cost 8-bit applications. Currently, the MSP430 MCU Value Line series offers 27 ultra-low power 16-bit devices that offer varying levels of analog integration, communication modules and package types. At 100K unit volumes, MSP430 MCU Value Line devices start at just $0.25 USD, ensuring thatAdrian FernandezMSP430 MicrocontrollersTexas Instruments W H I T E P A P E R2Texas Instrumentsdevelopers do not have to sacrifice price for improved performance. Additionally, the MSP430 MCUValue Line series will continue to grow to more than 100 devices through the second half of 2011.This roadmap will introduce higher memory sizes, more package options and additional integrated analogand digital peripherals.To make the transition from 8- to 16-bit MCUs more seamless, Texas Instruments (TI) listened to therequirements of developers and created the new MSP430 MCU Value Line LaunchPad development kit.Furthering the commitment to add performance and value to MCU designs with the MSP430 MCU ValueLine, TI introduced LaunchPad to lower the barrier of entry for developers new to 16-bit architectures, orthose new to MCU design, in general. The LaunchPad kit is TI’s simple, yet thorough, introduction to 16-bitMCU development, offering all of the hardware and software a developer needs to get started for just $4.30USD. Within minutes of opening the LaunchPad kit, users can begin interfacing with push buttons, LEDsand the on-chip peripherals of the MSP430 MCU Value Line devices. See Figure 1 below:For just $4.30, the LaunchPad kit includes a development board with an integrated USB-powered flashemulation tool for programming and debugging any of the existing MSP430 MCU Value Line devices. AnyMSP430G2xx MCU in a DIP package can be dropped into the DIP target socket of LaunchPad, which allowseasy evaluation of any MSP430 MCU Value Line device. The flexible target socket allows developers toremove their freshly programmed and debugged MSP430G2xx MCU to be plugged into a custombreadboard or PCB so that customers are not constrained to the form factor of the LaunchPad board.Alternatively, developers can use LaunchPad as a standalone system, by leaving the MSP430G2xx deviceplugged into the board to leverage on-board and programmable push buttons and LEDs. Additionally, everypin of the MSP430G2xx device is fully accessible, allowing easy interfacing of external components orcustom daughter cards. Figure 1.3Texas Instruments Figure 2. $4.30 LaunchPad kit offers the hardware and software needed to start developing applications, and is backed by an active online community to quicken time to market.Also provided in the kit are free, downloadable software compilers and debuggers including TI’s owneclipse-based Code Composer Studio™ version 4 and IAR Embedded Workbench Kickstart. Theseindependent development environments (IDEs) are full featured and are completely compatible withLaunchPad and the MSP430 MCU Value Line devices available today. This complements the hardwarefeatures of the LaunchPad board by providing a complete software component as well. Using either IDE,users can then leverage MSP430 MCU code examples, open source projects and other free onlineresources, which can be accessed on LaunchPad’s Wiki page, /launchpadwiki .The unlimited access to the LaunchPad Wiki promotes collaboration and simple sharing of solutions andideas, making LaunchPad a complete development environment. This active and growing online communitysupplements the hardware and software components of the LaunchPad package and provides instantsupport, projects and helpful hints that will be shared through the Wiki pages and E2E™ forums.To fully benefit from 16-bit architecture and ultra-low power performance, the MSP430 MCU Value Lineseries and LaunchPad development kit offers a complete and simple introduction to quicken developers’time to market. By providing 16-bit performance at 8-bit price points, and complete development tools forjust $4.30, TI would like to welcome both new and experienced users to the world of high performanceand affordable MCU development.A042210Important Notice: The products and services of Texas Instruments Incorporated and its subsidiaries described herein are sold subject to TI’s standard terms and conditions of sale. Customers are advised to obtain the most current and complete information about TI products and services before placing orders. TI assumes no liability for applications assistance, customer’s applications or product designs, software performance, or infringement of patents. The publication of information regarding any other company’s products or services does not constitute TI’s approval, warranty or endorsement thereof.The Platform Bar, MSP430, Code Composer Studio and E2E are trademarks of Texas Instruments.All other trademarks are the property of their respective owners.IMPORTANT NOTICETexas Instruments Incorporated and its subsidiaries(TI)reserve the right to make corrections,modifications,enhancements,improvements, and other changes to its products and services at any time and to discontinue any product or service without notice.Customers should obtain the latest relevant information before placing orders and should verify that such information is current and complete.All products are sold subject to TI’s terms and conditions of sale supplied at the time of order acknowledgment.TI warrants performance of its hardware products to the specifications applicable at the time of sale in accordance with TI’s standard warranty.Testing and other quality control techniques are used to the extent TI deems necessary to support this warranty.Except where mandated by government requirements,testing of all parameters of each product is not necessarily performed.TI assumes no liability for applications assistance or customer product design.Customers are responsible for their products and applications using TI components.To minimize the risks associated with customer products and applications,customers should provide adequate design and operating safeguards.TI does not warrant or represent that any license,either express or implied,is granted under any TI patent right,copyright,mask work right, or other TI intellectual property right relating to any combination,machine,or process in which TI products or services are rmation published by TI regarding third-party products or services does not constitute a license from TI to use such products or services or a warranty or endorsement e of such information may require a license from a third party under the patents or other intellectual property of the third party,or a license from TI under the patents or other intellectual property of TI.Reproduction of TI information in TI data books or data sheets is permissible only if reproduction is without alteration and is accompanied by all associated warranties,conditions,limitations,and notices.Reproduction of this information with alteration is an unfair and deceptive business practice.TI is not responsible or liable for such altered rmation of third parties may be subject to additional restrictions.Resale of TI products or services with statements different from or beyond the parameters stated by TI for that product or service voids all express and any implied warranties for the associated TI product or service and is an unfair and deceptive business practice.TI is not responsible or liable for any such statements.TI products are not authorized for use in safety-critical applications(such as life support)where a failure of the TI product would reasonably be expected to cause severe personal injury or death,unless officers of the parties have executed an agreement specifically governing such use.Buyers represent that they have all necessary expertise in the safety and regulatory ramifications of their applications,and acknowledge and agree that they are solely responsible for all legal,regulatory and safety-related requirements concerning their products and any use of TI products in such safety-critical applications,notwithstanding any applications-related information or support that may be provided by TI.Further,Buyers must fully indemnify TI and its representatives against any damages arising out of the use of TI products in such safety-critical applications.TI products are neither designed nor intended for use in military/aerospace applications or environments unless the TI products are specifically designated by TI as military-grade or"enhanced plastic."Only products designated by TI as military-grade meet military specifications.Buyers acknowledge and agree that any such use of TI products which TI has not designated as military-grade is solely at the Buyer's risk,and that they are solely responsible for compliance with all legal and regulatory requirements in connection with such use. TI products are neither designed nor intended for use in automotive applications or environments unless the specific TI products are designated by TI as compliant with ISO/TS16949requirements.Buyers acknowledge and agree that,if they use any non-designated products in automotive applications,TI will not be responsible for any failure to meet such requirements.Following are URLs where you can obtain information on other Texas Instruments products and application solutions:Products ApplicationsAmplifiers Audio /audioData Converters Automotive /automotiveDLP®Products Communications and /communicationsTelecomDSP Computers and /computersPeripheralsClocks and Timers /clocks Consumer Electronics /consumer-appsInterface Energy /energyLogic Industrial /industrialPower Mgmt Medical /medicalMicrocontrollers Security /securityRFID Space,Avionics&/space-avionics-defenseDefenseRF/IF and ZigBee®Solutions /lprf Video and Imaging /videoWireless /wireless-appsMailing Address:Texas Instruments,Post Office Box655303,Dallas,Texas75265Copyright©2010,Texas Instruments Incorporated。
手把手教你使用Grace开发LaunchPad

手把手教你使用Grace开发LaunchPad开发环境:Code Composer Studio v4.2操作系统:Windows XP SP3 32bit开发板:TI LaunchPadGrace是TI推出的图形外设配置工具,用于加速用户对MSP430的使用开发,下面简单介绍下如何使用Grace对LaunchPad的开发。
1、安装CCS 和Grace,这两个软件可以到TI的官网里下载到,/。
建议使用页面右上角的检索工具,找资料那些挺方便的:附:CCS下载地址:/tool/cn/ccstudioGrace下载地址:/tool/cn/grace2、安装完成之后,启动Code Composer Studio v4,第一次使用,会提示Select a workspace,这个根据自己需要选择合适目录作为工作路径。
3、由于前面安装了Grace,CCS会提示安装插件Add Discovered Extensions,选中后点击Finish,CCS会提示需要重启动。
4、CCS重启动之后,就看以看到CCS v4的华丽界面了。
至于弹出来的注册界面,注册方法已是公开的秘密,据说那个Crack是对CCS v4.1版及后续版本都支持的。
把CCS的欢迎界面Welcome最大化,我们可以通过这个欢迎界面,来找到需要的资料。
我这里安装的仅仅是对MSP430的支持,所以页面内容都是MSP430相关的。
点击Examples:在弹出来的页面里点击MSP430 Code Examples:点击之后,我们可以看到TI官网上的示例代码页面:再点击我们需要的芯片例程,就可以直接下载到了:是不是方便了很多咧,这个页面也就相当于一个浏览器,在里面我们可以直接链接到TI的官网里,教程、源码等随时可得。
TI给我们提供了极大的便利,用不用,怎么用就因人而异了。
闲着没事的时候,这里点点,那里按按,说不定就有意外的收获。
如果不小心把这个Welcome给关了,我们可以通过以下方式来重新打开:5、回到主题,关于Grace的使用。
Launchpad_Pro中文说明书
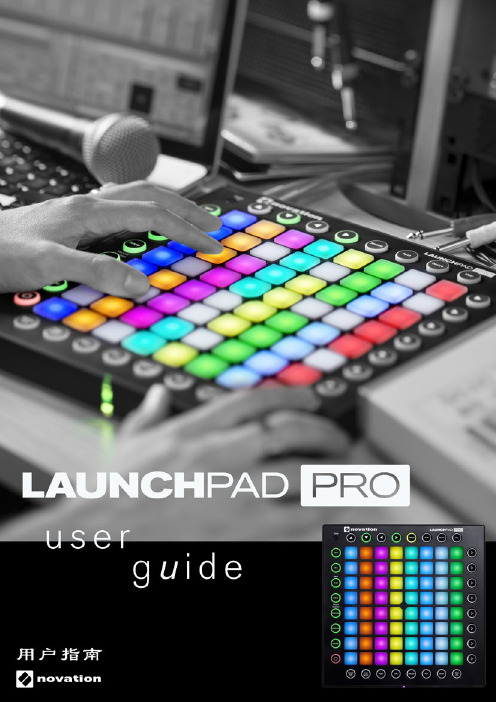
Launchpad Pro 概览
理解了Launchpad Pro的基本构成, 下面让我们进行详细 的学习。
下图是Launchpad Pro的正视图,主要分为7个区域:
设置按钮
导航箭头
模式选择按钮区
Ableton Live的设置
将Launchpad Pro与您的计算机相连,当您打开Ableton Live 时,Launchpad Pro会自动激活并完成与Ableton Live 的协同。 但是非常有必要了解“MIDI同步界面(MIDI sync)”的其他选项,这将事关Ableton Live能否与 Launchpad Pro的完美搭配。
Launchpad Pro右上角区域的第一个模式按钮(Mode Buttons)就是工程模式(Session Mode)按钮。这是四 个模式中最为重要的一个模式,因为一旦选定这个模式, Launchpad Pro将可以直接控制Ableton Live的“工程预览 (Session View)”界面。如果您是Ableton Live的新手。 请理解“Session View”界面可以让您在音乐进行的同时 触发、记录、编辑音频和MIDI片段。换句话说,您可以一 直即兴地玩下去。
6 功能按钮 -工程模式与音符/设备模式 -切换 -节拍器 -撤销操作 -删除 -量化 -复制 -加倍 -录音
8 音符模式/鼓组模式 -基本功能 -MIDI乐器 -鼓架
10 设备模式 -8个推子 -如何创建“宏(Macros)” -包络线 -设备模式中的常规音符
12 用户模式 -创建LED灯光显示模式
13 “设置(Setup)”按钮 -布局选择 -Live布局 -音符、鼓组、推子和编程布局(Layout) -“Setup”界面选项
macOS终端命令教程安装和卸载应用程序
macOS终端命令教程安装和卸载应用程序在开始本教程之前,请确保您已经正确安装了macOS操作系统。
macOS终端命令是一种强大的工具,它允许用户通过命令行来执行各种操作。
本教程将重点介绍如何使用终端命令来安装和卸载应用程序。
一、安装应用程序1. 打开终端命令行界面。
您可以通过在Launchpad中搜索“终端”或在“应用程序”文件夹中找到“实用工具”文件夹来打开终端。
2. 在终端中使用cd命令导航到应用程序的安装文件所在的目录。
例如,如果应用程序安装文件位于Downloads文件夹中,可以使用以下命令导航到该目录:```shellcd ~/Downloads```3. 确保已将应用程序的安装文件下载到了正确的目录。
您可以使用ls命令查看当前目录中的文件列表:```shellls```4. 运行安装命令。
每个应用程序的安装方法可能会有所不同,请确保在安装应用程序之前阅读其官方文档或提供的安装指南。
一般而言,您可以使用以下命令来安装.dmg或.pkg文件类型的应用程序:```shellsudo installer -pkg 应用程序名称.pkg -target /```请将“应用程序名称.pkg”替换为您要安装的应用程序的实际名称。
5. 输入管理员密码以完成应用程序的安装。
安装过程可能需要一些时间,请耐心等待。
二、卸载应用程序1. 打开终端命令行界面。
2. 运行卸载命令。
每个应用程序的卸载方法可能会有所不同,请确保在卸载应用程序之前阅读其官方文档或提供的卸载指南。
一般而言,您可以使用以下命令来卸载应用程序:```shellsudo rm -rf /Applications/应用程序名称.app```请将“应用程序名称.app”替换为您要卸载的应用程序的实际名称。
3. 输入管理员密码以完成应用程序的卸载。
三、常用终端命令除了安装和卸载应用程序外,终端命令还可以执行许多其他有用的操作。
以下是一些常用的终端命令示例:1. cd:更改当前工作目录。
飞碟灵创普教版使用教程

飞碟灵创普教版使用教程【最新版】目录1.飞碟灵创普教版的概述2.安装与配置飞碟灵创普教版3.飞碟灵创普教版的主要功能4.如何使用飞碟灵创普教版进行教学5.总结正文飞碟灵创普教版是一款专为教育领域打造的软件,它集成了多种教学功能,可以帮助教师轻松地进行课堂教学。
下面我们将详细介绍如何安装、配置和使用飞碟灵创普教版。
一、飞碟灵创普教版的概述飞碟灵创普教版是一款教育软件,它集成了多种教学功能,包括课件制作、在线测试、学生管理等,可以帮助教师轻松地进行课堂教学。
二、安装与配置飞碟灵创普教版1.下载飞碟灵创普教版的安装程序,并运行它。
2.按照安装程序的提示进行操作,直到安装完成。
3.启动飞碟灵创普教版,输入许可证密钥,进行初始化。
三、飞碟灵创普教版的主要功能1.课件制作:飞碟灵创普教版提供了丰富的课件制作工具,教师可以根据自己的需要制作出各种形式的课件。
2.在线测试:飞碟灵创普教版提供了在线测试功能,教师可以随时对学生进行测试,了解他们的学习情况。
3.学生管理:飞碟灵创普教版提供了学生管理功能,教师可以方便地管理学生的信息。
四、如何使用飞碟灵创普教版进行教学1.制作课件:教师可以根据自己的需要,使用飞碟灵创普教版的课件制作工具,制作出各种形式的课件。
2.进行教学:教师可以在课堂上使用飞碟灵创普教版进行教学,通过在线测试等功能,了解学生的学习情况。
3.管理学生:教师可以使用飞碟灵创普教版的学生管理功能,方便地管理学生的信息。
五、总结飞碟灵创普教版是一款实用的教育软件,它集成了多种教学功能,可以帮助教师轻松地进行课堂教学。
Rydex 邮件系统应用于 FB 上的安装和配置和使用说明.
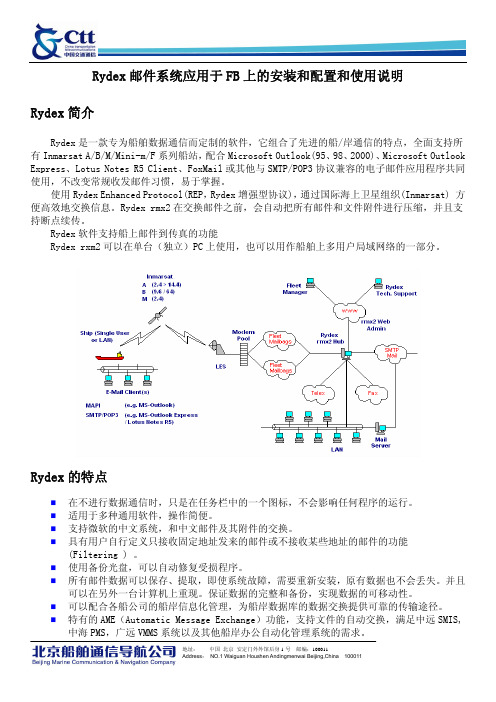
Rydex邮件系统应用于FB上的安装和配置和使用说明Rydex简介Rydex是一款专为船舶数据通信而定制的软件,它组合了先进的船/岸通信的特点,全面支持所有Inmarsat A/B/M/Mini-m/F系列船站,配合Microsoft Outlook(95、98、2000)、Microsoft Outlook Express、Lotus Notes R5 Client、FoxMail或其他与SMTP/POP3协议兼容的电子邮件应用程序共同使用,不改变常规收发邮件习惯,易于掌握。
使用Rydex Enhanced Protocol(REP,Rydex增强型协议),通过国际海上卫星组织(Inmarsat) 方便高效地交换信息。
Rydex rmx2在交换邮件之前,会自动把所有邮件和文件附件进行压缩,并且支持断点续传。
Rydex软件支持船上邮件到传真的功能Rydex rxm2可以在单台(独立)PC上使用,也可以用作船舶上多用户局域网络的一部分。
Rydex的特点在不进行数据通信时,只是在任务栏中的一个图标,不会影响任何程序的运行。
适用于多种通用软件,操作简便。
支持微软的中文系统,和中文邮件及其附件的交换。
具有用户自行定义只接收固定地址发来的邮件或不接收某些地址的邮件的功能(Filtering ) 。
使用备份光盘,可以自动修复受损程序。
所有邮件数据可以保存、提取,即使系统故障,需要重新安装,原有数据也不会丢失。
并且可以在另外一台计算机上重现。
保证数据的完整和备份,实现数据的可移动性。
可以配合各船公司的船岸信息化管理,为船岸数据库的数据交换提供可靠的传输途径。
特有的AME(Automatic Message Exchange)功能,支持文件的自动交换,满足中远SMIS,中海PMS,广远VMMS系统以及其他船岸办公自动化管理系统的需求。
支持所有的Inmarsat Fleets 终端,可以提供MPDS和ISDN通信费的比较作为参考。
python launchpadlib描述

Python Launchpadlib 描述1. 简介Python Launchpadlib 是 Launchpad 的官方 Python API,它提供了一种简洁而高效的方式来与 Launchpad 的数据库进行交互。
Launchpad 是一个项目协作评台,旨在帮助开发人员协作编写和维护软件。
2. 功能Python Launchpadlib 提供了一系列 API 来实现与 Launchpad 的交互,包括但不限于:- 访问和修改项目和团队信息- 创建、编辑和评论 bug 报告- 与社区进行交互,如发送消息、添加评论等- 以及其他与 Launchpad 相关的操作3. 安装要使用 Python Launchpadlib,首先需要安装它。
可以使用 pip 来安装,命令如下:```pip install launchpadlib```4. 使用示例以下是一个简单的示例,演示了如何使用 Python Launchpadlib 来获取 Launchpad 上的一个项目的信息:```pythonfrom unchpad import Launchpadlp = Launchpad.login_with('my-app', 'production')project = lp.projects['my-project']print(project.display_name)```在这个示例中,我们首先通过 Launchpad.login_with() 方法登录到Launchpad,然后访问了一个名为 'my-project' 的项目,并打印了它的显示名称。
5. 贡献Python Launchpadlib 是一个开源项目,欢迎开发者们贡献代码、报告 Bug 或者提出建议。
如果你对 Python Launchpadlib 感兴趣,可以访问其官方仓库了解更多信息:。
Adobe LiveCycle Launch Pad 10 用户指南(适用于管理员和开发人员)说明书

Legal NoticesFor more information, see /en_US/legalnotices/index.html.ContentsAbout This DocumentIntroductionDeploying Launch PadEnabling or Disabling ComponentsAdding new componentsCreate the SWF file. . . . . . . . . . . . . . . . . . . . . . . . . . . . . . . . . . . . . . . . . . . . . . . . . . . . . . . . . . . . . . . . . . . . . . . . . . . . . . . . . . . . . . . . . . . . . . . . . . . . . . . . . . . . . . . . . . . . . . . . . . . .7 Build the Launch Pad code . . . . . . . . . . . . . . . . . . . . . . . . . . . . . . . . . . . . . . . . . . . . . . . . . . . . . . . . . . . . . . . . . . . . . . . . . . . . . . . . . . . . . . . . . . . . . . . . . . . . . . . . . . . . . . . . . . . .8 Deploy the component . . . . . . . . . . . . . . . . . . . . . . . . . . . . . . . . . . . . . . . . . . . . . . . . . . . . . . . . . . . . . . . . . . . . . . . . . . . . . . . . . . . . . . . . . . . . . . . . . . . . . . . . . . . . . . . . . . . . . . .8 Test the component in Launch Pad . . . . . . . . . . . . . . . . . . . . . . . . . . . . . . . . . . . . . . . . . . . . . . . . . . . . . . . . . . . . . . . . . . . . . . . . . . . . . . . . . . . . . . . . . . . . . . . . . . . . . . . . . . . .9About This DocumentAdobe ® LiveCycle ® Enterprise Suite 3 (ES3) Launch Pad is an Adobe ® AIR client application that provides access from your desktop to the services on your organization’s LiveCycle server. Y ou access the services using the components available within Launch Pad.This document is intended for administrators and developers responsible for managing access to LiveCycle using LiveCycle Launch Pad components.Conventions used in this documentAdditional informationThe resources in this table can help you learn more about LiveCycle.Name Default valueDescription[LiveCycle root ]Windows:C:\Adobe\Adobe LiveCycle ES3Linux and UNIX:/opt/adobe/livecycle/The installation directory that is used for all LiveCycle modules. The installation directory contains subdirectories for Adobe® LiveCycle® Configuration Manager. This directory also includes directories relating to third-party products.[Launch Pad root ][LiveCycle root ]/sdk/misc/LaunchPadThe directory where all Launch Pad source files are saved.For information about SeeLaunch PadLaunch Pad Help An overview of LiveCycleLiveCycle Services Additional LiveCycle documents and resources LiveCycle Documentation Adobe Flash ®Builder ™Flash Documentation Other services and products that integrate with LiveCycle Patch updates, technical notes, and additional information on this product versionAdobe Enterprise SupportIntroductionAdobe LiveCycle Launchpad 10 provides access from your desktop to the services on your organization’s LiveCycle server. The following components are included with the SDK and appear in Launch Pad providing the corresponding services are enabled:•Convert to PDF•Export PDF•Create a PDF Package•Rights Protect DocumentAdministrators can also set up and enable additional components for end users based on other LiveCycle functionality.Note: The service that you want to access by using a component must be installed on the LiveCycle server. Otherwise, the component does not appear within Launch Pad.By combining Flex remoting and the services-oriented architecture of LiveCycle server, Launch Pad configures itself each time it restarts. Whenever you start Launch Pad, it queries the LiveCycle server for changes to existing components or for new components to display. Using Launch Pad benefits all types of users:•End users can access on-demand services, such as the Generate PDF service from the LiveCycle server without affecting desktop perfor-mance. Files are created according to enterprise standards instead of using settings that are selected.•Administrators can supply services to the desktop without desktop management and without end-user intervention. The administrators deploy their Launch Pad assets, which, in turn, appear on the desktop.•Developers have a platform for creating end-user values through an SOA programming interface.Deploying Launch PadAfter you complete the LiveCycle installation, you can install and deploy Launch Pad. The following files are used to deploy Launch Pad: adobe-launchpad-dsc.jar Contains the LiveCycle component called LaunchPadServiceadobe-launchpad-assets.lca and adobe-livecycle-launchpad.lca LiveCycle archive (LCA) files that contain process definitions for the desktop componentsInstall LaunchPadService:1In Adobe® LiveCycle® Workbench, navigate to the Components view.2Search the component list to see whether LaunchPadService is running. If LaunchPadService is running, stop it, and then uninstall it.3Right-click the Components view and install the adobe-launchpad-dsc.jar file from the deploy folder.4Right-click LaunchPadService and select Start Component.LaunchpadService is now running. LaunchpadService is the container application that interacts with the client Adobe AIR application. LaunchpadService is responsible for identifying and providing the available user interface components to the Adobe AIR application.To import the LiveCycle archive files:1In Adobe® LiveCycle® Administration Console, click Services > Application and Services > Application Management.Import two archives: adobe.-launchpad-assets.lca and adobe-livecycle-launchpad.lca. The Launch Pad assets archive file contains the SWF application modules and icons that are downloaded to Launch Pad. The Launch Pad services archive file contains the LiveCycle processes that run when Launch Pad makes a call to the LiveCycle server.2Click Import.3Select adobe-livecycle-launchpad.lca, and then click Preview.The adobe-livecycle-launchpad.lca file deploys the processes that are responsible for all the Launch Pad activities.4To deploy the assets to the run time, select Deploy Assets To Runtime When Import Is Complete.5To view a list of the assets that are contained in the file, click View Assets.6Click Import. The archive file is deployed.7Repeat steps 4-6 but choose the adobe-launchpad-assetts.lca file.The adobe-launchpad-assets.lca file is responsible for deploying the following Adobe AIR client assets: •The icons for the components•The SWF file code that runs within the Adobe AIR application and defines the user experience •The version of the Adobe AIR application used on the desktop•The configuration file that binds everything togetherLaunch Pad is now ready to be run, and the components are located on the client desktop.Enabling or Disabling ComponentsY ou control which LiveCycle components are available in Launch Pad by editing a copy of the Launch Pad configuration file (launchpad-config.xml). This configuration file is deployed with Launch Pad. Y ou can place the copy of the configuration file in the Launch Pad Appli-cations view within Workbench.To enable extending the number of Launch Pad components deployed to the desktop, add a new folder structure to the application assets. The folder structure is .../ext/config/. Create this folder structure and copy the launchpad-config.xml file into it. Then, edit the copy of the configuration file. (See “Deploying Launch Pad” on page3)Note: The /ext/config/launchpad-config.xml file takes precedence over the /launchpad-config.xml file. If a component is disabled in the/ext/config/launchpad-config.xml file but enabled in the /launchpad-config.xml file, that component does not appear in Launch Pad. It is recom-mended that you change only the ext/launchpad-config.xml file.To disable a component:❖Edit the /ext/config/launchpad-config.xml file to change the enabled tag from true to false.To enable a component:❖Edit the /ext/config/launchpad-config.xml file to change the enabled tag from false to true.Adding new componentsIn addition to the default components, you can create and enable components for other LiveCycle services.Before you can begin creating a component for Launch Pad, you must have access to the following items:•Launch Pad Includes the adobe-launchpad-module.swc library for developing components.•Adobe Flash®Builder™ 4.0 or later Includes the tools to create a SWF file for the component.•Workbench Used to create processes and deploy the component.•Adobe® LiveCycle® Foundation Provides the underlying foundation and services. Launch Pad must be connected to a LiveCycle server. Each component depends on having the associated LiveCycle service available.The following steps are for adding a new component:•Create the SWF file that runs within the desktop client.•Deploy the component.•Test the component’s accessibility in Launch Pad.Create the SWF fileThe first step for adding a new component is to create the SWF file.1Copy the Launch Pad library file (adobe-launchpad-module.swc) from [LiveCycle root]/sdk/client-libs/common directory to the /library folder of the project.The library contains the unchpad.ClientHubcomponent class. The components that you develop must be a subclass of the unchpad.ClientHubcomponent class, which has the following properties:•serverProtocol•serverName•serverPort•userName•passwordComponents use these properties to interact or load the services on the LiveCycle server.2Copy the following files from [Launch Pad root]/pdfg/src/com/adobe/launchpad/ui/common/effect/ to the project under a package:•AppearEffect.mxml•DisappearEffect.mxml•ClarifyEffect.mxmlBe sure to edit the package declaration line of these files accordingly.3In the project’s main MXML file, change the root element of the project from WindowedApplication/Application to Launchpadcomponent. The initial code of the MXML looks similar to the following code:<ch:LaunchpadModule xmlns:mx="/2006/mxml" layout="absolute"xmlns:ch="unchpad.*" creationComplete="initData(this)"xmlns:effect="mon.effect.*"xmlns:common="mon.*" hideEffect=" {disappear}" showEffect="{appear}"/> <effect:AppearEffect id="appear"/><effect:DisappearEffect id="disappear"/><effect:ClarifyEffect id="clarify"/>This code enables the sliding effect for showing and hiding a component in Launch Pad to the new component.4Update ChannelSet in the new component to communicate with the LiveCycle server:remote_object>.channelSet = this.lcChannelSet as ChannelSet;5Compile the component by using the Adobe Flash® compiler.6Use the @Embed tag to embed images that are used in the component, in the SWF file.The new component is ready to be deployed on the LiveCycle server.Build the Launch Pad codePerform the following steps to build the Launch Pad code:1Set the FLEX_HOME environment variable to the Flex SDK root directory.2Set the LiveCycle_ES_SDK environment variable to [dep root]/sdk.3Set the ANT_HOME environment variable to point to Ant (1.7 or later) root directory. Also, add %ANT_HOME%/bin to the system PATH variable.4Download the ant-contrib.jar fie from /projects/ant-contrib/files/ and copy it to the [ANT_HOME]/lib directory. 5Set the JAVA_HOME environment variable to the Java home directory. Also, add %JAVA_HOME%/bin to the system PATH variable. 6Copy the jdom.jar file (jdom-b7.zip) from /dist/binary/archive/) to the [dep root]/sdk/client-libs/thirdparty directory. 7Extract the [Launch Pad root] /lc-launchpad-src.zip file and follow the instructions to comment or uncomment the code lines in all build.xml files in the extracted directories.Tip: Use the keyword "comment" to search for instructions.8Update the value of flex.sdk.dir in the build.properties file to point to the Flex-sdk-3.4 location.9Execute the ant command from the [Launch Pad root] directory to build the code.Deploy the componentApplications are managed through the Application view in Workbench. Launch Pad has two applications: the system application and the Launch Pad Assets application, the application that contains assets and configuration information for Launch Pad.1To open the Launch Pad assets application from Workbench, click File > GetApplications.2Open Launch Pad Assets (system), and then select Launch Pad Assets (system)/1.0. The folder structure appears in the Applications view.3In Workbench, deploy the SWF file to the SWF file folder in the assets application in the Applications view.4Add the icon (32 X 32 pixels) that appears in the client to the Launchpadcomponent/icons folder in Workbench.5Create a folder called /ext/config in the Launchpadcomponent folder.6Copy the launchpad-config.xml file to this folder.7Edit the launchpad-config.xml file and create a component tag. The component tag supports the following tags:•id Identifies the component. If more than one component with the same ID is present in the configuration file, only the last occur-rence is enabled in Launch Pad.•name Name of the component. This text is used as the tooltip and application title when the component is enabled.•component-url URL of the component’s SWF file in the repository.•description Short description of the component.•icon-url URL of the component’s icon (png) in the repository.•enabled Specifies whether this component is enabled. The default is true.•order Specifies the order in which the component is shown in Launch Pad. The components are sorted alphabetically in Launch Pad.•services Acomma-separated list of services that the component uses. If a service is specified in this list, the component is sent to Launch Pad. The service must be installed on the LiveCycle server.•role A comma-separated list of roles that are required to download and run the component. If a role is specified, the component appears only if the current user has those roles.An example of a component tag<updates><enabled>true</enabled><current-app-version>9.0.20090707.004745</current-app-version><force-update>false</force-update><app-url>/Applications/LaunchpadAssets/1.0/Launchpad.air</app-url></updates><modules><module><id>IdOfTheNewcomponent</id><name>New component</name><module-url>/Applications/LaunchpadAssets/1.0/swf/Newcomponent.swf</component-url><description>New component</description><icon-url>/Applications/LaunchpadAssets/1.0/icons/Newcomponent.png</icon-url><enabled>true</enabled><order>1</order><services>AssemblerService</services><supported-operating-system>ALL</supported-operating-system></module></modules>Test the component in Launch PadY ou test the component’s accessibility in Launch Pad.1Start Launch Pad. The new component appears in the list of components.2Click the component and confirm that the service starts as expected.。
GoBoard Software 安装指南说明书

BrightLink GoBoard for Education –Hub and Teacher Console Software Installation GuideContents Introduction (2)Installing GoBoard for teachers (4)GoBoard setup wizard (8)Hub only configuration (11)Installing Teacher Console only configuration (15)Installing Combined Hub/Teacher Console configuration (23)GoBoard Student Apps (28)Software distribution - Export (29)Requirements (36)GoBoard Preferred network ports used for Wireless communication (37)Where To Get Help (38)IntroductionThank you for choosing GoBoard Software. This guide will give you all the information to get started.NOTE:Drive cloning should not be used as the licensing system will not work. If you clone your drive, you will need to insert a new license.GoBoard ConfigurationGoBoard software is designed to allow display and collaborative whiteboarding between multiple users/devices on the same network. Typically, there is a “Host PC” set up as the HUB, and a second “Console PC” set up to manage theHUB/whiteboard sessions. Other devices can then attach to the whiteboard sessions using free contributor apps* for Windows PCs, Android-based Chromebooks, and iOS devices.1. * Note: GoBoard contributor apps are available fromo Windows 10 – (North America), Epson.eu (Epson Europe)o iOS – Apple App storeo Android Chromebook/Android – Google App storeThe GoBoard software application file contains both the HUB and Console components. In a typical set up, the HUB computer is connected to a projector or other display device. Ideally, the HUB and console are installed on separate computers, allowing greater mobility, as the console computer can then be moved freely about the room. See illustration below:However, it is possible to install both the HUB and Console on a single computer that would both host and manage whiteboard sessions. See illustration below:Prior to installing the software, make sure that your device meets the following requirements:Windows 10 Hub/ Windows 10 Teacher ConsoleMinimum RequirementsWindows 10 version 1803•CPU quad-core 2 GHz•RAM DDR3 8 GB•Cam and microphone (for AV conferences)Optimal Specs•Dedicated graphics card (recommended)•Stylus for Teacher Console PCIf you have not already downloaded the GoBoard software, you can download it from the Epson website.In the USA go to In Canada go to www.epson.caDownload the application and save it to your Windows preferred directory: (HERE LINK)Once downloaded, double-click the setup .exe: (SETUP.exe) and follow the on-screen instructions to install GoBoard on Windows.Installing GoBoard for teachersAfter you have read through the terms and conditions, you must accept the End User License Agreement to continue. To do this select “I accept the agreement” option and then click on “Next”.Choose where to install the GoBoard application. The default path is C:\Program Files\GoBoard, but you may choose a different folder if preferred. Once decided, click on “Next”.Click on “Next” to continue the GoBoard installation.Click on “Install” and wait for the installation process to finish.Once installation is completed, a pop-up screen will appear.If you wish to have the GoBoard software open automatically, select the Launch GoBoard box when installation ends.Click on “Finish” to end the installation process.NOTE: When you create apps and then open them from GoBoard, the apps must open in front of the whiteboard. If apps open behind the whiteboard, a reboot of thePC is recommended.GoBoard setup wizardThe first time you open GoBoard software, the setup wizard will automatically start. English is the default language; You can choose among:1.English (United Kingdom)2.English (United States)3.Italian (Italy)4.Spanish (Spain)5.Portuguese (Portugal)6.French (France)7.French (Canada)8.German (Germany)9.Danish (Denmark)10. Dutch (Netherlands)11. Finnish (Finland)12. Norwegian (Norway)13. Swedish (Sweden).Select your preferred language and then click on “Continue”.There are three selectable installation modes. The default is HUB-only, but you may choose Teacher Console-only or Hub -Teacher Console combined. As mentioned previously, setting up the Hub on one PC and the Console on a separate PC allows greater mobility for the teacher who can move freely about the room with the consolePC while the Hub PC remains connected to the display.Hub Only allows the teacher to connect his/her own PC (the Console) to the Hub in order to share lessons created on his/her PC. Students can also connect their devices to the Hub via QR code reader or by manually entering the Hub’s IP address and a code displayed on the whiteboard. There is also the option to start a stand-alone whiteboard session – blocking the connection of other devices - if that is desired.Teacher Console Only. The Teacher Console is the workspace where teachers manage classes and prepare lessons. The teacher must then connect his/her device to the in-classroom hub via the Hub Only mode to share the lesson with students. Combined Teacher Console with Hub enables the teacher to use his/her own device as the hub for sharing lessons with students. There is also the option to look for nearby hubs as with the Teacher Console Only mode.Hub only configurationHow it worksThe image below shows a typical Hub configuration.The teacher and students can connect to the hub by scanning the hub QR code or by entering hub IP address manually.On GoBoard setup wizard of Hub only, a Classroom hub name must be decided upon and inserted, then click “Continue”.For Example:Classroom 6Science labNOTE: It is recommended to use a strong name for the Hub. Avoid a generic name like “EPSON Projector”. It is recommended to use very specific names like “Classroom XYZ”. This will ensure that teachers launch the lesson to the correct Hub and not in a different classroom.Enter a valid GoBoard License Key and then click on “Activate”. License keys can be found in the purchase confirmation email from GoBoard.If you have yet to purchase a license key, you can begin a free 30-day trial of GoBoard. At the end of 30-days, the software will become disabled.A license key can be purchased from an authorized Epson reseller.screen:The GoBoard Hub-only mode has been successfully configured.Installing Teacher Console only configurationinserted, then click “Continue”.Enter a valid GoBoard License Key and then click on “Activate”. License keys can be purchased from an authorized Epson reseller – for more details go to/goboard (North America).If you have yet to purchase a license key, you can begin a free 30-day trial ofGoBoard. At the end of 30-days, the software will become disabled.message:You can link a Google account for content backup purposes, otherwise to continue click on “Configure later”.NOTE: Once you have linked a Google account, you will see your Google account name inside the ‘Backup account’ box located in the Backup menu in ‘Settings’.Now GoBoard Teacher Console has been successfully configured.NOTE: To go from one mode to another (Teacher Console only, Hub only,Combined Teacher Console with Hub), click your User profile on the top left as seen in the image below.C opy the license key, then click “Reset”.Click “Confirm”.You will be returned to the GoBoard setup wizard.Installing Combined Hub/Teacher Console configurationHow it worksThe image below shows a typical Combined Teacher Console with Hub configuration.The teacher can use their own laptop as a hub device so students can connect to the hub by scanning the hub QR code or by entering the hub IP or address manually.On the GoBoard setup wizard of Combined Teacher Console with Hub mode, a Teacher first and last name must be entered, then click “Continue”.Enter a valid GoBoard License Key and then click on “Activate”. License keys can be found in the purchase confirmation email from GoBoard.If you have yet to purchase a license key, you can begin a free 30-day trial of GoBoard. At the end of 30-days, the software will become disabled.A license key can be purchased from an authorized Epson reseller.NOTE: Make sure that the license key is not expired, otherwise you will see this message:You can link a Google account for backup purposes, otherwise to continue click on “Configure later” button.NOTE: once you have linked a Google account, you will see your Google account name inside the ‘Backup account’ box located in the Backup menu in ‘Settings’.Now GoBoard Combined Teacher Console with Hub mode has been successfully configured.GoBoard Student AppsOther devices including PCs, Android Chromebooks, Android, iOS and Windows devices can connect to a whiteboard session as viewer and/or contributors. In order to do so, you must first download the free GoBoard apps from the associated app stores.Participants can download the app from App Store or Google play by searching for"GoBoard”.Link and QR code: https:///app/goboard/id1529617339Link and QR code:https:///store/apps/details?id=com.remago.goboardLink and QR code: (Windows Student app)Software distribution - ExportIf you already have GoBoard installed on your device, you will need to go to the Settings menu to Export any editable settings as you will need to uninstall GoBoard and reinstall it again to be able to have your chosen settings saved and as default. This is a job that is done by an IT manager to do mass installations.You will then automatically see the mode you have chosen to utilize, and you will no longer need to enter license key details as they will automatically have been entered by the system.Click the “Export” button to export for software distribution.Settings that you can export are:1.Your choice of language2.Installed mode (Teacher console, Hub or Combined Teacher Console withHub)3.License key serial number4.“Run on Startup” flag5.“Kiosk Mode” flag (only visible in Hub mode)6.Settings password (only visible in Hub mode)7.“Extend to multiple displays” flag for double display (only visible if you havetwo connected displays)To import the settings onto another machine, once the file has been exported, transfer it to another computer via a USB key, from this other computer copy the file and paste it insi de the “Desktop” folder. Please make sure that also the setup is in the same folder, when the file and the setup are in the same folder start the installation.Teacher Console and Combined Teacher Console with HubsettingsSelect the language and activate Run on Startup. Click on the blue “Export” button for Software distribution. You will be asked where to save the exported file. Select the preferred folder and then uninstall GoBoard for Teachers.Reinstall GoBoard for Teachers and make sure that the installation setup is in the same folder of the exported file. You will notice that exported settings will be automatically imported, and you will not be asked to input the license key as it has been automatically inserted. The teacher will now see their device name as their profile.Teacher ConsoleCombined Teacher Console with HubNOTE: The “Extend to multiple displays”flag will only be visible if the two display resolutions are identical, the two DPI are identical, the primary monitor is on the left and the secondary monitor is on the right.When you have two connected displays, the “Record all displays” flag will also be visible as you can see on the image below.NOTE: Close and reopen GoBoard to view the settings changes.Teacher ConsoleCombined Teacher Console with HubHub settingsYou can select the language, activate Kiosk Mode, insert a password to access the settings window and activate Run on Startup. Kiosk Mode prevents user interaction and activities on the device outside the scope of execution of the software. Click on the blue “Export” button for Software distribution. You will be asked where to save the exported file. Select the preferred folder and then uninstall GoBoard for Teachers.Reinstall GoBoard for Teachers and make sure that the installation setup is in the same folder of the exported file. You will notice that exported settings will be automatically imported, and you will not be asked to input the license key as it has been automatically inserted. The teacher will now see his/her device name as his/herprofile.NOTE: The “Extend to multiple displays” flag will only be visible if the two display resolutions are identical, the two DPI are identical, the primary monitor is on the left and the secondary monitor is on the right.When you have two connected displays, the “Record all displays” flag will also be visible as you can see on the image below.NOTE: Close and reopen GoBoard to view the settings changes.RequirementsWindows 10 HubMinimum Requirements•Windows 10 version 1803•CPU quad-core 2 GHz•RAM DDR3 8 GB•Cam and microphone (for AV conferences)Optimal Specs•Dedicated graphics card (recommended)Windows 10 Teacher ConsoleMinimum Requirements•Windows 10 version 1803•CPU quad-core 2 GHz•RAM DDR3 8 GB•Cam and microphone (for AV conferences)Optimal Specs•Dedicated graphics card (recommended)•Stylus (for best handwriting/drawing experience)GoBoard Preferred network ports used for Wireless communicationWhiteboard:8033 port TCP protocolHub discovery:8035/8036 UDPAirServer:Where To Get HelpIf you need to contact Epson for technical support services, use the following support options.Internet SupportVisit Epson's support website at /support/goboard (U.S.) orepson.ca/support/goboard (Canada) and select an option for solutions to common problems.Speak to a Support RepresentativeTo speak with a projector support specialist, dial (562) 276-4394 (U.S.) or (905) 709-3839 (Canada).© 2021 Epson America, Inc.。
Launchpad是什么?Launchpad使用教程

Launchpad是什么?Launchpad使⽤教程Launchpad是什么?Launchpad 是⽤来查找和打开Mac系统下的 app 的最快捷⽅式,通过 Launchpad,您可以查看、整理并轻松打开Mac ⾥⾯⼏乎所有的应⽤软件。
下⾯带来Mac基础教程之Launchpad的使⽤教程。
⼀、进⼊ Launchpad要打开 Launchpad 并快速访问 app,请执⾏以下操作:1、点按 Dock 中的 Launchpad 图标。
2、按键盘上的 Launchpad 键(如果有)。
3、在触控板上使⽤拇指和另外三个⼿指合拢⼿势。
⼆、导航 Launchpad在进⼊ Launchpad 后,OS X 会显⽰您的所有 app。
要打开某个 app,只要点按其图标。
默认情况下,Launchpad 中的项⽬按字母顺序排列。
您可以在 Launchpad 上通过拖动操作来按您所需的顺序重新排列图标。
如果⼀个屏幕上没有⾜够的空间来显⽰所有 app,Launchpad 会创建多个页⾯。
Launchpad 屏幕底部的点表⽰存在的 app 页⾯数以及当前显⽰哪个页⾯。
要在页⾯之间移动,请执⾏以下操作:1、通过⿏标滚轮前后滚动。
2、点按 Launchpad 屏幕底部的点。
3、在触控板上⽤两个⼿指向左或向右轻扫。
在 OS X Mountain Lion 及更⾼版本中,您还可以通过在 Launchpad 窗⼝顶部的搜索栏中输⼊ app 名称来搜索 app。
三、Launchpad ⽂件夹在 Launchpad 中,您可以分类整理 app。
只要将⼀个图标拖放到另⼀个位置即可。
要在 Launchpad 中查看某个⽂件夹的内容,只要点按该⽂件夹即可。
其他图标将消失,以便您查看该⽂件夹中的 app。
您也可以通过在此视图中点按其名称来重命名此⽂件夹。
您也可以将项⽬从某个⽂件夹中移回 Launchpad 主屏幕。
只要将图标拖出 Launchpad ⽂件夹然后松⼿即可。
launchpad工程模版

launchpad工程模版
《Launchpad工程模版》。
在软件开发领域,启动一个新项目往往需要花费大量的时间和精力来搭建基础框架和设定工程模版。
然而,有了现代化的开发工具和技术,我们可以通过使用Launchpad工程模版来快速启动一个新项目,从而节省时间和精力。
Launchpad工程模版是一种预先定义好的项目结构和配置,它包括了常见的文件目录结构、依赖管理、构建工具配置等,可以帮助开发团队快速搭建起一个全新的项目。
通过使用Launchpad工程模版,开发团队可以规范化项目结构,统一开发流程,提高开发效率和质量。
在创建一个新项目时,开发团队只需要简单地使用Launchpad工程模版,然后根据项目需求进行定制化配置,就可以立即开始开发工作。
这样一来,开发团队不需要从零开始搭建项目结构,而是可以专注于业务逻辑的实现和功能开发,从而加速项目的上线速度。
除了加速项目启动的速度,Launchpad工程模版还可以帮助团队保持一致的开发标准和最佳实践。
通过预先定义好的项目结构和配置,团队成员可以遵循统一的开发规范,减少因为个人差异而导致的代码风格不一致或者配置错误的问题,从而提高代码质量和可维护性。
总的来说,Launchpad工程模版是一个非常有用的工具,它可以帮助开发团队快速启动新项目,提高开发效率和质量。
通过使用Launchpad工程模版,开发团队可以更加专注于业务逻辑的实现,而不是浪费时间在搭建项目结构上。
因此,我强烈推荐开发团队在启动新项目时使用Launchpad工程模版,以便更快地将产品推向市场。
- 1、下载文档前请自行甄别文档内容的完整性,平台不提供额外的编辑、内容补充、找答案等附加服务。
- 2、"仅部分预览"的文档,不可在线预览部分如存在完整性等问题,可反馈申请退款(可完整预览的文档不适用该条件!)。
- 3、如文档侵犯您的权益,请联系客服反馈,我们会尽快为您处理(人工客服工作时间:9:00-18:30)。
附1 FB LaunchPad软件安装和配置说明 1.1FB LaunchPad软件安装
1)打开压缩文件,运行
FB_LaunchPadInstaller.ex
e,开始过程
2)选I accept the terms of
the License Agreemenet接
受使用条件要求条款
3)版本选择默认为Personal,如
果需要设置FB LaunchPad使用权
限,可选Corporate,默认密码为
admin
4)默认选项即可,点Next
默认选项即可,点Next
5)点击Install
6)安装完成,点击Done
7)程序安装完成后,可能
会弹出Windows安全警报
提示,点击解除阻止
1.2FB LaunchPad软件参数配置
1)双击桌面FB LaunchPad图标打开FB LaunchPad程序
2)弹出Select Terminal窗口,选中相应的FB型号后点击Search按钮
3)等待程序找到FB设备
4)程序找到FB设备后开始获取FB的状态
5)成功获取到FB设备状态后显示如下
6)打开LaunchPad service菜单下的APN options
7)在打开的APN Configuration窗口中点击Edit按钮
8)将APN地址改为
9)点击Add按钮
10)在Username下输入rydex Password下输入bjles ConfirmPassword下输入bjles后点Submit
11)在弹出的Edit Confirmation窗口中点OK按钮
12)回到APN Configuration窗口中点Apply按钮
13)配置完成,点击LaunchPad窗口中的Connect按钮即可控制IP数据连接了。
