Oracle11g RAC环境下多个Scan IP的修改方法
11gR2 RAC 修改IP地址

11gR2 RAC 修改IP地址11gR2 RAC 修改IP地址 (1)一修改Public和Private网络IP (2)场景1:只有修改IP地址,网络接口,子网和子网掩码不变 (2)场景2:IP,子网,子网掩码都改变 (2)二修改VIP (4)三修改SCAN VIP (5)一修改Public和Private网络IP场景1:只有修改IP地址,网络接口,子网和子网掩码不变例如,从192.168.1.10改成192.168.1.20,网络接口和子网相同。
操作步骤如下1停止所有节点的集群。
2主机层面修改IP,hosts文件、DNS修改对应信息。
3启动集群。
场景2:IP,子网,子网掩码都改变示例环境信息如下注意事项:在11.2版本的集群件,网络配置信息不仅存在OCR中,还会存在gpnp profile 中。
如果主机网络信息与集群中配置的信息不一致会导致CRS服务无法启动,所以修改IP 的顺序很重要。
关于Public IP和VIP的修改,下面操作过程适用于用hosts文件或DNS配置IP的环境,不适用于使用GNS环境。
1 备份集群配置信息备份GPNP Profile$ cd $GRID_HOME/gpnp/<hostname>/profiles/peer/$ cp -p profile.xml profile.xml.bk备份OCR检查备份信息[grid@rac1 ~]$ ocrconfig -showbackup手动备份[root@rac1 ~]# ocrconfig -manualbackup2 获取OCR配置的网络信息# oifcfg getifeth0 192.168.56.0 global publiceth1 10.0.0.0 global cluster_interconnectpublic 网络用于数据库与客户端的通信,VIP与public用相同的网络。
cluster_interconnect 网络用户RDBMS/ASM内存融合,从11gR2开始,也用于集群心跳。
scan ip功能

Oracle 11G R2 RAC增加了scan ip功能,在11.2之前,client链接数据库的时候要用vip,假如你的cluster有4个节点,那么客户端的tnsnames.ora中就对应有四个主机vip的一个连接串,如果cluster增加了一个节点,那么对于每个连接数据库的客户端都需要修改这个tnsnames.ora。
引入了scan以后,就方便了客户端连接的一个接口,顾名思义single client access name ,简单客户端连接名,这是一个唯一的名称,在整个公司网络内部唯一,并且在DNS 中可以解析为三个ip地址,客户端连接的时候只需要知道这个名称,并连接即可,每个SCAN VIP对应一个scan listener,cluster内部的service在每个scan listener上都有注册,scan listener接受客户端的请求,并foward到不同的Local listener中去,还是由local 的listener提供服务给客户端。
scan只是一个名字,这个名字在DNS上解析成三个IP地址(VIP也是一个名字,也要配置一个ip地址阿)无论cluster有多大(两个节点或者20个节点),都只有三个scan vip,在随机的节点上启动(如果是两个节点,可能三个vip在一个节点,也可能是1+2)scan主要是简化客户端连接,你如果有20个节点,客户端连接的时候,是不是需要配置20个vip,如果用scan,只需要一个scan name就行了,剩下的事情,scan帮你做了。
至于为什么需要在dns里注册三个,主要是为了尽量提高可用性。
当节点数大于3时,最多也只会有3个SCAN listener,也就是说有的节点上没有scan listener.如果使用/etc/hosts文件解析scan ip,因为不能做轮训的负载均衡,所以这时候scan ip 就只能有一个了。
例如:oracle 客户端如何连接到ORACLE 11GR2 带有DNS SCAN IP 的数据库服务器[grid@rac2 ~]$ srvctlconfig scanSCAN name: , Network: 1/192.168.3.0/255.255.255.0/eth0SCAN VIP name: scan1, IP: //192.168.3.231 SCAN VIP name: scan2, IP: //192.168.3.233 SCAN VIP name: scan3, IP: //192.168.3.232客户端TNSNAMES.ORA配置RACDB =(DESCRIPTION =(ADDRESS = (PROTOCOL = TCP)(HOST = )(PORT = 1521))(CONNECT_DATA =(SERVER = DEDICATED)(SERVICE_NAME = racdb){) )TNSPING 测试客户端网络配置指向DNS服务器地址192.168.3.32C:\Documents and Settings\Administrator>tnspingracdbTNS Ping Utility for 32-bit Windows: Version 11.1.0.7.0 - Production on 20-7月-2010 18:53:50Copyright (c) 1997, 2008, Oracle. All rights reserved.已使用的参数文件:D:\app\Administrator\product\11.1.0\db_1\network\admin\sqlnet.ora已使用TNSNAMES 适配器来解析别名Attempting to contact (DESCRIPTION = (ADDRESS = (PROTOCOL = TCP)(HOST = )(PORT = 1521)) (CONNECT_DATA = (SERVER = DEDICATED) (SERVICE_NAME = racdb)))OK (80 毫秒)客户端连接C:\Documents and Settings\Administrator>sqlplussystem/abcdefg@racdb SQL*Plus: Release 11.1.0.7.0 - Production on 星期二7月20 18:46:15 2010Copyright (c) 1982, 2008, Oracle. All rights reserved.连接到:Oracle Database 11g Enterprise Edition Release 11.2.0.1.0 - 64bit Production With the Partitioning, Real Application Clusters, Automatic Storage Management OLAP,Data Mining and Real Application Testing options SQL> select instance_name from v$instance; INSTANCE_NAME----------------racdb2SQL> exit。
Oracle11gRAC环境下publicipvippriv-ip的修改方法

Oracle11g RAC环境下public IP、VIP、scan-IP、private IP的修改方法一、修改方法1.环境操作系统版本:AIX 6.1Oracle版本:11.2.0.3修改前IP配置:192.168.101.61 host1192.168.101.62 host210.10.11.61 host1-priv10.10.11.62 host2-priv192.168.101.63 host1-vip192.168.101.64 host2-vip192.168.101.65 host-scan修改前网卡配置:en0:192.168.101.61en1:10.10.11.61修改后IP配置:192.168.102.61 host1192.168.102.62 host210.10.12.61 host1-priv10.10.12.62 host2-priv192.168.102.63 host1-vip192.168.102.64 host2-vip192.168.102.65 host-scan修改前网卡配置:en0:192.168.102.61en1:10.10.12.612.停止CRS相关资源的自启动2.1停止监听资源srvctl disable listenersrvctl stop listener2.2停止数据库资源srvctl disable database -d yxdbsrvctl stop database -d yxdb -o immediate2.3停止VIP资源srvctl disable vip -ihost1-vipsrvctl stop vip -n host1srvctl disable vip -ihost2-vipsrvctl stop vip -n host22.4停止scan_listener资源srvctl disable scan_listenersrvctl stop scan_listener2.5停止scan资源srvctl disable scansrvctl stop scan2.6停止crs服务(两个节点都要执行)crsctl stop crs3.修改Public IP、VIP、Scan IP、Private IP3.1修改Public IP网卡地址参考命令:smittcpip-> Minimum Configuration & Startup->en0备注:此处只修改Public IP的网卡配置,不修改Private IP的网卡配置,否则CRS 服务将无法启动。
ORACLERAC修改public和VIP地址的方法
ORACLE RAC修改public和VIP地址的方法在ORACLE RAC系统中,有时候在实施的时候使用一套IP地址,在正式环境中又使用一套真实的IP地址,此时就牵涉到如何修改主机以及RAC的IP地址。
在RAC系统中,系统拥有VIP,public地址以及private 地址和SCAN IP地址,本文主要讨论如何修改public地址和vip地址。
一、首先确认IP地址的规划1.在修改之前,一定要确认IP地址是否都已经规划好,这对后面修改非常重要,假定原有地址如下:192.168.0.12 cluster1192.168.0.13 cluster2192.168.0.14 cluster1-vip192.168.0.16 cluster2-vip192.168.0.15 cluster1-priv192.168.0.17 cluster2-priv2.新环境规划:192.168.100.12 cluster1192.168. 100.13 cluster2192.168. 100.14 cluster1-vip192.168. 100.16 cluster2-vip192.168. 100.15 cluster1-priv192.168. 100.17 cluster2-priv3.获取原有rac的地址规划# oifcfg getifvnet0 192.168.0.0 global publicvnet1 192.168.1.0 global cluster_interconnect二、修改PUBLIC和VIP地址的具体步骤在修改之前一定确认操作的正确性,因为在修改IP地址的时候,如果又是远程操作的话,务必注意网络的可用性。
在VLAN中,如果修改了地址,那么原有的网络修改后,新网络地址在vlan中无法使用,因此必须有网络工程师配合进行网络地址的修改,建议在运行ORACLE RAC系统的console台上进行修改地址。
11G RAC修改IP测试

11G RAC修改IP测试测试环境:操作系统:Redhat 5.8数据库版本:11.2.0.1目录【测试前规划】 (3)【公共IP修改】 (4)【DNS修改】 (4)【VIP修改】 (6)【完成检测】 (6)【官方文档】 (7)【测试前规划】原IP地址:-------------------------------------------------------192.168.4.41 rac01192.168.4.42 rac0210.10.10.211 rac01-priv10.10.10.212 rac02-priv192.168.4.43 rac01-vip192.168.4.44 rac02-vip192.168.4.45 racscan192.168.4.46 racscan192.168.4.47 racscan--------------------------------------------------------修改后IP地址:--------------------------------------------------------172.16.152.41 rac01172.16.152.42 rac0210.10.10.211 rac01-priv10.10.10.212 rac02-priv172.16.152.43 rac01-vip172.16.152.44 rac02-vip172.16.152.45 racscan172.16.152.46 racscan172.16.152.47 racscan---------------------------------------------------------在任意节点上修改:[root@rac01 ~]# cd /u01/app/grid/11.2/bin/[root@rac01 bin]# ./oifcfg getifeth0 192.168.4.0 global publiceth1 10.10.10.0 global cluster_interconnect[root@rac01 bin]# ./oifcfg delif -global eth0[root@rac01 bin]# ./oifcfg setif -global eth0/172.16.152.0:pubilc [root@rac01 bin]# ./oifcfg getifeth1 10.10.10.0 global cluster_interconnecteth0 172.16.152.0 global public停止所有服务的运行,在所有节点运行:[root@rac01 bin]# ./crsctl stop has【公共IP修改】然后修改RAC所有网卡地址:[root@rac01 bin]# setup将网卡eth0的IP改为要修改的新IP【DNS修改】修改RAC所有节点的/etc/resolv.conf文件[root@rac01 bin]# vi /etc/resolv.confsearch rac-scan.svc.om nameserver 172.16.152.42 (我用的是节点2作为DNS服务器,所以IP为172.16.152.42,此处自行修改DNS服务器IP)修改完成后在每个节点进行测试,是否能够正常解析节点1:[root@rac01 bin]# nslookup Server: 172.16.152.42Address: 172.16.152.42#53Name: Address: 172.16.152.47Name: Address: 172.16.152.45Name: Address: 172.16.152.46节点2:[root@rac02 ~]# nslookup Server: 172.16.152.42Address: 172.16.152.42#53Name: Address: 172.16.152.46Name: Address: 172.16.152.47Name: Address: 172.16.152.45修改每个节点上/etc/hosts文件:[root@rac01 ~]# vi /etc/hosts# Do not remove the following line, or various programs# that require network functionality will fail.127.0.0.1 localhost.localdomain localhost::1 localhost6.localdomain6 localhost6172.16.152.41 rac01172.16.152.42 rac0210.10.10.211 rac01-priv10.10.10.212 rac02-priv172.16.152.43 rac01-vip172.16.152.44 rac02-vip172.16.152.45 racscan172.16.152.46 racscan172.16.152.47 racscan在所有节点上重新启动所有服务[root@rac01 bin]# ./crsctl start has重新配SCAN VIP和SCAN Listener执行以下命令停止SCAN和SCAN Listener运行[root@rac01 bin]# ./srvctl stop scan_listener[root@rac01 bin]# ./srvctl stop scan执行下命令删除SCAN和SCAN Listener运行[root@rac01 bin]# ./srvctl remove scan_listener -f[root@rac01 bin]# ./srvctl remove scan -f执行以下命令添加SCAN:[root@rac01 bin]# ./srvctl add scan -n -k 1 -S 172.16.152.0/255.255.255.0/eth0添加SCAN Listener:[root@rac01 bin]# ./srvctl add scan_listener启动SCAN和Listener:[root@rac01 bin]# ./srvctl start scan[root@rac01 bin]# ./srvctl start scan_listener【VIP修改】停止VIP资源和本地监听:[root@rac01 bin]# ./crsctl stop resource ora.rac01.vip -fCRS-2673: Attempting to stop 'ora.LISTENER.lsnr' on 'rac01'CRS-2677: Stop of 'ora.LISTENER.lsnr' on 'rac01' succeededCRS-2673: Attempting to stop 'ora.rac01.vip' on 'rac01'CRS-2677: Stop of 'ora.rac01.vip' on 'rac01' succeeded[root@rac01 bin]# ./crsctl stop resource ora.rac02.vip -fCRS-2673: Attempting to stop 'ora.LISTENER.lsnr' on 'rac02'CRS-2677: Stop of 'ora.LISTENER.lsnr' on 'rac02' succeededCRS-2673: Attempting to stop 'ora.rac02.vip' on 'rac02'CRS-2677: Stop of 'ora.rac02.vip' on 'rac02' succeeded修改VIP地址:[root@rac01 bin]# ./srvctl modify nodeapps -A 172.16.152.43/255.255.255.0/eth0 -n rac01 [root@rac01 bin]# ./srvctl modify nodeapps -A 172.16.152.44/255.255.255.0/eth0 -n rac02启动VIP资源:[root@rac01 bin]# ./crsctl start resource ora.rac01.vip -fCRS-2672: Attempting to start 'ora.rac01.vip' on 'rac01'CRS-2676: Start of 'ora.rac01.vip' on 'rac01' succeeded[root@rac01 bin]# ./crsctl start resource ora.rac02.vip -fCRS-2672: Attempting to start 'ora.rac02.vip' on 'rac02'CRS-2676: Start of 'ora.rac02.vip' on 'rac02' succeeded启动本地监听:[root@rac01 bin]# ./srvctl start listener -n rac01[root@rac01 bin]# ./srvctl start listener -n rac02【完成检测】[grid@rac01 ~]$ crs_stat -tName Type Target State Host------------------------------------------------------------ora.CRSDGG.dg ora....up.type ONLINE ONLINE rac01ora.DATADG.dg ora....up.type ONLINE ONLINE rac01ora.FLASHDG.dg ora....up.type ONLINE ONLINE rac01ora....ER.lsnr ora....er.type ONLINE ONLINE rac01ora....N1.lsnr ora....er.type ONLINE ONLINE rac02ora.asm ora.asm.type ONLINE ONLINE rac01ora.eons ora.eons.type ONLINE ONLINE rac01ora.gsd ora.gsd.type OFFLINE OFFLINEwork ora....rk.type ONLINE ONLINE rac01ora.oc4j ora.oc4j.type OFFLINE OFFLINEora.ons ora.ons.type ONLINE ONLINE rac01ora....SM1.asm application ONLINE ONLINE rac01ora....01.lsnr application ONLINE ONLINE rac01ora.rac01.gsd application OFFLINE OFFLINEora.rac01.ons application ONLINE ONLINE rac01ora.rac01.vip ora....t1.type ONLINE ONLINE rac01ora....SM2.asm application ONLINE ONLINE rac02ora....02.lsnr application ONLINE ONLINE rac02ora.rac02.gsd application OFFLINE OFFLINEora.rac02.ons application ONLINE ONLINE rac02ora.rac02.vip ora....t1.type ONLINE ONLINE rac02ora.racdb.db ora....se.type OFFLINE OFFLINEora....ry.acfs ora....fs.type ONLINE ONLINE rac01ora.scan1.vip ora....ip.type ONLINE ONLINE rac02以上测试参考官方文档进行,下附11G官方文档部分【官方文档】-------------------------------------------------------------------------------------------------------------------- Changing Network Addresses on Manually Configured NetworksThis section contains the following topics:■Understanding When You Must Configure Network Addresses■Understanding SCAN Addresses and Client Service Connections■Changing the Virtual IP Addresses■Changing Oracle Clusterware Private Network ConfigurationUnderstanding When You Must Configure Network AddressesAn Oracle Clusterware configuration requires at least two interfaces:■A public network interface, on which users and application servers connect toaccess data on the database serverSee Also: Oracle Grid Infrastructure Installation Guide for yourplatform for information about configuring NTP for OracleClusterware, or disabling it to use CTSSChanging Network Addresses on Manually ConfiguredNetworksAdministering Oracle Clusterware 2-19■A private network interface for internode communication.If you use Grid Naming Service and DHCP to manage your network connections, then you may not need to configure address information on the cluster. Using GNS allows public Virtual Internet Protocol (VIP) addresses to be dynamic, DHCP-provided addresses. Clients submit name resolution requests to your network’s Domain Name Service (DNS), which forwards the requests to the grid naming service (GNS), managed within the cluster. GNS then resolves these requests to nodes in the cluster. If you do not use GNS, and instead configure networks manually, then public VIP addresses must be statically configured in the DNS, VIPs must be statically configured in the DNS and hosts file, and private IP addresses require static configuration. Understanding SCAN Addresses and Client Service ConnectionsPublic network addresses are used to provide services to clients. If your clients are connecting to the Single Client Access Name (SCAN) addresses, then you may need to change public and virtual IP addresses as you add or remove nodes from the cluster, but you do not need to update clients with new cluster addresses.SCANs function like a cluster alias. However, SCANs are resolved on any node in the cluster, so unlike a VIP address for a node, clients connecting to the SCAN no longer require updated VIP addresses as nodes are added to or removed from the cluster. Because the SCAN addresses resolve to the cluster, rather than to a node address in the cluster, nodes can be added to or removed from the cluster without affecting the SCAN address configuration.The SCAN is a fully qualified name (host name+domain) that is configured to resolveto all the addresses allocated for the SCAN. The addresses resolve using Round Robin DNS either on the DNS server, or within the cluster in a GNS configuration. SCAN listeners can run on any node in the cluster. SCANs provide location independence for the databases, so that client configuration does not have to depend on which nodes run a particular database.Oracle Database 11g release 2 (11.2) and later instances only register with SCAN listeners as remote listeners. Upgraded databases register with SCAN listeners as remote listeners, and also continue to register with all node listeners.Changing the Virtual IP AddressesClients configured to use public VIP addresses for Oracle Database releases before Oracle Database 11g release 2 (11.2) can continue to use their existing connection addresses. Oracle recommends that you configure clients to use SCANs, but it is not required that you use SCANs. When an earlier version of Oracle Database is upgraded, it is registered with the SCAN, and clients can start using the SCAN to connect to that database, or continue to use VIP addresses for connections.Note: Because of the Oracle Clusterware installation requirementthat you provide a SCAN name during installation, if you resolved atleast one IP address using the server /etc/hosts file to bypass theinstallation requirement but you do not have the infrastructurerequired for SCAN, then, after the installation, you can ignore theSCAN and connect to the databases in the cluster using VIPs.Oracle does not support removing the SCAN address.Changing Network Addresses on Manually Configured Networks2-20 Oracle Clusterware Administration and Deployment GuideIf you continue to use VIP addresses for client connections, you can modify the VIPaddress while Oracle Database and Oracle ASM continue to run. However, you muststop services while you modify the address. When you restart the VIP address,services are also restarted on the node.This procedure cannot be used to change a static public subnet to use DHCP. Only thesrvctl add network -S command creates a DHCP network.Perform the following steps to change a VIP address:1. Stop all services running on the node whose VIP address you want to changeusing the following command syntax, where database_name is the name of thedatabase, service_name_list is a list of the services you want to stop, and my_node is the name of the node whose VIP address you want to change:srvctl stop service -d database_name -s service_name_list -n my_nodeThis example specifies the database name (grid) using the -d option and specifiesthe services (sales,oltp) on the appropriate node (mynode).$ srvctl stop service -d grid -s sales,oltp -n mynode2. Confirm the current IP address for the VIP address by running the srvctlconfig vip command. This command displays the current VIP address boundto one of the network interfaces. The following example displays the configuredVIP address:$ srvctl config vip -n stbdp03VIP exists.:stbdp03VIP exists.: /stbdp03-vip/192.168.2.20/255.255.255.0/eth03. Stop the VIP resource using the srvctl stop vip command:$ srvctl stop vip -n mynode4. Verify that the VIP resource is no longer running by running the ifconfig -acommand on Linux and UNIX systems (or issue the ipconfig /all commandon Windows systems), and confirm that the interface (in the example it waseth0:1) is no longer listed in the output.5. Make any changes necessary to the /etc/hosts files on all nodes on Linux andUNIX systems, or the %windir%\system32\drivers\etc\hosts file onWindows systems, and make any necessary DNS changes to associate the new IPaddress with the old host name.6. To use a different subnet or NIC for the default network before you change anyVIP resource, you must use the srvctl modify network -Ssubnet/netmask/interface command as root to change the networkresource, where subnet is the new subnet address, netmask is the new netmask,Note: The following instructions describe how to change only a VIPaddress, and assume that the host name associated with the VIPaddress does not change. Note that you do not need to update VIPaddresses manually if you are using GNS, and VIPs are assignedusing DHCP.If you are changing only the VIP address, then update the DNS andthe client hosts files. Also, update the server hosts files, if those areused for VIP addresses.Changing Network Addresses on Manually Configured Networks Administering Oracle Clusterware 2-21and interface is the new interface. After you change the subnet, then you mustchange each node's VIP to an IP address on the new subnet, as described in thenext step.7. Modify the node applications and provide the new VIP address using thefollowing srvctl modify nodeapps syntax:$ srvctl modify nodeapps -n node_name -A new_vip_addressThe command includes the following flags and values:■-n node_name is the node name■-A new_vip_address is the node-level VIP address:name|ip/netmask/[if1[|if2|...]]For example, issue the following command as the root user:srvctl modify nodeapps -n mynode -A 192.168.2.125/255.255.255.0/eth0Attempting to issue this command as the installation owner account mayresult in an error. For example, if the installation owner is oracle, then youmay see the error PRCN-2018: Current user oracle is not aprivileged user.To avoid the error, run the command as the root or system administratoraccount.8. Start the node VIP by running the srvctl start vip command:$ srvctl start vip -n node_nameThe following command example starts the VIP on the node named mynode:$ srvctl start vip -n mynode9. Repeat the steps for each node in the cluster.Because the SRVCTL utility is a clusterwide management tool, you can accomplishthese tasks for any specific node from any node in the cluster, without logging into each of the cluster nodes.10. Run the following command to verify node connectivity between all of the nodesfor which your cluster is configured. This command discovers all of the networkinterfaces available on the cluster nodes and verifies the connectivity between allof the nodes by way of the discovered interfaces. This command also lists all of theinterfaces available on the nodes which are suitable for use as VIP addresses.$ cluvfy comp nodecon -n all -verboseChanging Oracle Clusterware Private Network ConfigurationThis section contains the following topics:■About Private Networks and Network Interfaces■Redundant Interconnect Usage■Consequences of Changing Interface Names Using OIFCFG■Changing a Network InterfaceChanging Network Addresses on Manually Configured Networks 2-22 Oracle Clusterware Administration and Deployment GuideAbout Private Networks and Network InterfacesOracle Clusterware requires that each node is connected through a private network (in addition to the public network). The private network connection is referred to as the cluster interconnect. Table 2–5 describes how the network interface card (NIC) and the private IP address are stored.Oracle only supports clusters in which all of the nodes use the same network interface connected to the same subnet (defined as a global interface with the oifcfg command). You cannot use different network interfaces for each node (node-specific interfaces). Refer to Appendix D, "Oracle Interface Configuration Tool (OIFCFG) Command Reference" for more information about global and node-specific interfaces. Redundant Interconnect UsageYou can define multiple interfaces for Redundant Interconnect Usage by classifyingthe interfaces as private either during installation or after installation using theoifcfg setif command. When you do, Oracle Clusterware creates from one to four (depending on the number of interfaces you define) highly available IP (HAIP) addresses, which Oracle Database and Oracle ASM instances use to ensure highly available and load balanced communications.The Oracle software (including Oracle RAC, Oracle ASM, and Oracle ACFS, all 11g release 2 (11.2.0.2), or later), by default, uses these HAIP addresses for all of its traffic, allowing for load balancing across the provided set of cluster interconnect interfaces. If one of the defined cluster interconnect interfaces fails or becomes non-communicative, then Oracle Clusterware transparently moves the corresponding HAIP address to one of the remaining functional interfaces.Table 2–5 Storage for the Network Interface, Private IP Address, and Private Host Name Entity Stored In... CommentsNetwork interfacenameOperating systemFor example: eth1You can use wildcards when specifyingnetwork interface names.For example: eth*Private networkInterfacesOracle Clusterware, inthe Grid Plug and Play(GPnP) ProfileConfigure an interface for use as a privateinterface during installation by marking theinterface as Private, or use the oifcfgsetif command to designate an interface asa private interface.See Also: "OIFCFG Commands" on page D-3for more information about the oifcfgsetif commandNote: Oracle Clusterware uses at most four interfaces at any givenpoint, regardless of the number of interfaces defined. If one of theinterfaces fails, then the HAIP address moves to another one of theconfigured interfaces in the defined set.When there is only a single HAIP address and multiple interfacesfrom which to select, the interface to which the HAIP address movesis no longer the original interface upon which it was configured.Oracle Clusterware selects the interface with the lowest numericalsubnet to which to add the HAIP address.See Also: Oracle Grid Infrastructure Installation Guide for yourplatform for information about defining interfacesChanging Network Addresses on Manually Configured NetworksAdministering Oracle Clusterware 2-23Consequences of Changing Interface Names Using OIFCFGThe consequences of changing interface names depend on which name you arechanging, and whether you are also changing the IP address. In cases where you areonly changing the interface names, the consequences are minor. If you change thename for the public interface that is stored in OCR, then you also must modify thenode applications for the cluster. Therefore, you must stop the node applications forthis change to take effect.Changing a Network InterfaceYou can change a network interface and its associated subnet address using thefollowing procedure. You must perform this change on all nodes in the cluster.This procedure changes the network interface and IP address on each node in thecluster used previously by Oracle Clusterware and Oracle Database.1. Ensure that Oracle Clusterware is running on all of the cluster nodes by runningthe following command:$ olsnodes -sThe command returns output similar to the following, showing that OracleClusterware is running on all of the nodes in the cluster:./olsnodes -smyclustera Activemyclusterc Activemyclusterb Active2. Ensure that the replacement interface is configured and operational in theoperating system on all of the nodes. Use the ifconfig command (or ipconfigon Windows) for your platform. For example, on Linux, use:$ /sbin/ifconfig..3. Add the new interface to the cluster as follows, providing the name of the newinterface and the subnet address, using the following command:$ oifcfg setif -global if_name/subnet:cluster_interconnectYou can use wildcards with the interface name. For example, oifcfg setif-global "eth*/192.168.0.0:cluster_interconnect is valid syntax.However, be careful to avoid ambiguity with other addresses or masks used withother cluster interfaces. If you use wildcards, then the command returns a warningsimilar to the following:eth*/192.168.0.0 global cluster_interconnectPRIF-29: Warning: wildcard in network parameters can cause mismatchSee Also: My Oracle Support (formerly OracleMetaLink) note276434.1 for more details about changing the node applications to usea new public interface name, available at the following URL:https://Caution: The interface that the Oracle RAC (RDBMS) interconnectuses must be the same interface that Oracle Clusterware uses with thehost name. Do not configure the private interconnect for Oracle RACon a separate interface that is not monitored by Oracle Clusterware.Changing Network Addresses on Manually Configured Networks2-24 Oracle Clusterware Administration and Deployment Guideamong GPnP profile, OCR, and system4. After the previous step completes, you can remove the former subnet, as follows,by providing the name and subnet address of the former interface:oifcfg delif -global if_name/subnetFor example:$ oifcfg delif -global eth1/10.10.0.05. Verify the current configuration using the following command:oifcfg getifFor example:$ oifcfg getifeth2 10.220.52.0 global cluster_interconnecteth0 10.220.16.0 global public6. Stop Oracle Clusterware on all nodes by running the following command as rooton each node:# crsctl stop crs7. When Oracle Clusterware stops, deconfigure the deleted network interface in theoperating system using the ifconfig command. For example:$ ifconfig downAt this point, the IP address from network interfaces for the former subnet isdeconfigured from Oracle Clusterware. This command does not affect theconfiguration of the IP address on the operating system.You must update the operating system configuration changes, because changesmade using ifconfig are not persistent.Note: Legacy network configuration does not support wildcards;thus wildcards are resolved using current node configuration at thetime of the update.See Also: Appendix D, "Oracle Interface Configuration Tool(OIFCFG) Command Reference" for more information about usingOIFCFG commandsCaution: This step should be performed only after a replacementinterface is committed into the Grid Plug and Play configuration.Simple deletion of cluster interfaces without providing a validreplacement can result in invalid cluster configuration.Note: With cluster network configuration changes, the cluster mustbe fully stopped; do not use rolling stops and restarts.See Also: Your operating system documentation for moreinformation about how to make ifconfig commands persistentChanging Network Addresses on Manually Configured NetworksAdministering Oracle Clusterware 2-258. Restart Oracle Clusterware by running the following command on each node inthe cluster as the root user:# crsctl start crsThe changes take effect when Oracle Clusterware restarts.If you use the CLUSTER_INTERCONNECTS initialization parameter, then you mustupdate it to reflect the changes.。
Oracle_11gR2_SCAN_IPscanip配置详解

Oracle_11gR2_SCAN_IPscanip配置详解Oracle_11gR2_SCAN_IP scan ip配置详解在Oracle 11gR2以前,如果数据库采用了RAC架构,在客户端的tnsnames中,需要配置多个节点的连接信息,从而实现诸如负载均衡,failover等等RAC的特性。
因此,当数据库RAC集群需要添加或删除节点时,需要及时对客户端机器的tns进行更新,以免出现安全隐患。
在11gR2中,为了简化该项配置工作,引入了SCAN(Single Client Access Name)的特性,该特性的好处在于,在数据库与客户端之间,添加了一层虚拟的服务层,就是所谓的scan ip 以及scan ip listener,在客户端仅需要配置scan ip的tns信息,通过scan ip listener,连接后台集群数据库。
这样,不论集群数据库是否有添加或者删除节点的操作,均不会对client产生影响。
下面,具体介绍下SCAN(Single Client Access Name)的架构以及配置。
首先,简要的看下在11gR2中,安装RAC发生的巨大变化,在10g以及11gR1的时代,安装RAC的步骤是先安装CRS,再安装DB,而到了11gR2的时代,crs与asm被集成在一起,合称为GRID,必须先安装GRID后,才能继续安装DB,否则,你就跟11gR2的RAC 无缘咯。
而被11gR2引入的SCAN,就是包含在安装grid的过程中。
SCAN的定义,有两种途径:1. 在DNS中定义域名。
2. 通过oracle提供的Grid Naming Server(GNS)实现DHCP自定义。
如果通过dns来定义,则需要在网络中定义3个SCAN IP地址,指向同一个域名,这3个ip地址必须处于同一个子网内,同时域名不能太长,否则您打字也麻烦不是,哈哈。
另外,SCAN IP是由oracleclusterware管理的,因此在主机的集群软件(如IBM HACMP,HP SERVICE GUARD)中不能将此ip配置进去,类似于10g中的vip,在grid安装前,此IP是无法ping 通的。
Oracle RAC更换IP地址

机使用的ip地址给改改. 主机名及修改前后的ip地址如下:主机名修改前的ip地址修改后的ip地址作用rac1 192.168.0.181 192.168.1.181 rac1 eth0 native iprac2 192.168.0.182 192.168.1.182 rac2 eth0 native iprac1-vip 192.168.0.191 192.168.1.191 rac1 viprac2-vip 192.168.0.192 192.168.1.192 rac2 viprac1-priv 10.10.10.181 10.1.0.181 rac1 eth1 ip interconnrac2-priv 10.10.10.182 10.1.0.182 rac2 eth1 ip interconn思路如下, 停止所有oracle相关的进程, 然后修改操作系统的ip设置, 修改与oracle相关的ip地址的设定, 启动crs及相关服务.具体操作步骤如下:1 停止oracle相关的所有进程, 包括数据库, asm, node application, crs本身.1.1 查看当前系统上crs运行的状态oracle@rac2:/u01/app/oracle/product/10.2.0/crs/bin$ ./crs_statNAME=ora.orcl.dbTYPE=applicationTARGET=ONLINESTATE=ONLINE on rac2NAME=ora.orcl.orcl1.instTYPE=applicationTARGET=ONLINESTATE=ONLINE on rac1NAME=ora.orcl.orcl2.instTYPE=applicationTARGET=ONLINESTATE=ONLINE on rac2NAME=ora.rac1.ASM1.asmTYPE=applicationTARGET=ONLINESTATE=ONLINE on rac1NAME=ora.rac1.LISTENER_RAC1.lsnrTYPE=applicationTARGET=ONLINESTATE=ONLINE on rac1NAME=ora.rac1.gsdTYPE=applicationTARGET=ONLINESTATE=ONLINE on rac1NAME=ora.rac1.onsTYPE=applicationTARGET=ONLINESTATE=ONLINE on rac1NAME=ora.rac1.vipTYPE=applicationTARGET=ONLINESTATE=ONLINE on rac1NAME=ora.rac2.ASM2.asmTYPE=applicationTARGET=ONLINESTATE=ONLINE on rac2NAME=ora.rac2.LISTENER_RAC2.lsnrTYPE=applicationTARGET=ONLINESTATE=ONLINE on rac2NAME=ora.rac2.gsdTYPE=applicationTARGET=ONLINESTATE=ONLINE on rac2NAME=ora.rac2.onsTYPE=applicationTARGET=ONLINESTATE=ONLINE on rac2NAME=ora.rac2.vipTYPE=applicationTARGET=ONLINESTATE=ONLINE on rac21.2 关闭数据库oracle@rac2:/u01/app/oracle/product/10.2.0/crs/bin$ srvctl stop database -d orcl1.3 关闭asm实例oracle@rac2:/u01/app/oracle/product/10.2.0/crs/bin$ srvctl stop asm -n rac1oracle@rac2:/u01/app/oracle/product/10.2.0/crs/bin$ srvctl stop asm -n rac21.4 关闭其他应用程序rac2:/u01/app/oracle/product/10.2.0/crs/bin# ./srvctl stop nodeapps -n rac1rac2:/u01/app/oracle/product/10.2.0/crs/bin# ./srvctl stop nodeapps -n rac21.5 关闭crs后台进程, 这一操作会在操作系统一级中止运行的crs后台进程, 必须在所有节点上运行.rac1:/u01/app/oracle/product/10.2.0/crs/bin# /etc/init.d/init.crs stopShutting down Oracle Cluster Ready Services (CRS):Stopping resources.Successfully stopped CRS resourcesStopping CSSD.Shutting down CSS daemon.Shutdown request successfully issued.Shutdown has begun. The daemons should exit soon.2 修改操作系统的ip设置debian的网络配置文件为/etc/network/interfaces和/etc/hosts, 其他linux发行版及unix网络配置文件位置可能并不一样. 以节点rac1为例, 修改前/etc/network/interfaces文件内容为:# This file describes the network interfaces available on your system# and how to activate them. For more information, see interfaces(5).# The loopback network interfaceauto loiface lo inet loopback# The primary network interfaceauto eth0 eth1iface eth0 inet staticaddress 192.168.0.181netmask 255.255.255.0network 192.168.0.0broadcast 192.168.0.255gateway 192.168.0.1# dns-* options are implemented by the resolvconf package, if installeddns-nam eservers 202.106.0.20iface eth1 inet staticaddress 10.10.10.181netmask 255.255.255.0network 10.10.10.0broadcast 10.10.10.255修改后内容为:# This file describes the network interfaces available on your system# and how to activate them. For more information, see interfaces(5).# The loopback network interfaceauto loiface lo inet loopback# The primary network interfaceauto eth0 eth1iface eth0 inet staticaddress 192.168.1.181netmask 255.255.255.0network 192.168.1.0broadcast 192.168.1.255gateway 192.168.1.1# dns-* options are implemented by the resolvconf package, if installed dns-nam eservers 202.106.0.20iface eth1 inet staticaddress 10.1.0.181netmask 255.255.255.0network 10.1.0.0broadcast 10.1.0.255/etc/hosts文件内容为:127.0.0.1 localhost.localdomain localhost192.168.0.181 rac1192.168.0.182 rac2192.168.0.191 rac1-vip192.168.0.192 rac2-vip10.10.10.181 rac1-priv10.10.10.182 rac2-priv# The following lines are desirable for IPv6 capable hosts::1 ip6-localhost ip6-loopbackfe00::0 ip6-localnetff00::0 ip6-mcastprefixff02::1 ip6-allnodesff02::2 ip6-allroutersff02::3 ip6-allhosts修改后:127.0.0.1 localhost.localdomain localhost192.168.1.181 rac1192.168.1.182 rac2192.168.1.191 rac1-vip192.168.1.192 rac2-vip10.1.0.181 rac1-priv10.1.0.182 rac2-priv# The following lines are desirable for IPv6 capable hosts::1 ip6-localhost ip6-loopbackfe00::0 ip6-localnetff00::0 ip6-mcastprefixff02::1 ip6-allnodesff02::2 ip6-allroutersff02::3 ip6-allhosts集群中所有节点的hosts文件应该保持一致./etc/network/interfaces和/etc/hosts文件修改后可使用/etc/init.d/networking restart或者重启操作系统使设置生效.3 启动crs, 设置oracle中ip地址相关的设置.3.1 启动crs, 并关闭随crs启动的应用程序rac1:/u01/app/oracle/product/10.2.0/db_1/network/admin# /etc/init.d/init.crs start Startup will be queued to init within 90 seconds.由于oracle所有应用设置为自动启动, 所以在crs启动时会试图启动所有的服务, 但是在对oracle相关的ip地址进行设置时需要crs处于运行状态而数据库, asm和node application处于停止状态, 所以需要我们参考1.2, 1.3, 1.4的内容关闭数据库, asm和node application.3.2 使用oifcfg修改网卡设置, oifconfig可以被用来设置和查看网卡被oracle使用的方式.rac2:/u01/app/oracle/product/10.2.0/crs/bin# ./oifcfg getif -globaleth0 192.168.0.0 global publiceth1 10.10.10.0 global cluster_interconnectrac2:/u01/app/oracle/product/10.2.0/crs/bin# ./oifcfg setif -global eth0/192.168.1.0:public rac2:/u01/app/oracle/product/10.2.0/crs/bin# ./oifcfg iflisteth0 192.168.1.0eth0 192.168.0.0eth1 10.1.0.0rac2:/u01/app/oracle/product/10.2.0/crs/bin# ./oifcfg delif -global eth0/192.168.0.0rac2:/u01/app/oracle/product/10.2.0/crs/bin# ./oifcfg iflisteth0 192.168.1.0eth1 10.1.0.0rac2:/u01/app/oracle/product/10.2.0/crs/bin# ./oifcfg getif -globaleth0 192.168.1.0 global publiceth1 10.10.10.0 global cluster_interconnectrac2:/u01/app/oracle/product/10.2.0/crs/bin# ./lifcfg setif -global eth1:/10.1.0.0:cluster_interconnect-bash: ./lifcfg: No such file or directoryrac2:/u01/app/oracle/product/10.2.0/crs/bin# ./oifcfg setif -global eth1:/10.1.0.0:cluster_interconnectrac2:/u01/app/oracle/product/10.2.0/crs/bin# ./oifcfg getif -globaleth0 192.168.1.0 global publiceth1 10.10.10.0 global cluster_interconnecteth1: 10.1.0.0 global cluster_interconnectrac2:/u01/app/oracle/product/10.2.0/crs/bin# ./oifcfg setif -global eth1/10.1.0.0:cluster_interconnectrac2:/u01/app/oracle/product/10.2.0/crs/bin# ./oifcfg getif -globaleth0 192.168.1.0 global publiceth1 10.10.10.0 global cluster_interconnecteth1 10.1.0.0 global cluster_interconnecteth1: 10.1.0.0 global cluster_interconnectrac2:/u01/app/oracle/product/10.2.0/crs/bin# ./oifcfg delif -global eth1:rac2:/u01/app/oracle/product/10.2.0/crs/bin# ./oifcfg delif -global eth1/10.10.10.0rac2:/u01/app/oracle/product/10.2.0/crs/bin# ./oifcfg getif -globaleth0 192.168.1.0 global publiceth1 10.1.0.0 global cluster_interconnectoifcfg iflist会显示当前使用的网卡及其子网设置, 而oifcfg getif -global 则会显示配置文件中的信息.3.3 修改vip地址rac2:/u01/app/oracle/product/10.2.0/crs/bin# ./srvctl modify nodeapps -n rac1 -A 192.168.1.191/255.255.255.0/eth0rac2:/u01/app/oracle/product/10.2.0/crs/bin# ./srvctl modify nodeapps -n rac2 -A 192.168.1.192/255.255.255.0/eth03.4 设置listener.ora和tnsnames.ora, 检查这些文件中是否有指定原来ip的地方, 修改为更改后的ip 地址, 在rac1的配置文件中listener.ora包含了192.168.0.181我修改成了192.168.1.181, rac2上的listener.ora也做了相应的修改.3.5 启动node applications, asm, 数据库rac2:/u01/app/oracle/product/10.2.0/crs/bin# ./srvctl start nodeapps -n rac1rac2:/u01/app/oracle/product/10.2.0/crs/bin# ./srvctl start nodeapps -n rac2rac2:/u01/app/oracle/product/10.2.0/crs/bin# ./srvctl start asm -n rac2rac2:/u01/app/oracle/product/10.2.0/crs/bin# ./srvctl start asm -n rac1rac2:/u01/app/oracle/product/10.2.0/crs/bin#rac2:/u01/app/oracle/product/10.2.0/crs/bin# ./srvctl start database -d orcl3.6 来看看我们的成果:rac2:/u01/app/oracle/product/10.2.0/crs/bin# ifconfig -aeth0 Link encap:Ethernet HWaddr 00:0C:29:0D:FE:0Finet addr:192.168.1.182 Bcast:192.168.1.255 Mask:255.255.255.0UP BROADCAST RUNNING MULTICAST MTU:1500 Metric:1RX packets:142242 errors:0 dropped:0 overruns:0 frame:0TX packets:140057 errors:0 dropped:0 overruns:0 carrier:0collisions:0 txqueuelen:1000RX bytes:83167889 (79.3 MiB) TX bytes:87987399 (83.9 MiB)Interrupt:19 Base address:0x1480eth0:1 Link encap:Ethernet HWaddr 00:0C:29:0D:FE:0Finet addr:192.168.1.192 Bcast:192.168.1.255 Mask:255.255.255.0UP BROADCAST RUNNING MULTICAST MTU:1500 Metric:1Interrupt:19 Base address:0x1480eth1 Link encap:Ethernet HWaddr 00:0C:29:0D:FE:19inet addr:10.1.0.182 Bcast:10.1.0.255 Mask:255.255.255.0UP BROADCAST RUNNING MULTICAST MTU:1500 Metric:1RX packets:29781 errors:0 dropped:0 overruns:0 fram e:0TX packets:26710 errors:0 dropped:0 overruns:0 carrier:0collisions:0 txqueuelen:1000RX bytes:19667330 (18.7 MiB) TX bytes:11573375 (11.0 MiB) Interrupt:16 Base address:0x1800lo Link encap:Local Loopbackinet addr:127.0.0.1 Mask:255.0.0.0UP LOOPBACK RUNNING MTU:16436 Metric:1RX packets:21796 errors:0 dropped:0 overruns:0 fram e:0TX packets:21796 errors:0 dropped:0 overruns:0 carrier:0 collisions:0 txqueuelen:0RX bytes:6238339 (5.9 MiB) TX bytes:6238339 (5.9 MiB)rac2:/u01/app/oracle/product/10.2.0/crs/bin# ./crs_stat NAME=ora.orcl.dbTYPE=applicationTARGET=ONLINESTATE=ONLINE on rac1NAME=ora.orcl.orcl1.instTYPE=applicationTARGET=ONLINESTATE=ONLINE on rac1NAME=ora.orcl.orcl2.instTYPE=applicationTARGET=ONLINESTATE=ONLINE on rac2NAME=ora.rac1.ASM1.asmTYPE=applicationTARGET=ONLINESTATE=ONLINE on rac1NAME=ora.rac1.LISTENER_RAC1.lsnrTYPE=applicationTARGET=ONLINESTATE=ONLINE on rac1NAME=ora.rac1.gsdTYPE=applicationTARGET=ONLINESTATE=ONLINE on rac1NAME=ora.rac1.onsTYPE=applicationTARGET=ONLINESTATE=ONLINE on rac1NAME=ora.rac1.vipTYPE=applicationTARGET=ONLINESTATE=ONLINE on rac1NAME=ora.rac2.ASM2.asmTYPE=applicationTARGET=ONLINESTATE=ONLINE on rac2NAME=ora.rac2.LISTENER_RAC2.lsnrTYPE=applicationTARGET=ONLINESTATE=ONLINE on rac2NAME=ora.rac2.gsdTYPE=applicationTARGET=ONLINESTATE=ONLINE on rac2NAME=ora.rac2.onsTYPE=applicationTARGET=ONLINESTATE=ONLINE on rac2NAME=ora.rac2.vipTYPE=applicationTARGET=ONLINESTATE=ONLINE on rac2rac2:/u01/app/oracle/product/10.2.0/crs/bin# su - oracleoracle@rac2:~$ lsnrctl statLSNRCTL for Linux: Version 10.2.0.1.0 - Production on 23-AUG-2006 23:23:47 Copyright (c) 1991, 2005, Oracle. All rights reserved.Connecting to (ADDRESS=(PROTOCOL=tcp)(HOST=)(PORT=1521))STATUS of the LISTENER------------------------Alias LISTENER_RAC2Version TNSLSNR for Linux: Version 10.2.0.1.0 - ProductionStart Date 23-AUG-2006 22:24:44Uptime 0 days 0 hr. 59 min. 3 secTrace Level offSecurity ON: Local OS AuthenticationSNMP OFFListener Parameter File /u01/app/oracle/product/10.2.0/db_1/network/admin/listener.ora Listener Log File /u01/app/oracle/product/10.2.0/db_1/network/log/listener_rac2.log Listening Endpoints Summary...(DESCRIPTION=(ADDRESS=(PROTOCOL=tcp)(HOST=192.168.1.192)(PORT=1521))) (DESCRIPTION=(ADDRESS=(PROTOCOL=tcp)(HOST=192.168.1.182)(PORT=1521))) Services Summary...Service "+ASM" has 1 instance(s).Instance "+ASM2", status BLOCKED, has 1 handler(s) for this service...Service "+ASM_XPT" has 1 instance(s).Instance "+ASM2", status BLOCKED, has 1 handler(s) for this service...Service "PLSExtProc" has 1 instance(s).Instance "PLSExtProc", status UNKNOWN, has 1 handler(s) for this service...Service "orcl" has 2 instance(s).Instance "orcl1", status READY, has 1 handler(s) for this service...Instance "orcl2", status READY, has 2 handler(s) for this service...Service "orclXDB" has 2 instance(s).Instance "orcl1", status READY, has 1 handler(s) for this service...Instance "orcl2", status READY, has 1 handler(s) for this service...Service "orcl_XPT" has 2 instance(s).Instance "orcl1", status READY, has 1 handler(s) for this service...Instance "orcl2", status READY, has 2 handler(s) for this service...The command completed successfully。
修改RAC-SCAN IP

由于公司网络经验变动。
机器关掉一段时间再重启,就发现原来设好的静态IP不能用了,对于单实例oracle还好,对于RAC环境就不行了。
尤其是rac-scan。
下面是常见的RAC环境IP分配情况:[oracle@dbp ~]$ cat /etc/hosts# Do not remove the following line, or various programs# that require network functionality will fail.127.0.0.1 localhost.localdomain localhost::1 localhost6.localdomain6 localhost6#Public ip10.30.153.2xx dbp10.30.153.2xx dbs#Private ip192.168.1.100 dbp-priv192.168.1.101 dbs-priv#Virtual ip10.30.152.83 dbp-vip10.30.152.84 dbs-vip#Scan ip10.30.152.85 rac-scan明显public ip跟scan ip是最容易出事的。
目标是把rac-scan改成10.30.153.2xx。
将直接导致集群环境无法对外访问。
[oracle@dbp ~]$ crs_stat -tName Type Target State Host------------------------------------------------------------ora.ARCH.dg ora....up.type ONLINE ONLINE dbpora.DATA.dg ora....up.type ONLINE ONLINE dbpora....ER.lsnr ora....er.type ONLINE ONLINE dbpora....N1.lsnr ora....er.type ONLINE ONLINE dbpora....DATA.dg ora....up.type ONLINE ONLINE dbpora.asm ora.asm.type ONLINE ONLINE dbpora....SM1.asm application ONLINE ONLINE dbpora....BP.lsnr application ONLINE ONLINE dbpora.dbp.gsd application ONLINE ONLINE dbpora.dbp.ons application ONLINE ONLINE dbpora.dbp.vip ora....t1.type ONLINE ONLINE dbpora....SM2.asm application ONLINE ONLINE dbsora....BS.lsnr application ONLINE ONLINE dbsora.dbs.gsd application ONLINE ONLINE dbsora.dbs.ons application ONLINE ONLINE dbsora.dbs.vip ora....t1.type ONLINE ONLINE dbsora.eons ora.eons.type ONLINE ONLINE dbpora.gsd ora.gsd.type ONLINE ONLINE dbpwork ora....rk.type ONLINE ONLINE dbpora.oc4j ora.oc4j.type ONLINE ONLINE dbpora.ons ora.ons.type ONLINE ONLINE dbpora....ry.acfs ora....fs.type ONLINE ONLINE dbpora.scan1.vip ora....ip.type ONLINE OFFLINEora.test.db ora....se.type ONLINE ONLINE dbs下面开始操作。
gRRAC修改IP地址

gR RAC 修改IP地址11gR2 RAC 修改IP地址11gR2 RAC 修改IP地址环境:VMWare ESX 4.0.1 , RHEL5.5 2.6.18-194.el5PAE修改前/etc/hosts:# Do not remove the following line, or various programs # that require network functionality will fail.127.0.0.1 localhost.localdomain localhost# Public168.100.8.101 rac1.localdomain rac1 168.100.8.102 rac2.localdomain rac2# Private172.16.8.101 rac1-priv.localdomain rac1-priv 172.16.8.102 rac2-priv.localdomain rac2-priv# Virtual168.100.8.111 rac1-vip.localdomain rac1-vip 168.100.8.112 rac2-vip.localdomain rac2-vip# SCAN168.100.8.103 rac-scan.localdomain rac-scan修改后/etc/hosts:# Do not remove the following line, or various programs # that require network functionality will fail.127.0.0.1 localhost.localdomain localhost# Public168.100.8.201 rac1.localdomain rac1 168.100.8.202 rac2.localdomain rac2# Private172.16.8.201 rac1-priv.localdomain rac1-priv 172.16.8.202 rac2-priv.localdomain rac2-priv# Virtual168.100.8.211 rac1-vip.localdomain rac1-vip 168.100.8.212 rac2-vip.localdomain rac2-vip# SCAN168.100.8.203 rac-scan.localdomain rac-scan修改步骤:1) 关闭所有的crs资源,但保留crs的后台进程2) 改变public ip3) 改变Vip4)修改scan IP5) 关闭crs进程6) 修改网卡IP地址,重新配置/etc/hosts和/etc/sysconfig/network-scripts/ifcfg-eth*7) 重启服务器详细记录如下:1) 关闭所有的crs资源,但保留crs的后台进程先检查一下RAC服务情况:#su - oracle$cd $GRID_HOME/bin$./crs_stat -tName Type Target State Host ------------------------------------------------------------ora.DATAGRP.dg ora....up.type ONLINE ONLINE rac1 ora....ER.lsnr ora....er.type ONLINE ONLINE rac1 ora....N1.lsnr ora....er.type ONLINE ONLINE rac2ora.asm ora.asm.type ONLINE ONLINE rac1 ora.eons ora.eons.type ONLINE ONLINE rac1 ora.gsd ora.gsd.type ONLINE ONLINE rac1 work ora....rk.type ONLINE ONLINE rac1 ora.oc4j ora.oc4j.type ONLINE ONLINE rac2 ora.ons ora.ons.type ONLINE ONLINE rac1 ora.rac.db ora....se.type ONLINE ONLINE rac1 ora....SM1.asm application ONLINE ONLINE rac1 ora....C1.lsnr application ONLINE ONLINE rac1 ora.rac1.gsd application ONLINE ONLINE rac1 ora.rac1.ons application ONLINE ONLINE rac1 ora.rac1.vip ora....t1.type ONLINE ONLINE rac1ora....SM2.asm application ONLINE ONLINE rac2 ora....C2.lsnr application ONLINE ONLINErac2ora.rac2.gsd application ONLINE ONLINE rac2 ora.rac2.ons application ONLINE ONLINE rac2 ora.rac2.vip ora....t1.type ONLINE ONLINE rac2 ora....ry.acfs ora....fs.type ONLINE ONLINE rac1 ora.scan1.vip ora....ip.type ONLINE ONLINE rac2所有服务正常。
Oracle RAC 修改 IP 地址
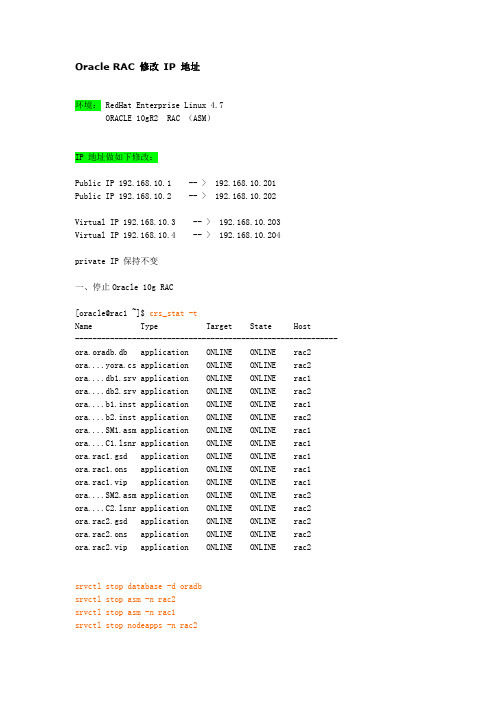
Oracle RAC 修改IP 地址环境: RedHat Enterprise Linux 4.7ORACLE 10gR2 RAC (ASM)IP 地址做如下修改:Public IP 192.168.10.1 -- > 192.168.10.201Public IP 192.168.10.2 -- > 192.168.10.202Virtual IP 192.168.10.3 -- > 192.168.10.203Virtual IP 192.168.10.4 -- > 192.168.10.204private IP 保持不变一、停止Oracle 10g RAC[oracle@rac1 ~]$ crs_stat -tName Type Target State Host------------------------------------------------------------ora.oradb.db application ONLINE ONLINE rac2 ora....yora.cs application ONLINE ONLINE rac2 ora....db1.srv application ONLINE ONLINE rac1 ora....db2.srv application ONLINE ONLINE rac2 ora....b1.inst application ONLINE ONLINE rac1 ora....b2.inst application ONLINE ONLINE rac2 ora....SM1.asm application ONLINE ONLINE rac1 ora....C1.lsnr application ONLINE ONLINE rac1ora.rac1.gsd application ONLINE ONLINE rac1ora.rac1.ons application ONLINE ONLINE rac1ora.rac1.vip application ONLINE ONLINE rac1 ora....SM2.asm application ONLINE ONLINE rac2 ora....C2.lsnr application ONLINE ONLINE rac2ora.rac2.gsd application ONLINE ONLINE rac2ora.rac2.ons application ONLINE ONLINE rac2ora.rac2.vip application ONLINE ONLINE rac2srvctl stop database -d oradbsrvctl stop asm -n rac2srvctl stop asm -n rac1srvctl stop nodeapps -n rac2srvctl stop nodeapps -n rac1[root@rac1 ~]# crs_stat -tName Type Target State Host------------------------------------------------------------ora.oradb.db application OFFLINE OFFLINEora....yora.cs application OFFLINE OFFLINEora....db1.srv application OFFLINE OFFLINEora....db2.srv application OFFLINE OFFLINEora....b1.inst application OFFLINE OFFLINEora....b2.inst application OFFLINE OFFLINEora....SM1.asm application OFFLINE OFFLINEora....C1.lsnr application OFFLINE OFFLINEora.rac1.gsd application OFFLINE OFFLINEora.rac1.ons application OFFLINE OFFLINEora.rac1.vip application OFFLINE OFFLINEora....SM2.asm application OFFLINE OFFLINEora....C2.lsnr application OFFLINE OFFLINEora.rac2.gsd application OFFLINE OFFLINEora.rac2.ons application OFFLINE OFFLINEora.rac2.vip application OFFLINE OFFLINE二、对Oracle 10g RAC的配置进行如下修改2.1设置listener.ora和tnsnames.ora, 检查这些文件中是否有指定原来ip的地方, 修改为更改后的ip地址。
oraclerac修改ip地址
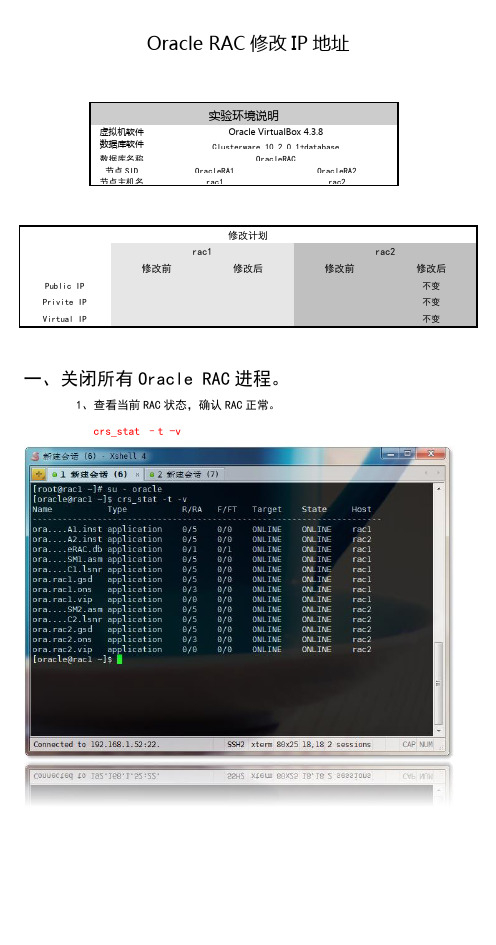
Oracle RAC修改IP地址实验环境说明虚拟机软件Oracle VirtualBox 4.3.8数据库软件Clusterware 10.2.0.1+database数据库名称OracleRAC节点SID OracleRA1OracleRA2节点主机名rac1rac2修改计划rac1rac2修改前修改后修改前修改后Public IP不变Privite IP不变Virtual IP不变一、关闭所有Oracle RAC进程。
1、查看当前RAC状态,确认RAC正常。
crs_stat –t -v2、关闭所有rac实例、相关进程。
在一个节点上执行以下命令关闭rac实例:(注意,必须按照database、asm、nodeapps顺序关闭) srvctl stop database –d OracleRACsrvctl stop asm –n rac1srvctl stop asm –n rac2srvctl stop nodeapps –n rac1srvctl stop nodeapps –n rac2检查RAC是否全部为OFFLINE状态。
crs_stat –t -v 关闭CRS后台进程,必须在两个节点使用root用户执行/etc/ stoprac1rac2二、修改操作系统IP设置。
1、修改hosts文件,两个节点保持hosts文件内容一致。
rac1rac22、在需要修改IP的节点上修改主机网卡IP地址。
修改Public IP(本机Public IP设置在eth0网卡上)#vi /etc/sysconfig/network-scripts/ifcfg-eth0修改Virtual IP(本机Virtual IP设置在eth1网卡上)#vi /etc/sysconfig/network-scripts/ifcfg-eth1重启修改了IP设置的节点的网络服务,使IP生效#service network restart(由于IP地址改变,xshell断开,重新连接到新的IP即可)三、启动CRS,修改RAC中IP地址相关设置1、在两个节点启动CRS,并且关闭database,asm,nodeapps。
生产线上-11gRAC修改ip

11gRAC修改scanip,vip,public ip假设原hosts192.168.1.67 rac1192.168.1.68 rac2192.168.1.65 rac1-vip192.168.1.66 rac2-vip192.168.1.69 scan修改为192.168.1.90 rac1192.168.1.91 rac2192.168.1.92 rac1-vip192.168.1.93 rac2-vip192.168.1.94 scan一、停止crs及相关资源1 禁止所有节点自动启动并关闭两边节点数据库、监听1.1关闭和禁用listener[grid@rac1~] s rvctl status listener // 检查监听状态监听程序 LISTENER 已启用监听程序 LISTENER 正在节点上运行: rac2,rac1[grid@rac1~]srvctl disable listener // 禁用监听[grid@rac1~] s rvctl status listener // 检查监听状态监听程序 LISTENER 已禁用监听程序 LISTENER 正在节点上运行: rac2,rac1[grid@rac1~]srvctl stop listener //关监听[grid@rac1~] s rvctl status listener // 检查监听状态监听程序 LISTENER 已禁用监听程序 LISTENER 未运行1.2关闭和禁用数据库[oracle@rac1~]$ srvctl config database // 查看注册的数据库[grid@rac1~]srvctl config database -d orcl -a // 查看数据库配置(注:是否已禁用)数据库唯一名称: orcl数据库名: orclOracle 主目录: /u01/app/oracle/product/11.2.0.3/db_1Oracle 用户: oracleSpfile: +DATA/orcl/spfileorcl.ora域:启动选项: open停止选项: immediate数据库角色: PRIMARY管理策略: AUTOMATIC服务器池: orcl数据库实例: orcl1,orcl2磁盘组: DATA装载点路径:服务:类型: RAC数据库已启用数据库是管理员管理的[grid@rac1~]srvctl disable database -d hyw //hyw是数据库名禁用数据库[grid@rac1~]srvctl config database -d orcl -a // 查看数据库配置(注:是否已禁用,orcl是数据库名称)数据库唯一名称: orcl数据库名: orclOracle 主目录: /u01/app/oracle/product/11.2.0.3/db_1Oracle 用户: oracleSpfile: +DATA/orcl/spfileorcl.ora域:启动选项: open停止选项: immediate数据库角色: PRIMARY管理策略: AUTOMATIC服务器池: orcl数据库实例: orcl1,orcl2磁盘组: DATA装载点路径:服务:类型: RAC数据库已禁用数据库是管理员管理的[grid@rac1~] srvctl status database -d orcl // 查看数据库状态实例 orcl1 正在节点 rac1 上运行实例 orcl2 正在节点 rac2 上运行[grid@rac1~]srvctl stop database -d hyw -o immediate //关数据库[grid@rac1~] srvctl status database -d orcl // 查看数据库状态实例 orcl1 没有在 rac1 节点上运行实例 orcl2 没有在 rac2 节点上运行2 禁止所有节点自动启动并停止VIP(名字要对应hosts)[root@rac1~] srvctl status vip -n rac1 // 查看vip状态及配置VIP rac1-vip 已启用VIP rac1-vip 正在节点上运行: rac1[root@rac1~] srvctl status vip -n rac2 // 查看vip状态及配置VIP rac2-vip 已启用VIP rac2-vip 正在节点上运行: rac2[root@rac1~]/u01/app/11.2.0/grid/bin/srvctl disable vip -i "rac1-vip" //禁用VIP [root@rac1~]/u01/app/11.2.0/grid/bin/srvctl disable vip -i "rac2-vip" //禁用VIP [root@rac1~] srvctl status vip -n rac1 // 查看vip状态及配置VIP rac1-vip 已禁用VIP rac1-vip 正在节点上运行: rac1[root@rac1~] srvctl status vip -n rac2 // 查看vip状态及配置VIP rac2-vip 已禁用VIP rac2-vip 正在节点上运行: rac2[root@rac1~] srvctl status vip -n rac1 // 查看vip状态及配置(操作同上)VIP rac1-vip 已启用VIP rac1-vip 正在节点上运行: rac1[root@rac1~] srvctl status vip -n rac2 // 查看vip状态及配置(操作同上)VIP rac2-vip 已启用VIP rac2-vip 正在节点上运行: rac2[rootd@rac1~]$ srvctl stop vip -n rac1 // 停止VIP[root@rac1~]$ srvctl stop vip -n rac2 // 停止VIP[root@rac1~] srvctl status vip -n rac1 // 查看vip状态及配置VIP rac1-vip 已禁用VIP rac1-vip 未运行[root@rac1~] srvctl status vip -n rac2 // 查看vip状态及配置VIP rac2-vip 已禁用VIP rac2-vip 未运行3 禁止所有节点的SCAN_LISTENER的启动,停止所有节点的SCAN_LISTENER [grid@rac1~]$srvctl status scan_listener // 查看SCAN_LISTENER是否禁用及状态SCAN 监听程序 LISTENER_SCAN1 已启用SCAN 监听程序 LISTENER_SCAN1 正在节点 rac2 上运行[grid@rac1~]$ srvctl disable scan_listener //禁用scan listener[grid@rac1~]$ srvctl status scan_listener // 查看SCAN_LISTENER是否禁用及状态[grid@rac1~]$srvctl status listener // 查看SCAN_LISTENER状态[grid@rac1~]$ srvctl stop scan_listener[grid@rac1~]$ srvctl status listener // 查看SCAN_LISTENER状态4 禁止所有节点的SCAN的启动,停止所有节点的SCAN[root@rac1 ~]# srvctl status scan // 查看scan是否禁用及状态[root@rac1 ~]#/u01/app/11.2.0/grid/bin/srvctl disable scan[root@rac1 ~]# srvctl status scan // 查看scan是否禁用及状态[grid@rac1~]$ srvctl stop scan[root@rac1 ~]# srvctl status scan // 查看scan是否禁用及状态5 停止crs //两个节点都要执行[root@rac1 ~]# crsctl check crs // 查看crs状态CRS-4638: Oracle 高可用性服务联机CRS-4535: 无法与集群就绪服务通信CRS-4529: 集群同步服务联机CRS-4534: 无法与事件管理器通信[root@rac1 ~]#/u01/app/11.2.0/grid/bin/crsctl stop crs CRS-2791: 正在启动用于关闭 'rac2' 上 Oracle 高可用性服务管理的资源的操作CRS-2673: 尝试停止 'ora.crsd' (在 'rac2' 上)CRS-2790: 正在启动关闭 'rac2' 上集群就绪服务管理的资源的操作CRS-2673: 尝试停止 'ora.cvu' (在 'rac2' 上)CRS-2673: 尝试停止 'ora.orcl.db' (在 'rac2' 上)CRS-2673: 尝试停止 'ora.LISTENER.lsnr' (在 'rac2' 上)CRS-2673: 尝试停止 'ora.oc4j' (在 'rac2' 上)CRS-2677: 成功停止 'ora.cvu' (在 'rac2' 上)CRS-2672: 尝试启动 'ora.cvu' (在 'rac1' 上)CRS-2677: 成功停止 'ora.LISTENER.lsnr' (在 'rac2' 上)CRS-2673: 尝试停止 'ora.rac2.vip' (在 'rac2' 上)CRS-2676: 成功启动 'ora.cvu' (在 'rac1' 上)CRS-2677: 成功停止 'ora.rac2.vip' (在 'rac2' 上)CRS-2672: 尝试启动 'ora.rac2.vip' (在 'rac1' 上)CRS-2676: 成功启动 'ora.rac2.vip' (在 'rac1' 上)CRS-2677: 成功停止 'ora.orcl.db' (在 'rac2' 上)CRS-2673: 尝试停止 'ora.DATA.dg' (在 'rac2' 上)CRS-2677: 成功停止 'ora.oc4j' (在 'rac2' 上)CRS-2672: 尝试启动 'ora.oc4j' (在 'rac1' 上)CRS-2677: 成功停止 'ora.DATA.dg' (在 'rac2' 上)CRS-2673: 尝试停止 'ora.asm' (在 'rac2' 上)CRS-2677: 成功停止 'ora.asm' (在 'rac2' 上)CRS-2676: 成功启动 'ora.oc4j' (在 'rac1' 上)CRS-2673: 尝试停止 'ora.ons' (在 'rac2' 上)CRS-2677: 成功停止 'ora.ons' (在 'rac2' 上)CRS-2673: 尝试停止 'work' (在 'rac2' 上)CRS-2677: 成功停止 'work' (在 'rac2' 上)CRS-2792: 关闭 'rac2' 上集群就绪服务管理的资源的操作已完成CRS-2677: 成功停止 'ora.crsd' (在 'rac2' 上)CRS-2673: 尝试停止 'ora.mdnsd' (在 'rac2' 上)CRS-2673: 尝试停止 'ora.ctssd' (在 'rac2' 上)CRS-2673: 尝试停止 'ora.evmd' (在 'rac2' 上)CRS-2673: 尝试停止 'ora.asm' (在 'rac2' 上)CRS-2677: 成功停止 'ora.evmd' (在 'rac2' 上)CRS-2677: 成功停止 'ora.mdnsd' (在 'rac2' 上)CRS-2677: 成功停止 'ora.ctssd' (在 'rac2' 上)CRS-2677: 成功停止 'ora.asm' (在 'rac2' 上)CRS-2673: 尝试停止 'ora.cluster_interconnect.haip' (在 'rac2' 上)CRS-2677: 成功停止 'ora.cluster_interconnect.haip' (在 'rac2' 上)CRS-2673: 尝试停止 'ora.cssd' (在 'rac2' 上)CRS-2677: 成功停止 'ora.cssd' (在 'rac2' 上)CRS-2673: 尝试停止 'ora.crf' (在 'rac2' 上)CRS-2677: 成功停止 'ora.crf' (在 'rac2' 上)CRS-2673: 尝试停止 'ora.gipcd' (在 'rac2' 上)CRS-2677: 成功停止 'ora.gipcd' (在 'rac2' 上)CRS-2673: 尝试停止 'ora.gpnpd' (在 'rac2' 上)CRS-2677: 成功停止 'ora.gpnpd' (在 'rac2' 上)CRS-2793: 关闭 'rac2' 上 Oracle 高可用性服务管理的资源的操作已完成CRS-4133: Oracle 高可用性服务已停止。
ORACLE RAC11G 更改IP地址

ORACLE RAC11G 更改IP地址环境:oracle 11.2.0.4 rac 修改前IP地址# public ip192.168.2.71 db1192.168.2.72 db2192.168.2.76 db3#priv ip200.100.100.11 db1-priv 200.100.100.12 db2-priv 200.100.100.13 db3-priv#vip ip192.168.2.73 db1-vip192.168.2.74 db2-vip192.168.2.77 db3-vip#scan ip192.168.2.75 db-scan修改后IP地址# public ip192.168.1.71 db1192.168.1.72 db2192.168.1.76 db3#priv ip100.100.100.11 db1-priv 100.100.100.12 db2-priv 100.100.100.13 db3-priv#vip ip192.168.1.73 db1-vip192.168.1.74 db2-vip192.168.1.77 db3-vip#scan ip192.168.1.75 db-scan1、查看ocr的备份[root@db1 bin]# ./ocrconfig -showbackup2、备份OCR[root@db1 bin]# ./ocrconfig -manualbackupdb3 2015/01/29 19:58:22 /u01/app/11.2.0/grid/cdata/db-scan/backup_20150129_195822.ocr3、关闭数据库srvctl stop database -d db4、在任意节点上修改:这里我是在节点1上面操作的[root@db1 ~]# cd /u01/app/11.2.0/grid/bin/[root@db1 bin]# ./oifcfg getifeth0 192.168.2.0 global publiceth1 200.100.100.0 global cluster_interconnect[root@db1 bin]# ./oifcfg delif -global eth0[root@db1 bin]# ./oifcfg setif -global eth0/192.168.1.0:public[root@db1 bin]# ./oifcfg getifeth1 200.100.100.0 global cluster_interconnecteth0 192.168.1.0 global public[root@db1 bin]# ./oifcfg delif -global eth1PRIF-31: Failed to delete the specified network interface because it is the last private interface这里不允许删除最后一个私有接口,可以先添加一个私有接口再来删除[root@db1 bin]# ./oifcfg setif -global eth1/200.100.100.0:cluster_interconnect[root@db1 bin]# ./oifcfg getifeth1 100.100.100.0 global cluster_interconnecteth0 192.168.2.0 global publiceth1 200.100.100.0 global cluster_interconnect[root@db1 bin]# ./oifcfg delif -global eth1/100.100.100.0:cluster_interconnect [root@db1 bin]# ./oifcfg getifeth0 192.168.2.0 global publiceth1 200.100.100.0 global cluster_interconnect在某节点停止oracle高可能用性服务[root@db1 bin]# ./crsctl stop cluster -all5、修改IP地址及/etc/hosts文件并测试6、在所有节点重新启动所有服务[root@db1 bin]#./crsctl start cluster -all7、停止scan_listener和scan[root@db1 bin]#./srvctl stop scan_listener[root@db1 bin]#./srvctl stop scan8、删除scan_listener和scan[root@db1 bin]#./srvctl remove scan_listener -f[root@db1 bin]#./srvctl remove scan -f9、添加scan和scan_listener[root@db1 bin]#./srvctl add scan -n db-scan -k 2 -S 192.168.1.0/255.255.255.0/eth0说明:上面命令中-k 为1(network number)会报错,因为之前已经被使用过[root@db1 bin]# ./srvctl config scanSCAN name: db-scan, Network: 2/192.168.1.0/255.255.255.0/eth0SCAN VIP name: scan1, IP: /db-scan/192.168.1.75[root@db1 bin]#./srvctl add scan_listener10、启动scan和scan_listener[root@db1 bin]#./srvctl start scan[root@db1 bin]#./srvctl start scan_listener11、停止VIP资源[root@db1 bin]# ./crsctl stop resource ora.db1.vip -f[root@db1 bin]# ./crsctl stop resource ora.db2.vip -f[root@db1 bin]# ./crsctl stop resource ora.db3.vip -f这里可以通过下面命令查看vip的状态[root@db1 bin]# ./crsctl stat res -tora.db1.vip1 OFFLINE OFFLINEora.db2.vip1 OFFLINE OFFLINEora.db3.vip1 OFFLINE OFFLINE12、修改vip地址[root@db1 bin]# ./srvctl modify nodeapps -A 192.168.1.73/255.255.255.0/eth0 -n db1 [root@db1 bin]# ./srvctl modify nodeapps -A 192.168.1.74/255.255.255.0/eth0 -n db2[root@db1 bin]# ./srvctl modify nodeapps -A 192.168.1.77/255.255.255.0/eth0 -n db3 13、启动VIP资源:[root@db1 bin]# ./crsctl start resource ora.db1.vip -fCRS-2672: Attempting to start 'ora.db1.vip' on 'db1'CRS-2676: Start of 'ora.db1.vip' on 'db1' succeeded[root@db1 bin]# ./crsctl start resource ora.db2.vip -fCRS-2672: Attempting to start 'ora.db2.vip' on 'db2'CRS-2676: Start of 'ora.db2.vip' on 'db2' succeeded[root@db1 bin]# ./crsctl start resource ora.db3.vip -fCRS-2672: Attempting to start 'ora.db3.vip' on 'db3'CRS-2676: Start of 'ora.db3.vip' on 'db3' succeeded启动VIP资源后本地监听就已经启动了,下面第14步操作可以不执行14、启动本地监听:[root@db1 bin]# ./srvctl start listener -n db1[root@db1 bin]# ./srvctl start listener -n db2[root@db1 bin]# ./srvctl start listener -n db3问题:操作完成之后执行oifcfg getif,出现在下面的提示信息[grid@db1 peer]$ oifcfg getifeth0 192.168.1.0 global publiceth1 100.100.100.0 global cluster_interconnectOnly in OCR: eth1: 100.100.100.0 global cluster_interconnectPRIF-30: Network information in OCR and GPnP profile differs说网络信息在OCR与GPnP不一致,这里重新配置一下即可[grid@db1 peer]$ oifcfg setif -global eth1/100.100.100.0:cluster_interconnect [grid@db1 peer]$ oifcfg getifeth0 192.168.1.0 global publiceth1 100.100.100.0 global cluster_interconnect。
一步步教你如何配置添加删除11gr2 gns,scan,vip

The Grid Interprocess Communication (GIPC) daemon: This daemon is new in
Oracle 11gR2. The daemon process is gipcd, and it supports Grid Infrastructure
• The Grid Naming Service (GNS): This service performs name resolution within the
cluster. It is implemented by the gnsd daemon, and it provides a gateway between the cluster mDNS service and the external DNS servers.
安装结束
[oracle@oel1 ~]$ crsctl stat res -t -------------------------------------------------------------------------------NAME TARGET STATE SERVER -------------------------------------------------------------------------------Local Resources -------------------------------------------------------------------------------ora.DATA.dg ONLINE ONLINE oel1 ONLINE ONLINE oel2 ora.LISTENER.lsnr ONLINE ONLINE oel1 ONLINE ONLINE oel2 ora.asm ONLINE ONLINE oel1 ONLINE ONLINE oel2 ora.eons ONLINE ONLINE oel1 ONLINE ONLINE oel2 ora.gsd OFFLINE OFFLINE oel1 OFFLINE OFFLINE oel2 work ONLINE ONLINE oel1 ONLINE ONLINE oel2 ora.ons ONLINE ONLINE oel1 ONLINE ONLINE oel2 -------------------------------------------------------------------------------Cluster Resources -------------------------------------------------------------------------------ora.LISTENER_SCAN1.lsnr 1 ONLINE ONLINE oel2 ora.LISTENER_SCAN2.lsnr 1 ONLINE ONLINE oel1 ora.LISTENER_SCAN3.lsnr 1 ONLINE ONLINE oel1 ora.gns 1 ONLINE ONLINE oel1 ora.gns.vip 1 ONLINE ONLINE oel1
Oracle 11g R2 RAC高可用连接特性 – SCAN详解解读

SCAN概念先介绍一下什么叫SCAN,SCAN(Single Client Access Name)是Oracle从11g R2开始推出的,客户端可以通过SCAN特性负载均衡地连接到RAC数据库。
SCAN提供一个域名来访问RAC,域名可以解析1个到3个(注意,最多3个)SCAN IP,我们可以通过DNS或者GNS来解析实现。
其中DNS大家都很熟悉,这里不多说。
GNS(Grid Naming Service)则是Oracle 11g R2的新功能,可以通过DHCP服务为节点和SCAN分配VIP和SCAN IP。
另外还有个优点是,对于新加入集群的节点,它会自动分配VIP地址,更新集群资源,客户端依然通过SCAN特性负载均衡地连接到新增集群节点上。
DNS和GNS配置与解析相关内容在下面还有说明。
除了DNS和GNS解析方法外,SCAN也可以使用hosts文件来解析,但用过的人都知道,此方法不仅在安装RAC的时候产生问题,后期使用也是存在问题的,比如SCAN域名只能定义一个SCAN IP。
所以这种方法也是Oracle不推荐使用的。
但尽管如此,我见过很多生产上依然这样使用,也就是废弃了11g的新特性SCAN,而是依然采用VIP连接方式。
备注:有人可能会注意到《此方法不仅在安装RAC的时候产生问题》这句,RAC安装的时候的确会报错,但这并不影响后期Oracle的使用。
SCAN最明显的优点就是,当集群中新增加了节点或者删除了节点,不需要额外维护客户端。
PUBLIC IP, PRIVATE IP, VIP, SCAN VIP, GNS VIP, LOCAL_LISTENER, REMOTE_LISTENER , LOCAL LISTENER, SCAN LISTENER在RAC部署的时候,我们都会接触到PUBLIC IP、PRIVATE I、VIP等等,那下面就针对它们进行介绍。
PUBLIC IP : 这是我们网卡上配置的真实IP地址,我们称为公共IP,这个IP的存在关系到下面介绍的VIP 能不能正确漂在其所在网卡上。
修改RAC中IP的方法

修改10.2 RAC中IP(Public/Private/VIP)的方法Public/Private的名称不能更改,如果确实需要更改名称,需要重新安装CRS。
本文只说明如何更改Public/Private的IP地址。
VIP可以支持修改名称和IP地址。
1 shut down the RDBMS and ASM instances, listenersand nodeapps on all nodes before shutting down the CRS daemons onall nodes. Note that these setps must be run in the order specified.1.1 查看当前系统上crs运行的状态$ crs_stat -t1.2 关闭数据库% $ORACLE_HOME/bin/srvctl stop database -d dbname1.3 To shutdown ASM instances run the following command on each node% $ORACLE_HOME/bin/srvctl stop asm -n <node_name>1.4 To shutdown nodeapps run the following comand on each node:% $ORACLE_HOME/bin/srvctl stop nodeapps -n <node_name>2 修改操作系统的ip设置在主机上修改网卡属性设置。
修改/etc/hosts文件为新的IP地址配置。
重新启用网卡,使设置生效修改HACMP中的相关设置(建议把HACMP中网卡相关配置全部删除)。
3 修改ORACLE中相关设置3.1 Use the getif option to show the currently configured interfaces. This will display the interfaces that are currently stored in the OCR。
rac环境修改网段

RAC环境修改网段一、规划 (2)二、修改PUBLIC IP (2)1、查看HOSTS设置 (2)2、查看CRS资源状态 (3)3、查看当前PUBLIC配置 (4)4、删除0网段 (4)5、添加1网段 (5)6、查看节点2PUBLIC配置 (5)7、编辑HOSTS文件 (5)8、修改网络配置文件 (5)9、查看集群状态 (7)三、修改VIP (7)1、停止节点1的实例和资源 (7)2、查看集群状态 (7)3、修改VIP (8)4、查看当前集群状态 (9)5、编辑HOSTS文件 (10)四、修改SCAN IP (11)1、查看SCAN IP配置 (11)2、停止SCAN和LISTENER (11)3、观察集群状态 (11)4、编辑HOSTS文件 (12)5、刷新SCAN IP (12)6、启动SCAN和LISTENER (12)7、查看集群状态 (13)一、规划修改前修改后二、修改Public IP1、查看hosts设置(本案例在节点1上操作)2、查看crs资源状态3、查看当前public配置4、删除0网段5、添加1网段6、查看节点2public配置7、编辑hosts文件只修改public IP,两个节点都要修改8、修改网络配置文件9、查看集群状态可以看出,VIP和RAC-SCANIP都已经停止了。
三、修改VIP本案例在节点1上操作1、停止节点1的实例和资源2、查看集群状态可以看出,实例已经运行在节点2。
3、修改VIP修改VIP语句:./srvctl modefy nodeapps –n rac01 –A 192.168.1.131/255.255.255.0/eth0 查看结果语句:./srvctl config nodeapps -a4、查看当前集群状态可以看出,节点2的VIP自己启动并应用了。
节点1还是OFFLINE状态,手工启动一下。
再次查看状态,节点1和节点2的VIP都已启动5、编辑hosts文件只修改VIP,两个节点都要修改四、修改SCAN IP 本案例在节点1上操作1、查看scan ip配置2、停止SCAN和LISTENER3、观察集群状态4、编辑hosts文件修改rac-scan对应的IP,两个节点都要修改5、刷新scan IP刷新scan IP语句:./srvctl modify scan –n rac-scan 查看结果语句:./srvctl config scan6、启动SCAN和LISTENER7、查看集群状态。